How to Create a Realistic “Hit by a Car” Effect in After Effects
Introduction to the “Hit by a Car” Effect
Are you ready to take your video or film production to the next level? In this tutorial, we’ll show you how to create a jaw-dropping hit by a car effect using Adobe After Effects. By following these simple steps, you can add excitement, drama, and realism to your scenes.
Get 10% off when you subscribe to our newsletter

Before we get started, make sure you have a basic understanding of Adobe After Effects. Take some time to familiarize yourself with the software’s interface, timeline, keyframes, and effects. This knowledge will help you get the most out of this tutorial and unleash your creativity.
Now, let’s dive into the first step – gathering the necessary footage and assets. To create a convincing hit by a car effect, you’ll need the right materials.
Get 10% off when you subscribe to our newsletter

1. Gather Footage of a Car and a Walking Person
The first step is to gather or shoot the necessary footage. You’ll need two videos: one of a car driving by and another of a person walking. Make sure the angles match for a seamless combination. If possible, shoot the footage with a green screen for easier editing later on.
2. Import the Footage into After Effects
Once you have the footage, import it into After Effects. Go to File > Import > File and select both the video of the car and the person. Ensure you organize the footage in the Project panel so it’s easy to access throughout the process.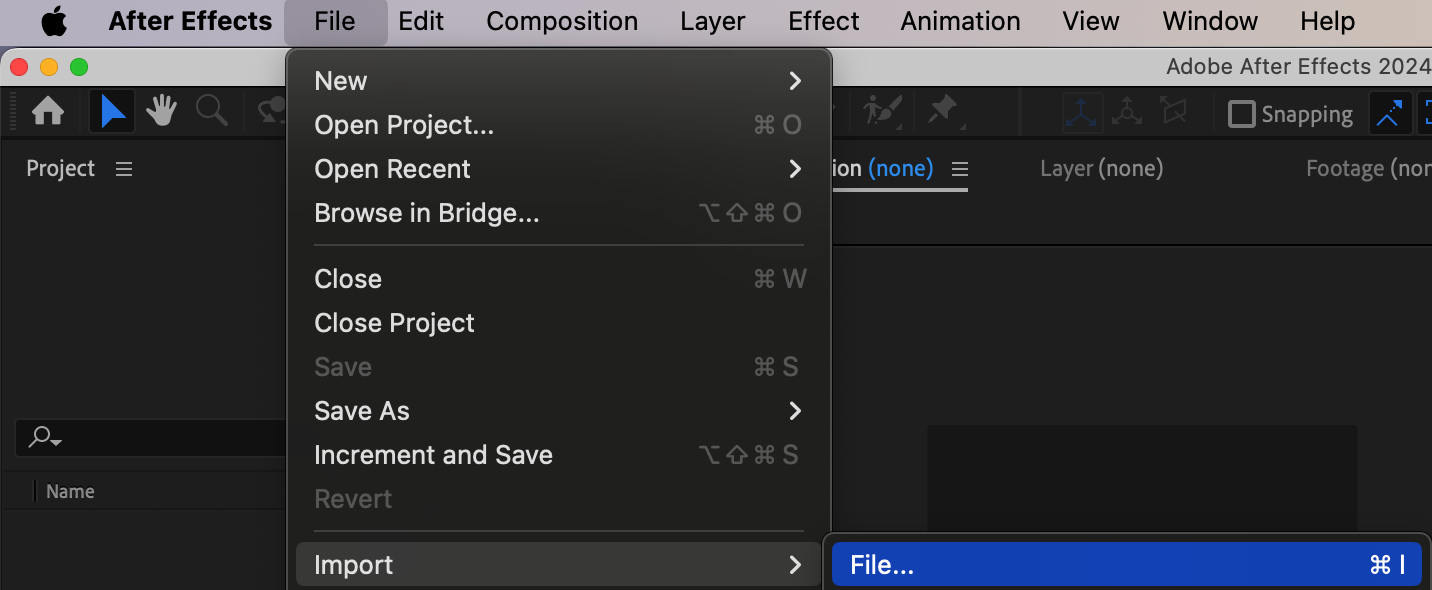 3. Create a New Composition
Get 10% off when you subscribe to our newsletter

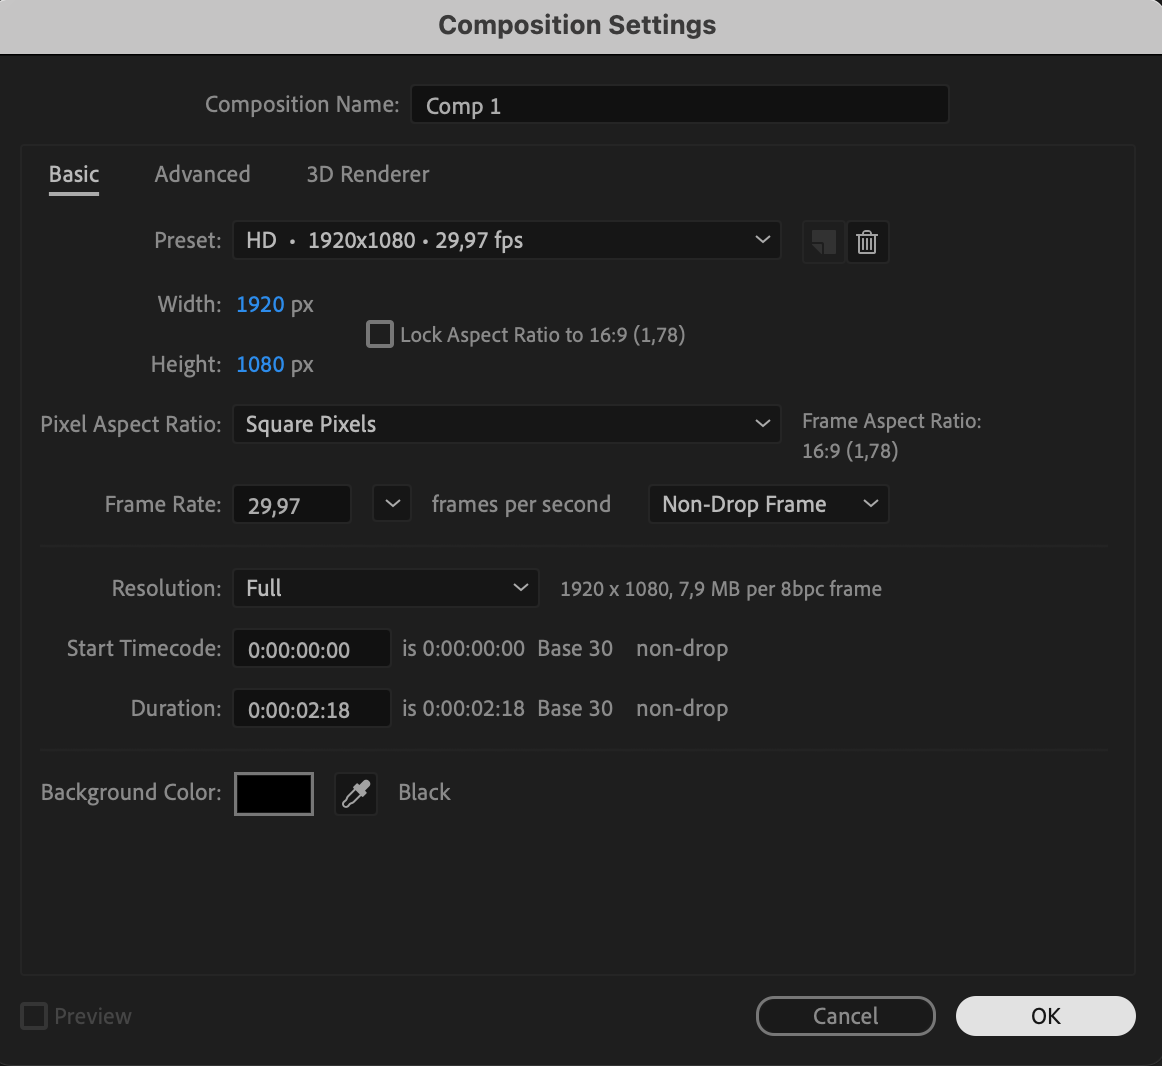
Create a new composition by going to Composition > New Composition. Set the dimensions and duration to fit your project’s needs. This composition will serve as your main workspace where the effect comes to life.
 4. Add the Walking Person Footage
Drag the footage of the walking person into the timeline to begin editing. Once it appears in the timeline, use the Transform options (Position, Scale, etc.) to place the person in the desired part of the frame. Make sure the position looks natural, as if they are walking in the scene.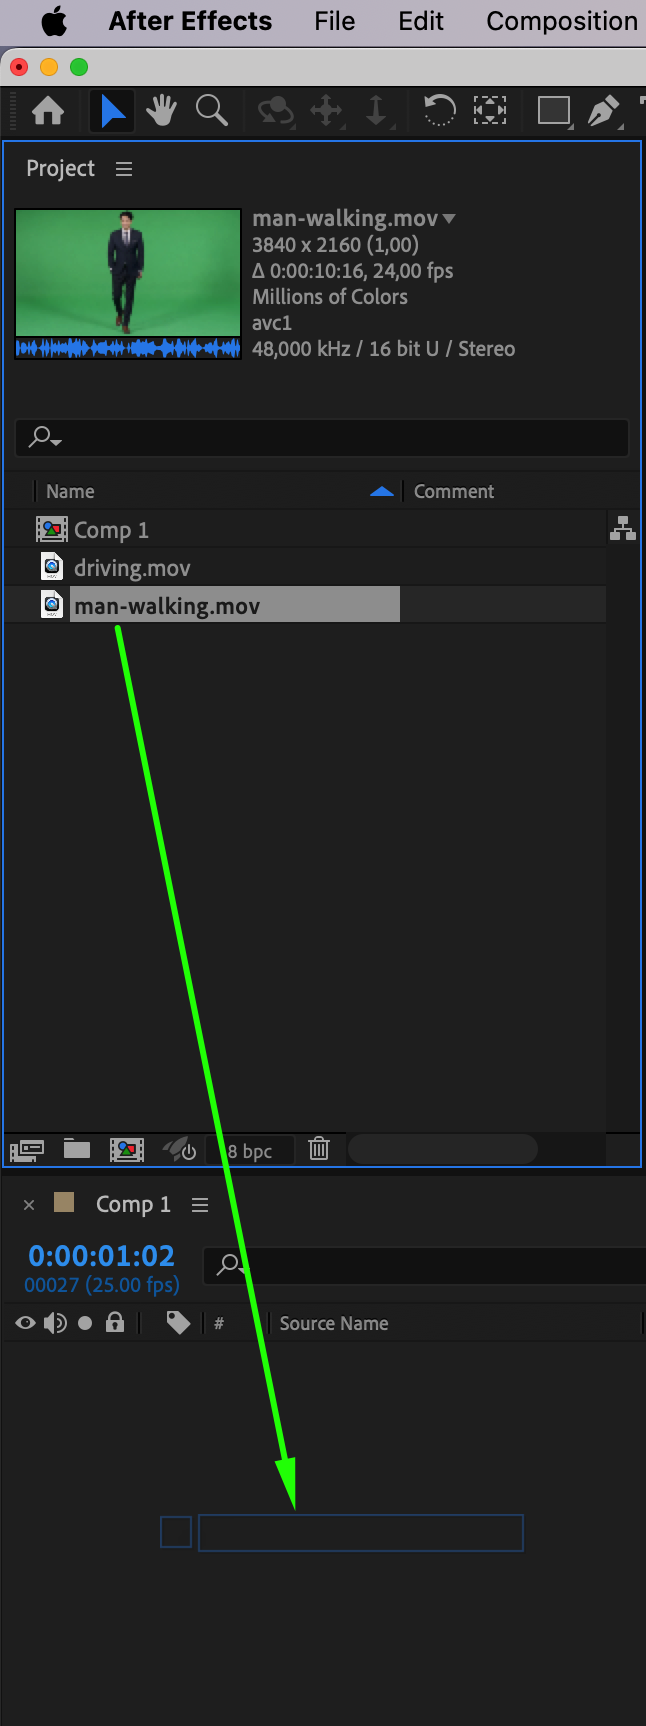 5. Remove the Green Screen (If Applicable)
Get 10% off when you subscribe to our newsletter

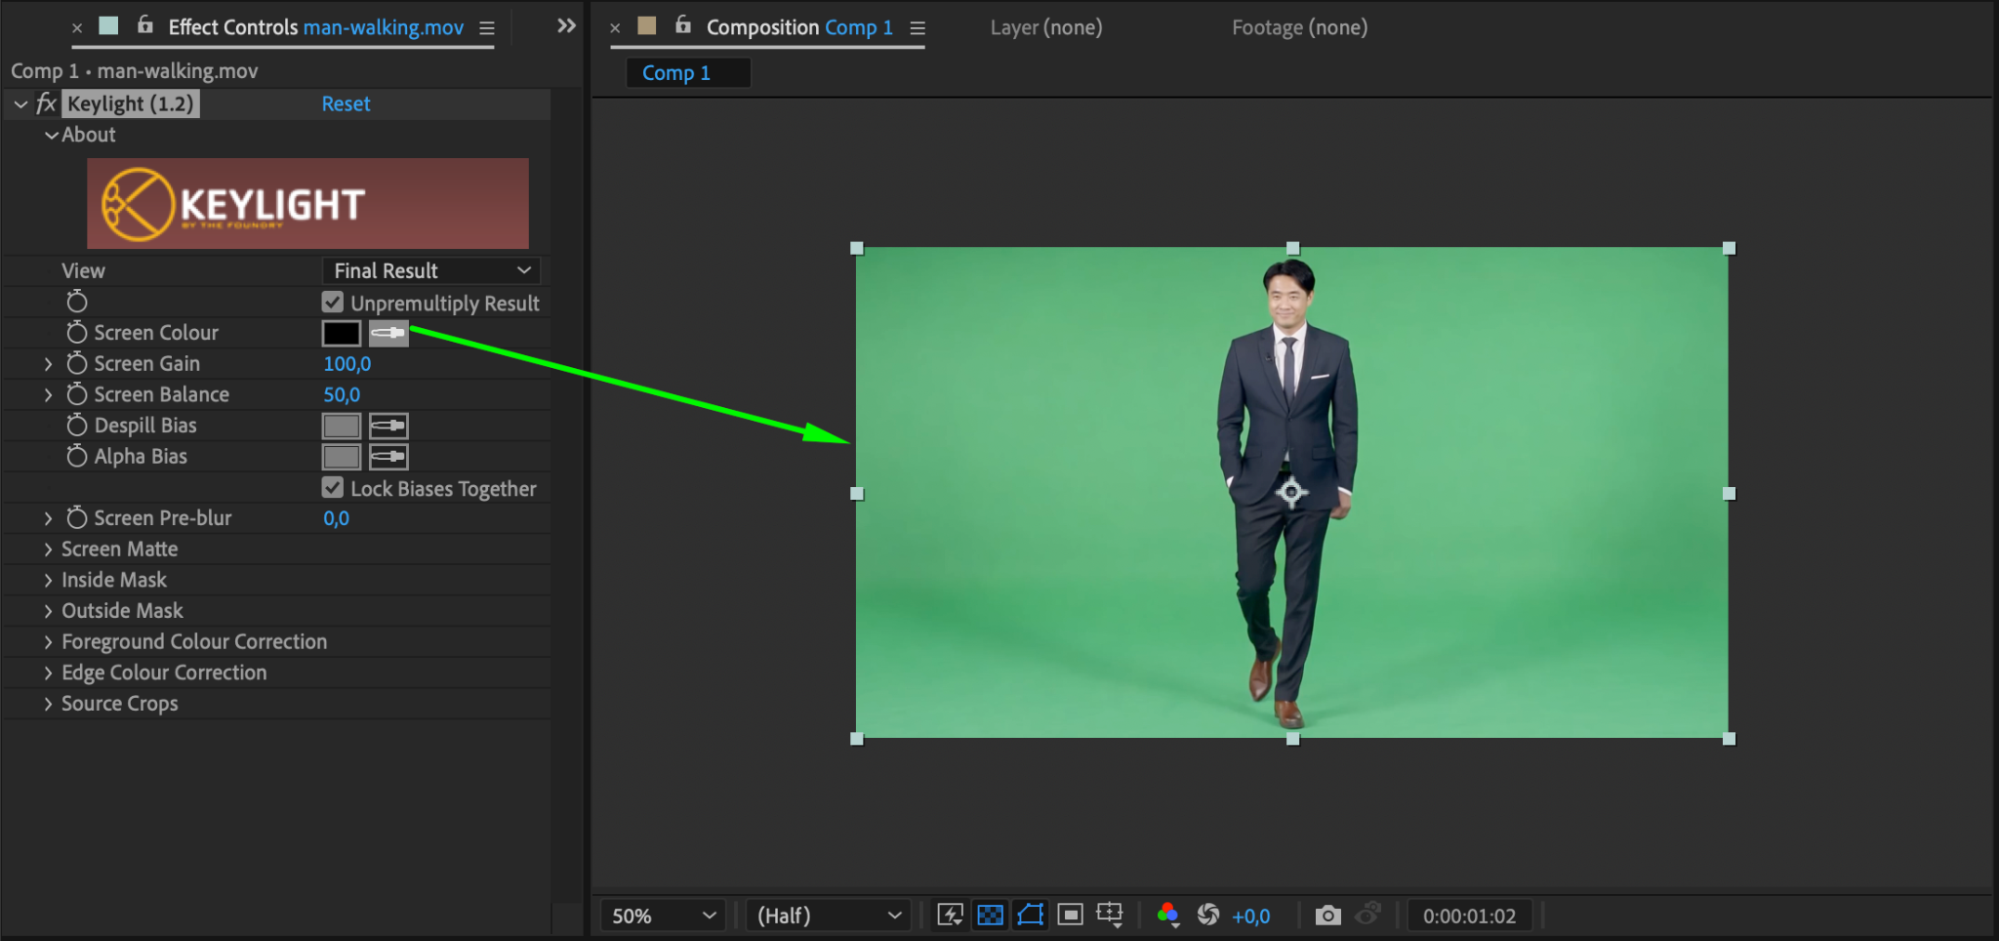
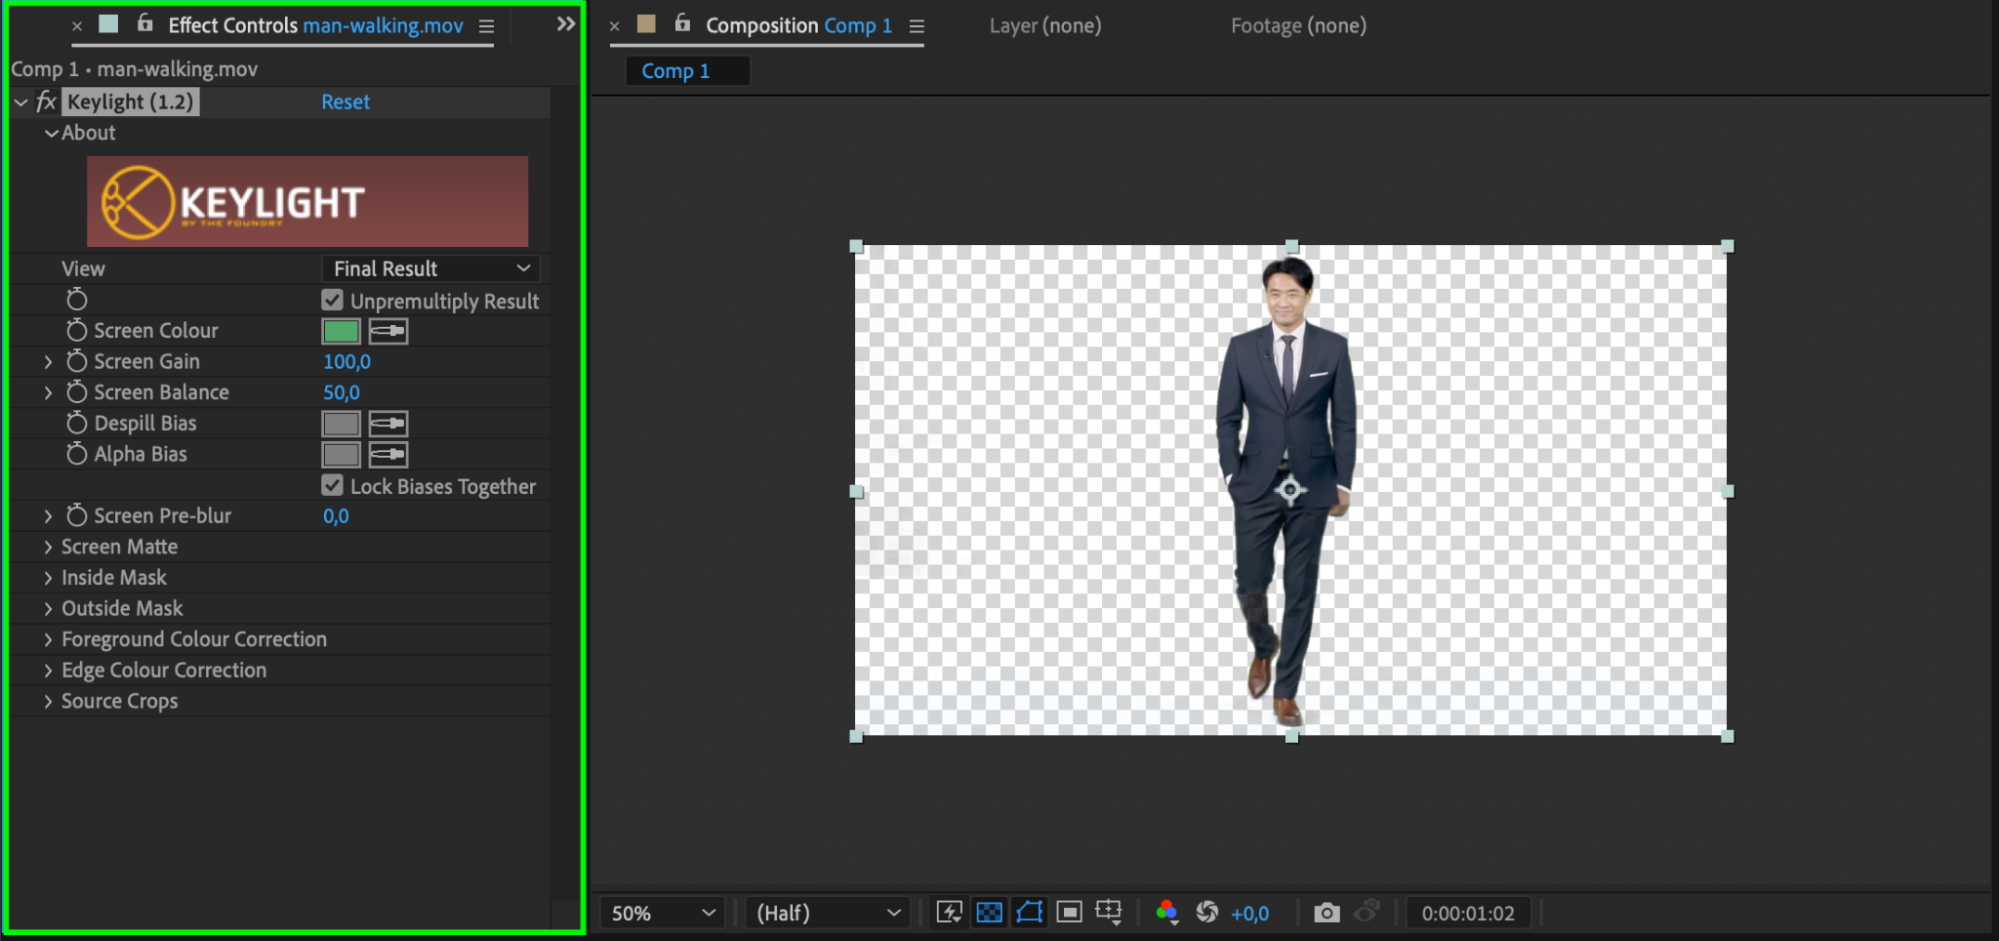
If your footage has a green screen, apply the Keylight effect from the Effects & Presets panel. Drag the Keylight effect onto the layer with the walking person, then use the Eyedropper Tool to select the green background. This will remove the green screen, making the person ready to be composited into the car scene.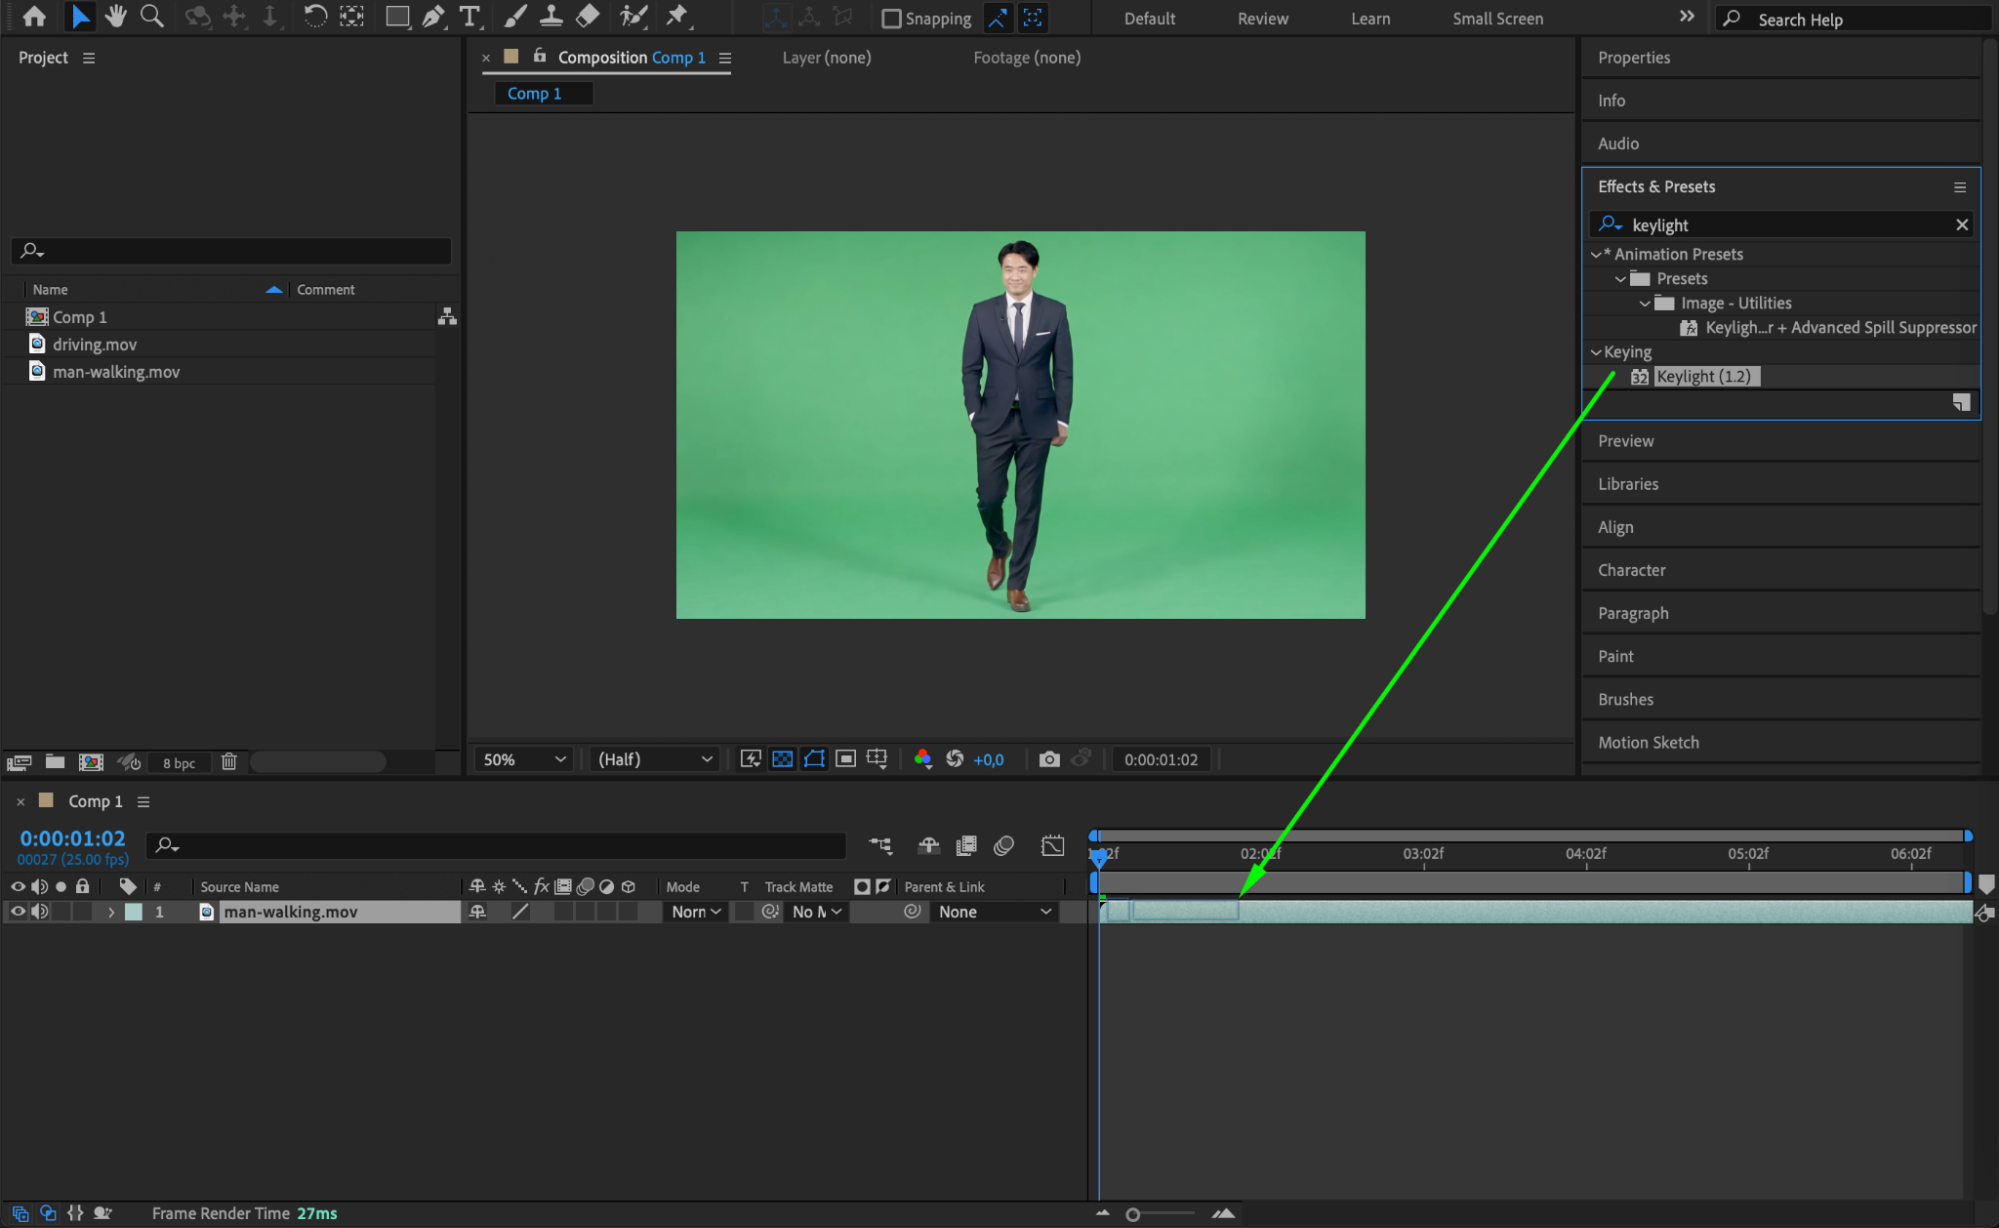
 6. Add the Car Footage to the Timeline
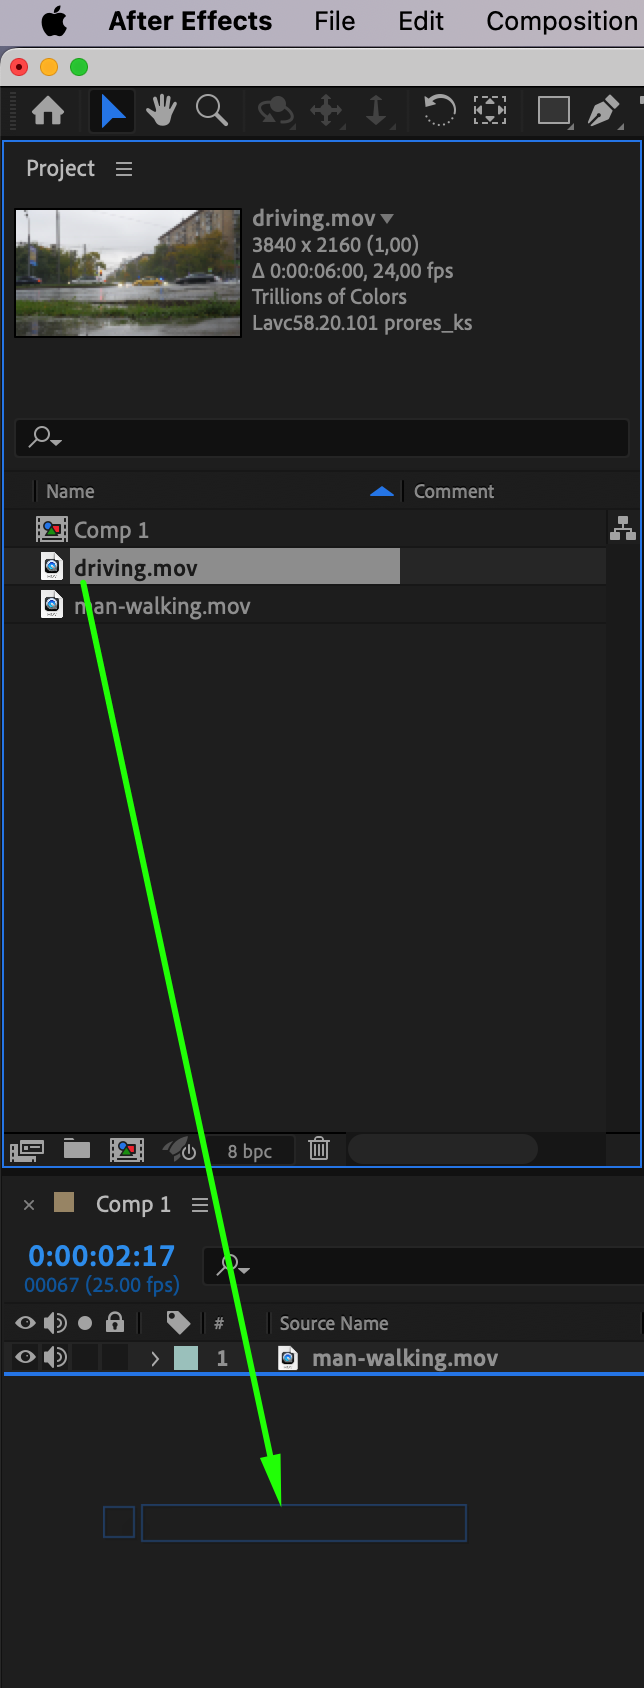
Next, drag the footage of the car into the timeline. Place it below the person’s layer so the car is in the background. Adjust its position and scale using the Transform settings to ensure it looks correctly placed and that it moves toward the person at the right speed.
 7. Position the Layers with Keyframes
Get 10% off when you subscribe to our newsletter

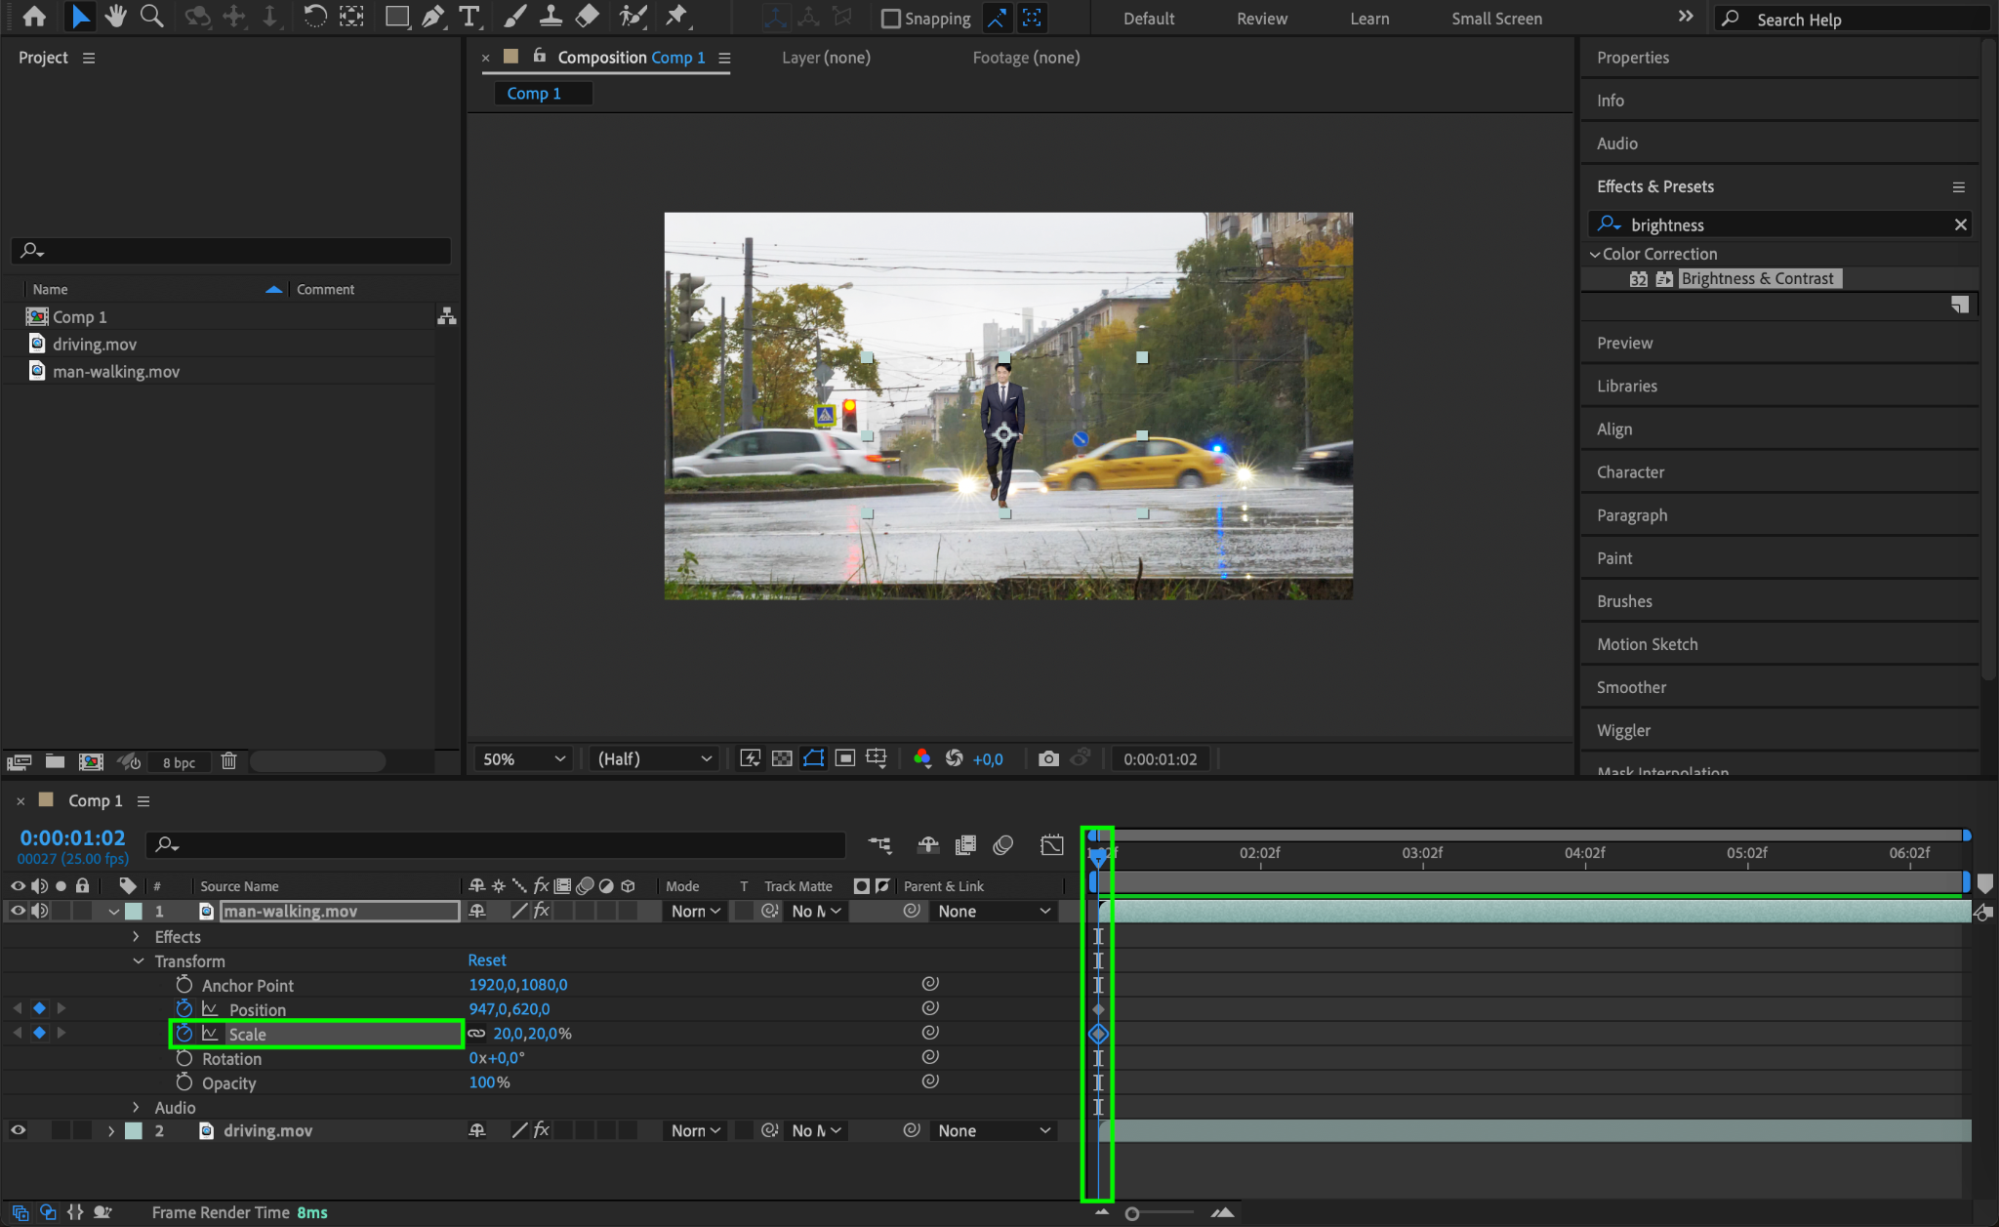
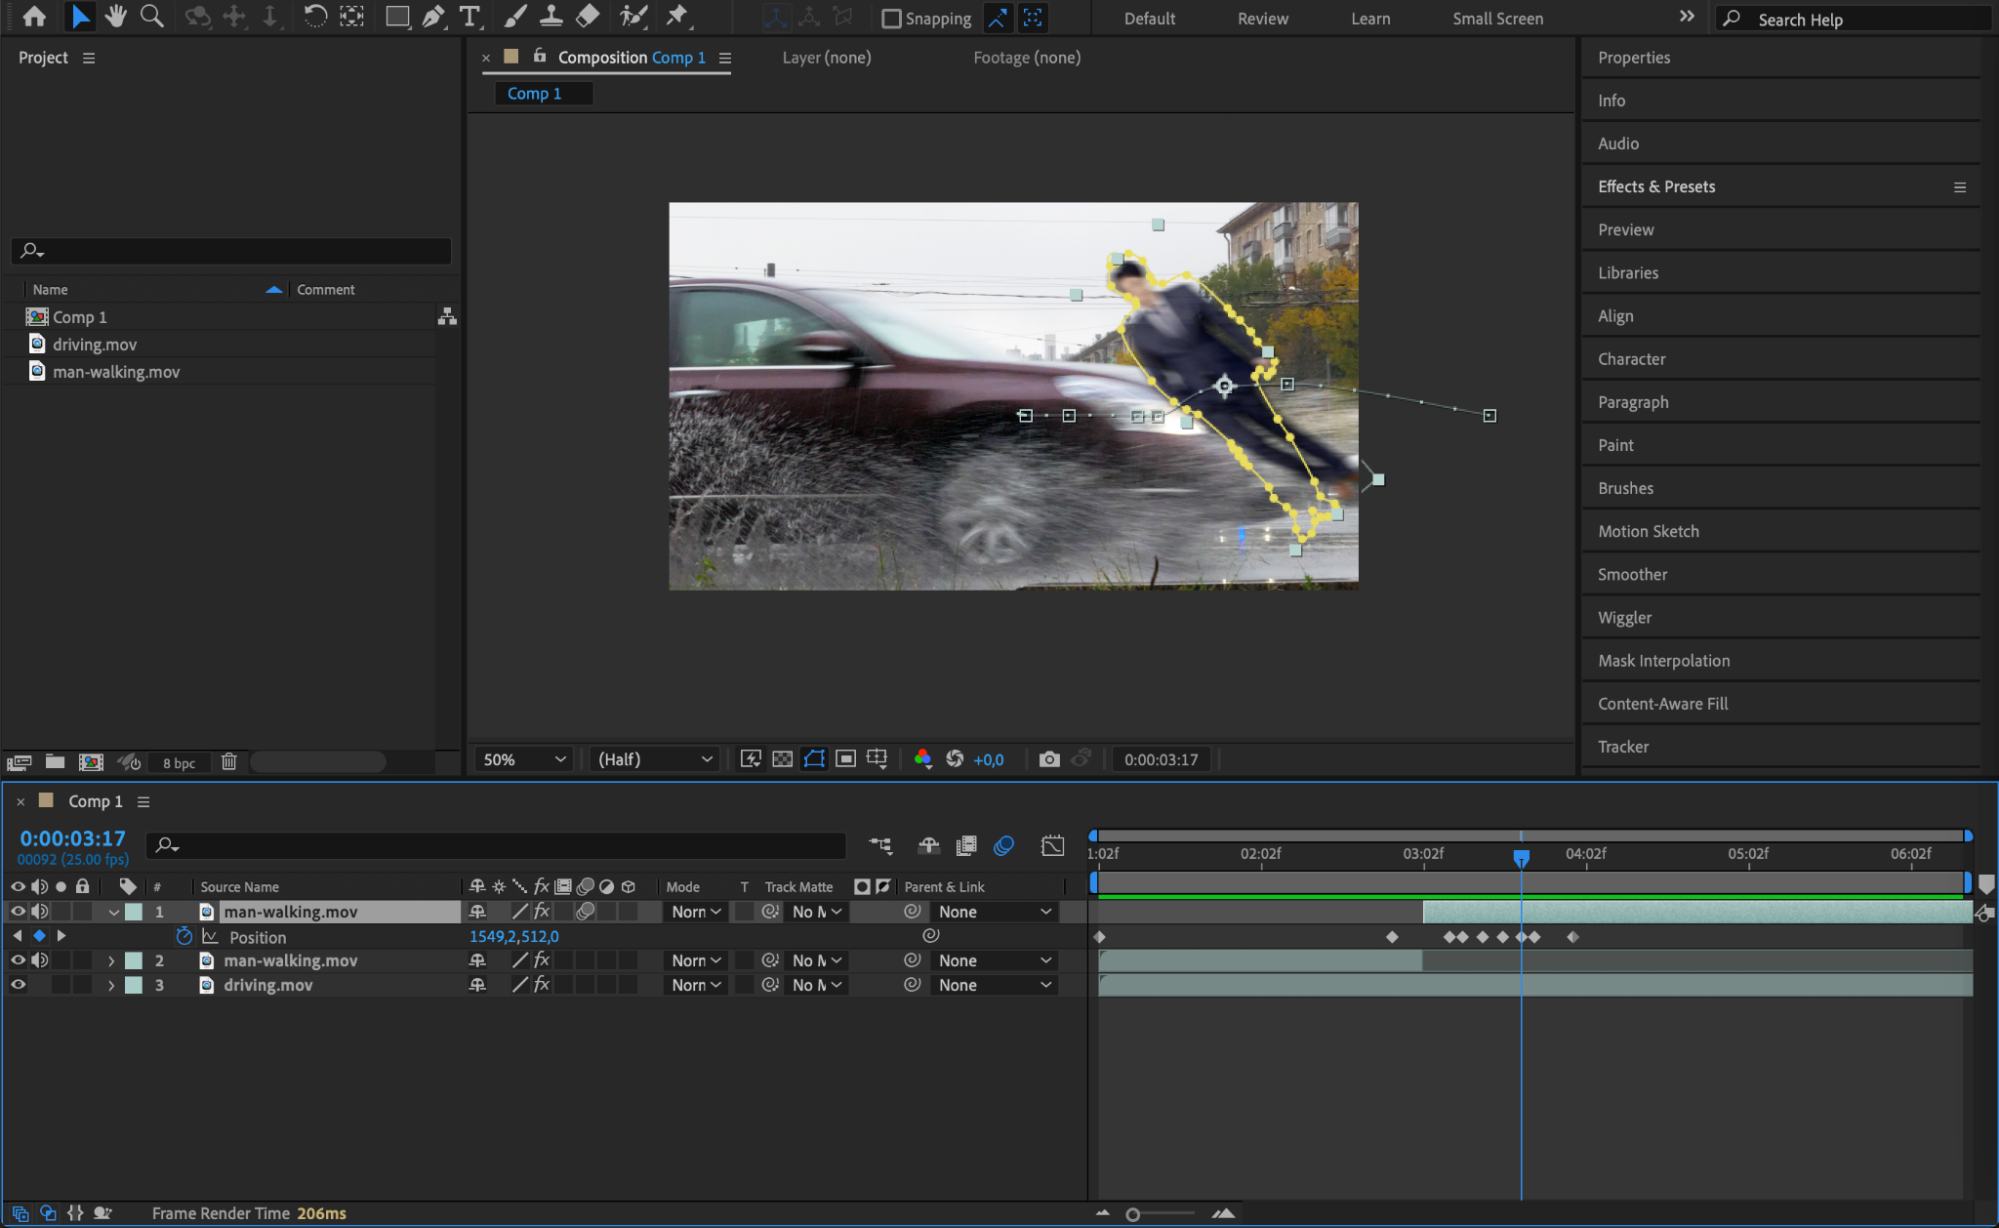
Use keyframes to animate the person’s position as the car approaches. You can adjust the Position and Scale of the person to ensure they are correctly placed in relation to the car.
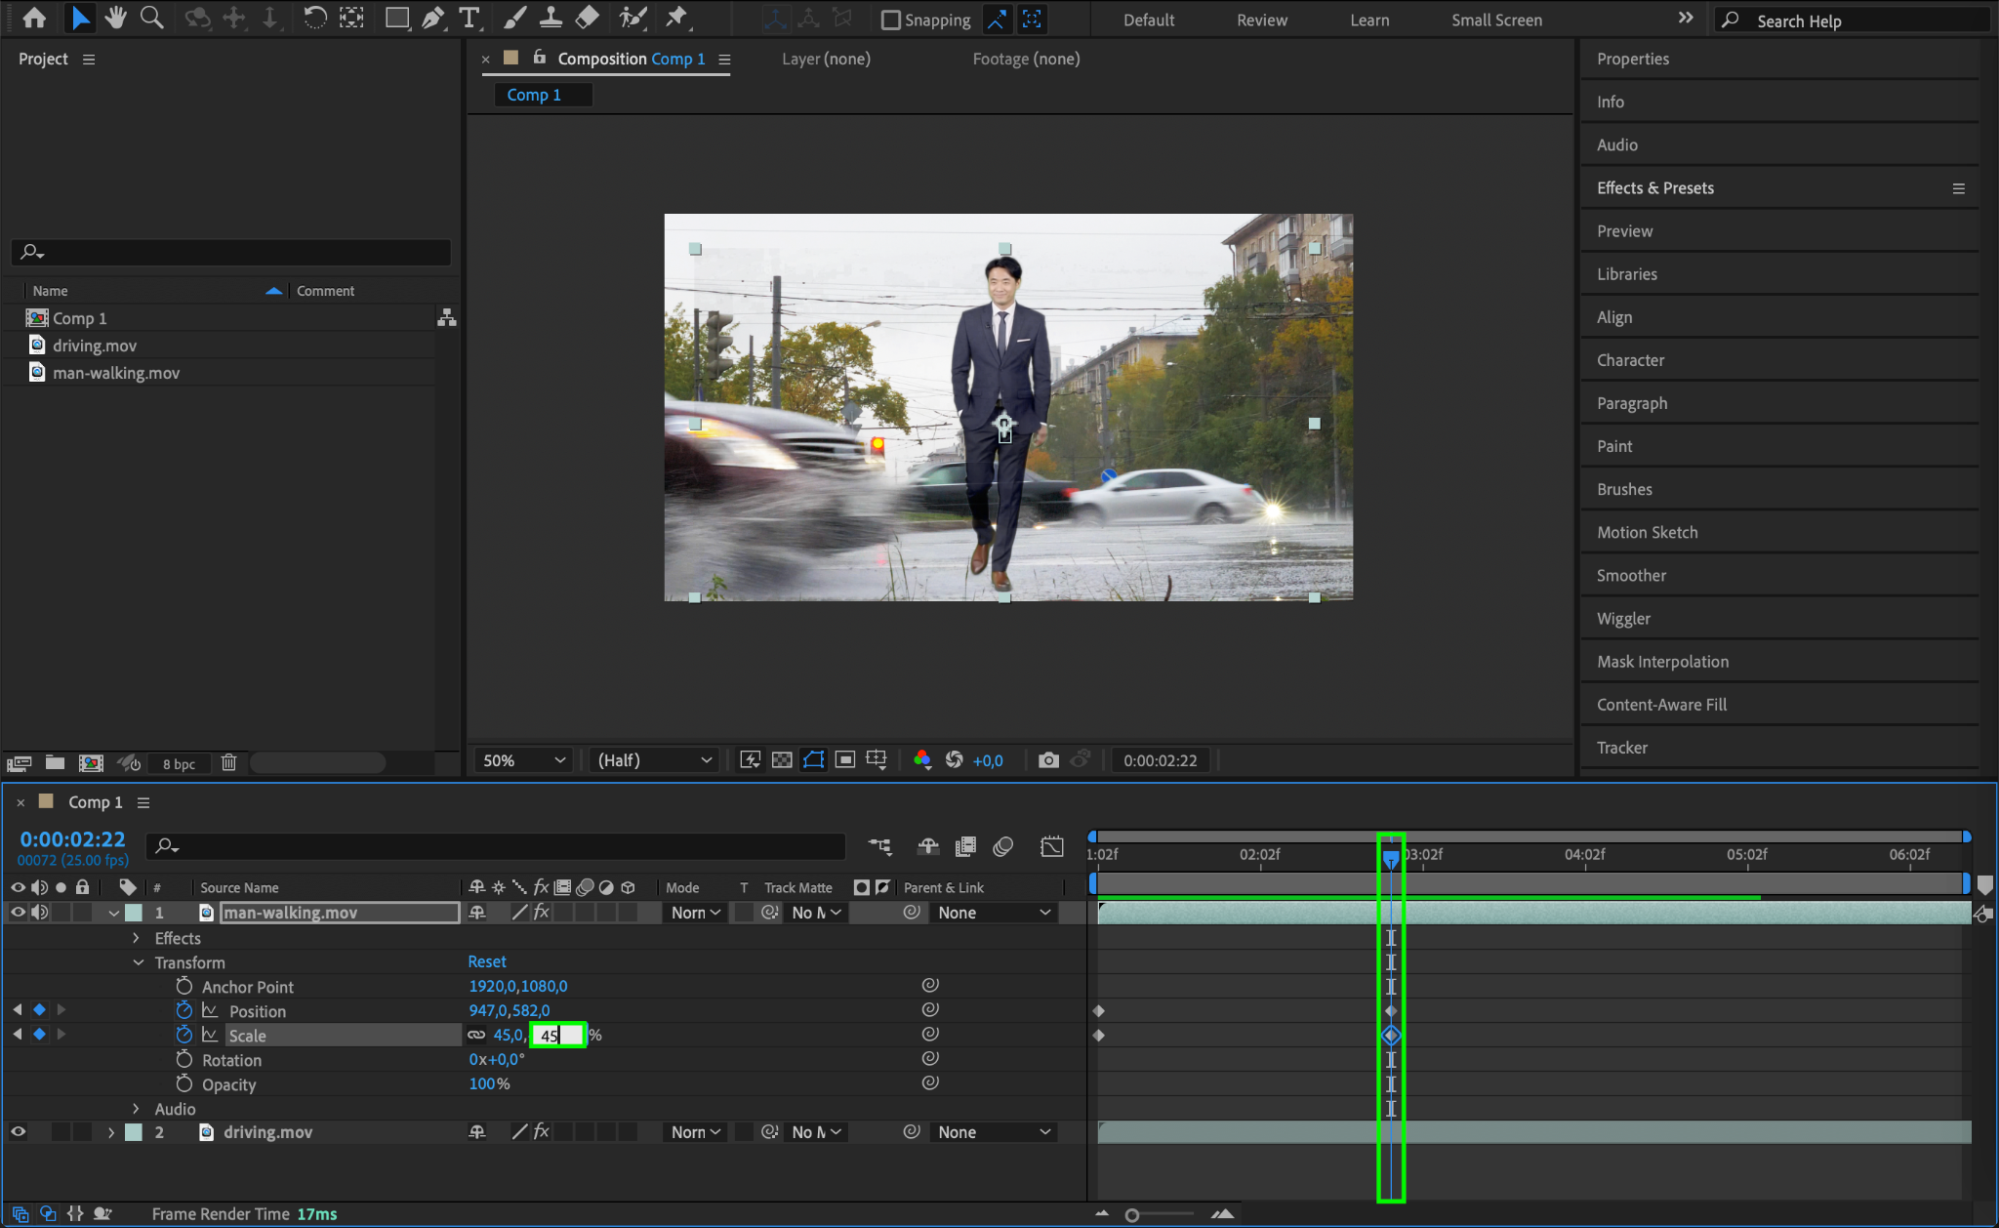 8. Split the Layer for the Impact Moment
Get 10% off when you subscribe to our newsletter

When the car is close to hitting the person, split the person’s layer at the impact moment. Select the layer, move the Current Time Indicator to the frame where the car hits, and press “Ctrl + Shift + D” to split the layer. This ensures the following frames will only show the post-impact action.
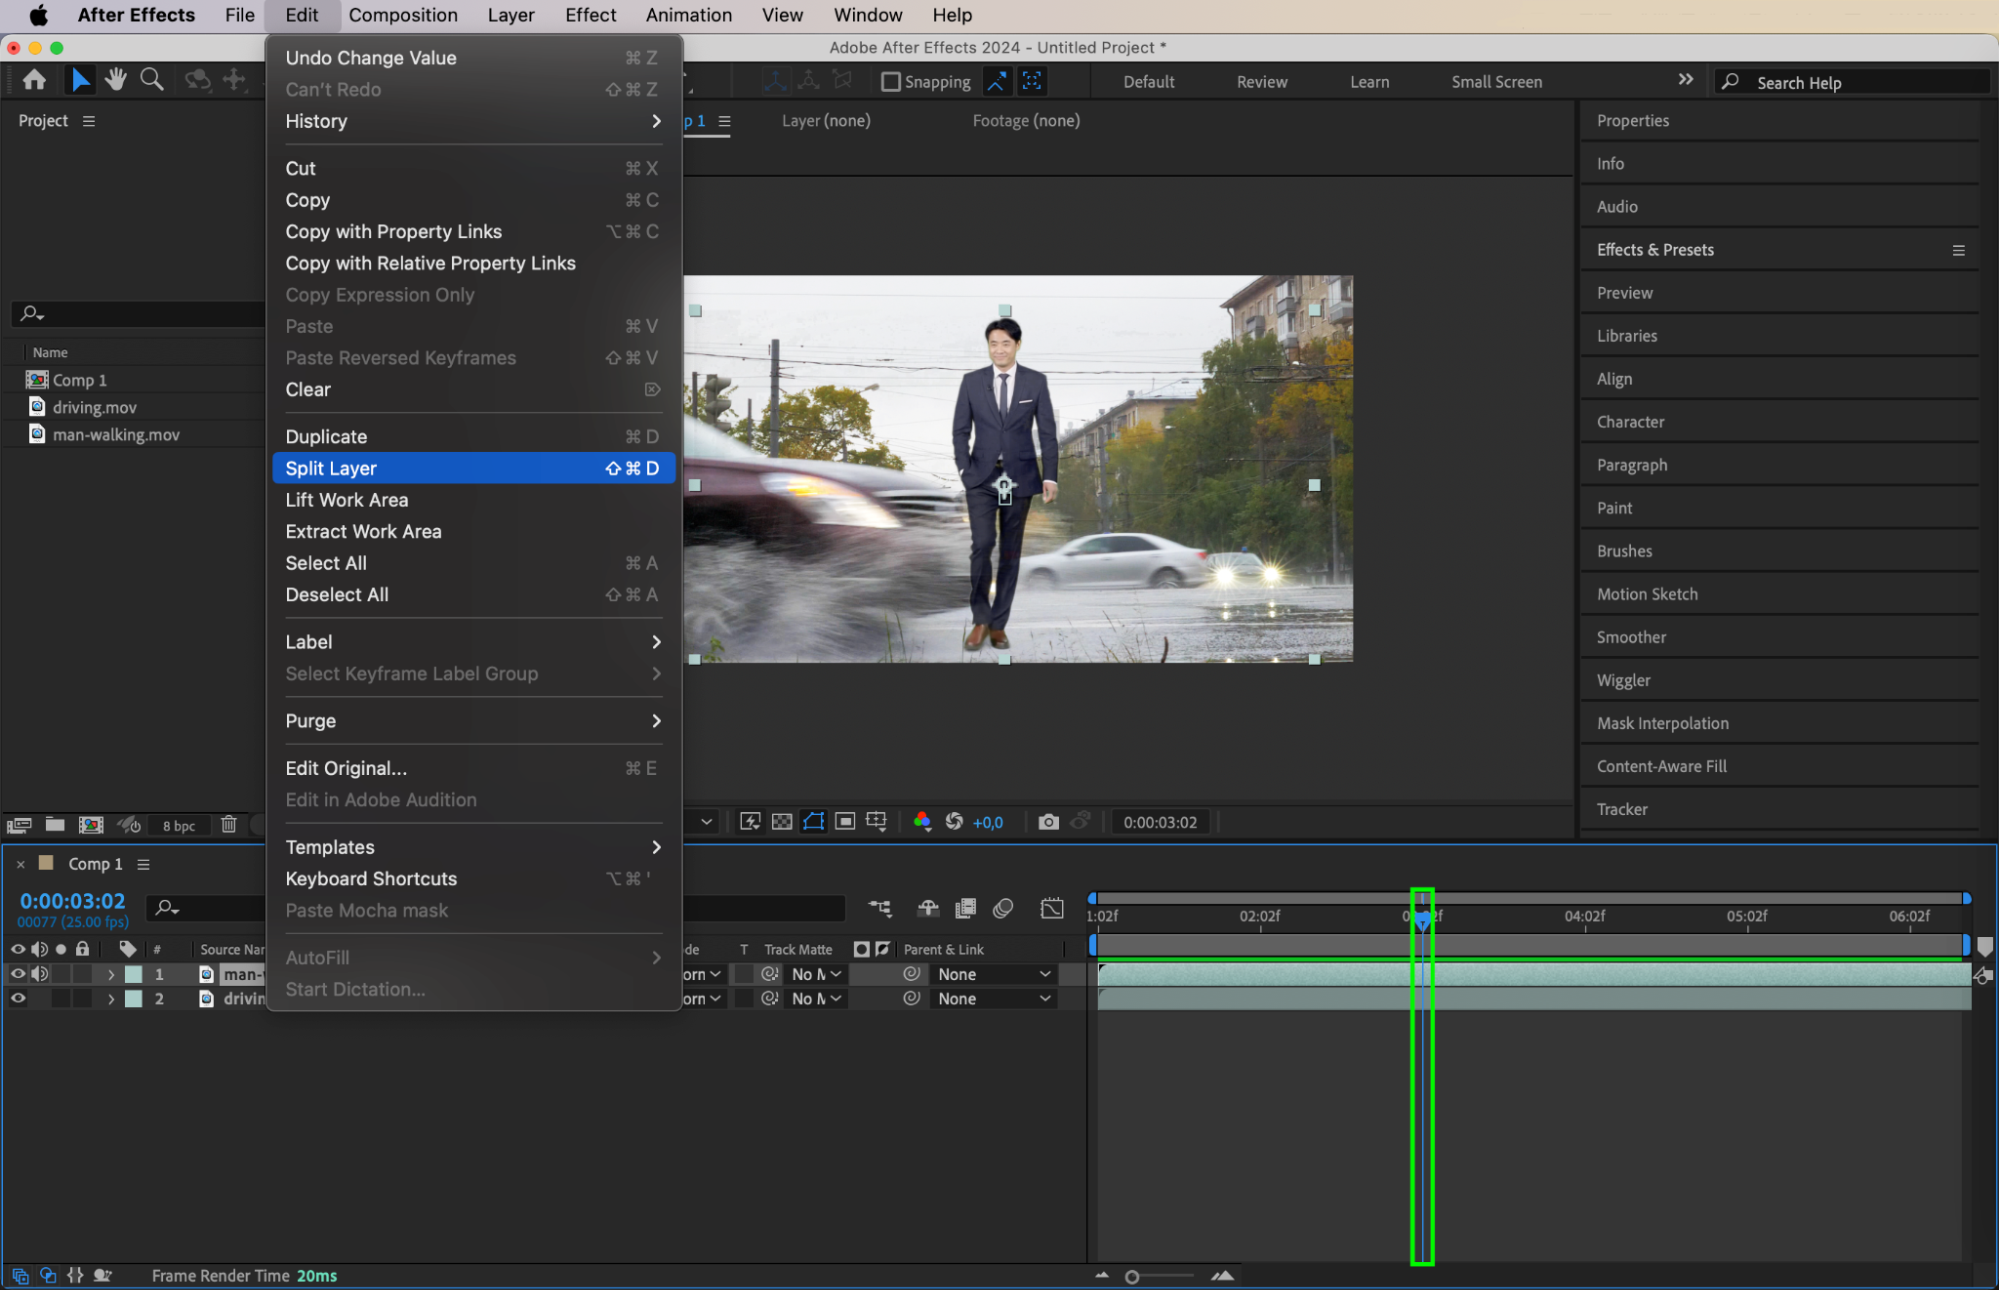 9. Freeze the Frame at the Moment of Impact
On the second part of the split layer, right-click and choose Time > Freeze Frame. This will freeze the person in place at the moment of impact. Extend this frozen layer to cover the remaining timeline. This adds a sense of abruptness to the scene.
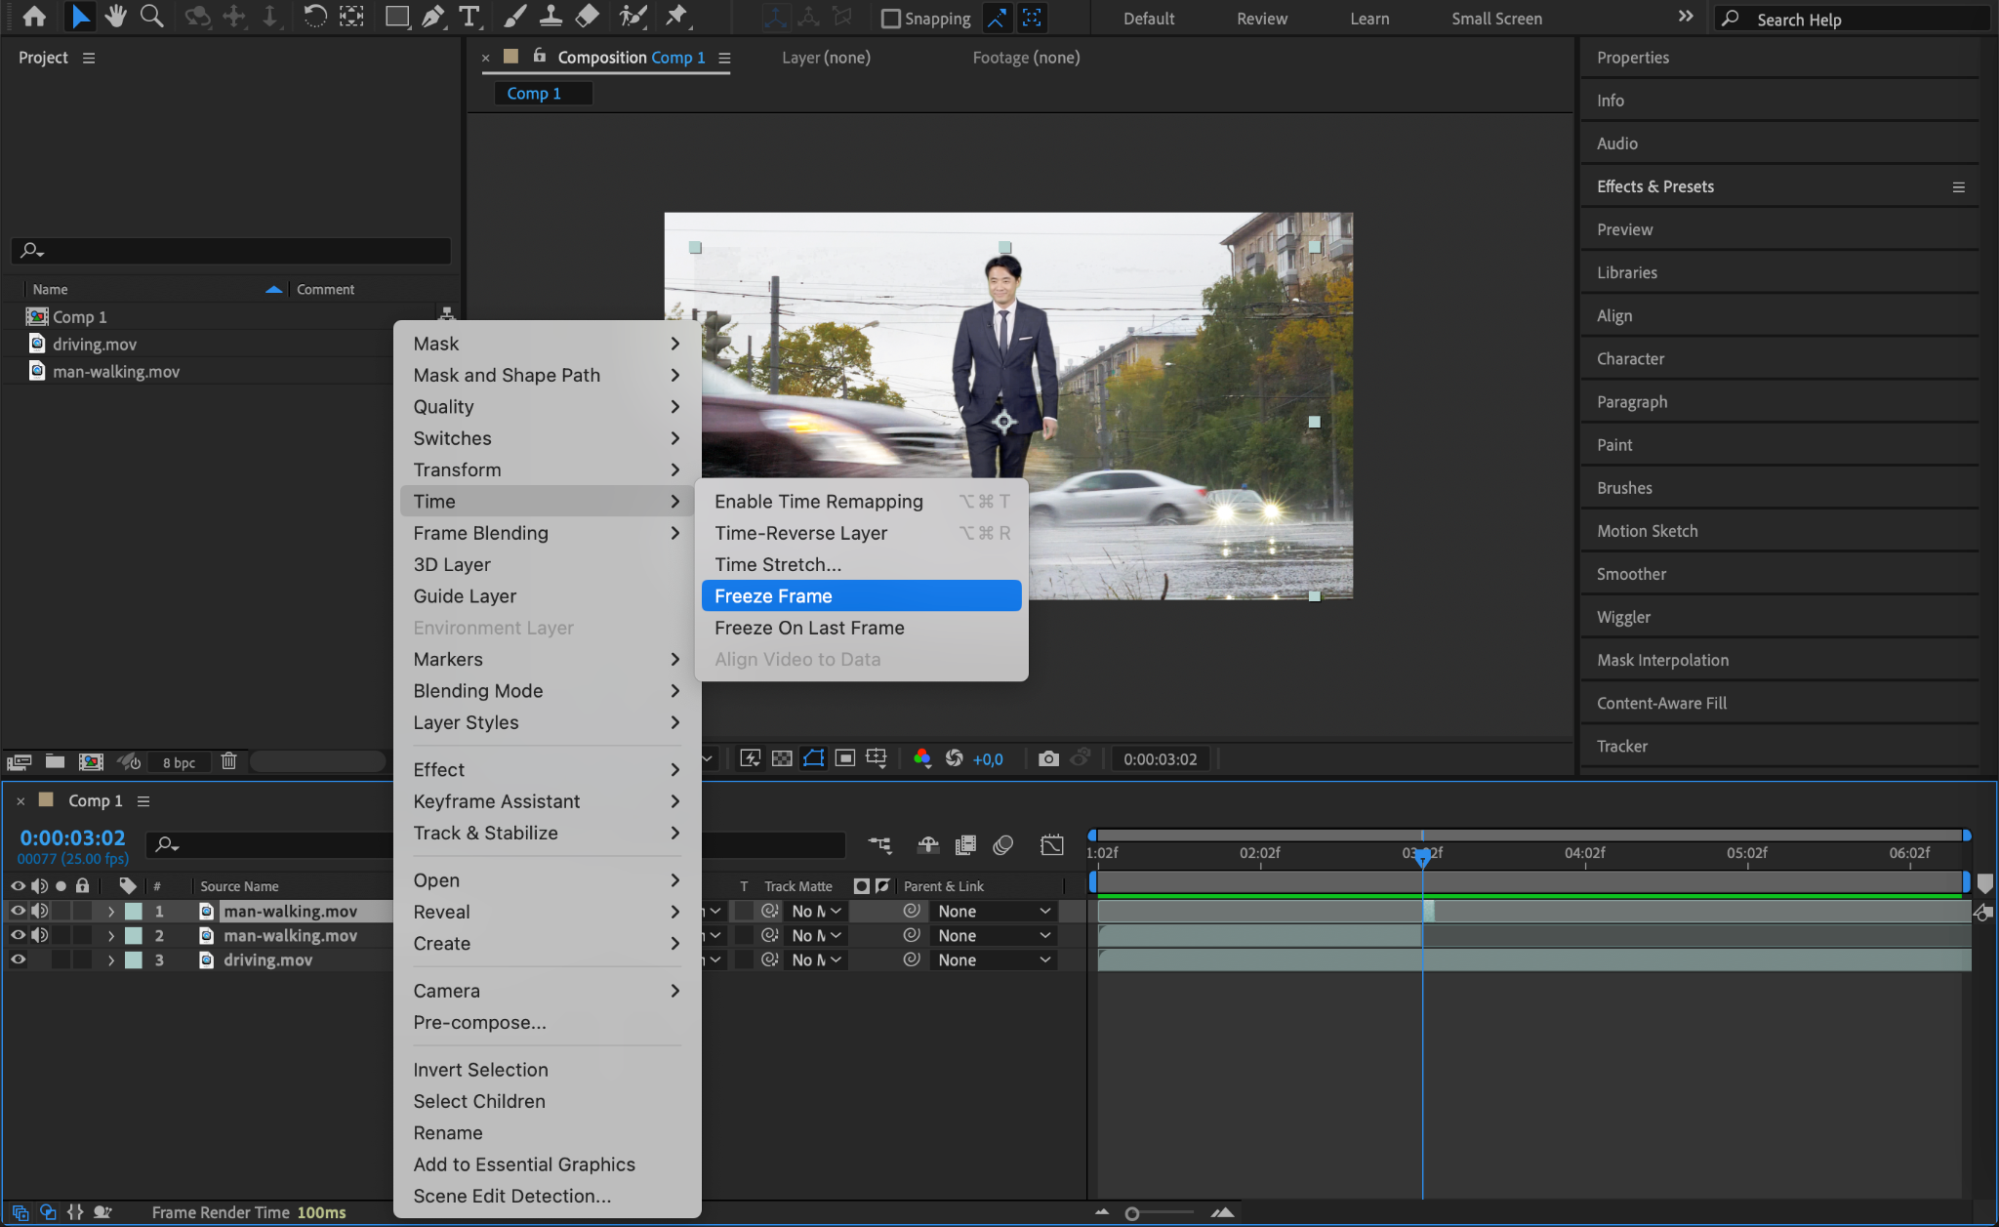

 10. Use the Pen Tool to Create a Mask
Get 10% off when you subscribe to our newsletter

Select the Pen Tool (G) and draw a mask around the person to isolate them. This step allows you to manipulate the shape and size of the mask for precise masking during the hit, making the effect more convincing.
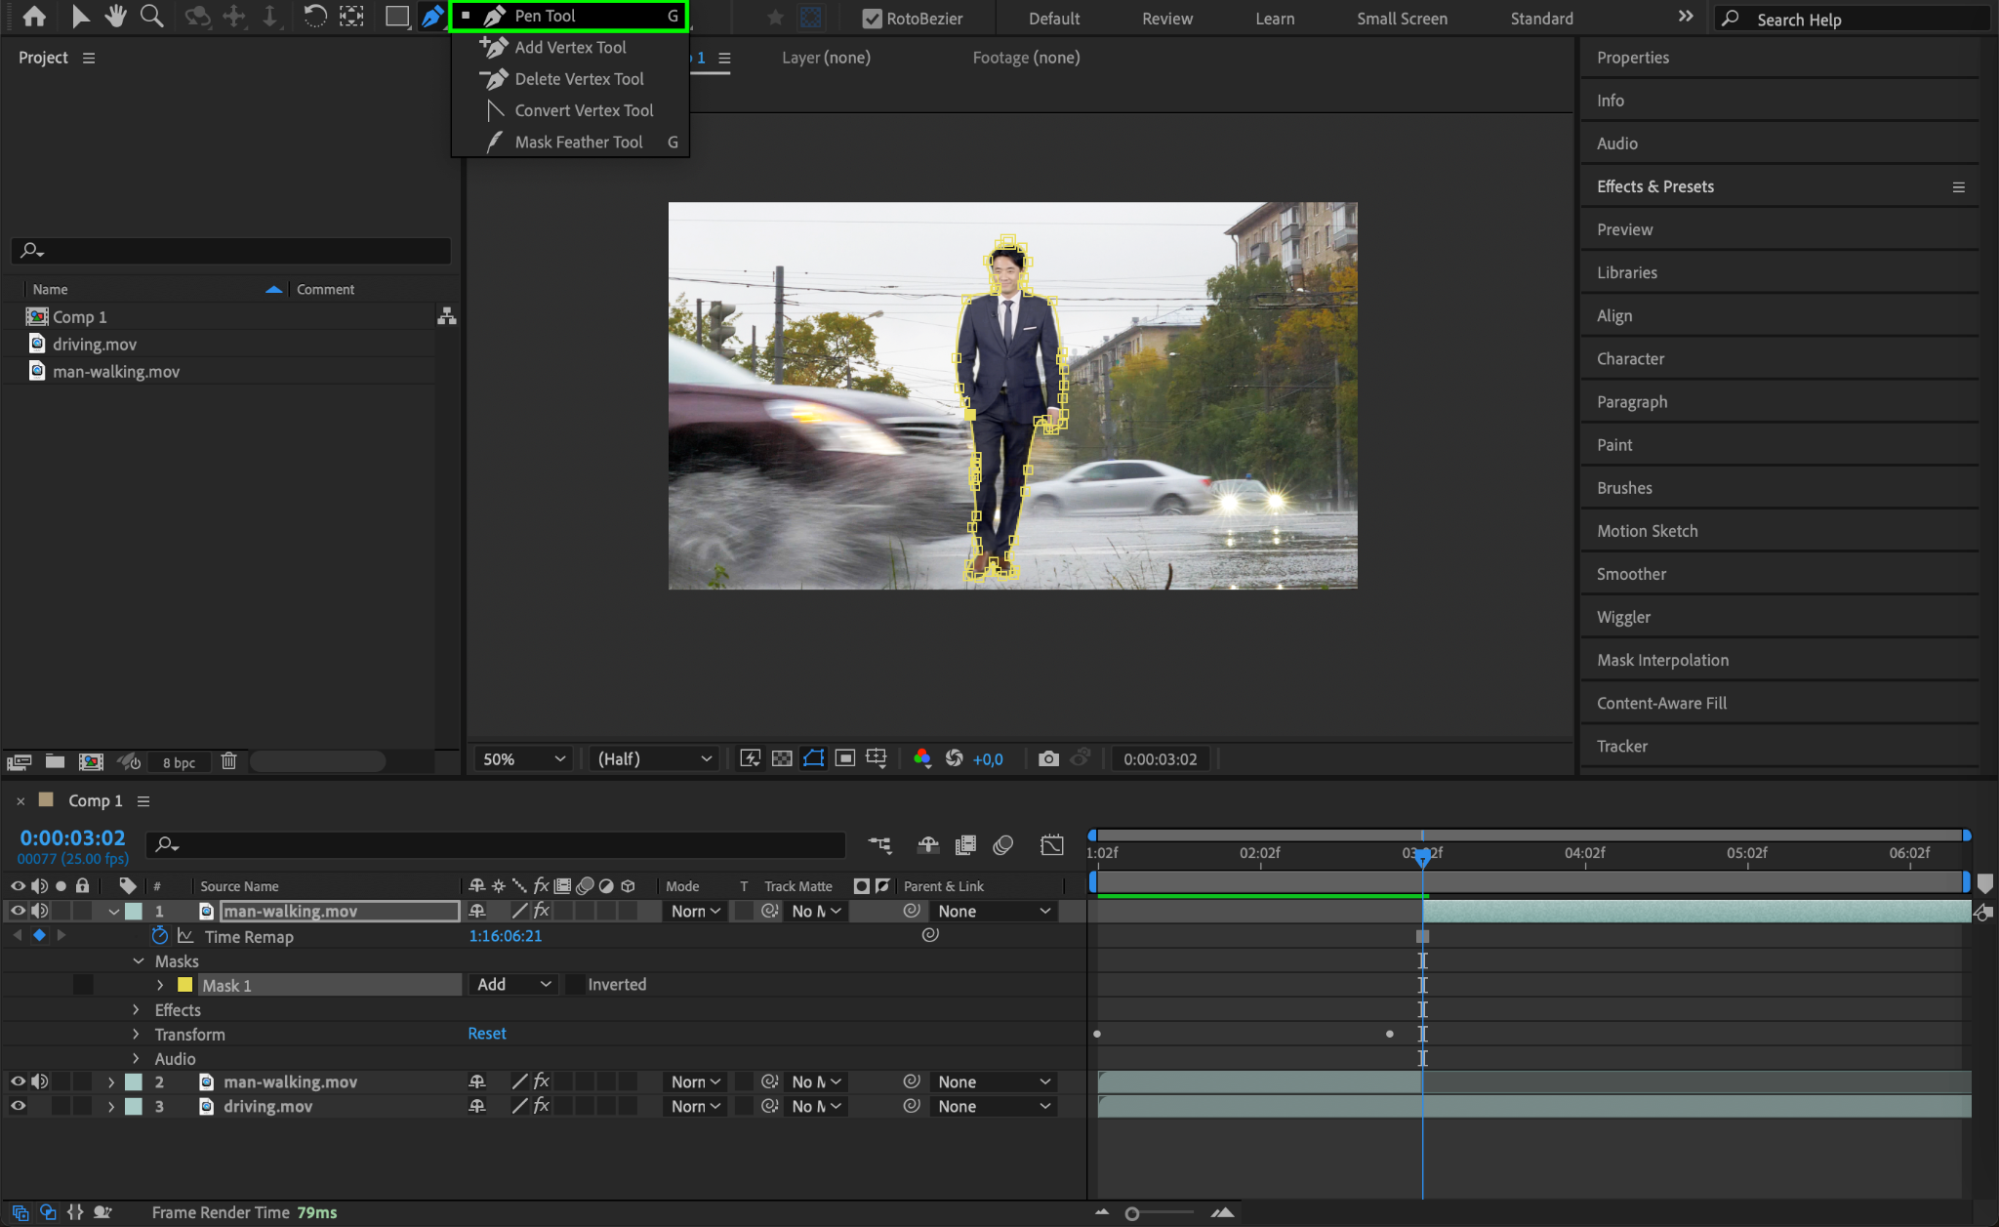 11. Animate the Person Flying Back
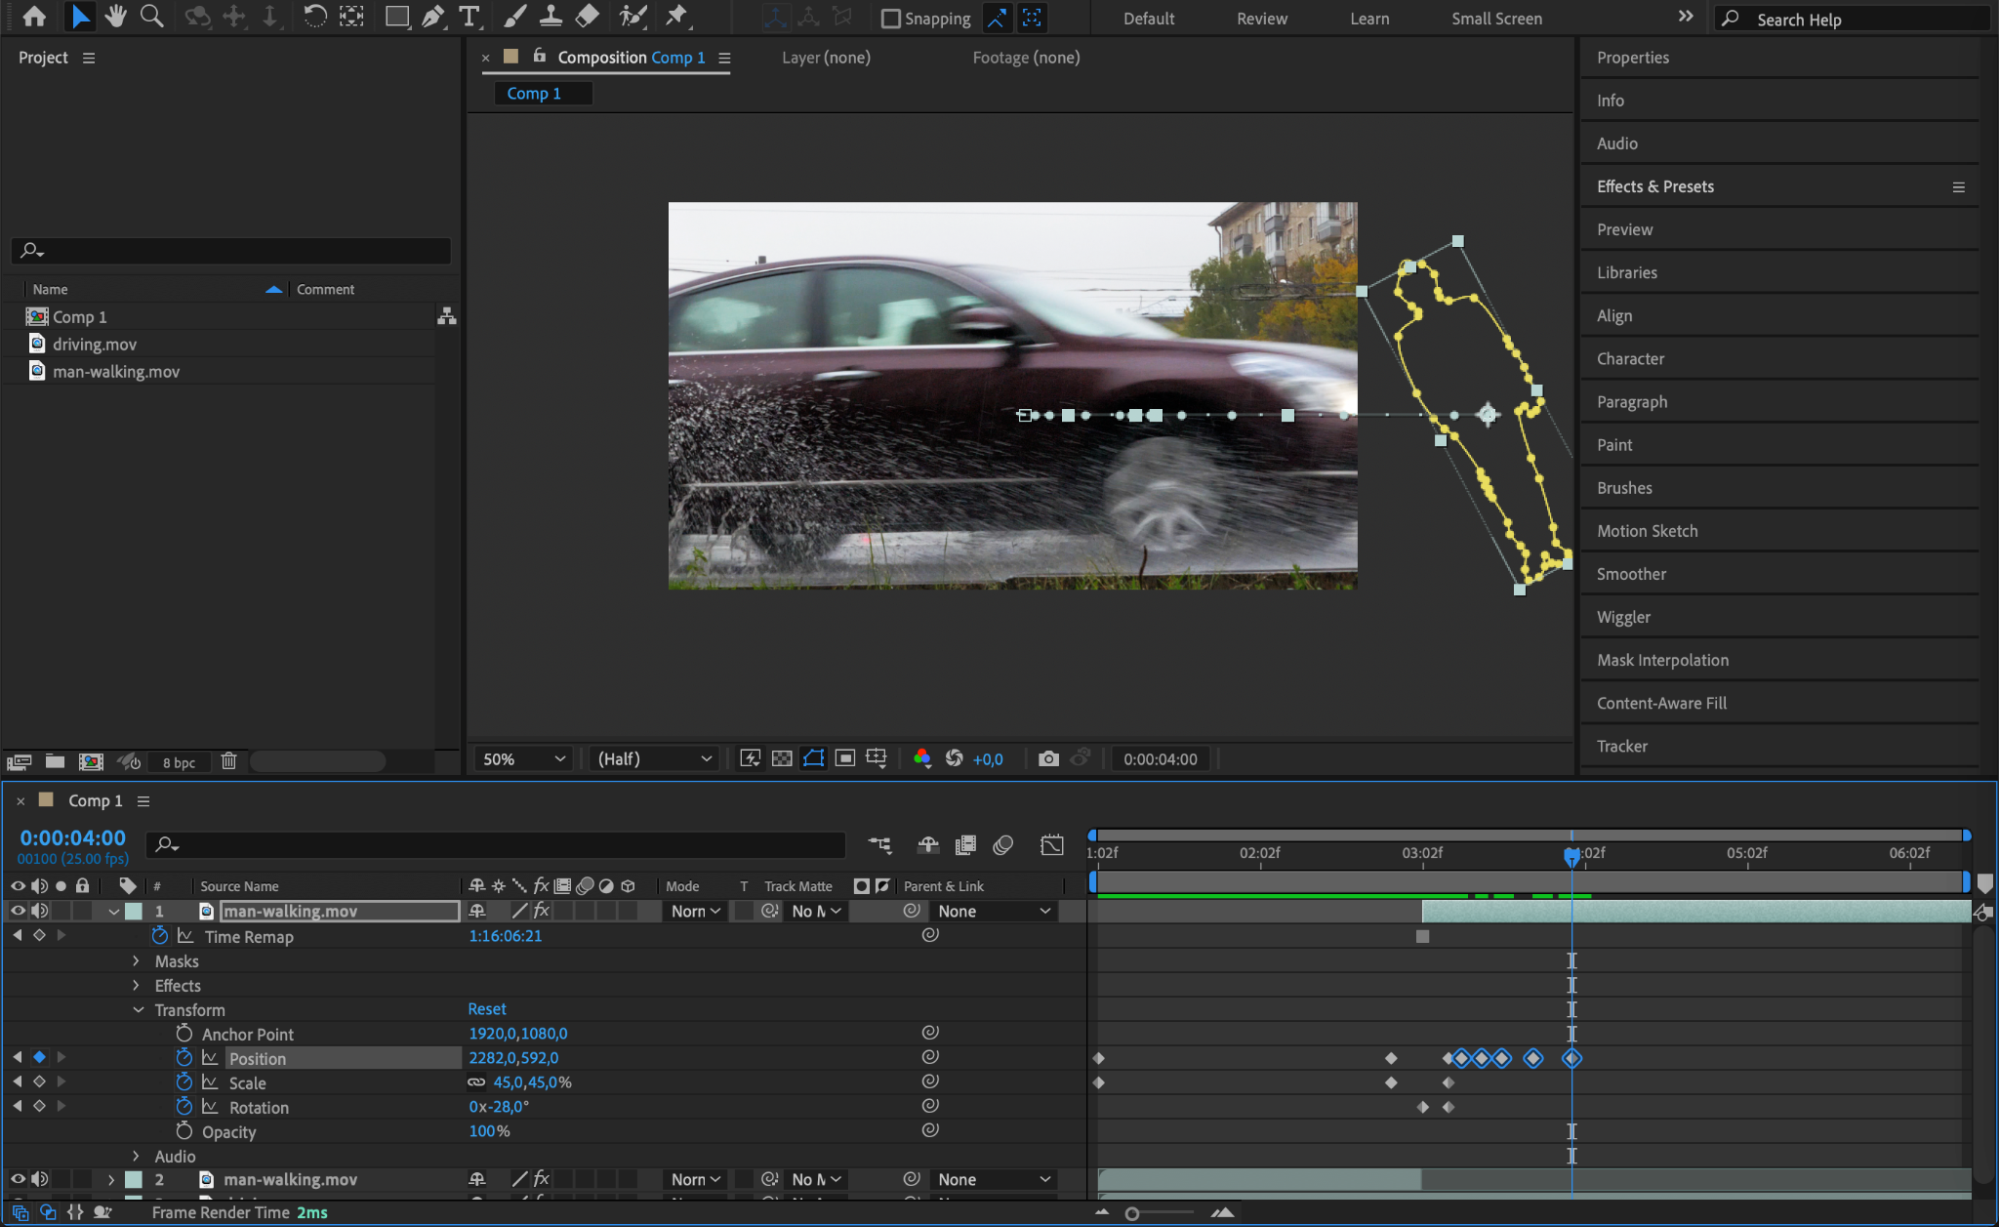
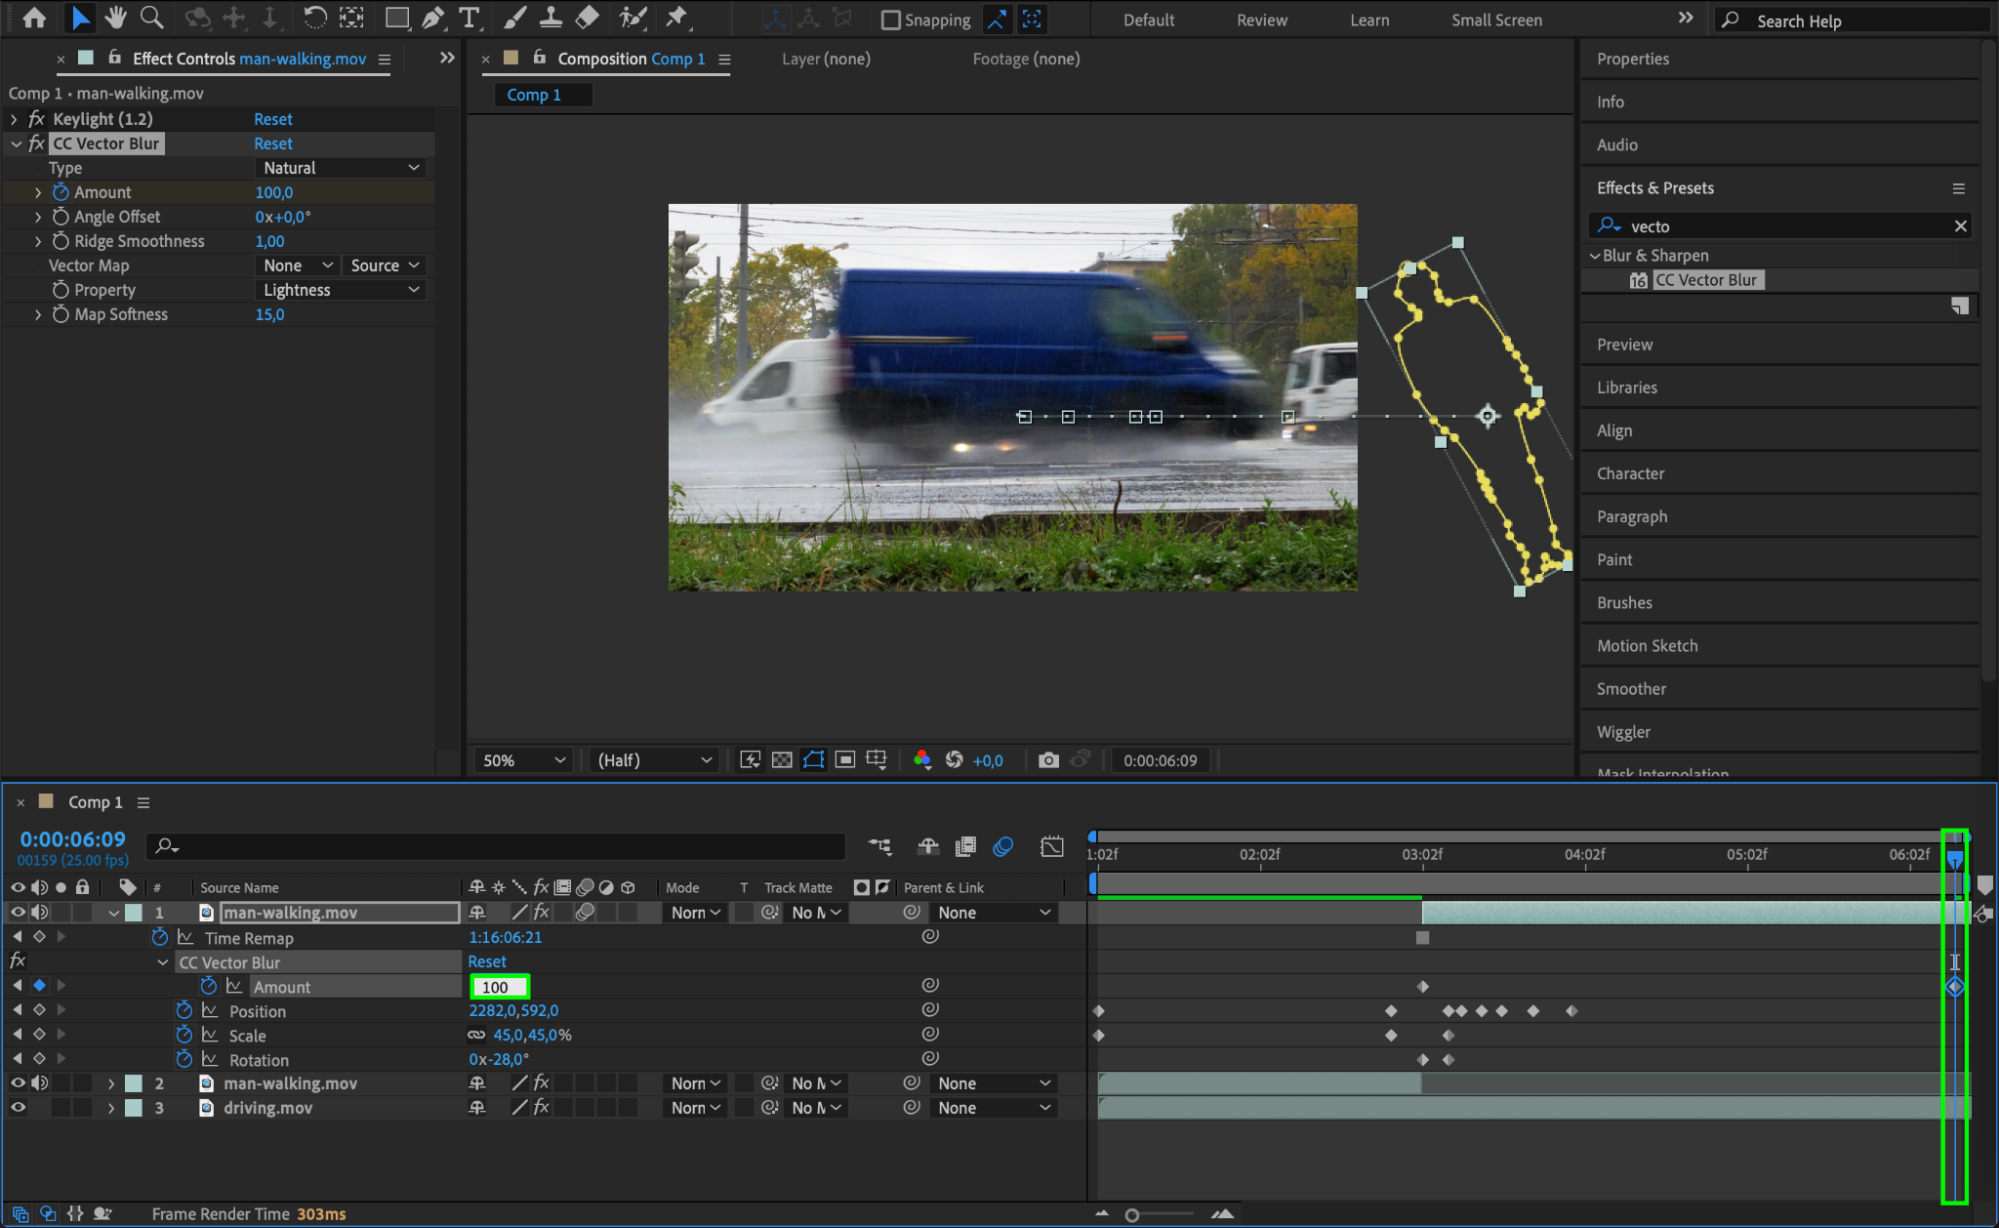
Now, animate the mask and the person’s movement to simulate them being hit by the car. Use keyframes on the Position and Rotation properties to create the effect of the person flying backward. The key is to make the movement sharp and fast, mimicking the force of the hit.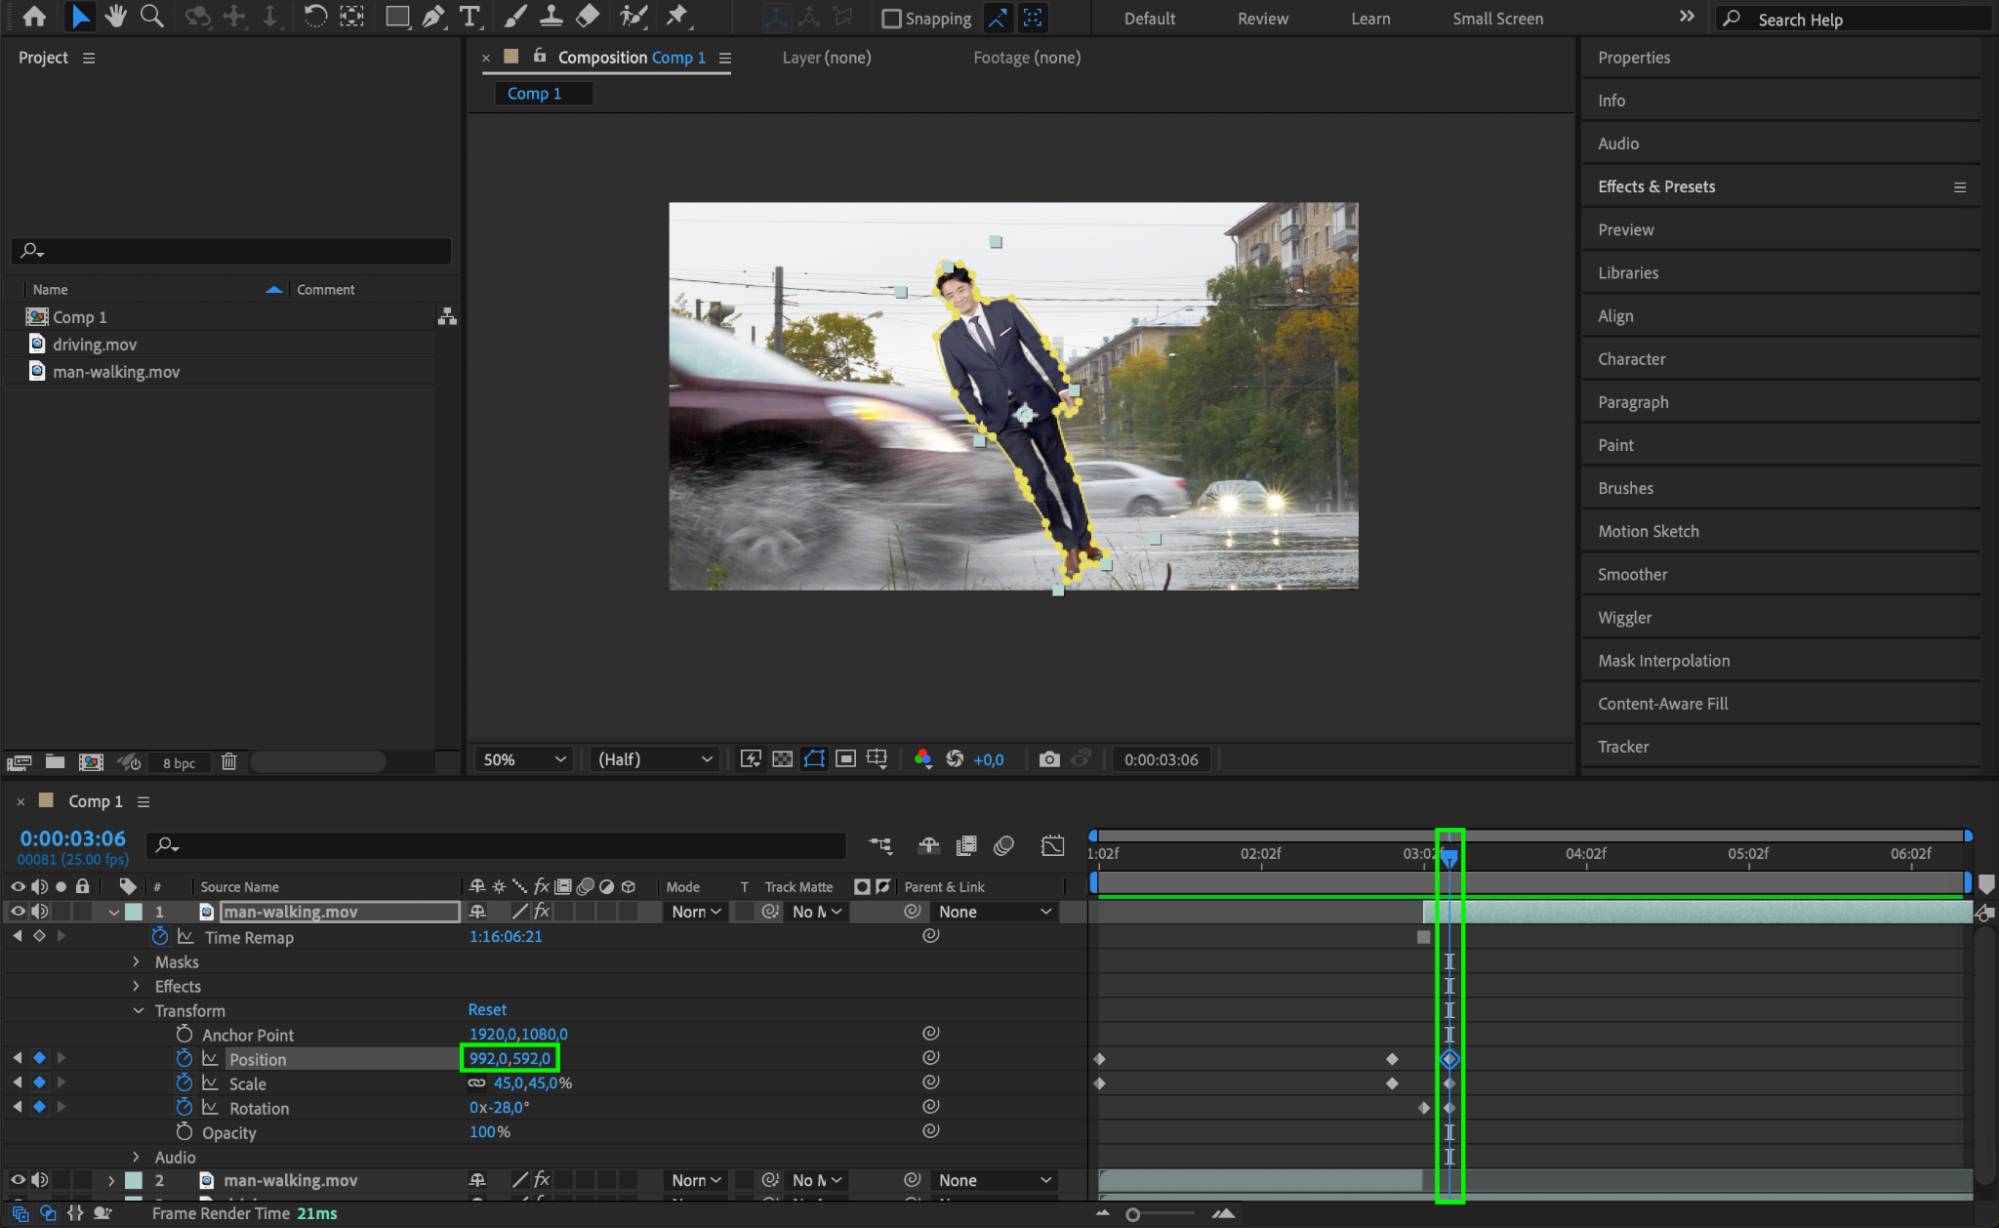
 12. Add Motion Blur and Vector Blur
Get 10% off when you subscribe to our newsletter

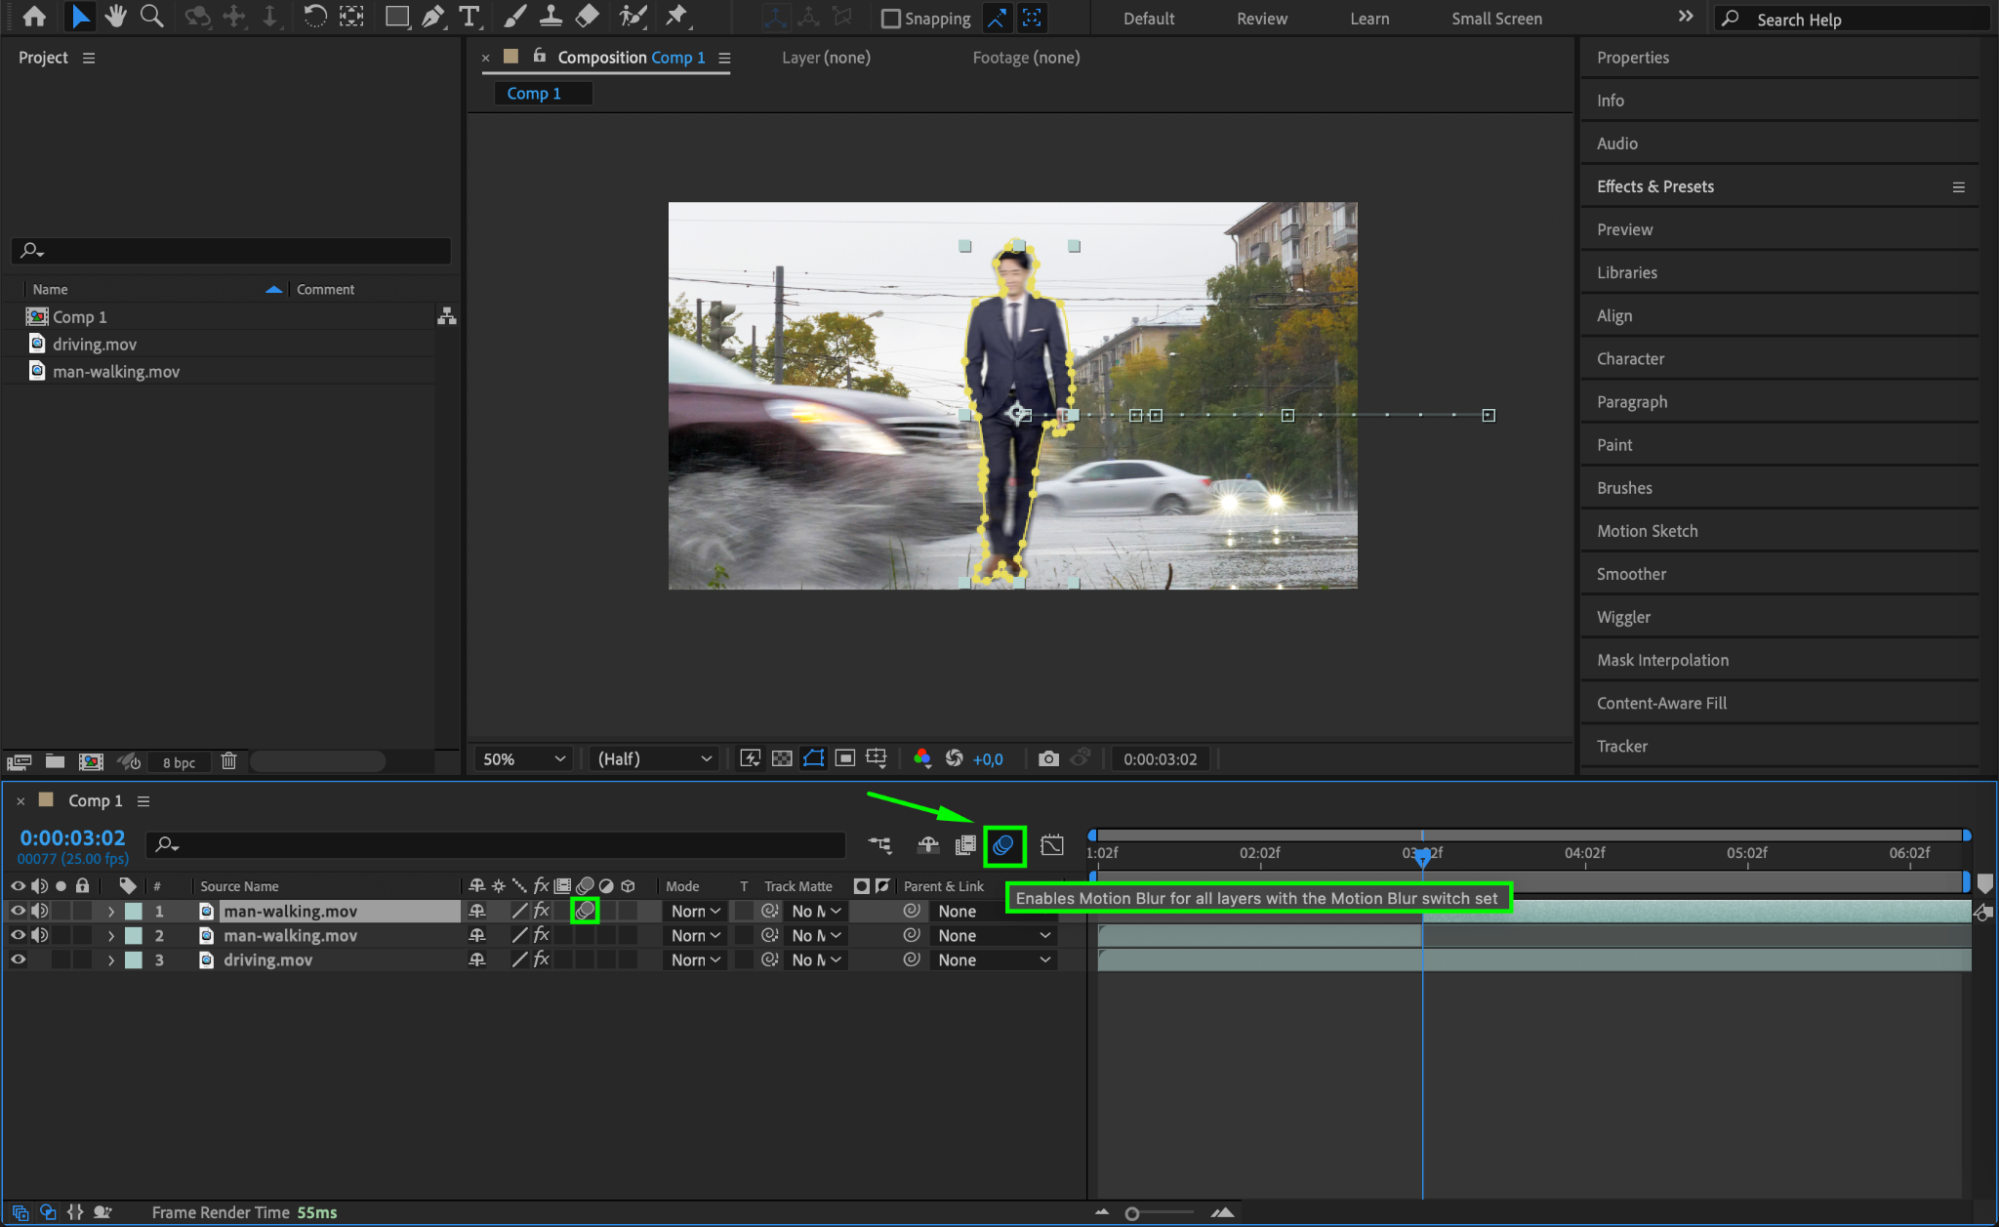
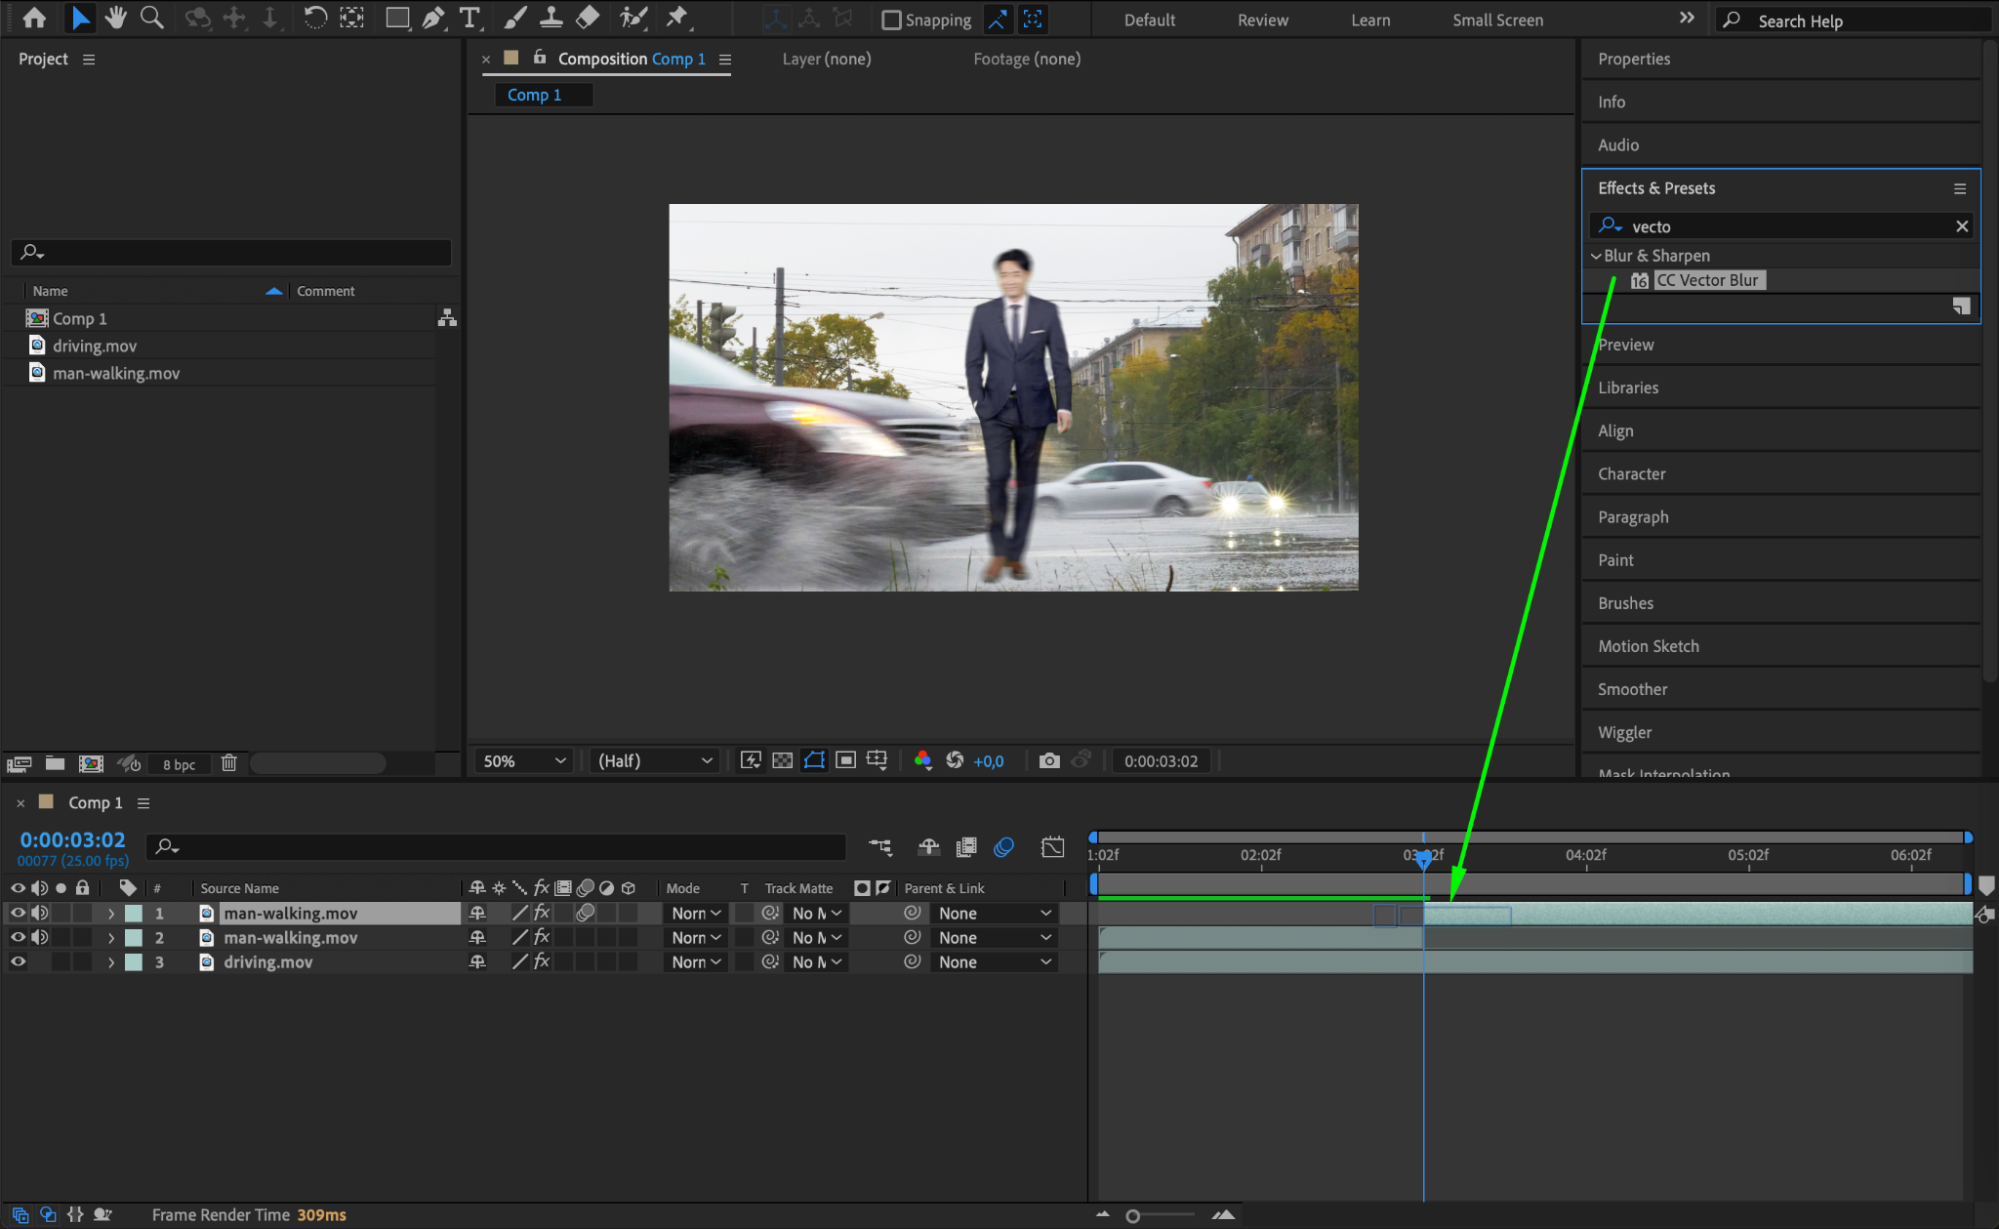
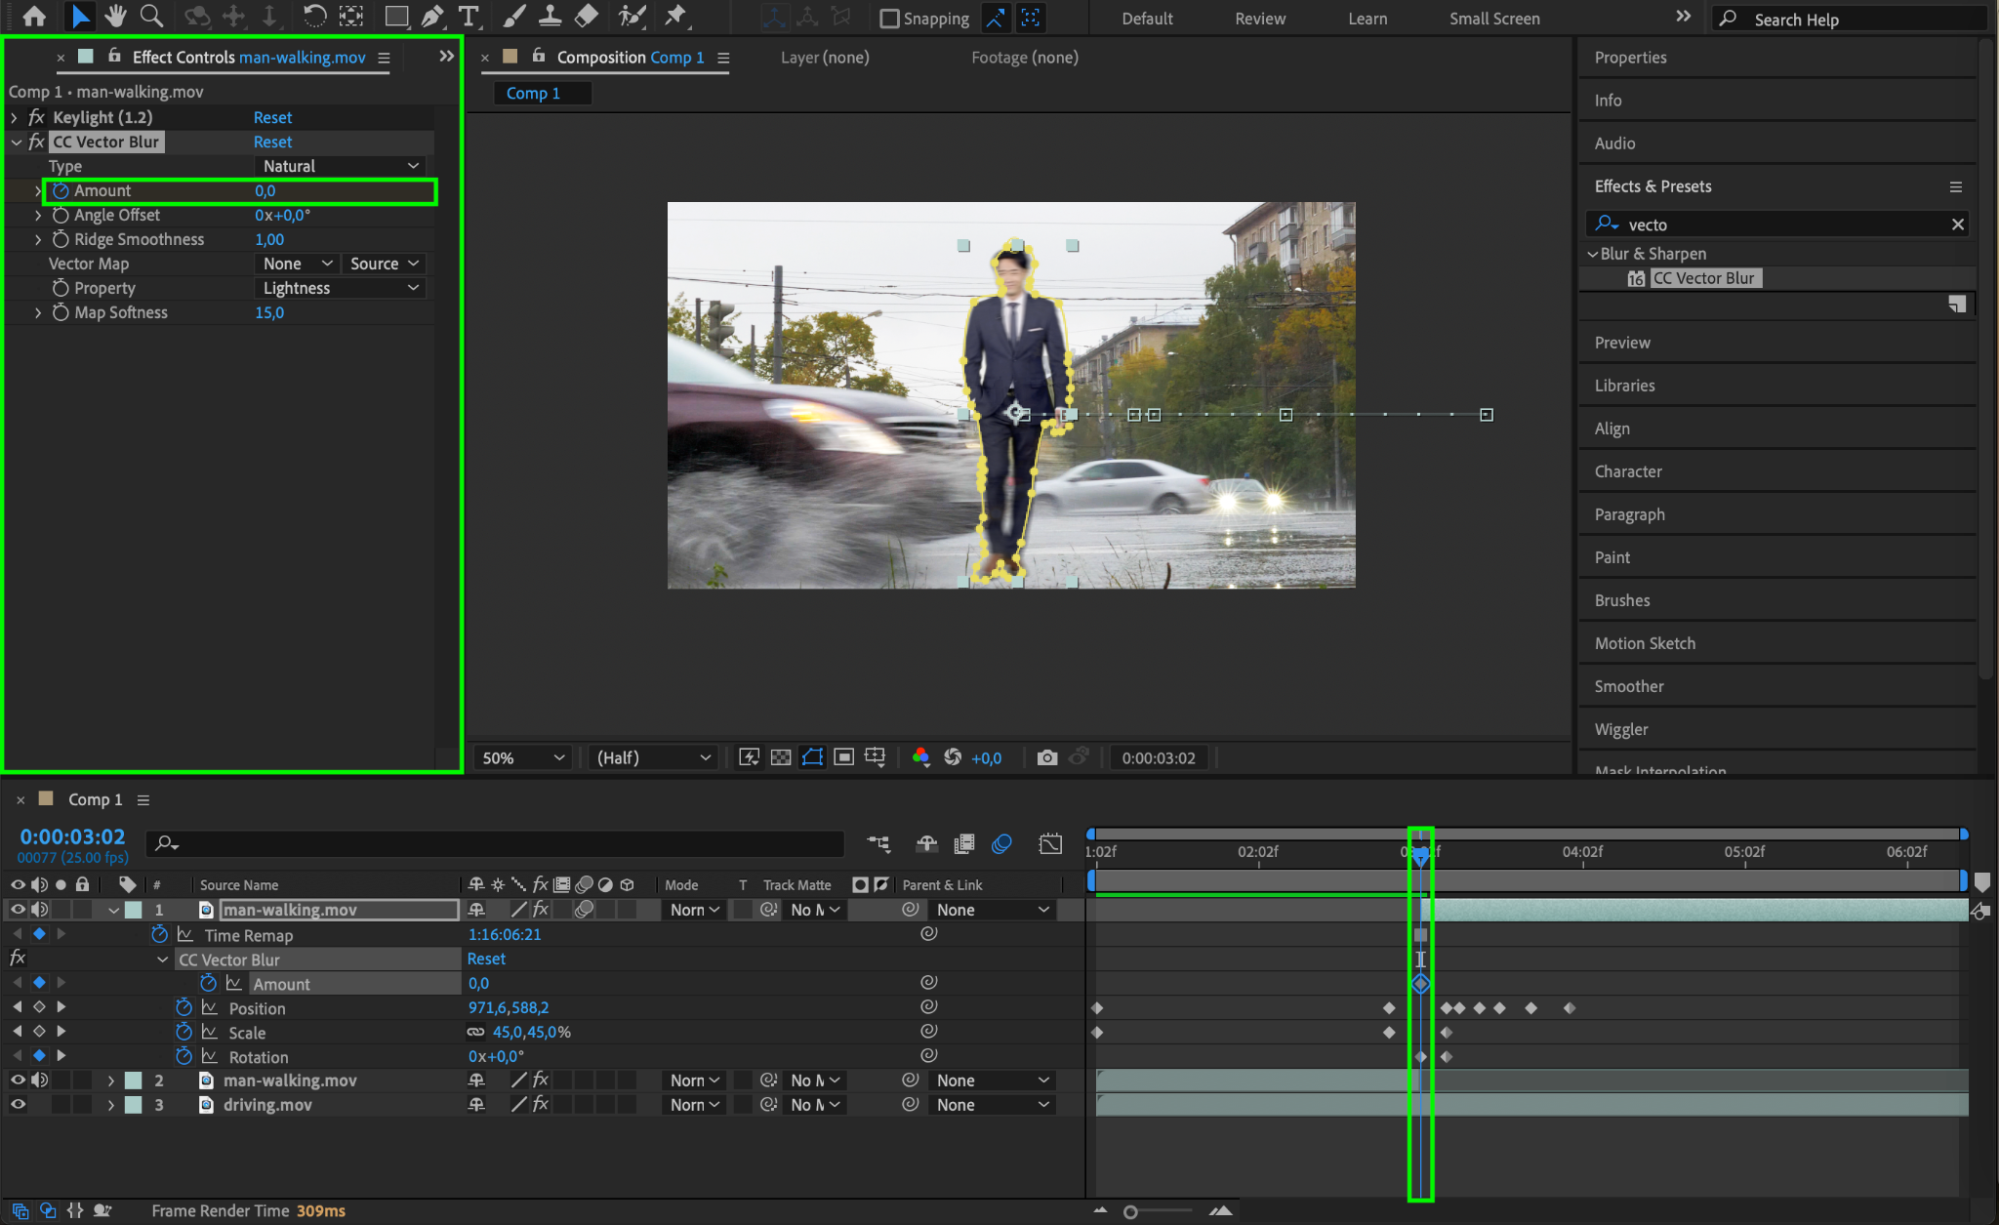
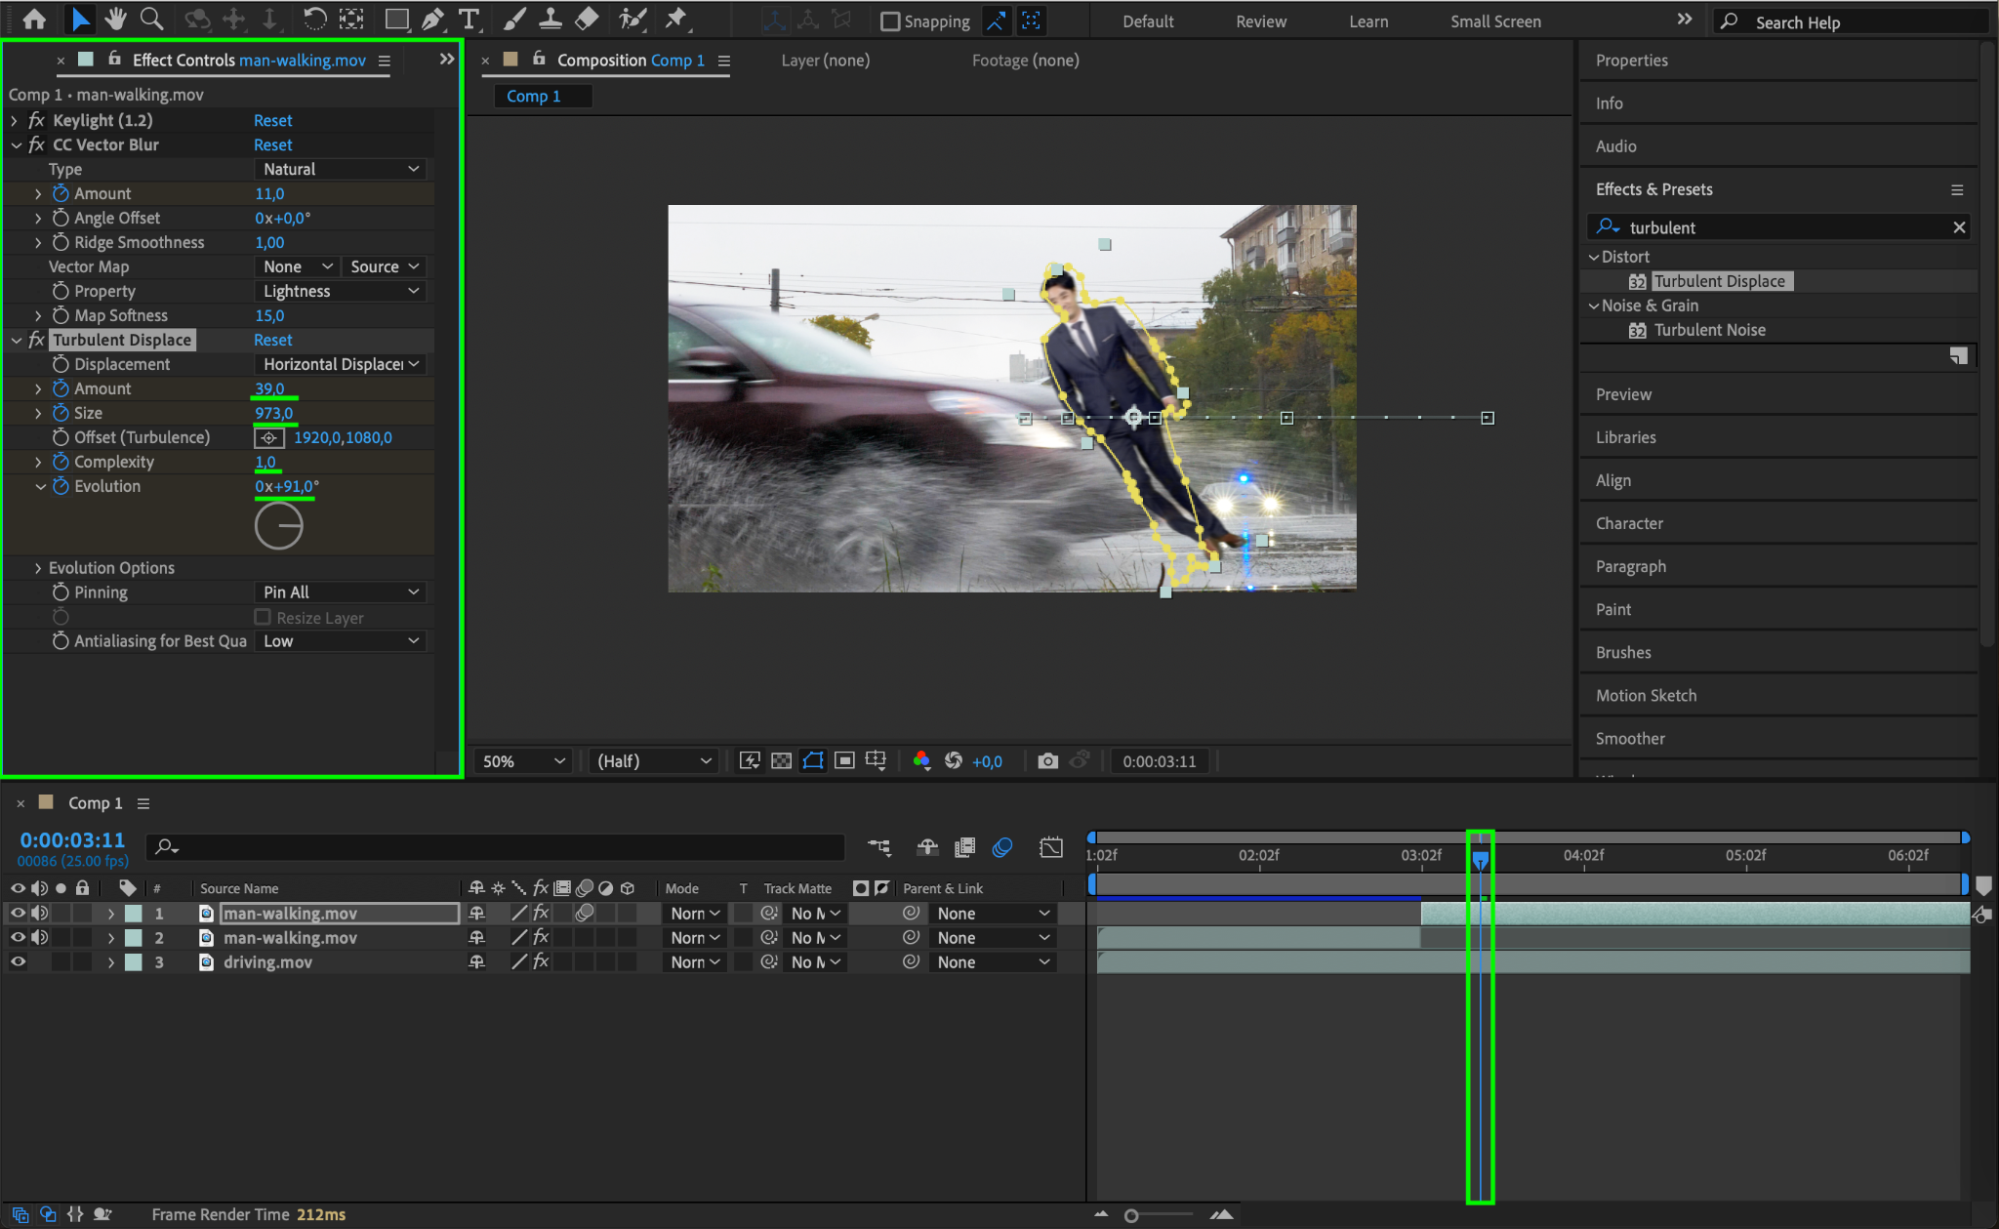
Enable Motion Blur for the person’s layer to add realism to the fast movement. You can also apply CC Vector Blur from the Effects & Presets panel to add more dynamic blurring, especially for the limbs or body parts that would naturally blur with fast movement.
 13. Use Turbulent Displace for Impact
Get 10% off when you subscribe to our newsletter

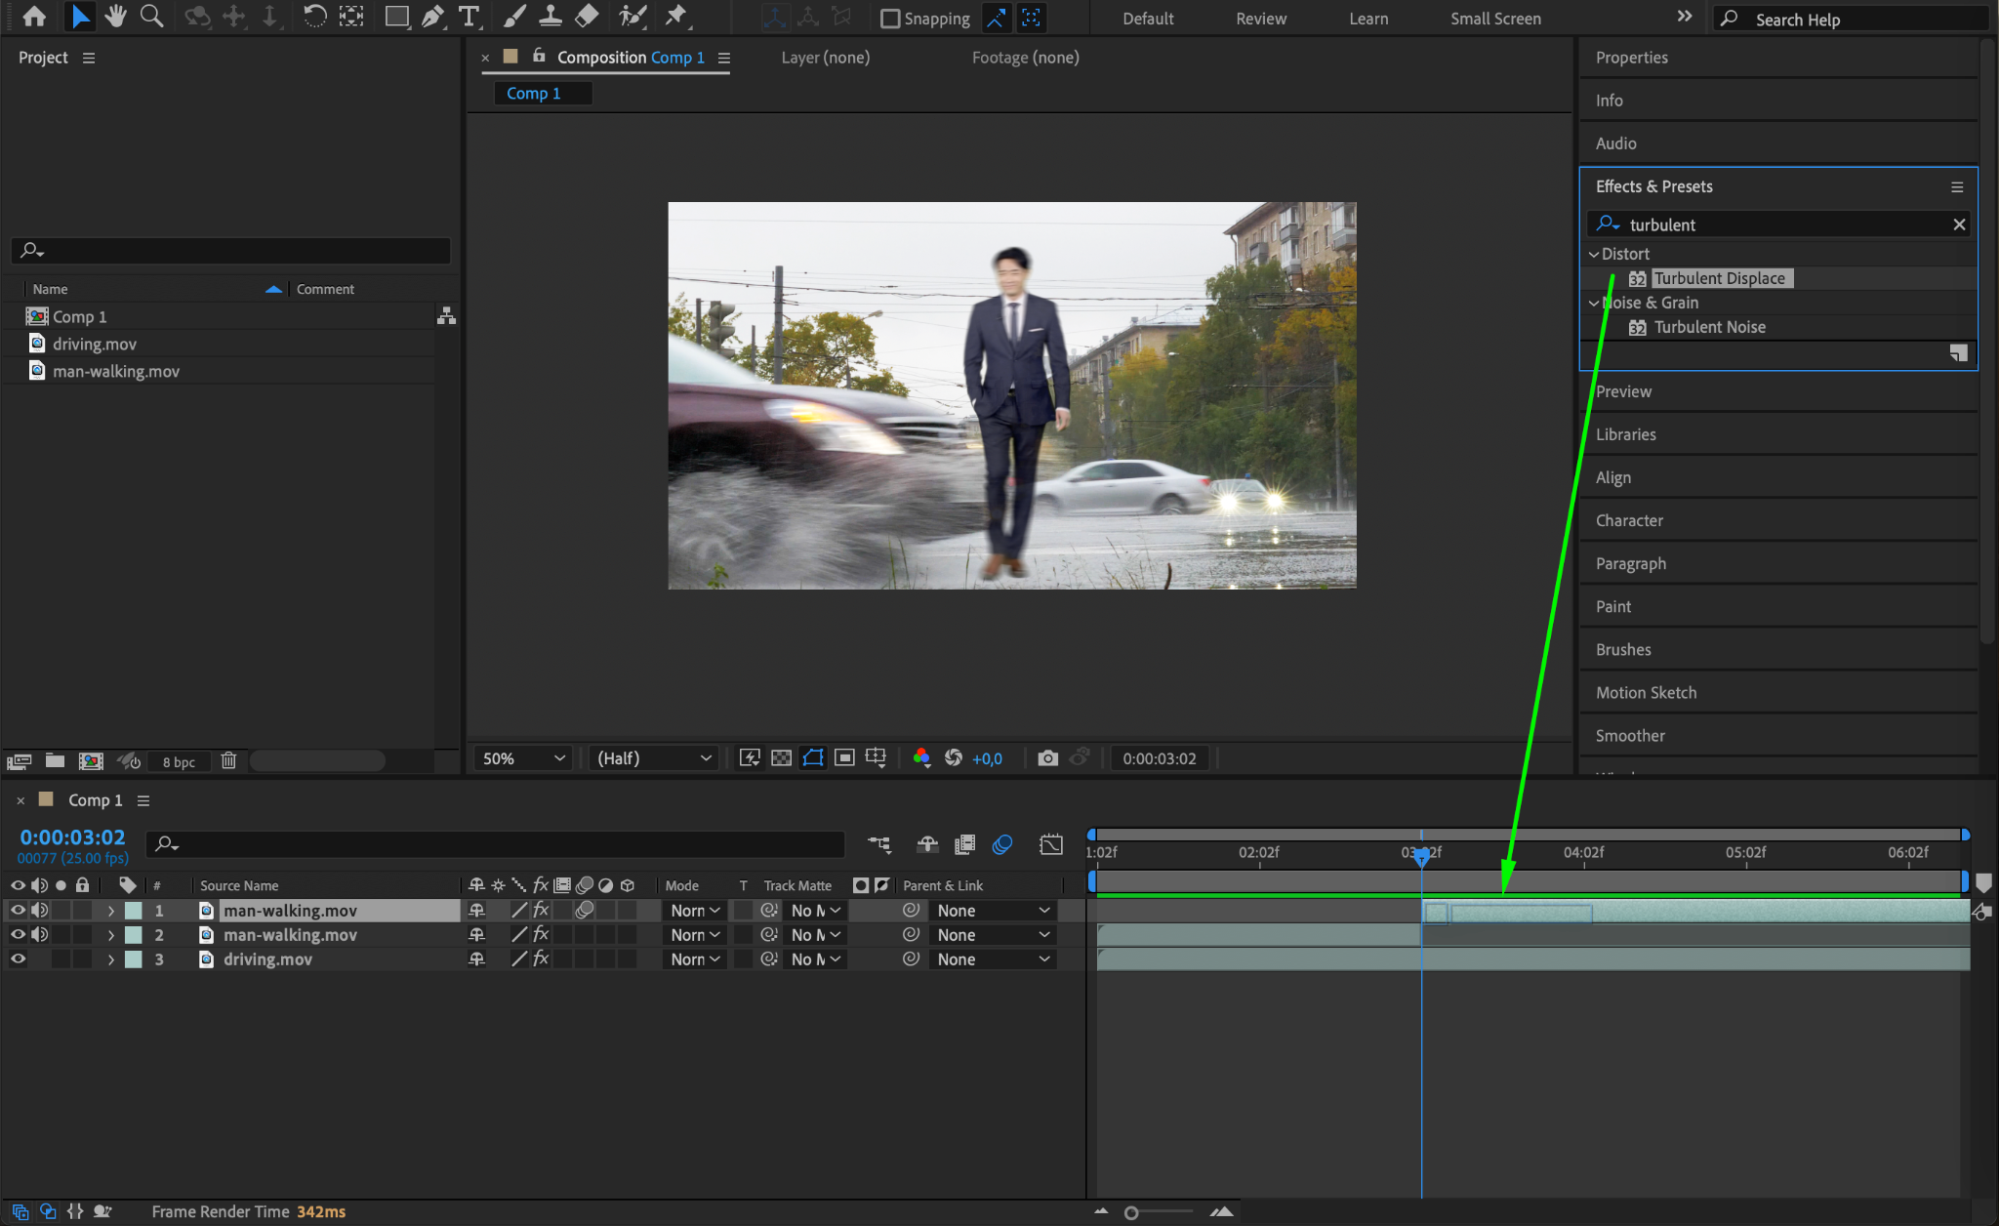
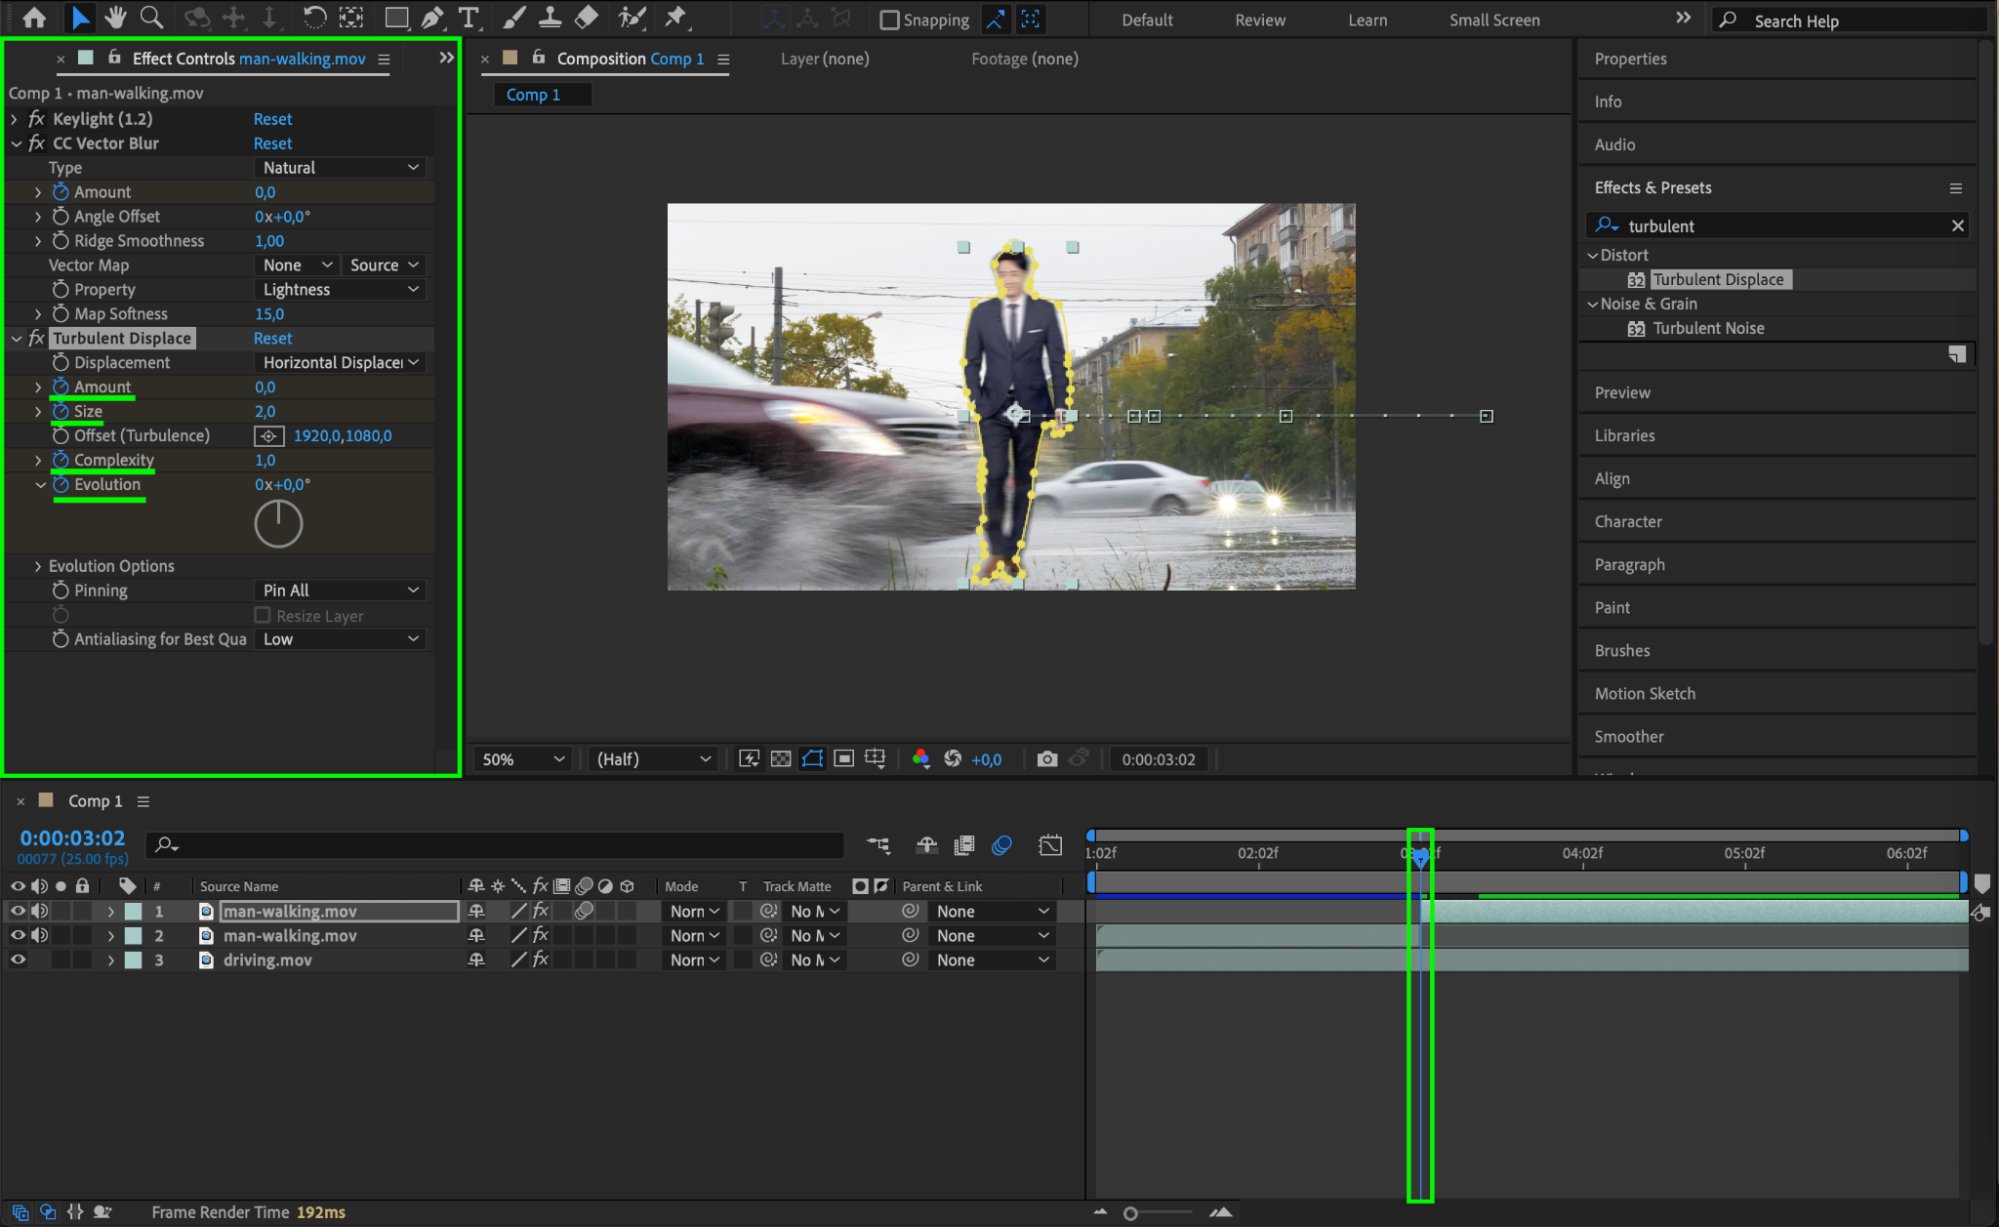
Apply the Turbulent Displace effect from the Effects & Presets panel to the person’s layer. This effect can create subtle distortions on the person’s figure, giving the illusion of motion and impact rippling through the body. Adjust the Amount and Size for a realistic effect.
14. Preview and Make Final Adjustments
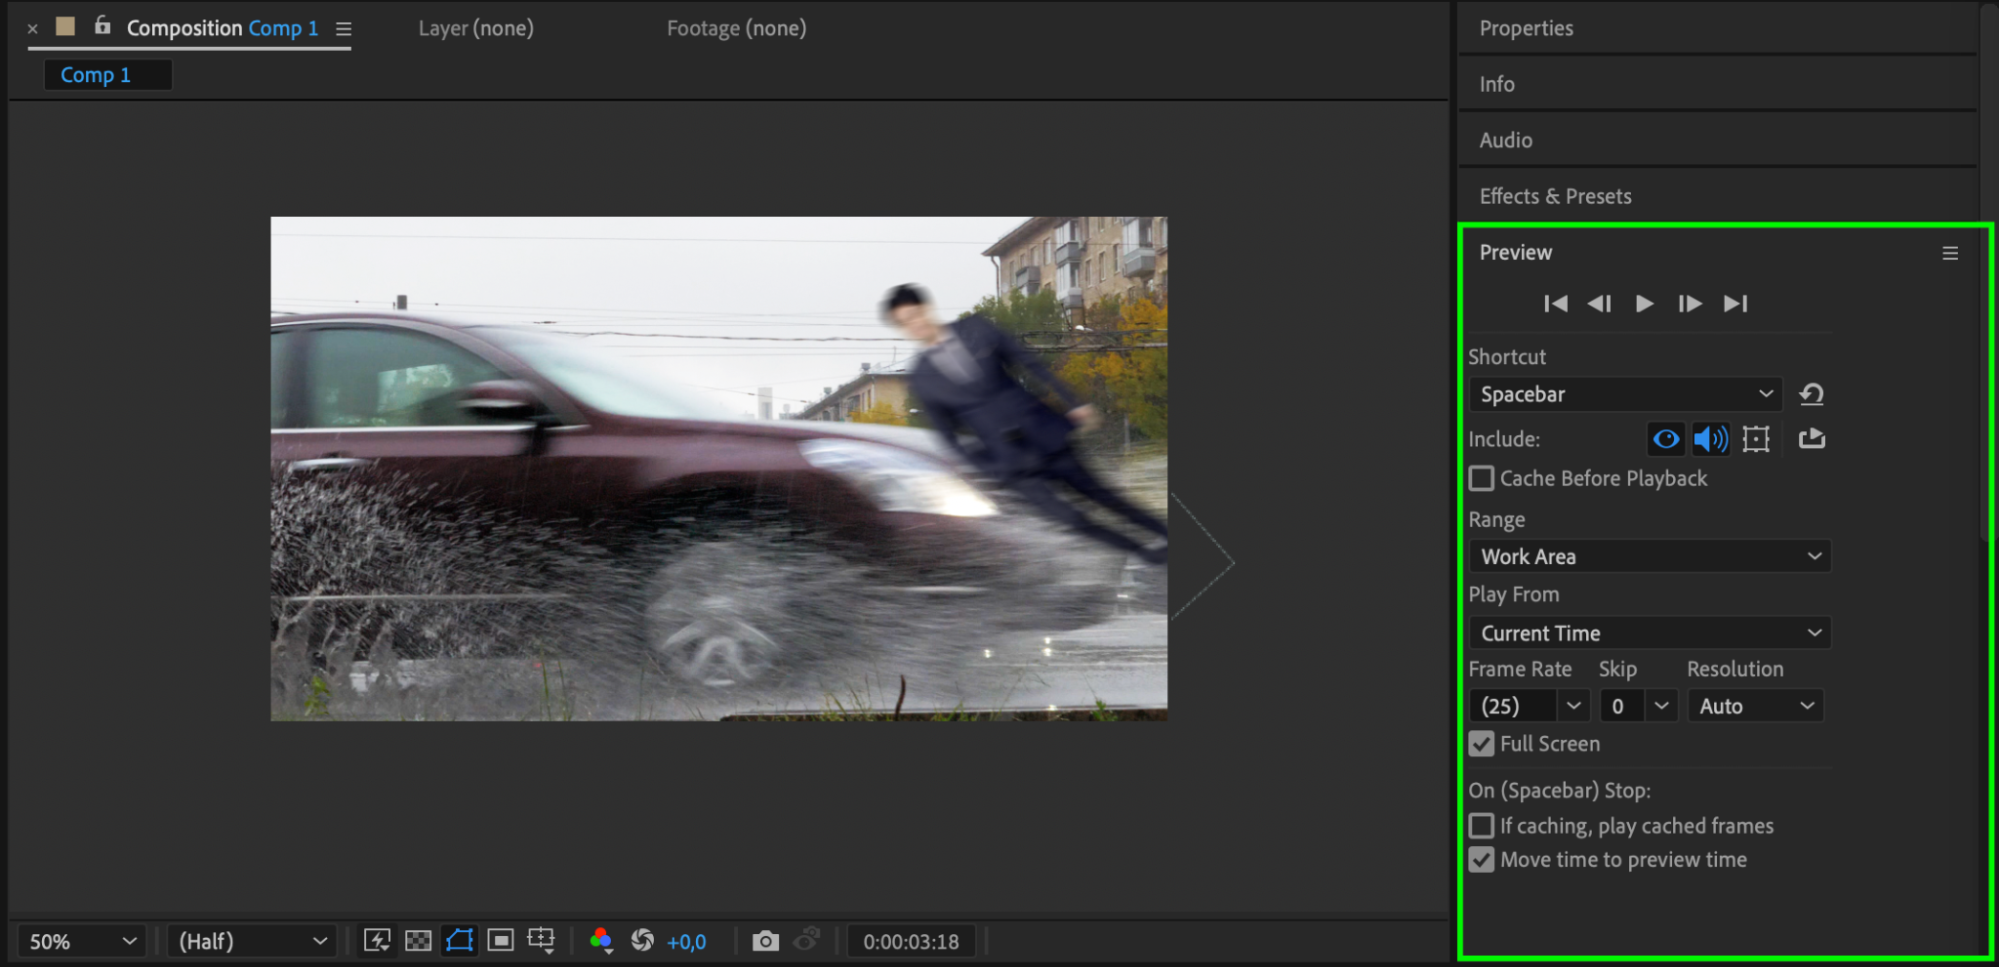
Finally, preview the entire sequence by pressing the Play button. Watch the motion carefully and make any necessary adjustments to the keyframes, effects, or timing to ensure the hit looks seamless and impactful.
Get 10% off when you subscribe to our newsletter

Conclusion
By following these steps, you can create a realistic and dramatic “hit by a car” effect in Adobe After Effects. This effect can add a thrilling element to your video projects, whether you’re working on short films, commercials, or action scenes. With a bit of practice, you’ll be able to pull off professional-level effects that will leave your audience in awe!

