Step-by-Step Guide to Creating a Hologram Effect in After Effects
Introduction: Bring Sci-Fi Holograms to Life
Holograms are a staple of futuristic designs and can add a stunning effect to your video projects. In this guide, we’ll show you how to create a convincing hologram using After Effects. With tools like motion tracking, Keylight, and Glow, you’ll have a sci-fi hologram ready in no time.
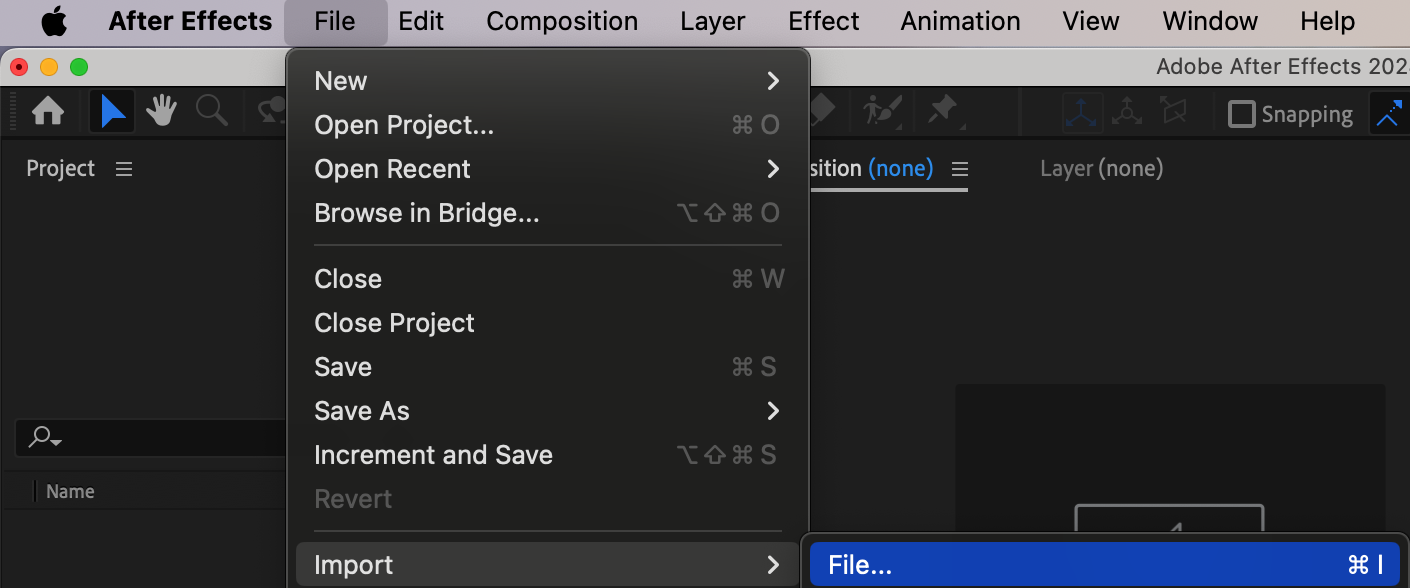
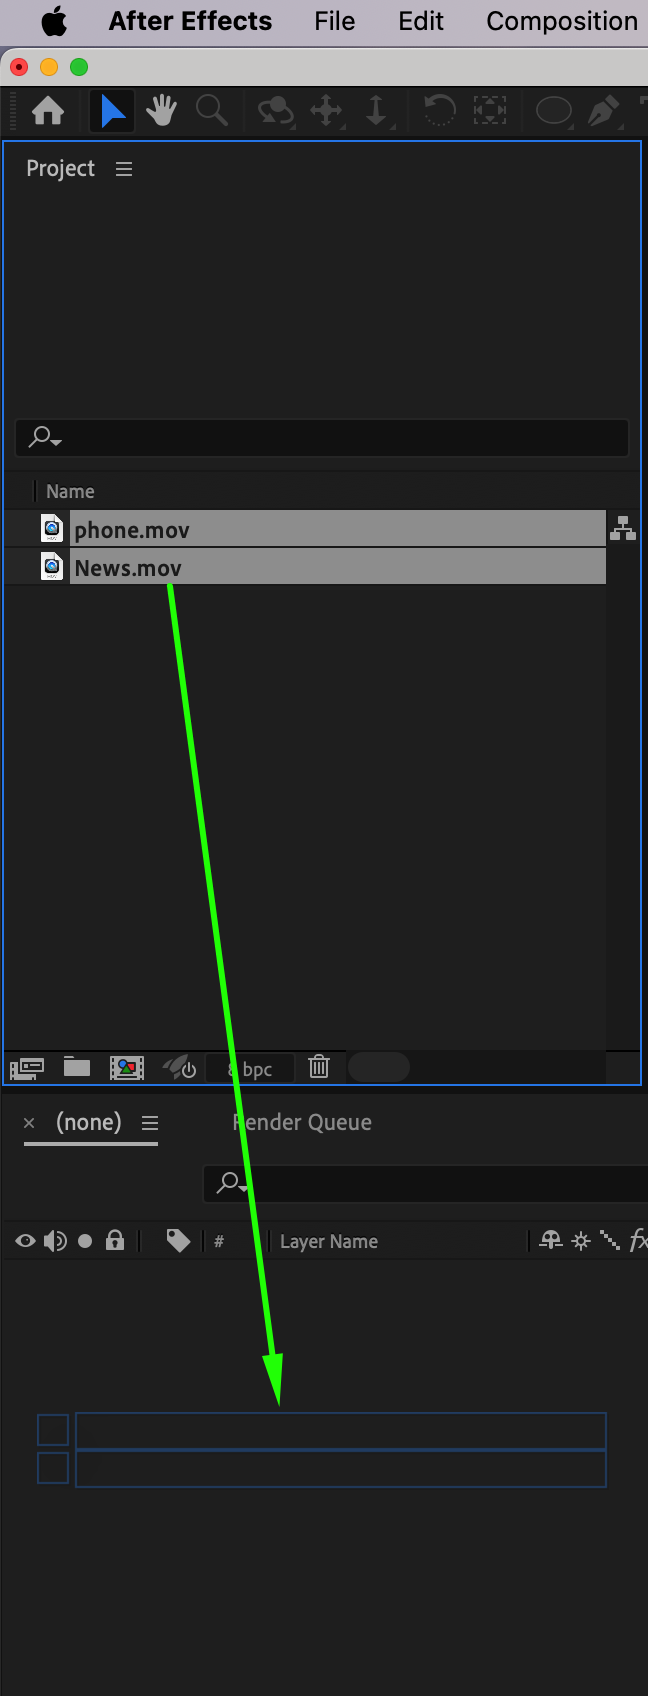
Step 1: Import Your Files
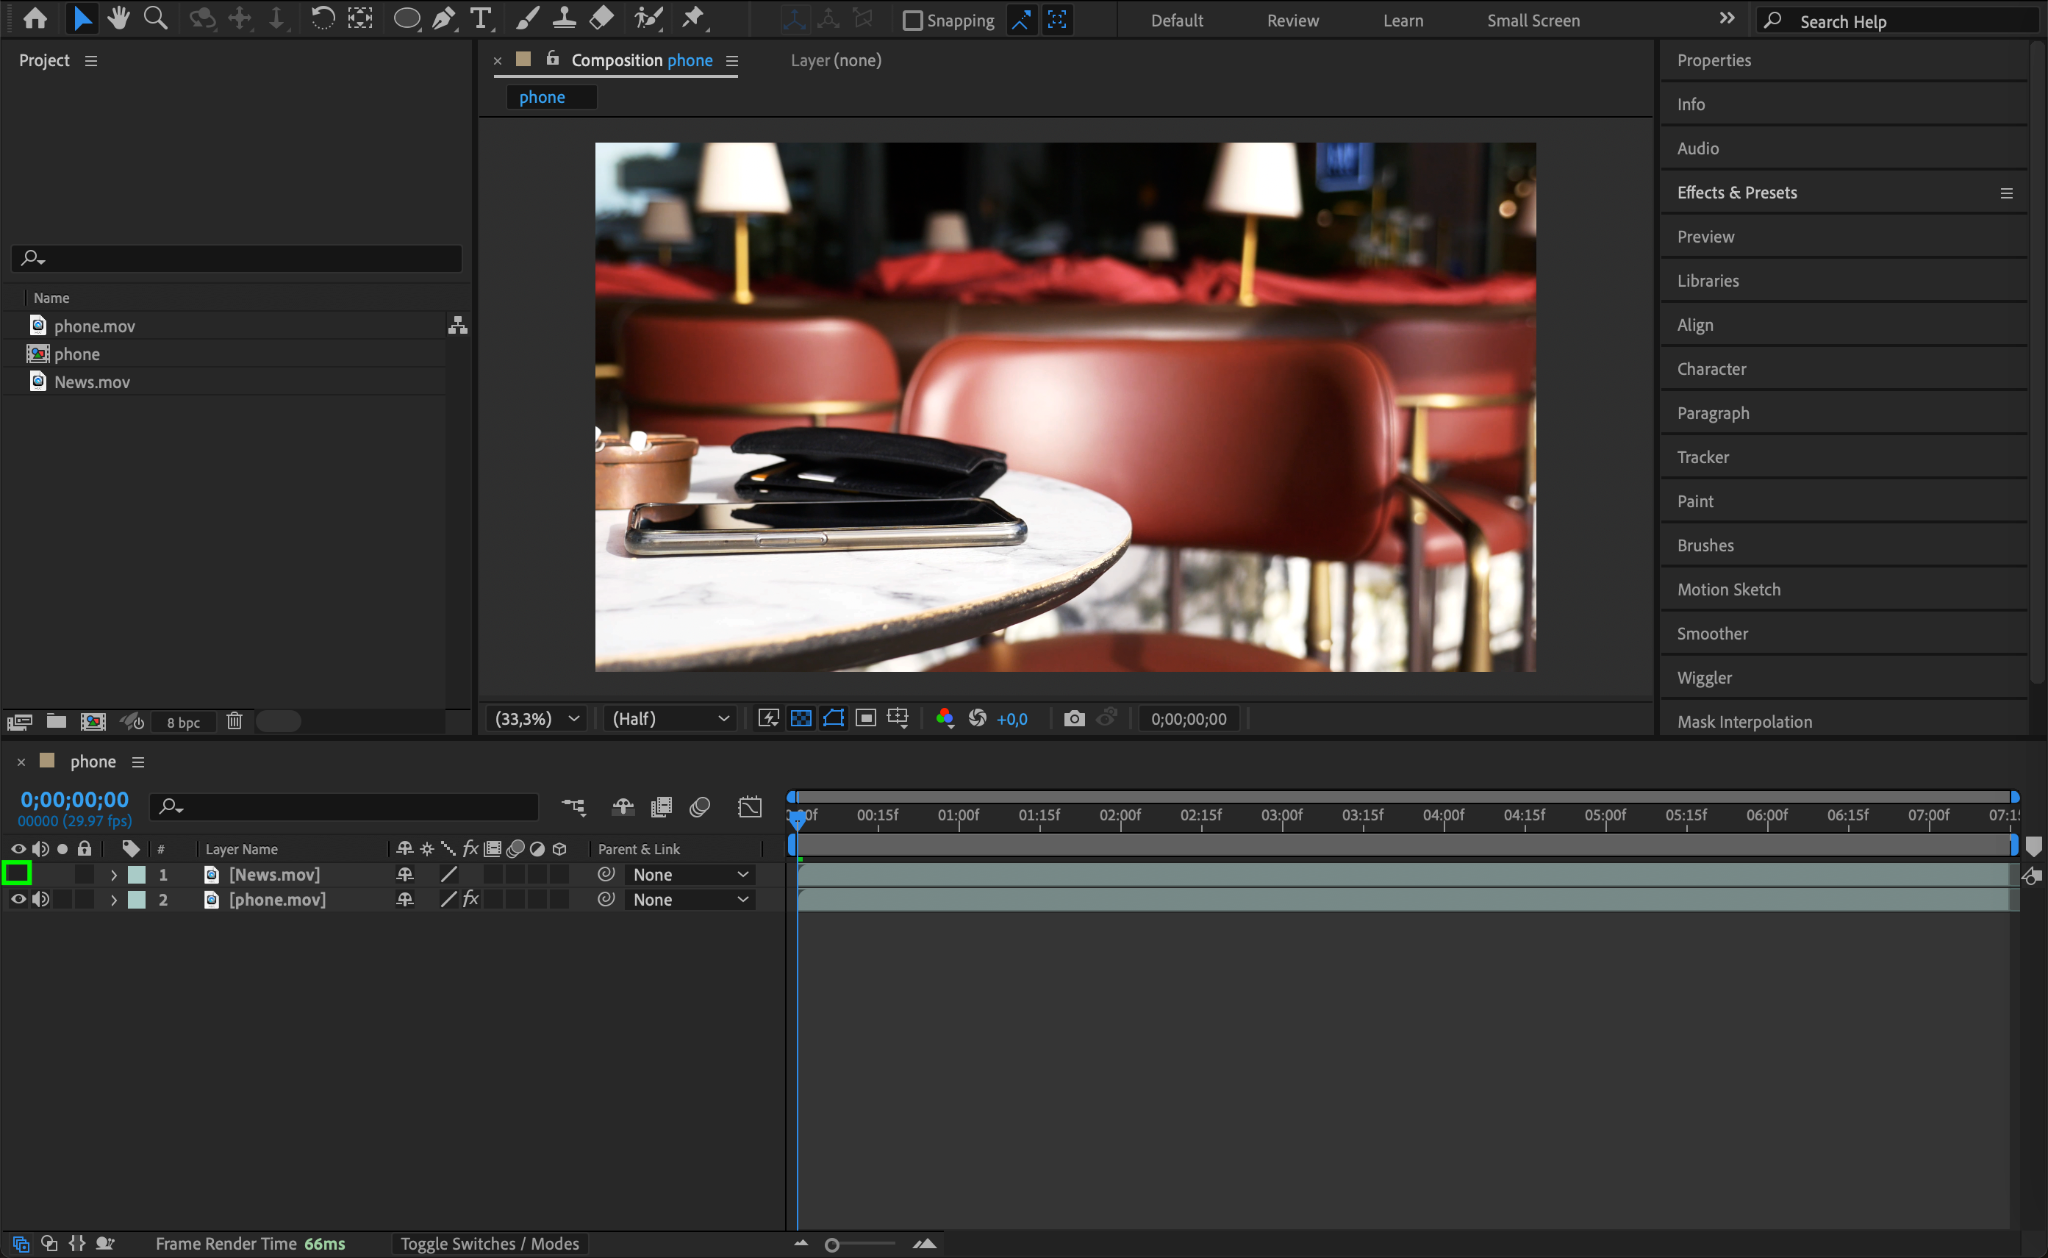
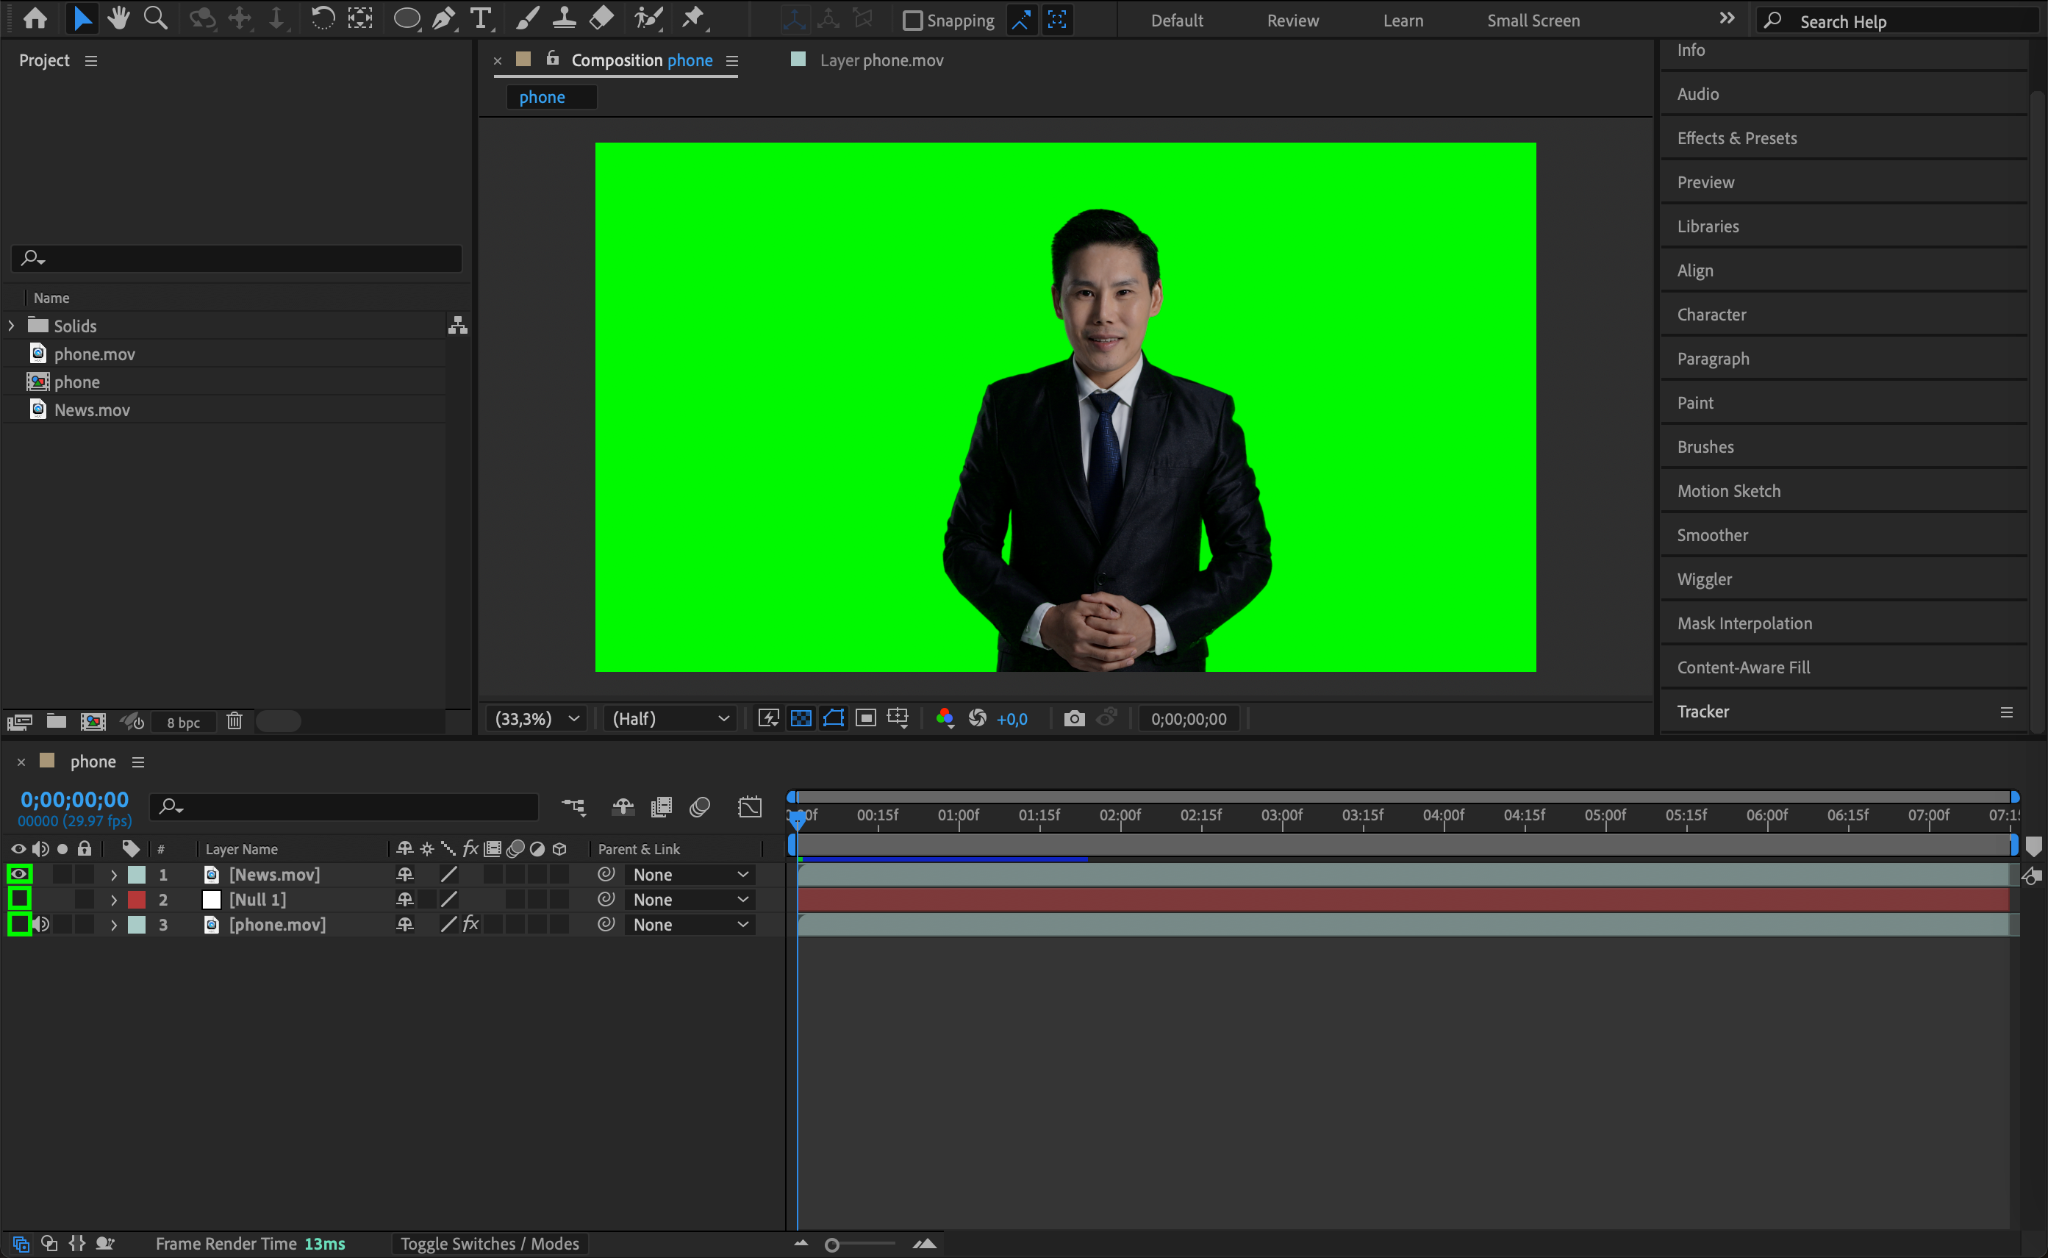
Start by importing two video files: one of the device (e.g., a phone or tablet) and the other of the content you want to display as a hologram. Drag both files onto the timeline, placing the device footage below the hologram content.
Get 10% off when you subscribe to our newsletter

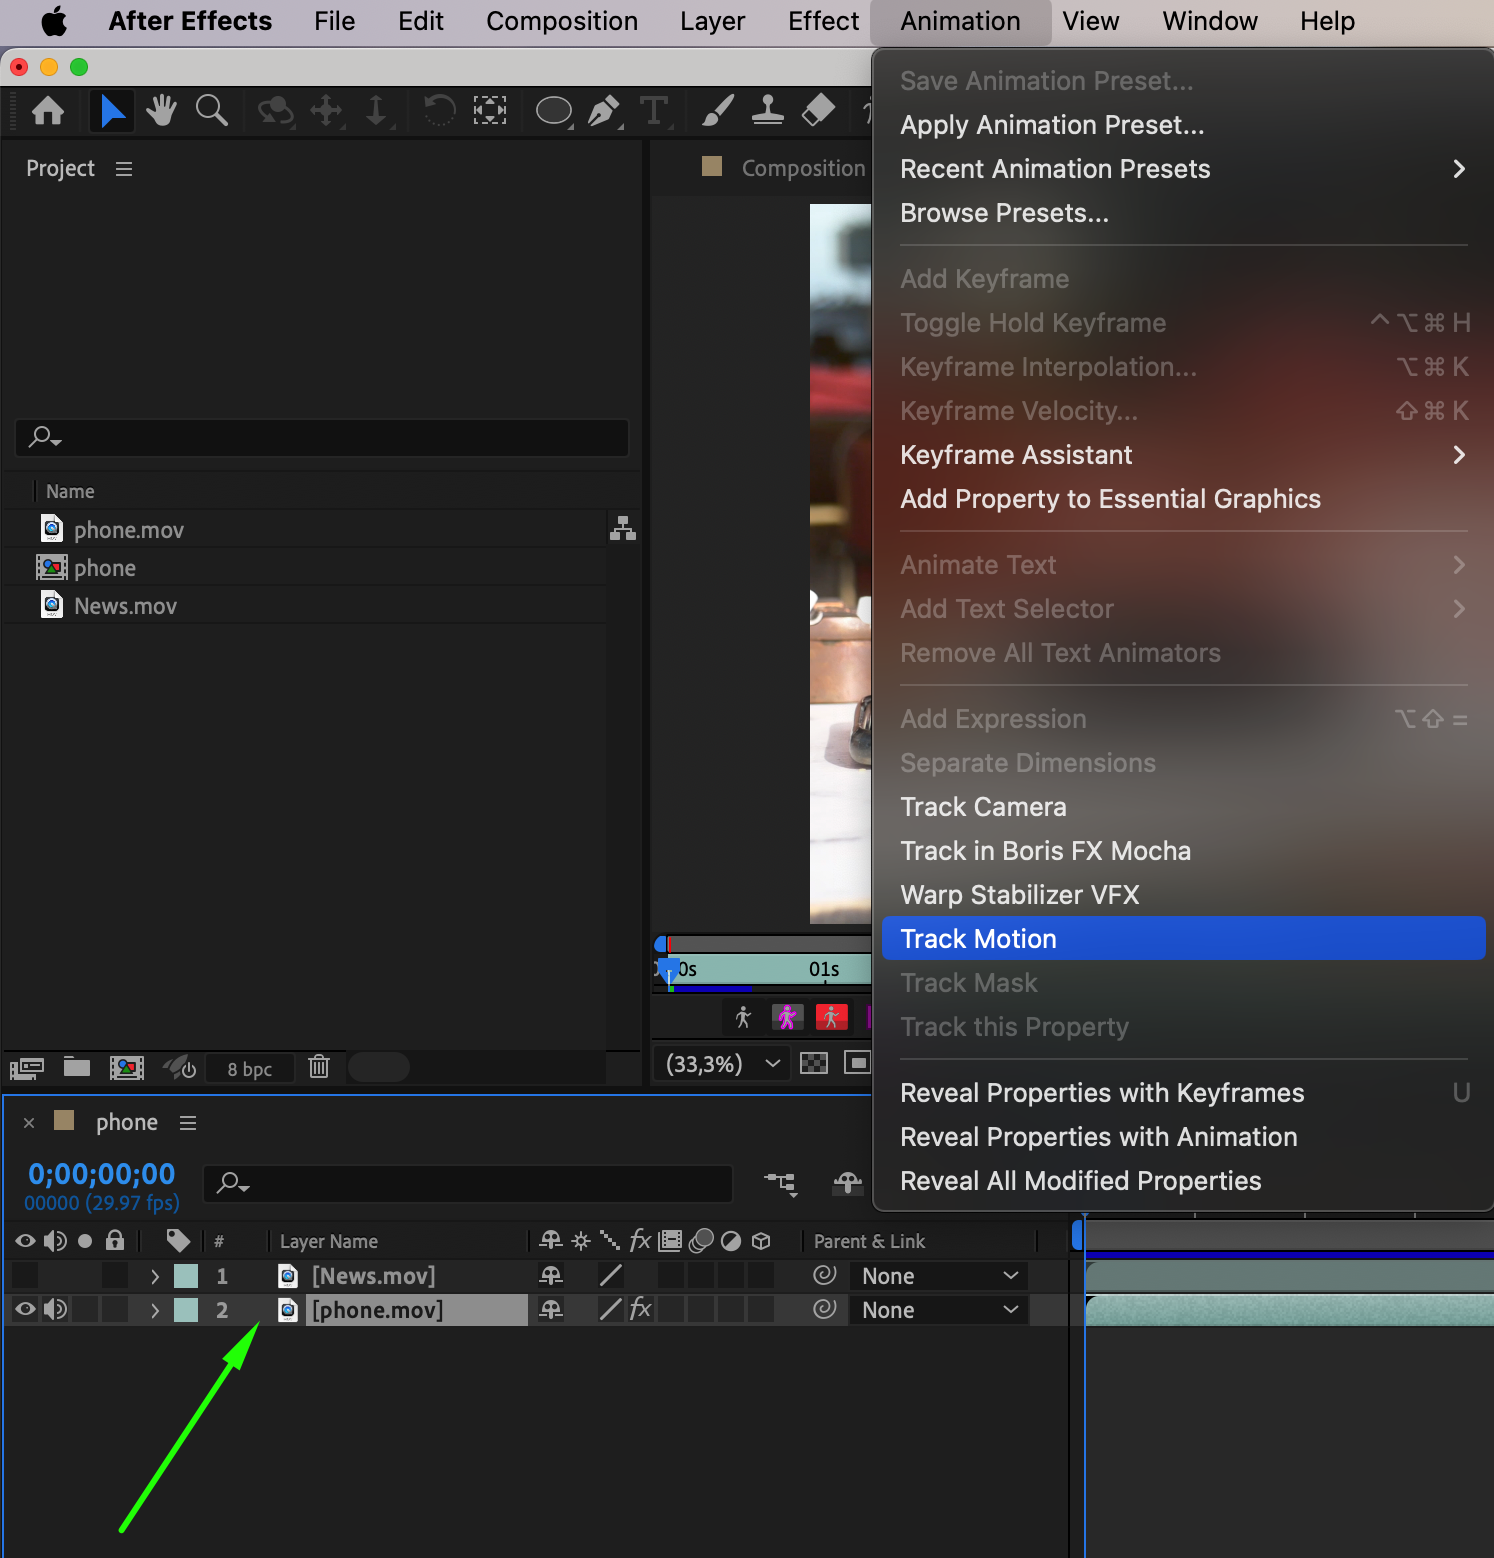
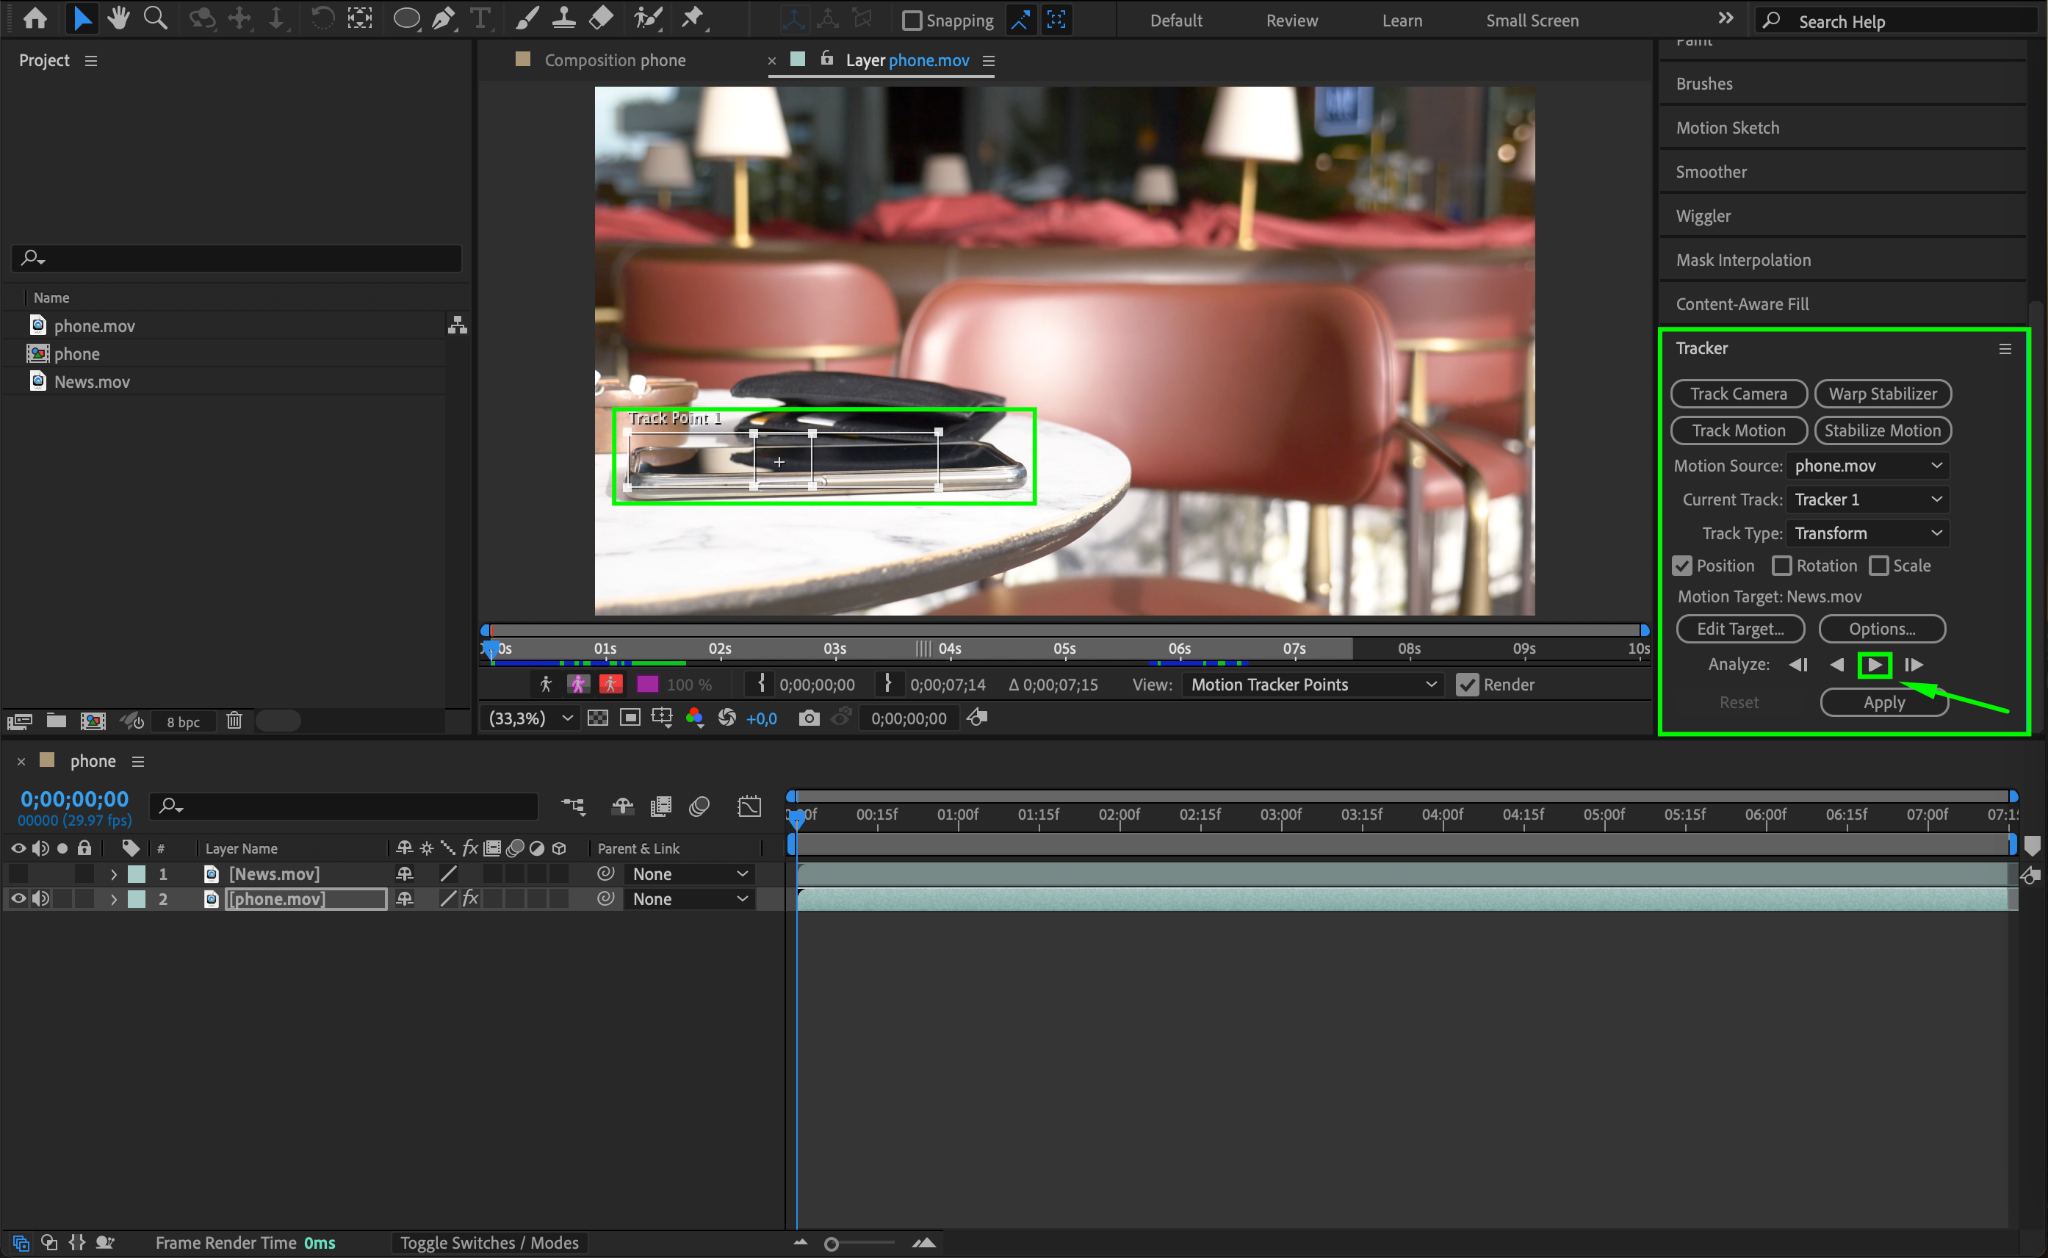
Step 2: Track Motion on the Device
Hide the hologram content by clicking the Eye icon next to its layer. Select the device layer, then go to Animation > Track Motion. Position the tracking point on the device screen or another fixed part of the device. Click Play in the Analyze section to track the motion.

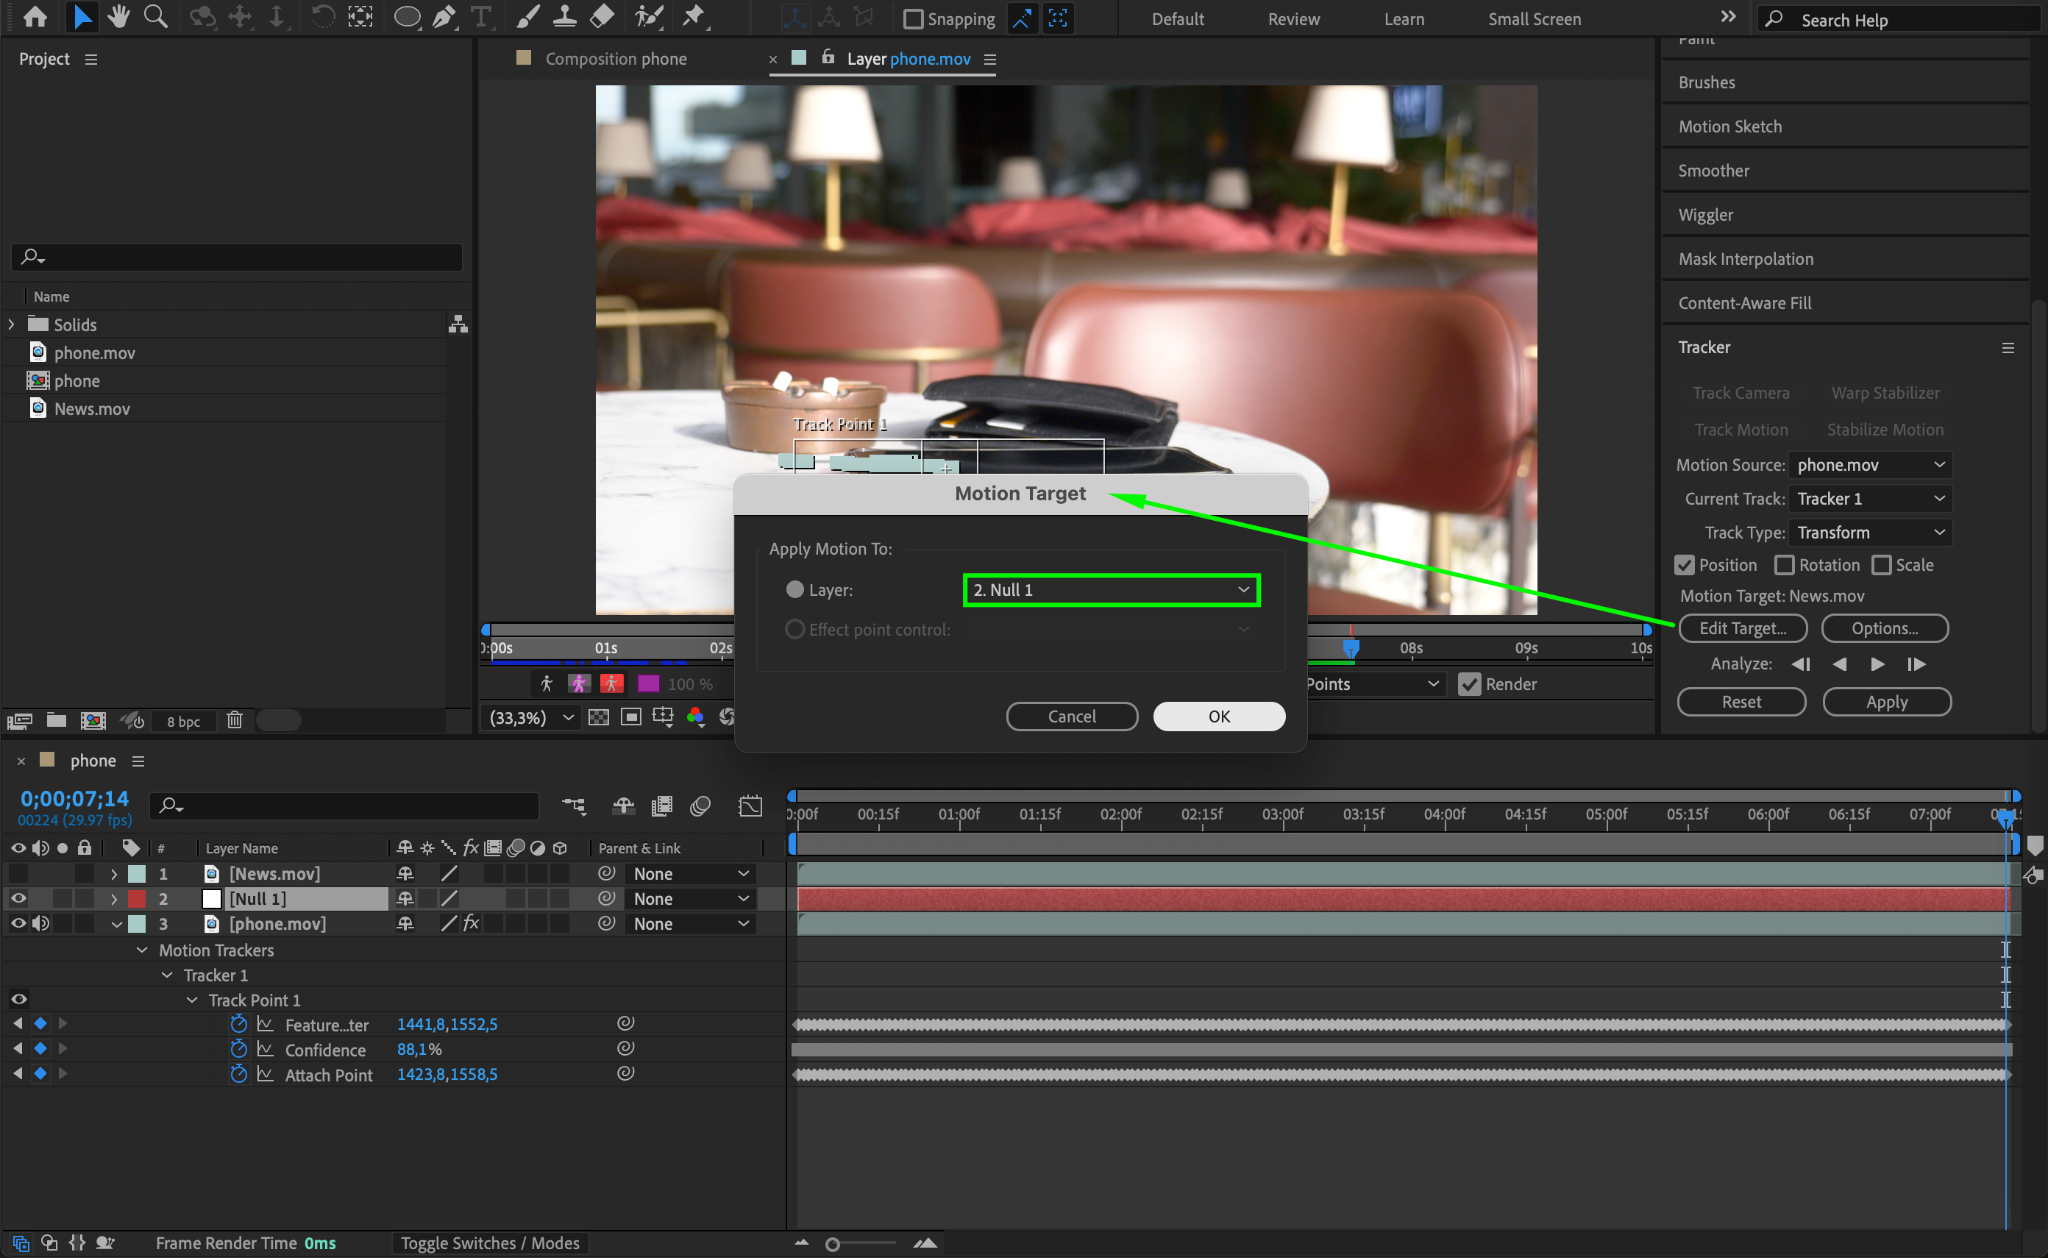
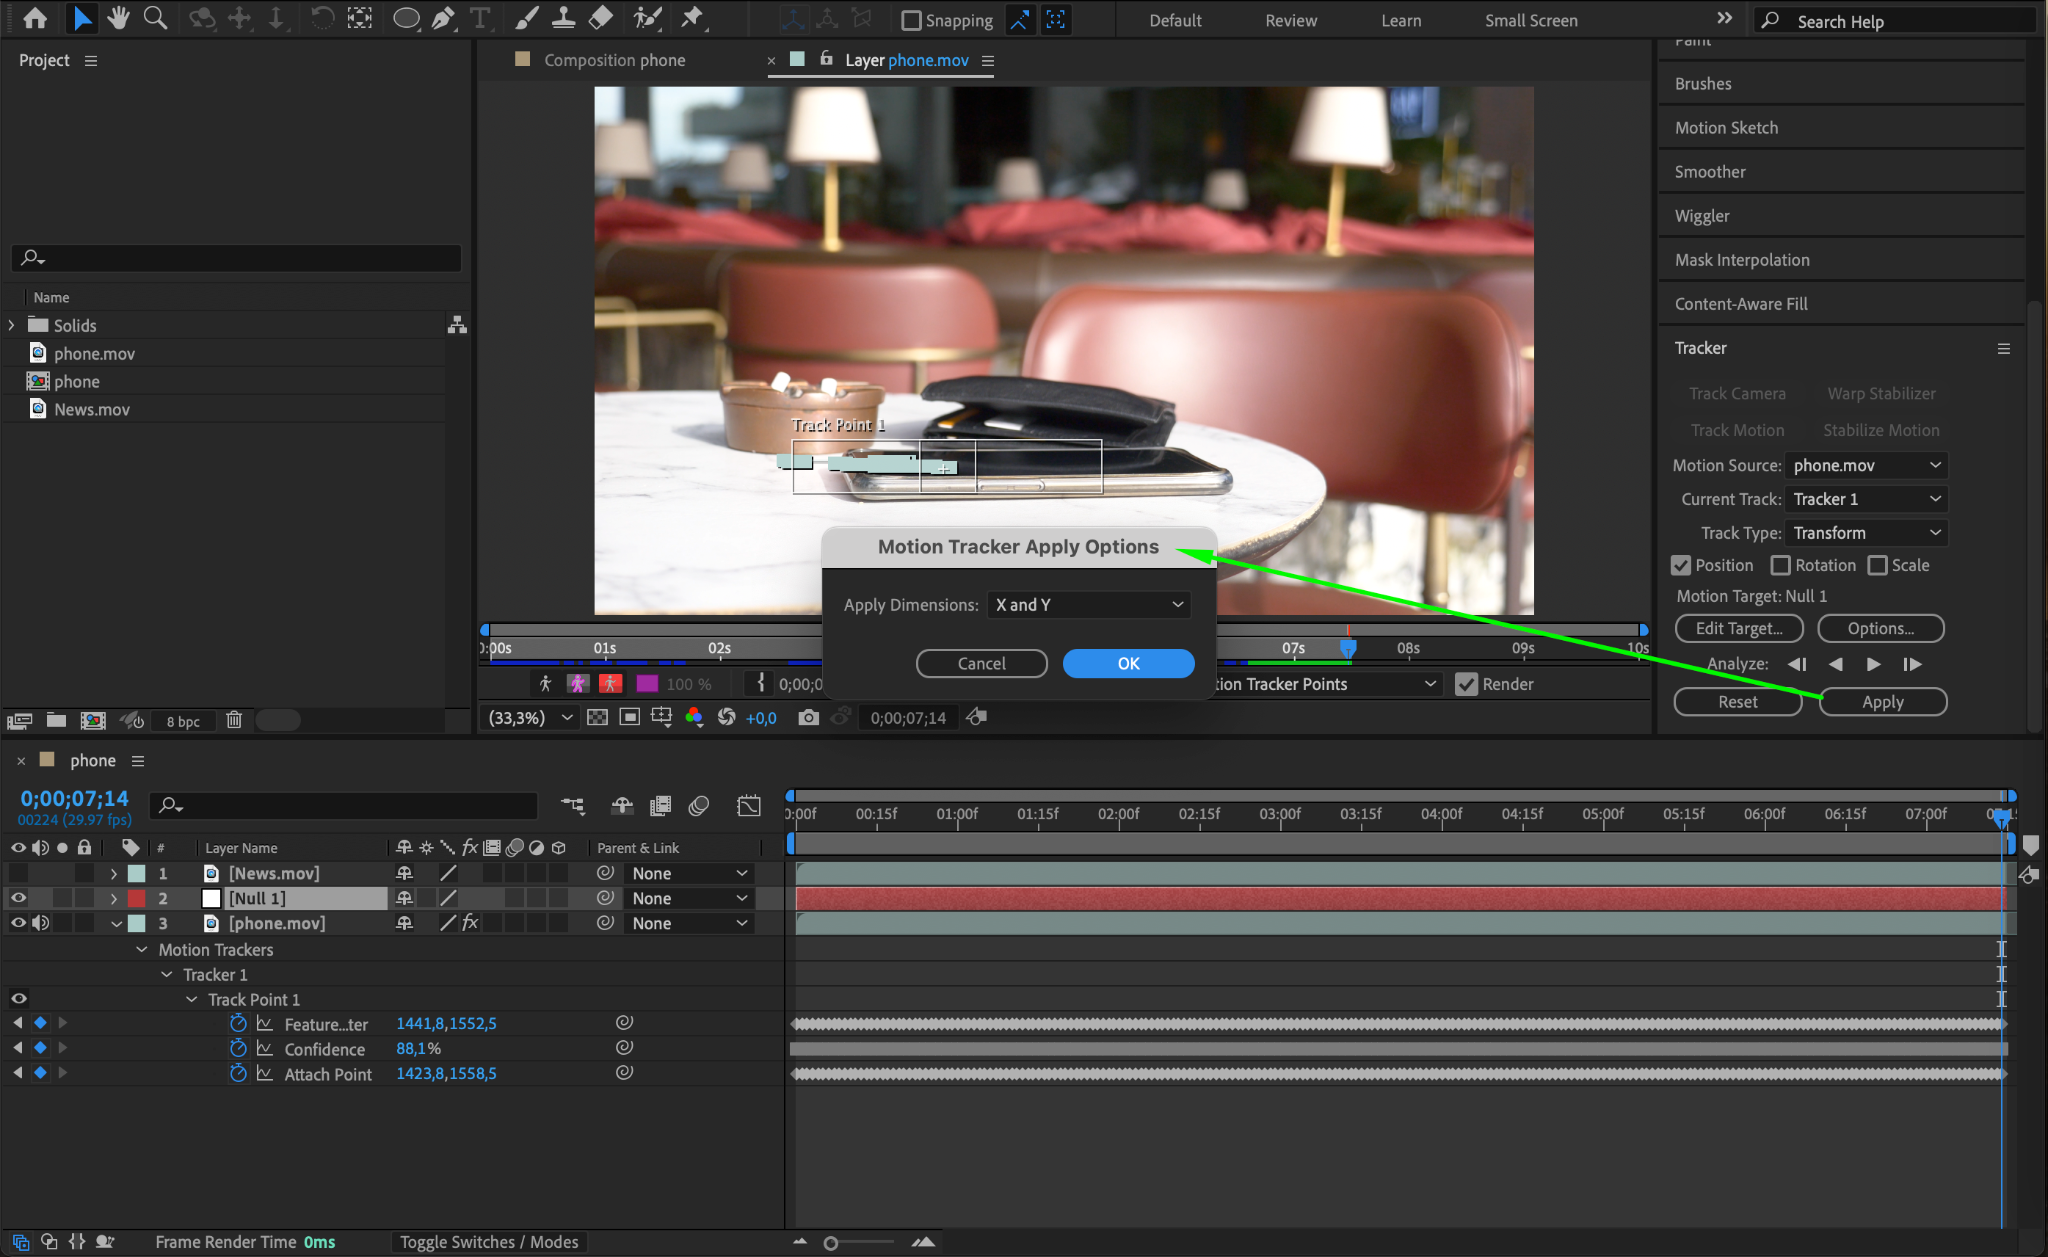
Step 3: Apply Tracking Data to a Null Object
Once tracking is complete, go to Layer > New > Null Object. In the Tracker panel, click Edit Target, select the null object, and press Apply. Choose X and Y dimensions to apply the tracking data. This ensures the hologram follows the movement of the device.

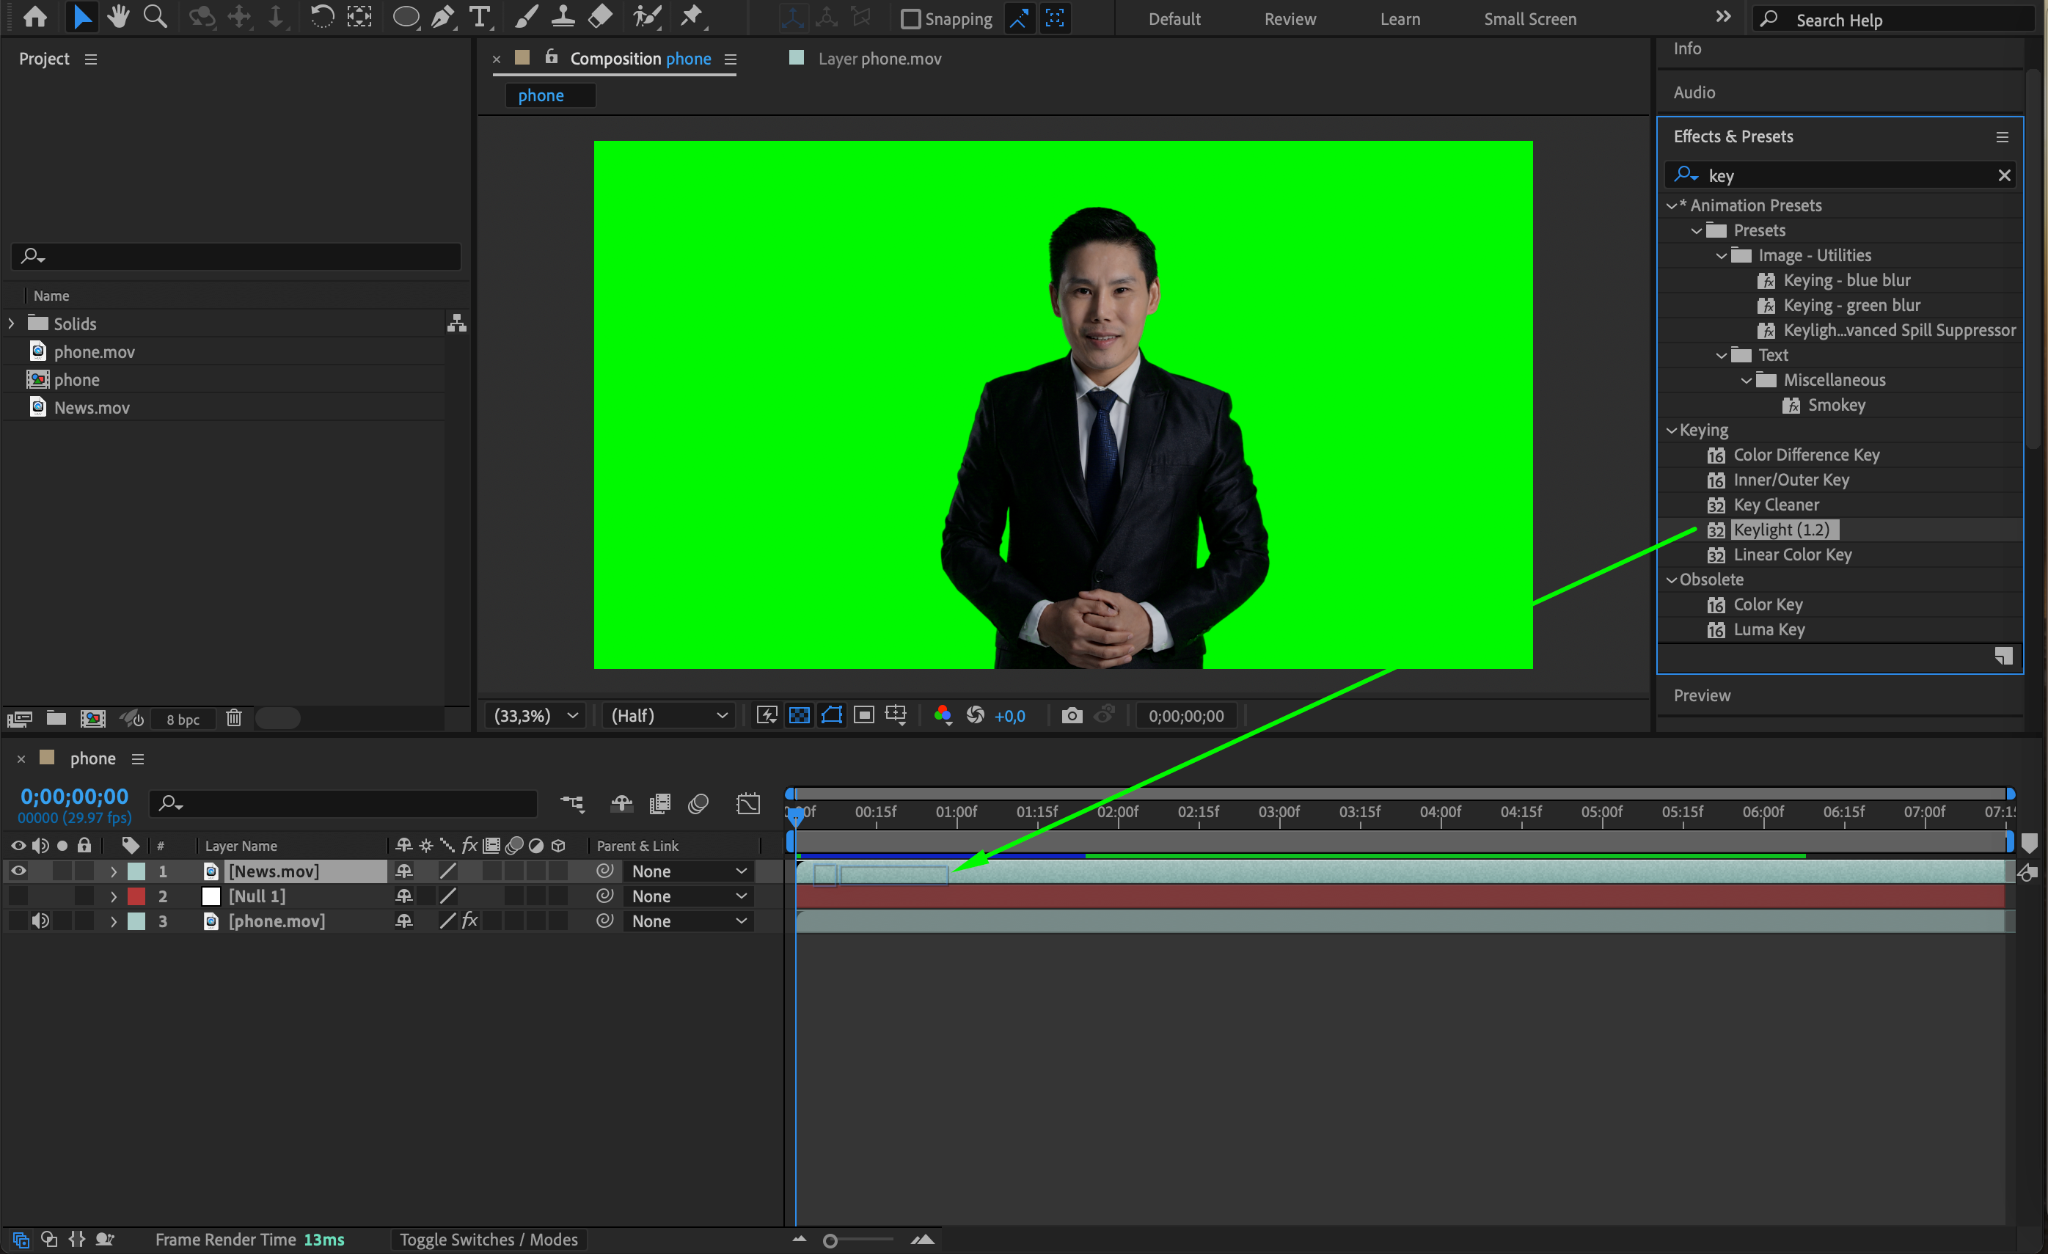
Step 4: Remove the Background from Hologram Content
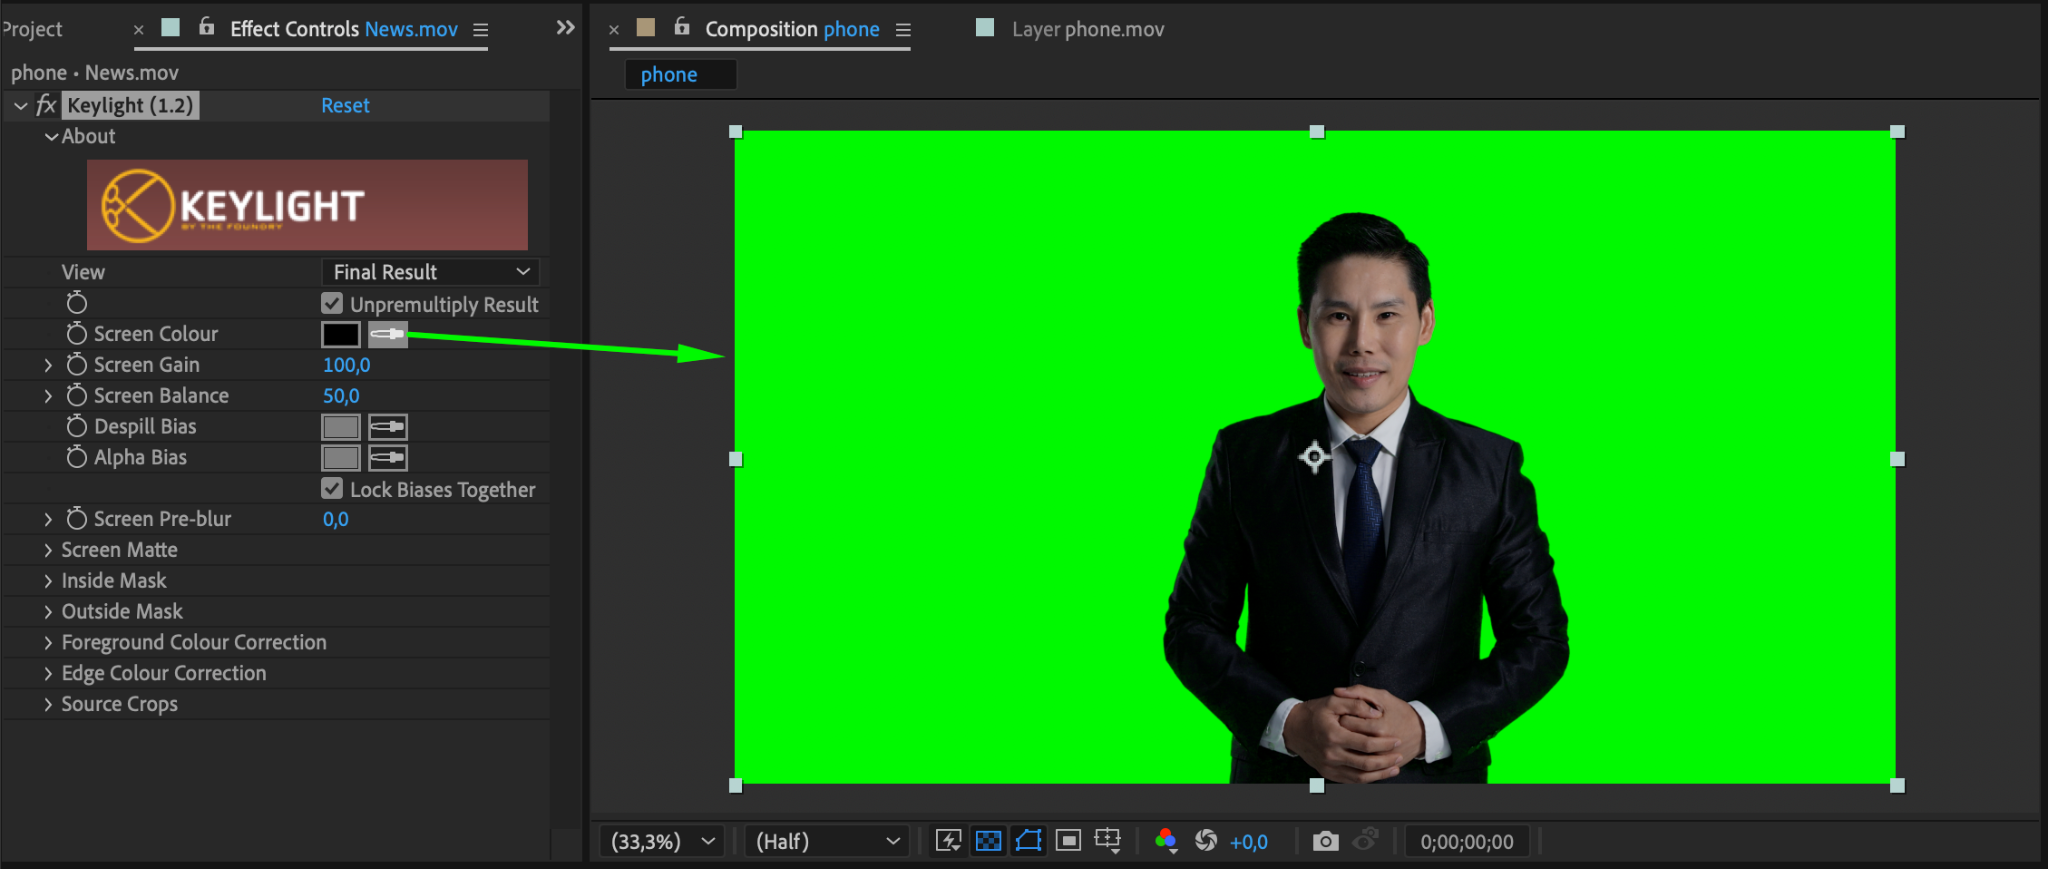
Make the device layer invisible and focus on the hologram content layer. Apply the Keylight (1.2) effect to remove the background. Use the Eyedropper tool to select the background color and fine-tune the settings for a clean removal.
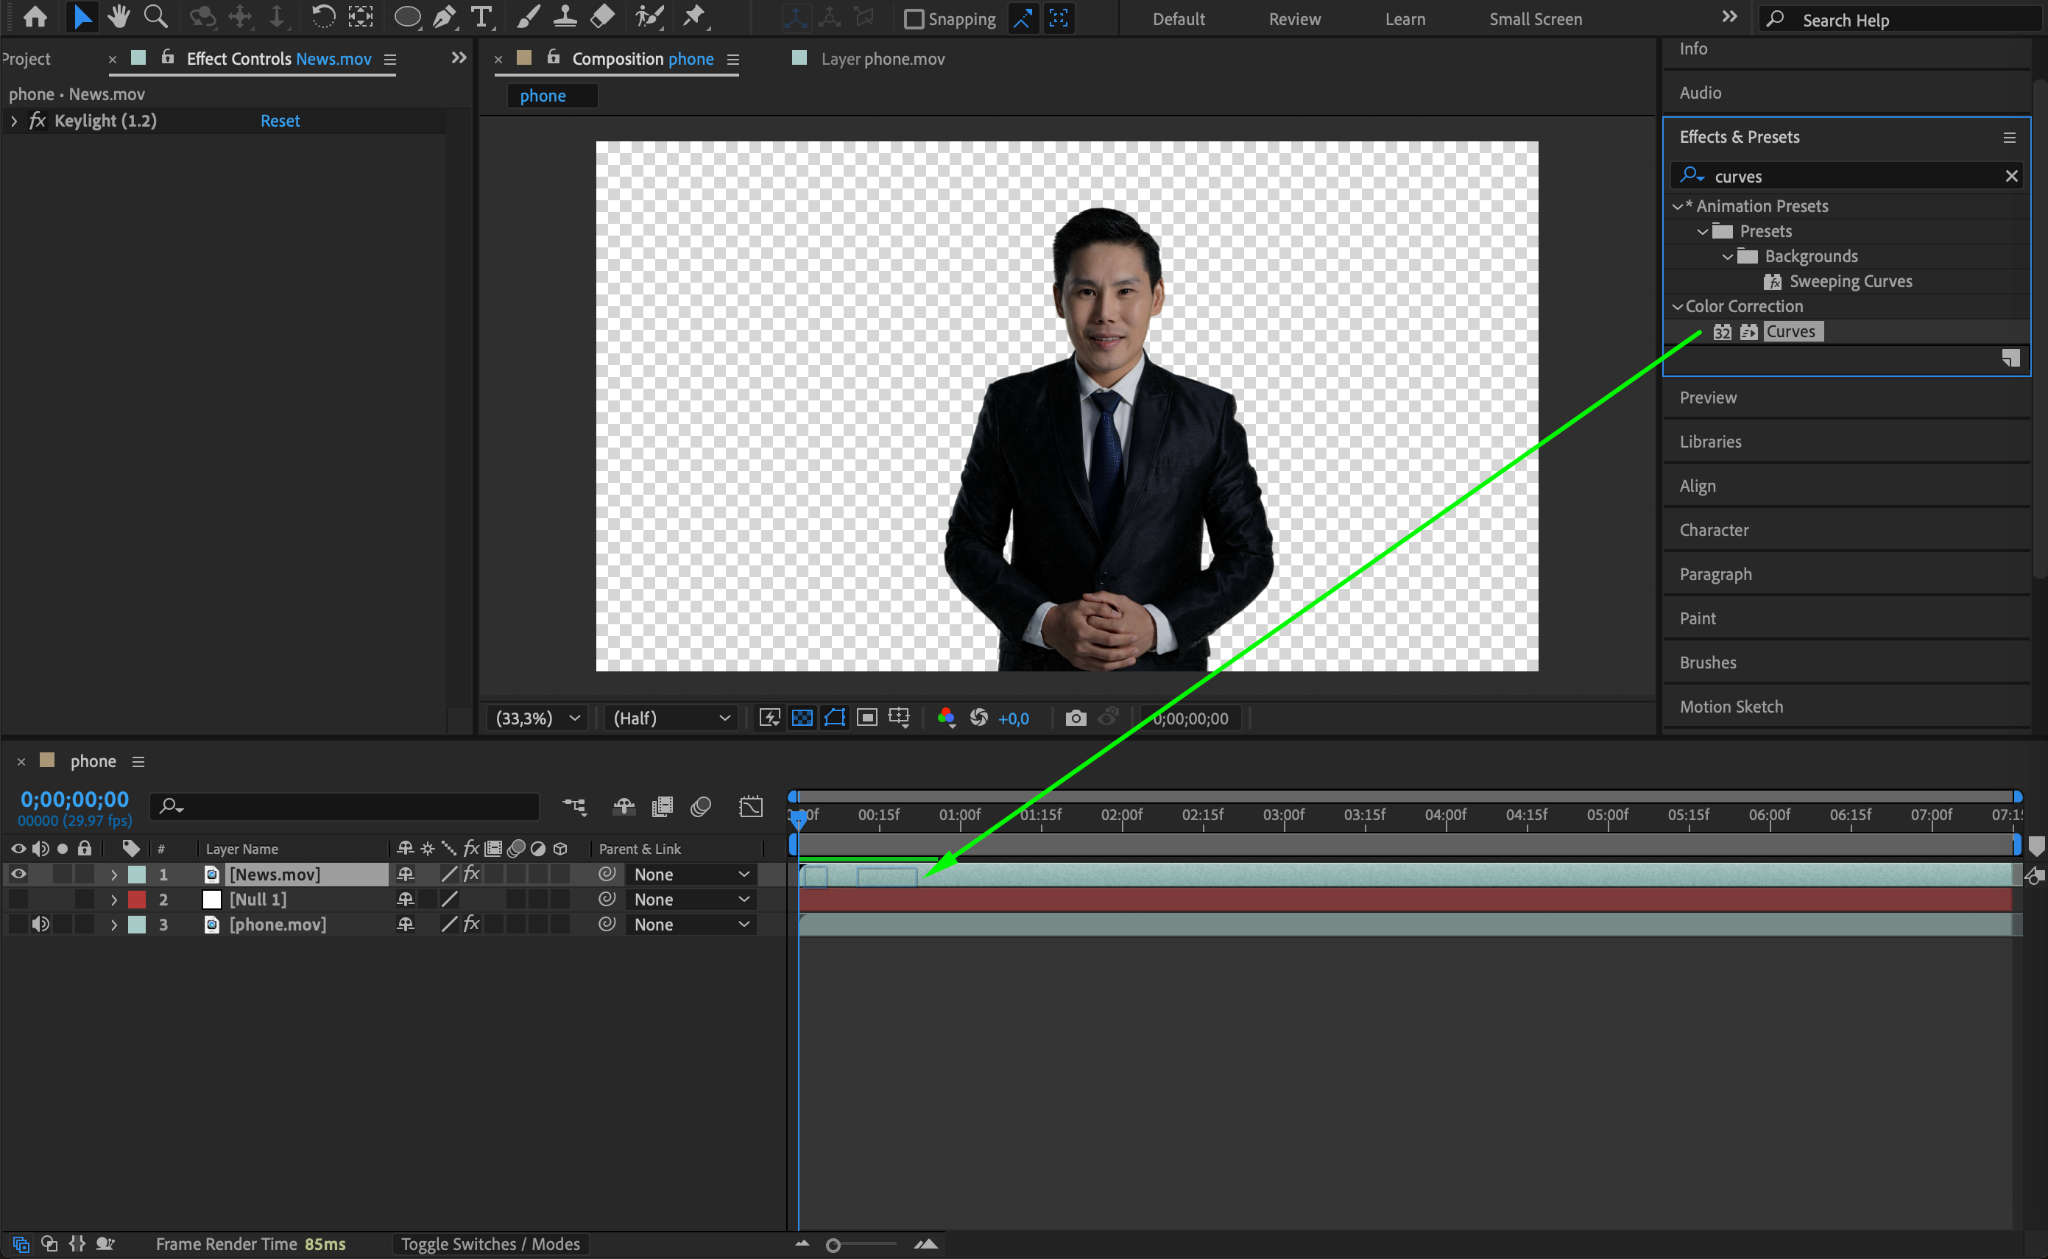
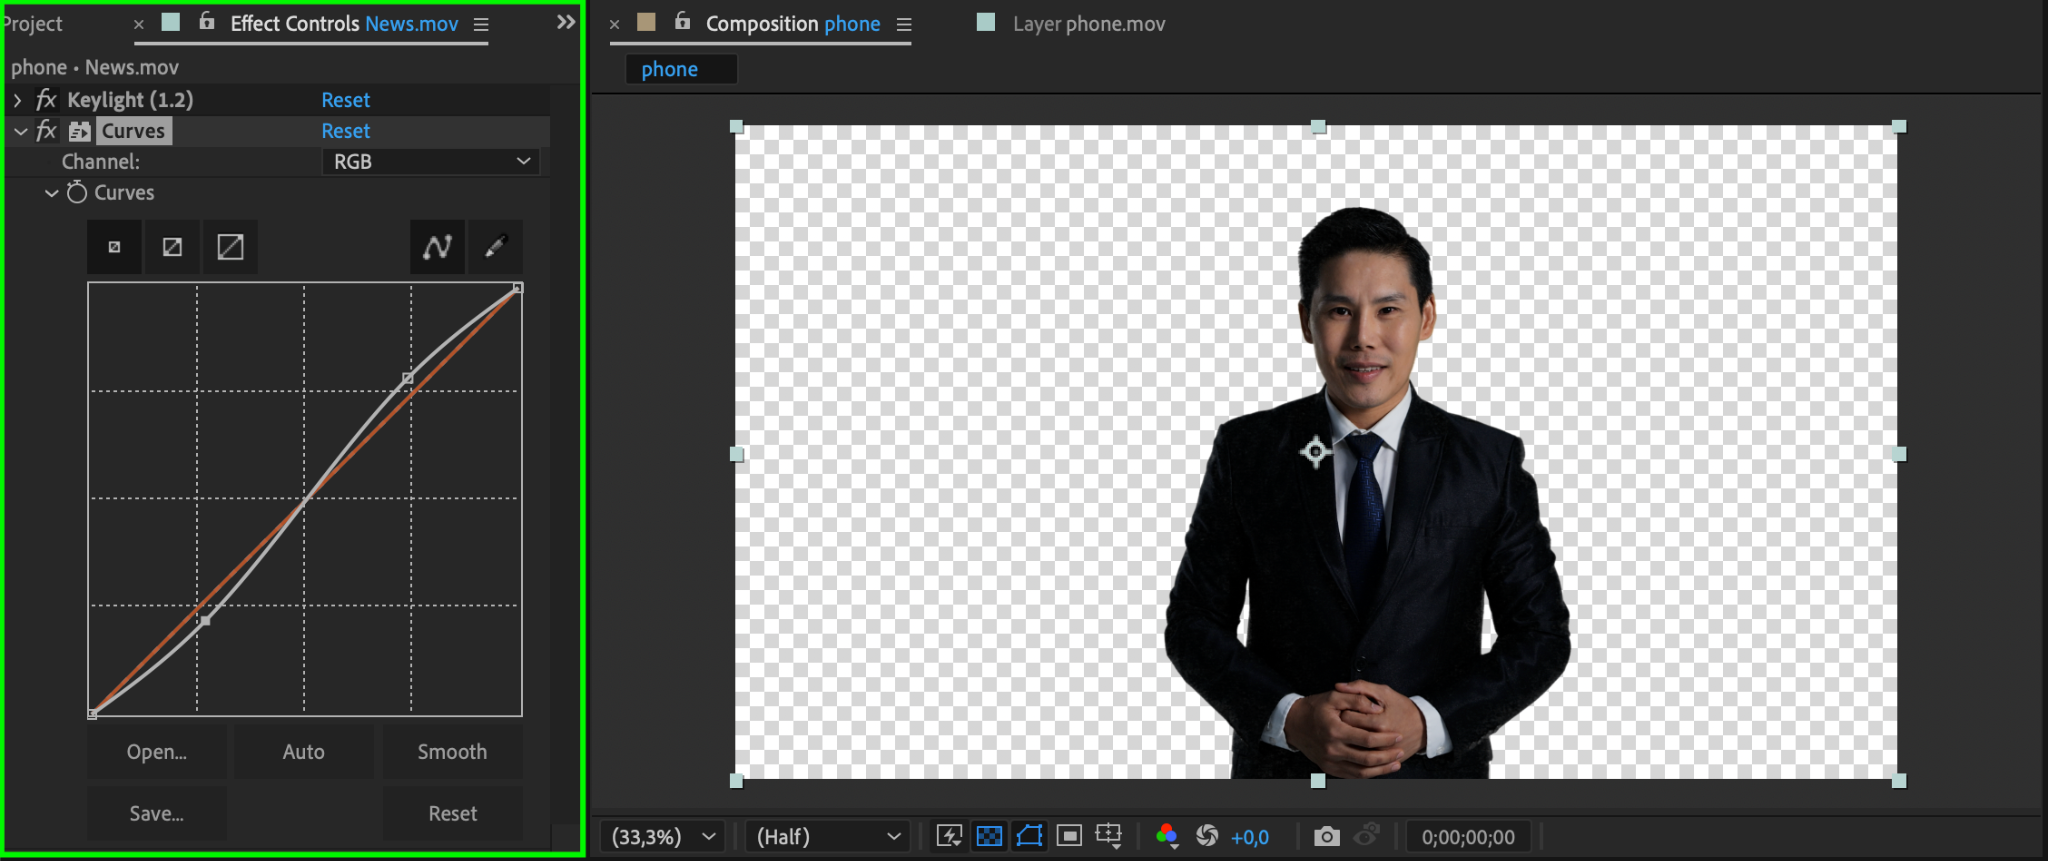
Step 5: Adjust Colors with Curves
Add the Curves effect to the hologram content and create an S-shaped curve to enhance contrast. This gives the hologram a sharper, more defined appearance.
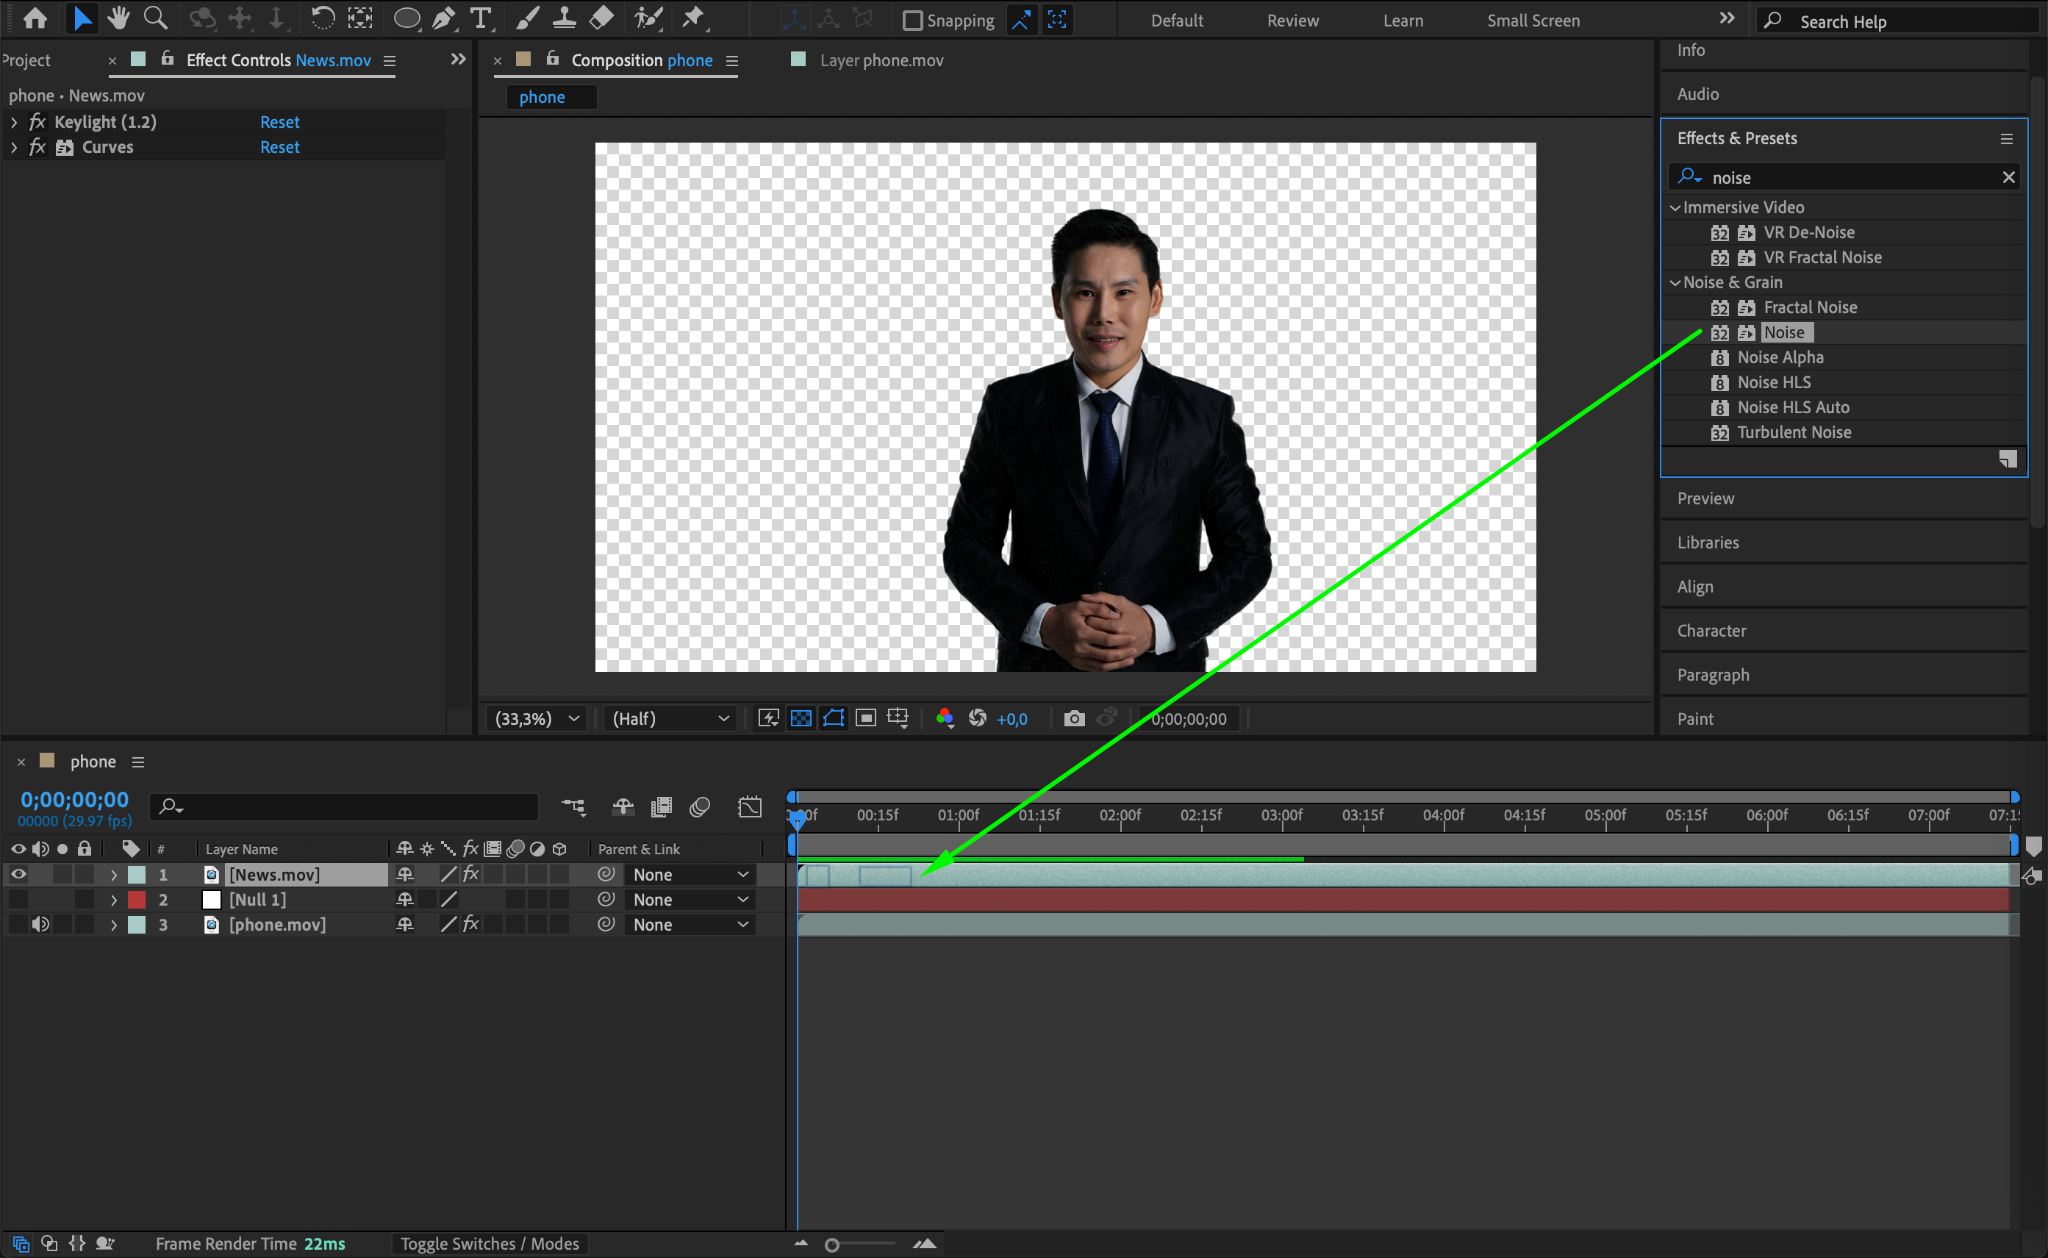
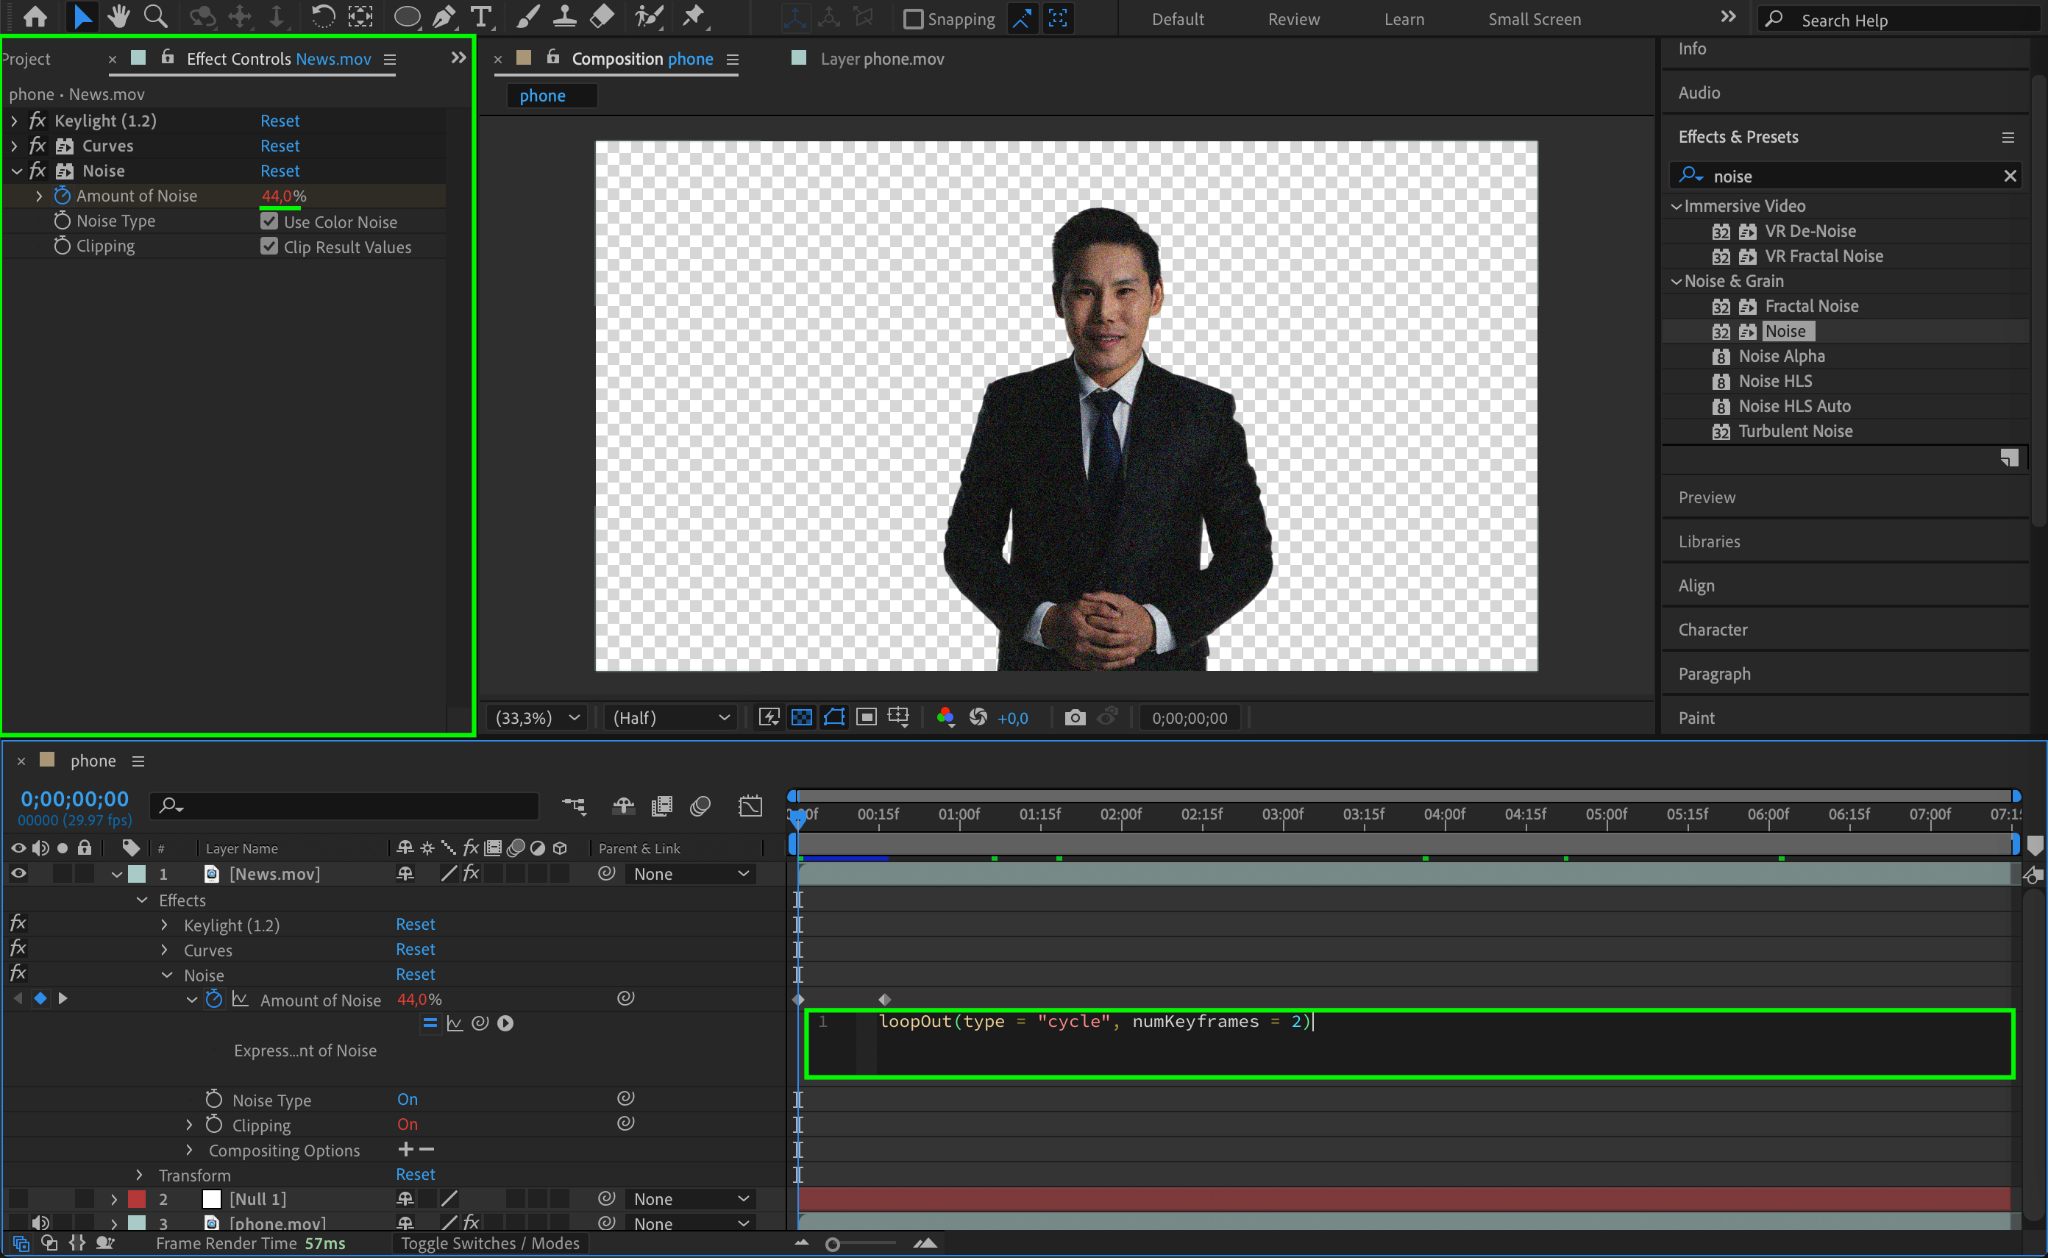
Step 6: Add Noise for a Futuristic Look
Apply the Noise effect and set the Amount of Noise to 44%. This simulates digital interference and adds a futuristic touch to the hologram.
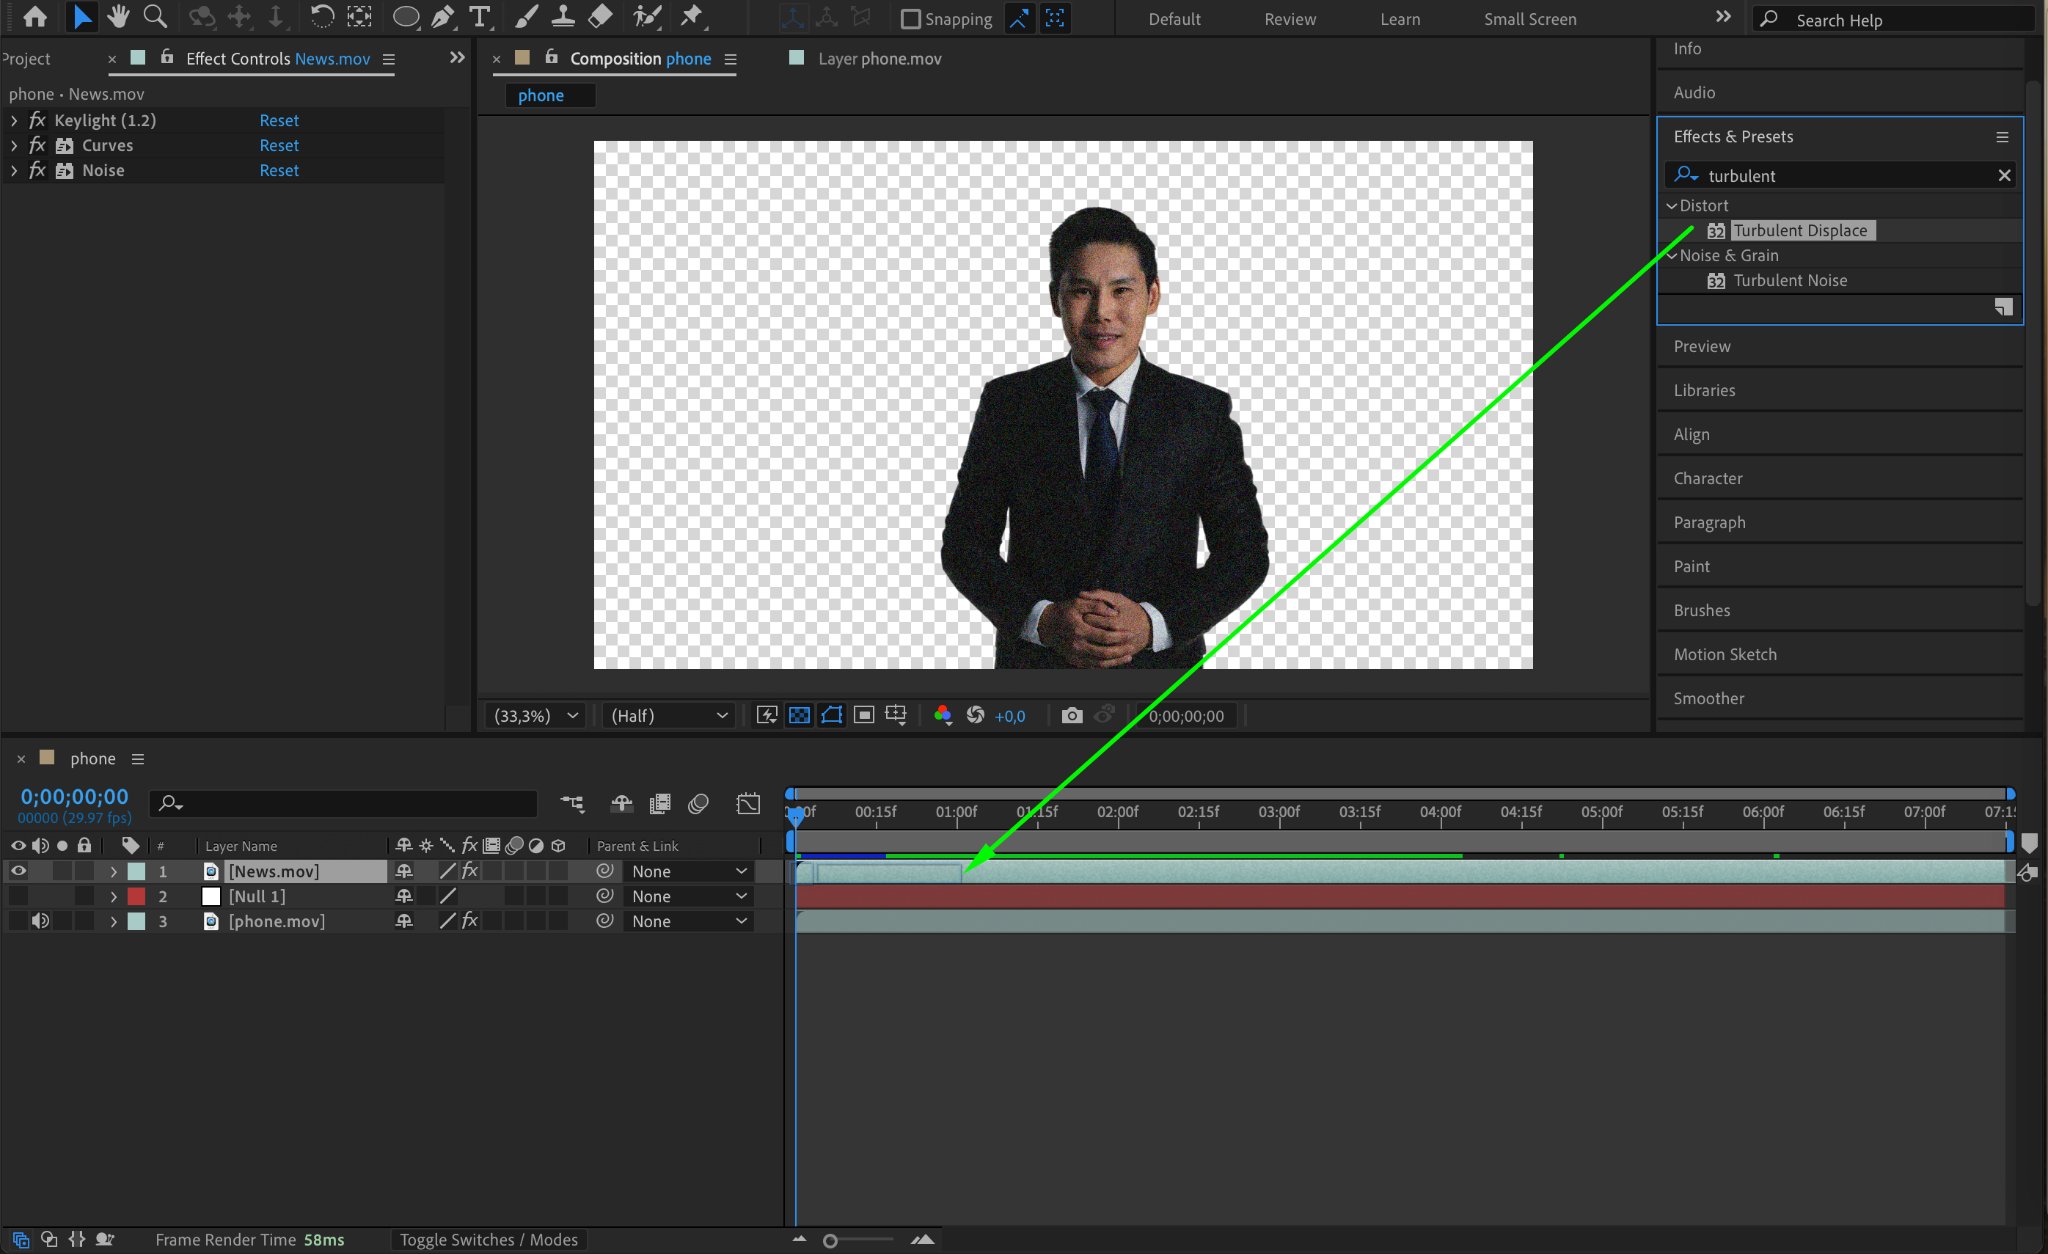
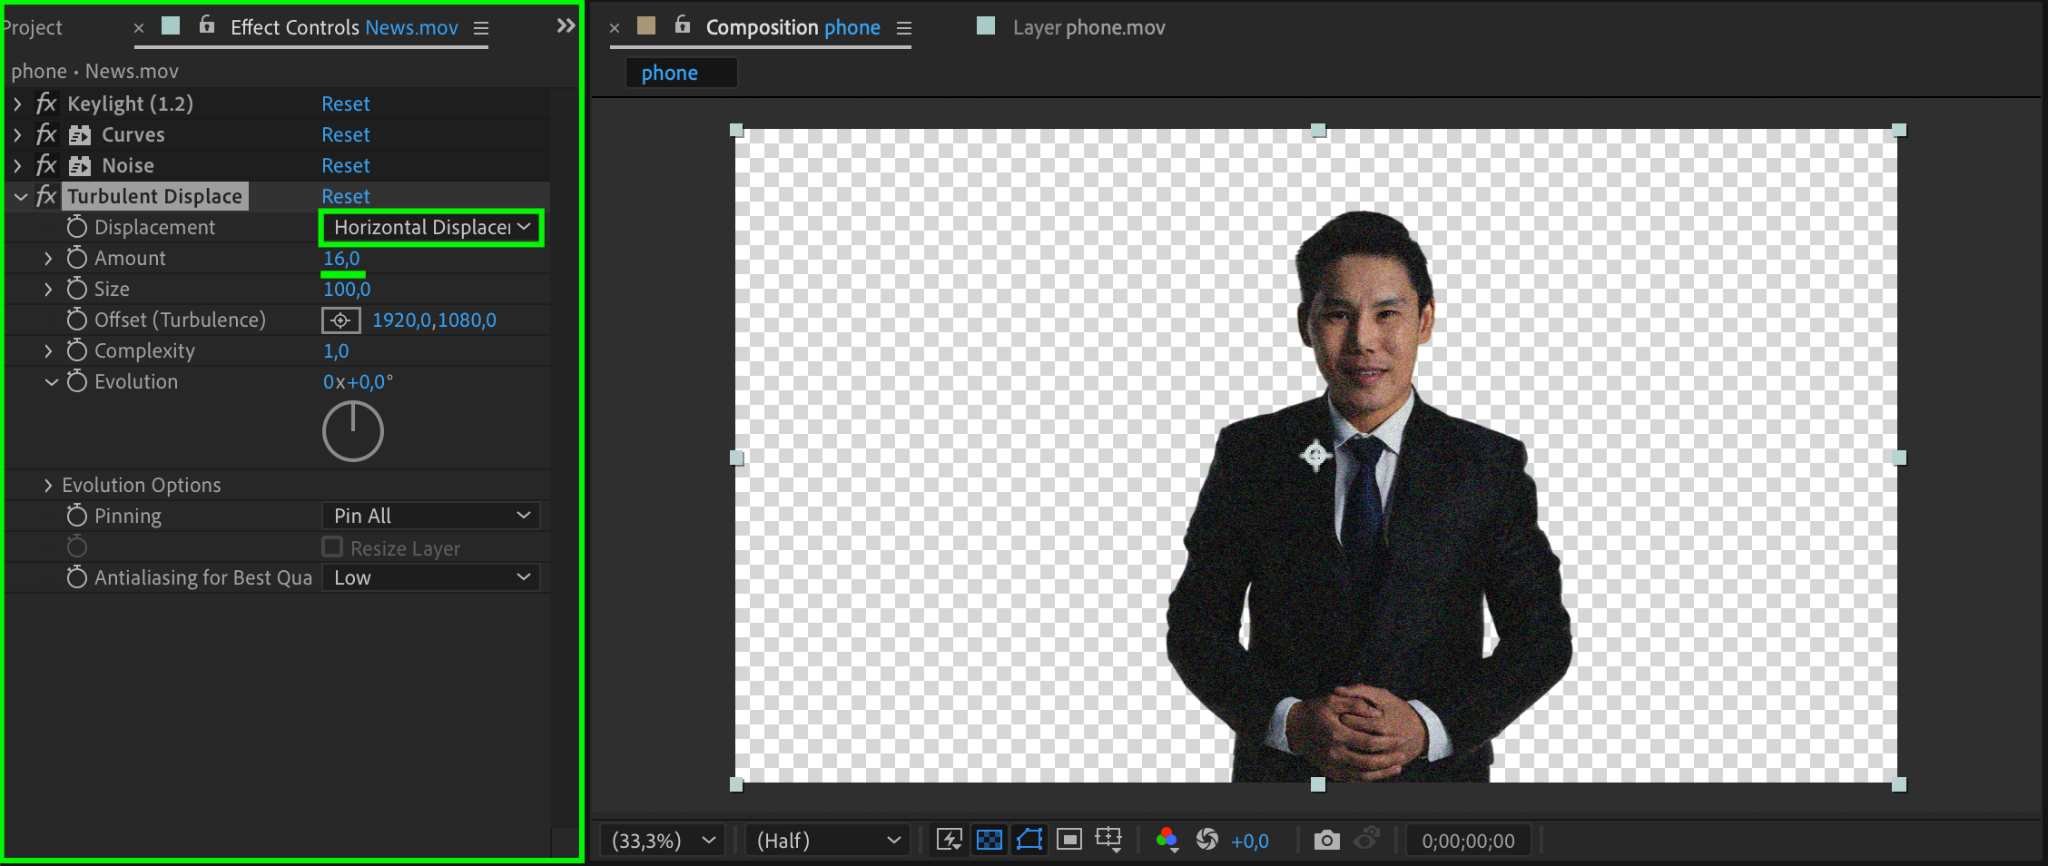
Step 7: Create Distortion with Turbulent Displace
Apply the Turbulent Displace effect and set the Displacement to Horizontal Displacement with an Amount of 16. Animate the displacement settings over time to make the hologram flicker and shift slightly.

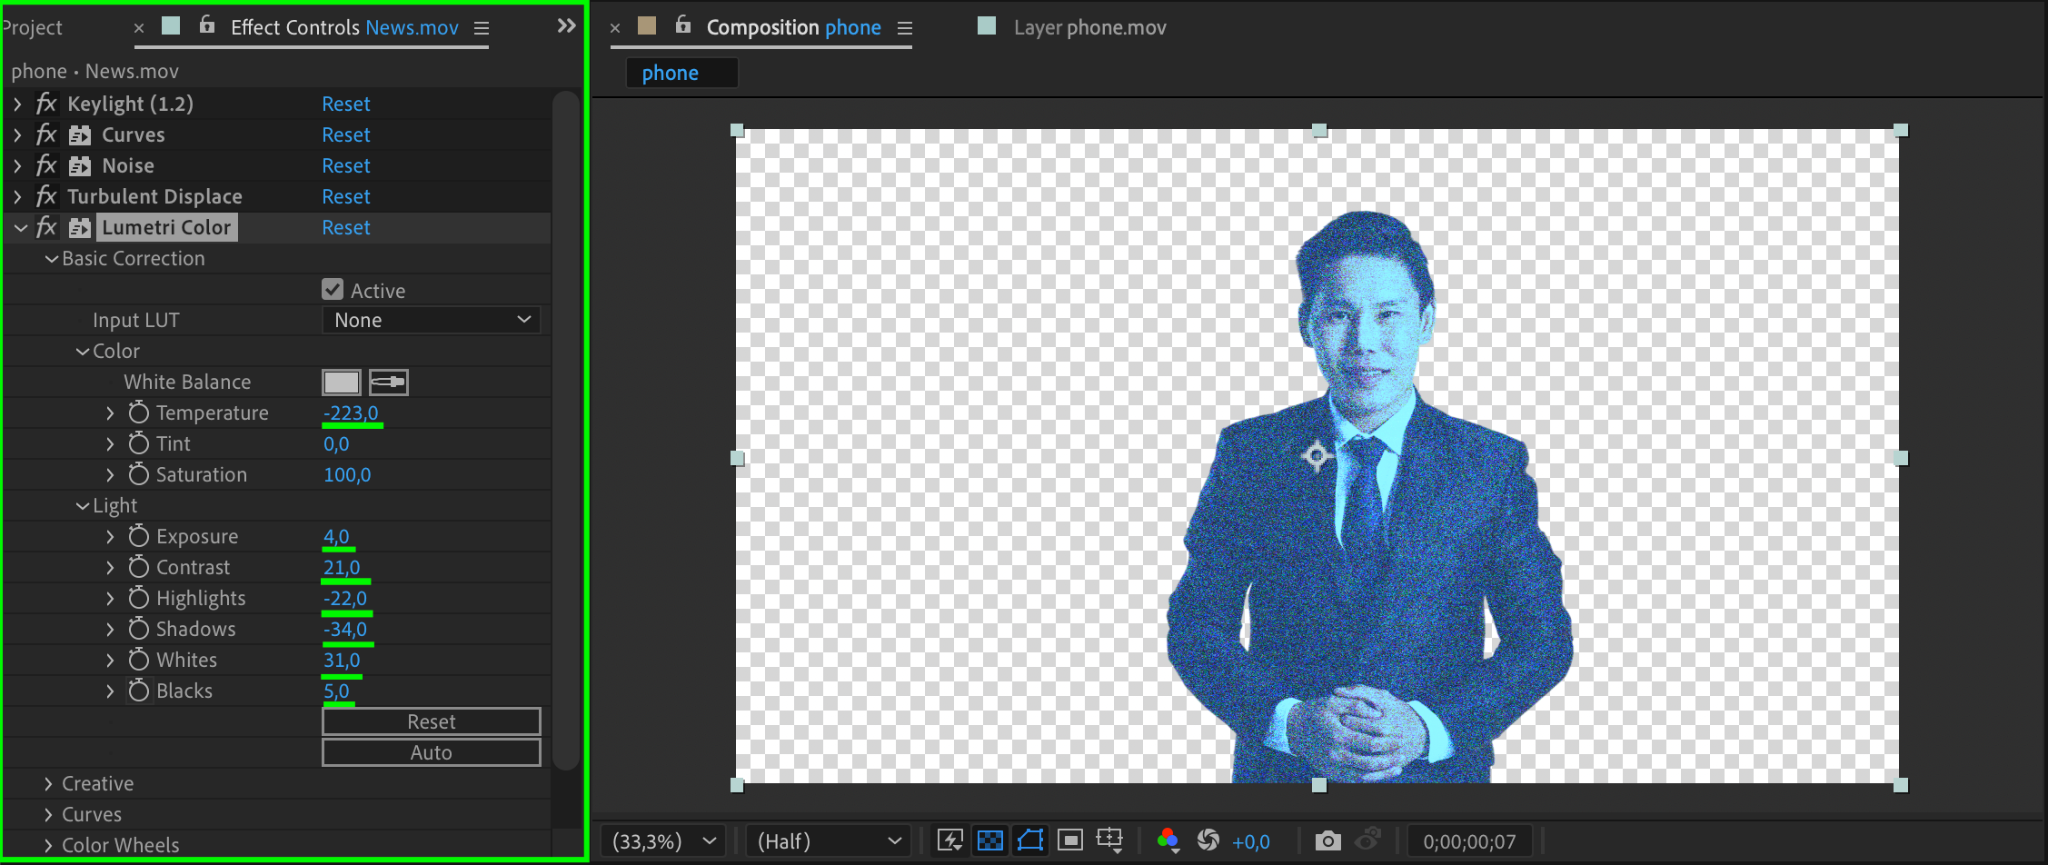
Step 8: Adjust Colors for a Sci-Fi Aesthetic
Use the Lumetri Color effect to adjust the color tone. Set the Temperature to -223 for a cool, bluish hologram look. Experiment with other parameters like Shadows and Contrast to achieve the desired appearance.
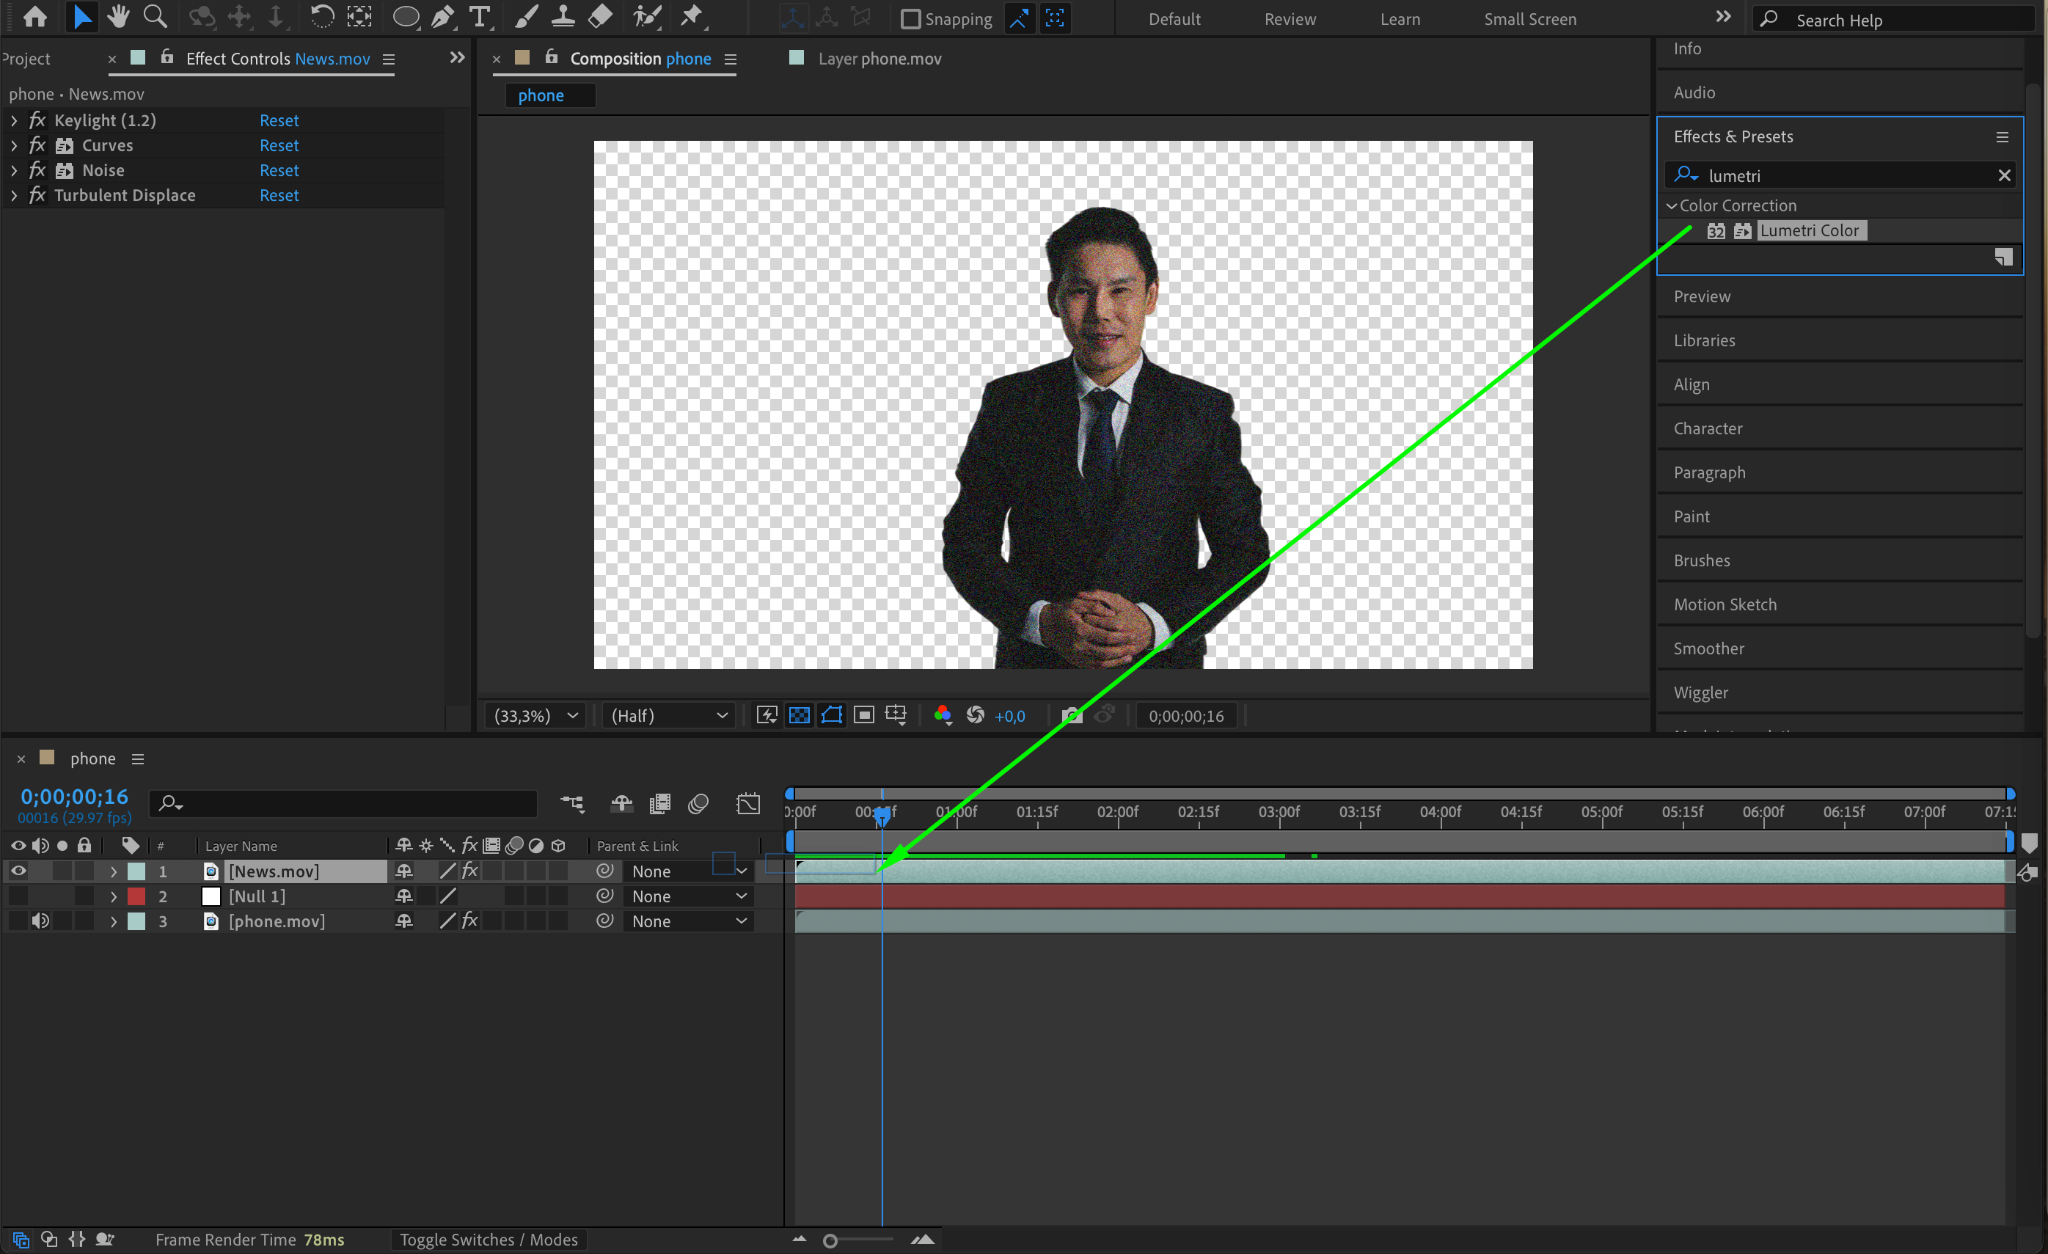
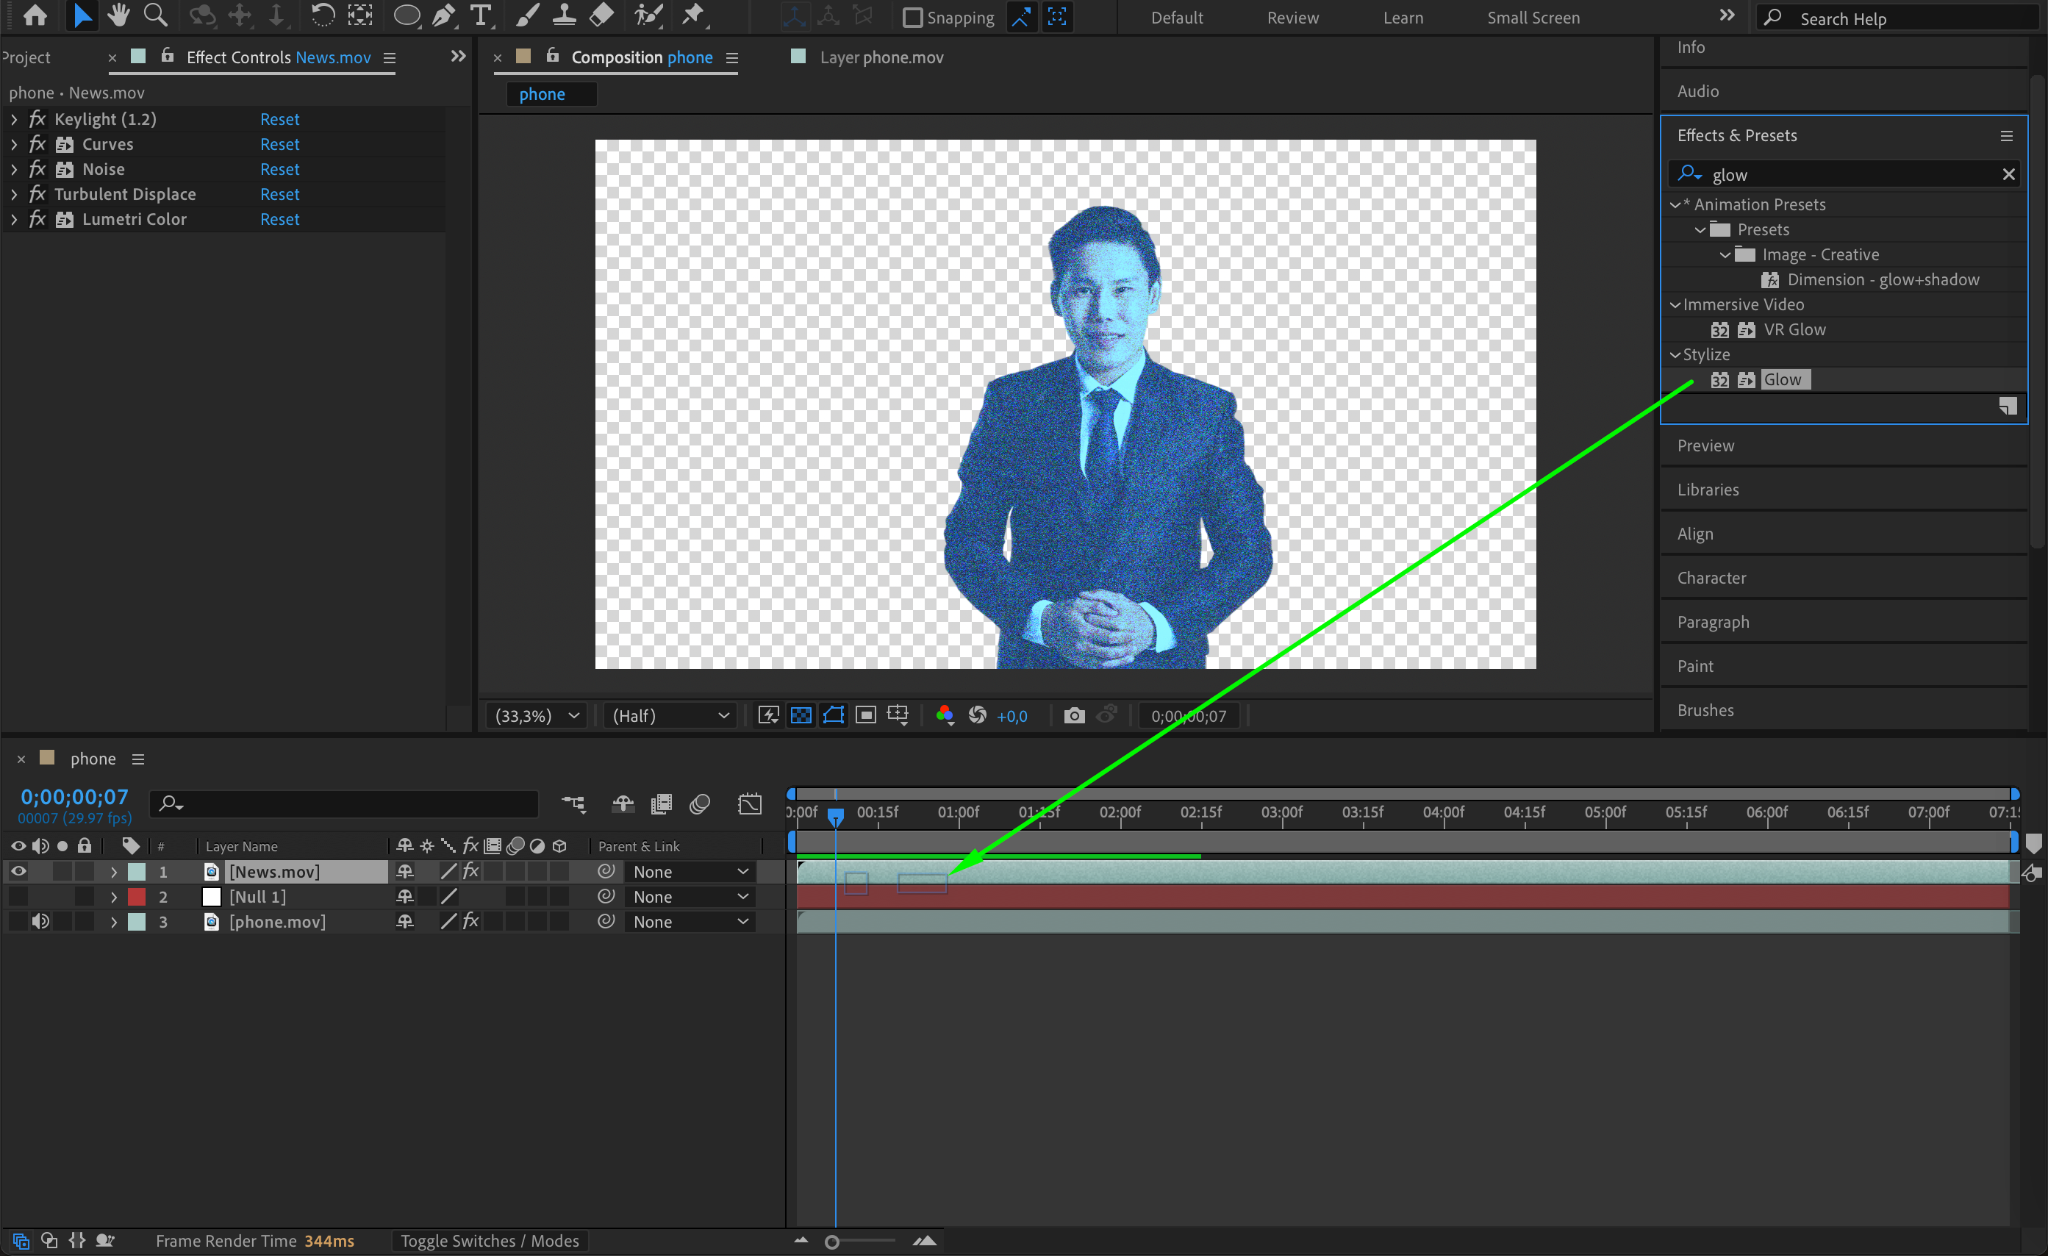
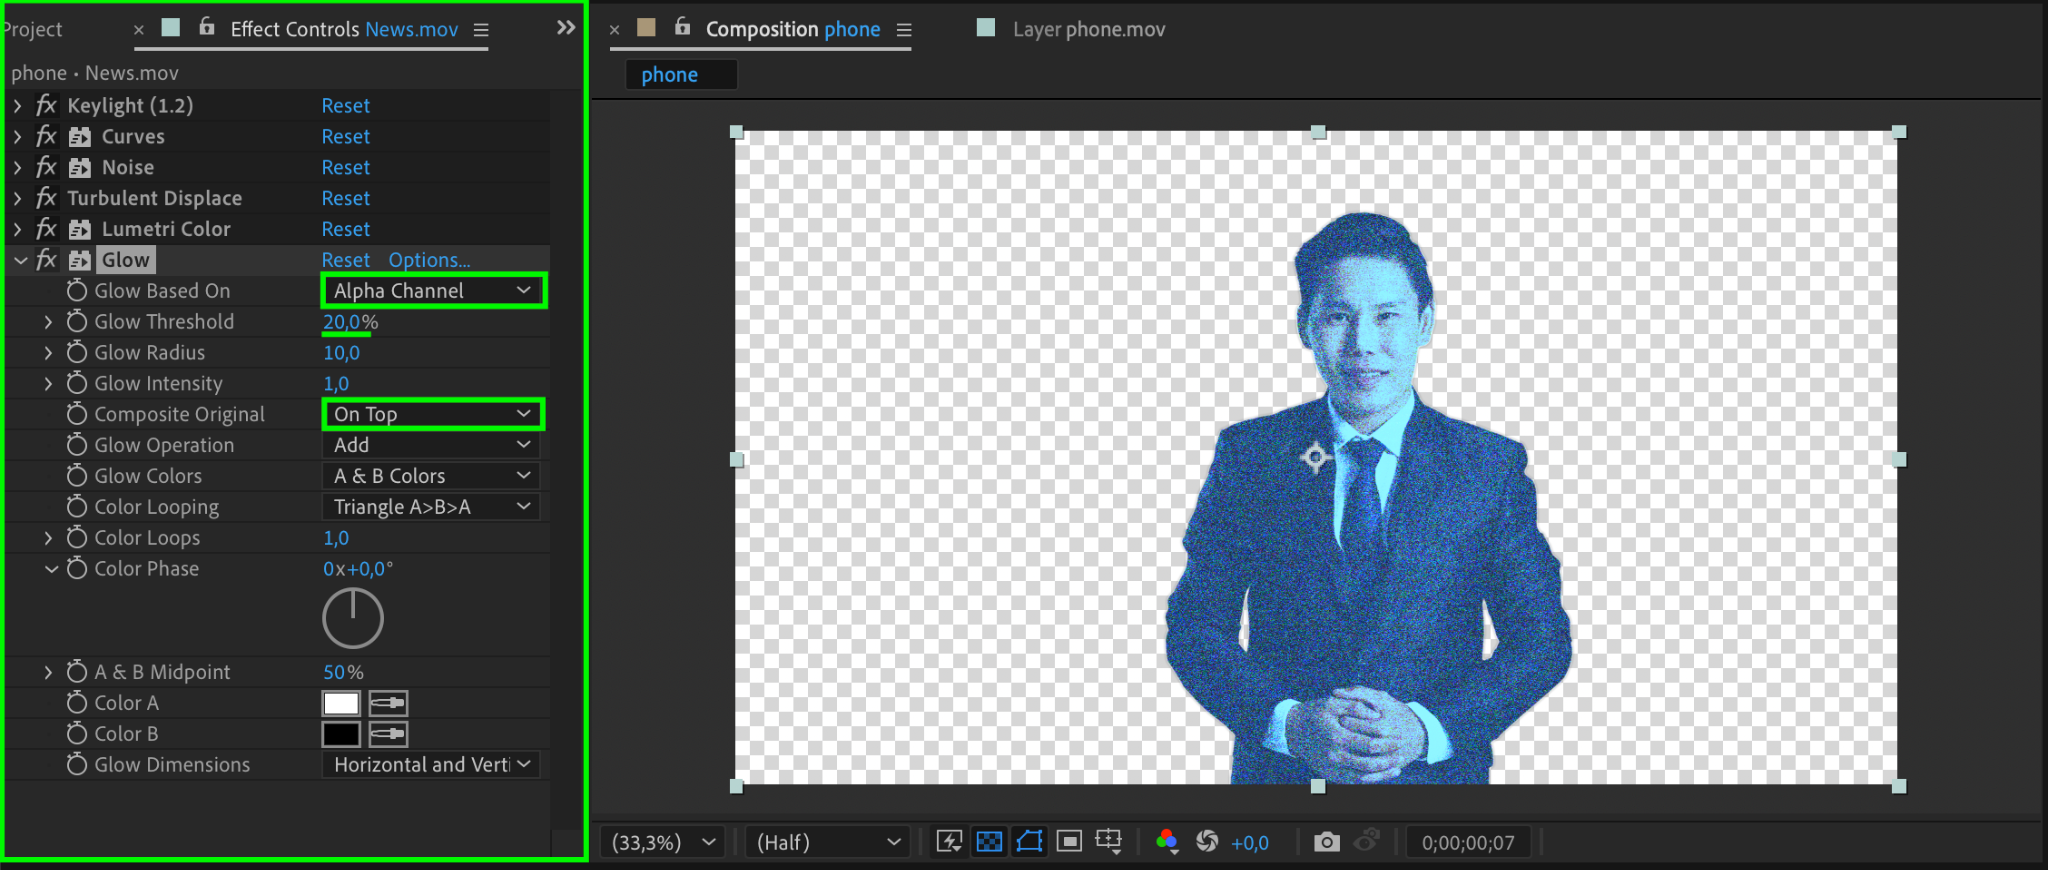
Step 9: Add a Glow Effect
Apply the Glow effect and configure it for a holographic shine:
Glow Based On: Alpha Channel
Glow Threshold: 20
Composite Original: On Top
This creates a bright, futuristic glow around the hologram.
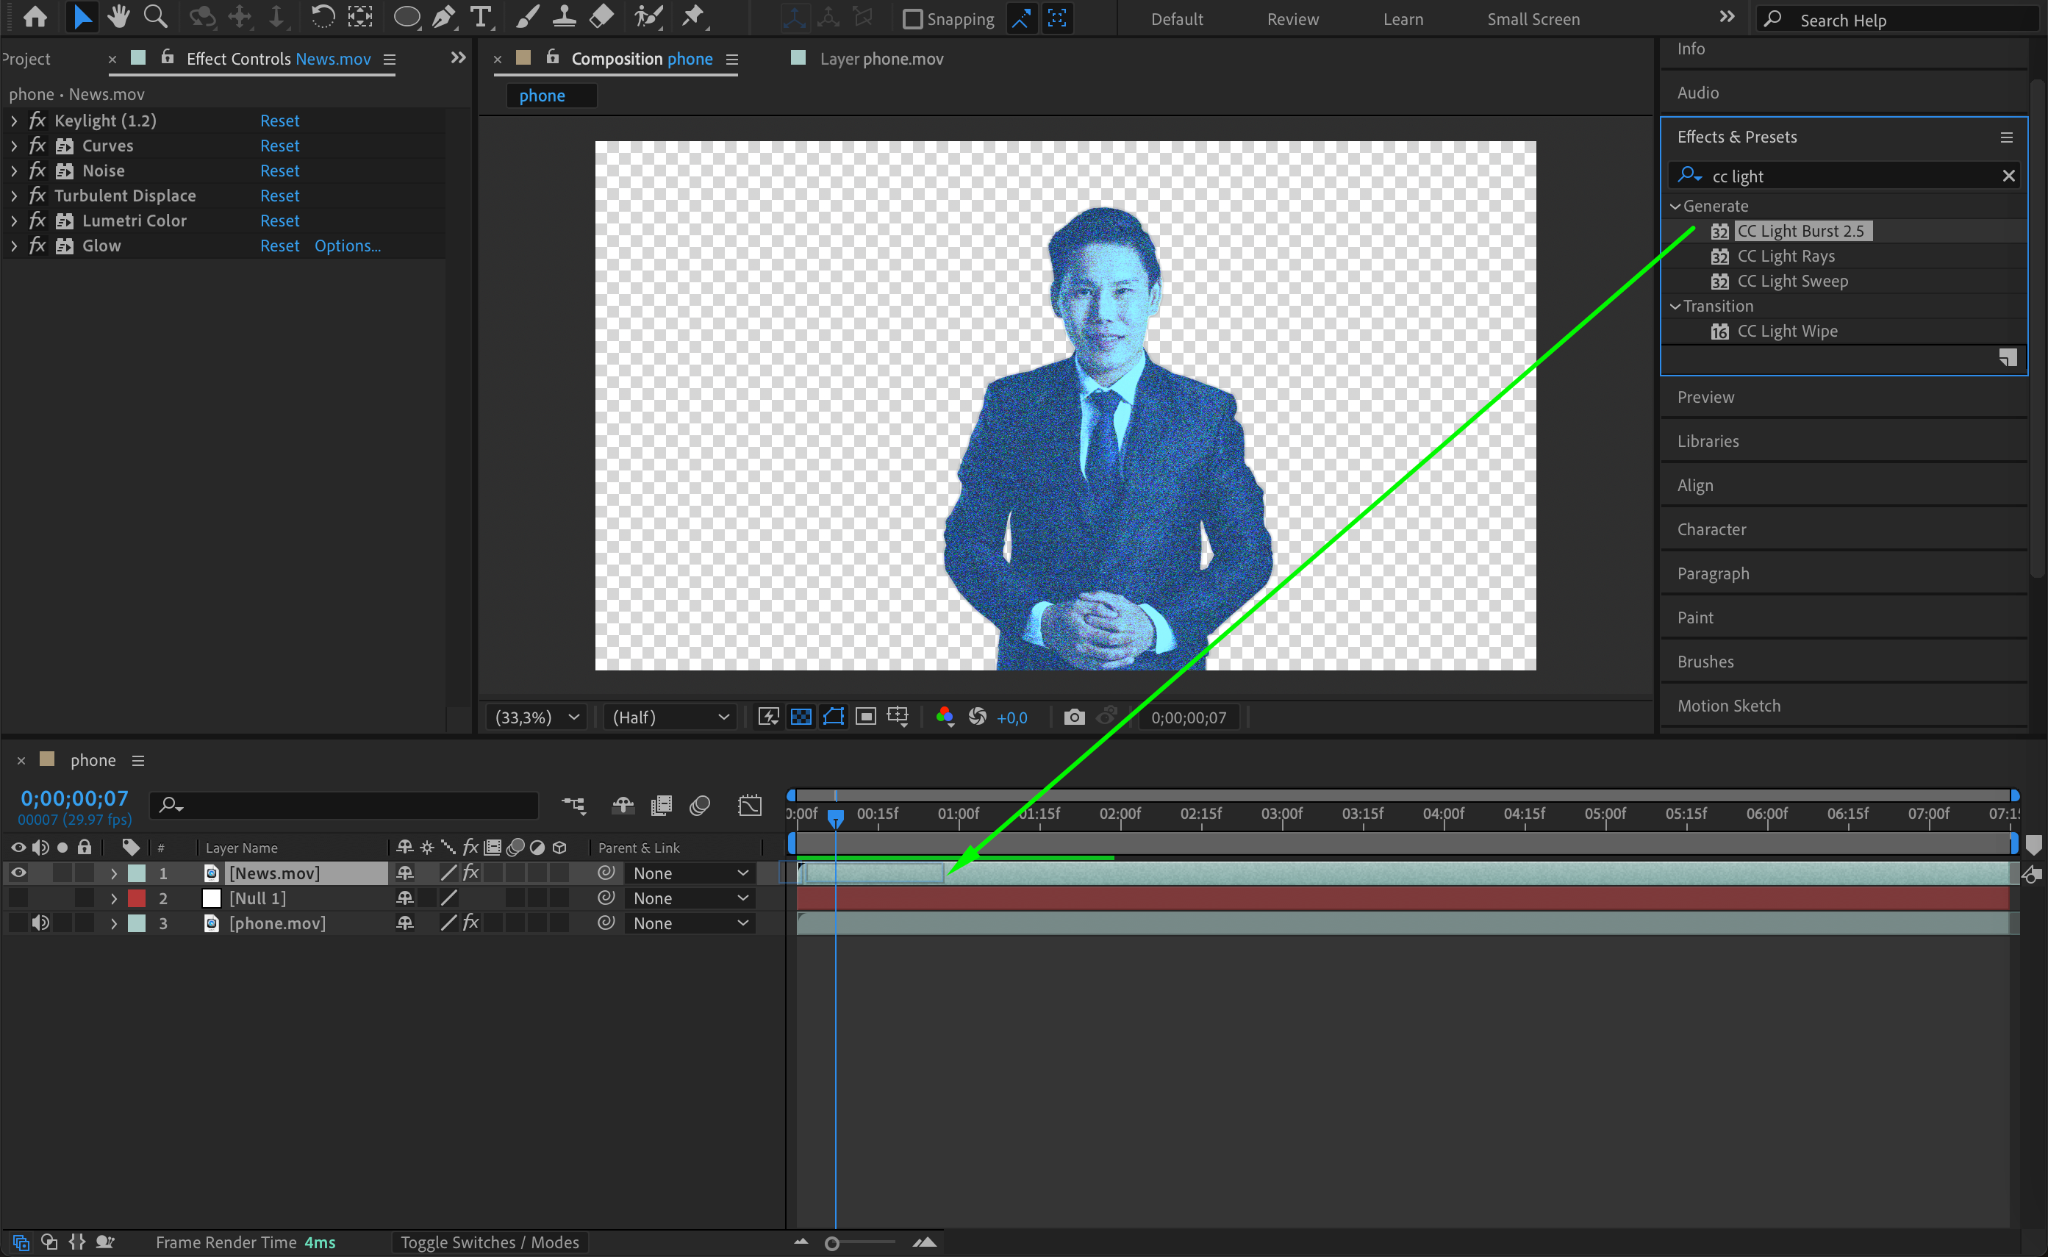
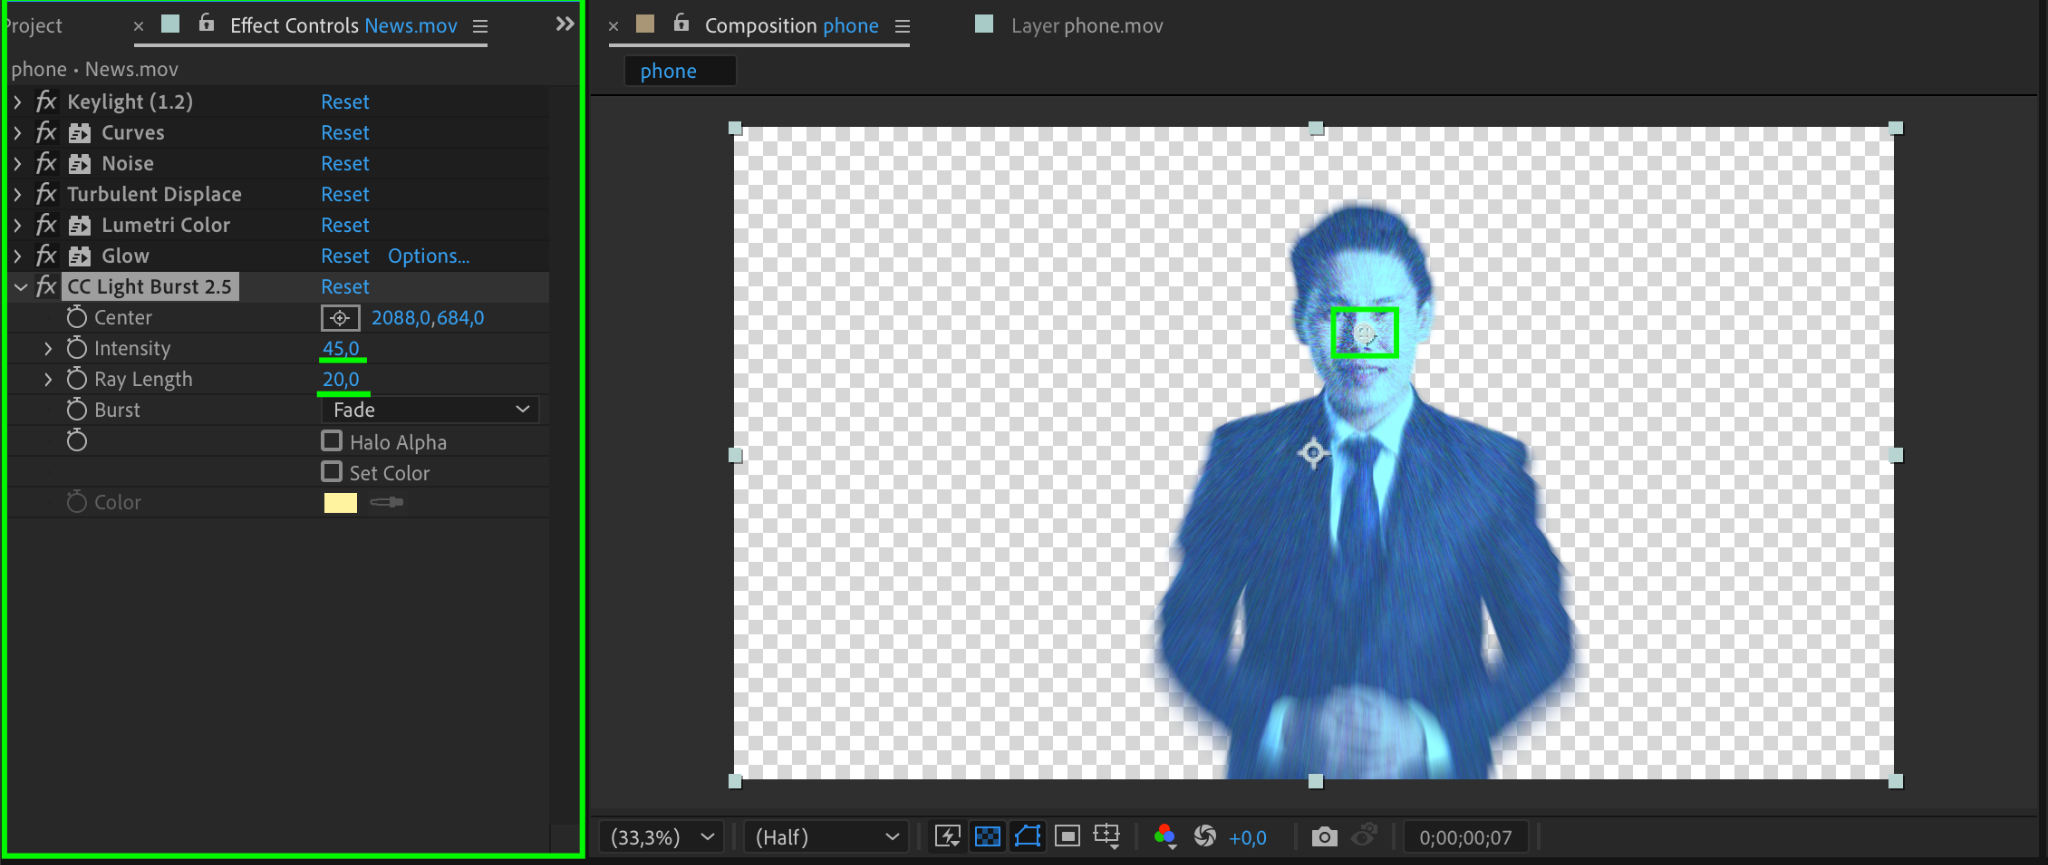
Step 10: Add Light Rays with CC Light Burst 2.5
Apply the CC Light Burst 2.5 effect to the hologram layer. Set the Intensity to 45 and the Ray Length to 20. This adds dramatic light rays radiating from the hologram.
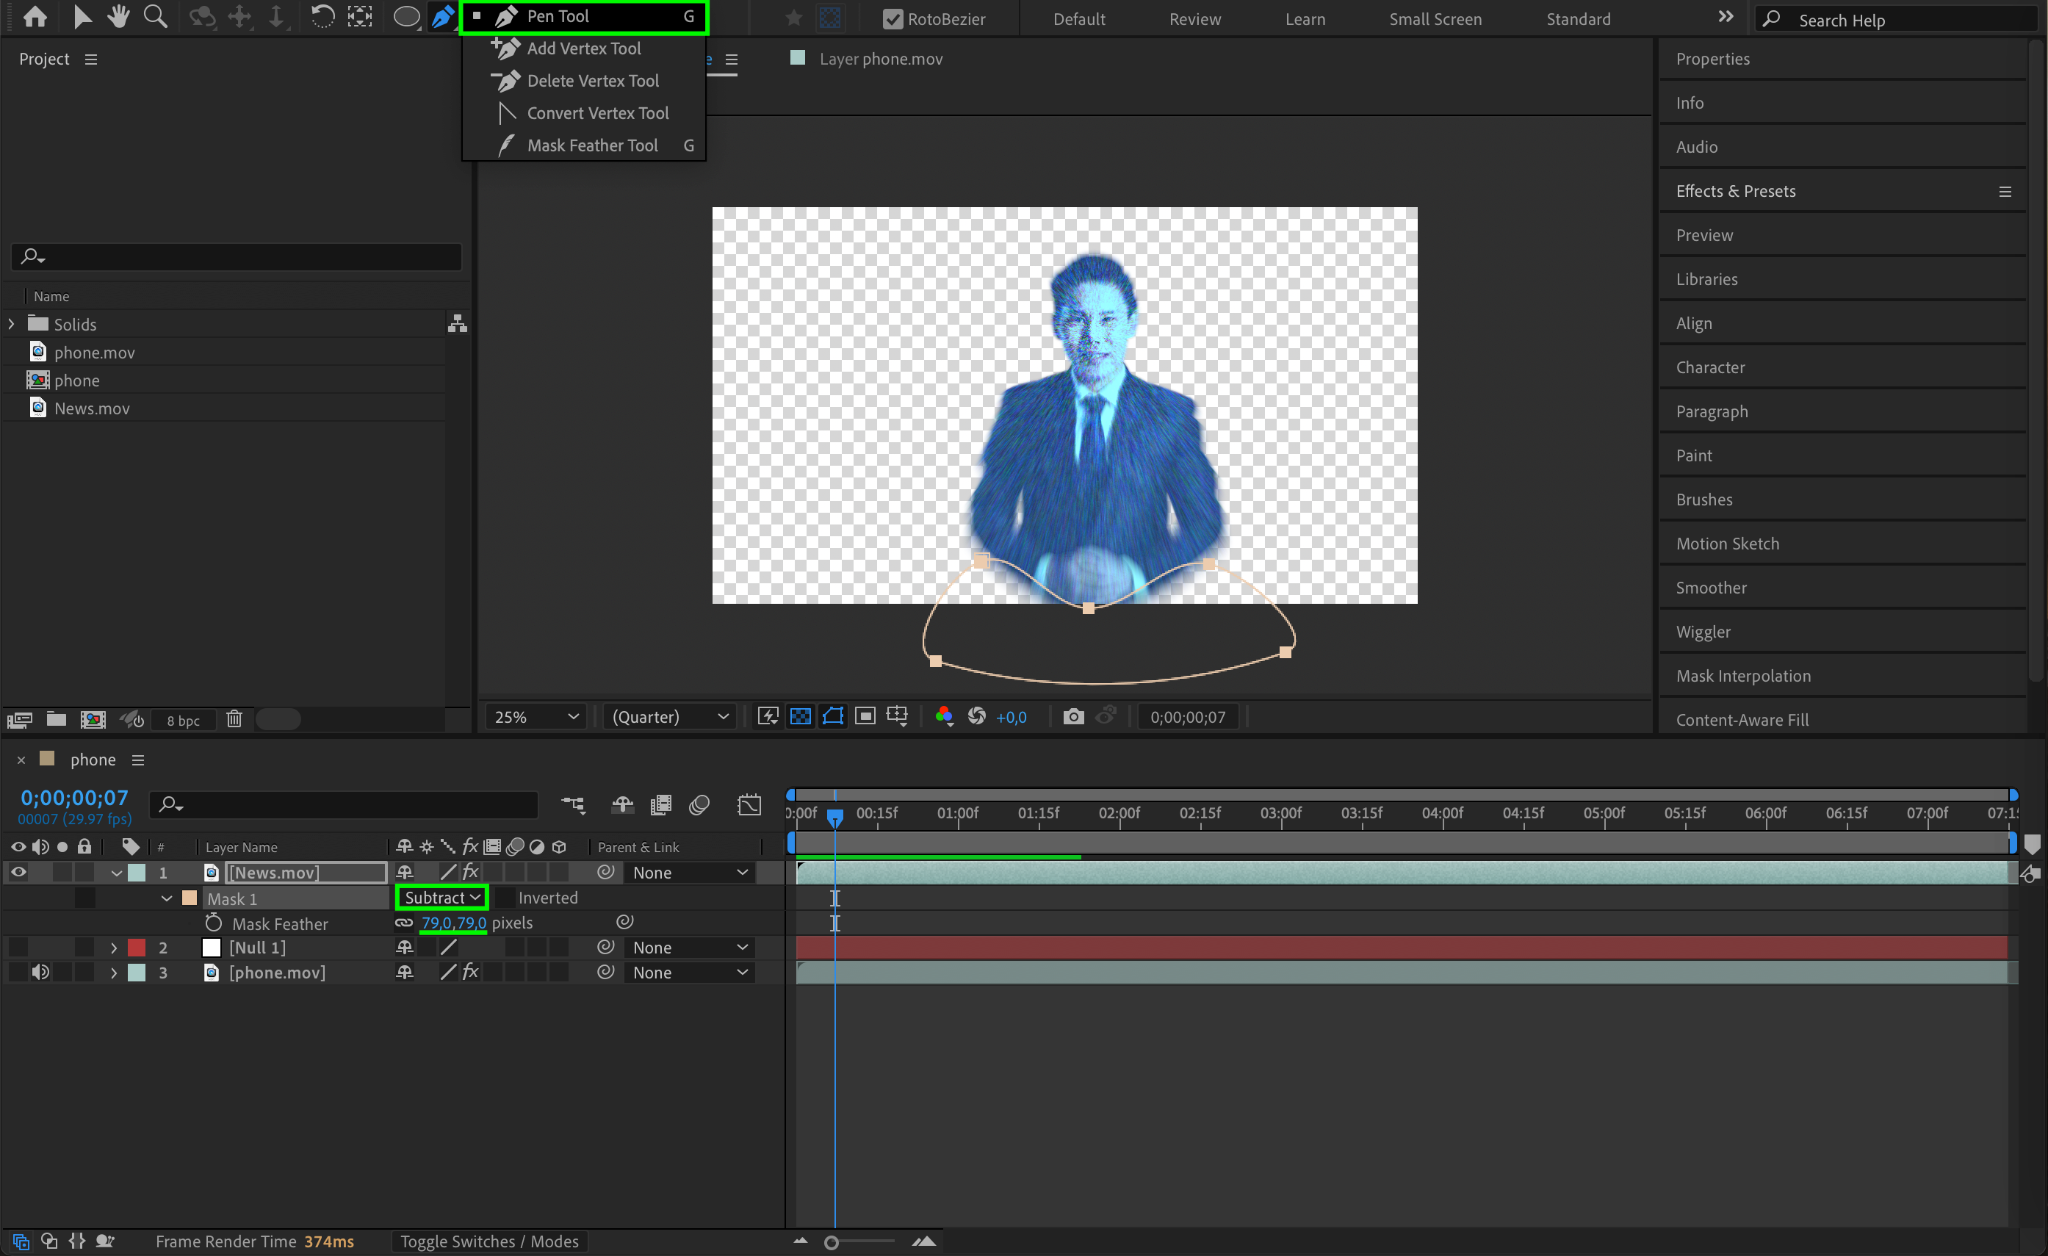
Step 11: Mask the Base of the Hologram
Use the Pen Tool (G) to create a mask at the bottom of the hologram to simulate its projection source. Set the mask Mode to Subtract and the Mask Feather to 79 to blend it smoothly.
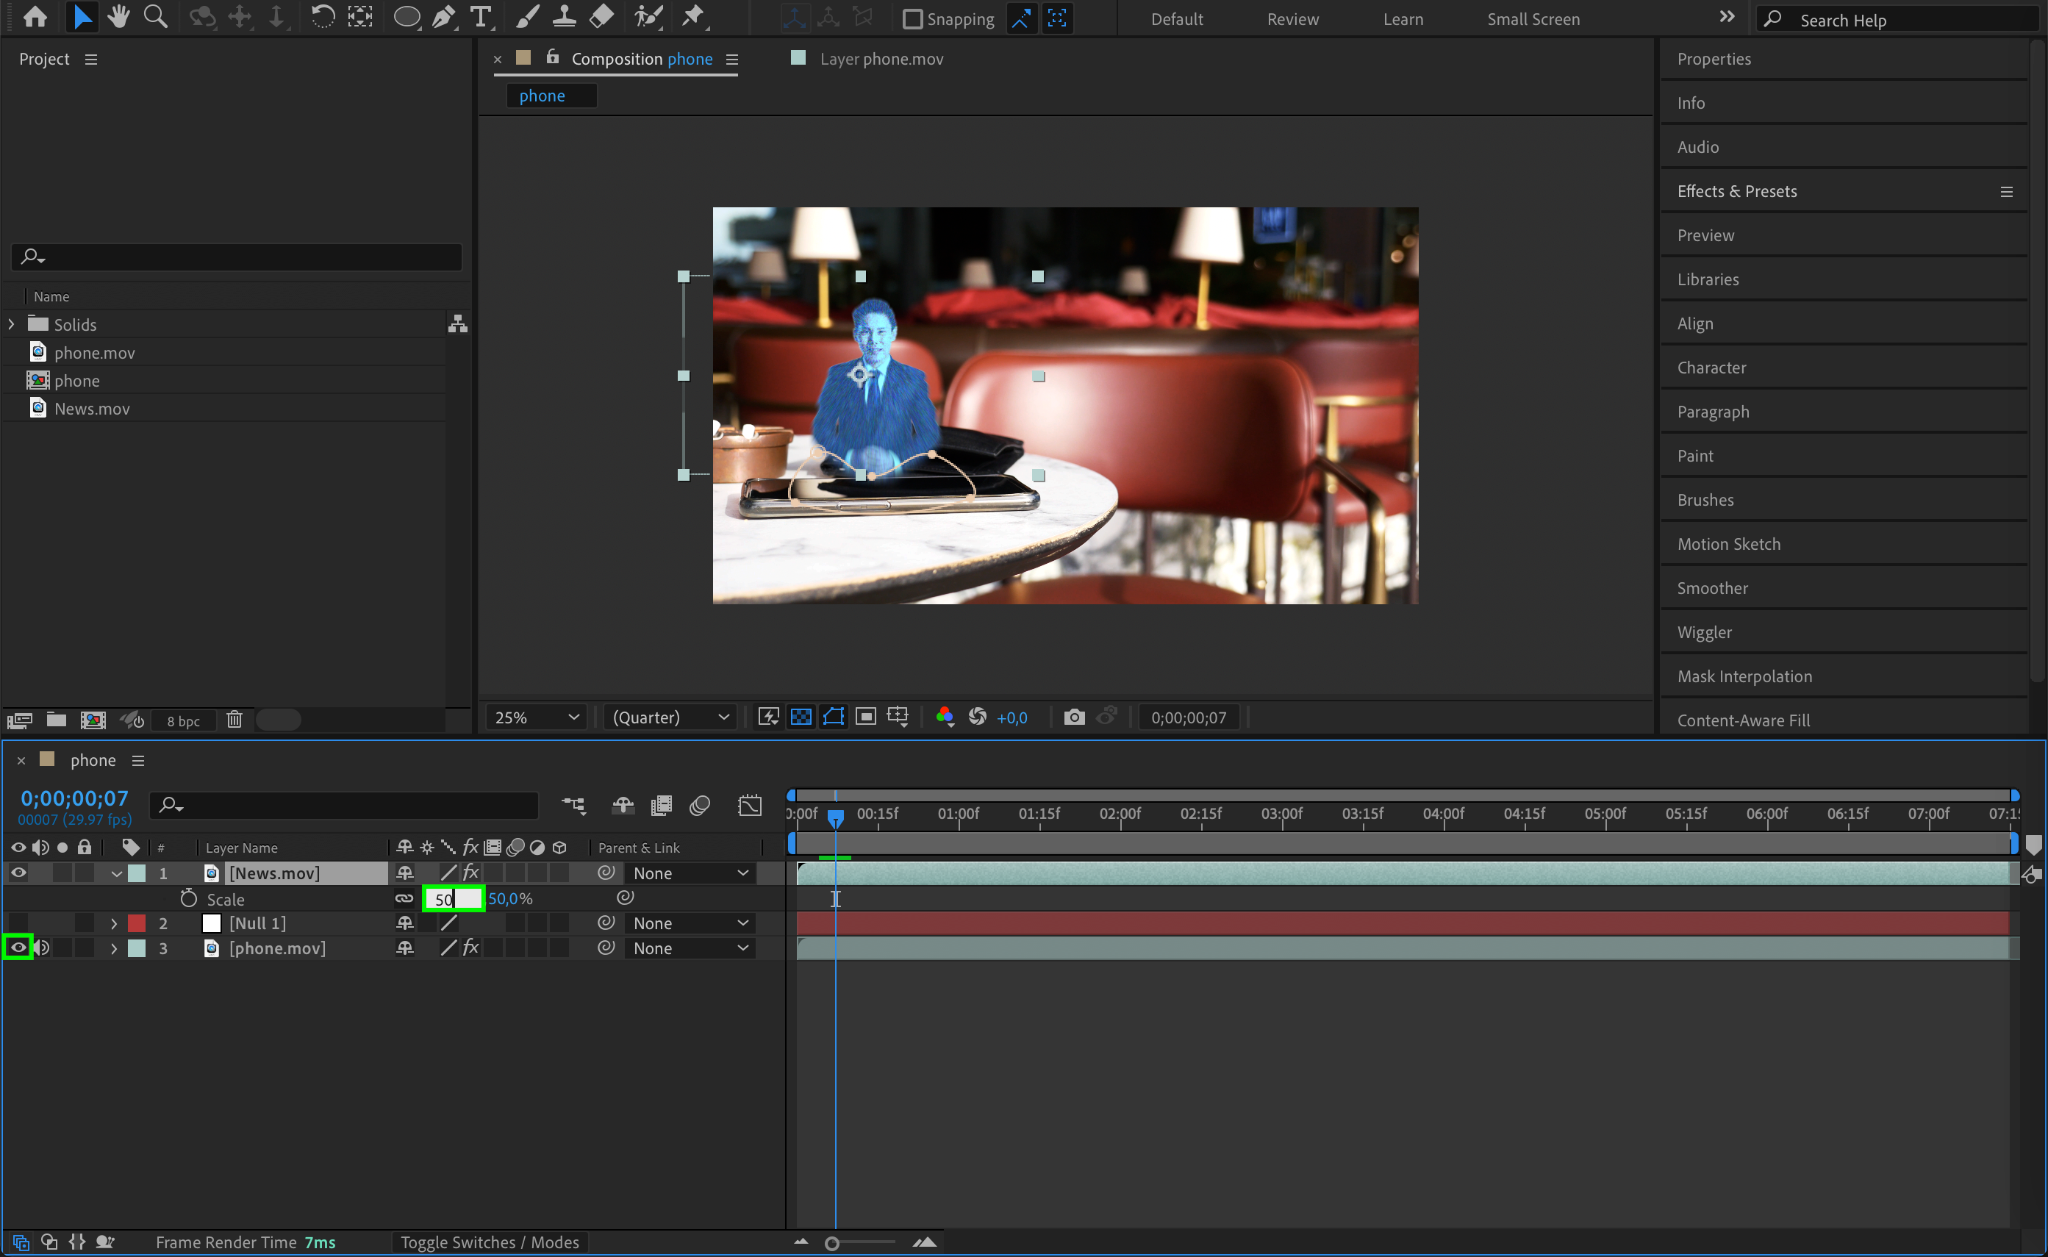
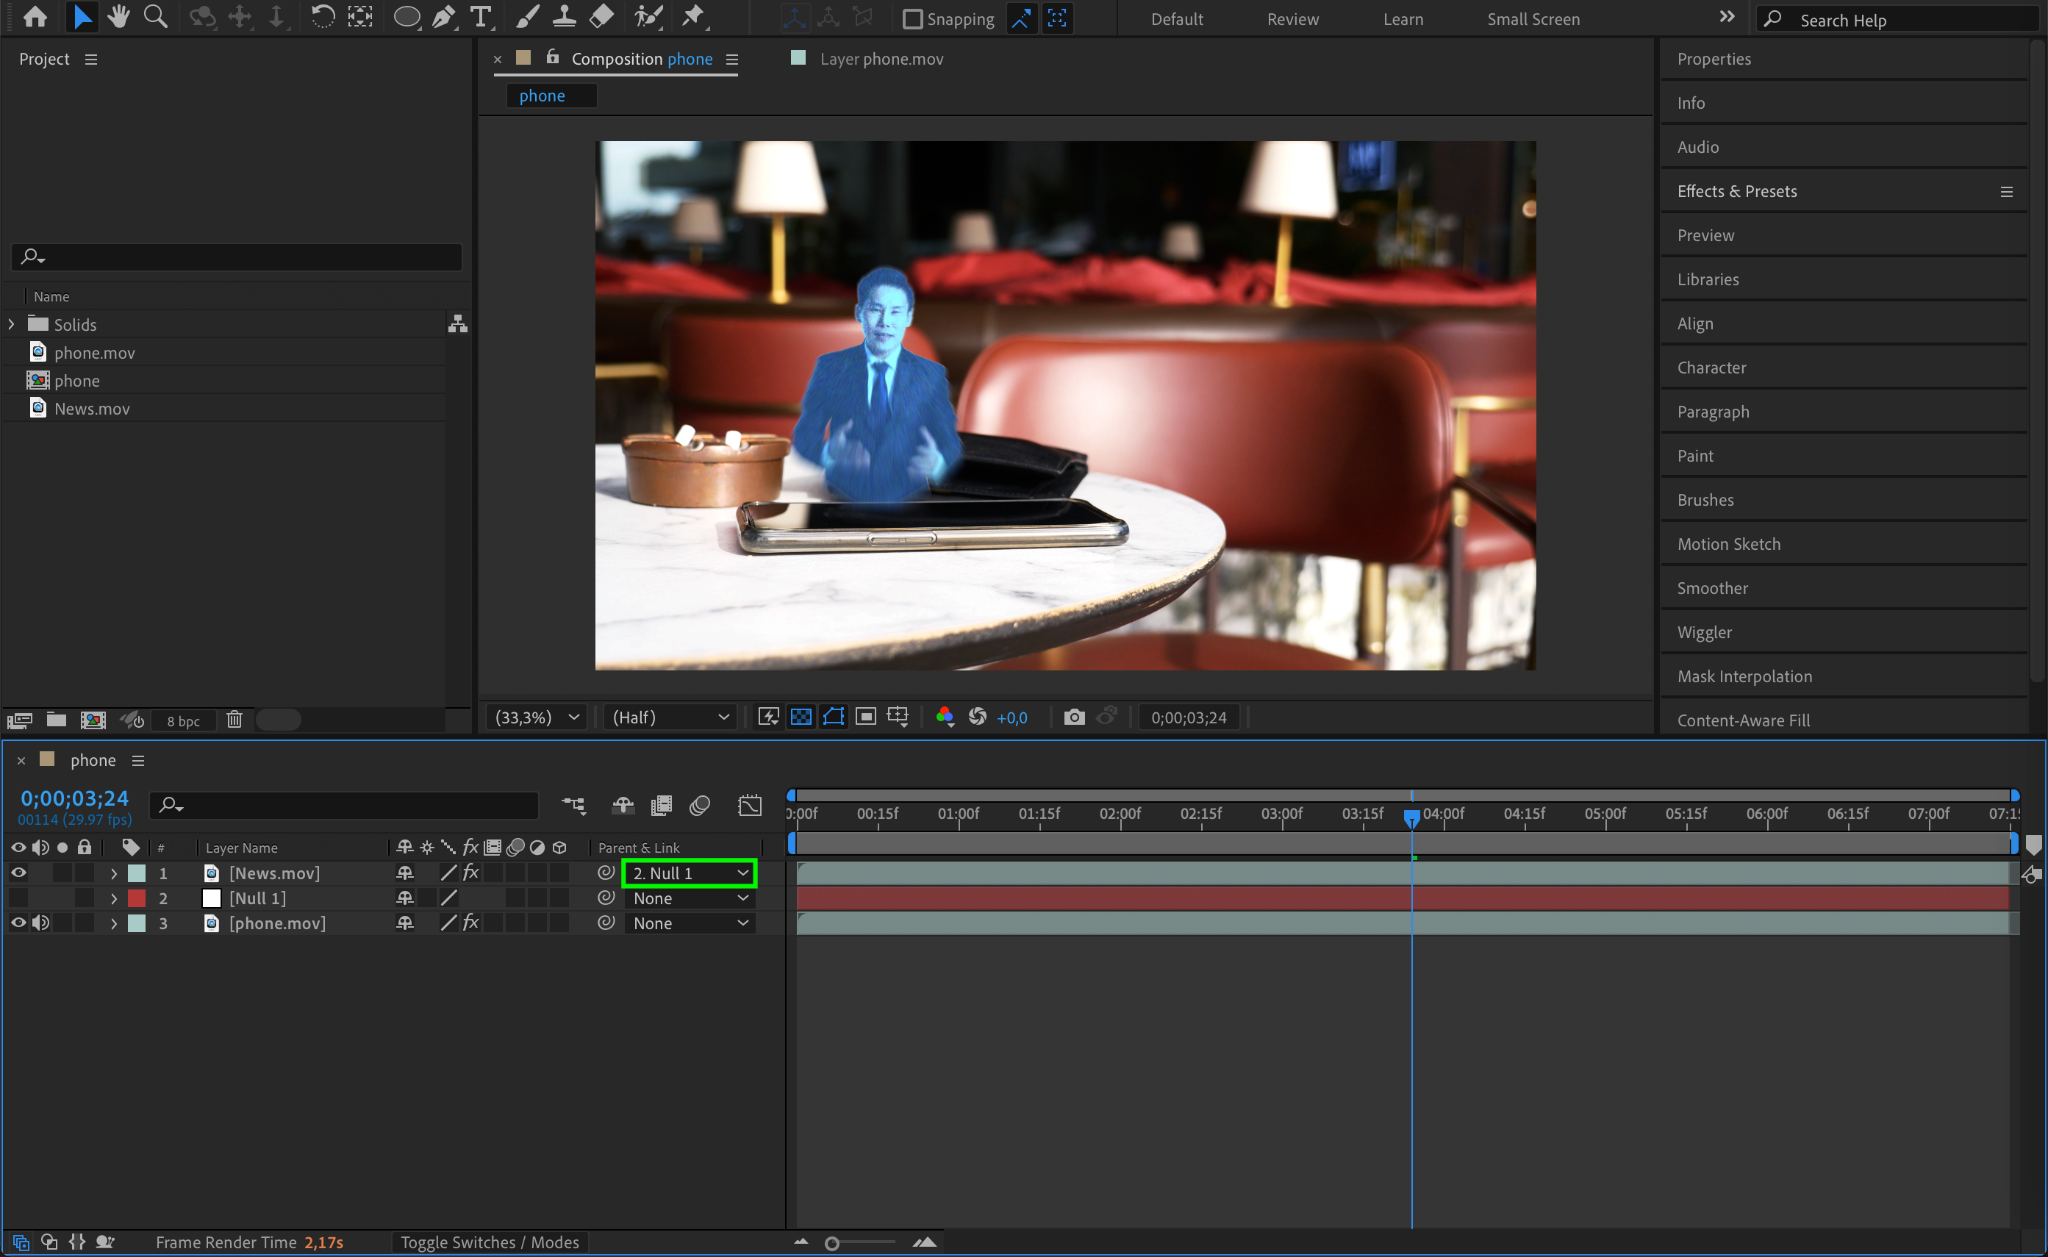
Step 12: Finalize Placement and Parent to the Null Object
Make the device layer visible again and scale the hologram content to fit the device screen. Adjust the transparency of the hologram to make it blend naturally with the device footage. Parent the hologram layer to the null object to link its motion with the device.
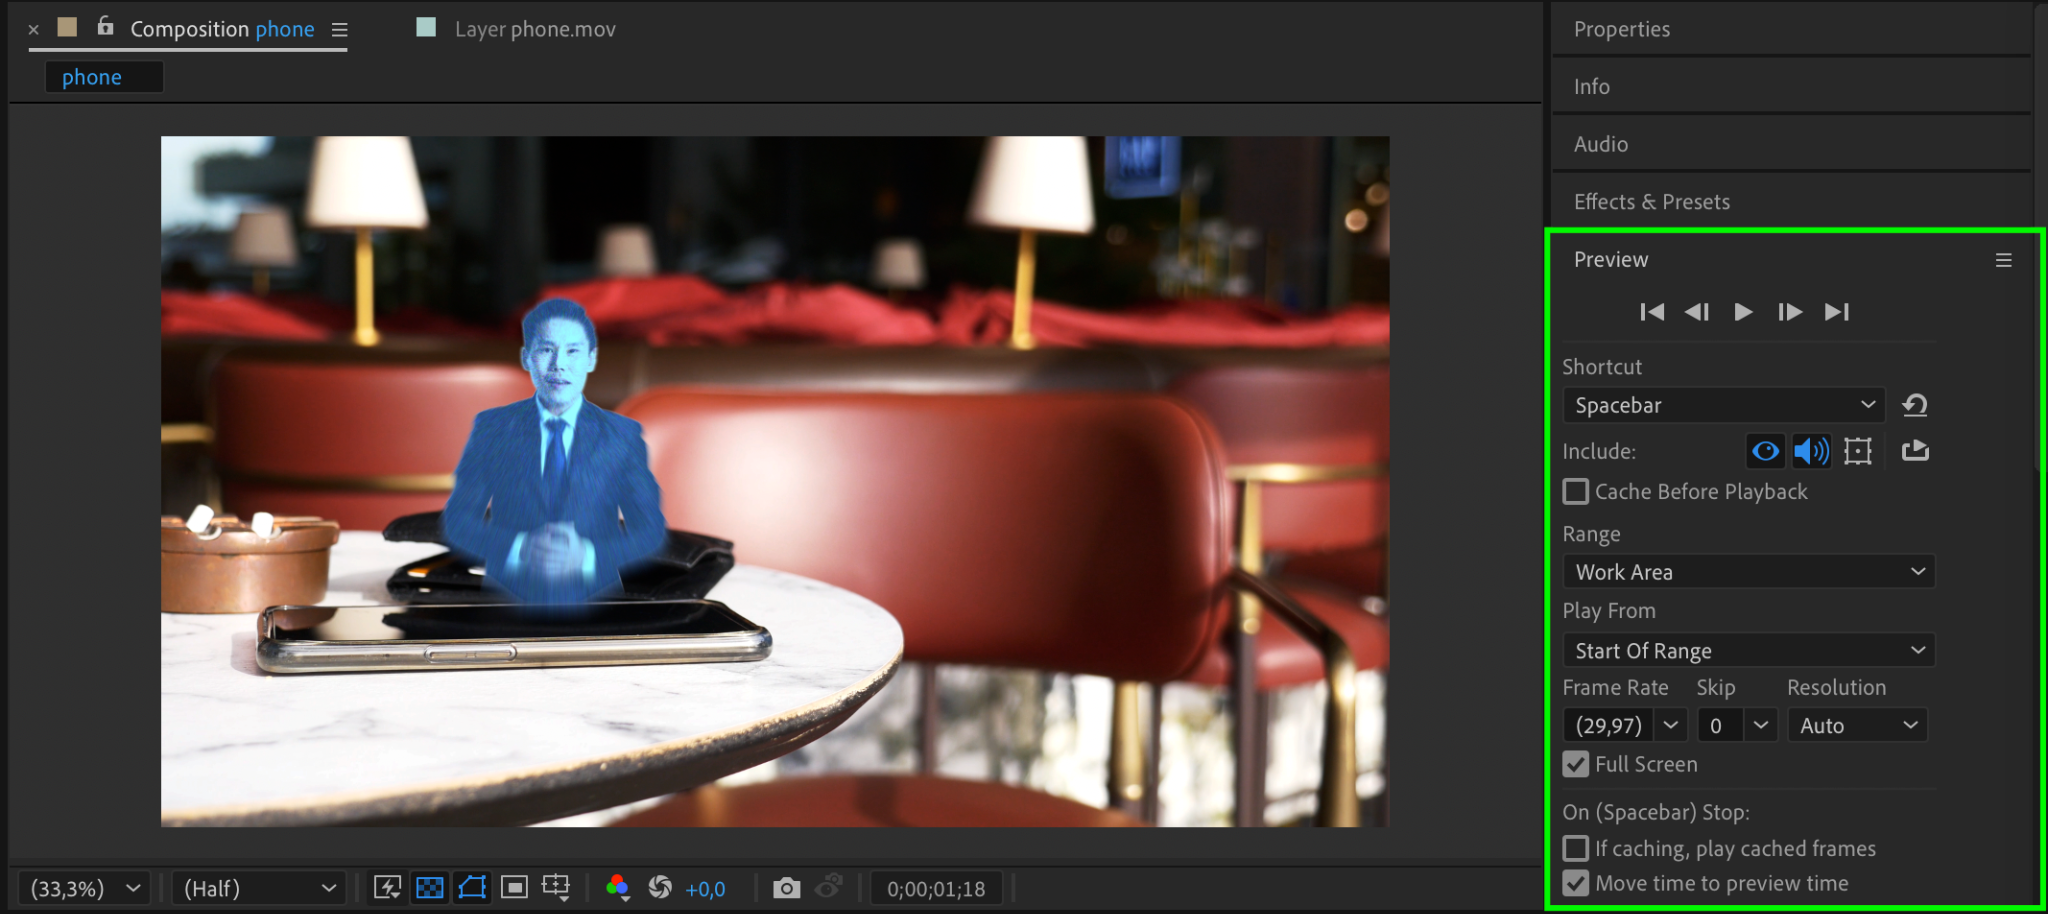
Step 13: Preview and Render
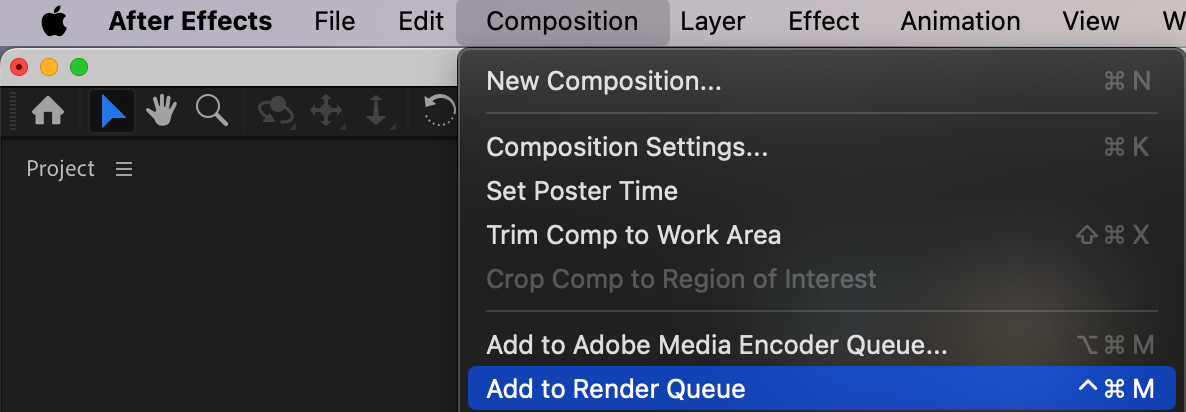
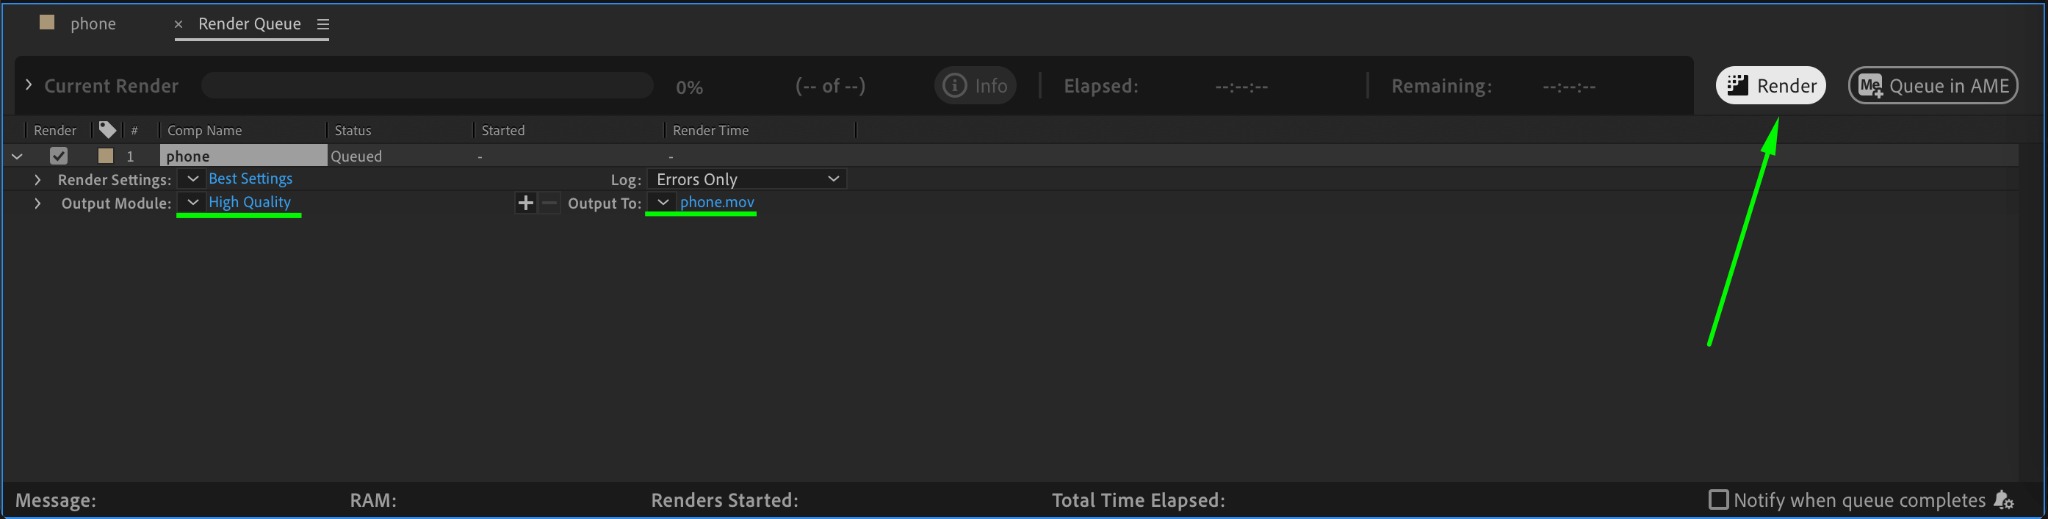
Press Spacebar to preview your work and fine-tune any settings. Once satisfied, render the composition by going to Composition > Add to Render Queue and choosing your desired format.
Conclusion
Creating a hologram in After Effects involves combining motion tracking, color grading, and advanced effects. With this guide, you can craft a realistic and engaging hologram effect to elevate your video projects. Experiment with different settings to make your hologram unique!
Our Bestsellers


