Step-by-Step Guide to Creating a Meteor Effect in After Effects
Introduction: Bringing the Meteor Effect to Life
Creating a meteor effect in After Effects is an exciting way to enhance your video projects. By combining stock footage, advanced tracking tools, and precise layering, you can create a realistic meteor crashing through the sky. Follow this guide for a detailed walkthrough to make your composition visually stunning.
Step 1: Import Your Footage and Stock Meteor Video
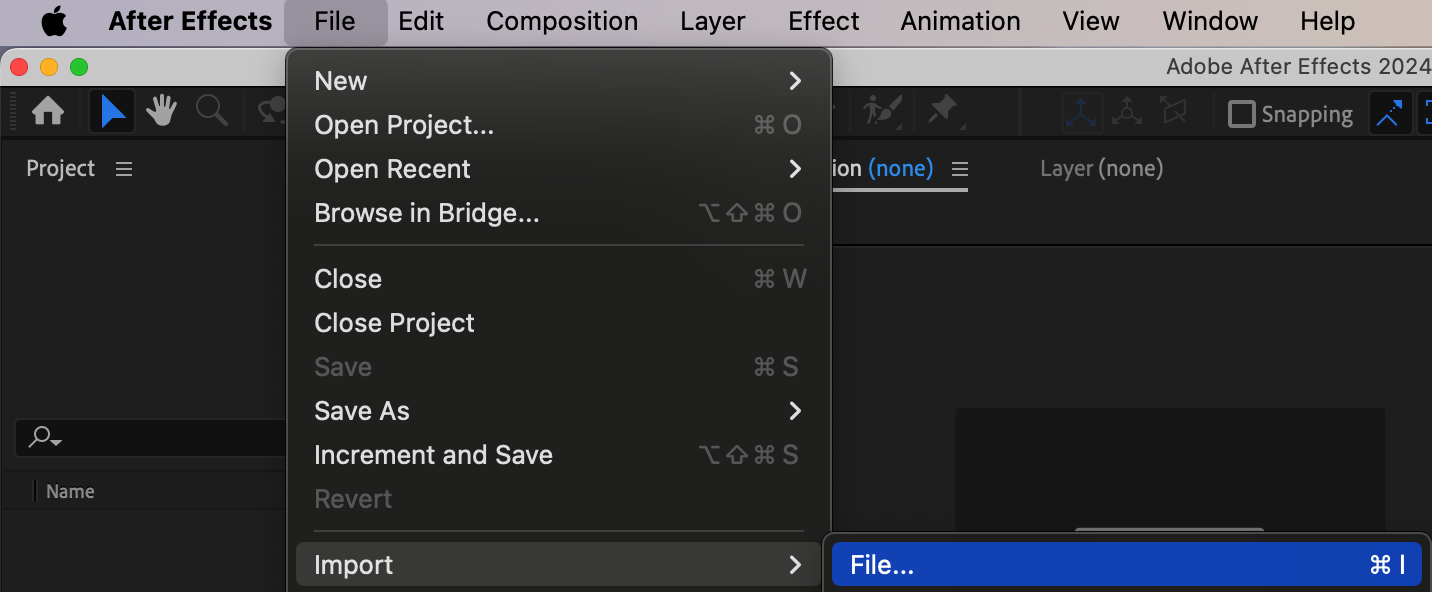
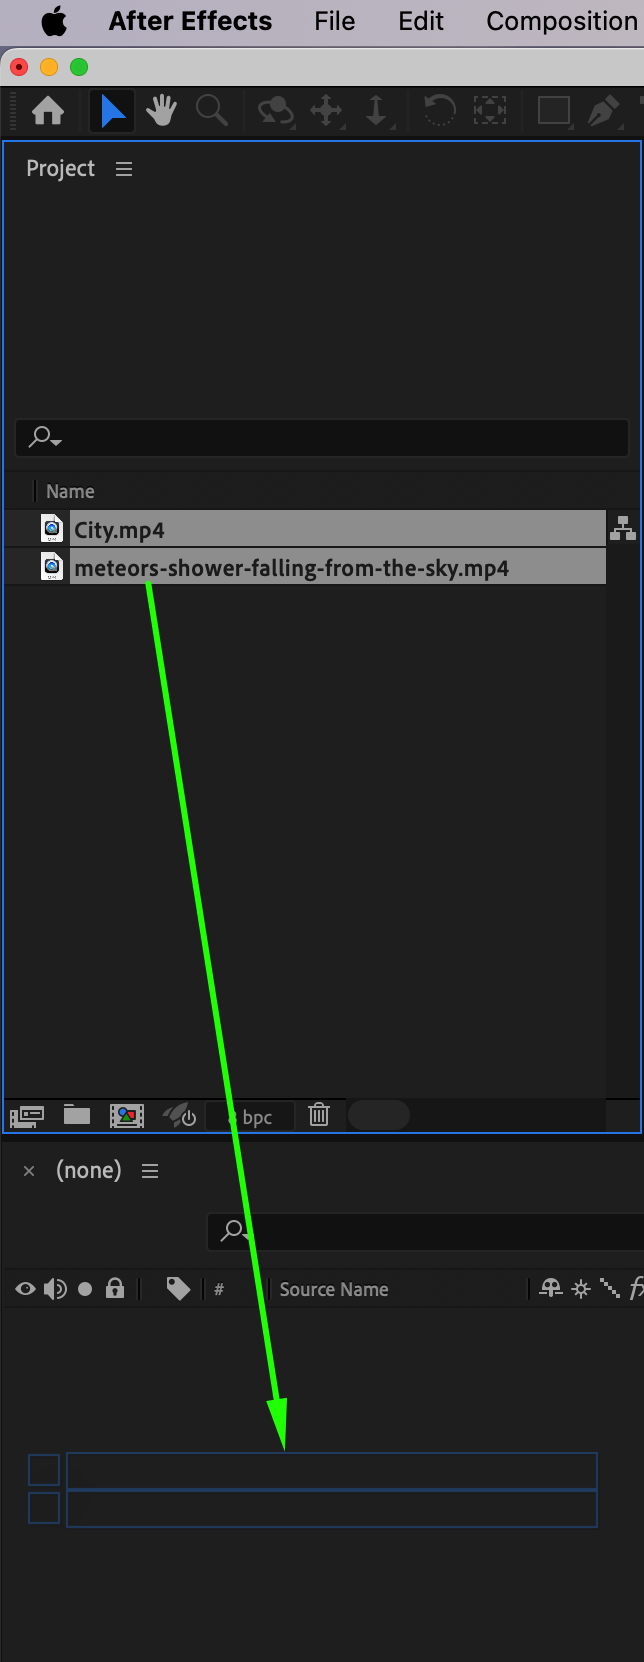
Start by importing your main footage (the background scene) and stock footage of a meteor. To do this, go to File > Import > File, select your files, and add them to the timeline. Place your main footage at the bottom layer and your meteor footage above it.
Get 10% off when you subscribe to our newsletter

Step 2: Make the Meteor Layer Invisible
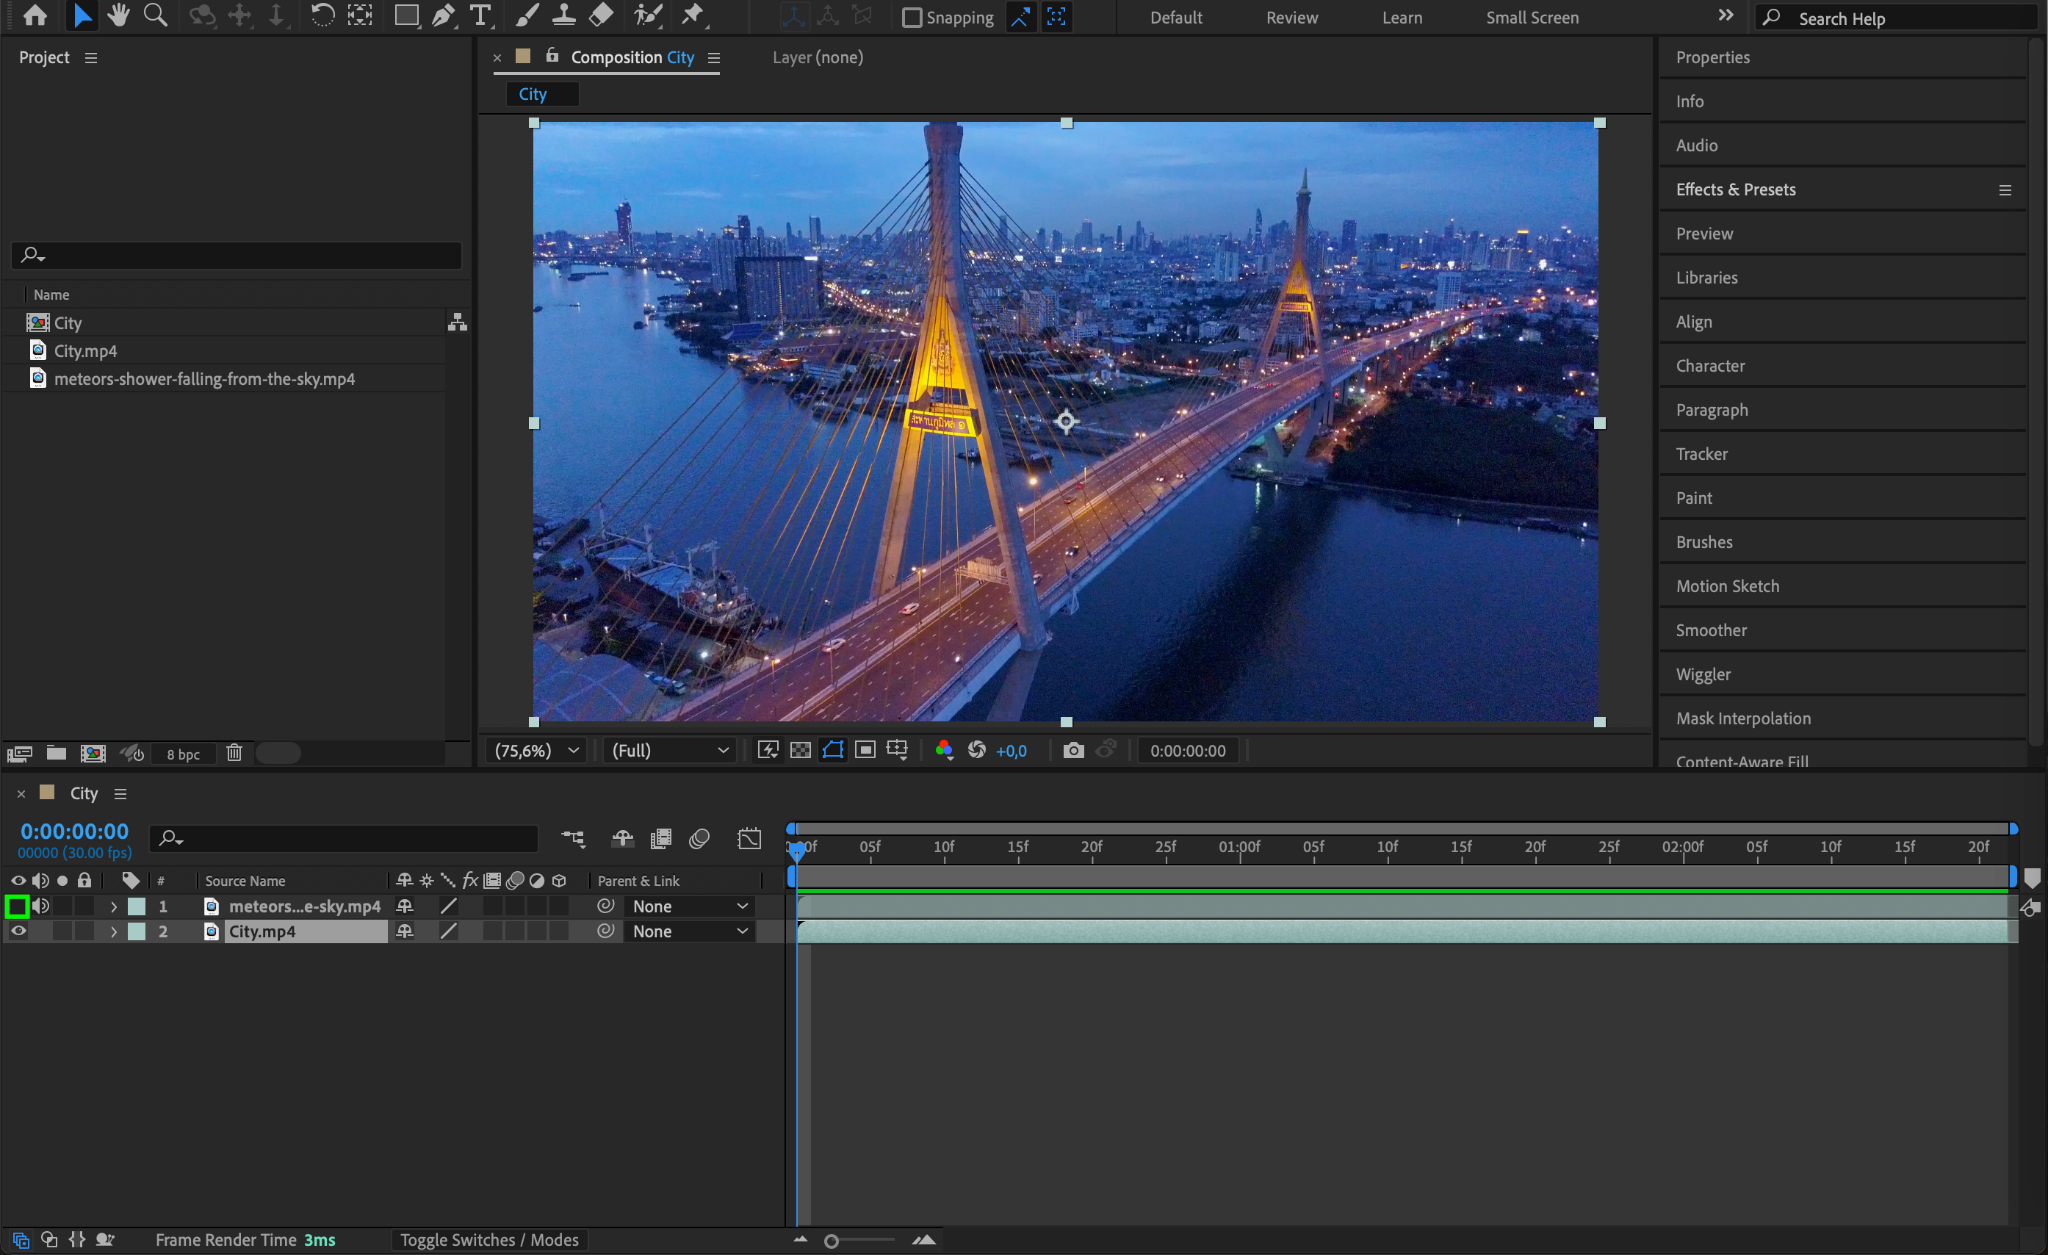
For now, hide the meteor layer to focus on preparing your main footage. To make the layer invisible, click on the Eye Icon next to the layer in the timeline.
Step 3: Apply 3D Camera Tracking to Your Main Footage
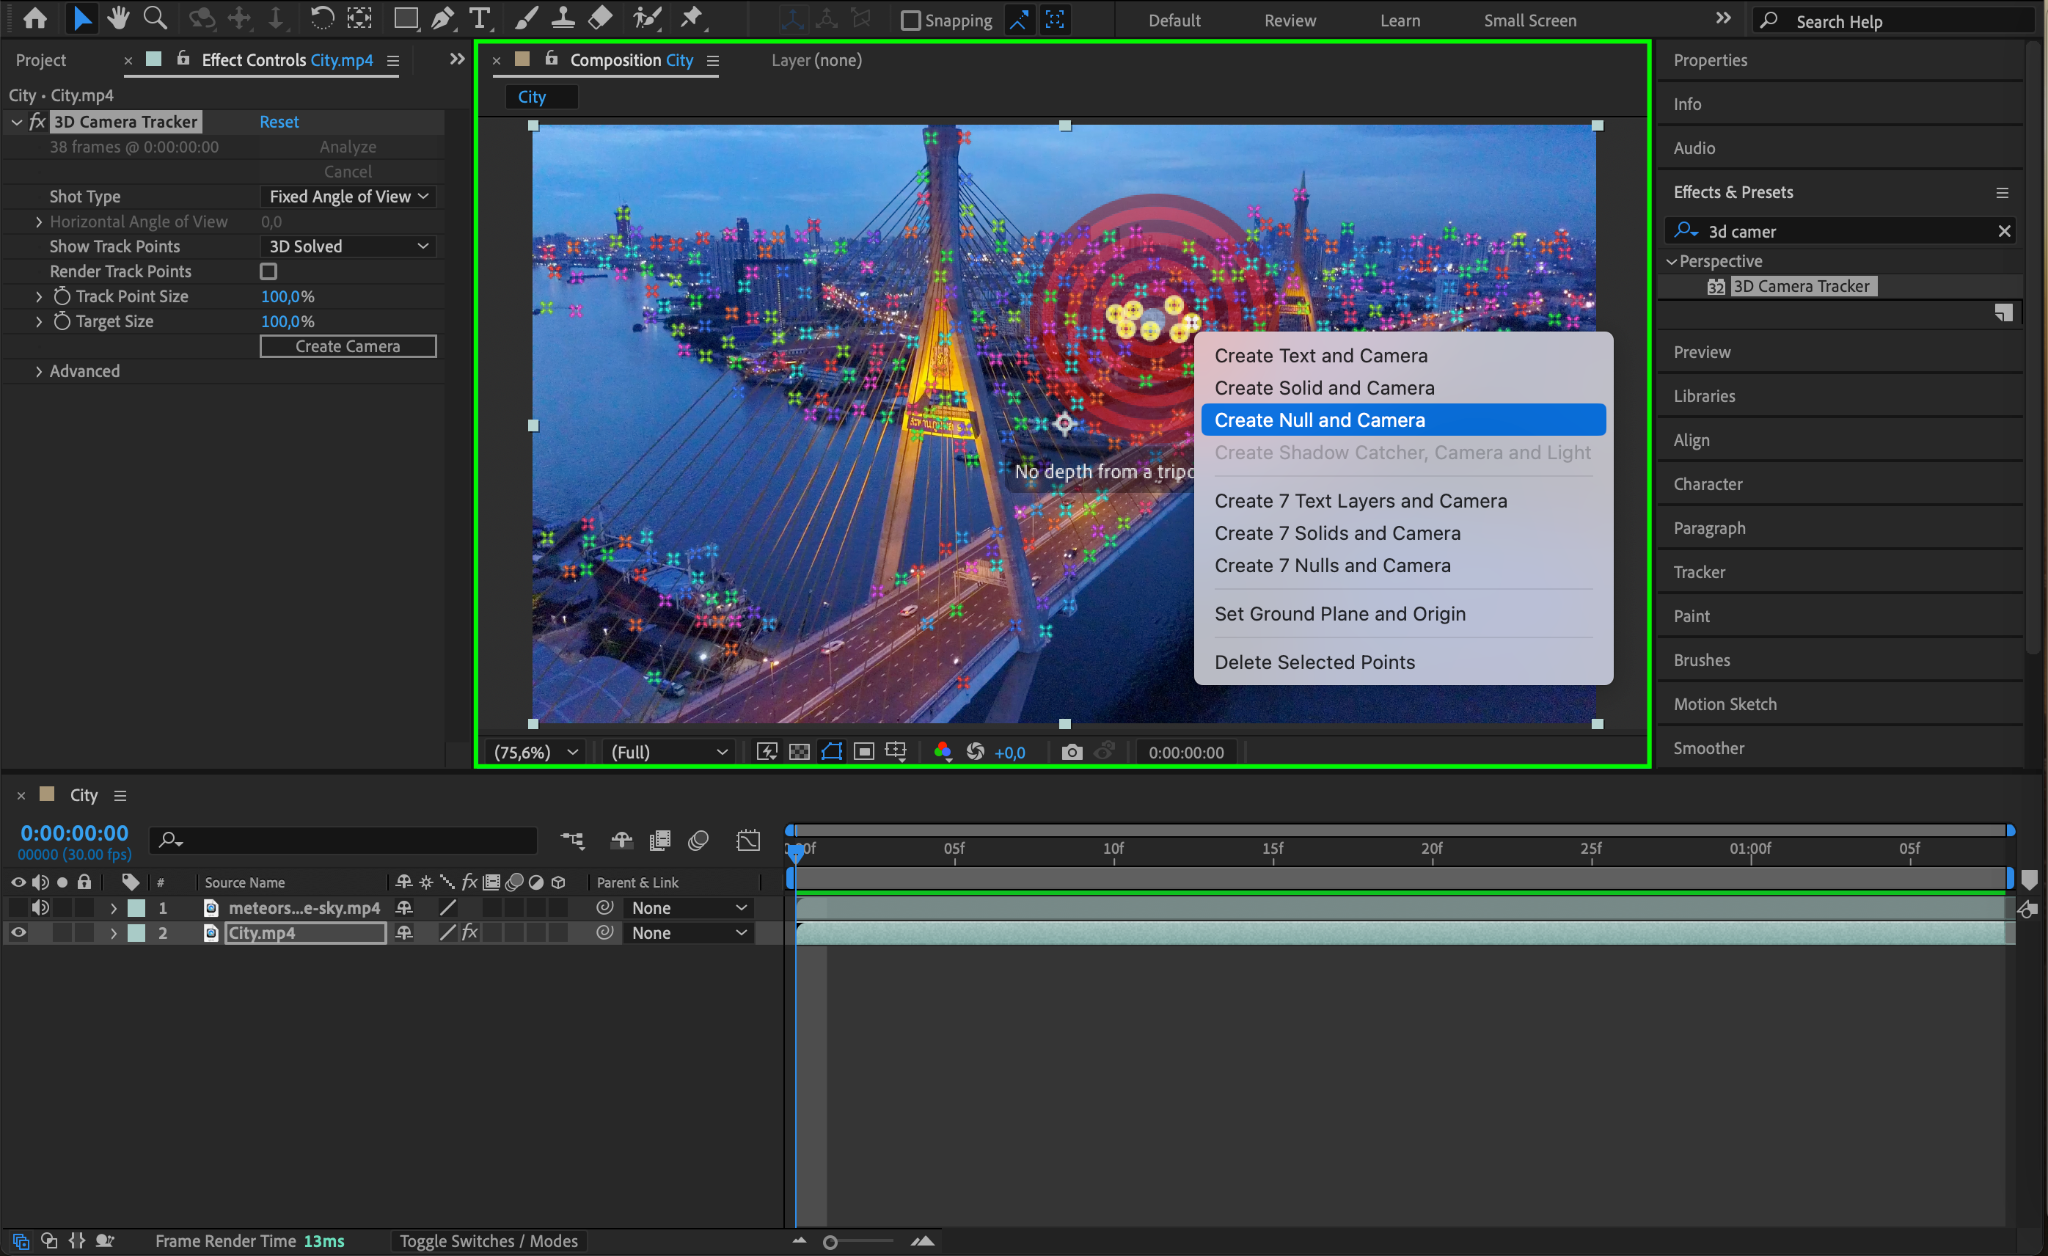
Select your main footage layer and apply the 3D Camera Tracker effect from the Effects & Presets panel. Allow the tracker to analyze your scene, and once complete, select an area in the footage where the meteor should land or move through. Right-click and choose Create Null and Camera.

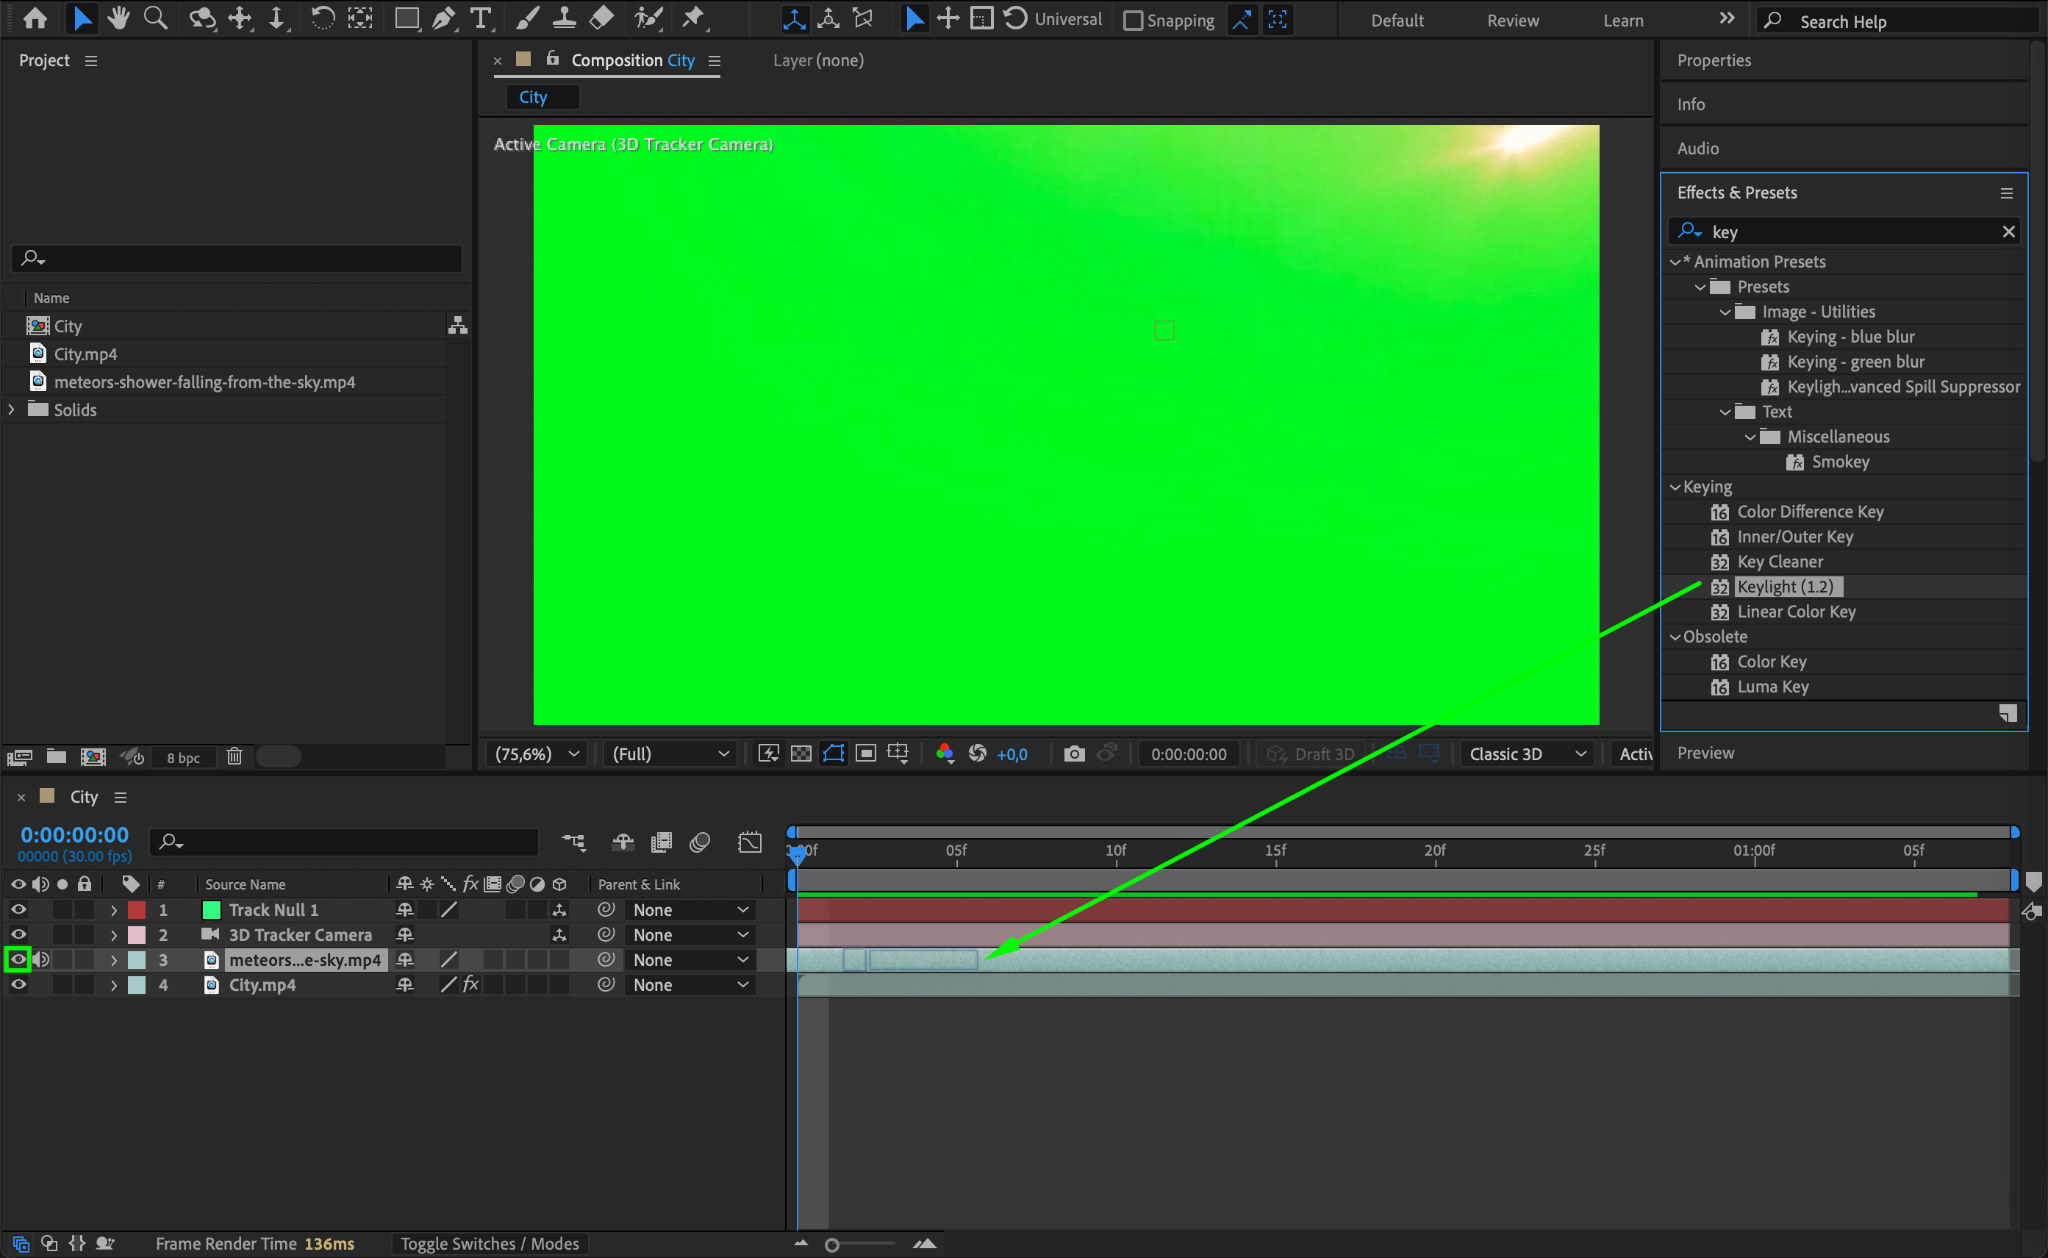
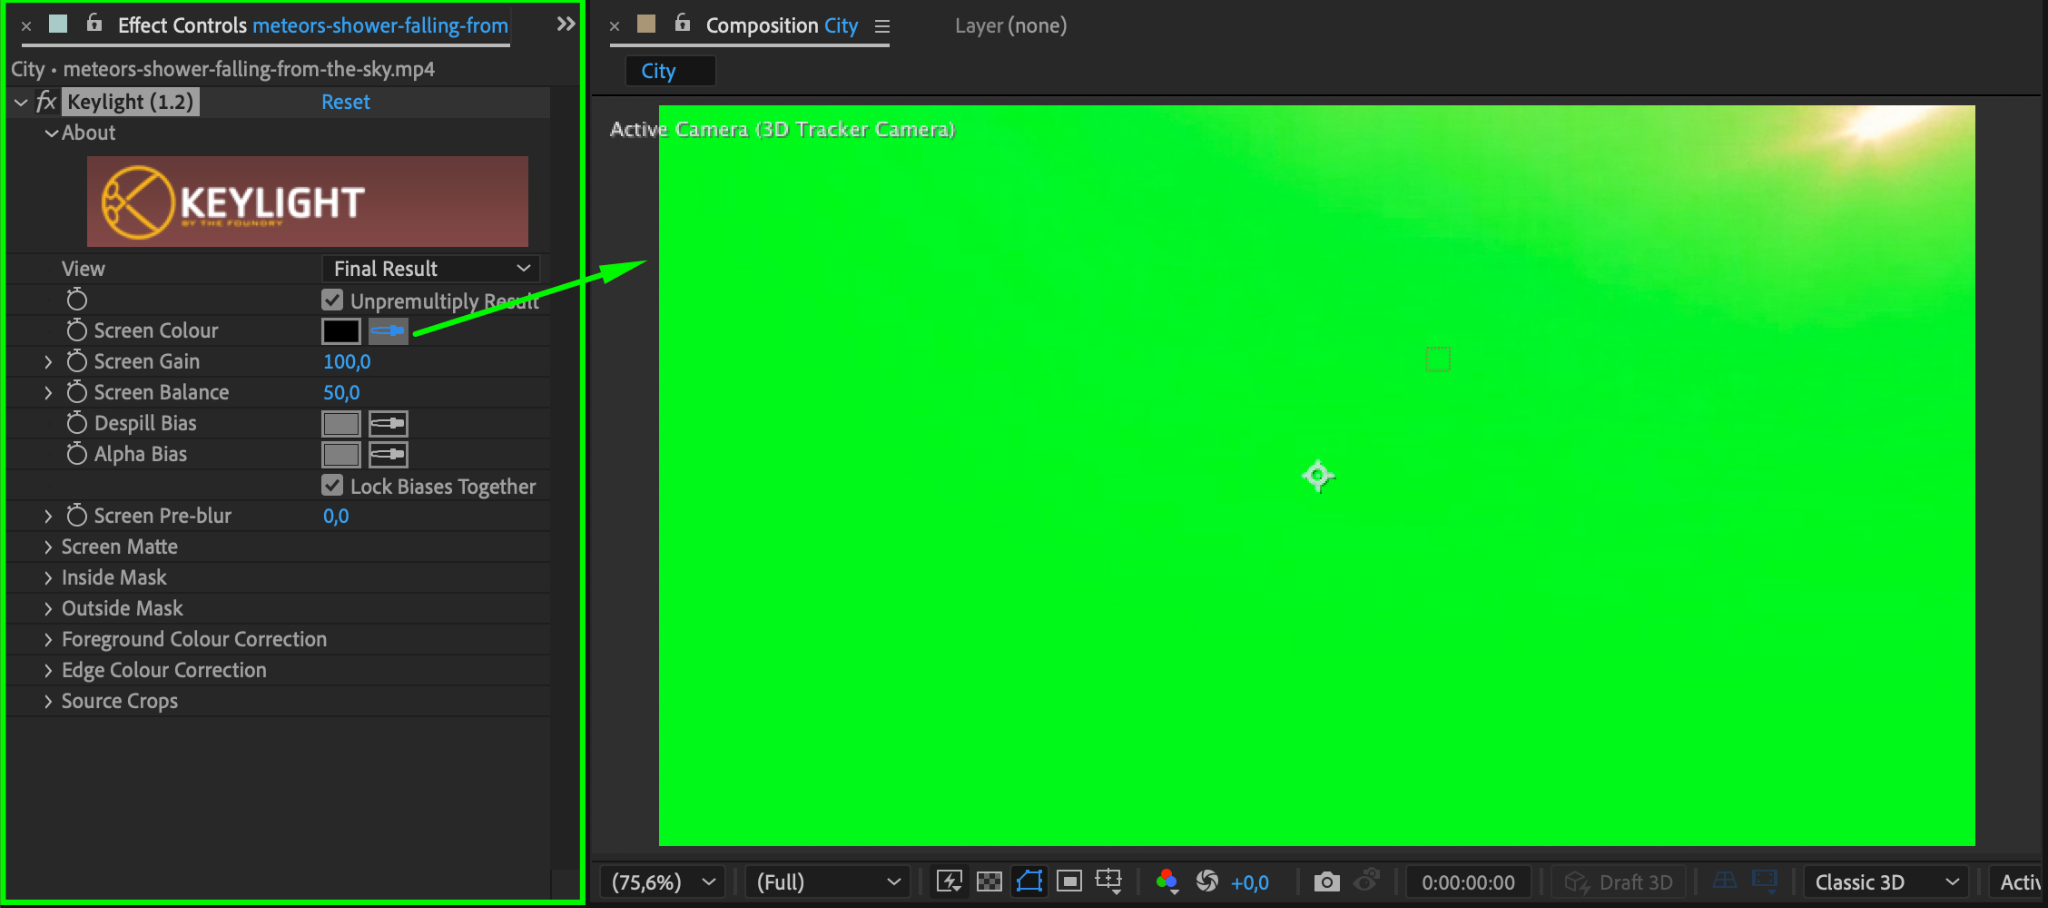
Step 4: Enable the Meteor Layer and Key Out Its Background
Make the meteor layer visible again by clicking the Eye Icon. Apply the Keylight Effect from the Effects & Presets panel to remove its background. Use the Eyedropper Tool to select the background color you want to key out. Adjust the settings as needed to clean up the edges.
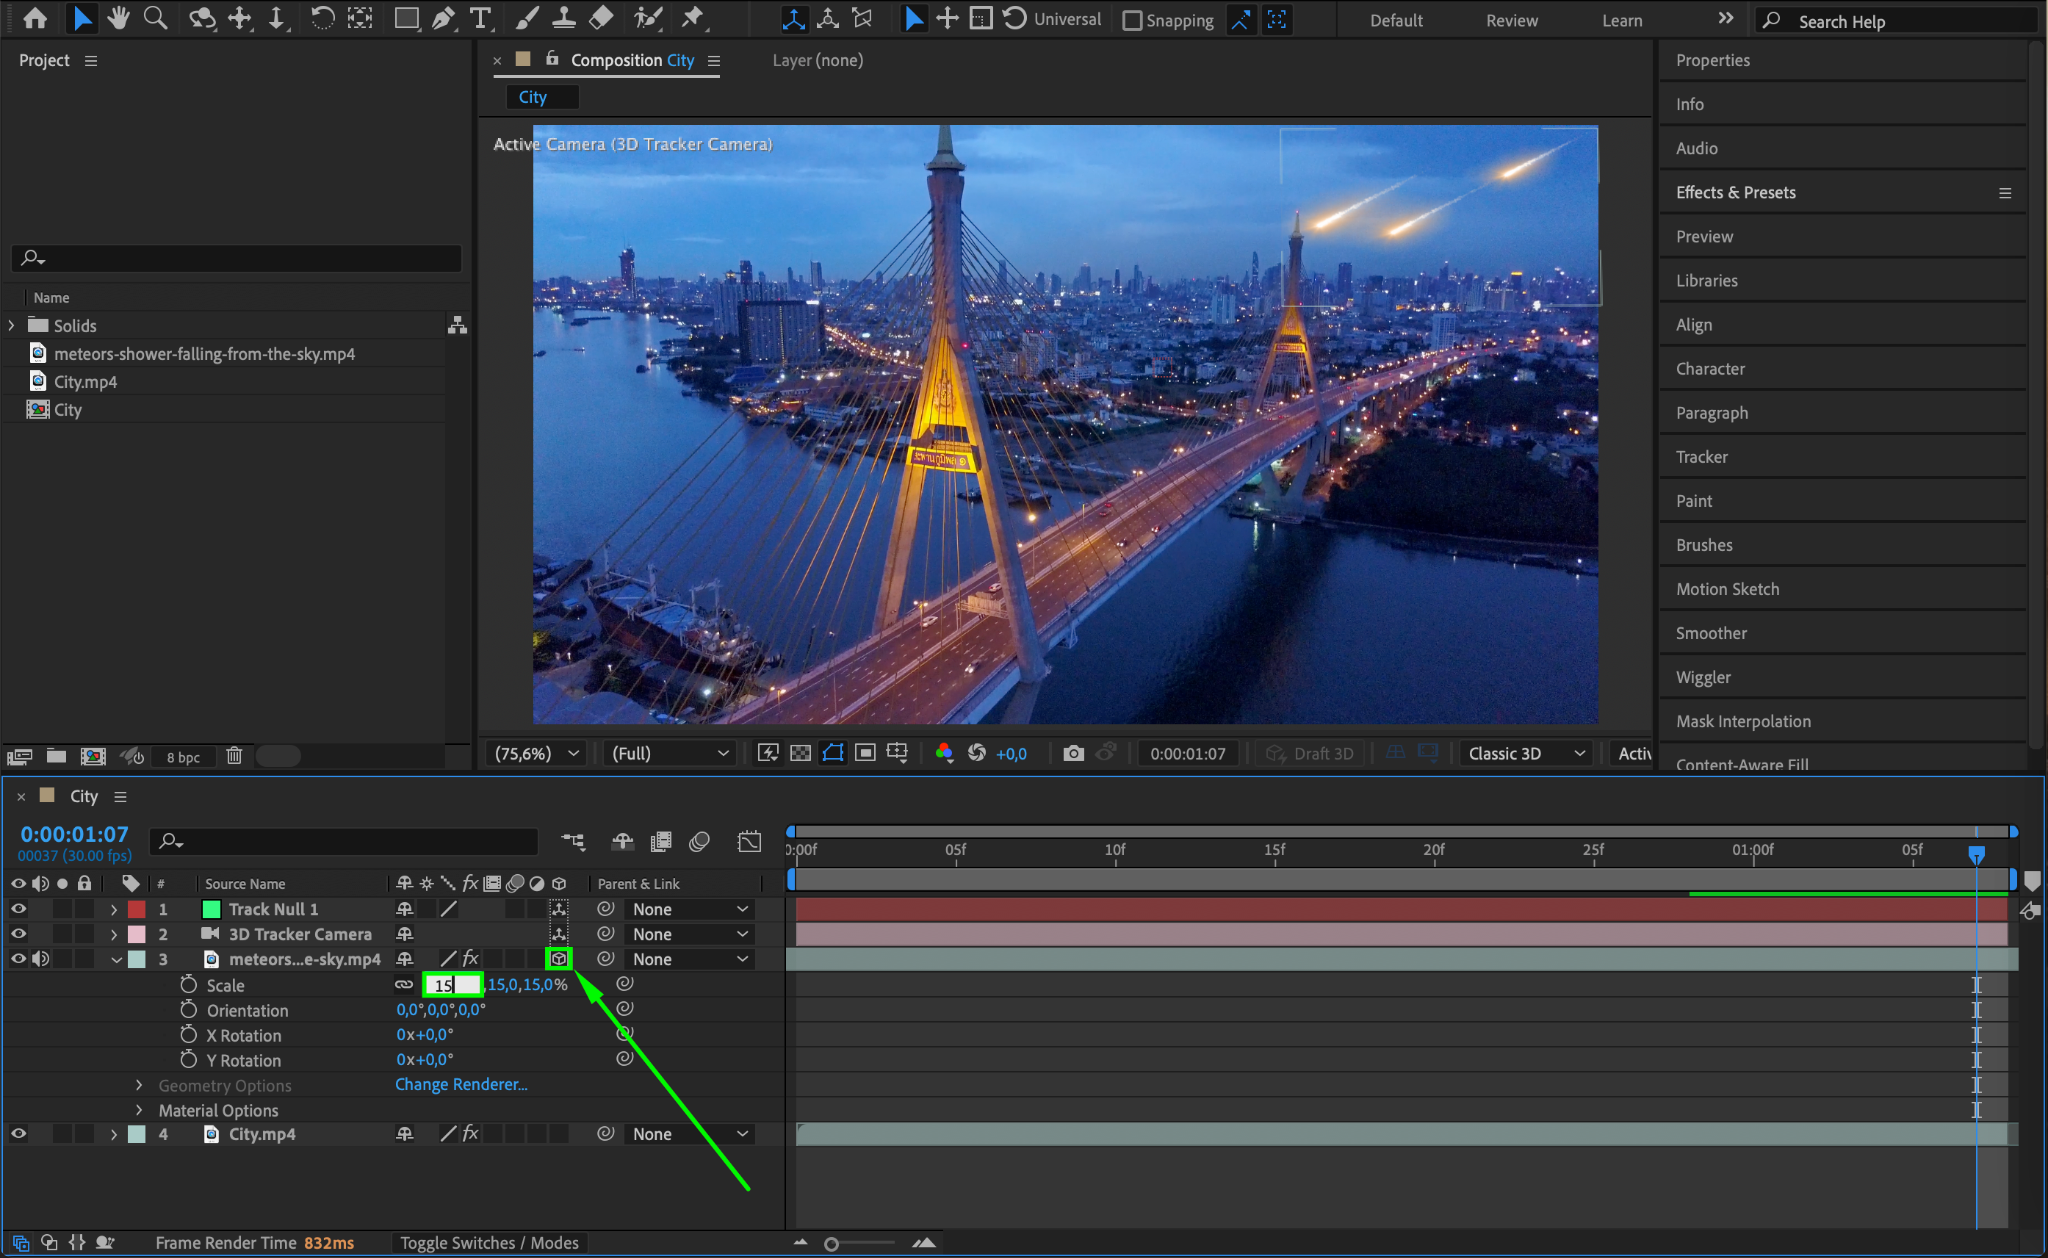
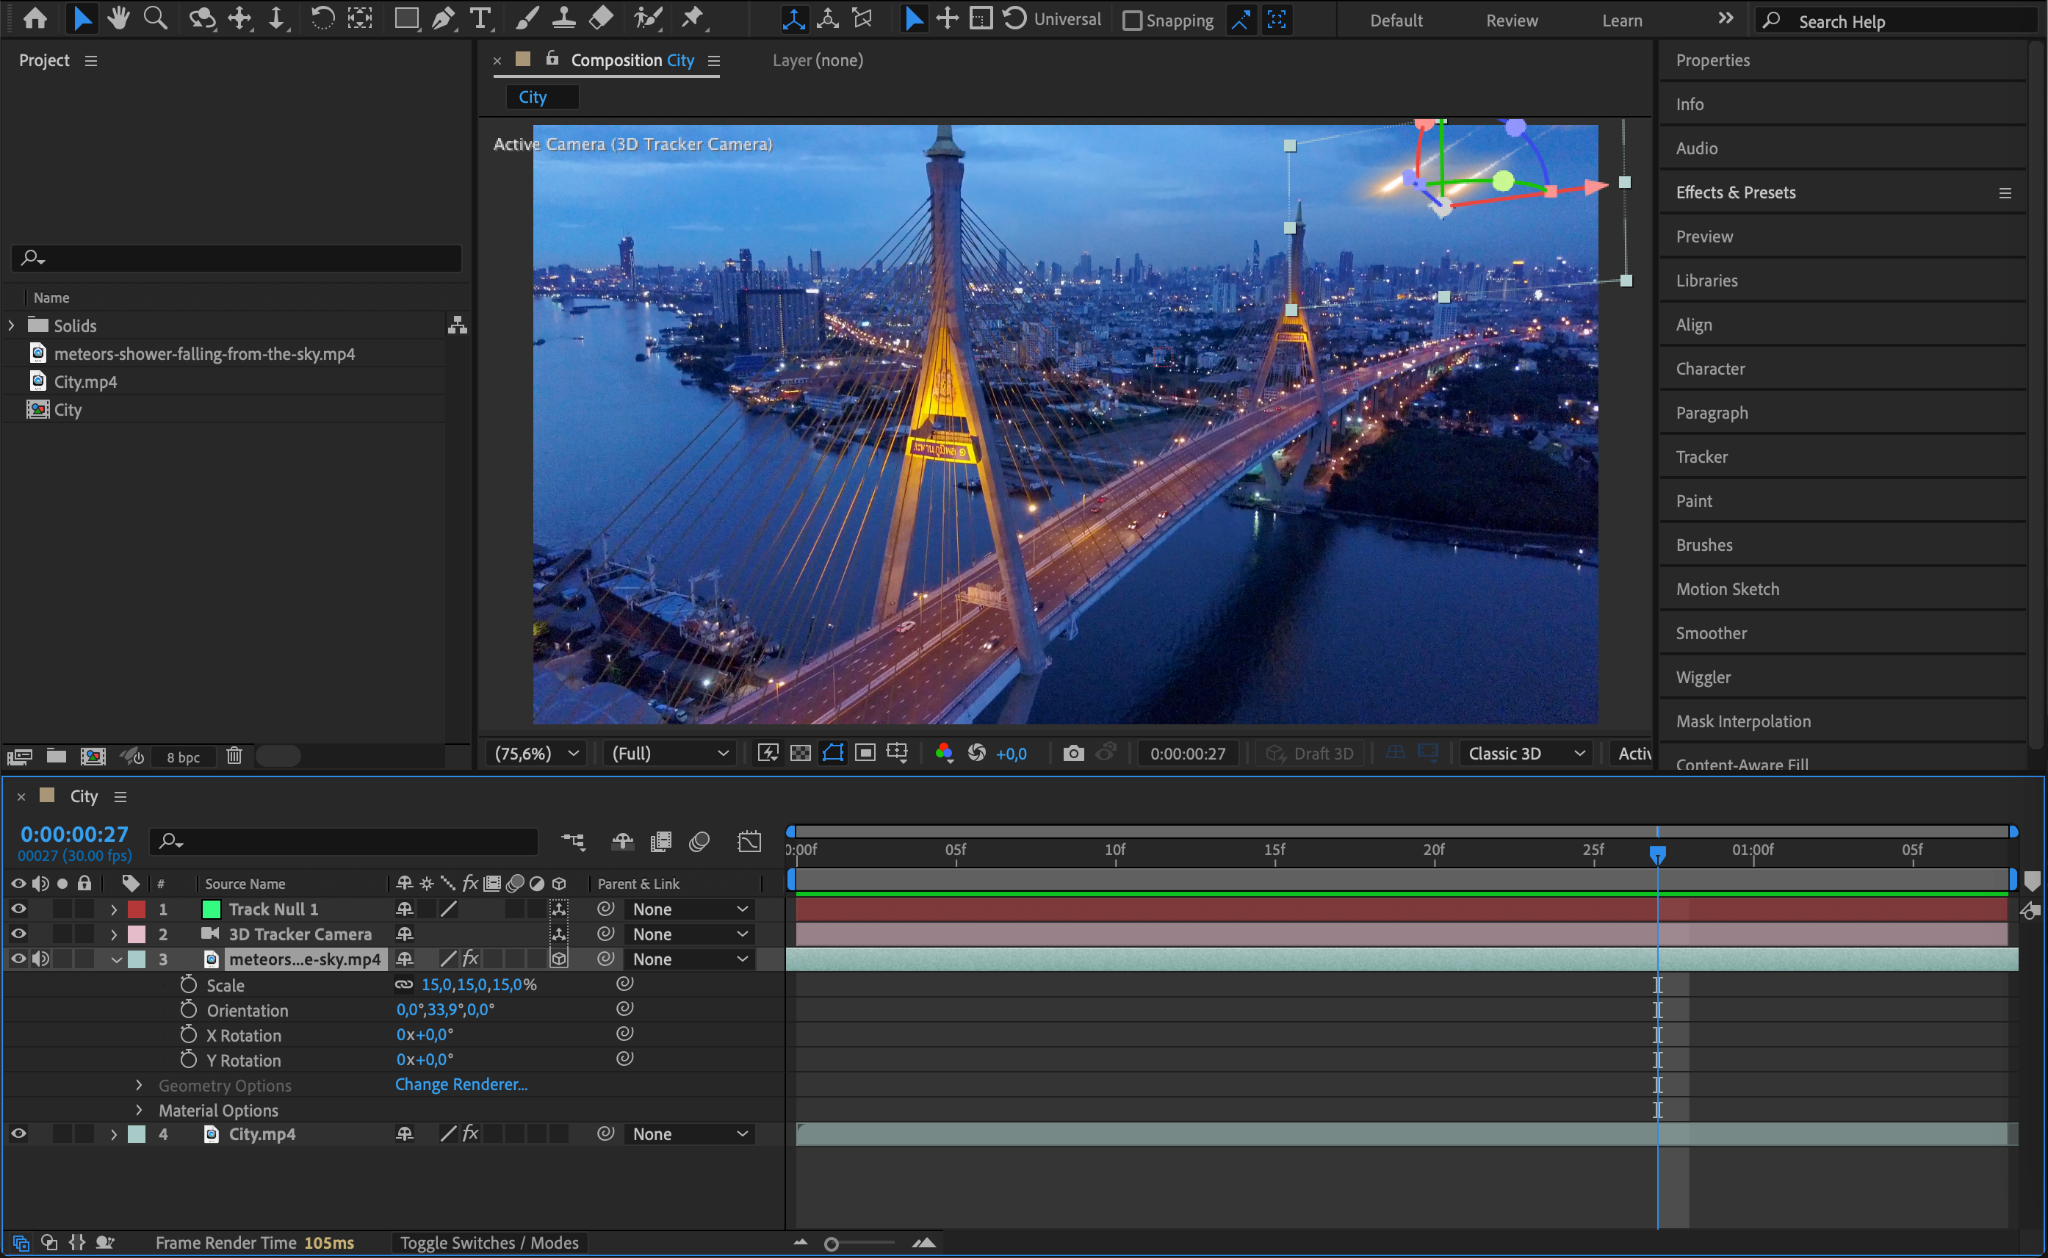
Step 5: Adjust the Meteor’s Scale and Orientation
Turn the meteor layer into a 3D layer by selecting the 3D Layer Box in the timeline. Adjust its scale, rotation, and position to align it with the scene.
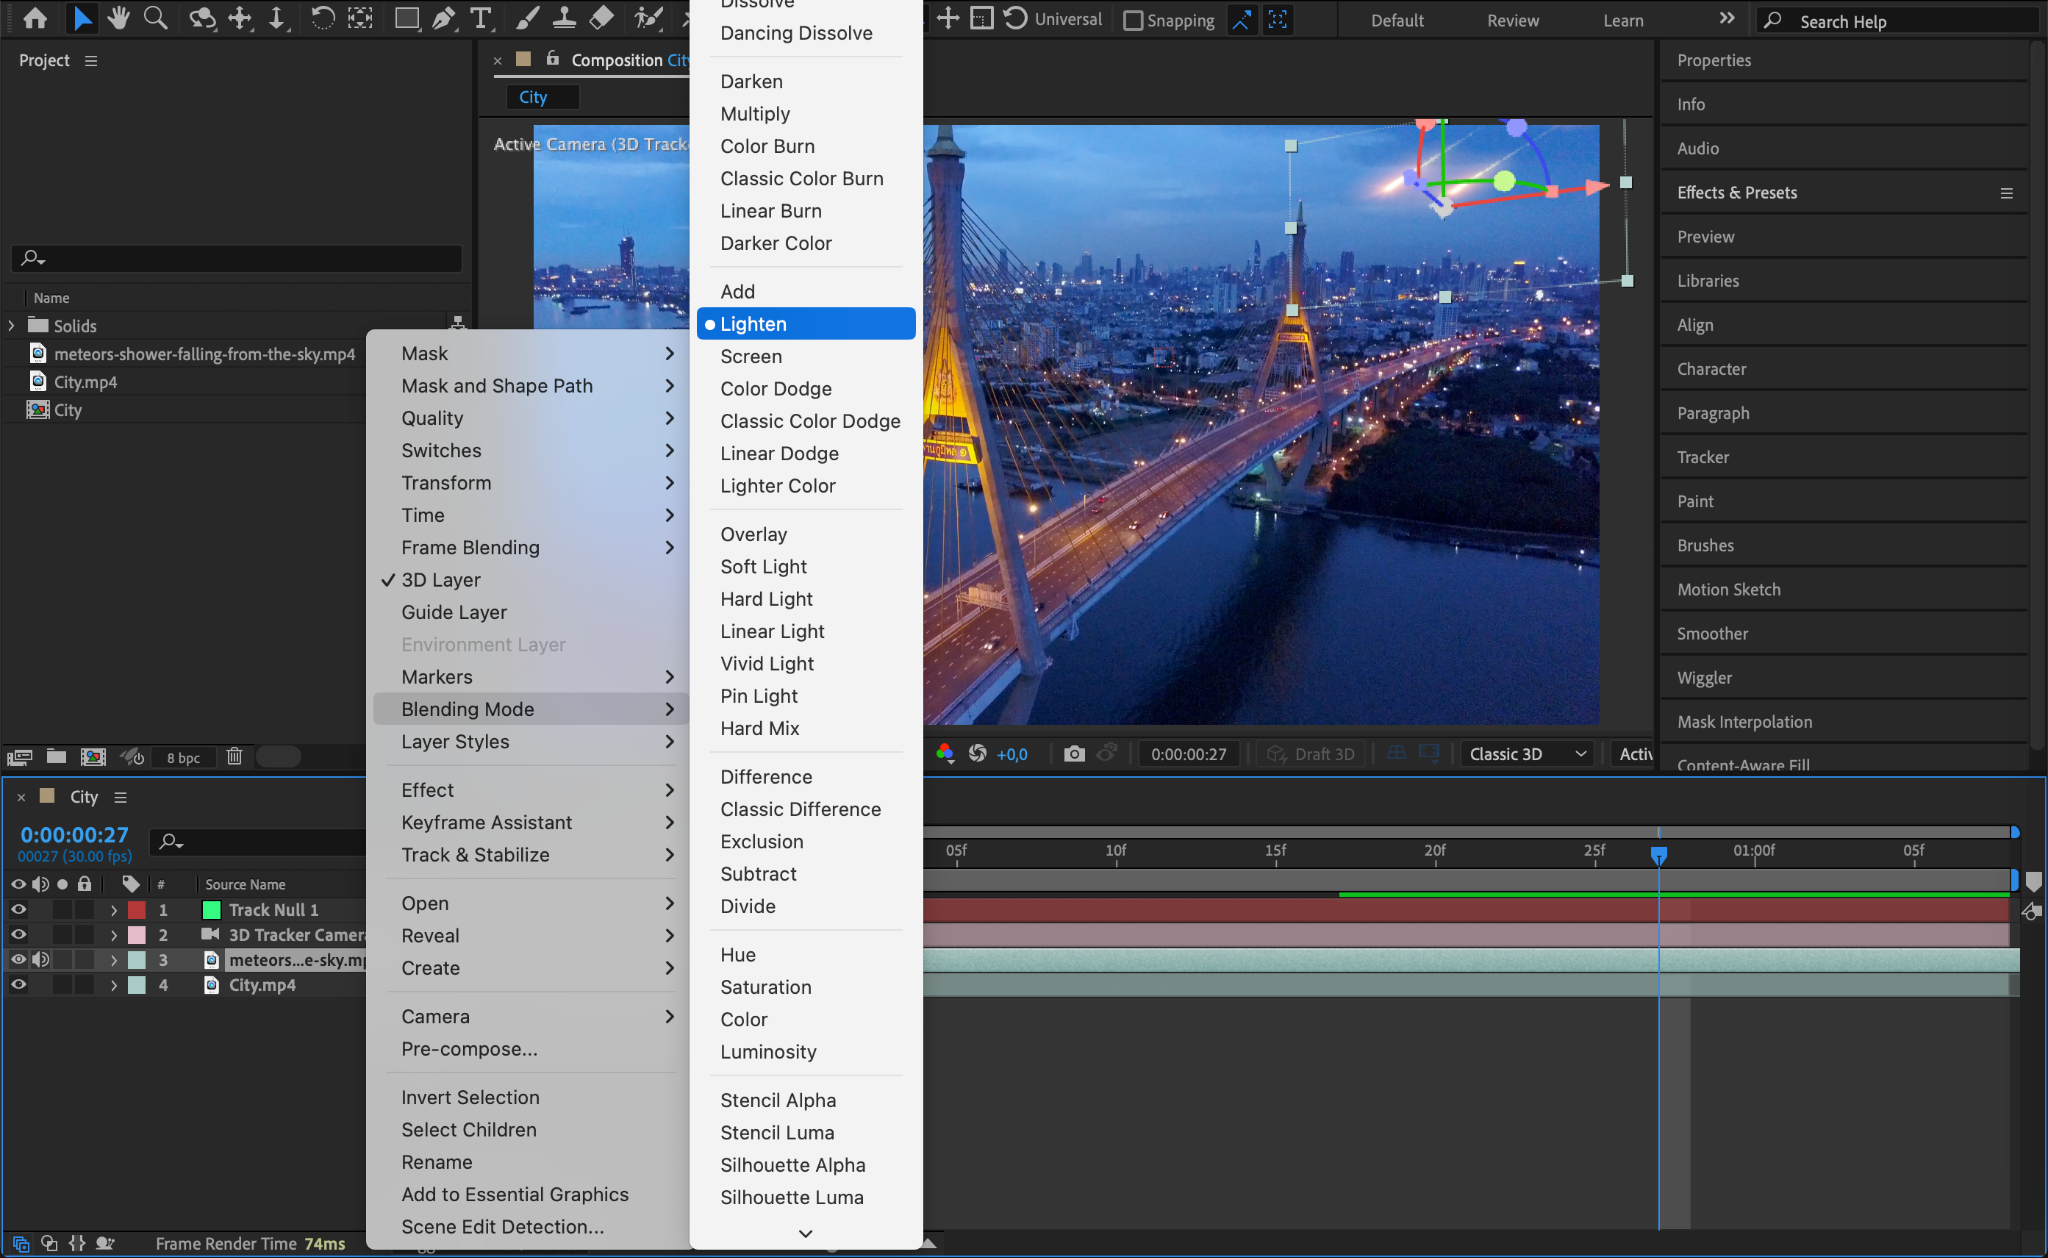
Step 6: Set the Blending Mode
Change the meteor layer’s blending mode to Lighten. This helps the meteor integrate with the lighting of the scene, creating a more natural look.
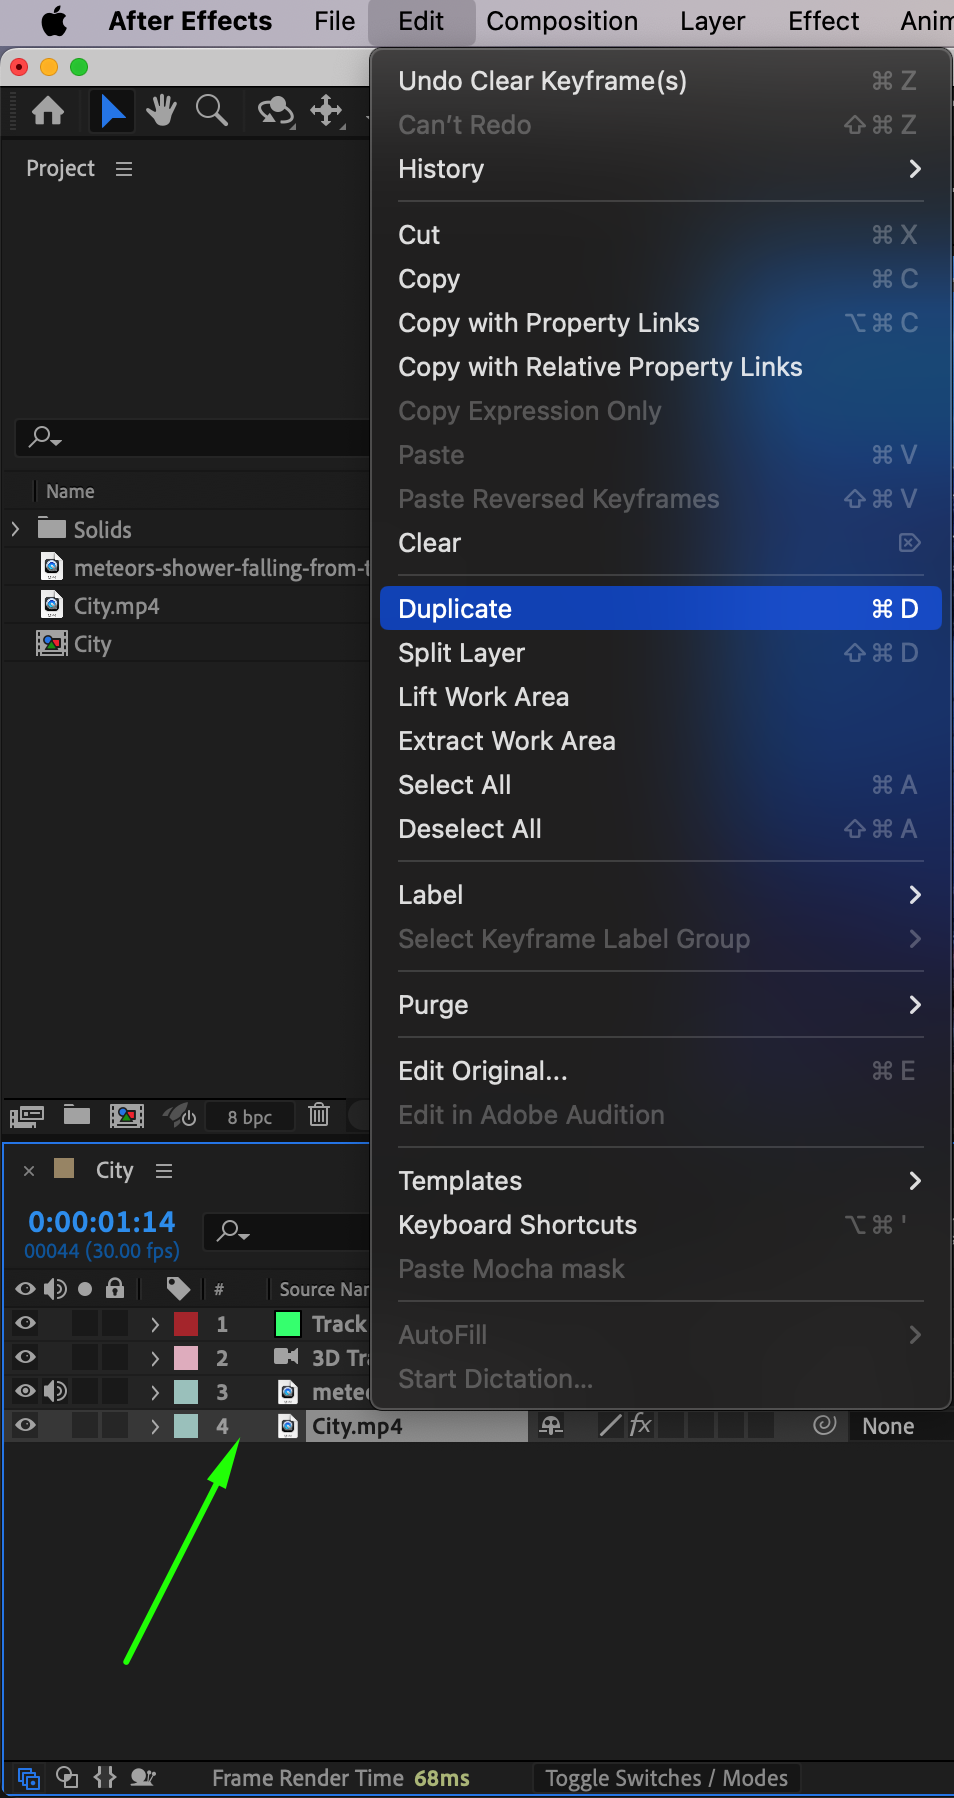
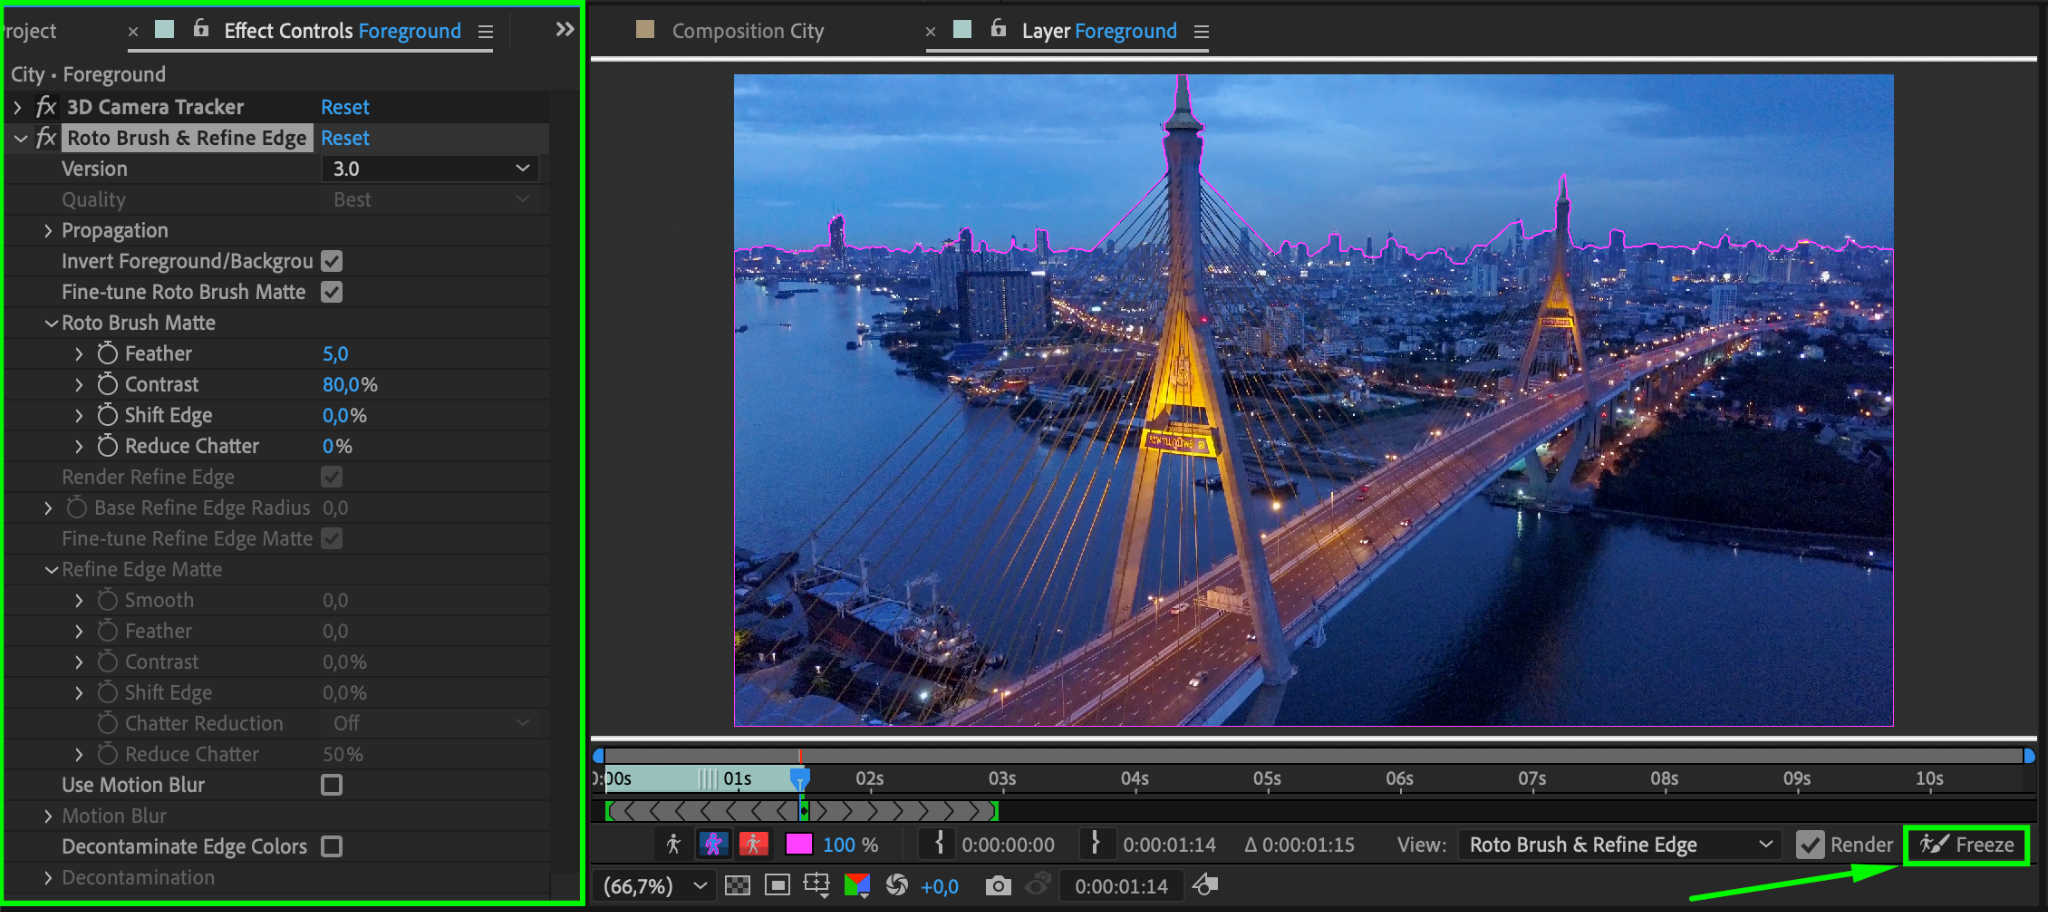
Step 7: Add a Foreground Layer Using the Roto Brush
Duplicate your main footage layer and rename the duplicate to “Foreground”. Move it above the meteor layer. Apply the Roto Brush Tool (Alt/Option + W) to this layer to isolate the foreground elements, such as trees or buildings, while excluding the sky. Freeze the selection to lock the mask.
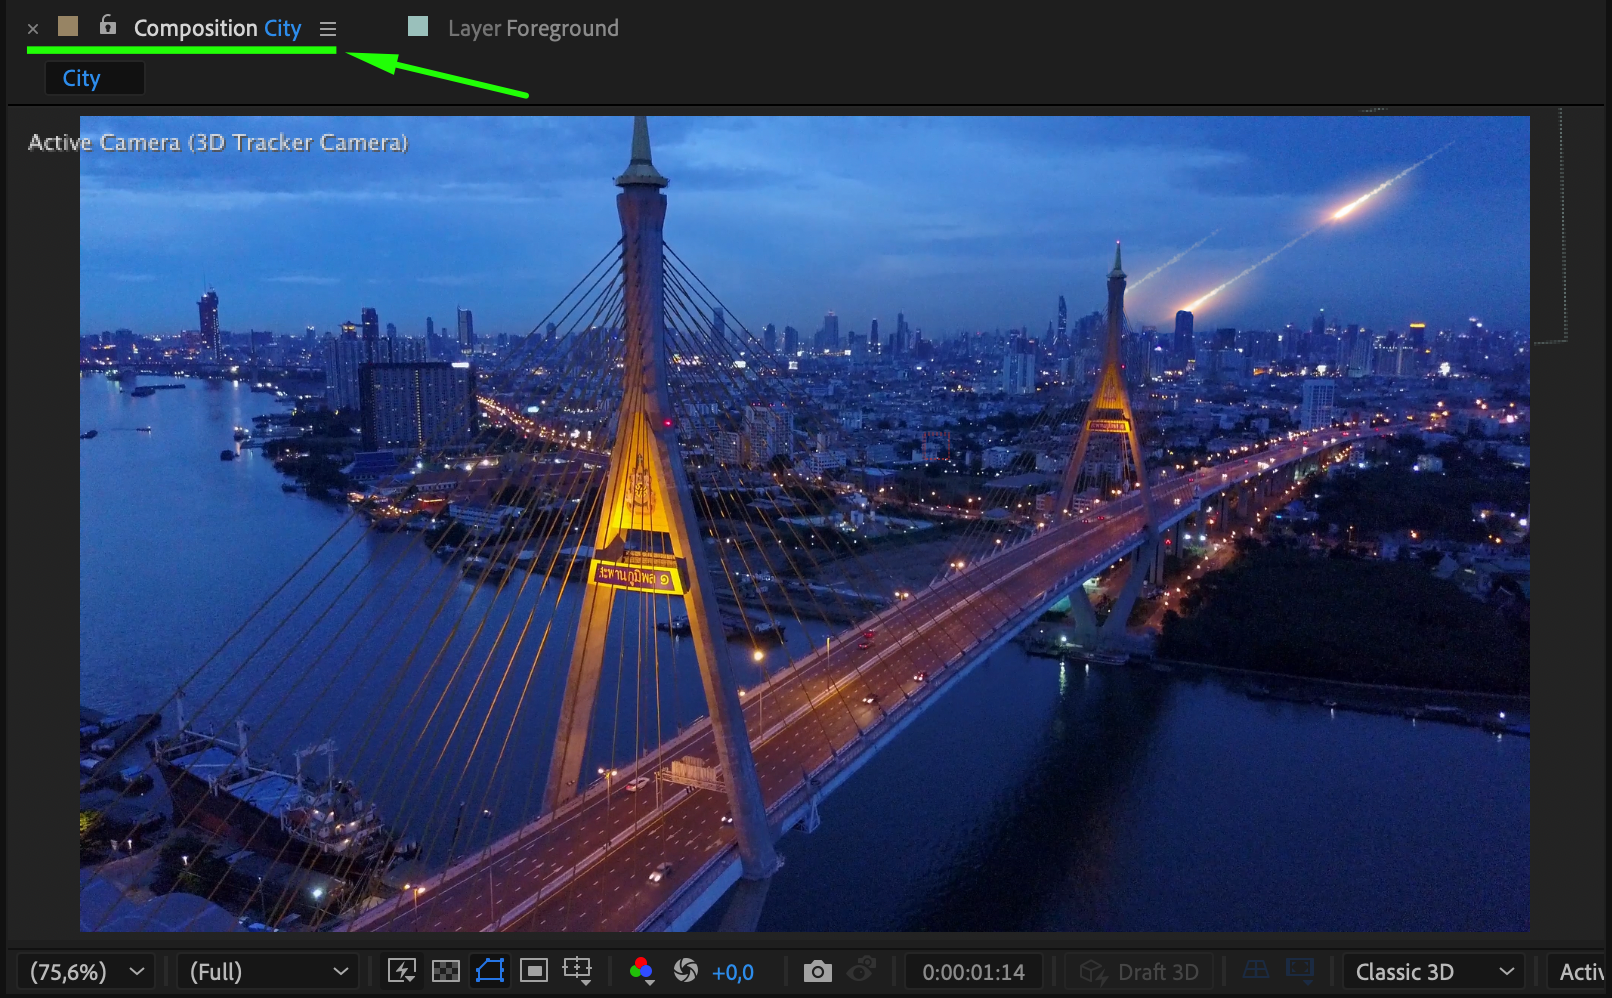
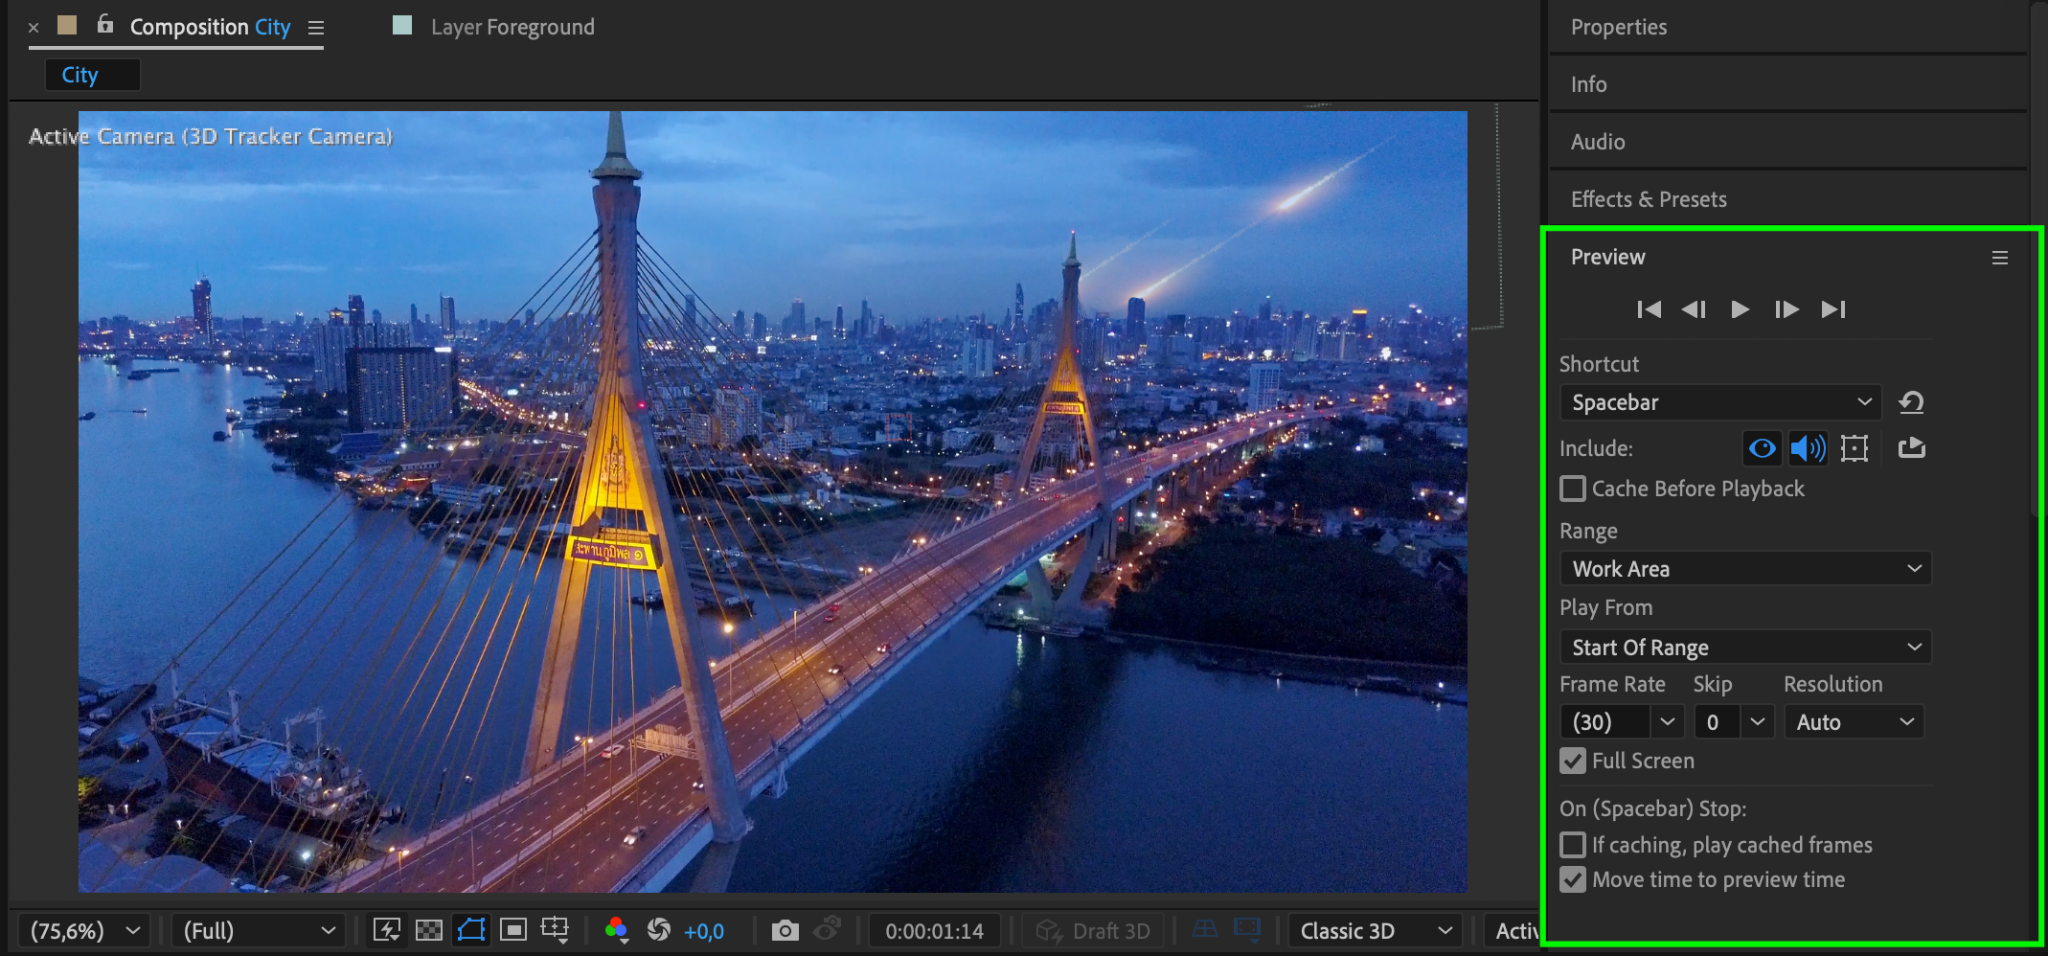
Step 8: Fine-Tune and Preview the Effect
Preview the scene to ensure all layers, effects, and movements look cohesive. Make adjustments as needed, such as refining the meteor’s trajectory, tweaking the roto brush selection, or enhancing the blending mode.
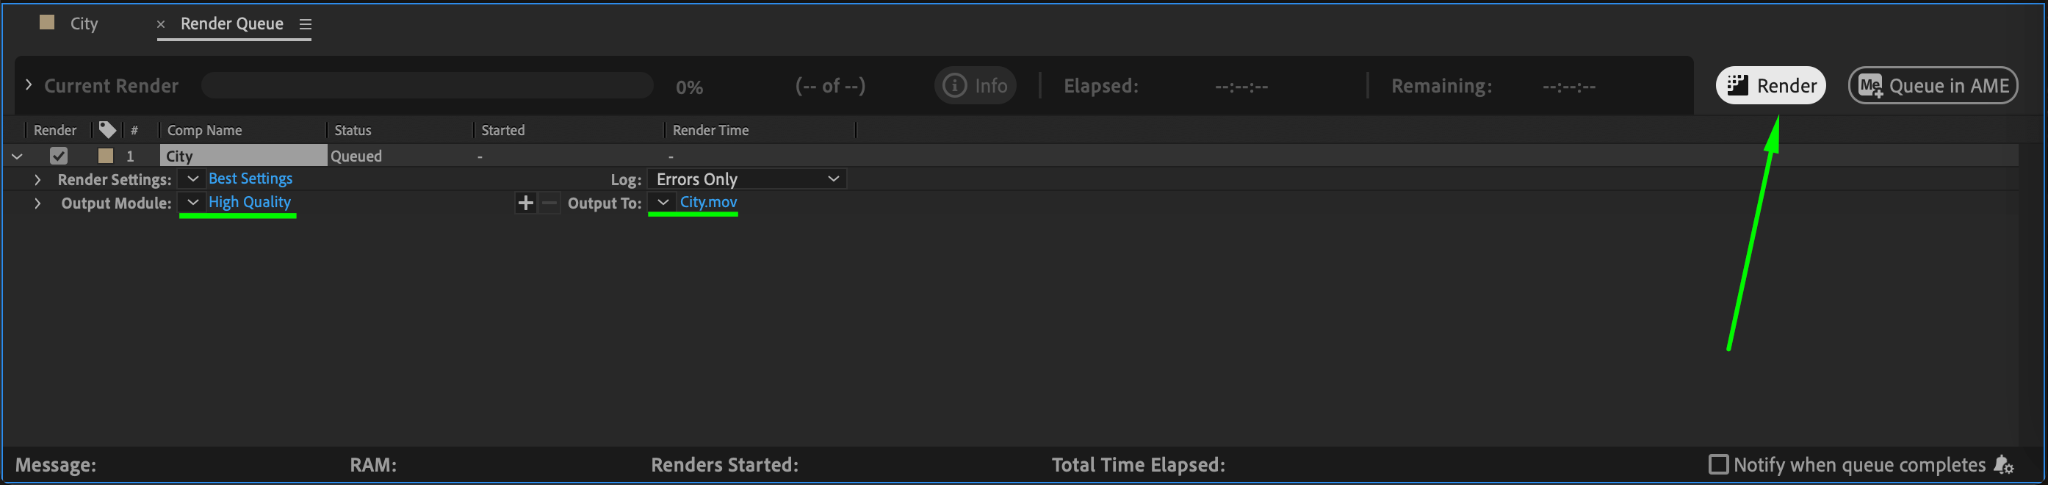
Step 9: Render the Final Composition
Once satisfied with the effect, render the project. Go to Composition > Add to Render Queue. Choose the desired format and quality settings, then click Render.

Conclusion
Creating a meteor effect in After Effects involves a combination of techniques, including 3D camera tracking, keying, and layering. By following these steps, you can produce a realistic meteor effect that adds excitement and drama to your projects.
Our Bestsellers


