A Complete Guide to Creating a Montage in After Effects
Introduction to Creating a Stunning Montage in After Effects
Montages are a powerful storytelling tool, combining multiple clips to create a dynamic visual experience. Whether you’re working on a film, a music video, or a promotional project, a well-crafted montage can captivate your audience and communicate a compelling message. Adobe After Effects is the perfect software to bring your montage vision to life, offering endless creative possibilities through its wide range of tools and features. In this guide, we will explore the step-by-step process to create a professional-looking montage using After Effects.
Get 10% off when you subscribe to our newsletter

Step-by-Step Guide to Create a Montage in After Effects
Creating a montage in After Effects allows you to combine footage, add effects, and create smooth transitions for a captivating final product. Follow this detailed step-by-step guide to get started on your montage project.
Step 1: Import Your Footage
Begin by importing all the video clips, images, and audio files you plan to use for your montage. To do this, go to File > Import > File and select your media. You can also drag and drop files directly into the Project panel. 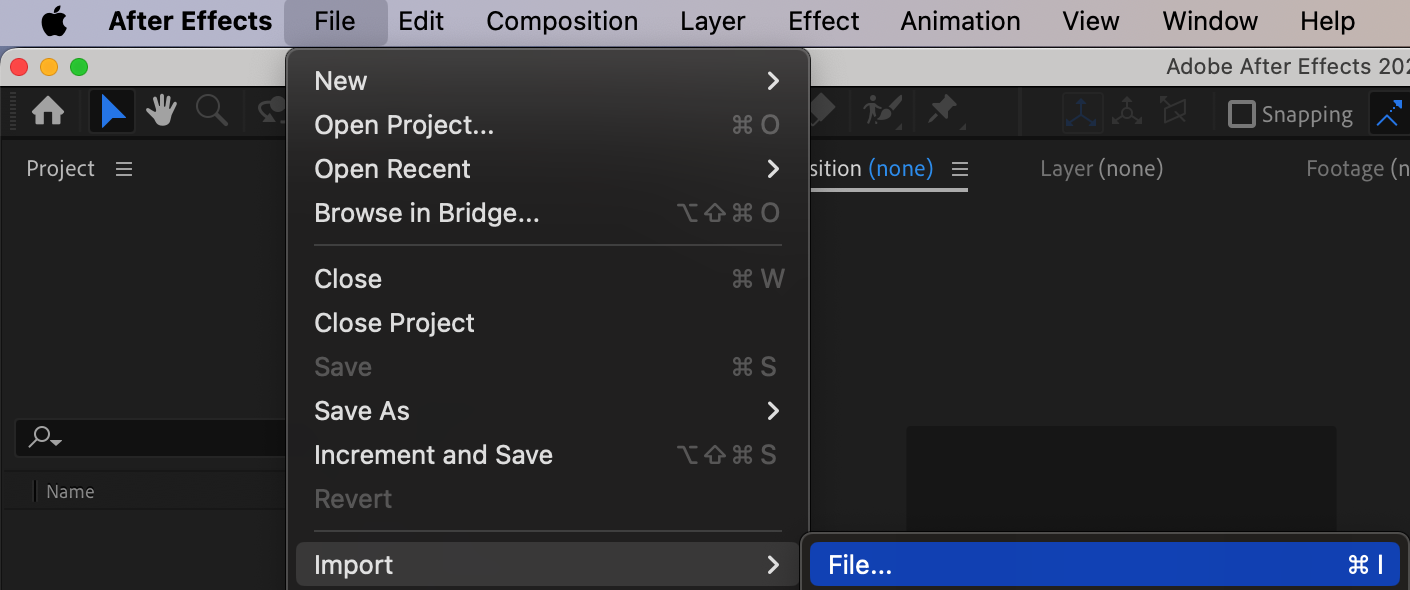
Step 2: Create a New Composition
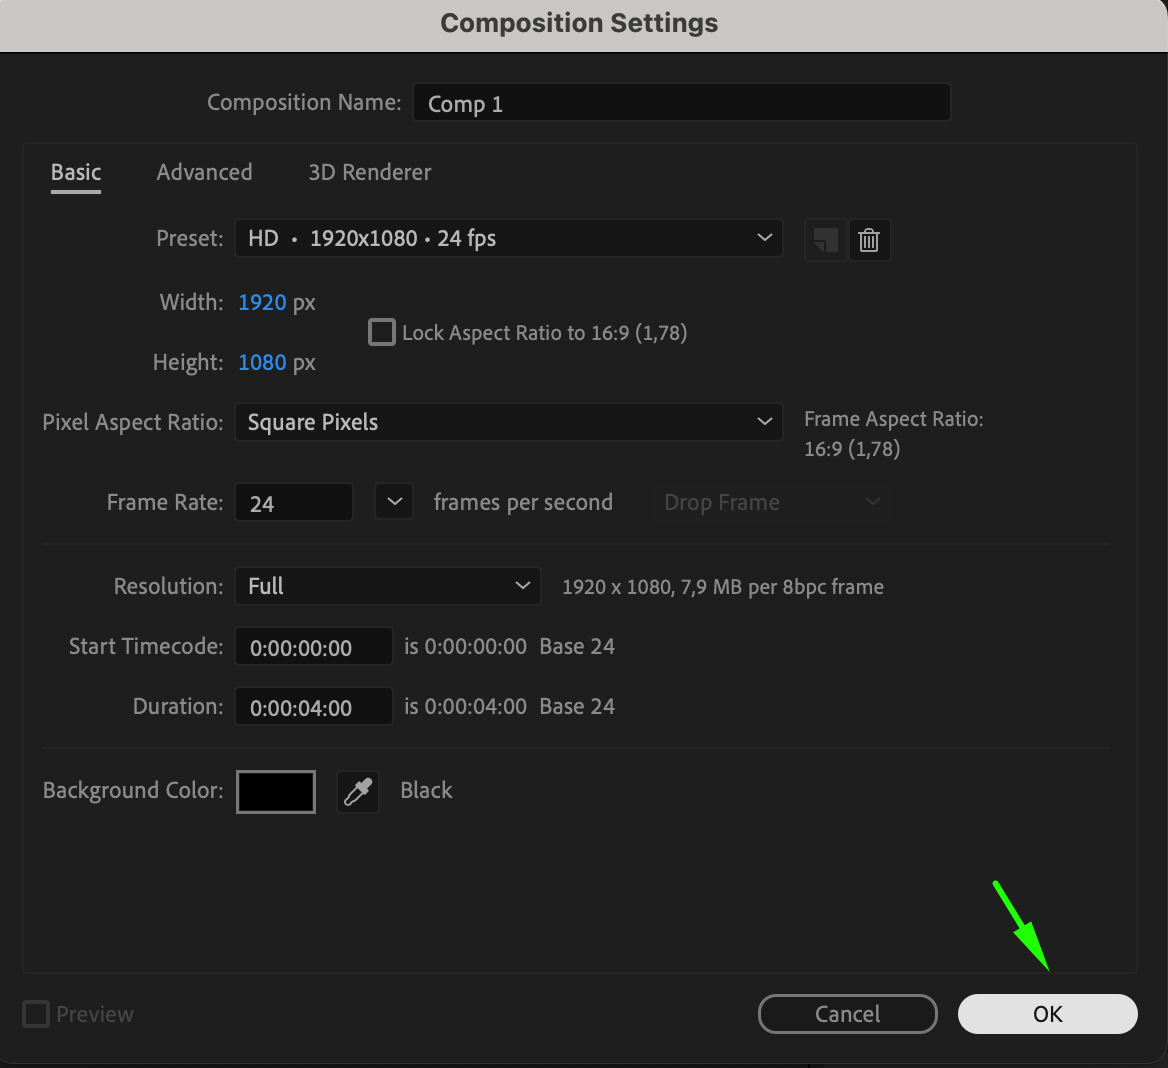
Next, you need to create a composition, which will act as the canvas for your montage. Go to Composition > New Composition and set the resolution, frame rate, and duration according to your project needs. For consistency, ensure your composition settings match those of your footage (e.g., 1080p resolution at 24 frames per second).
 Step 3: Arrange Your Clips on the Timeline
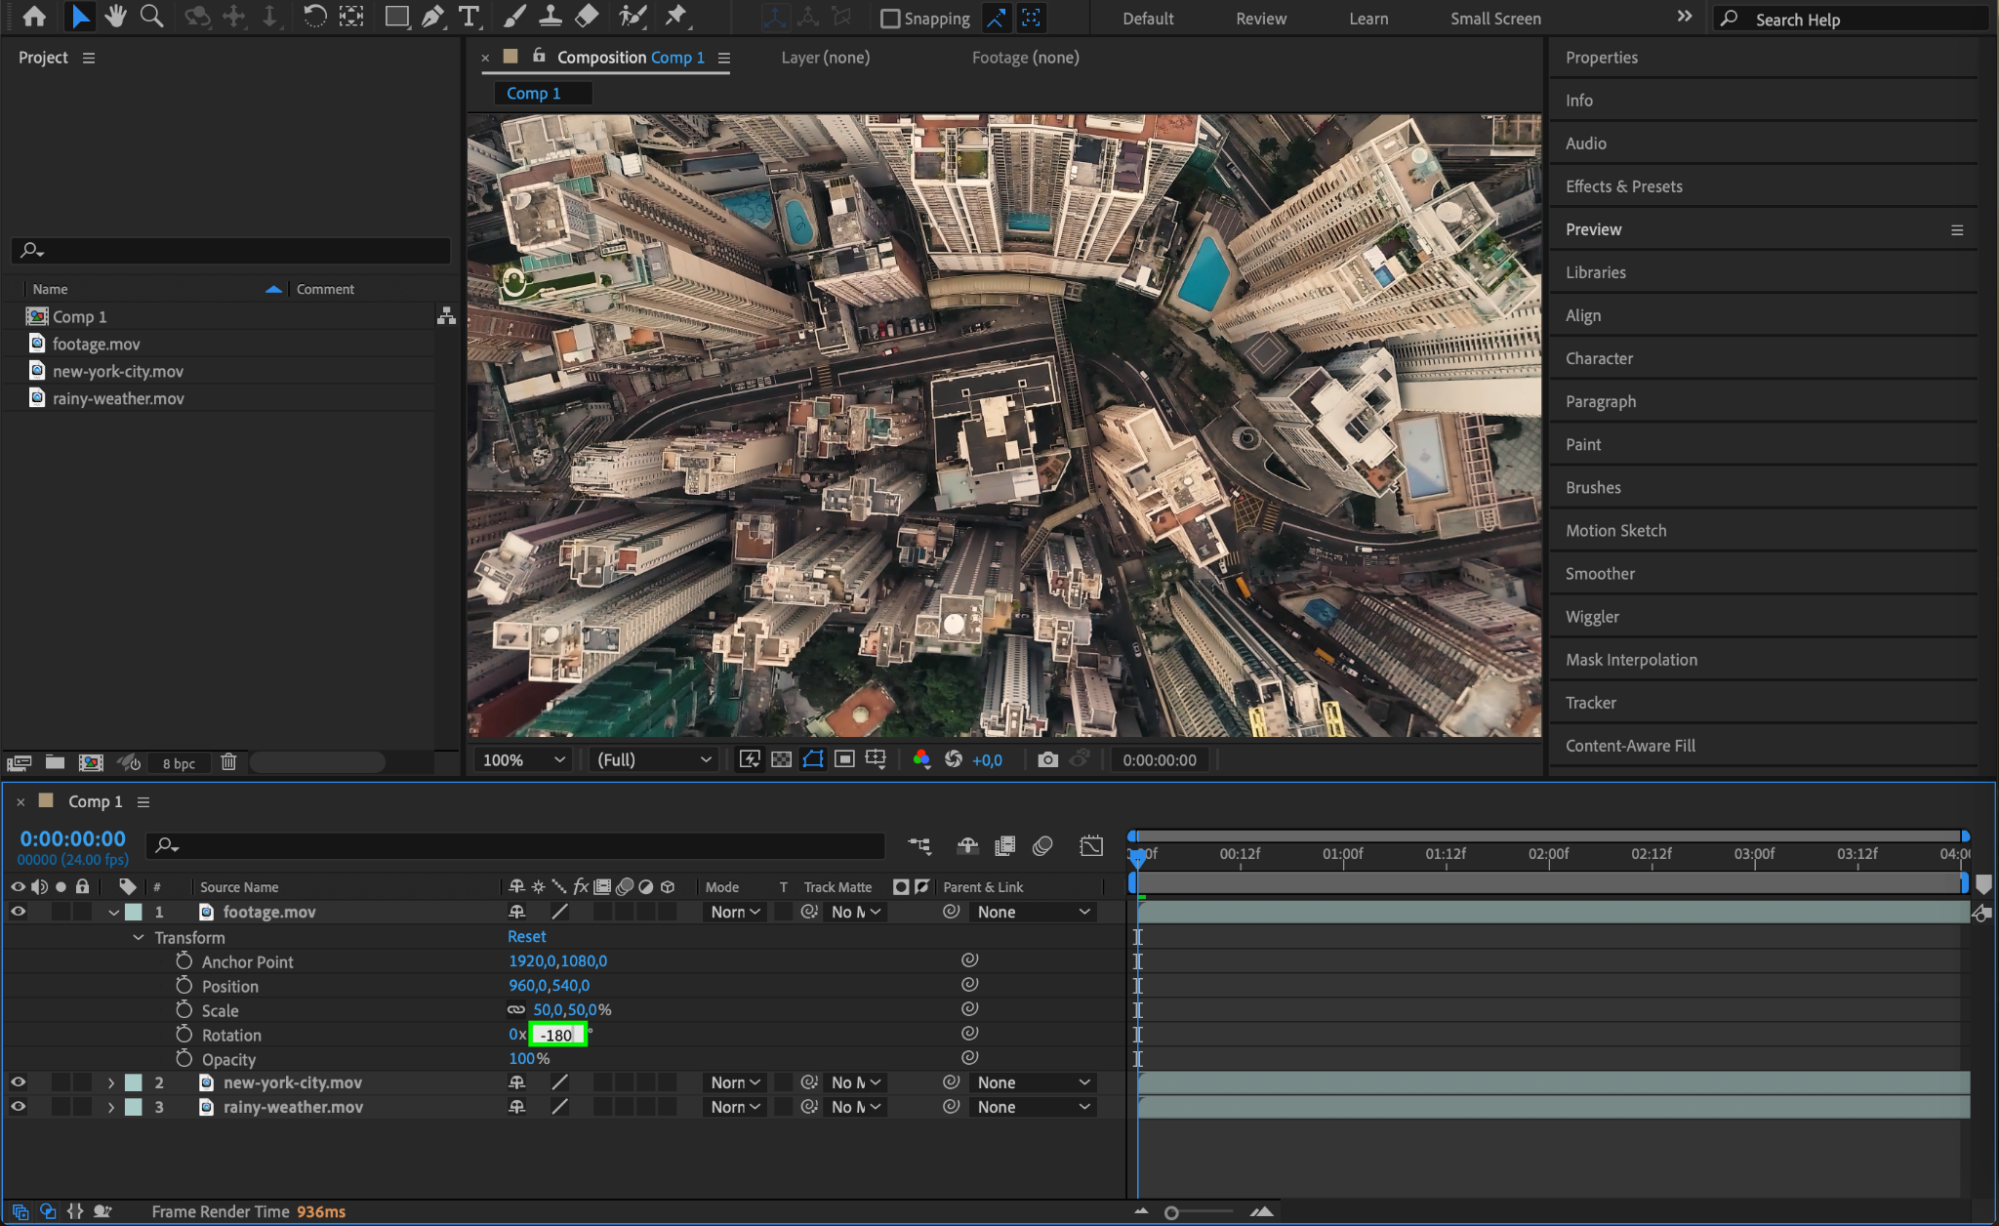
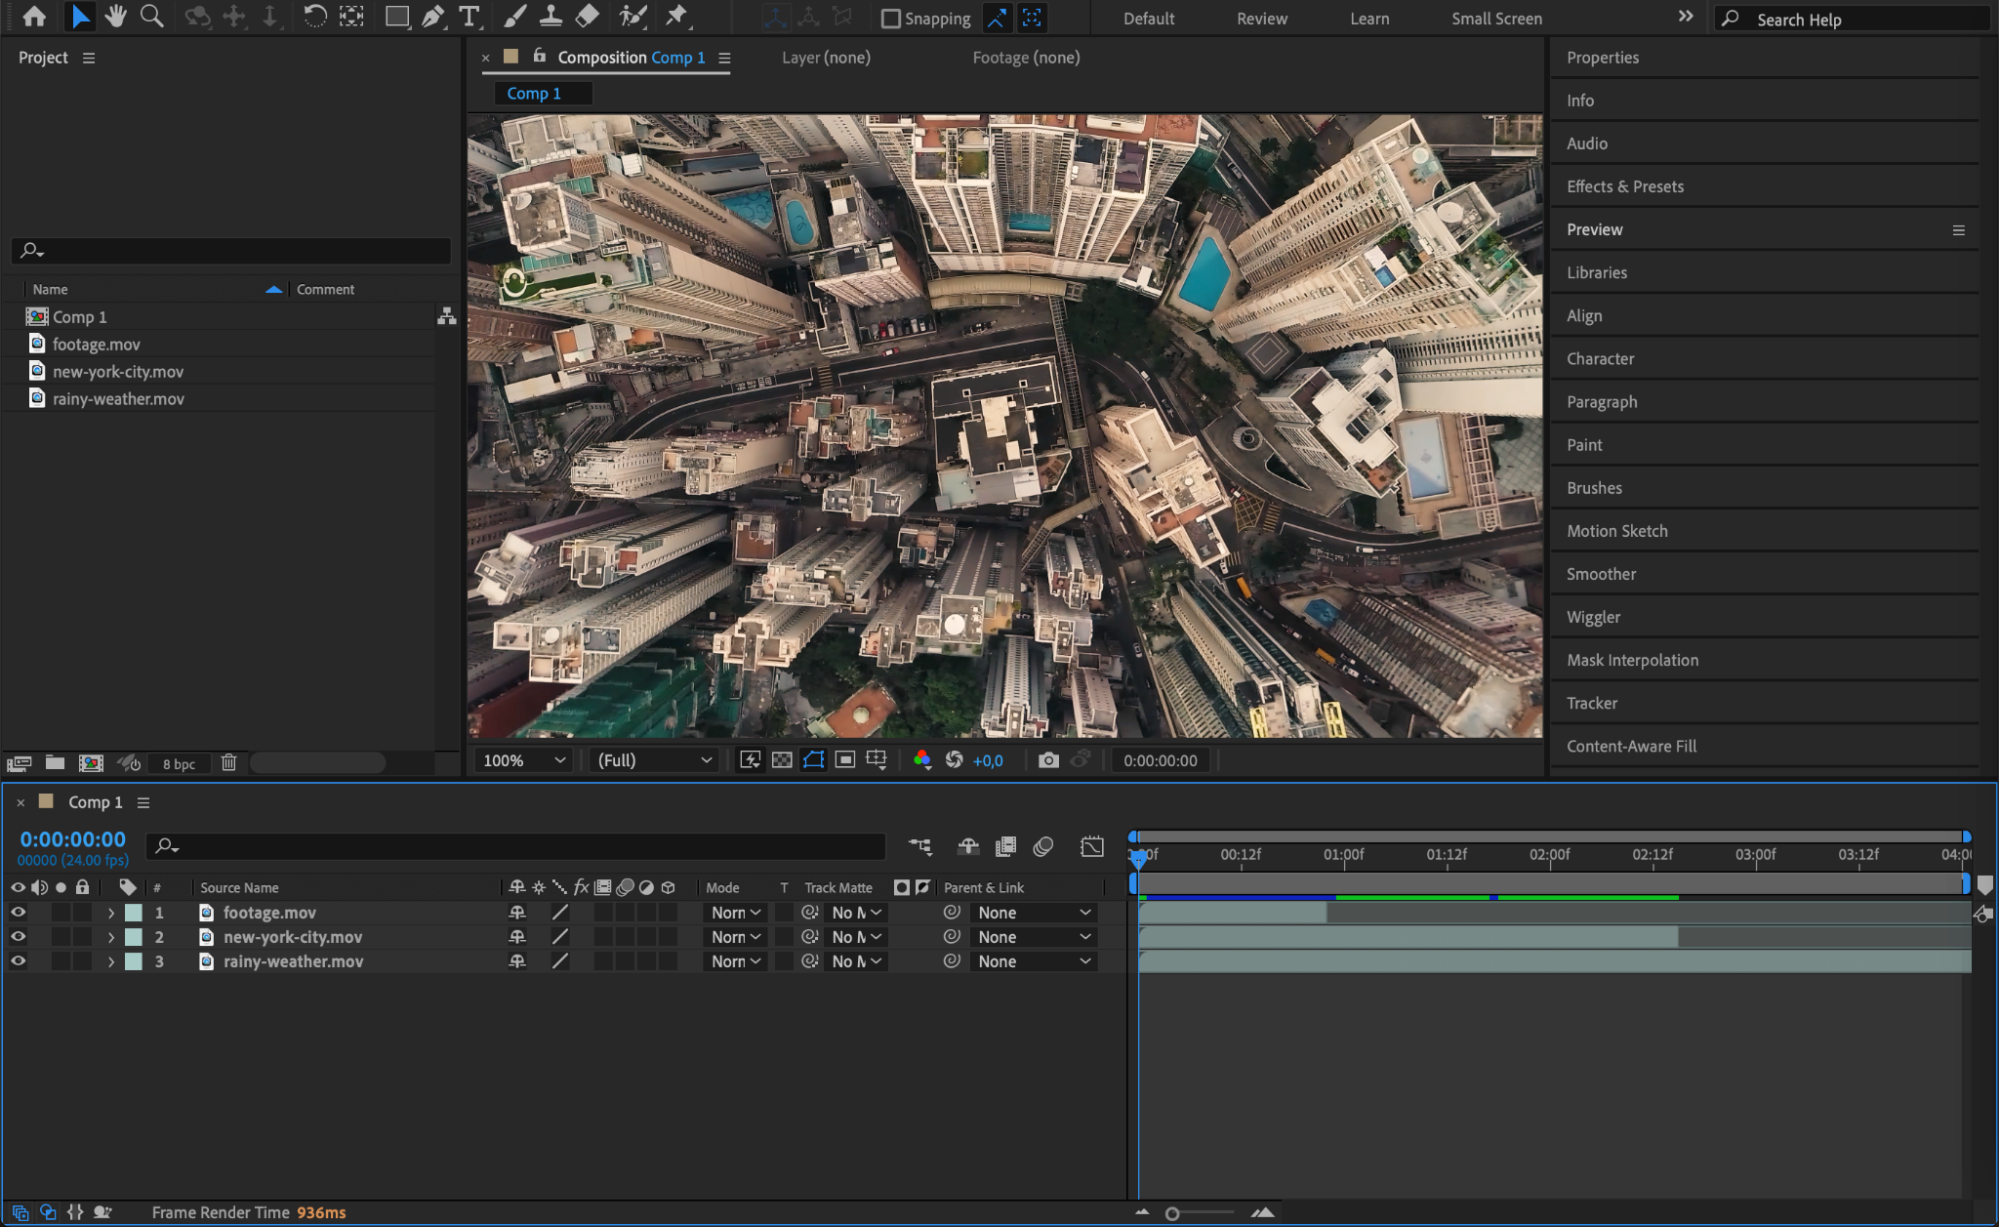
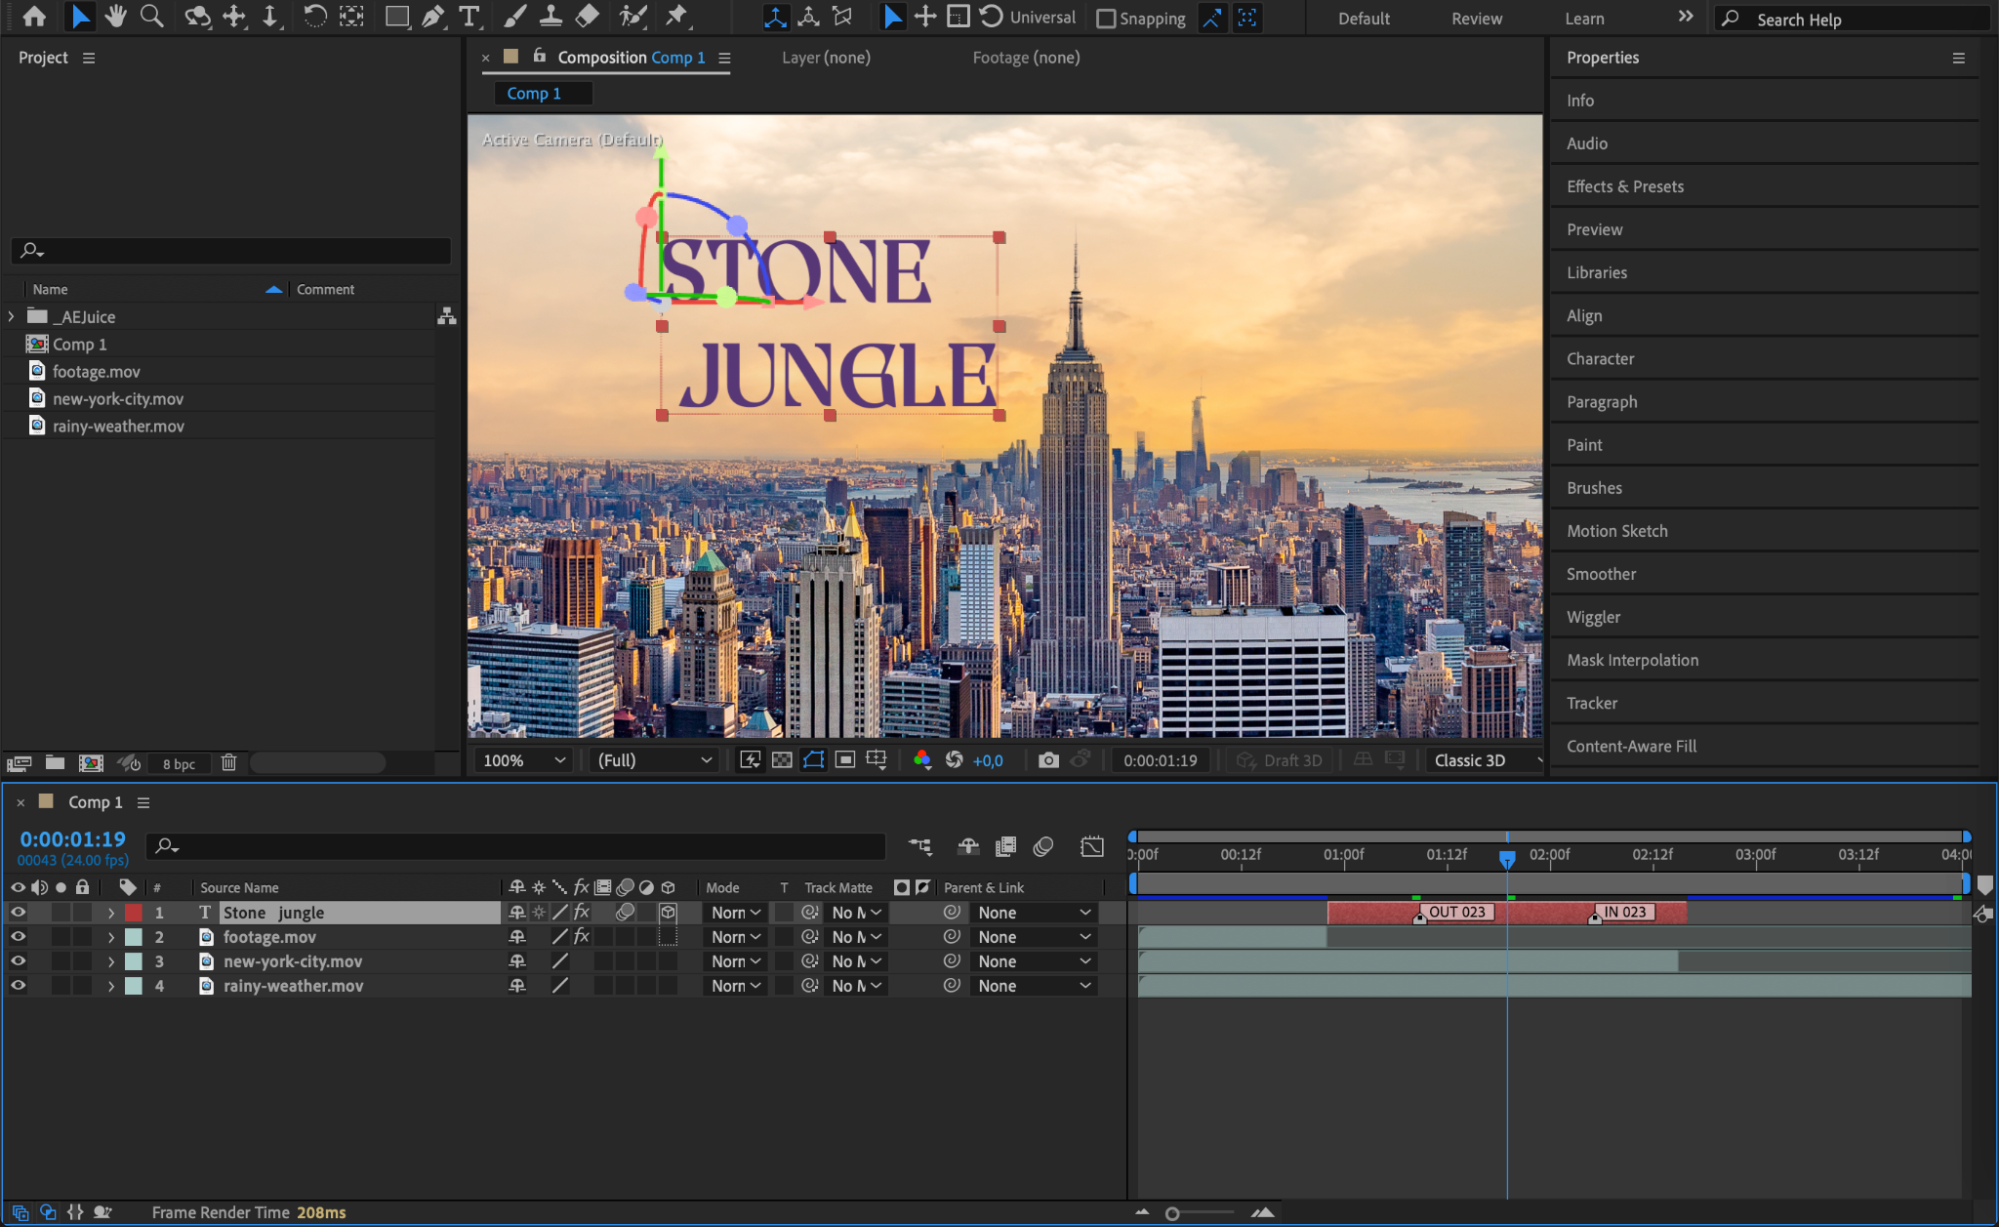
Drag your video clips from the Project panel onto the Timeline. Arrange them in the order you want them to appear in your montage. Use the Transform properties (scale, rotation, and position) under each layer to properly place and resize your clips within the composition. This step lets you determine the visual flow of the montage.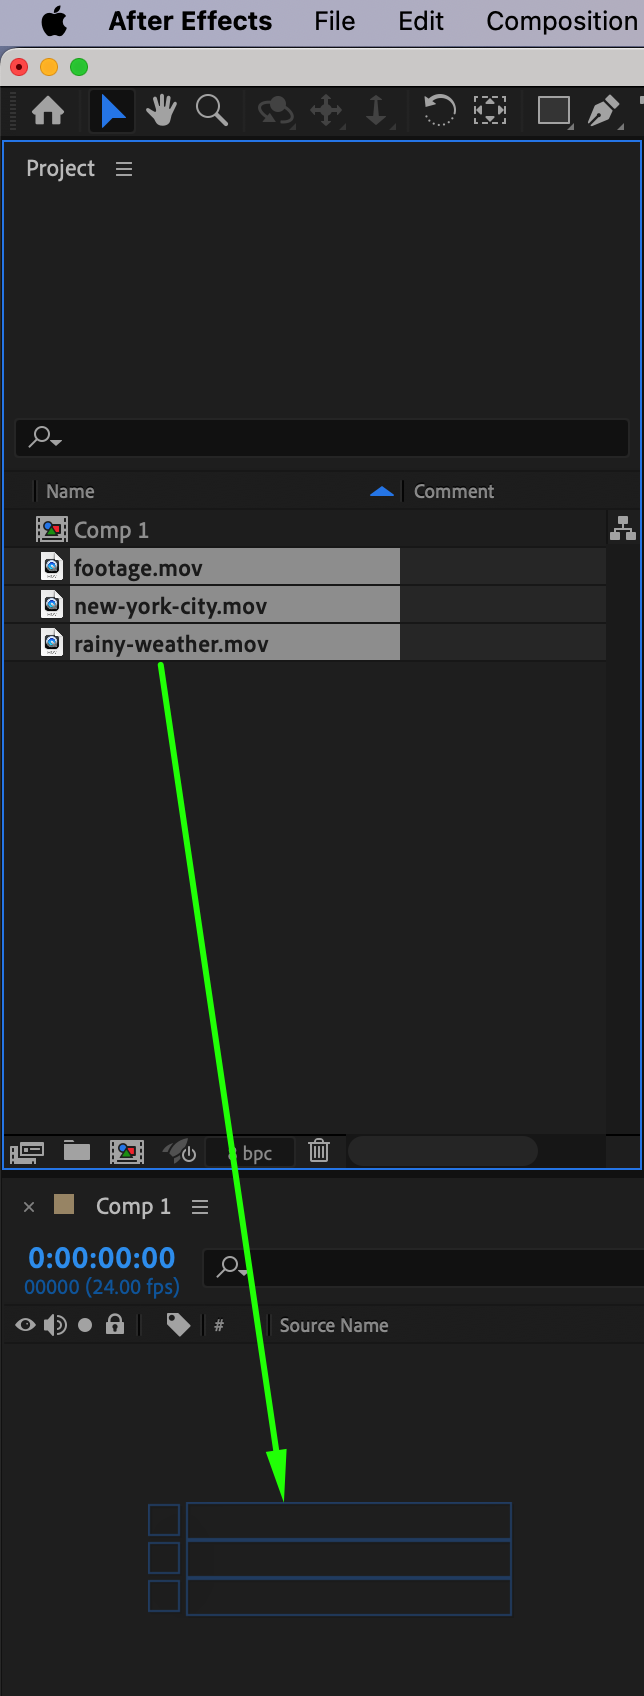
Get 10% off when you subscribe to our newsletter

Step 4: Trim Clips with Precision
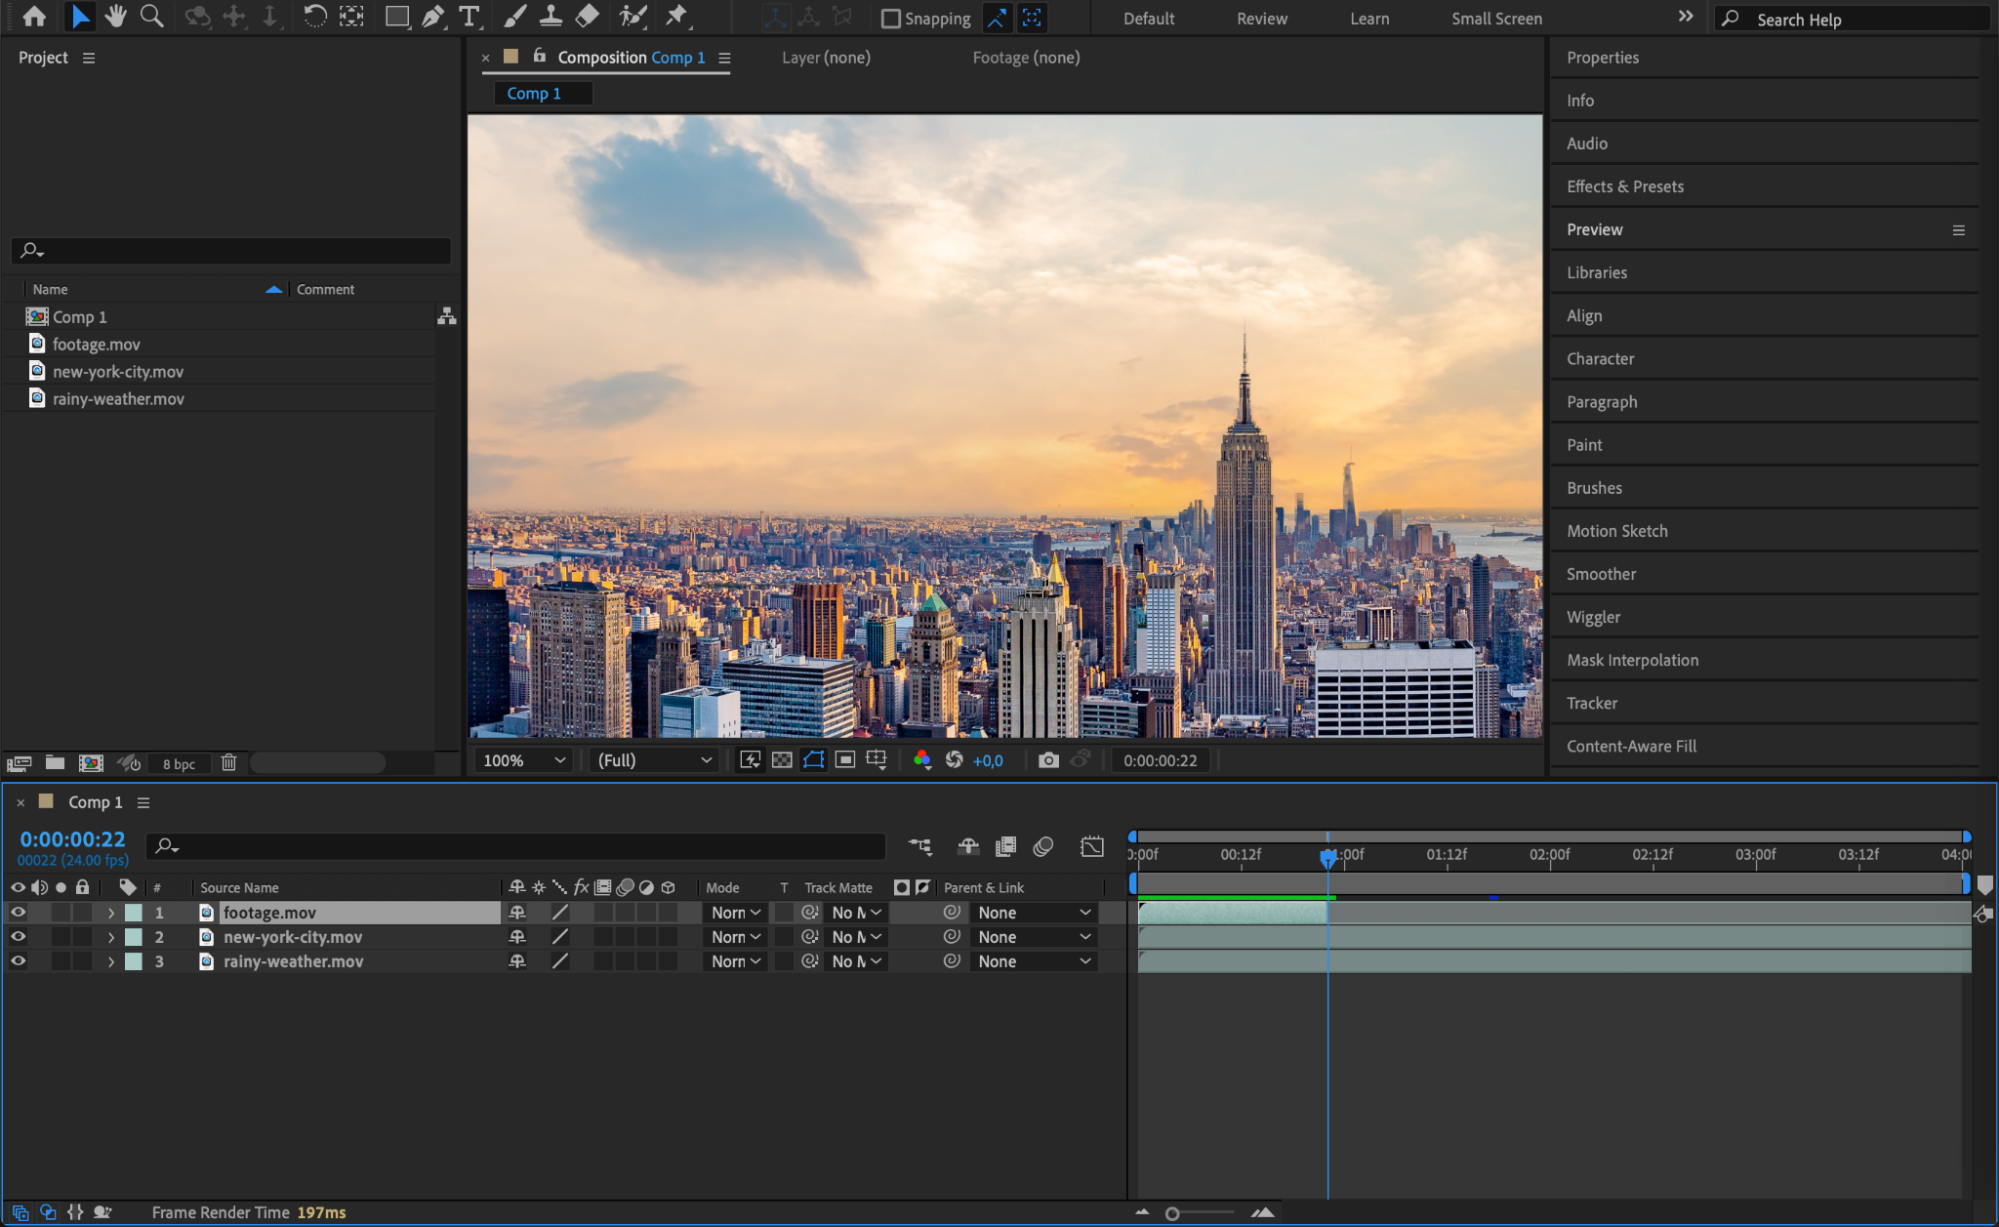
To trim or cut your clips, use the Current Time Indicator (CTI) to navigate through the timeline. Shortcuts like “Alt/Option + [” and “Alt/Option + ]” allow you to quickly trim the in and out points of your layers. This helps you fine-tune the timing of each clip and create a smooth, cohesive montage.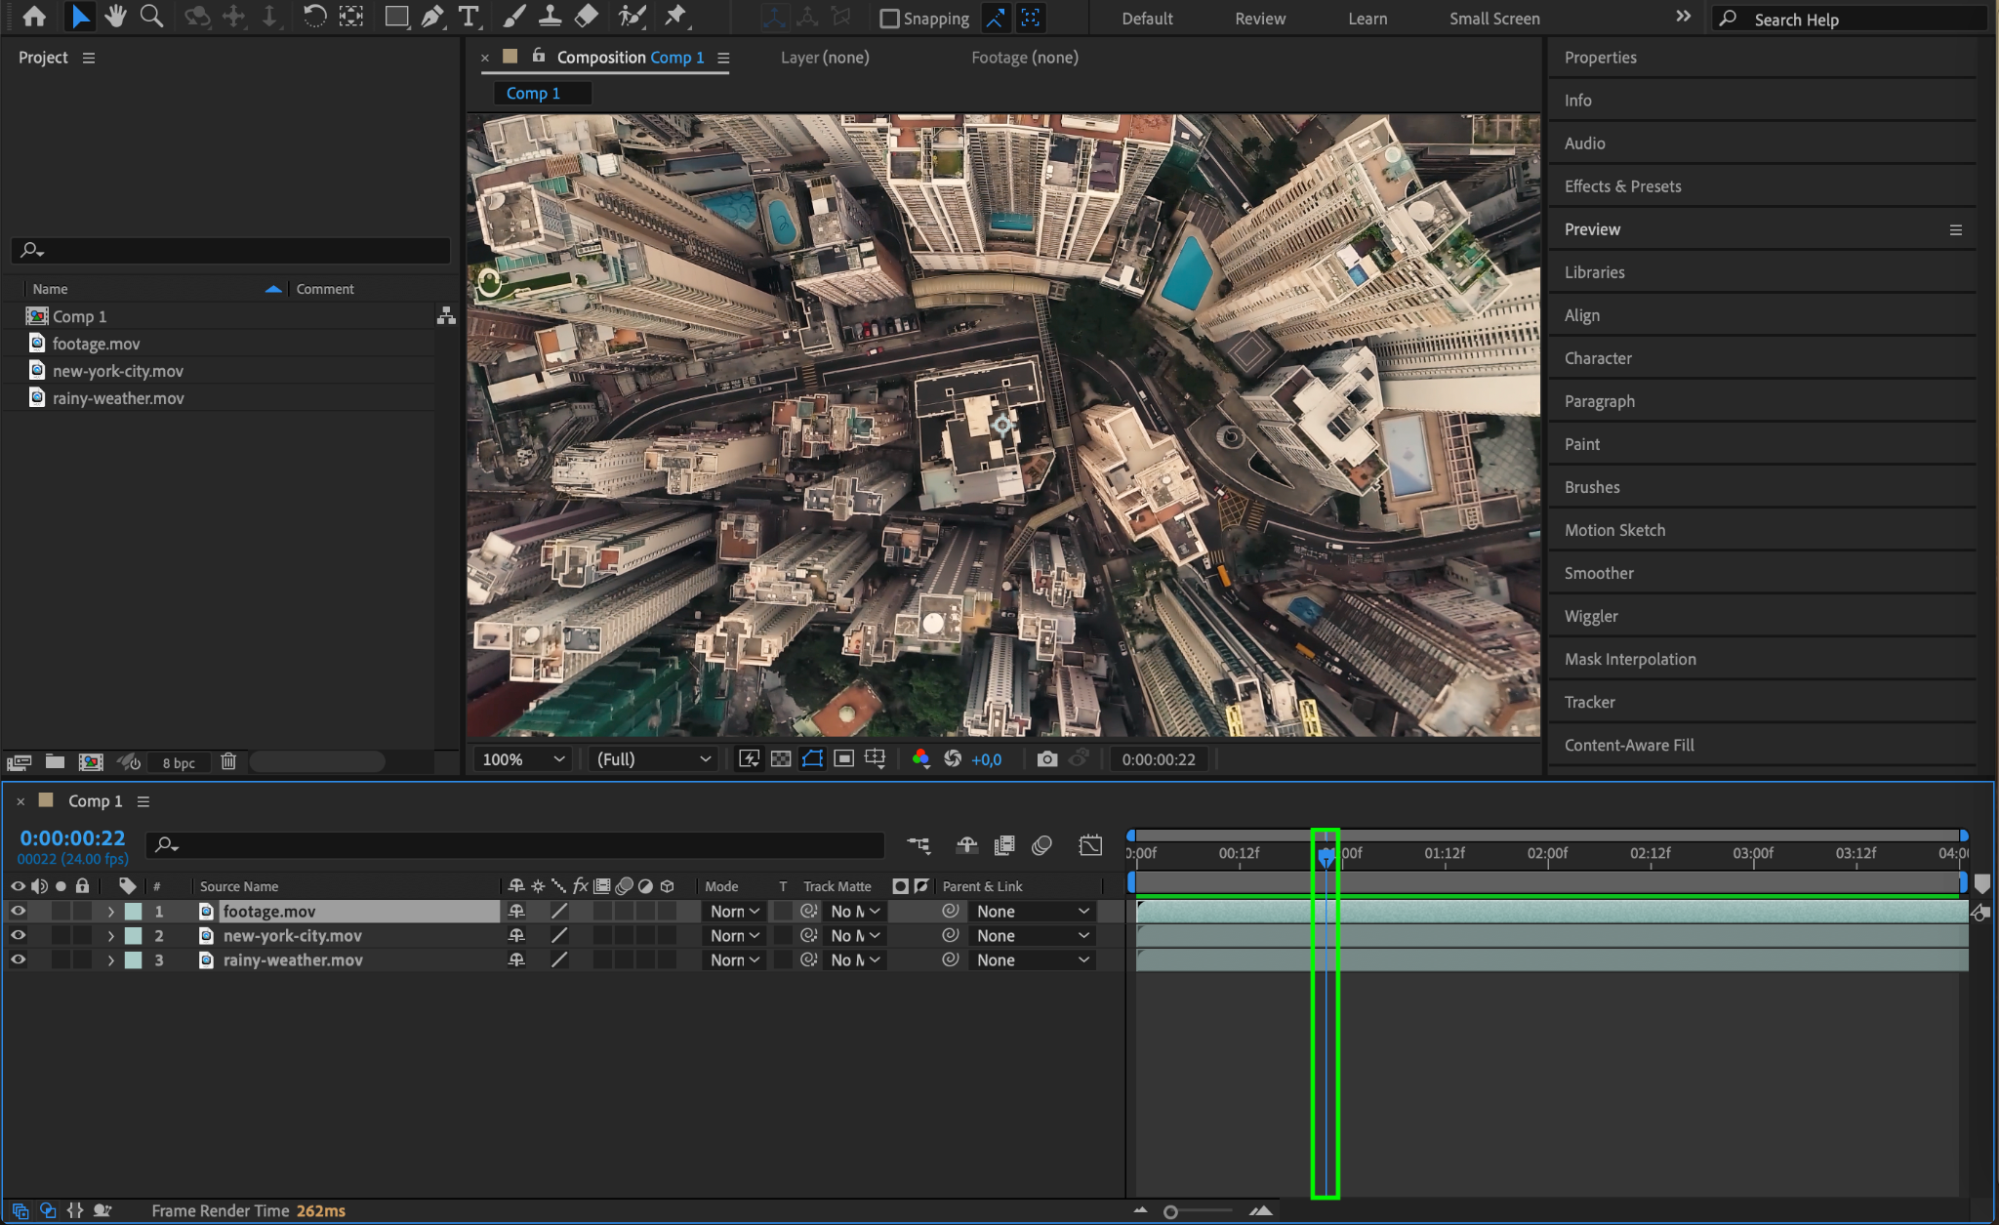
Step 5: Add Effects and Keyframe Animations
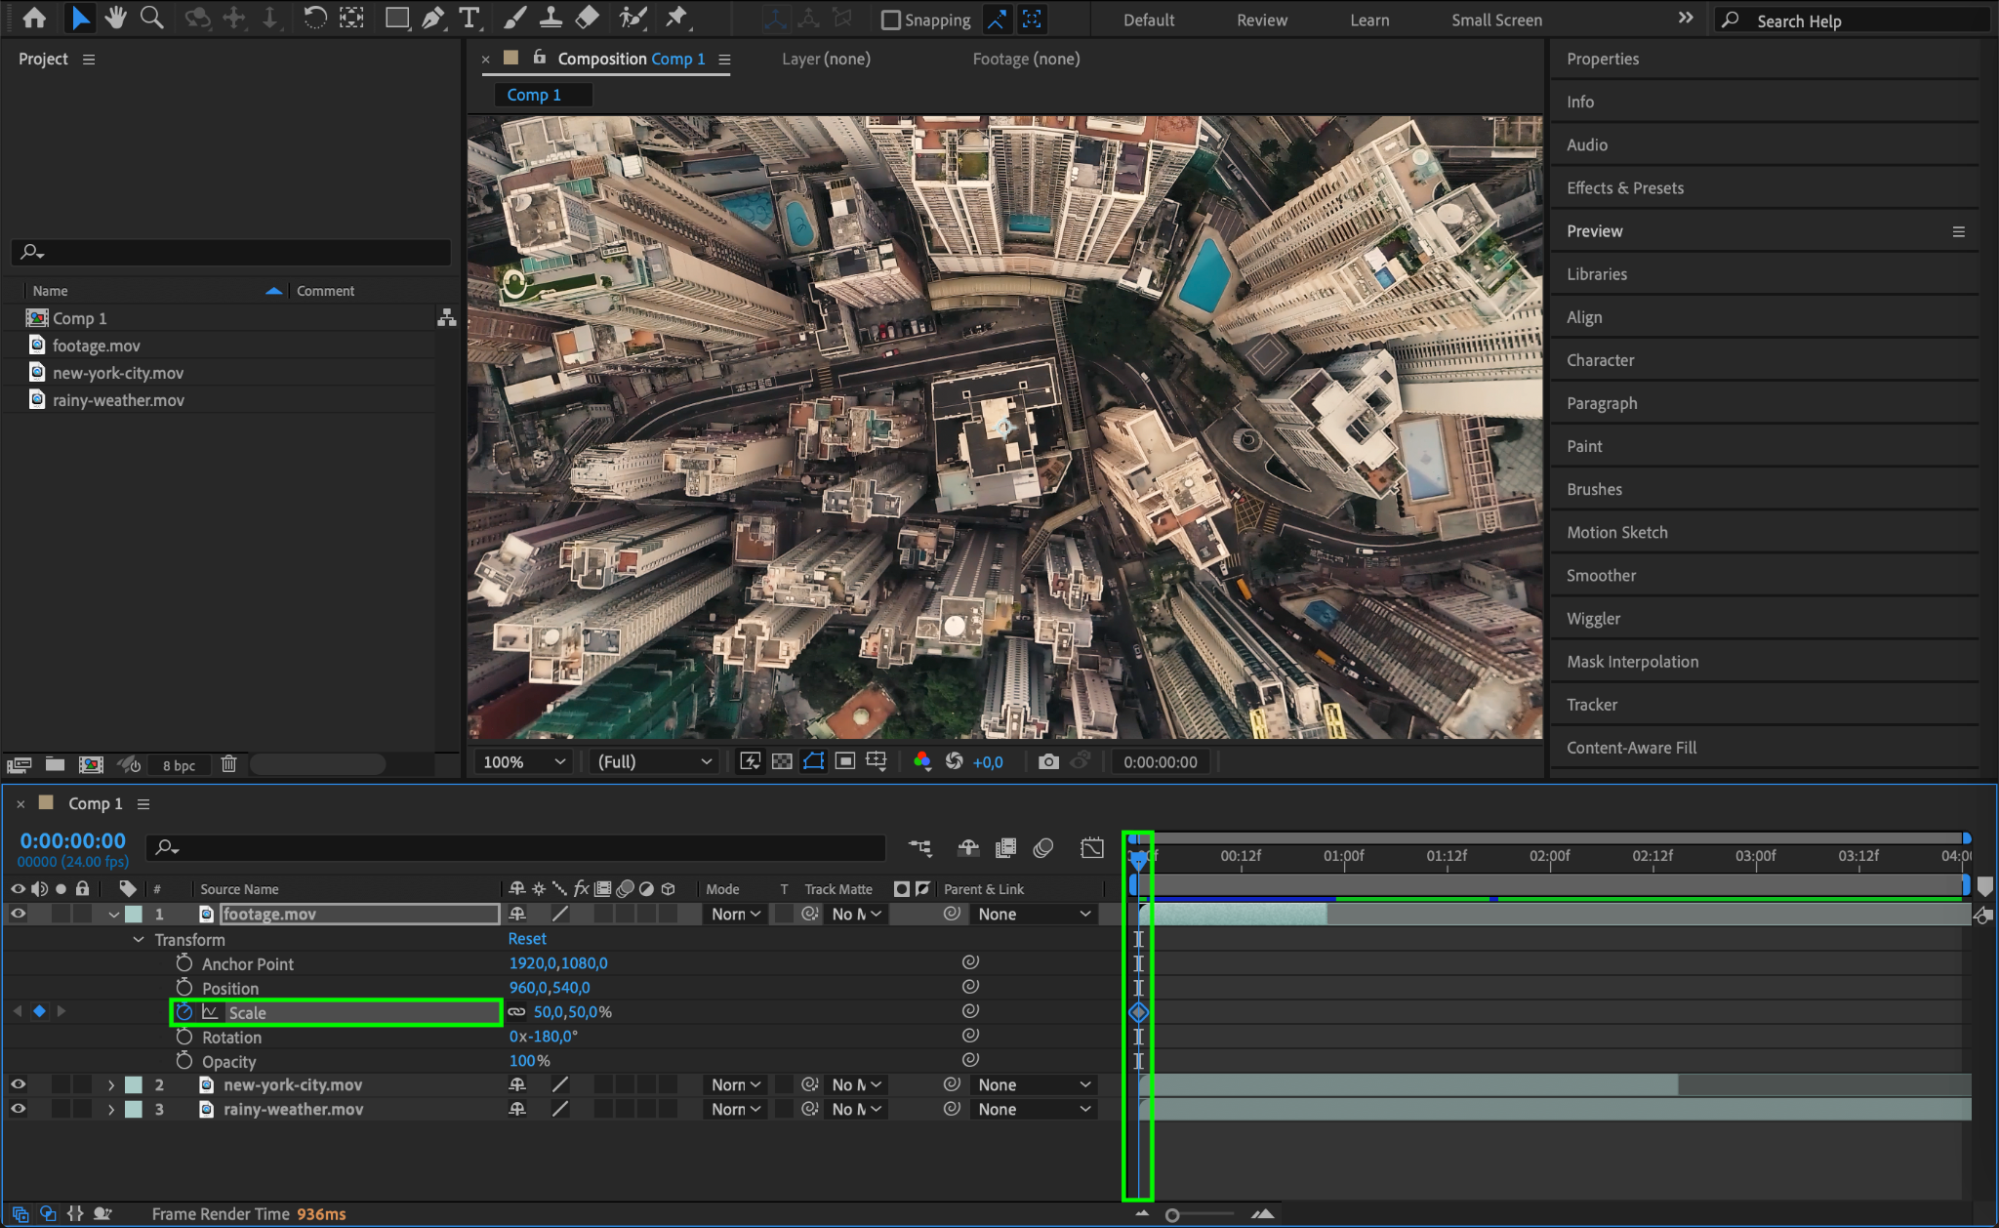
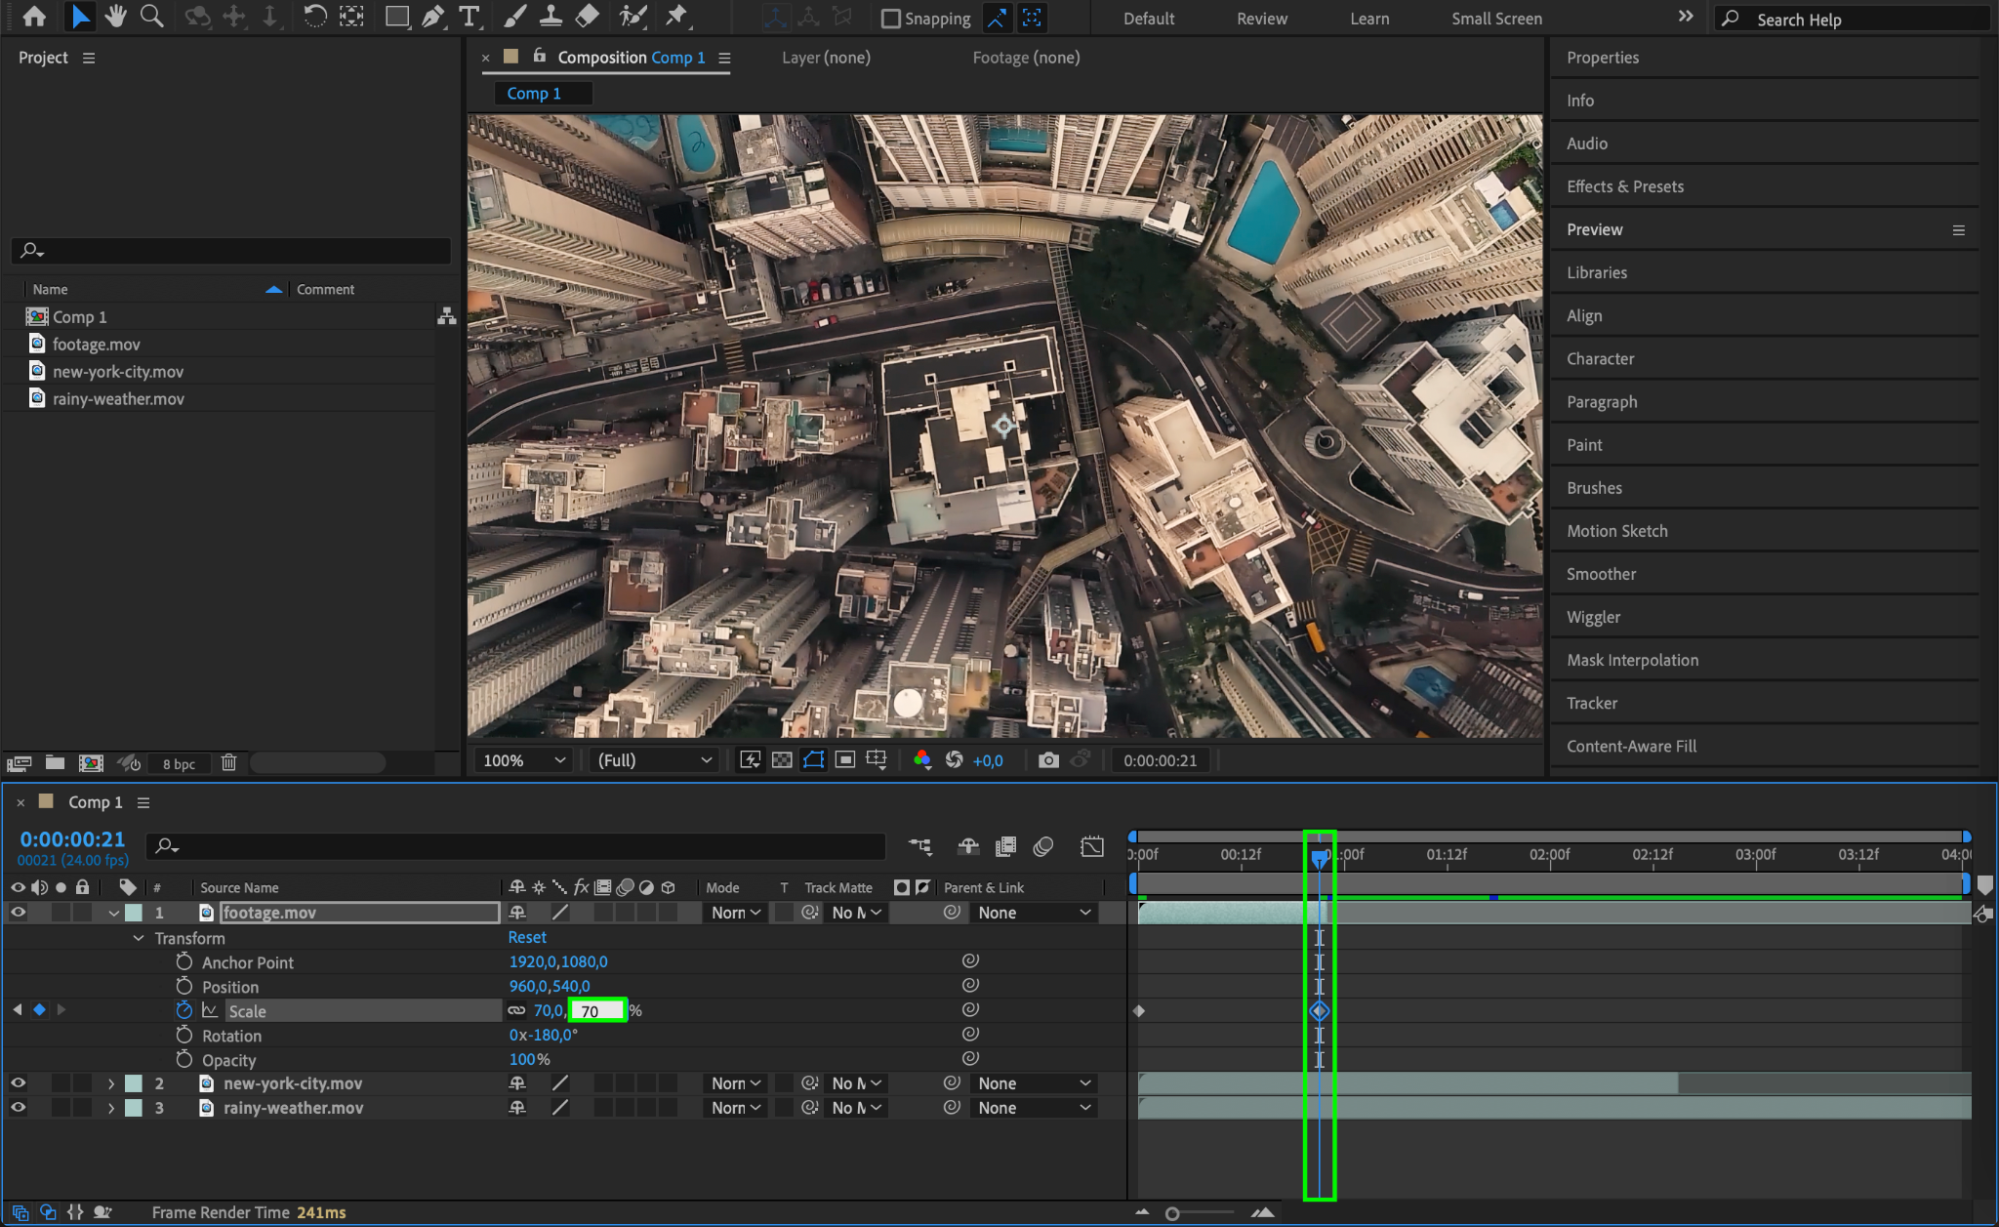
Now it’s time to bring your montage to life with effects. Select a layer, click the stopwatch icon next to any parameter (e.g., opacity, position) to activate keyframe animation, and adjust the value over time to create dynamic movements. You can access built-in effects from the Effects & Presets panel, or even use third-party plugins for more advanced visuals. Experiment with different effects to make your montage stand out.
Step 6: Use Graph Editor and Curves for Smooth Animation
For a more polished and professional animation, use the Graph Editor to smooth out your keyframe transitions. After setting keyframes for properties like Position or Opacity, click on the Graph Editor icon in the timeline. This will show the speed and timing of your animation. Adjust the curves by dragging the handles to create smoother, more natural motion between keyframes. This technique, known as easing, adds fluidity and refinement to your montage’s animations.


Step 7: Add Transitions Between Clips
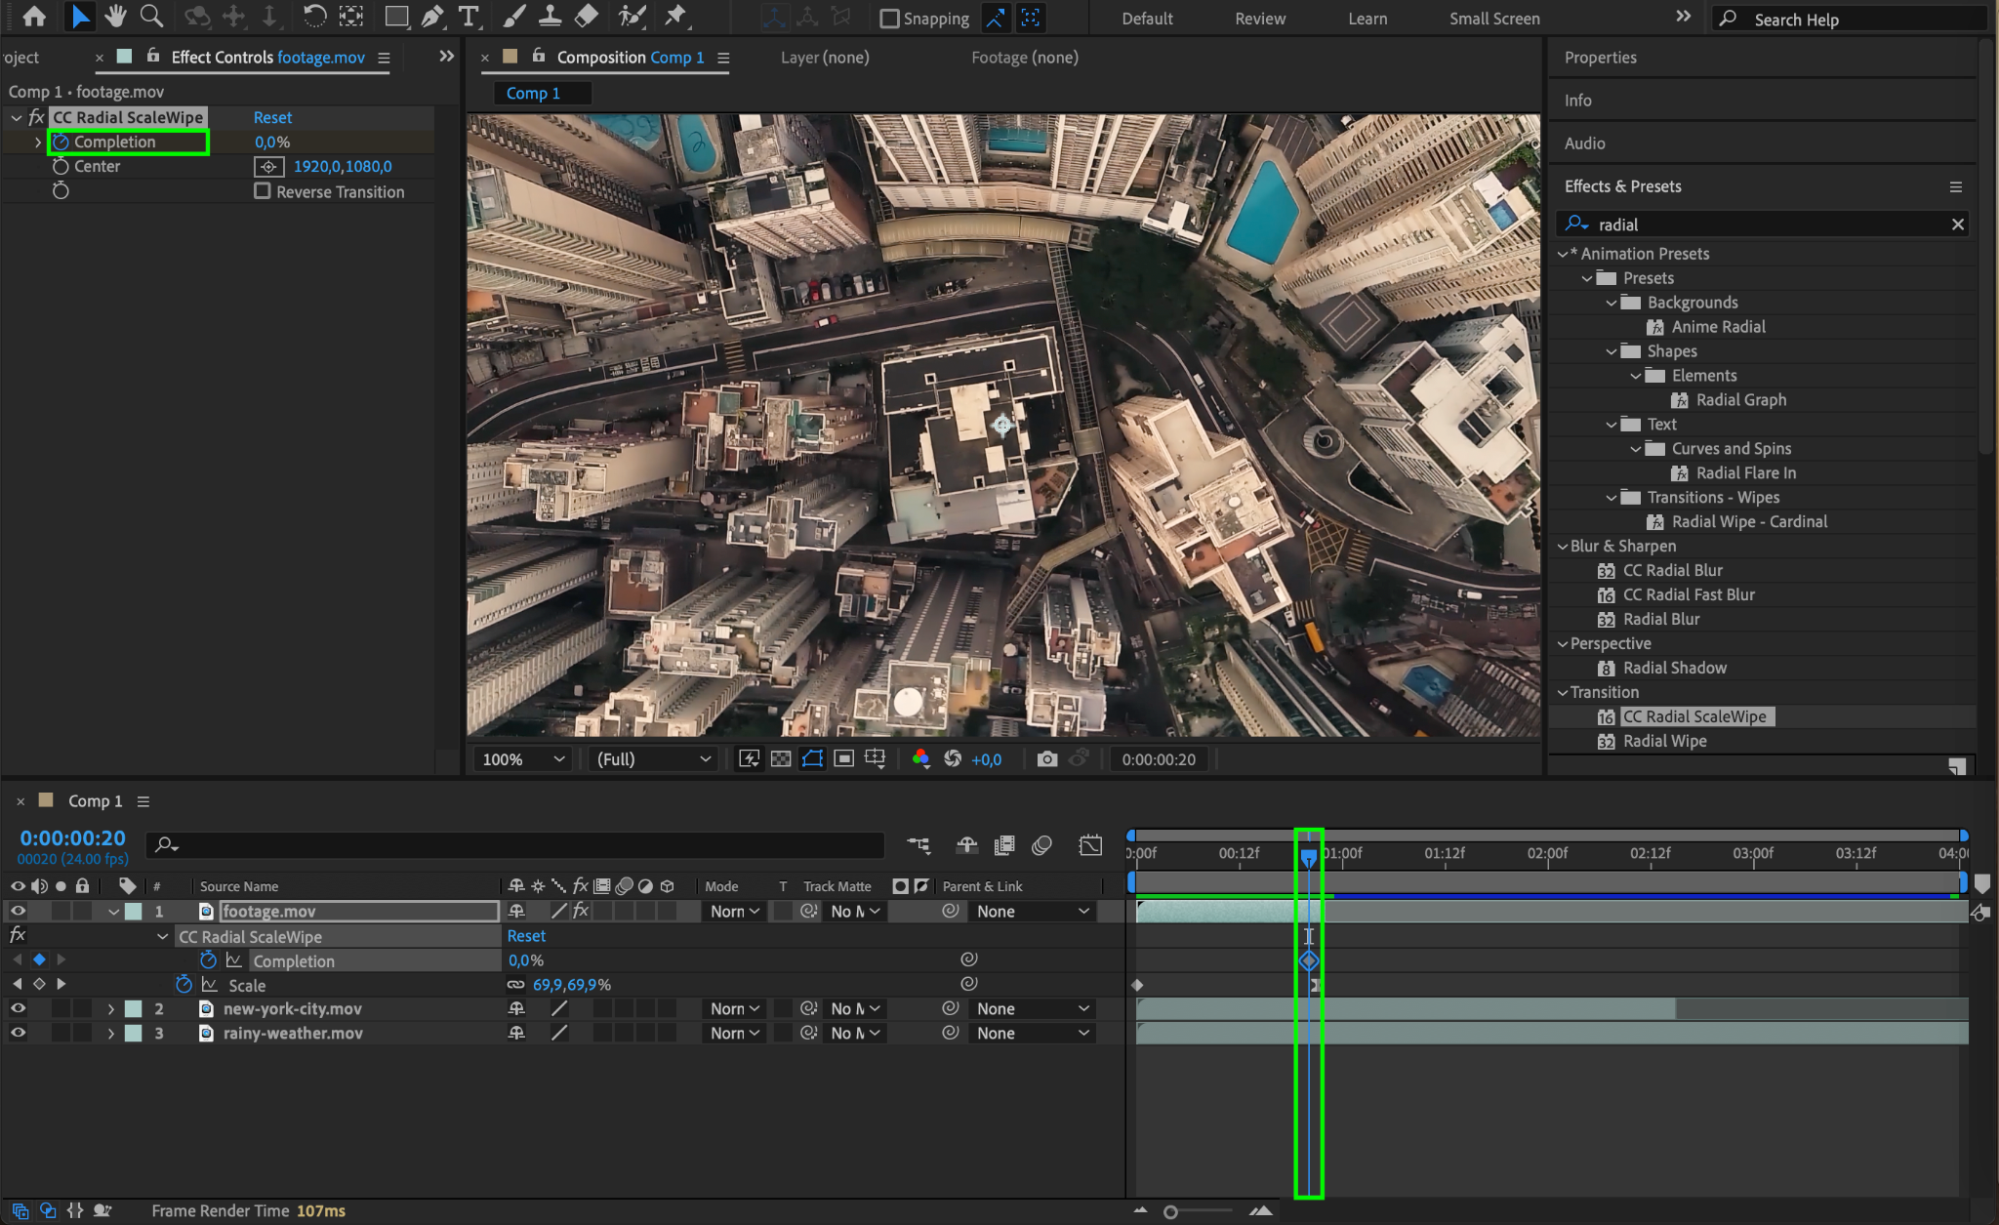
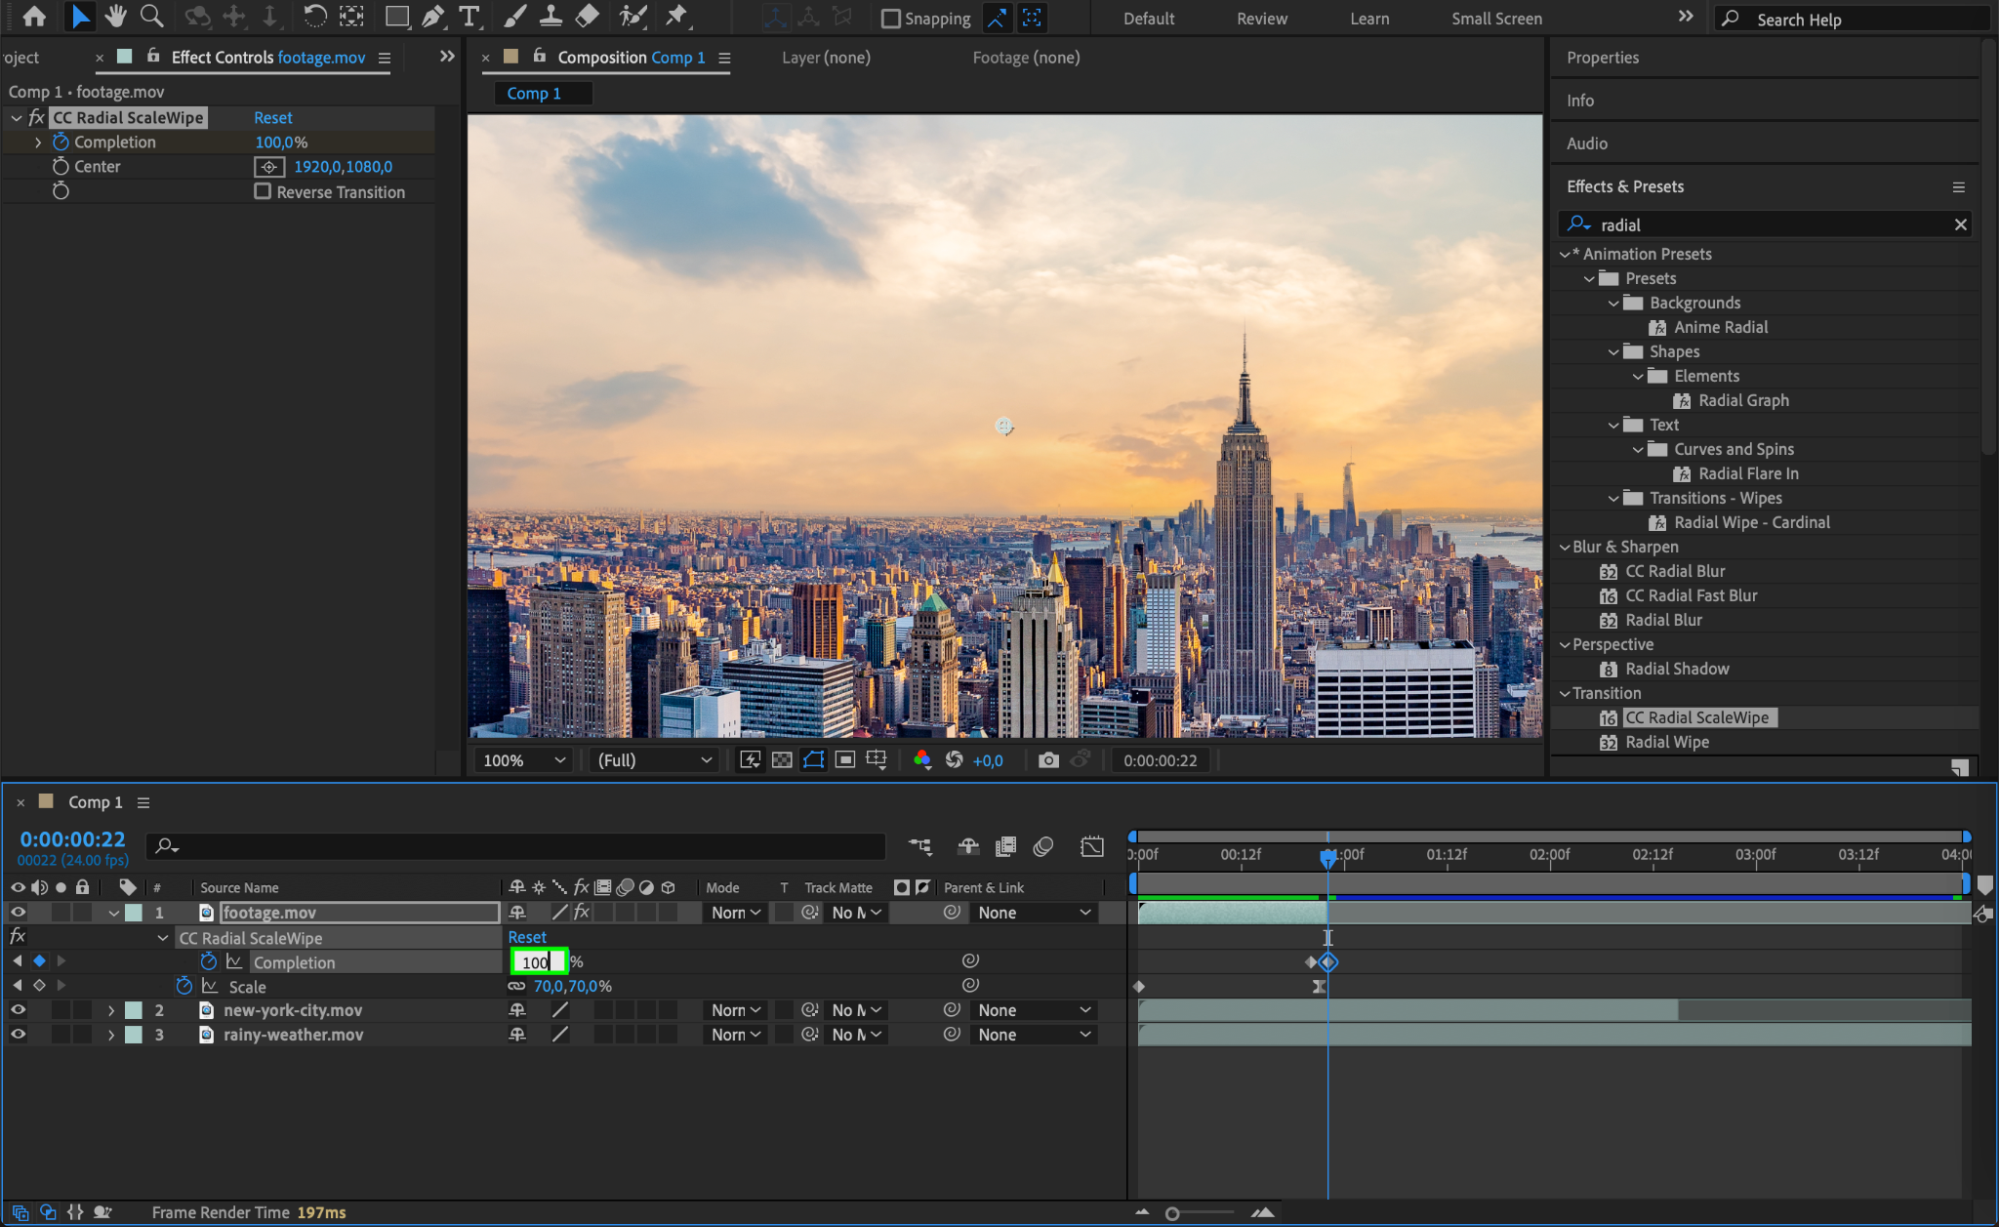
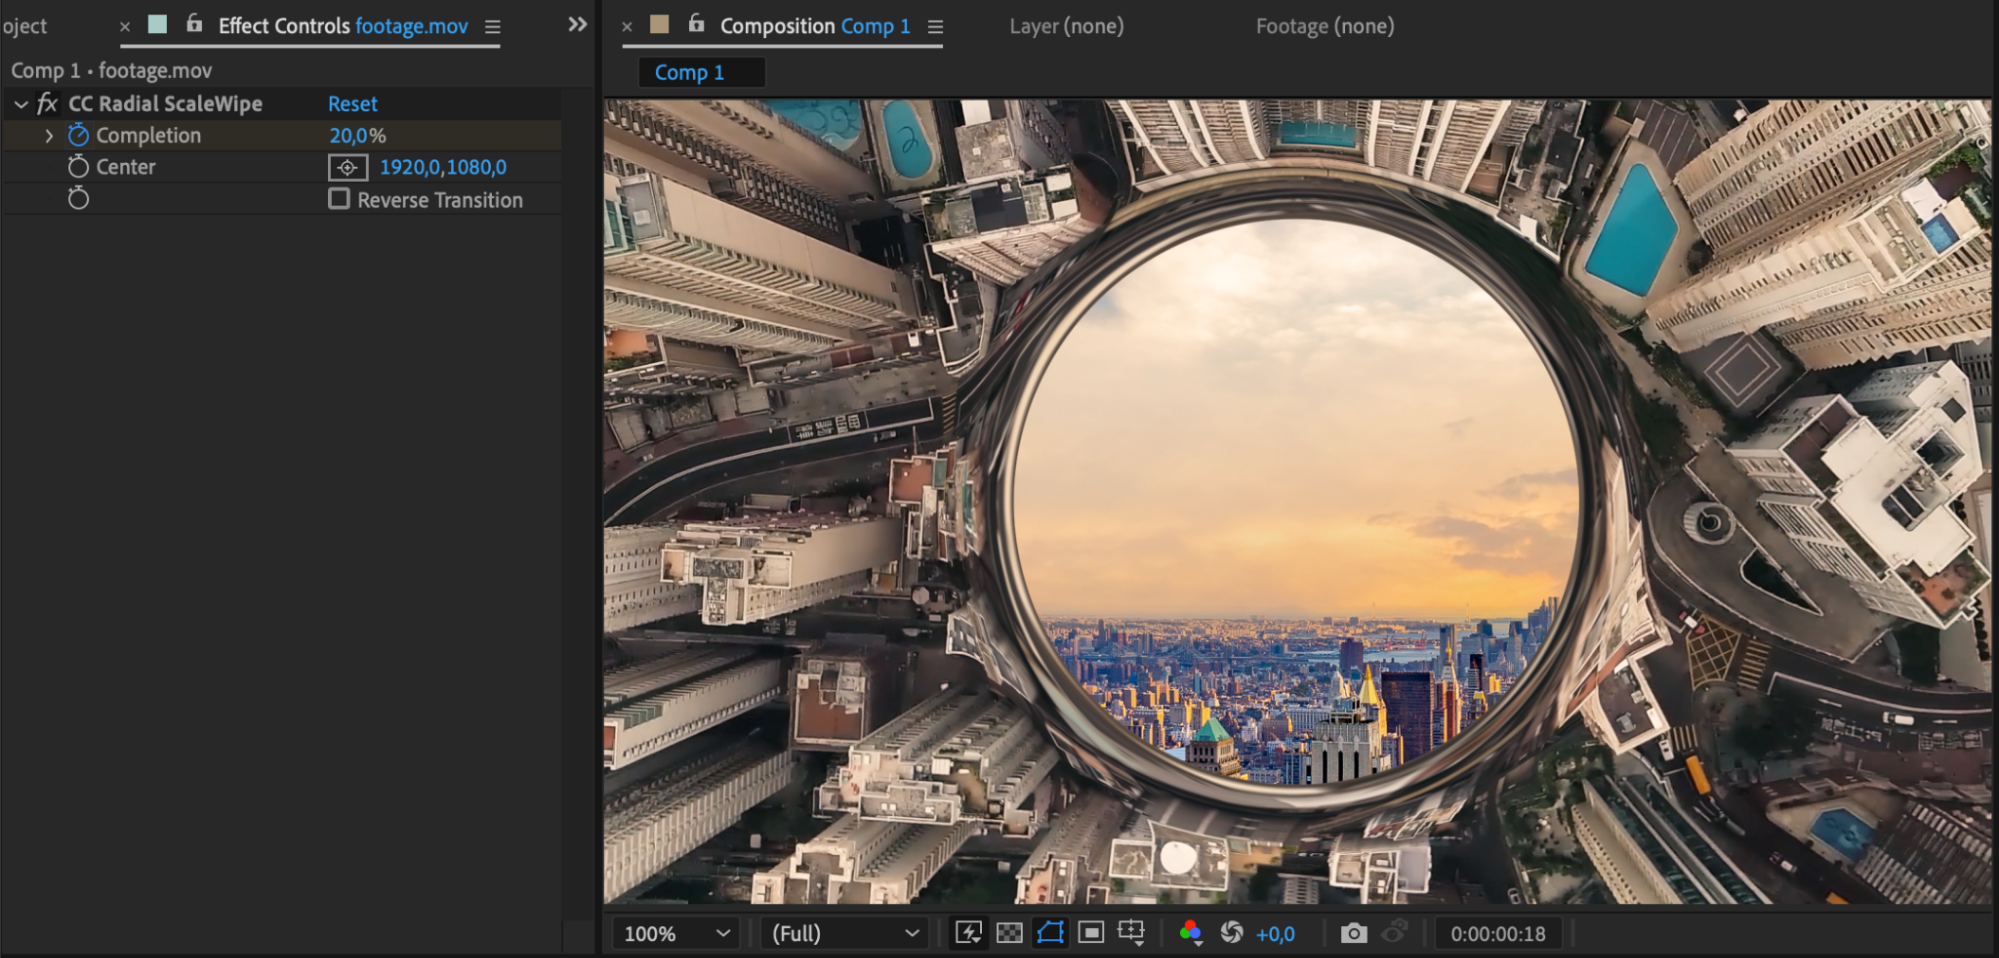
Transitions can significantly enhance the flow between clips in your montage. To add transitions, go to the Effects & Presets panel, select a transition effect (such as Block Dissolve, Grid Wipe, or Slide), and drag it onto the first clip in the timeline. Once applied, you can further customize the transition in the Effect Controls panel. Use keyframes to animate the transition if necessary, ensuring it complements the overall mood and pace of your montage.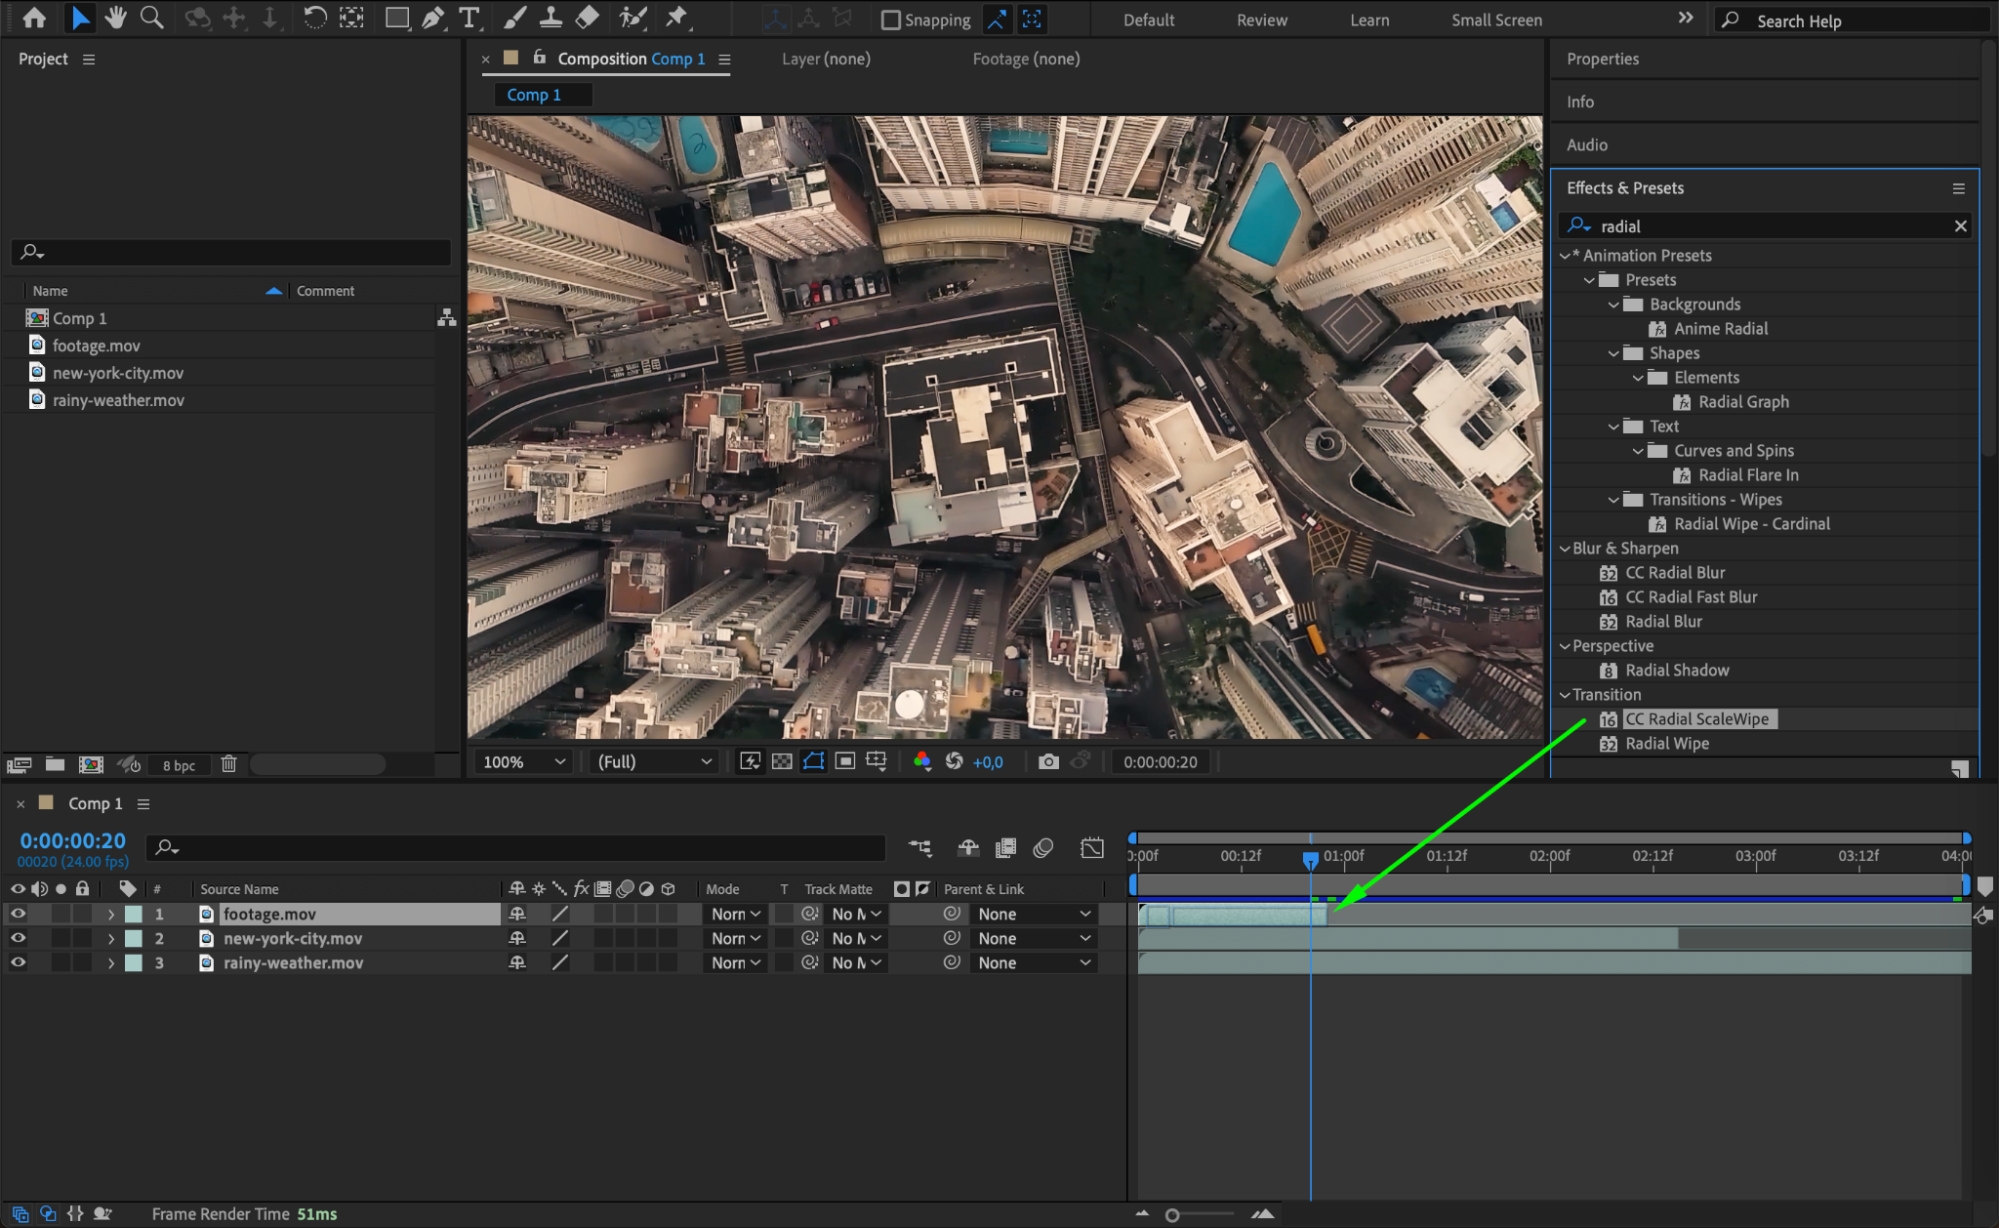
Step 8: Apply Text and Graphics
If needed, add text by using the Type Tool (Ctrl/Cmd + T) and insert any necessary titles, captions, or labels. You can also add graphics to enhance your montage. Experiment with different fonts, sizes, and styles to ensure everything fits your montage’s theme and remains visually appealing.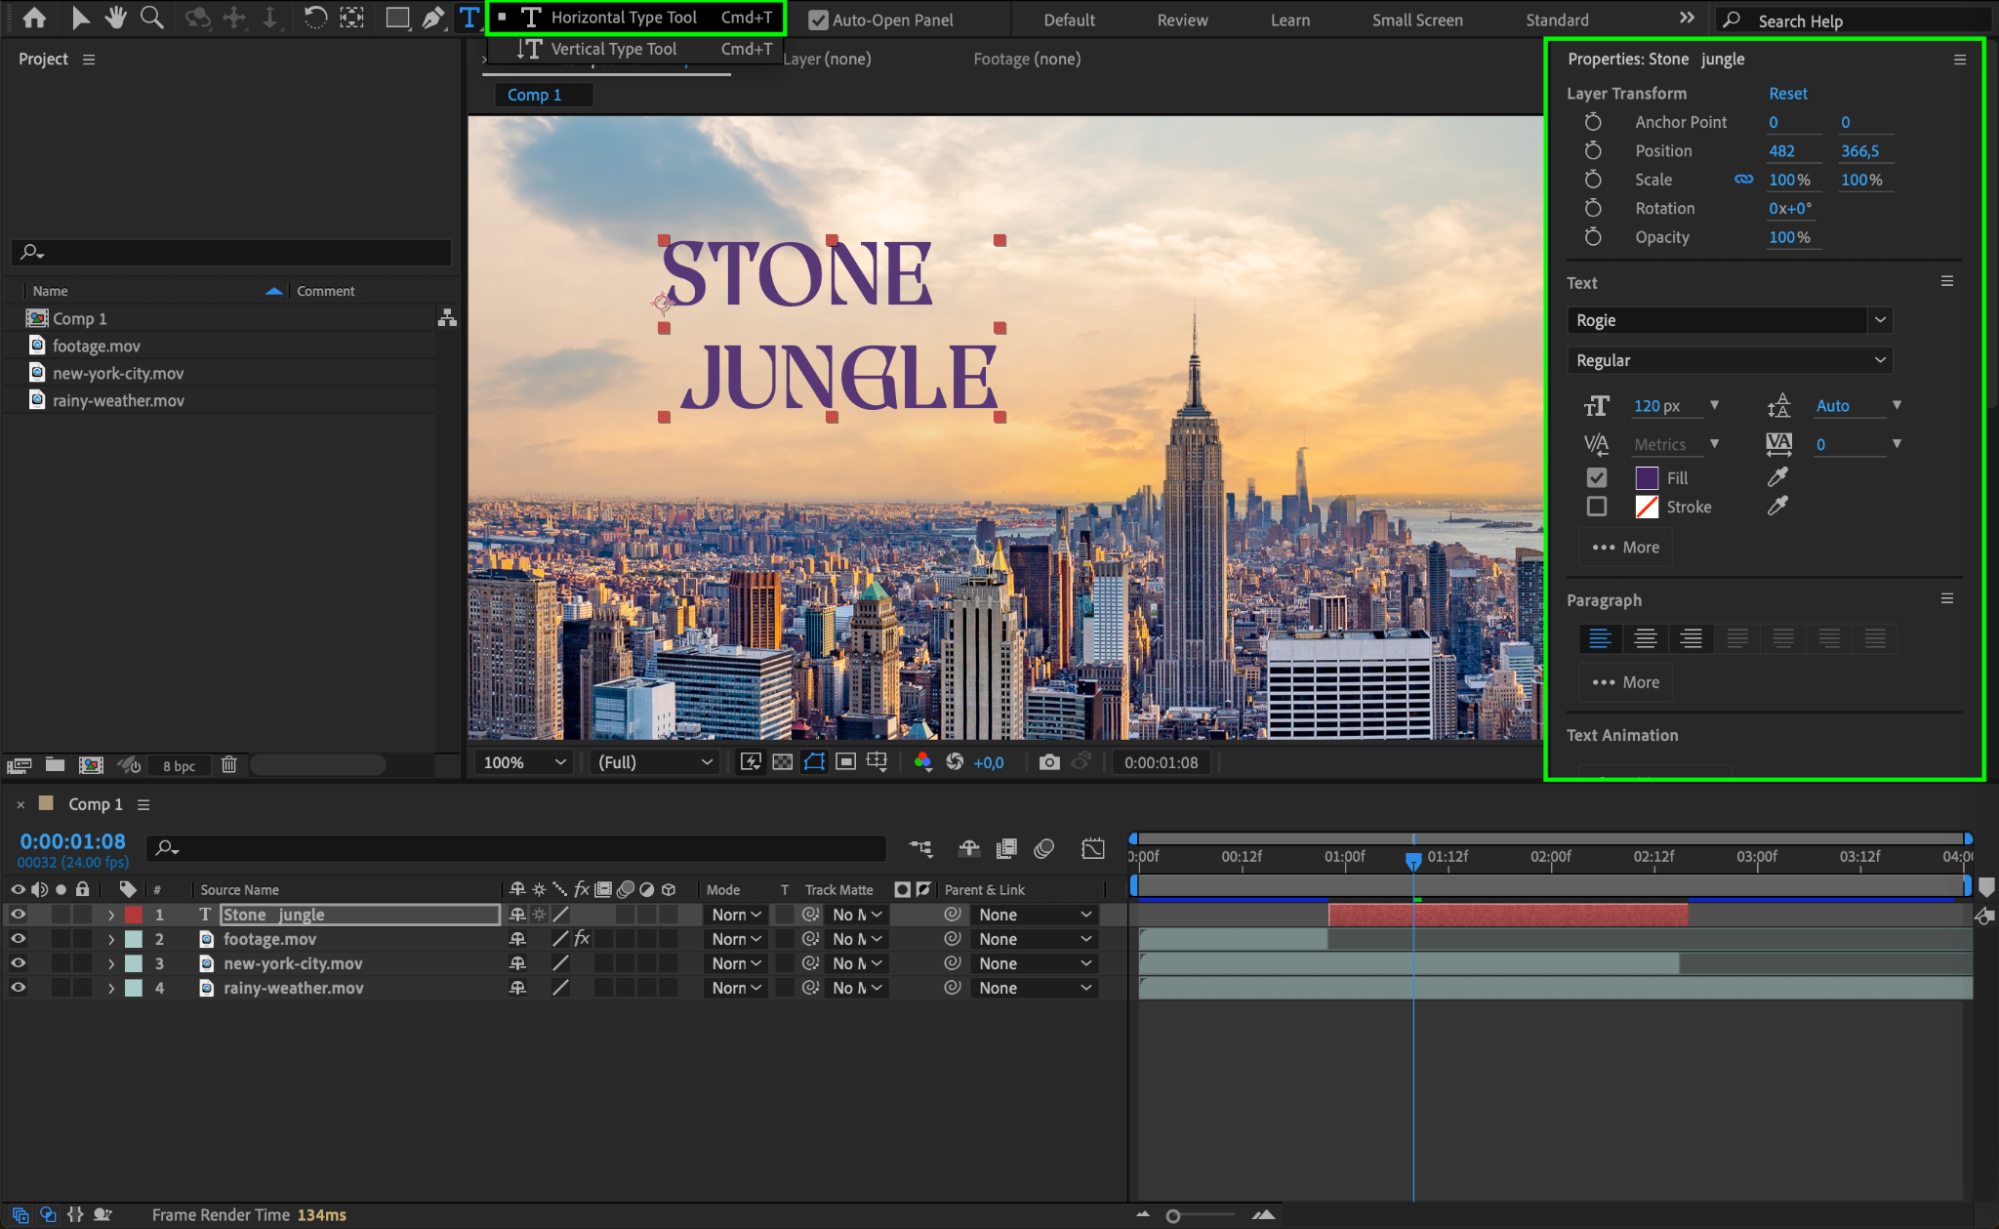
Get 10% off when you subscribe to our newsletter

Step 9: Use Plugins for Enhanced Animations
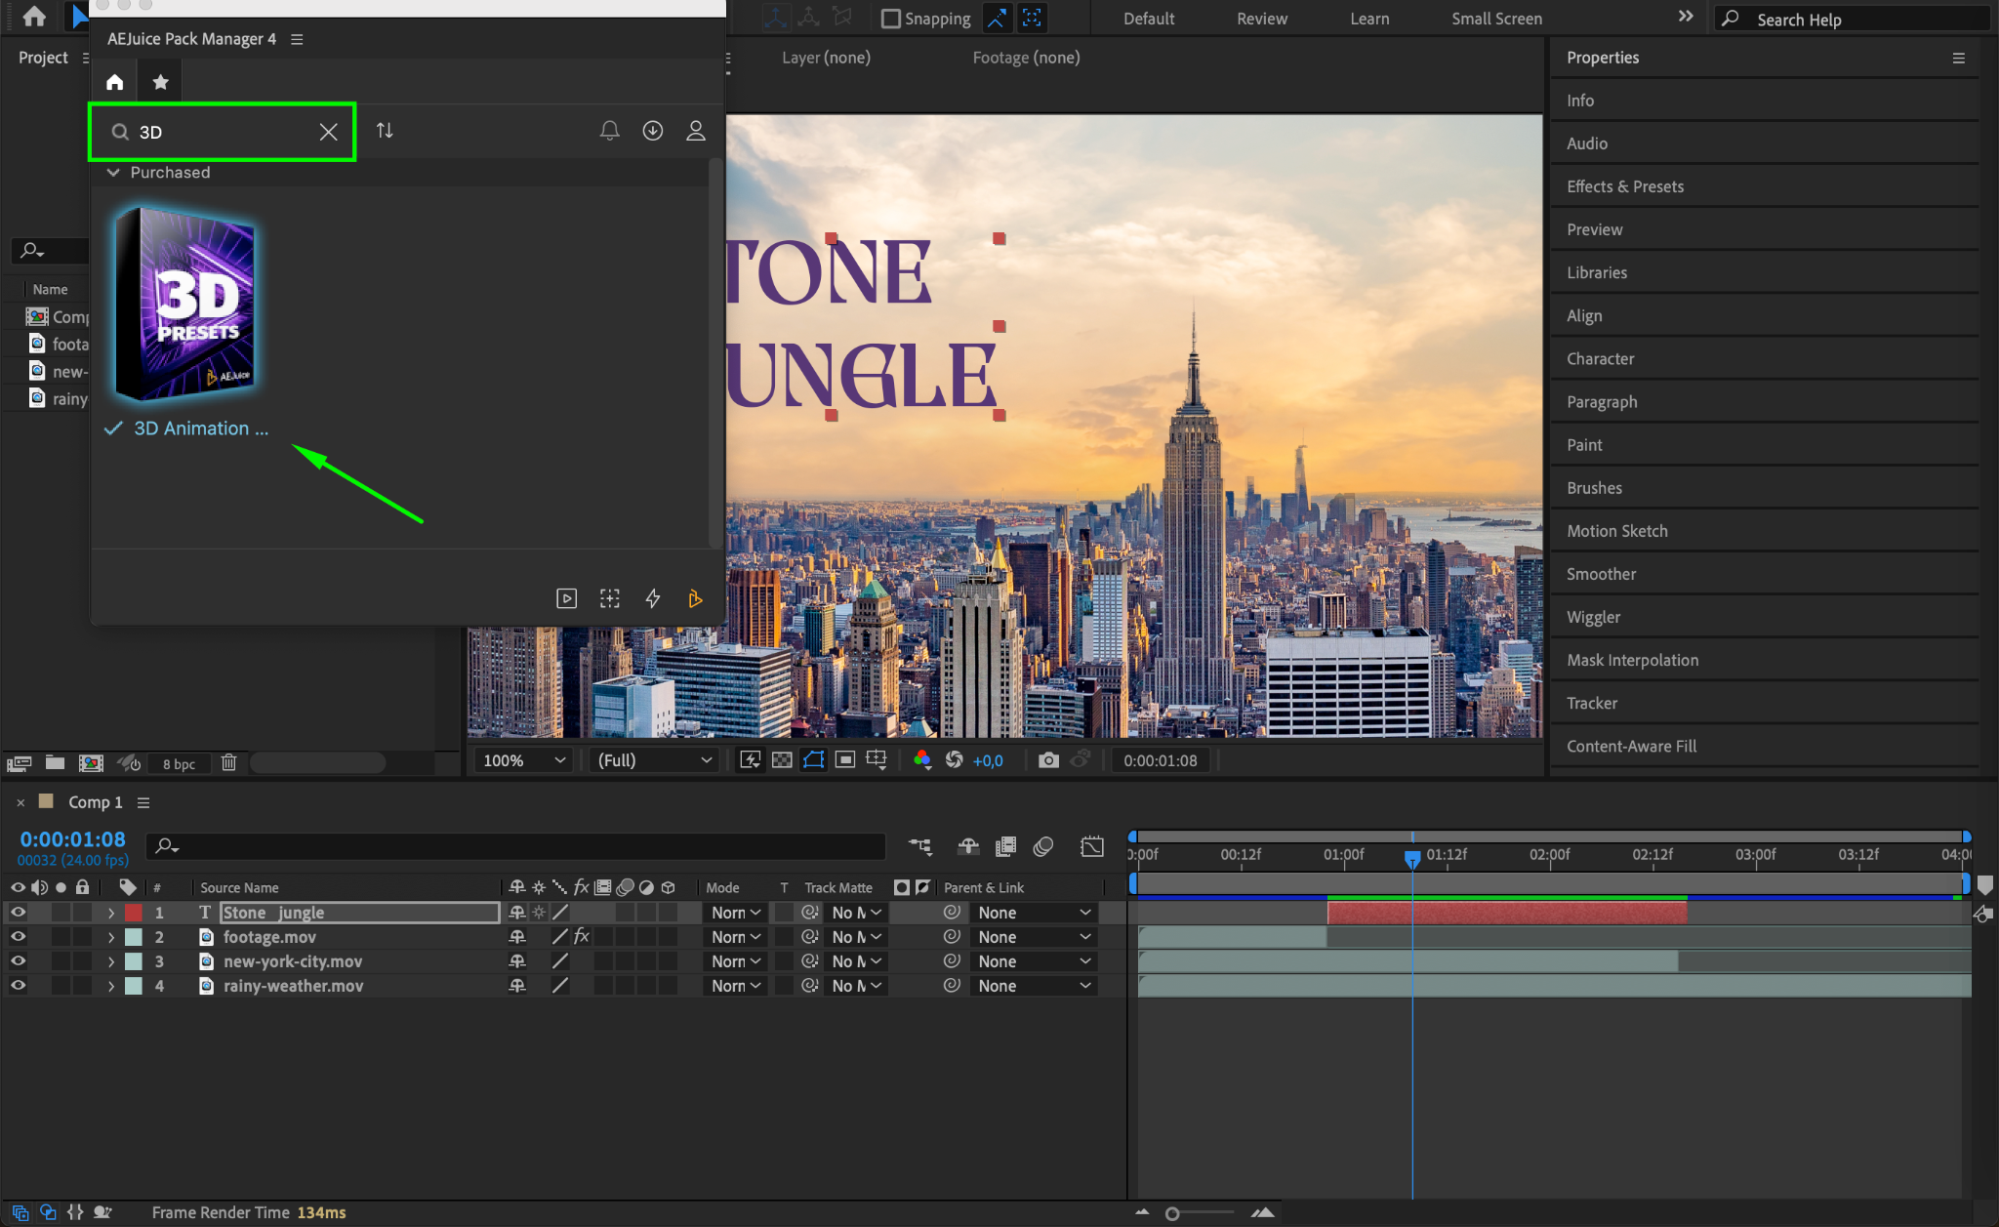
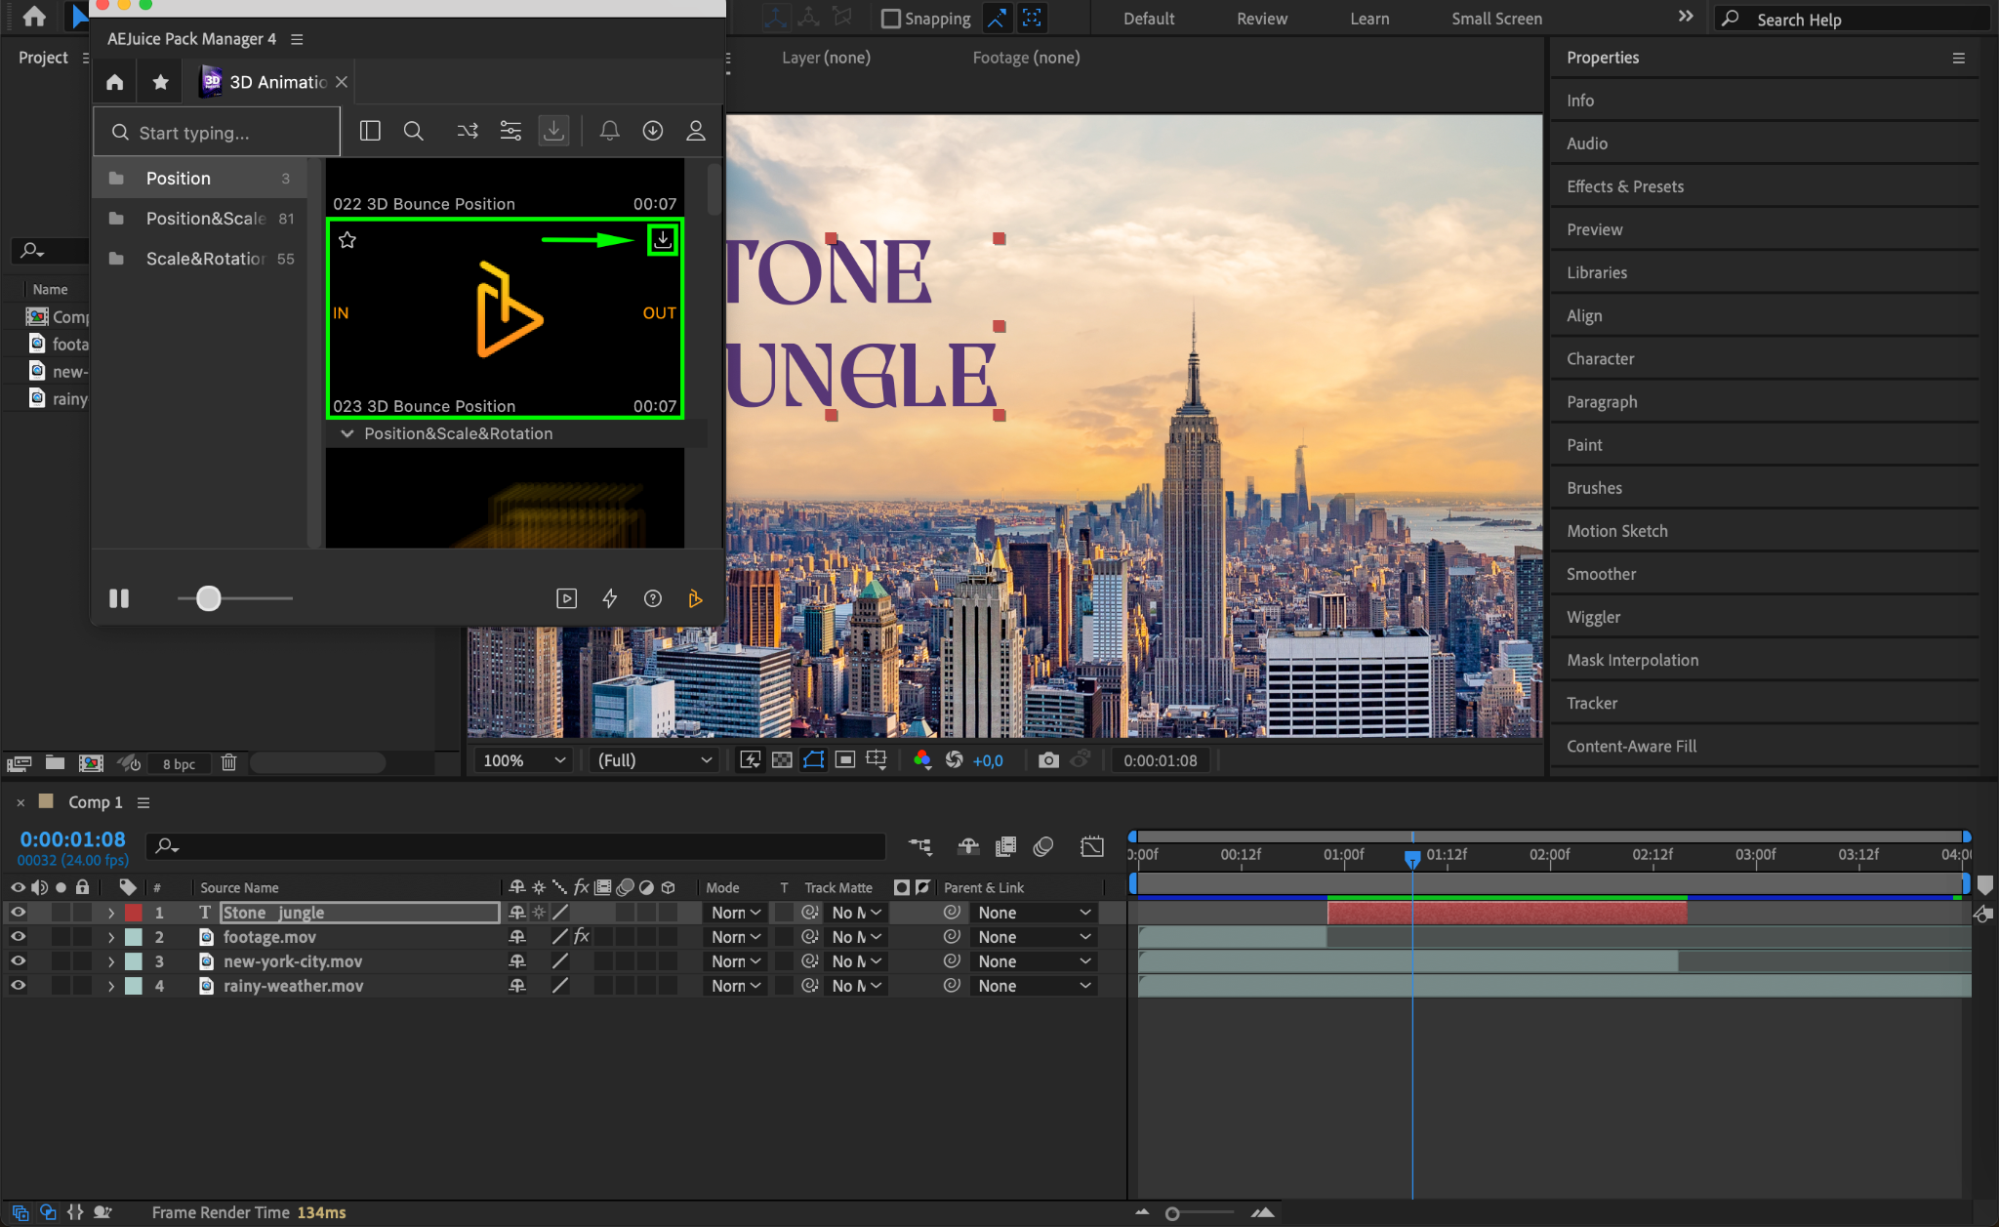
Enhance your montage by using third-party plugins like AEJuice, which offers a wide variety of animations, backgrounds, elements, and transitions. These tools can help you elevate your montage by adding unique, captivating visual elements.
Step 10: Preview Your Montage
Once you’ve arranged and edited your clips, preview the montage by pressing the Spacebar. Review the flow and check for any timing issues or areas that need improvement. Adjust animations, transitions, or effects as needed.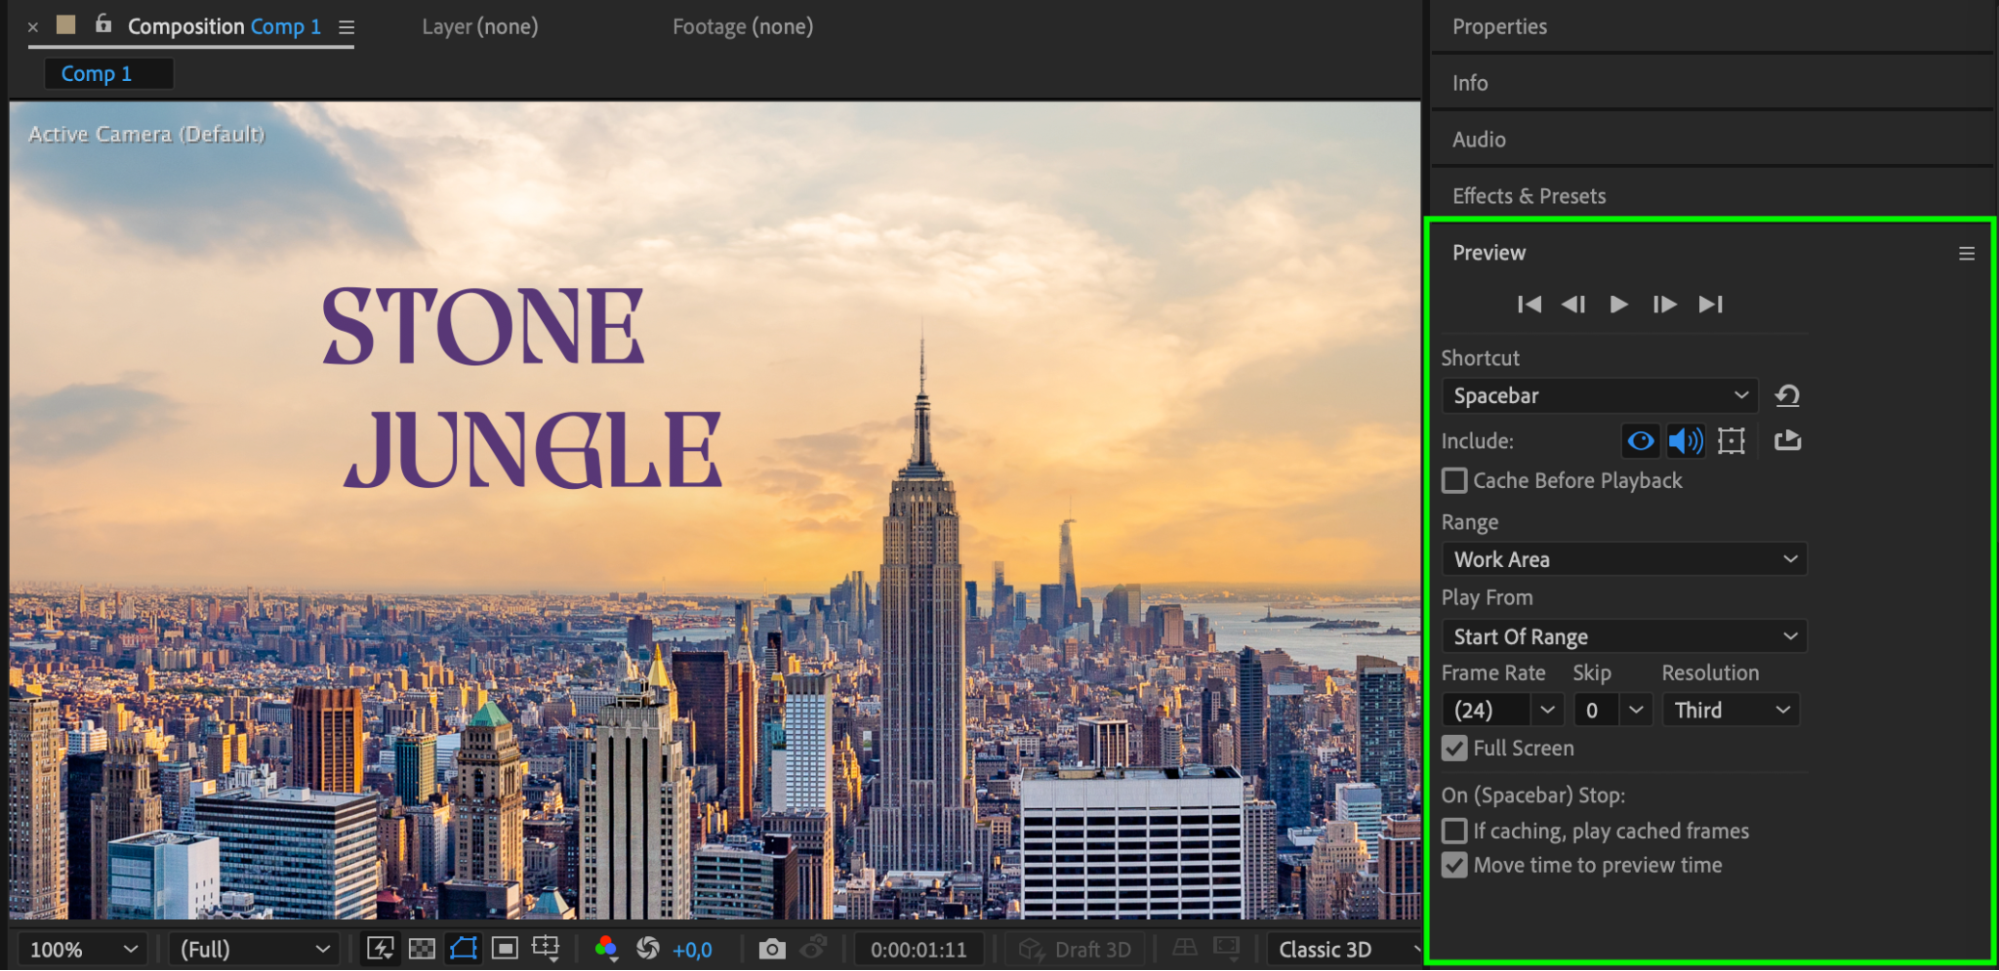
Step 11: Render Your Montage
When you are satisfied with the final result, render your montage by going to Composition > Add to Render Queue. Select your desired output settings, such as file format, resolution, and codec. Once everything is set, click the Render button and let After Effects process and export your montage.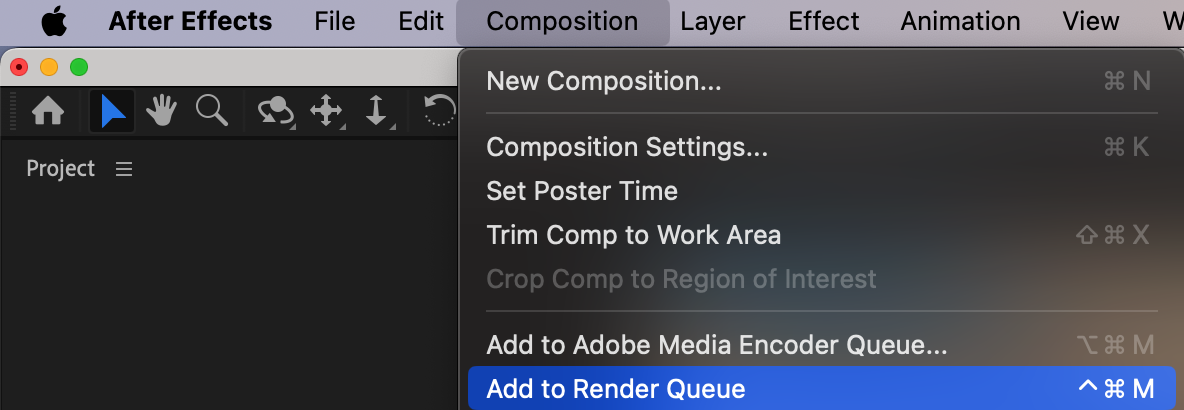

Conclusion
Congratulations! You’ve successfully created a montage in After Effects. By following these steps, you can combine different clips, apply smooth transitions, and enhance your video with effects, all while adding your own creative flair. Keep experimenting with different techniques and tools to make your montages even more dynamic and captivating. Happy editing!


