A Complete Guide to Creating a Motion Poster in After Effects
Introduction – How to Bring Your Poster to Life with Motion
Creating a motion poster can add a dynamic element to your project, whether you’re promoting a product, event, or idea. In After Effects, you can animate your poster elements, apply visual effects, and fine-tune each aspect to create a compelling and professional-looking design. This guide will walk you through the process of creating a motion poster from scratch.
Get 10% off when you subscribe to our newsletter

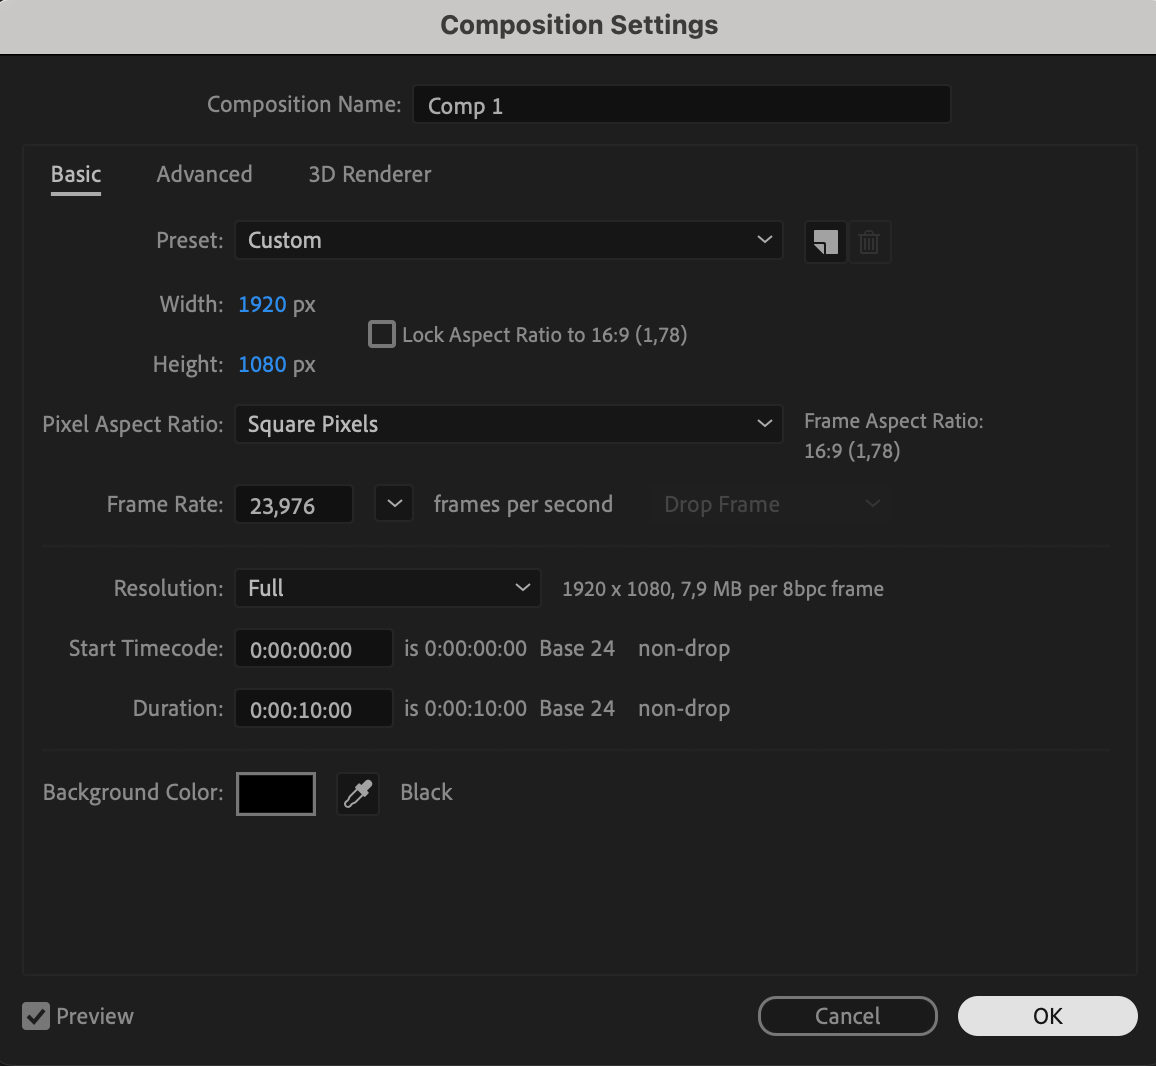
Step 1: Create a New Composition
Start by creating a new composition. Go to Composition > New Composition, set your desired resolution, frame rate, and duration, and click OK. This will be the foundation for your motion poster.
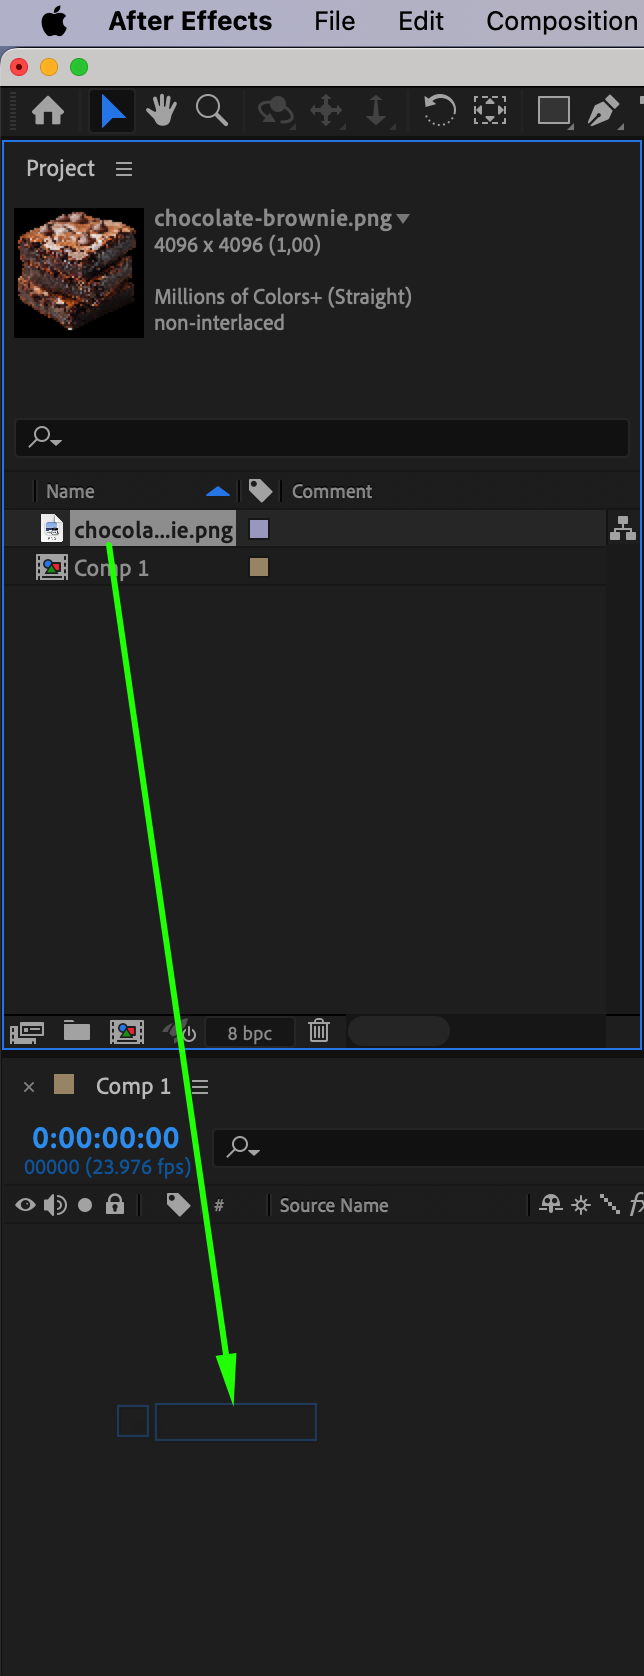
 Step 2: Import Your Resources
Go to File > Import > File and select the assets you want to use for your poster (images, videos, logos, etc.). Drag and drop them into your Project Panel, and then place them on the timeline in the order you prefer.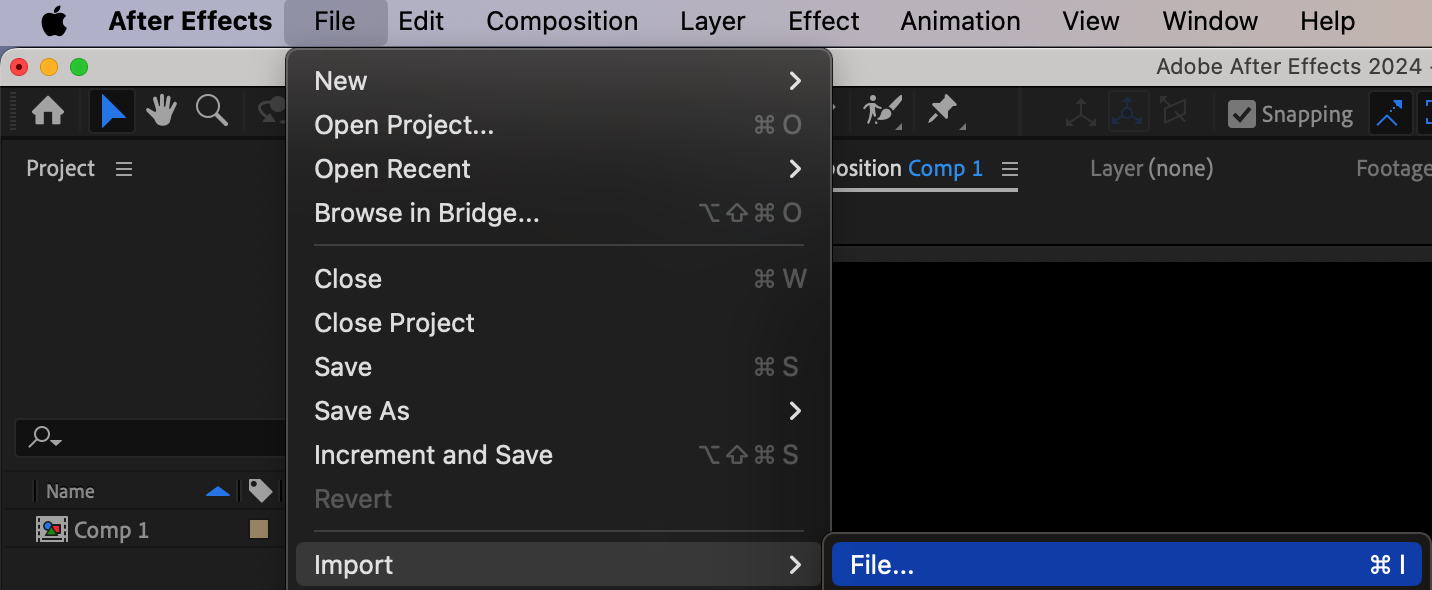
 Step 3: Adjust the Position and Scale of Each Resource
For each asset, adjust the Position and Scale properties to fit your composition. You can also tweak the Rotation if necessary to make sure everything aligns and fits within the frame.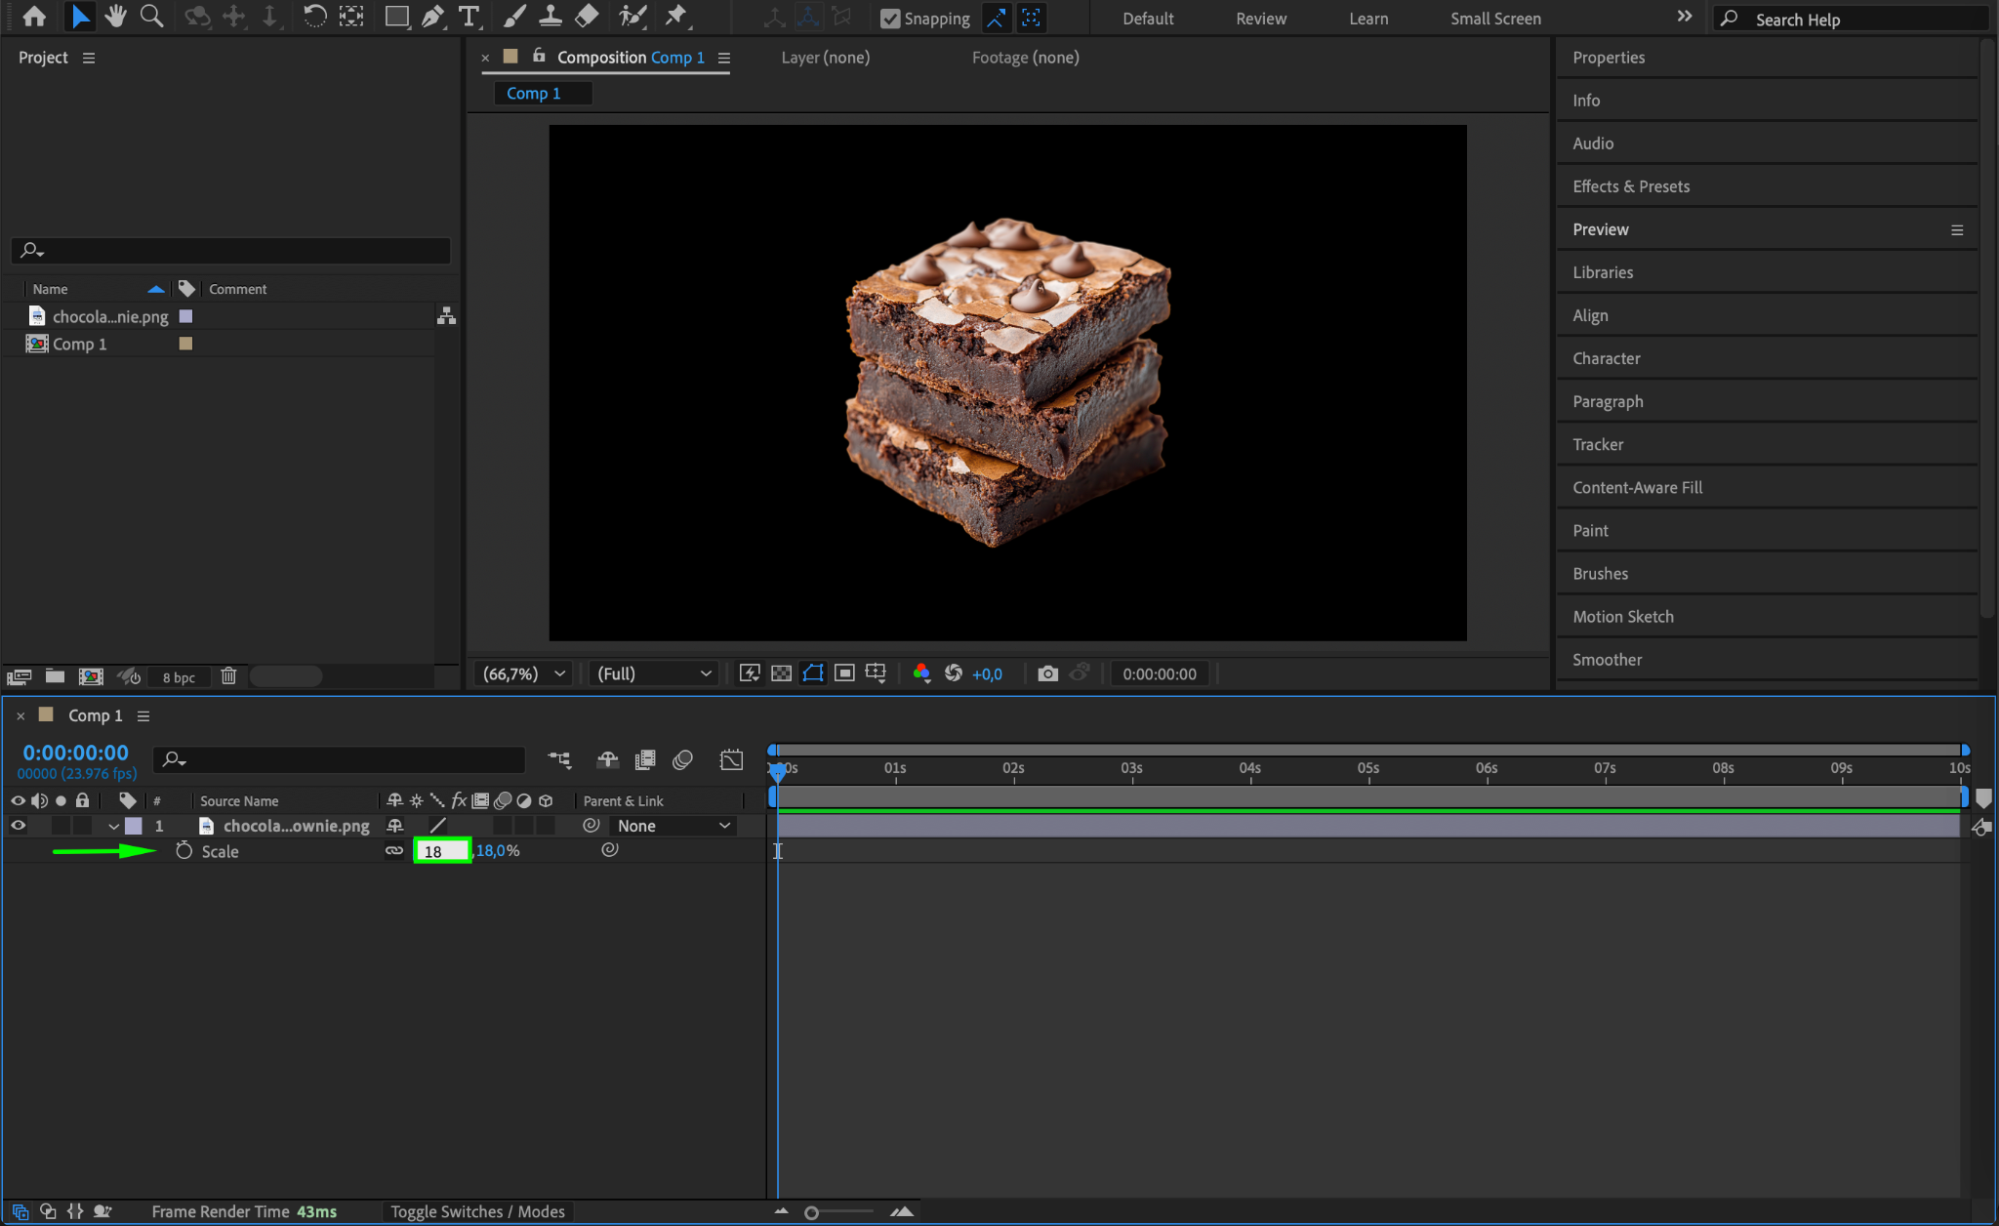 Step 4: Create a New Solid Layer
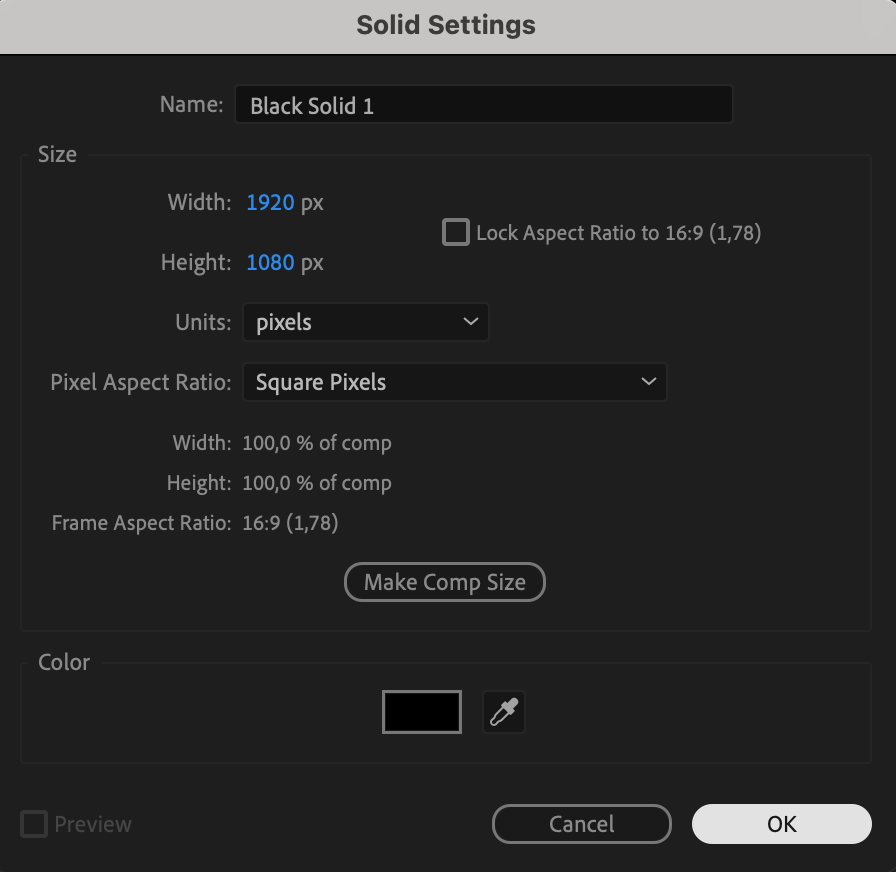
Go to Layer > New > Solid to create a background or any solid element you want to add to your poster. Choose a color that complements your design. This can act as a backdrop or a graphic element.
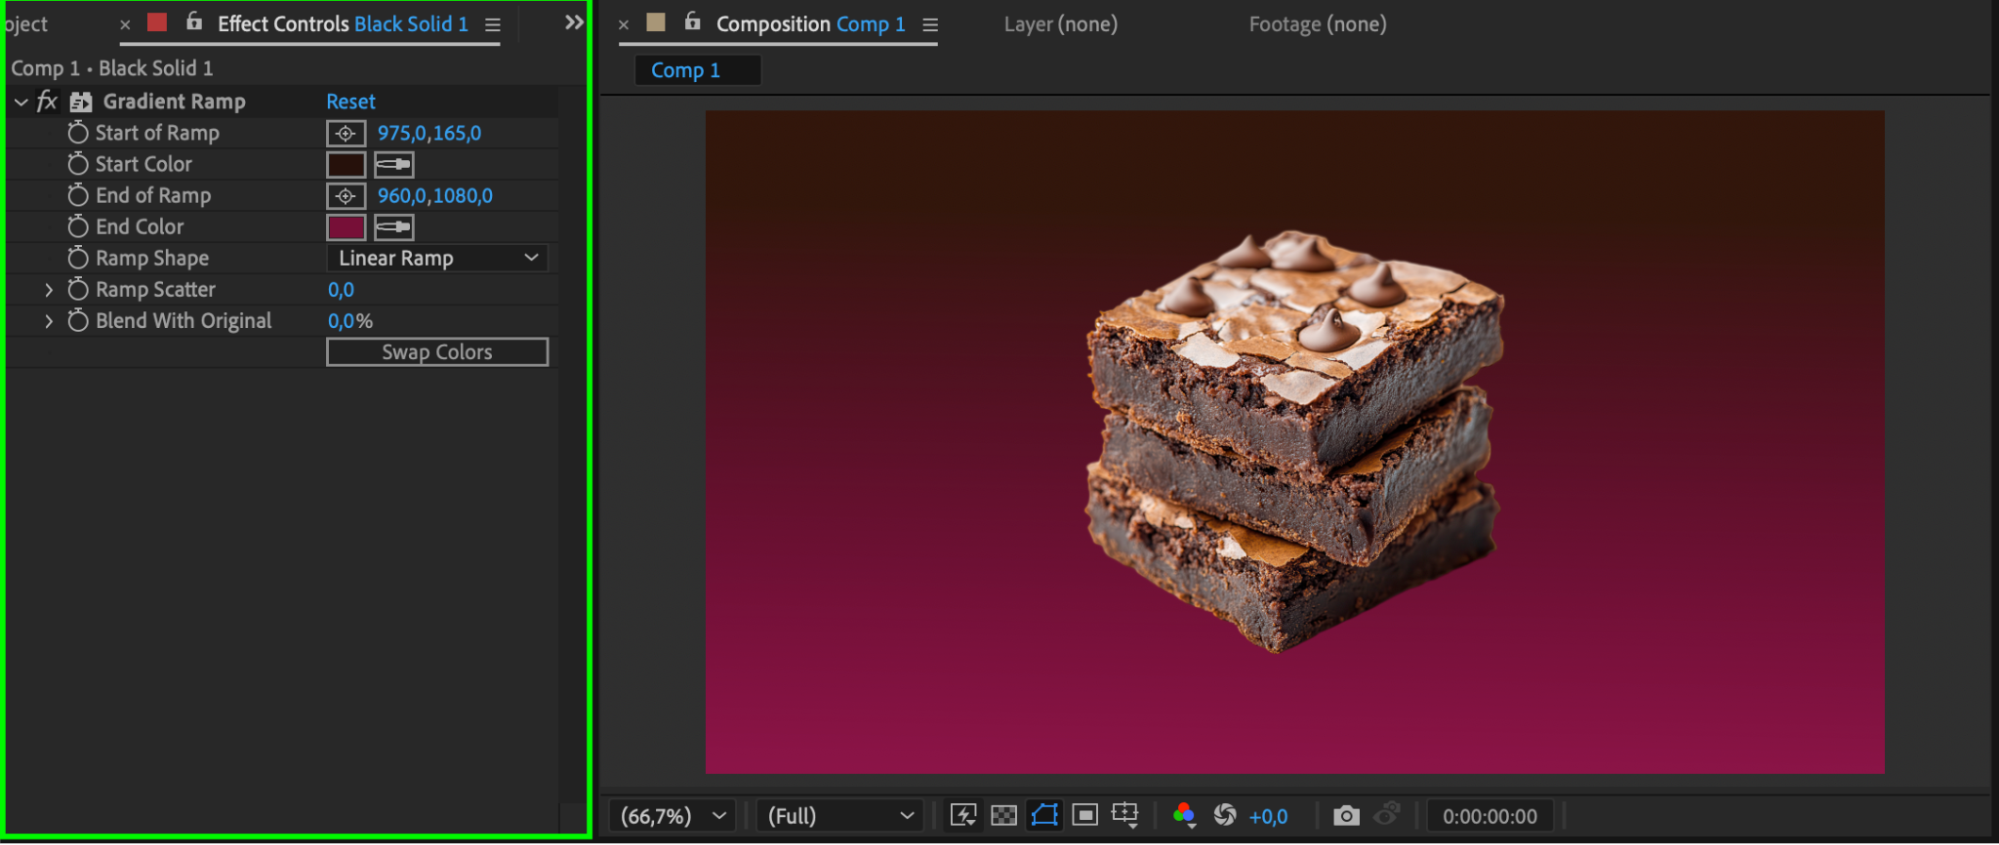
 Step 5: Apply the Gradient Ramp Effect
Drag the Gradient Ramp effect from the Effects & Presets panel to the solid layer. Choose colors that are eye-catching and complement the theme of your poster. The gradient will add depth and dimension to the background.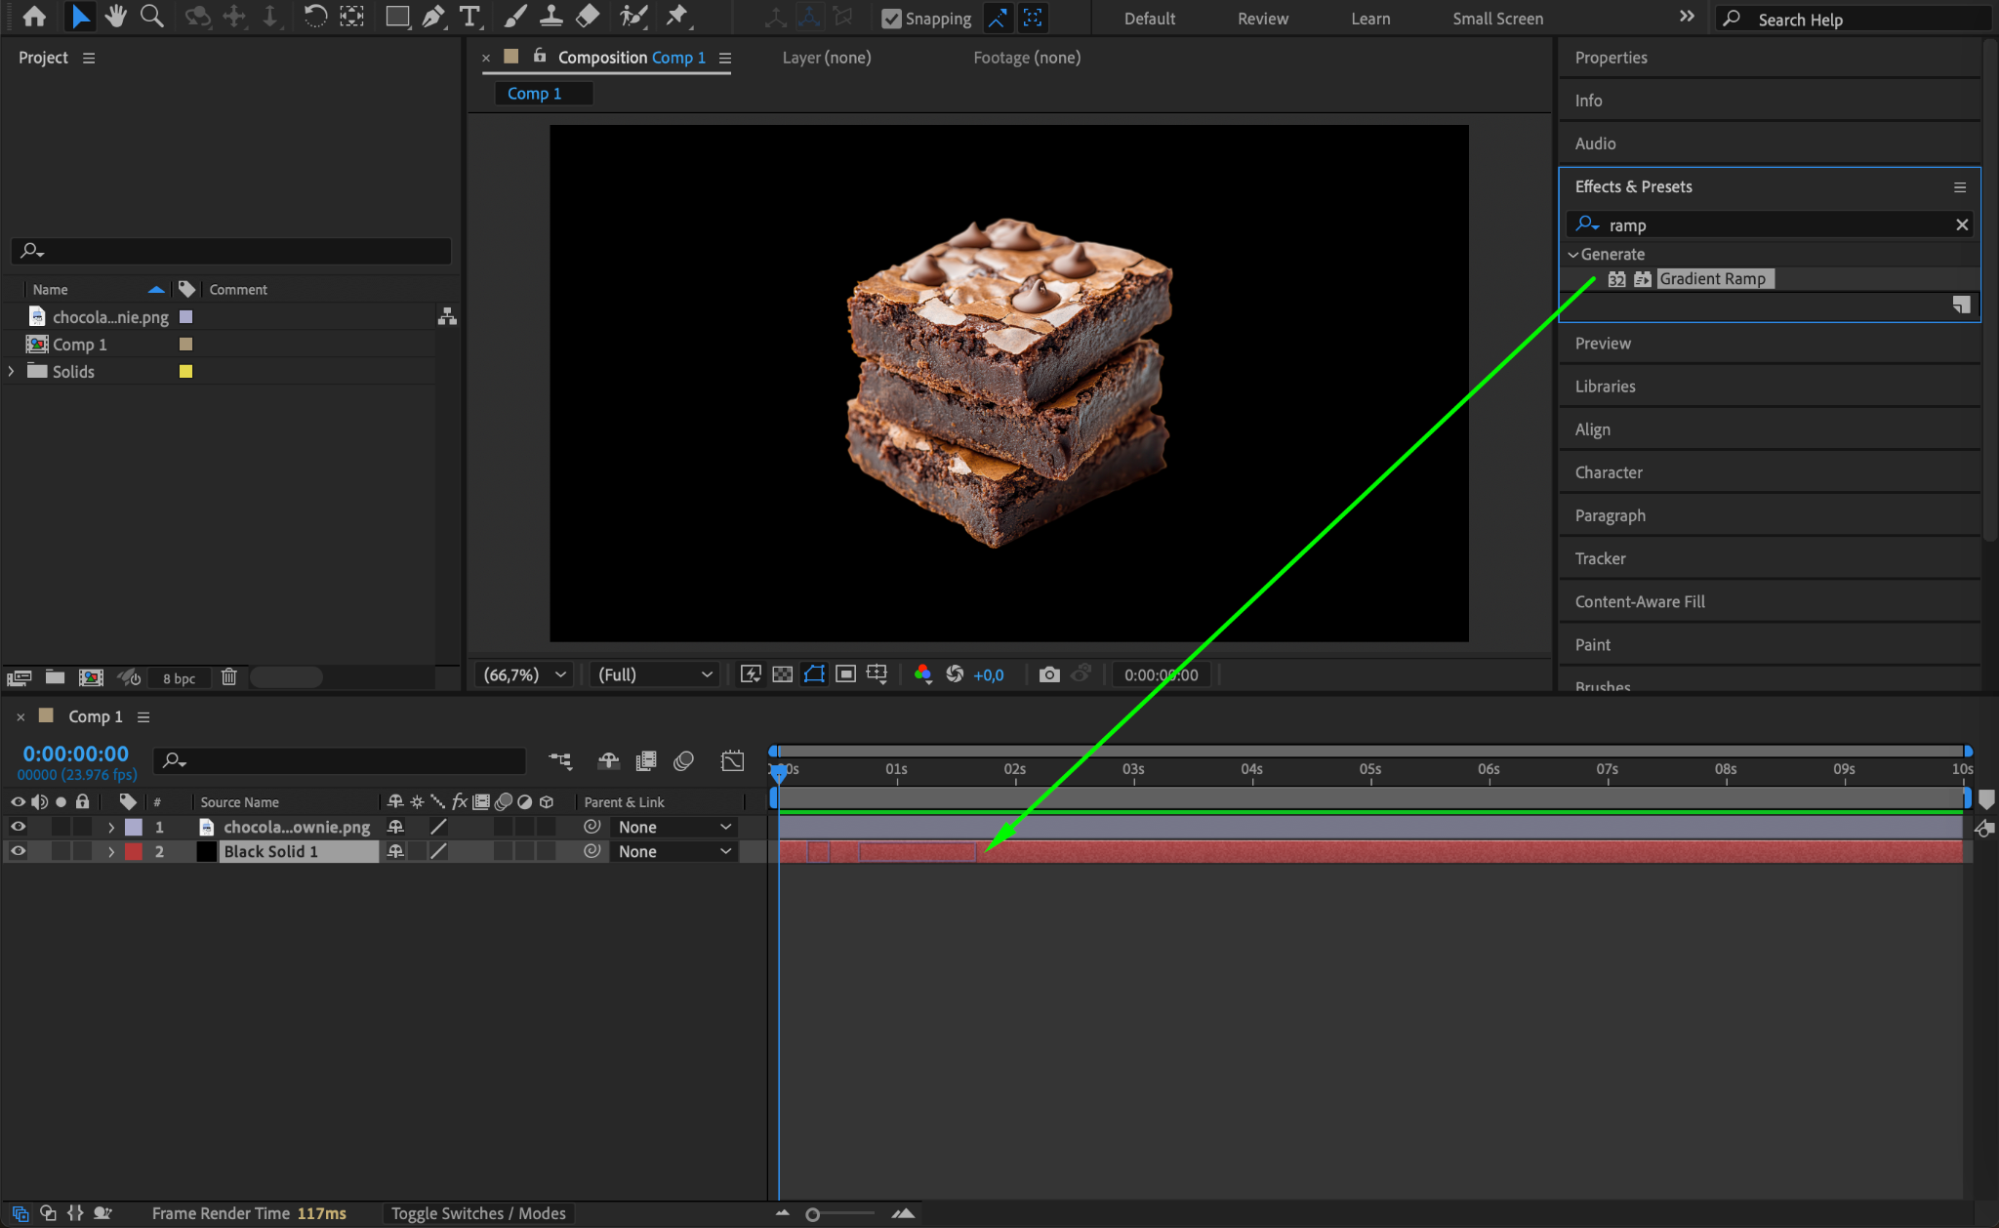
 Step 6: Add Text with the Type Tool
Use the Type Tool (Ctrl/Cmd + T) to create text that describes the benefits or key information about your product, event, or message. Choose a readable font and adjust the size, color, and positioning to make it stand out on the poster.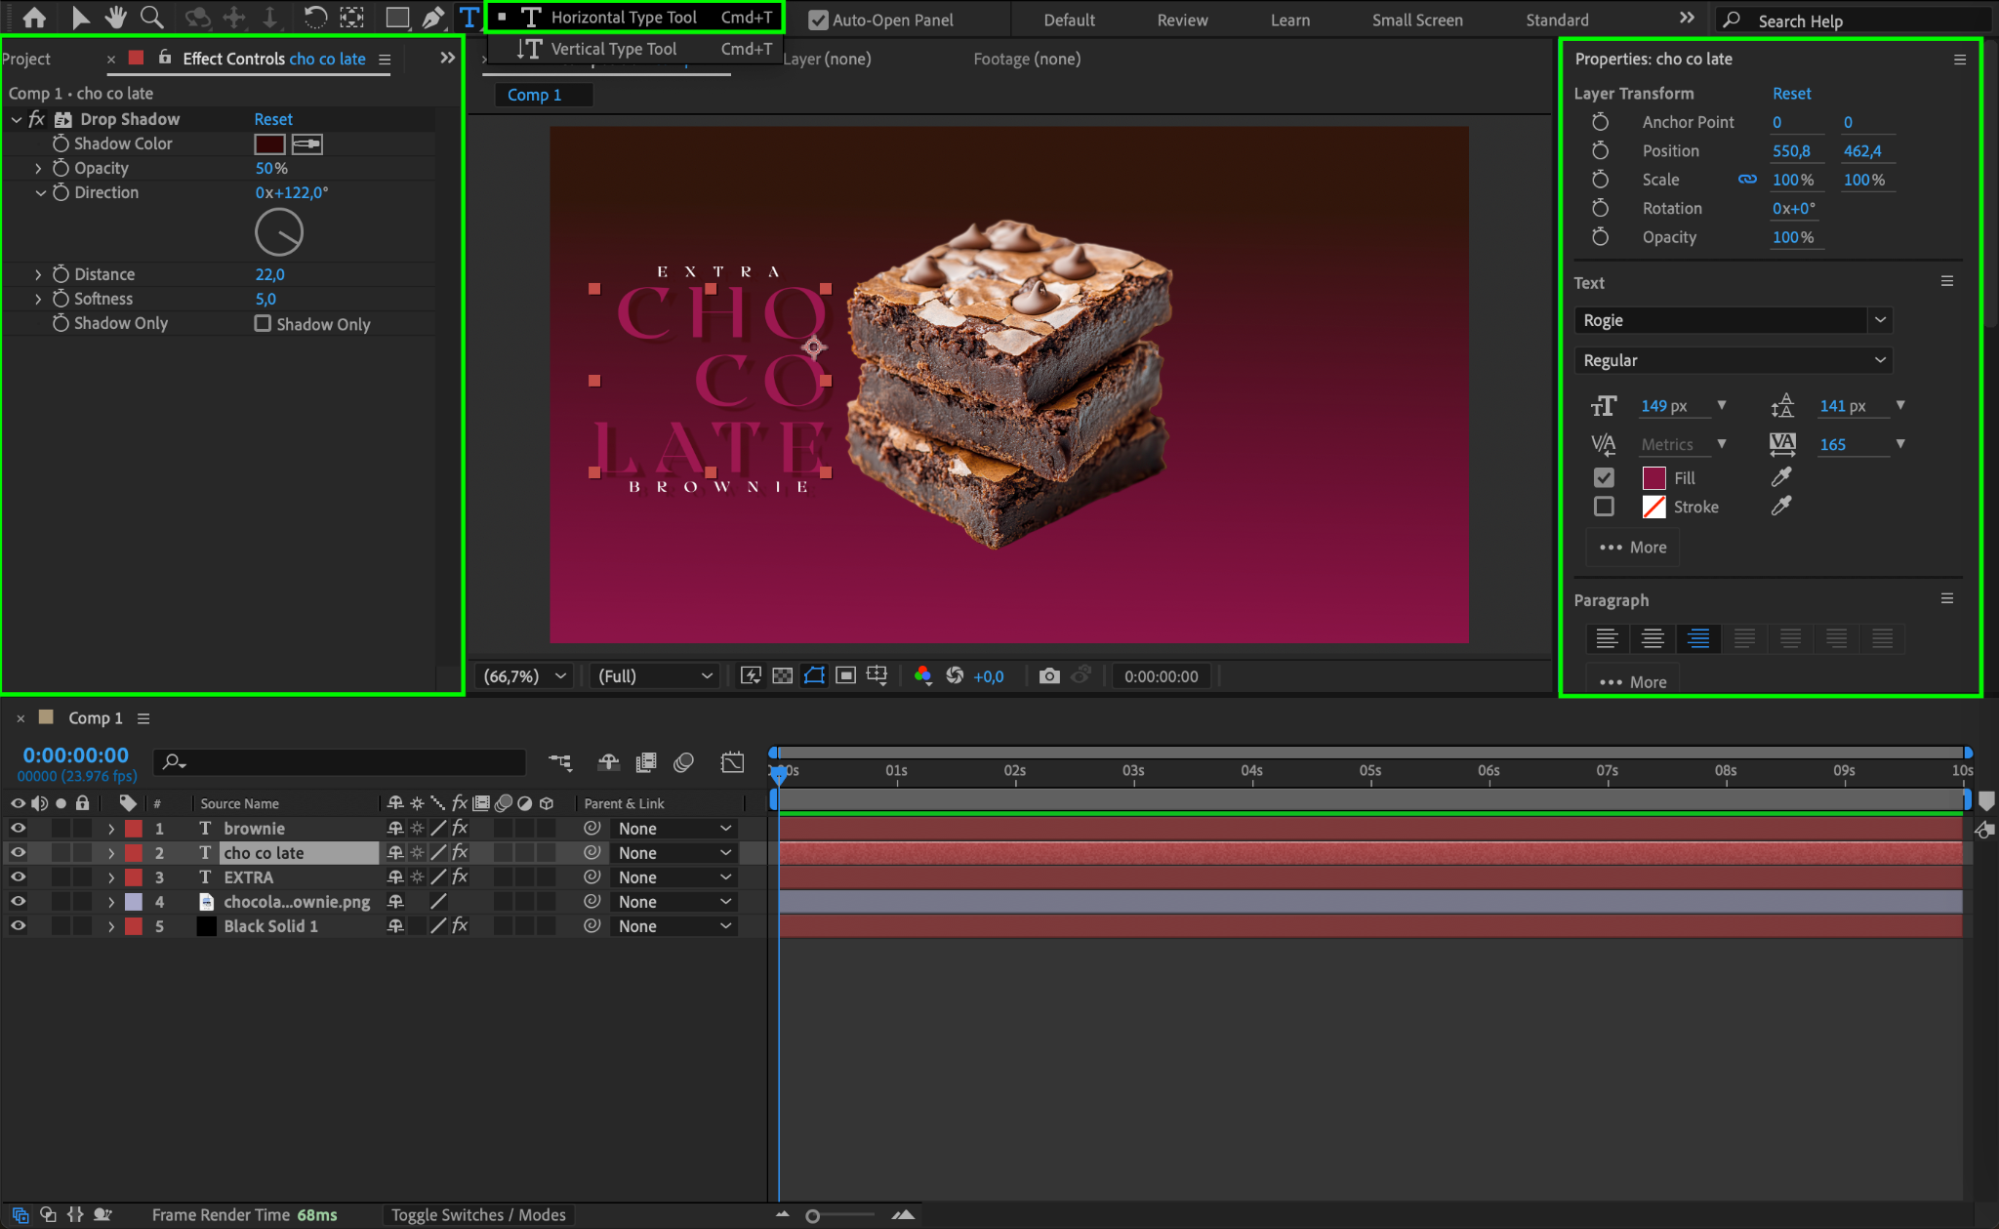 Step 7: Duplicate Elements and Apply Effects
To create more visual interest, duplicate elements like text, images, or logos. Add effects to these duplicates to enhance the poster’s visual appeal. Use different effects such as blur, glow, or distortion to make your design more dynamic.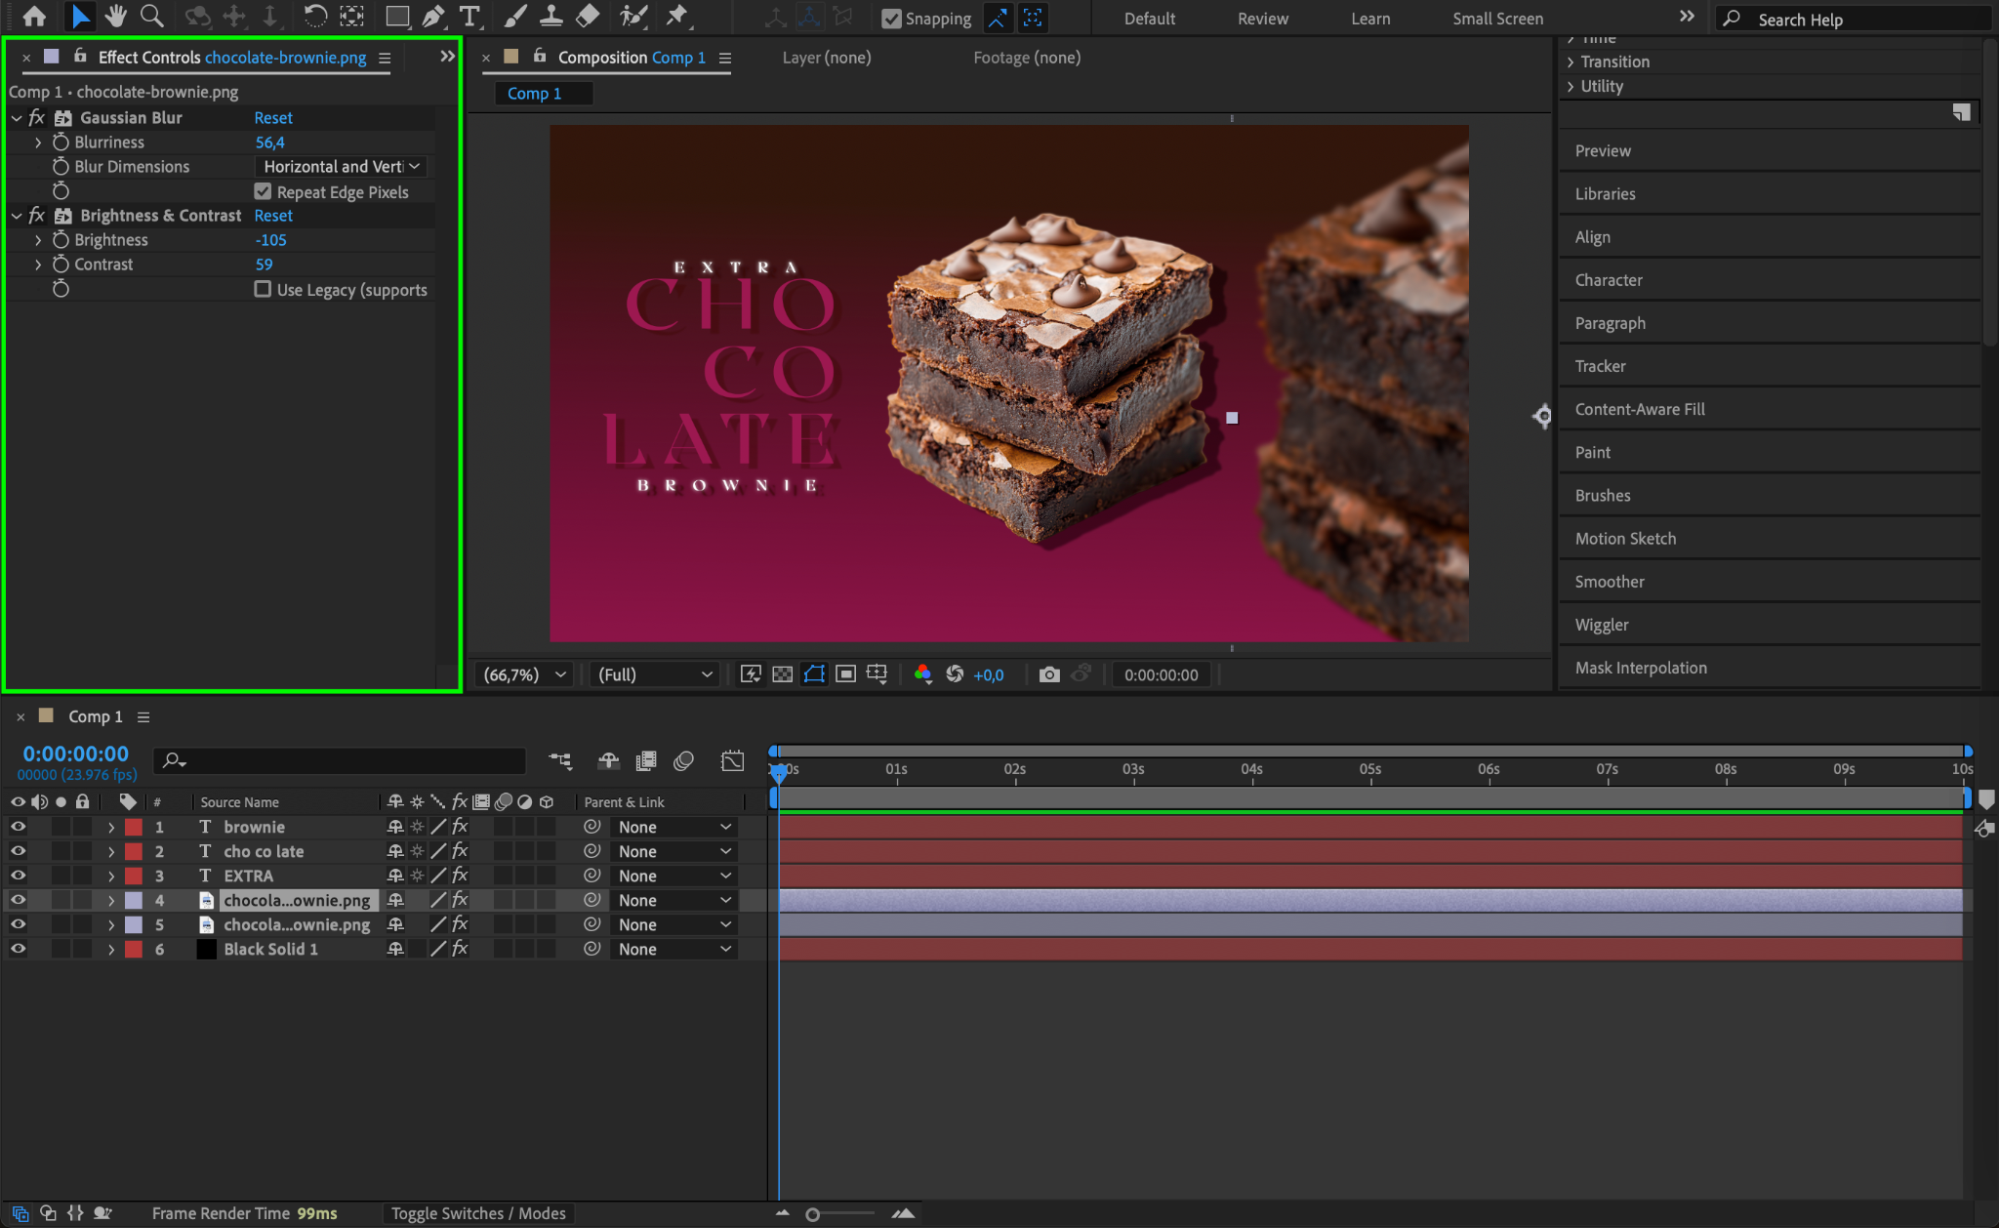 Step 8: Animate Your Resources
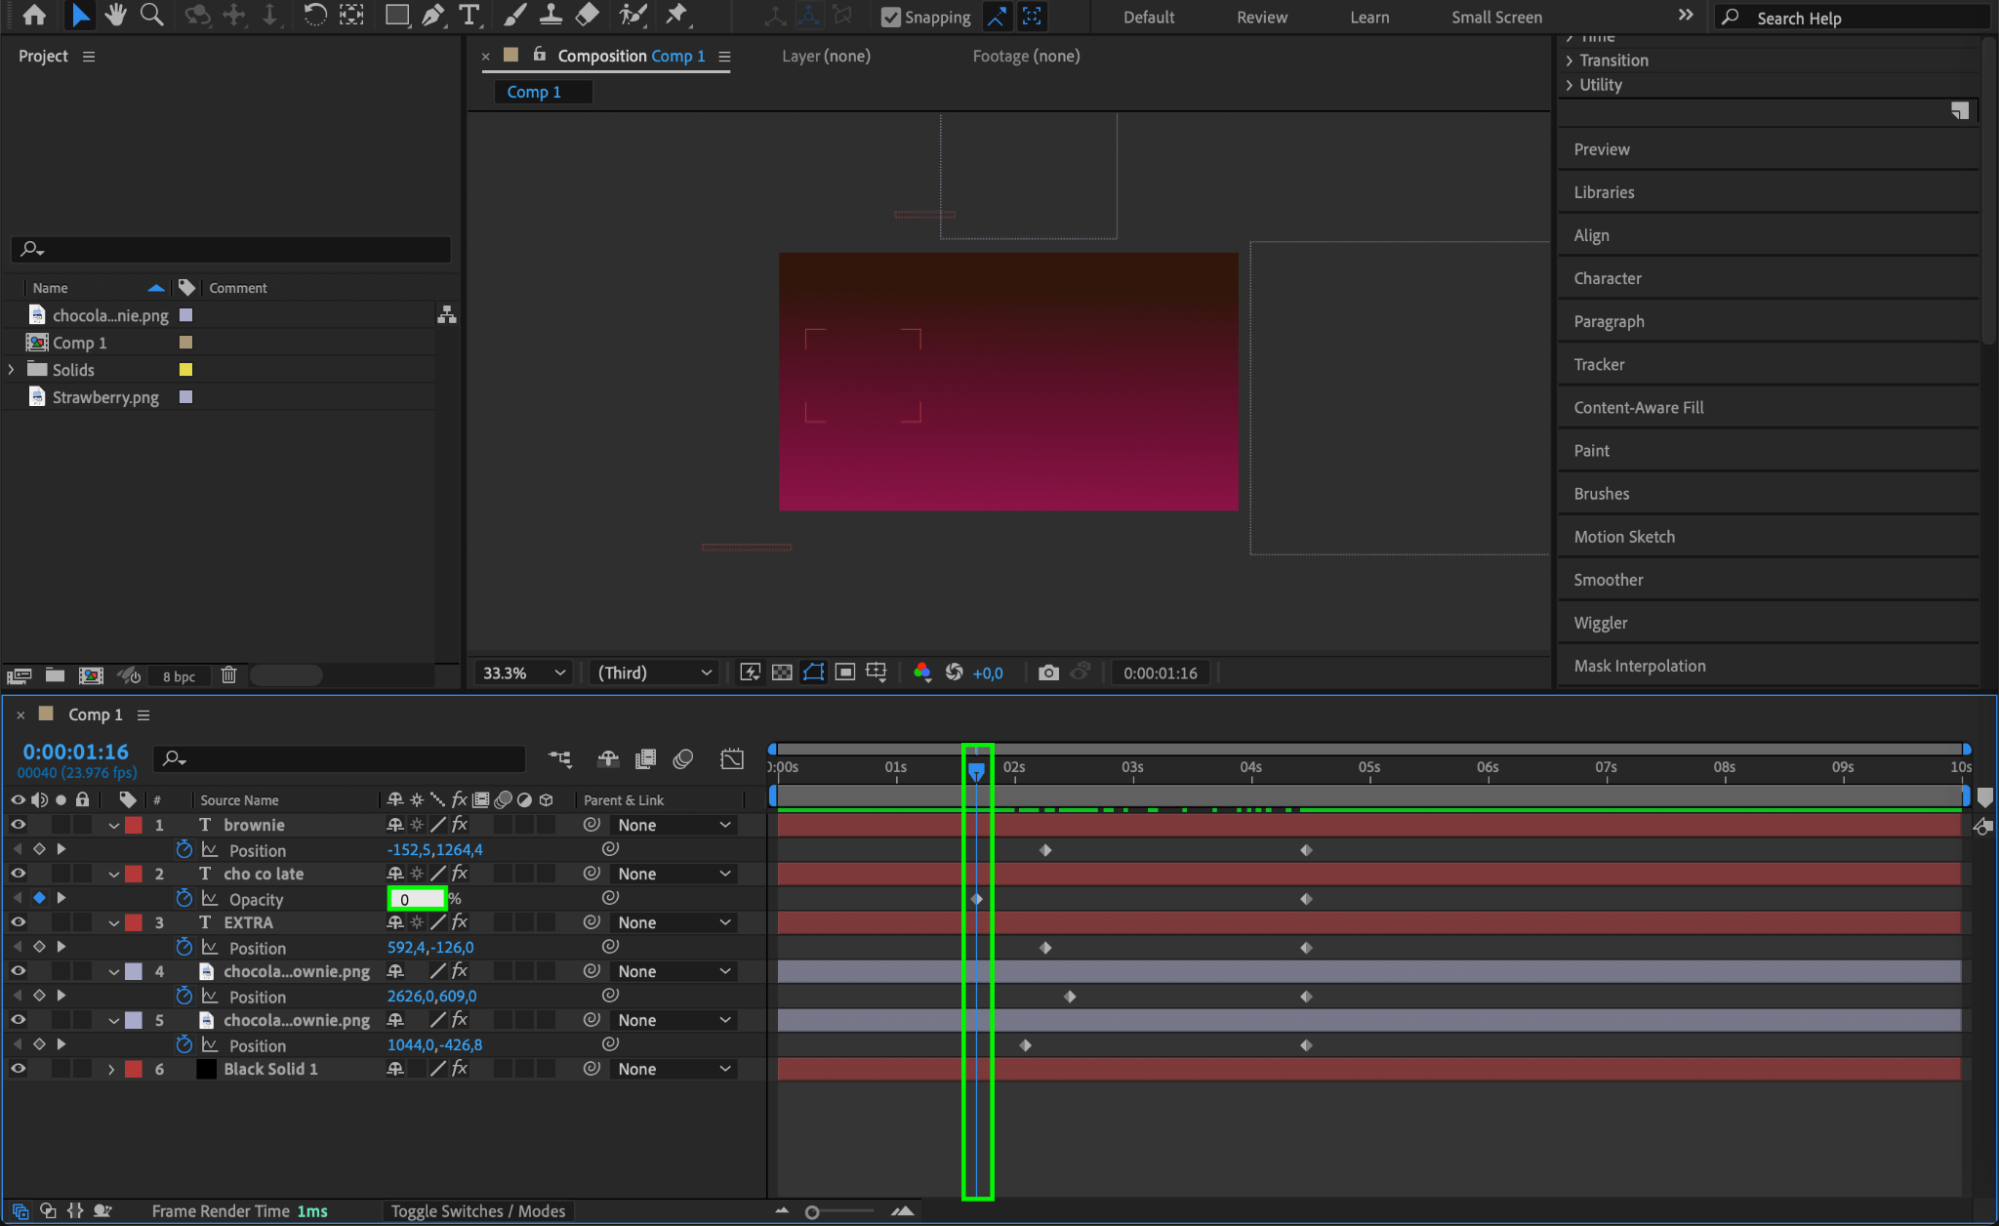
Move the CTI (Current Time Indicator) to the middle of the composition timeline. For each resource, choose a property you want to animate, such as Position, Scale, Rotation, or Opacity, and click the stopwatch icon to create a keyframe. Then, move the CTI forward in time and change the property values to create smooth animation.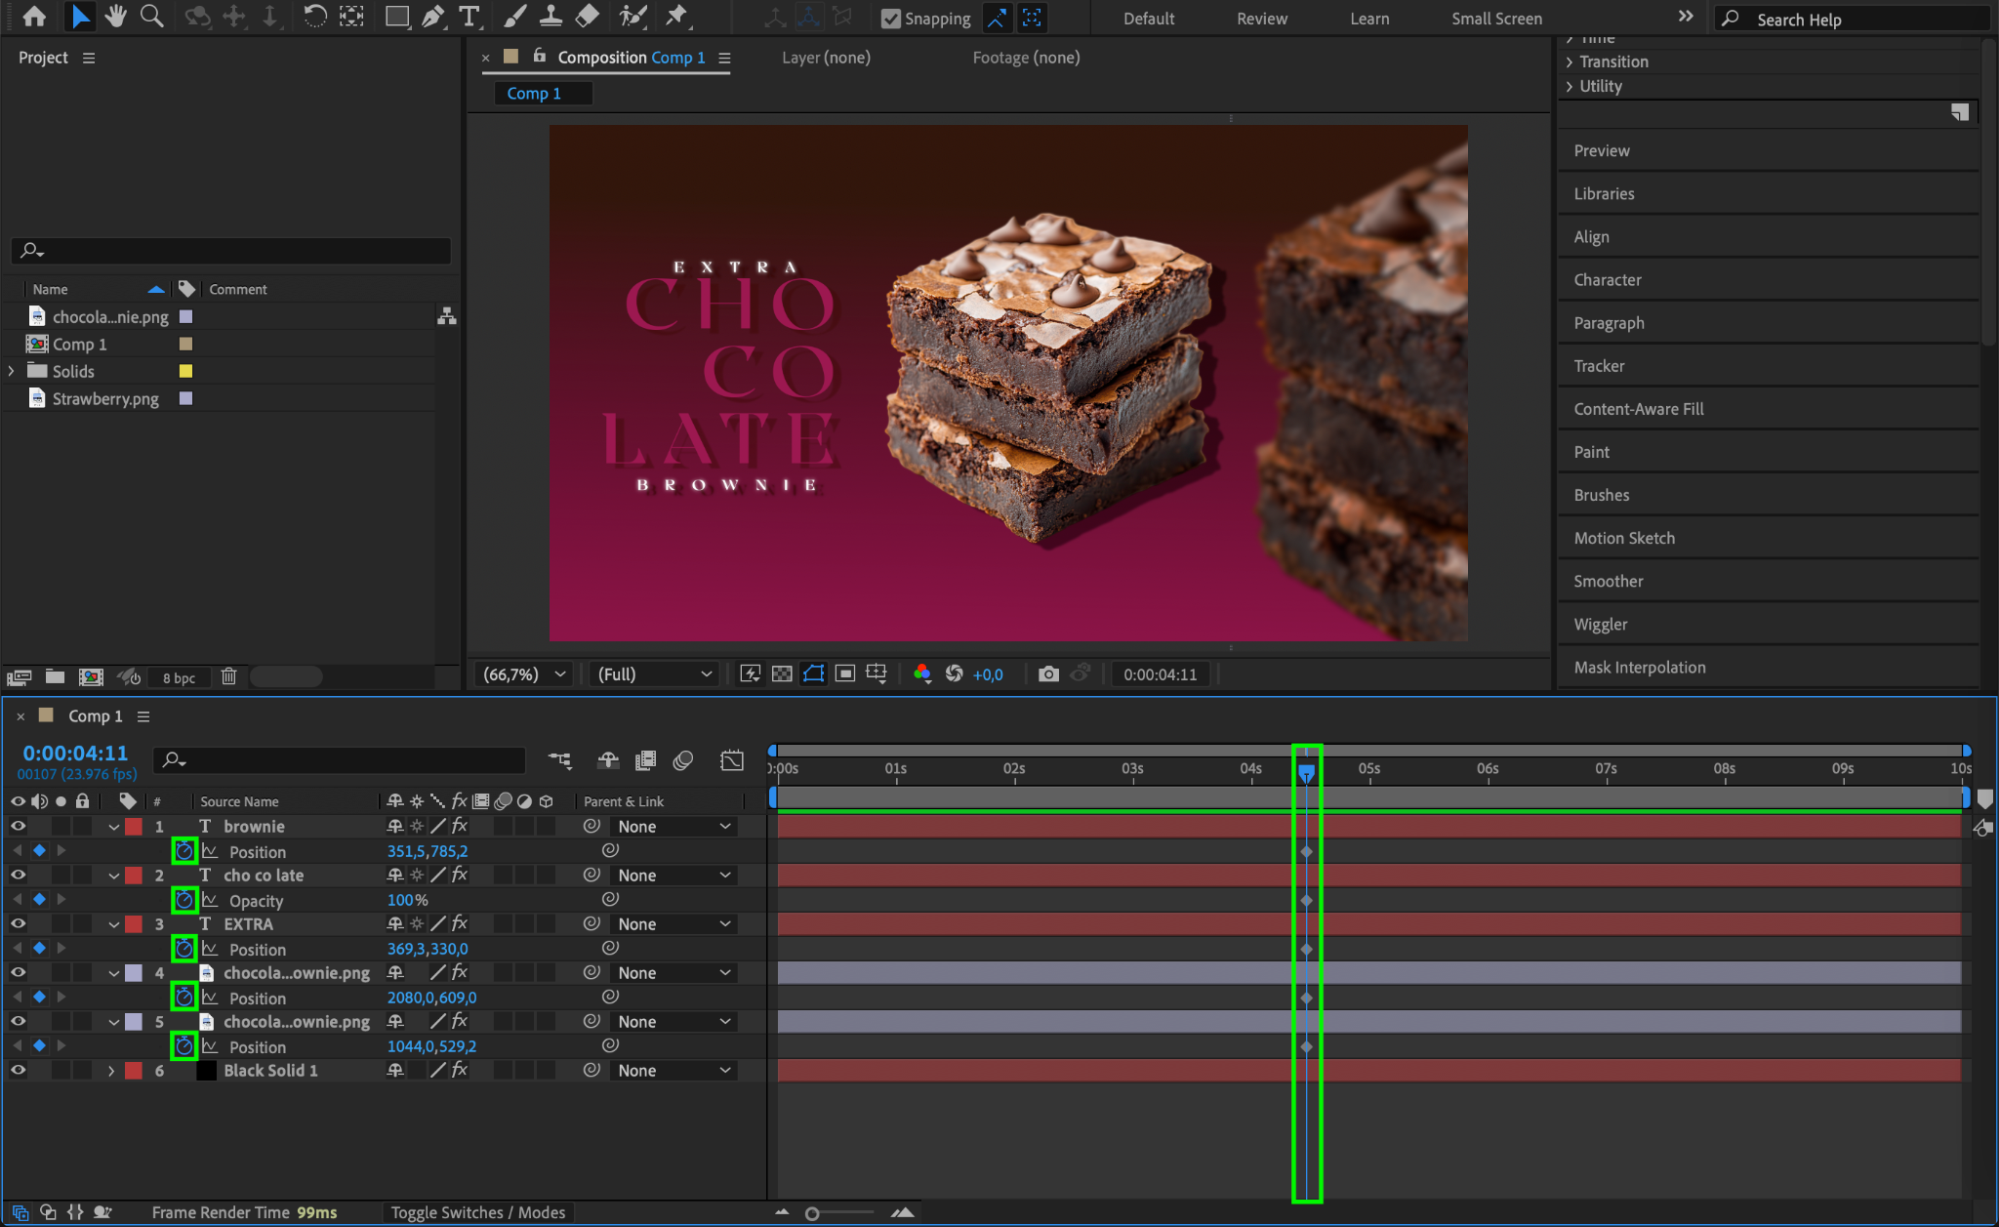
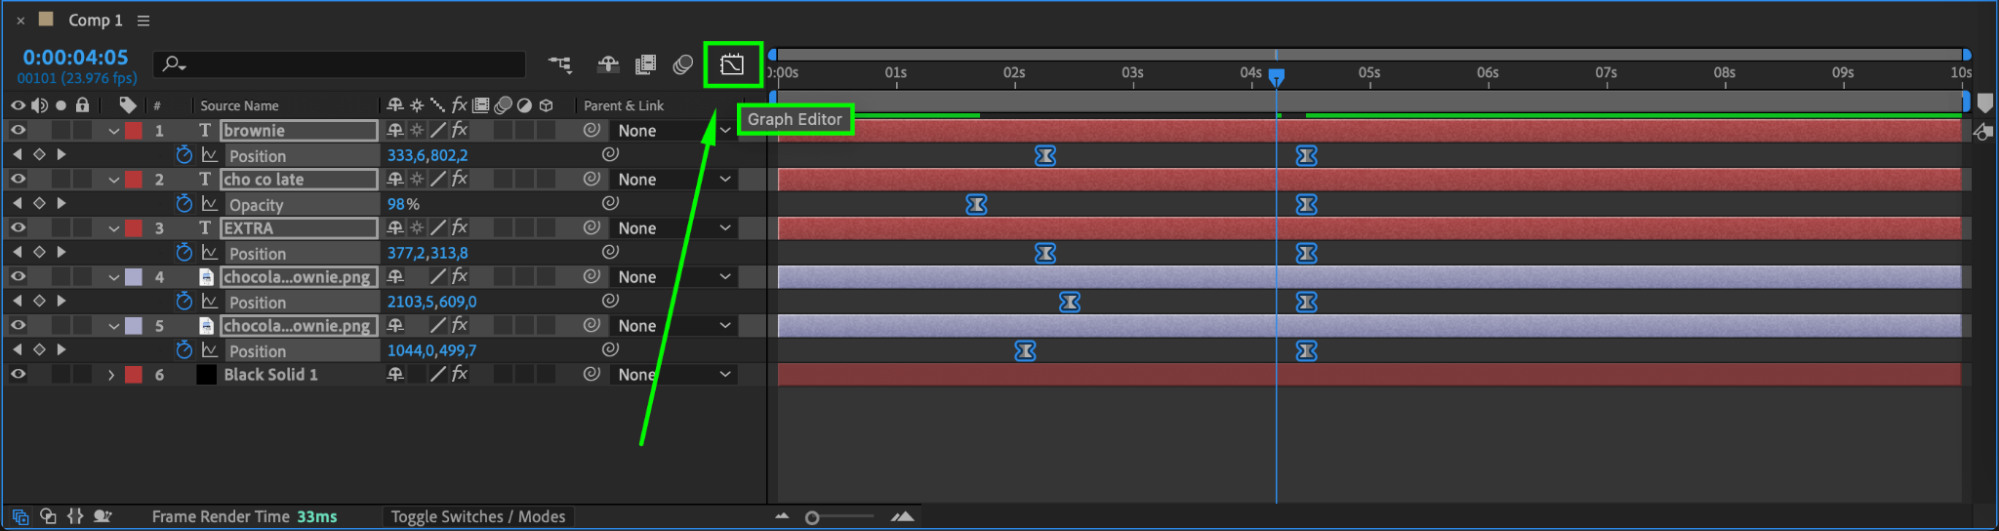
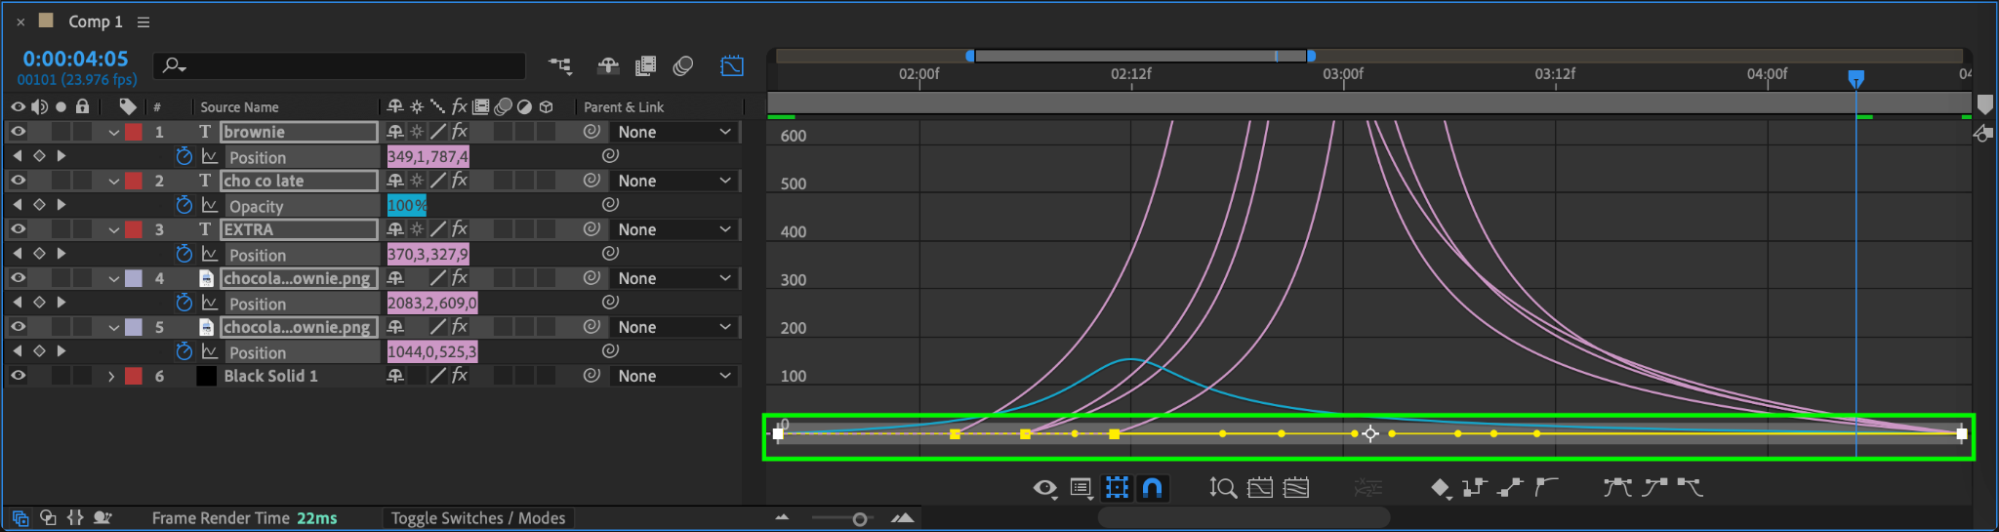
 Step 9: Use Easy Ease and the Graph Editor
To make the animation more fluid, select all keyframes and press F9 to apply Easy Ease. This will smooth the motion of your animation. Use the Graph Editor to fine-tune the easing and make the animation even smoother.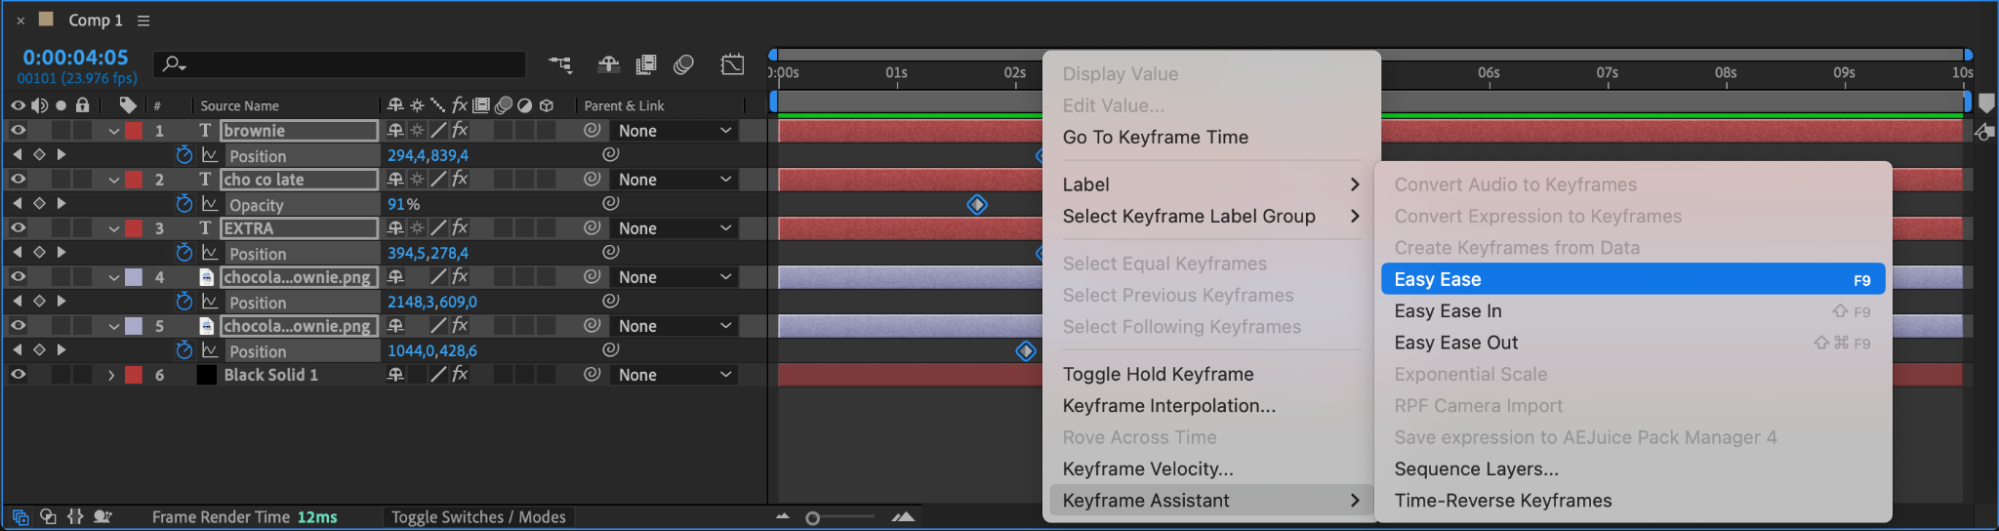
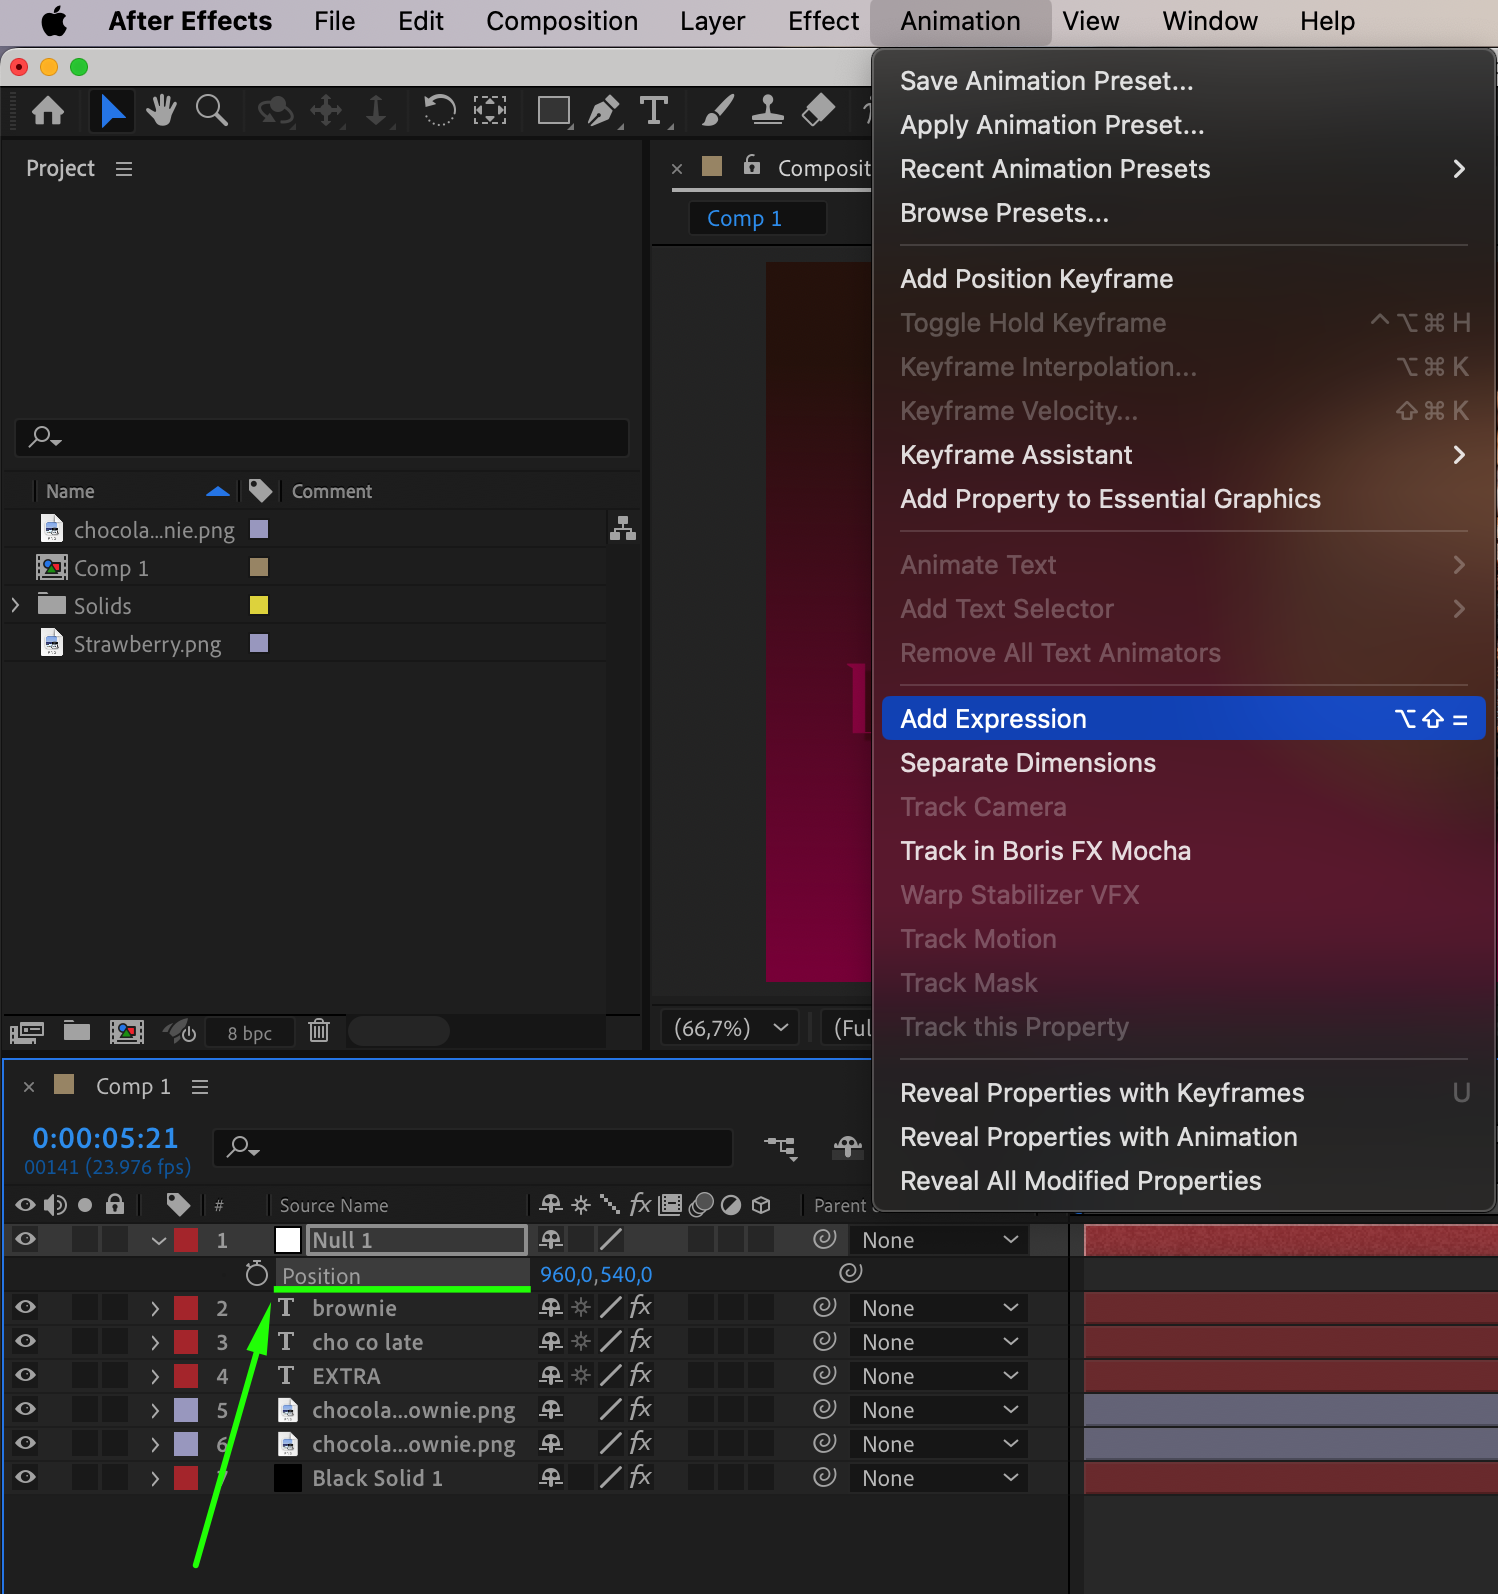
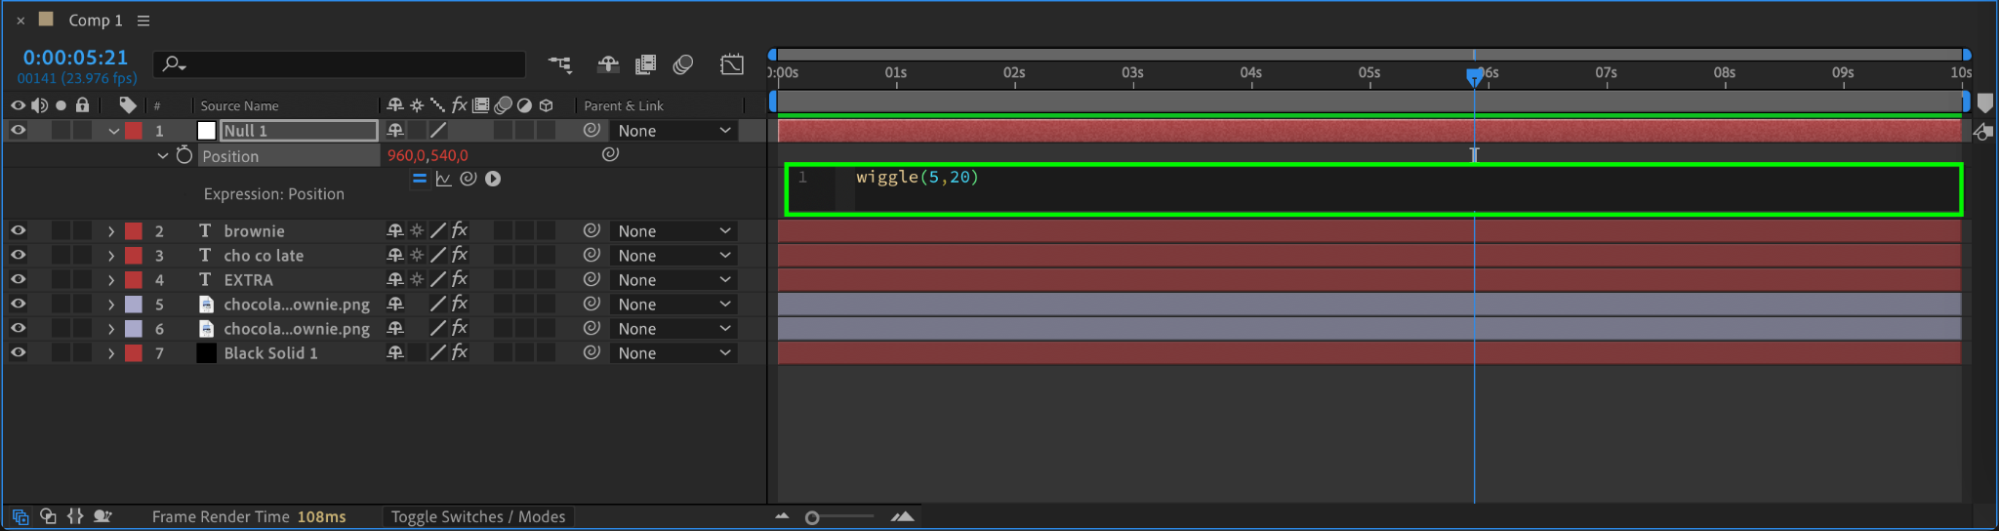
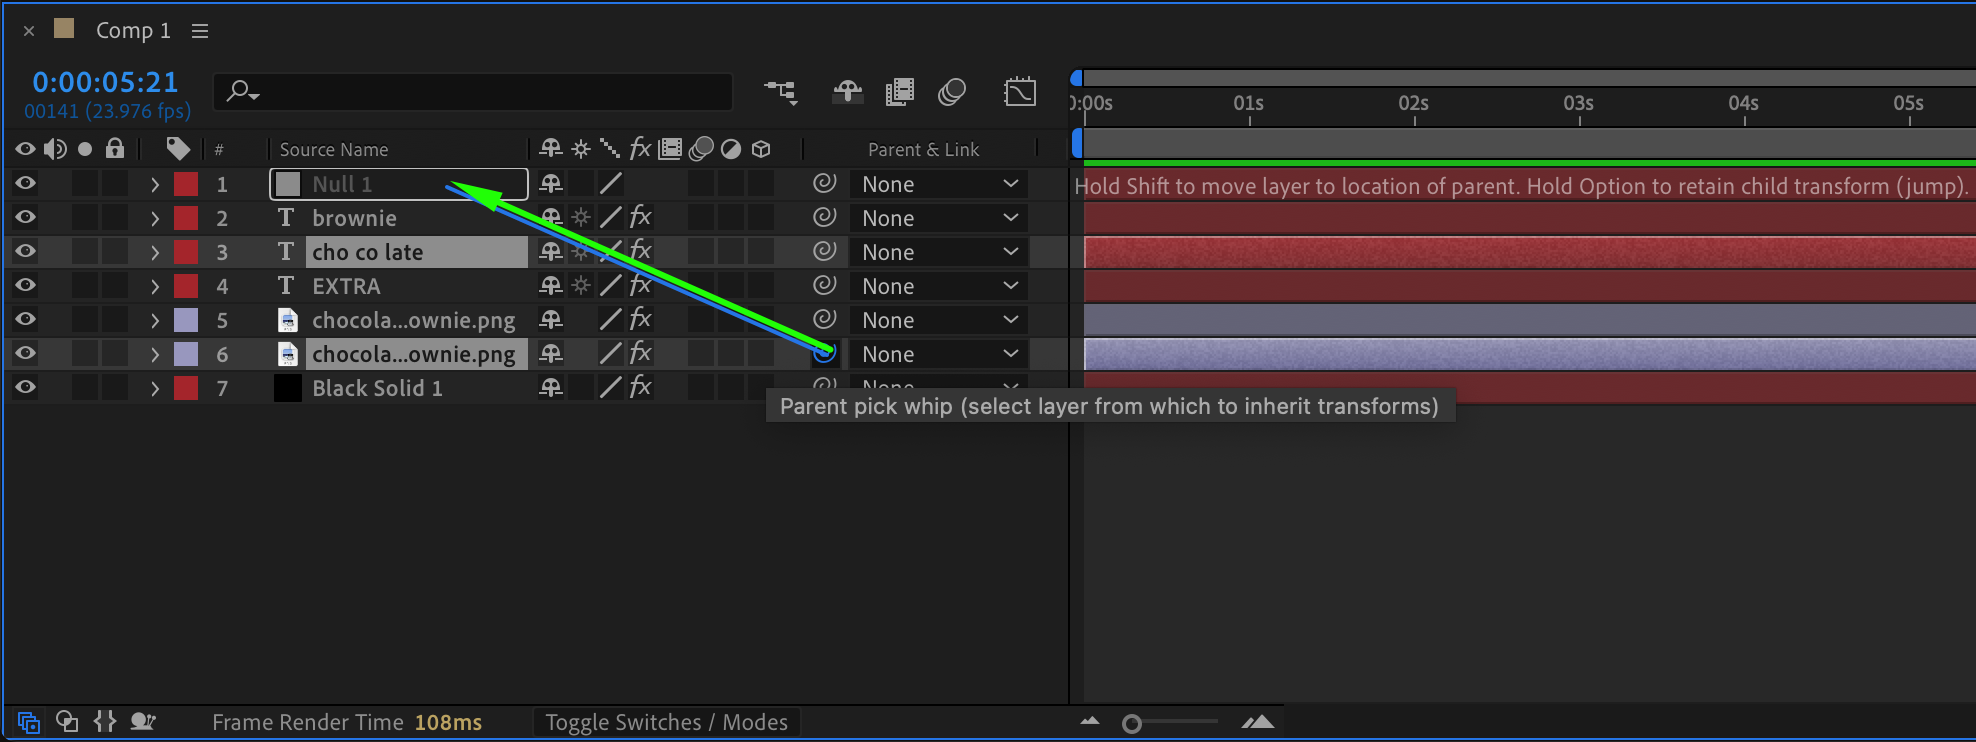
 Step 10: Create a Null Object for Animation Control
Go to Layer > New > Null Object. A null object allows you to control multiple layers simultaneously. Parent the layers you want to animate to the null object by selecting the layers and dragging the pick whip to the null object. Now, you can animate multiple elements at once by controlling the null object.
 Step 11: Preview Your Motion Poster
Once everything is set up, preview your motion poster by pressing Spacebar. Make sure all animations are smooth, and the poster looks visually appealing.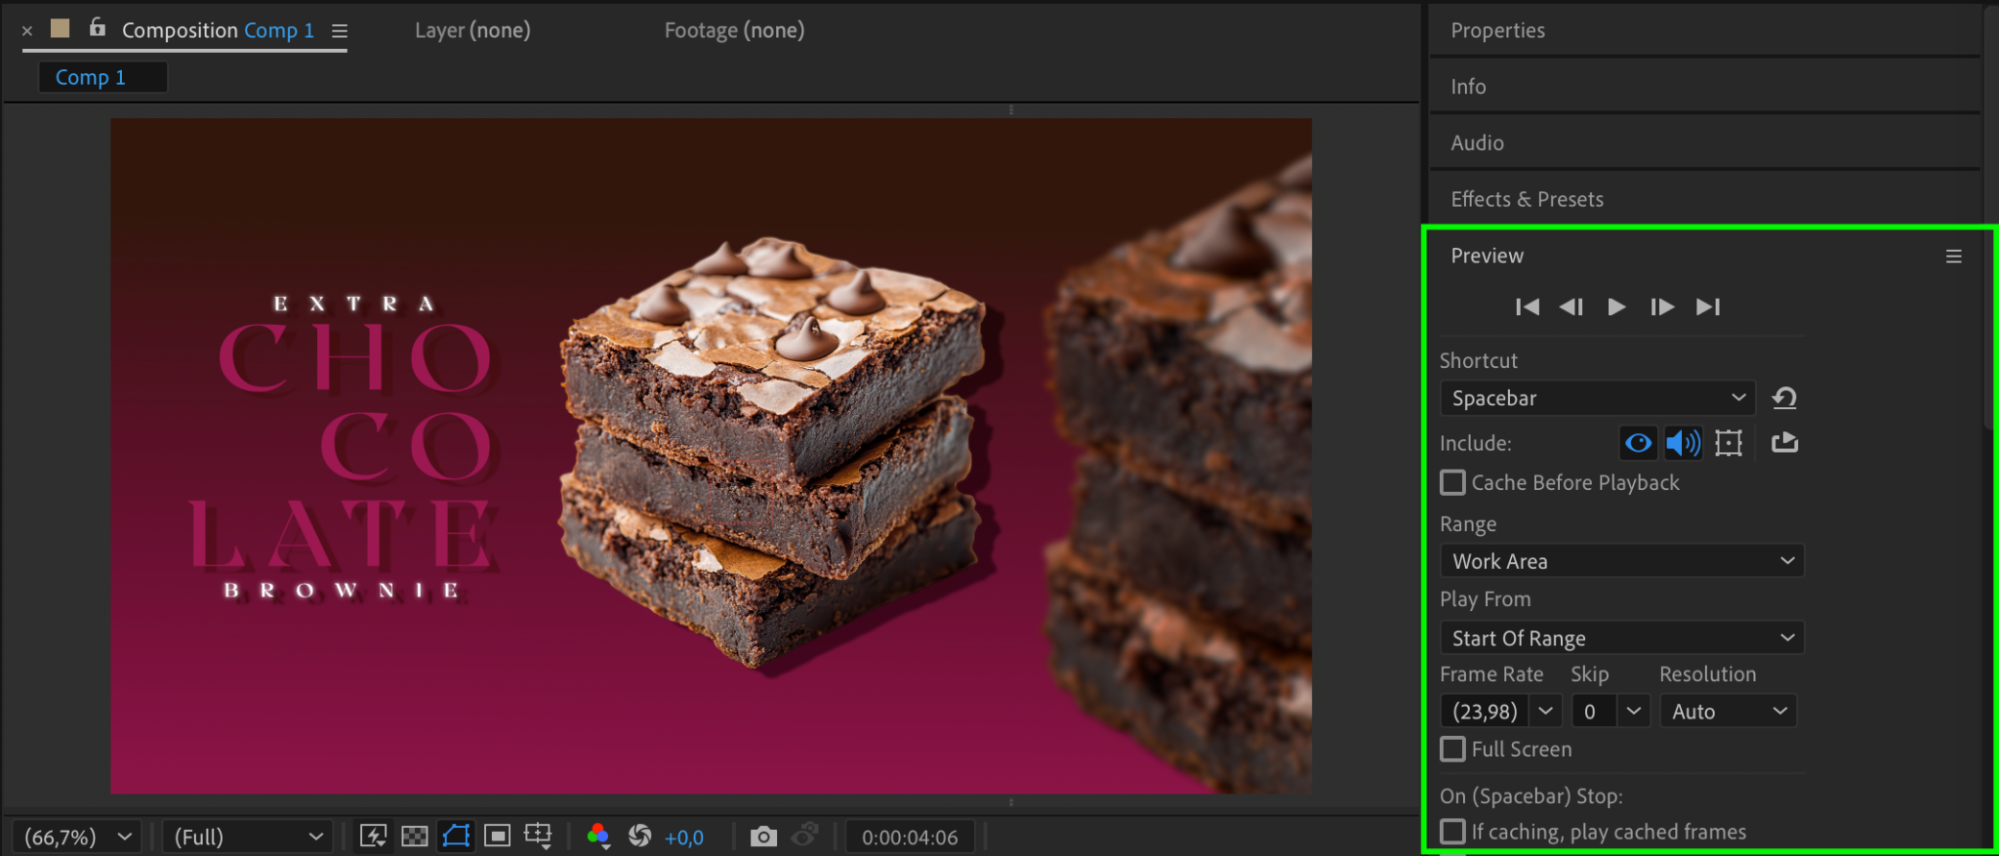 Step 12: Render the Final Poster
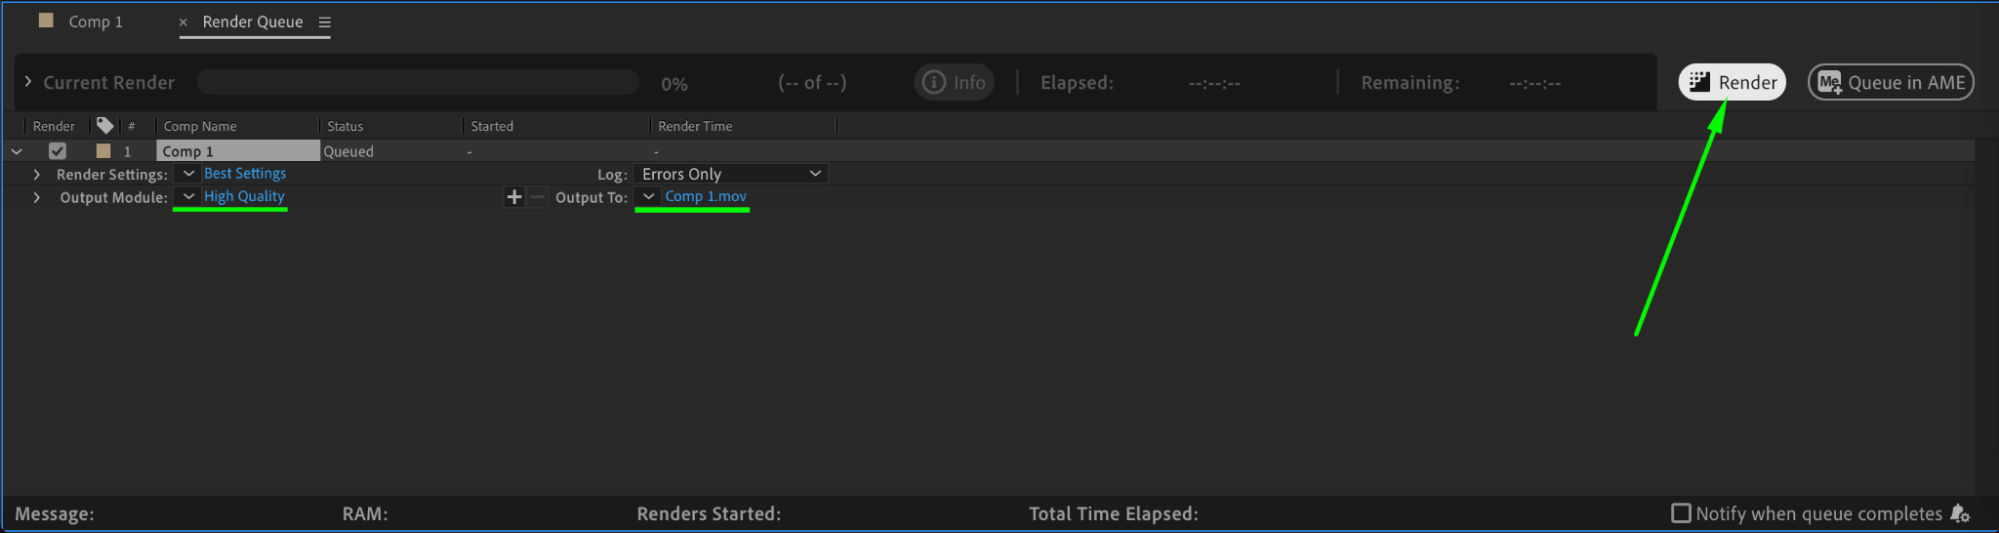
Once you’re happy with the motion poster, go to Composition > Add to Render Queue.
Choose your desired output settings and click Render to export the final video.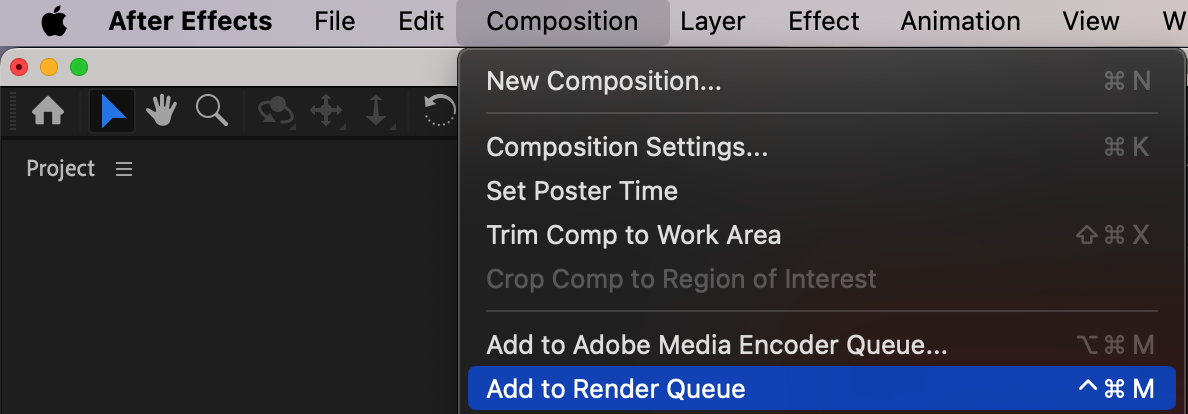
 Conclusion
By following these steps, you can create a stunning motion poster in After Effects that brings your ideas to life with dynamic animations and eye-catching effects. Whether for advertising, social media, or events, this technique is an excellent way to engage your audience and deliver your message with impact.
Our Bestsellers


