How to Create a Moving Background in After Effects
Introduction
A moving background adds depth and energy to any animation or video project. In this guide, you’ll learn how to create an animated background using gradients, motion tile, and distortion effects in After Effects. This technique is useful for intros, motion graphics, and looping backgrounds.
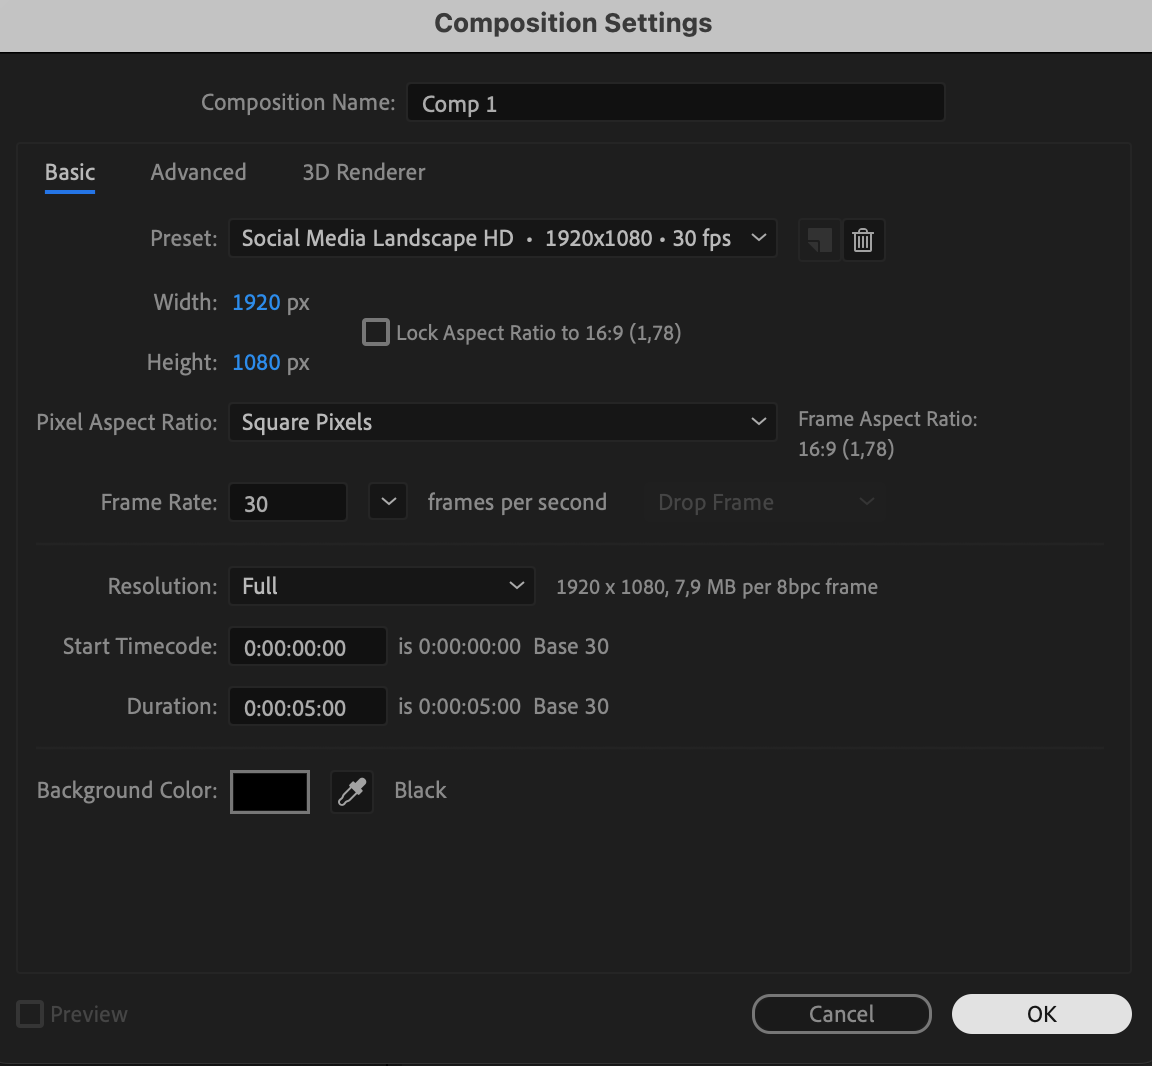
Step 1: Create a New Composition
Get 10% off when you subscribe to our newsletter

Open After Effects and go to Composition > New Composition. Set your desired resolution and duration. A standard 1920×1080 composition with a duration of 5 seconds is a good starting point.
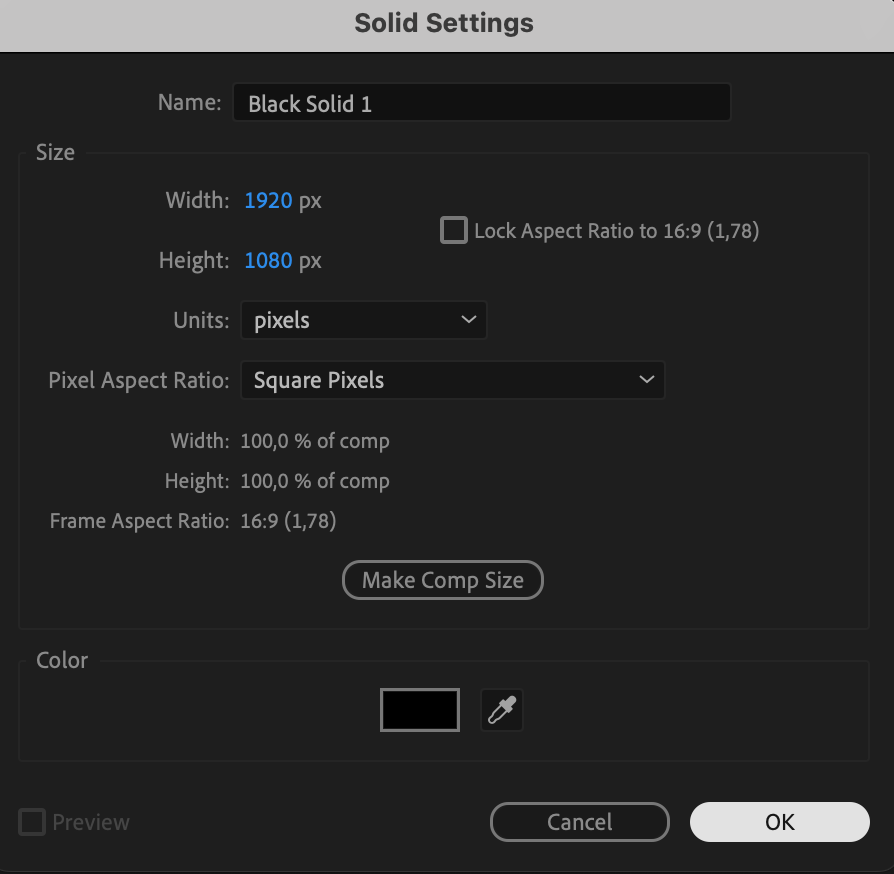
 Step 2: Add a Solid Layer
Go to Layer > New > Solid, choose any color, and click OK. This solid layer will serve as the base for your moving background.
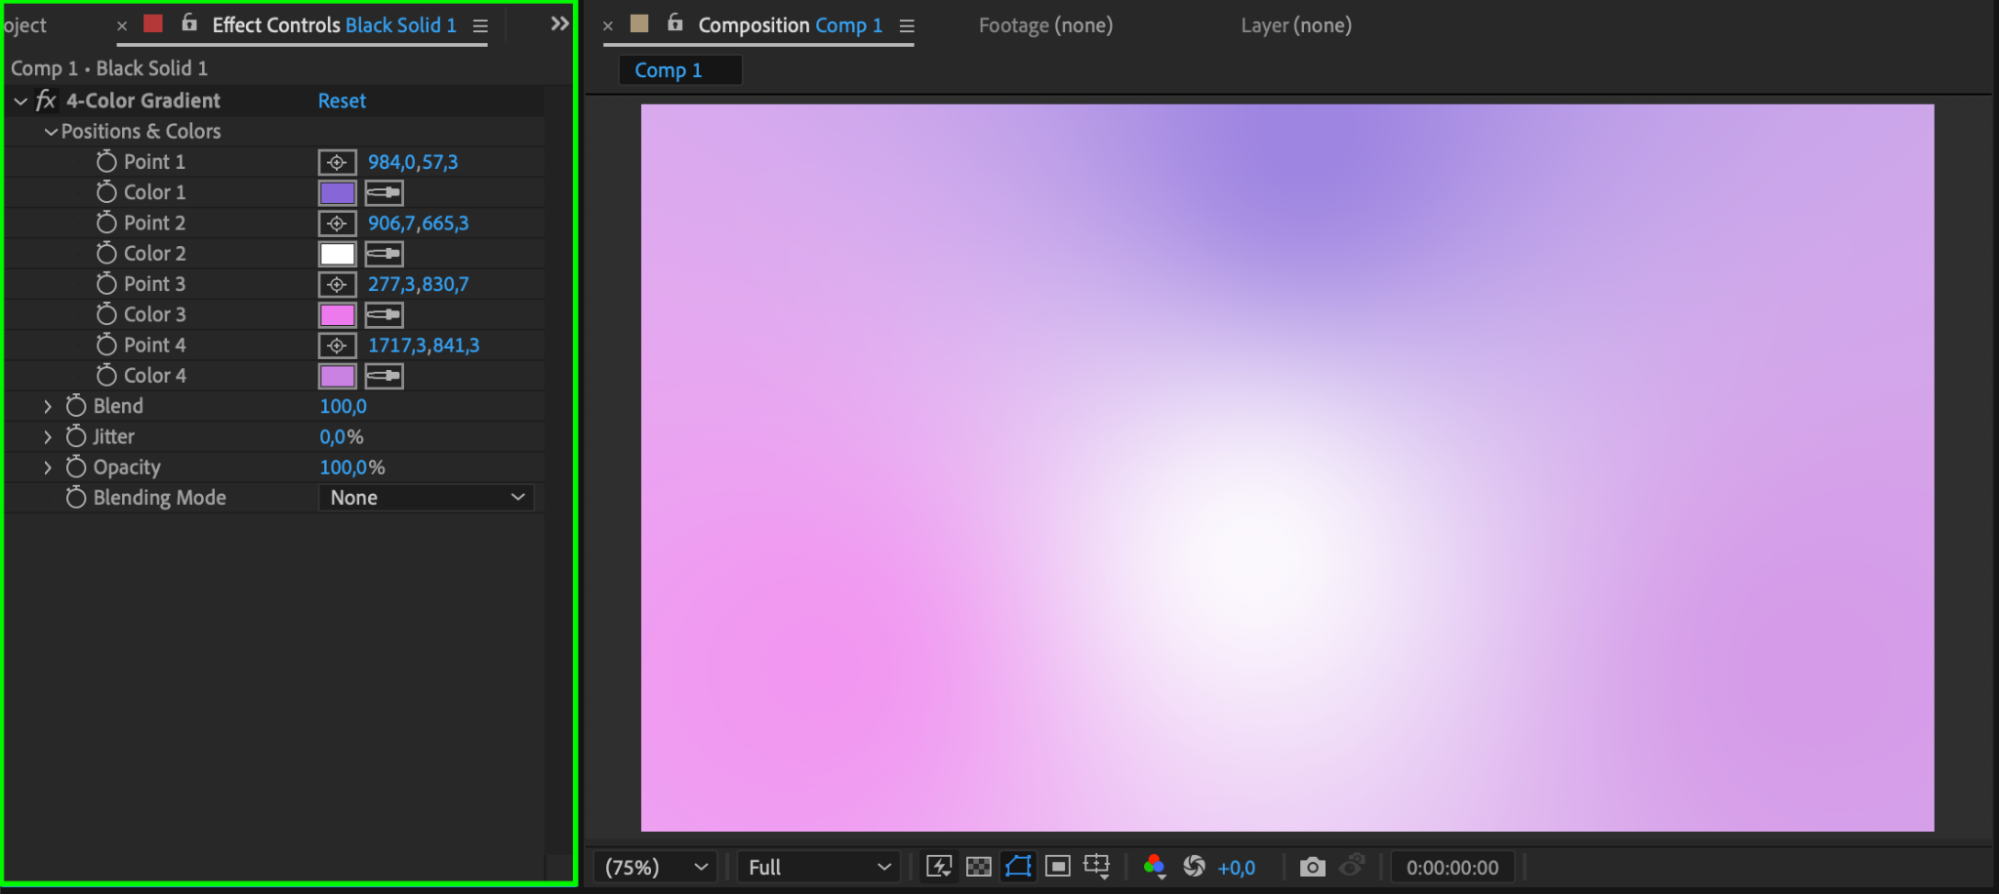
 Step 3: Apply a 4-Color Gradient
Open the Effects & Presets panel, search for 4-Color Gradient, and drag it onto the solid layer. Adjust the colors to create a vibrant or subtle gradient effect that fits your project style.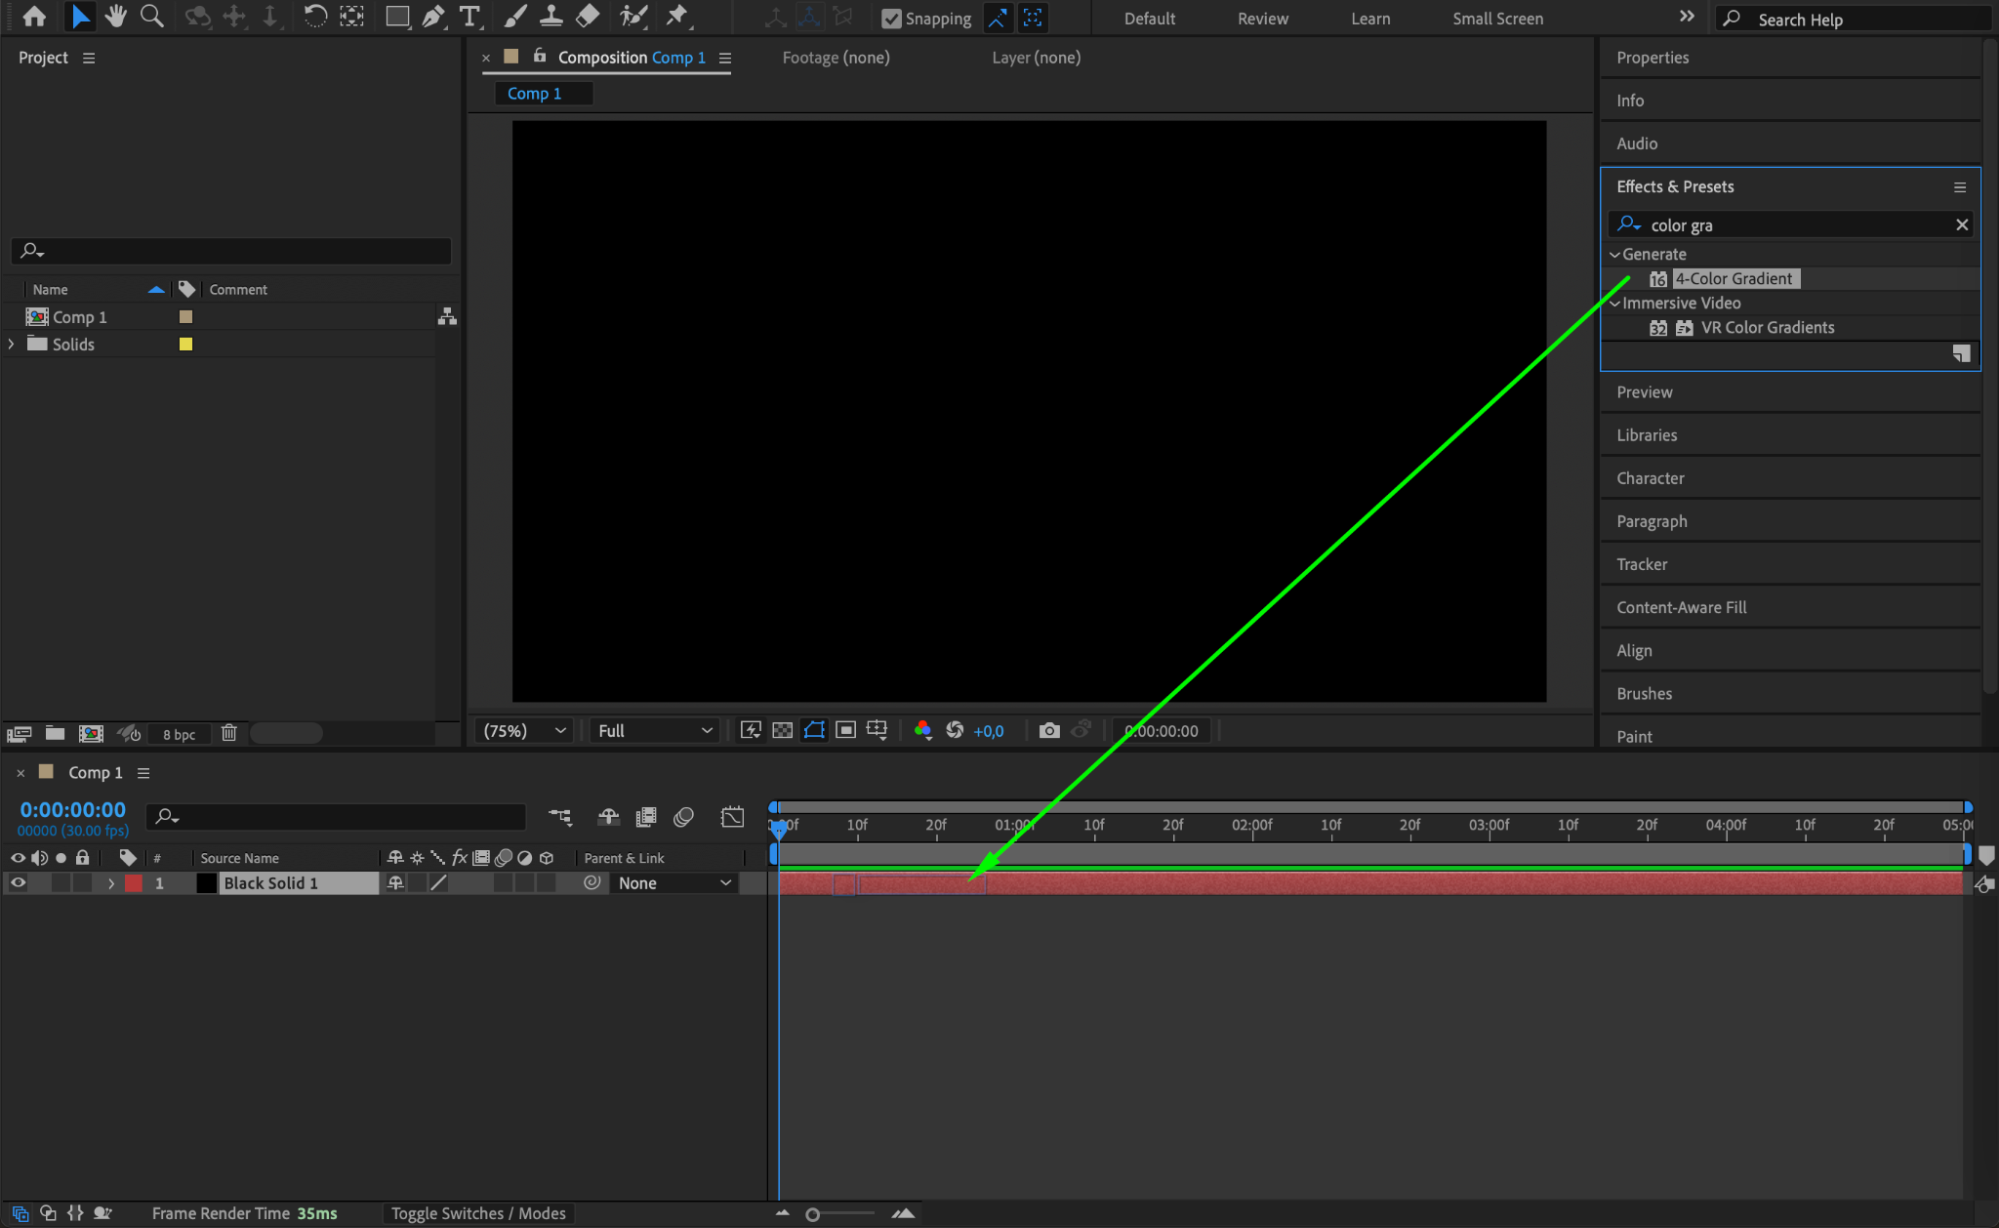
 Step 4: Add an Adjustment Layer
Go to Layer > New > Adjustment Layer. This layer will be used to apply effects that will animate the background without affecting other elements. Step 5: Apply the Motion Tile Effect
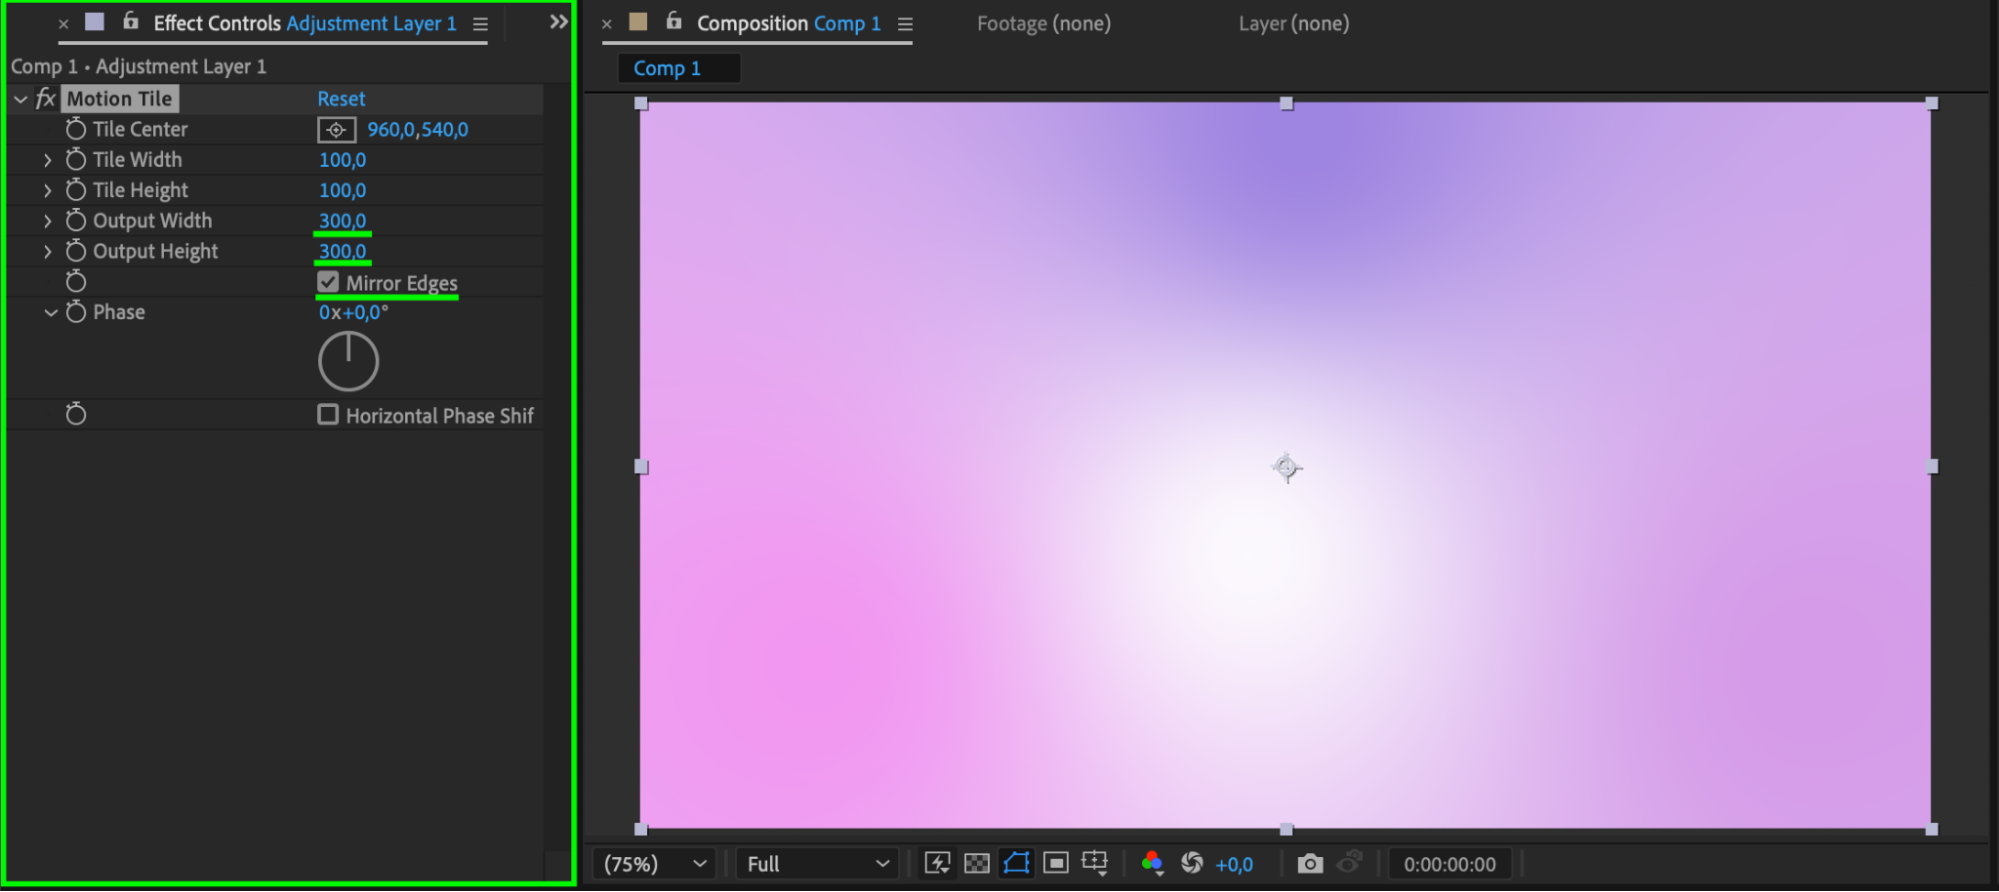
With the adjustment layer selected, search for Motion Tile in the Effects & Presets panel and apply it. Set Output Width and Output Height to 300, then enable Mirror Edges to create seamless movement.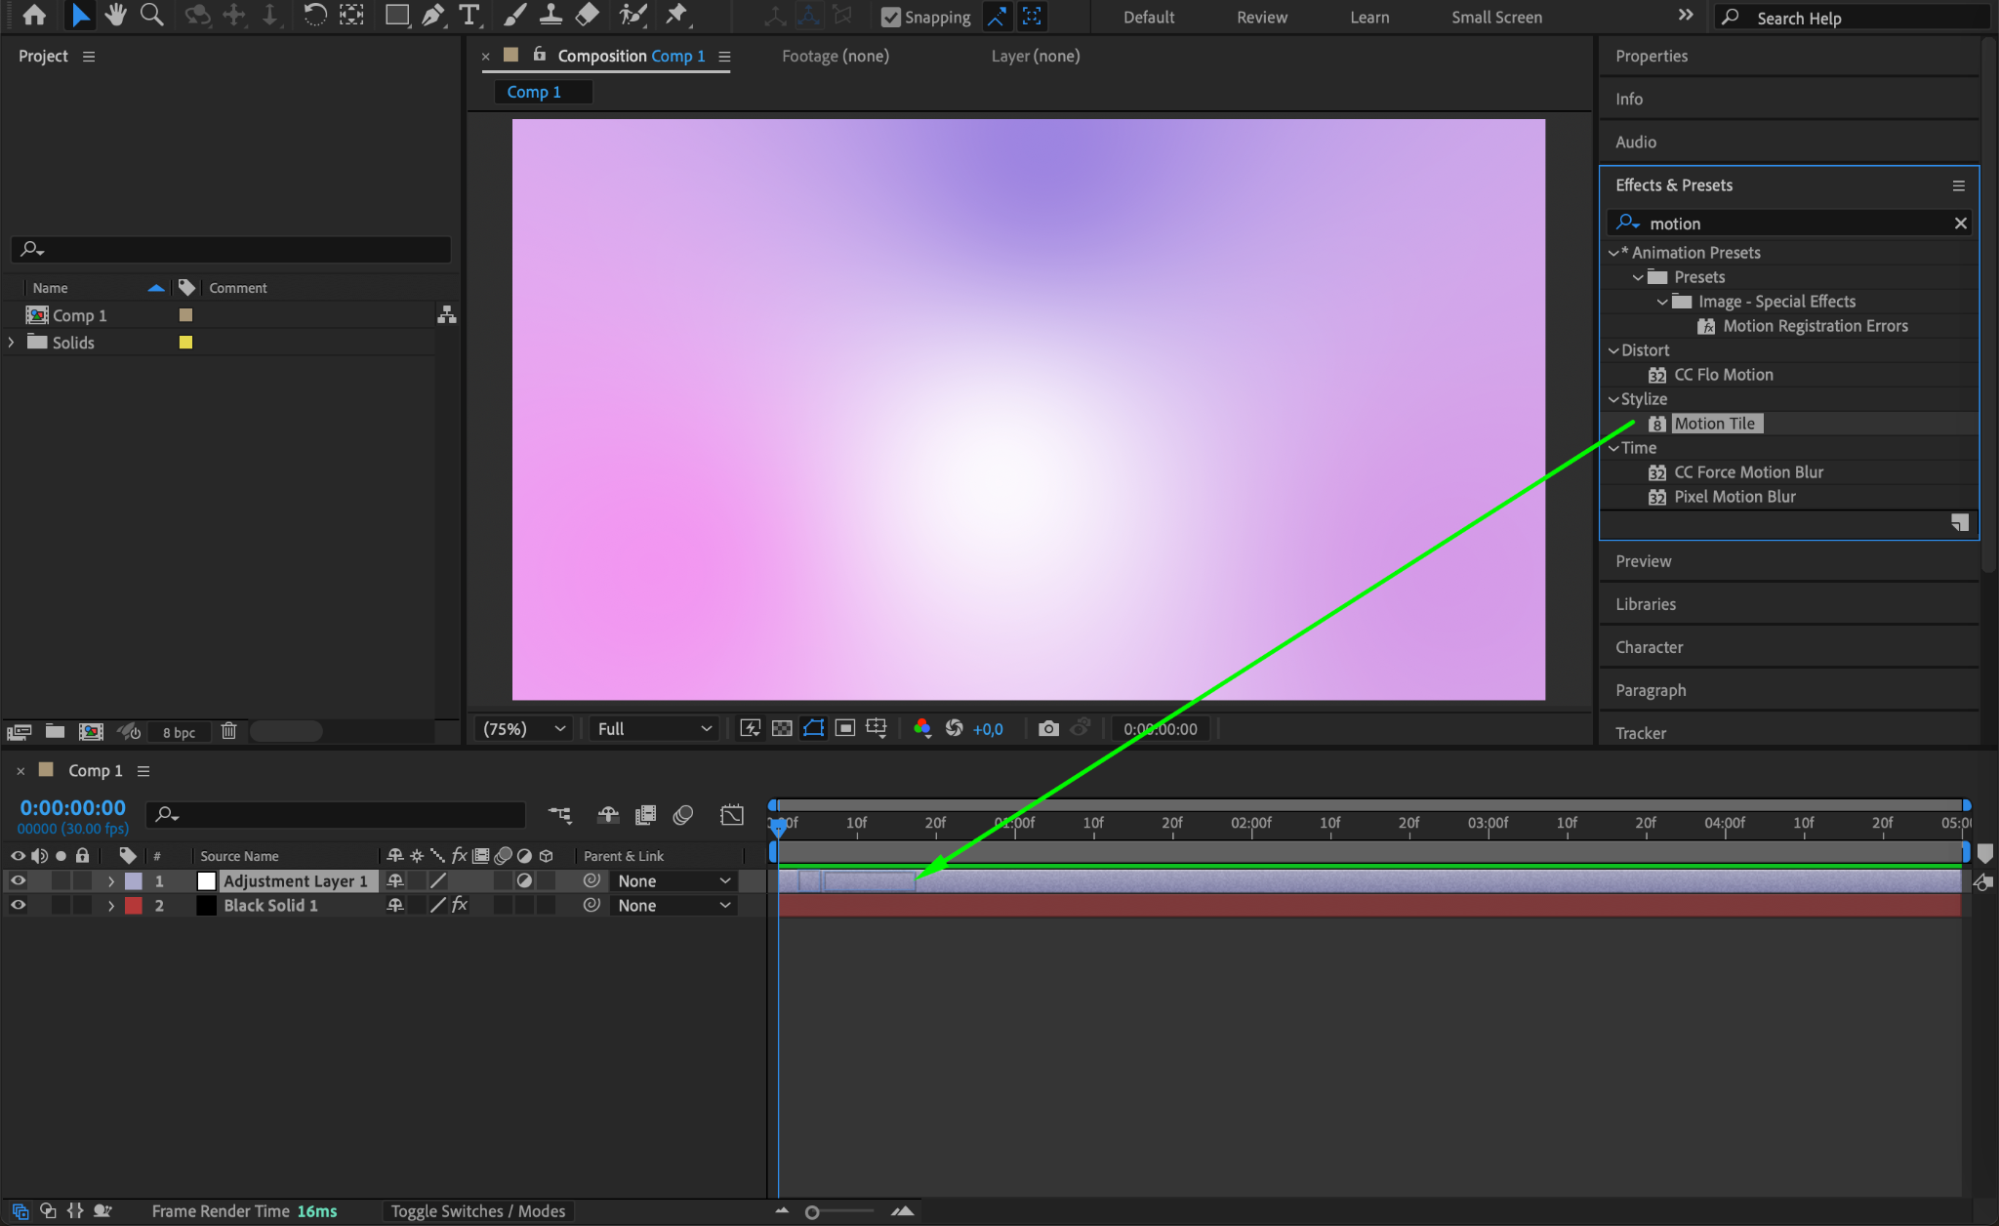
 Step 6: Add Turbulent Displace for Organic Motion
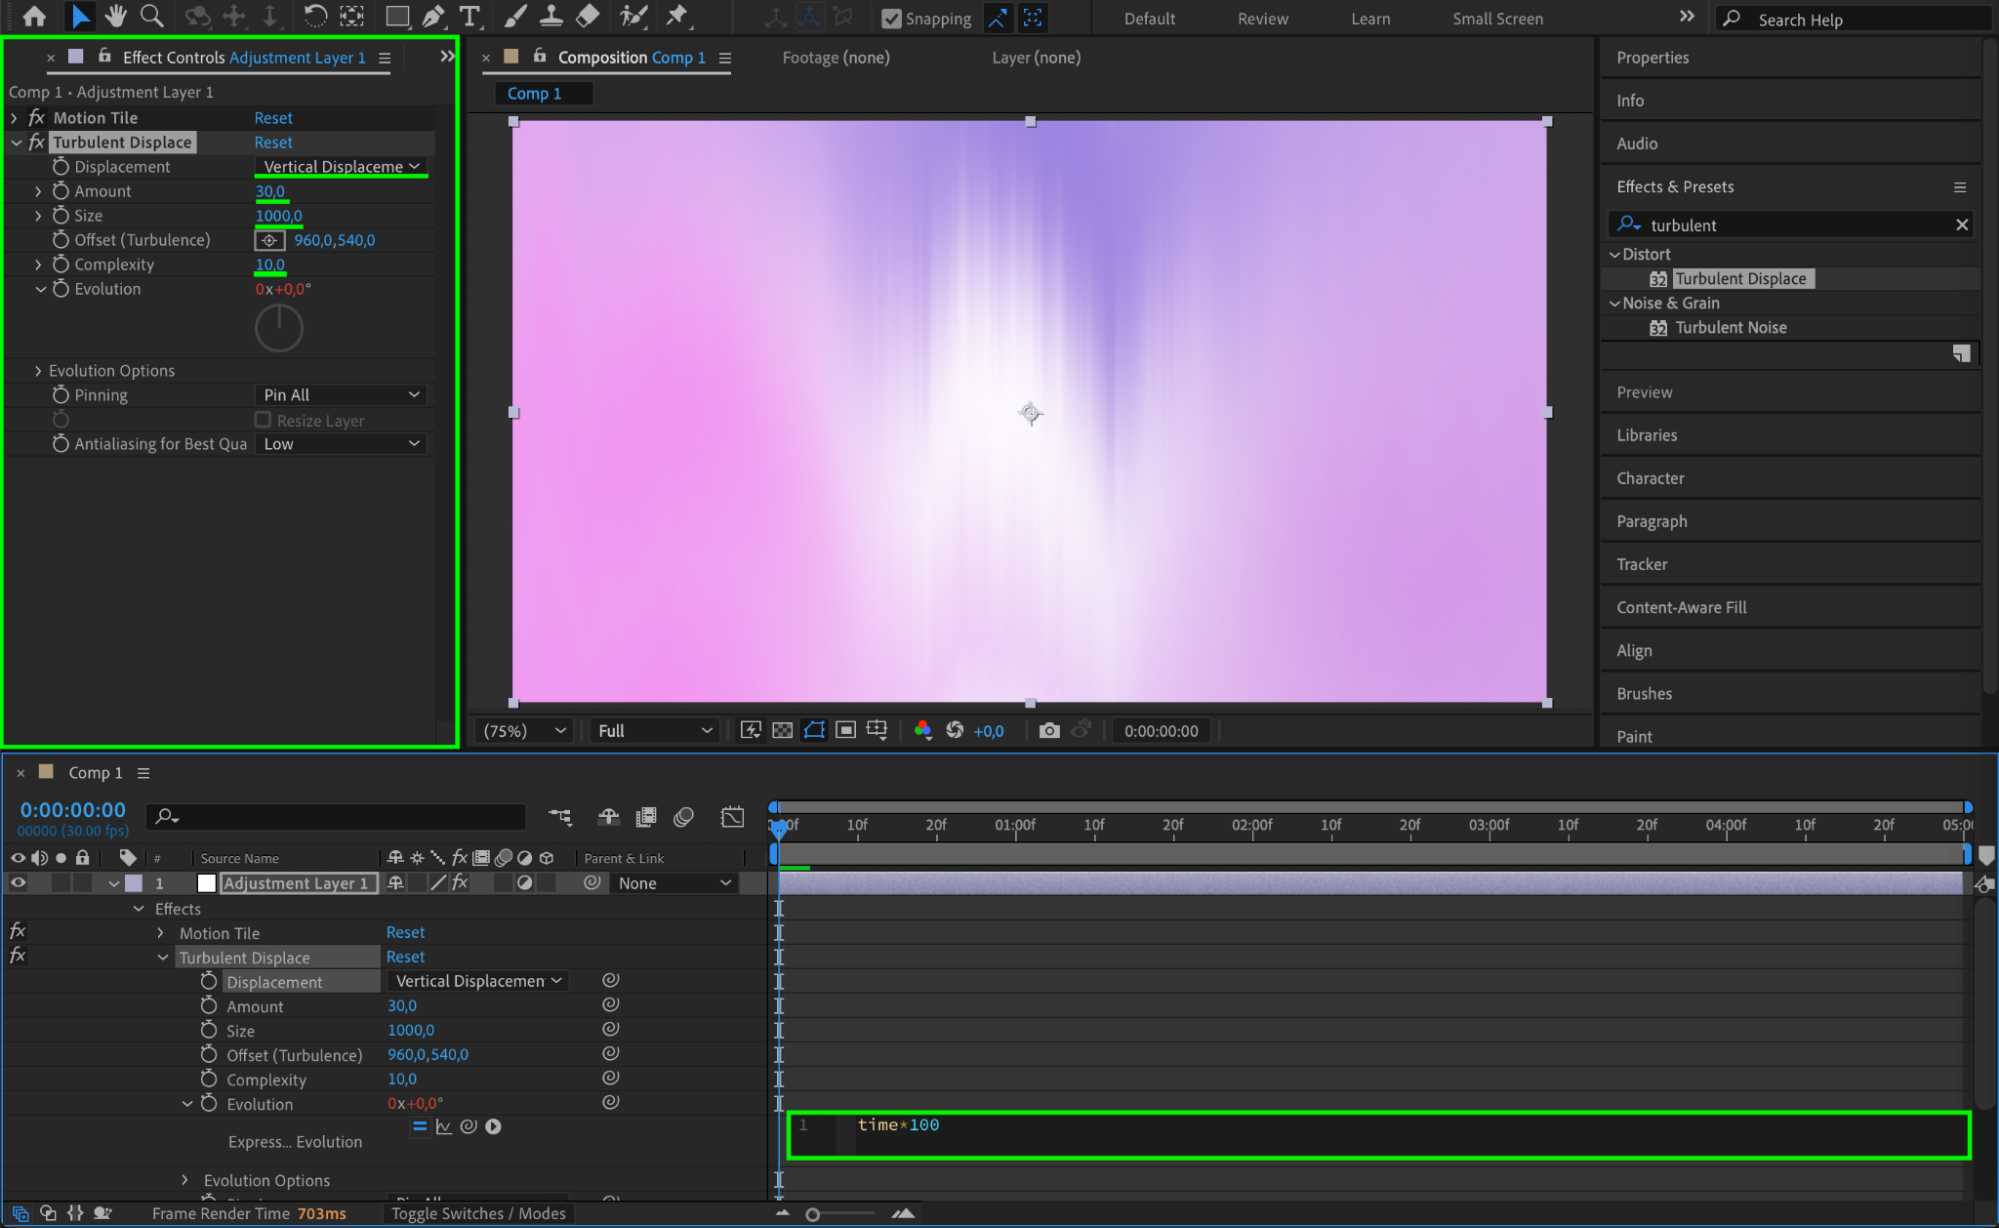
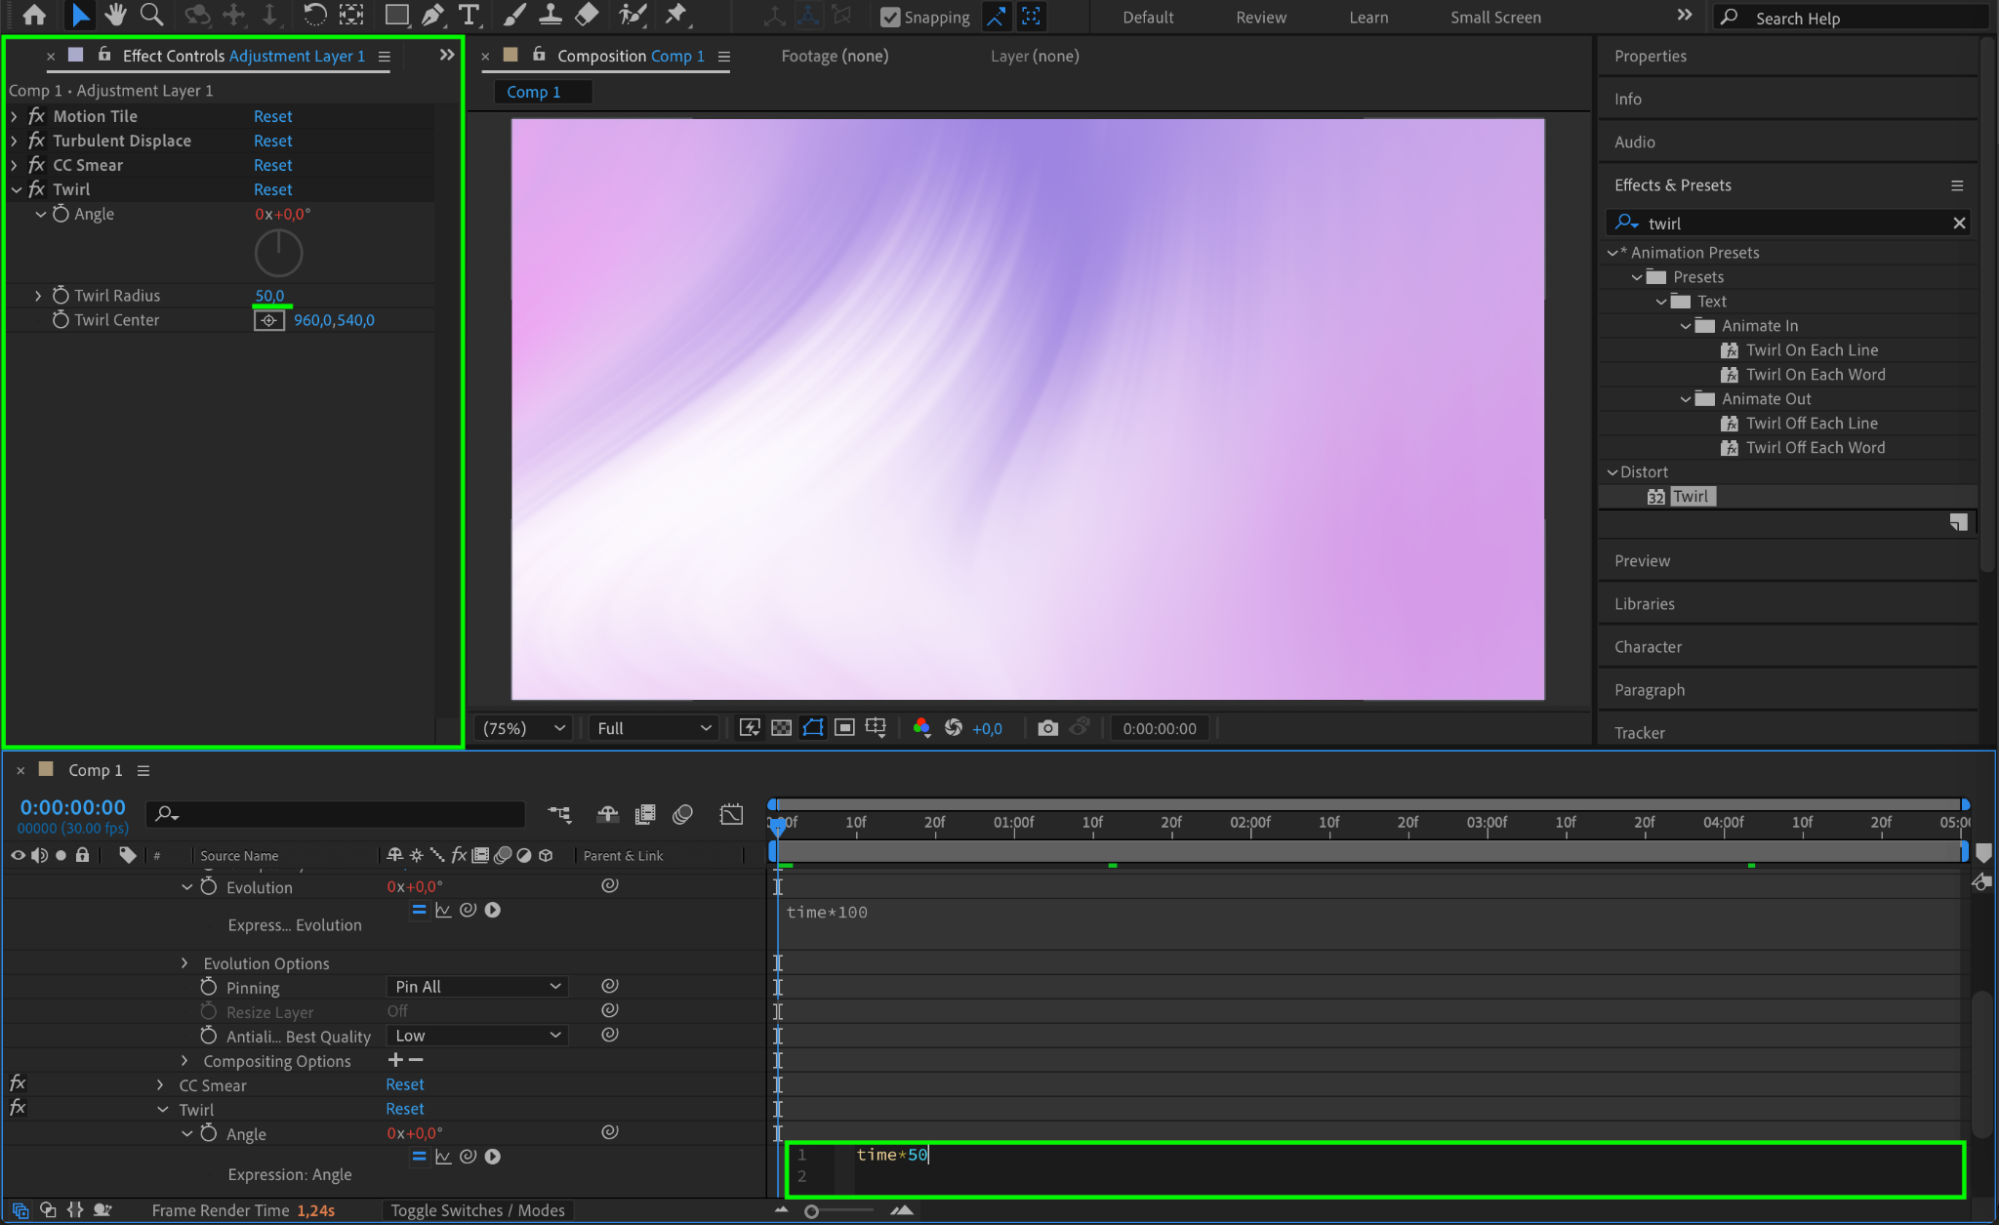
Apply the Turbulent Displace effect to the adjustment layer. Set Displacement to Vertical Displacement, Amount to 30, Size to 1000, and Complexity to 10. In the Evolution property, enter the expression: time*100 to create continuous movement.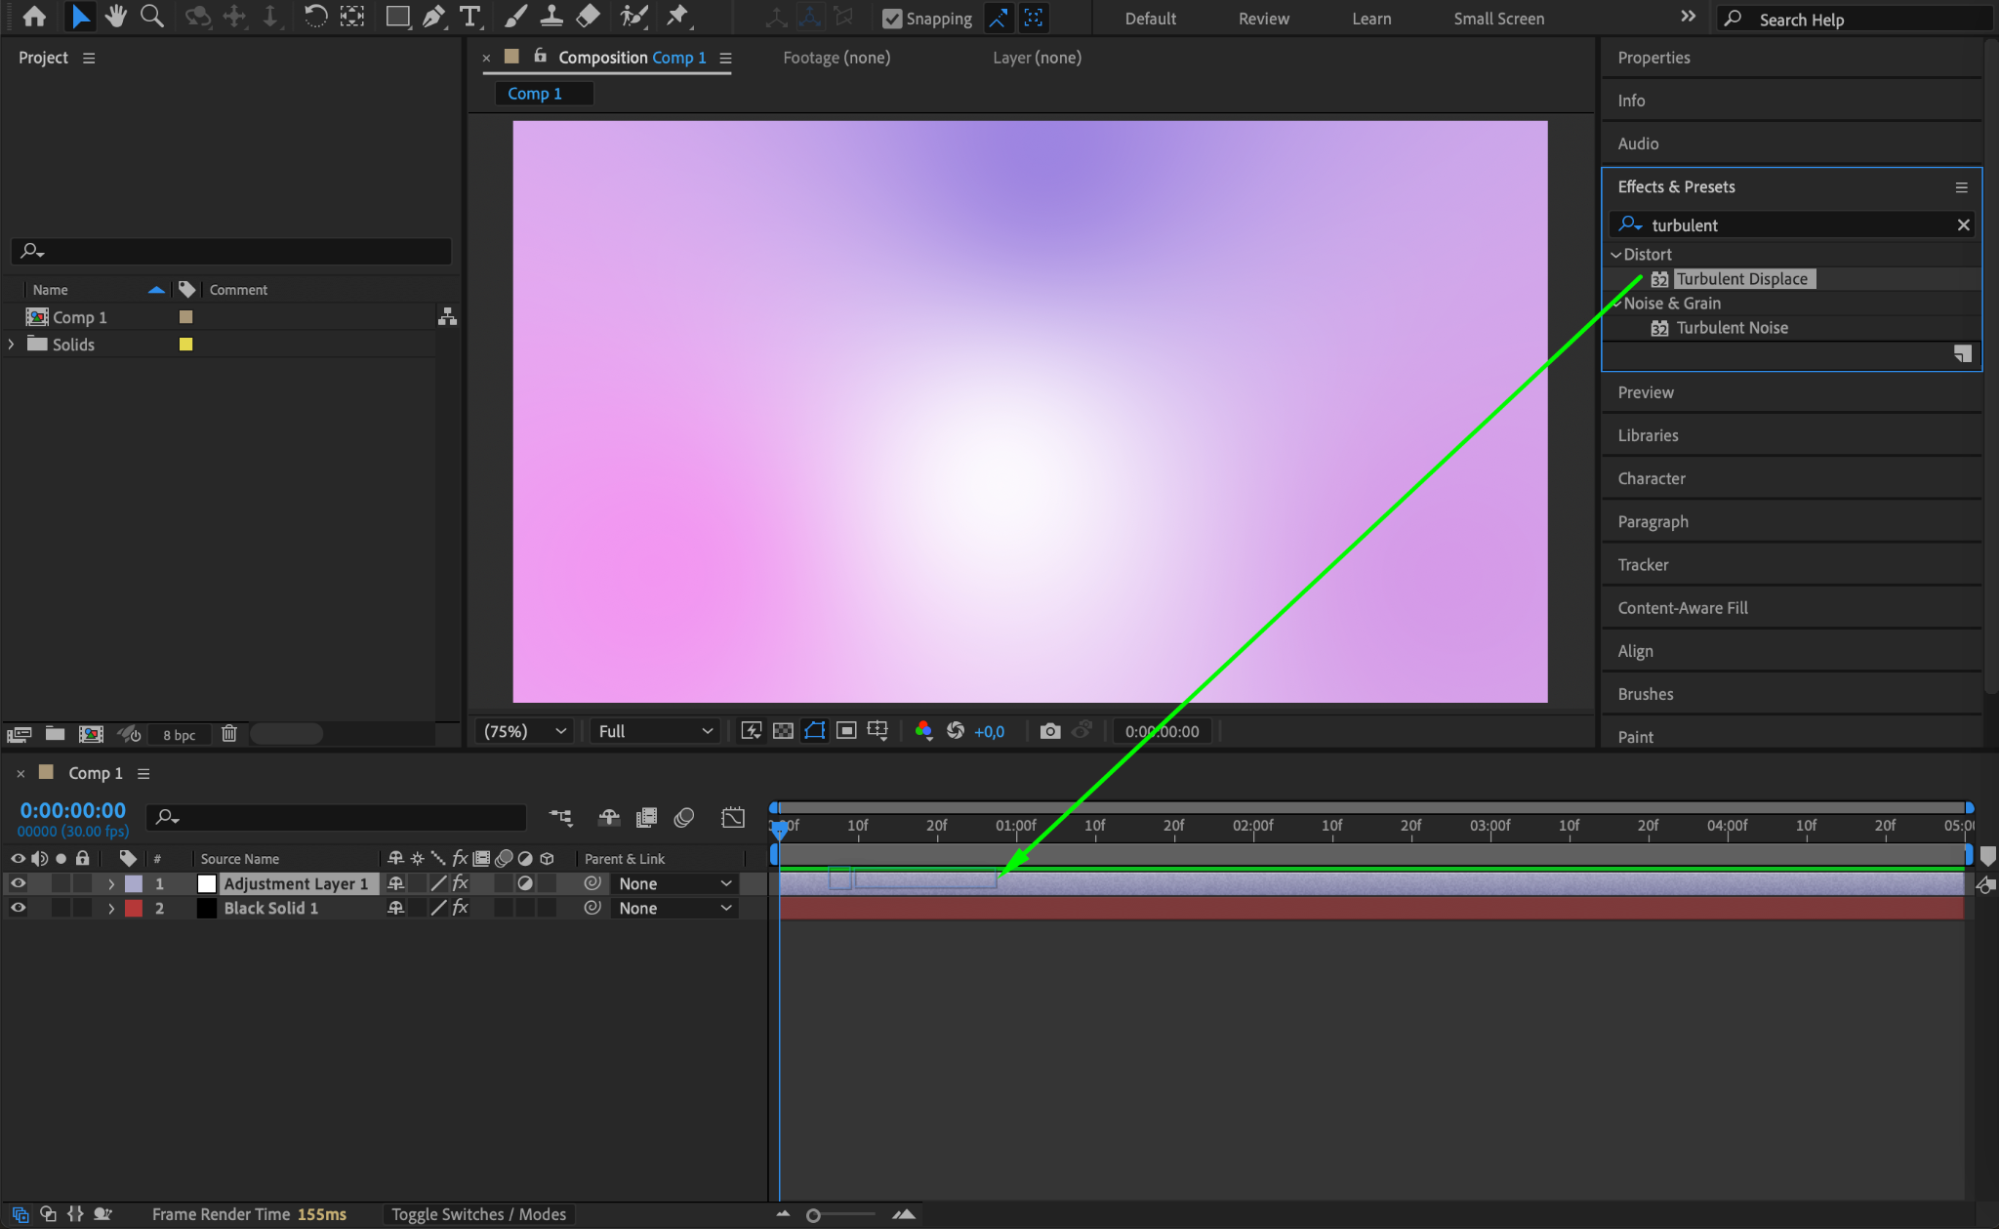
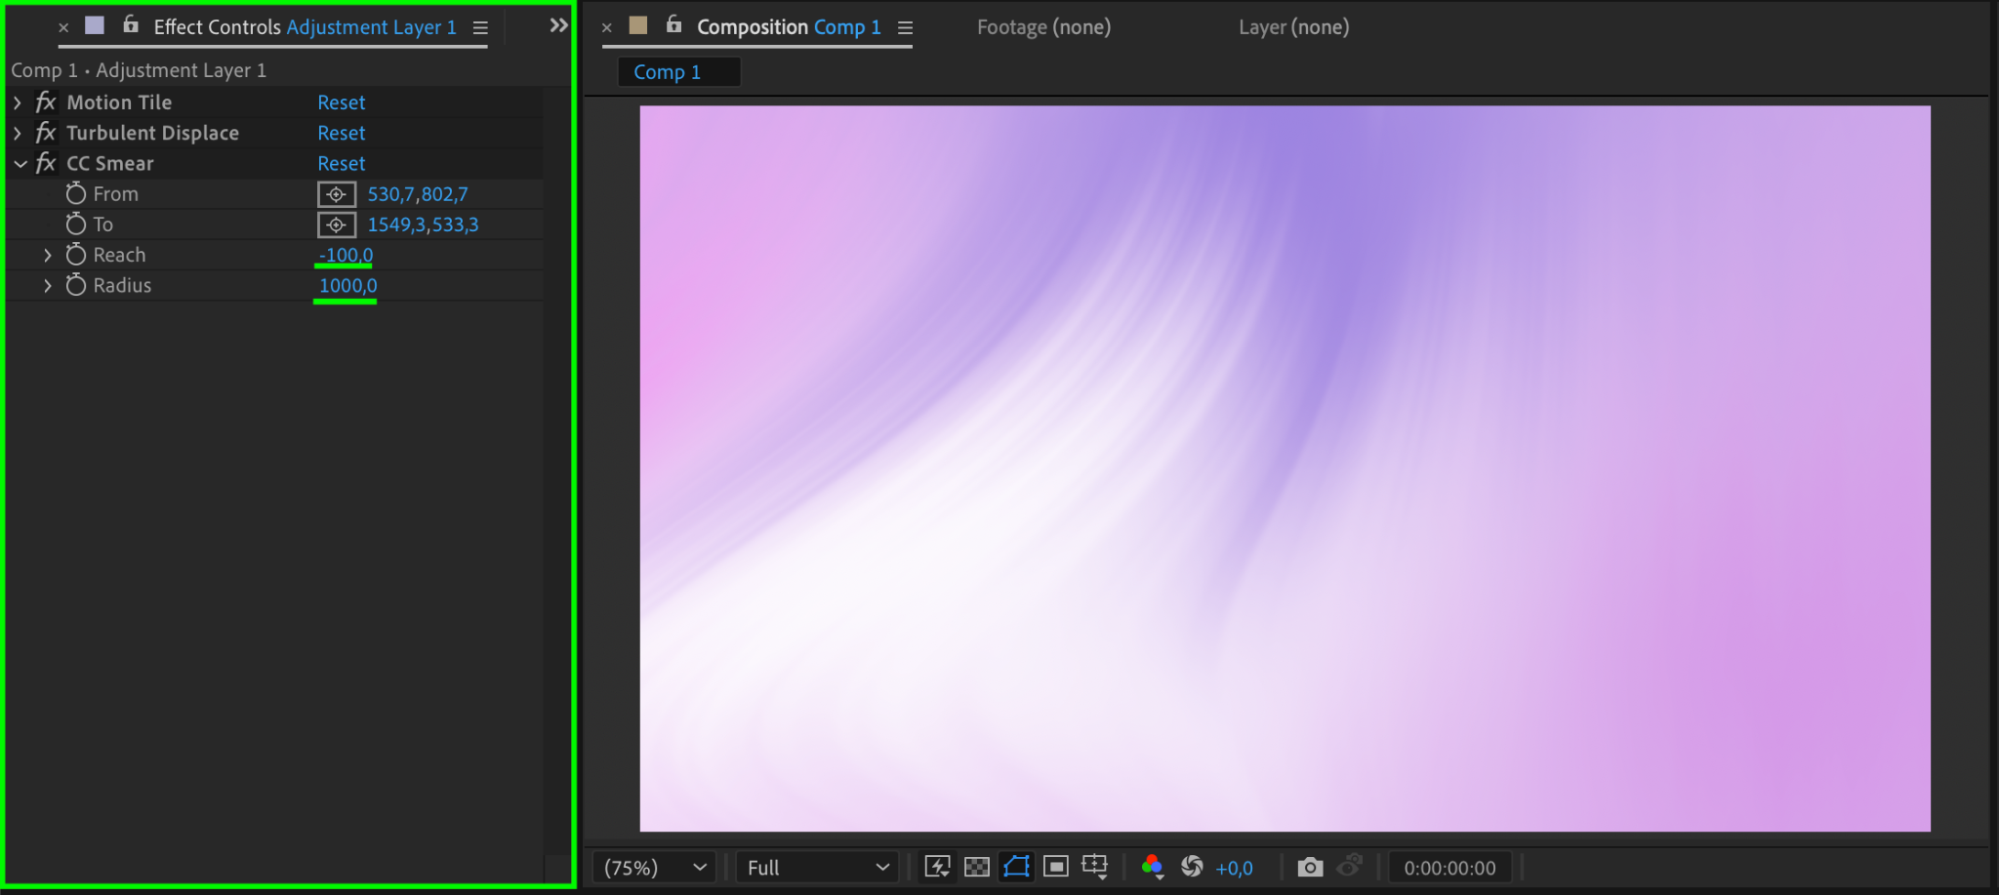
 Step 7: Apply the CC Smear Effect
Search for CC Smear and apply it to the adjustment layer. Set Reach to -100 and Radius to 1000 to create smooth warping motion in the background.
 Step 8: Add the Twirl Effect
Apply the Twirl effect from the Effects & Presets panel. Set the Twirl Radius to 50 and use the expression time*50 for the Angle property to generate a subtle swirling motion.
 Step 9: Preview the Animation
Press Spacebar to preview your moving background. Adjust the effect values if needed to refine the movement and achieve the desired look.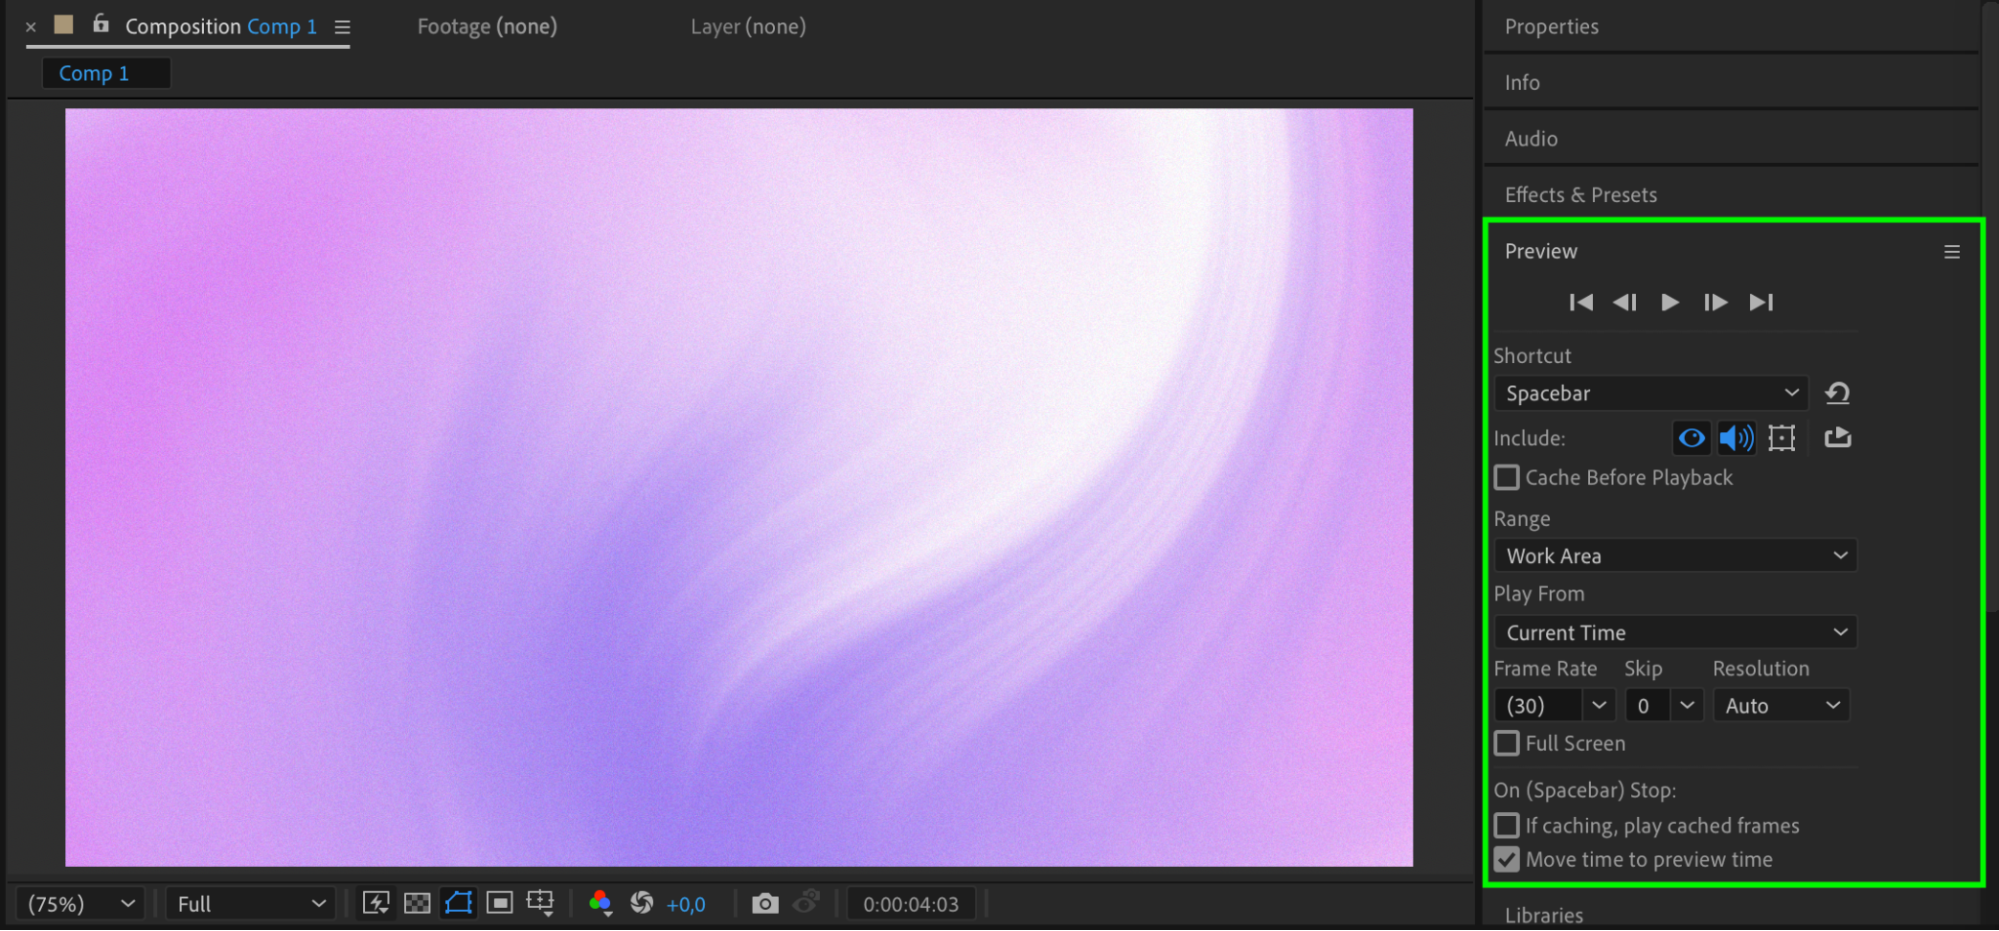 Step 10: Render the Final Background
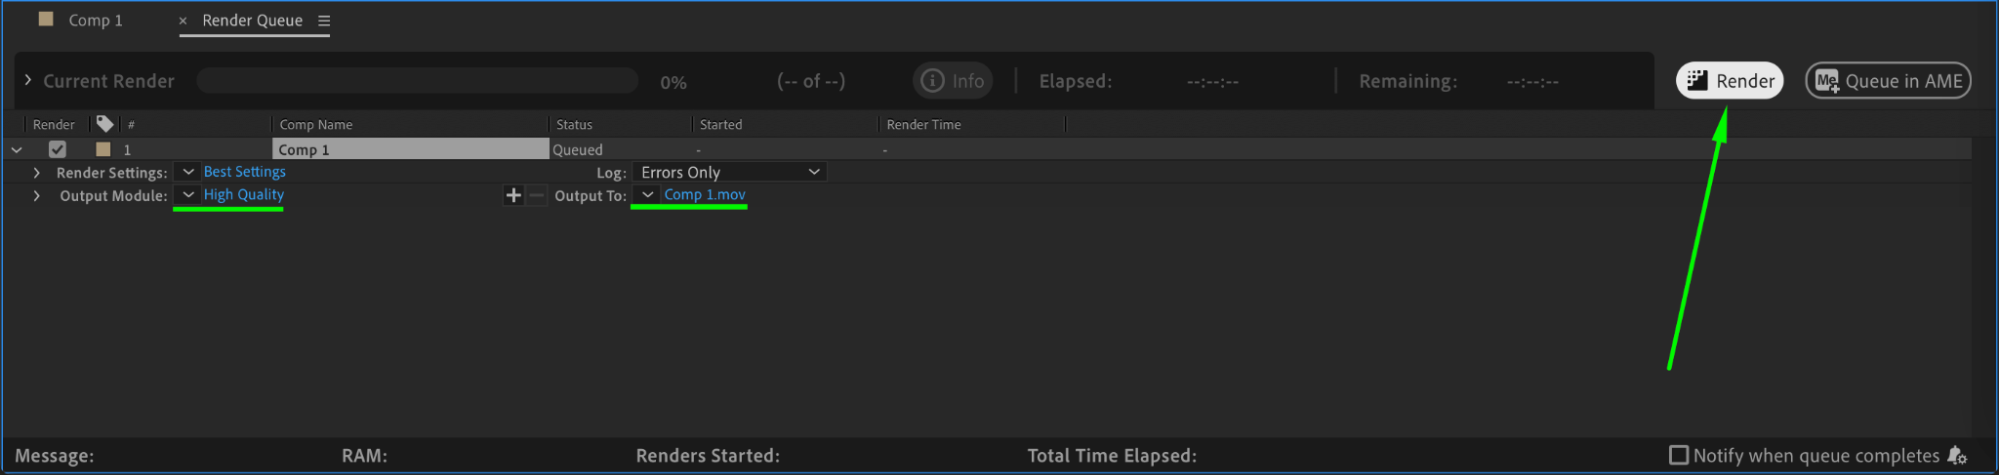
Once you’re satisfied with the animation, go to Composition > Add to Render Queue, select your desired format and quality settings, then click Render to export your moving background.
 Conclusion
By following these steps, you can create an animated moving background in After Effects using simple effects and expressions. This technique is perfect for dynamic intros, motion graphics, or looping backgrounds in videos.
Our Bestsellers


