Creating a Professional Production Logo in After Effects
Introduction
A production logo is an essential part of branding for videos, films, and digital media. In this guide, you will learn how to take a vector logo and animate it in After Effects using 3D extrusion, trim paths, and lighting to give it a polished and cinematic look.
Step 1: Import Your Vector Logo
Get 10% off when you subscribe to our newsletter

Start by importing your vector logo file (such as an .AI or .eps file) into After Effects. Drag it onto the timeline to create a new composition. Ensure that your logo is properly aligned and scaled to fit the composition.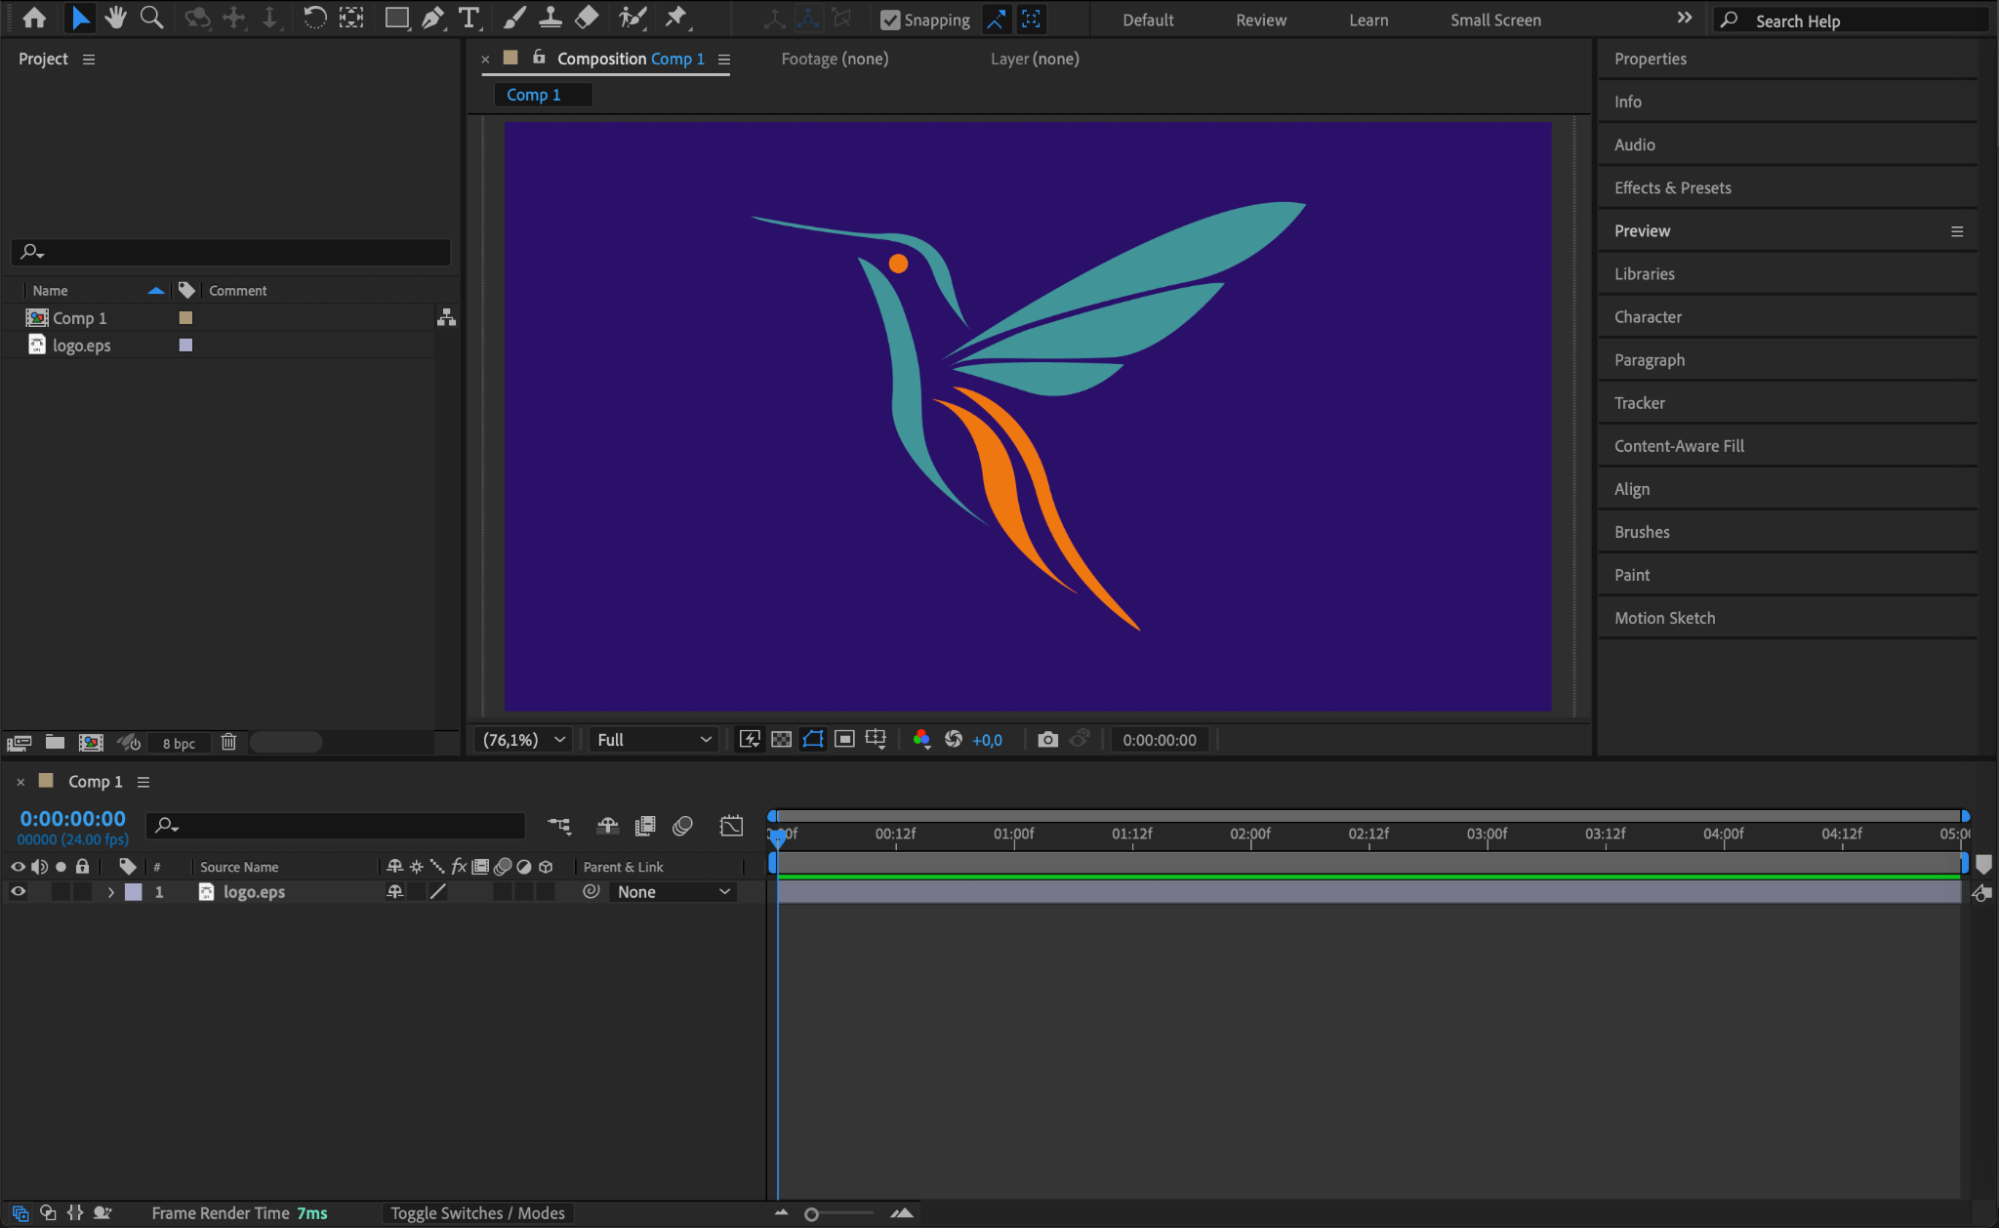 Step 2: Convert to Shape Layers
Right-click on the vector logo layer in the timeline and select Create > Create Shapes from Vector Layer. This converts your logo into a shape layer, allowing for more advanced animation and 3D effects.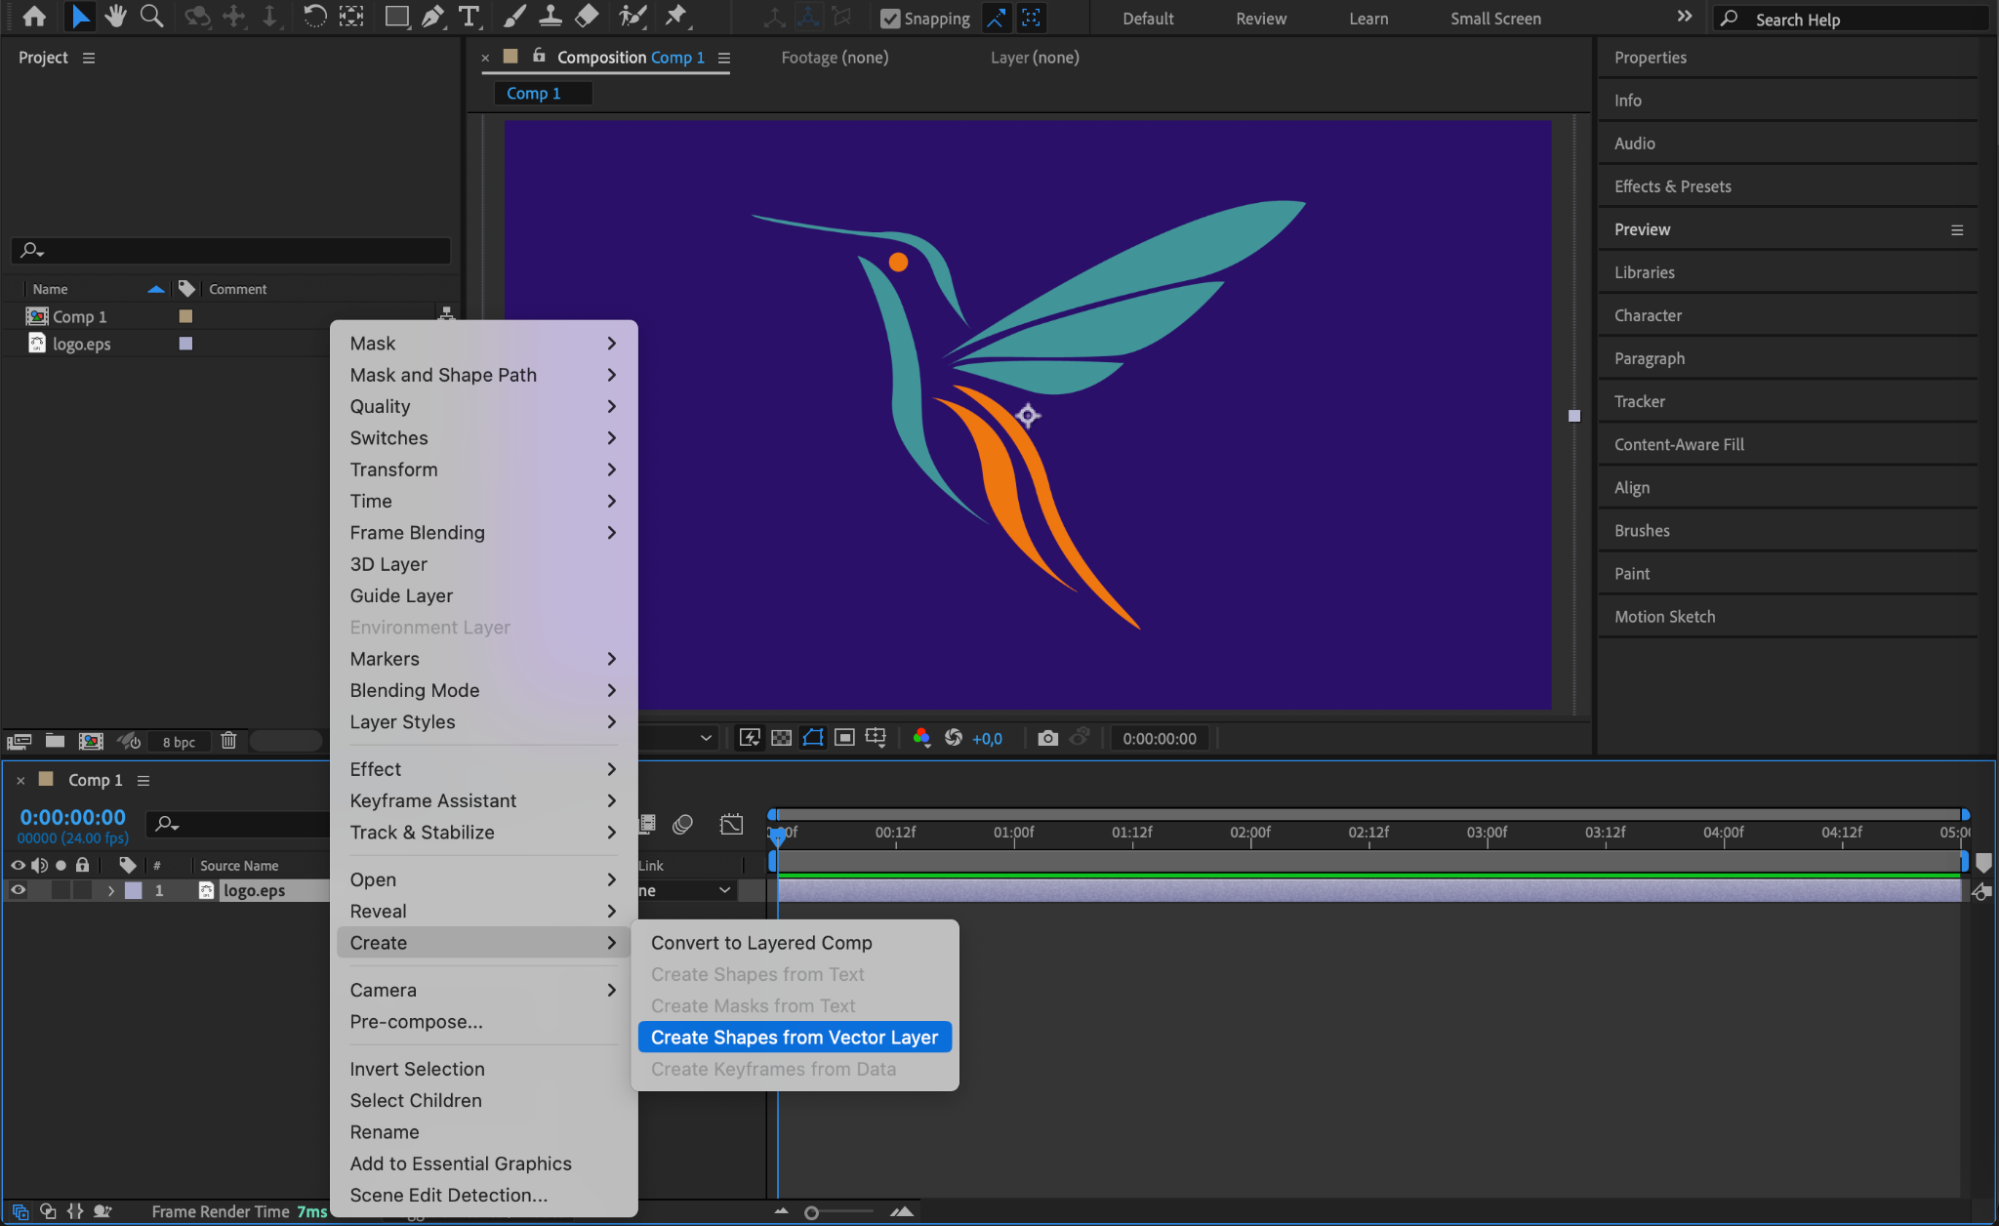 Step 3: Add Stroke to the Logo
Expand the shape layer properties. Next to the Contents section, click the Add button and select Stroke. Then, set the Fill to None to ensure only the stroke is visible.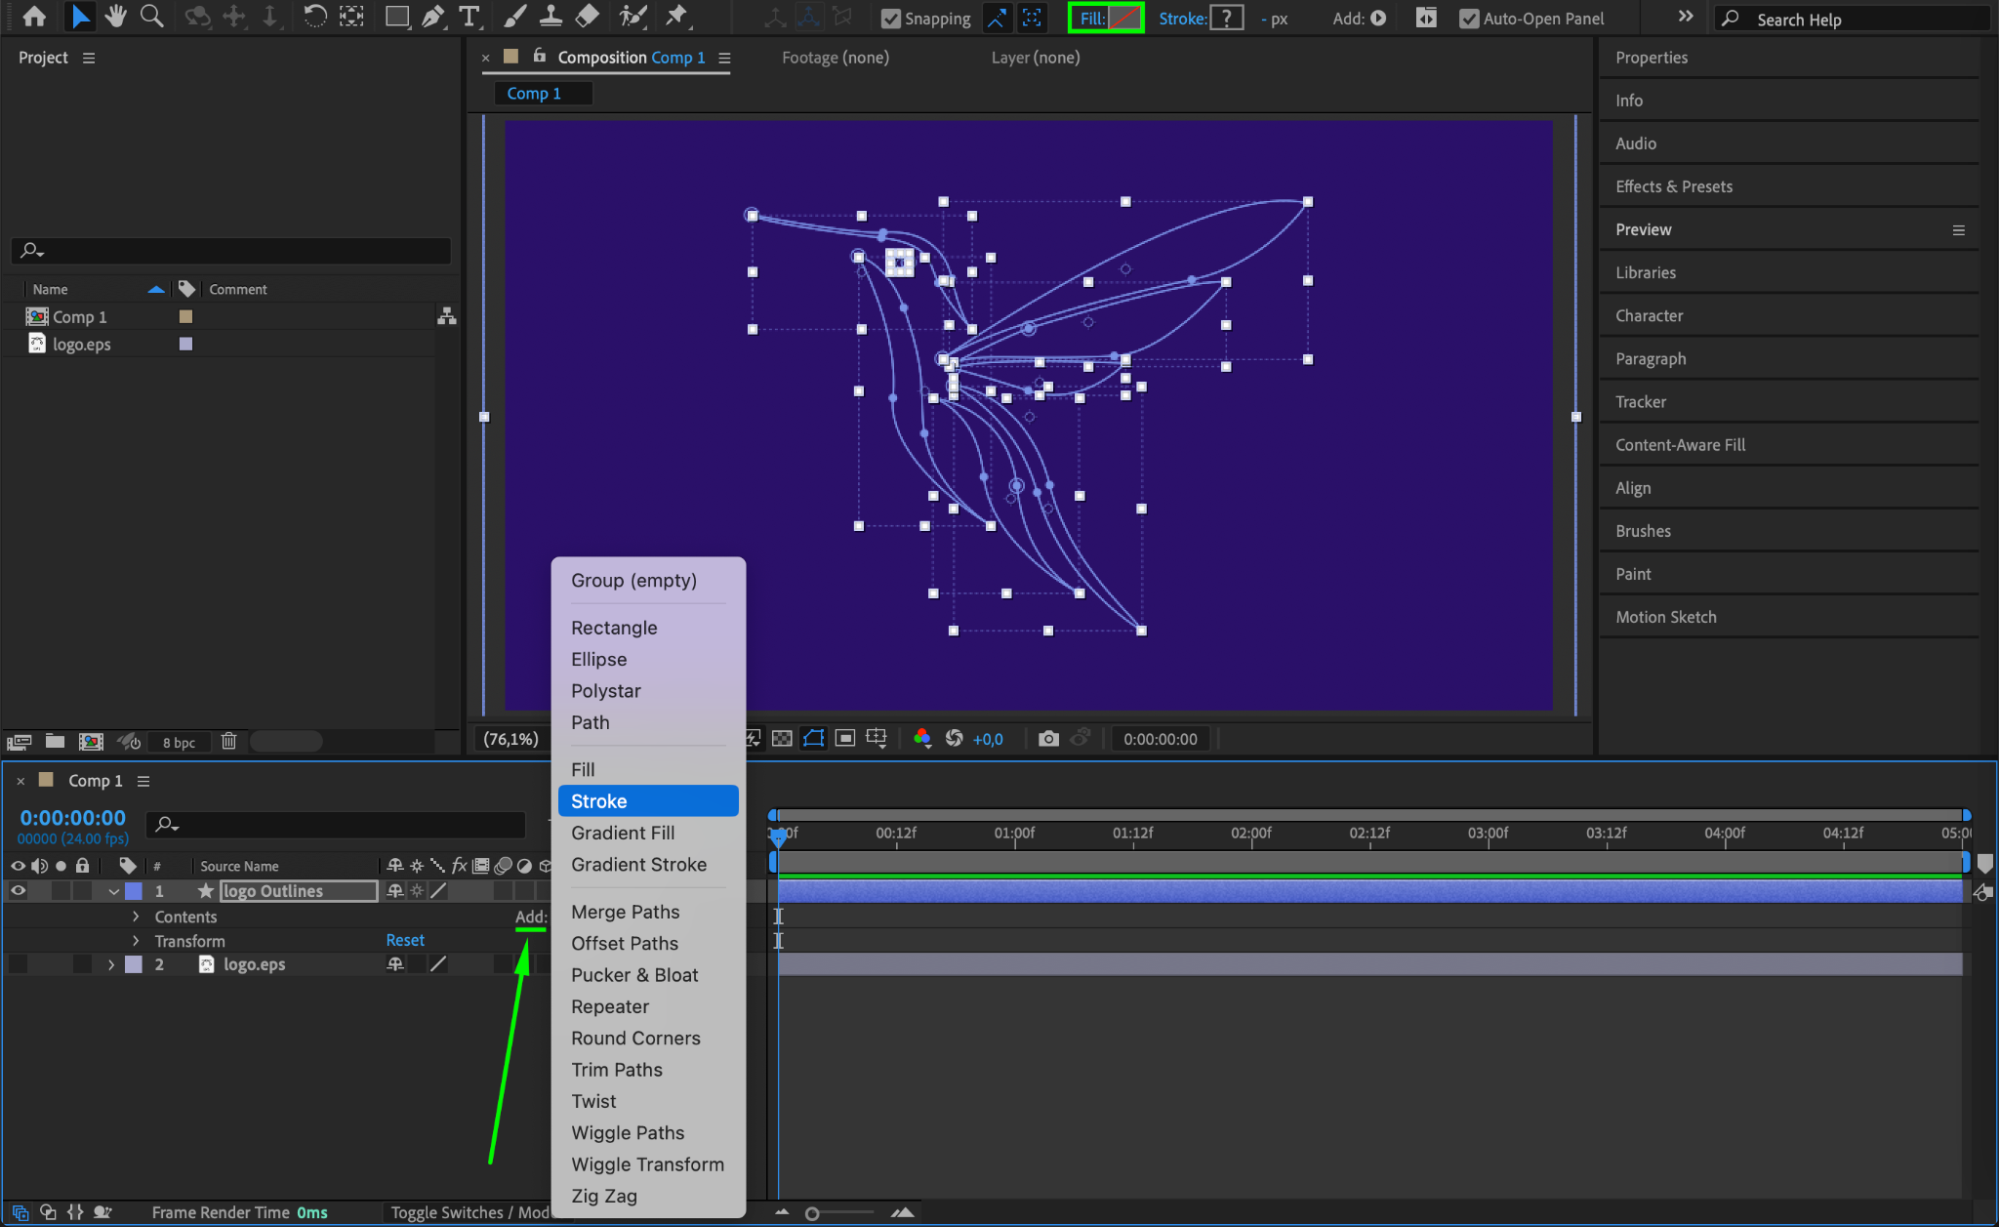 Step 4: Enable 3D for the Logo Layer
Click the 3D Layer checkbox for the logo layer in the timeline to enable three-dimensional transformations. This allows for depth and perspective adjustments. Step 5: Apply Extrusion for a 3D Look
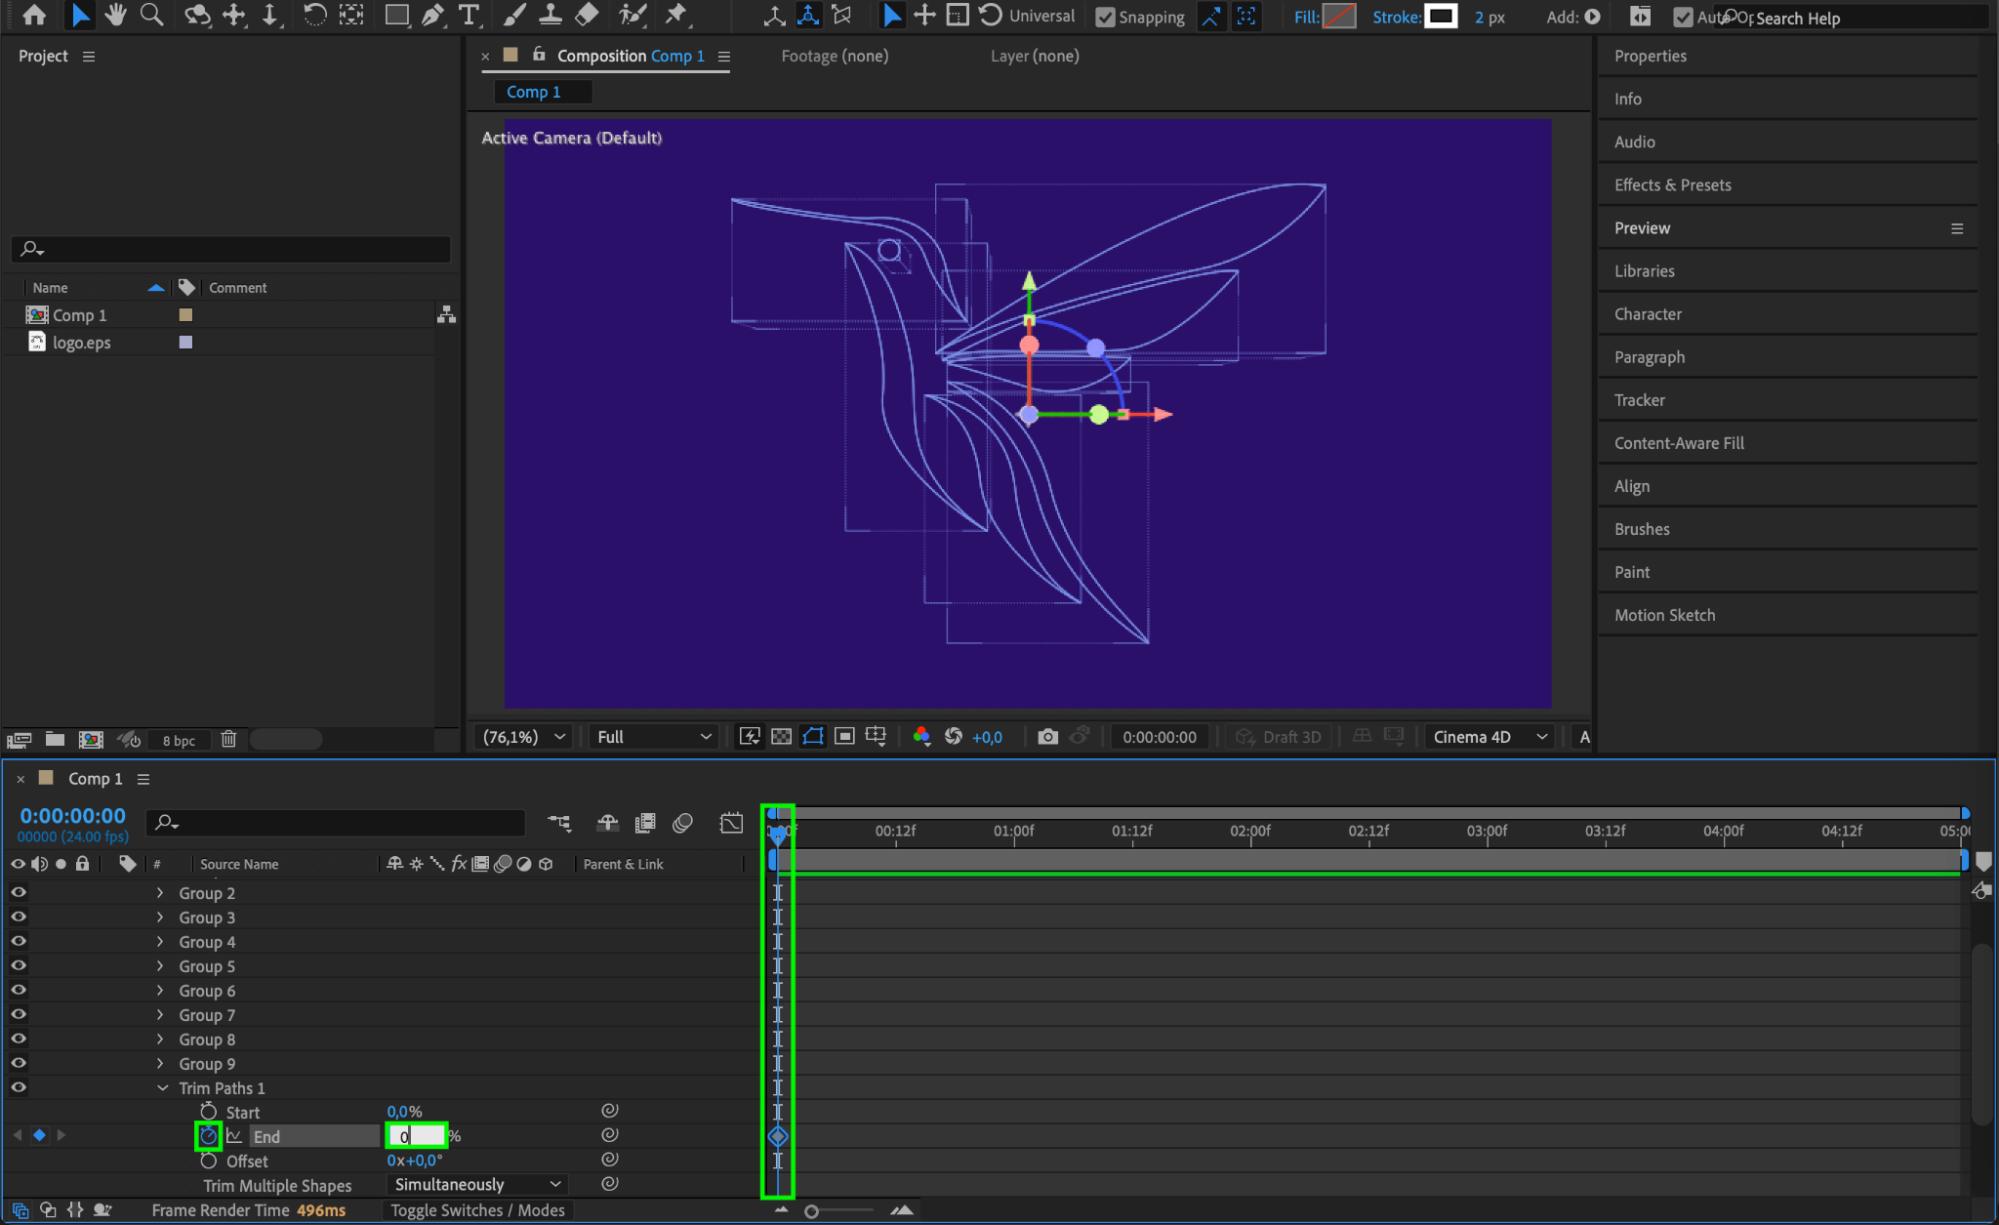
At the bottom of the Composition Panel, change the Renderer to Cinema 4D. Then, in the Geometry Options, increase the Extrusion Depth to 240 to give your logo a 3D effect. 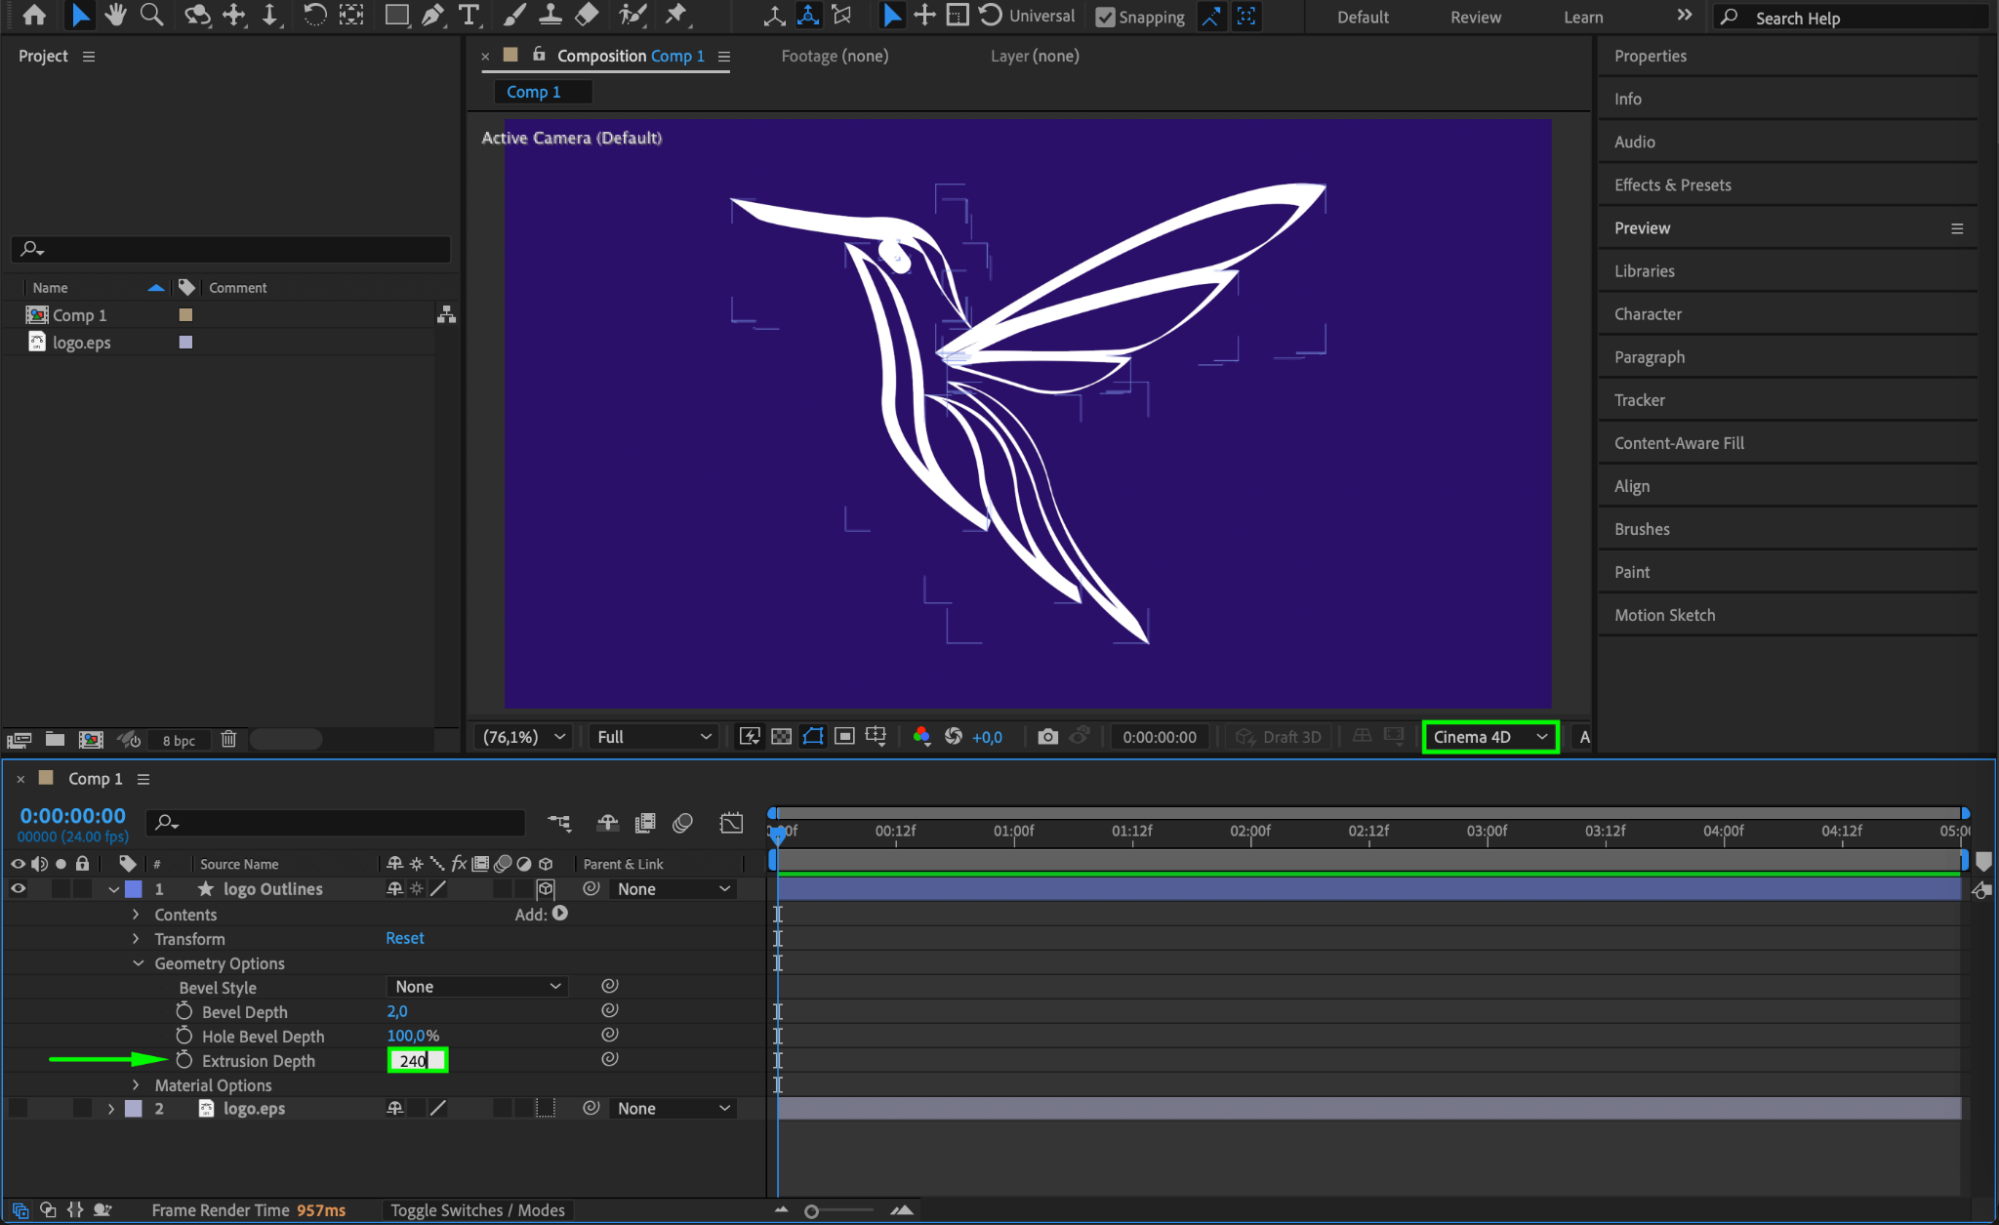 Step 6: Animate with Trim Paths
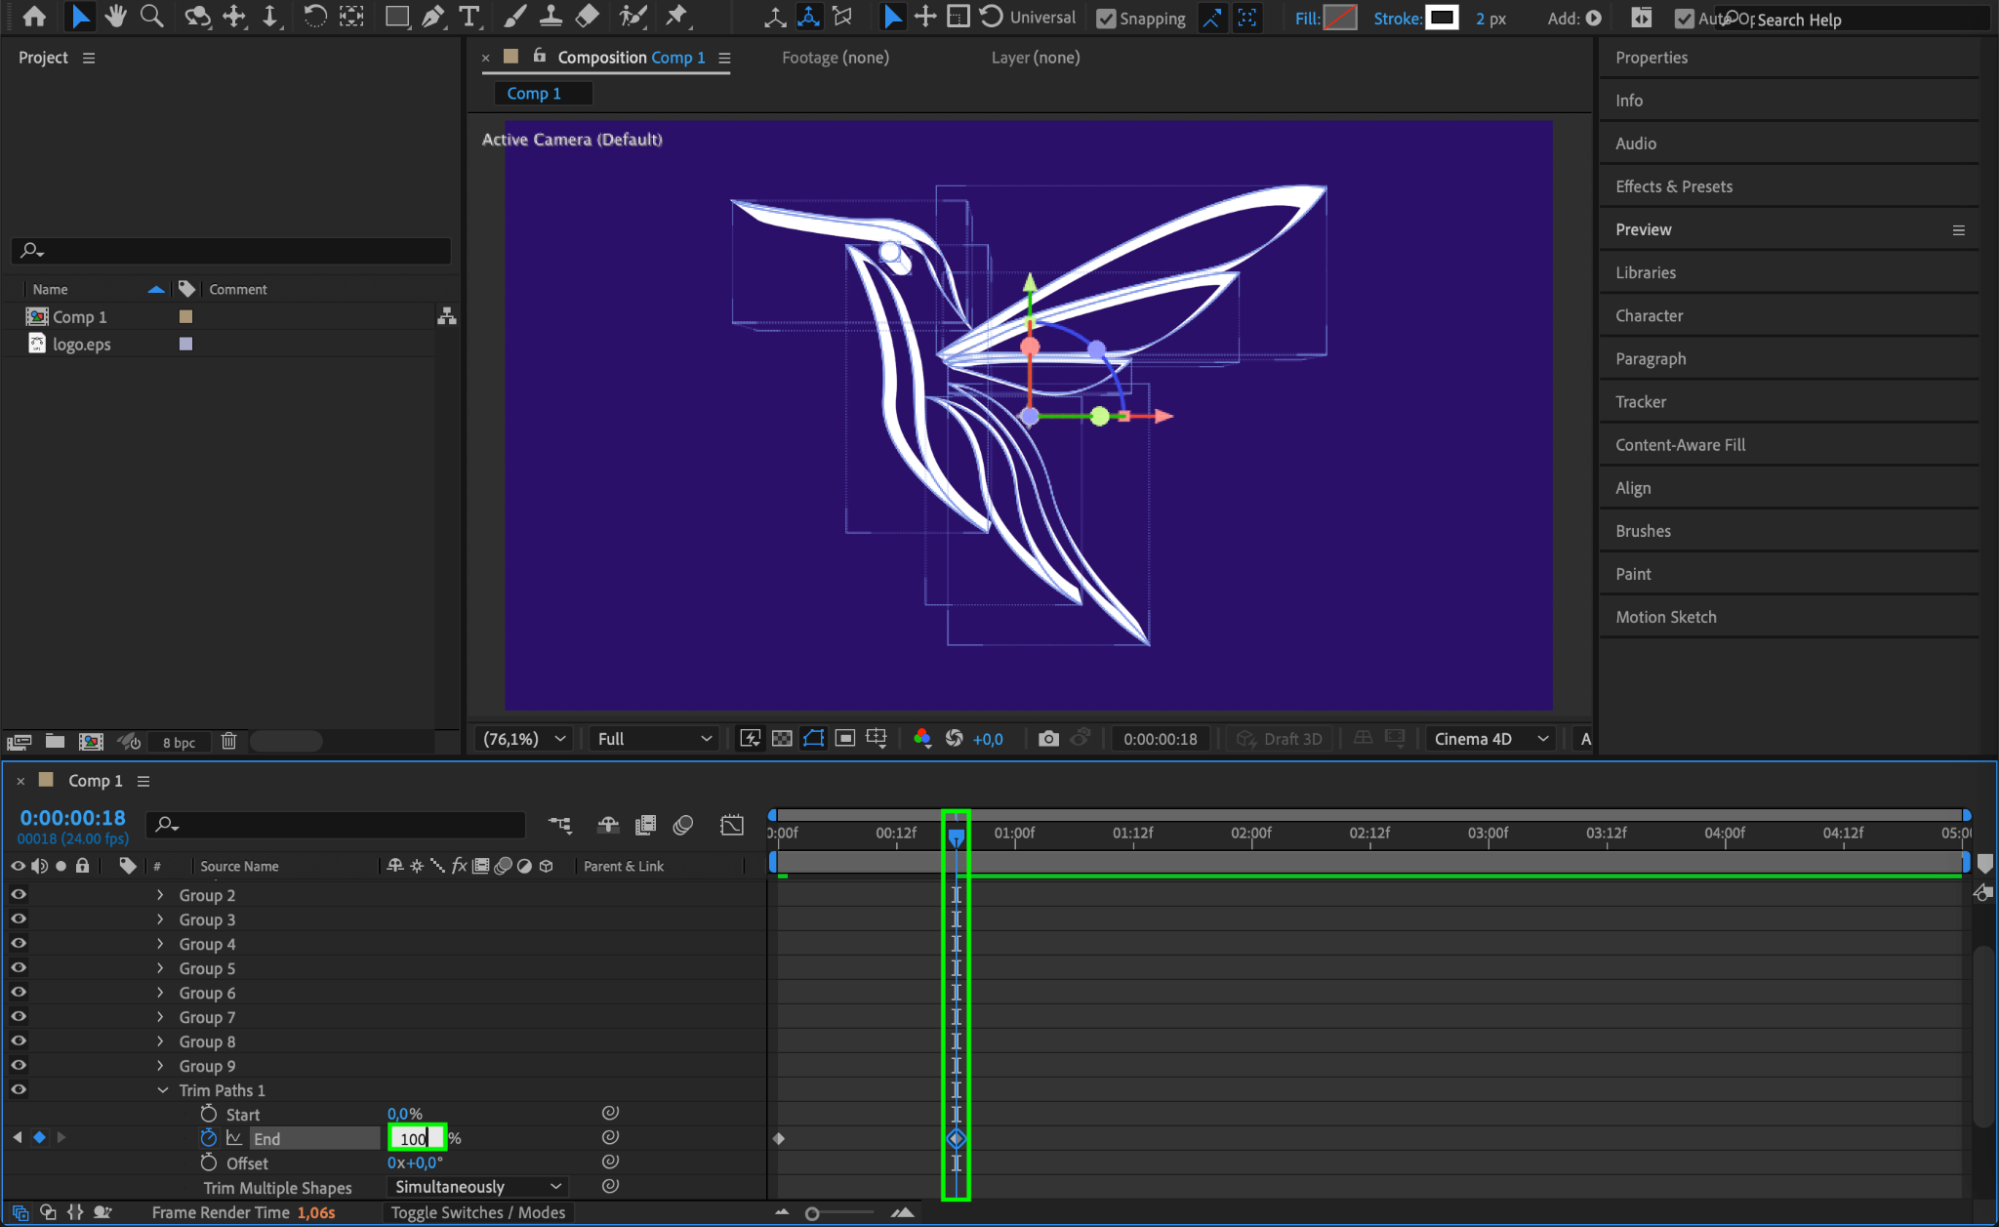
Press the Add button again and choose Trim Paths. Animate the End value from 0% at the start to 100% over a few frames to create a smooth reveal effect for your logo.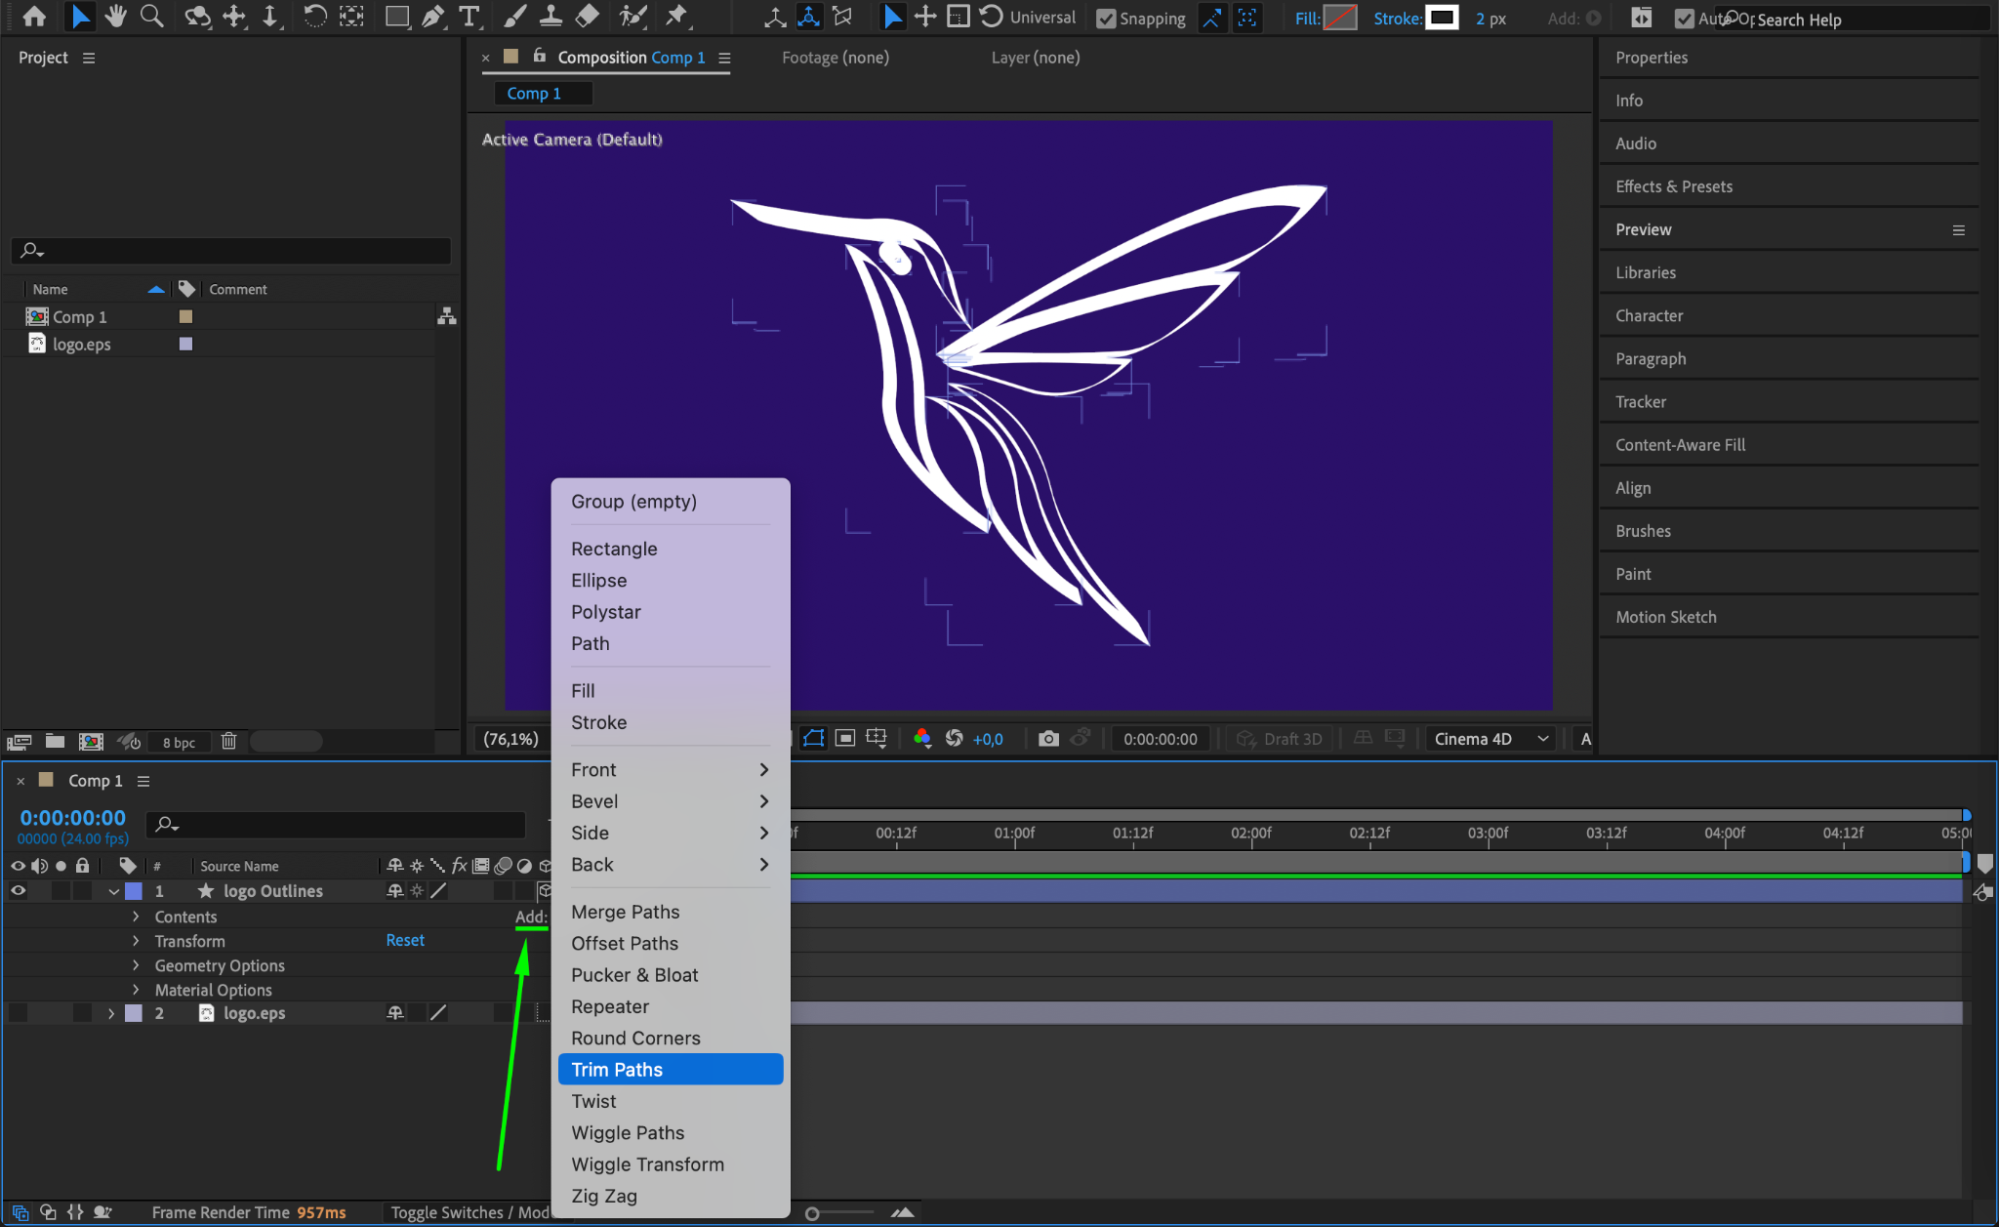
 Step 7: Add Lighting to Enhance Depth
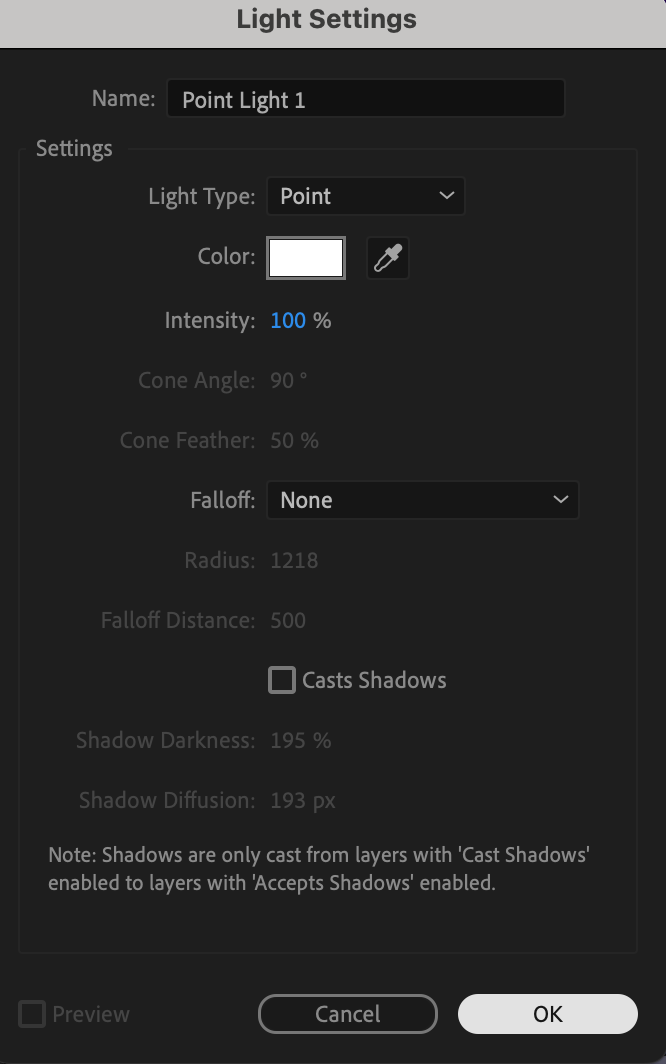
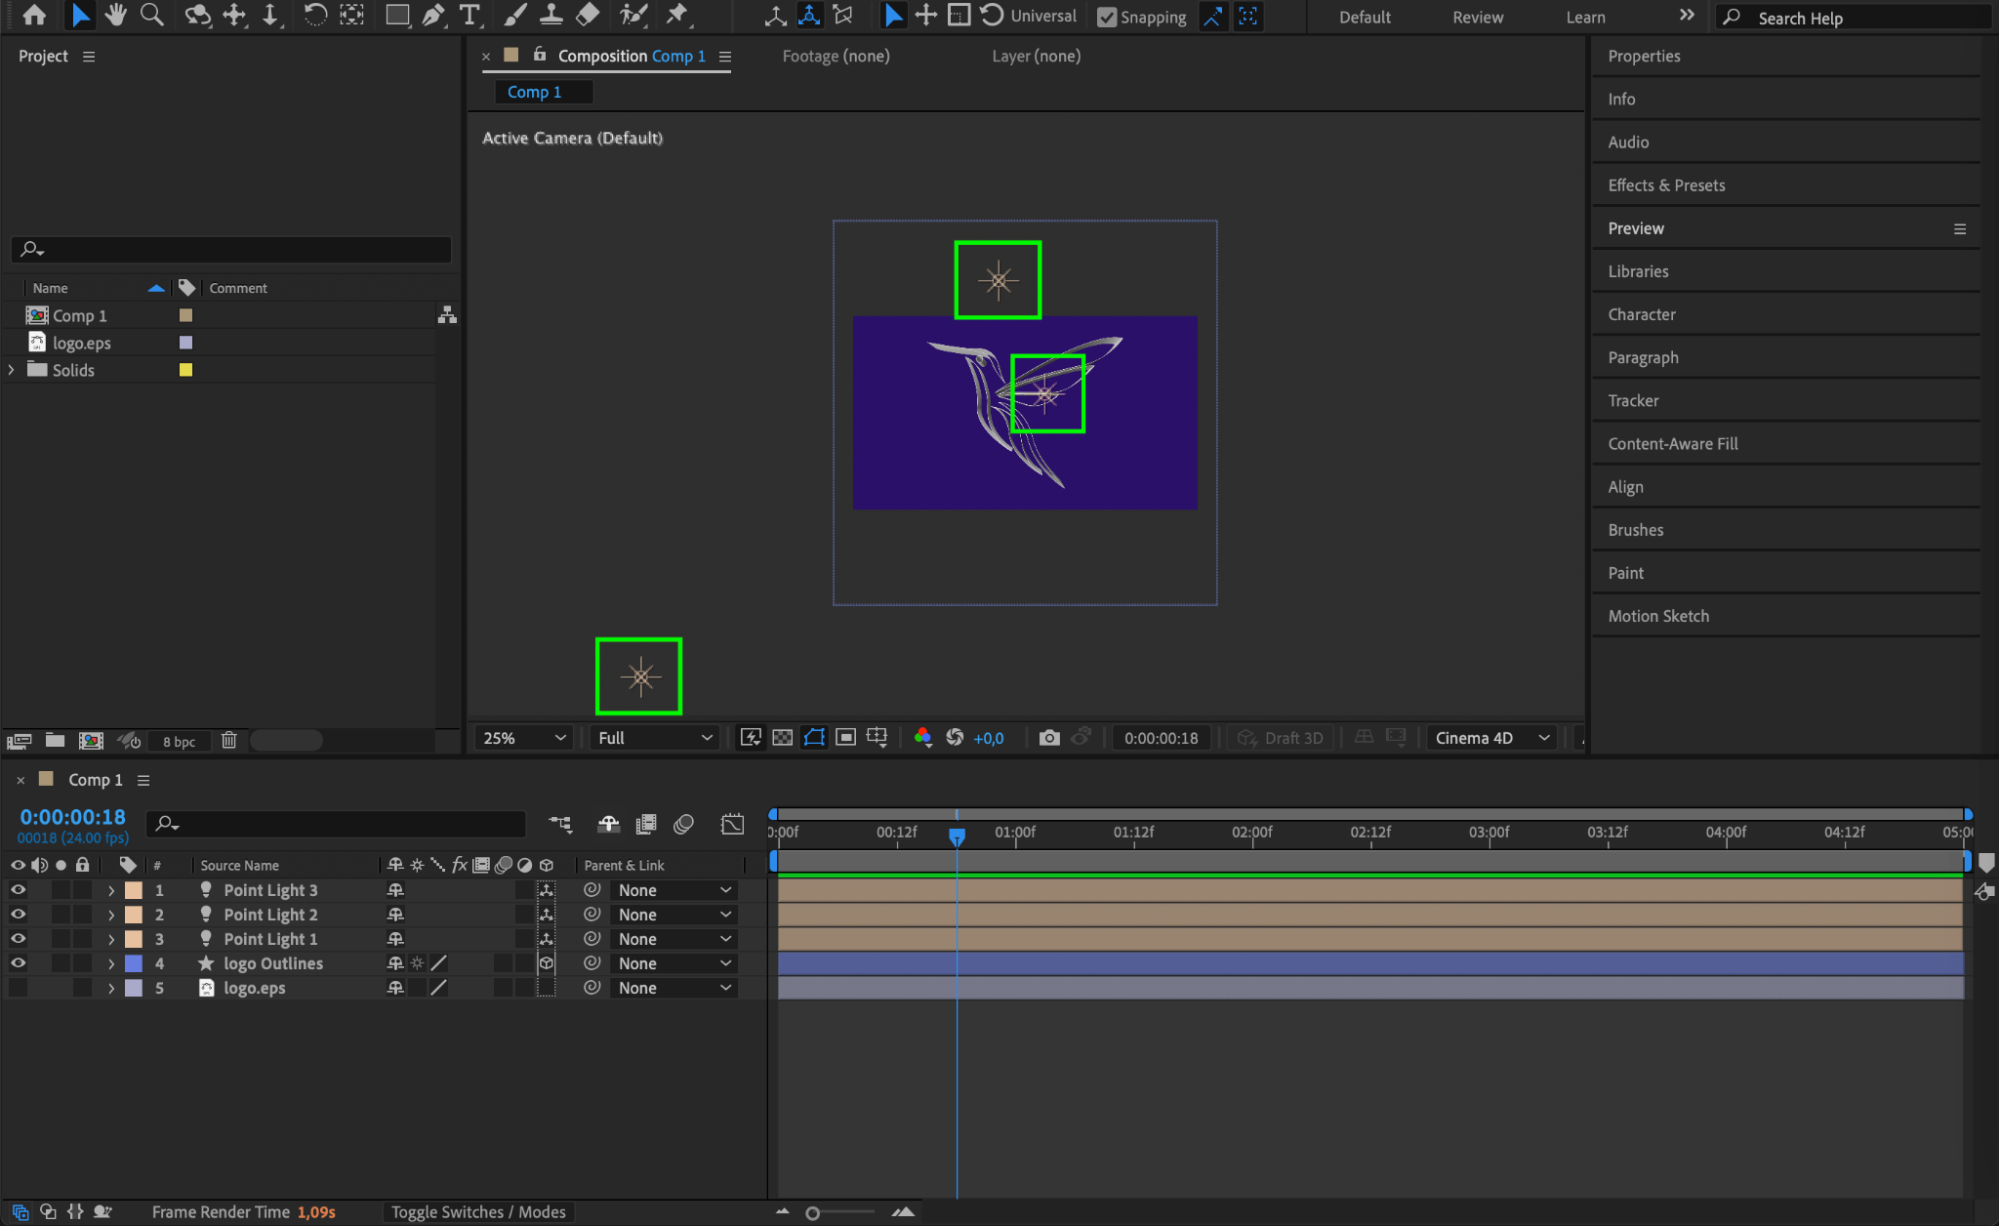
Go to Layer > New > Light and select Point Light as the light type. Duplicate the light layer twice, adjusting their positions in the Composition Panel to create proper illumination and depth.
 Step 8: Adjust Light Intensity
For each light layer, adjust the Intensity value to achieve the desired level of brightness and shadows on the logo. Proper lighting adds realism and highlights the 3D effect.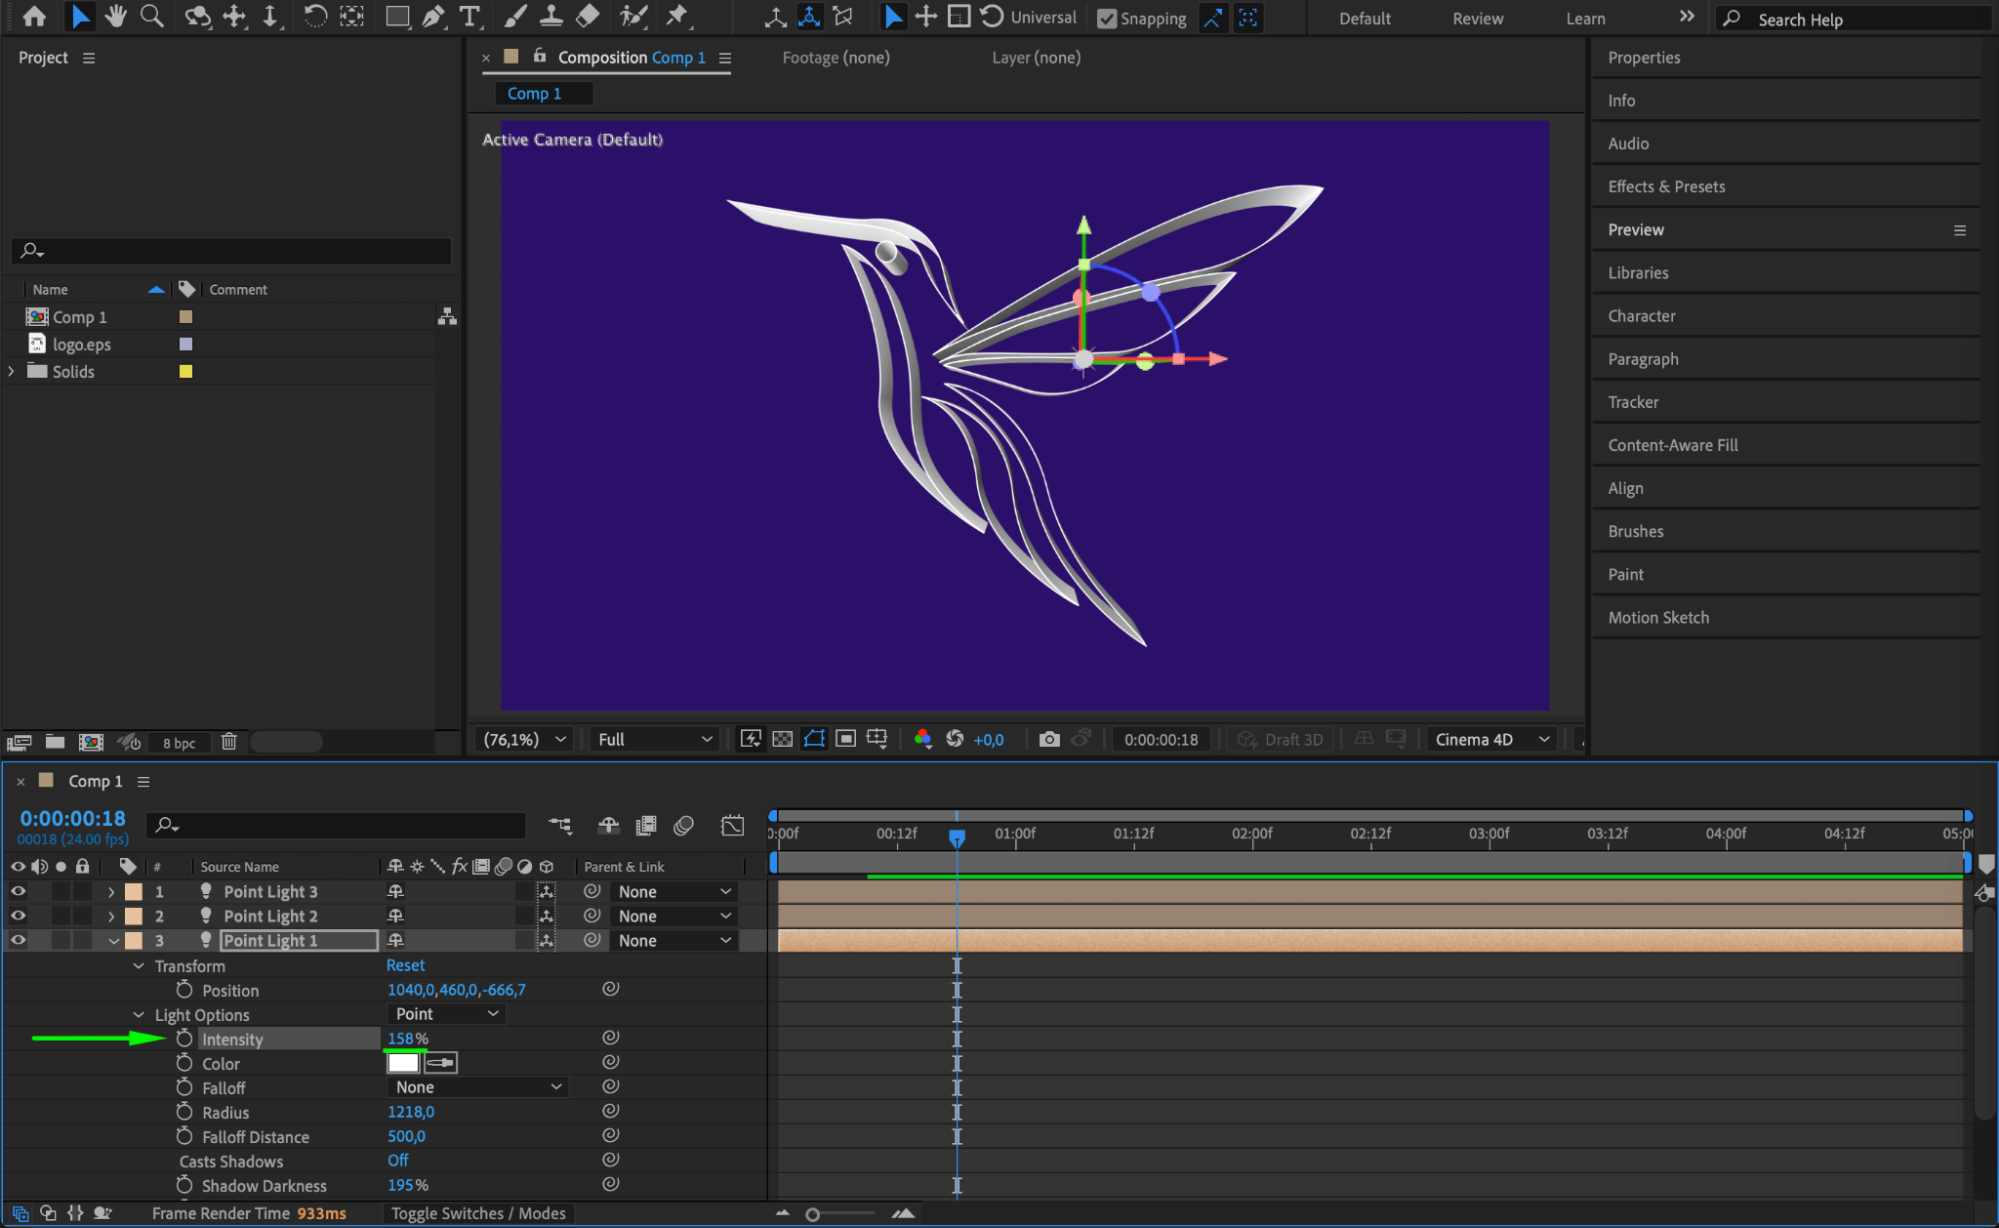 Step 9: Preview the Animation
Press Spacebar to preview the animation. Ensure that the trim paths, lighting, and extrusion depth create a professional and engaging motion effect. Make any necessary adjustments to timing and effects.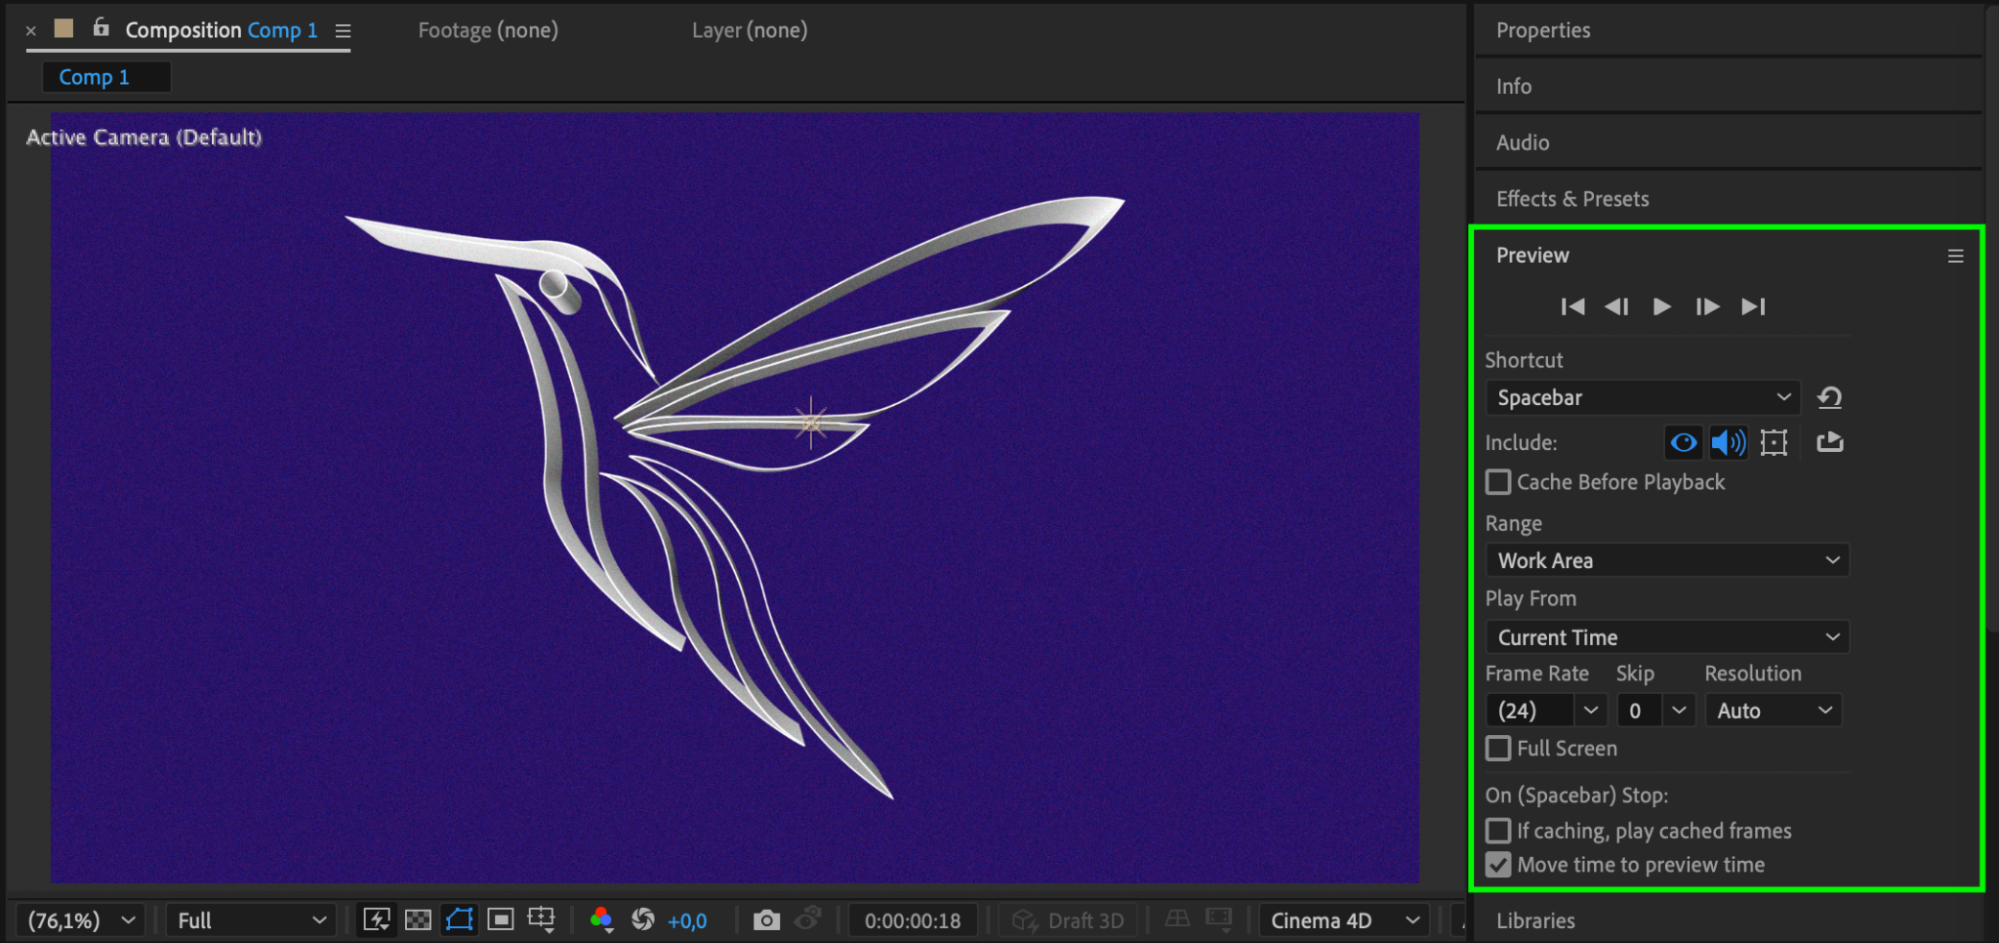 Step 10: Render the Final Output
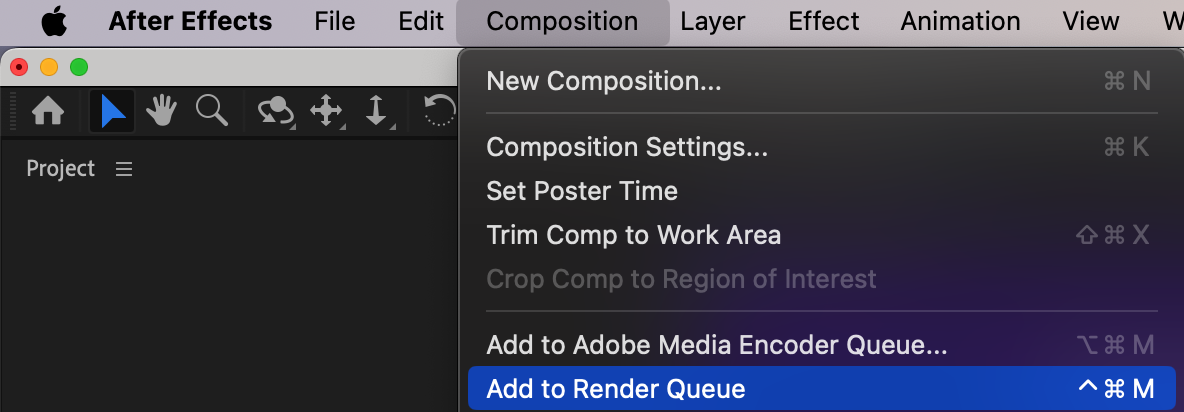
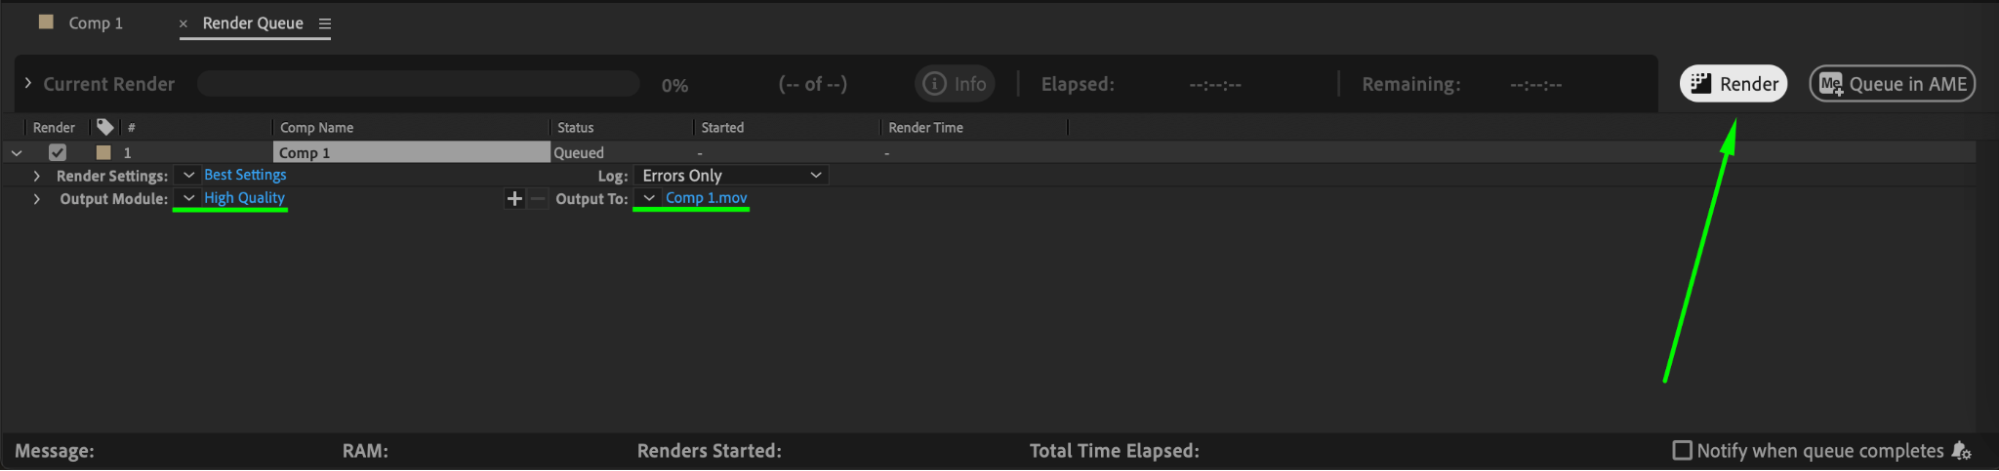
Once satisfied, go to Composition > Add to Render Queue, set your desired render settings, and export your animated production logo in high quality.
 Conclusion
By following these steps, you can create a professional production logo animation in After Effects. Using 3D extrusion, trim paths, and lighting, you can add depth and polish to your brand’s visual identity, making it stand out in any video project.
Our Bestsellers


