Guide to Creating a Pulsing Text Effect in After Effects
Introduction to the Pulsing Text Effect in After Effects
Adding a pulsing effect to text in After Effects is an easy way to make titles or messages more dynamic and engaging. This guide will take you through the steps to create a pulsing text effect by animating the scale, adding easing, and setting the effect to loop.
Step 1: Create a New Composition
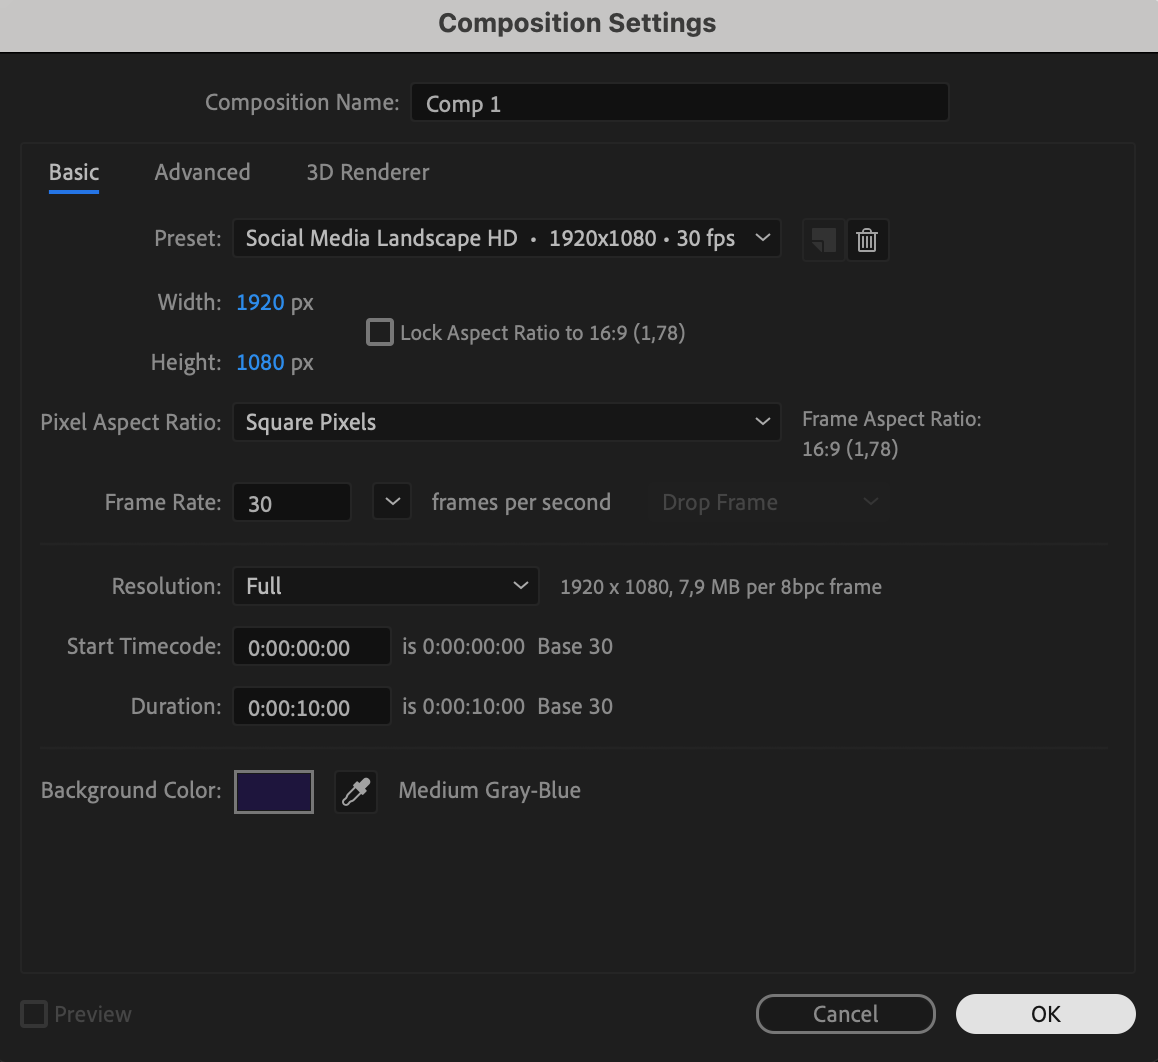
To start, go to Composition > New Composition and set the Width to 1920, Height to 1080, Frame Rate to 30, and Duration to 10 seconds. This will serve as the main workspace for your pulsing text effect.
 Step 2: Add a Text Layer
Next, create the text layer by selecting the Text Tool (Ctrl/Cmd + T) and clicking on the composition to type in your text. Customize the font, size, and color in the Properties panel to achieve the desired look for your animation.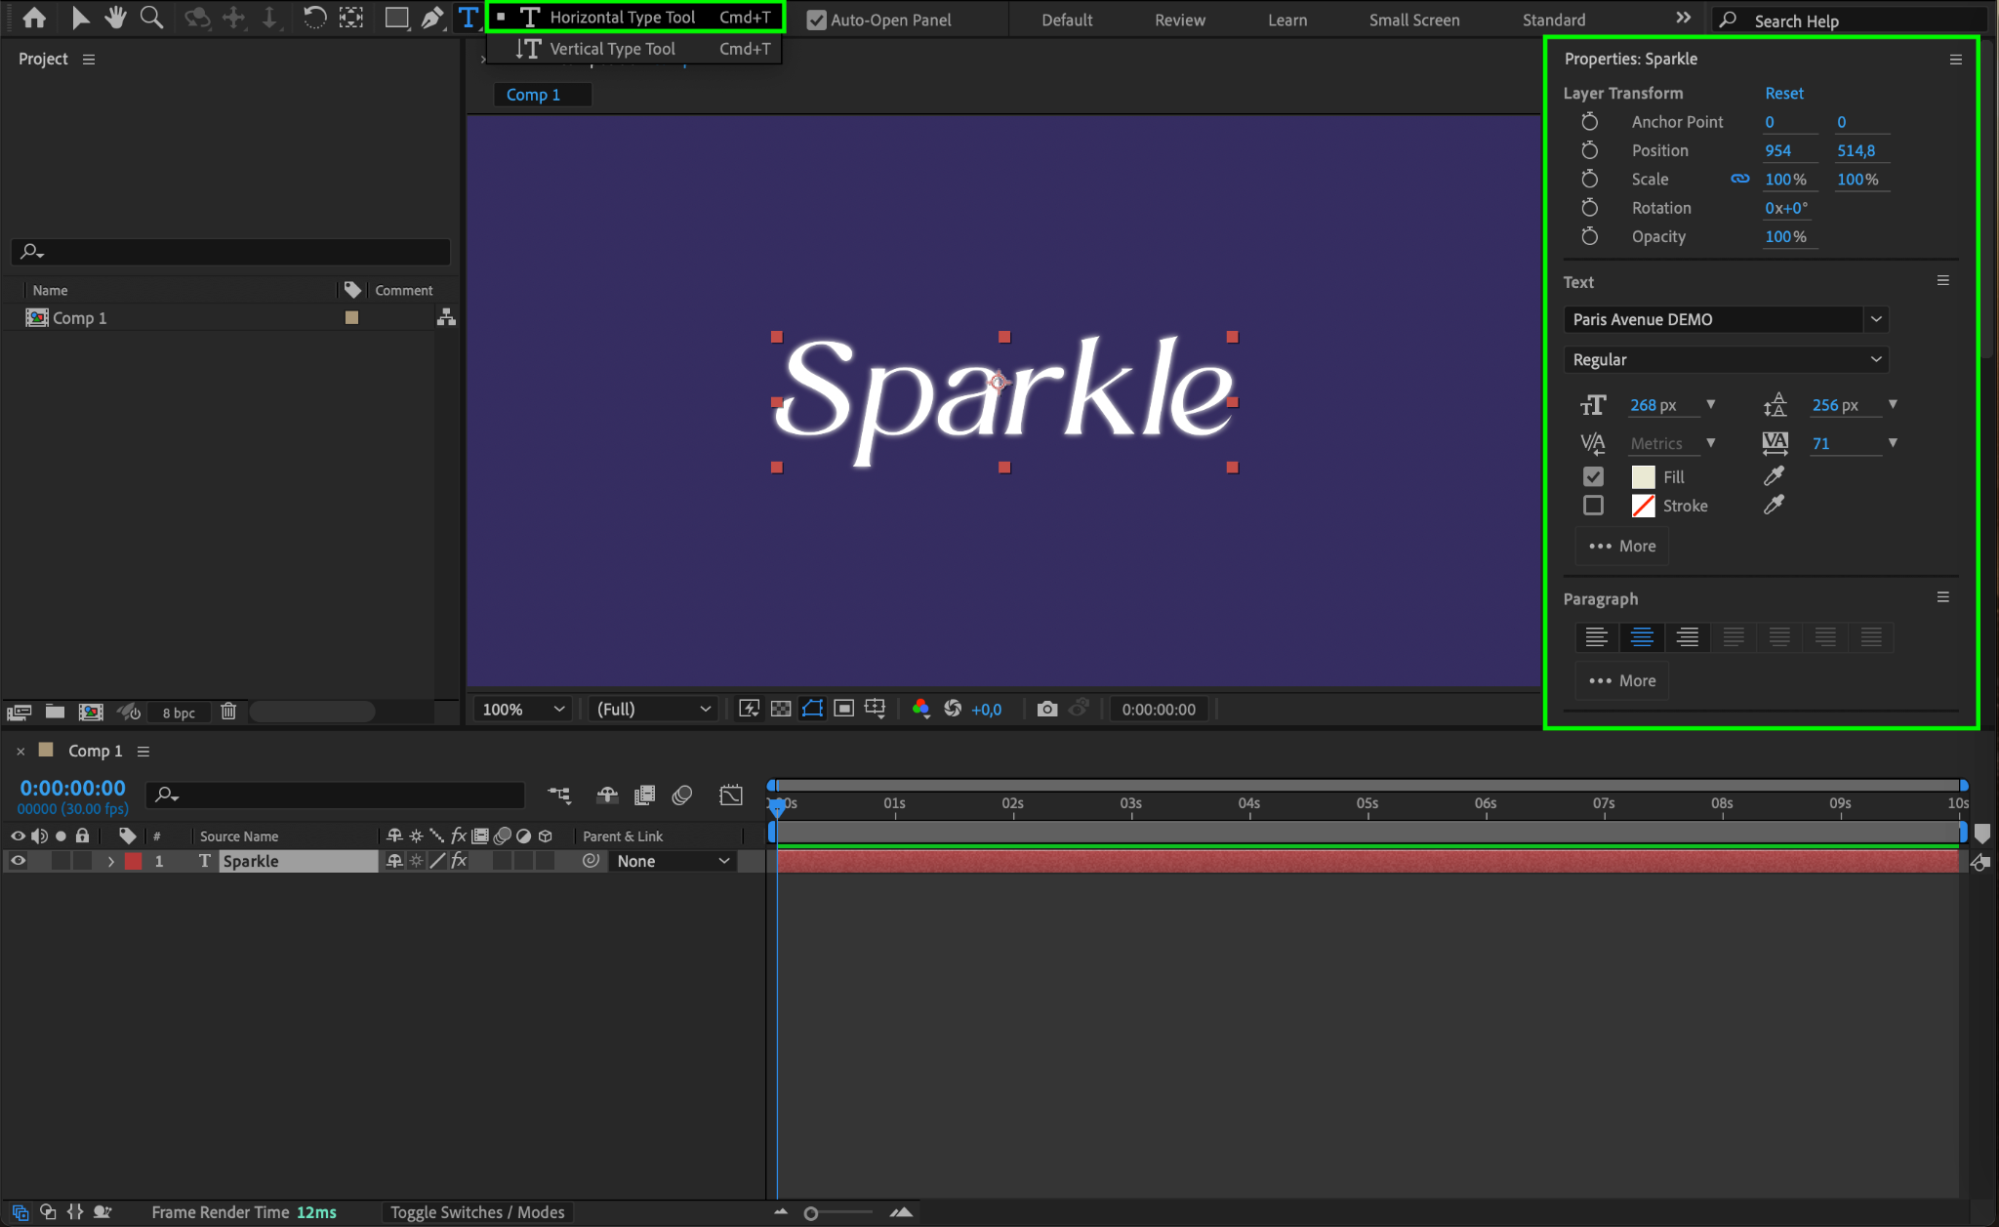 Step 3: Add Scale Keyframes for Pulsing
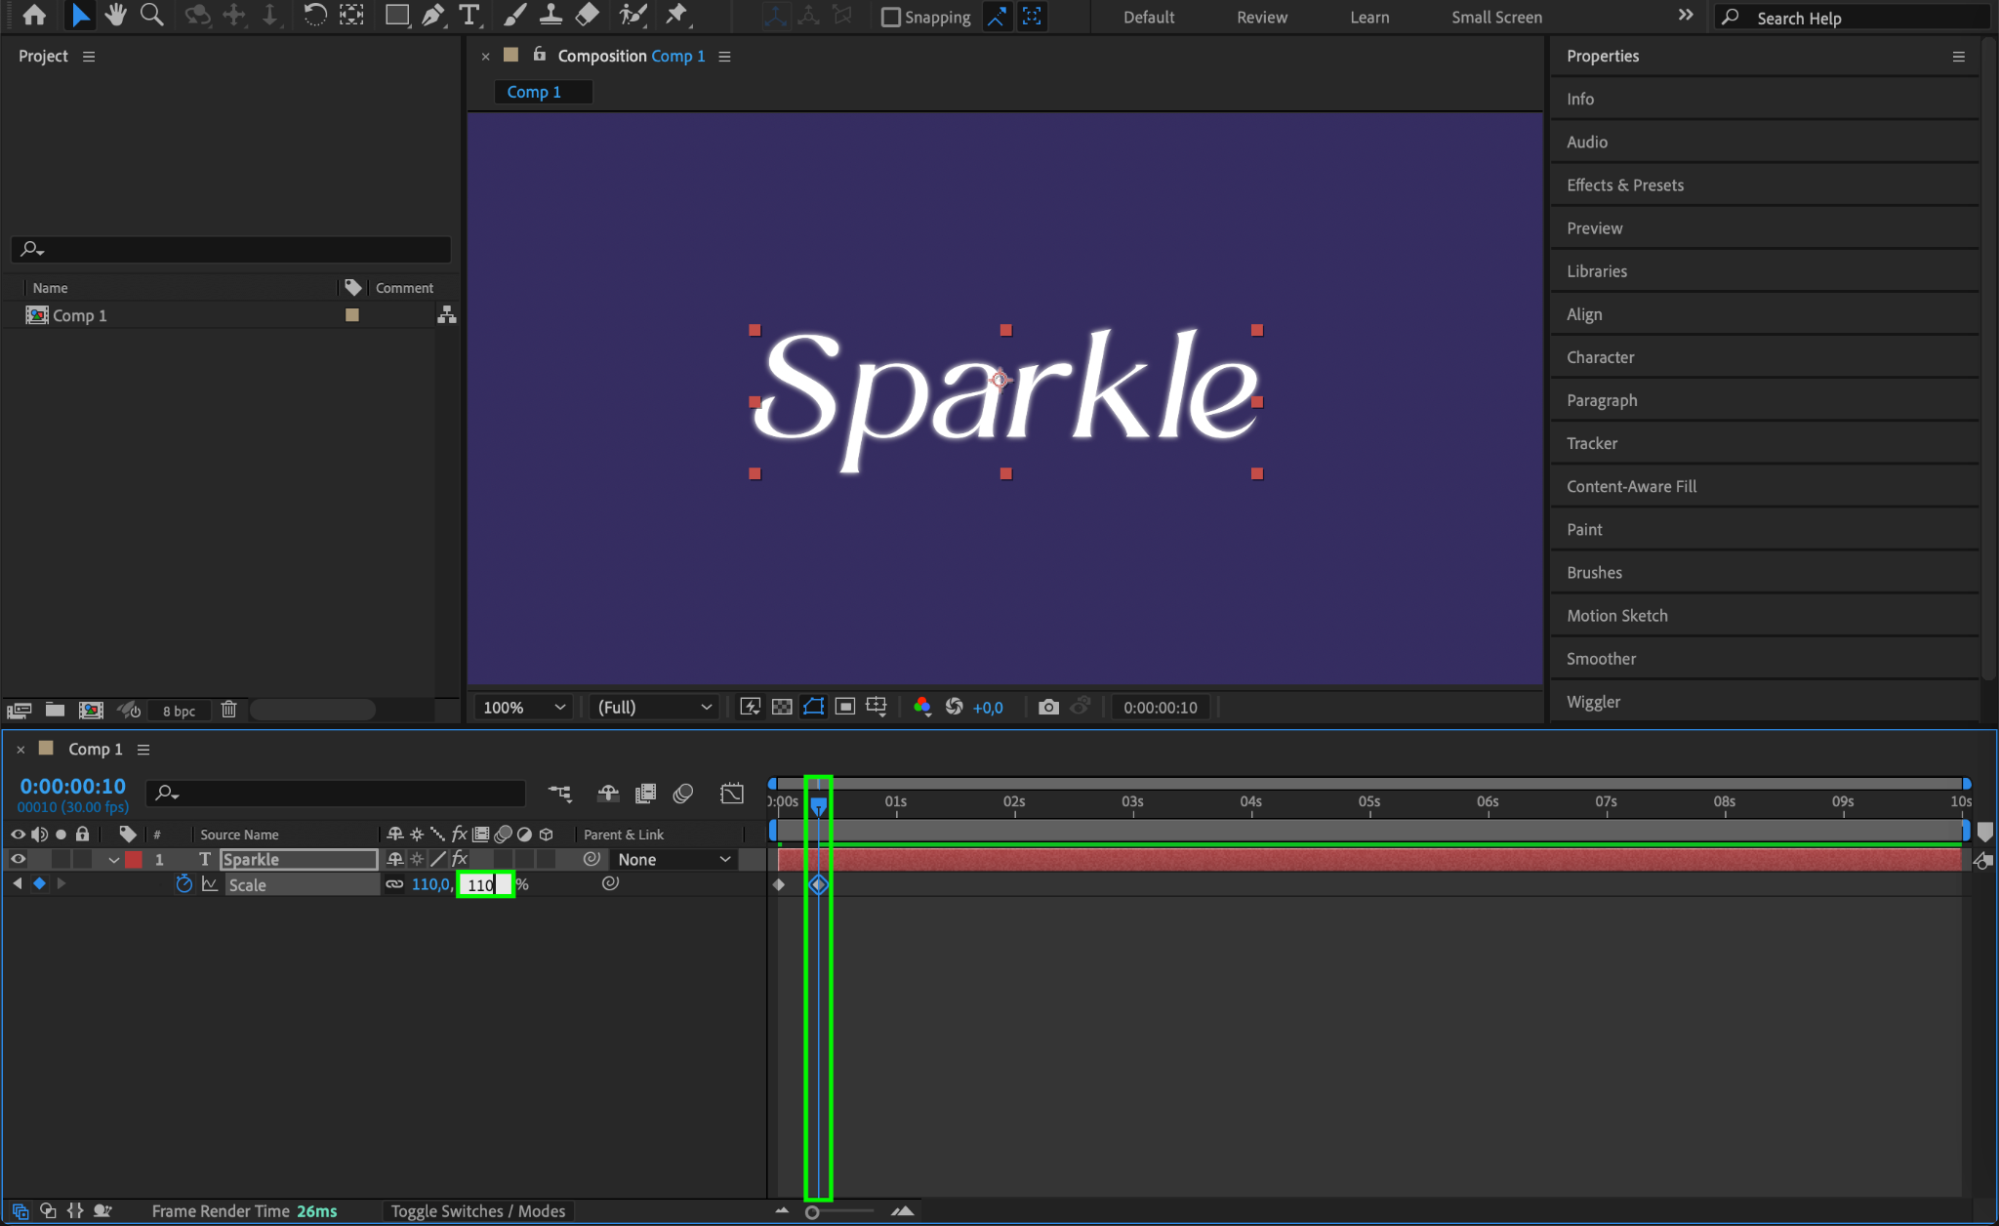
With the text layer selected, press “S” to open the Scale property. Set the CTI (Current Time Indicator) at the beginning, set Scale to 100%, and add a keyframe. Move the CTI 10 frames forward, set the scale to 110%, then move another 10 frames and set it back to 100%.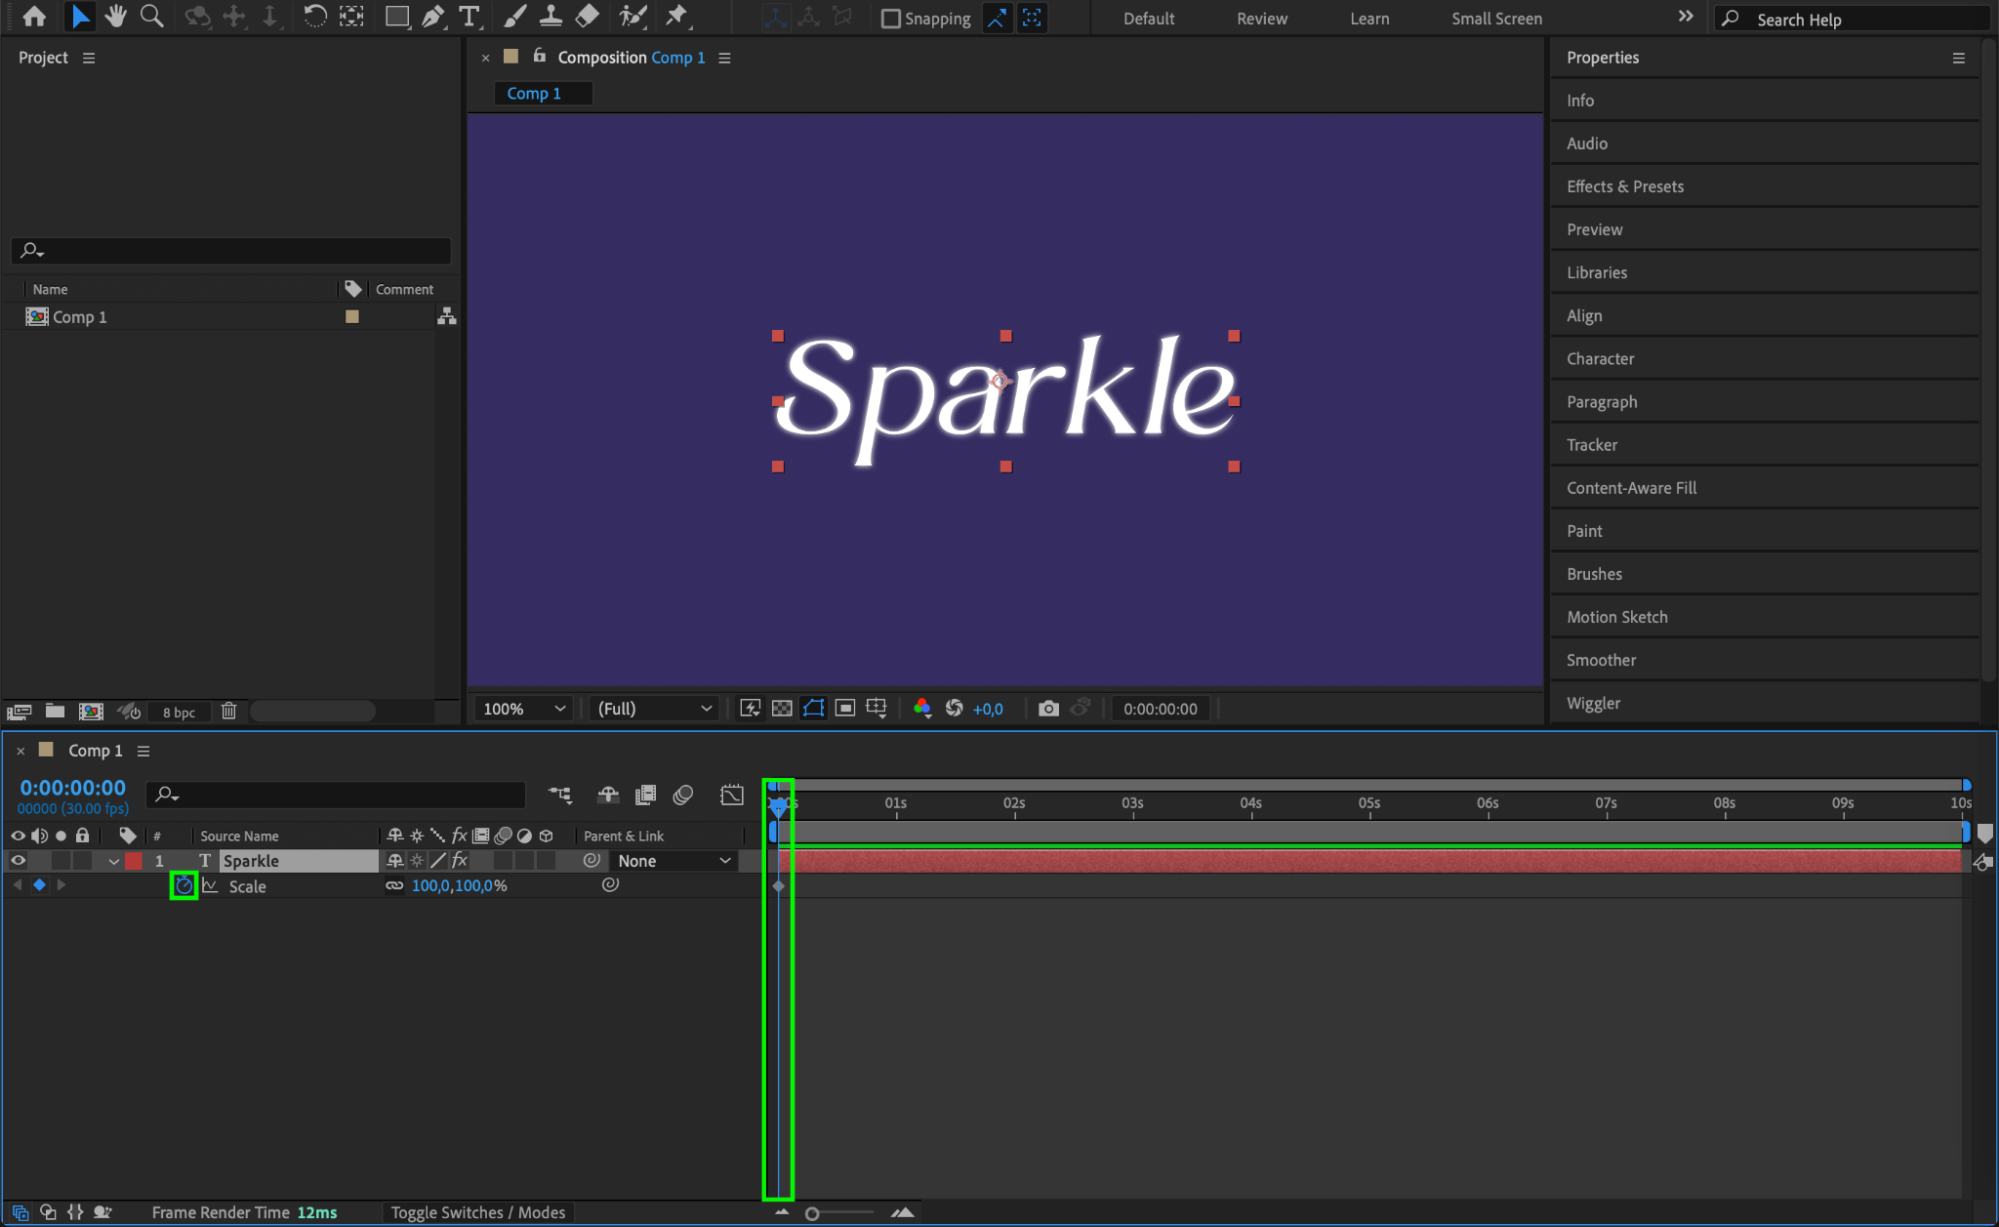
 Step 4: Add Easy Ease for Smooth Animation
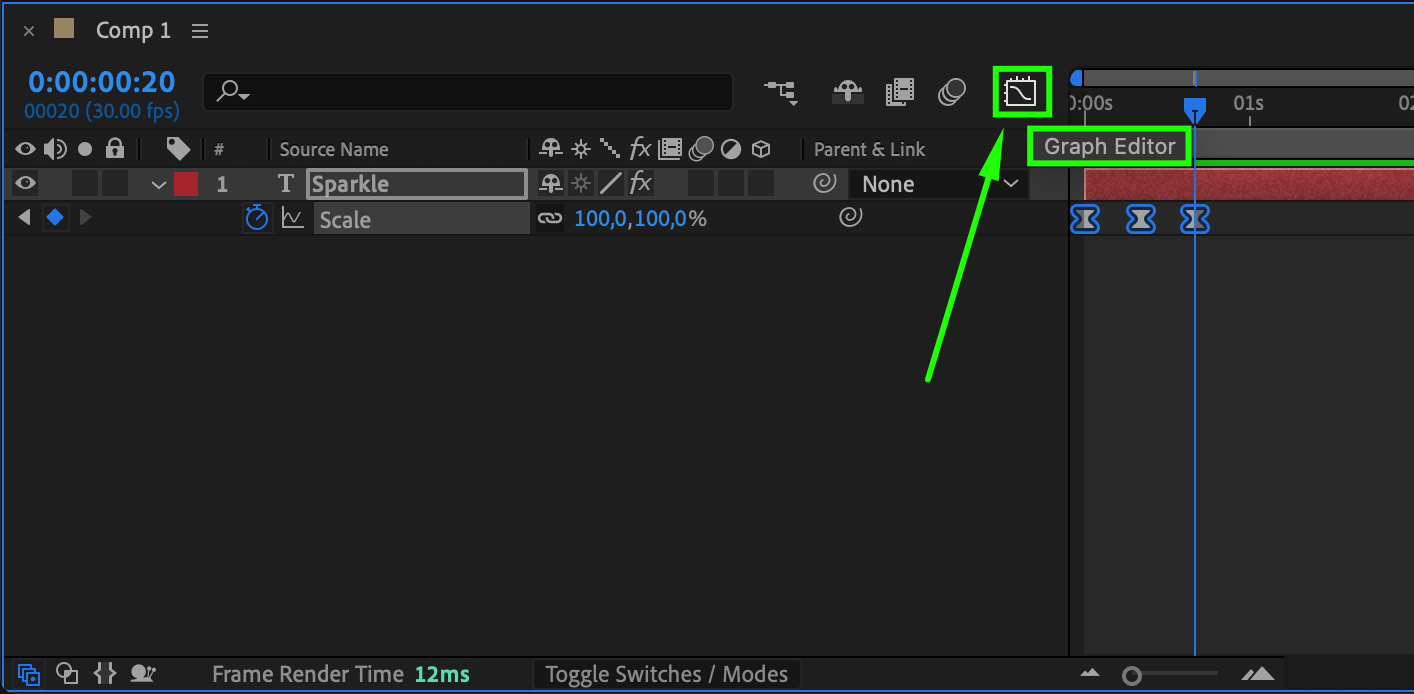
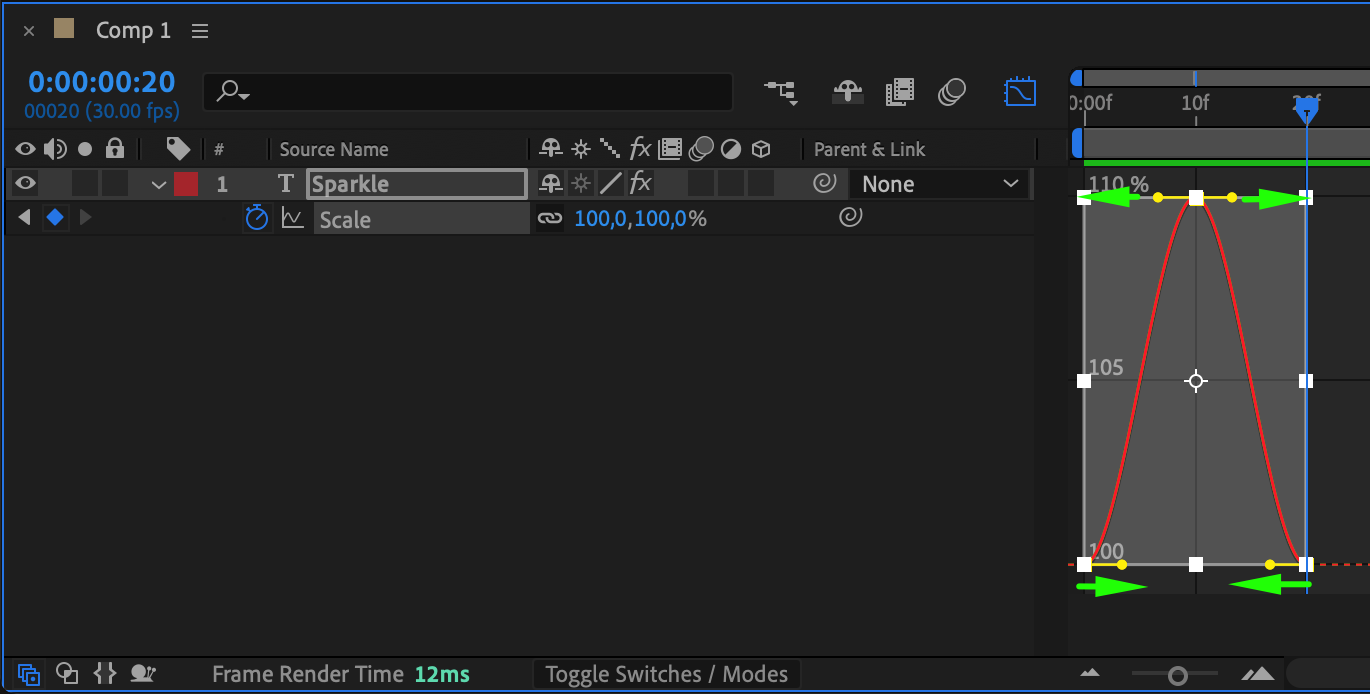
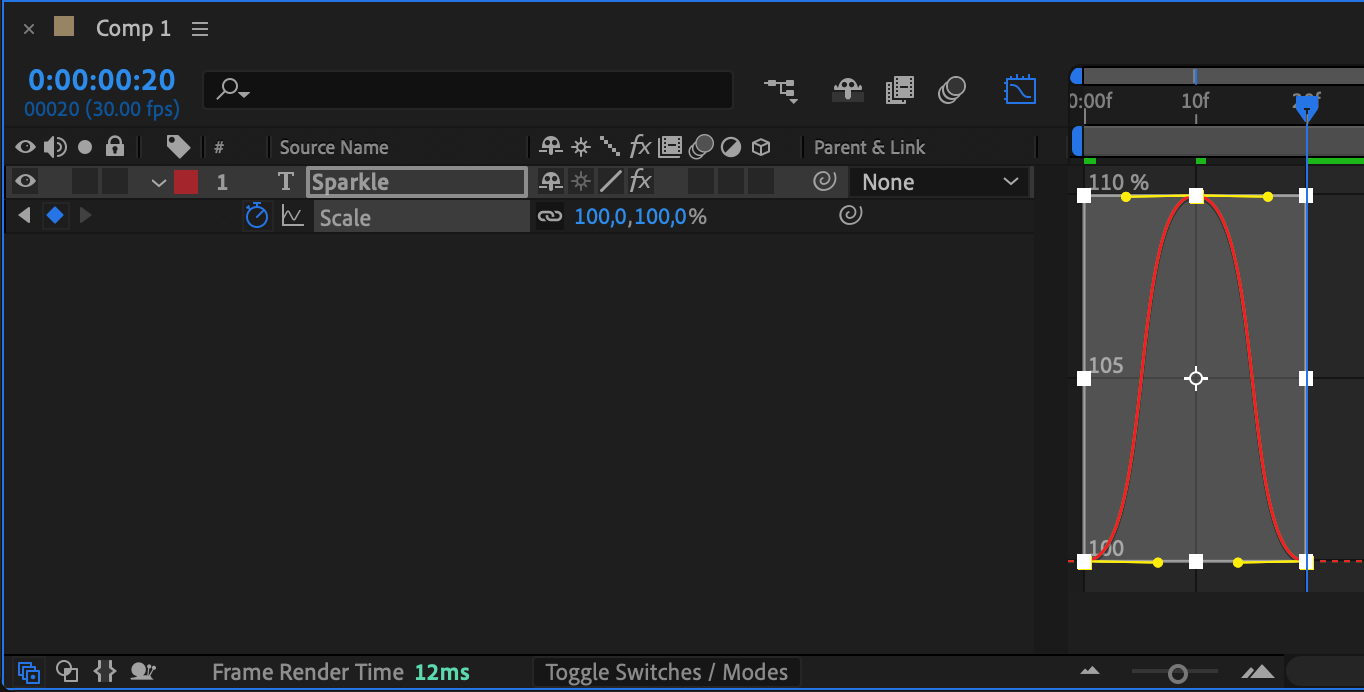
Select all keyframes, right-click, and choose Keyframe Assistant > Easy Ease to smooth out the animation. To further refine, open the Graph Editor and adjust the handles of each keyframe, creating a smooth curve that enhances the pulse effect.

 Step 5: Loop the Pulsing Animation
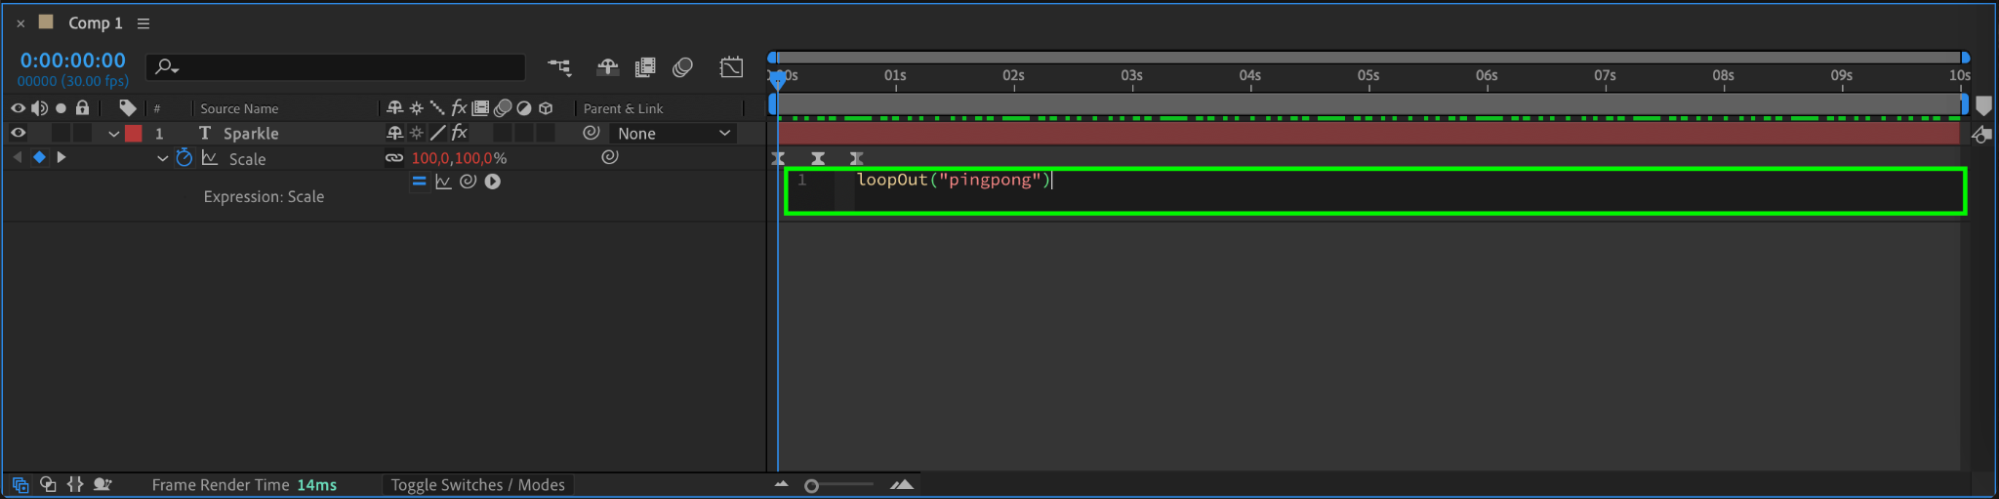
To make the pulsing continuous, click on the Scale property, go to the Animation menu, select Add Expression, and type loopOut(“pingpong”). This expression will make the text scale up and down in a repeating cycle, creating a seamless pulsing effect.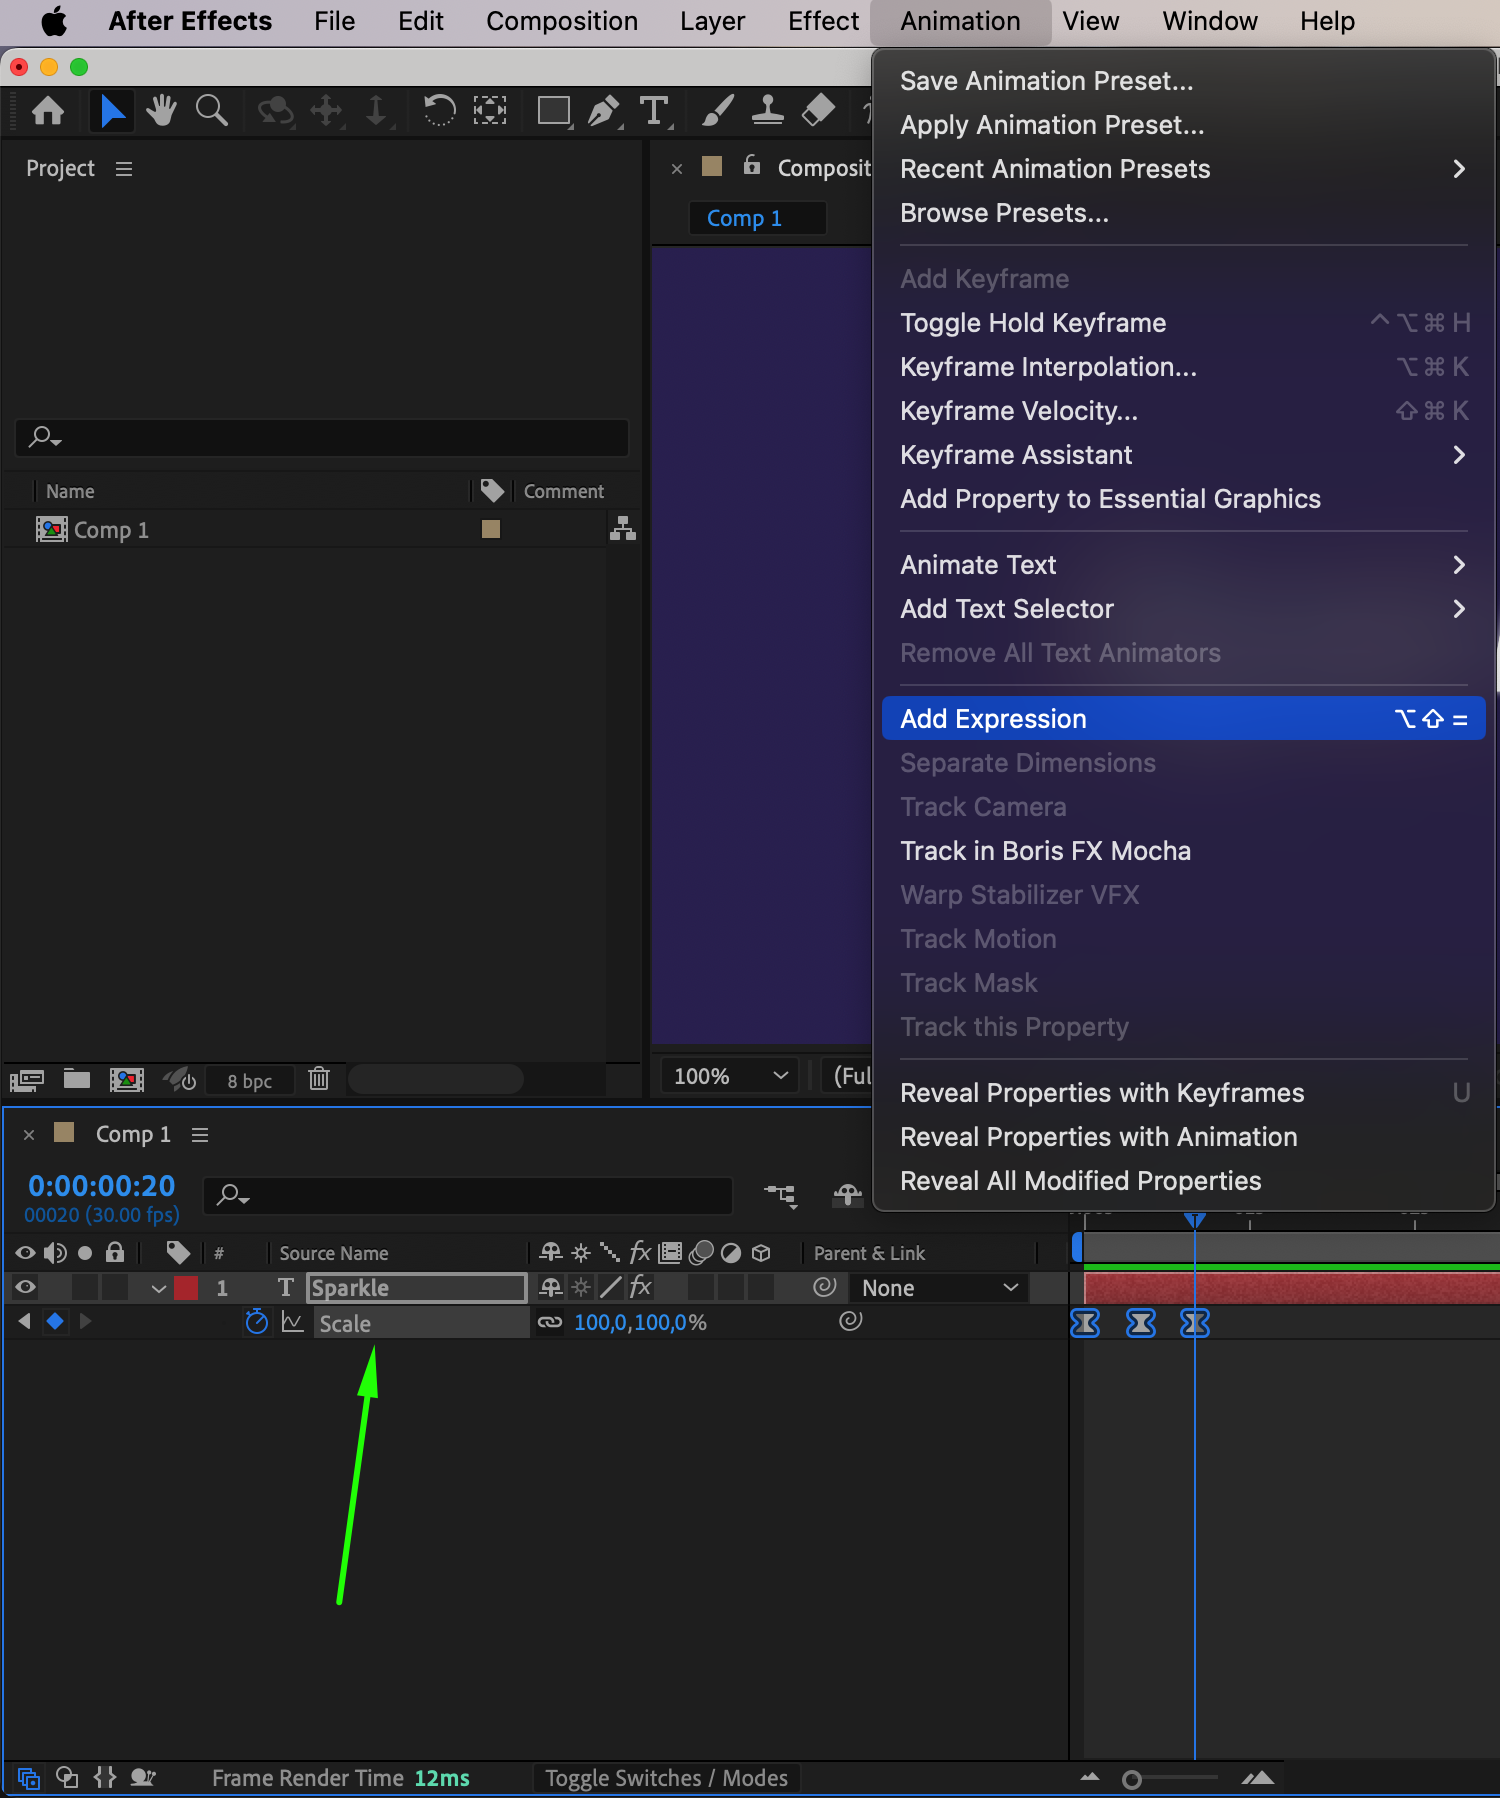
 Step 6: Preview the Animation
To view the effect, press the Spacebar to preview the pulsing animation. Adjust the timing or scale values as needed to achieve your desired look.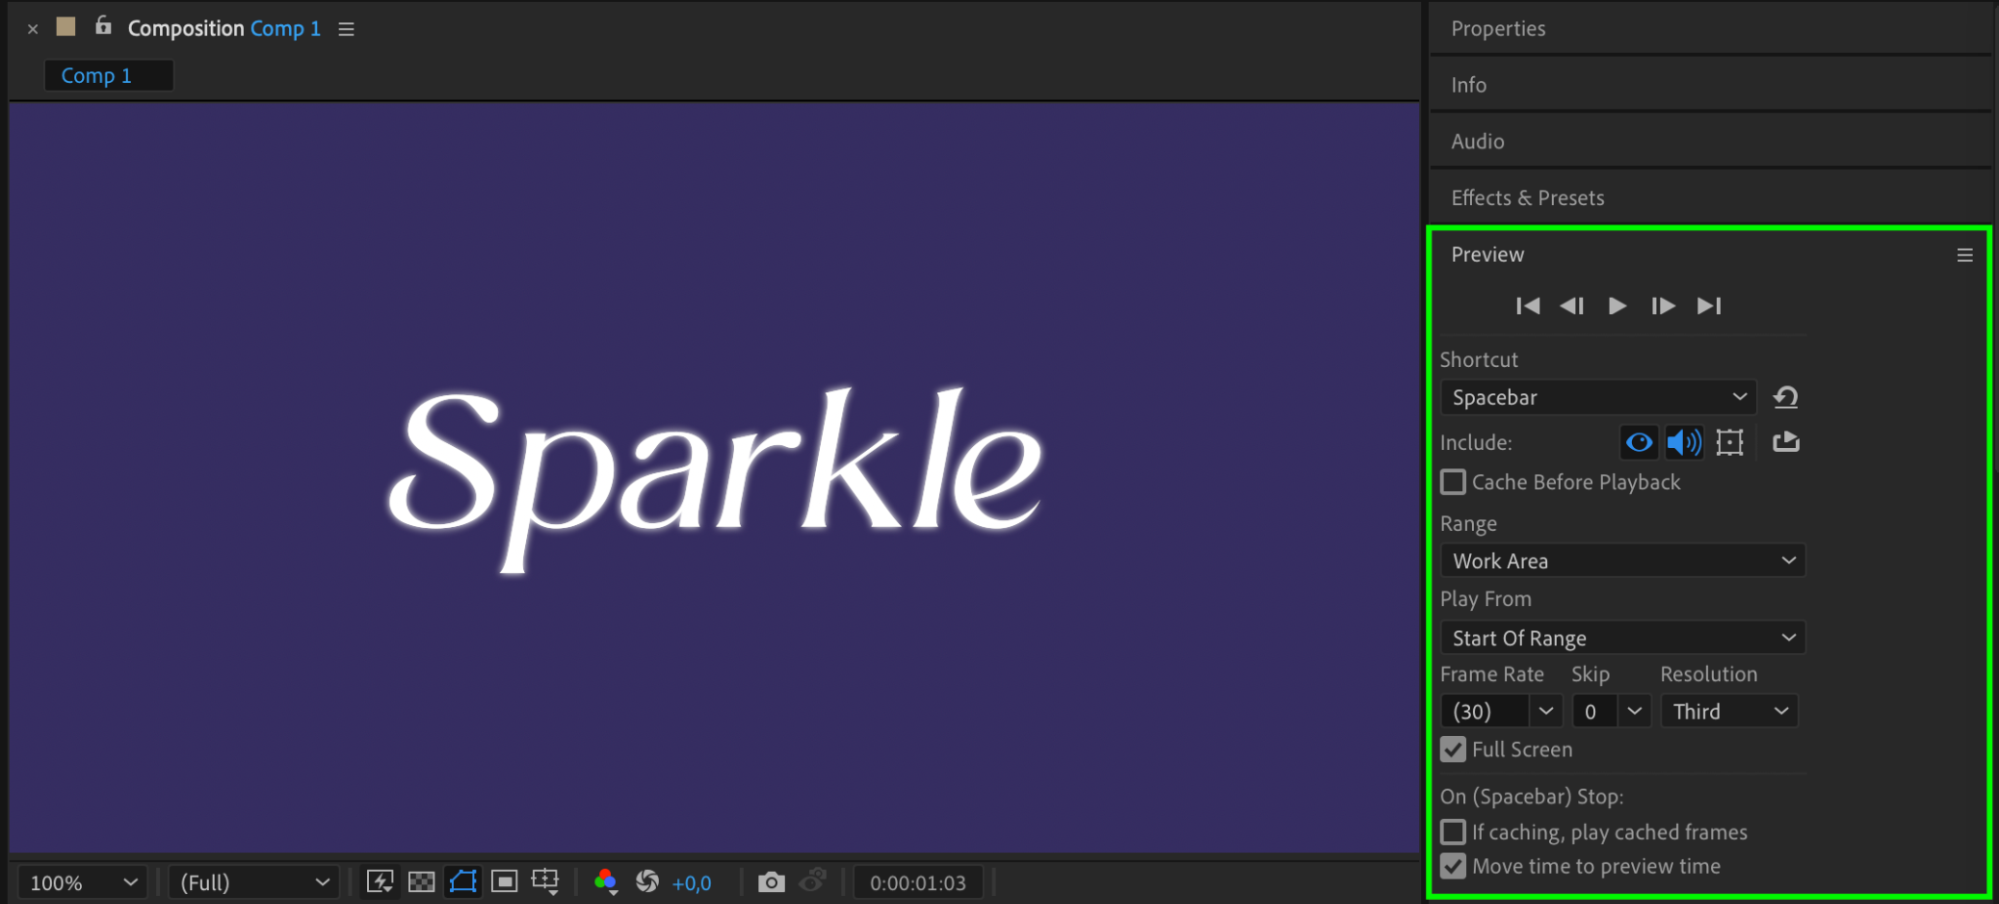 Step 7: Render the Final Animation
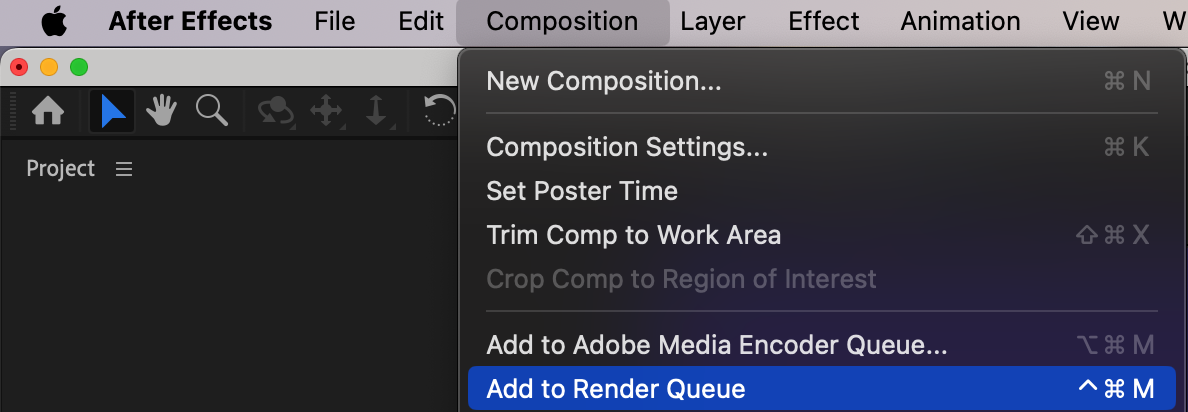
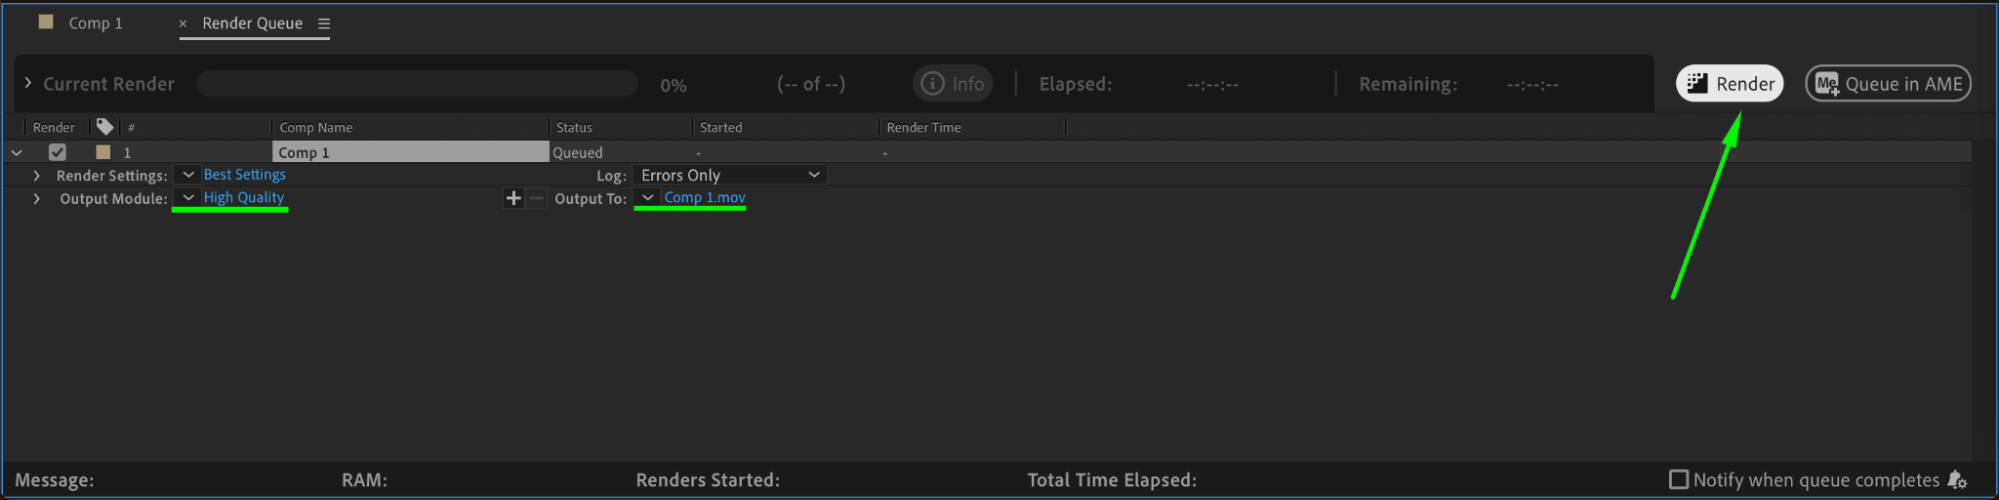
Once satisfied, go to Composition > Add to Render Queue, set your output settings, and click Render. This will export your pulsing text effect, ready to use in your project.
 Conclusion
Creating a pulsing text effect in After Effects is a simple yet powerful way to add energy and focus to your text. By combining scale animation, smooth easing, and a looping expression, you can create a dynamic look that enhances any design. Experiment with different settings to customize the effect for your project.
Our Bestsellers

