How to Create a Smooth Lens Blur Transition in After Effects
Why Use a Lens Blur Transition?
A lens blur transition is a great way to smoothly shift between two scenes, creating a natural focus shift effect. By combining the Camera Lens Blur and Exposure effects, you can make your transitions more cinematic and visually appealing. Follow these steps to create a seamless lens blur transition in After Effects.
Get 10% off when you subscribe to our newsletter

Step 1: Open Your Project
Launch After Effects and open a project with two video clips placed on the timeline. Ensure the clips are positioned one after the other without gaps. Step 2: Create an Adjustment Layer
Go to Layer > New > Adjustment Layer. This layer will hold the transition effects, allowing you to apply them without affecting the original footage.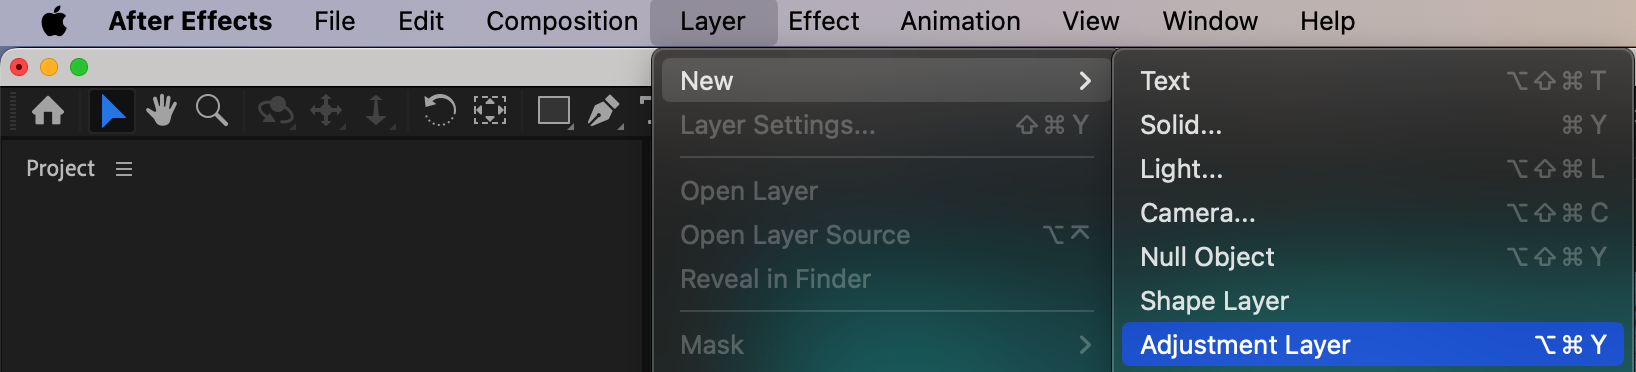
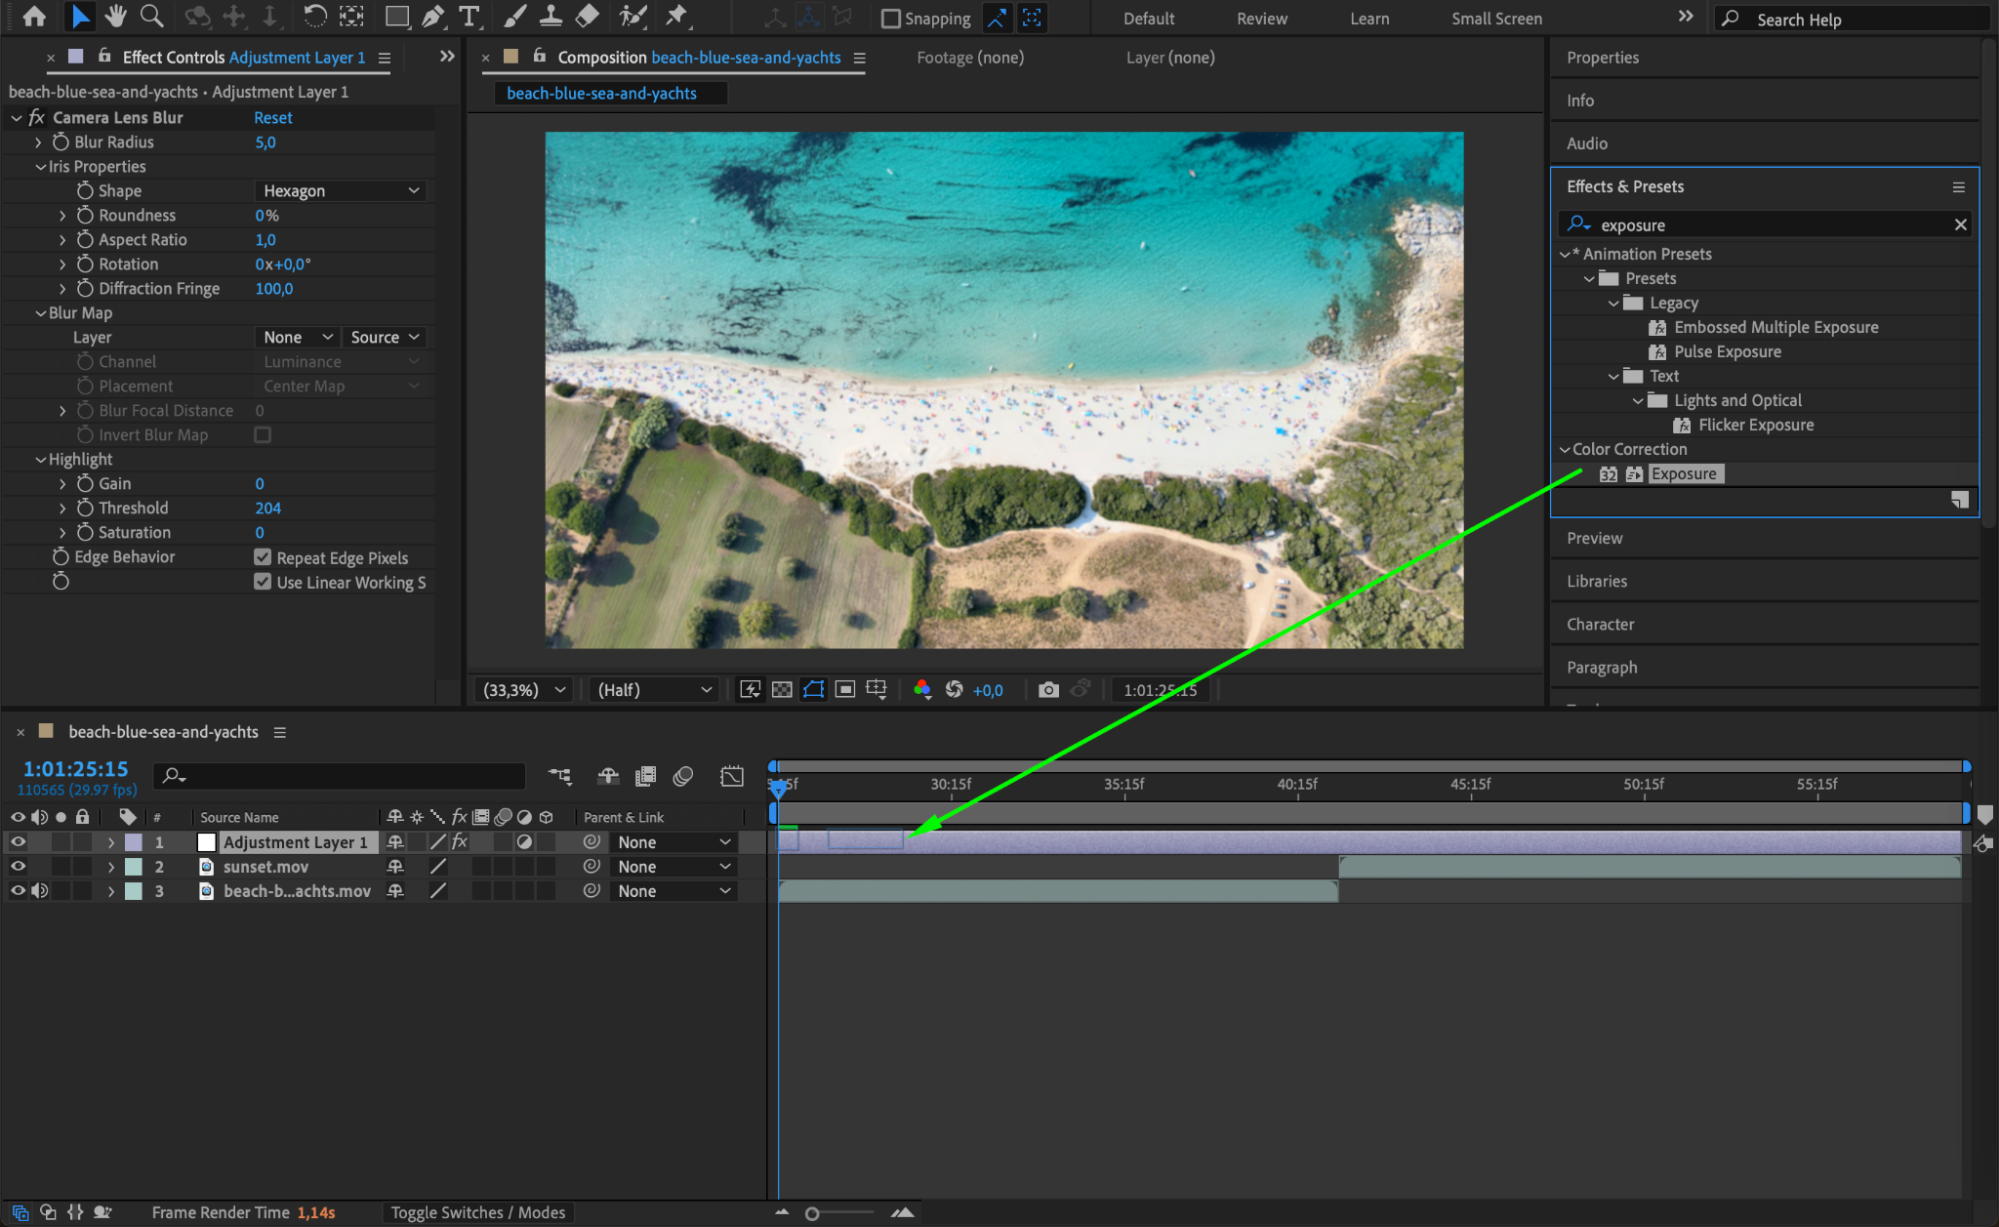
Step 3: Apply Camera Lens Blur and Exposure Effects
Open the Effects & Presets panel, search for Camera Lens Blur and Exposure, then drag both effects onto the Adjustment Layer. These effects will create the blur transition and simulate a natural exposure change.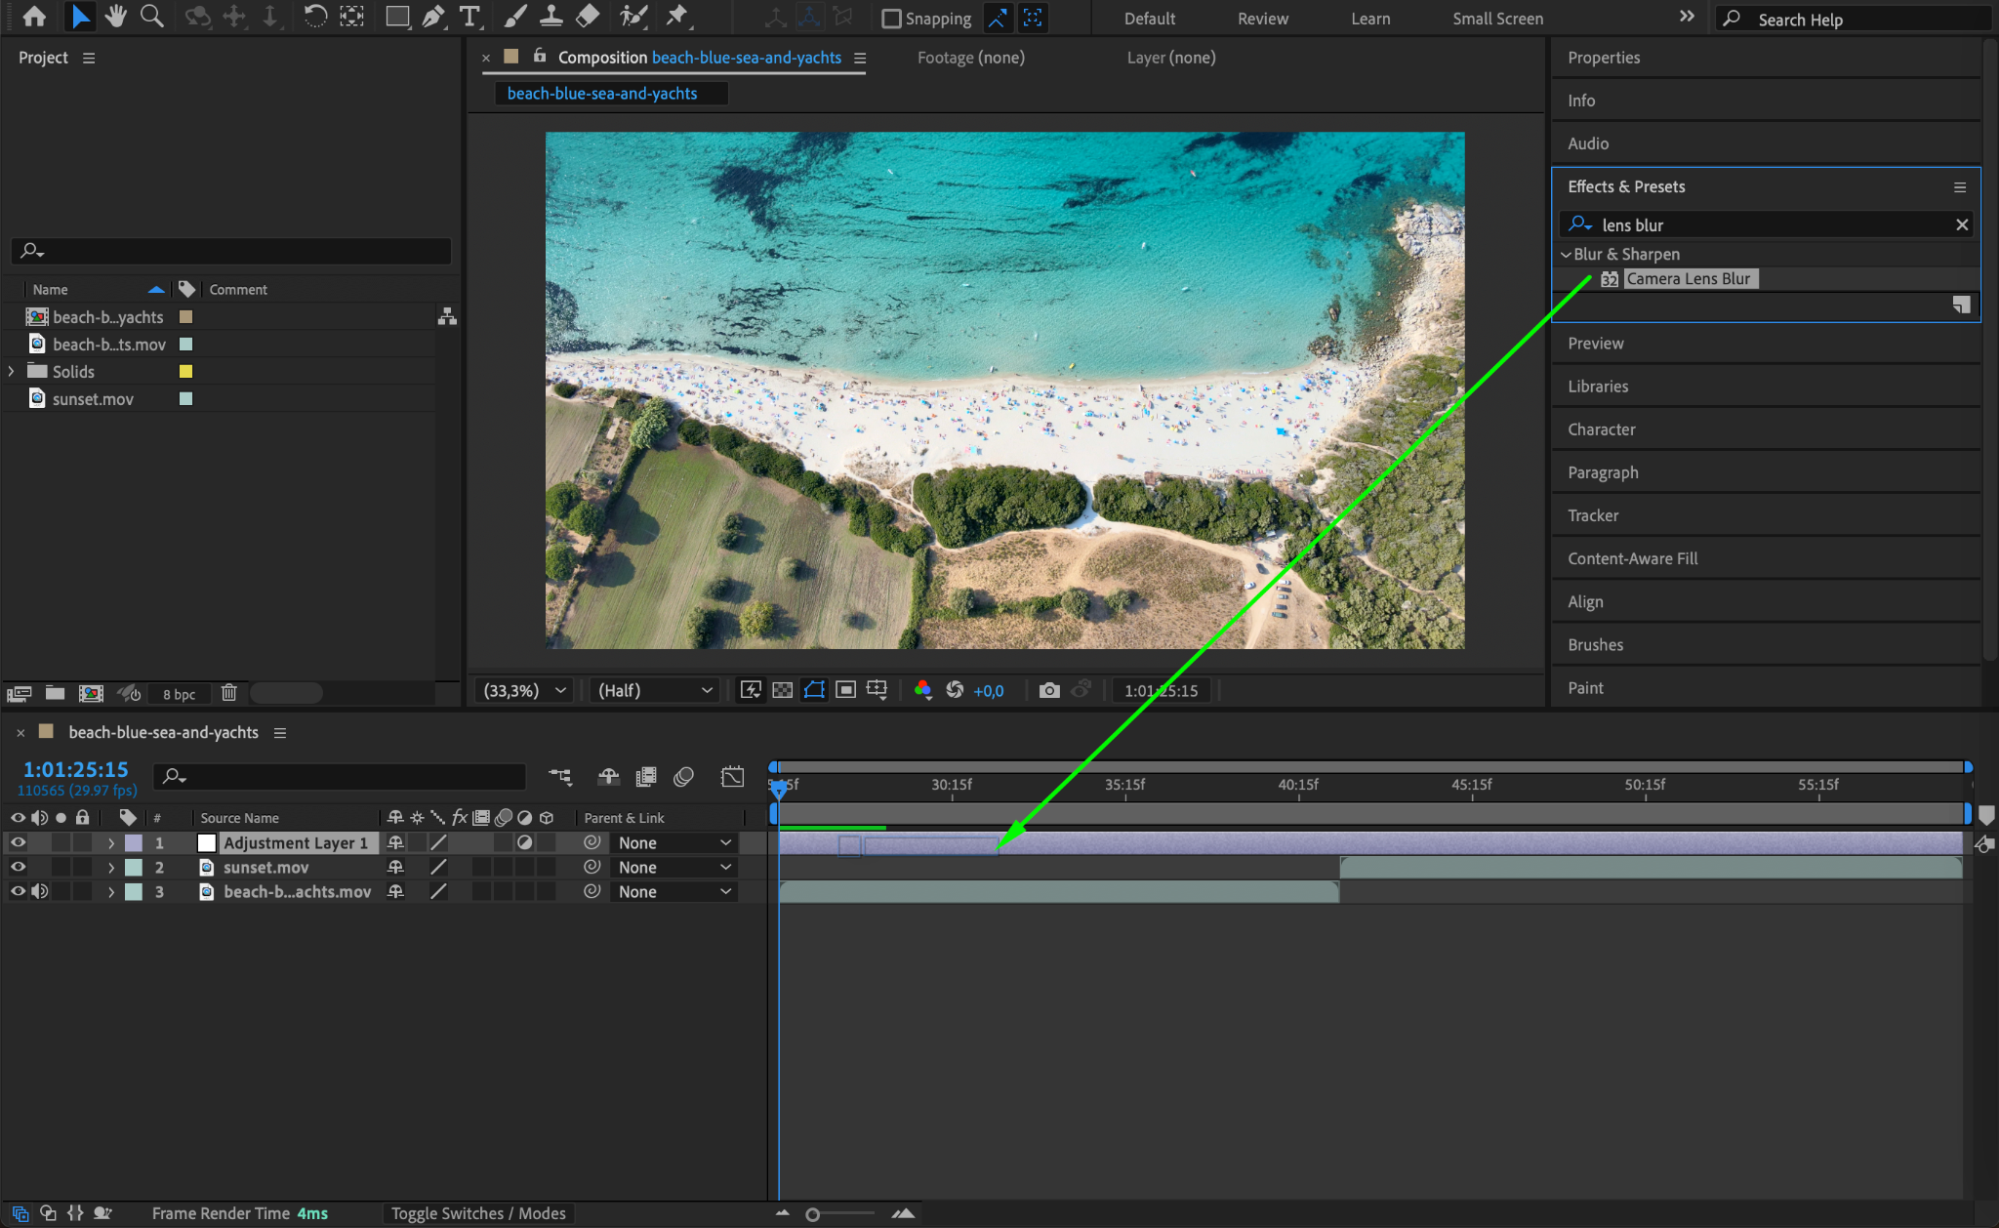
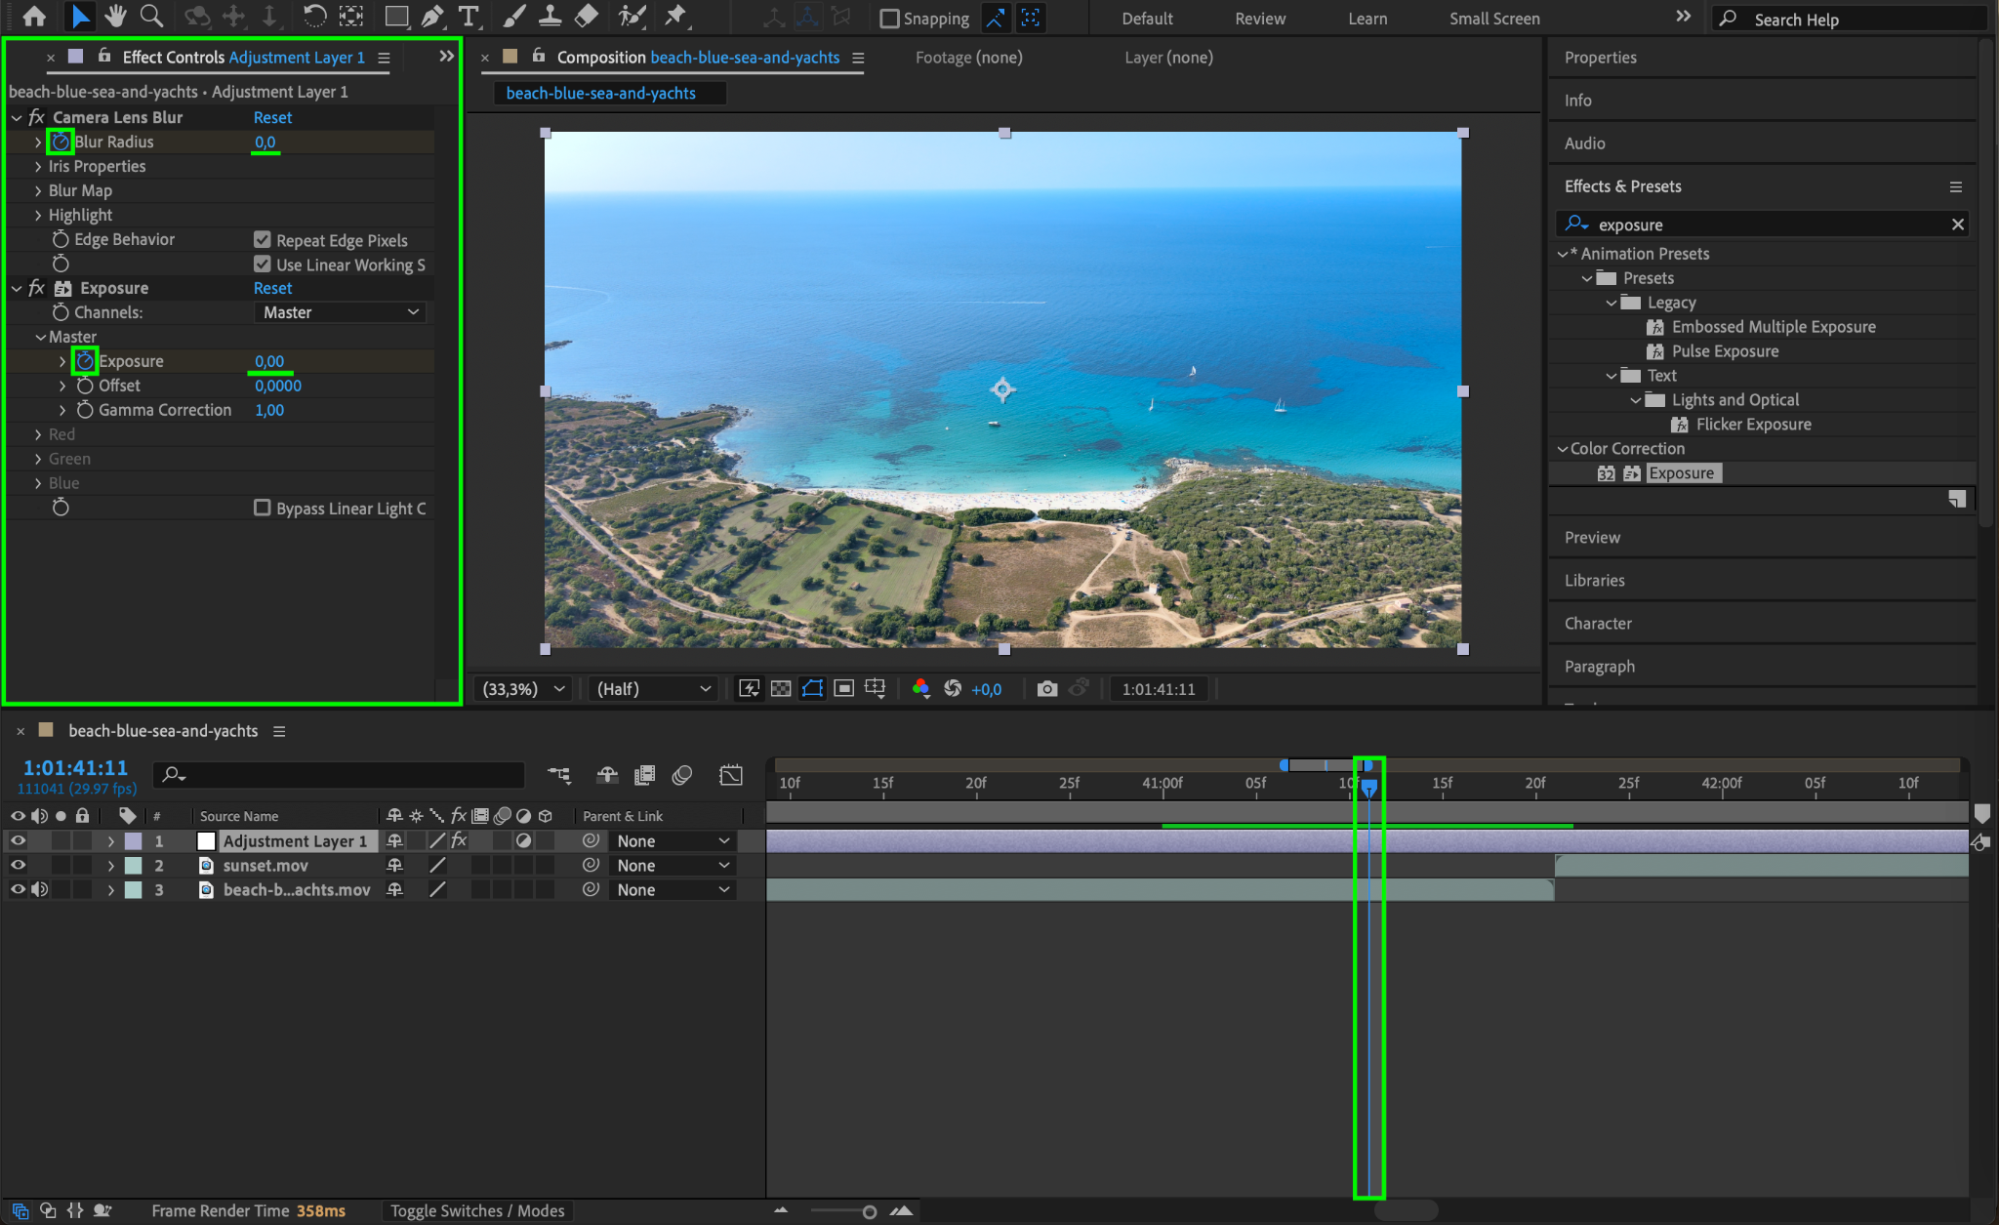
 Step 4: Set the Starting Keyframes
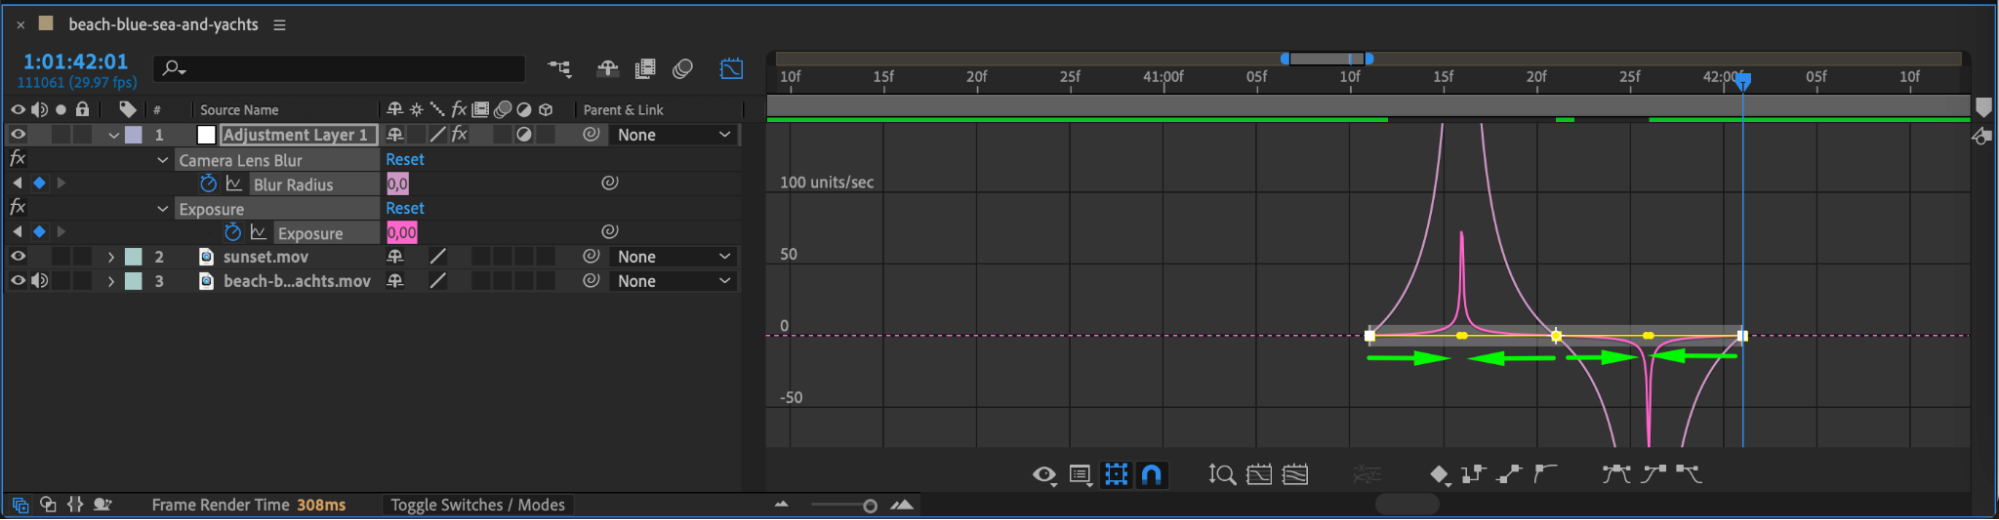
Move the Current Time Indicator (CTI) to the point where the first video ends and the second video begins. Press “Ctrl/Cmd + Shift + Left Arrow” to move slightly backward. Click the stopwatch icons for Blur Radius (Camera Lens Blur) and Exposure to create keyframes with both values set to 0.
 Step 5: Increase Blur and Exposure for the Transition
Press “Ctrl/Cmd + Shift + Right Arrow” to move forward in the timeline. Increase Blur Radius to 50 and Exposure to 1.5. This will make the screen blur and brighten at the peak of the transition.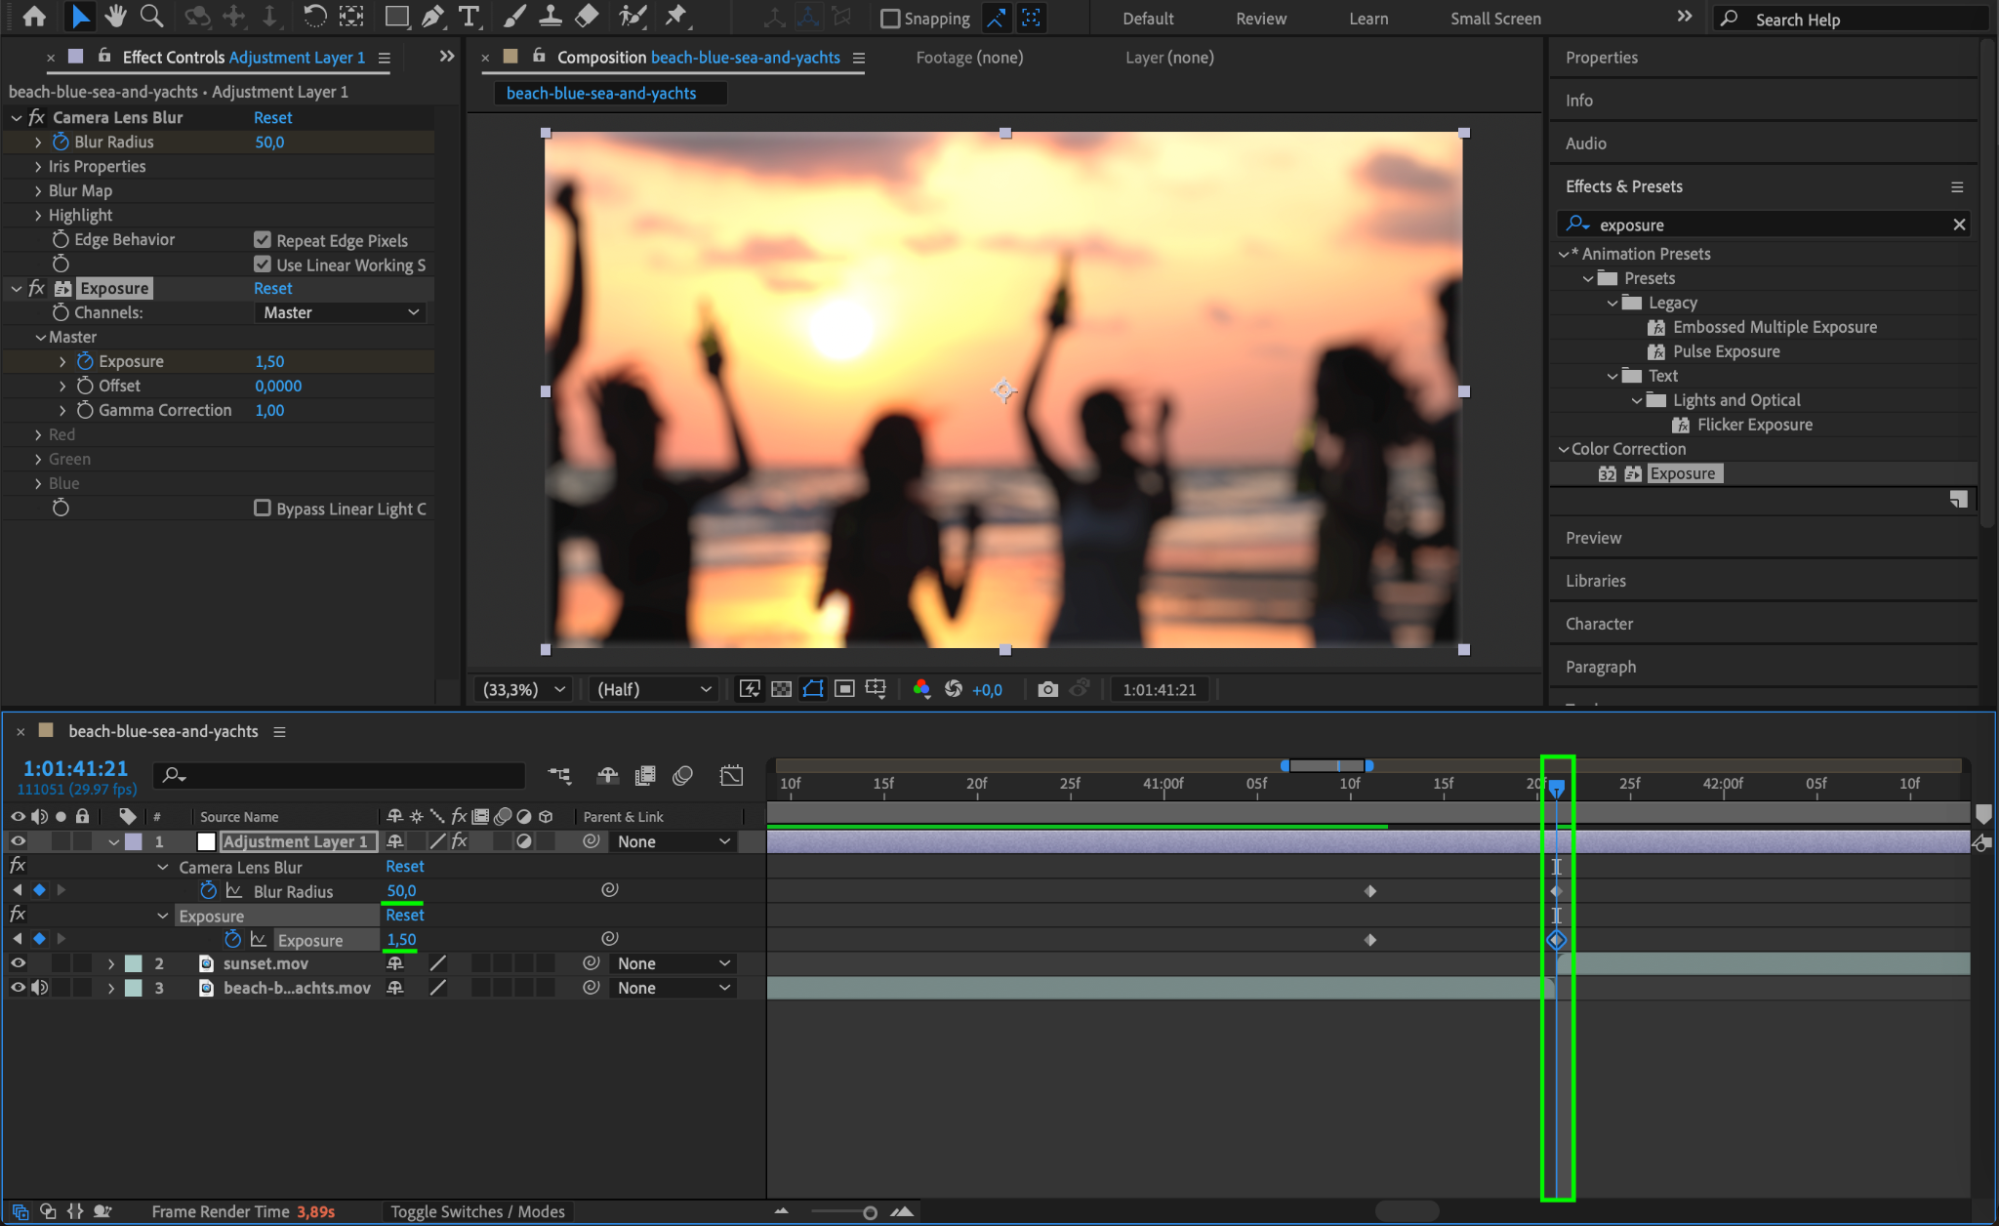 Step 6: Restore the Original Values
Press “Ctrl/Cmd + Shift + Right Arrow” again to move forward. Set Blur Radius and Exposure back to 0 to smoothly reveal the next video.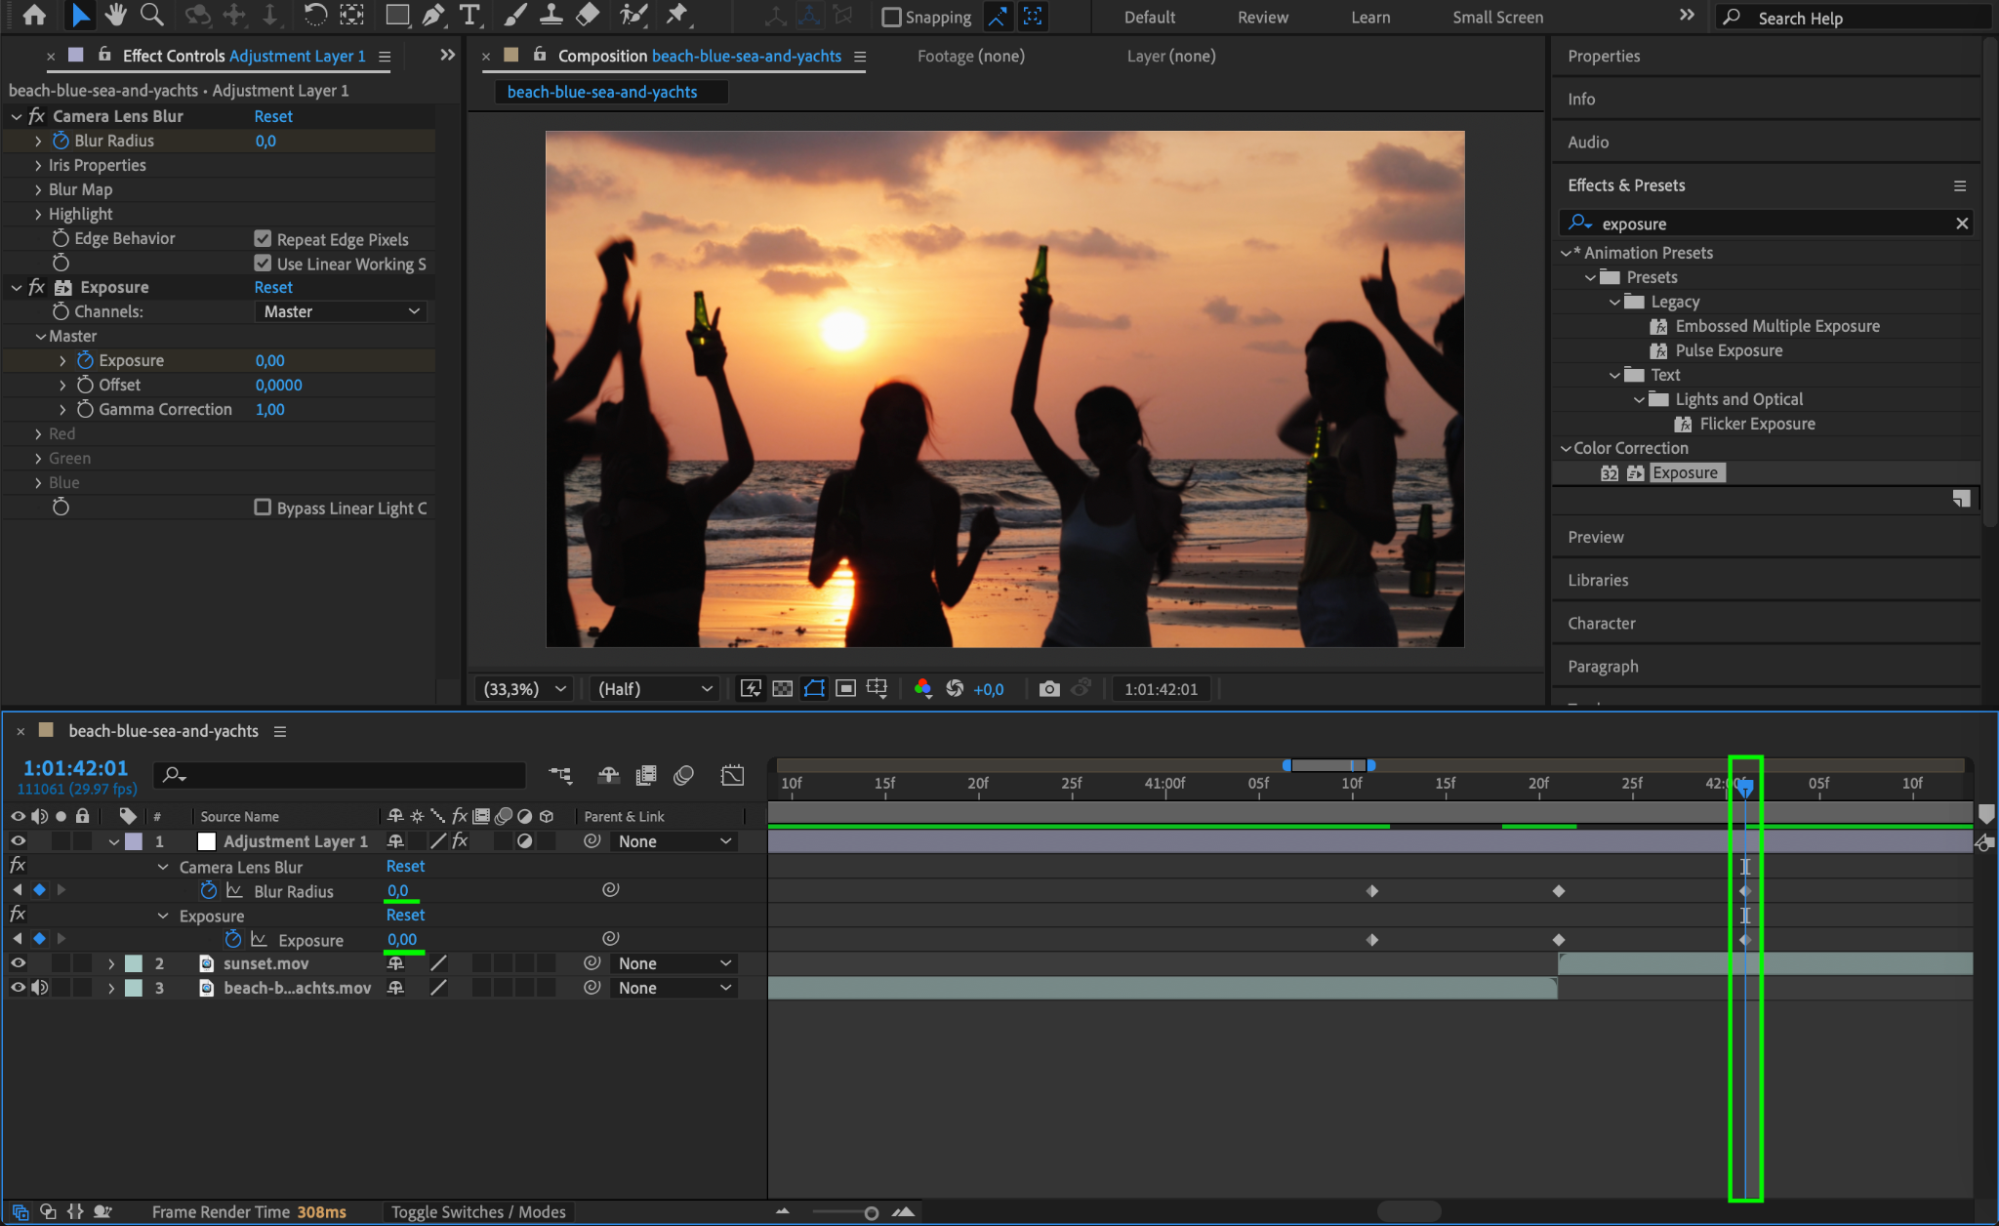 Step 7: Add Easy Ease and Adjust the Graph Editor
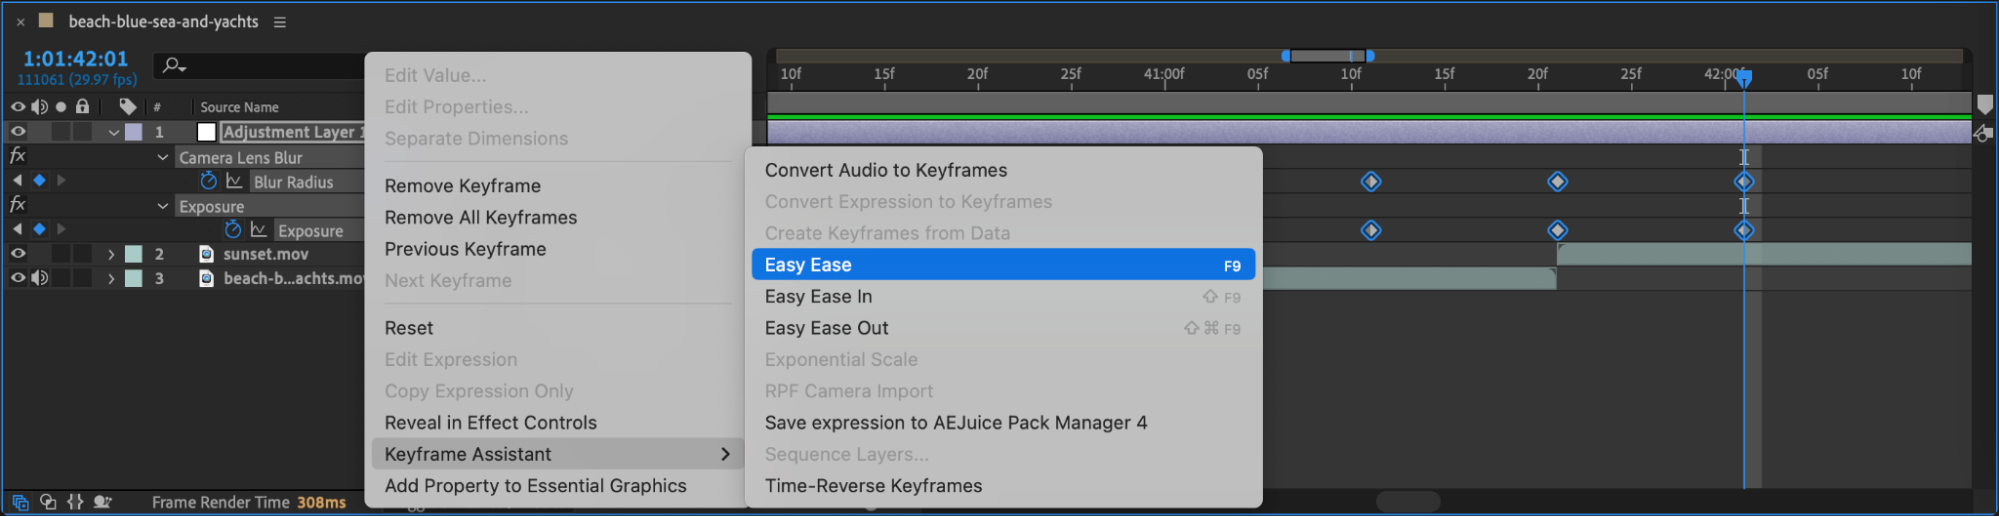
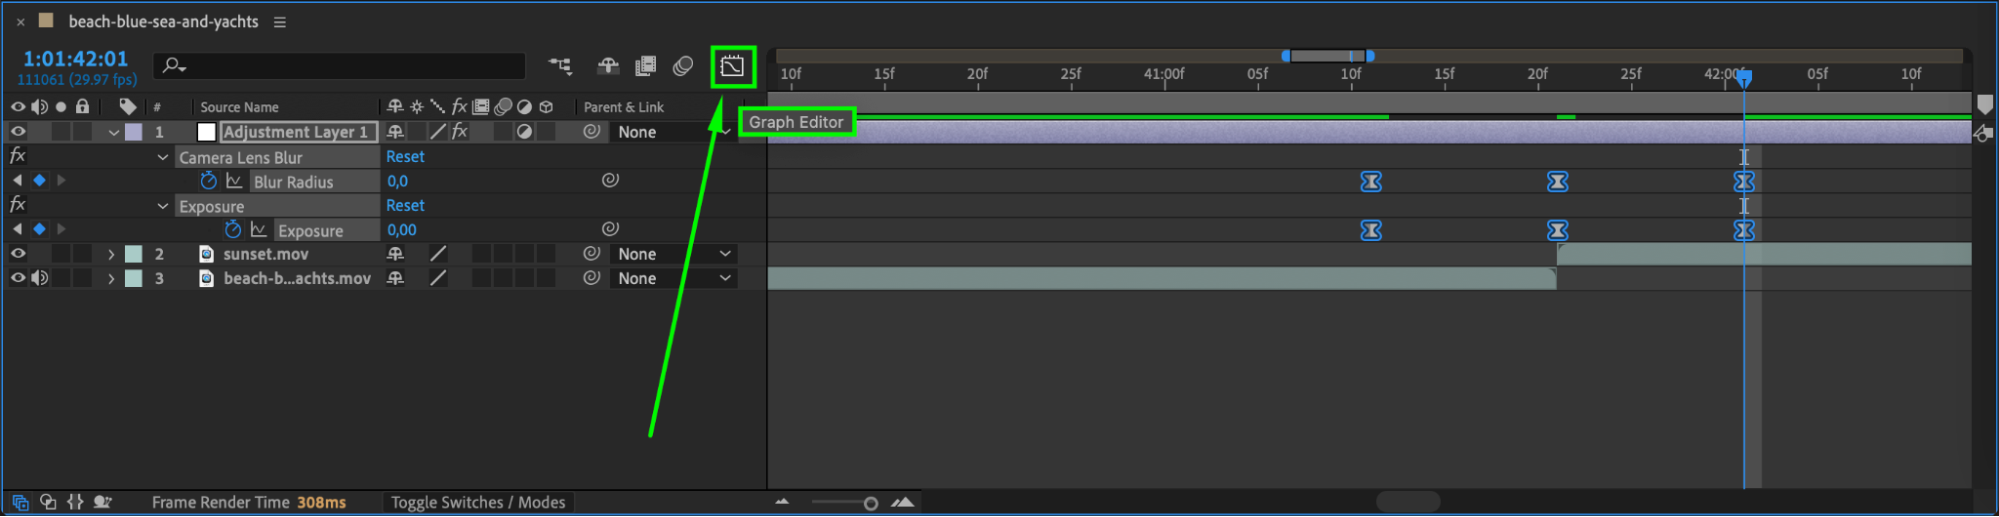
Select all keyframes, then right-click and choose Keyframe Assistant > Easy Ease. Open the Graph Editor and adjust the speed curve for a smoother, more natural transition. A gradual ease-in and ease-out will enhance the cinematic effect.
 Step 8: Preview the Transition
Press Spacebar to play back your timeline and check how the transition looks. If needed, adjust keyframes or effect values to improve the result.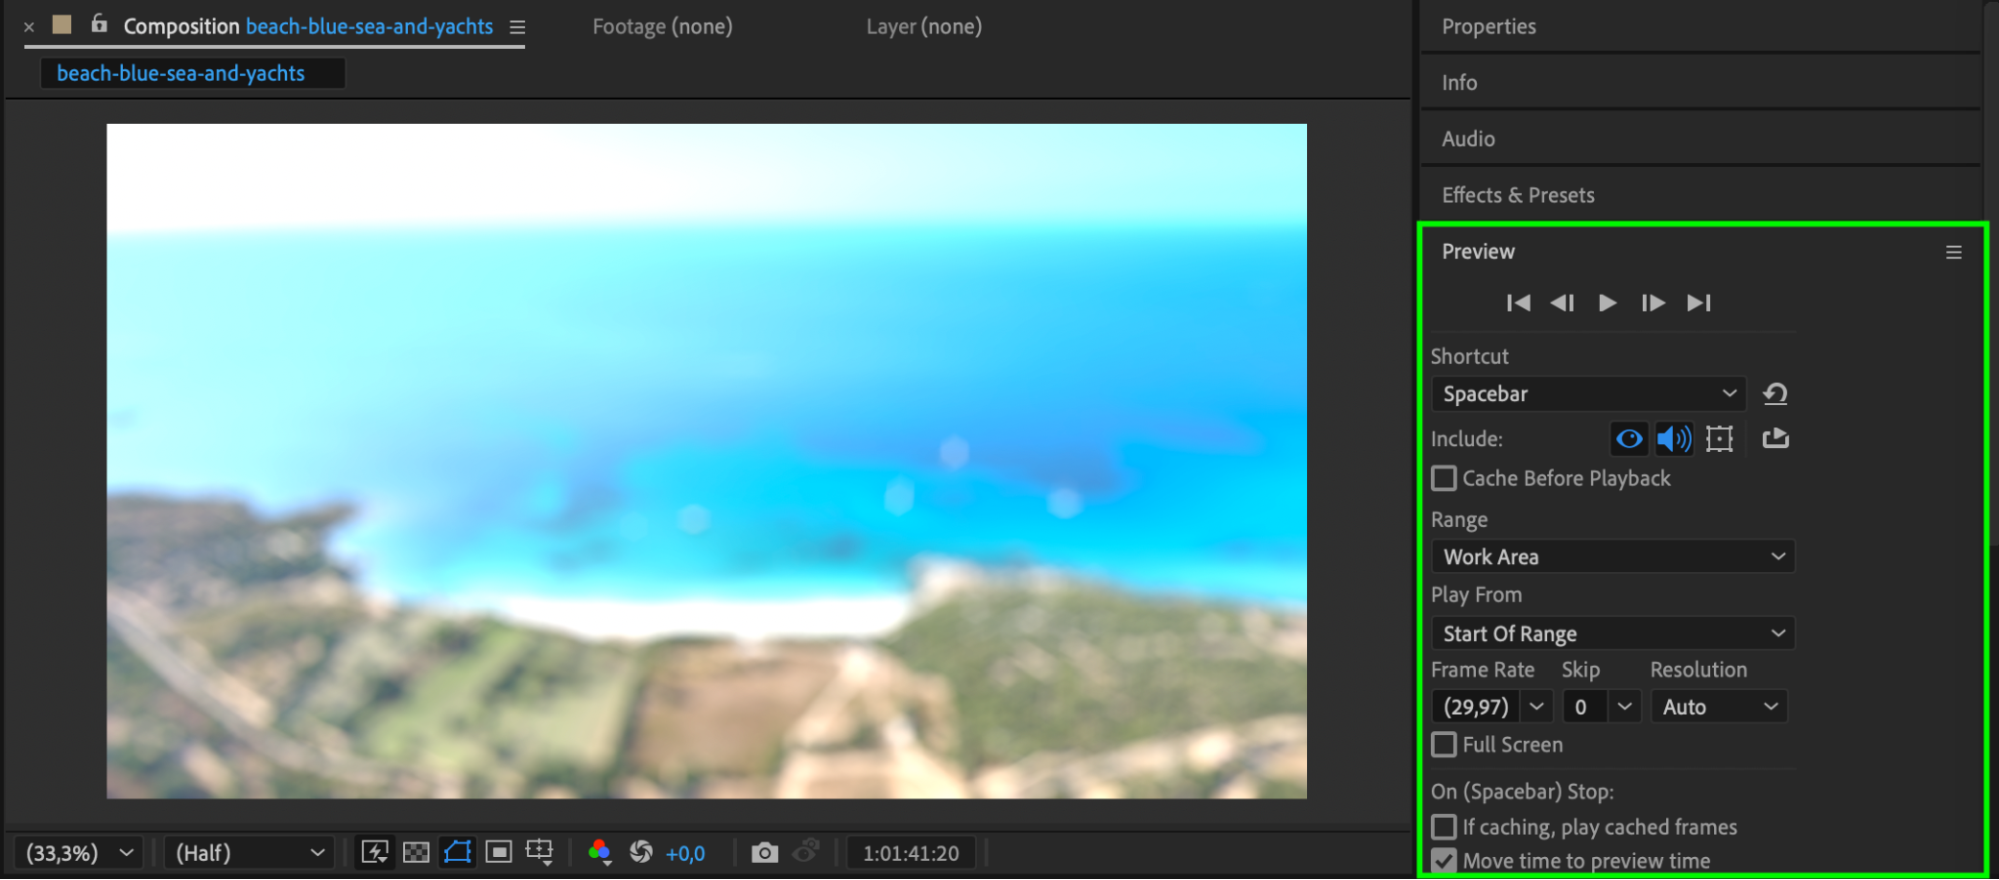 Step 9: Render the Final Video
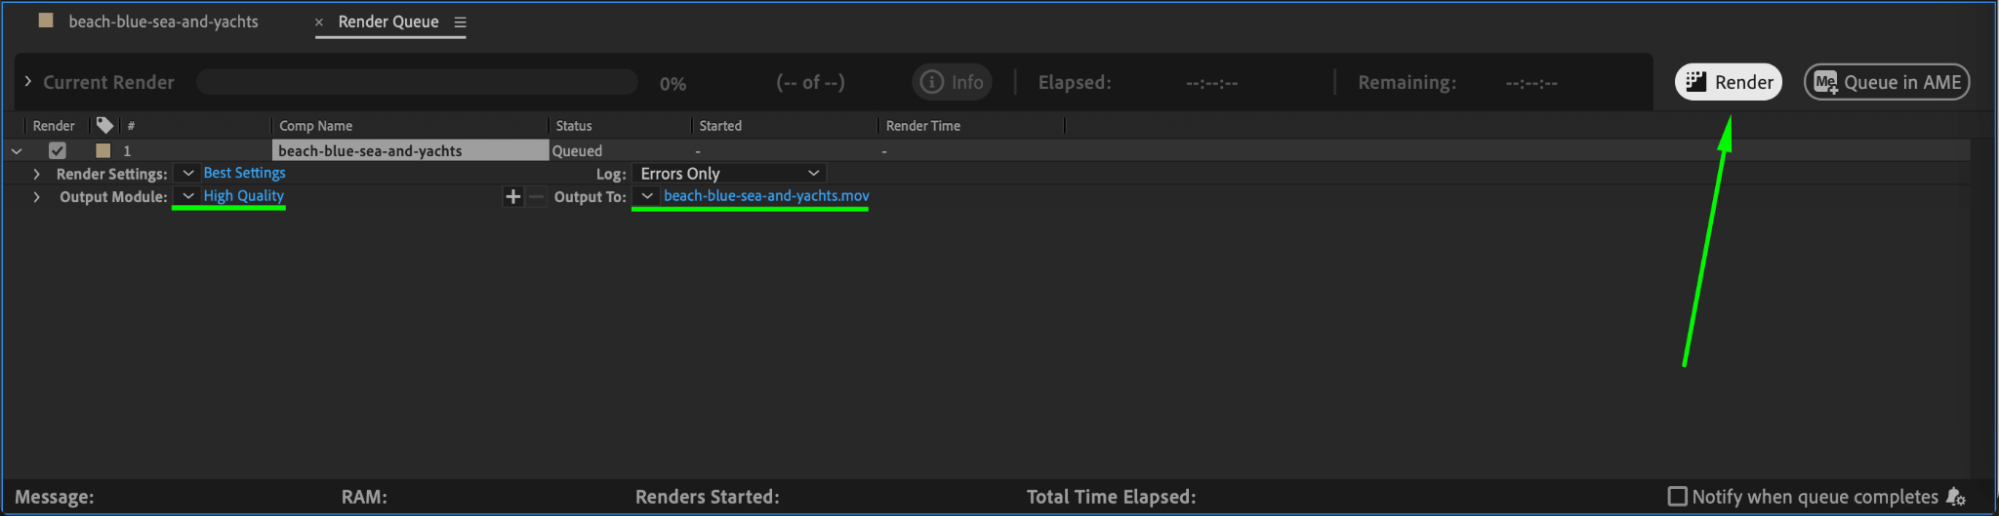
Once satisfied, go to Composition > Add to Render Queue or Add to Adobe Media Encoder Queue to export your video with the new lens blur transition.
 Conclusion
A lens blur transition in After Effects is an effective way to create smooth and cinematic scene changes. By using an adjustment layer, Camera Lens Blur, and Exposure effects, you can achieve a professional-looking transition with minimal effort. Experiment with blur values and timing to get the perfect look for your project!
Our Bestsellers


