Step-by-Step Guide to Crafting Slide Transitions in After Effects
Introduction – Add Seamless Transitions to Your Videos with a Slide Effect
Slide transitions are a clean and effective way to switch between clips in your video projects. This tutorial will guide you through the process of creating a slide transition in After Effects using keyframes and motion blur for a professional touch.
Get 10% off when you subscribe to our newsletter

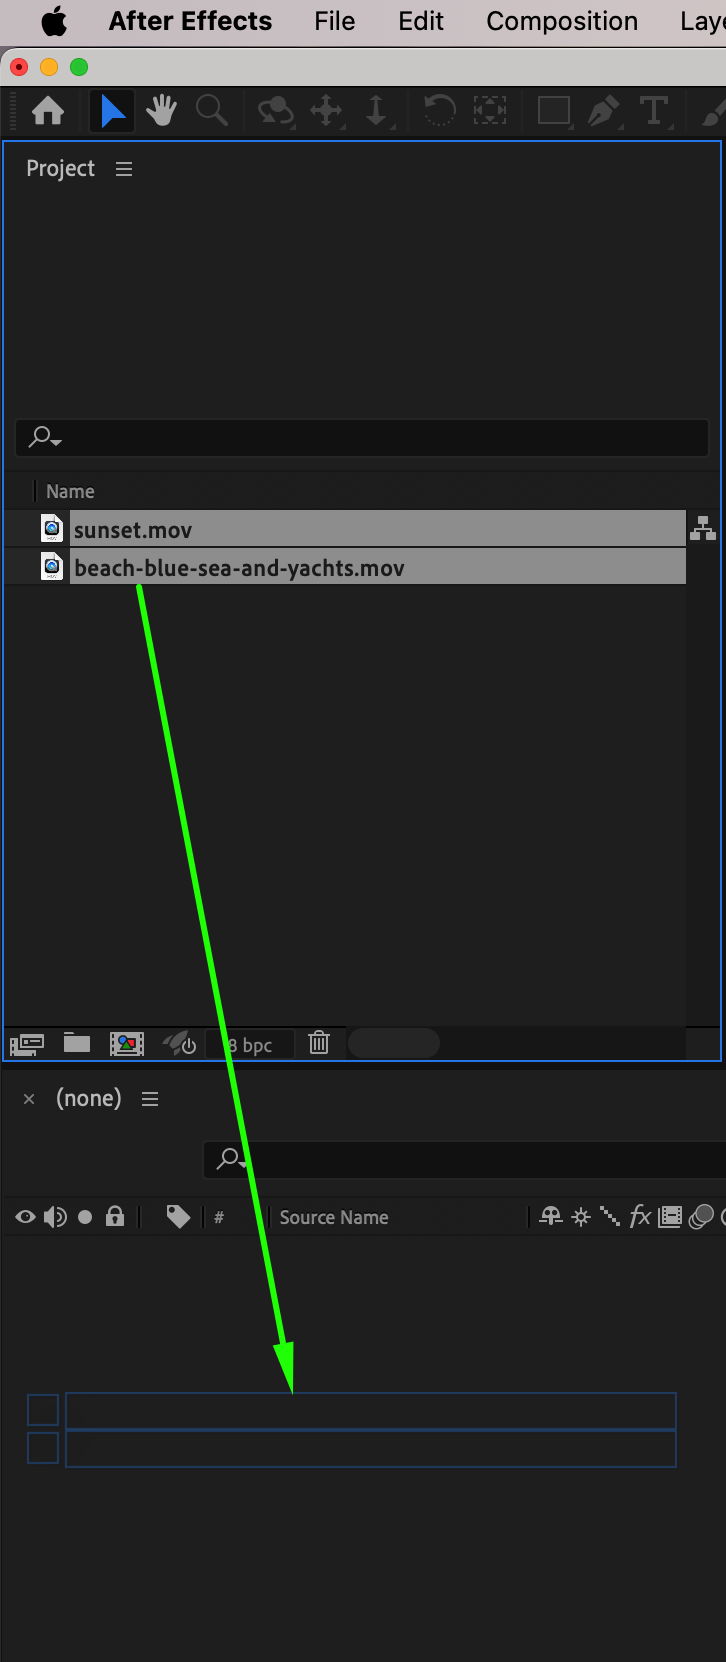
Step 1: Import Your Video Files
Start by importing the video files for your transition. Go to File > Import > File, select the clips you want to use, and click Open. Drag each video onto the timeline to stack them as layers in the order you want them to appear.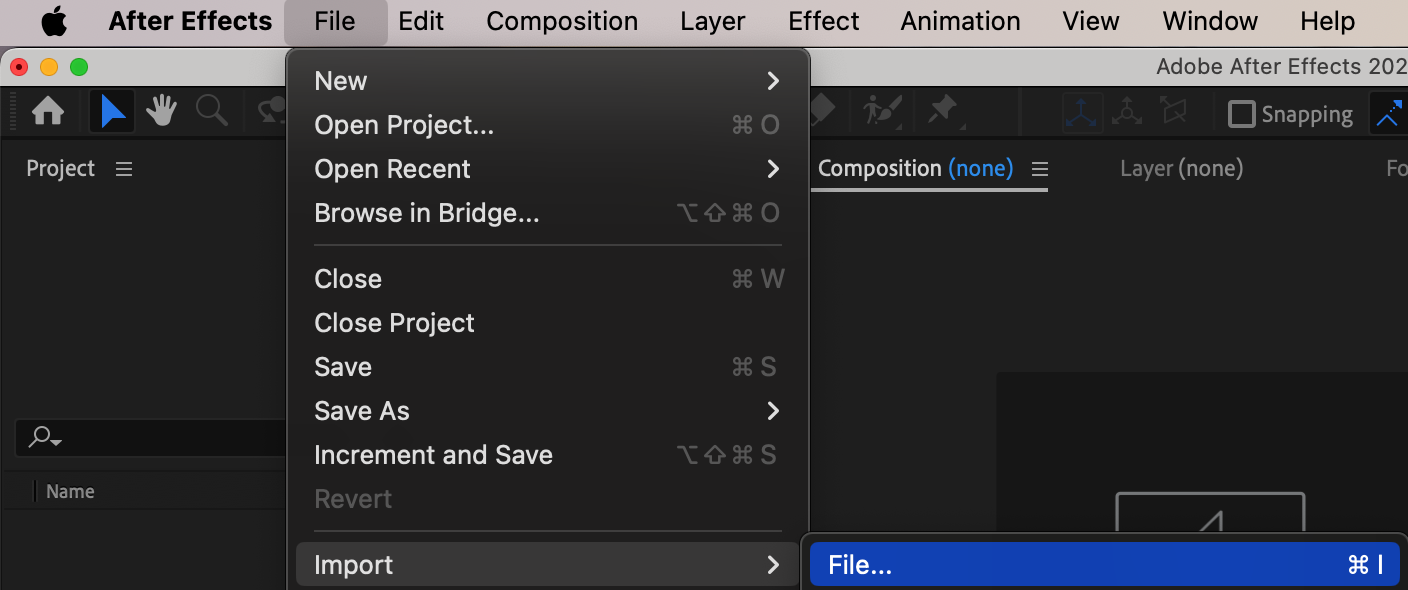
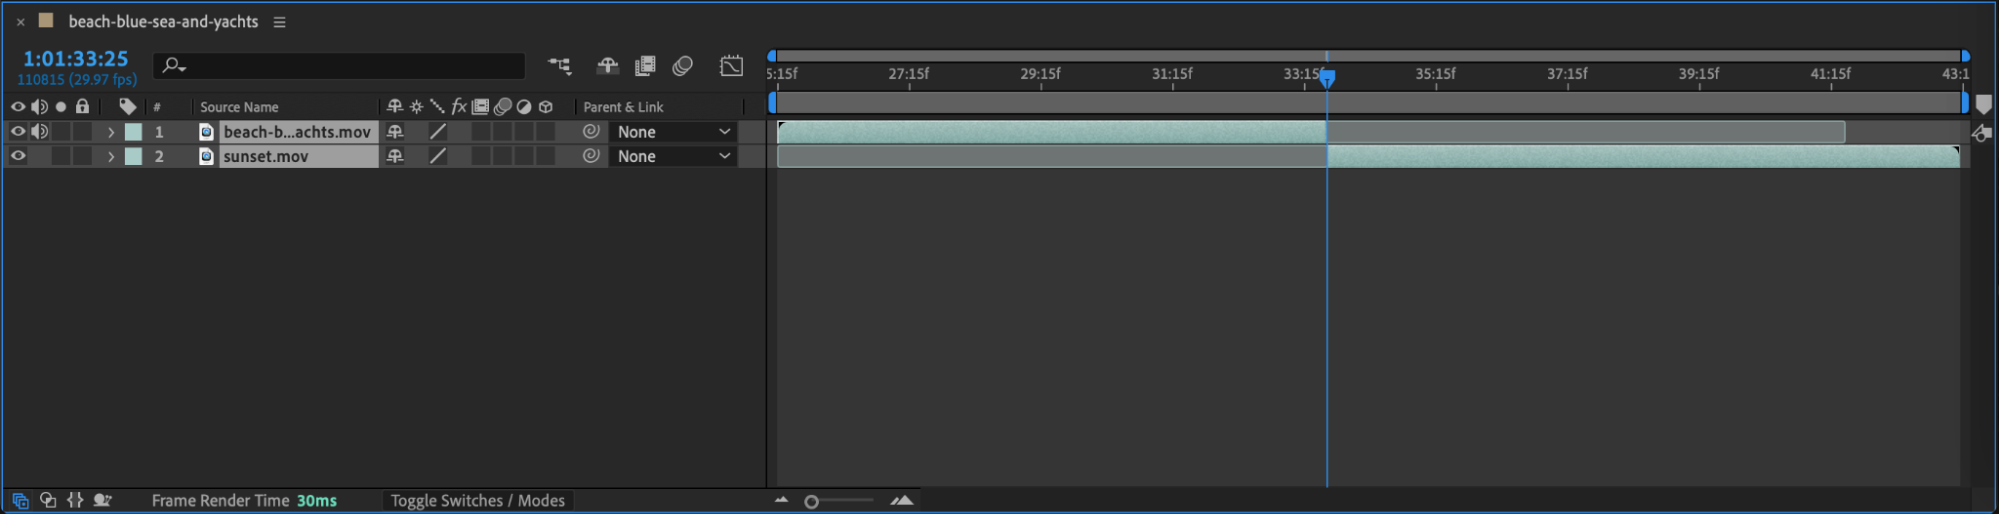
 Step 2: Adjust the Duration of Each Layer
Ensure each video layer’s duration aligns properly on the timeline. To adjust, simply drag the beginning or end of each layer to set its length. This ensures the transition will flow smoothly between the two clips.
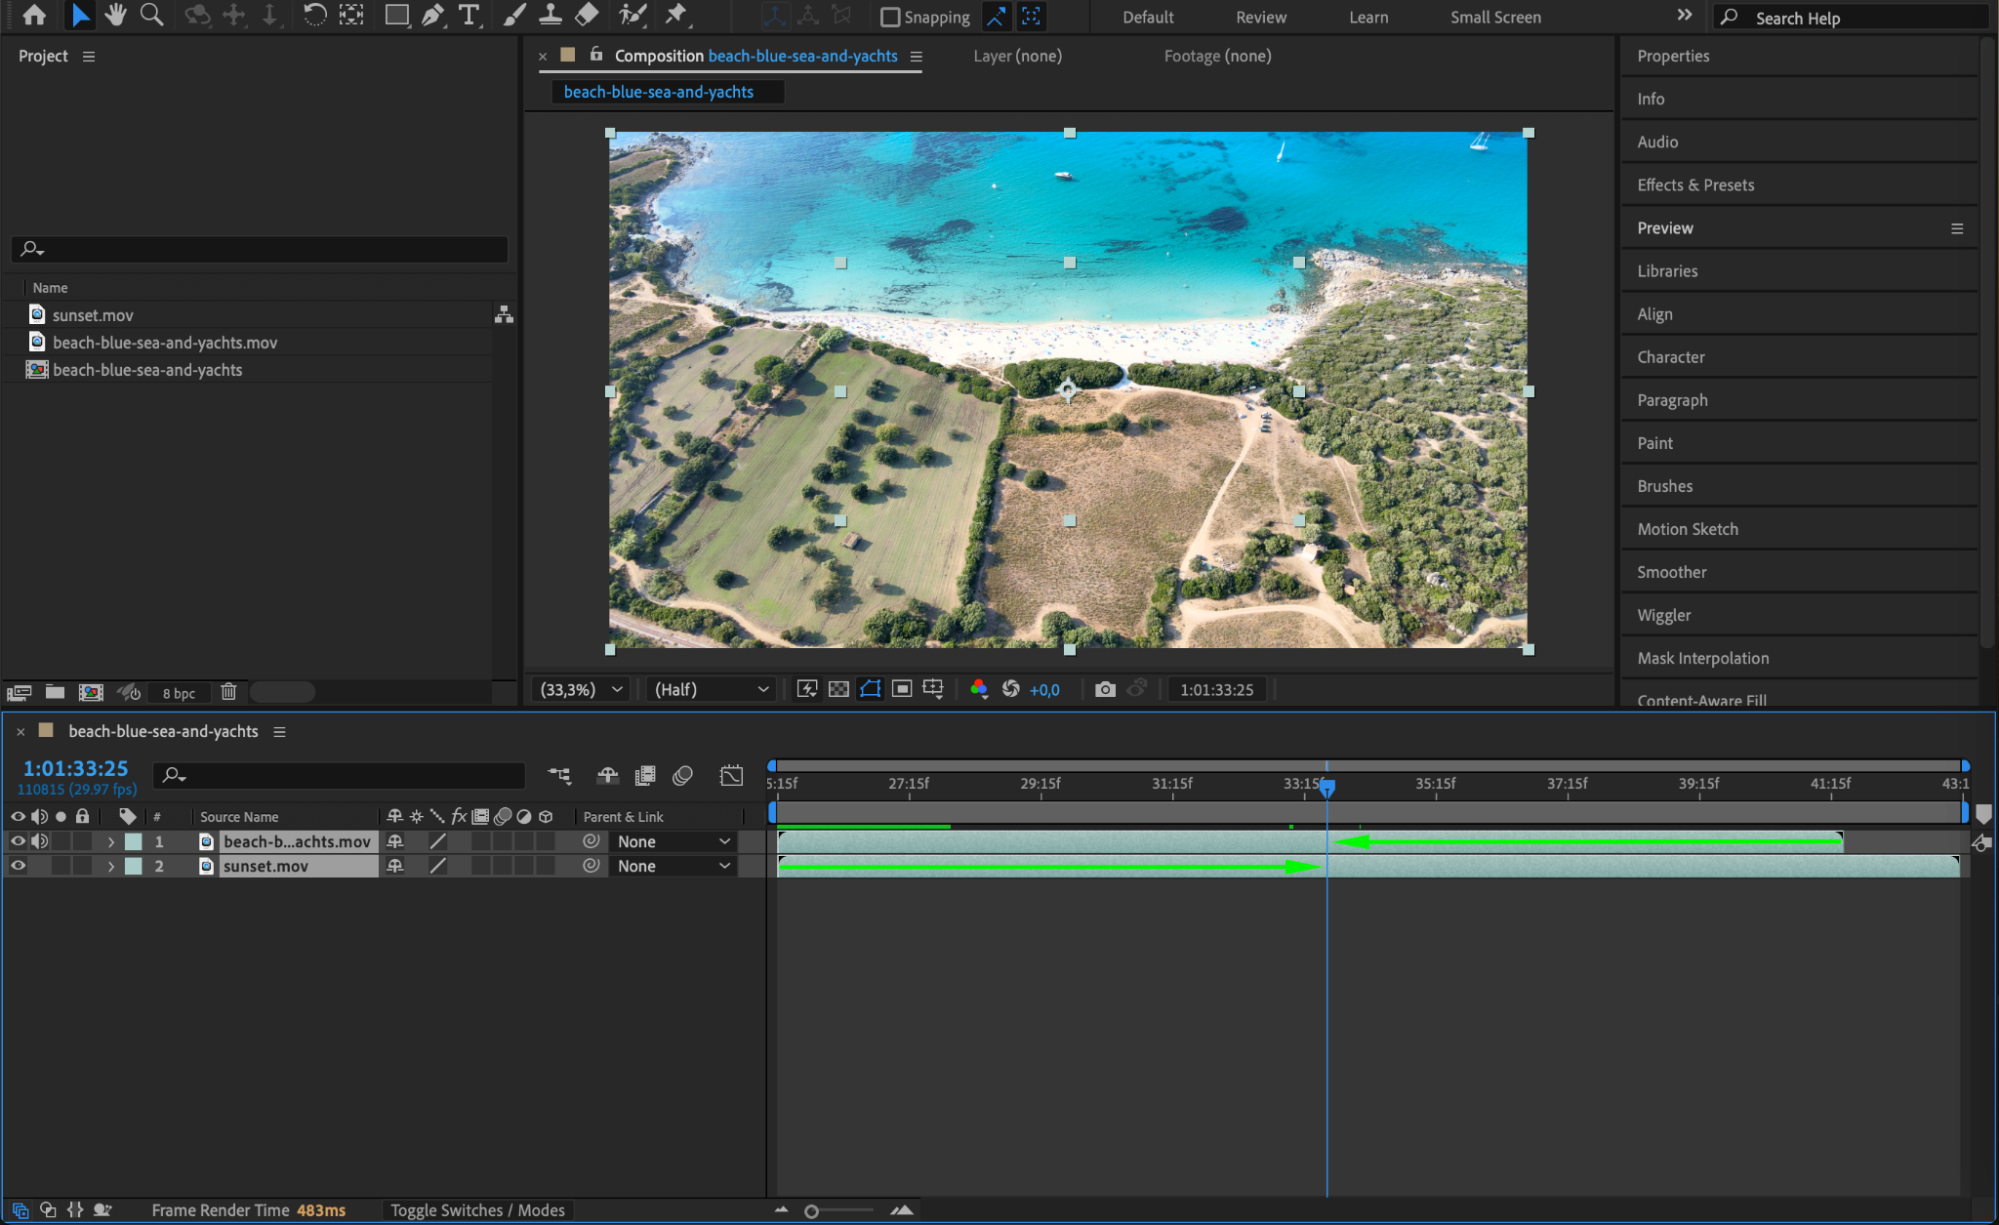
 Step 3: Set the Start of the Transition
Position the CTI (Current Time Indicator) at the point where the two clips meet on the timeline. Press “Ctrl/Cmd + Shift + Left Arrow” to move the CTI 10 frames backward. At this position, select the first layer and open Position property. Click the stopwatch icon next to the Position parameter to create the first keyframe, marking the start of the transition.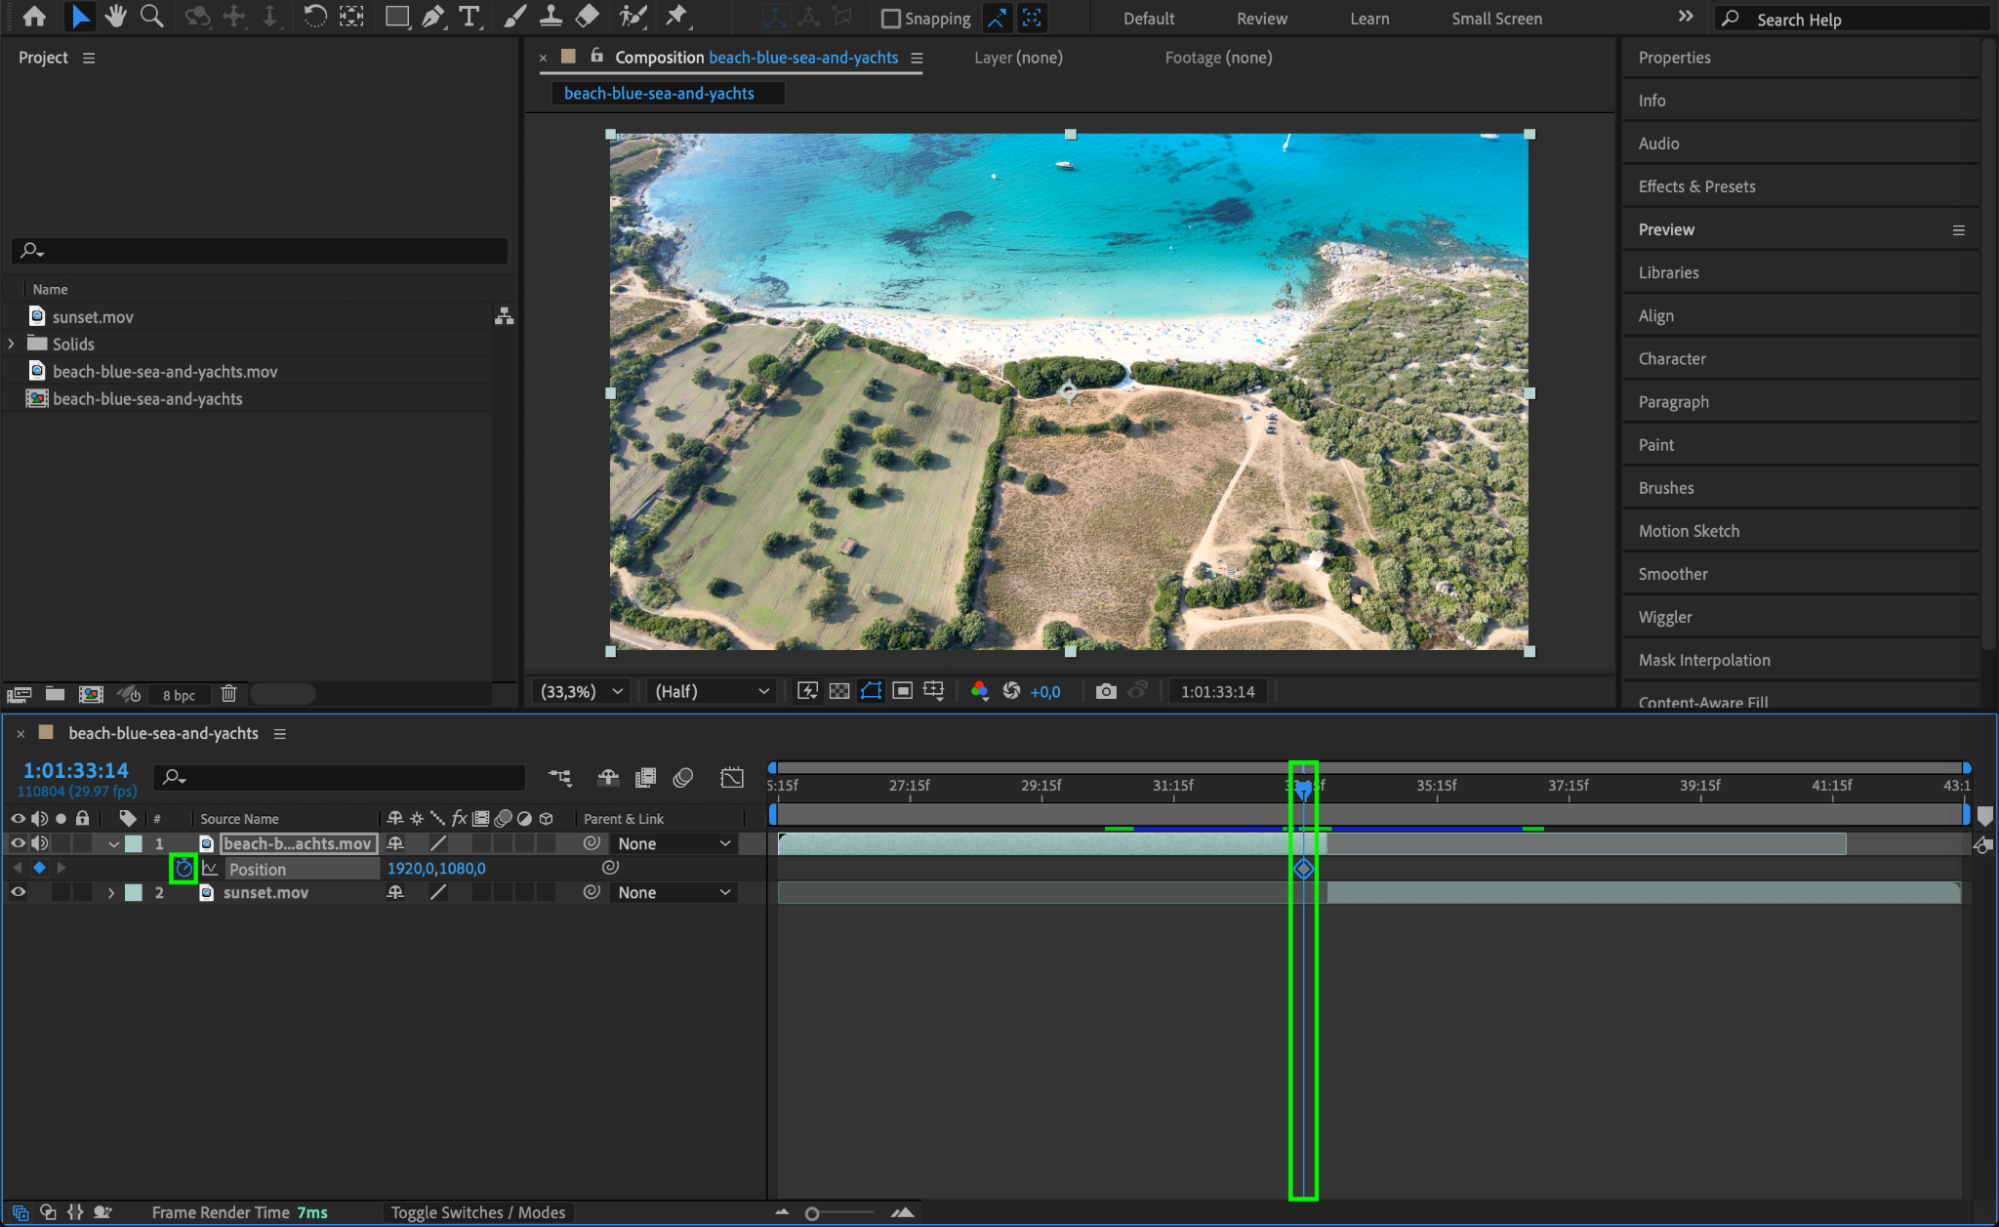 Step 4: Create the First Layer’s Animation
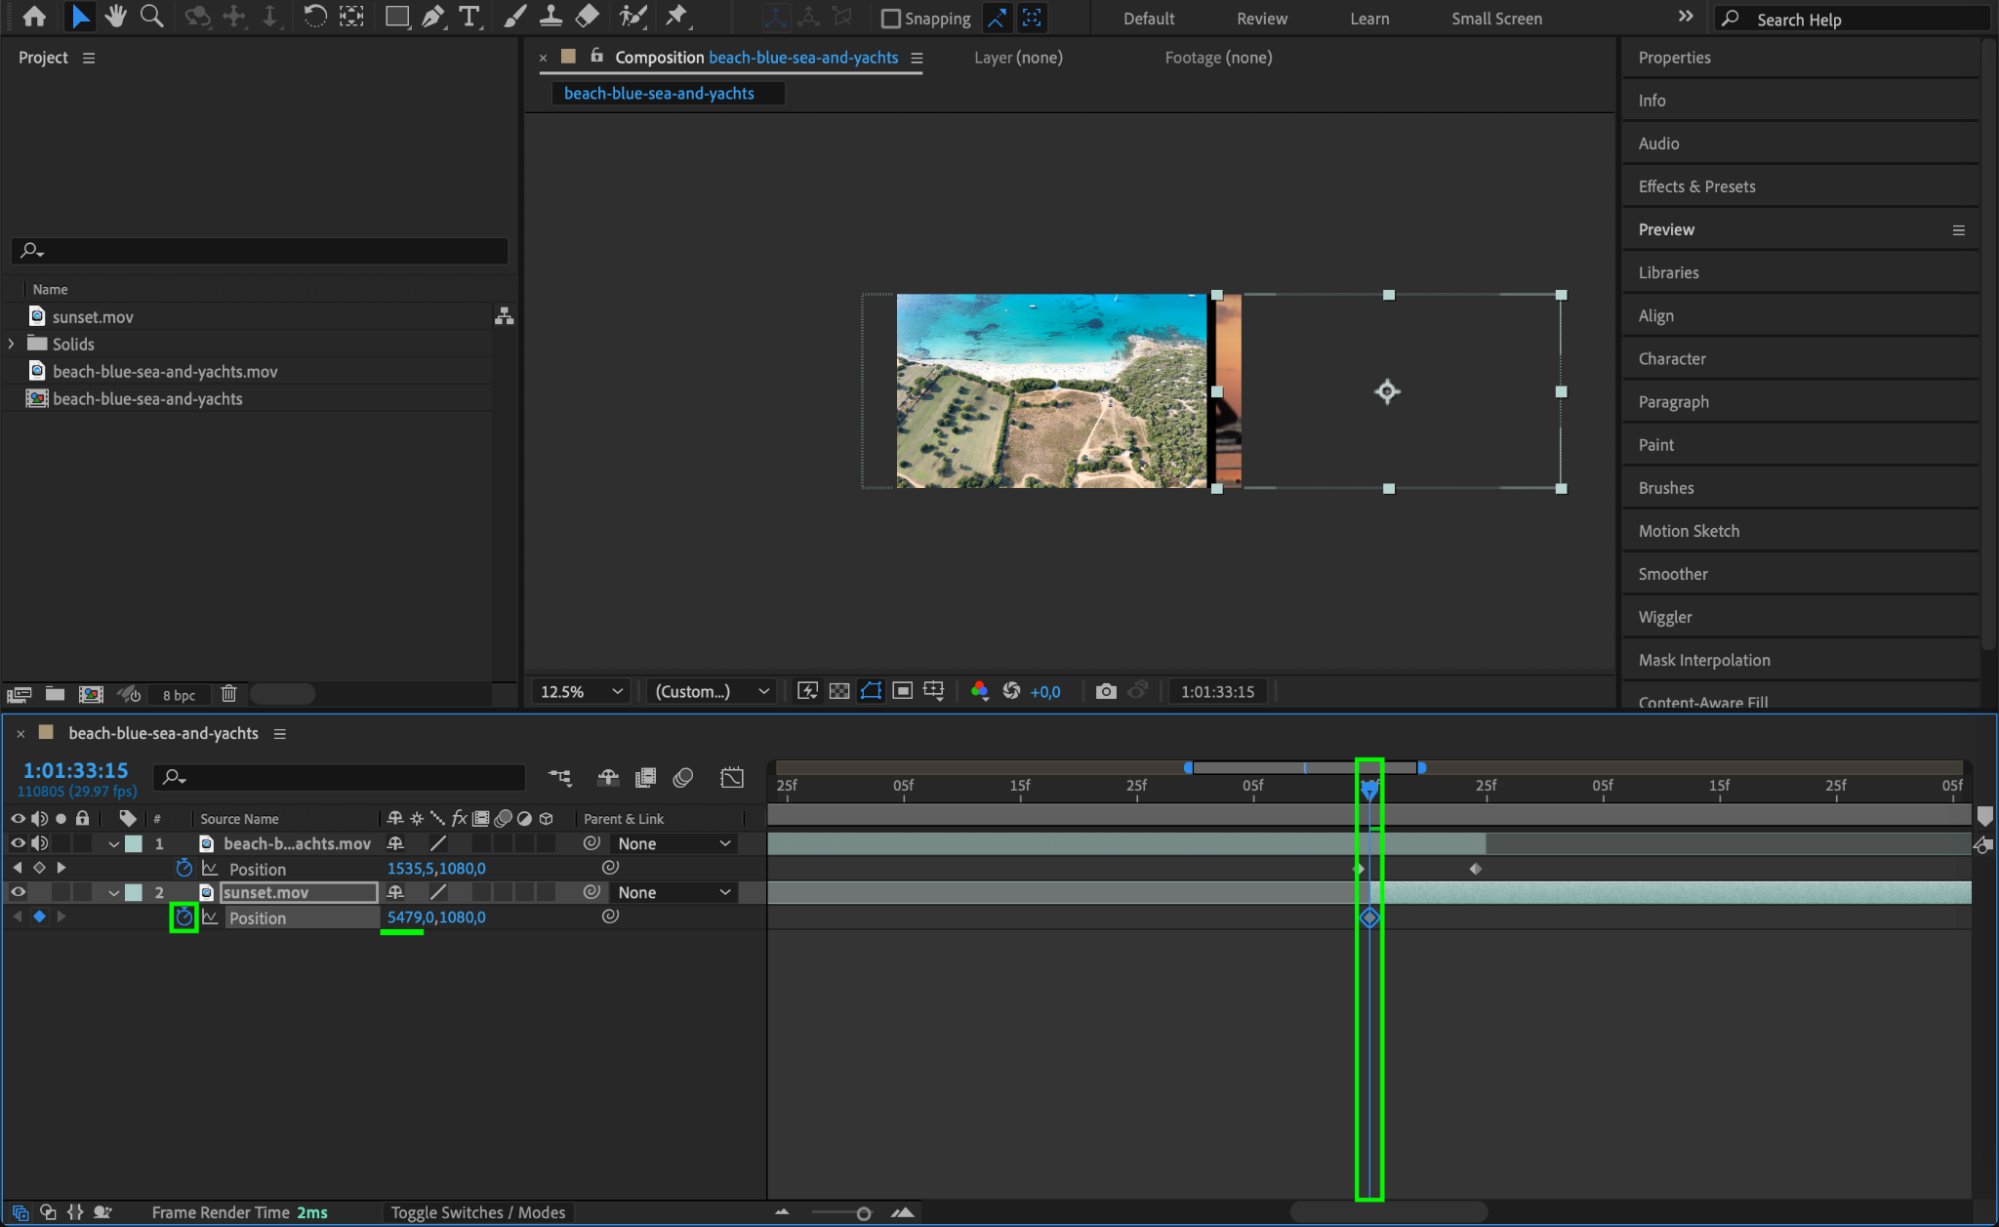
Move the CTI back to the transition point where the two clips meet. For the first layer, create a second keyframe by adjusting the X-position value to move the clip completely out of the frame to the left (e.g., set X = -1925 if your composition width is 1920). This makes the first clip slide out of view, setting the stage for the next clip. Step 5: Begin the Second Layer’s Transition
Drag the beginning of the second layer so it starts immediately after the first layer’s initial keyframe. At this position, select the second layer and click the stopwatch icon next to the Position parameter to create the starting keyframe. Adjust its X-position to align the clip just off-screen to the right (e.g., X = 5479).
 Step 6: Complete the Second Layer’s Animation
Move the CTI to the point where the first layer’s second keyframe ends. For the second layer, create a second keyframe for the Position parameter and set its value to move the clip into its original position (e.g., X = 1920). This ensures the second clip slides in smoothly as the first clip slides out.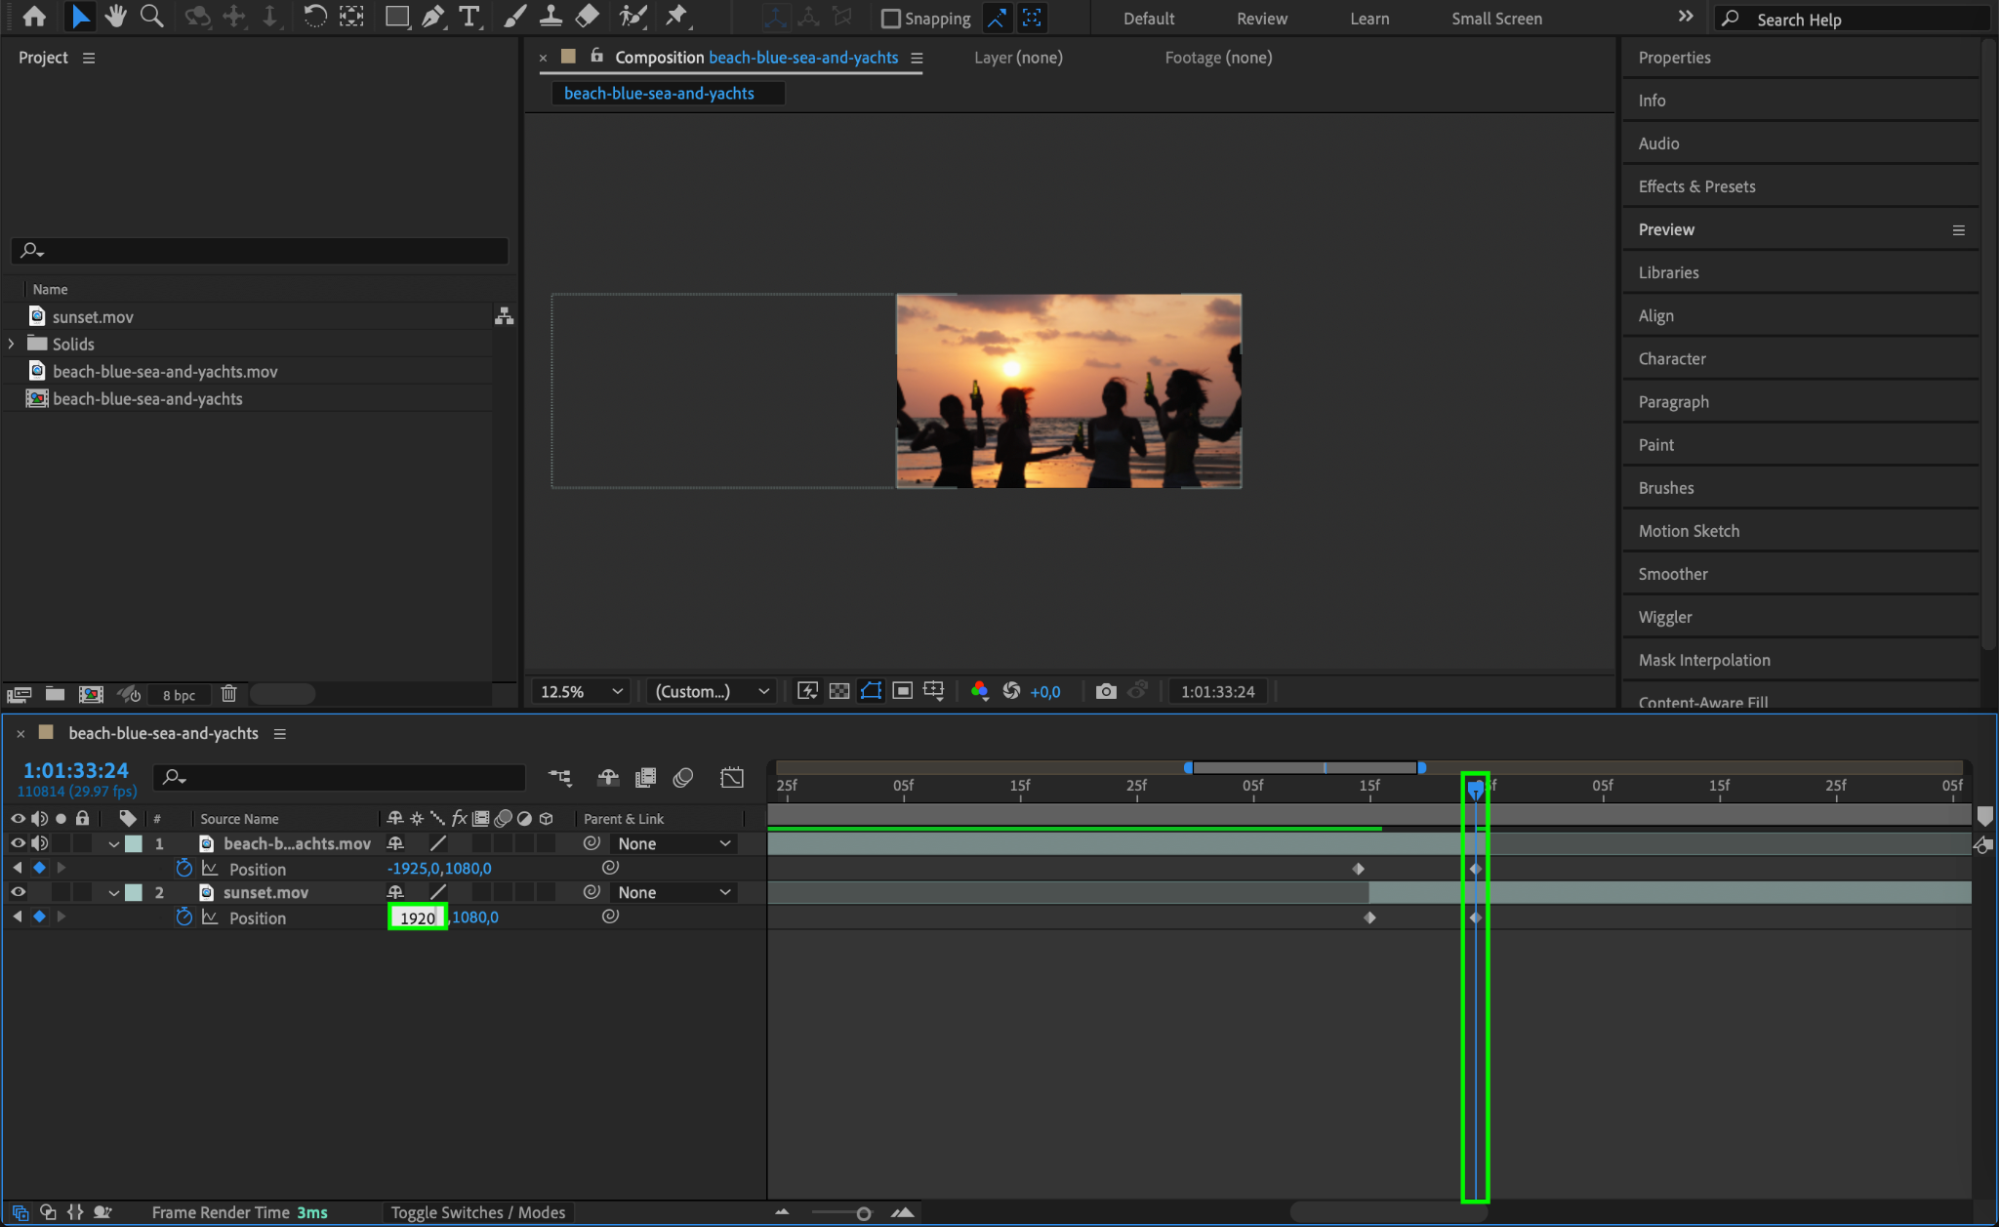 Step 7: Enable Motion Blur
To enhance the realism of the slide transition, enable motion blur. First, click the Enable Motion Blur button in the timeline. Then, activate the motion blur for both the first and second layers by toggling the motion blur switch next to each layer. This adds a natural blur effect to the movement.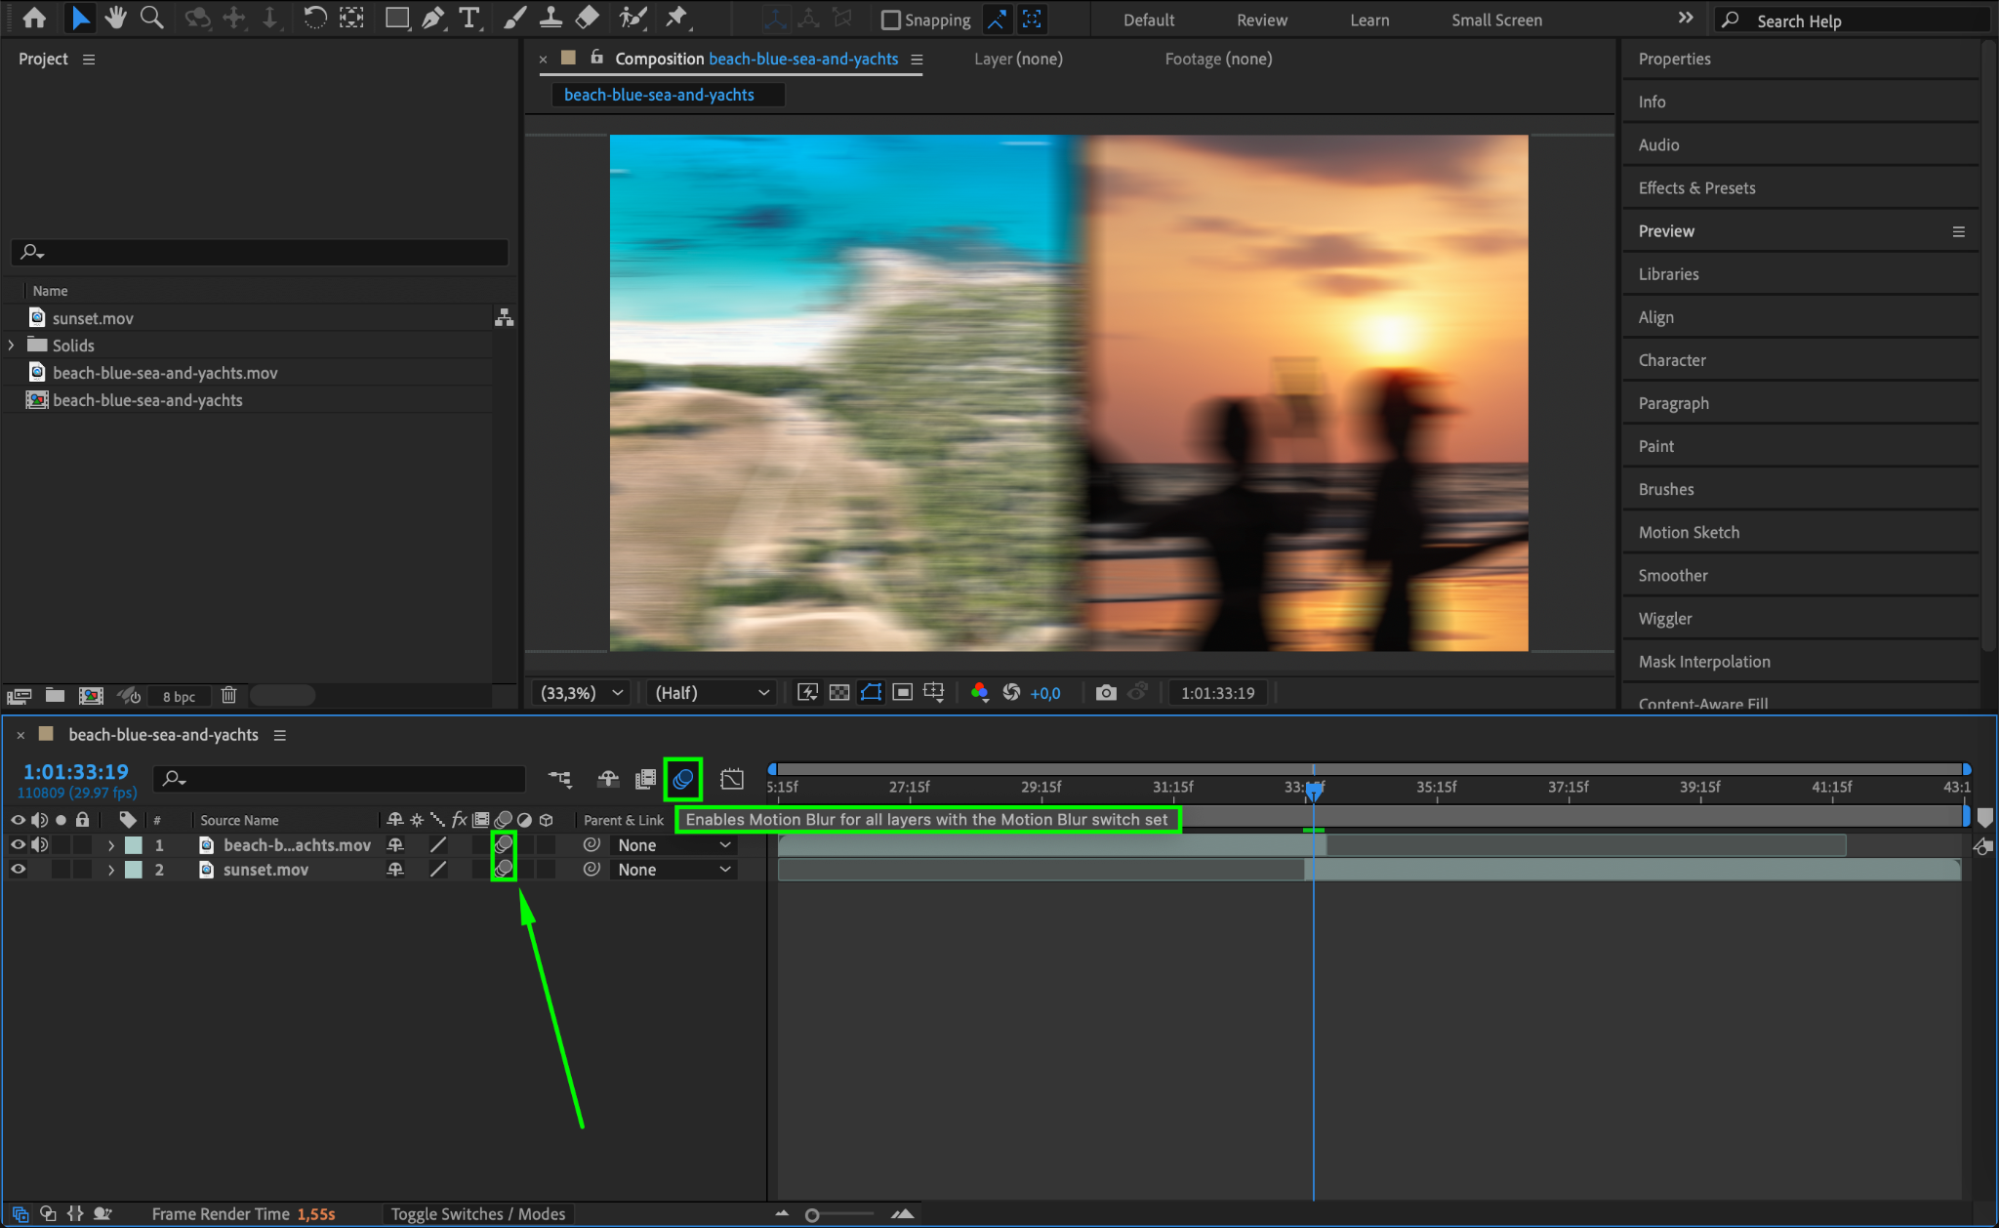 Step 8: Preview Your Transition
Press the spacebar to preview your slide transition. Ensure the motion is smooth, the timing aligns, and there are no visible gaps or abrupt movements between the clips.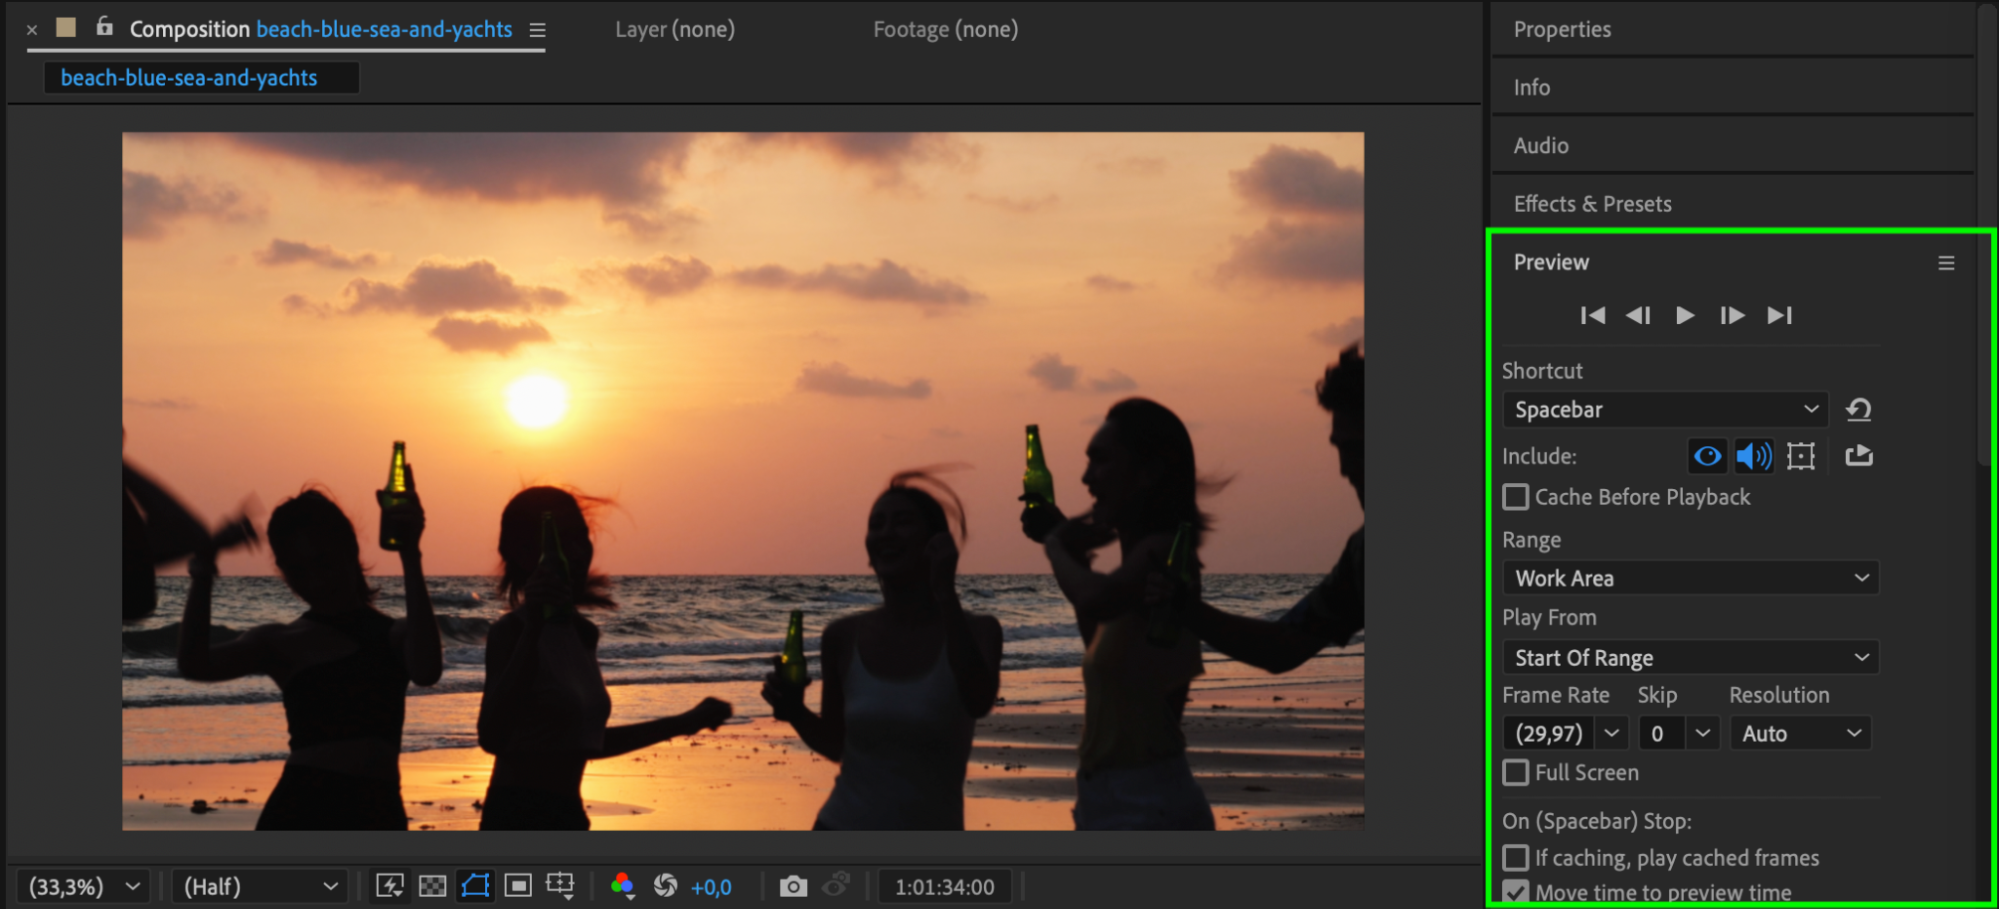 Step 9: Render Your Project
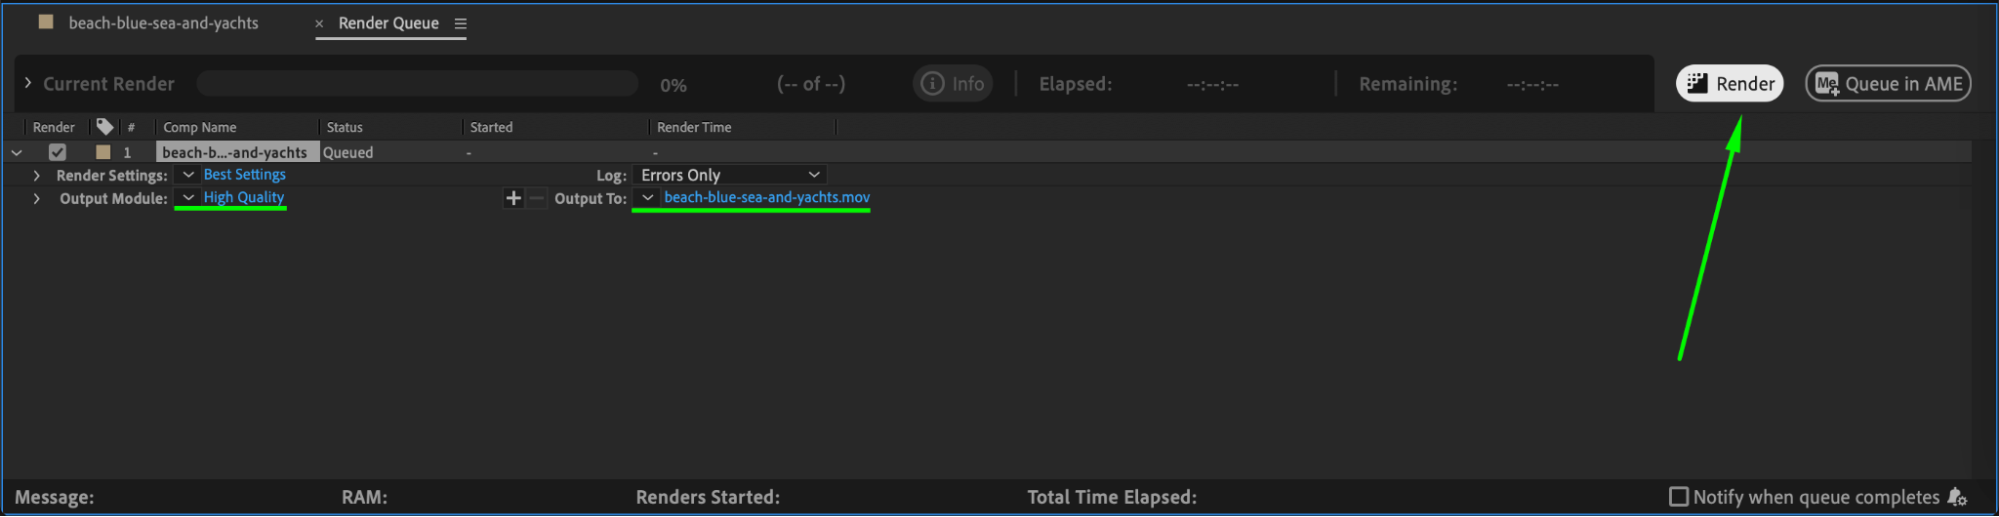
Once satisfied with the transition, render your composition. Go to Composition > Add to Render Queue, choose your desired output settings, and click Render to export your video with the slide transition.

Conclusion
Slide transitions in After Effects offer a simple yet polished way to connect clips seamlessly. By following these steps, you can create smooth, professional transitions that enhance your video projects. Experiment with different speeds and settings to customize the effect to your style.
Our Bestsellers


