Crafting a Stunning YouTube Intro with Adobe After Effects
Introduction: Start Your YouTube Videos with Impact
Are you ready to take your YouTube channel to the next level? With Adobe After Effects, you can create stunning intros that captivate viewers from the first second. In this guide, we’ll walk you through the process of making a YouTube intro using After Effects, helping you craft an introduction that perfectly represents your brand and keeps your audience engaged.
Get 10% off when you subscribe to our newsletter

Step 1: Plan Your YouTube Intro
Before jumping into After Effects, take time to plan out your intro. Think about the message you want to convey and consider your channel’s branding, including colors, fonts, and overall style. Your intro should reflect your channel’s personality, whether it’s fun, professional, or educational. Having a clear vision will guide your design choices.
Step 2: Gather High-Quality Assets
Next, gather all the necessary assets, such as your logo, background images, videos, and any additional graphics you plan to include. Make sure these assets are high-resolution for a professional look. Proper organization of these files will save you time during the design process.
Step 3: Create a New Composition in After Effects
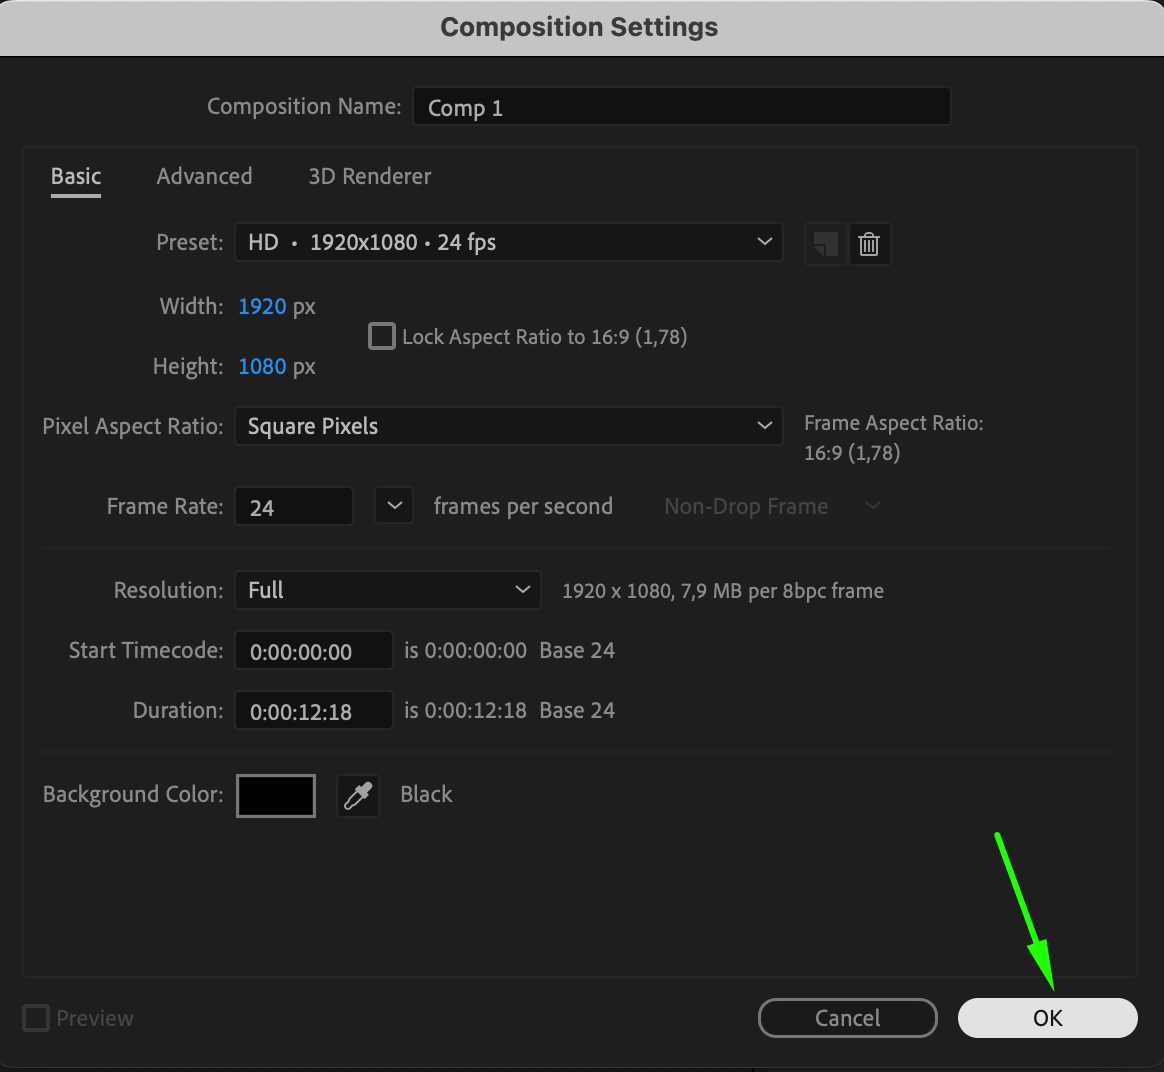
Open Adobe After Effects and create a new composition by navigating to “Composition” > “New Composition.” Set the resolution to 1920×1080 for Full HD or adjust to match your preferred video size. Set the duration to match how long you want your intro to be (typically 5-12 seconds is ideal for YouTube intros).
 Step 4: Import Your Assets and Start Designing
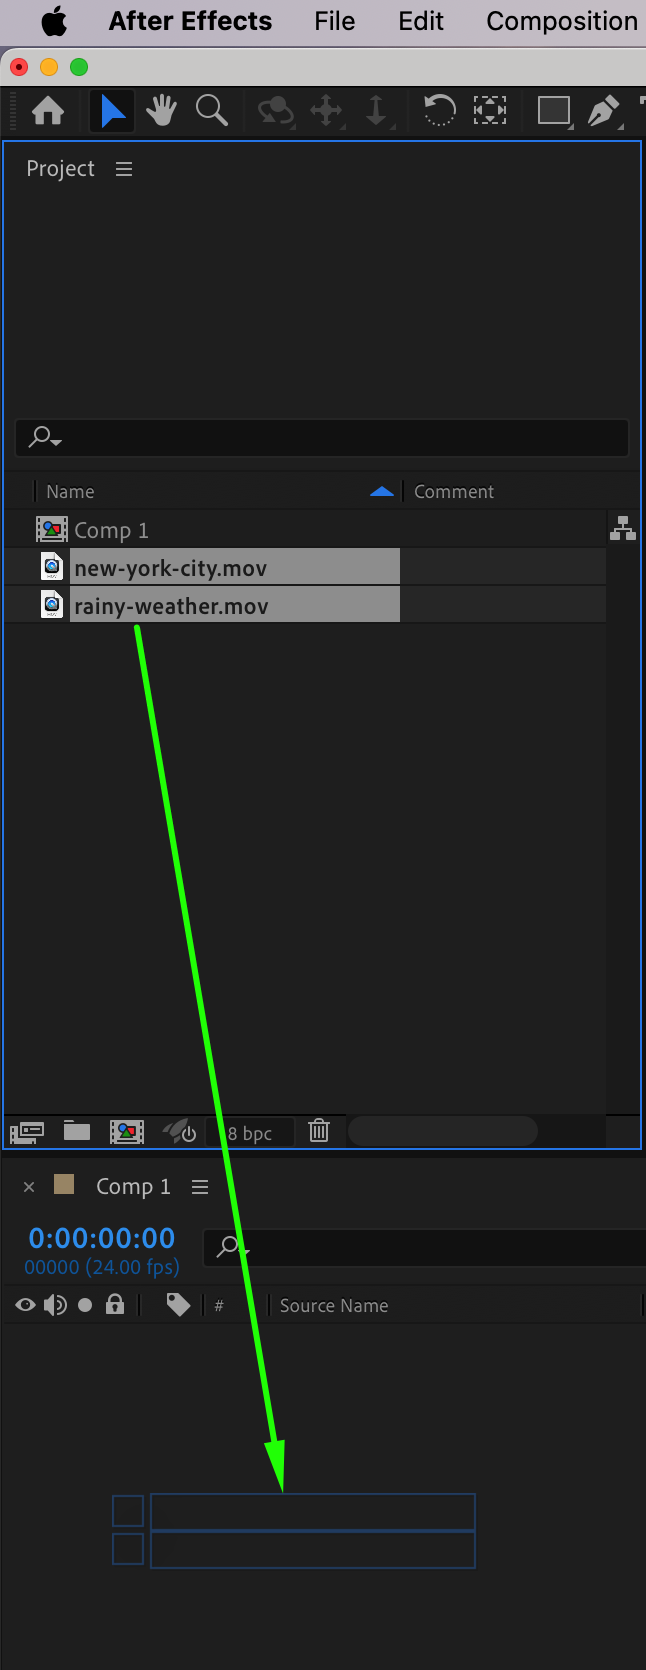
Import your collected assets by going to “File” > “Import” > “File” and then drag and drop them into the timeline. Begin arranging your layers, adding background elements, and organizing any other design pieces. This sets the foundation for your intro design.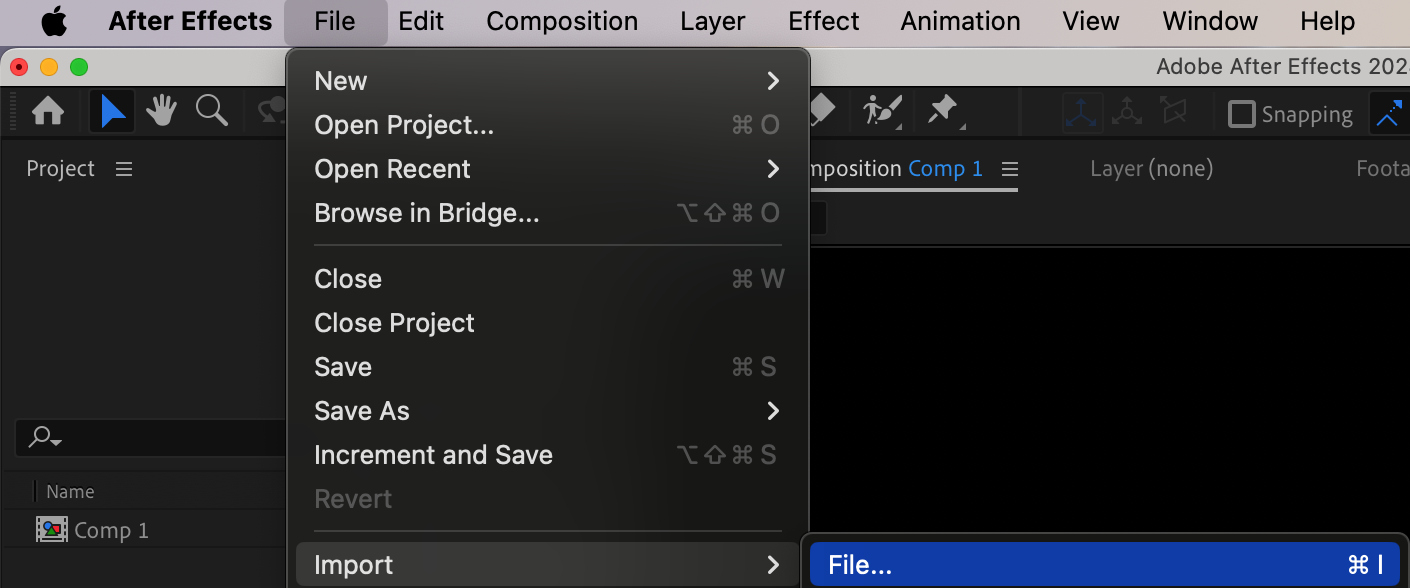
 Step 5: Organize Layers in the Composition
In After Effects, layer organization is key. Use the Transform options (Position, Scale, Rotation) to align each element perfectly in your composition.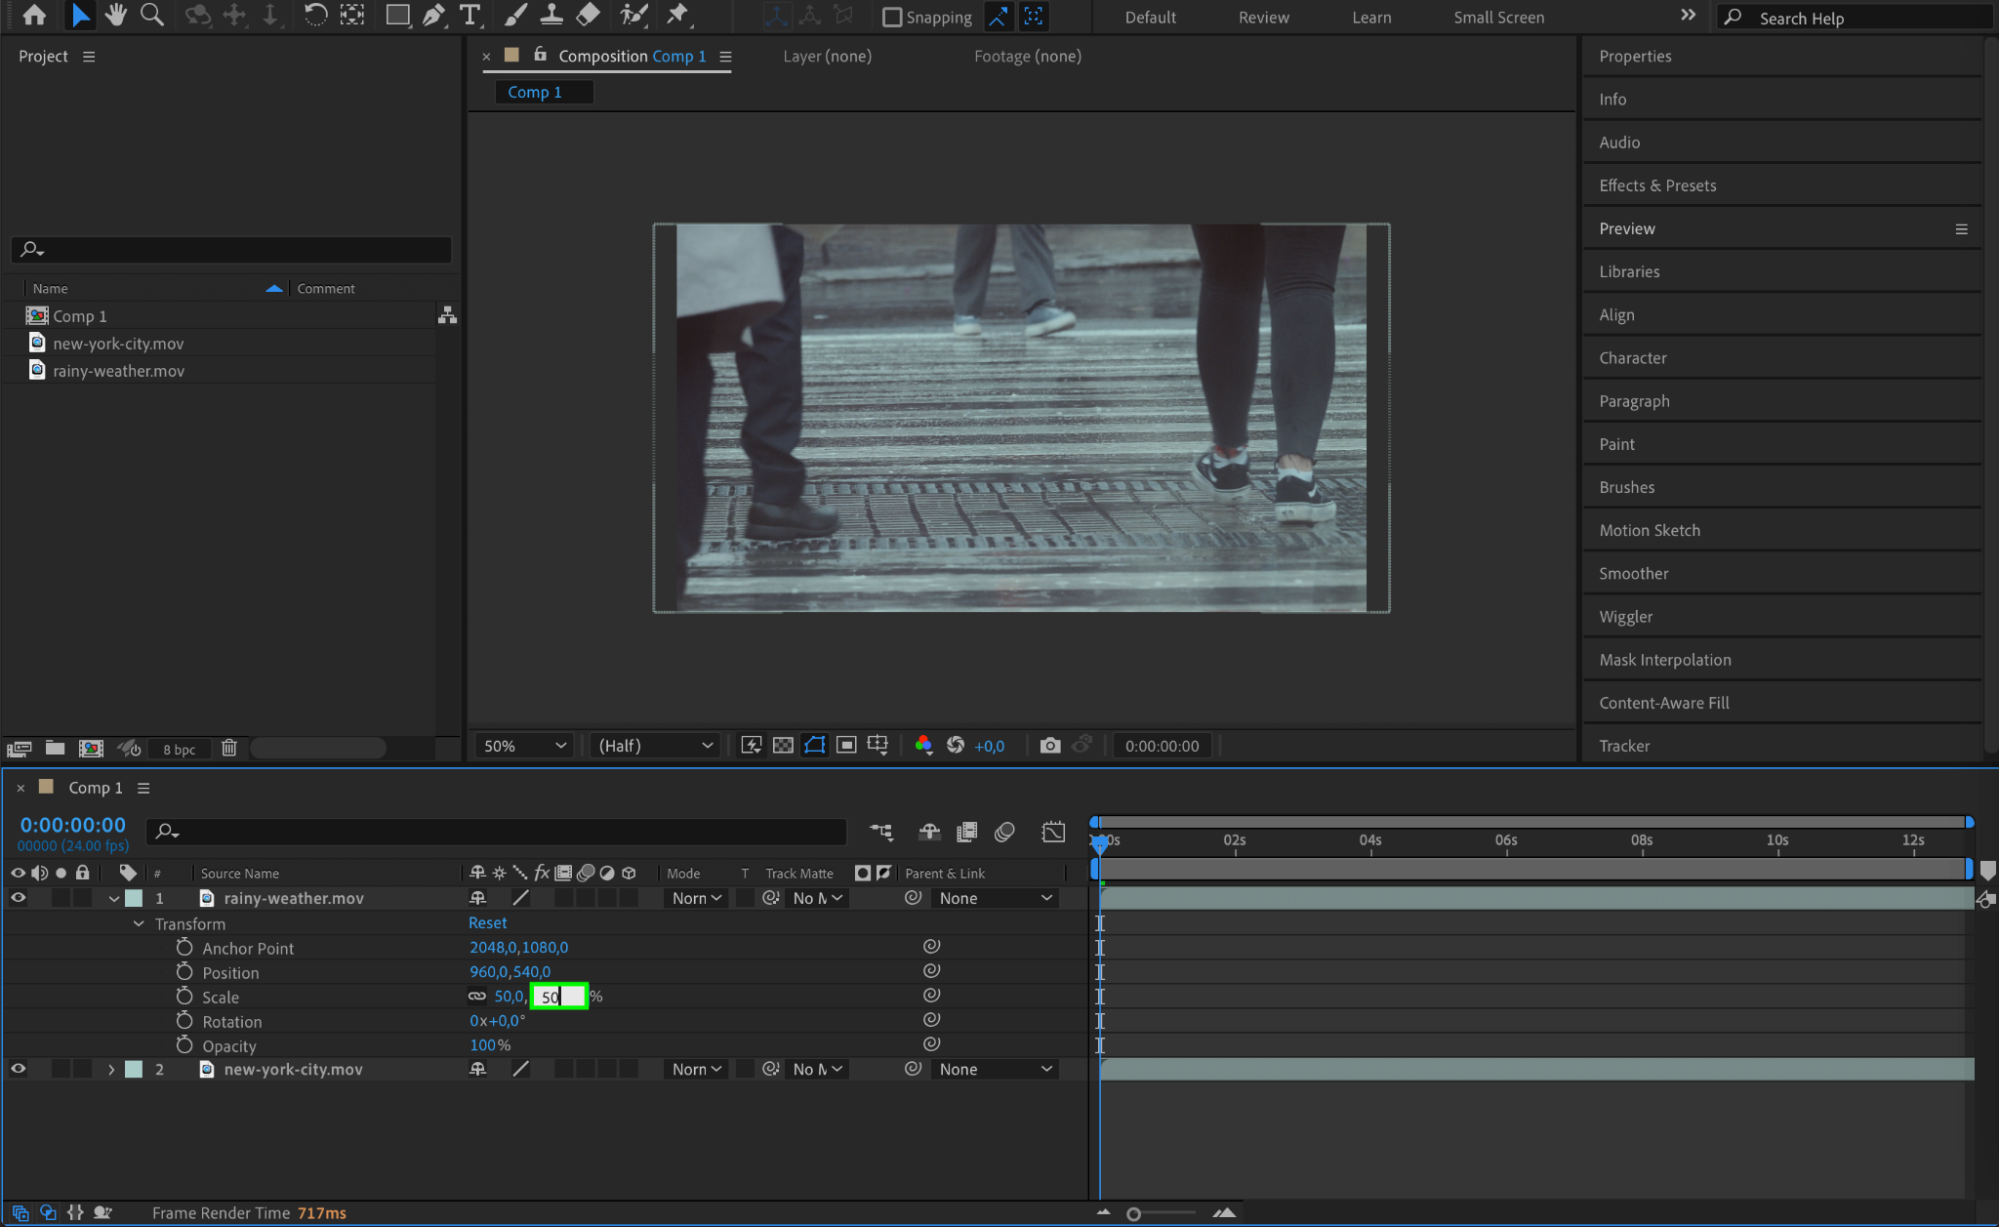 Step 6: Trim Layers with Keyboard Shortcuts
Once your layers are arranged, use the current time indicator (CTI) to adjust where each element appears or disappears in the intro. Press “Alt/Option + [” to set the layer’s start point and “Alt/Option + ]” to trim the endpoint, ensuring each element appears at the right time.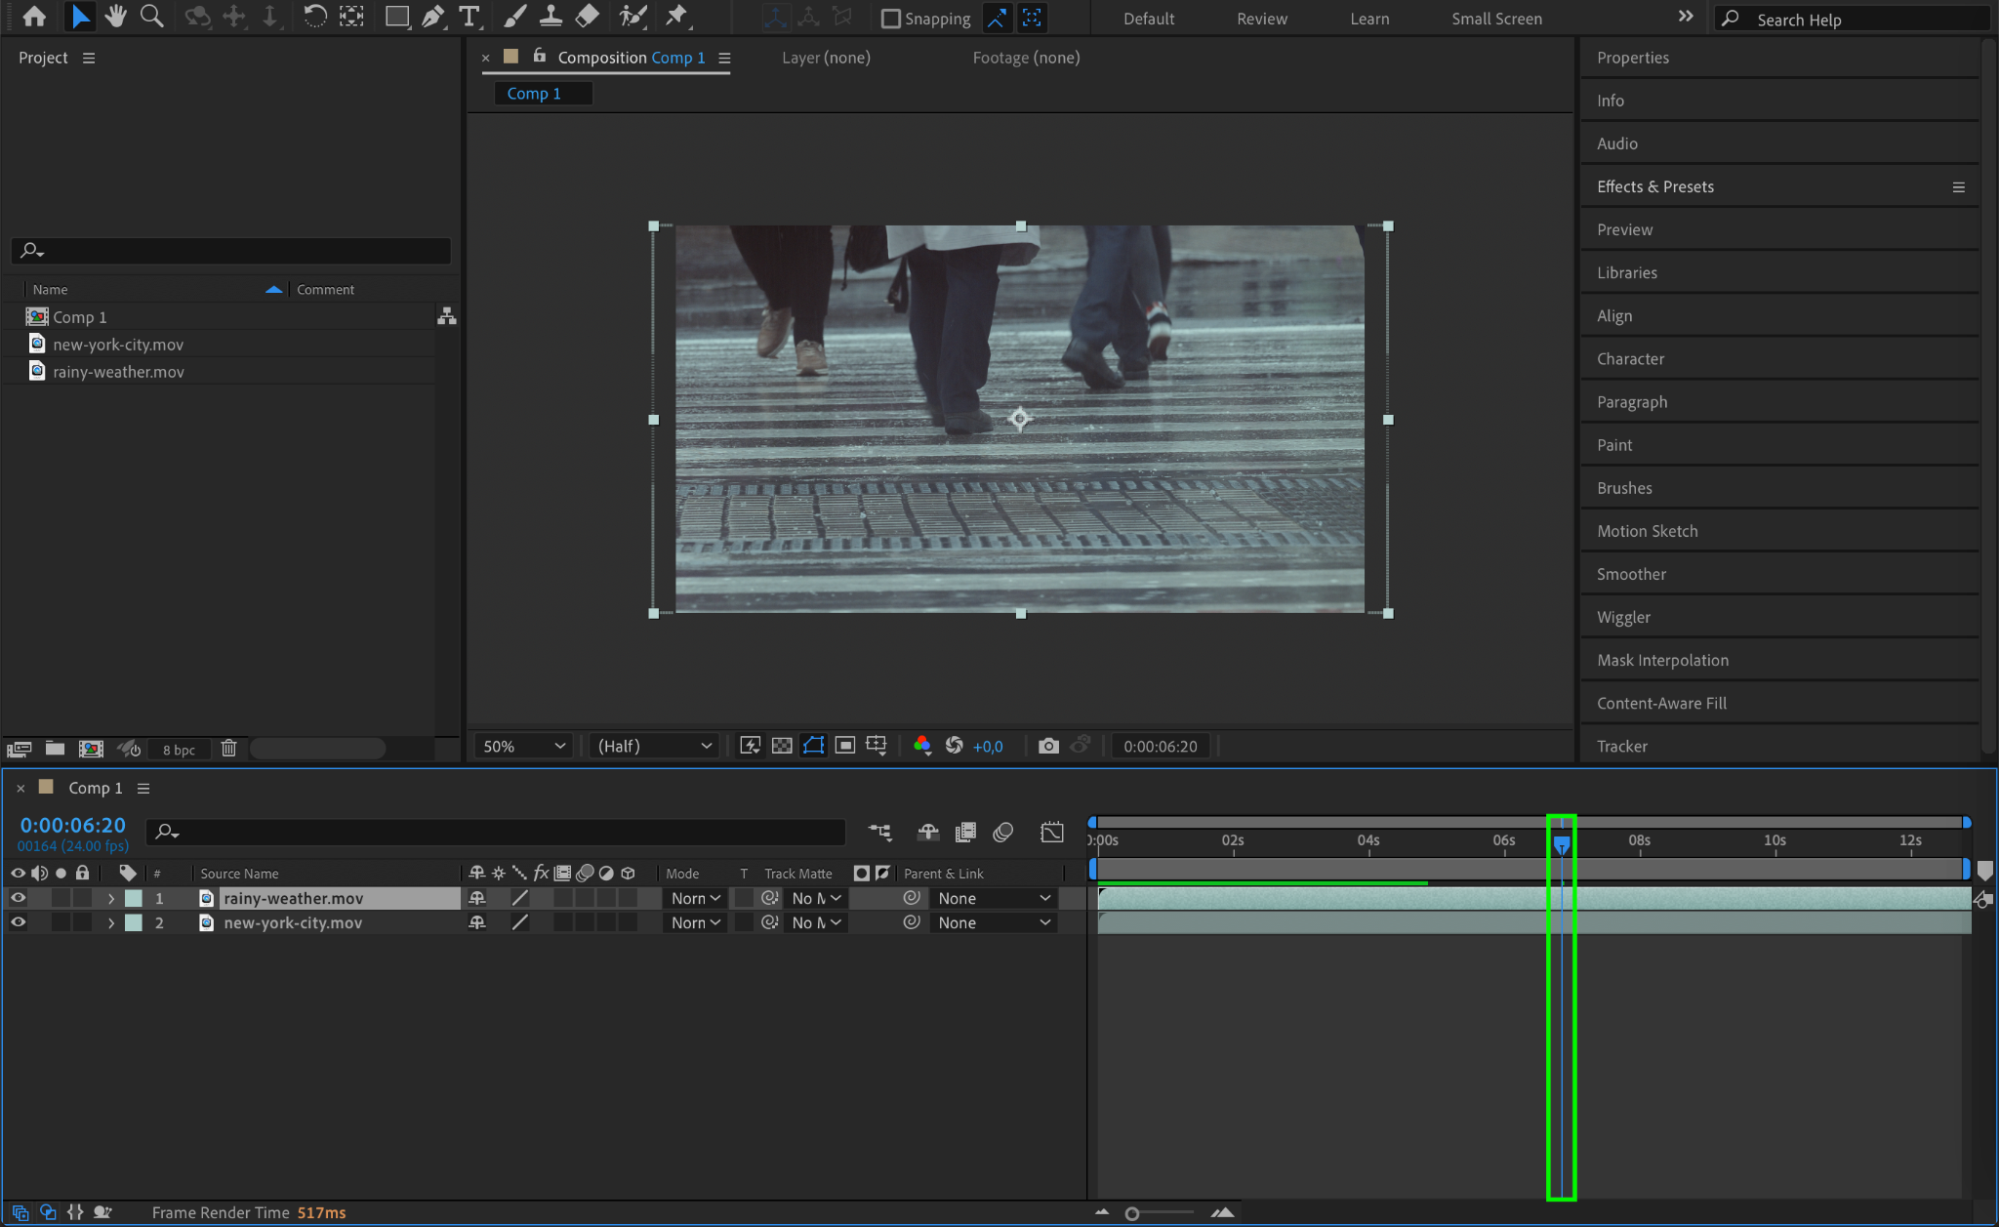
 Step 7: Animate Your Intro with Keyframes
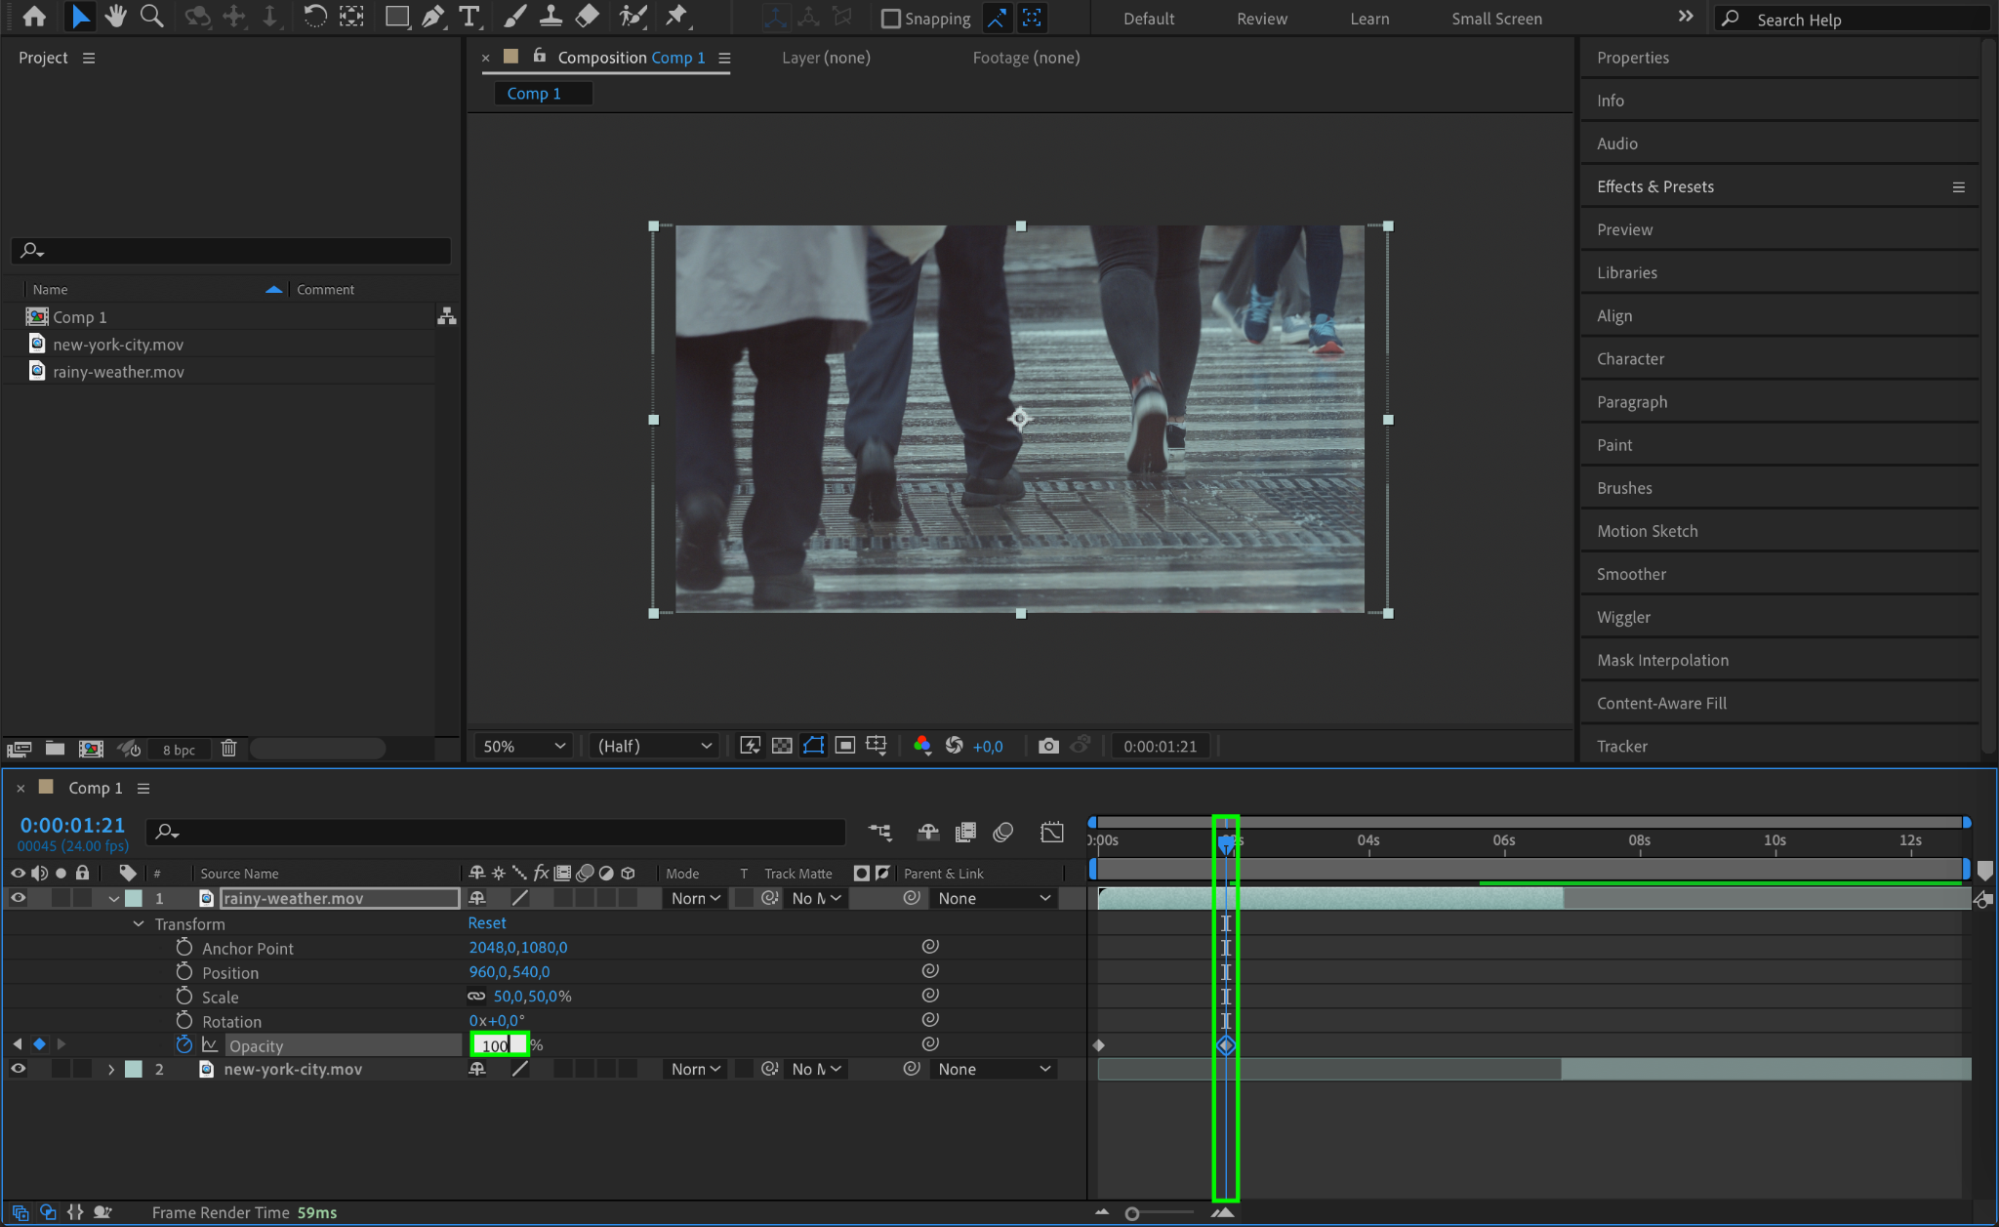
Now, bring your intro to life using keyframe animation. Select the element you want to animate, click the stopwatch next to the property you want to animate (Position, Opacity, Scale, etc.), and create keyframes at different points in the timeline. This will animate your assets to move, fade, or rotate, adding motion and dynamics to your intro.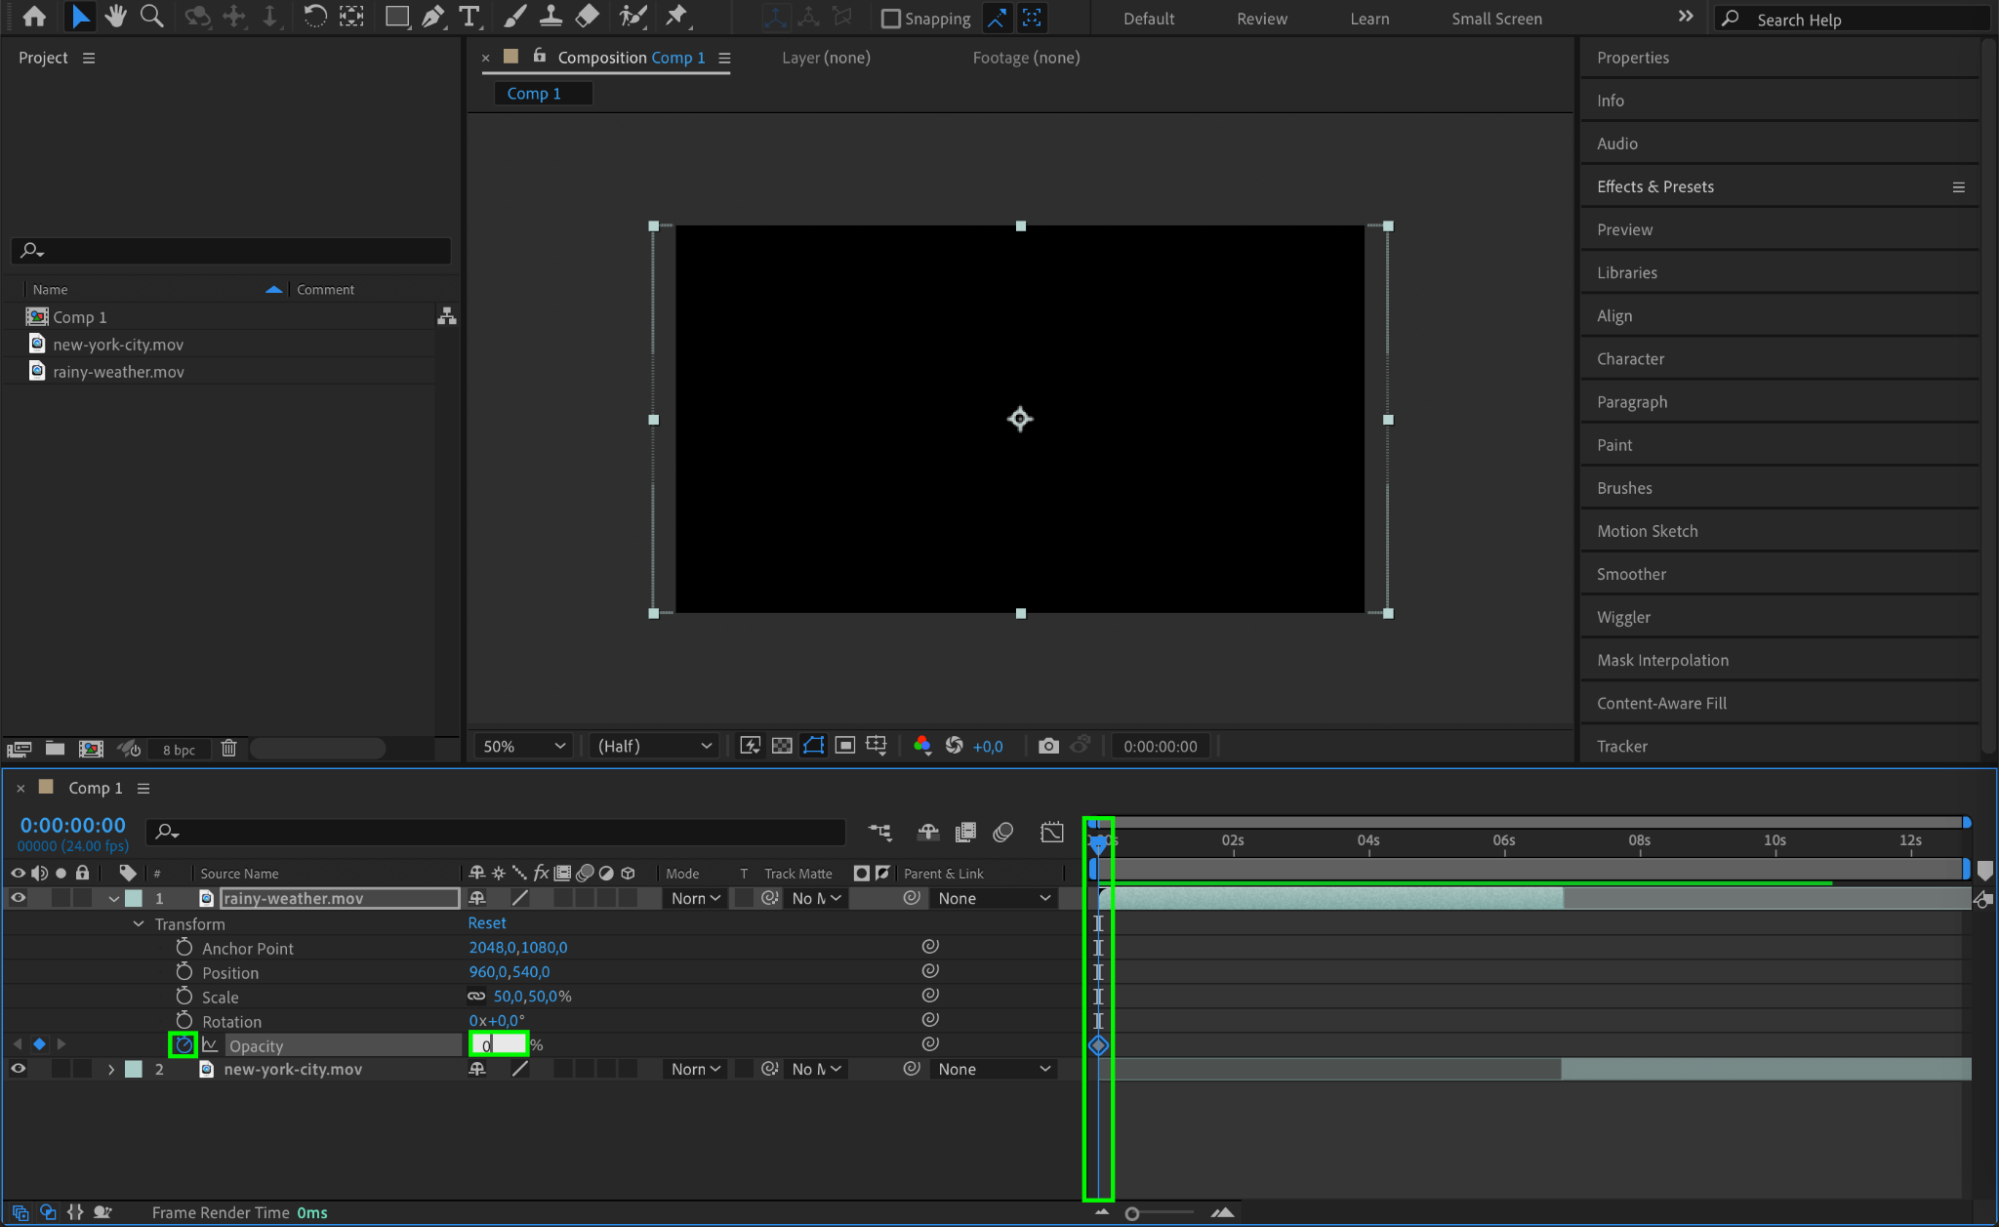
 Step 8: Add Music and Sound Effects
For a more engaging intro, add background music and sound effects. Import audio files by dragging them into your project panel and then placing them in the timeline. Sync the audio with your animations, ensuring that any sound effects match up with key visual moments. You can search for royalty-free music online or create your own in Adobe Audition.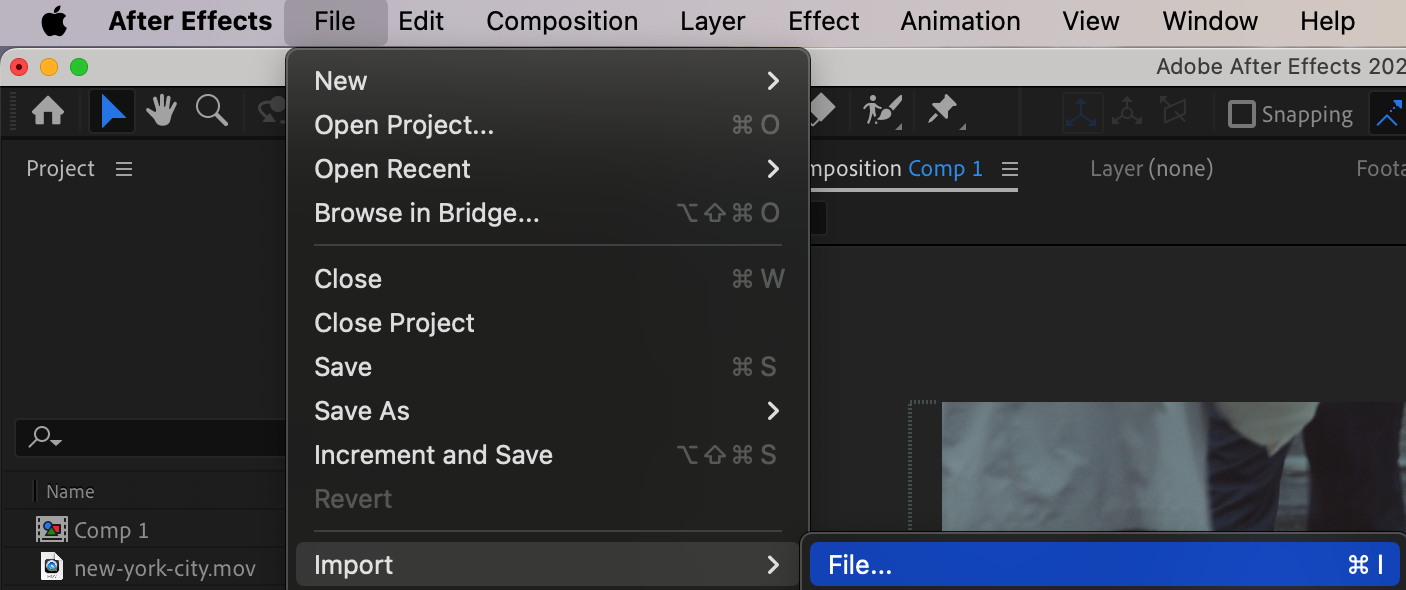
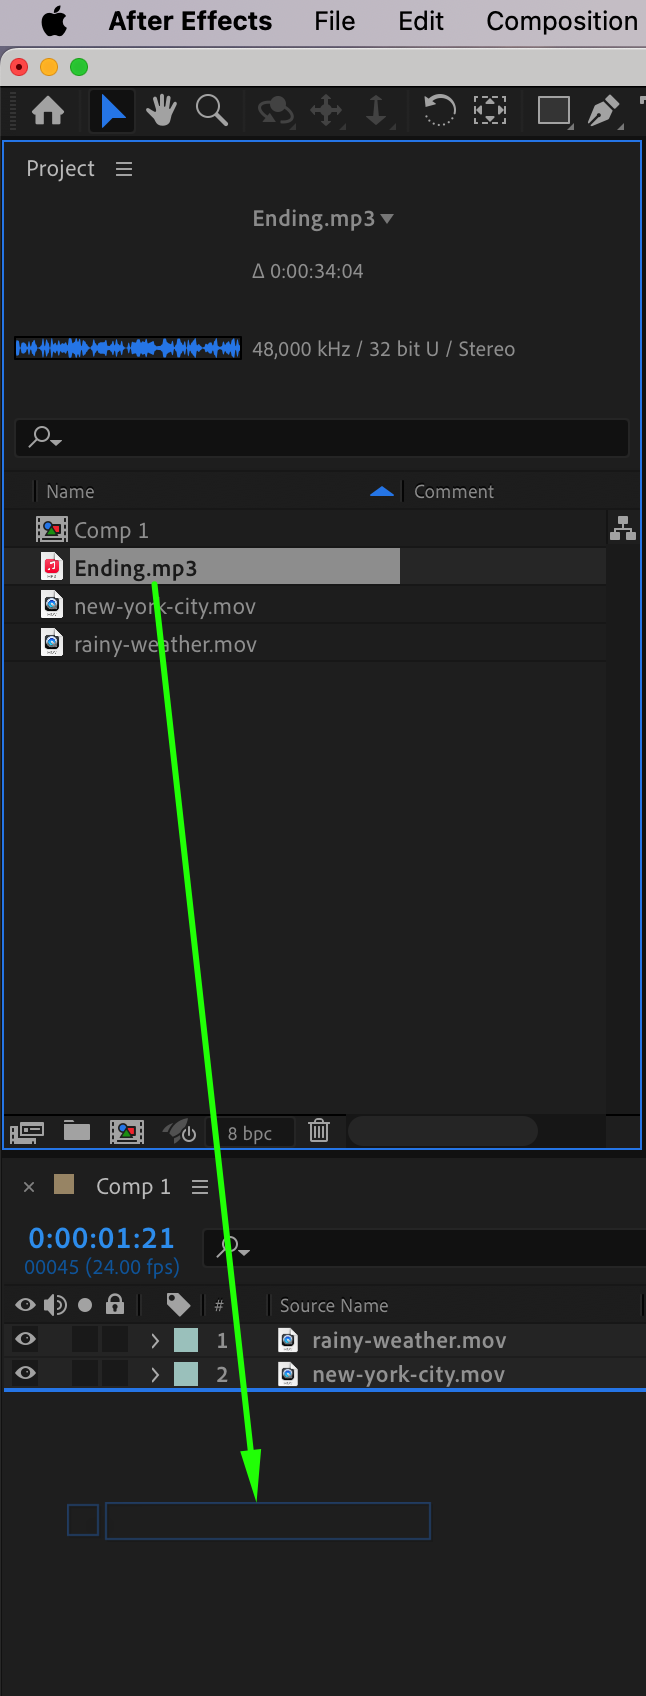

 Step 9: Add Text to Your Intro
To add text, press “Ctrl/Cmd + T” to activate the text tool, then click in the composition window to type your desired text. Customize the font, size, and color to match your branding. Text can be a great way to include your channel name or a tagline. Animate the text to appear dynamically with keyframes, just like your other elements.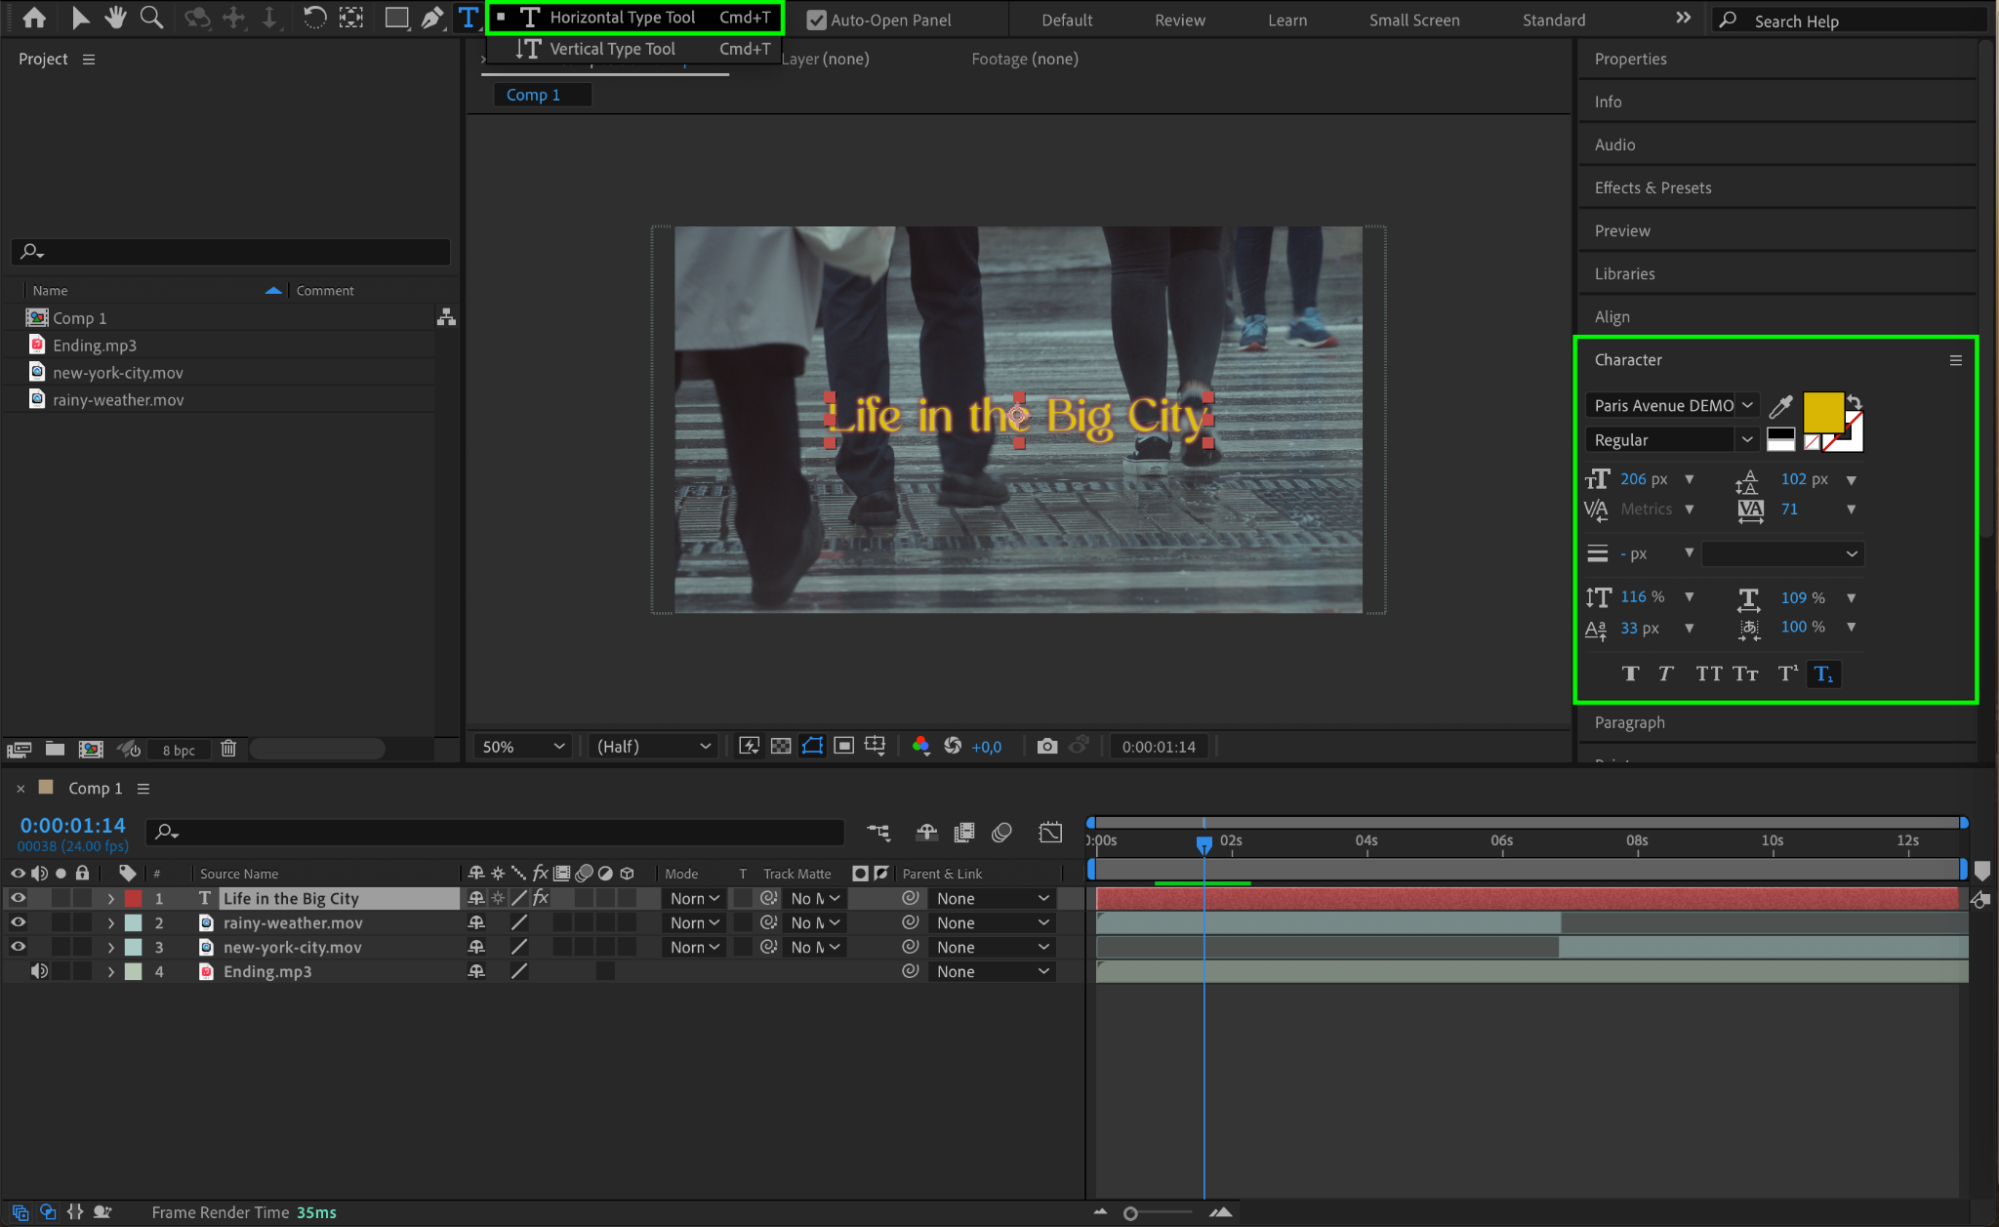 Step 10: Preview Your Intro
Before rendering, it’s important to preview your intro. Click the Play button in the Preview panel to watch the animation in real-time. Look for any timing issues or areas that need adjustment, such as aligning the audio or tweaking the animations for smoother transitions.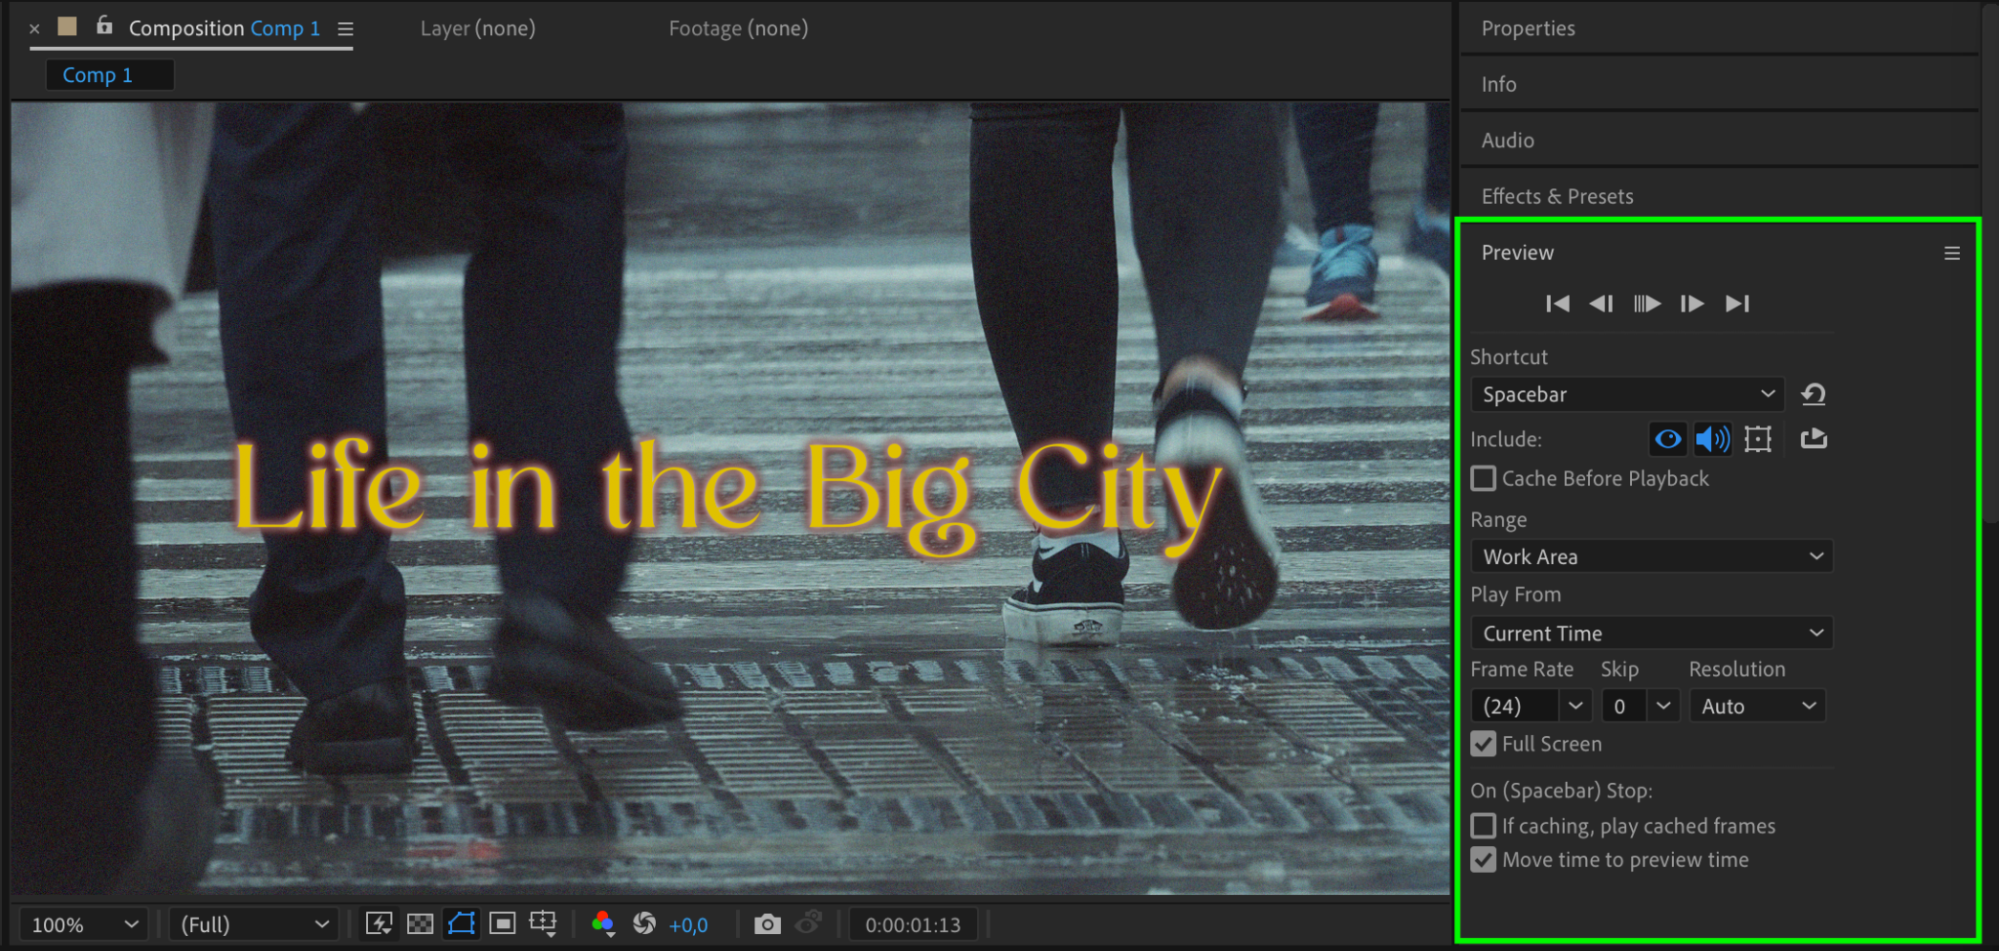 Step 11: Render Your Intro
Once satisfied with your intro, render the final video by navigating to “Composition” > “Add to Render Queue.” Set your export settings, including format (such as H.264 for MP4) and codec (Apple ProRess 4444), and click “Render.” After Effects will generate your final video file, ready for upload.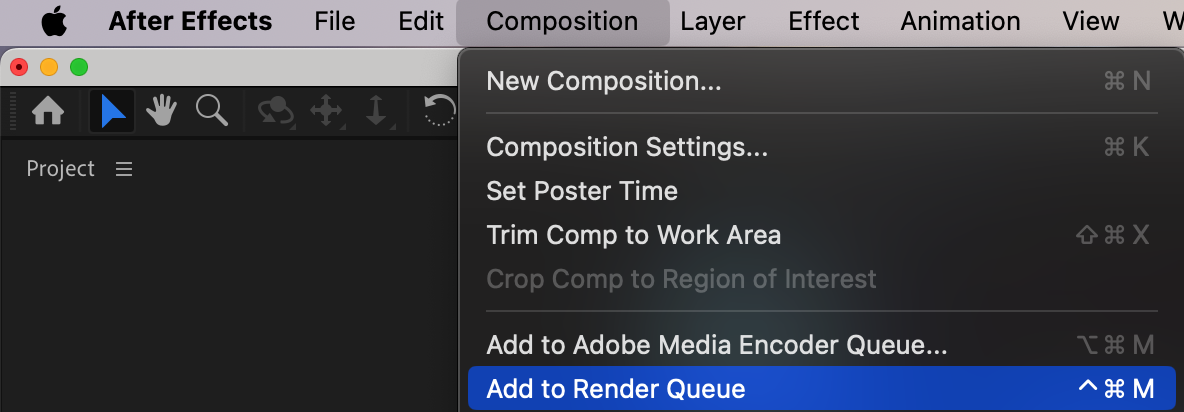
 Step 12: Upload to YouTube
Finally, log into your YouTube account, click the video icon, and select “Upload video.” Choose your rendered intro file, and fill in the necessary details like title, description, and tags. If you want to use your intro as a pre-roll ad, ensure you select the appropriate settings.
Conclusion
Creating a YouTube intro in Adobe After Effects is an exciting and creative way to make a great first impression. By following these steps, you can design a professional and captivating intro that aligns with your channel’s brand. Don’t hesitate to experiment with animations, music, and effects to truly make your intro stand out. Happy designing!


