How to Make a Title Sequence in After Effects
Introduction – Creating a Professional Title Sequence
A title sequence is an essential part of any video project, helping to set the tone and engage the audience. With After Effects, you can create dynamic and professional title animations. In this guide, we’ll go through the steps to design a smooth title sequence.
Get 10% off when you subscribe to our newsletter

Step 1: Open a New Composition
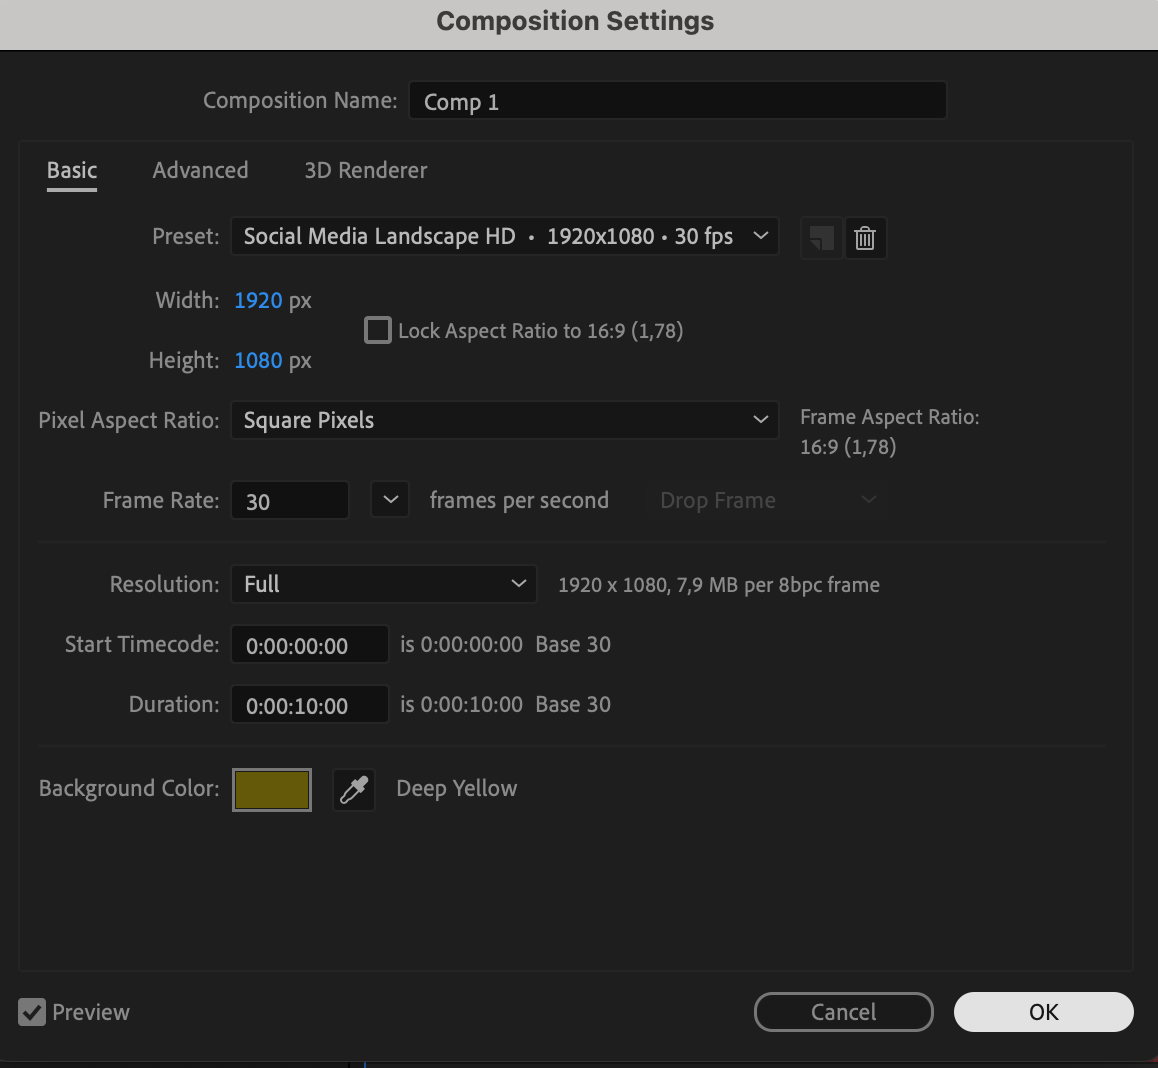
Start by launching After Effects and creating a new composition. Navigate to Composition > New Composition and set the desired resolution and frame rate. A standard setting is 1920×1080 resolution at 30 fps. This will be your workspace for the title sequence.
 Step 2: Create a Text Layer
To add text, select the Text Tool (Ctrl/Cmd + T) from the toolbar. Click in the composition panel and type your title. Adjust the font, size, and alignment from the Character and Paragraph panels. Center the text both horizontally and vertically.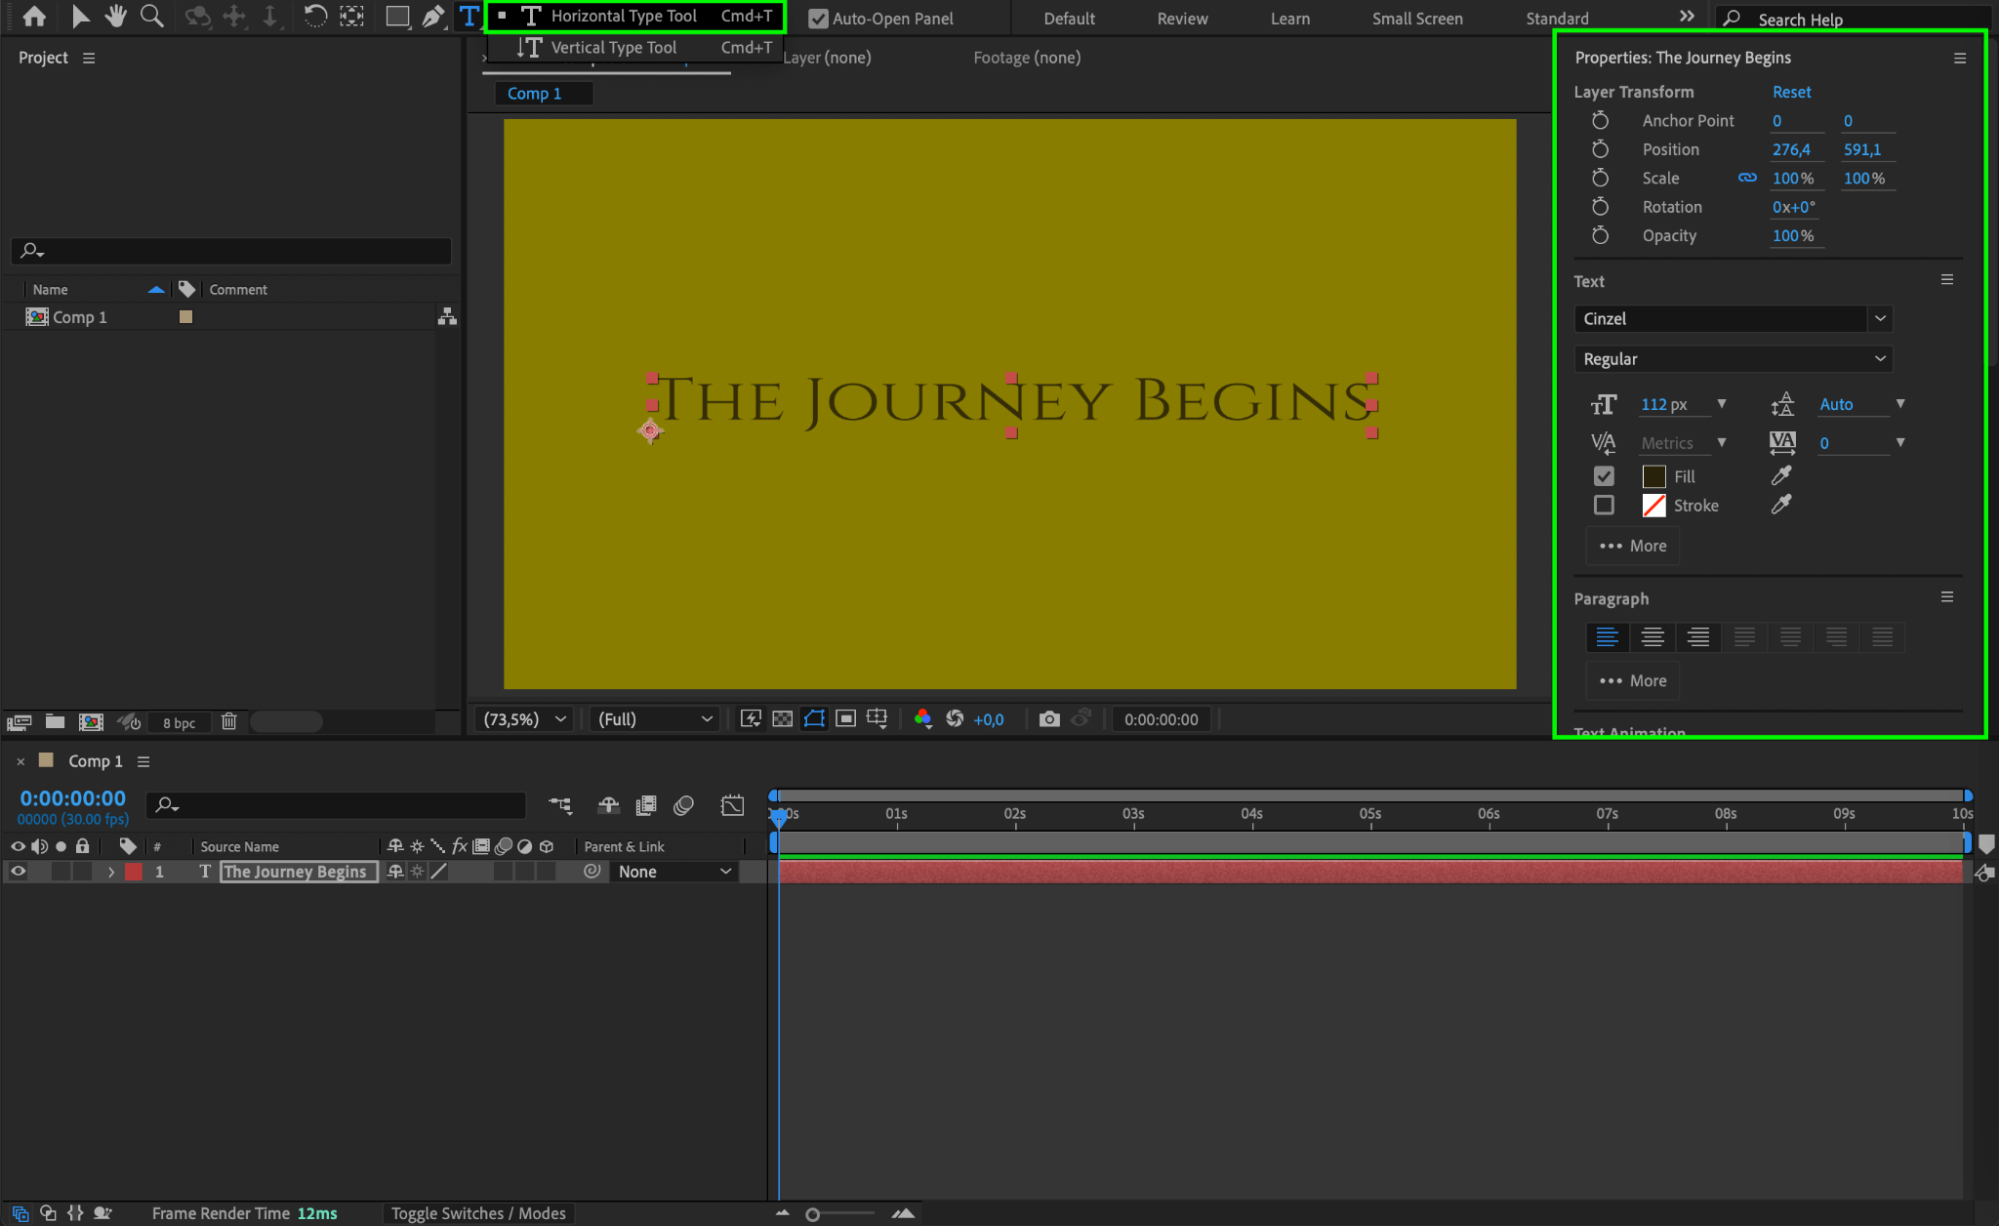 Step 3: Set the Anchor Point
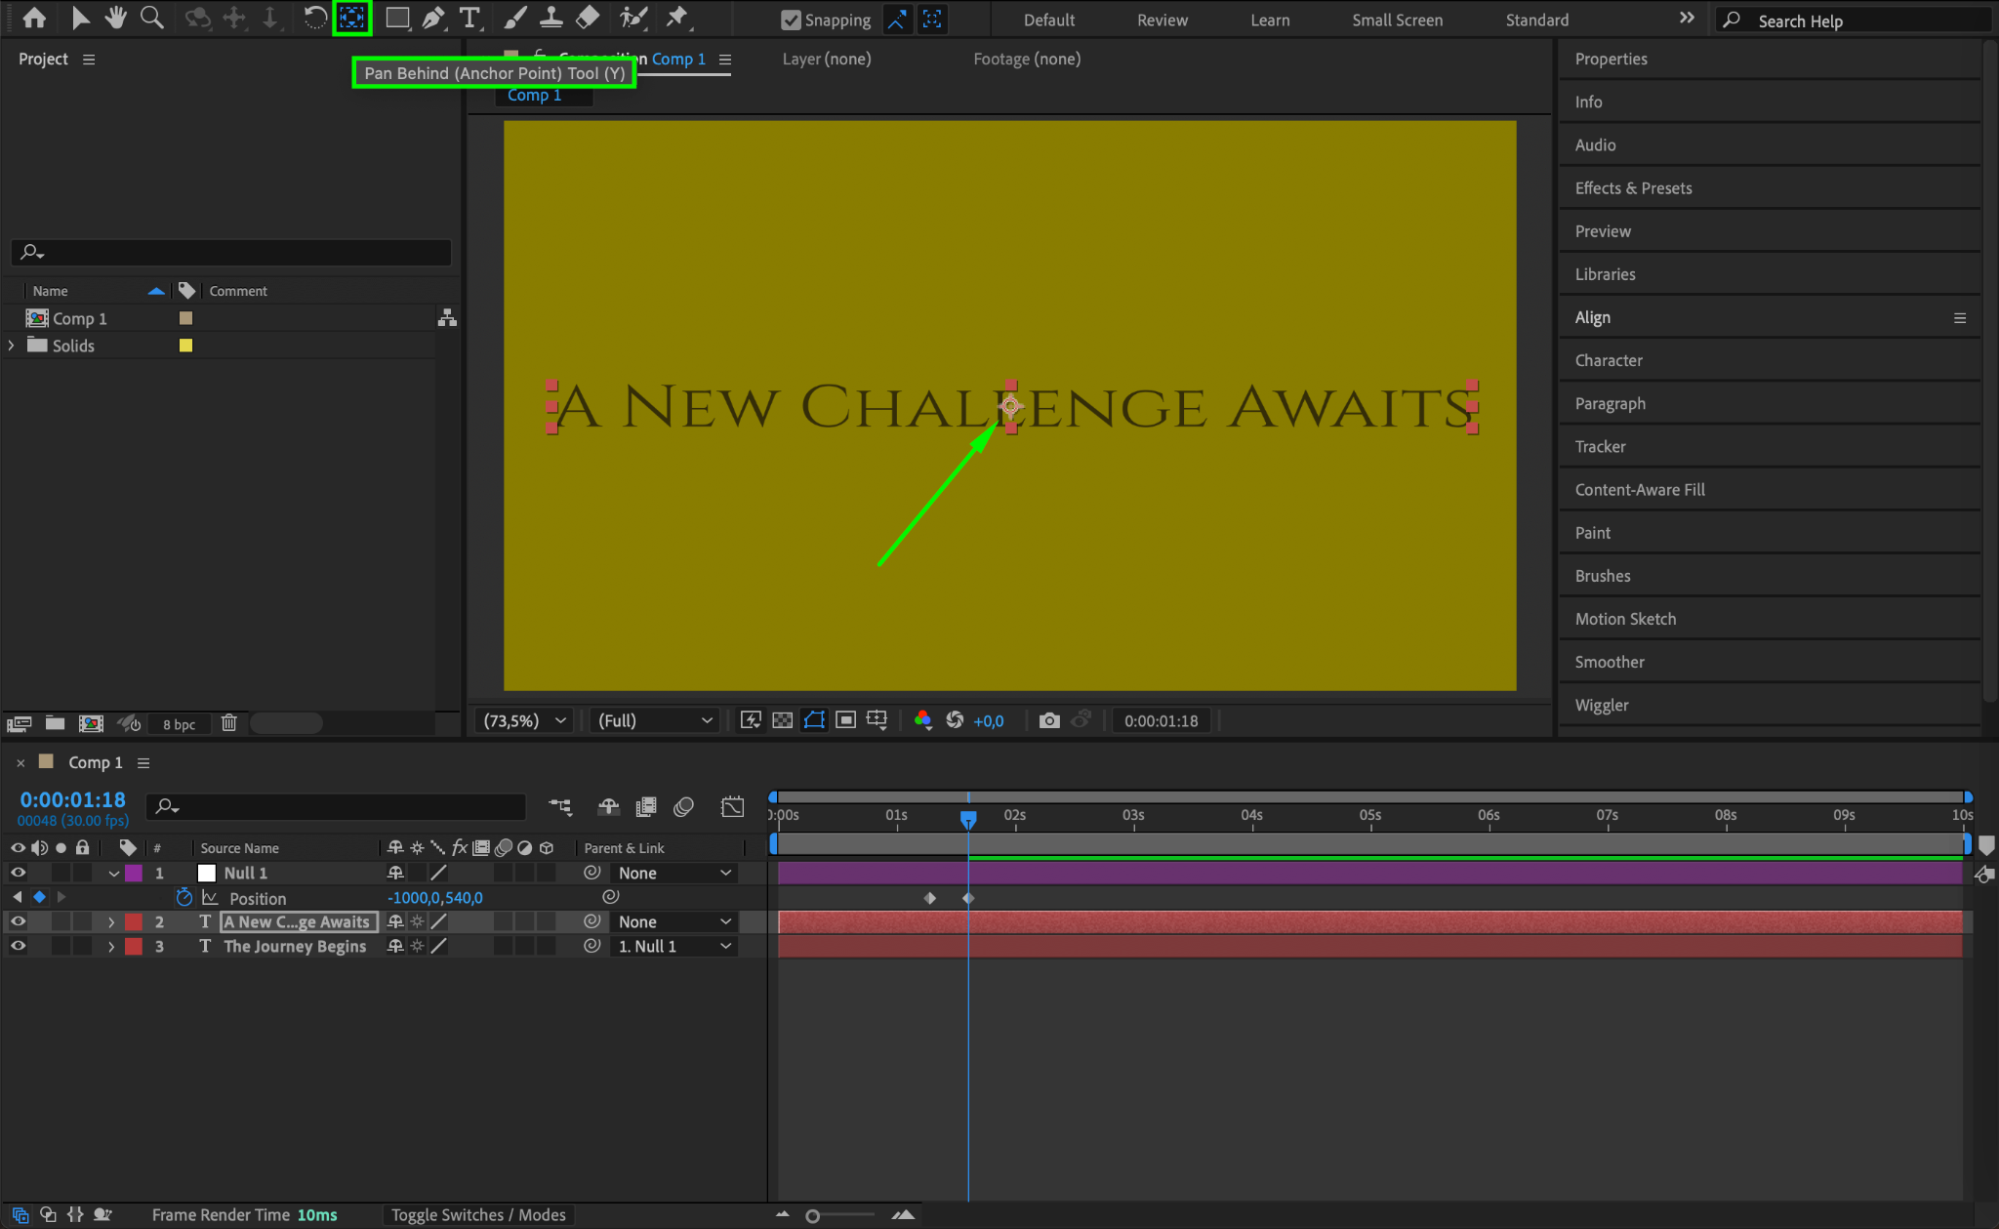
Use the Pan Behind Tool (Y) to move the anchor point to the center of the text. This ensures smooth scaling and animation.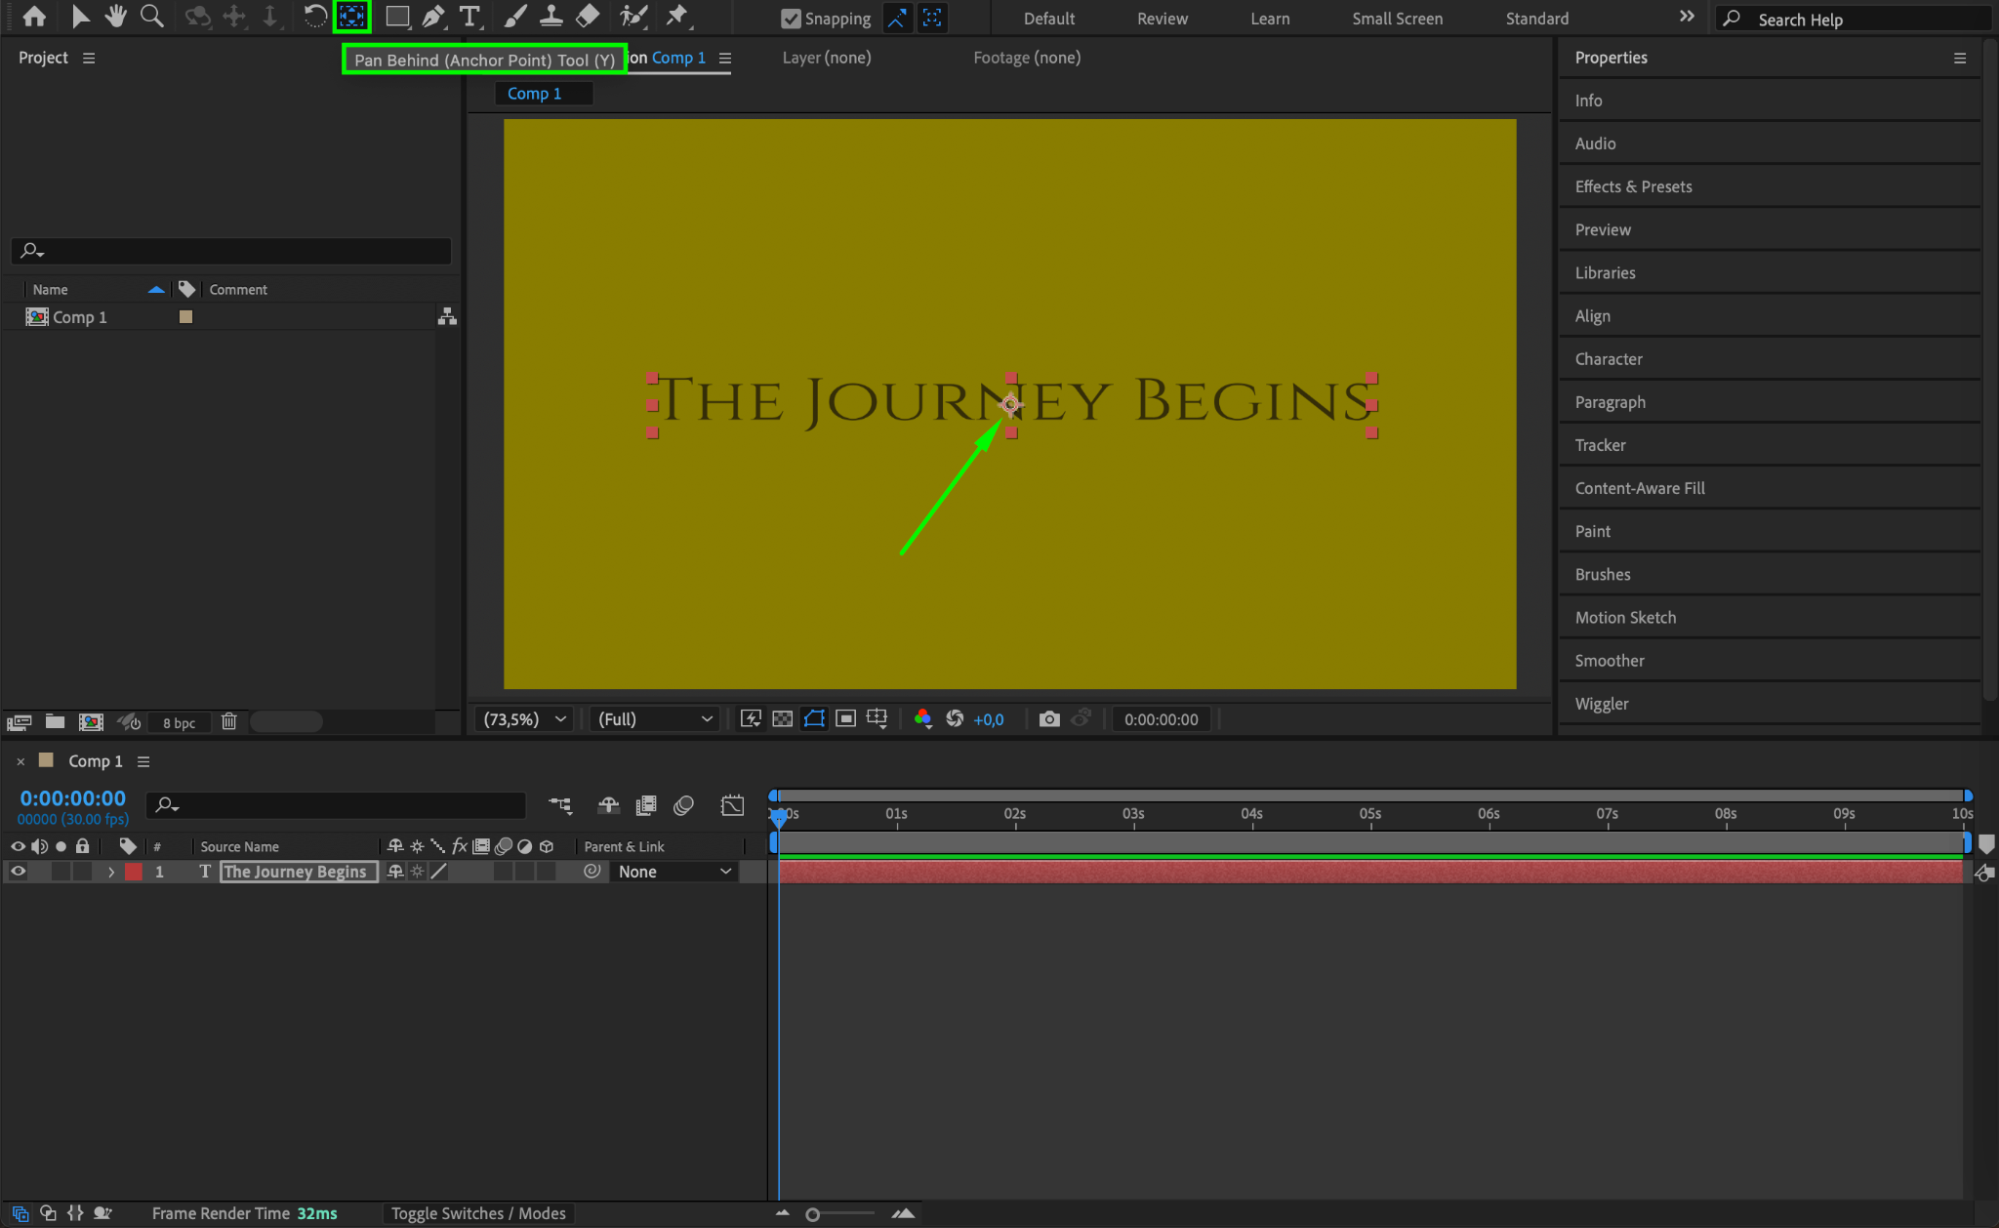 Step 4: Create a Null Object
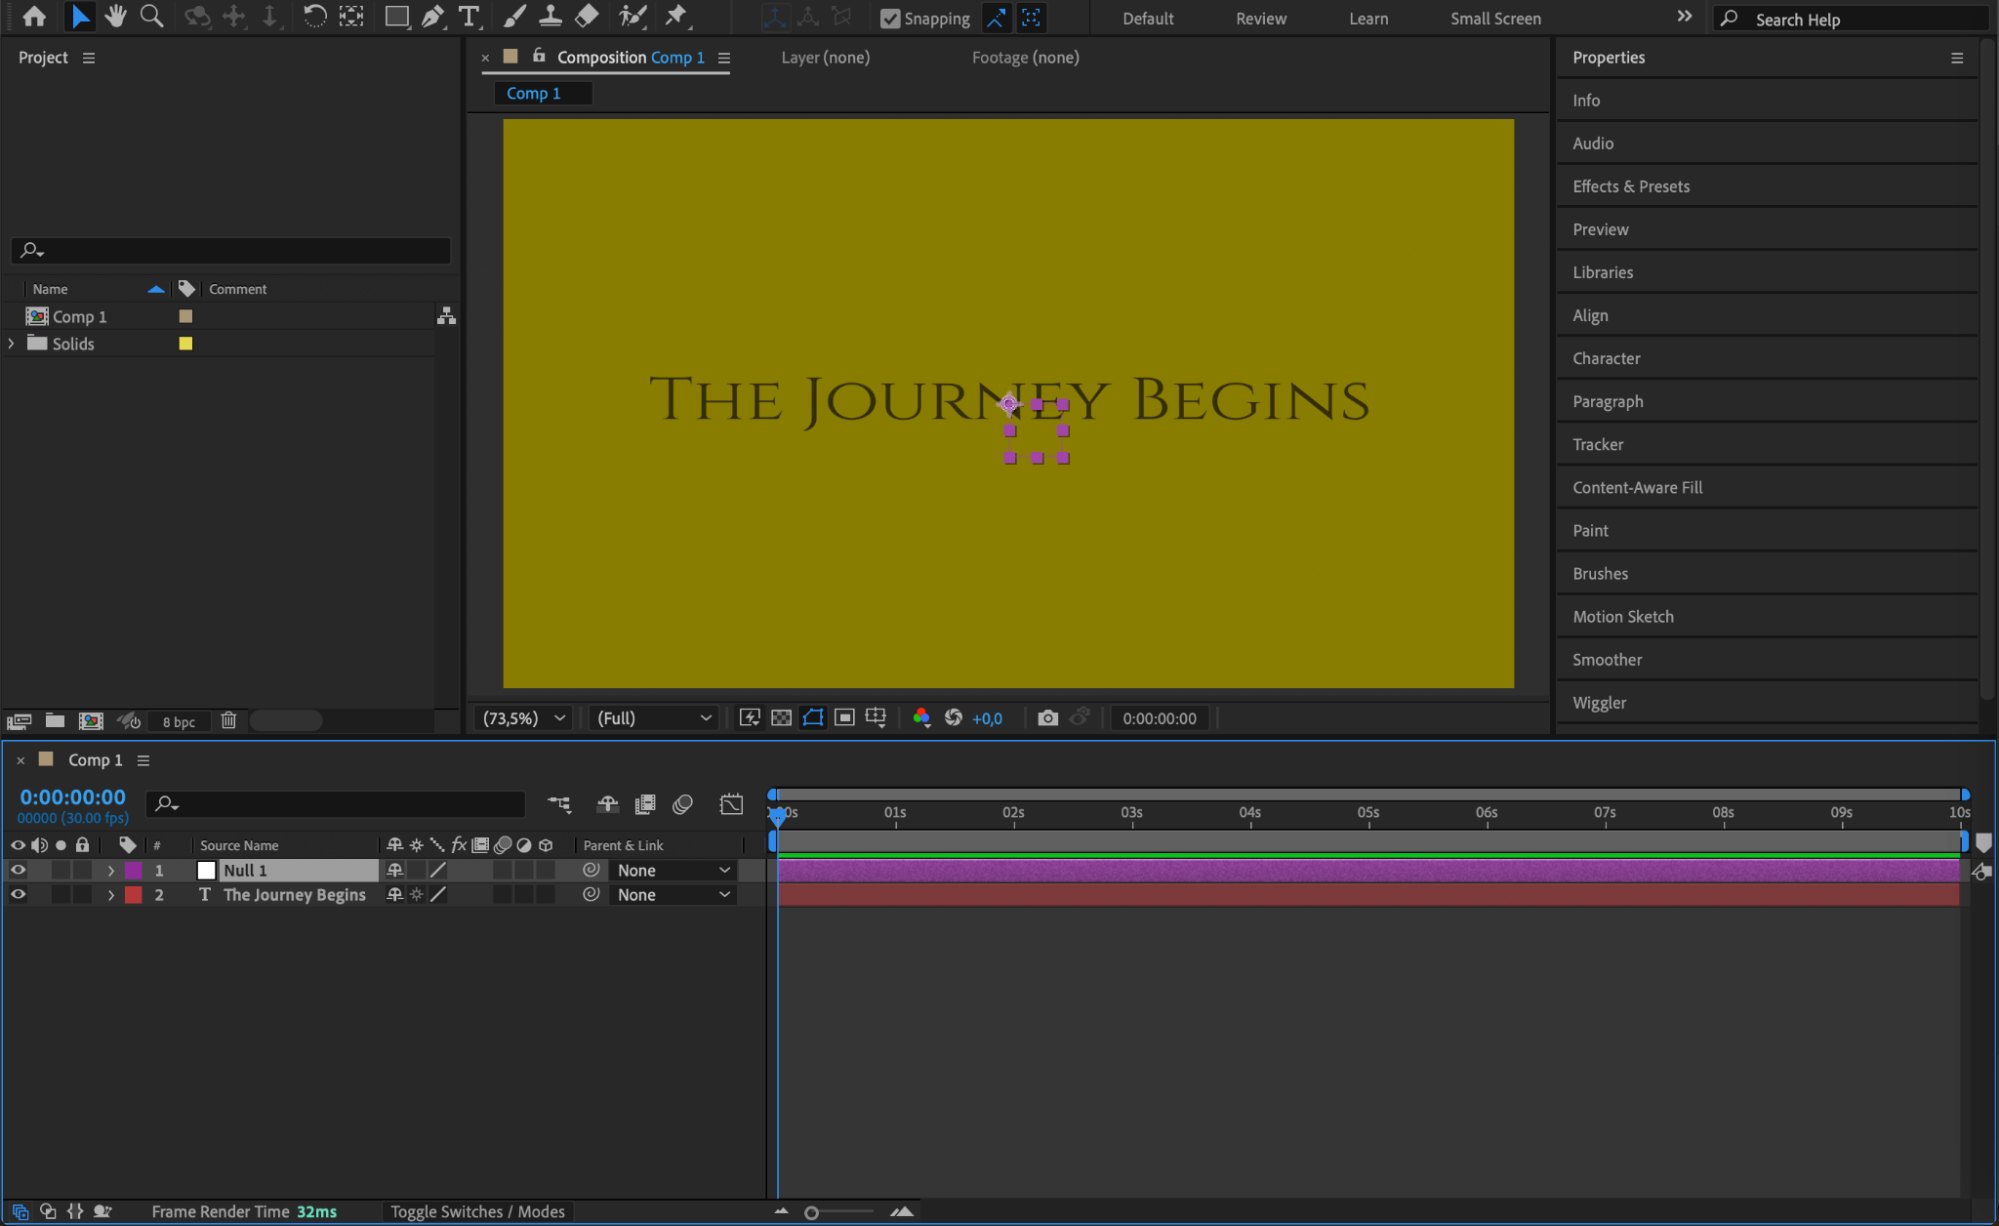
Go to Layer > New > Null Object. Change the label color to keep your project organized. This null object will control multiple text layers for easier animation.
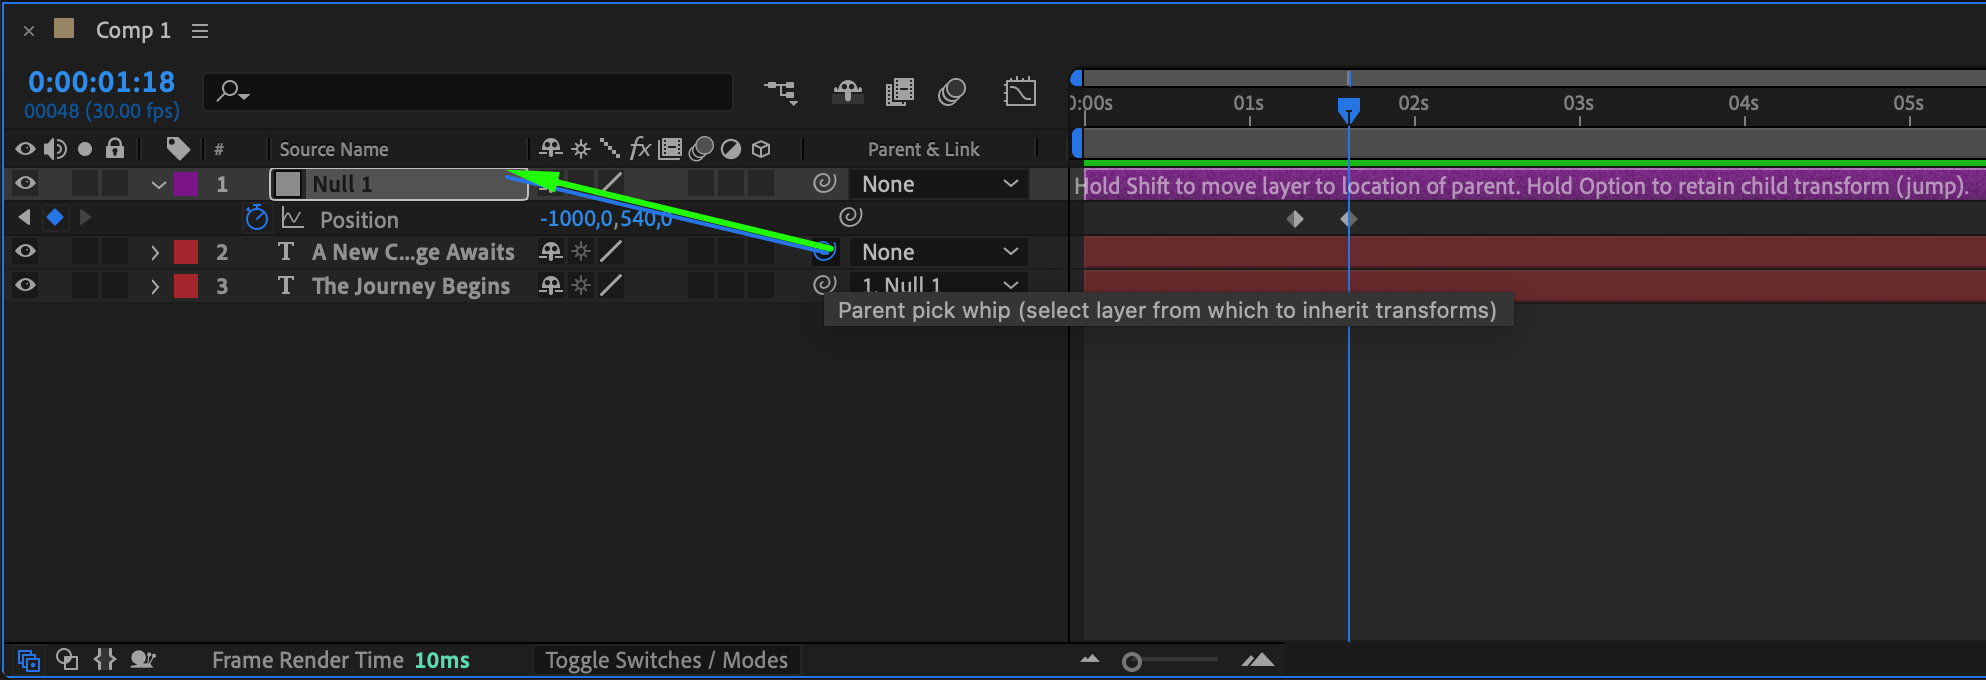
 Step 5: Parent the Text Layer to the Null Object
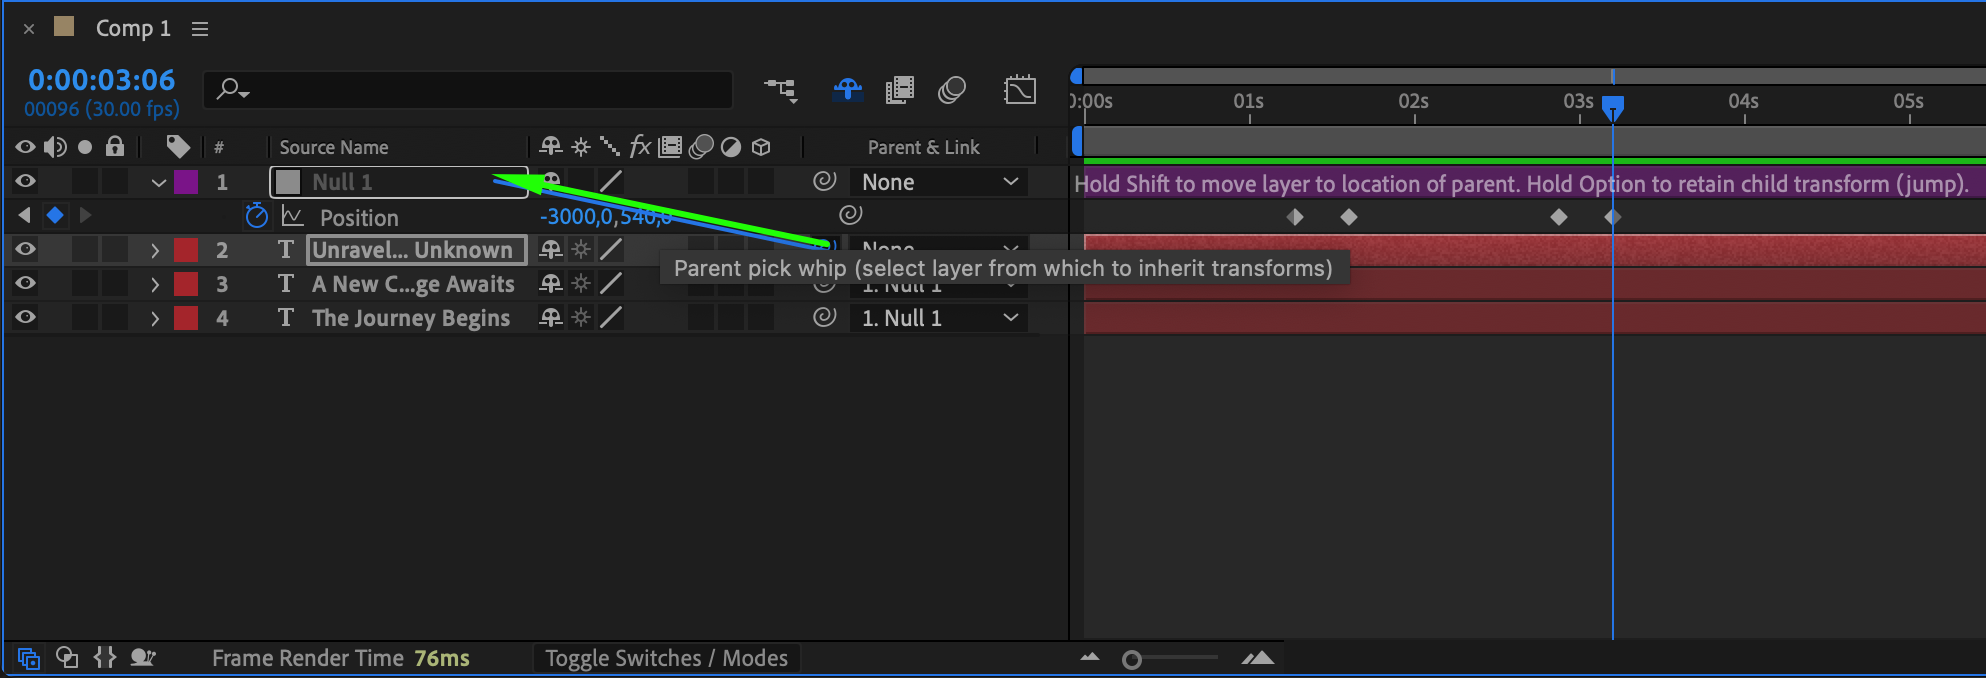
Select your text layer and use the Pick Whip Tool to make it a child of the null object. This allows you to animate the null object instead of each text layer individually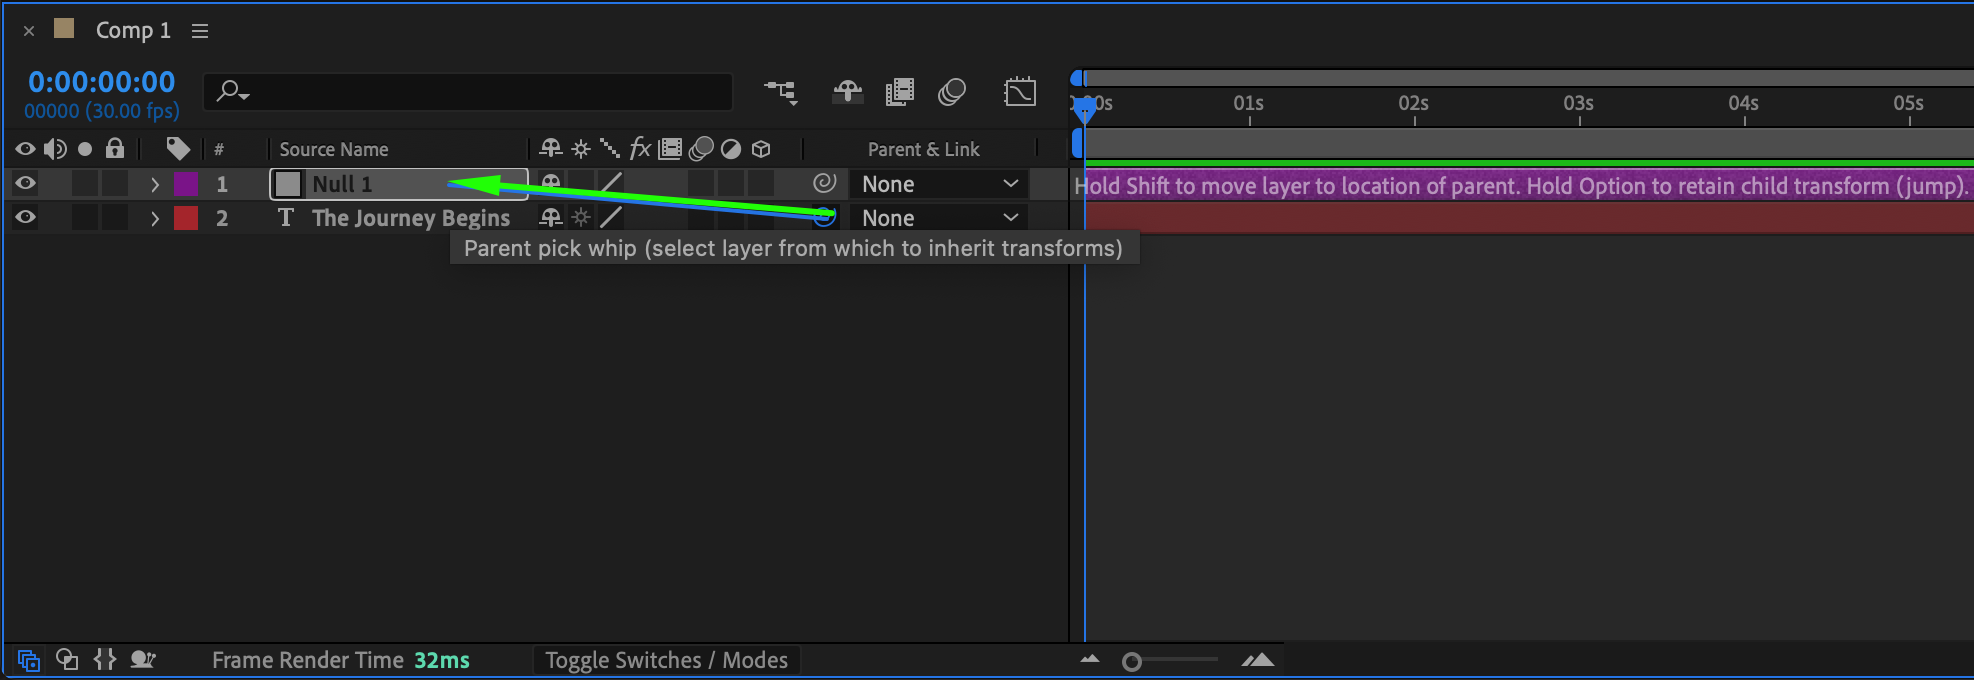 Step 6: Animate the Text Movement
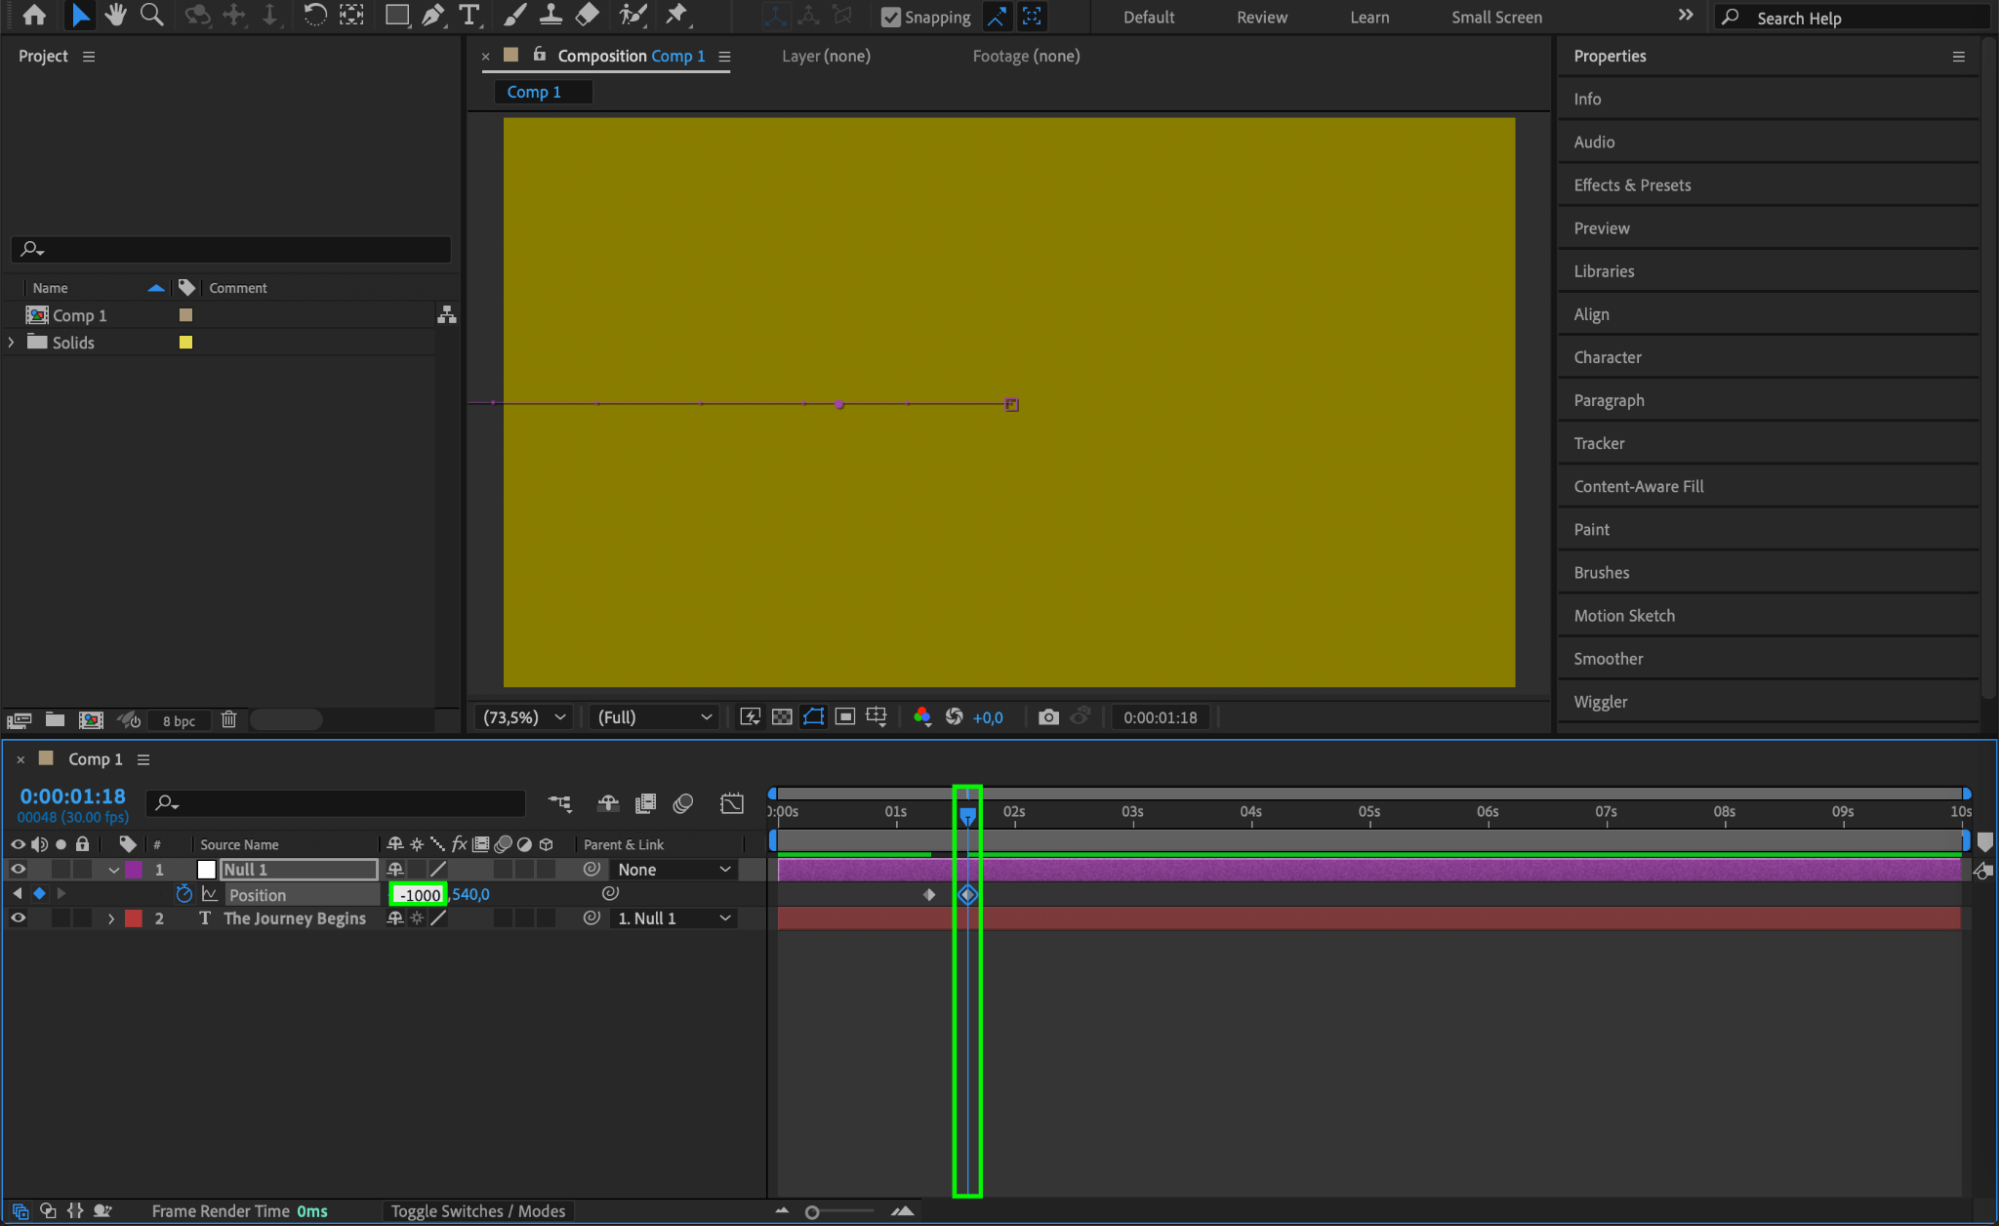
Move the CTI (Current Time Indicator) to the point where you want the current text to start transitioning to the next one.
Select the Null Object and click the stopwatch next to Position to create a keyframe.
Press Ctrl/Cmd + Shift + Right Arrow to move 10 frames forward.
Adjust the X-position (e.g., set it to -1000) to move the text completely off-screen.
This step ensures a smooth transition between text layers in the title sequence.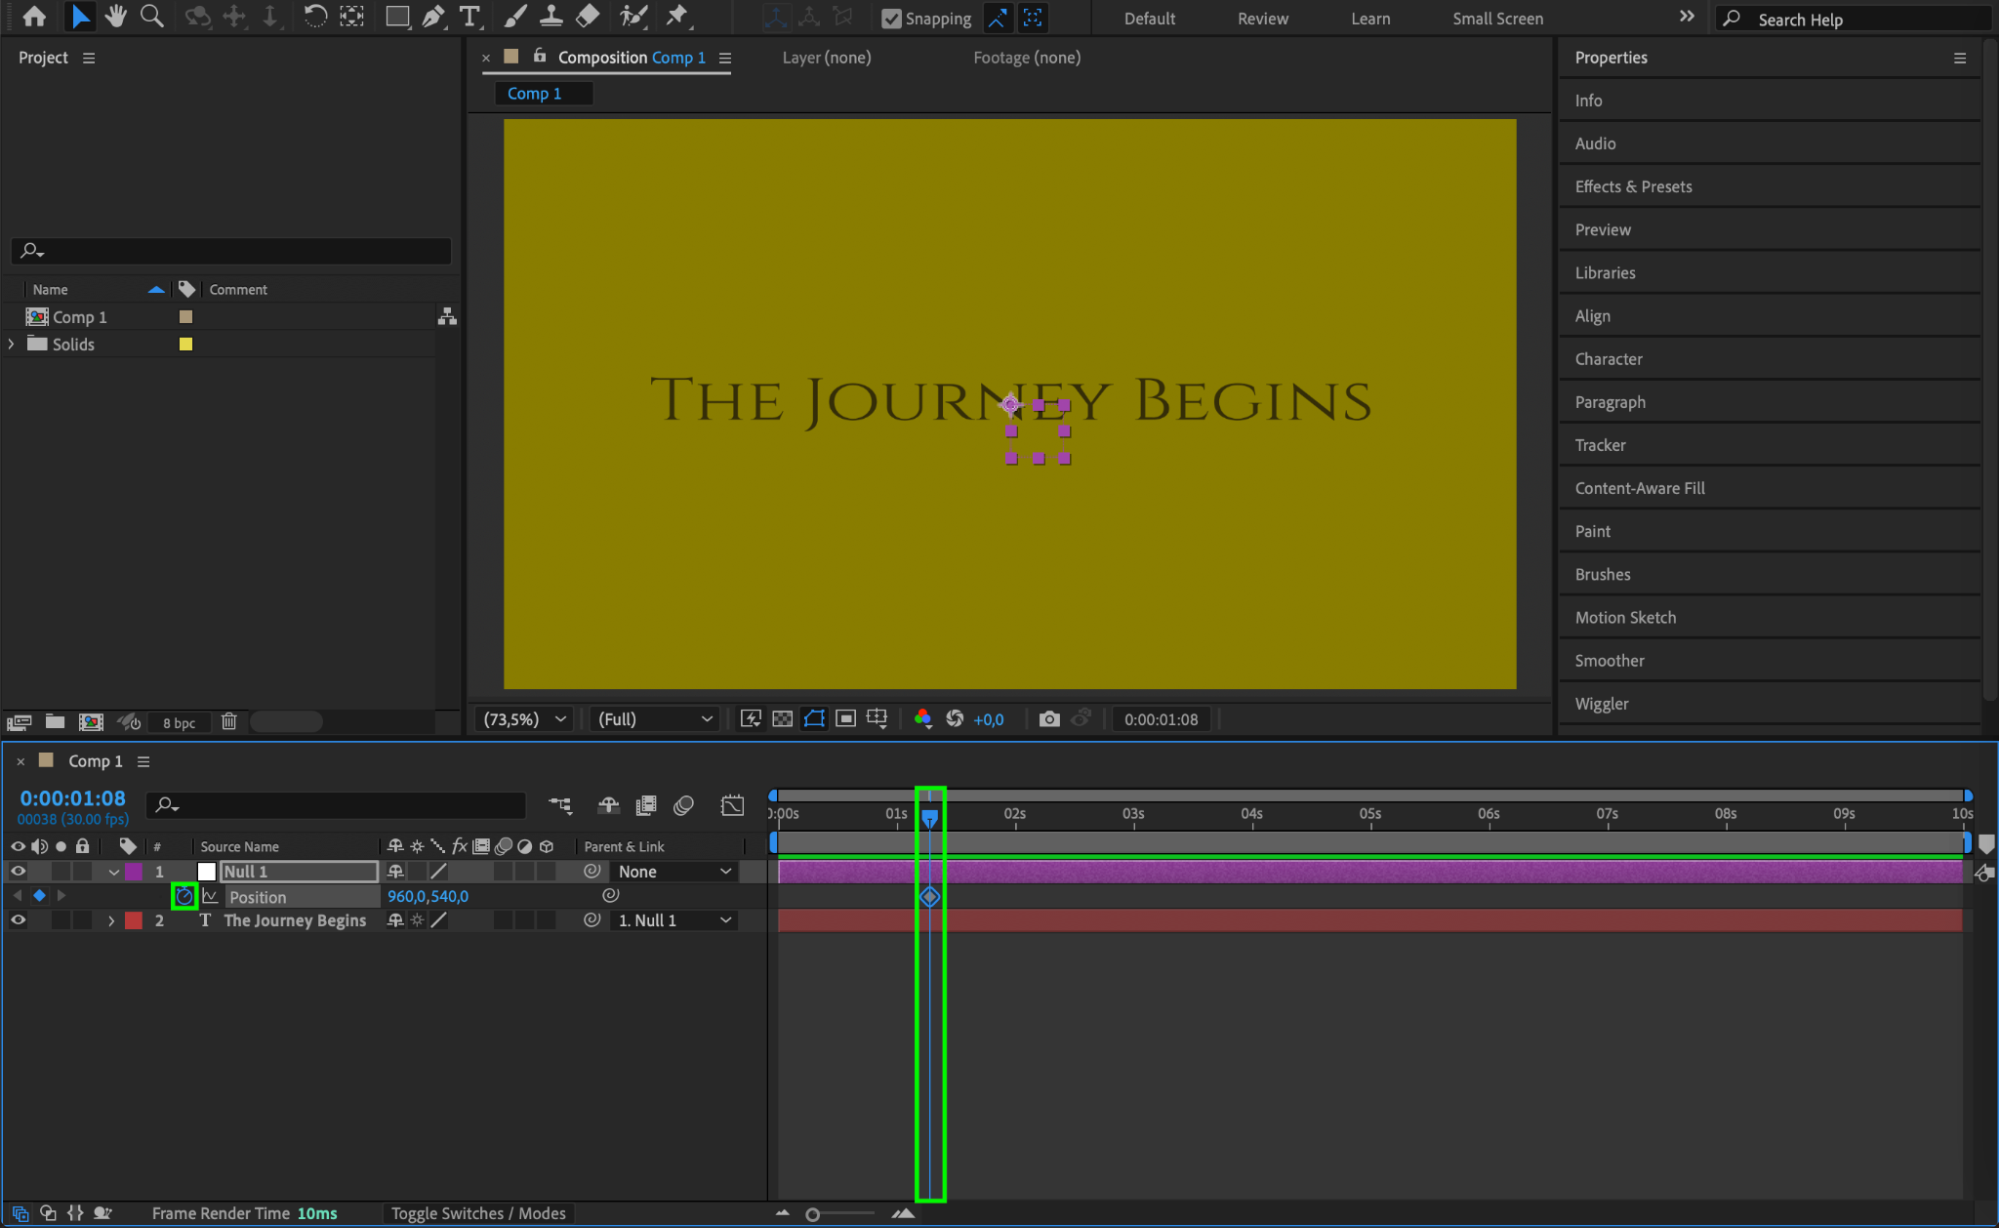
 Step 7: Add More Text Layers
Create a new Text Layer and position it below the null object.
Set the anchor point to the center.
Make the text layer child of the same null object.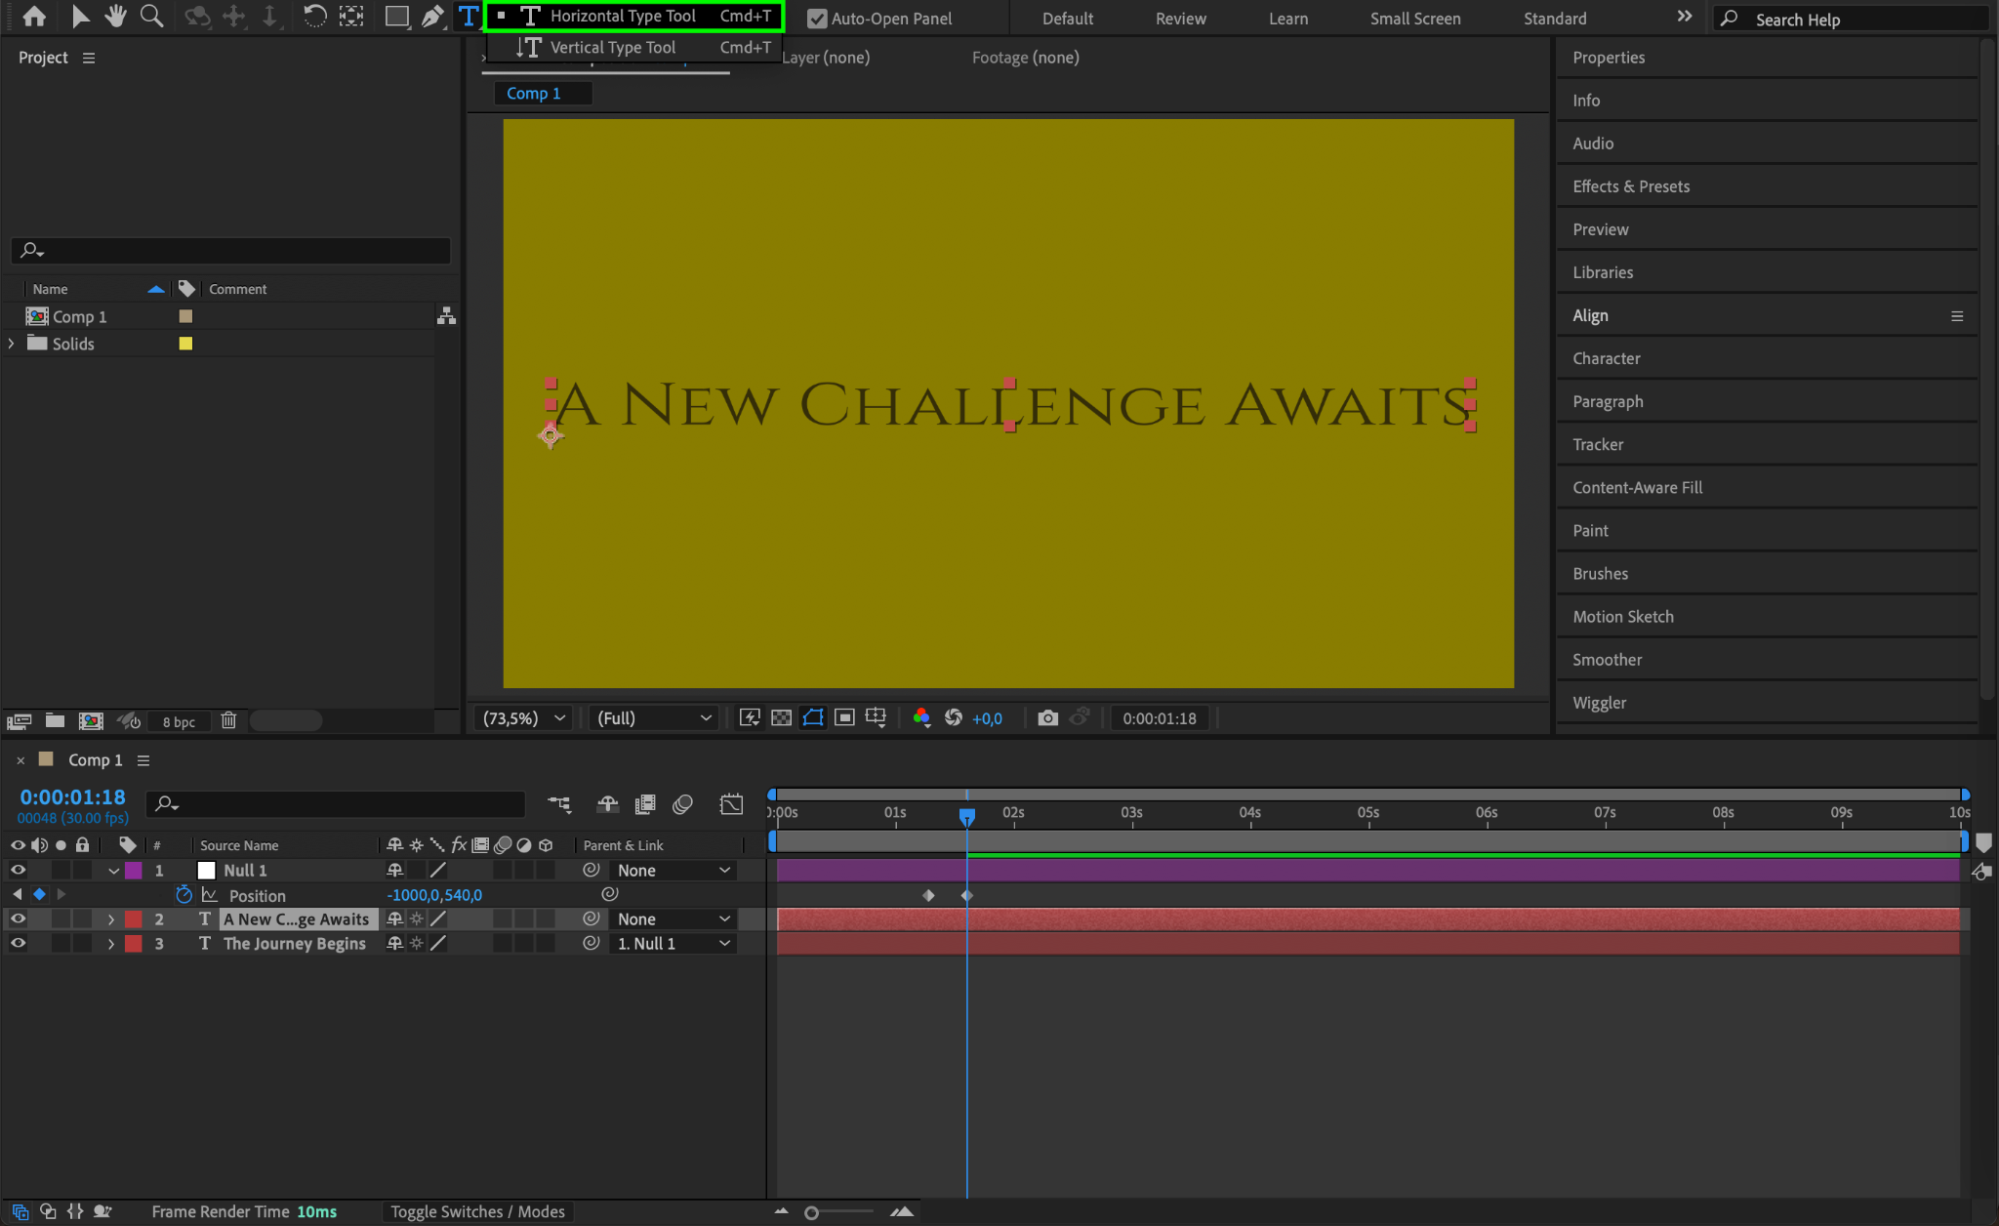
 Step 8: Animate the Next Text Layer
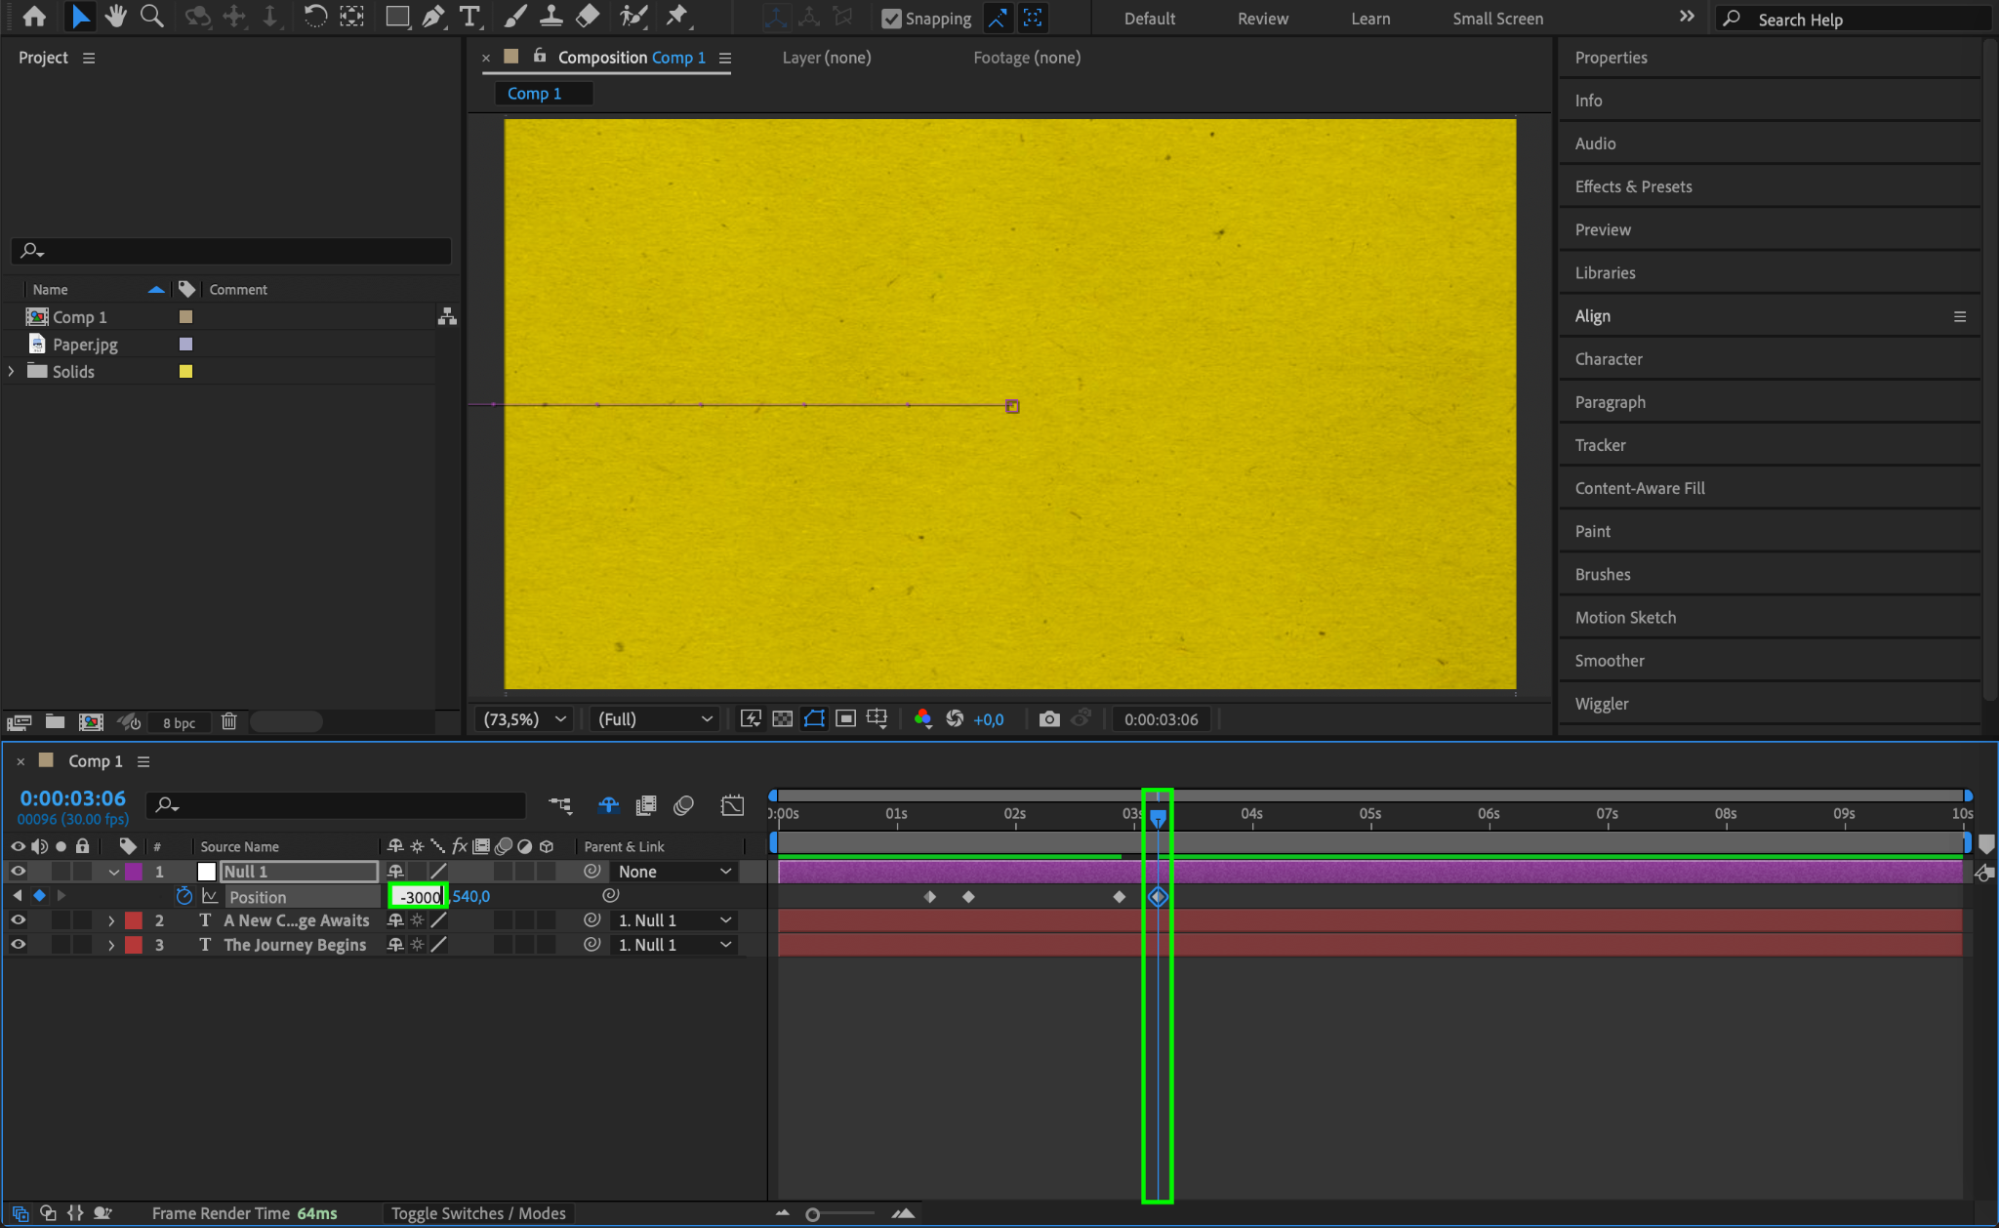
Move the CTI forward to the point where this new text should appear.
Click the diamond icon next to Position to create a keyframe.
Move 10 frames forward (Ctrl/Cmd + Shift + Right Arrow) and change the X-position (e.g., -3000) to move it completely off-screen.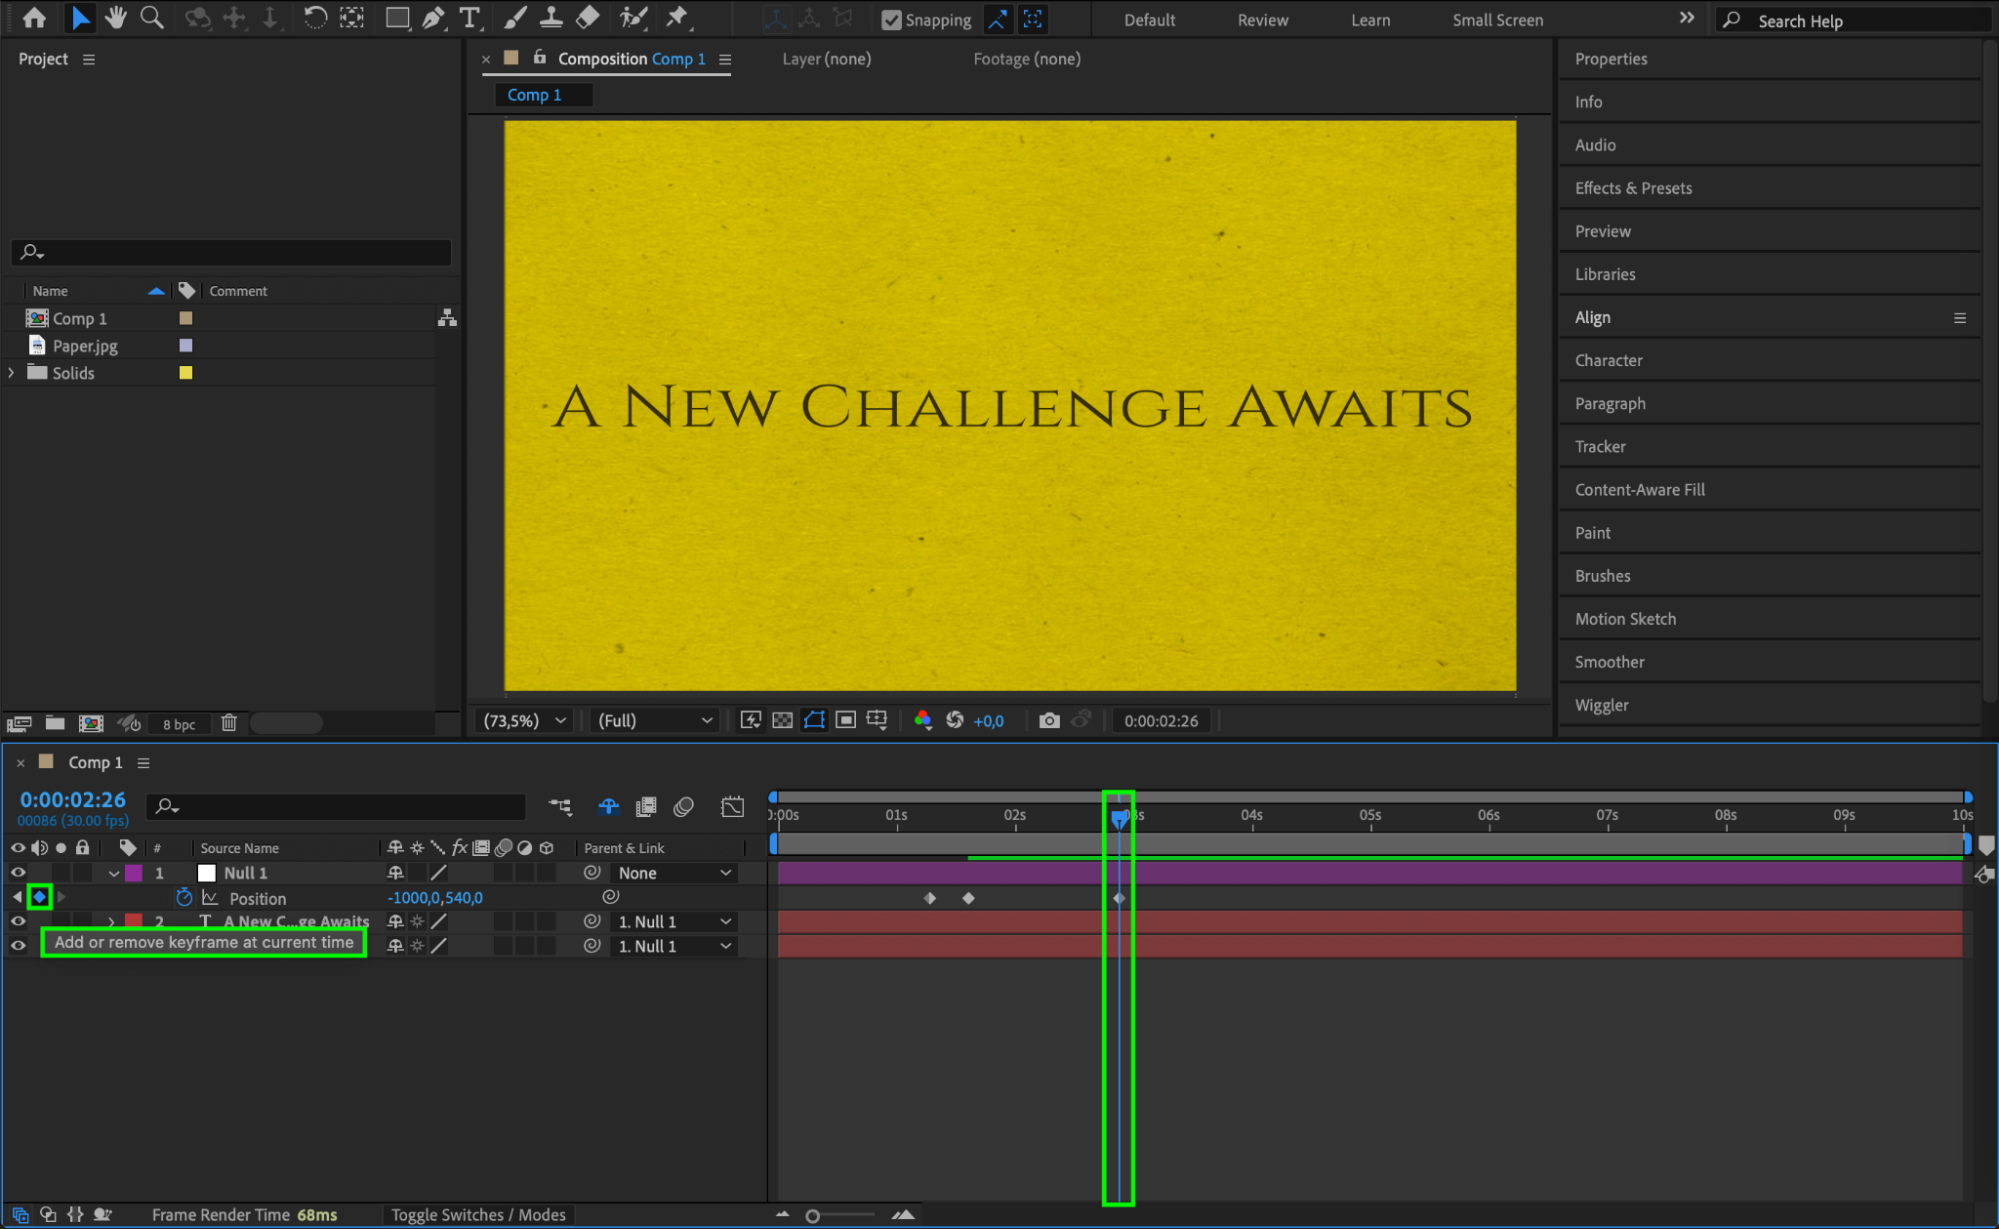
 Step 9: Repeat for Additional Titles
Repeat Steps 7 and 8 for all the text layers in your sequence. This will create a smooth cascading effect as each title moves in and out.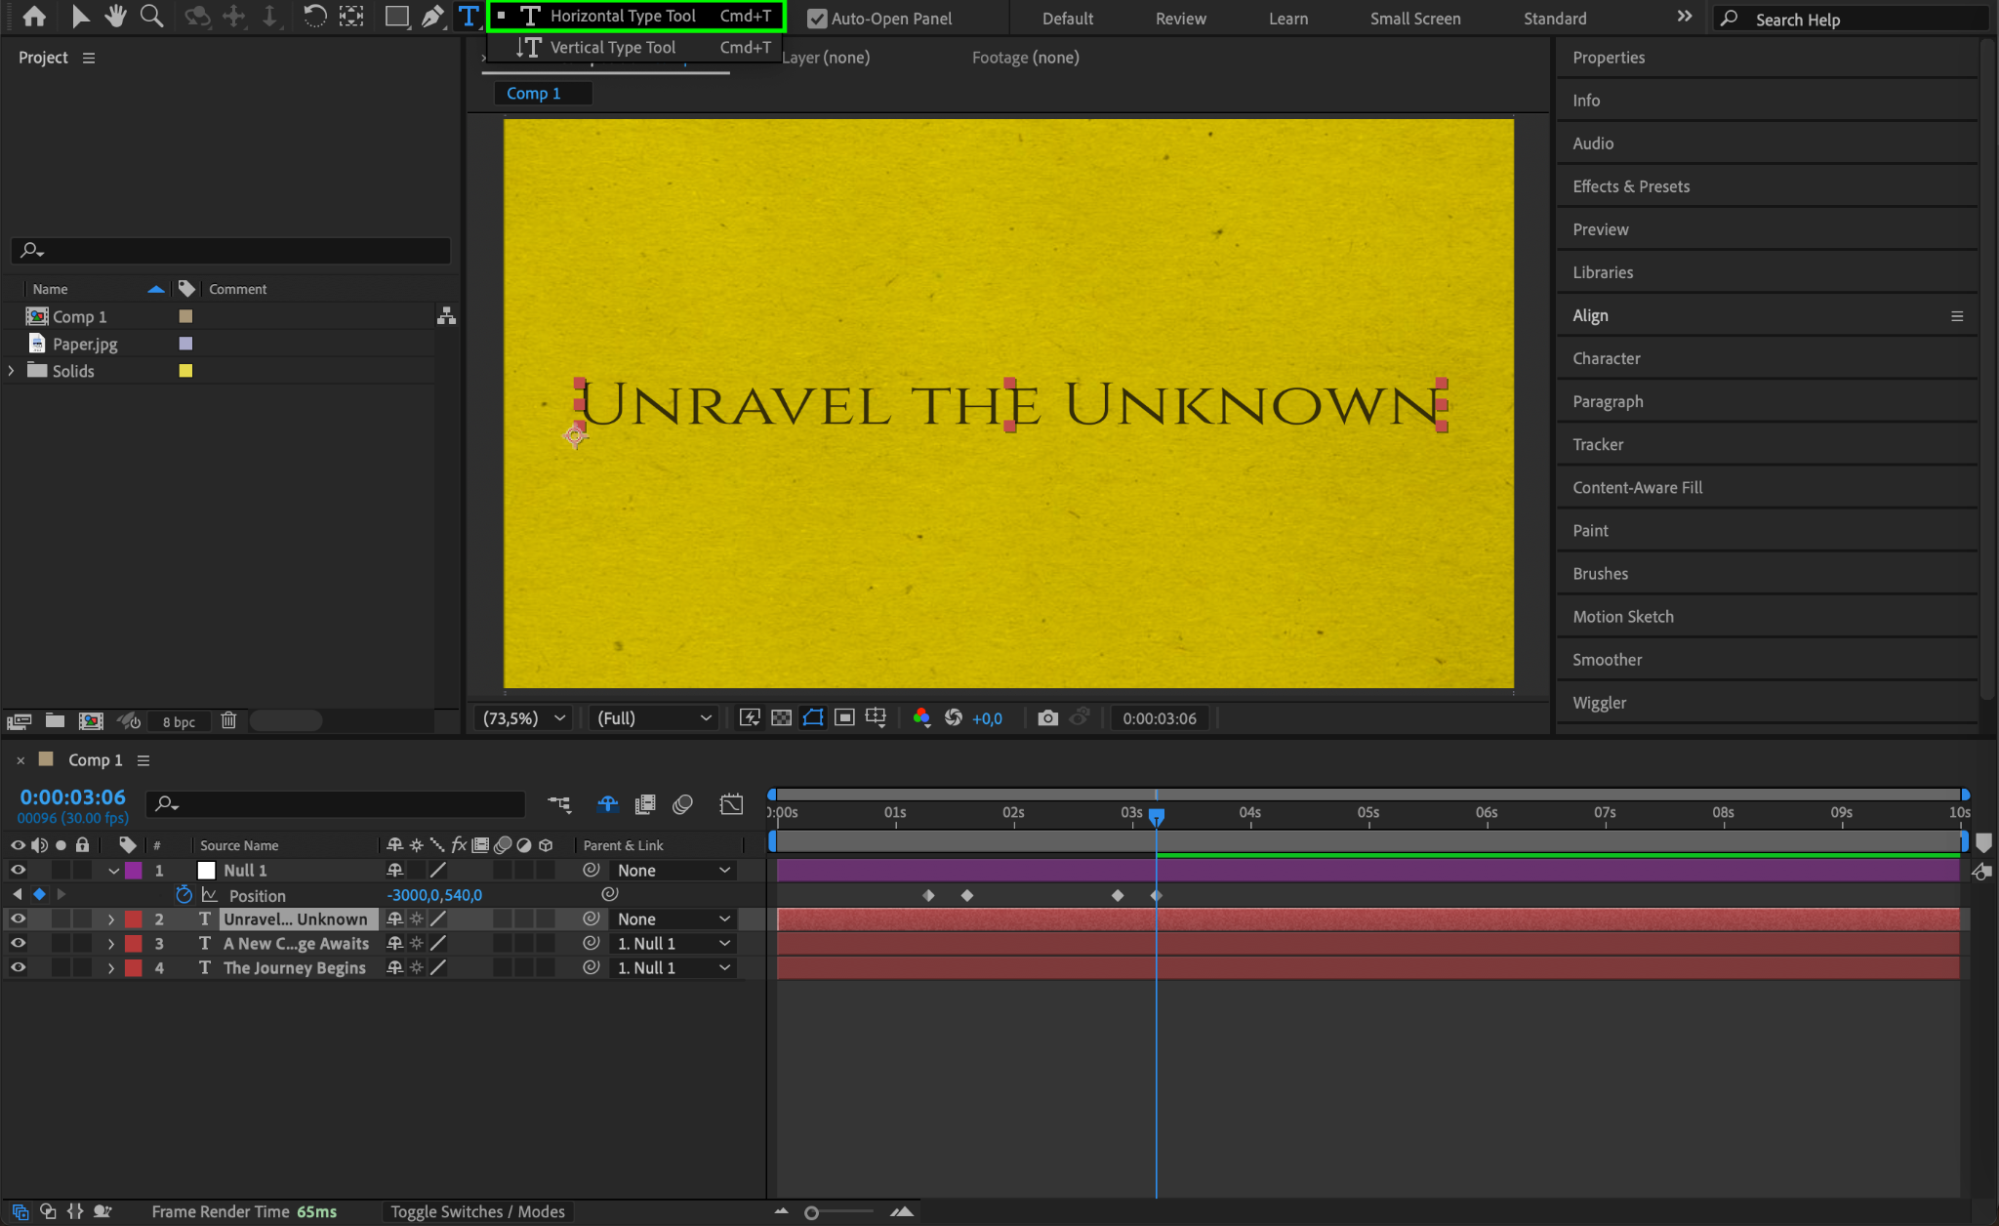

 Step 10: Enable Motion Blur
Click the Motion Blur icon next to each text layer in the Timeline Panel.
Enable Motion Blur for the entire composition by clicking the Motion Blur toggle at the top of the Timeline Panel.
This will create a smoother and more natural-looking text animation.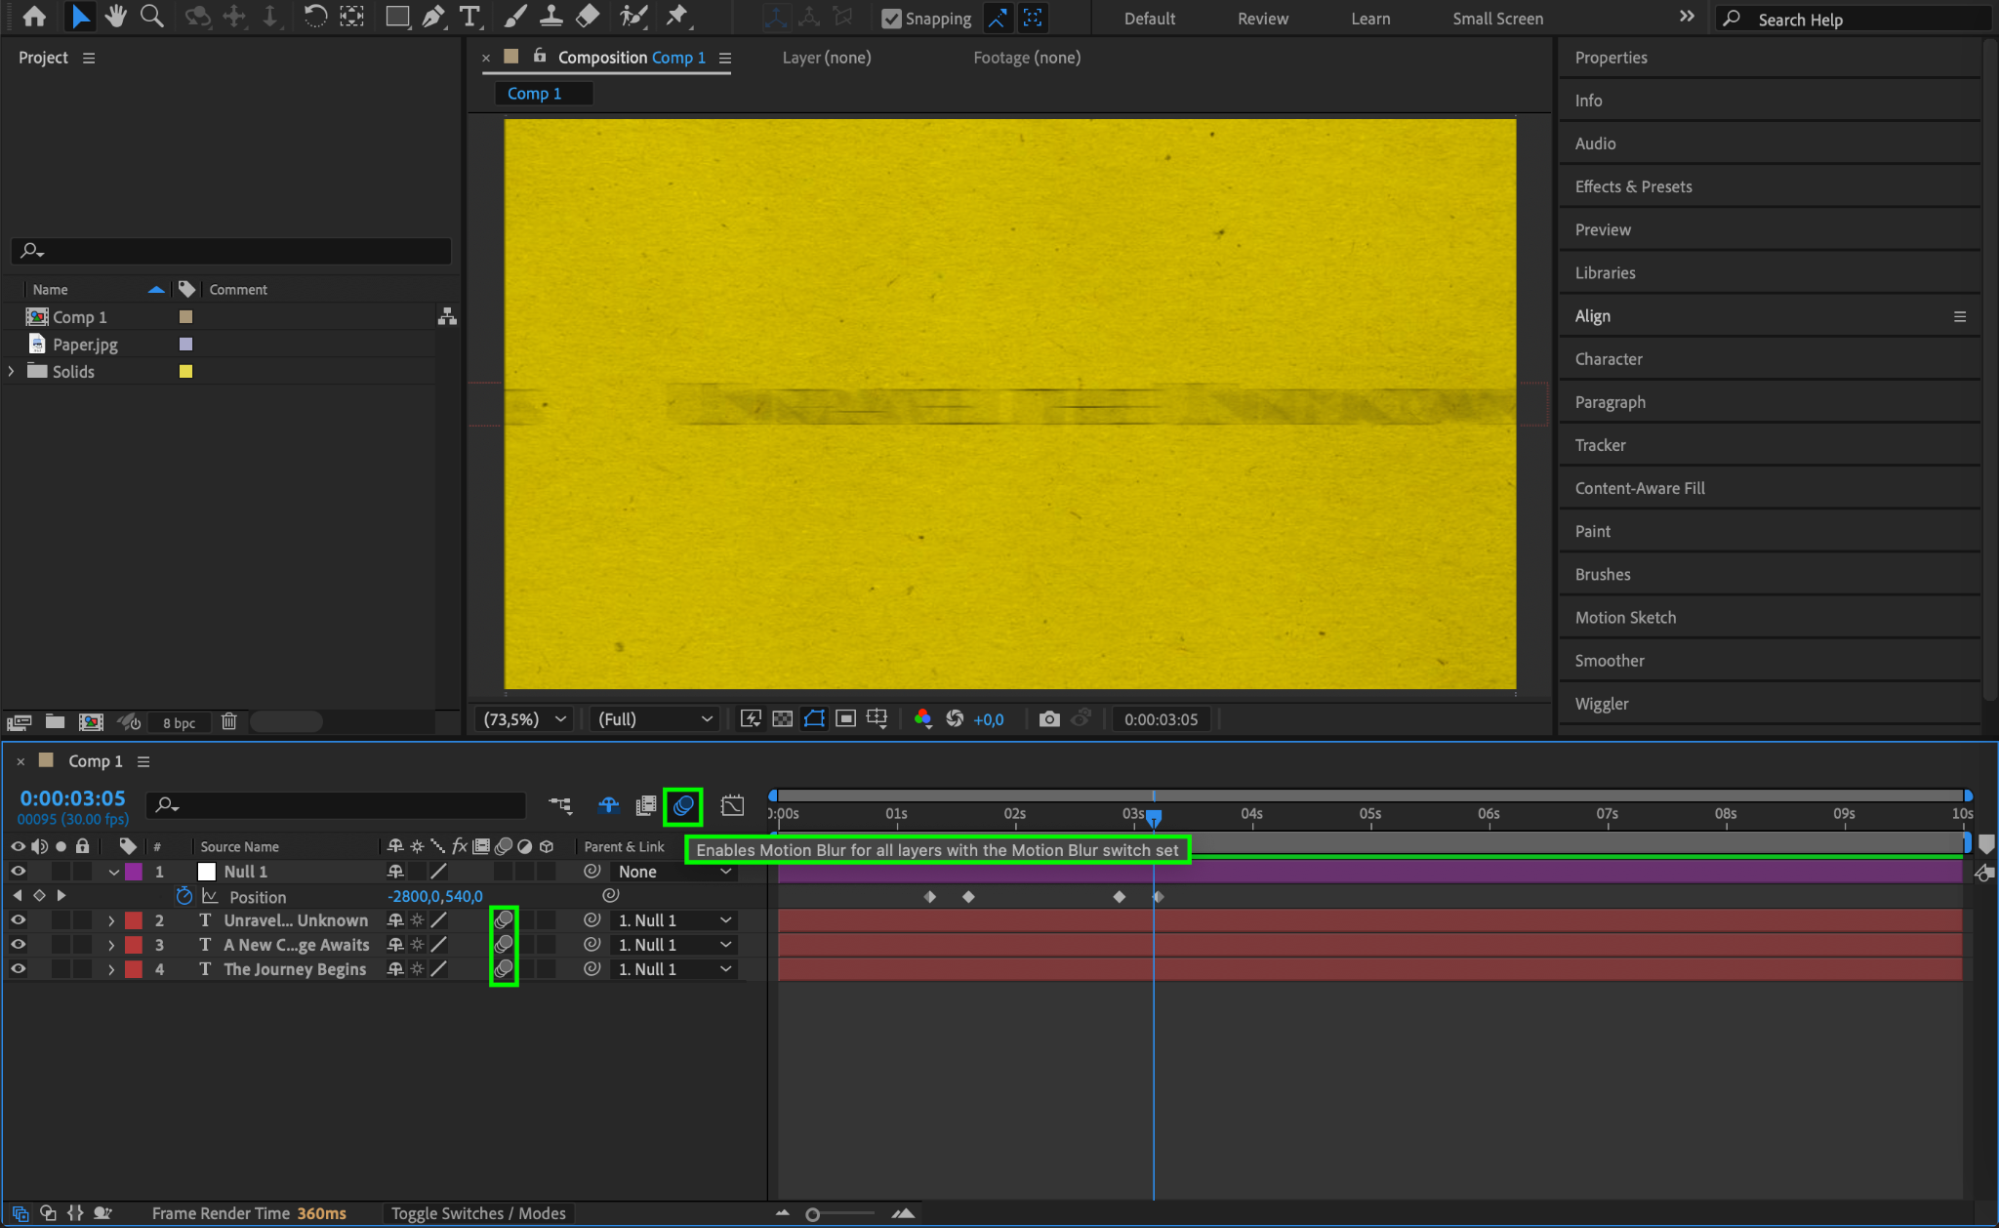 Step 11: Preview Your Animation
Press Spacebar to preview the animation and make adjustments if needed.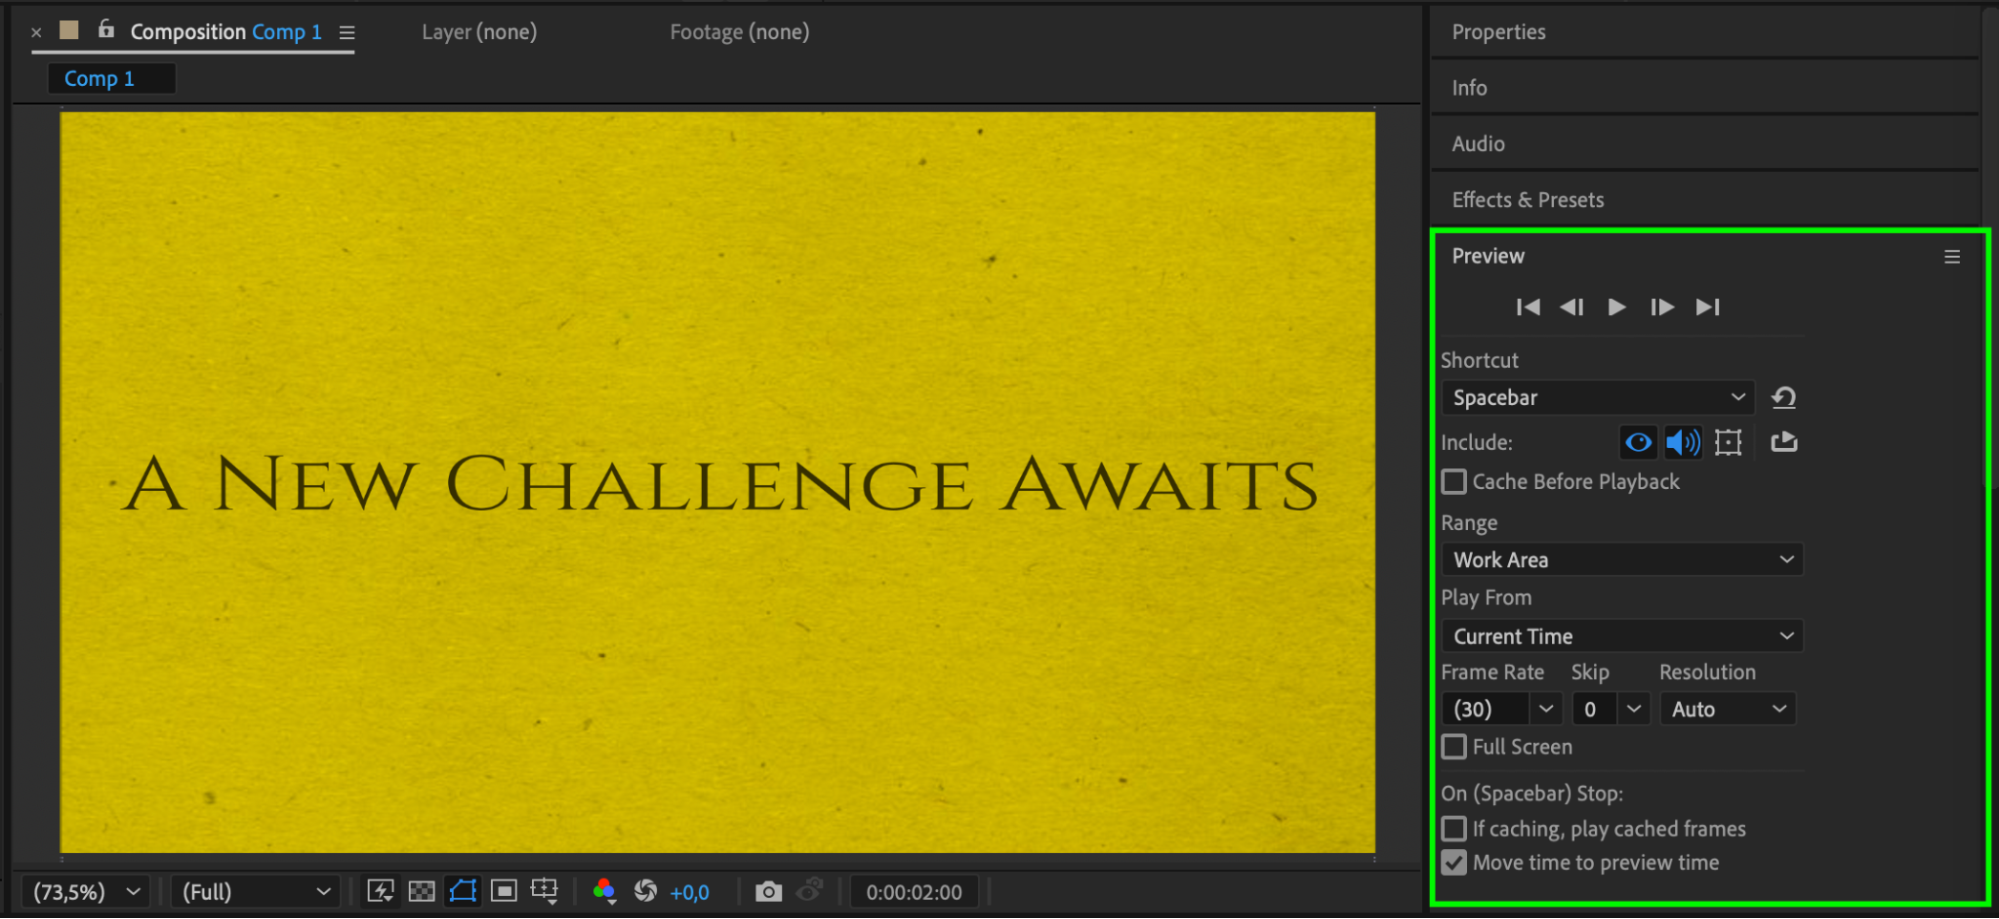 Step 12: Render the Final Sequence
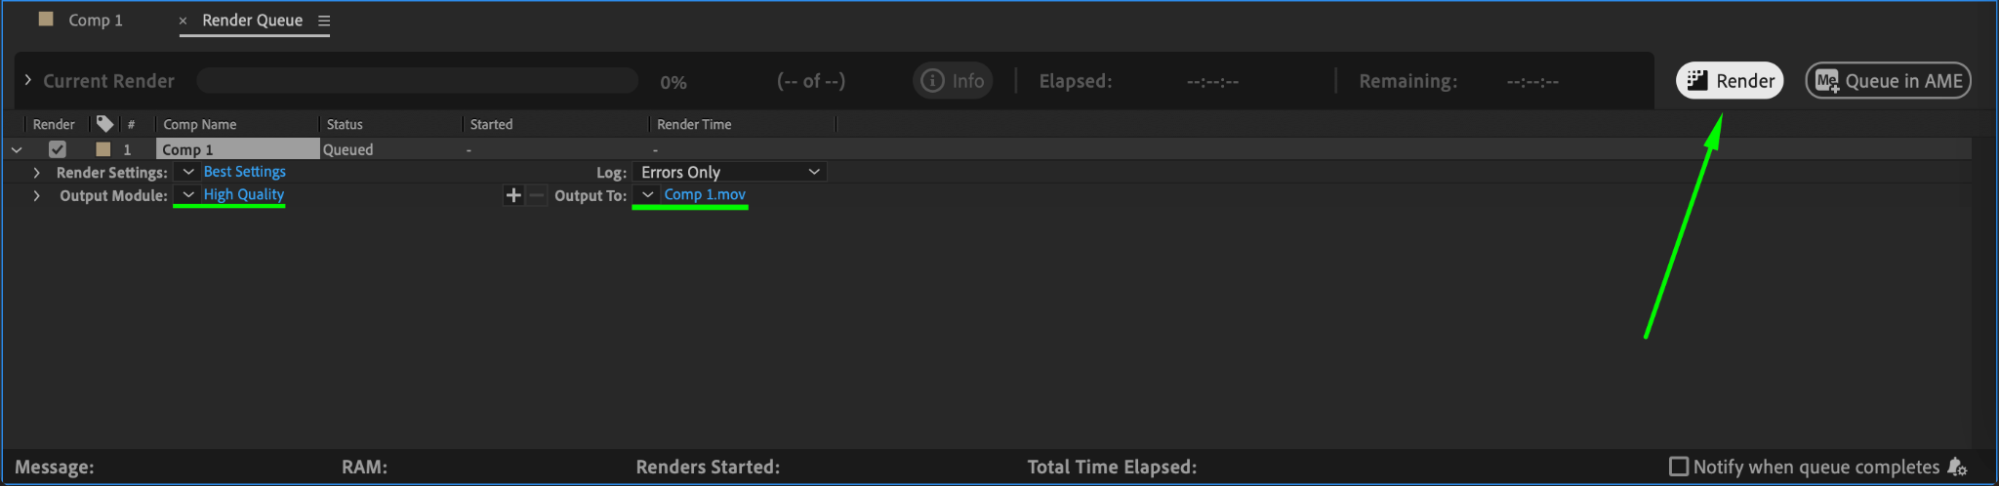
Once satisfied, export your title sequence:
Go to Composition > Add to Render Queue.
Choose the format and output settings.
Click Render to finalize the sequence.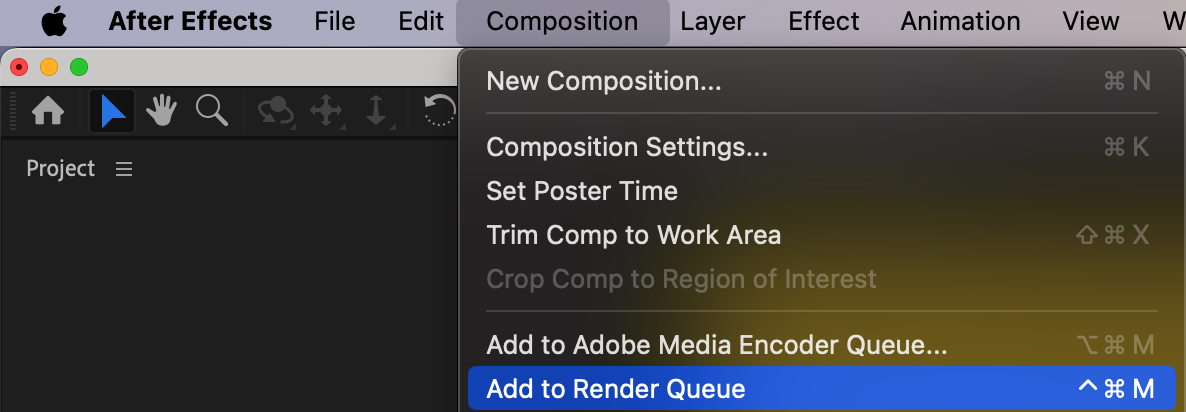
 Conclusion
Creating a title sequence in After Effects is a great way to add professionalism to your videos. By using keyframes, motion blur, and null objects, you can build a smooth and dynamic sequence efficiently. Try experimenting with different fonts, transitions, and effects to customize your titles.
Our Bestsellers


