Creating a Typography Animation in After Effects
Introduction
Typography animations are a great way to make text visually engaging. Whether for motion graphics, social media content, or presentations, a well-animated typography video can enhance your message. In this tutorial, you will learn how to animate text using After Effects tools like Range Selector, Opacity, Position, and a Null Object to create a smooth and professional look.
Get 10% off when you subscribe to our newsletter

Step 1: Create a New Composition
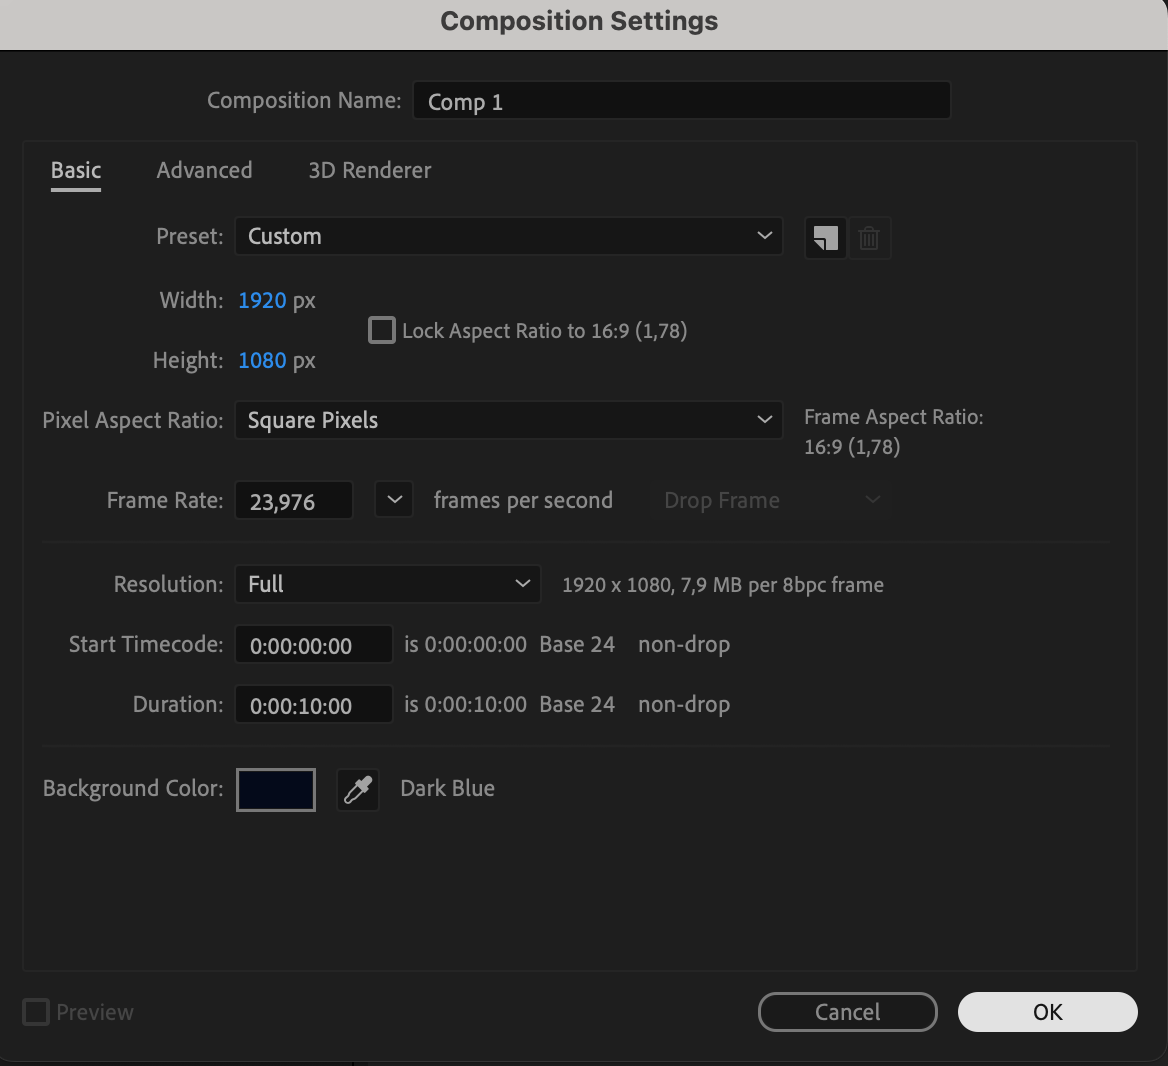
Start by opening After Effects and creating a new composition. Set the resolution, frame rate, and duration according to your project requirements.
 Step 2: Add Text Layers
Use the Type Tool (Ctrl/Cmd + T) to create two text layers. These will be animated separately to create a dynamic effect.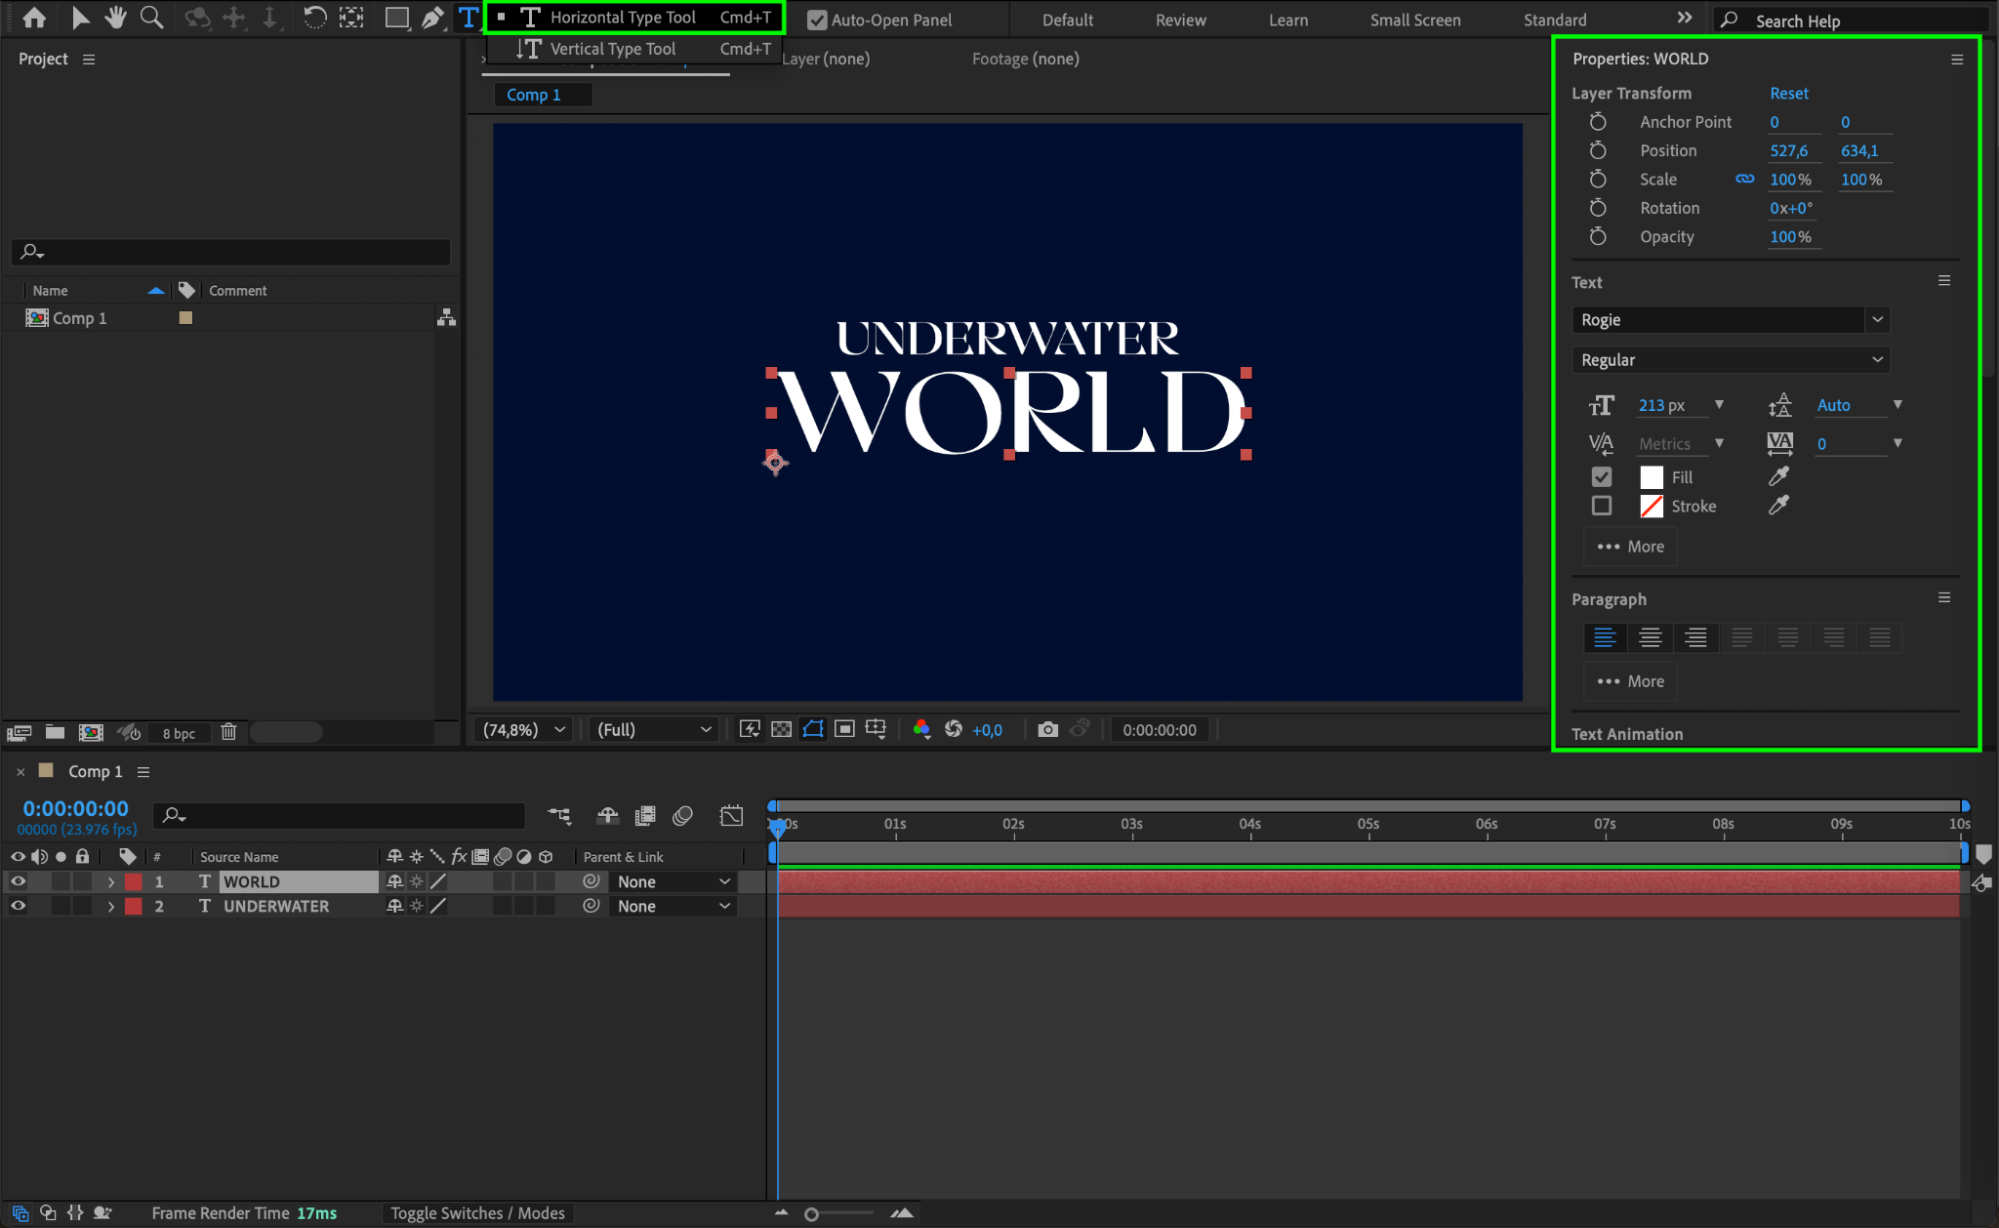 Step 3: Adjust the Anchor Point
Select the Pan Behind Tool (Y) and move the anchor point of the top text layer to the center-bottom of the text. This will ensure that the animation starts from a natural position. Step 4: Add a Position Animation to the Text Layer
Expand the properties of the first text layer. To the right of the Text section, find the Animate button and click on it. From the dropdown menu, select Position. This will allow you to animate the movement of the text.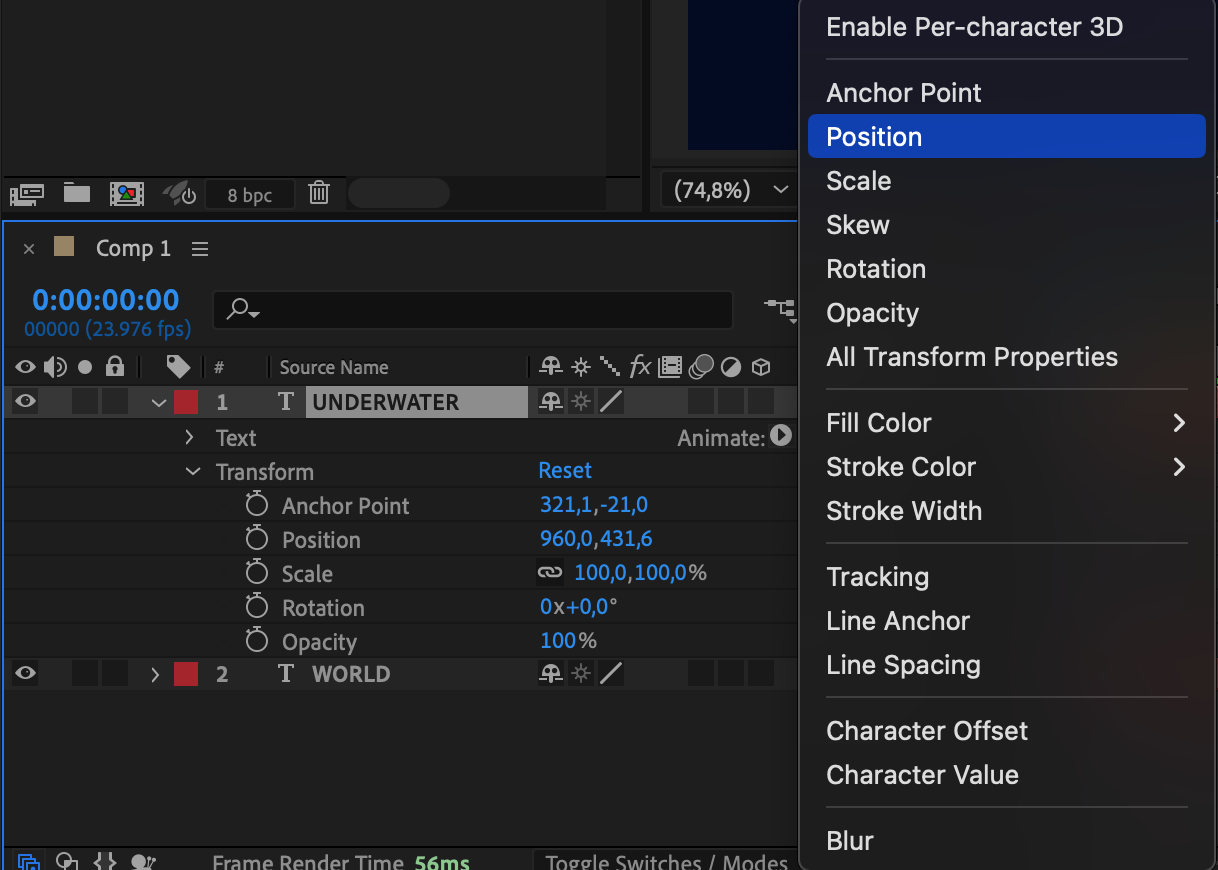 Step 5: Add an Opacity Property
Next to Animator 1, click the “Add” button. From the dropdown menu, go to Property > Opacity. This will enable you to animate both the position and opacity together for a smoother effect.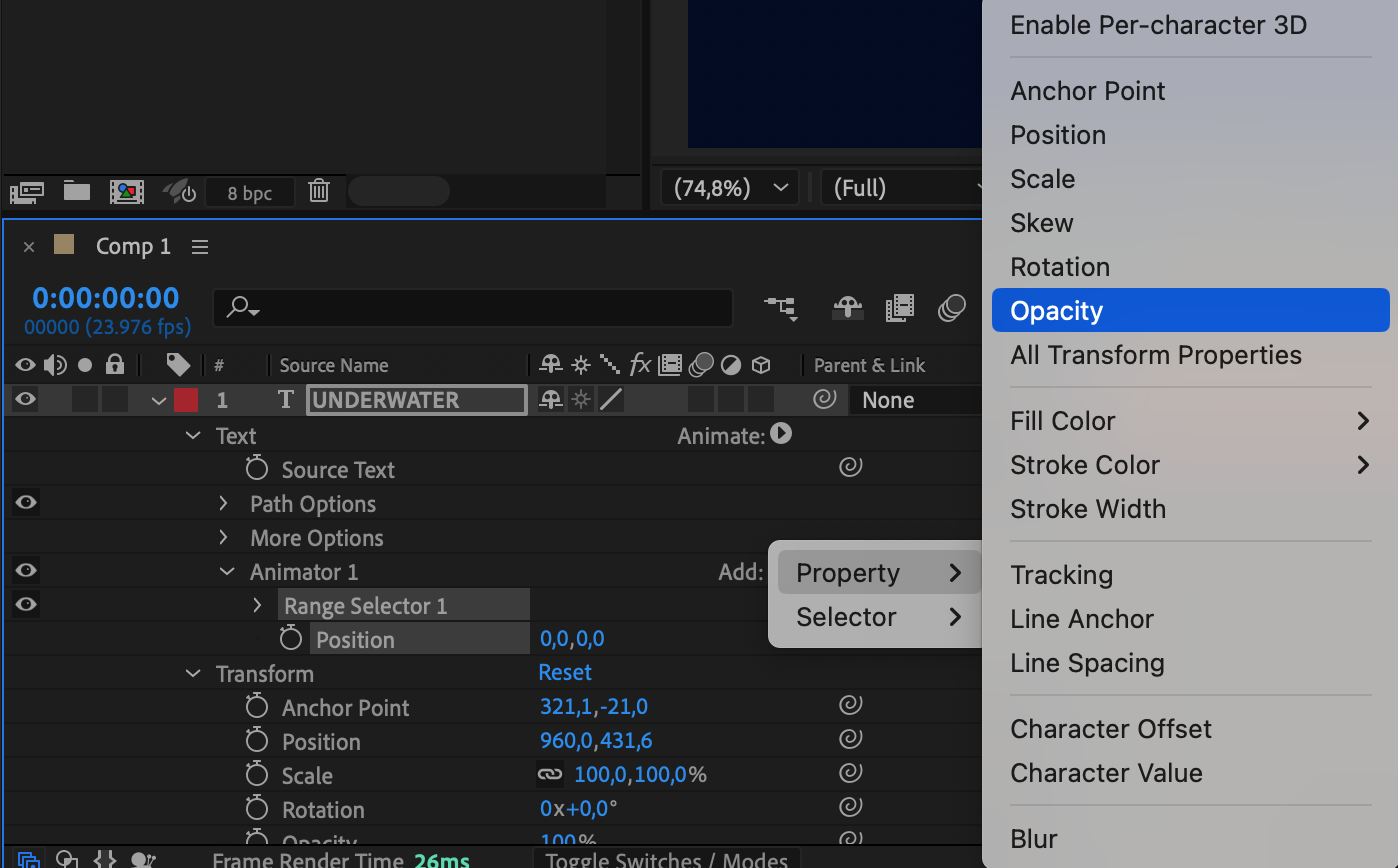 Step 6: Animate Position and Opacity
Set Position to (0,100) so the text starts slightly lower than its original position.
Set Opacity to 0 so it starts invisible.
Move the CTI (Current Time Indicator) to the beginning of the timeline and click the stopwatch next to Start.
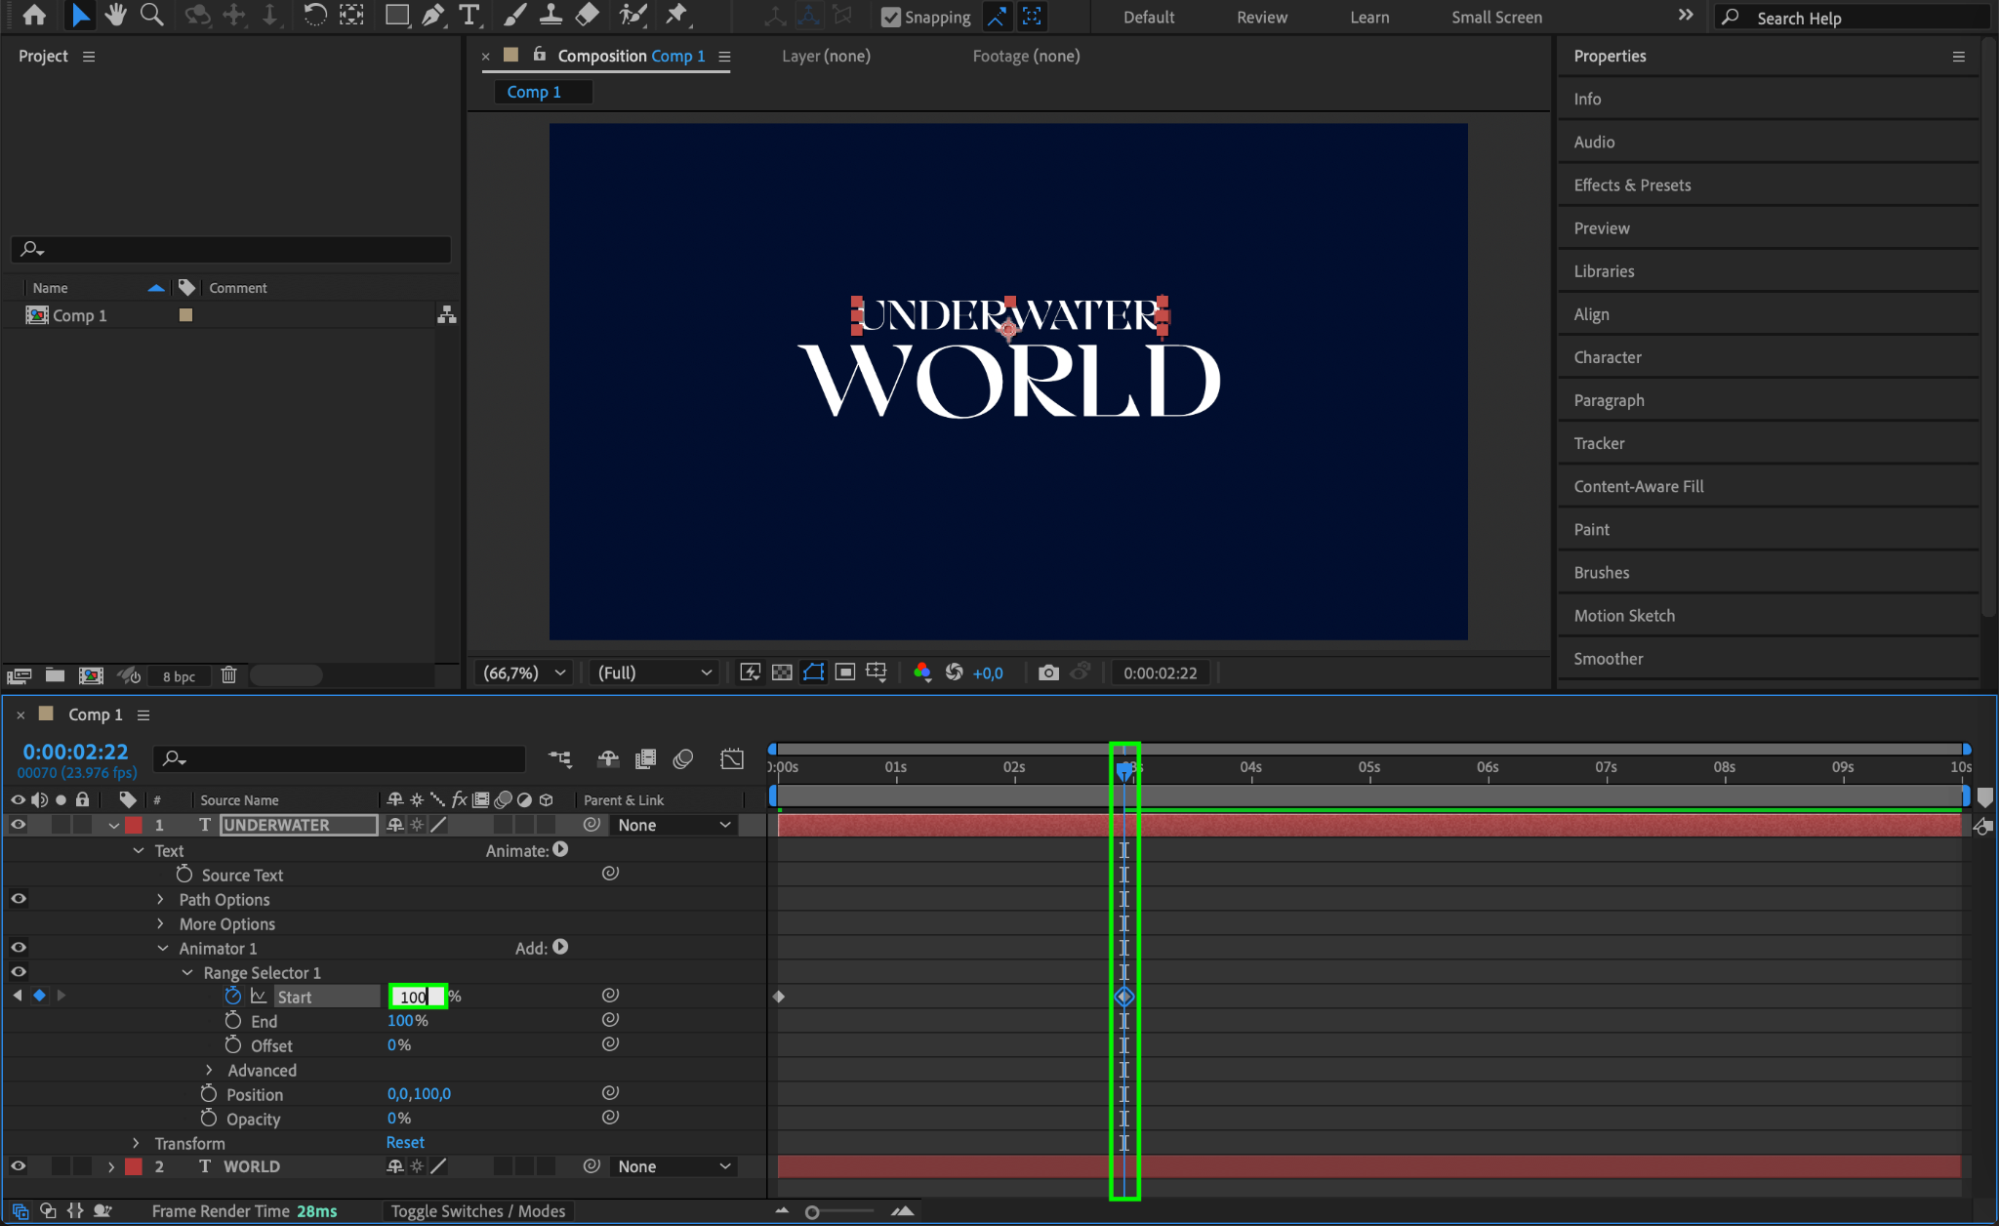
Move the CTI forward and set the Start value to 100. This will create a smooth text appearance animation.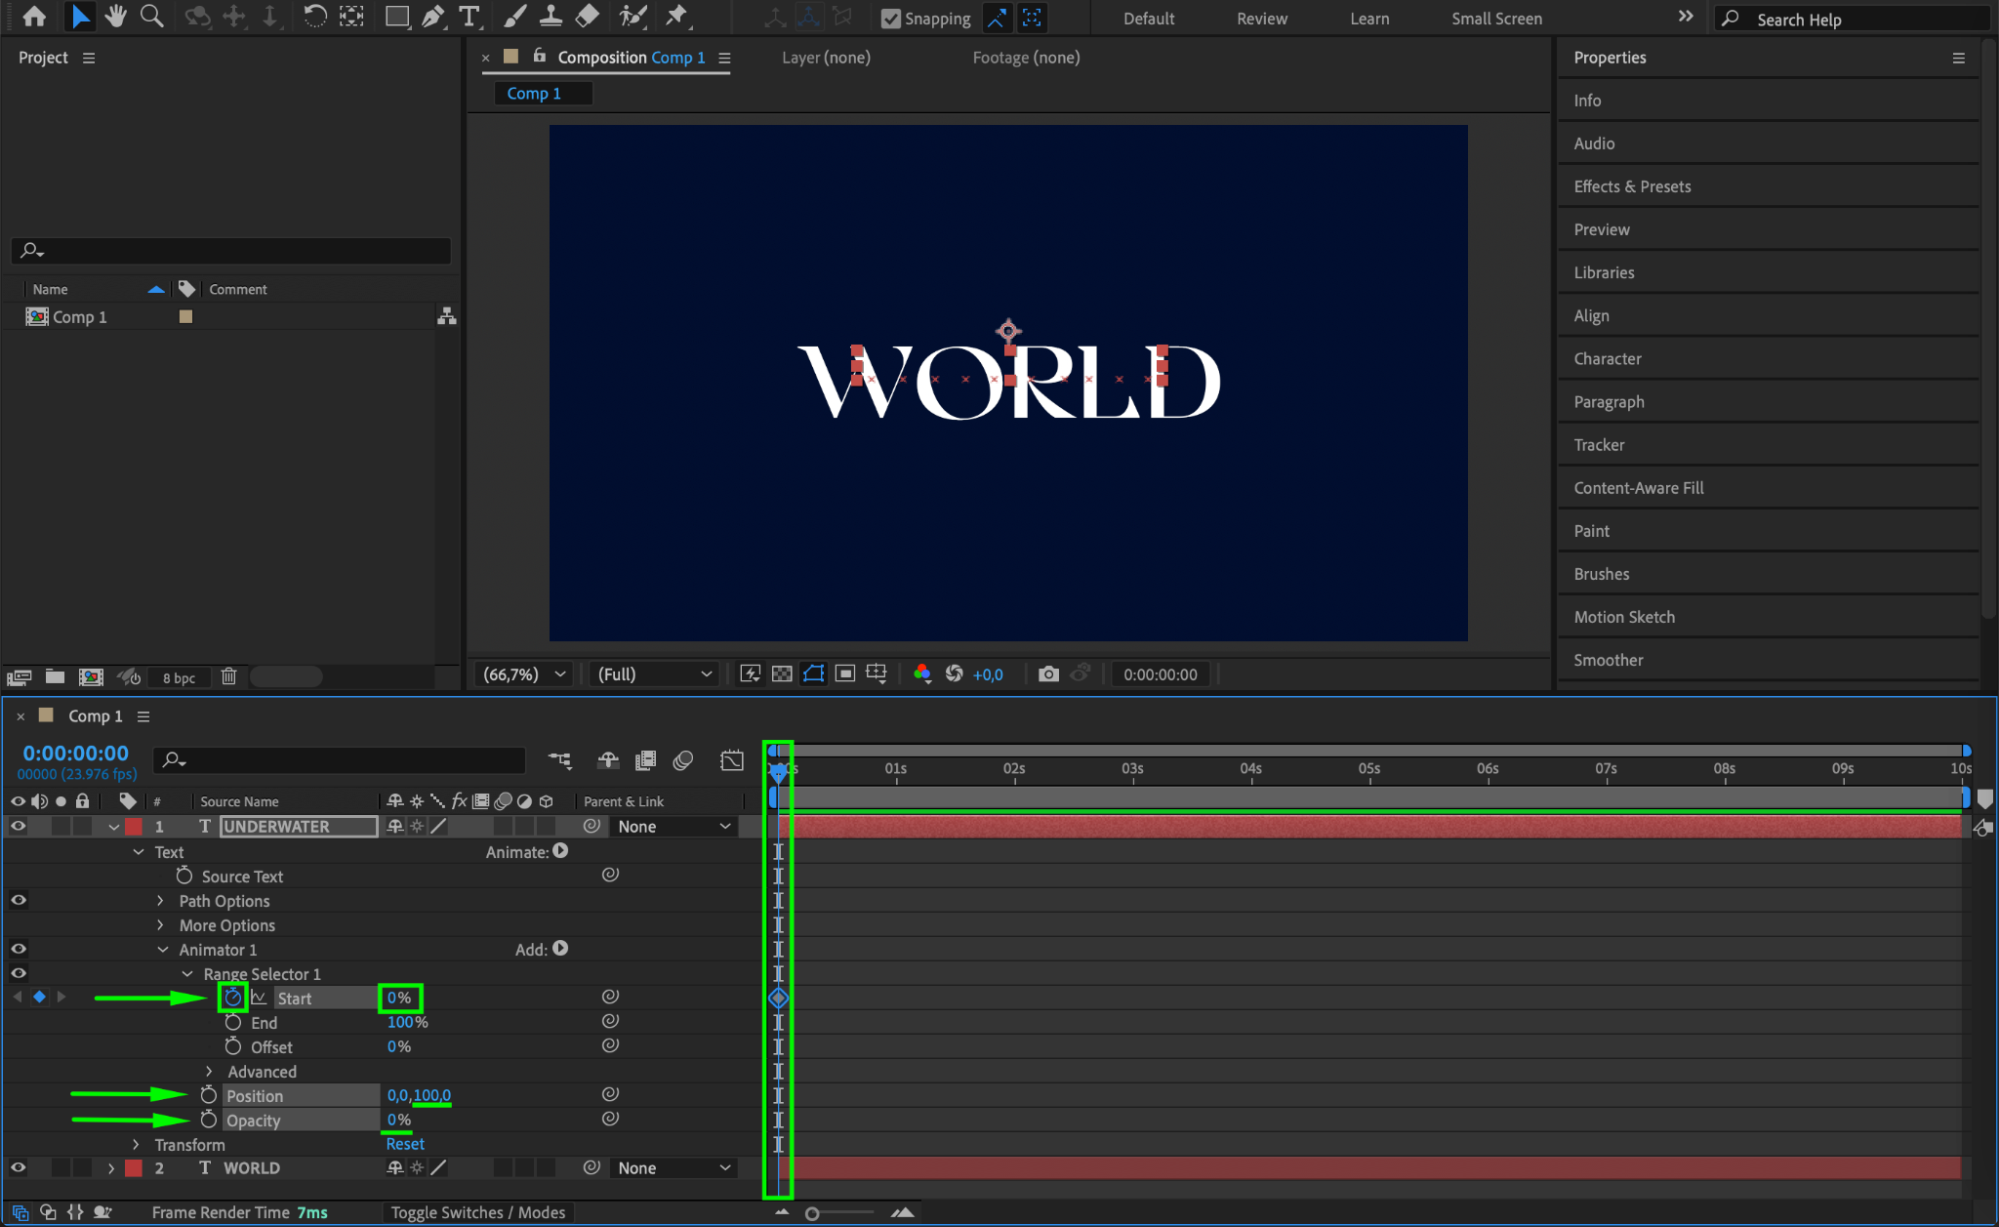
 Step 7: Copy the Animation Properties
Locate Animator 1 inside the text layer properties. Go to Edit and select Copy to duplicate this animation setup.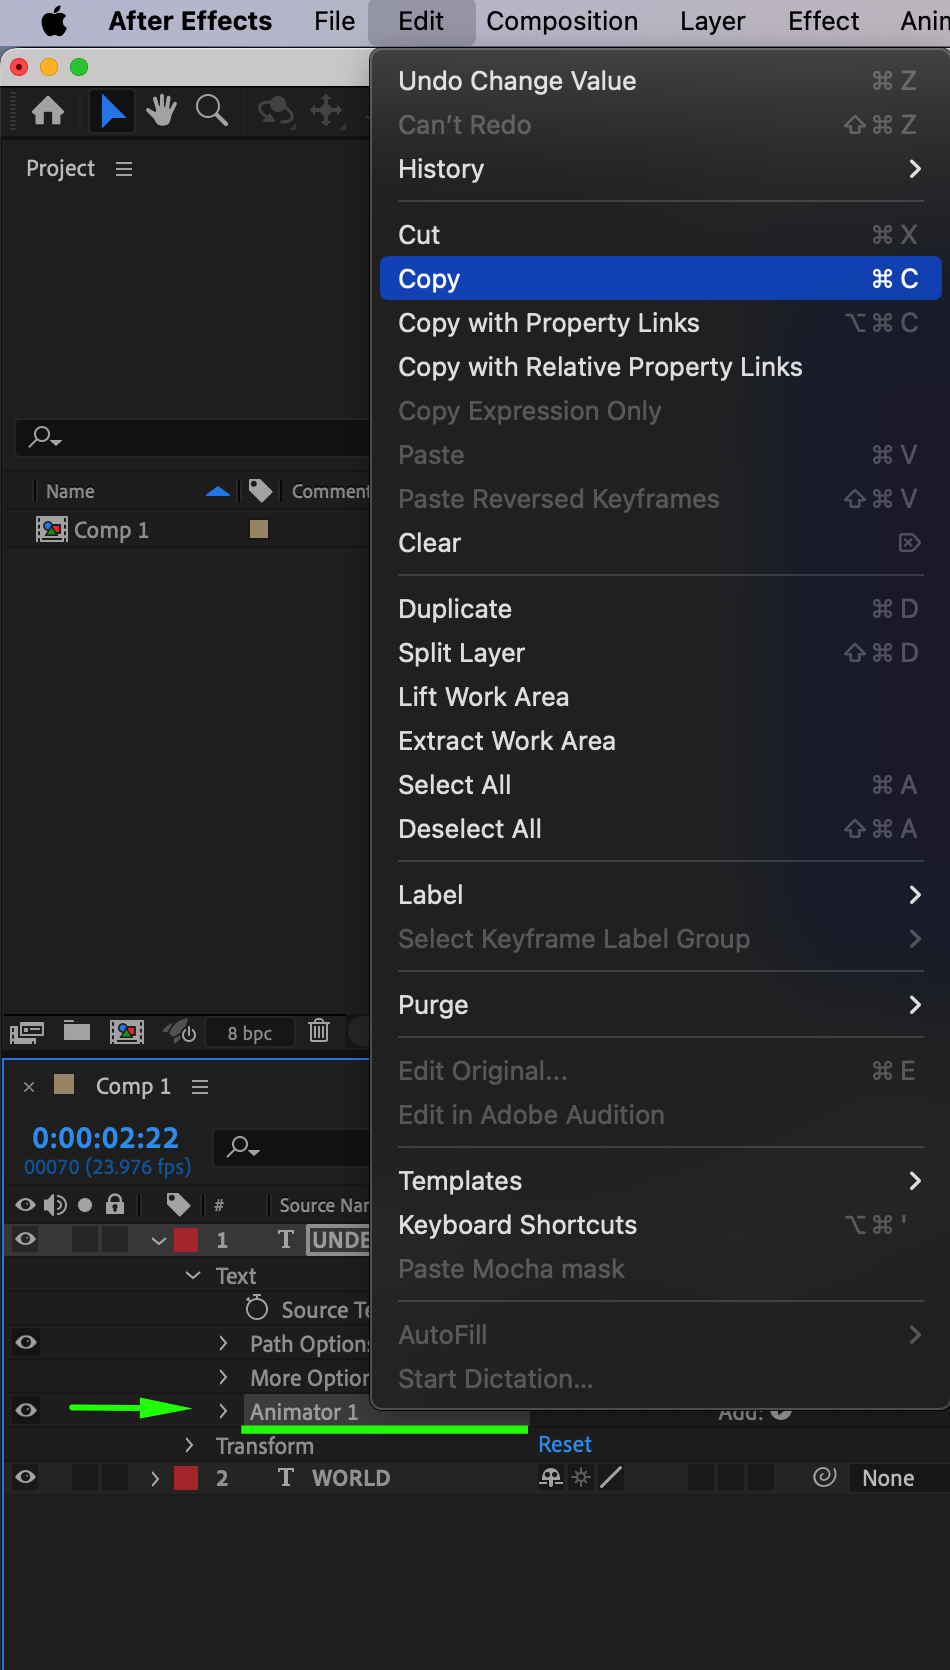 Step 8: Apply the Animation to the Second Text Layer
Select the second text layer and Paste the copied animation. Move the layer slightly forward in the timeline so that the second text appears after the first one.

 Step 9: Add a Null Object
Go to Layer > New > Null Object to create a null layer. This will allow you to control both text layers together. Step 10: Parent the Text Layers to the Null Object
Select both text layers and make them child layers of the null object by using the Parent & Link dropdown or Pick Whip tool. This will allow you to animate both text layers simultaneously.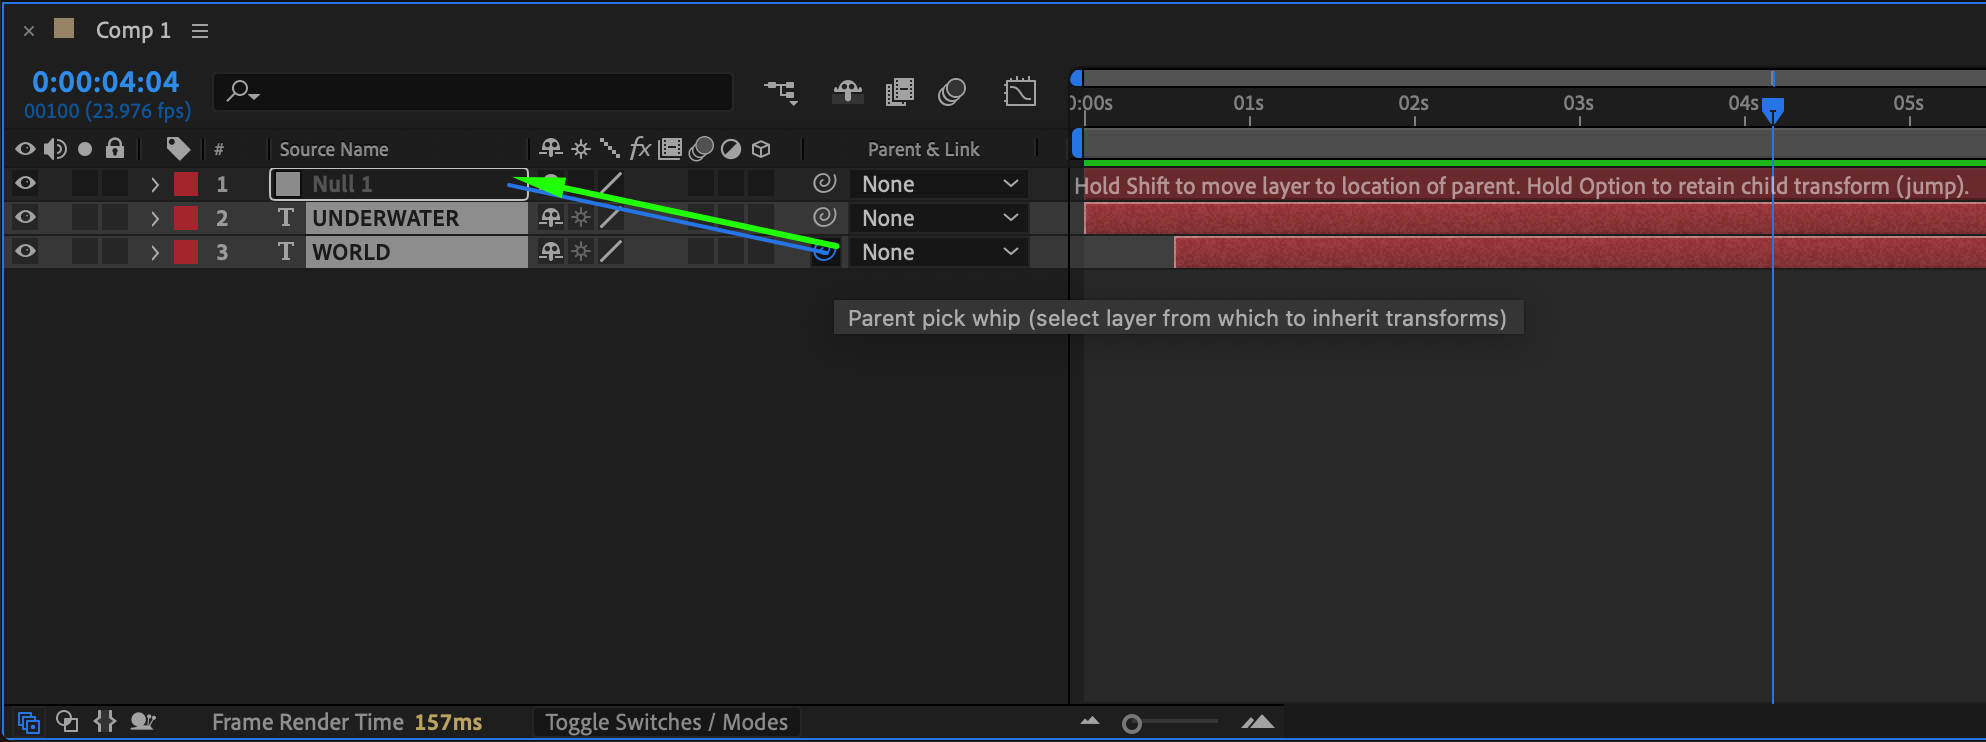 Step 11: Animate the Scale of the Null Object
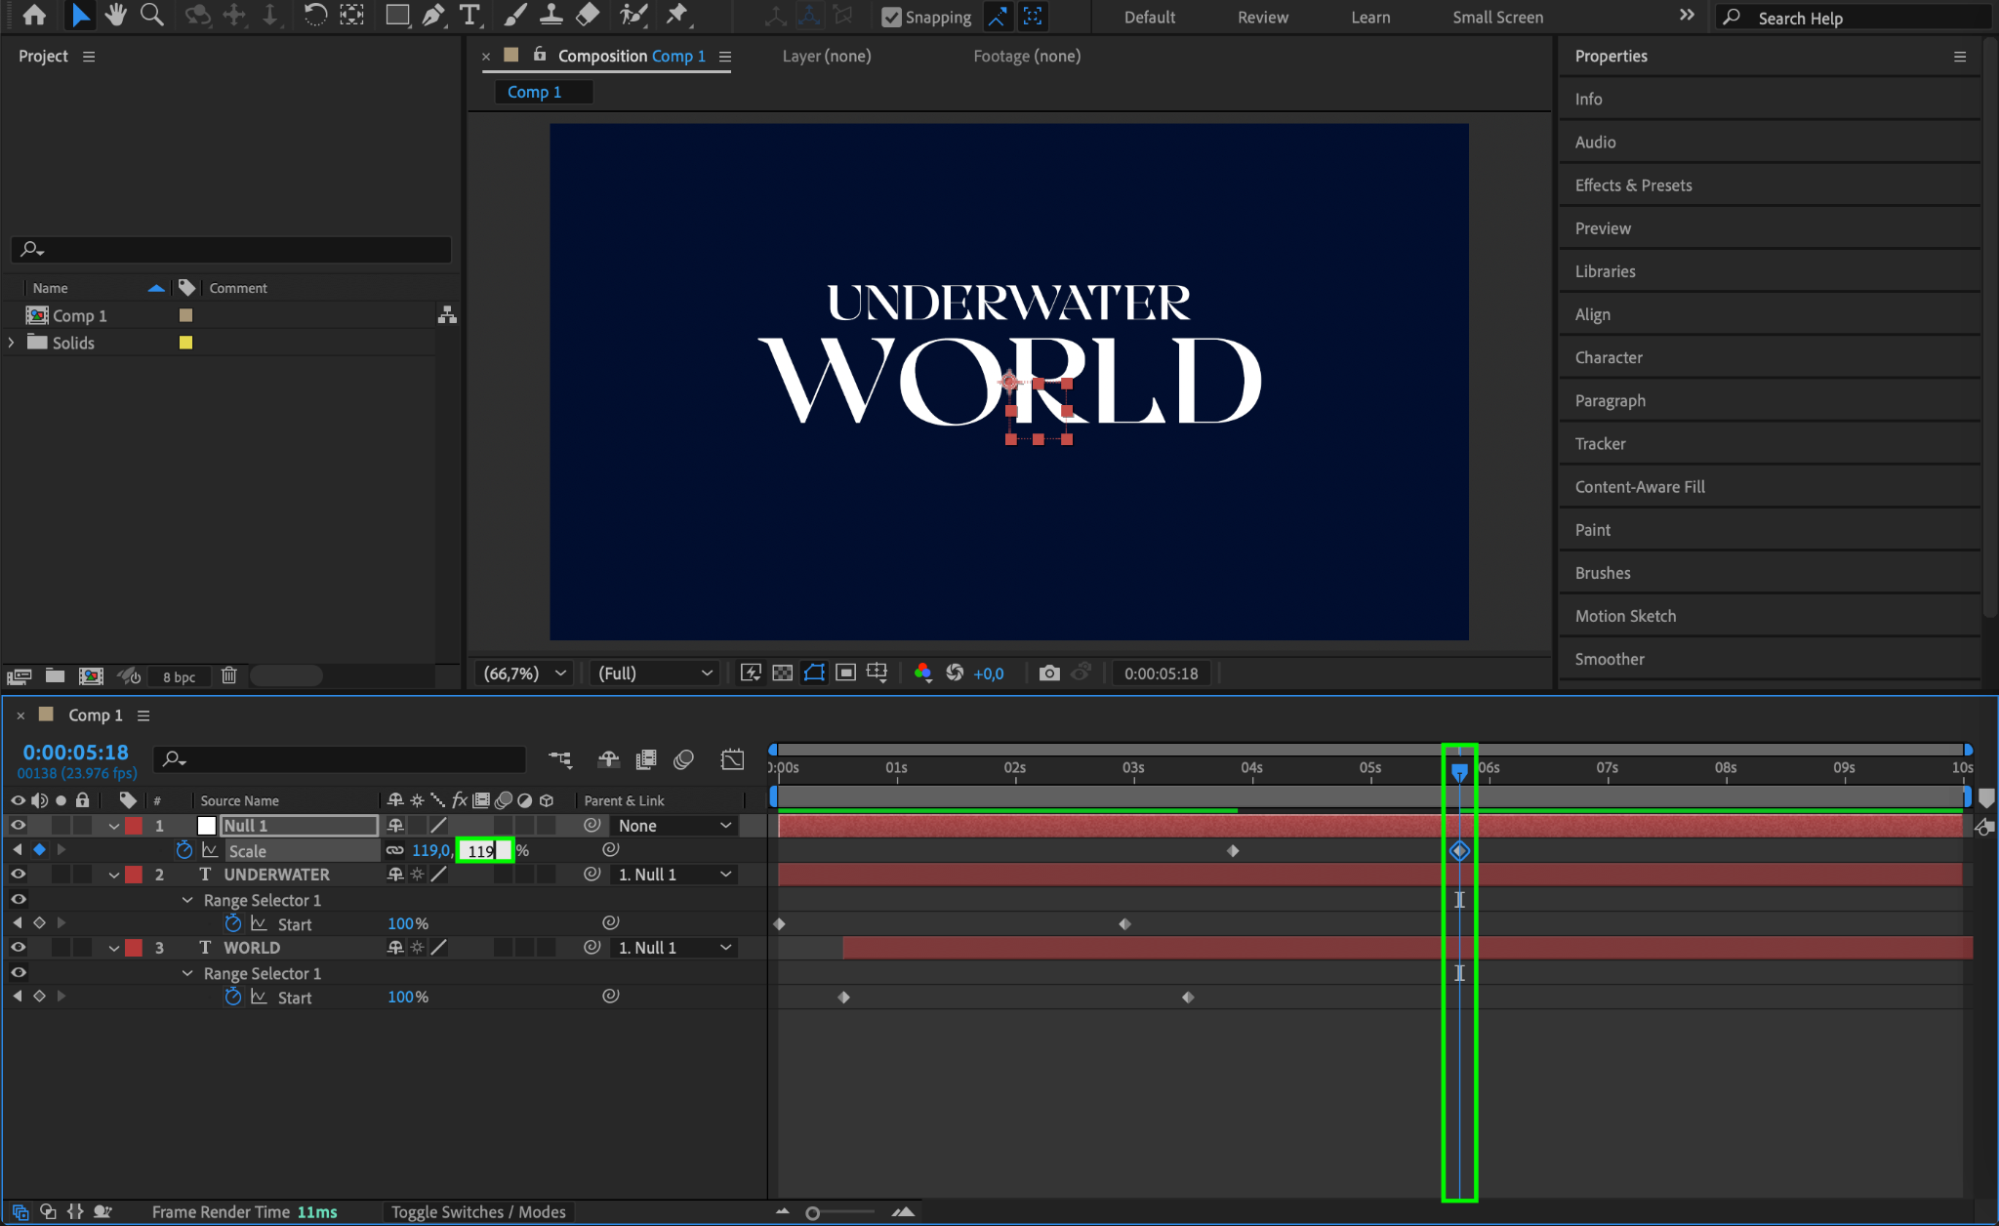
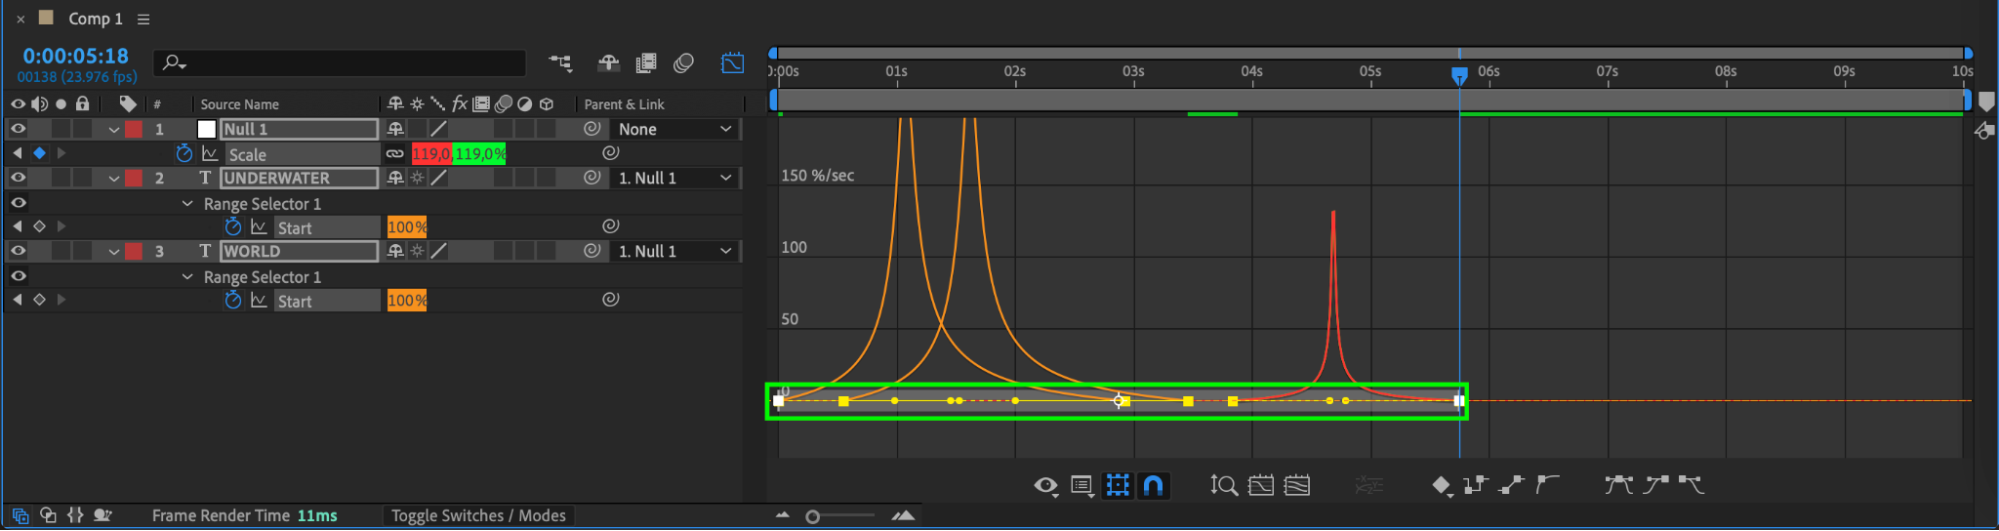
Expand the Transform properties of the null object and set keyframes for Scale. Start with a slightly smaller scale and gradually increase it to create a subtle zoom effect.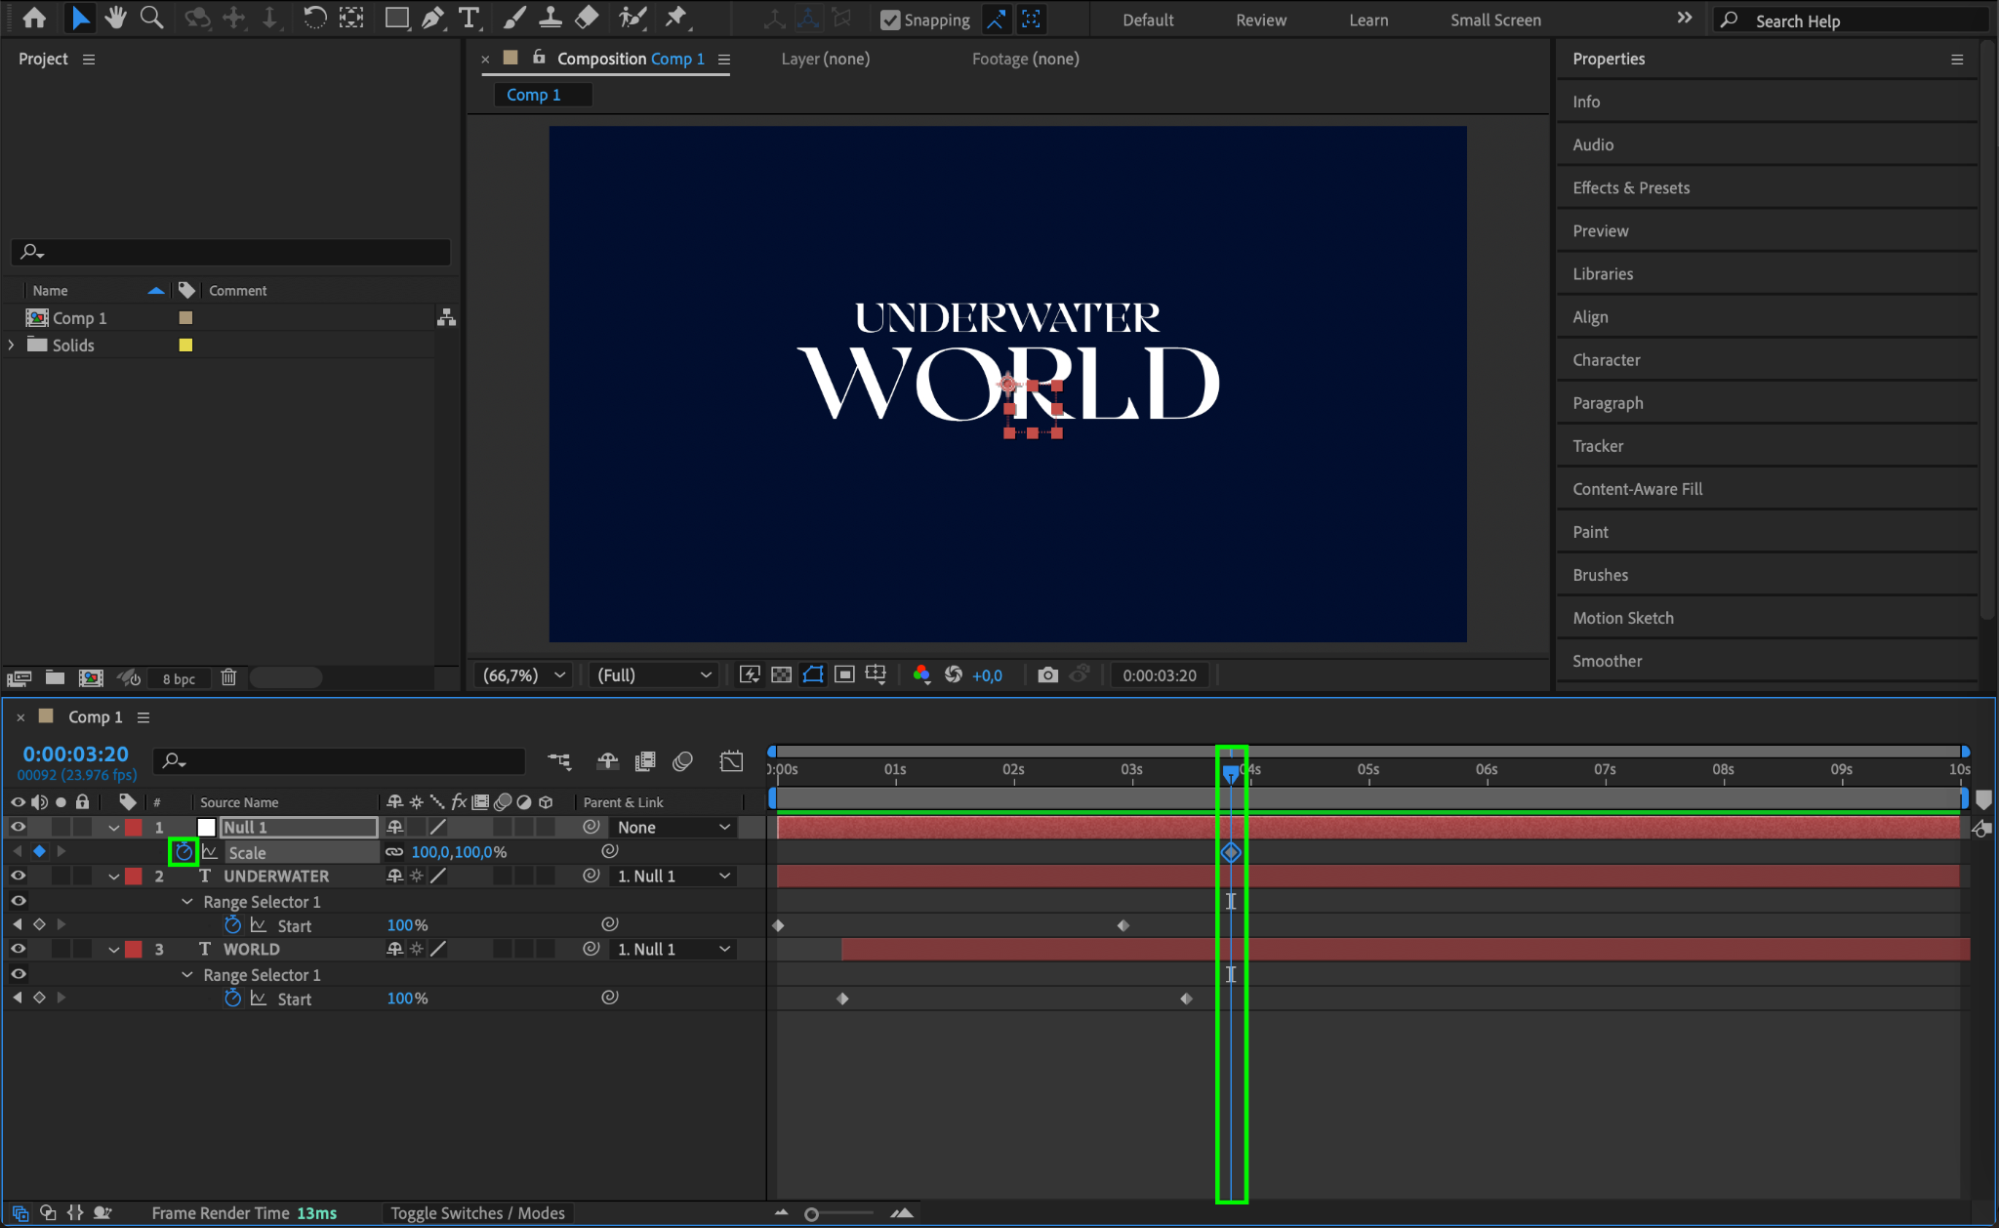
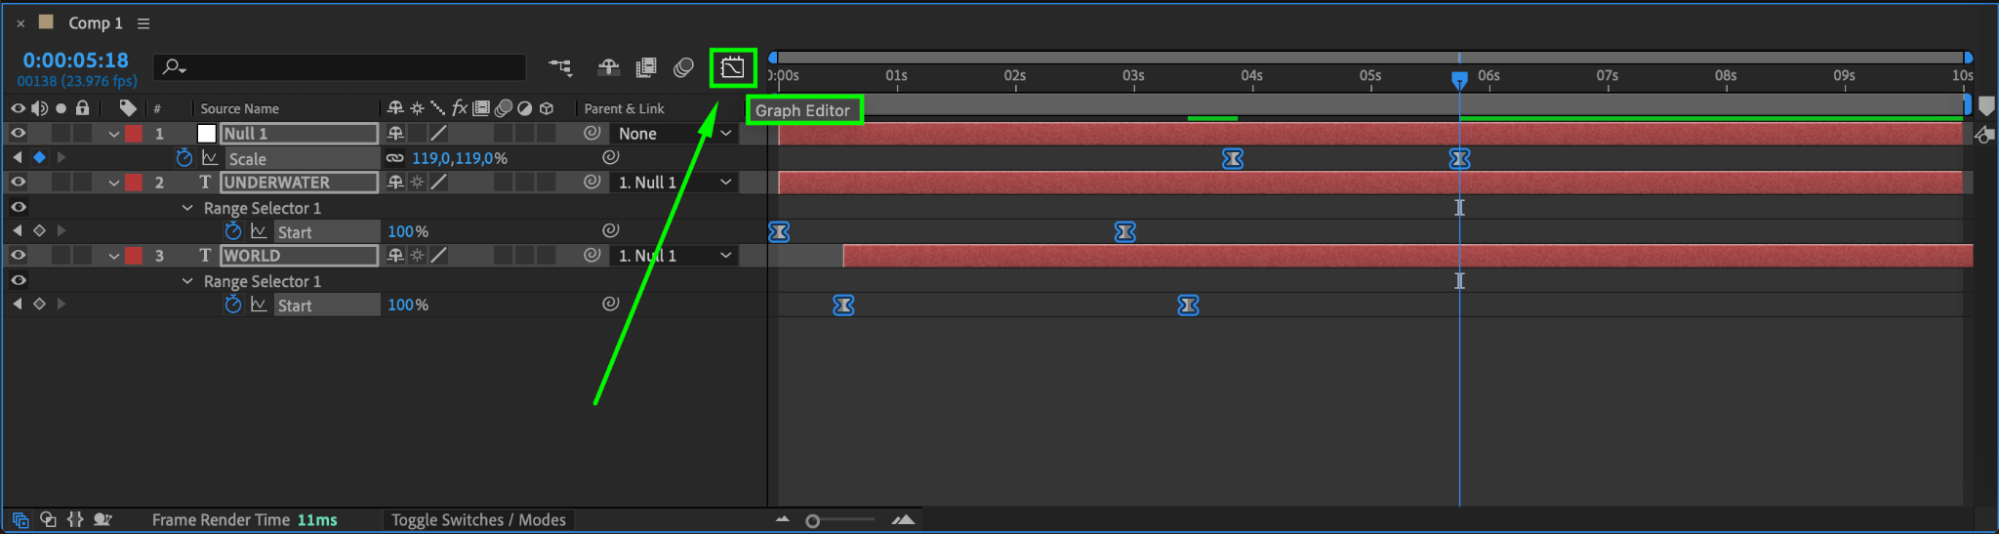
 Step 12: Apply Easy Ease and Graph Editor Adjustments
Select all keyframes, right-click, and choose Easy Ease. Then, open the Graph Editor and adjust the curves to create smoother animation transitions.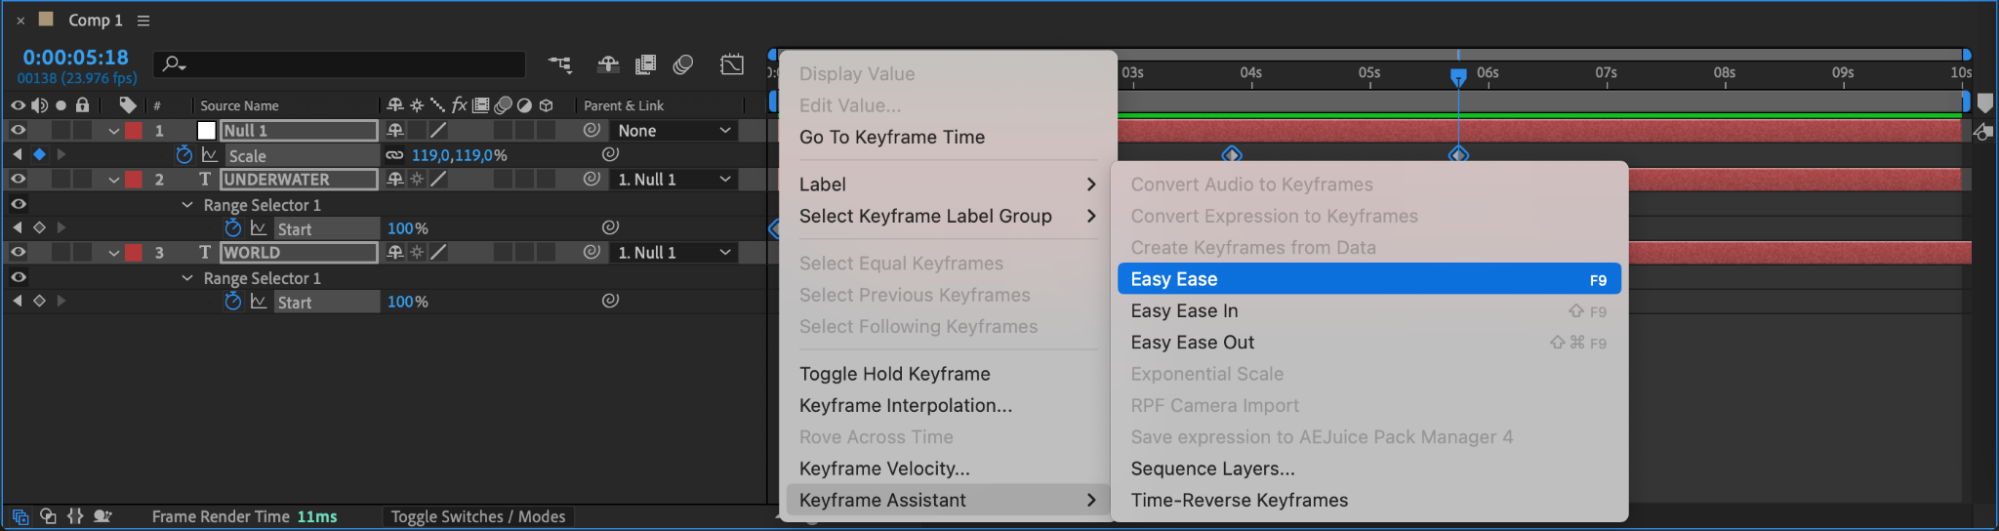
 Step 13: Preview the Animation
Press Spacebar to preview your animation. Adjust the timing if necessary to make the movement feel natural.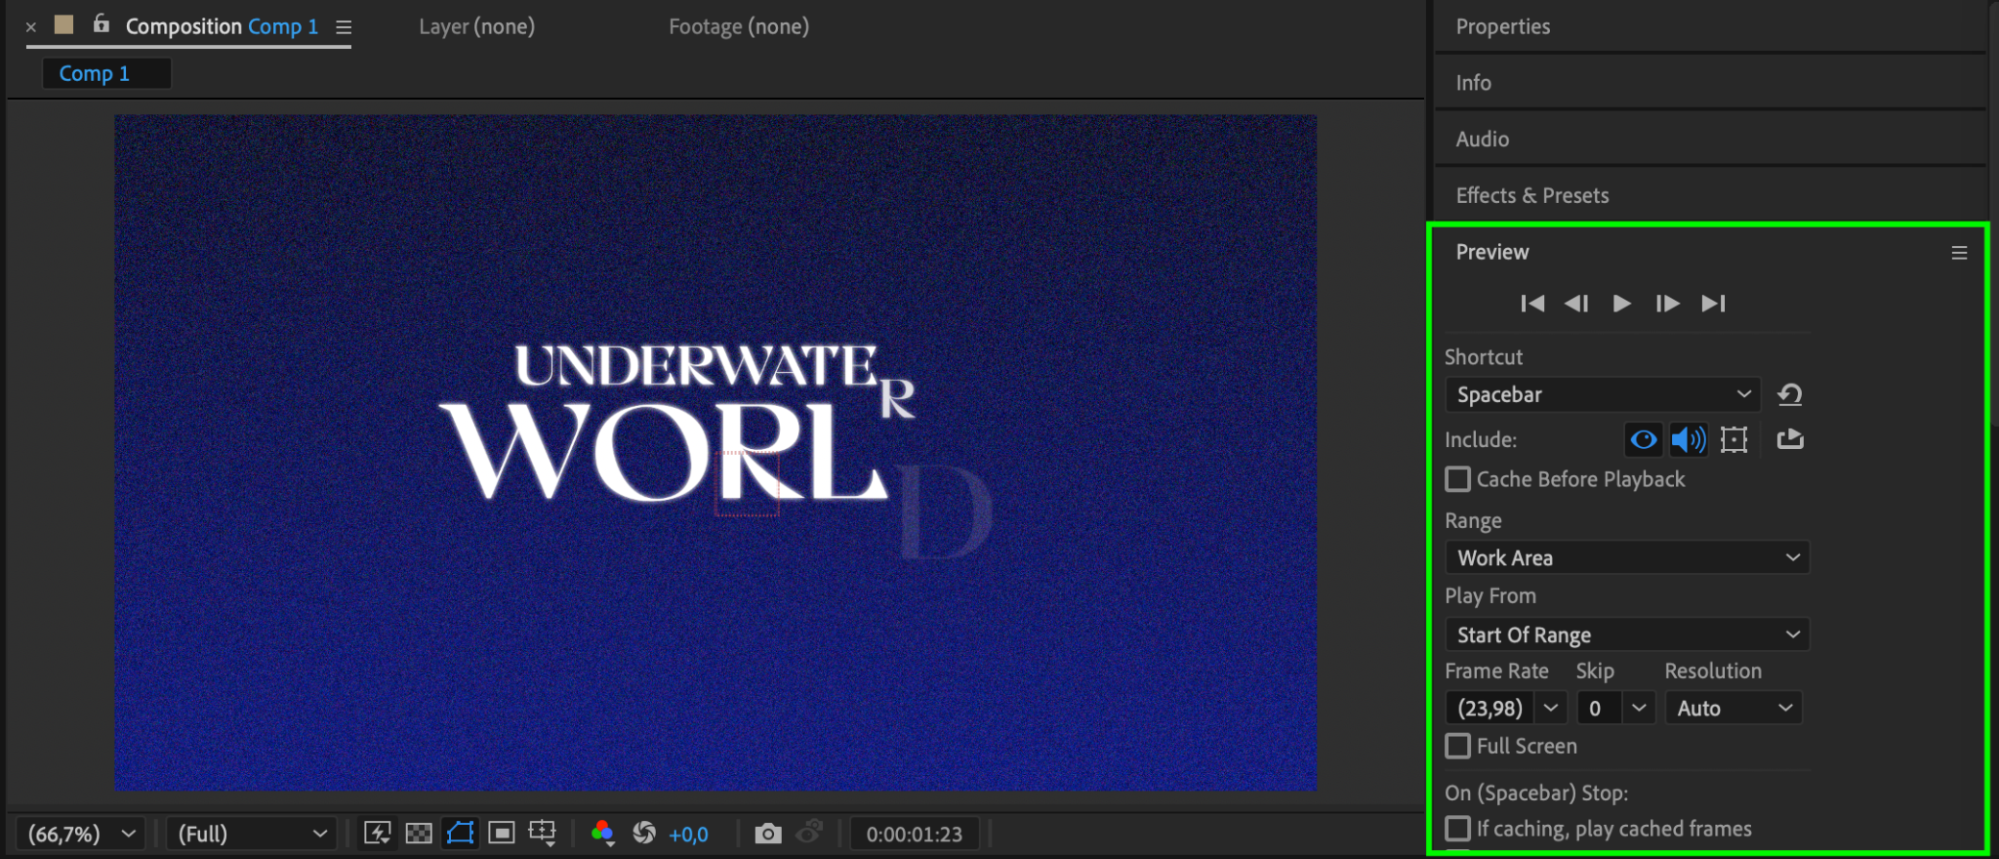 Step 14: Render the Final Video
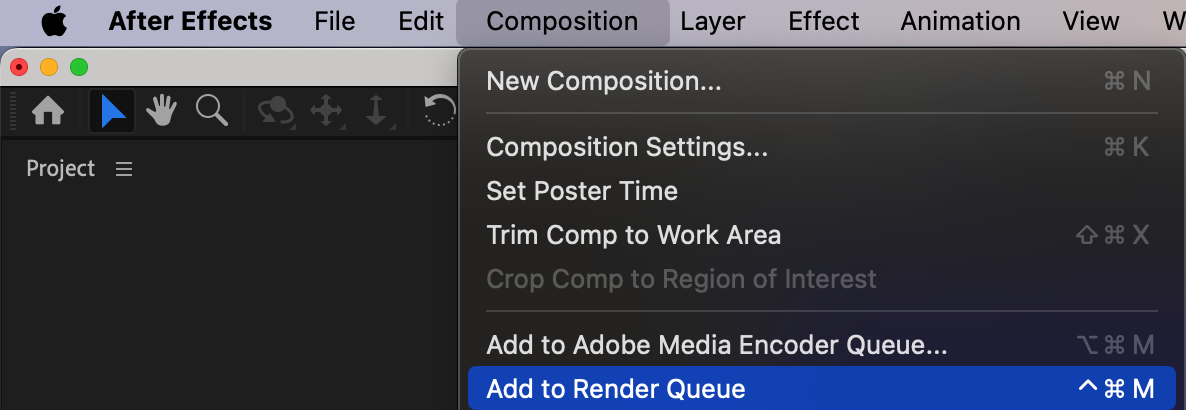
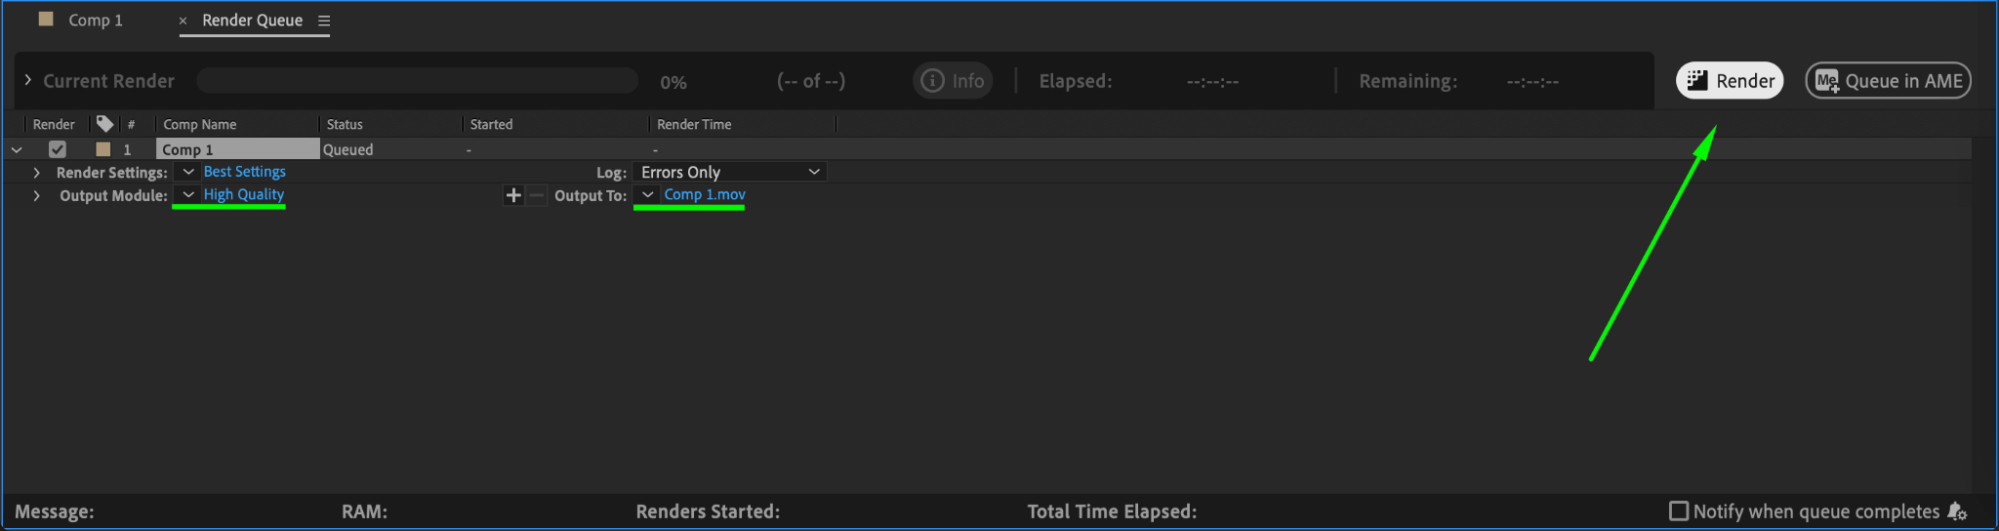
Once satisfied with the animation, go to Composition > Add to Render Queue and export your video with the desired settings.
 Conclusion
You have successfully created a professional typography animation in After Effects! By combining position, opacity, and scaling animations, you can produce visually appealing text effects for any project. Experiment with different speeds, fonts, and effects to customize the look further.
Our Bestsellers


