Step-by-Step Guide to Creating a VHS Effect in After Effects
Introduction to the VHS Effect in After Effects
The VHS effect gives video footage a nostalgic, retro feel by replicating the look of old VHS tapes with chromatic aberration, grain, and distortion. This guide will walk you through creating a VHS effect in After Effects with detailed steps for each component of the effect.
Step 1: Import Your Video Clip
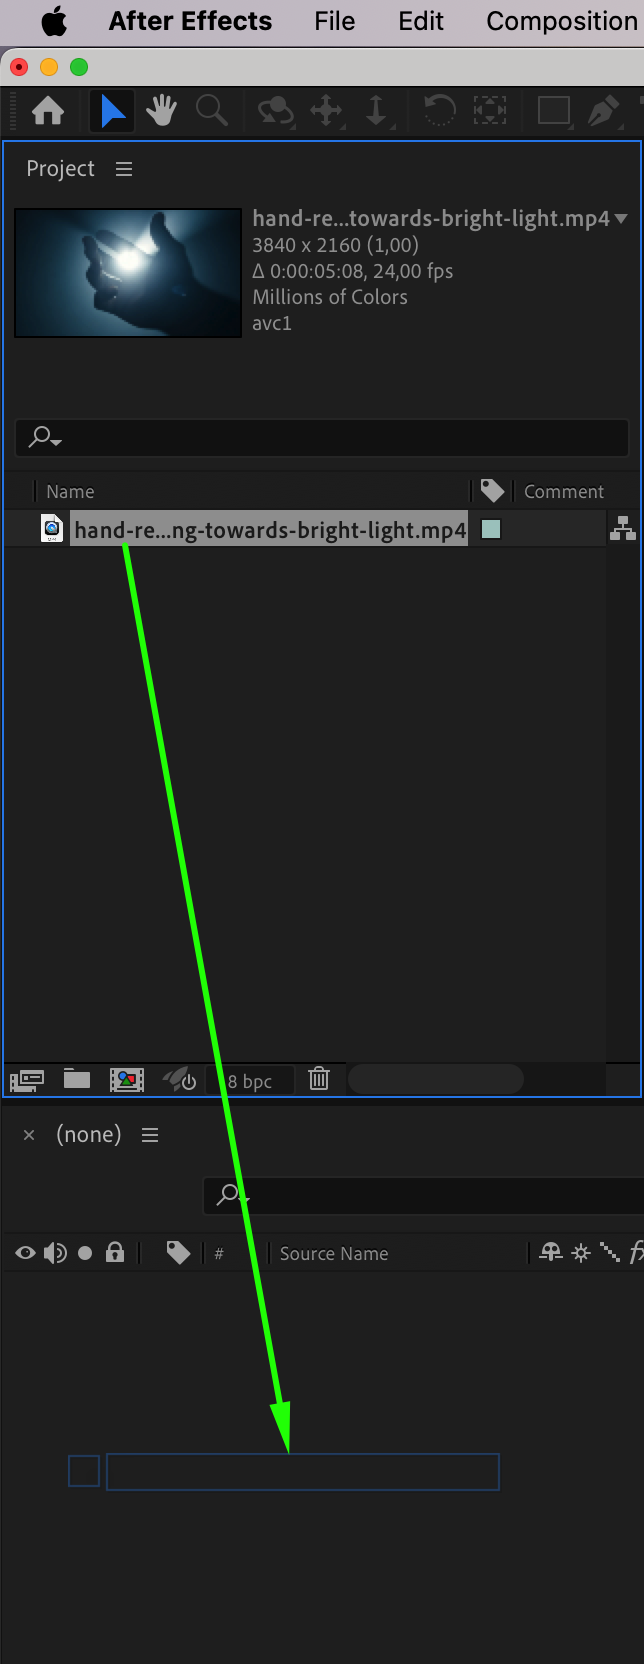
To start, go to File > Import > File and select the video file you want to apply the VHS effect to. Once imported, drag the clip onto the timeline to begin.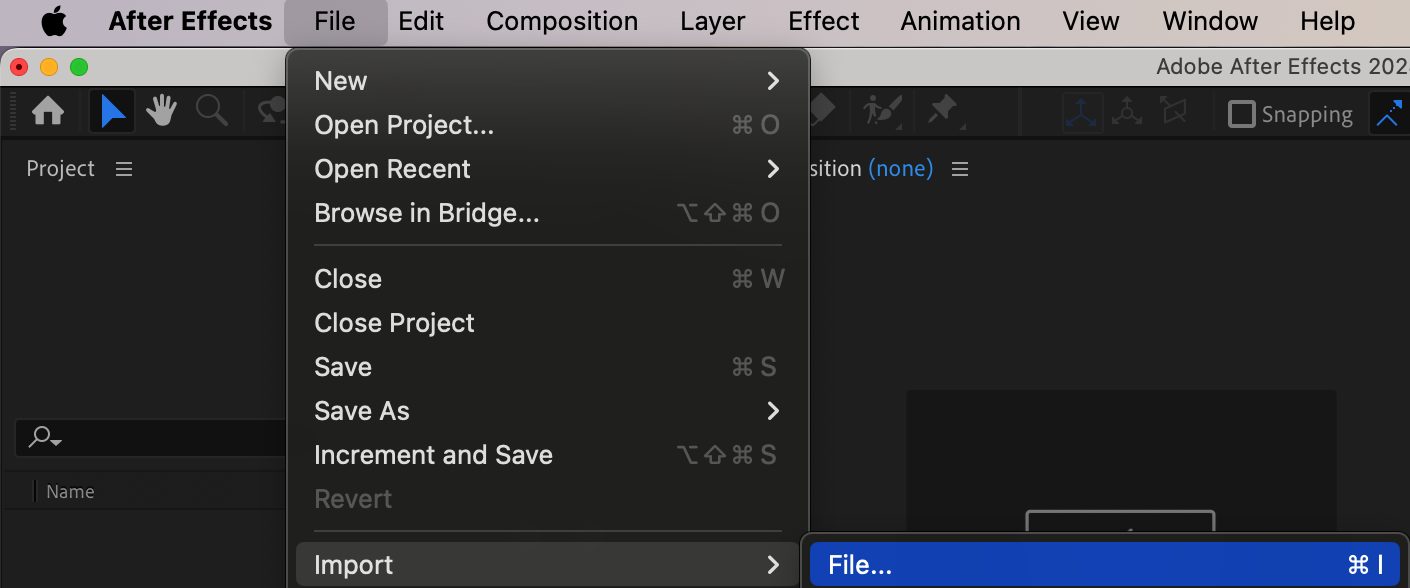
 Step 2: Duplicate the Layer
Get 10% off when you subscribe to our newsletter

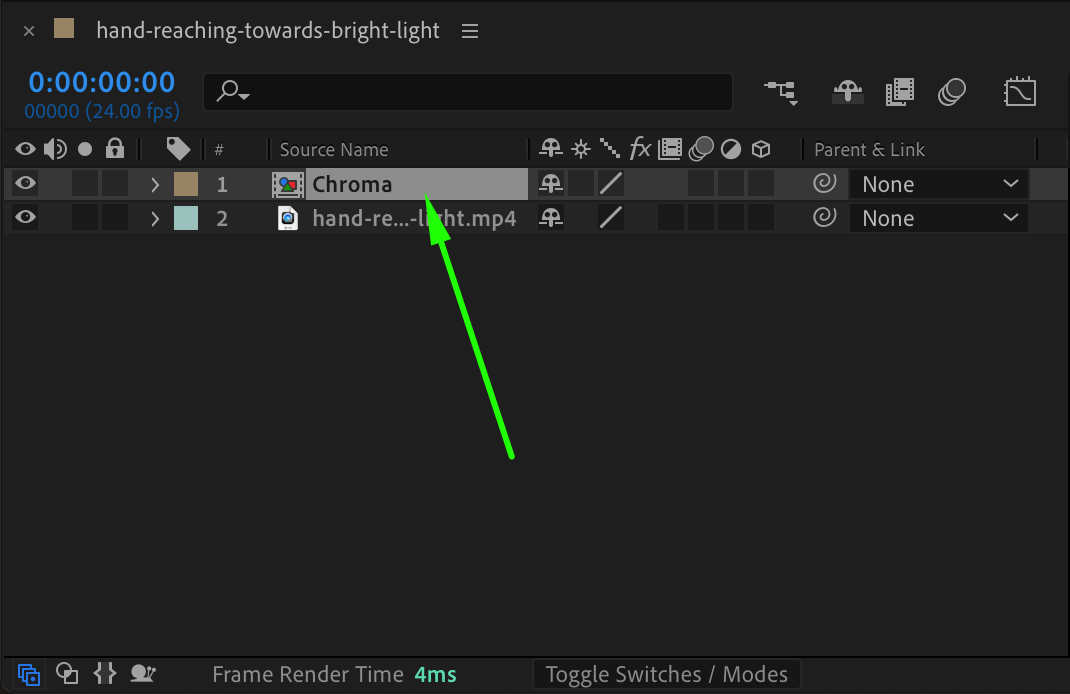
To create the chromatic distortion for the VHS effect, go to the Edit menu and select Duplicate. This will create a copy of your video layer, allowing you to apply effects separately on each layer for the classic VHS color fringing effect.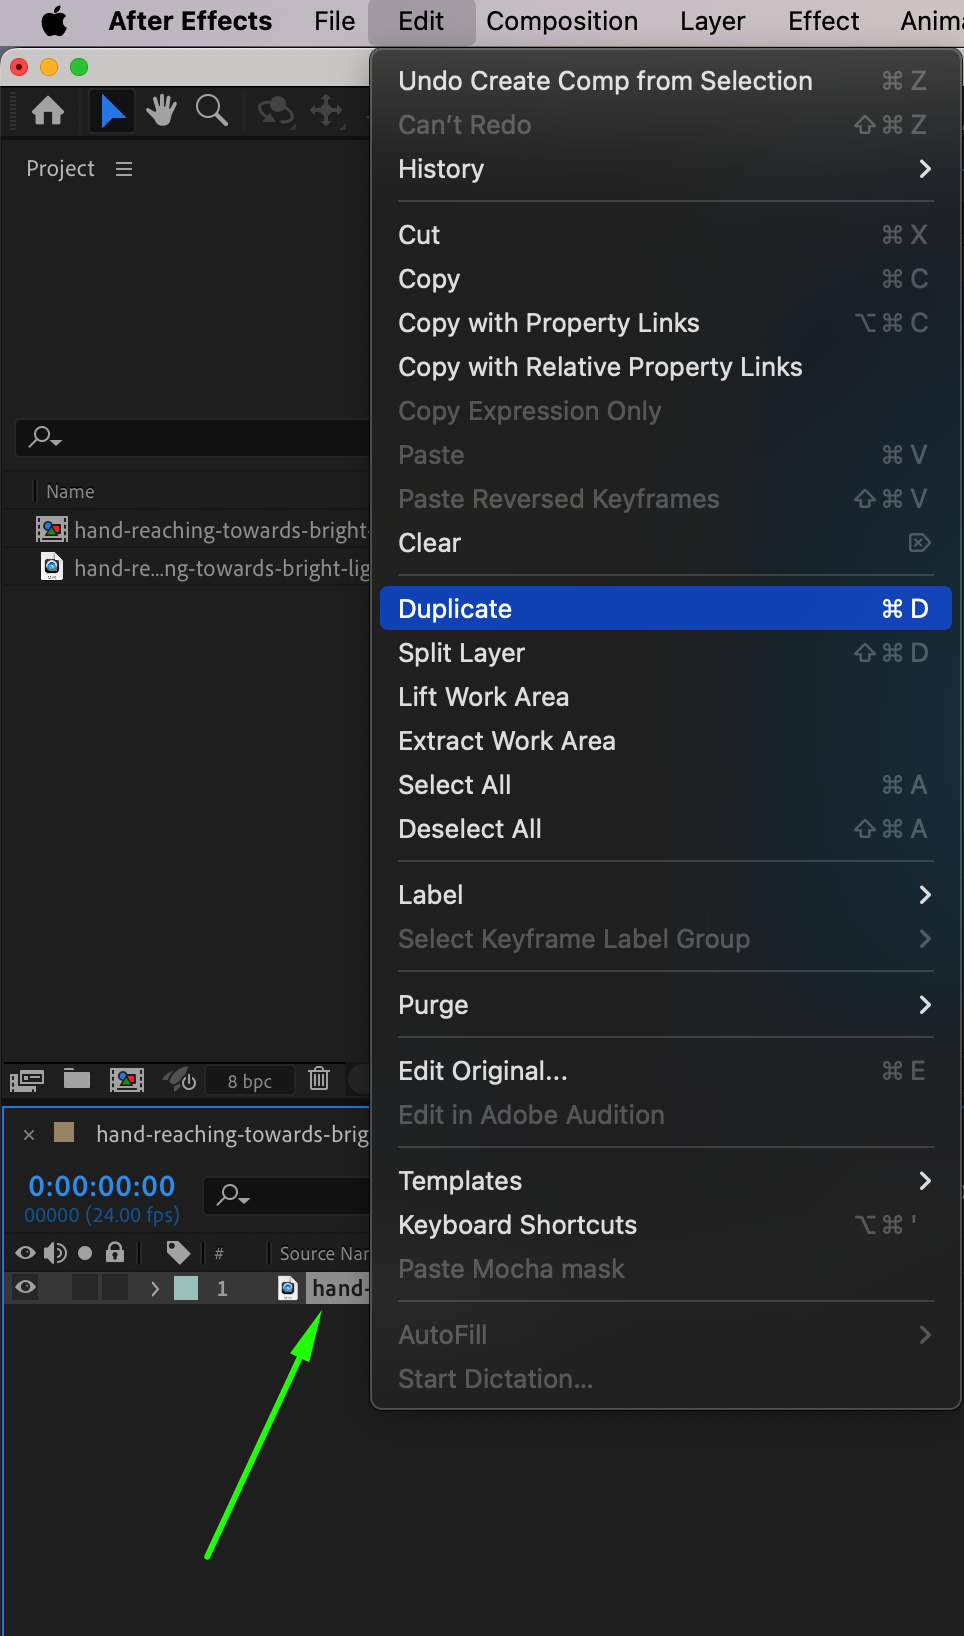 Step 3: Pre-compose the Duplicate Layer
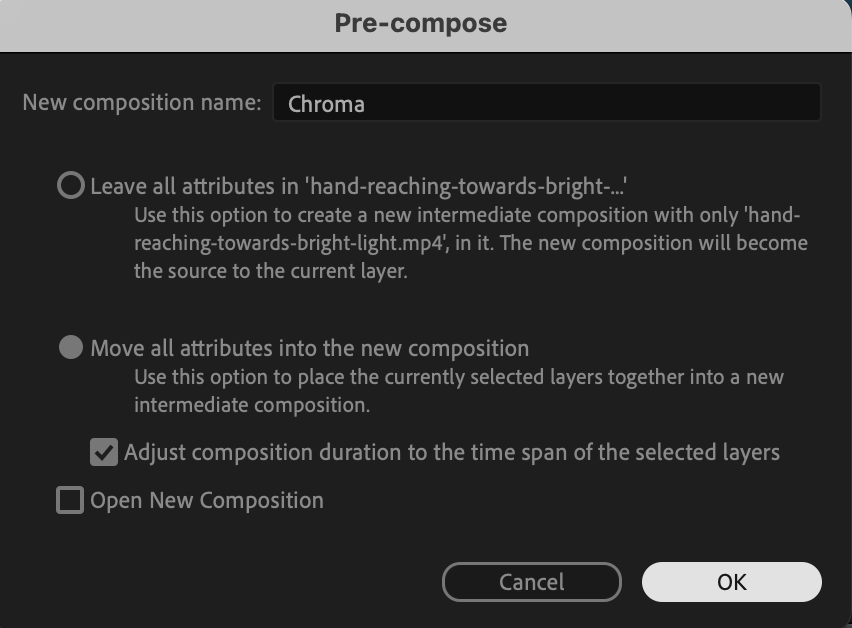
Right-click on the duplicated layer, choose Pre-compose, and name it “Chroma.” Double-click on this pre-comp to open it, where we’ll apply adjustments to create the chromatic effect.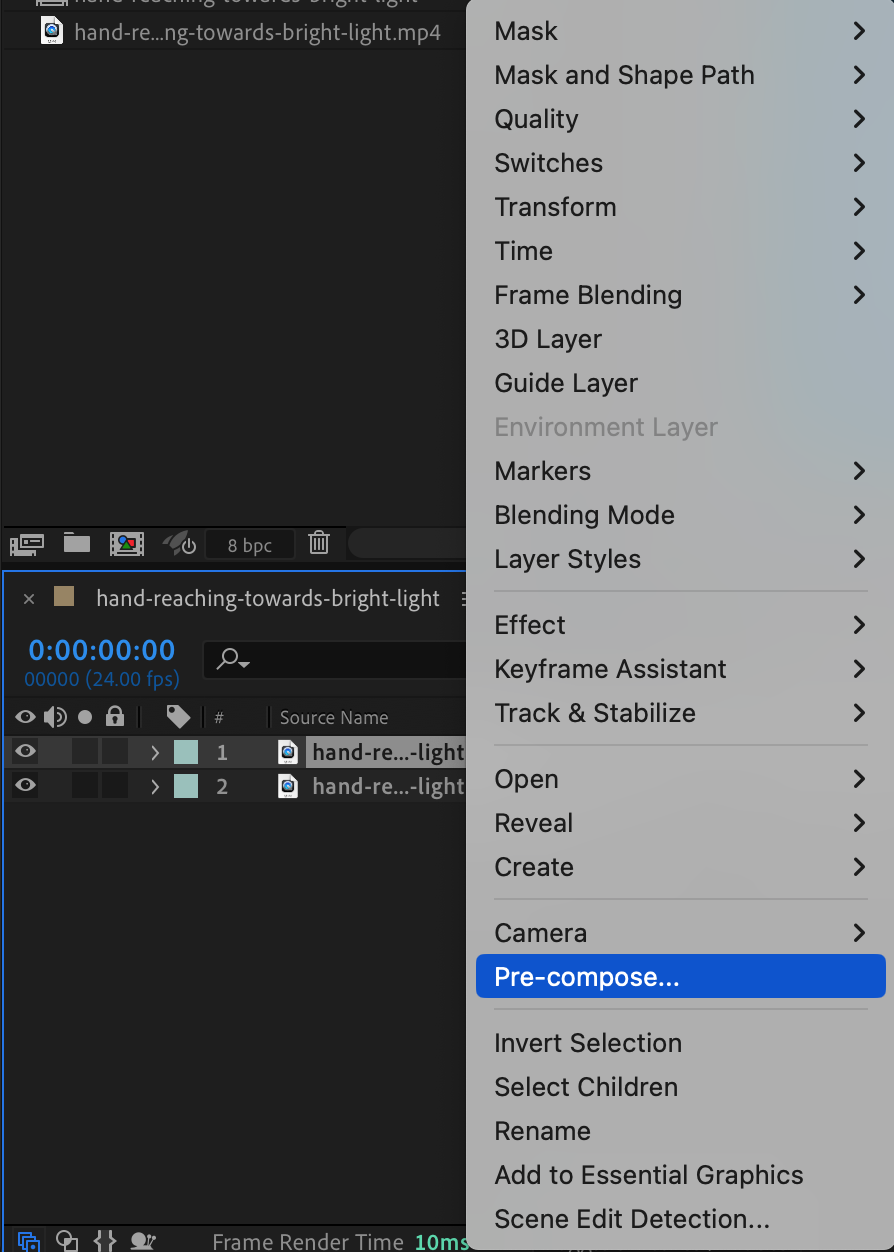
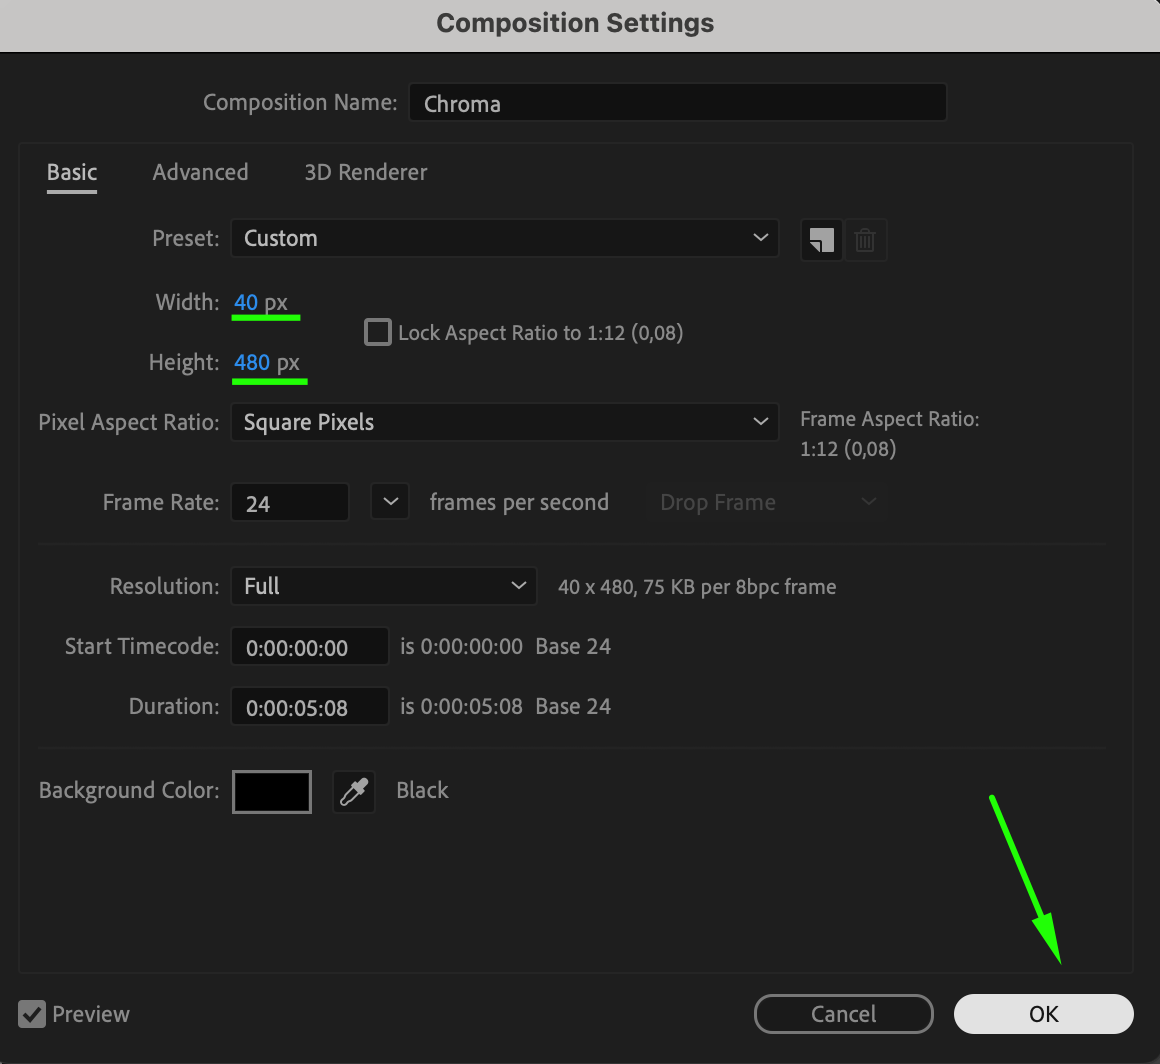
 Step 4: Adjust Composition Settings for Chroma
Go to Composition > Composition Settings, set the Width to 40 and Height to 480. This will make the layer narrower, which is essential for achieving the chromatic aberration.
 Step 5: Resize the Video to Fit
With the Chroma layer open, press “S” to open the Scale settings. Click the link icon to unlock proportional scaling, then adjust the width and height to fit the new composition dimensions.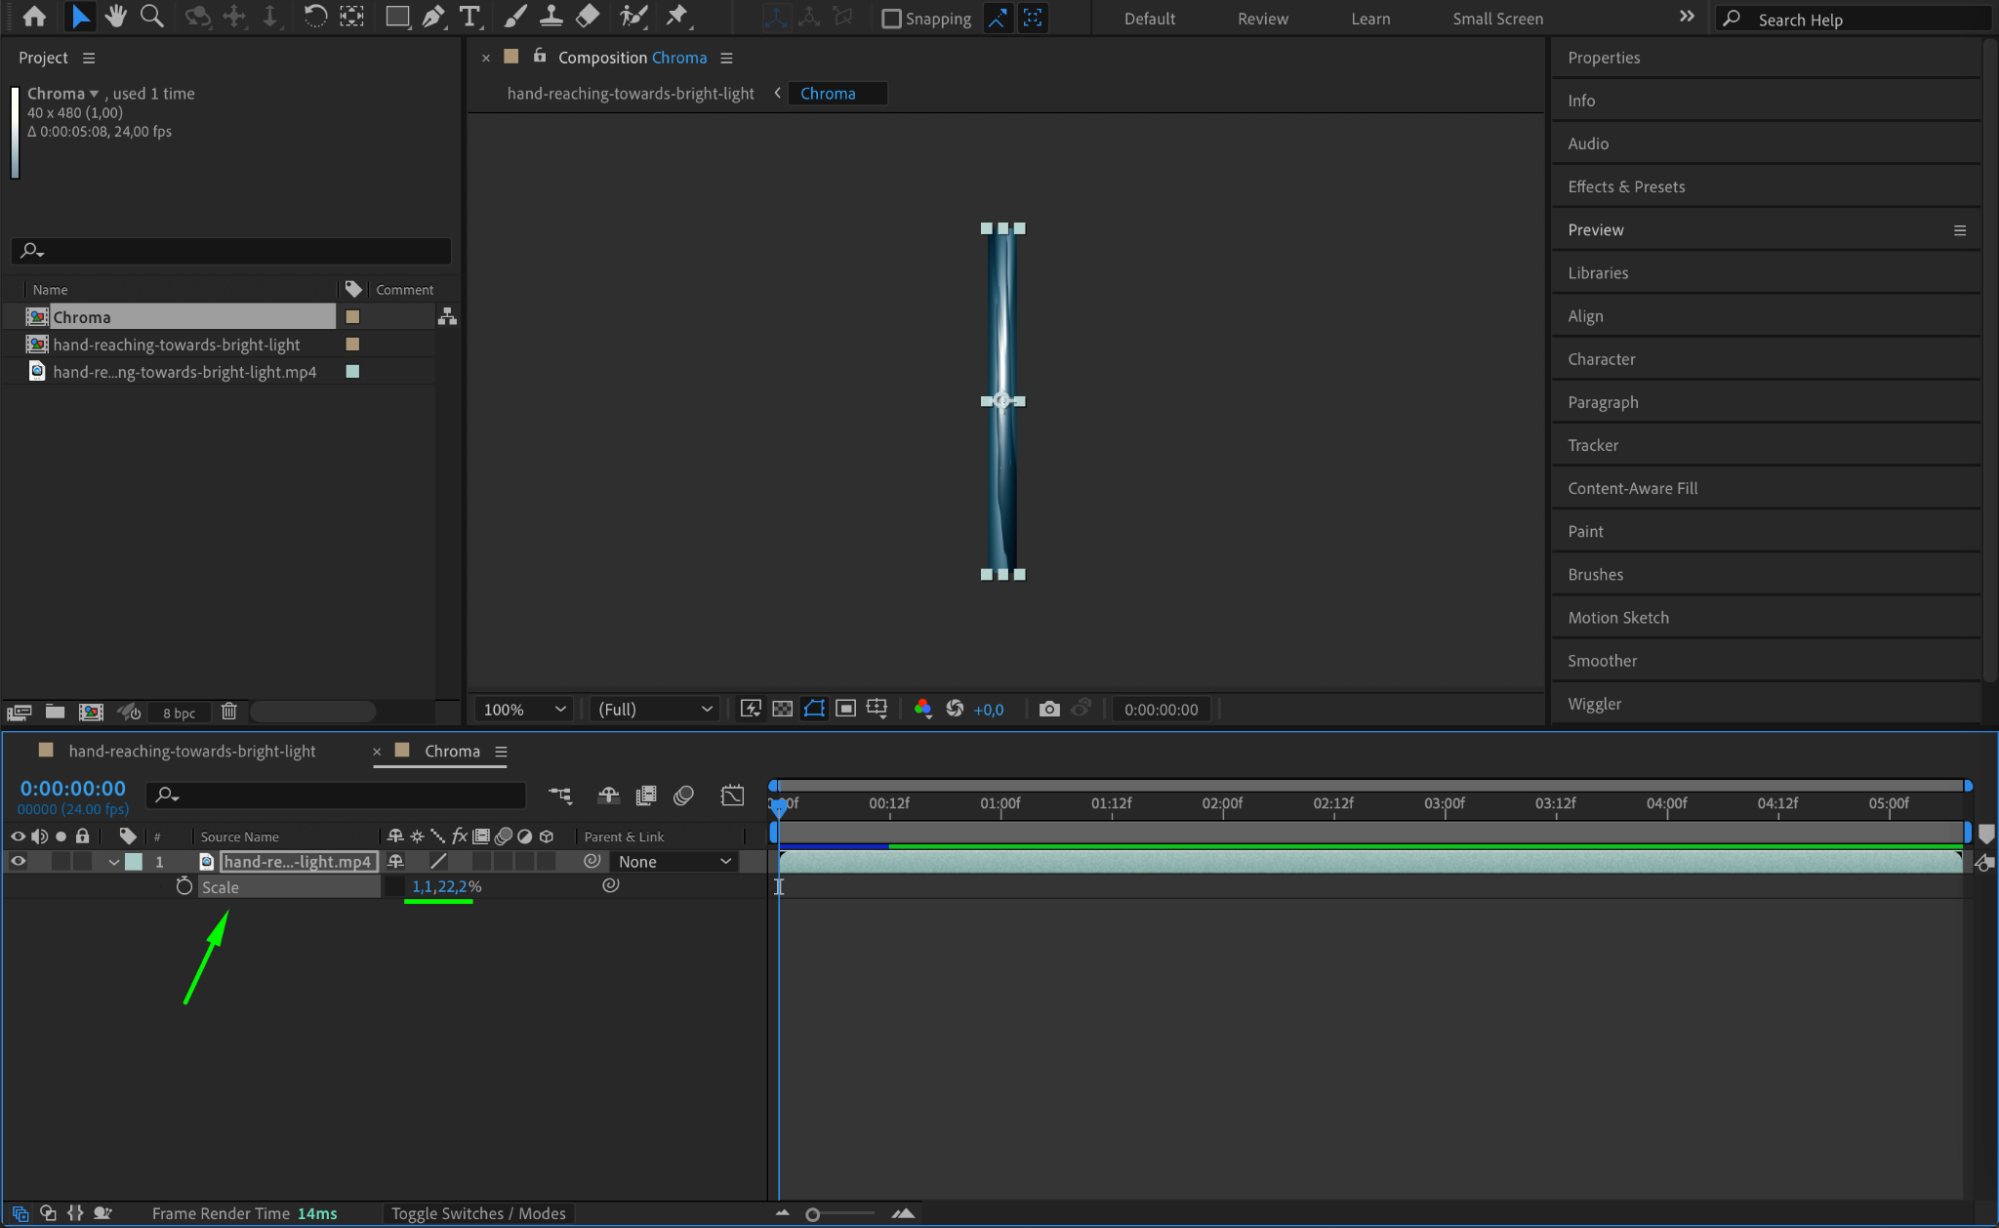 Step 6: Return to the Main Composition
Close the Chroma pre-comp and return to the main composition to continue with the Luma effect layer. Step 7: Pre-compose the Original Layer
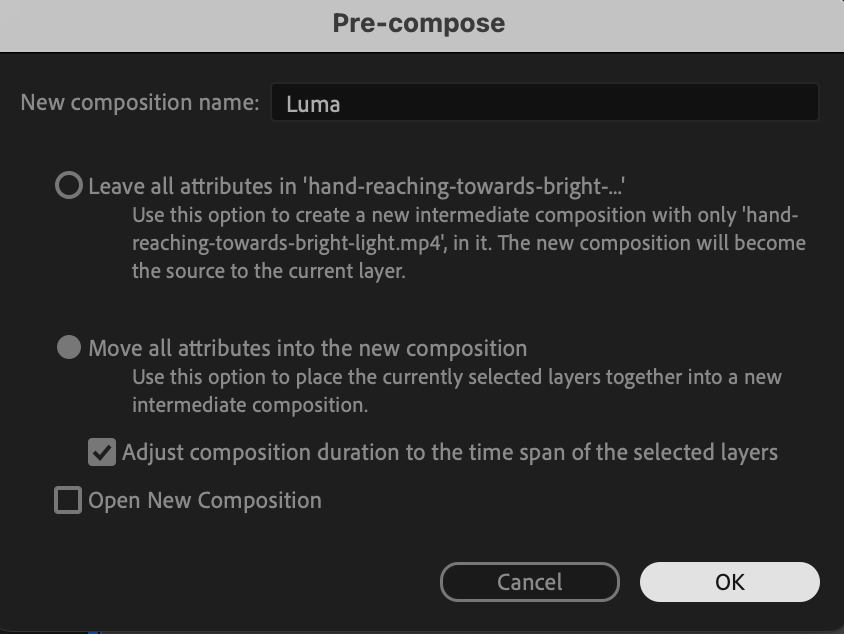
Right-click the original video layer, select Pre-compose, and name it “Luma.” Double-click on this pre-comp to open it and apply unique adjustments.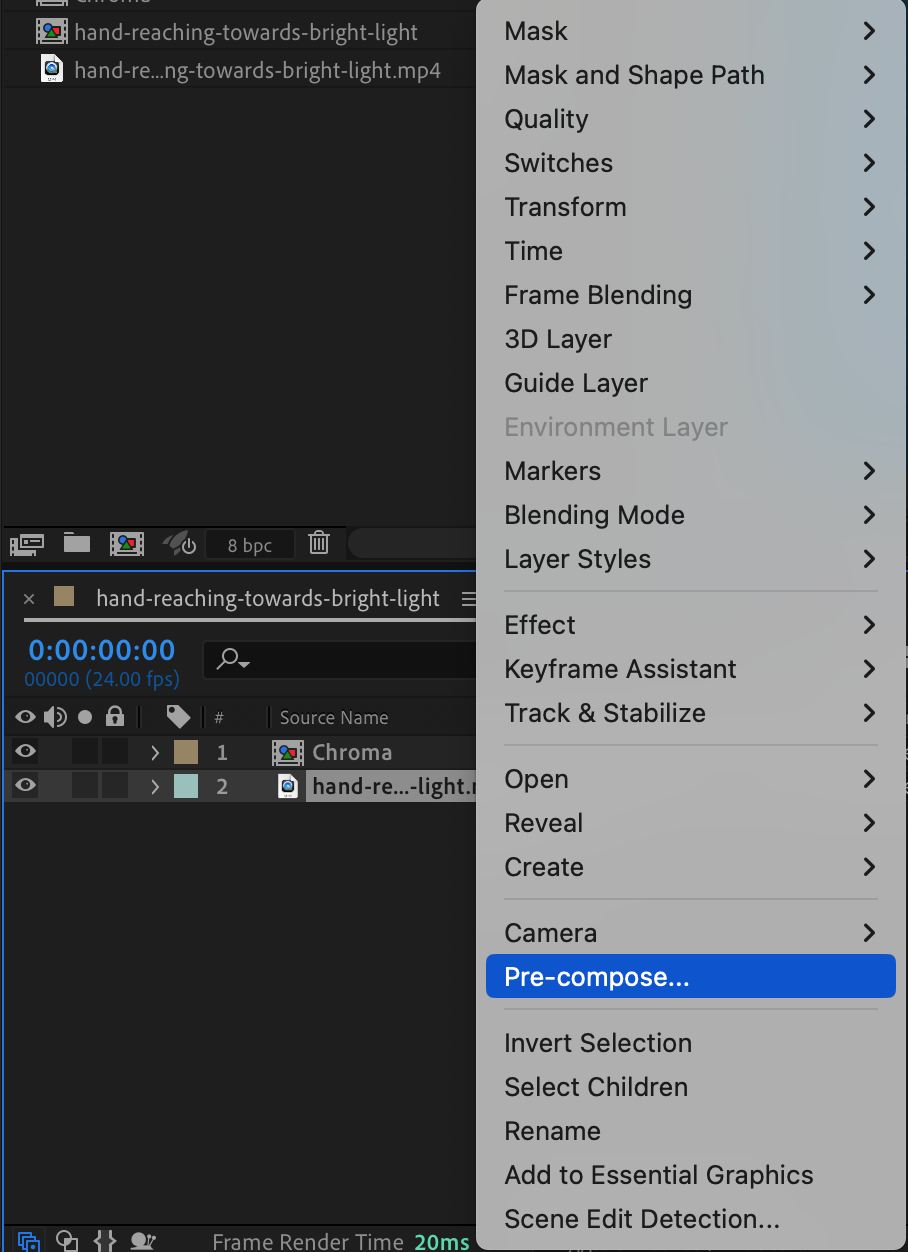
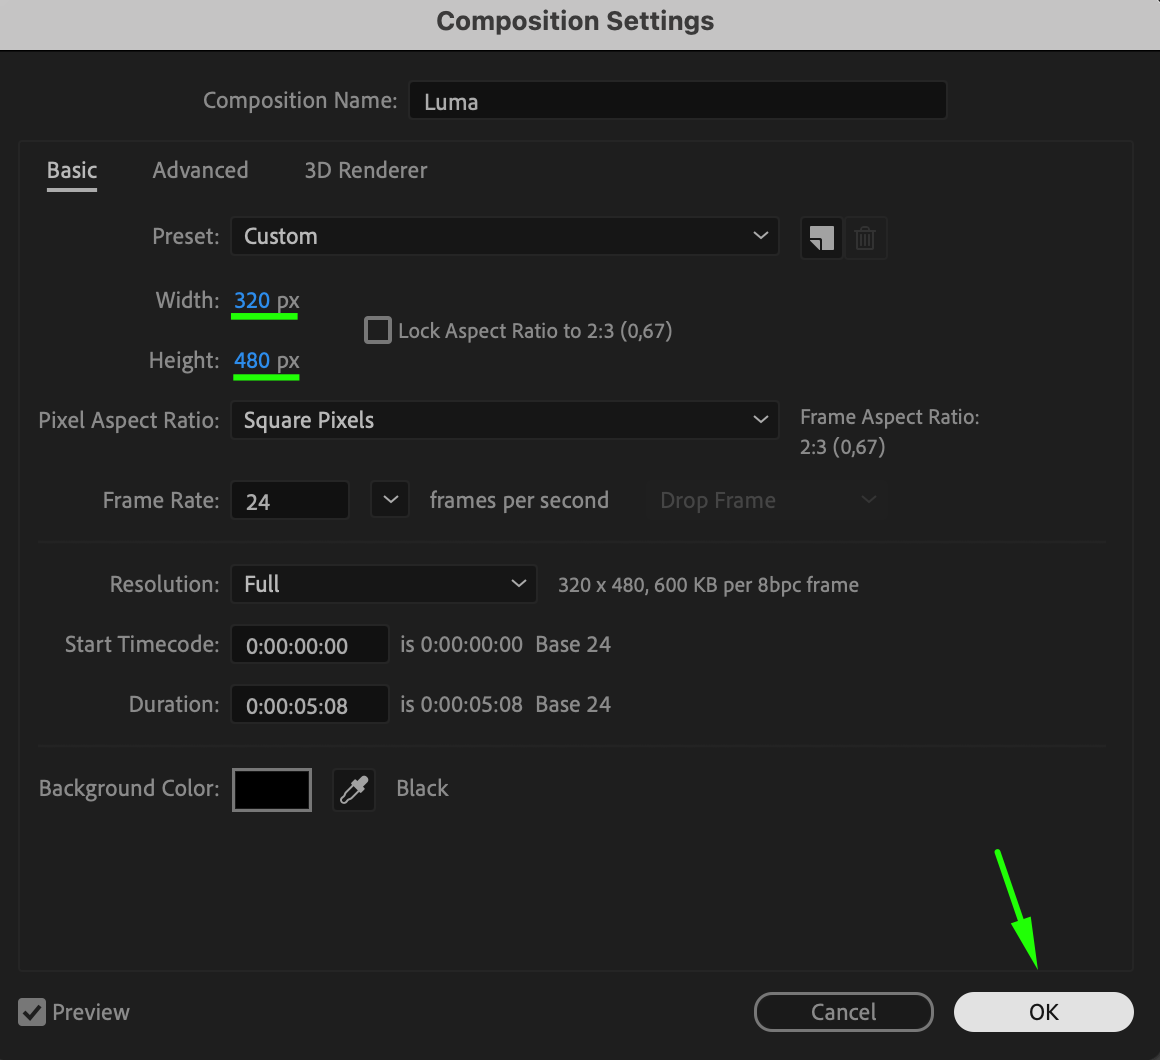
 Step 8: Adjust Composition Settings for Luma
In the Luma composition, go to Composition > Composition Settings, set the Width to 320 and Height to 480. This will compress the video’s horizontal dimensions.
 Step 9: Resize the Video for Luma
With the Luma composition open, press “S” to adjust the scale. Unlock proportional scaling by clicking the chain icon, then adjust the height to match the new composition dimensions.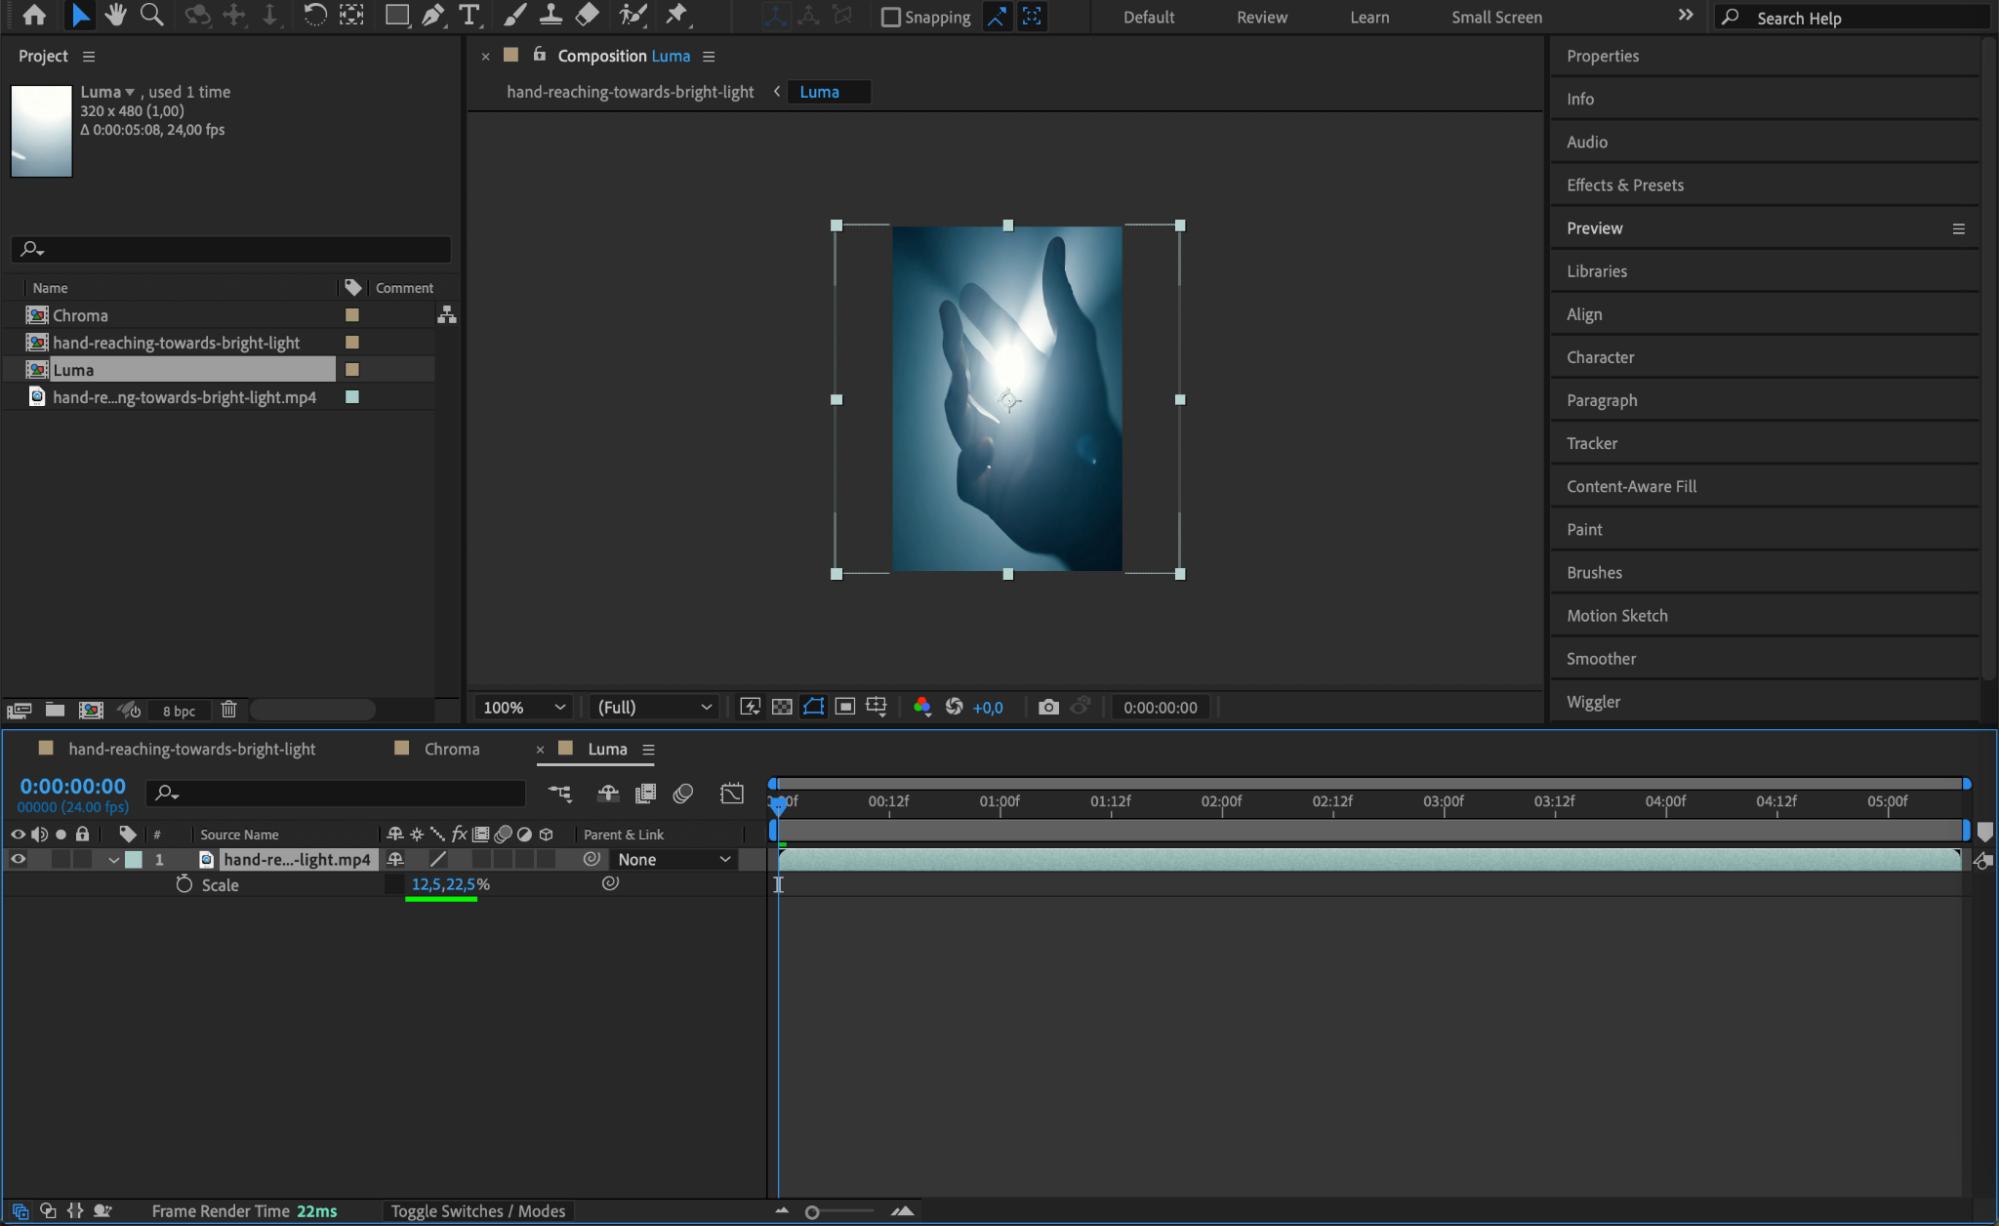 Step 10: Return to the Main Composition
Close the Luma pre-comp and return to the main composition, where both Chroma and Luma layers will be used to create the VHS effect.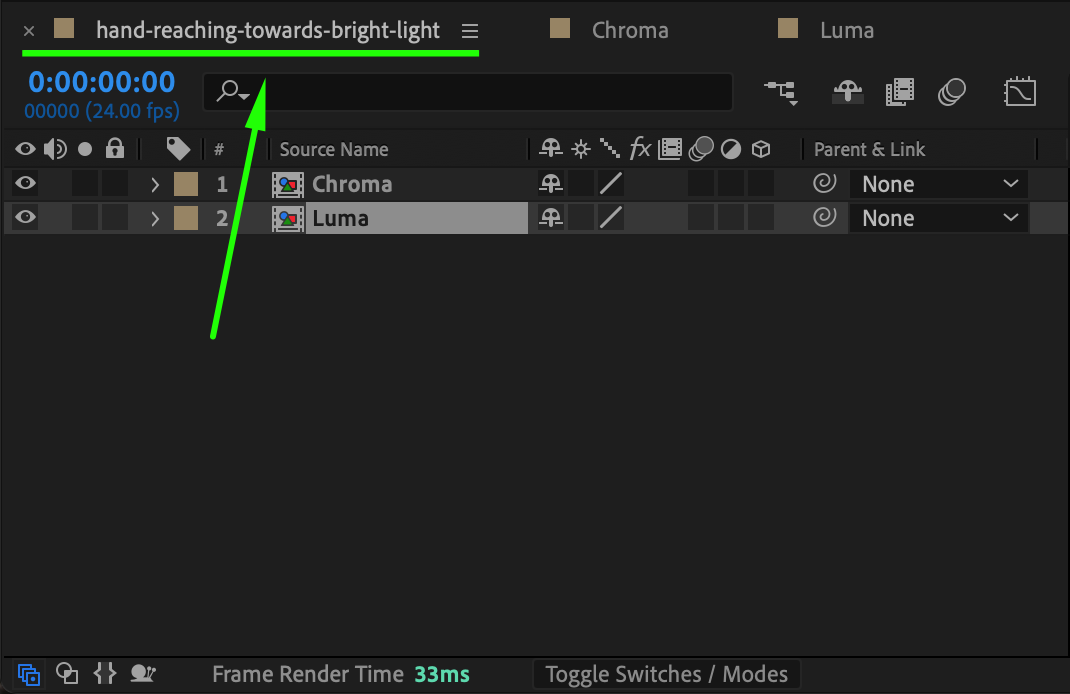 Step 11: Adjust Composition Settings for VHS Effect
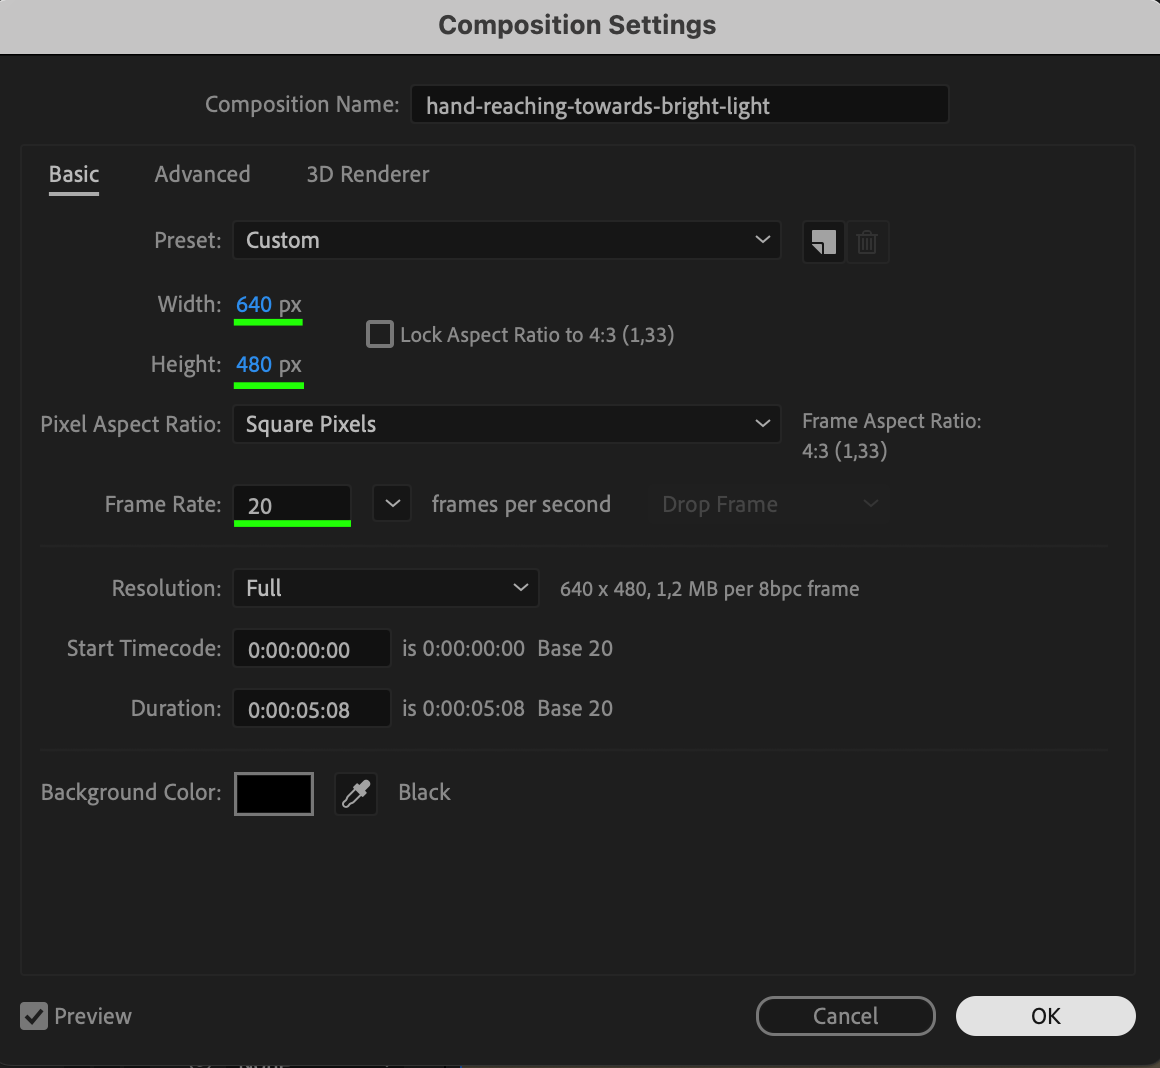
Go to Composition > Composition Settings and set the Width to 640, Height to 480, and Frame Rate to 20. These settings will mimic the lower resolution and frame rate typical of vintage VHS, adding authenticity to the effect.
Step 12: Adjust Scale for Chroma and Luma Layers
Select the Chroma layer, press “S” for scale, and set the X-scale to 1619. Then, select the Luma layer and set the X-scale to 200. These values enhance the chromatic separation needed for a retro effect.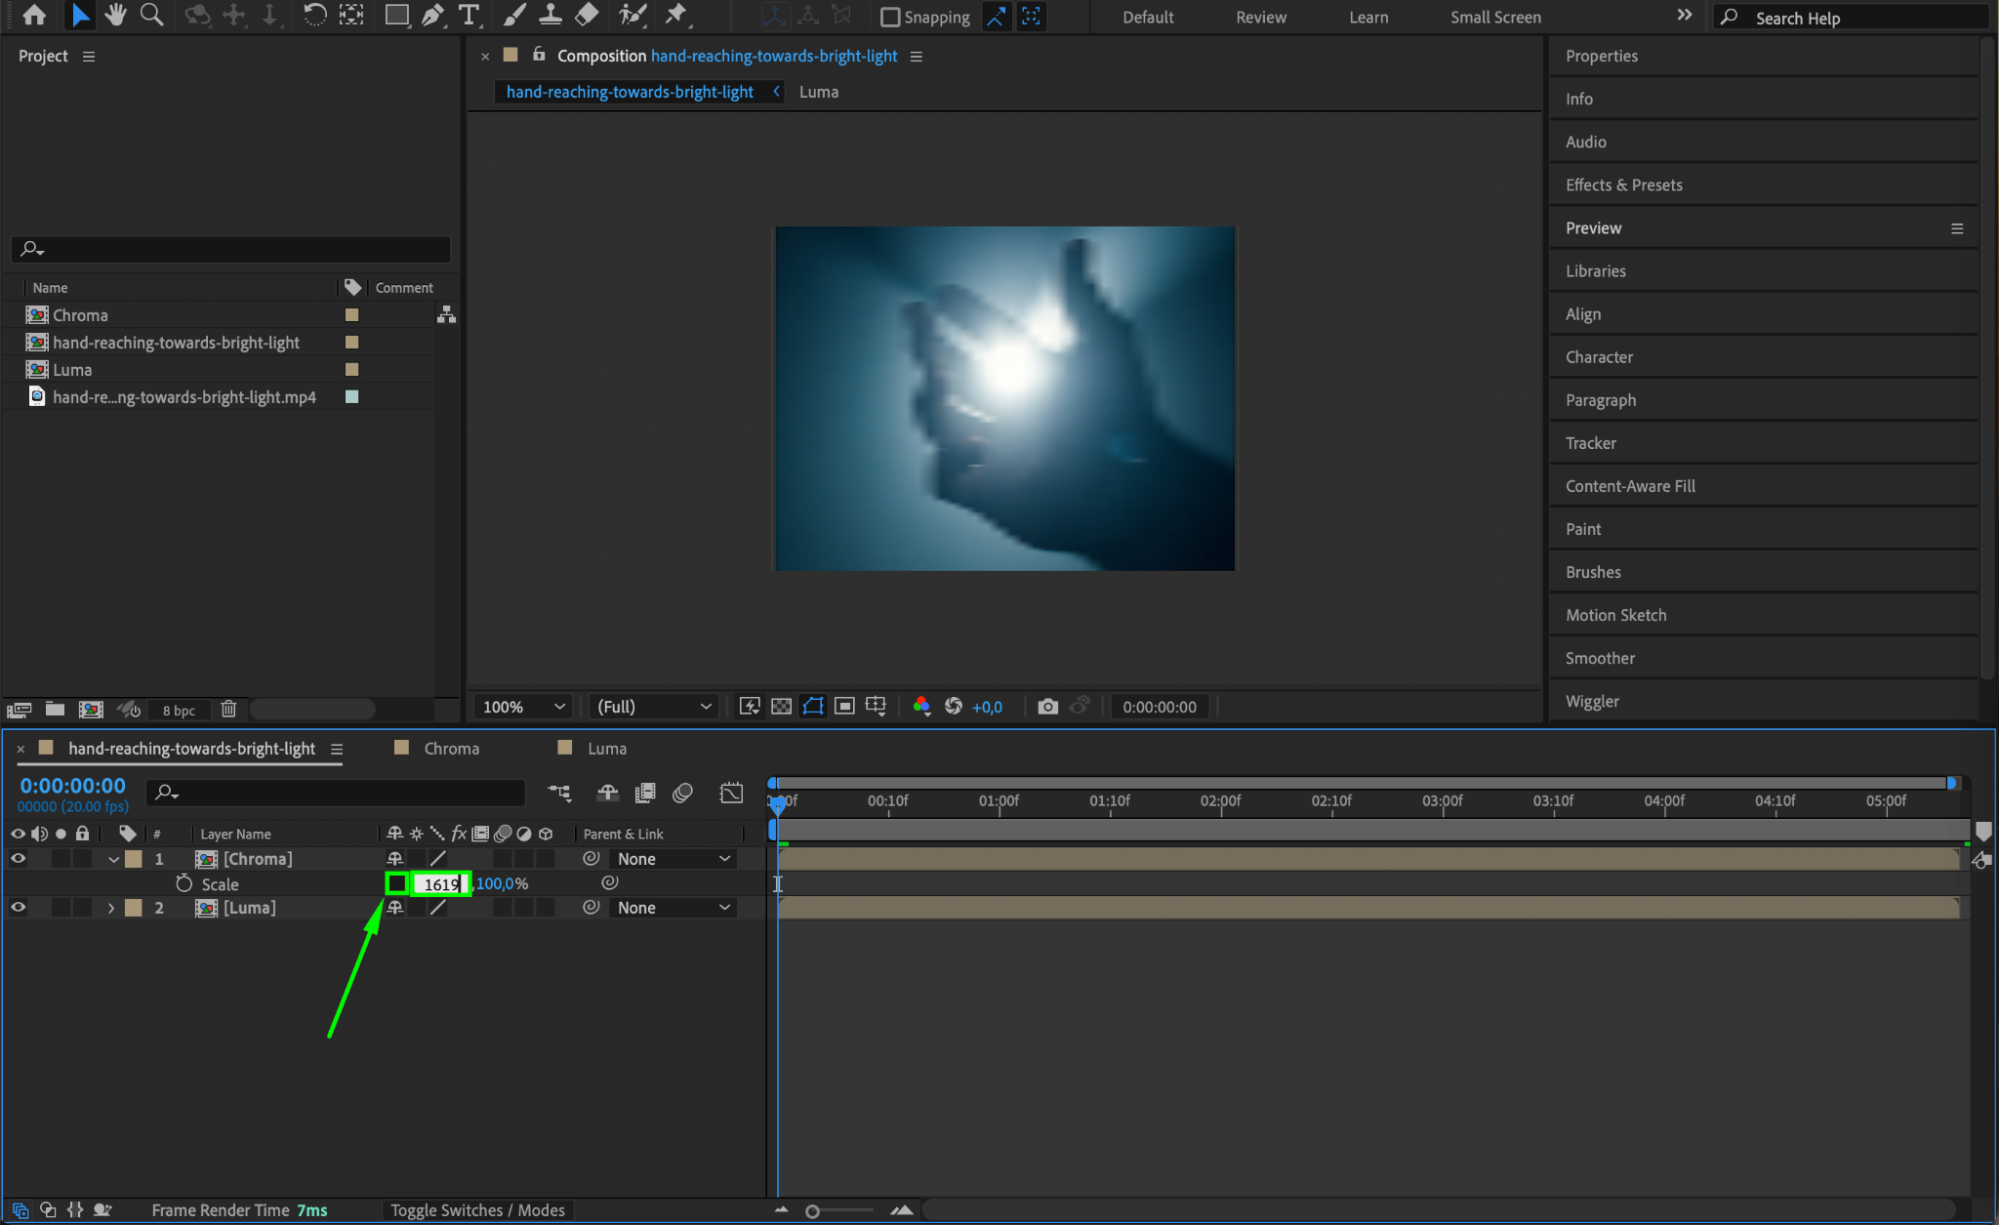
 Step 13: Change Blending Mode for Chroma Layer
Right-click on the Chroma layer, go to Blending Mode, and select Color. This changes the Chroma layer to add color distortion to the main video, creating the characteristic color fringing of VHS footage.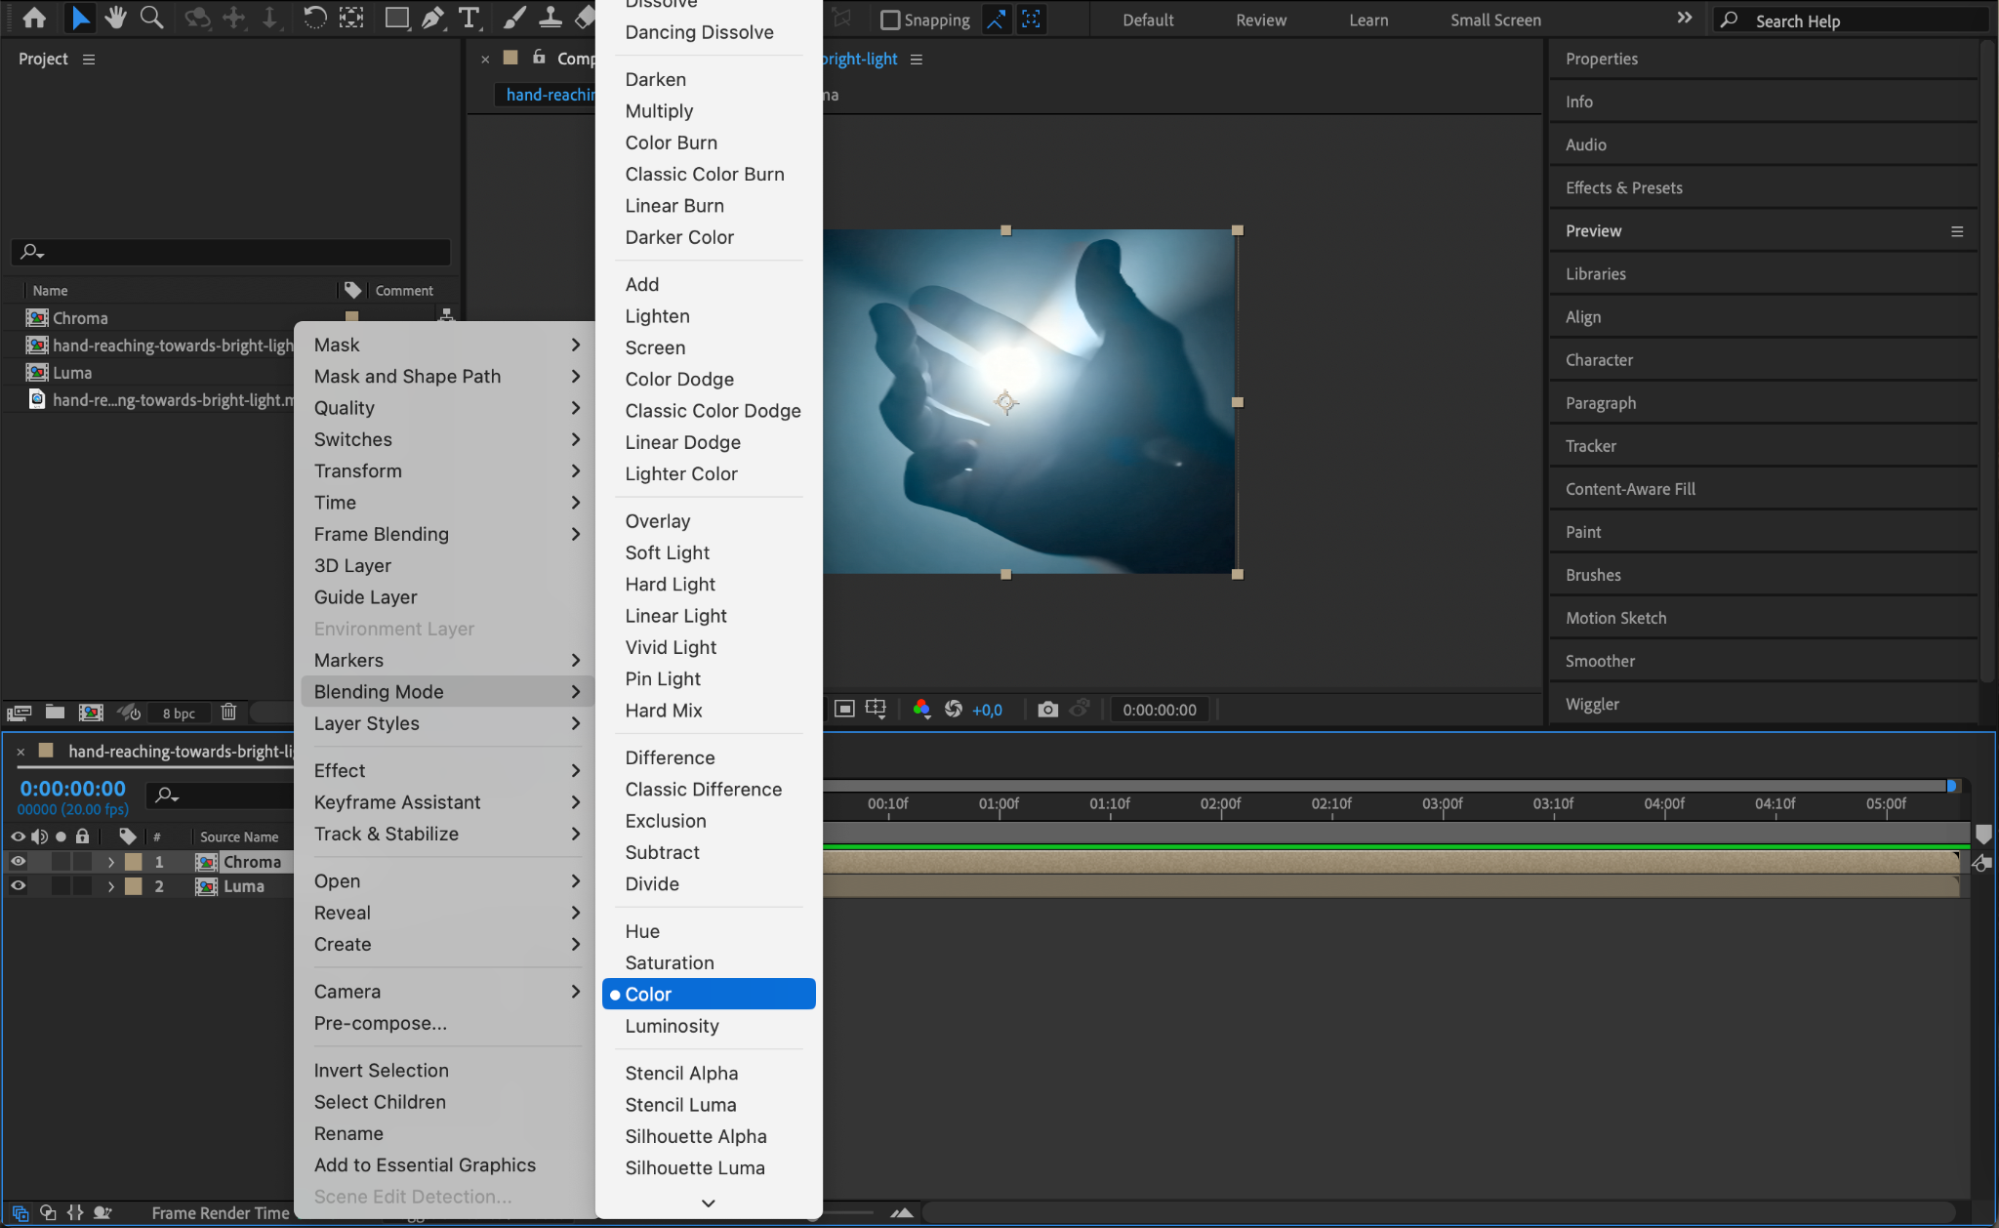 Step 14: Pre-compose Both Layers
Select both the Chroma and Luma layers, right-click, and choose Pre-compose. Name the new pre-comp “VHS” for easier management.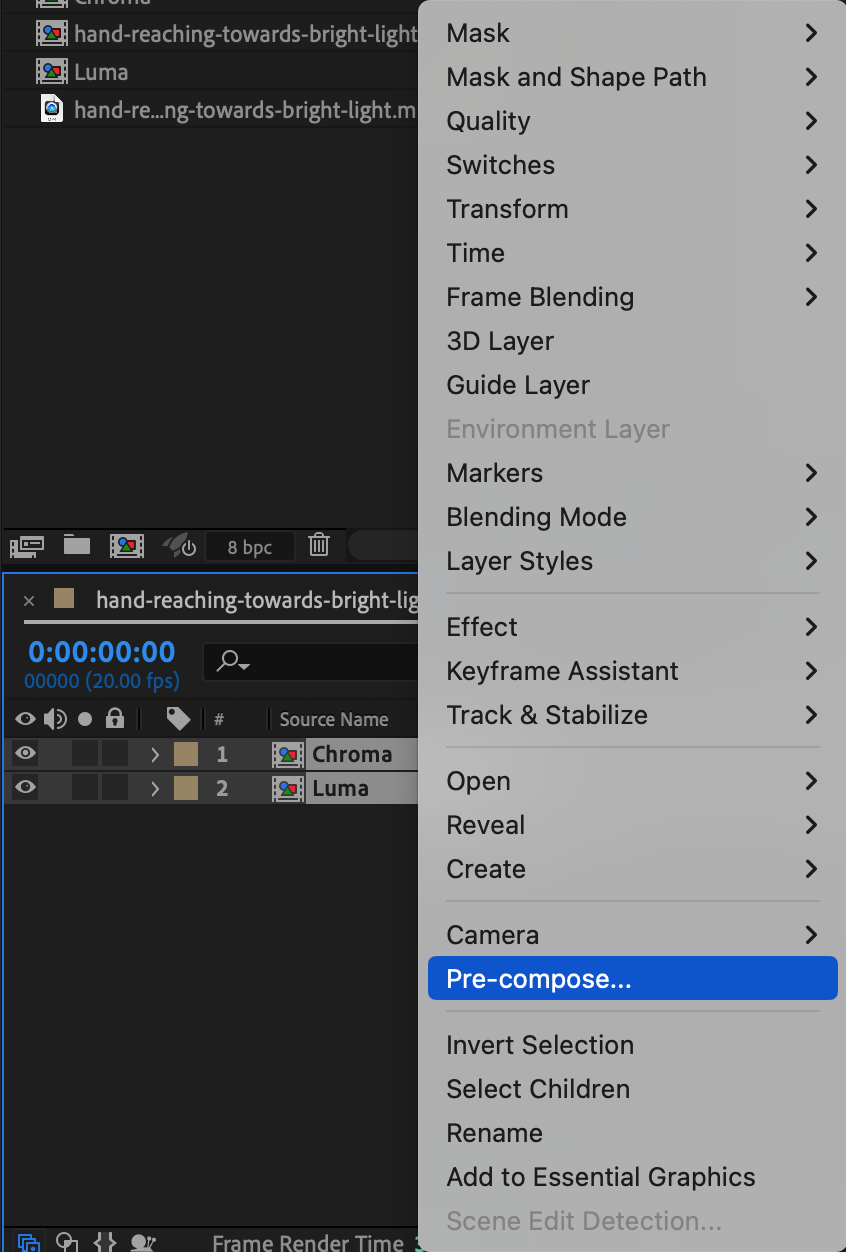
 Step 15: Add an Adjustment Layer
Go to Layer > New > Adjustment Layer. This layer will host additional effects to refine the VHS look, adding blur, grain, and distortion.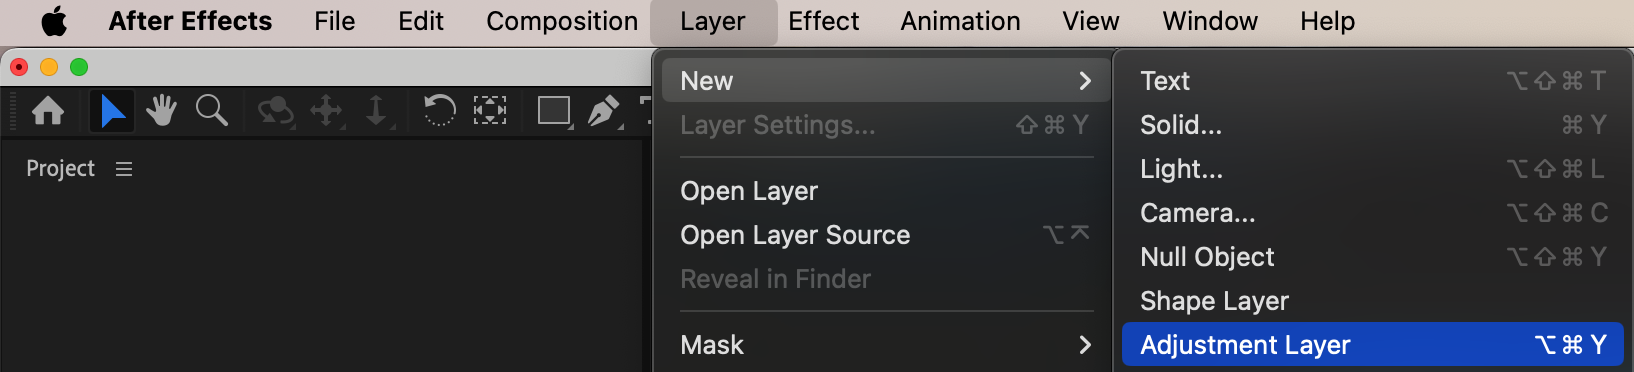 Step 16: Apply Fast Box Blur
With the Adjustment Layer selected, open Effects & Presets and search for Fast Box Blur. Set the Blur Radius to 1 to slightly soften the image, mimicking the low resolution of VHS.
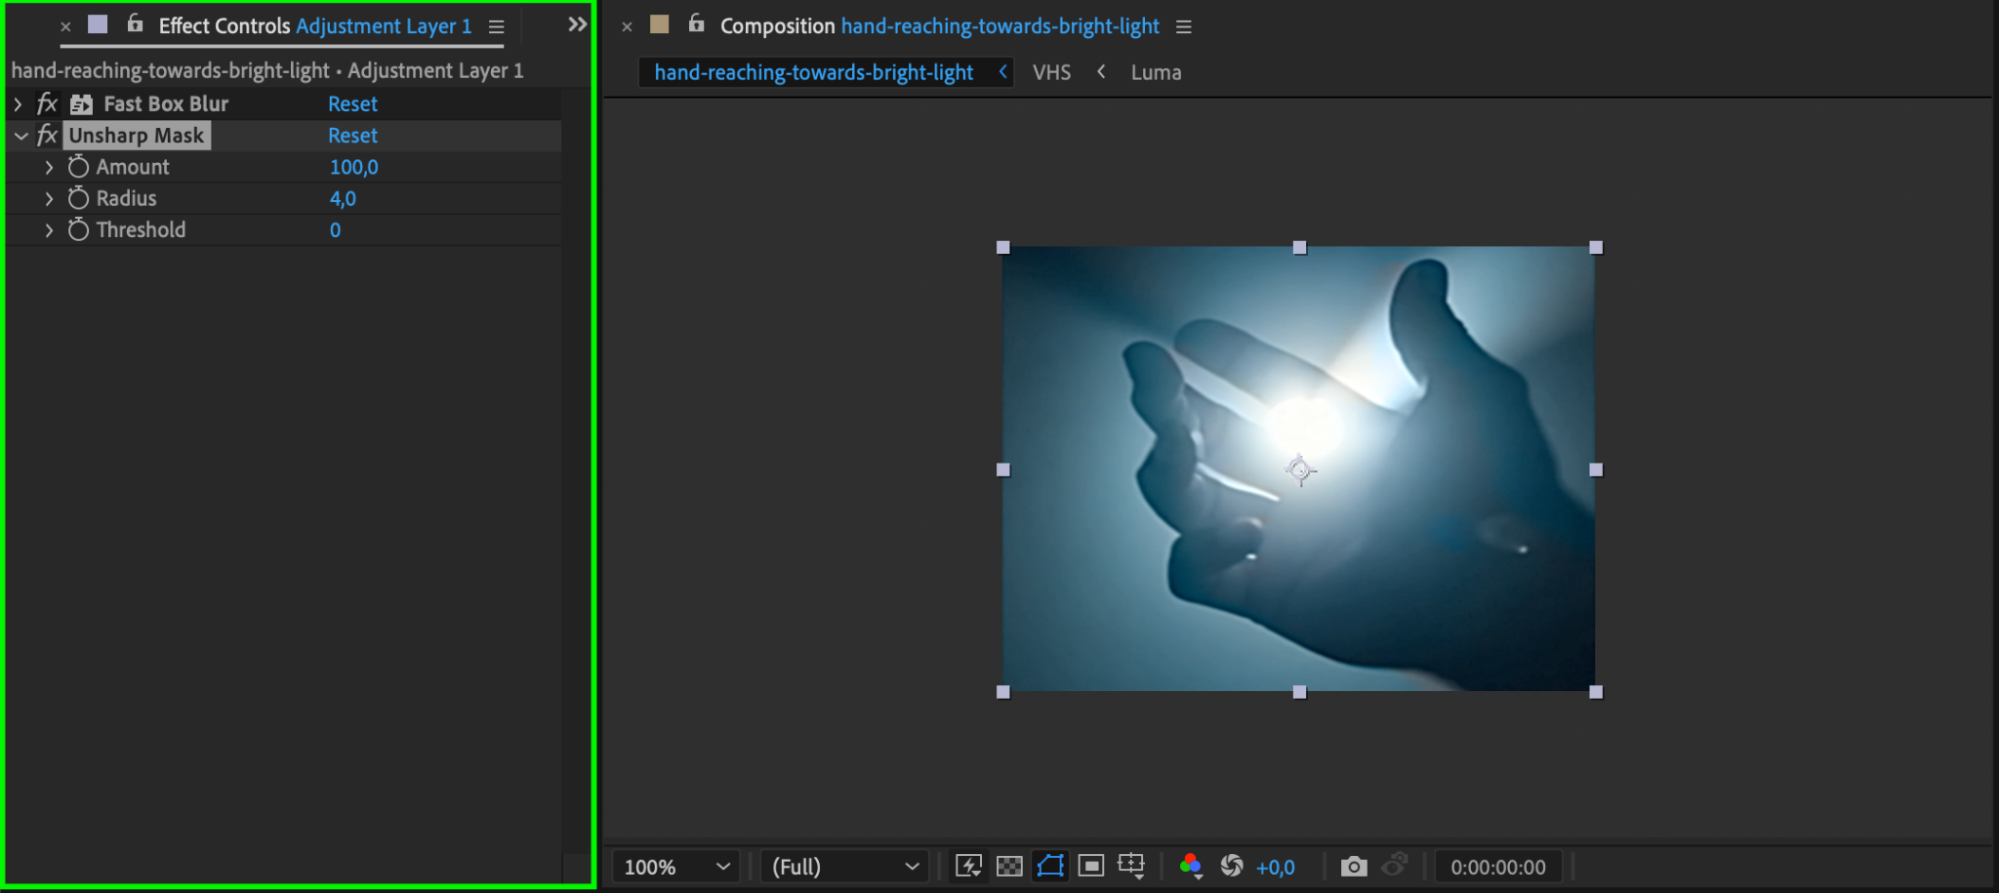
 Step 17: Apply Unsharp Mask
Add the Unsharp Mask effect from Effects & Presets. Set Amount to 100 and Radius to 4. This will sharpen edges slightly to create contrast against the blur, replicating VHS video sharpness.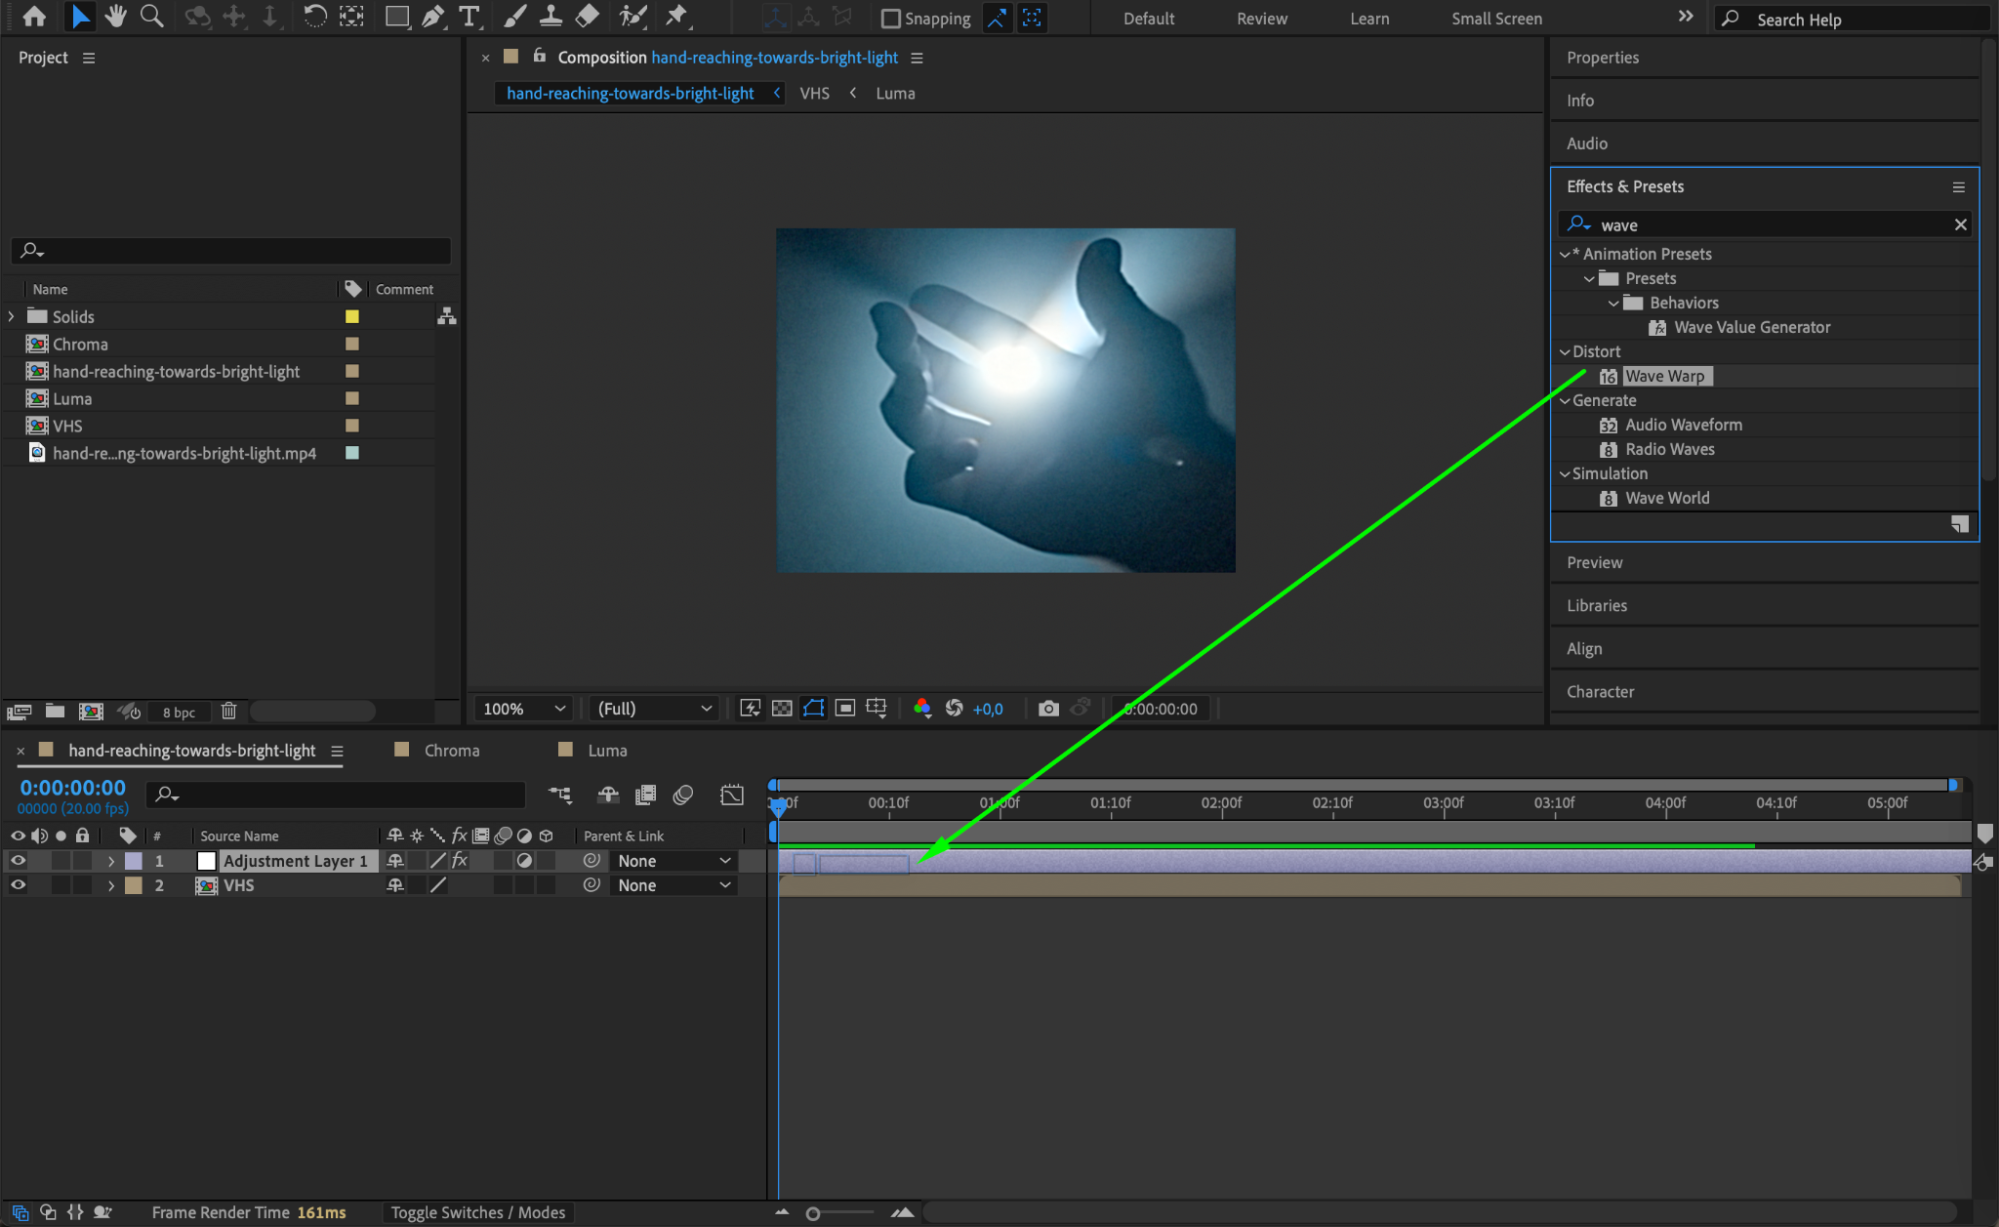
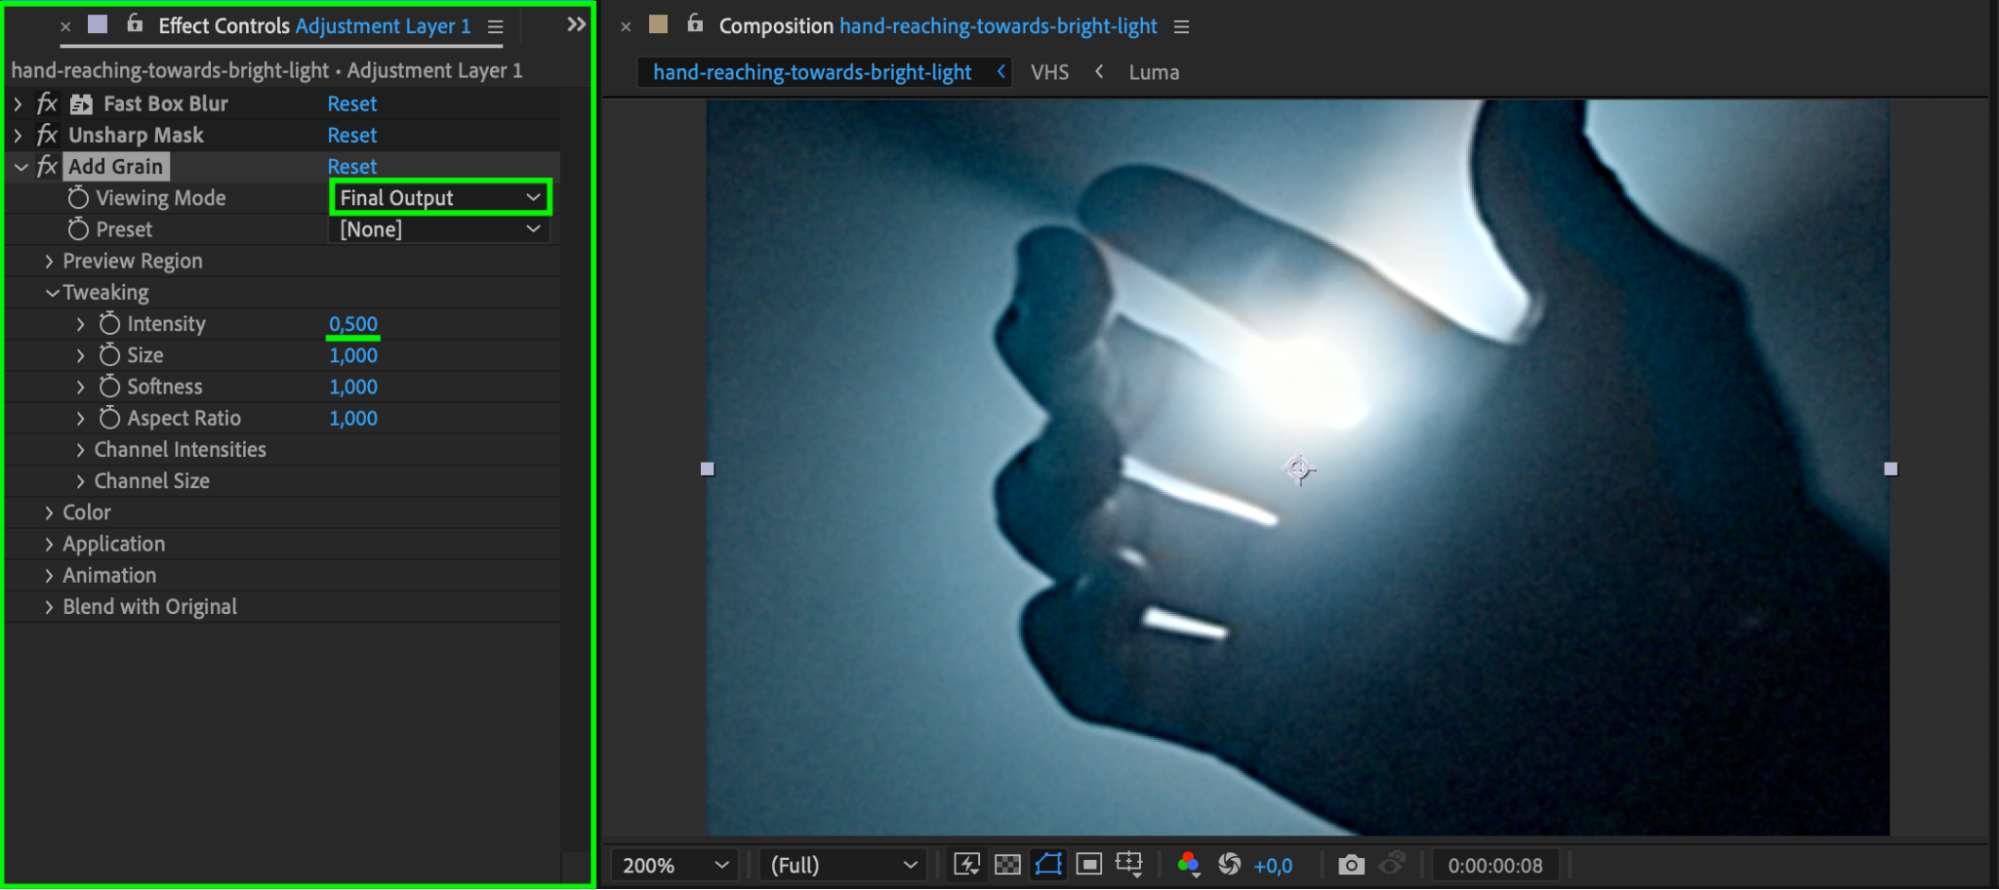
 Step 18: Apply Add Grain Effect
Find the Add Grain effect and apply it to the Adjustment Layer. Set Intensity to 0.5 and Viewing Mode to Final Output to add a subtle layer of grain to the video, enhancing the retro feel.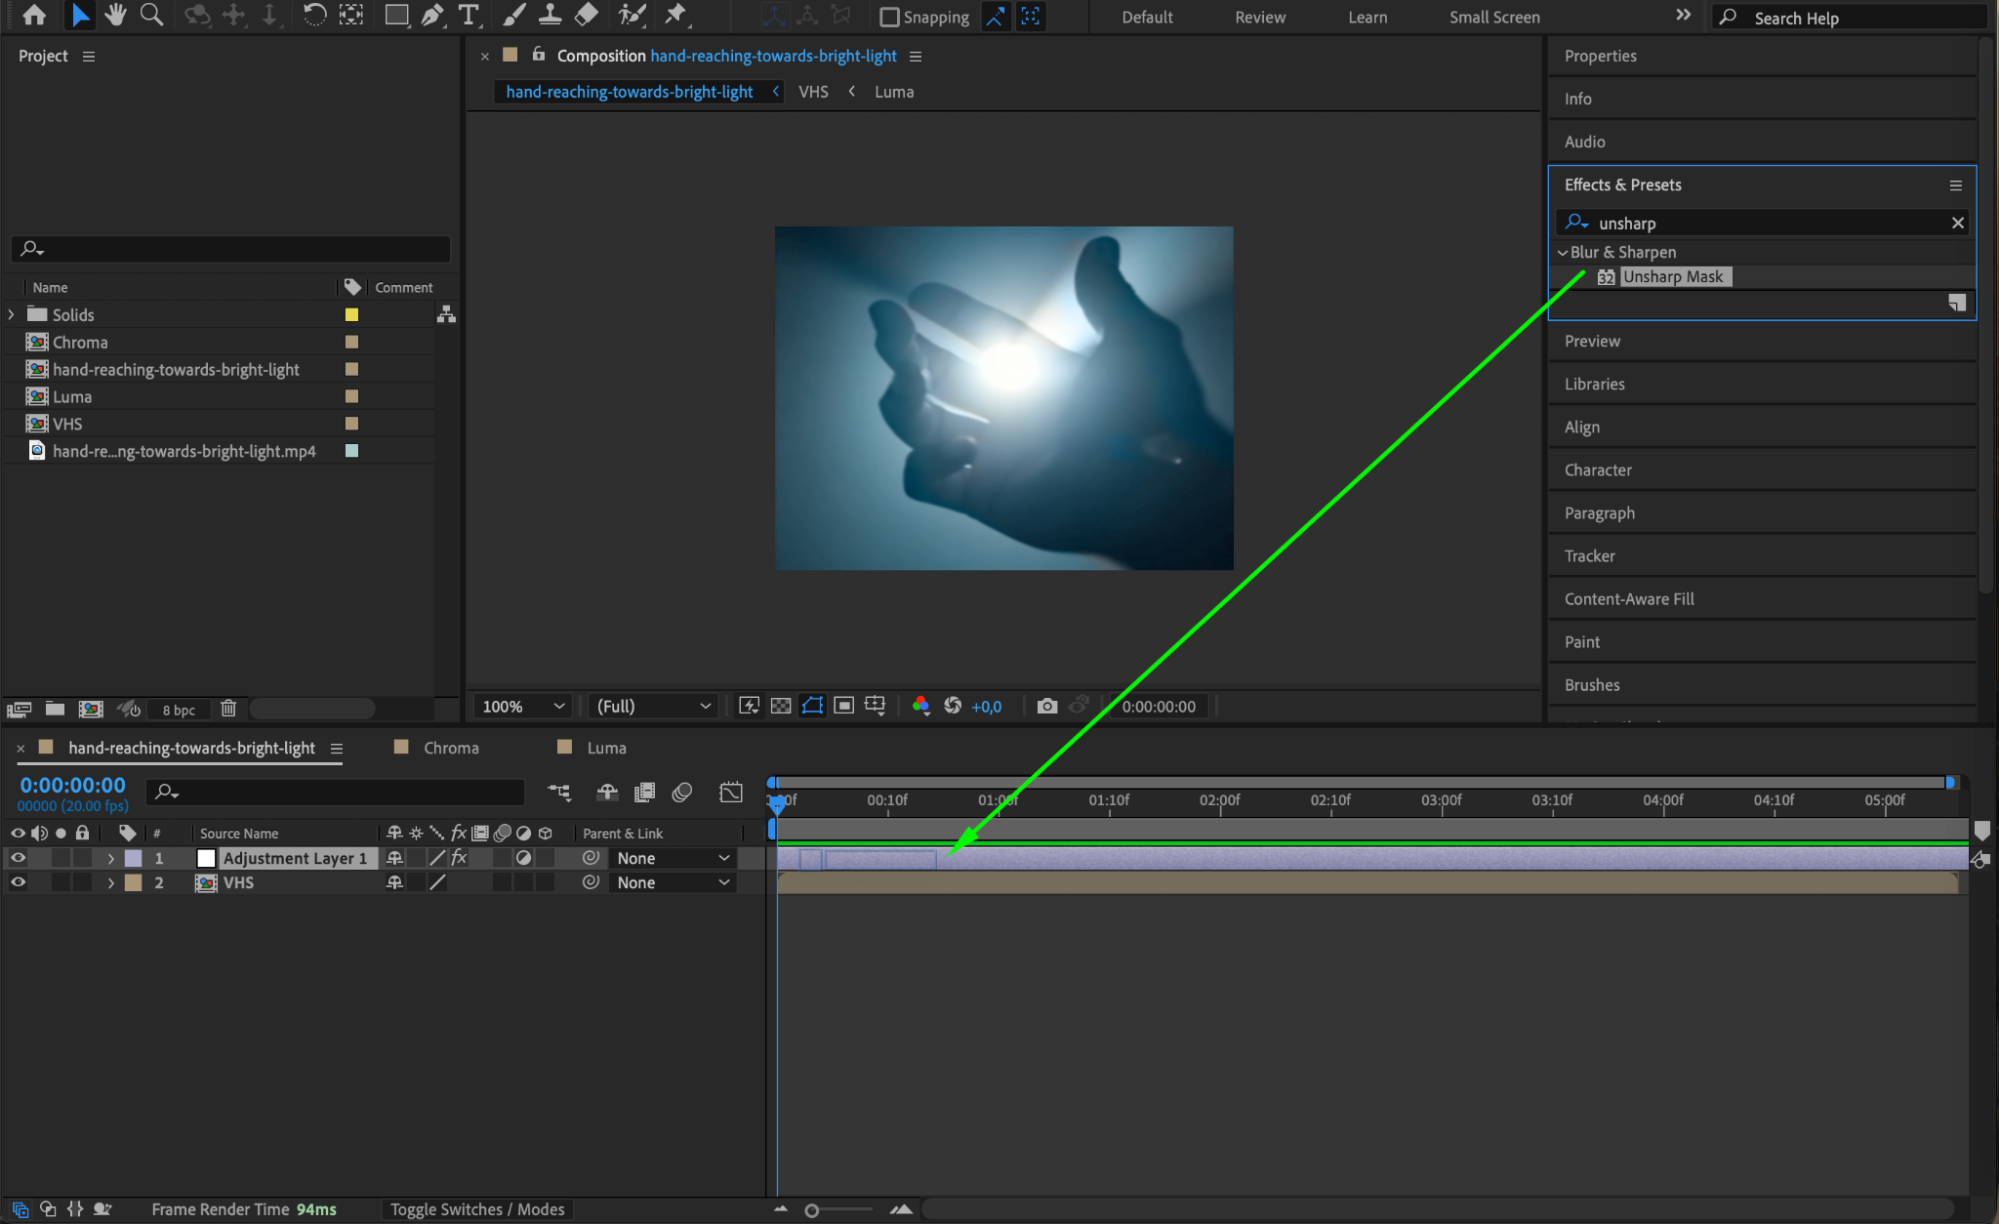
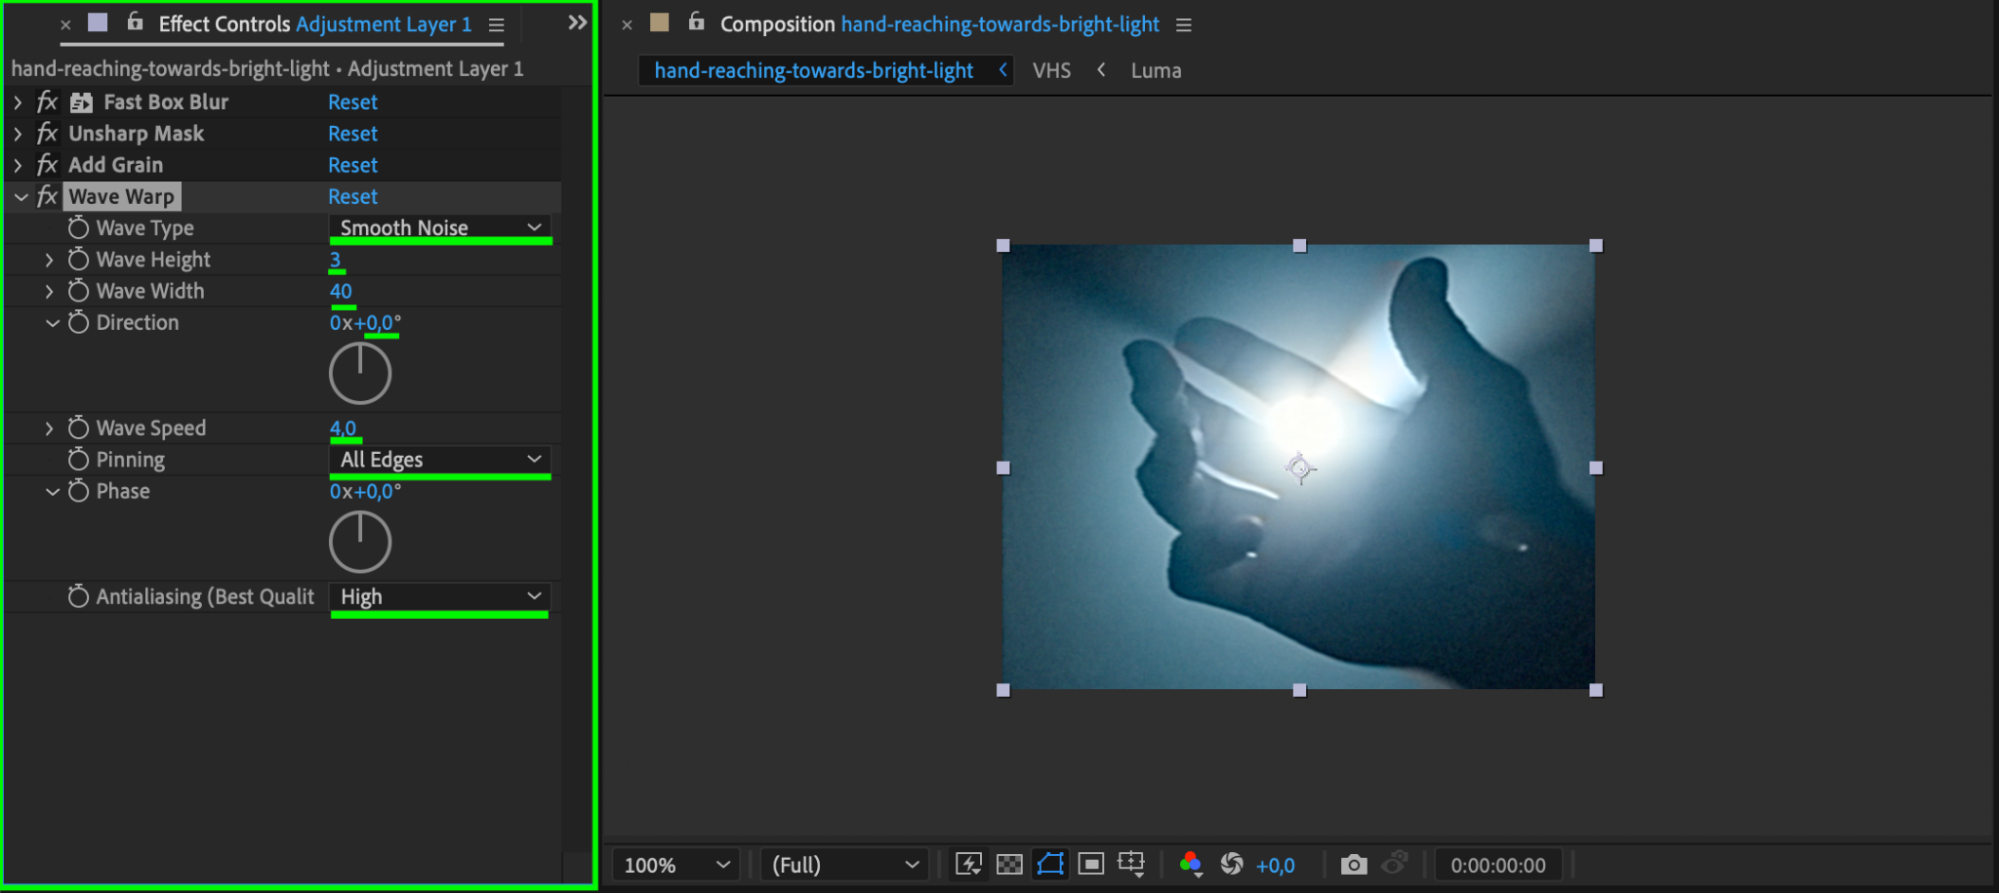
 Step 19: Apply Wave Warp for Distortion
Search for Wave Warp and apply it to the Adjustment Layer. Set Wave Type to Smooth Noise, Wave Height to 1, Wave Width to 40, Direction to 0, Wave Speed to 4, Pinning to All Edges, and Anti-aliasing to High. This adds a subtle horizontal warping effect typical of VHS playback.
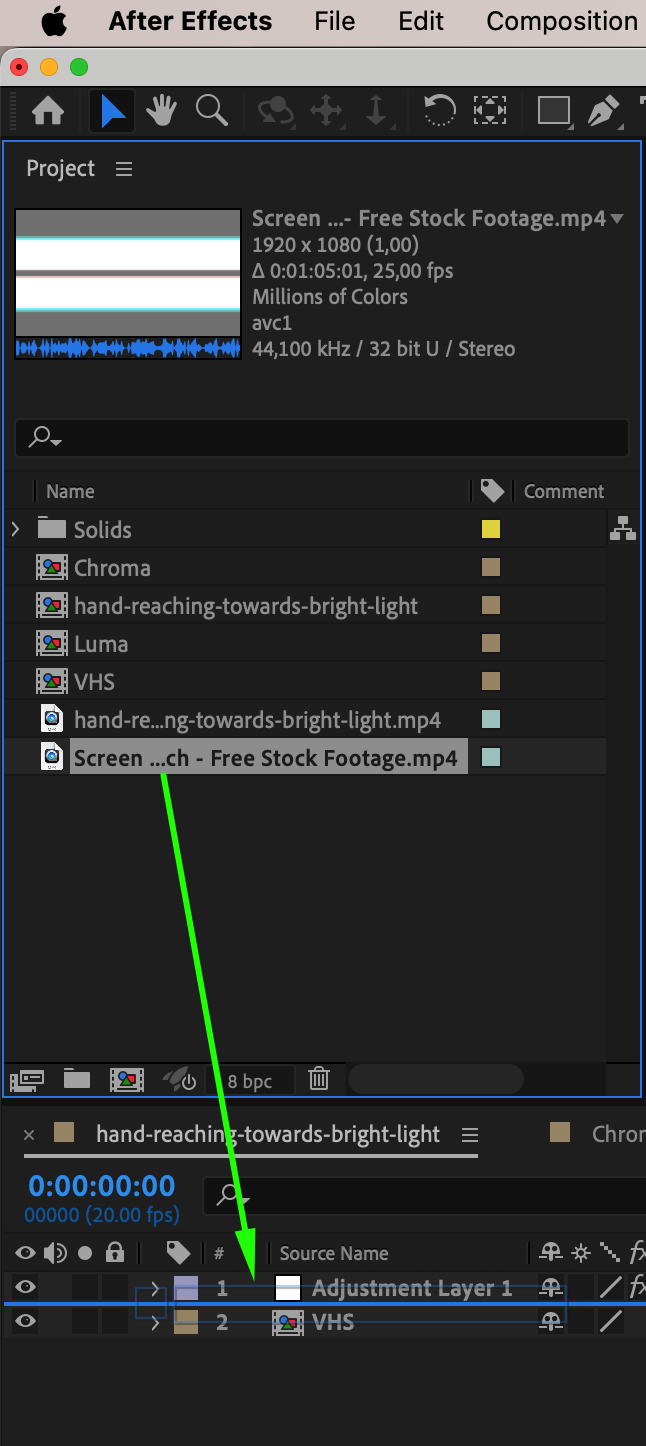
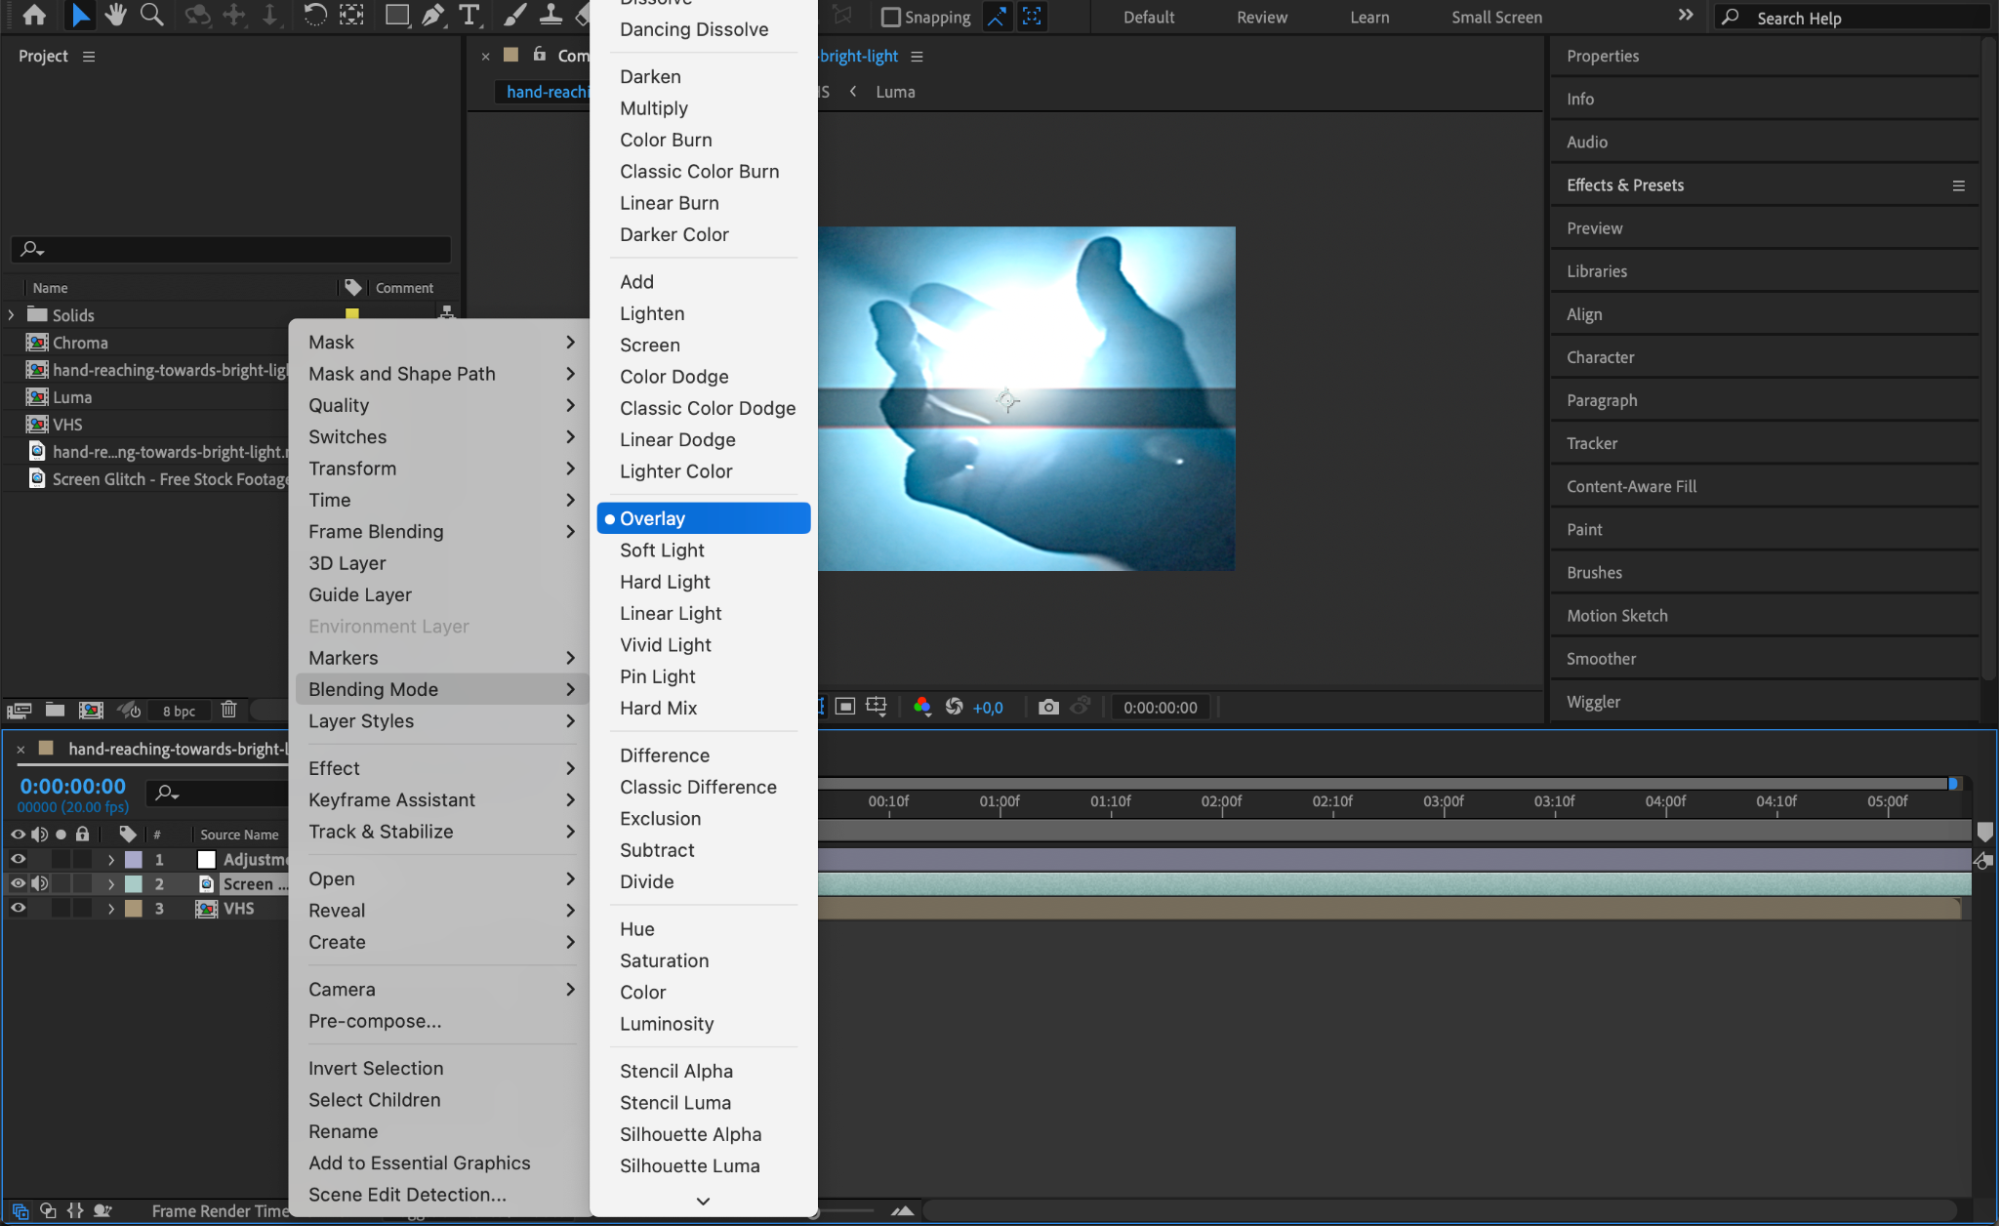
 Step 20: Add Glitch Footage for Extra Effect
Import a glitch footage file, drag it under the Adjustment Layer, and set its Blending Mode to Overlay or Screen. Adjust the opacity to control the intensity of the glitches for a realistic VHS look.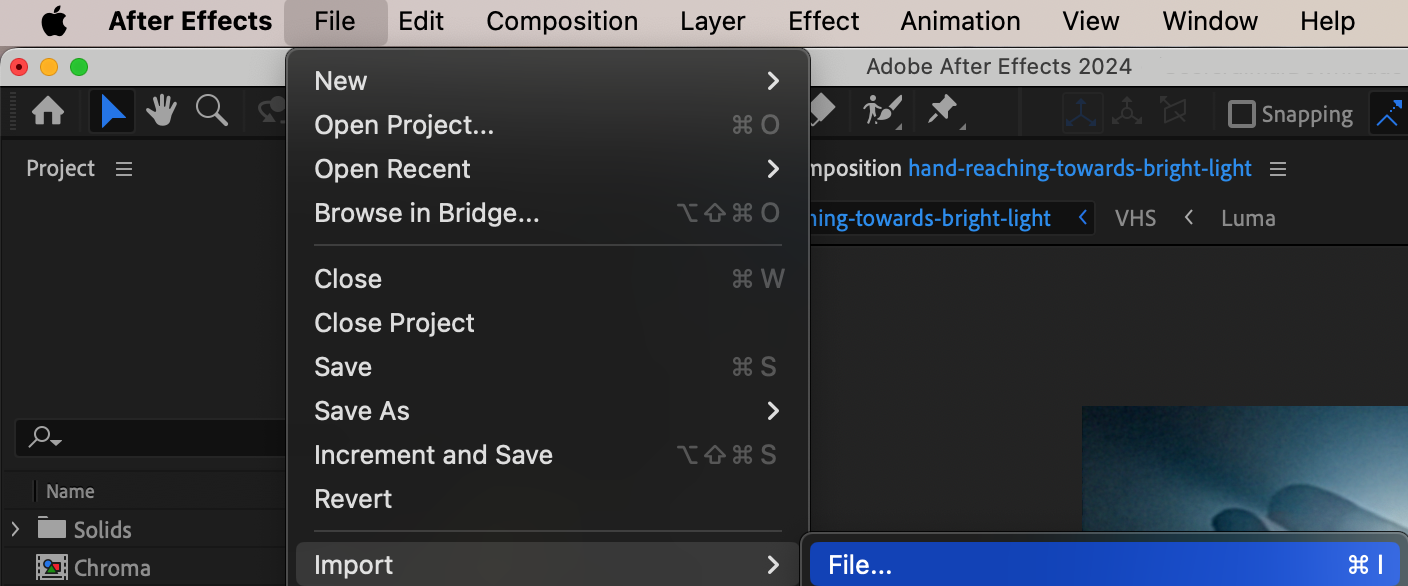
 Step 21: Preview the Effect
Press Spacebar to preview your work and see the VHS effect in action. Make any final adjustments to effect parameters if needed.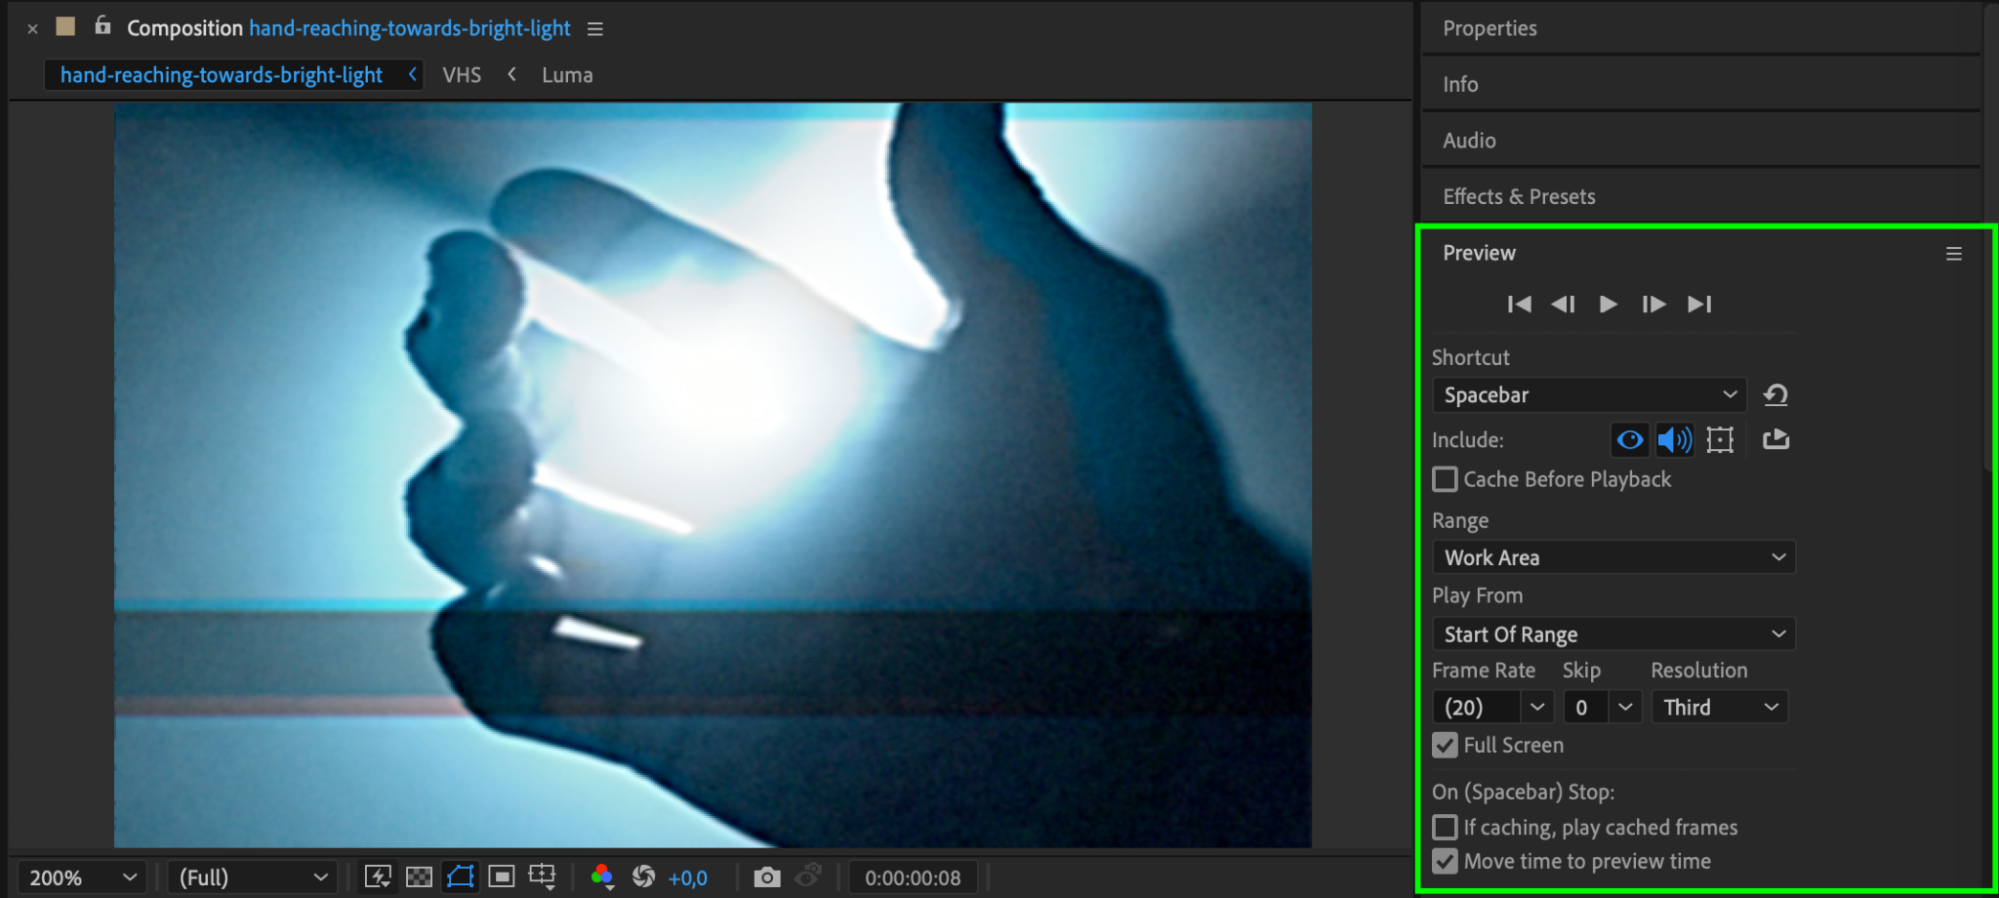 Step 22: Render the Final Video
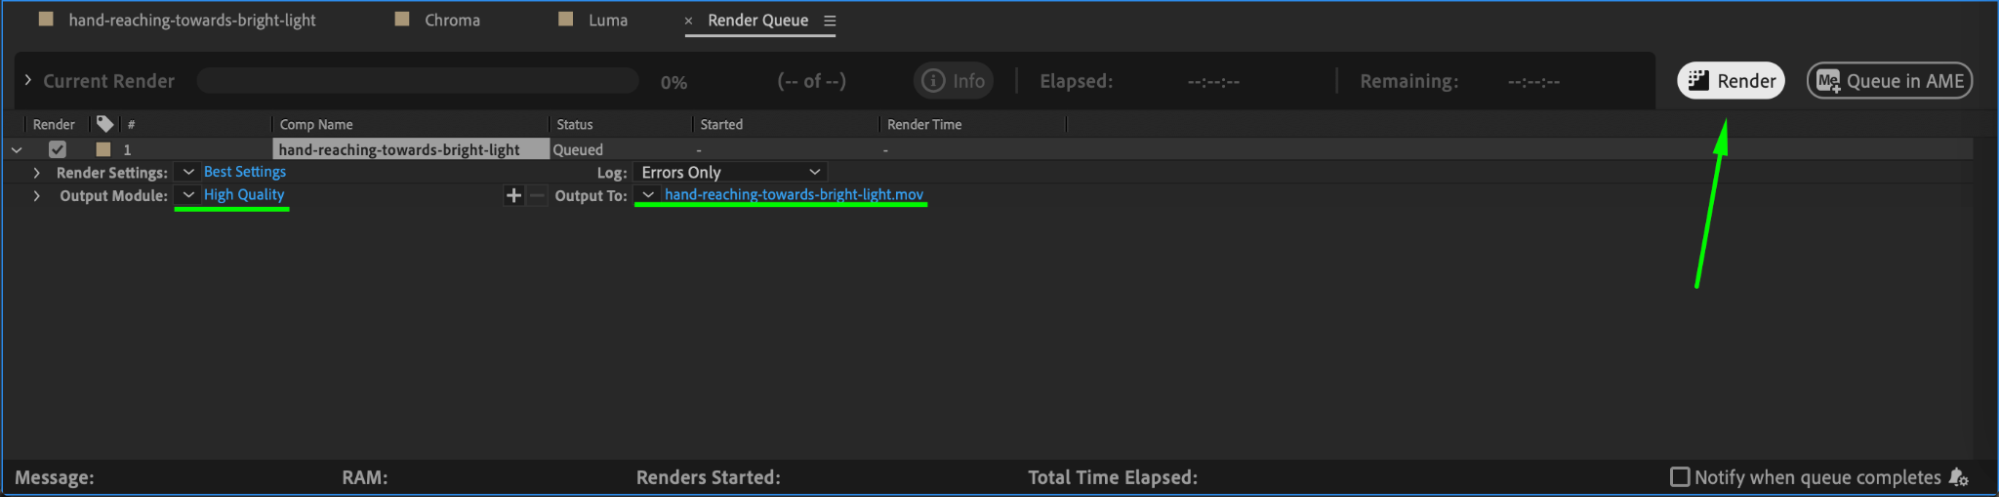
Once satisfied with the look, go to Composition > Add to Render Queue, select your output settings, and click Render to export the video with the VHS effect.
 Conclusion
The VHS effect is a great way to add nostalgia and character to digital footage. By using scaling, blending modes, blur, grain, and distortion effects, you can transform any video into a vintage, VHS-inspired clip perfect for retro-styled projects. Experiment with different glitch and distortion settings to make the effect your own.
Our Bestsellers


