Creating a Virtual Set in After Effects
Introduction to Virtual Set Creation
A virtual set allows you to place a subject filmed on a green screen into any digital background, making it ideal for news broadcasts, interviews, and creative video projects. After Effects provides powerful tools to achieve this effect professionally. Follow these steps to create a seamless virtual set.
Get 10% off when you subscribe to our newsletter

Step 1: Import Your Footage
Go to File > Import > File, then select two video clips: one with a person filmed on a green screen and another stock video as the virtual background. Drag the green screen footage to the top layer in the timeline and place the background video below it.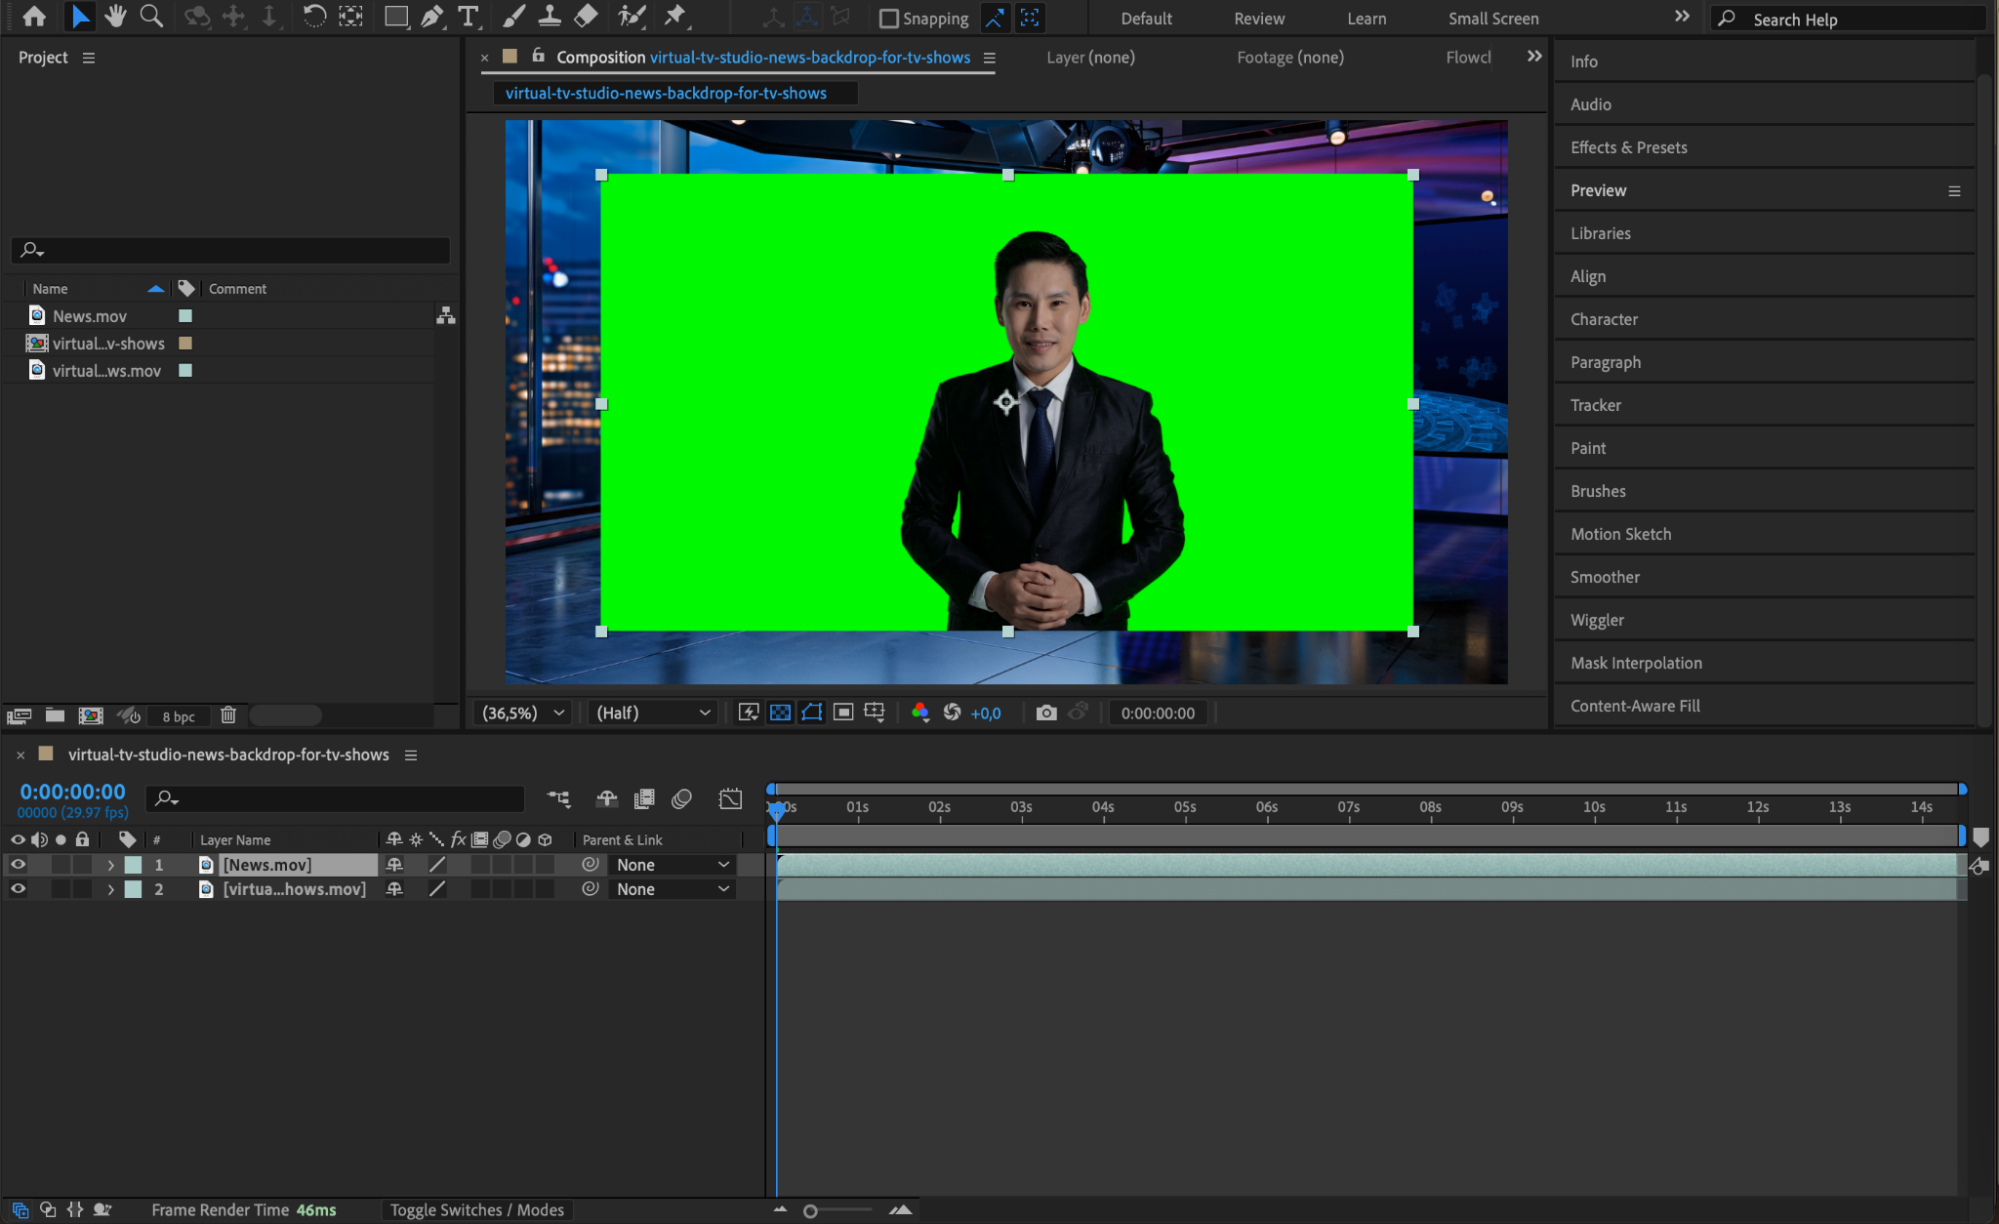 Step 2: Mask Unnecessary Areas
Select the green screen layer, then choose the Rectangle Tool (Q) from the toolbar. Create a mask around the person to remove any unwanted areas from the footage. This helps keep only the relevant part of the video visible and makes the keying process more precise.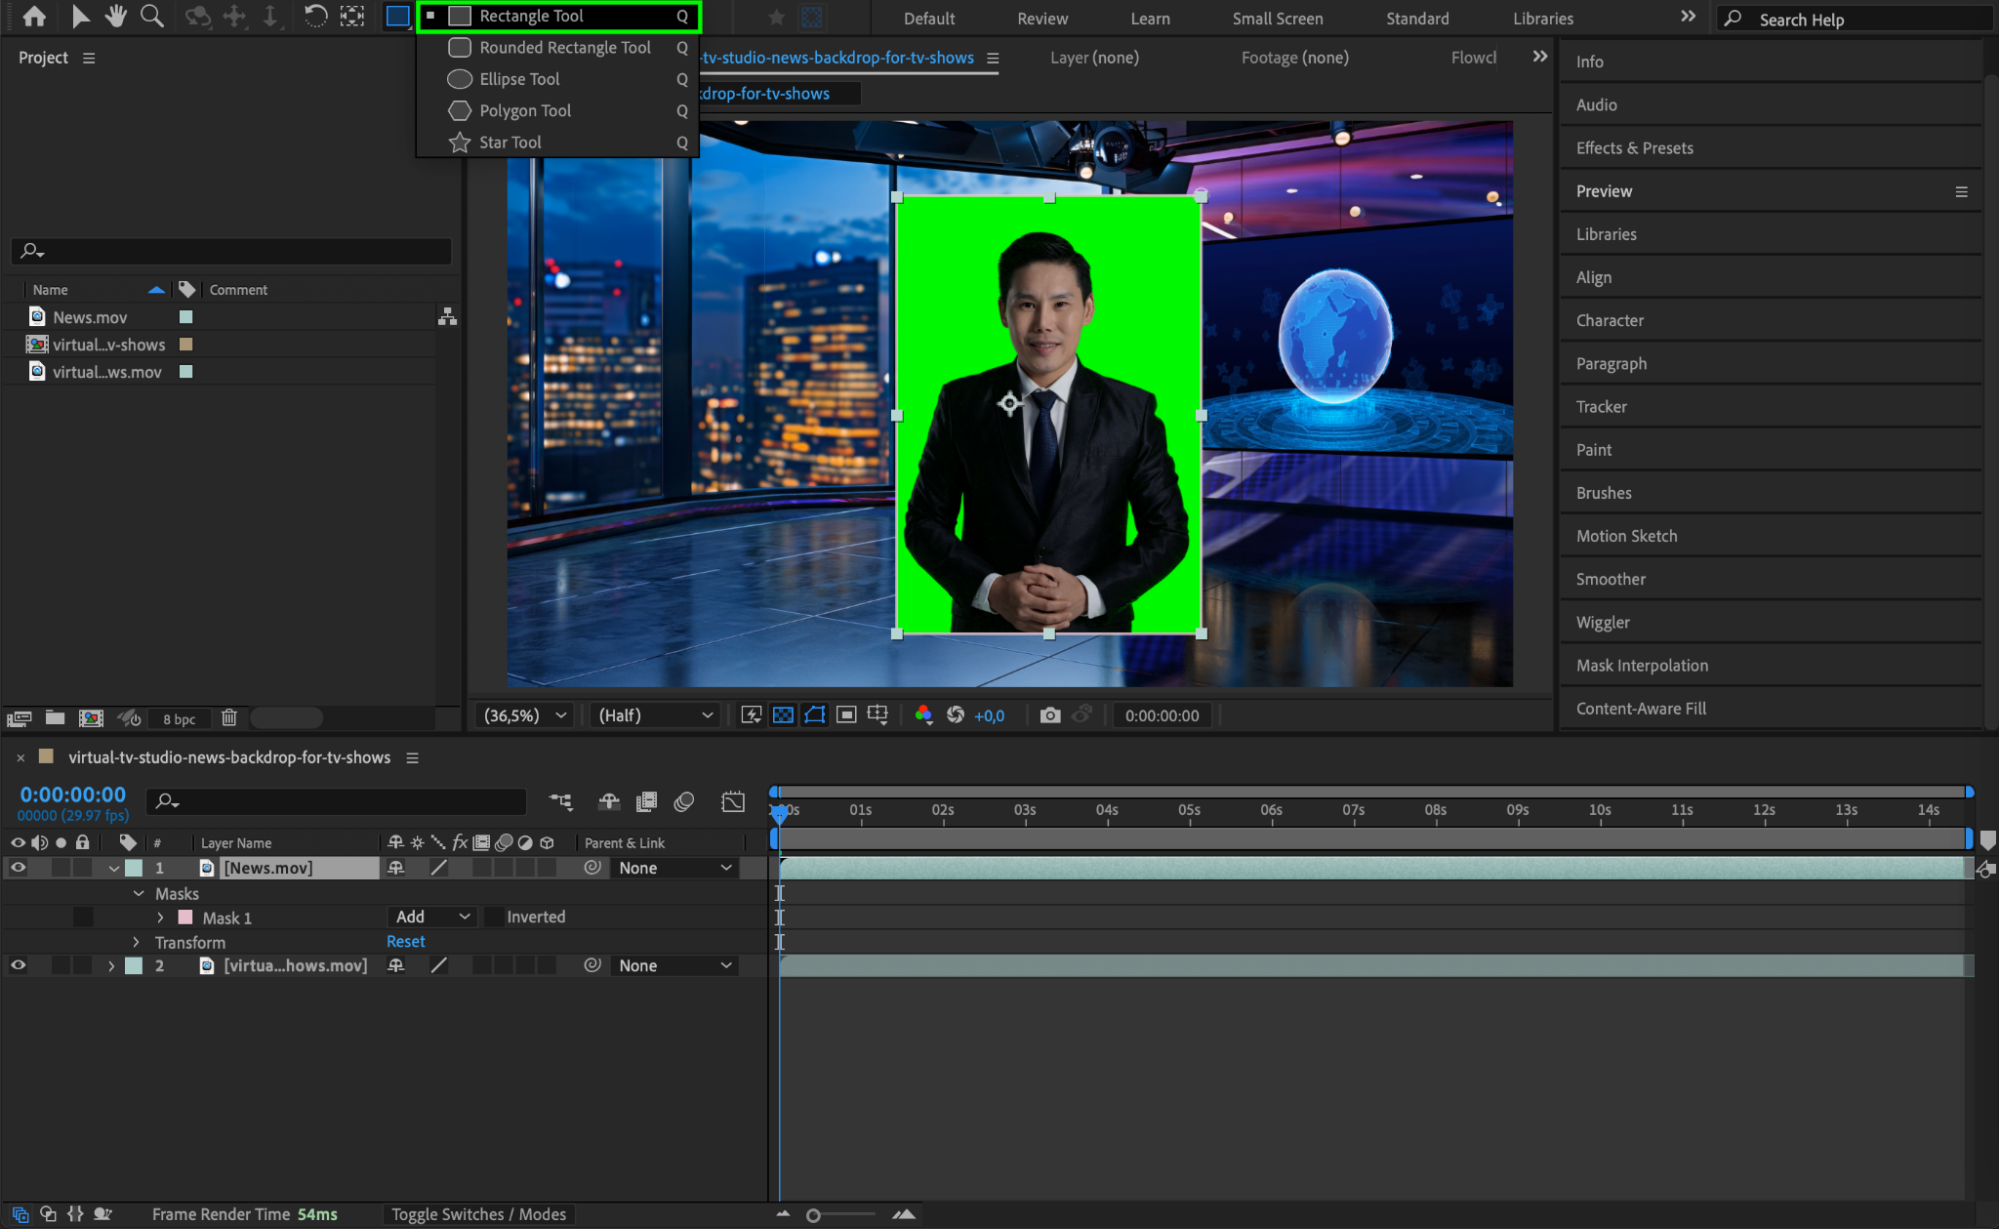 Step 3: Apply the Keylight Effect
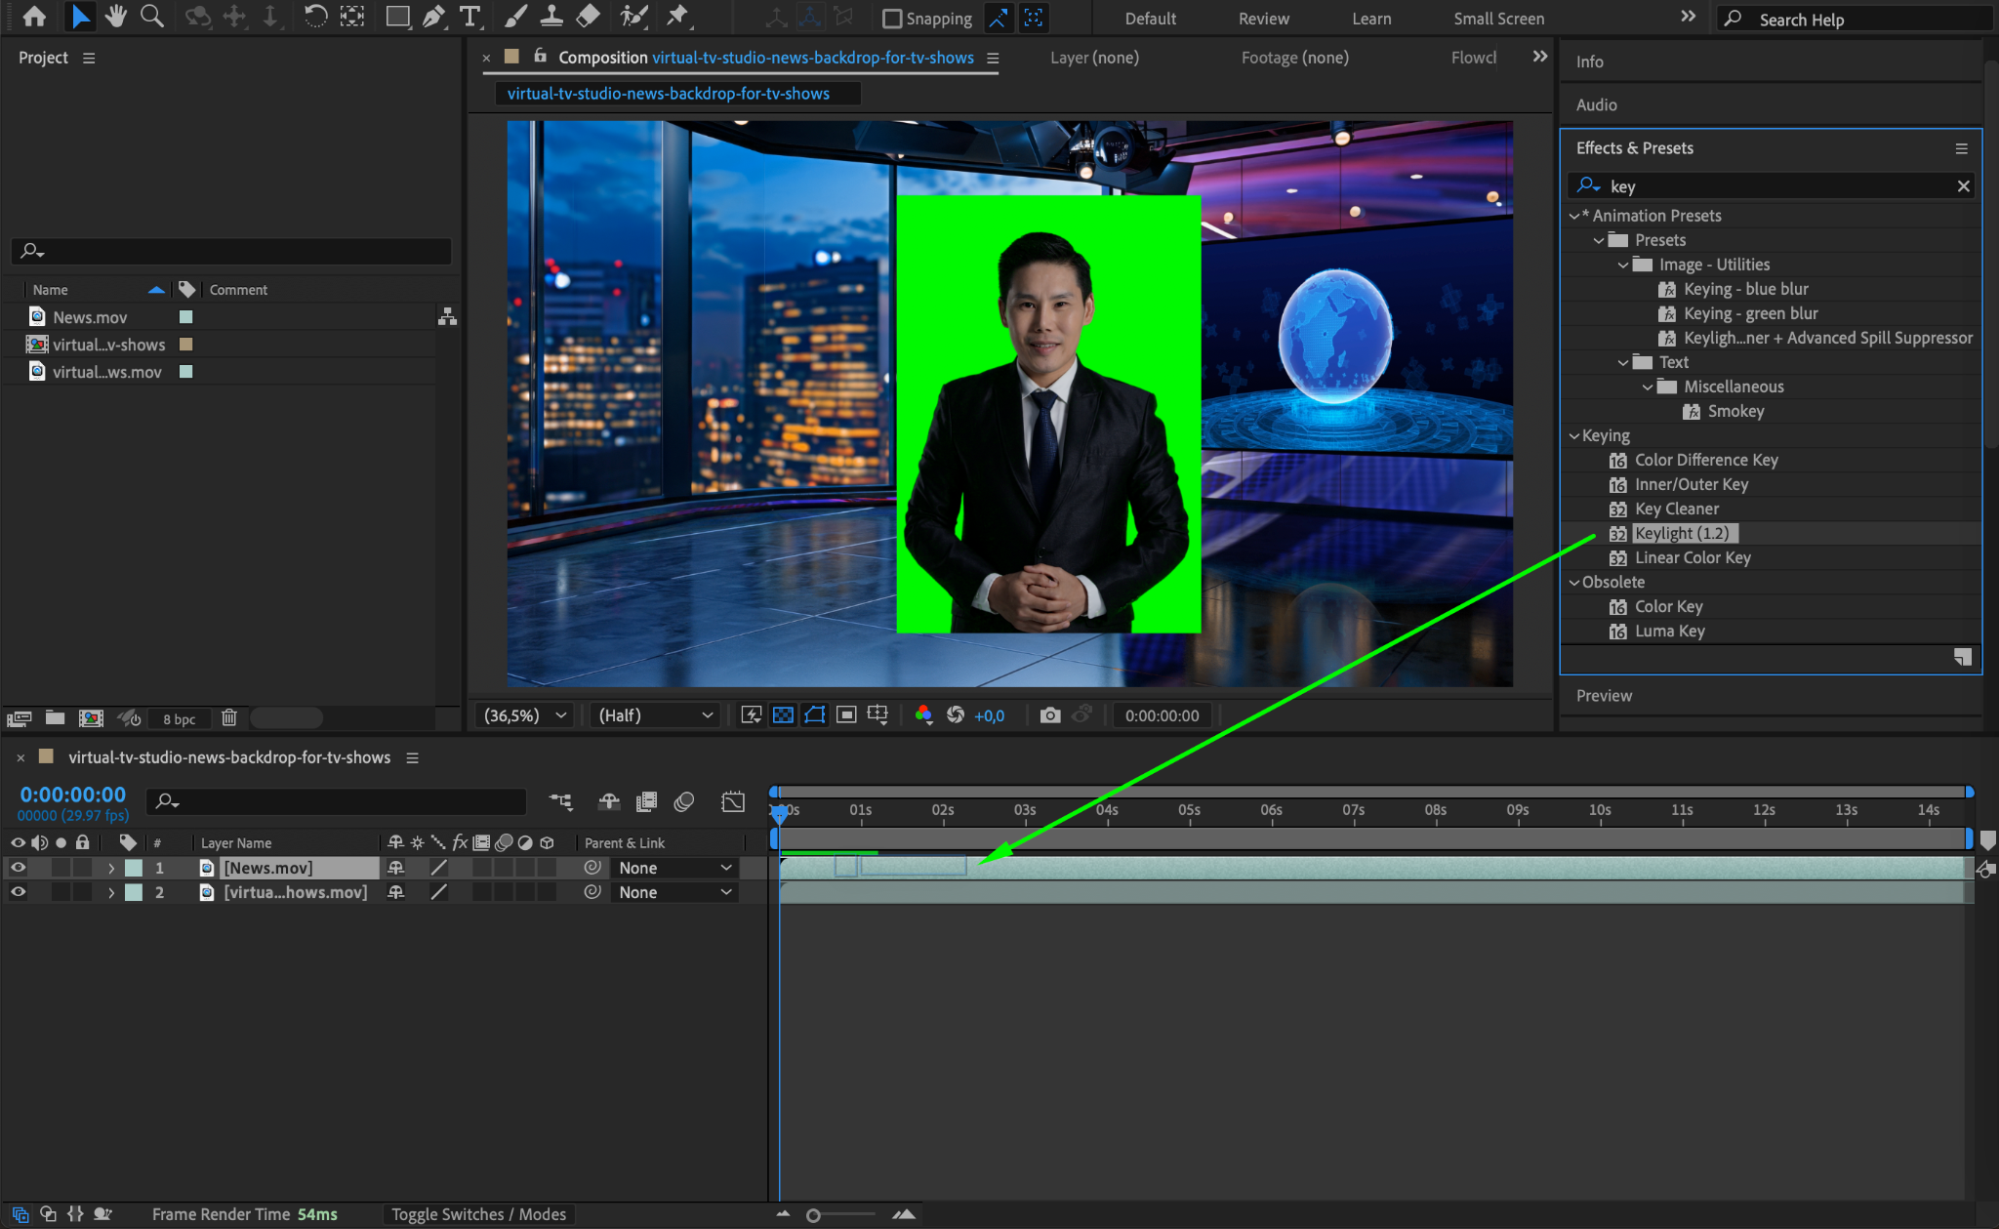
Open the Effects & Presets panel, search for Keylight 1.2, and drag it onto the green screen layer. This effect is essential for removing the green background and making the subject blend with the virtual set.
 Step 4: Remove the Green Background
In the Effect Controls panel, locate the Screen Colour option. Click on the eyedropper tool next to it and select the green background in your footage. This will remove the green screen and make the background transparent, revealing the virtual set behind the subject.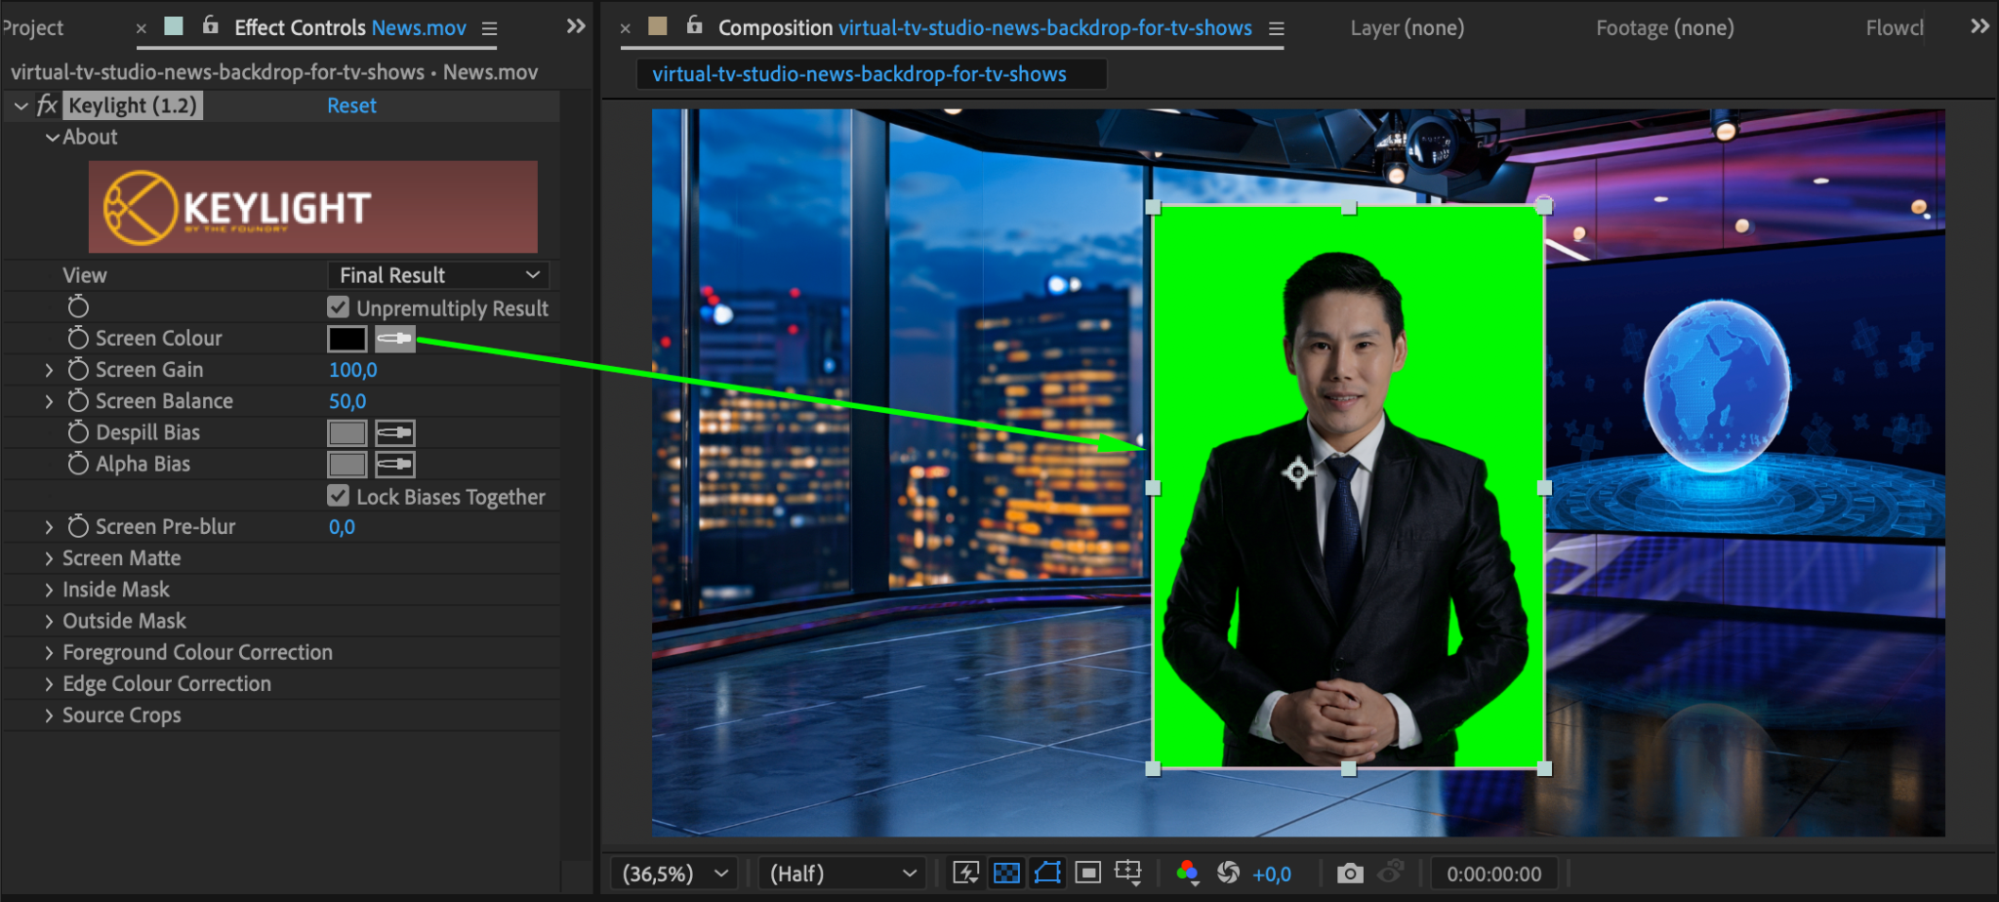 Step 5: Adjust Scale and Position
Use the Transform properties of the green screen layer to correctly position and scale the person within the virtual set. Adjust the Scale and Position settings in the timeline until the subject looks naturally placed in the scene.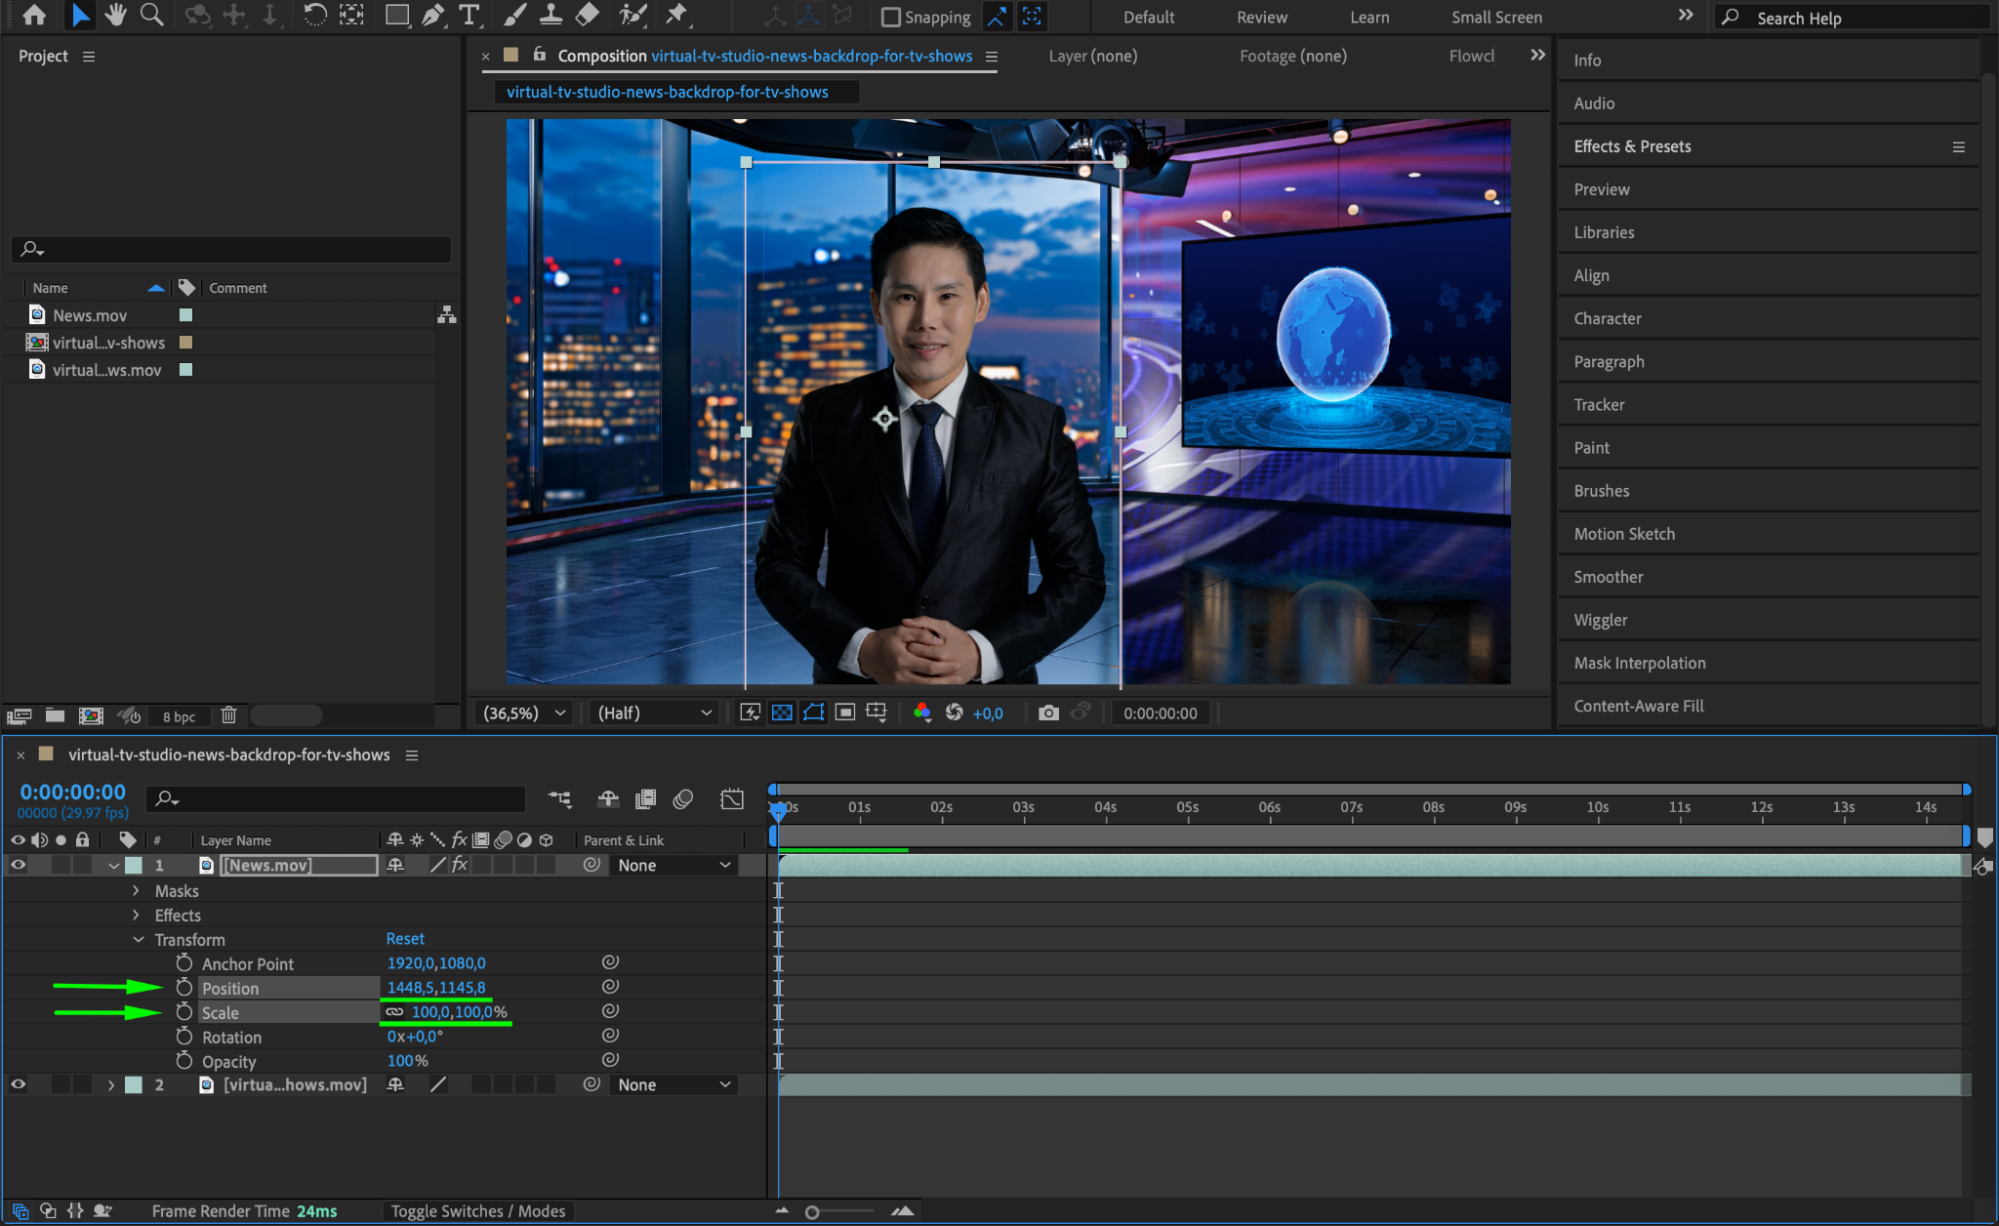 Step 6: Refine the Keying Effect (Optional)
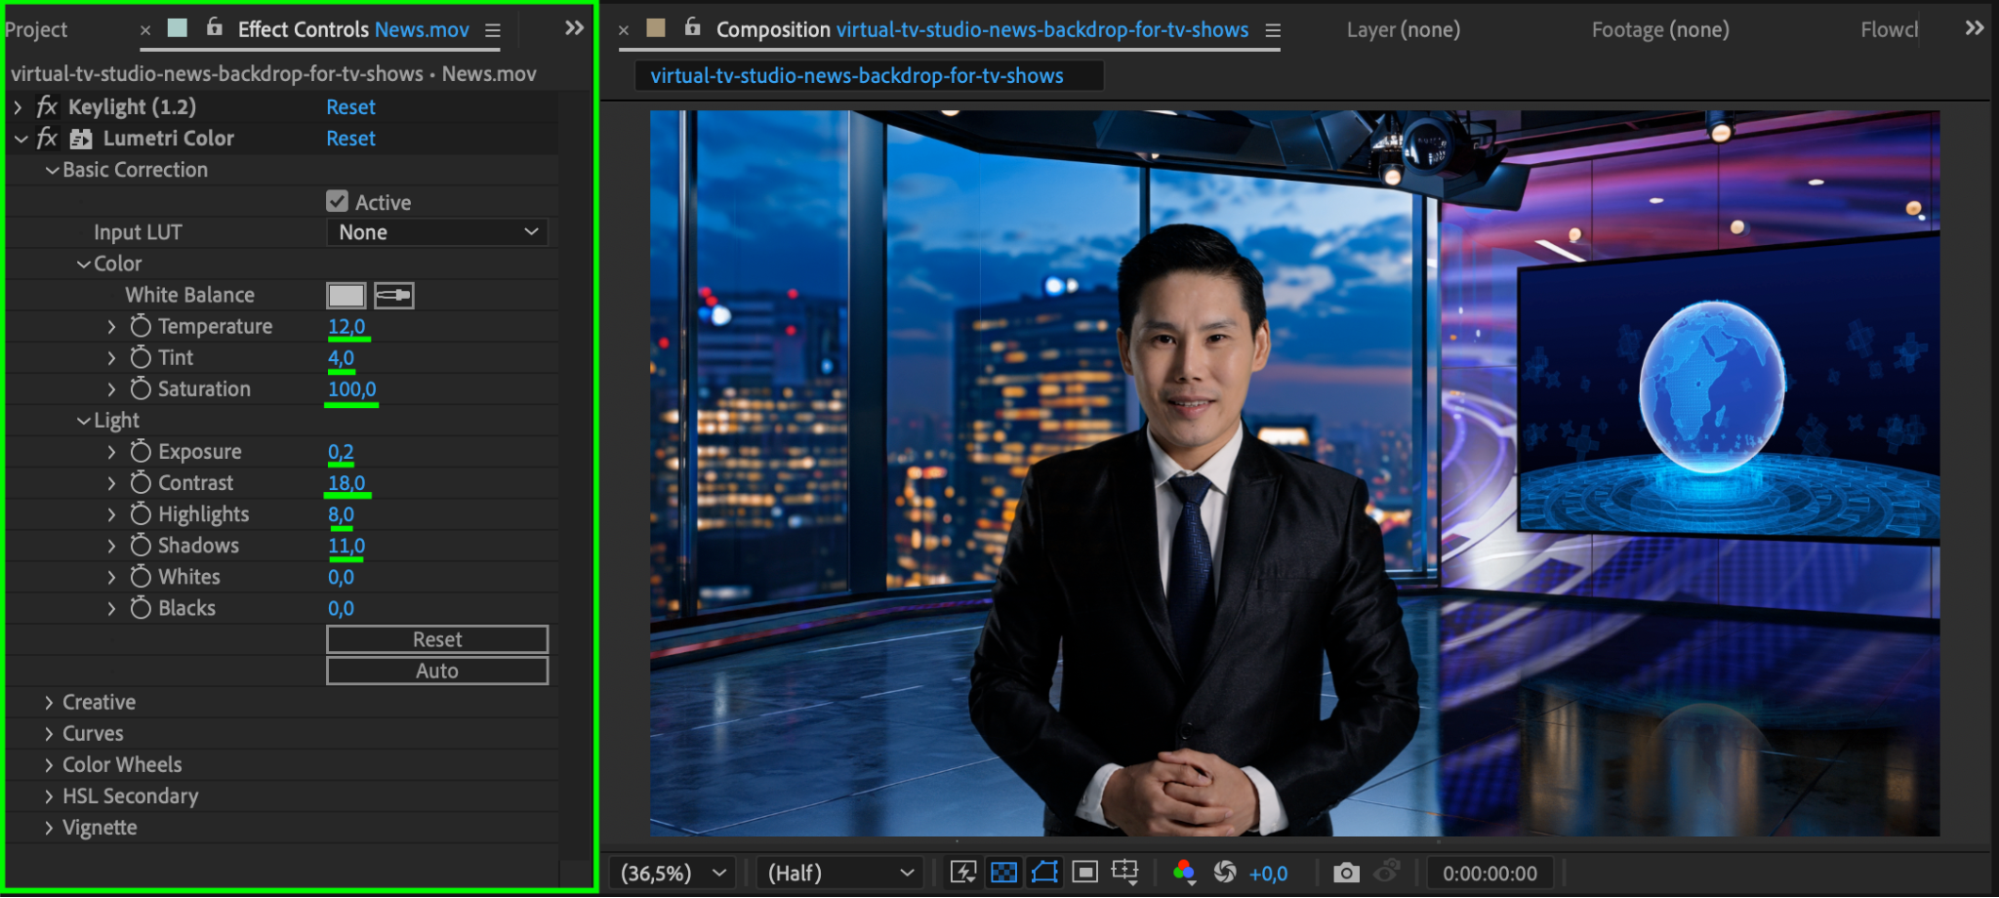
If any green spill remains on the subject, fine-tune the Screen Matte settings in Keylight. Adjust Clip Black and Clip White to remove unwanted edges, and use Screen Shrink/Grow to refine the mask around the subject.
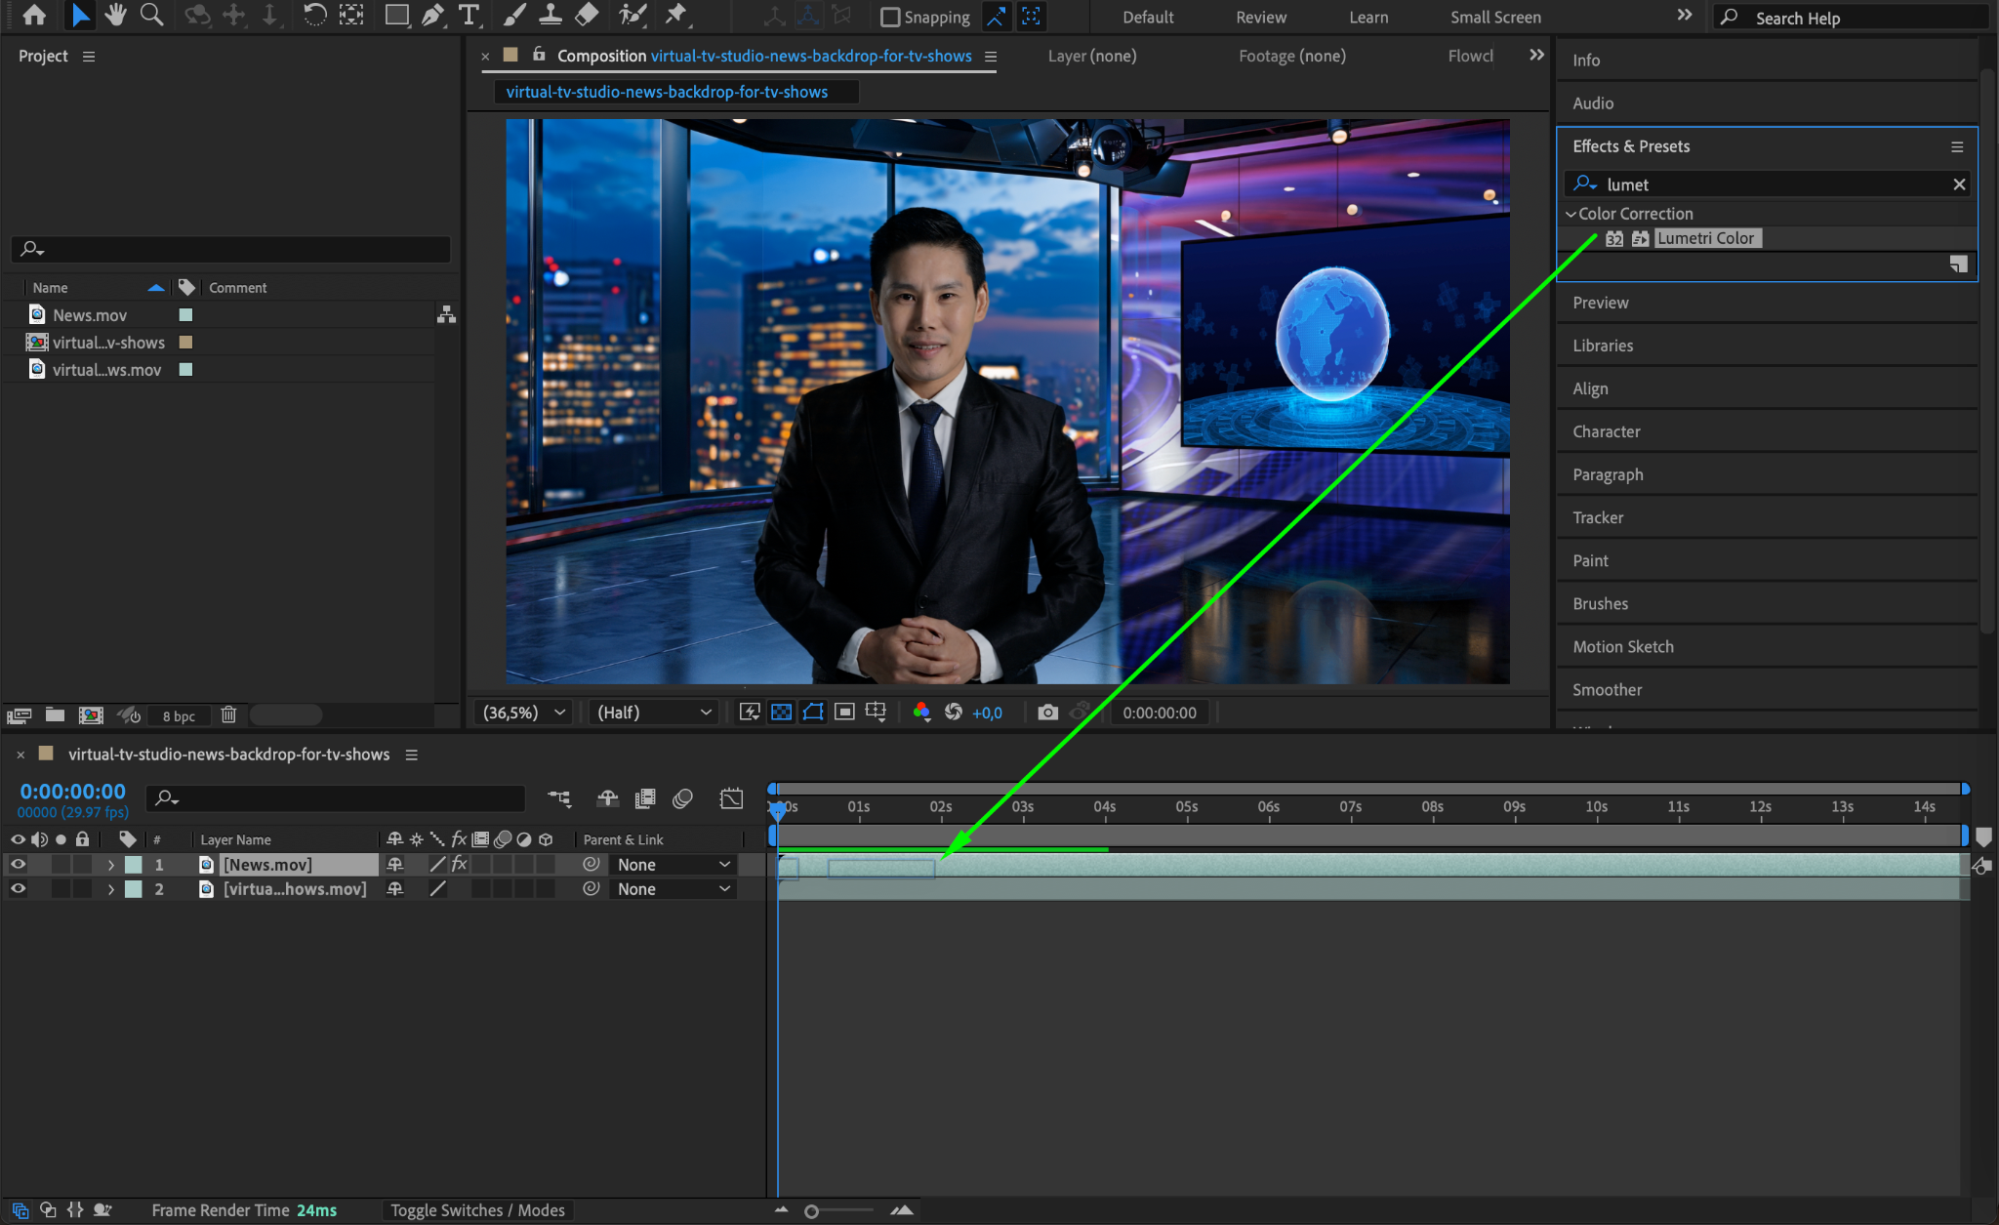
Step 7: Apply Color Correction
Use the Lumetri Color effect from the Effects & Presets panel to match the lighting and colors of the subject to the virtual background. Adjust Exposure, Contrast, Temperature, and Saturation to create a natural blend between the two video layers.
 Step 8: Preview the Composition
Press the Spacebar to play the composition and check how the subject looks within the virtual set. Toggle the Effects visibility on and off to compare the original and adjusted footage. Step 9: Render the Final Video
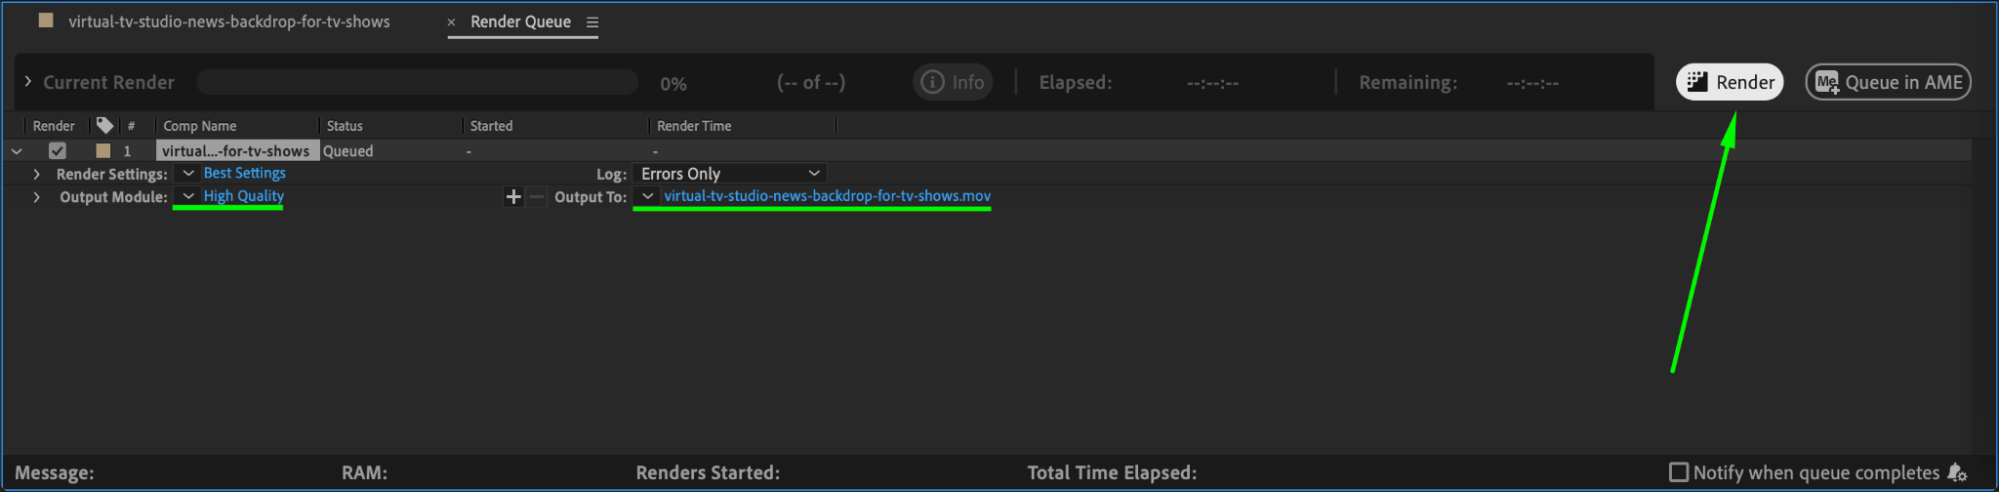
Go to Composition > Add to Render Queue, choose the desired format and output settings, and click Render to export your completed virtual set video.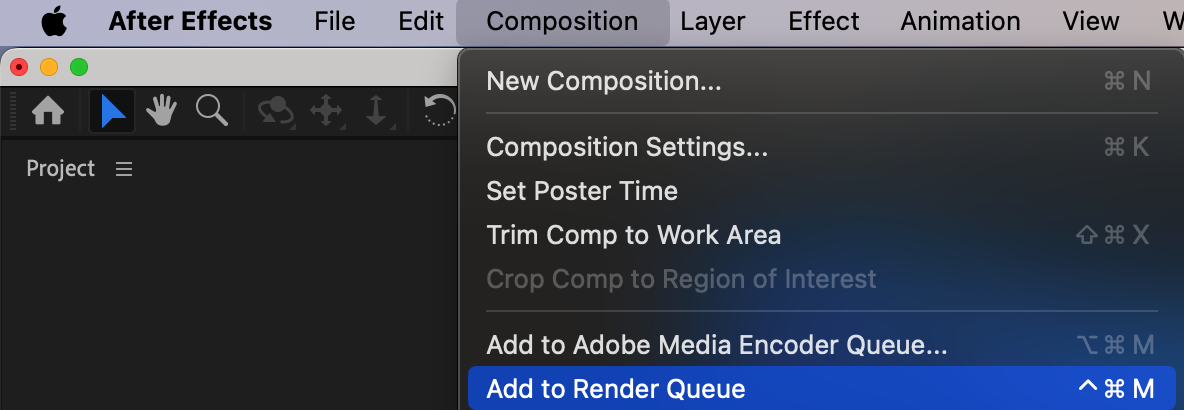
 Conclusion
Creating a virtual set in After Effects allows you to place a subject in any environment using green screen technology. By following these steps and using tools like Keylight and Lumetri Color, you can achieve a professional and seamless virtual set effect.
Our Bestsellers


