Step-by-Step Guide to Creating an RGB Split Effect in After Effects
Introduction – Learn How to Add a Stunning RGB Split Effect to Your Videos in After Effects
The RGB split effect is a popular visual technique that adds a glitchy, distorted look to your videos by separating and shifting the red, green, and blue color channels. This tutorial will walk you through the steps to create this effect in After Effects.
Get 10% off when you subscribe to our newsletter

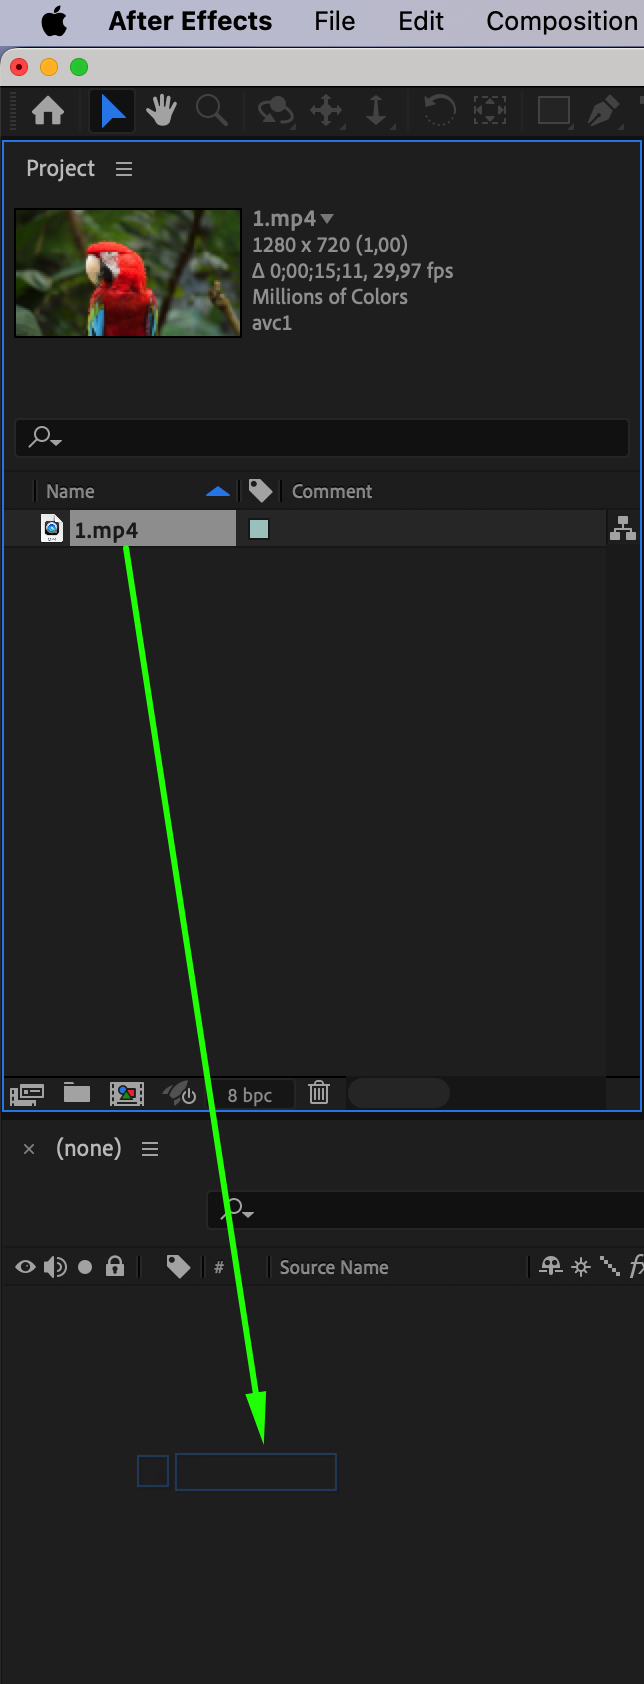
Step 1: Import Your Video Files
Begin by importing your video into After Effects. Go to File > Import > File, then select your video clip. Once imported, drag the video onto your timeline.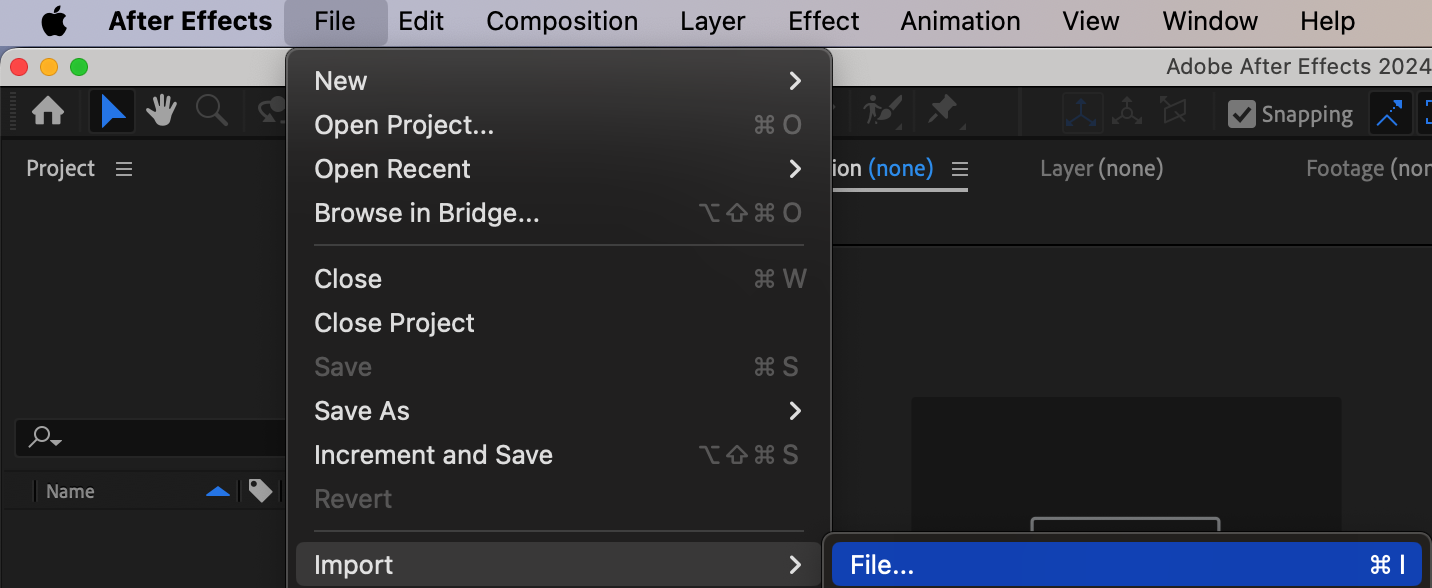
 Step 2: Add Additional Elements (Optional)
If you want to apply the RGB split effect to other elements like logos, text, or shapes, you can add them to your project now. These can be manipulated with the same RGB split effect as your video for added visual flair.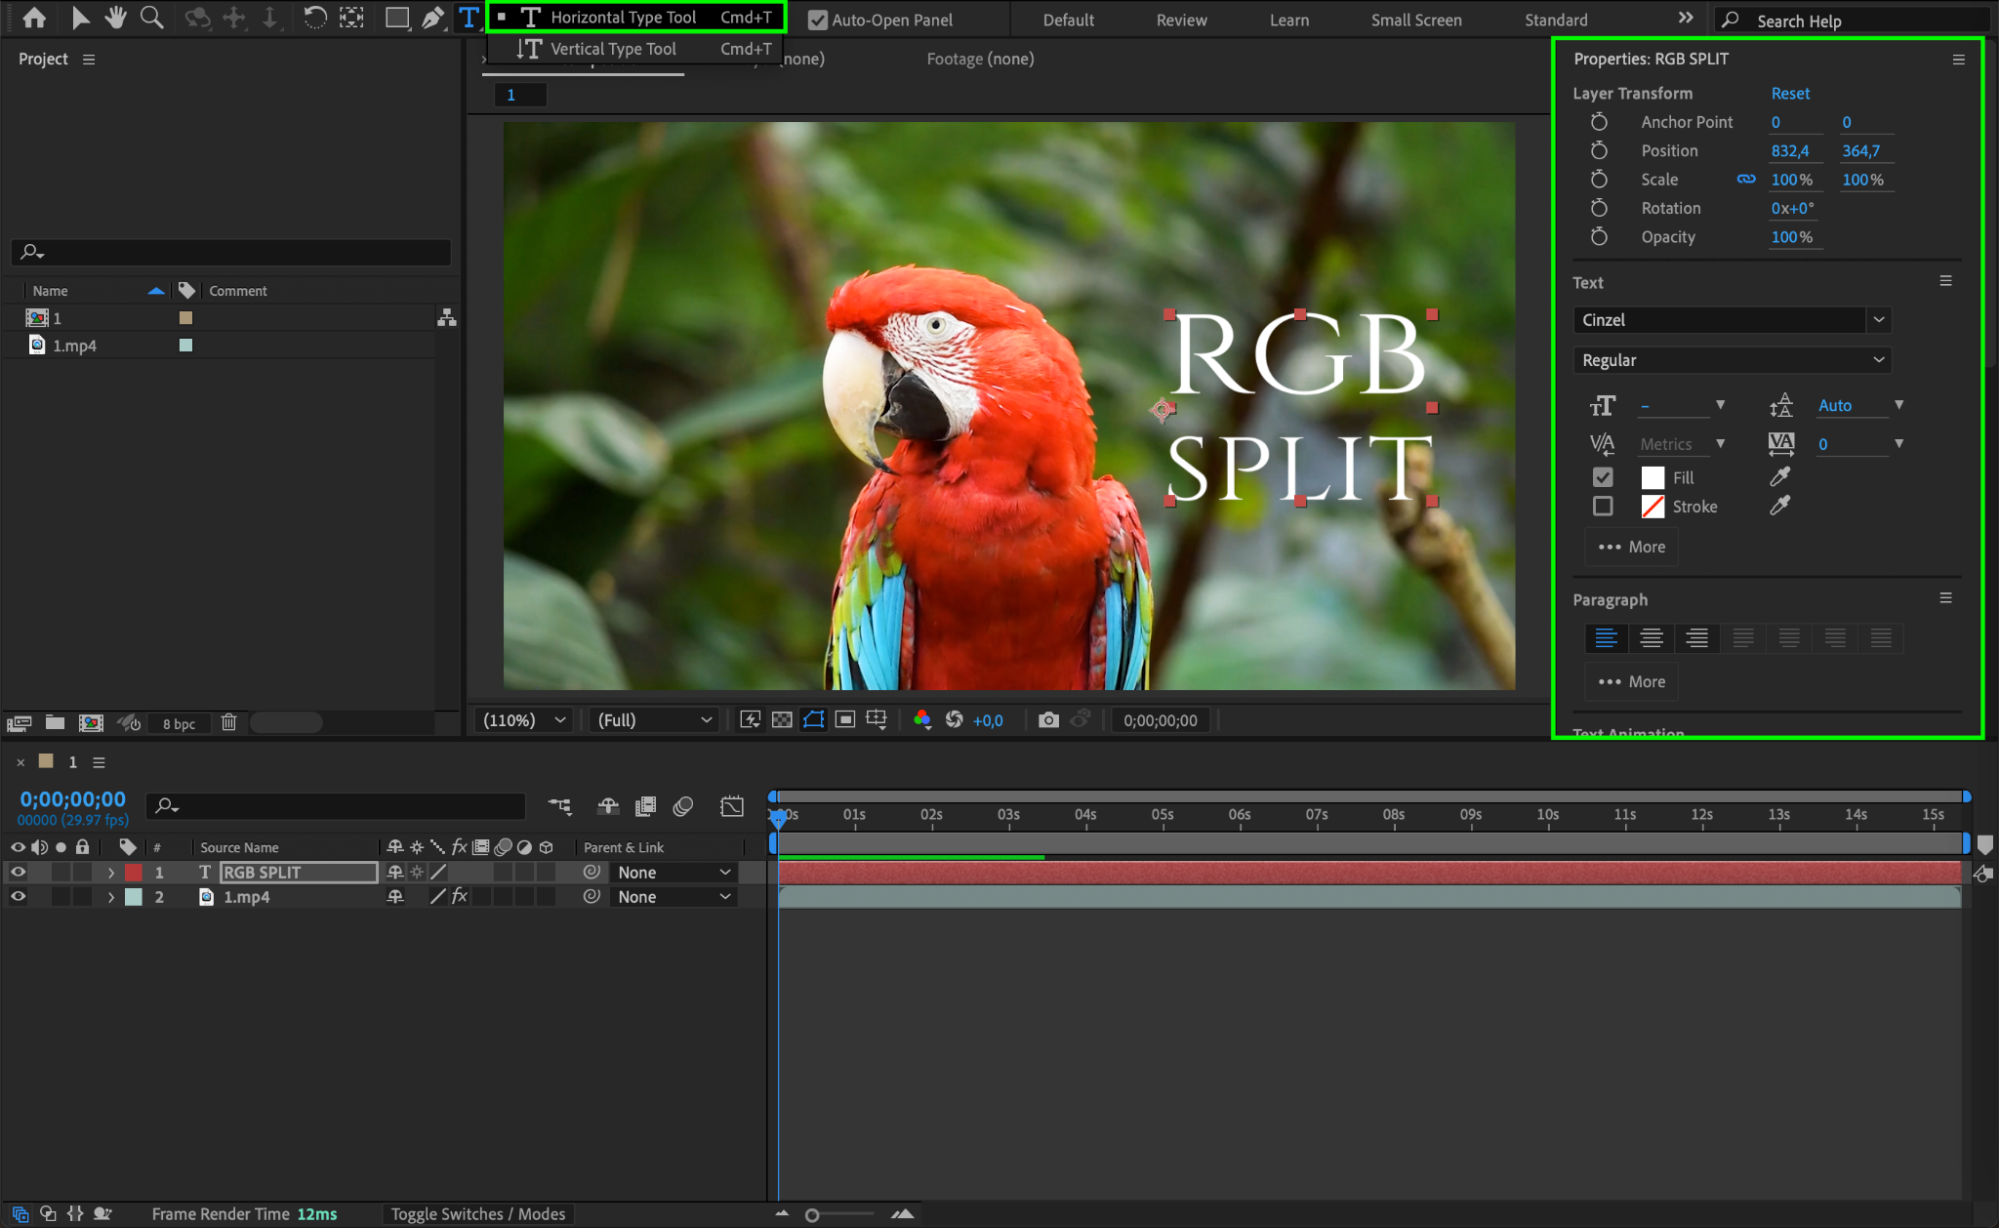 Step 3: Pre-compose the Layers
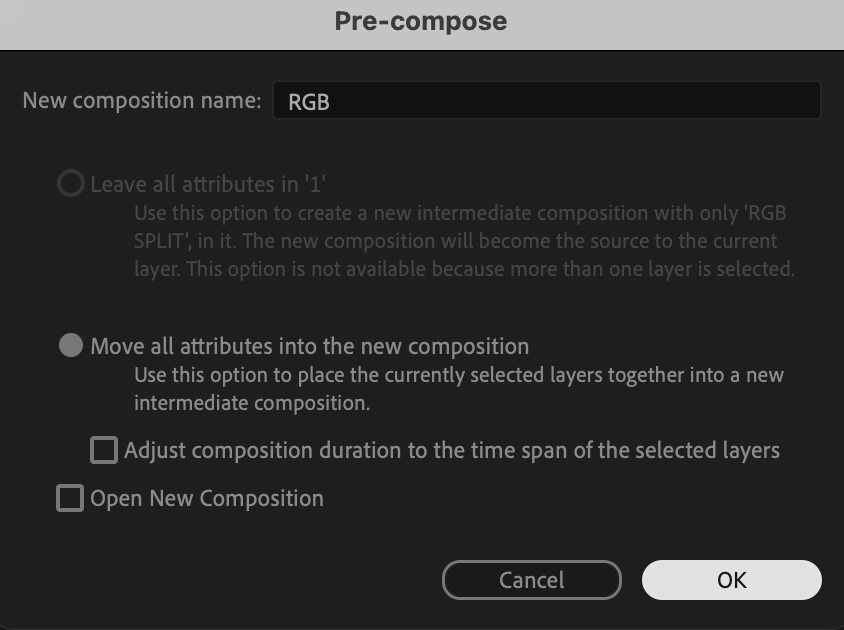
Select all the layers in your timeline (including your video and any other elements). Right-click on them and choose Pre-compose. Name the new composition something like “RGB.” This will combine all your elements into a single layer for easier manipulation.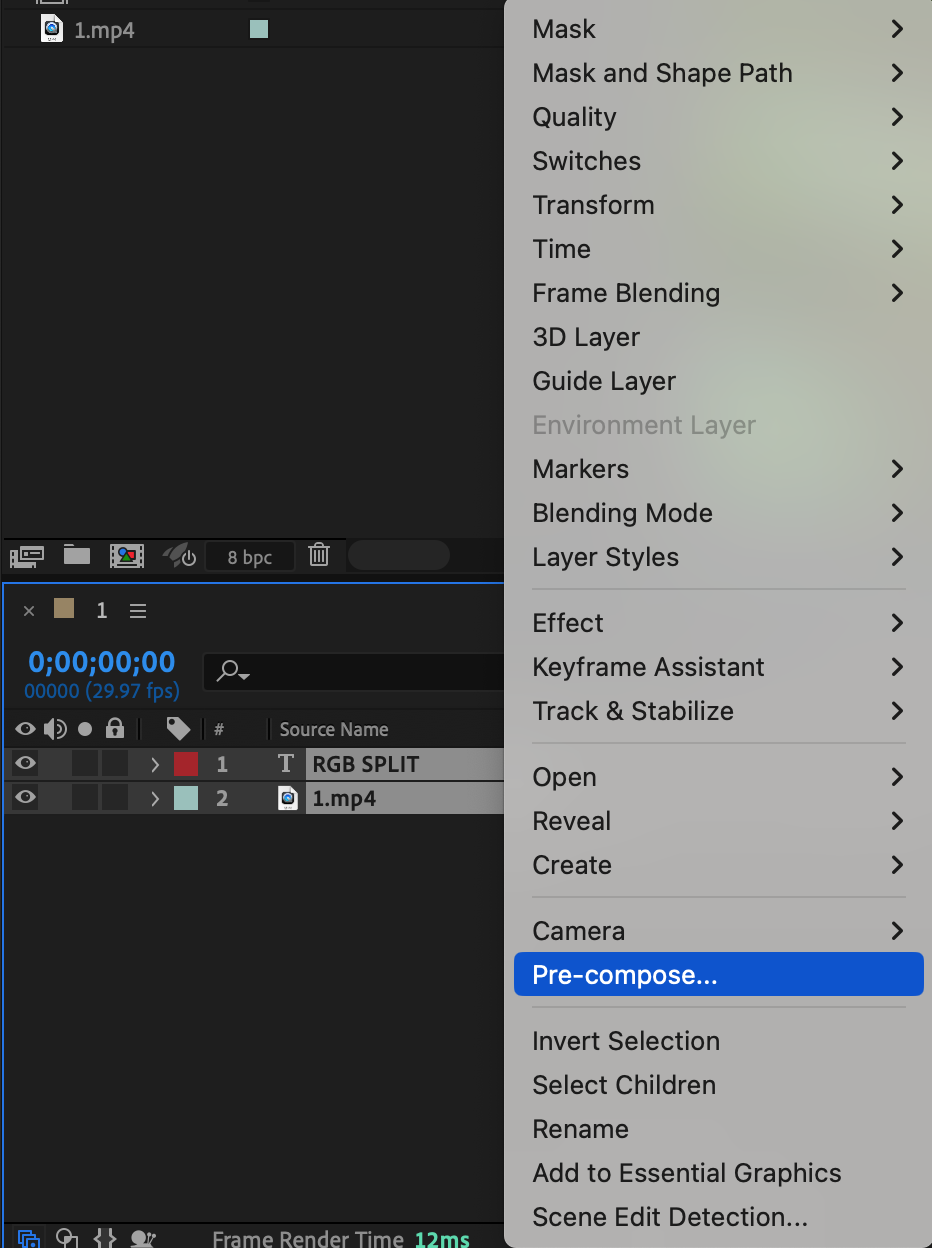
 Step 4: Apply the Shift Channels Effect
With the pre-composed layer selected, go to the Effects & Presets panel and search for the Shift Channels effect. Drag it onto your pre-composed layer. This effect will allow you to manipulate the color channels of your video.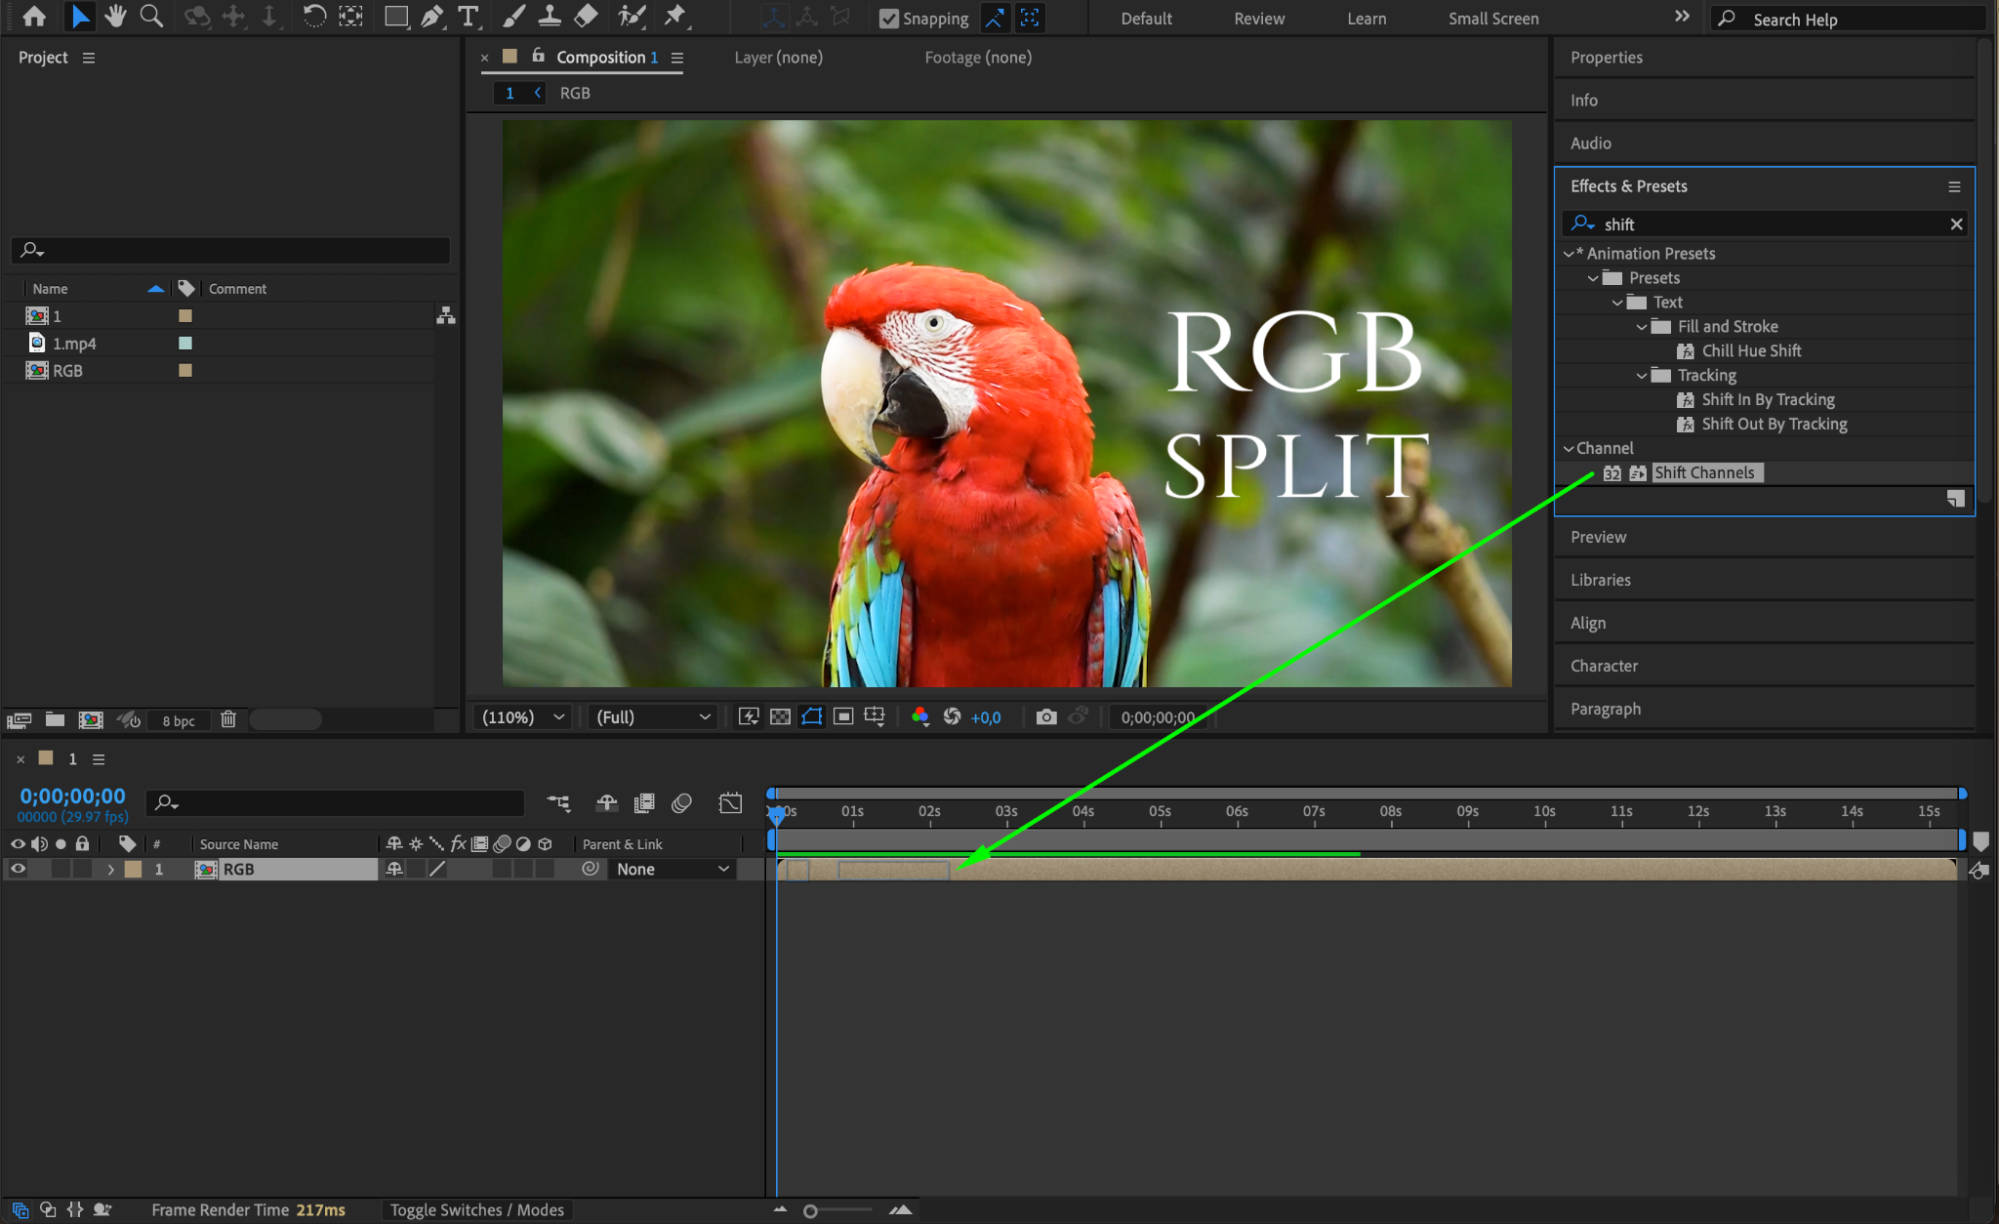 Step 5: Adjust the Channel Settings
In the Effect Controls panel, set the following parameters for the Shift Channels effect:
Set Take Red From to Red.
Set Take Green From to Full Off.
Set Take Blue From to Full Off.
This will isolate the red channel and remove the green and blue channels from the video.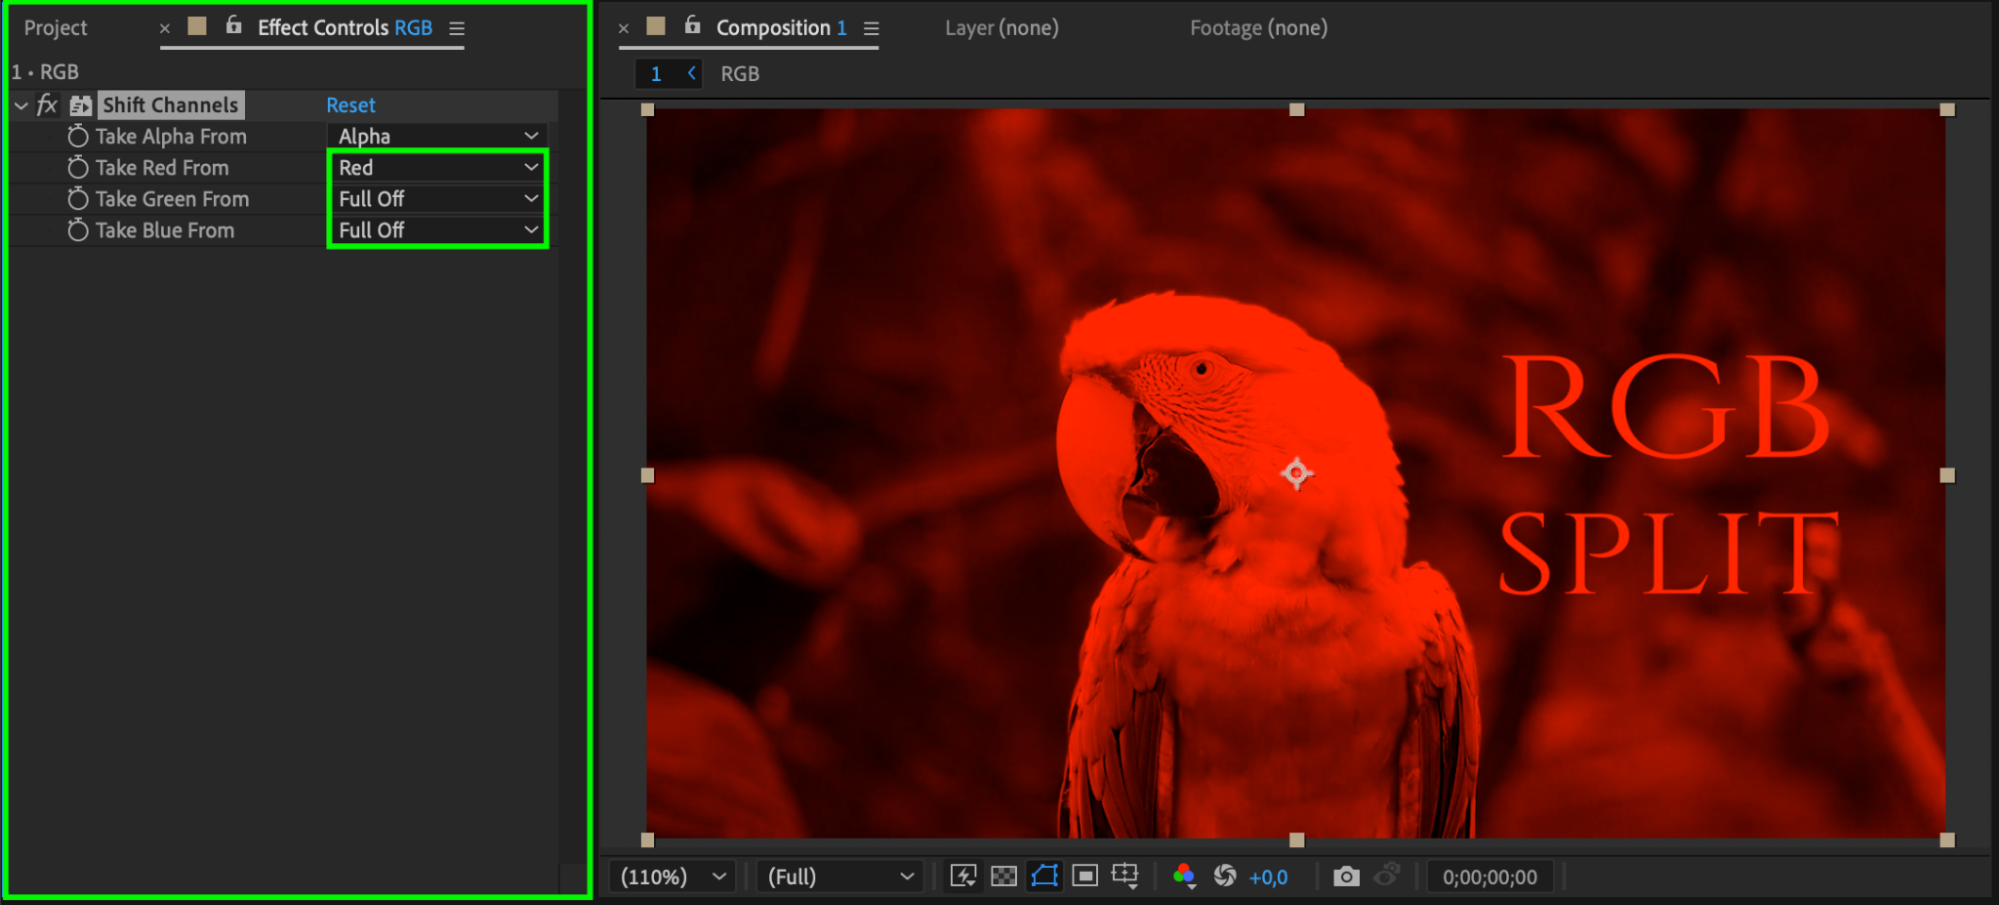 Step 6: Duplicate the Layer
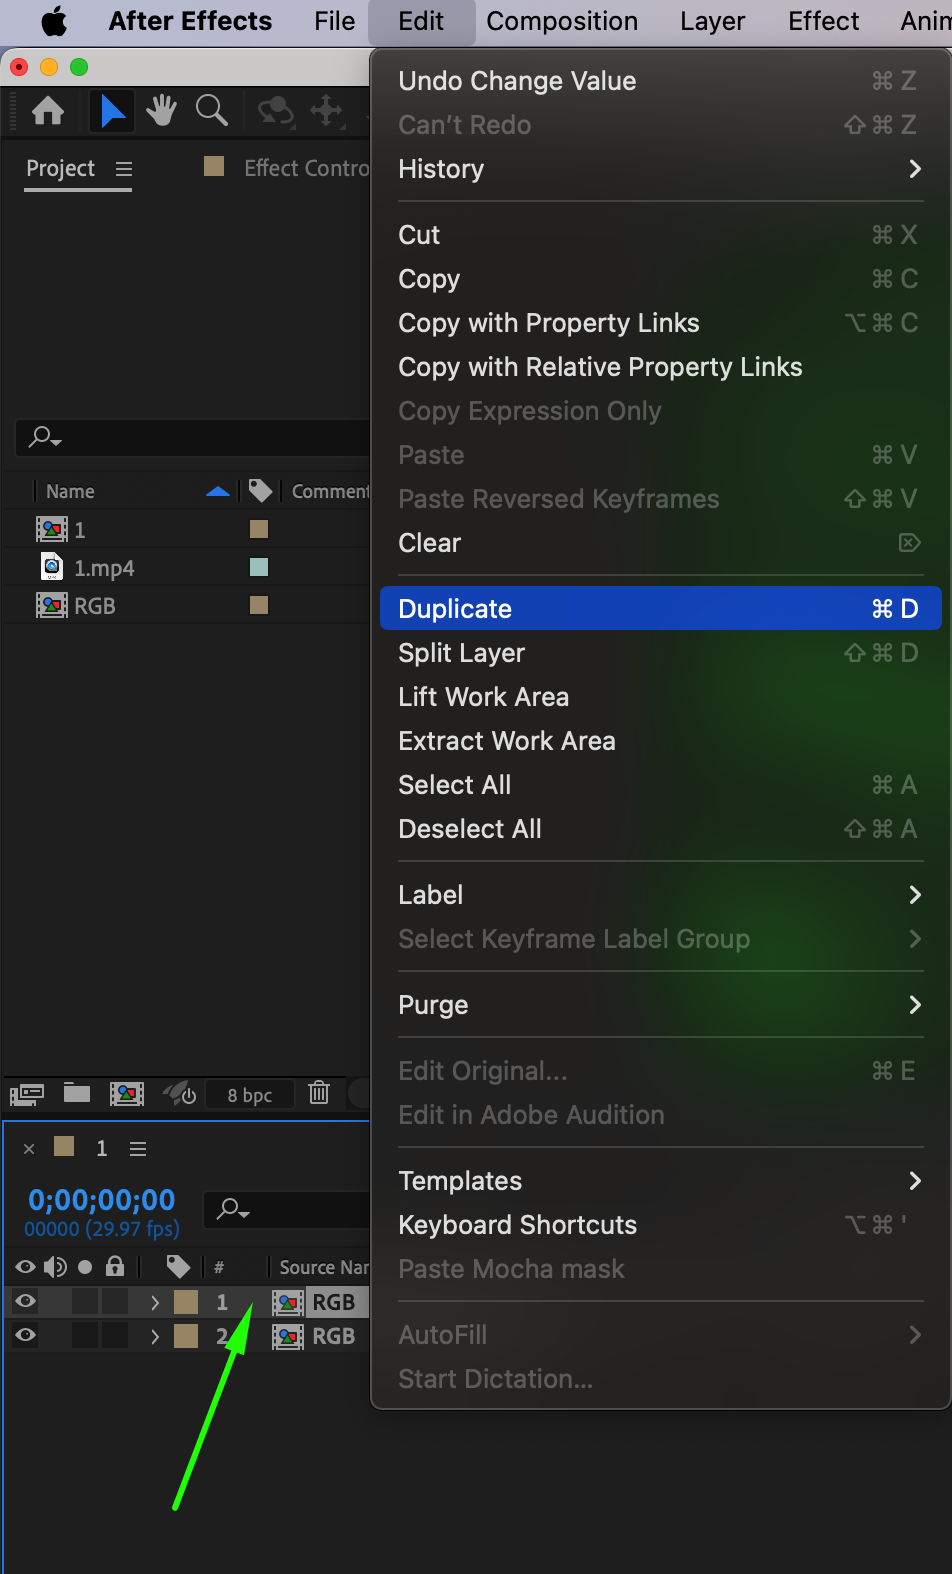
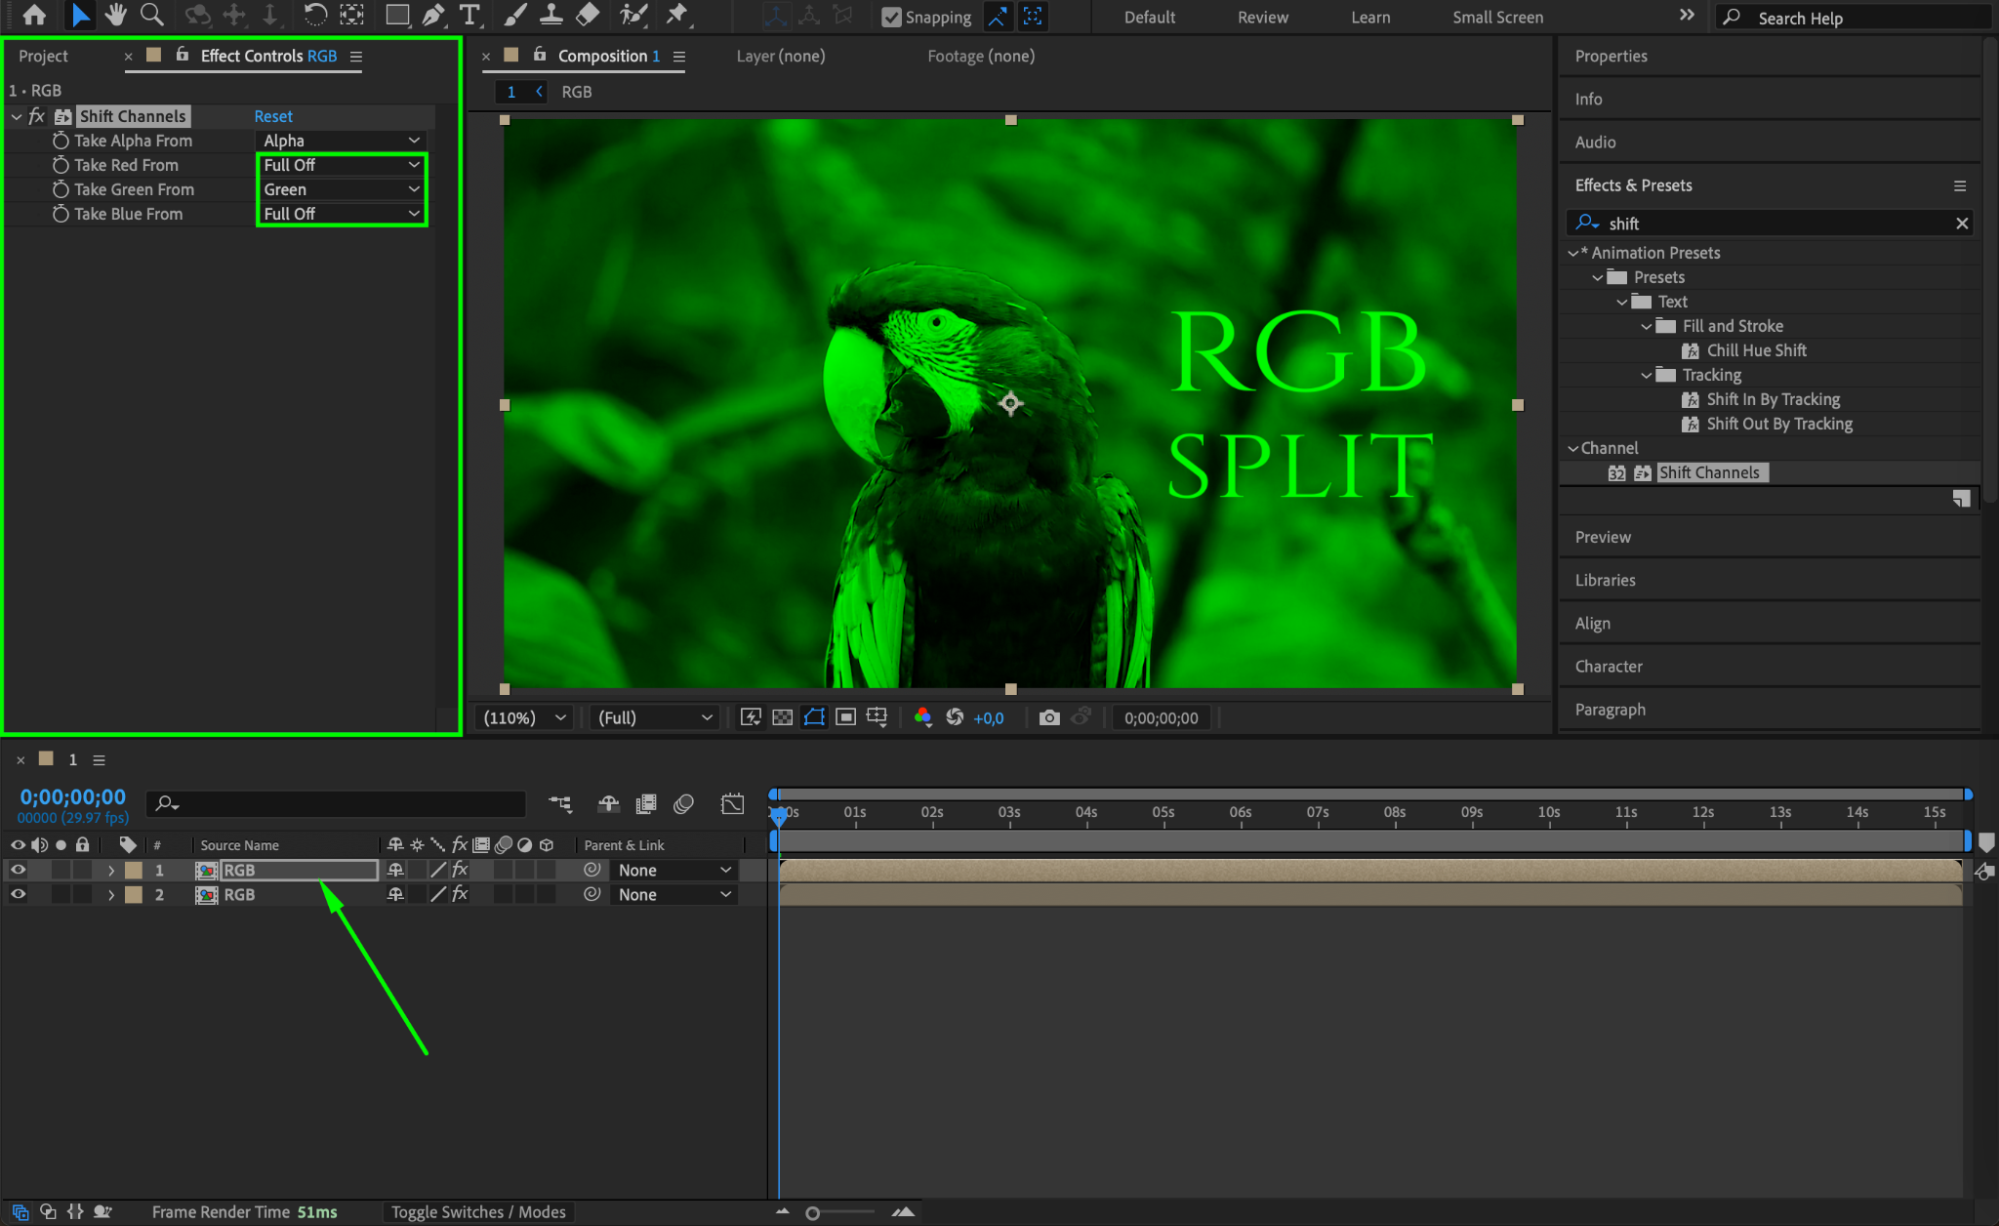
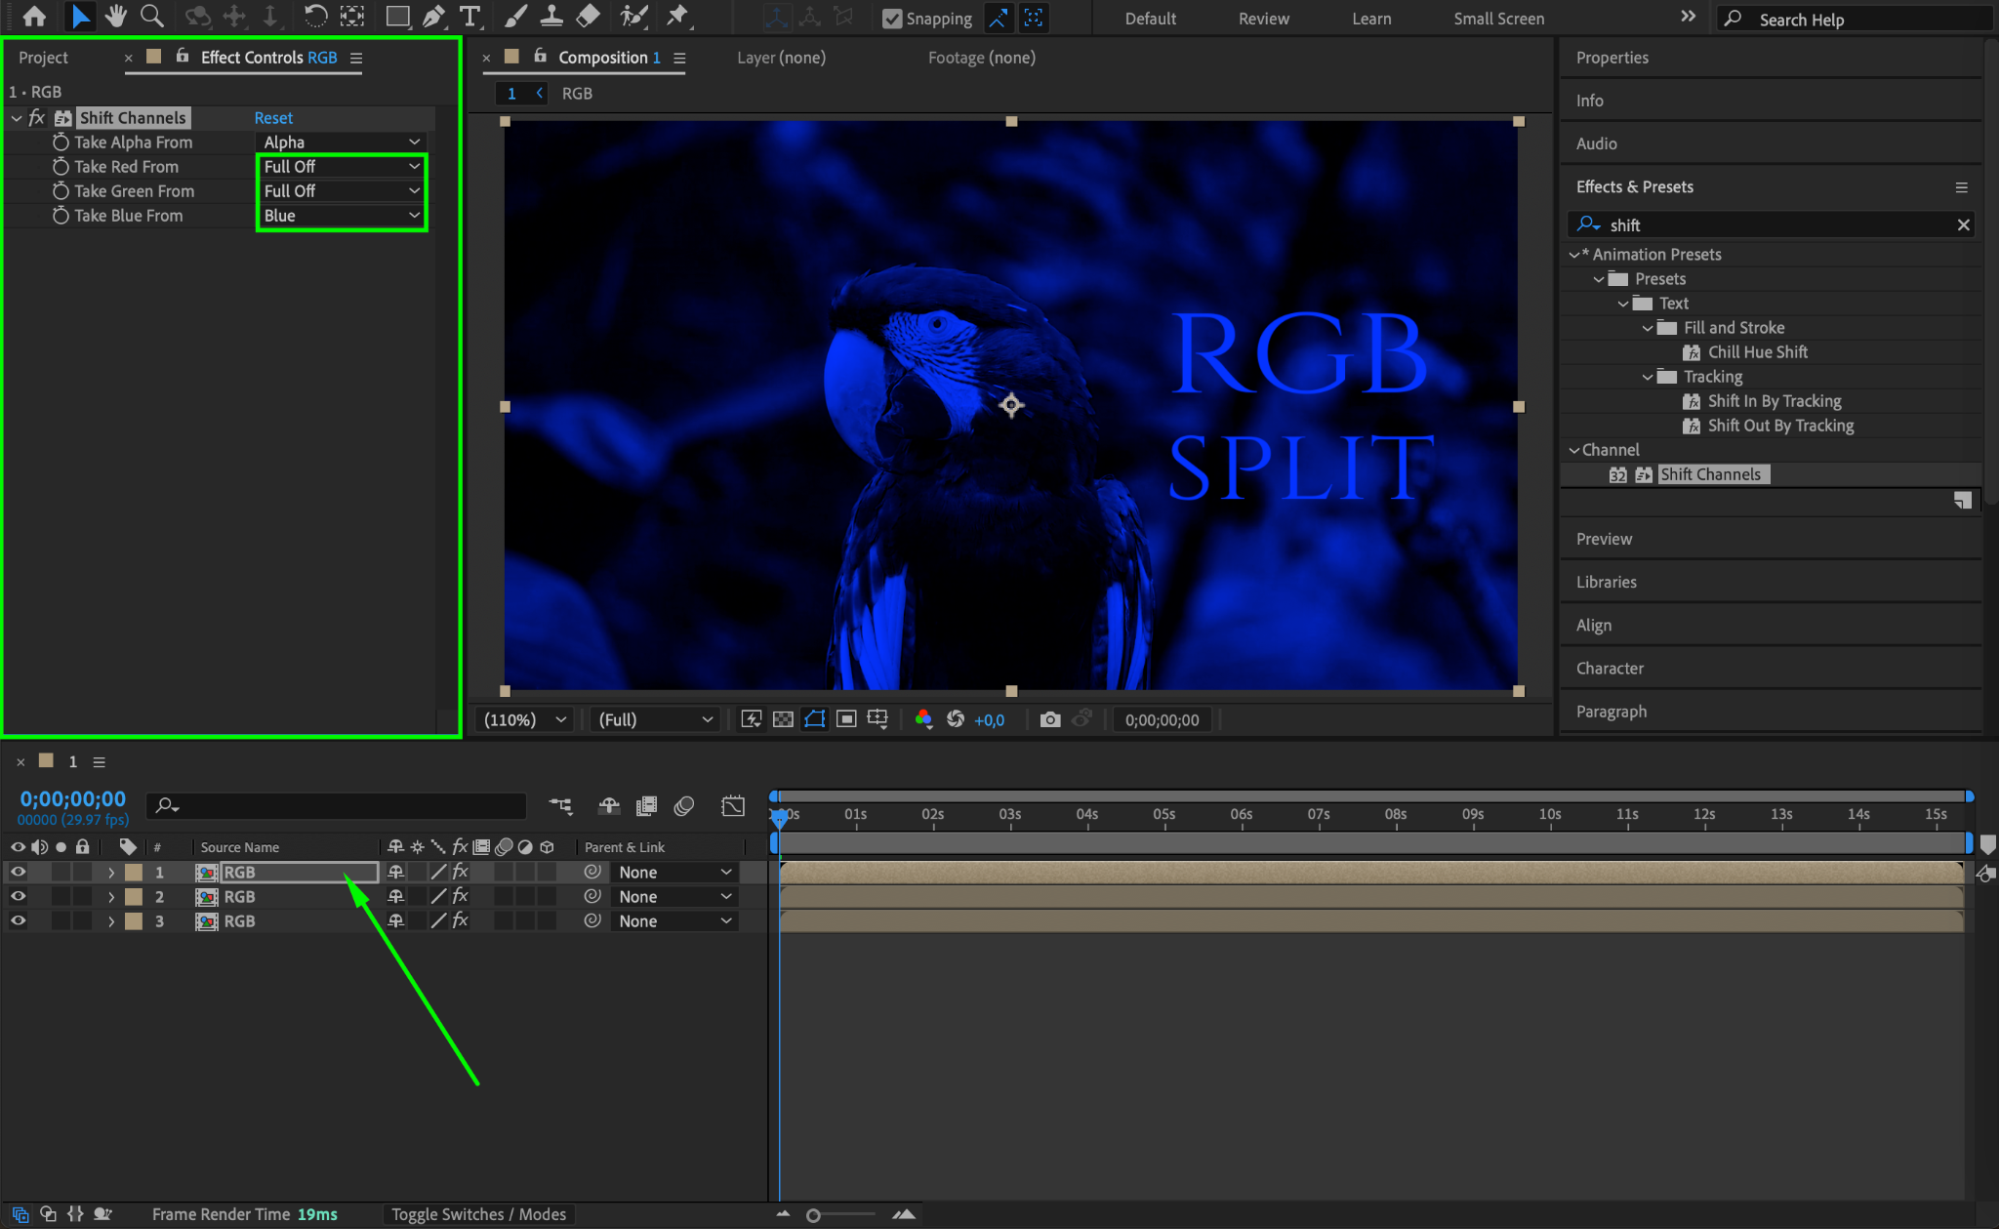
Now, duplicate the layer twice by selecting it and pressing Ctrl/Cmd + D. For each of the new layers, adjust the channel settings from
On the second layer, set Take Green From to Green, and the other two channels to Full Off.
On the third layer, set Take Blue From to Blue, and the other two channels to Full Off.
This will create three layers: one for each color channel (Red, Green, and Blue).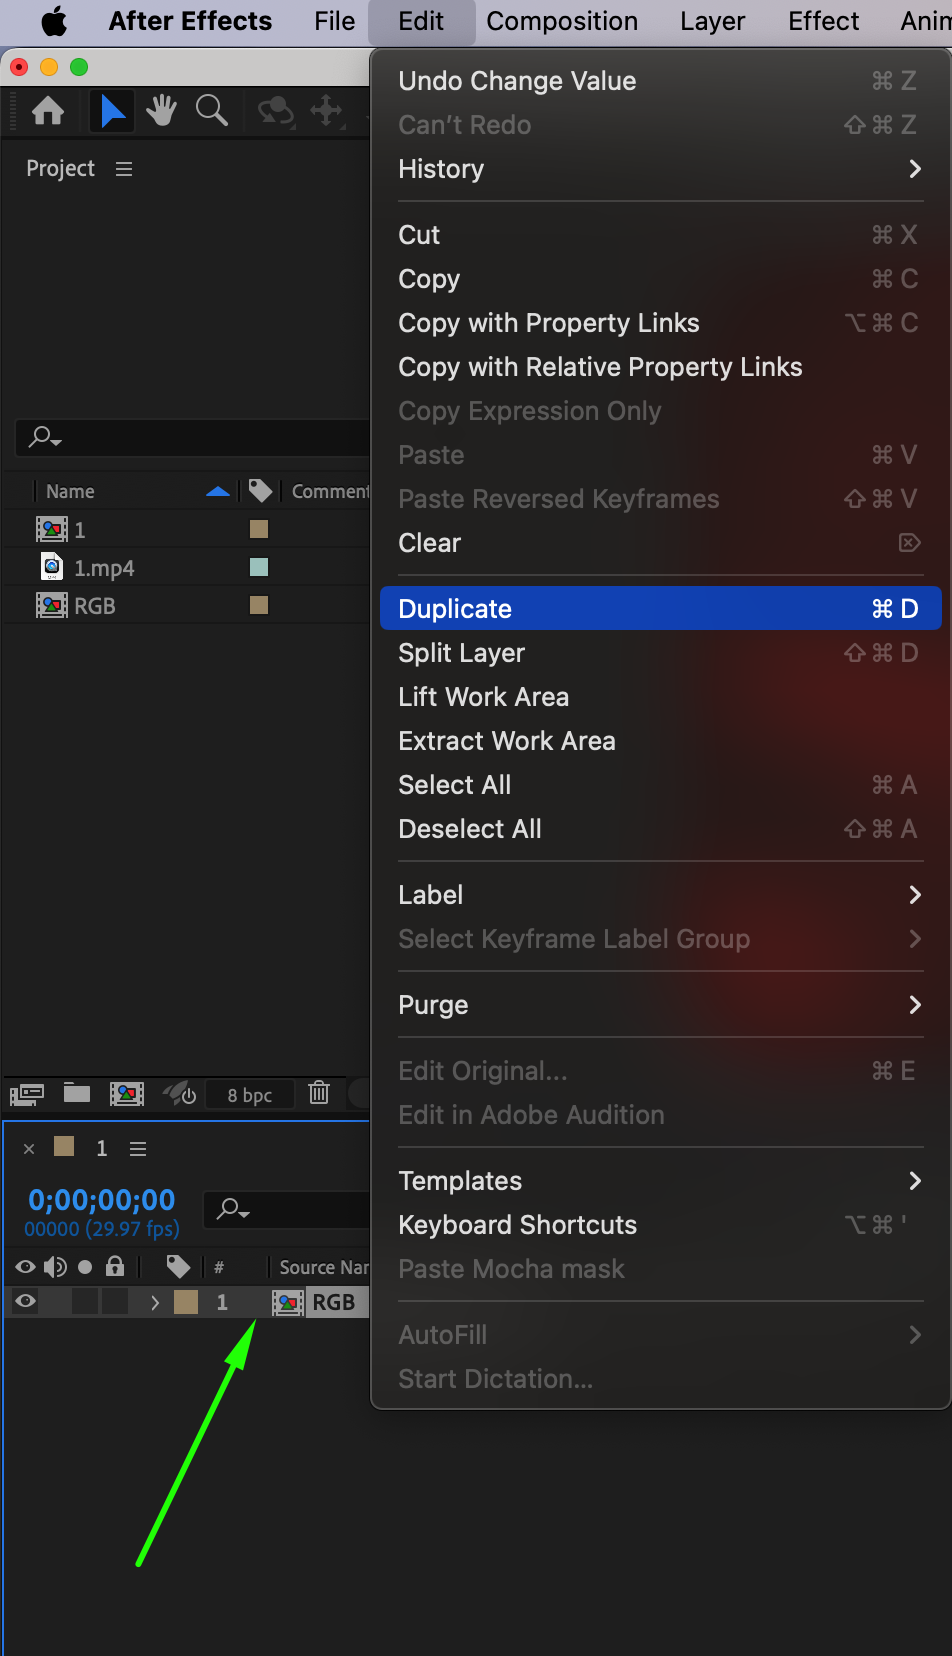
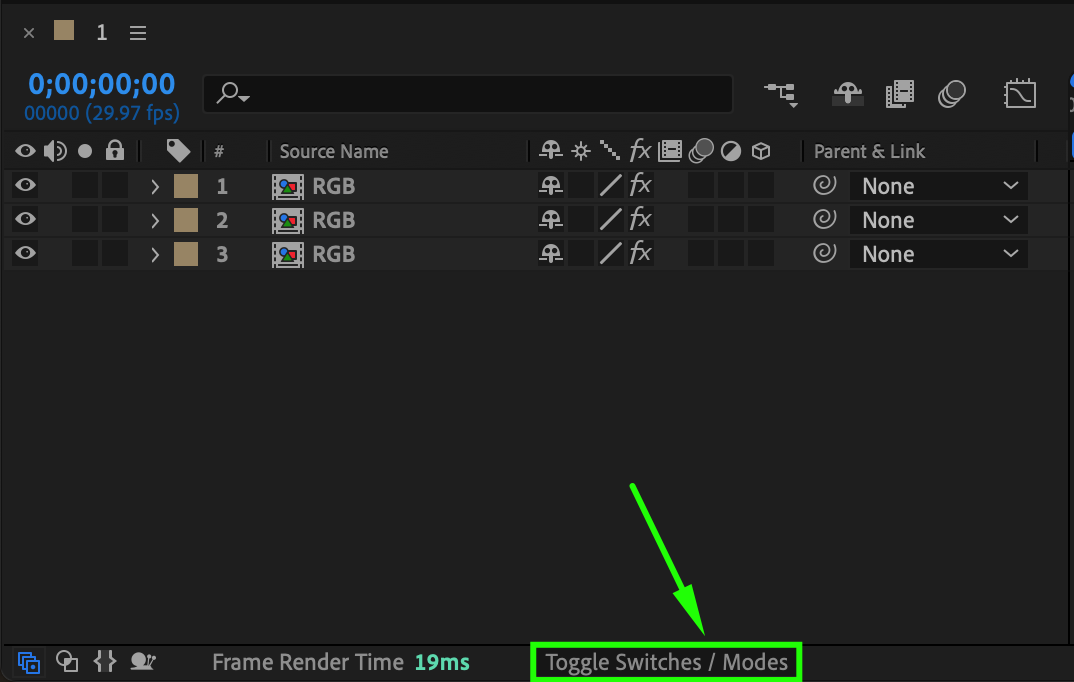
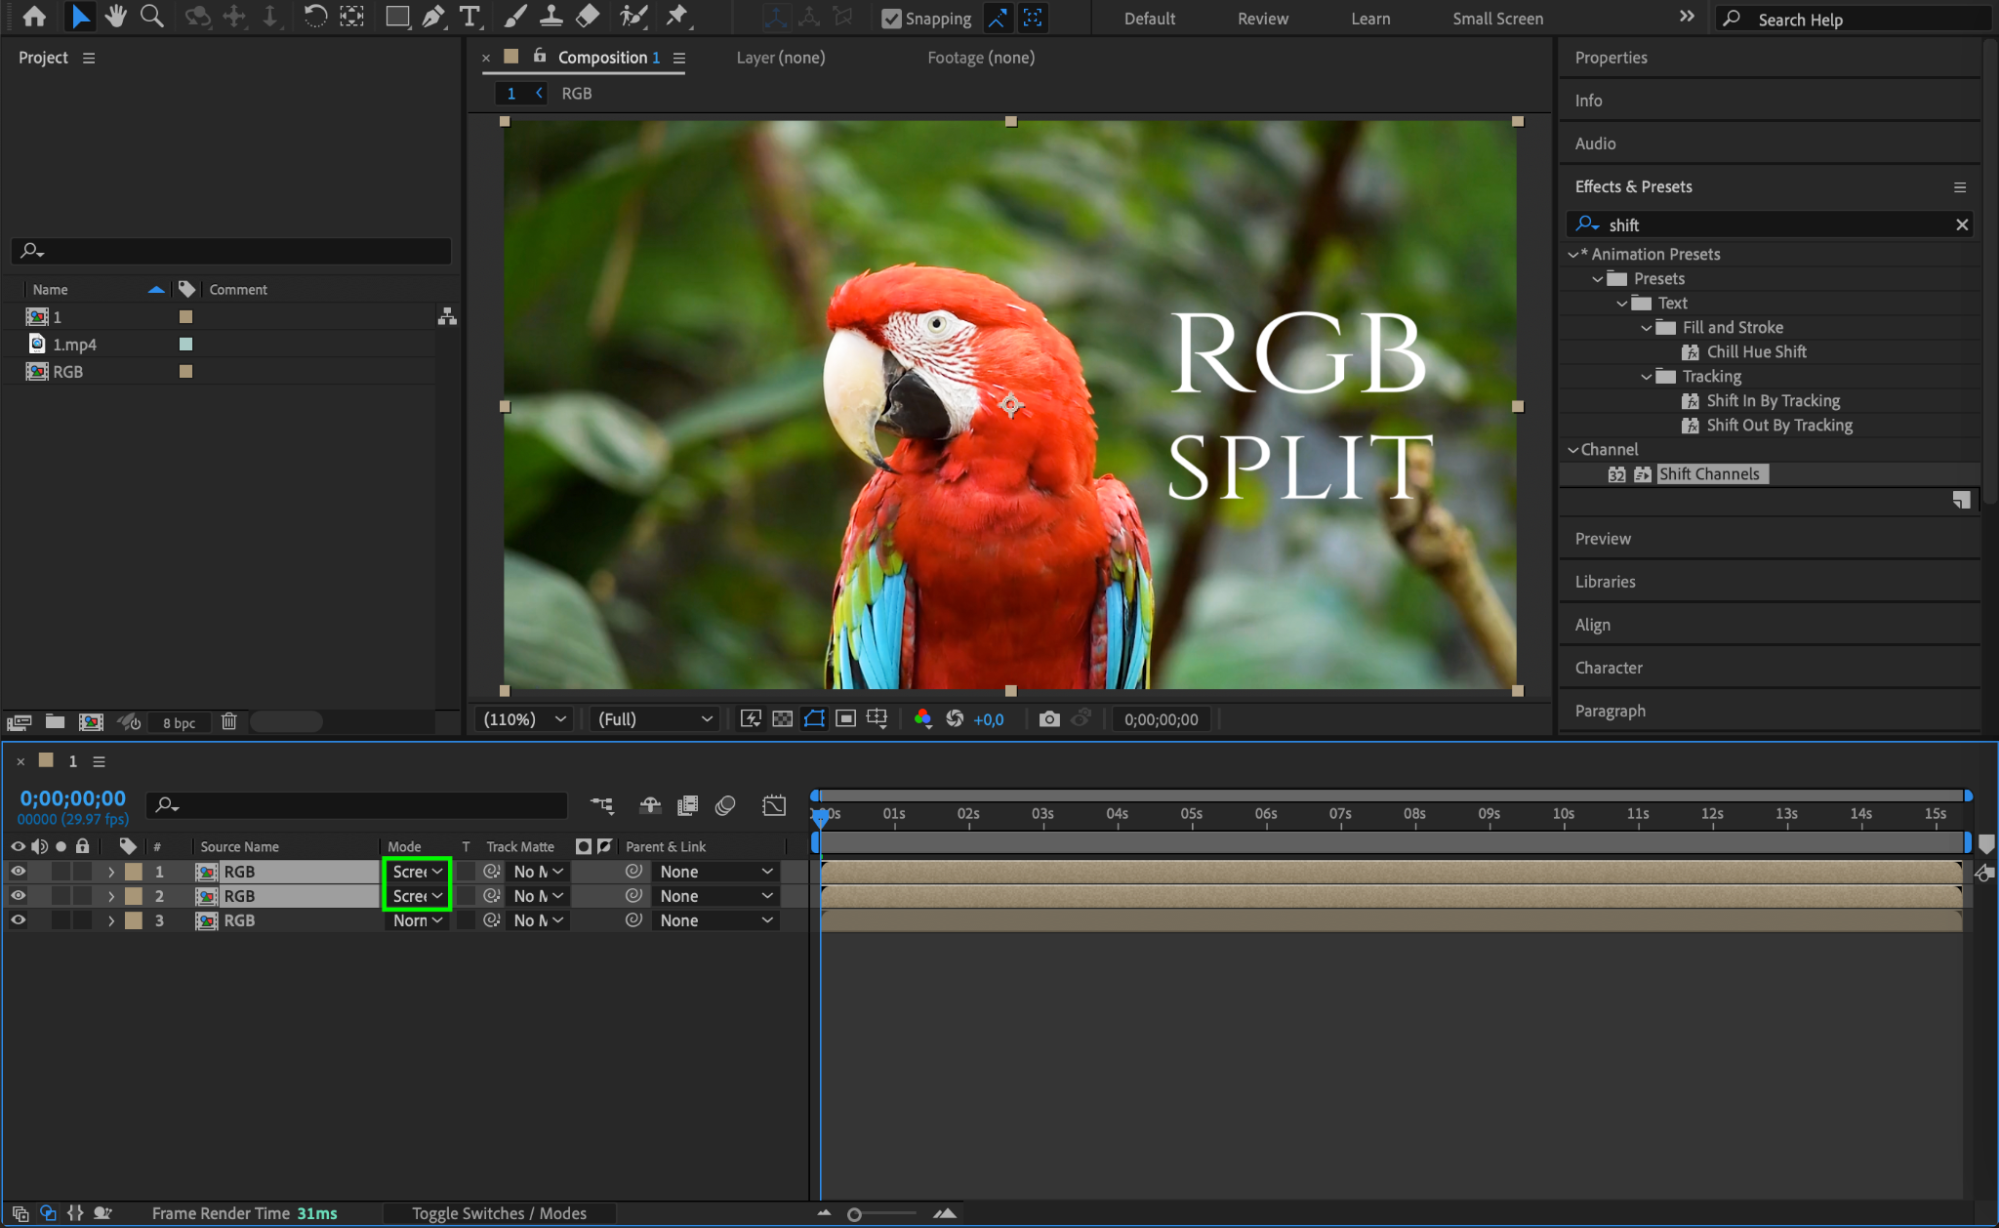
 Step 7: Change the Blend Mode
Click the Toggle Switches/Modes button to reveal the blending modes in the timeline. Set the blending mode of the top two layers to Screen. This will allow the colors to mix together and create the RGB split effect.
 Step 8: Adjust the Position of Each Layer
Now, slightly offset the position of each layer to create the distinct RGB separation. You can move each layer up, down, left, or right to make the split effect more prominent.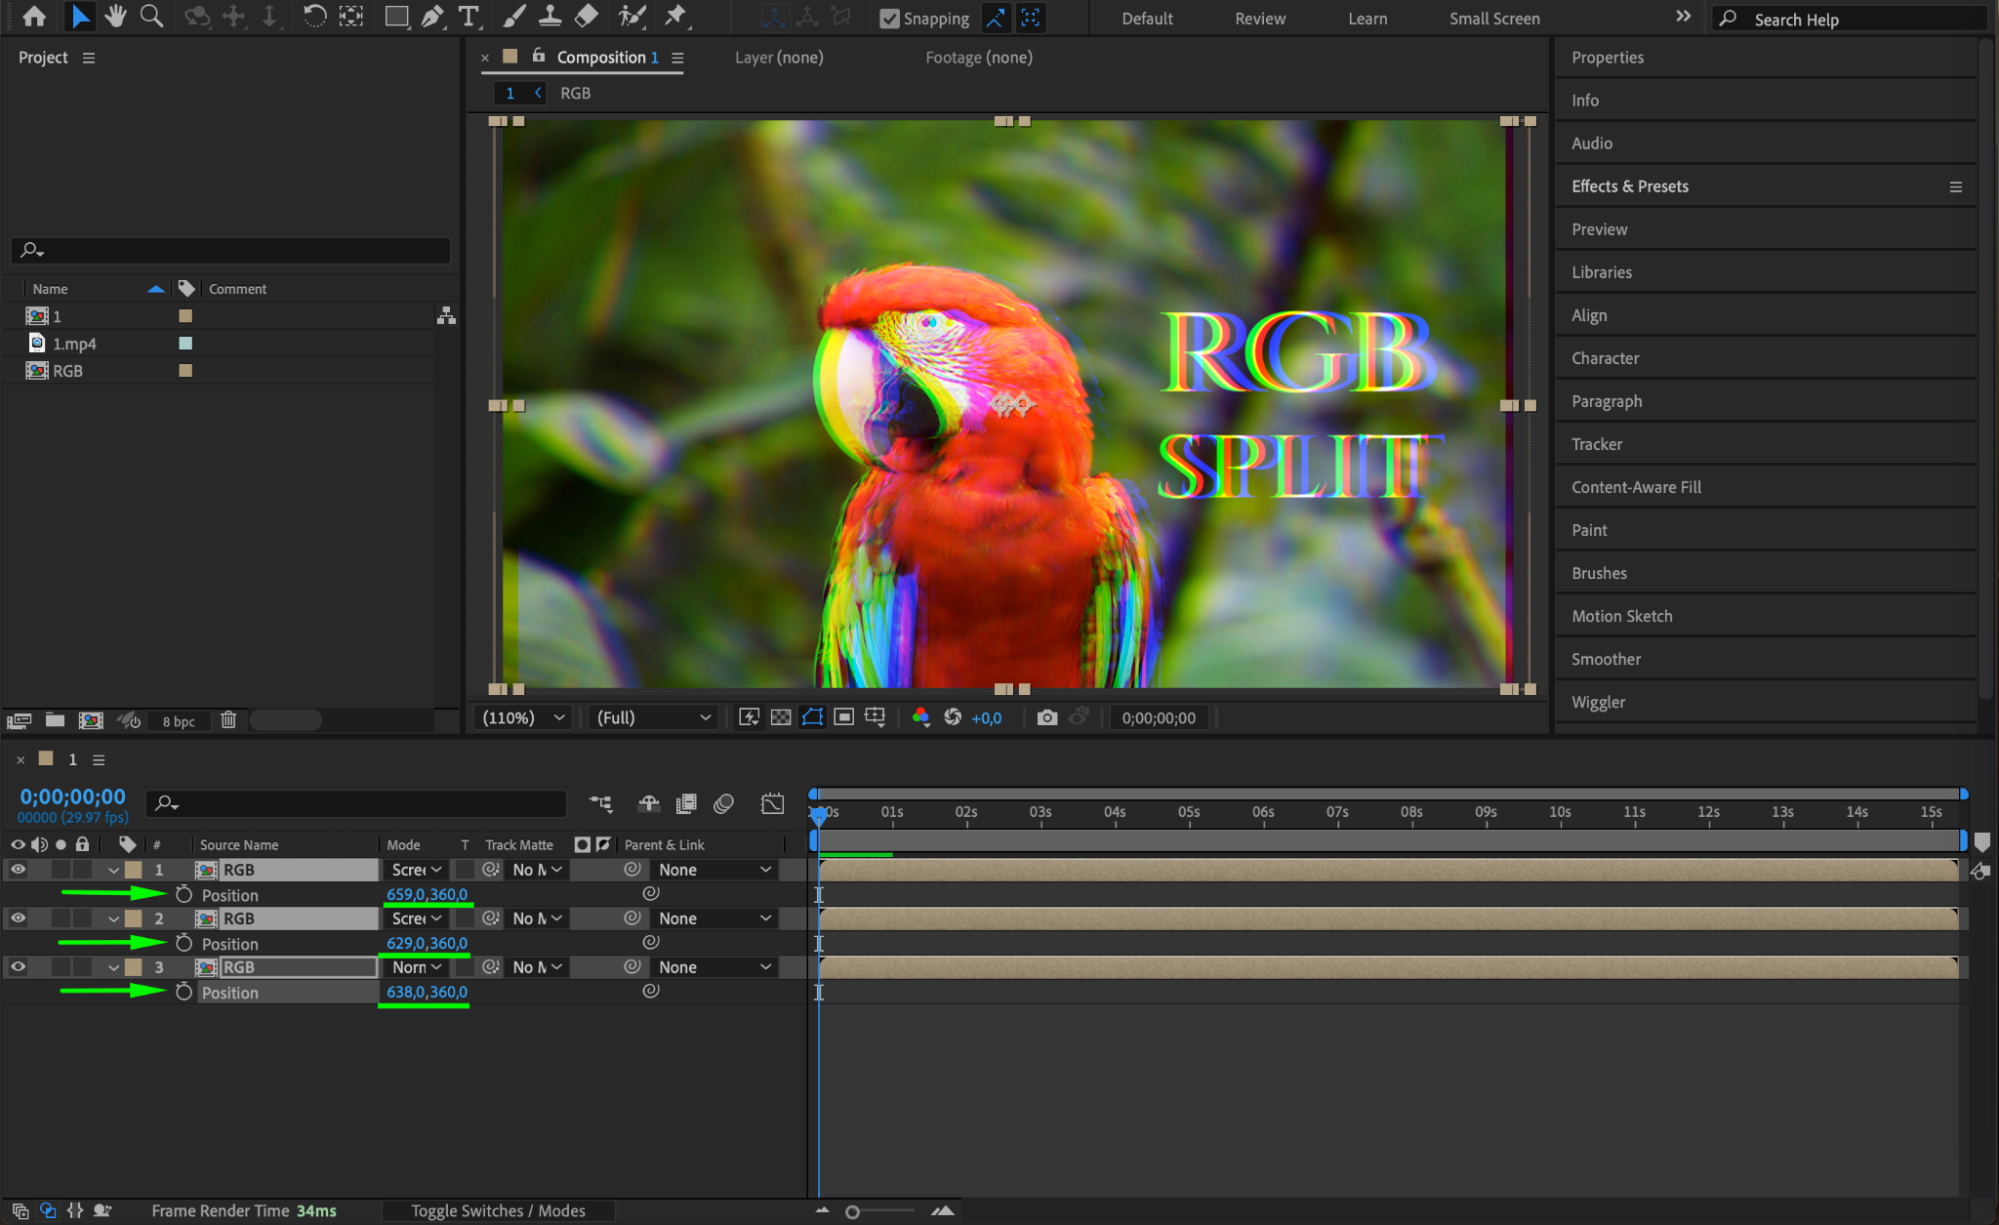 Step 9: Add Wiggle Expression (Optional)
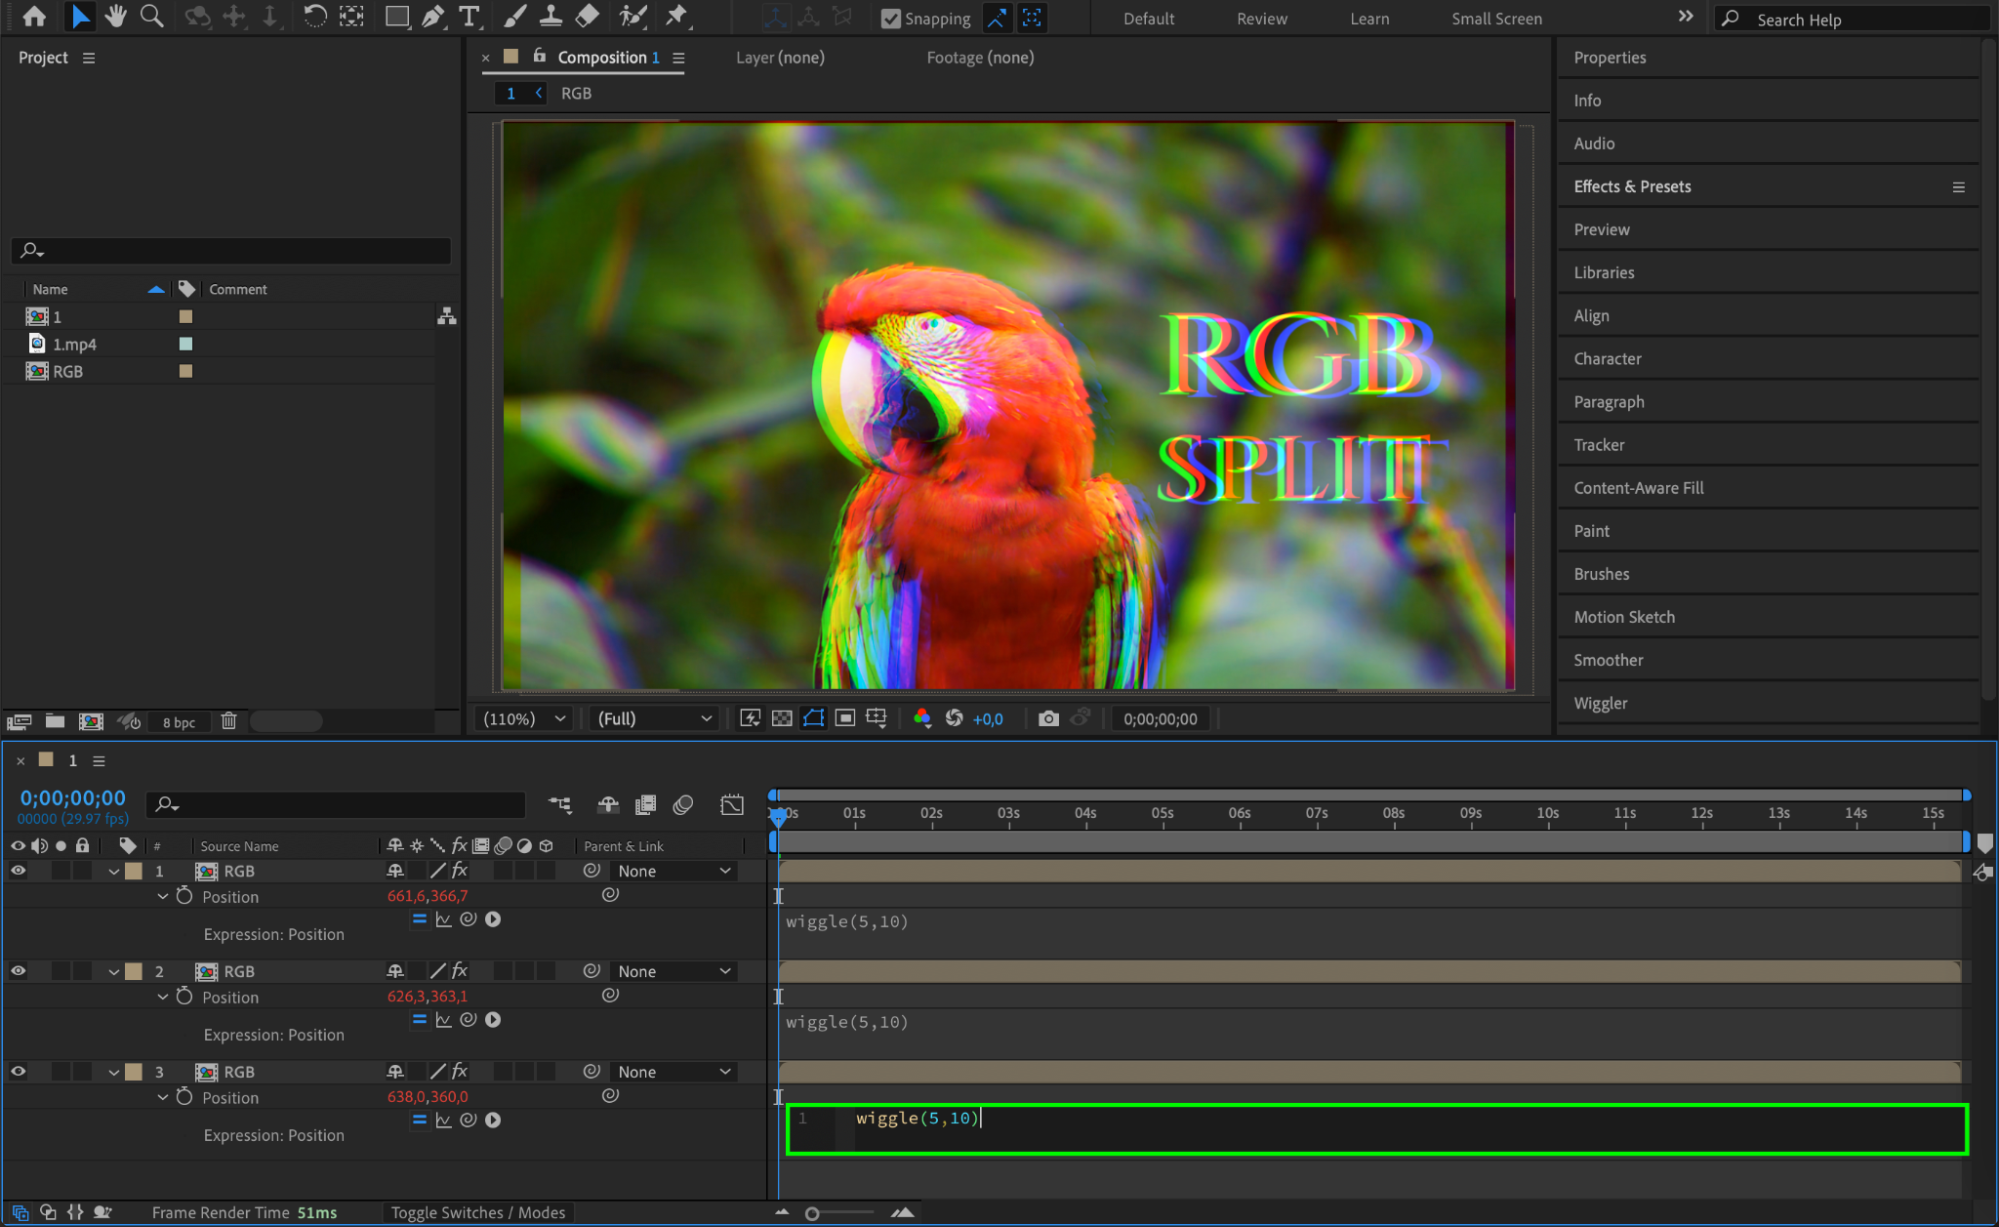
To make the RGB split effect more dynamic, you can add a wiggle expression to the position of each layer. Select the Position property of each layer, then press Alt/Option + Click on the stopwatch icon to add an expression. Type wiggle(5,10) to create a random, jittery motion that will make the effect feel more energetic.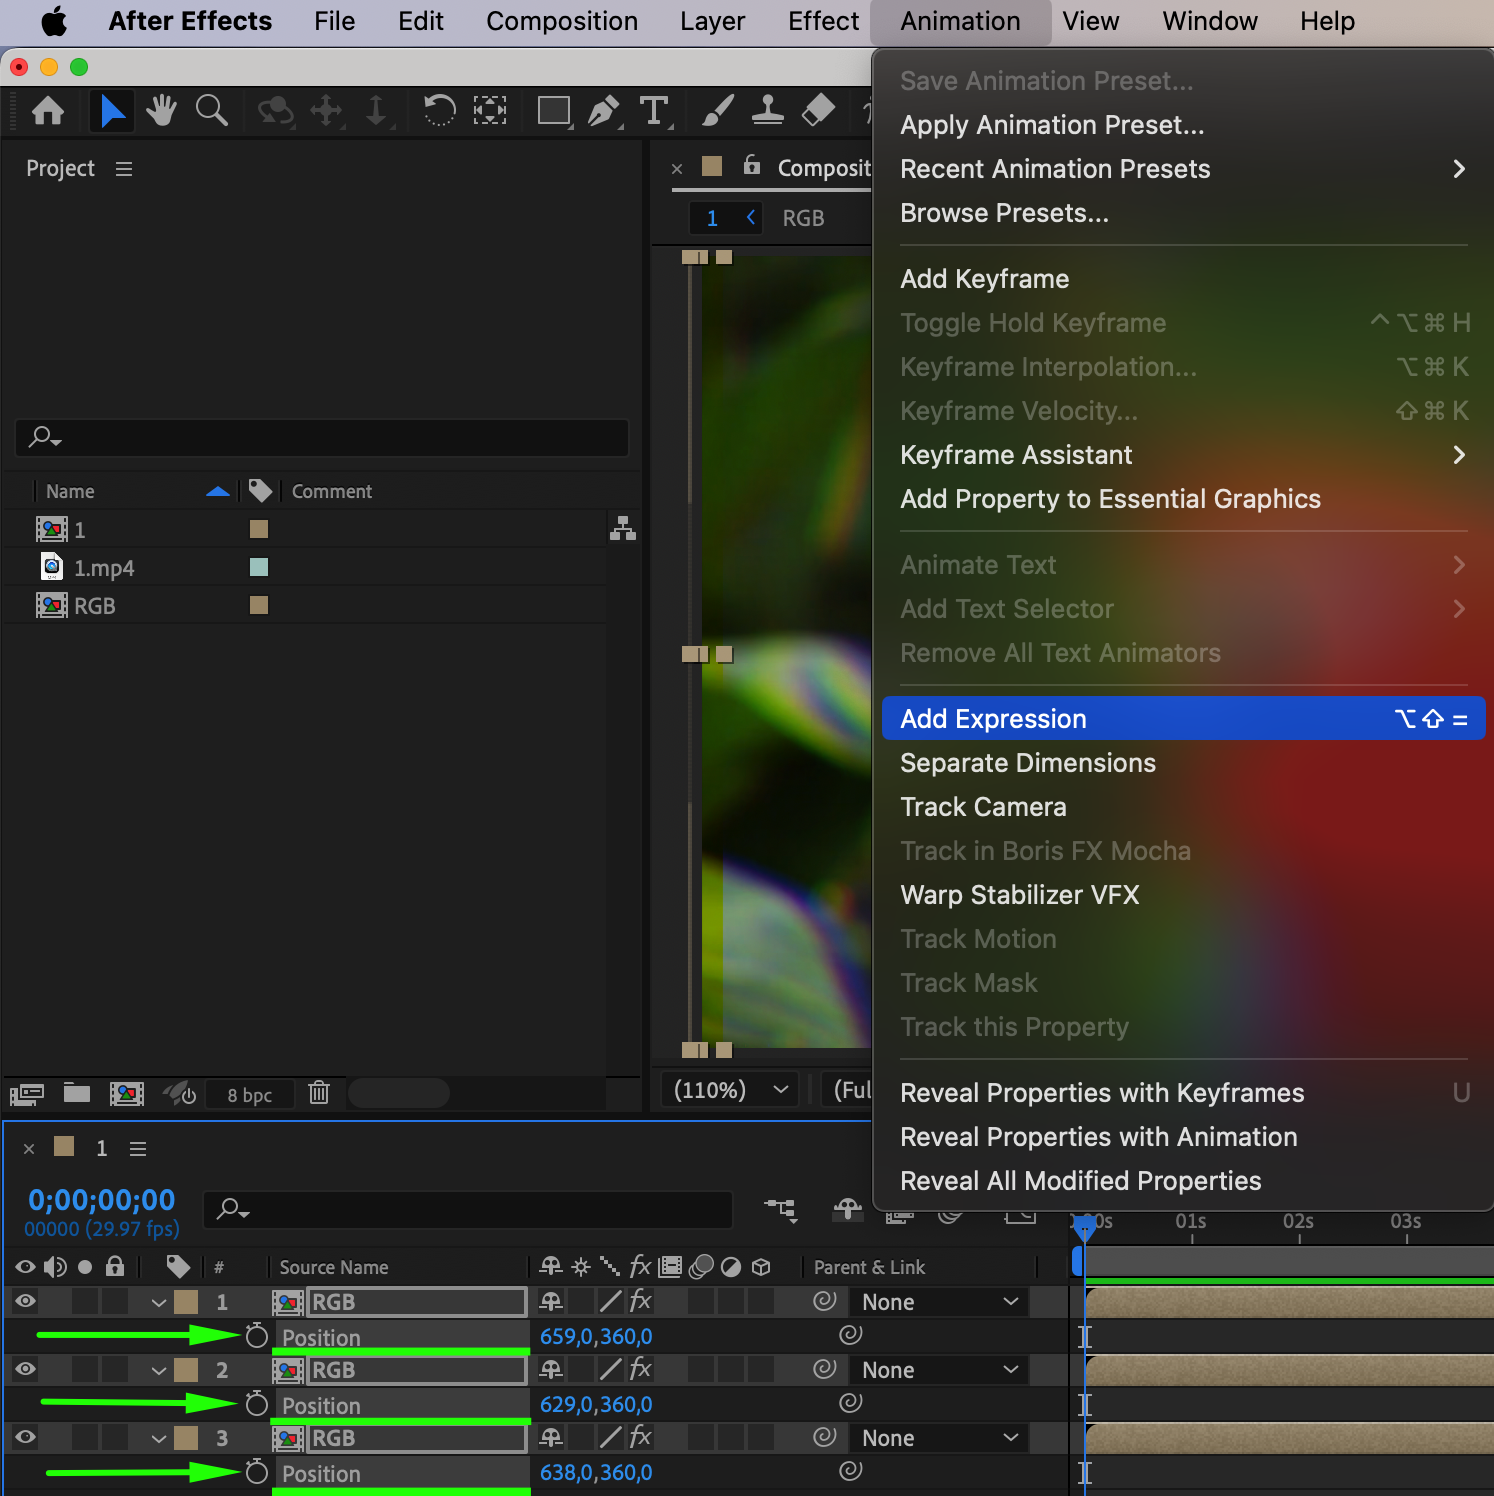
 Step 10: Preview the Effect
Once you have made all your adjustments, press Spacebar to preview the effect. Check how the RGB split looks and make sure the layers are positioned correctly and the colors are shifting as you want them to.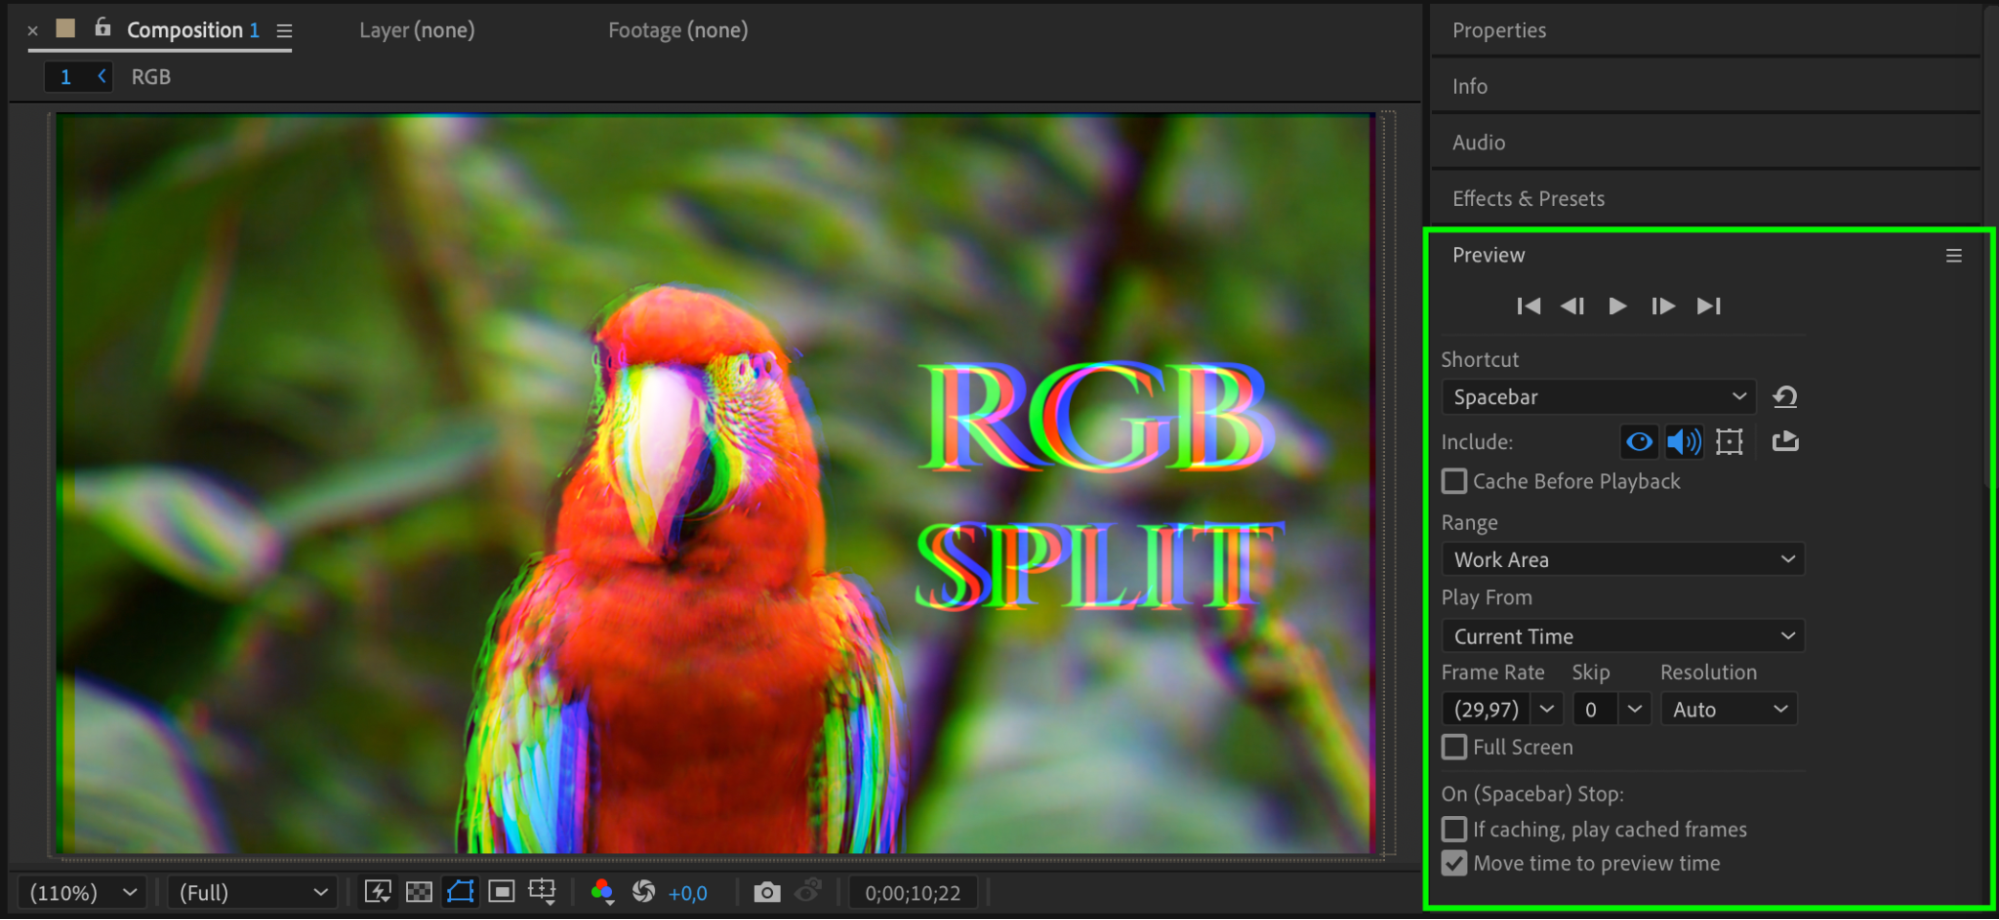 Step 11: Render the Final Animation
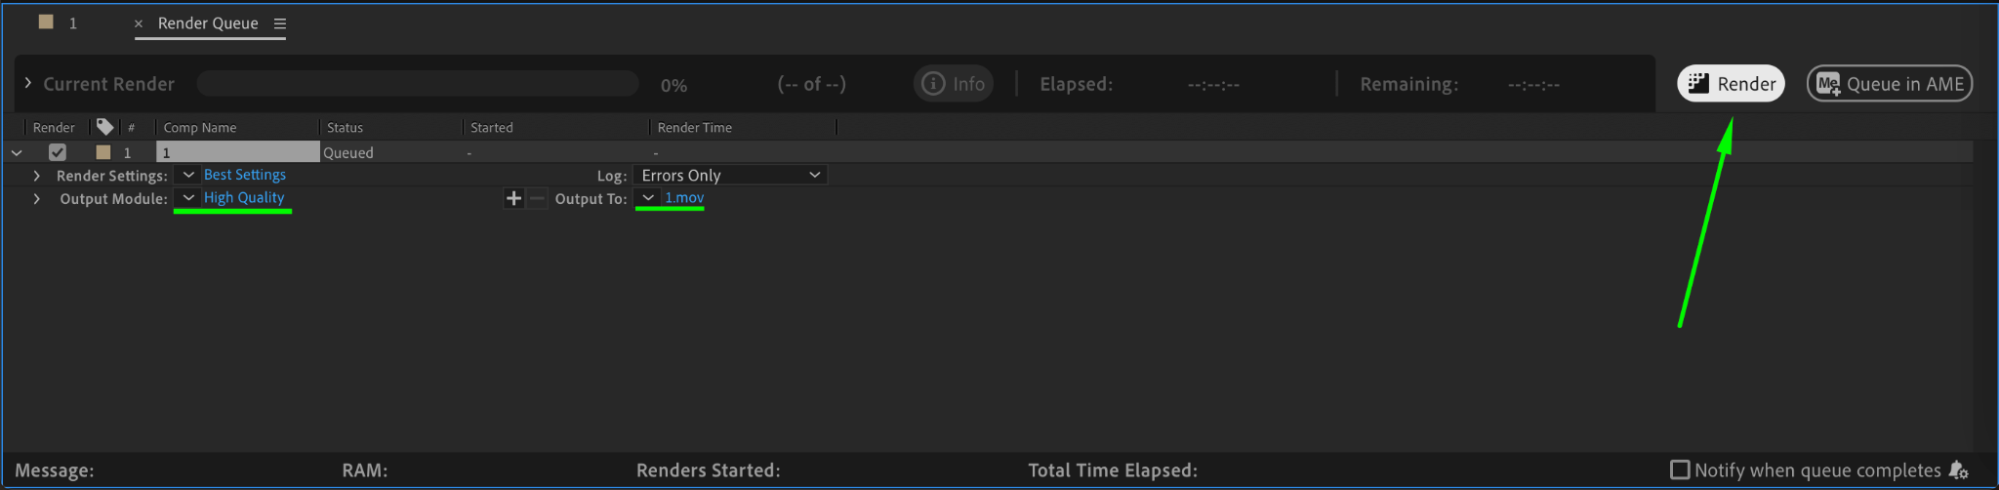
Once you’re satisfied with the effect, go to Composition > Add to Render Queue. Choose your desired settings and click Render to export the final animation with the RGB split effect applied.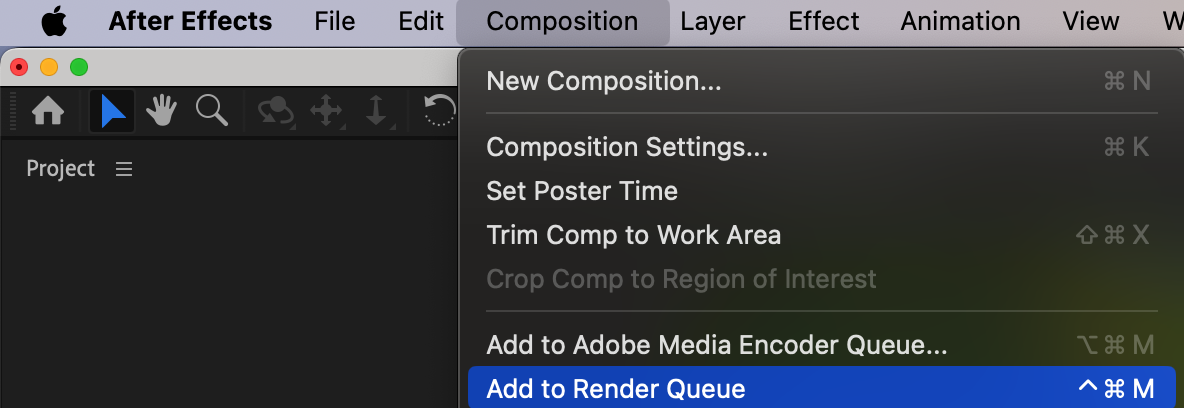
 Conclusion
By following these steps, you can easily create the RGB split effect in After Effects, adding a visually striking and dynamic touch to your videos. This technique is perfect for music videos, glitch effects, or simply adding some creative flair to your content.
Our Bestsellers


