How to Animate in Adobe After Effects: A Step-by-Step Guide
Introduction to Animating in Adobe After Effects
Are you ready to bring your designs to life? With Adobe After Effects, you can create dynamic motion graphics that captivate your audience. Whether you’re new to animation or looking to enhance your skills, this guide will walk you through the essential steps for animating in Adobe After Effects. Let’s get started!
Step 1: Create a New Composition
To begin animating, you need to create a new composition. Go to Composition > New Composition or press “Ctrl/Cmd + N”. Set the parameters such as resolution, frame rate, and duration according to the goals of your project. A well-set composition forms the foundation of your animation, ensuring that all elements are properly aligned with your project’s specifications.
 Step 2: Import Your Assets
Next, import the video, image, or graphic you want to animate. You can do this by going to File > Import > File or simply dragging your assets into the Project panel. Once imported, your assets will appear in the project panel, ready for use. Importing assets correctly ensures that all the necessary elements are available for your animation process.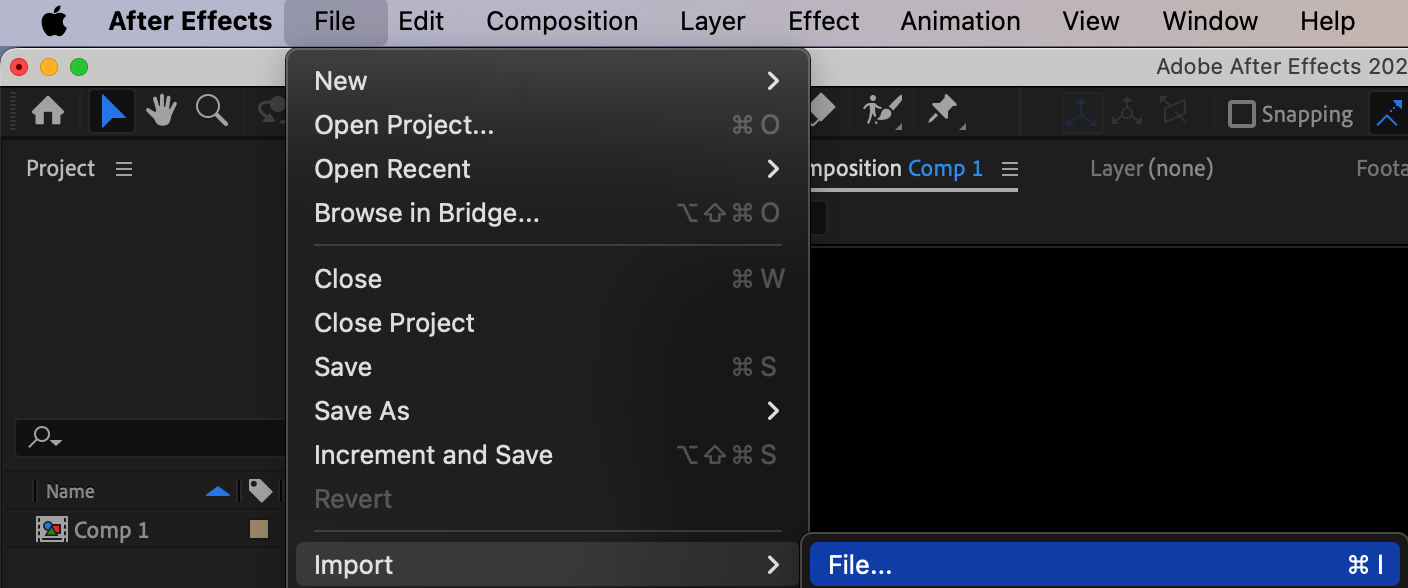 Step 3: Add Assets to the Timeline
Get 10% off when you subscribe to our newsletter

Drag the imported assets from the Project panel onto the Timeline panel. This step allows you to start editing and animating your assets within the composition. Organize the layers on the timeline to reflect the sequence in which they should appear and interact. Properly arranging your timeline layers is crucial for a smooth workflow and effective animation.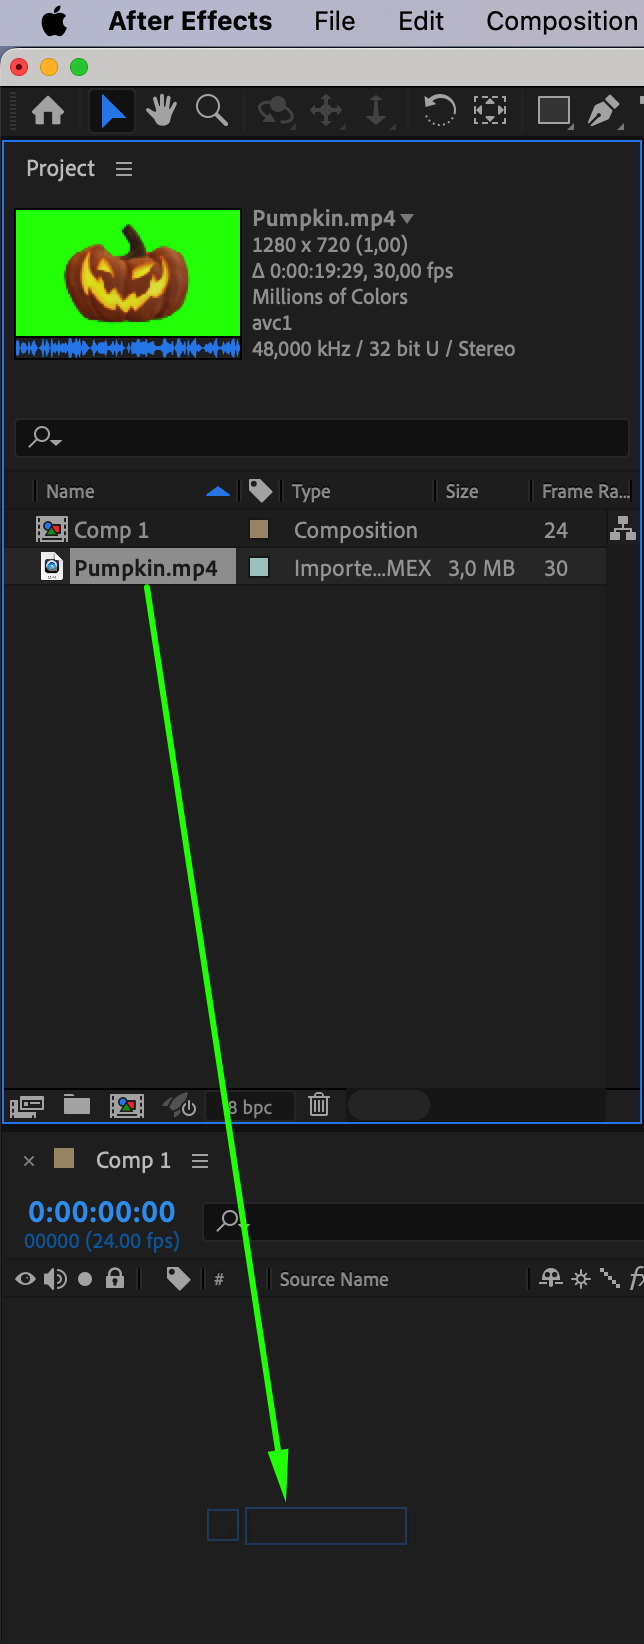
 Step 4: Use Keyframes to Animate Properties
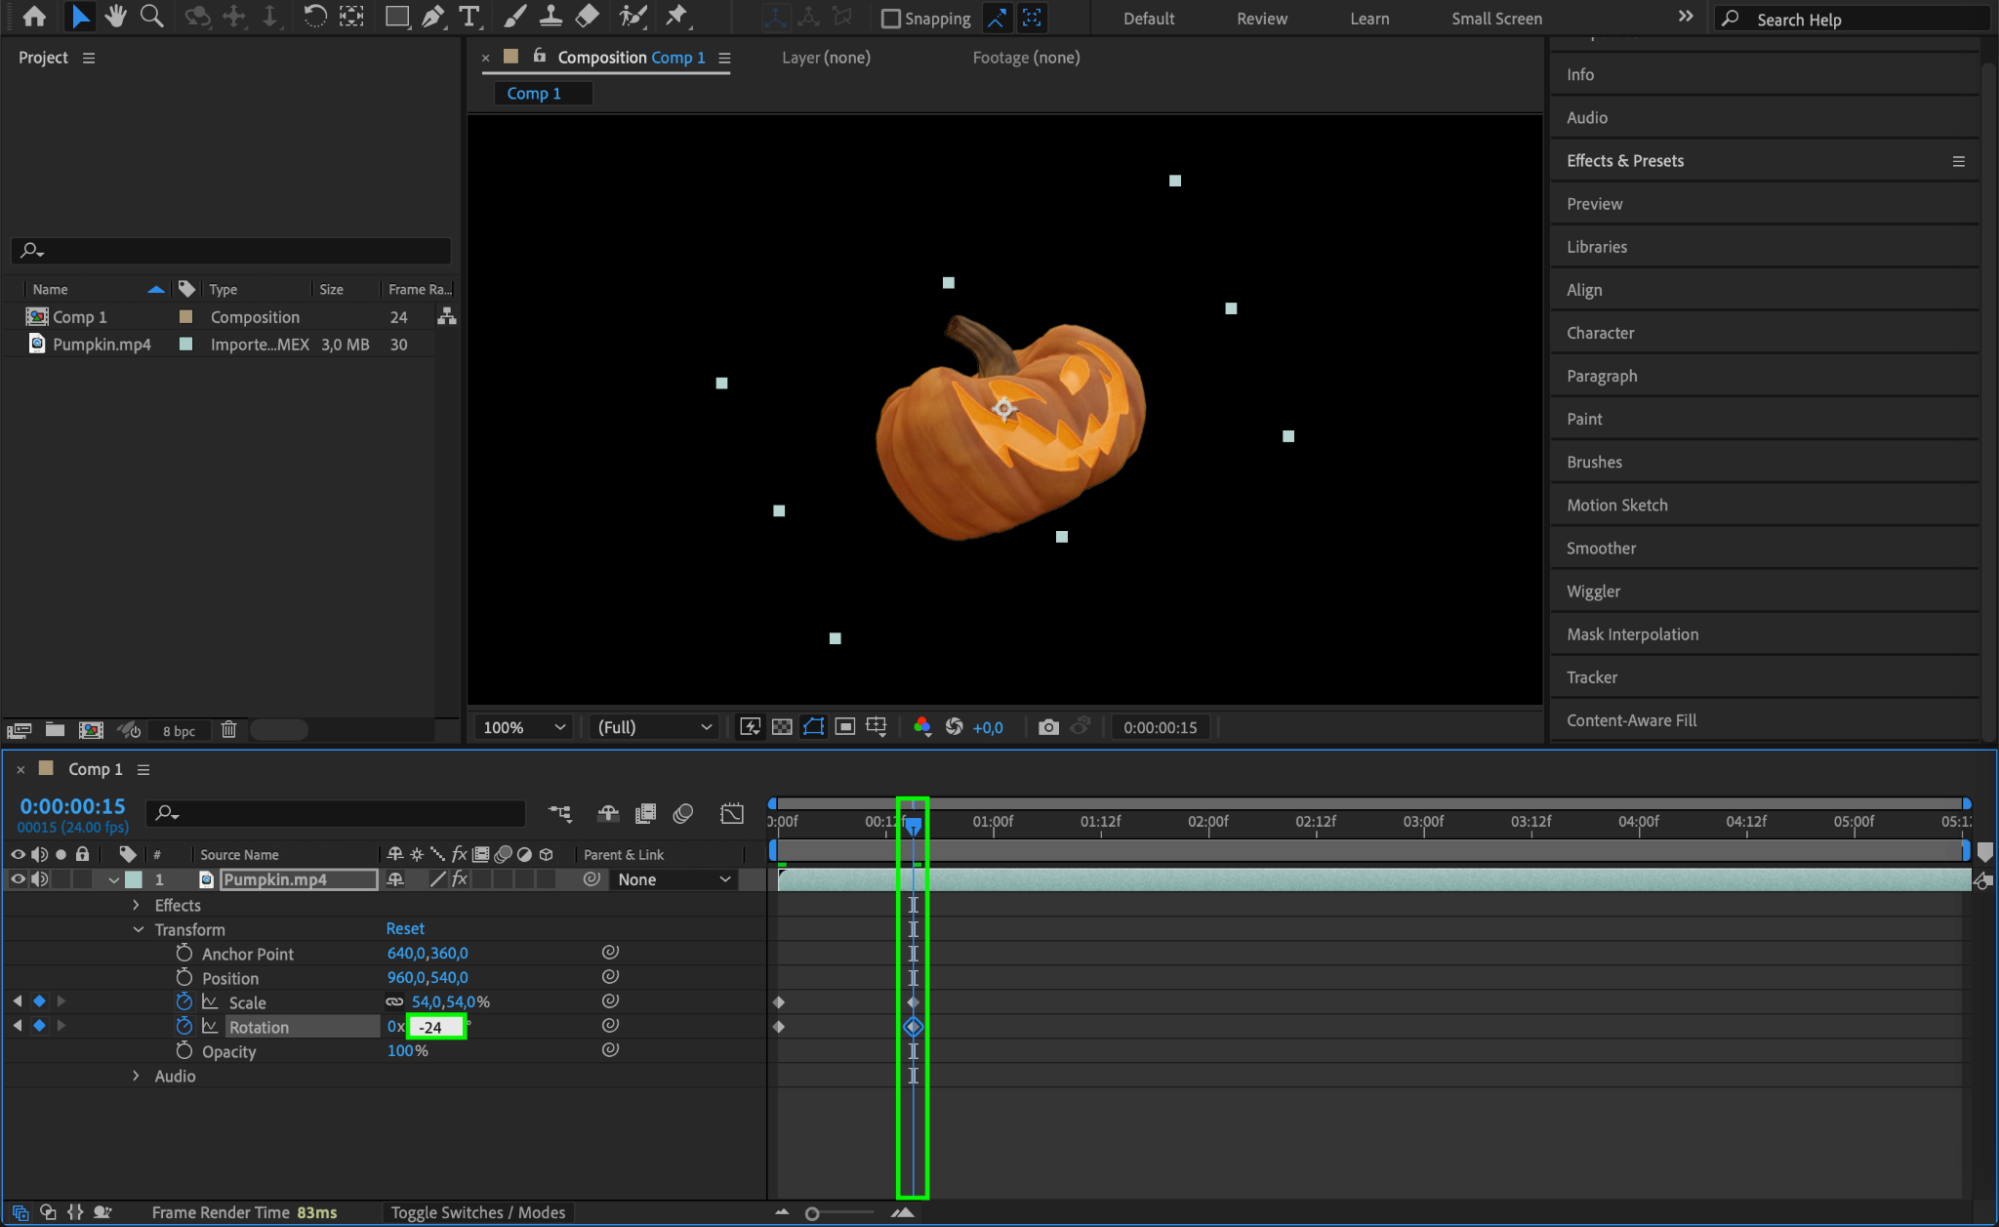
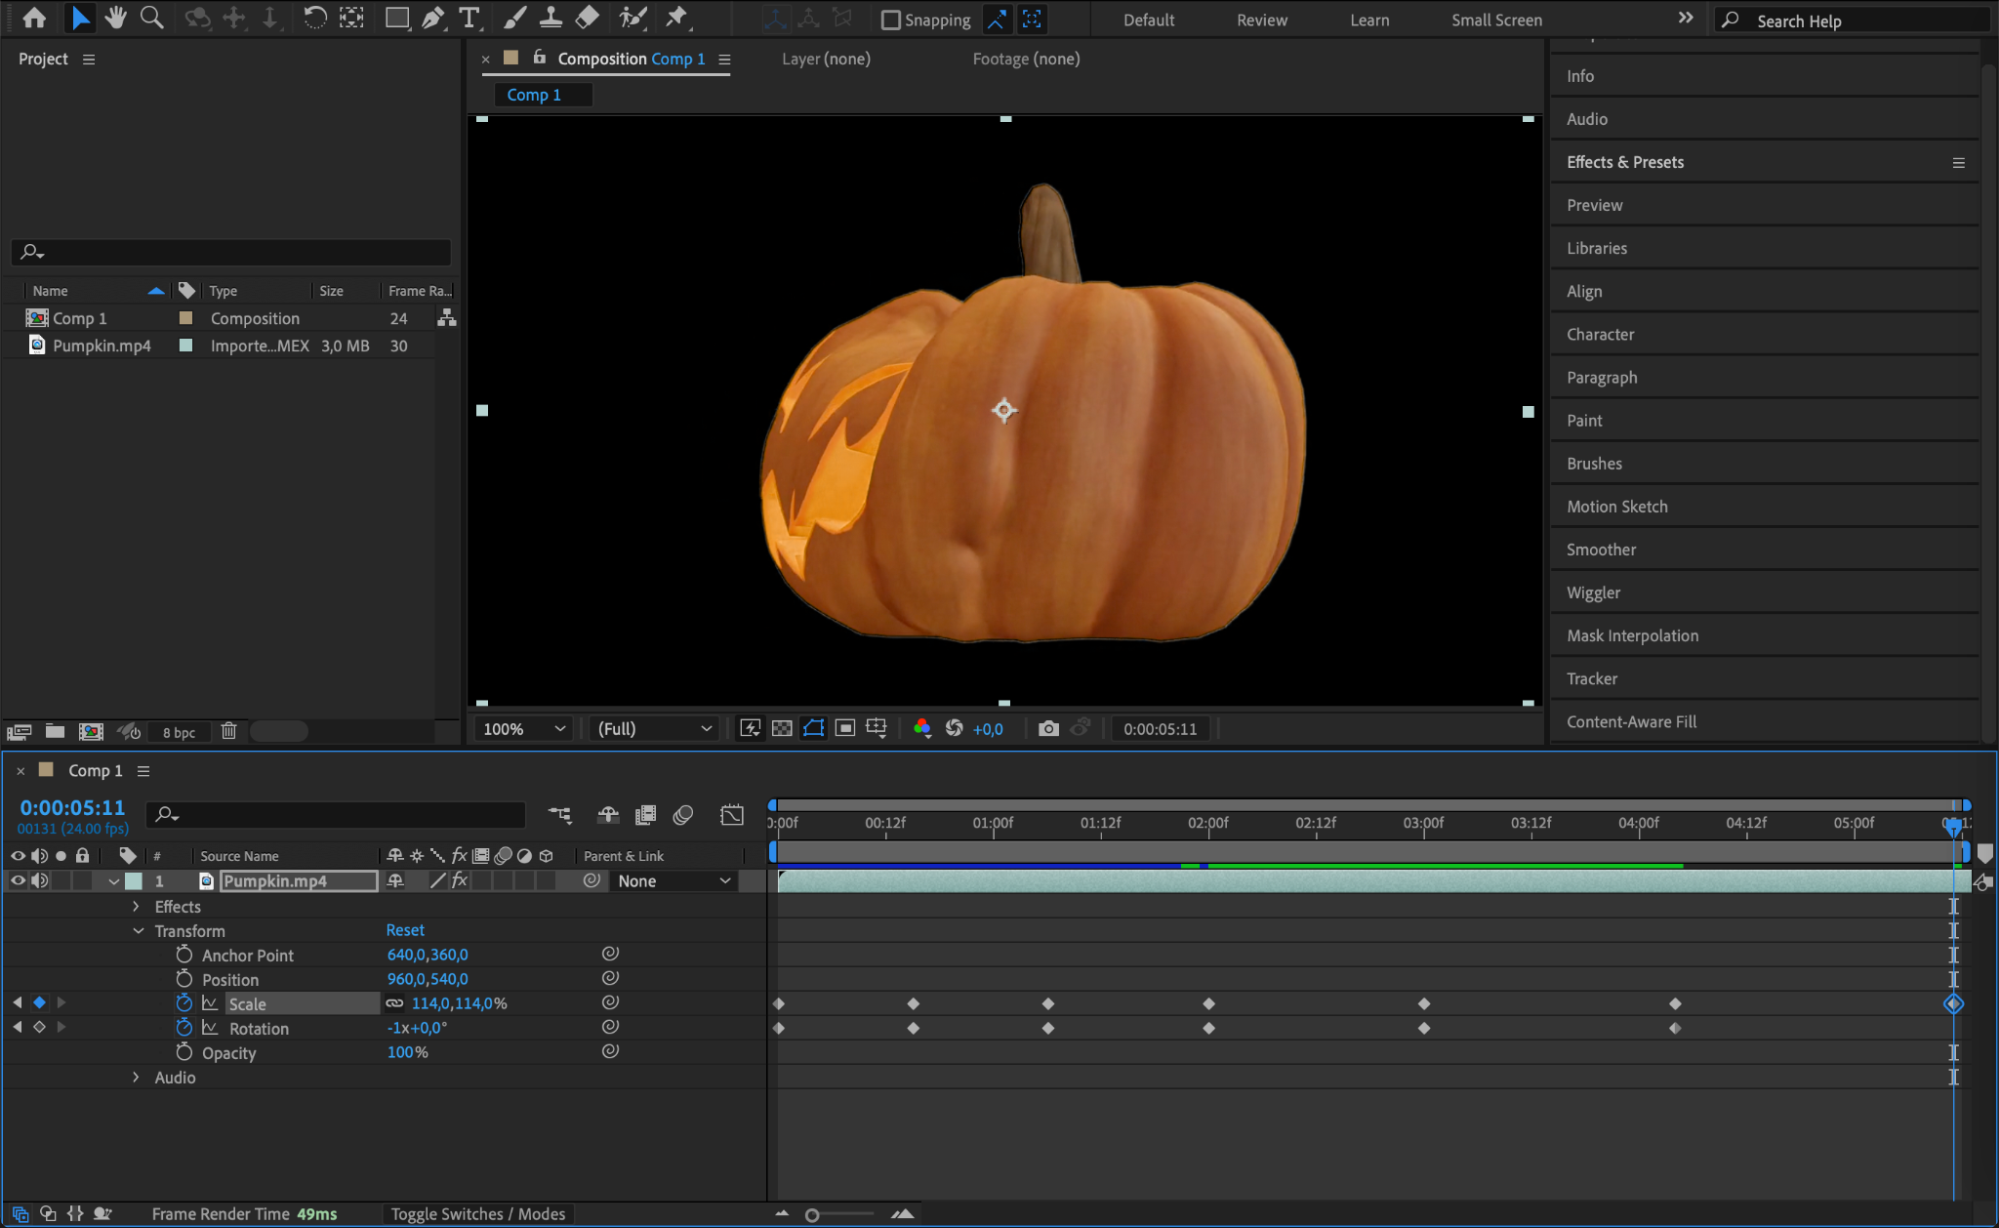
Keyframes are the building blocks of animation in After Effects. They allow you to control properties like position, scale, rotation, and opacity over time. To create a keyframe, click the stopwatch icon next to the property you want to animate. Move the Current Time Indicator forward, change the property value, and After Effects will automatically create a new keyframe. This technique allows for smooth transitions and realistic movements in your animation.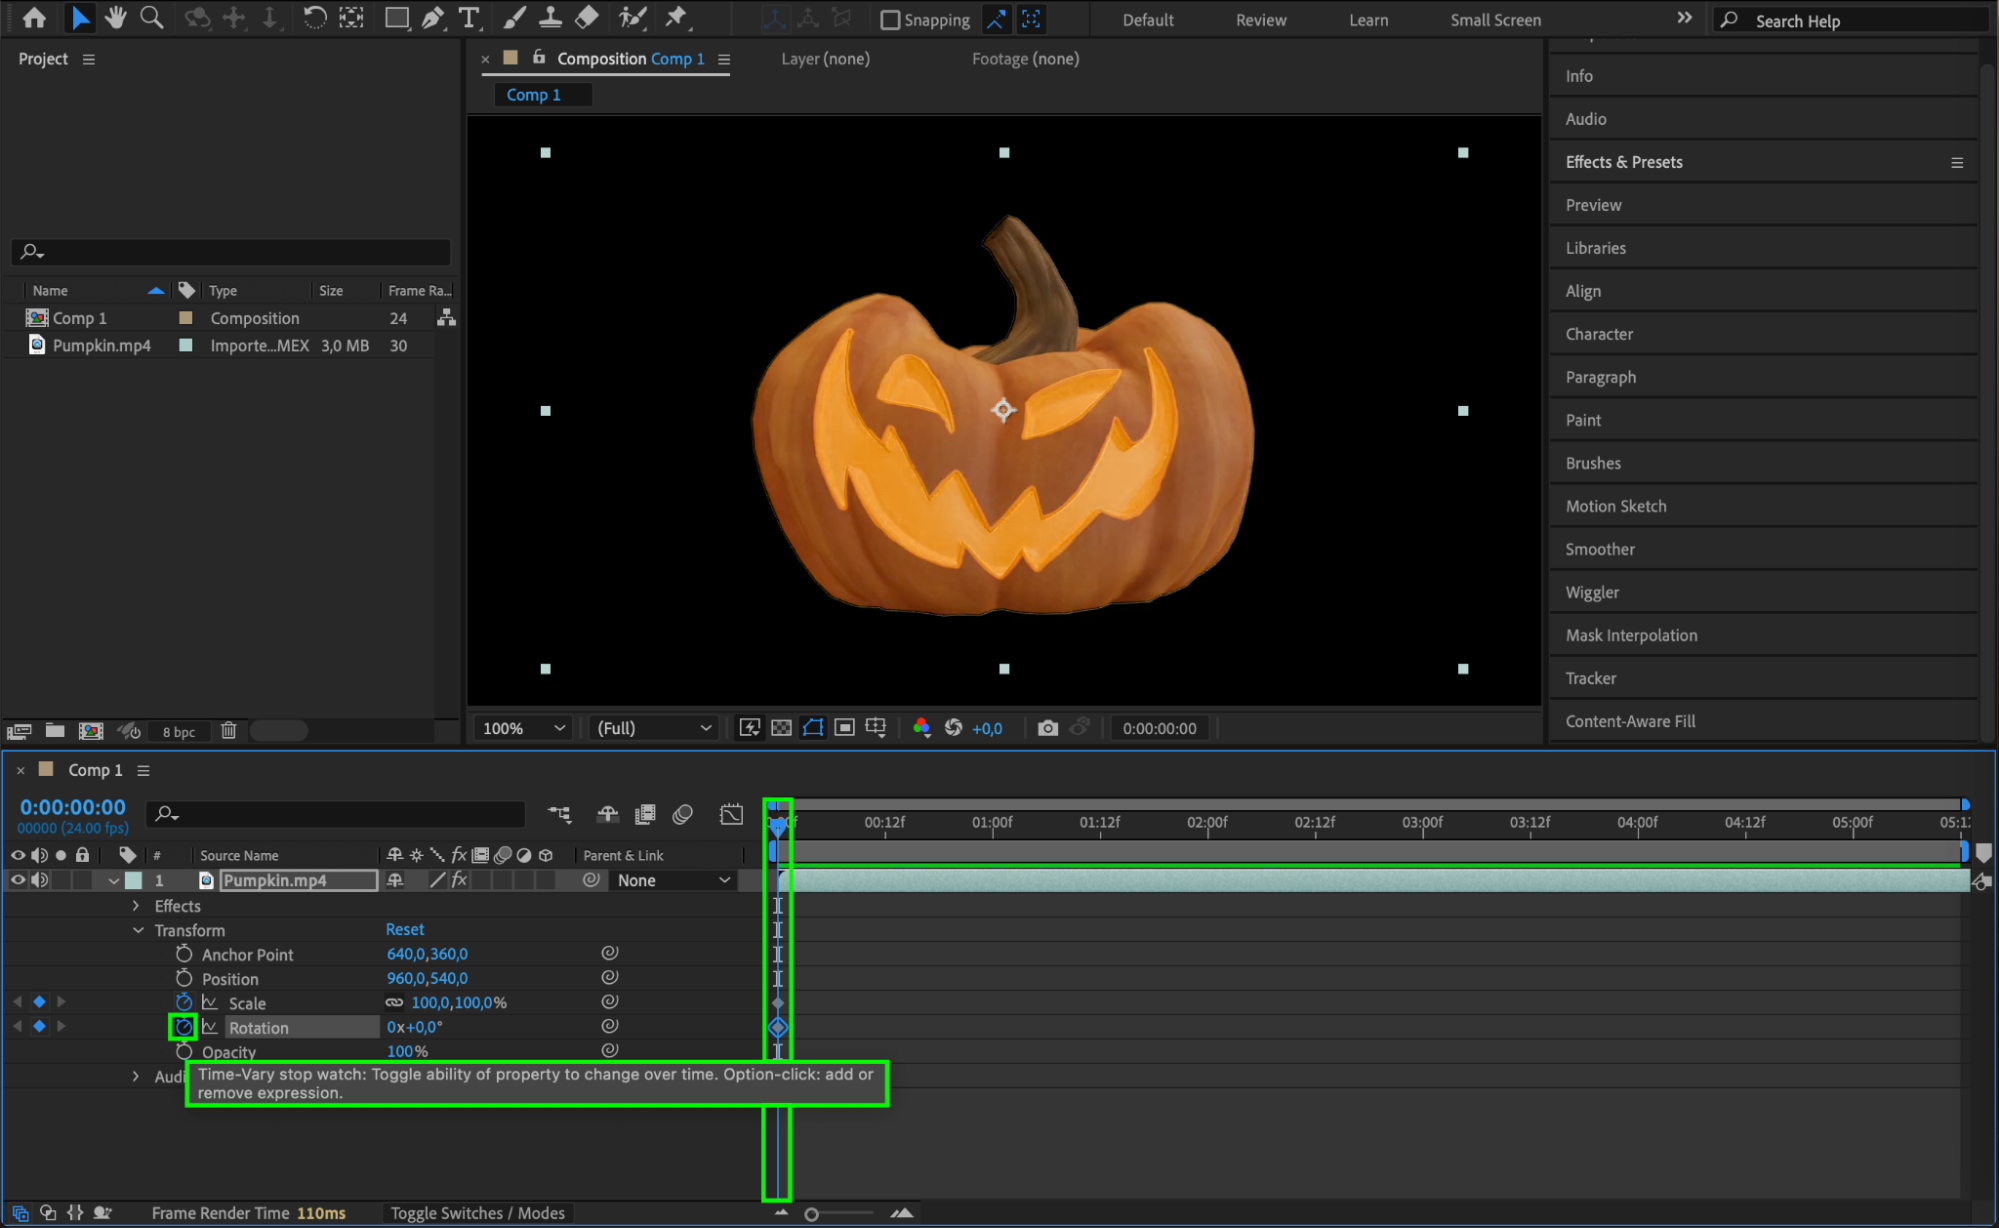
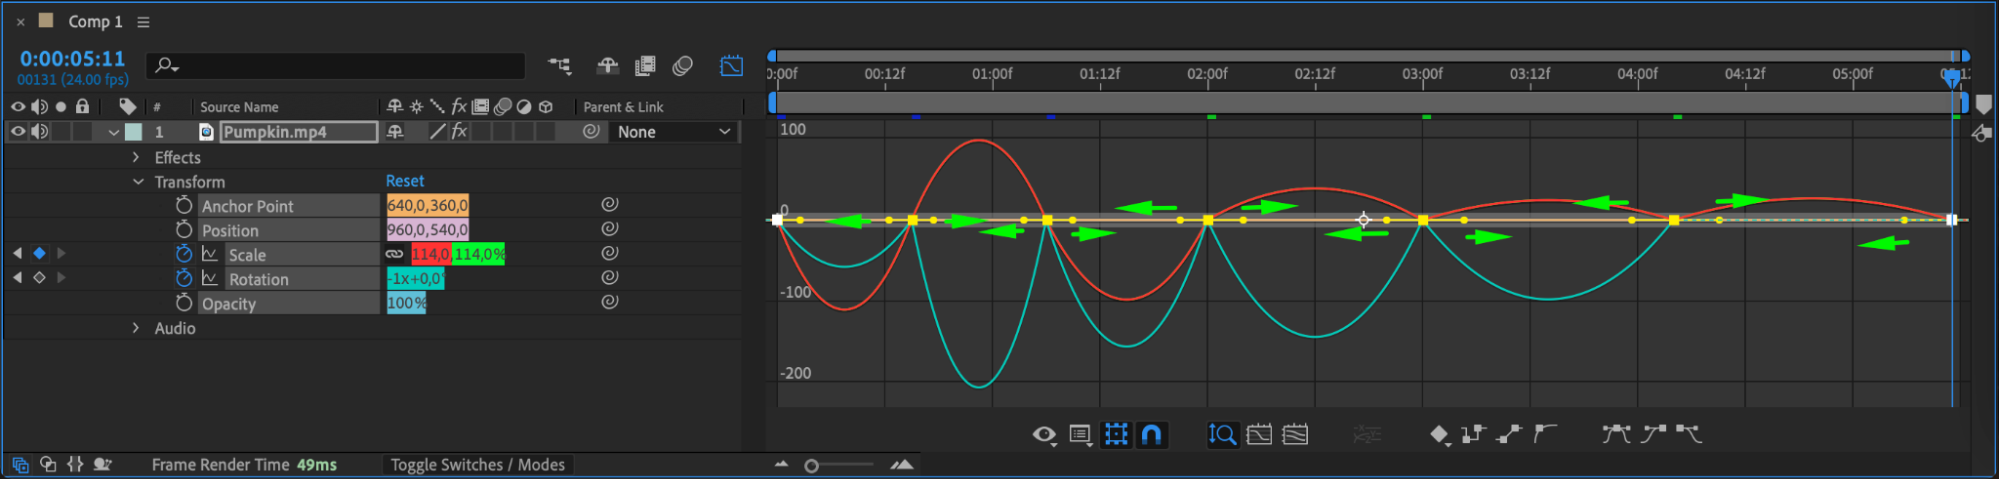
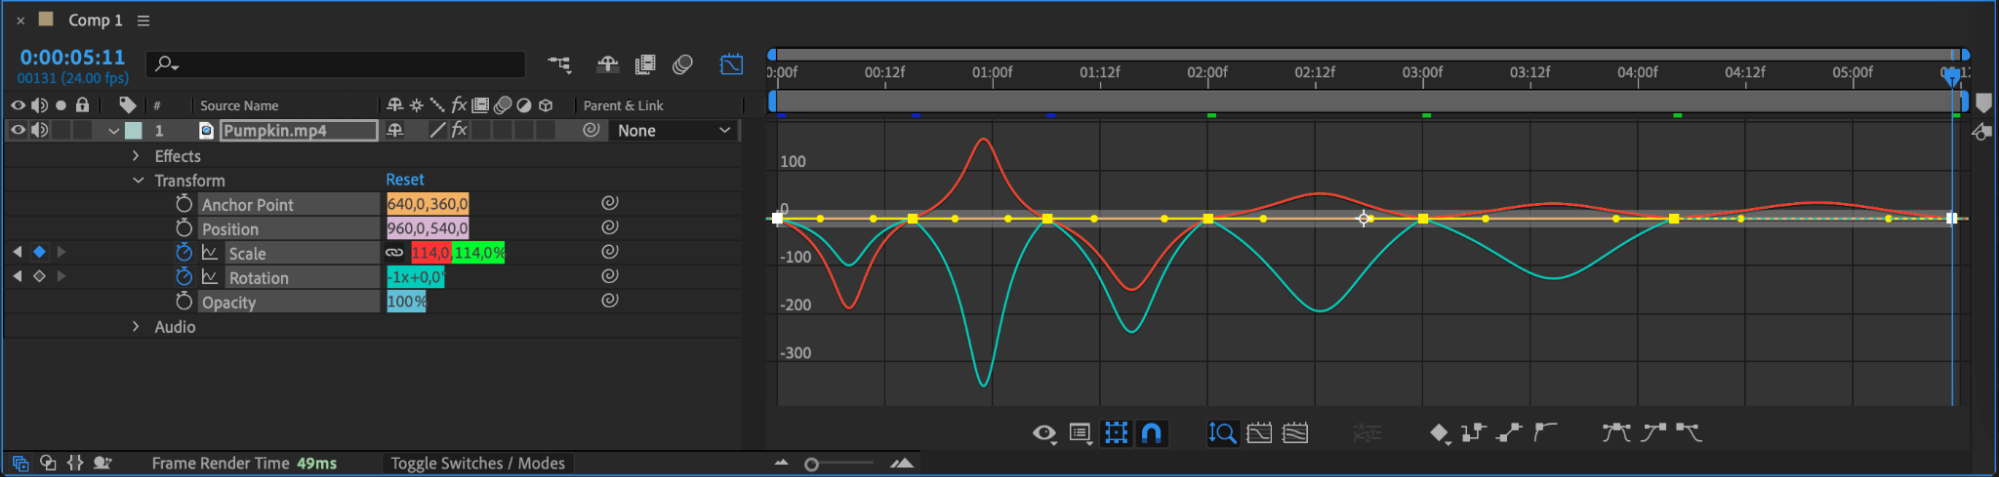
 Step 5: Smooth Your Animation with the Graph Editor
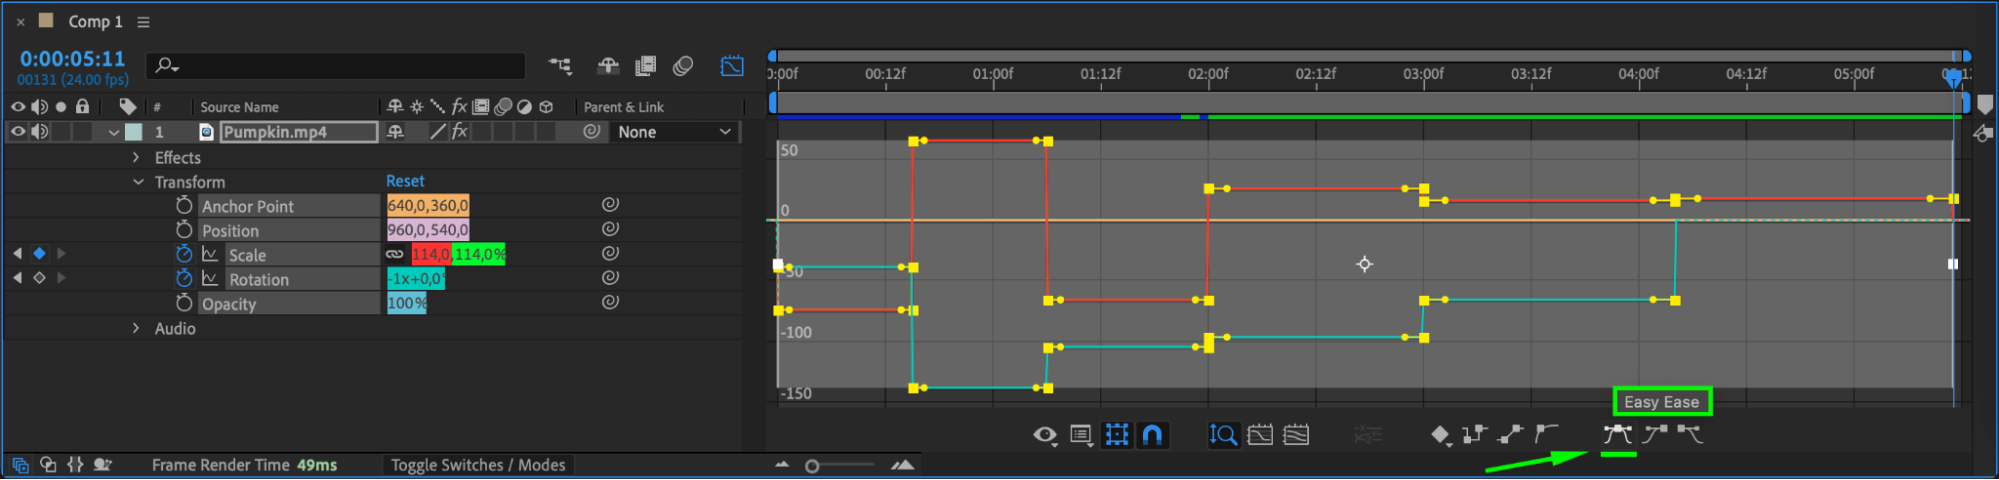
The Graph Editor is a powerful tool that lets you refine the motion of your keyframes by adjusting the speed and acceleration curves. Select your keyframes and click on the Graph Editor button. Here, you can manipulate the curves to create more natural, fluid animations. Smoothing your animations in this way enhances the visual appeal and ensures that your movements feel polished and professional.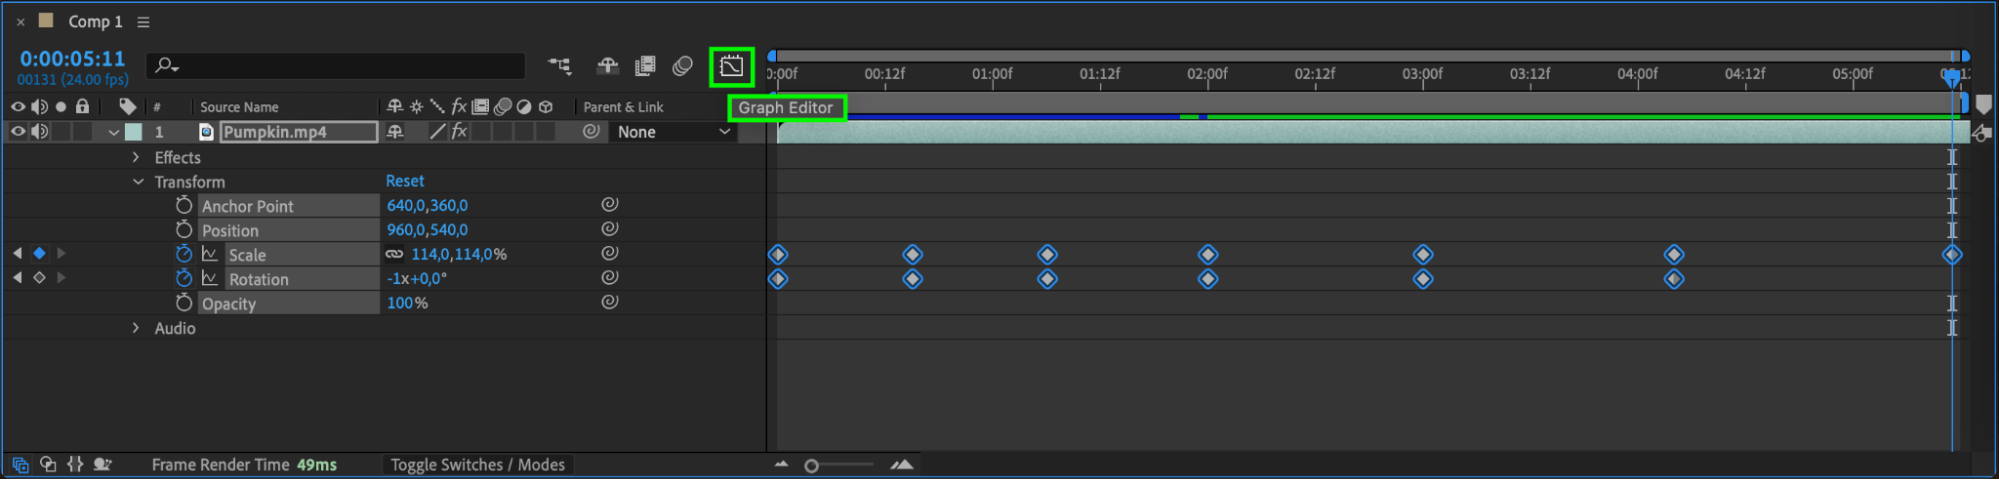
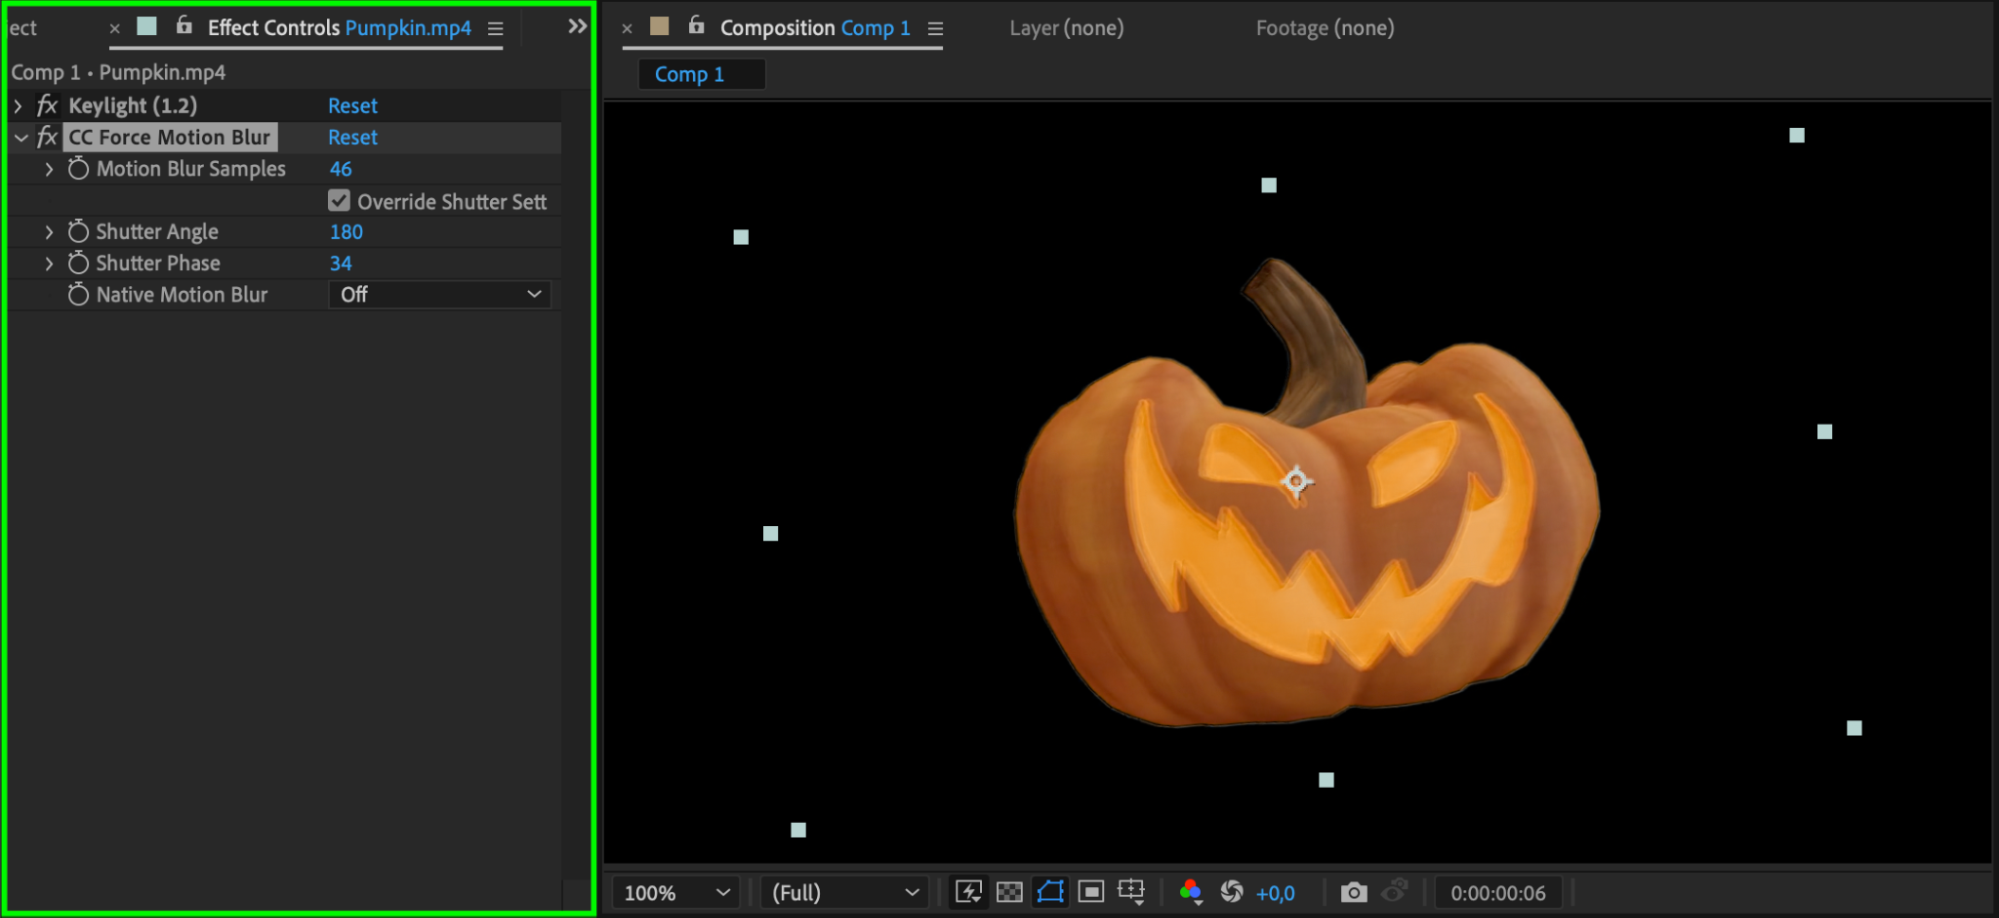
 Step 6: Apply Effects and Presets
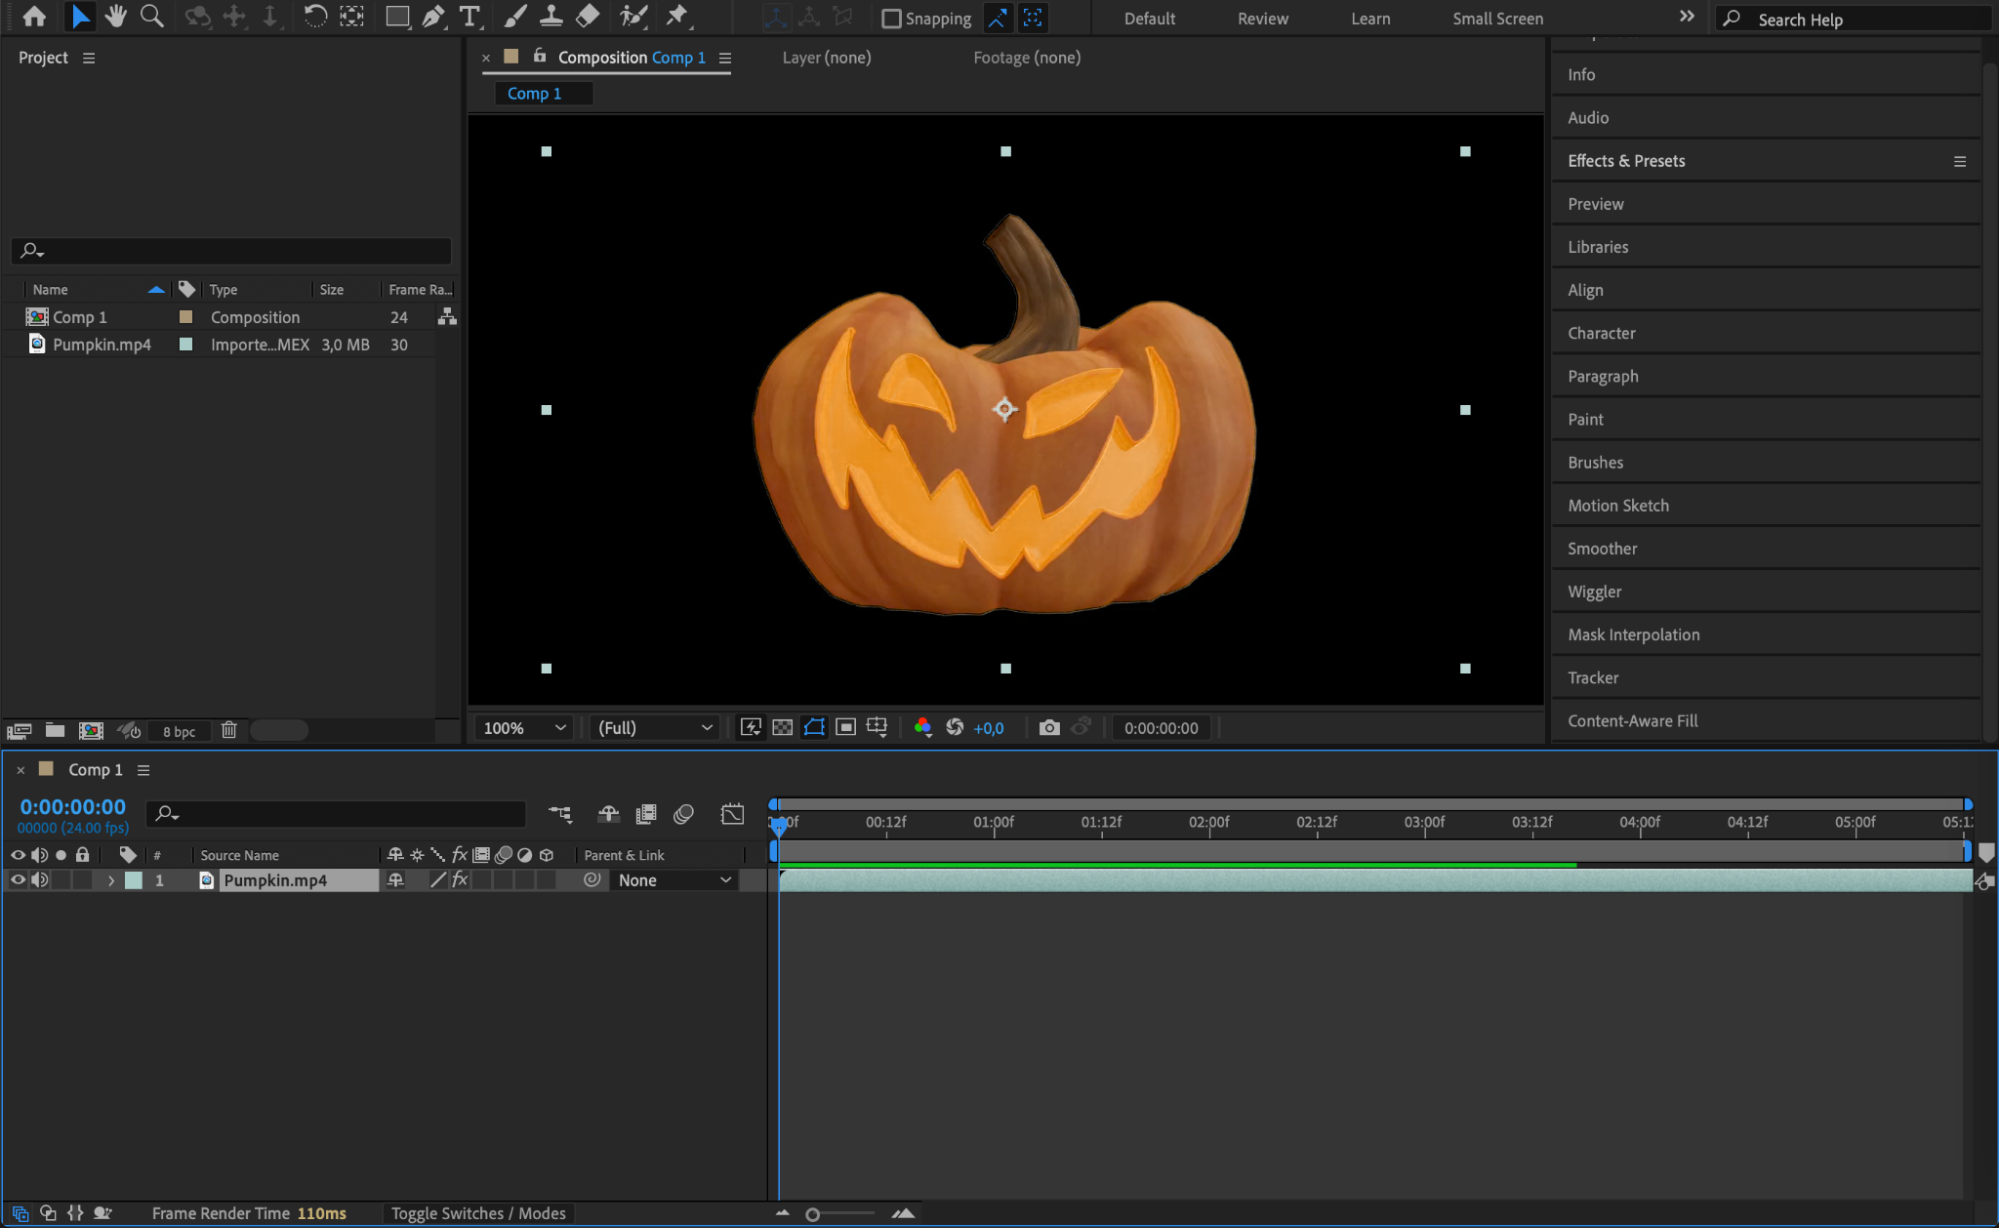
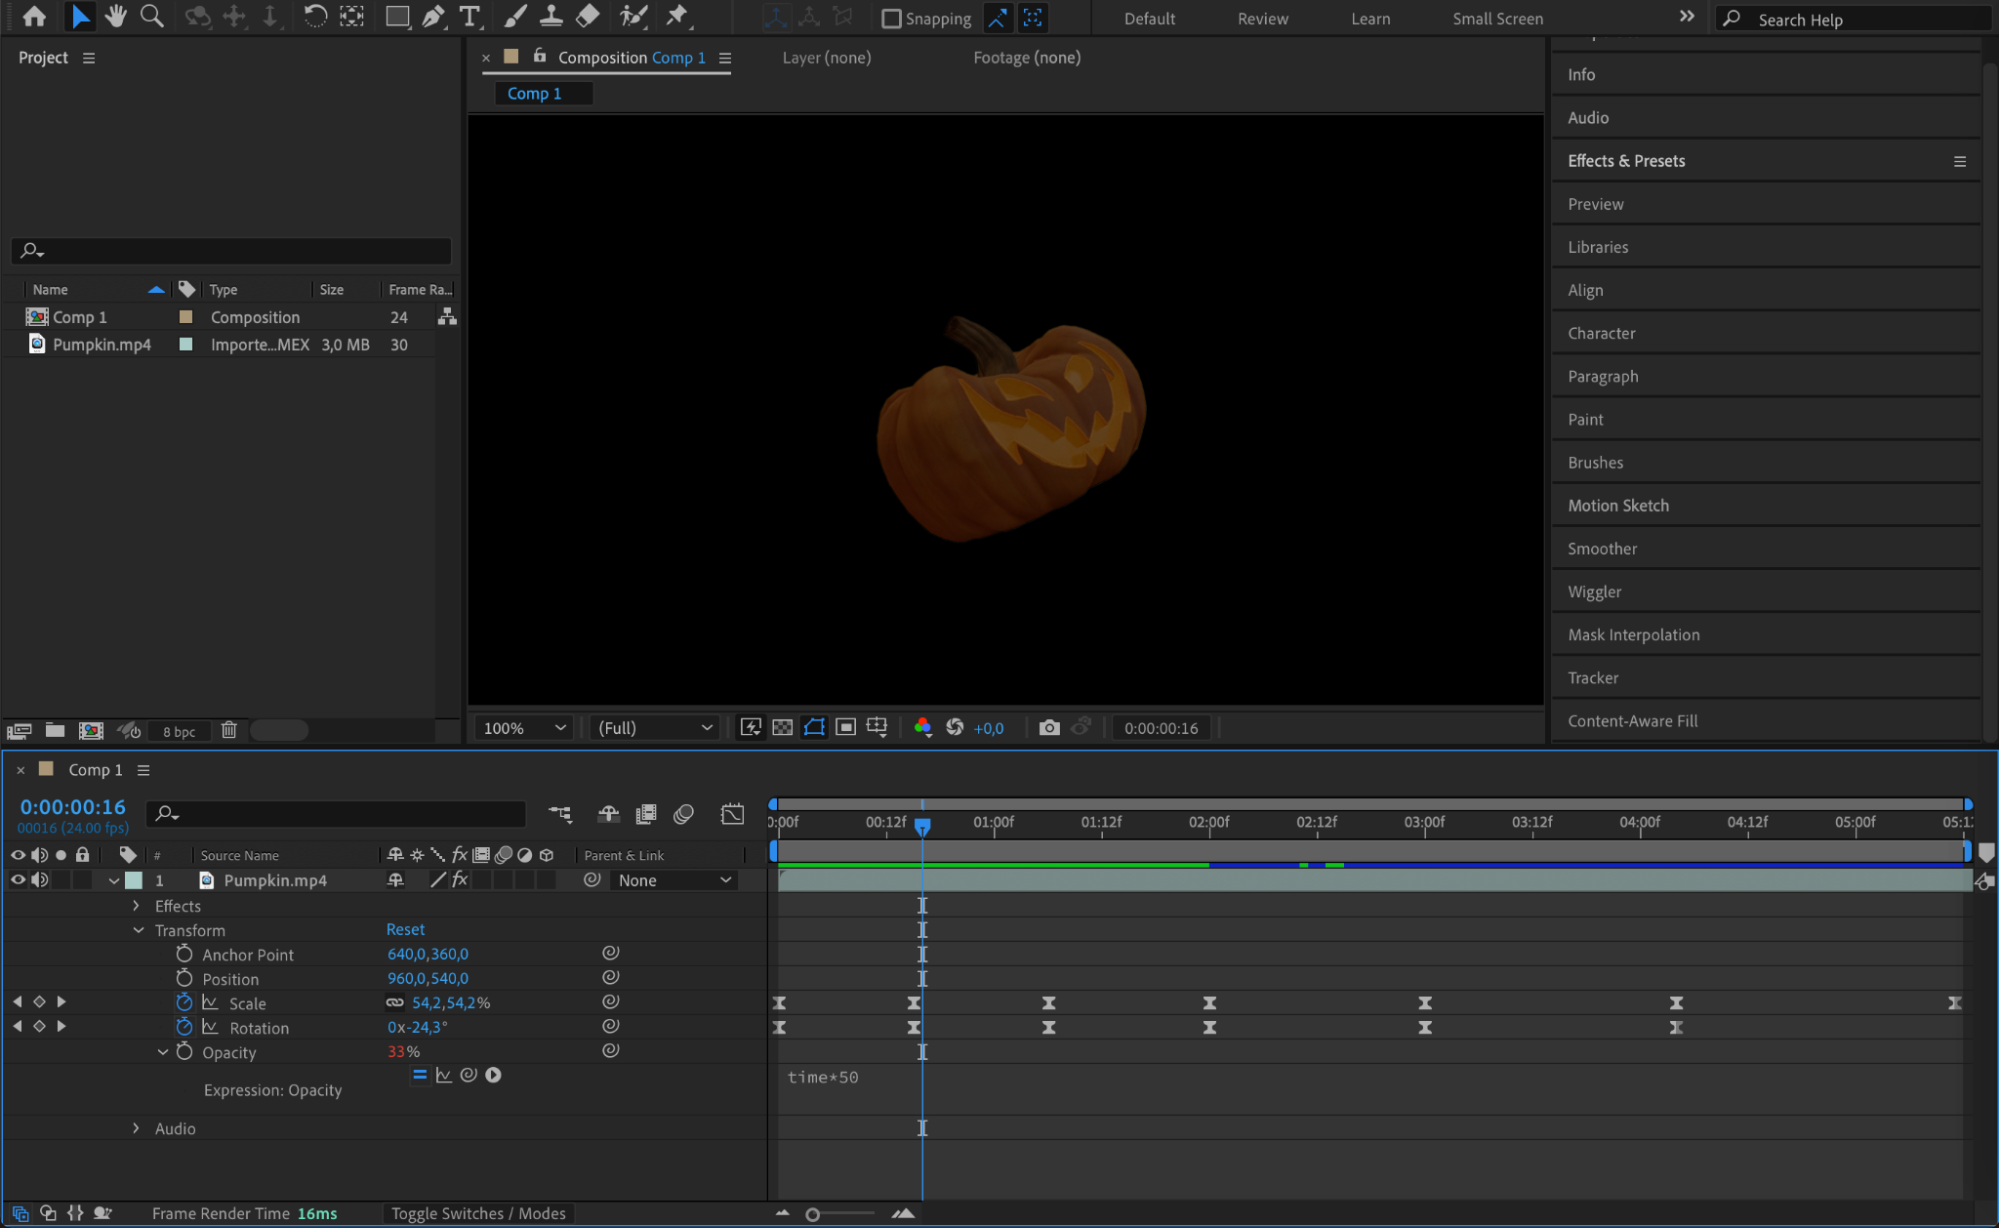
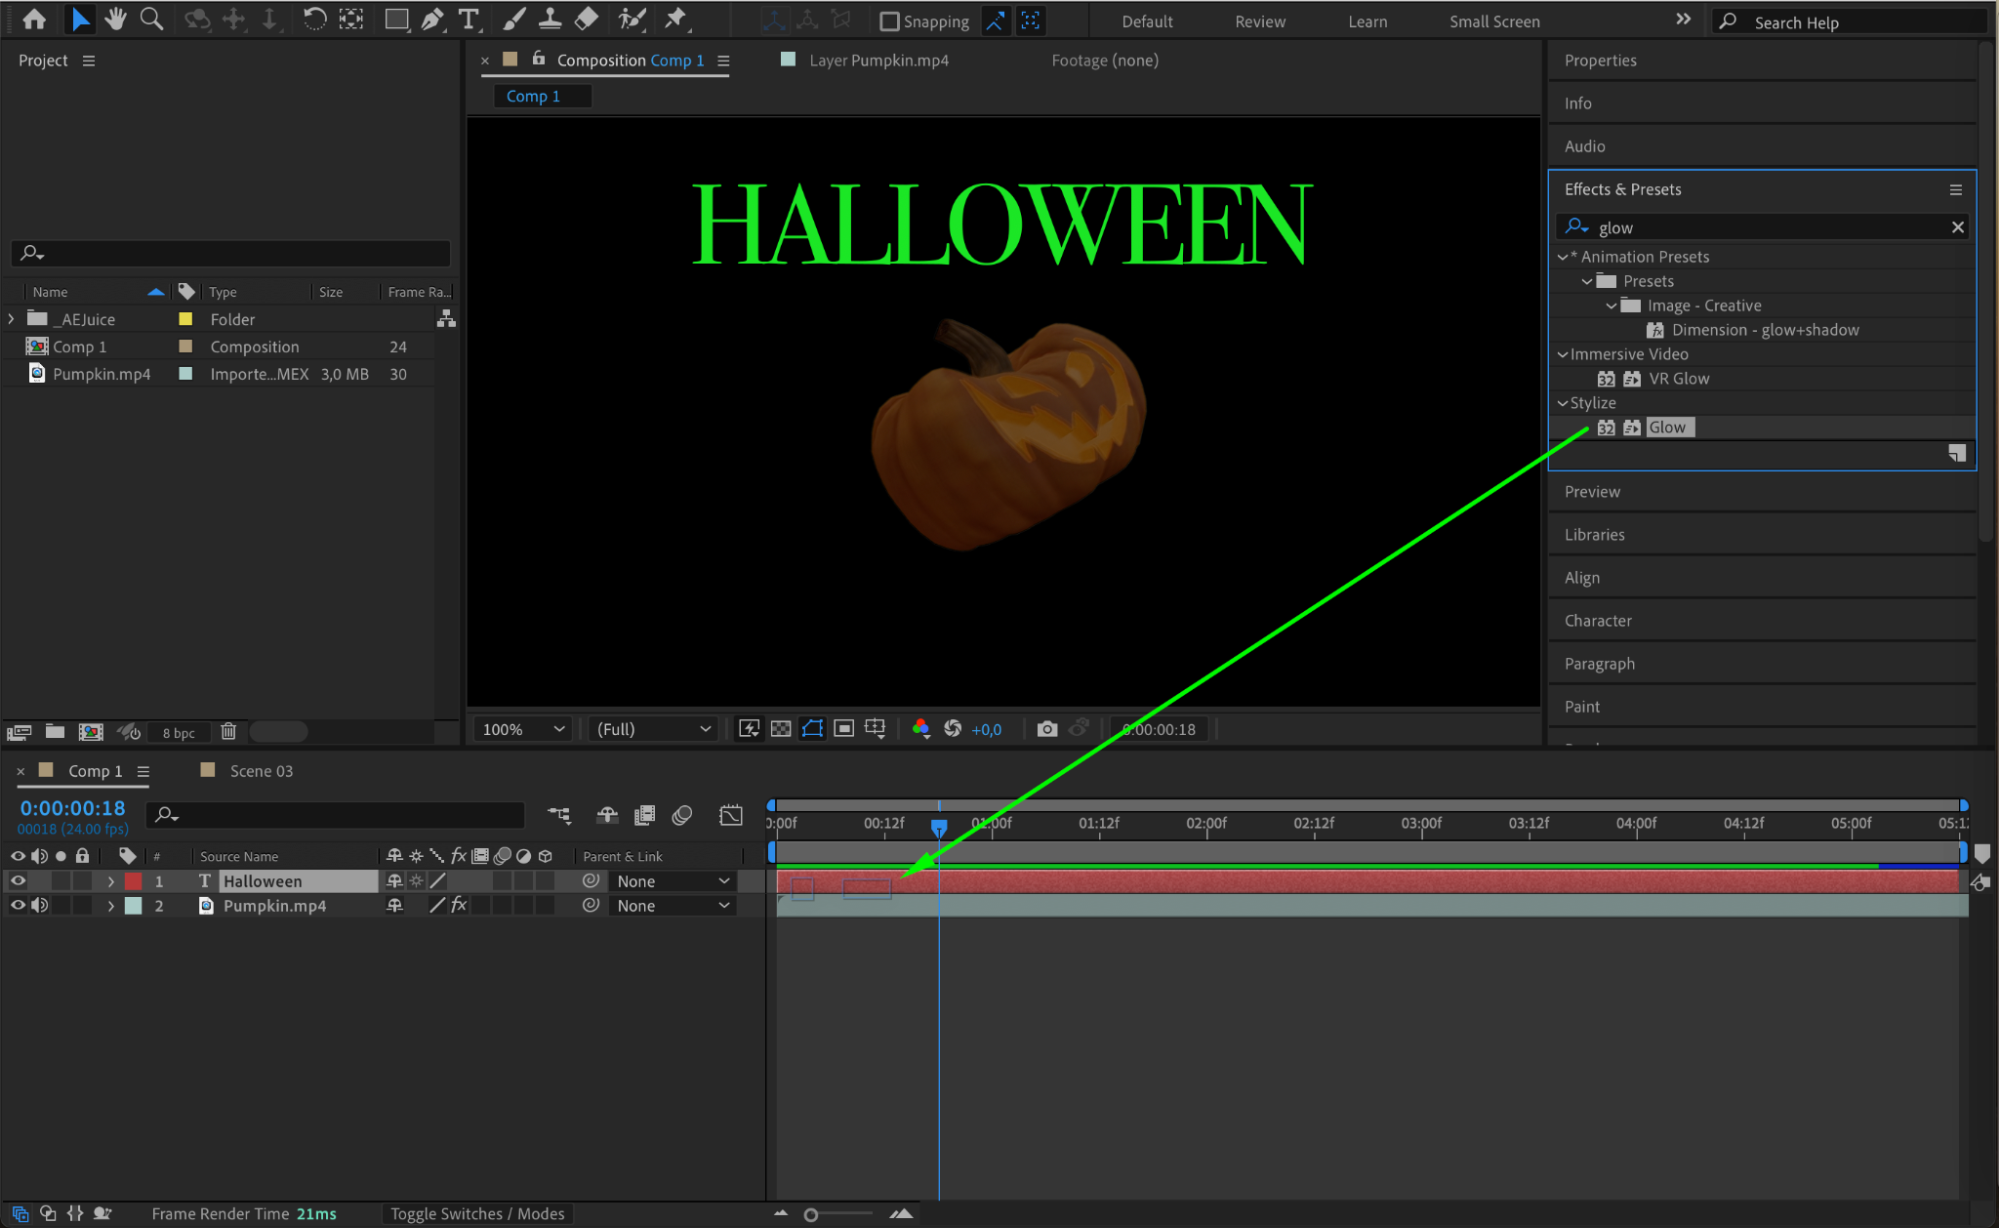
To elevate your animations, apply effects and utilize presets. Go to Effects & Presets in the right-hand panel and browse through the options like motion blur, glow, and particle effects. Drag the desired effect onto your layer in the timeline. Effects and presets can add depth, style, and sophistication to your animations, making them more engaging and dynamic.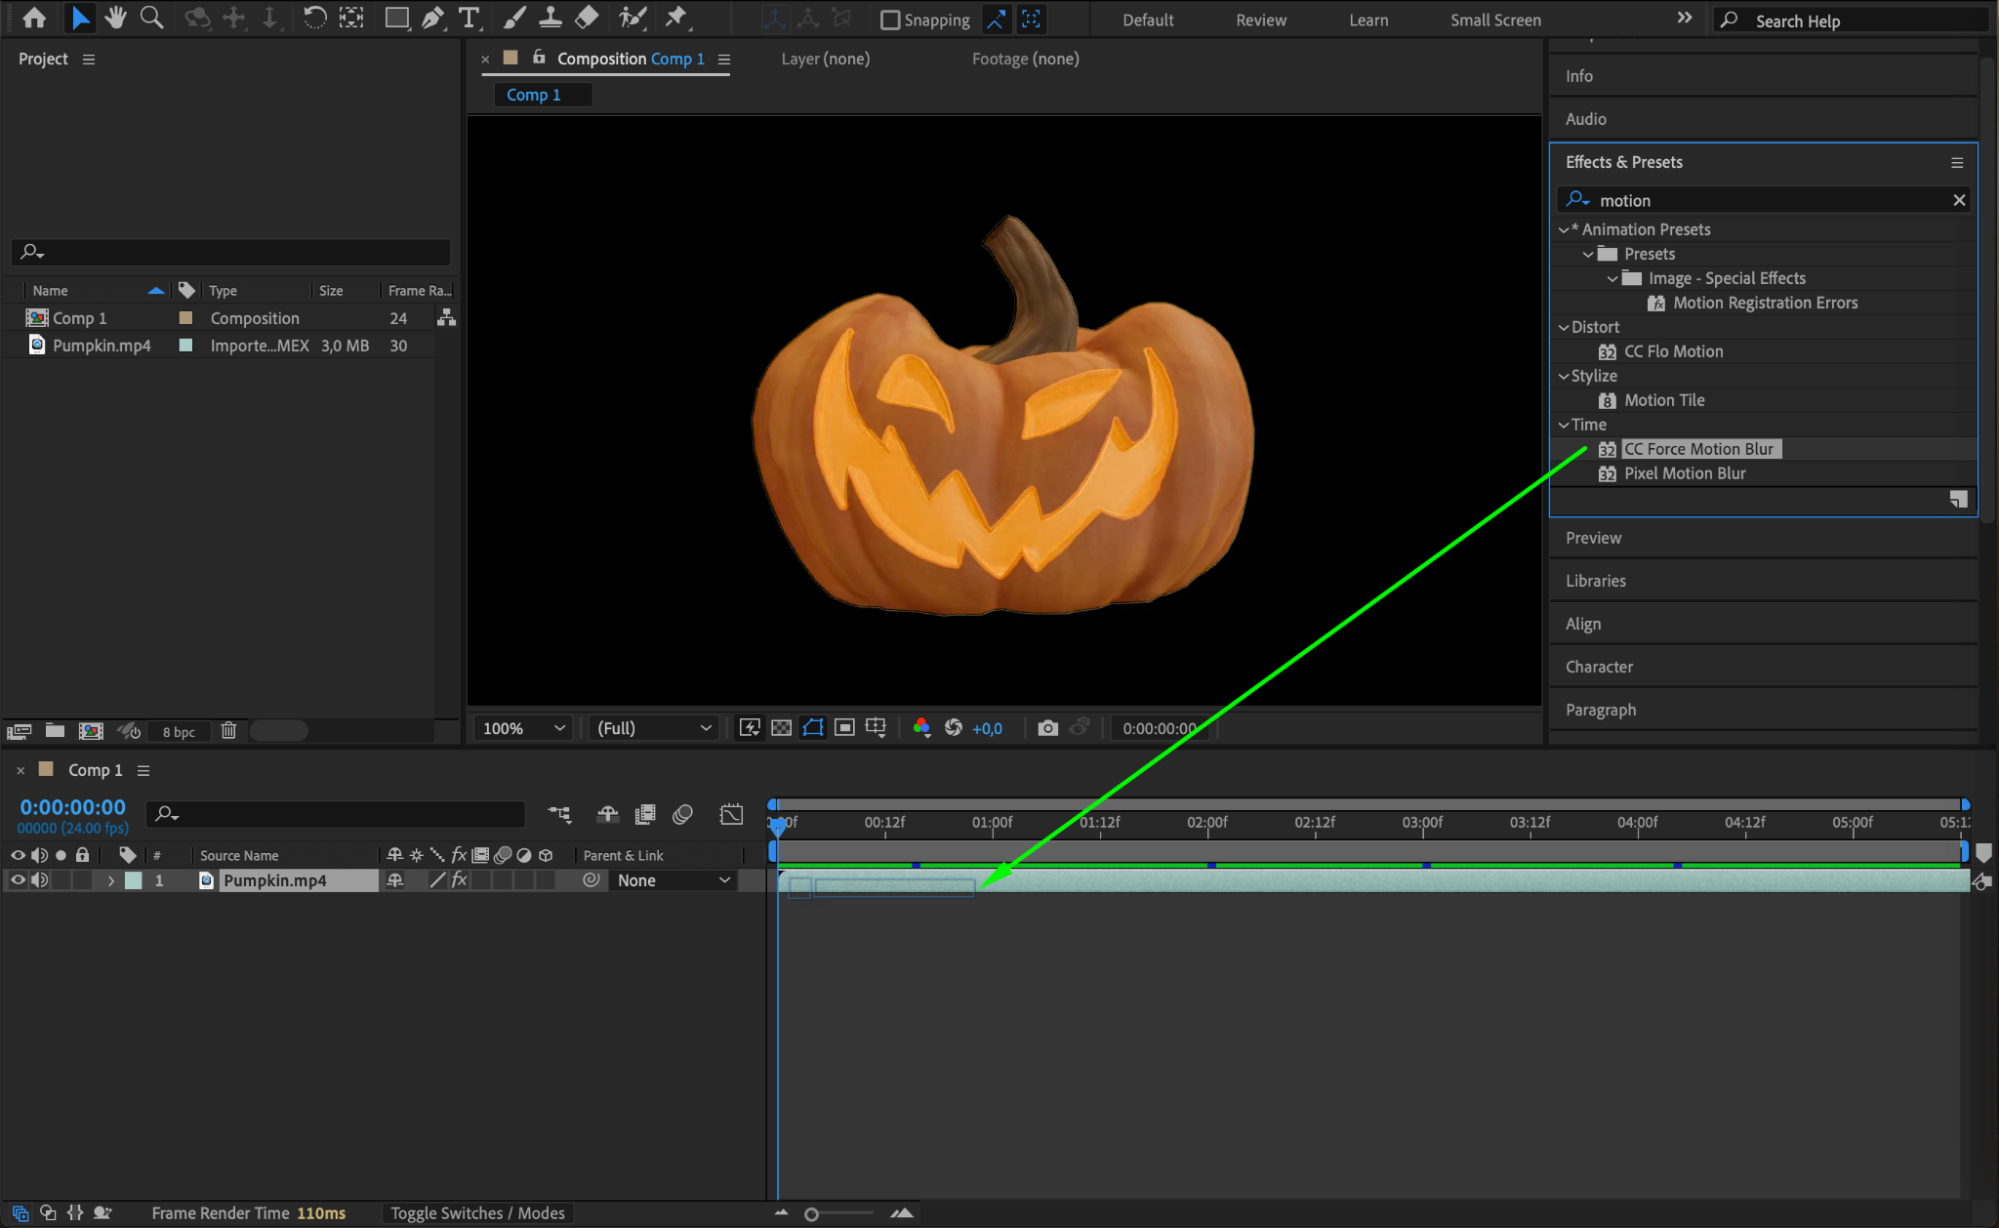
 Step 7: Use Expressions for Advanced Animations
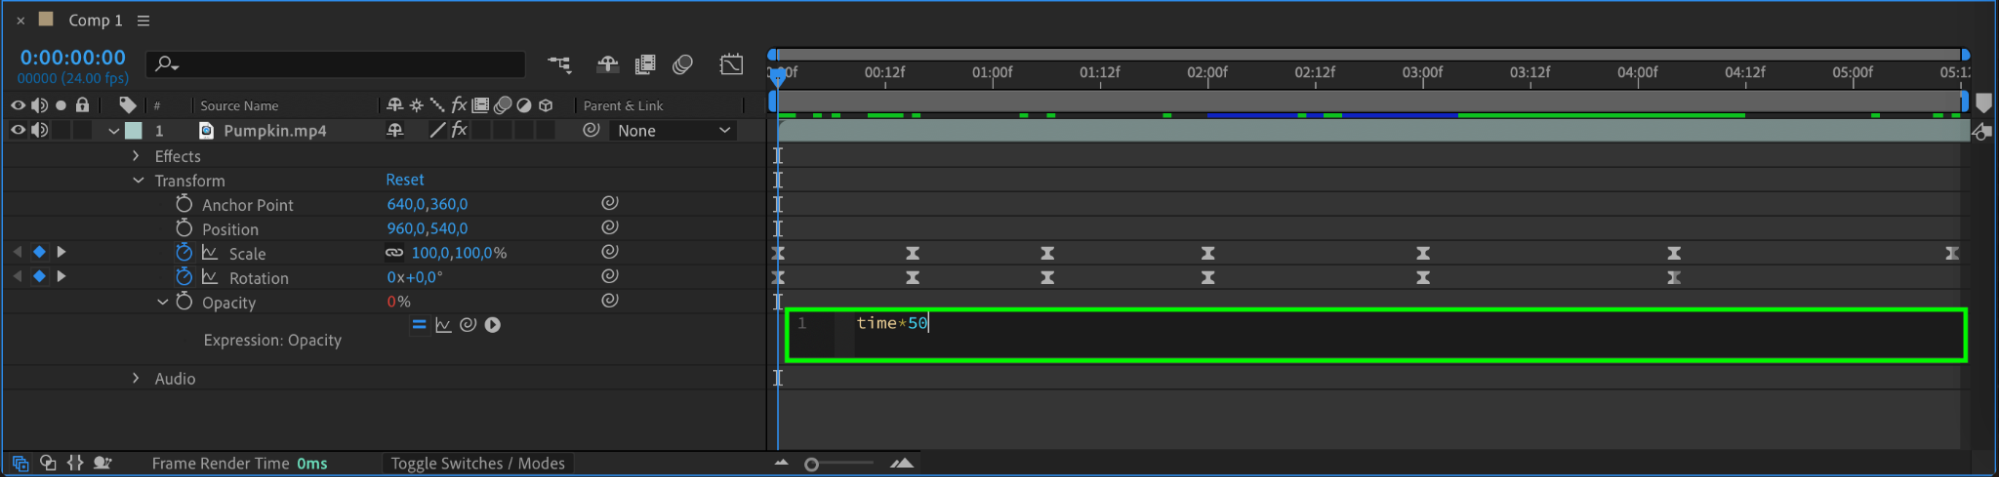
Expressions in After Effects allow for advanced automation and dynamic animations. To add an expression, select a property, go to Animation > Add Expression, and enter your code. Expressions let you create complex animations by linking properties or creating automated responses to changes. This step can significantly enhance your animations by adding interactivity and complexity.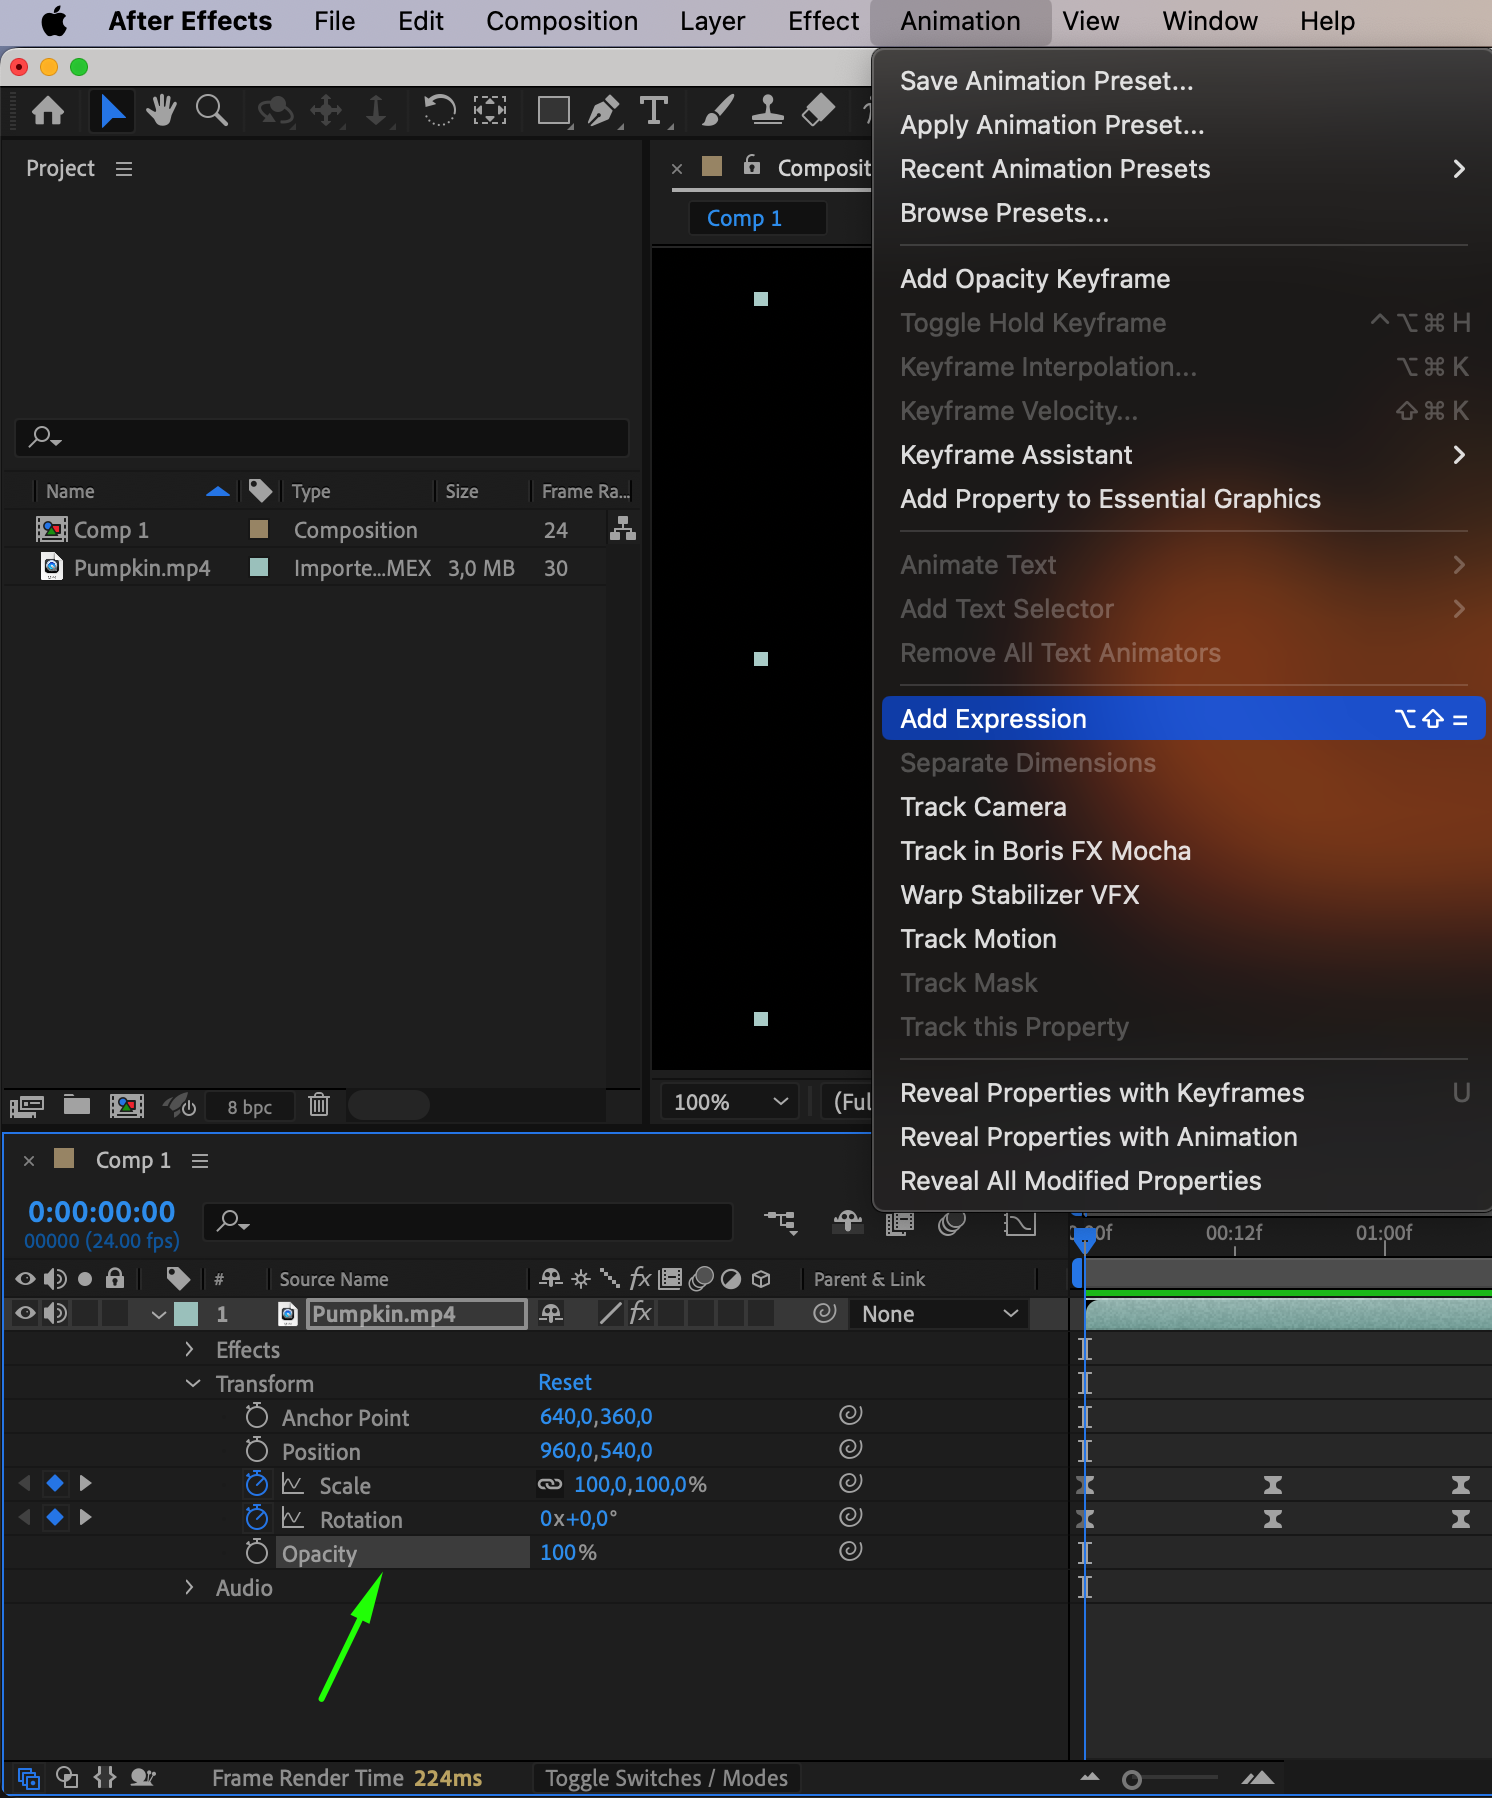
 Step 8: Add Text to Your Animation
To add text, select the Type Tool and click on the composition panel. Type your text and adjust its properties like font, size, and color. You can animate text just like any other asset, using keyframes to create dynamic motion. Adding text is essential for titles, lower thirds, or any on-screen information you want to convey.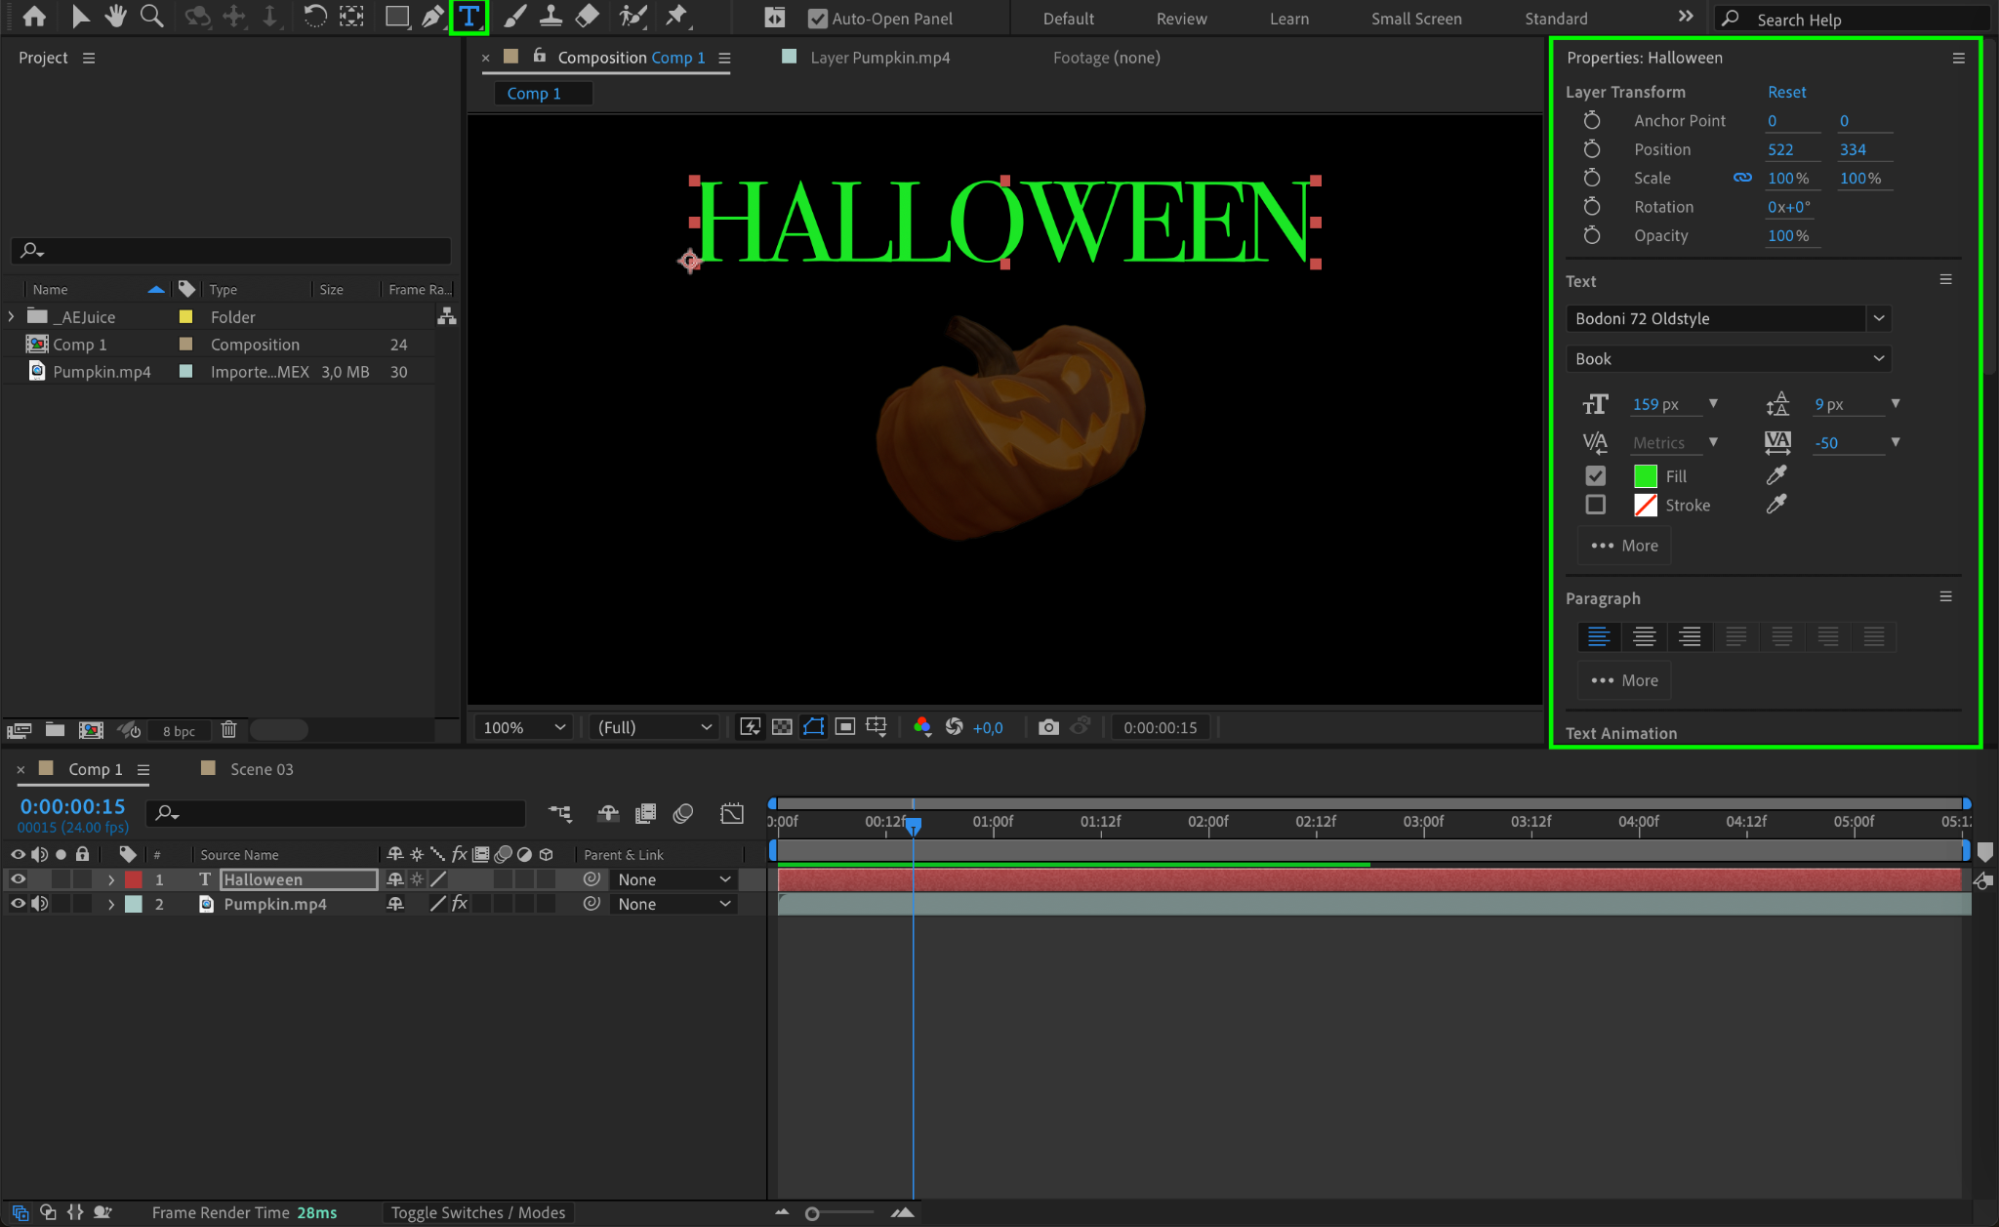
 Step 9: Explore Plugins for Unique Effects
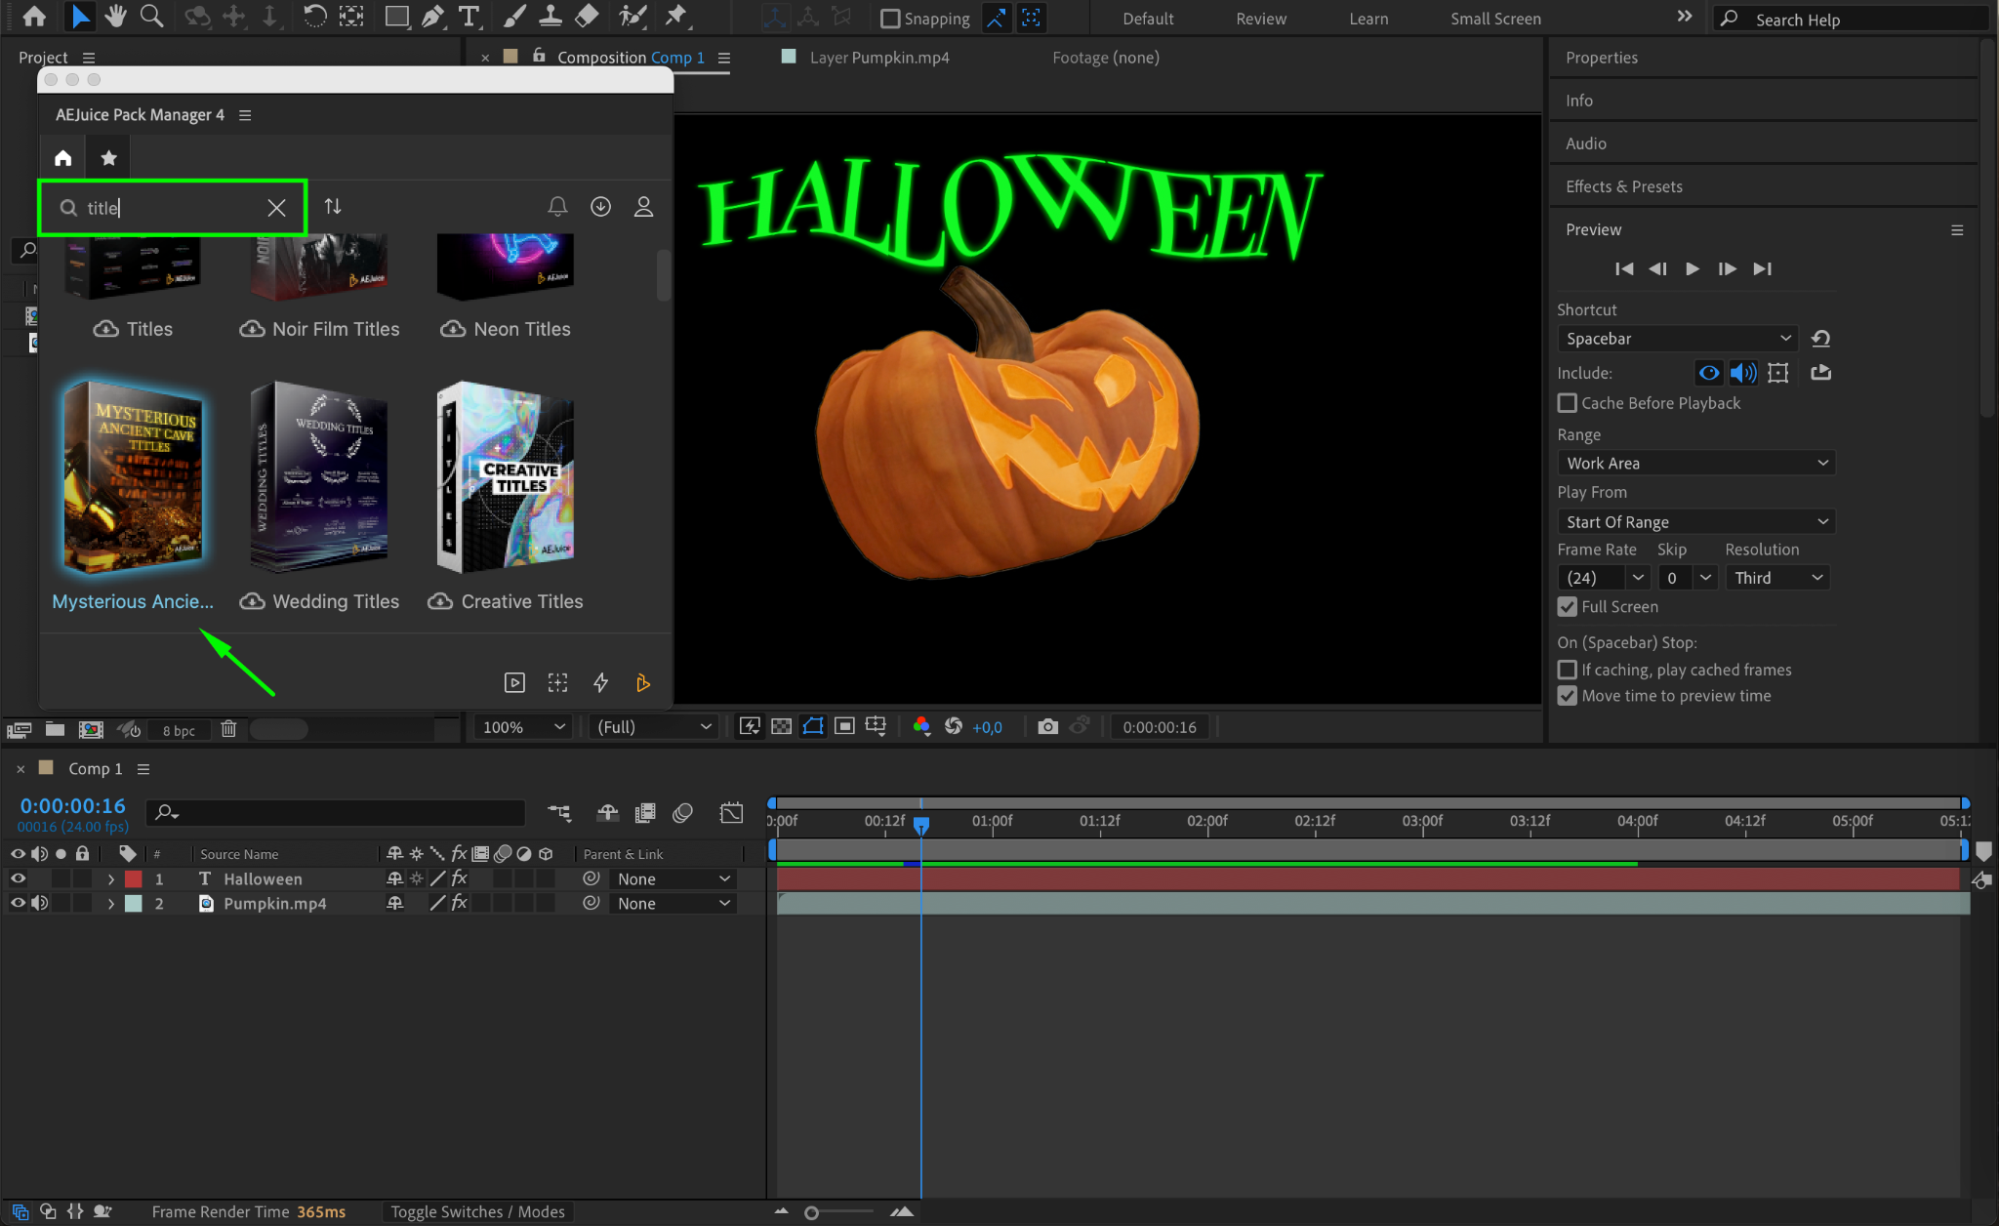
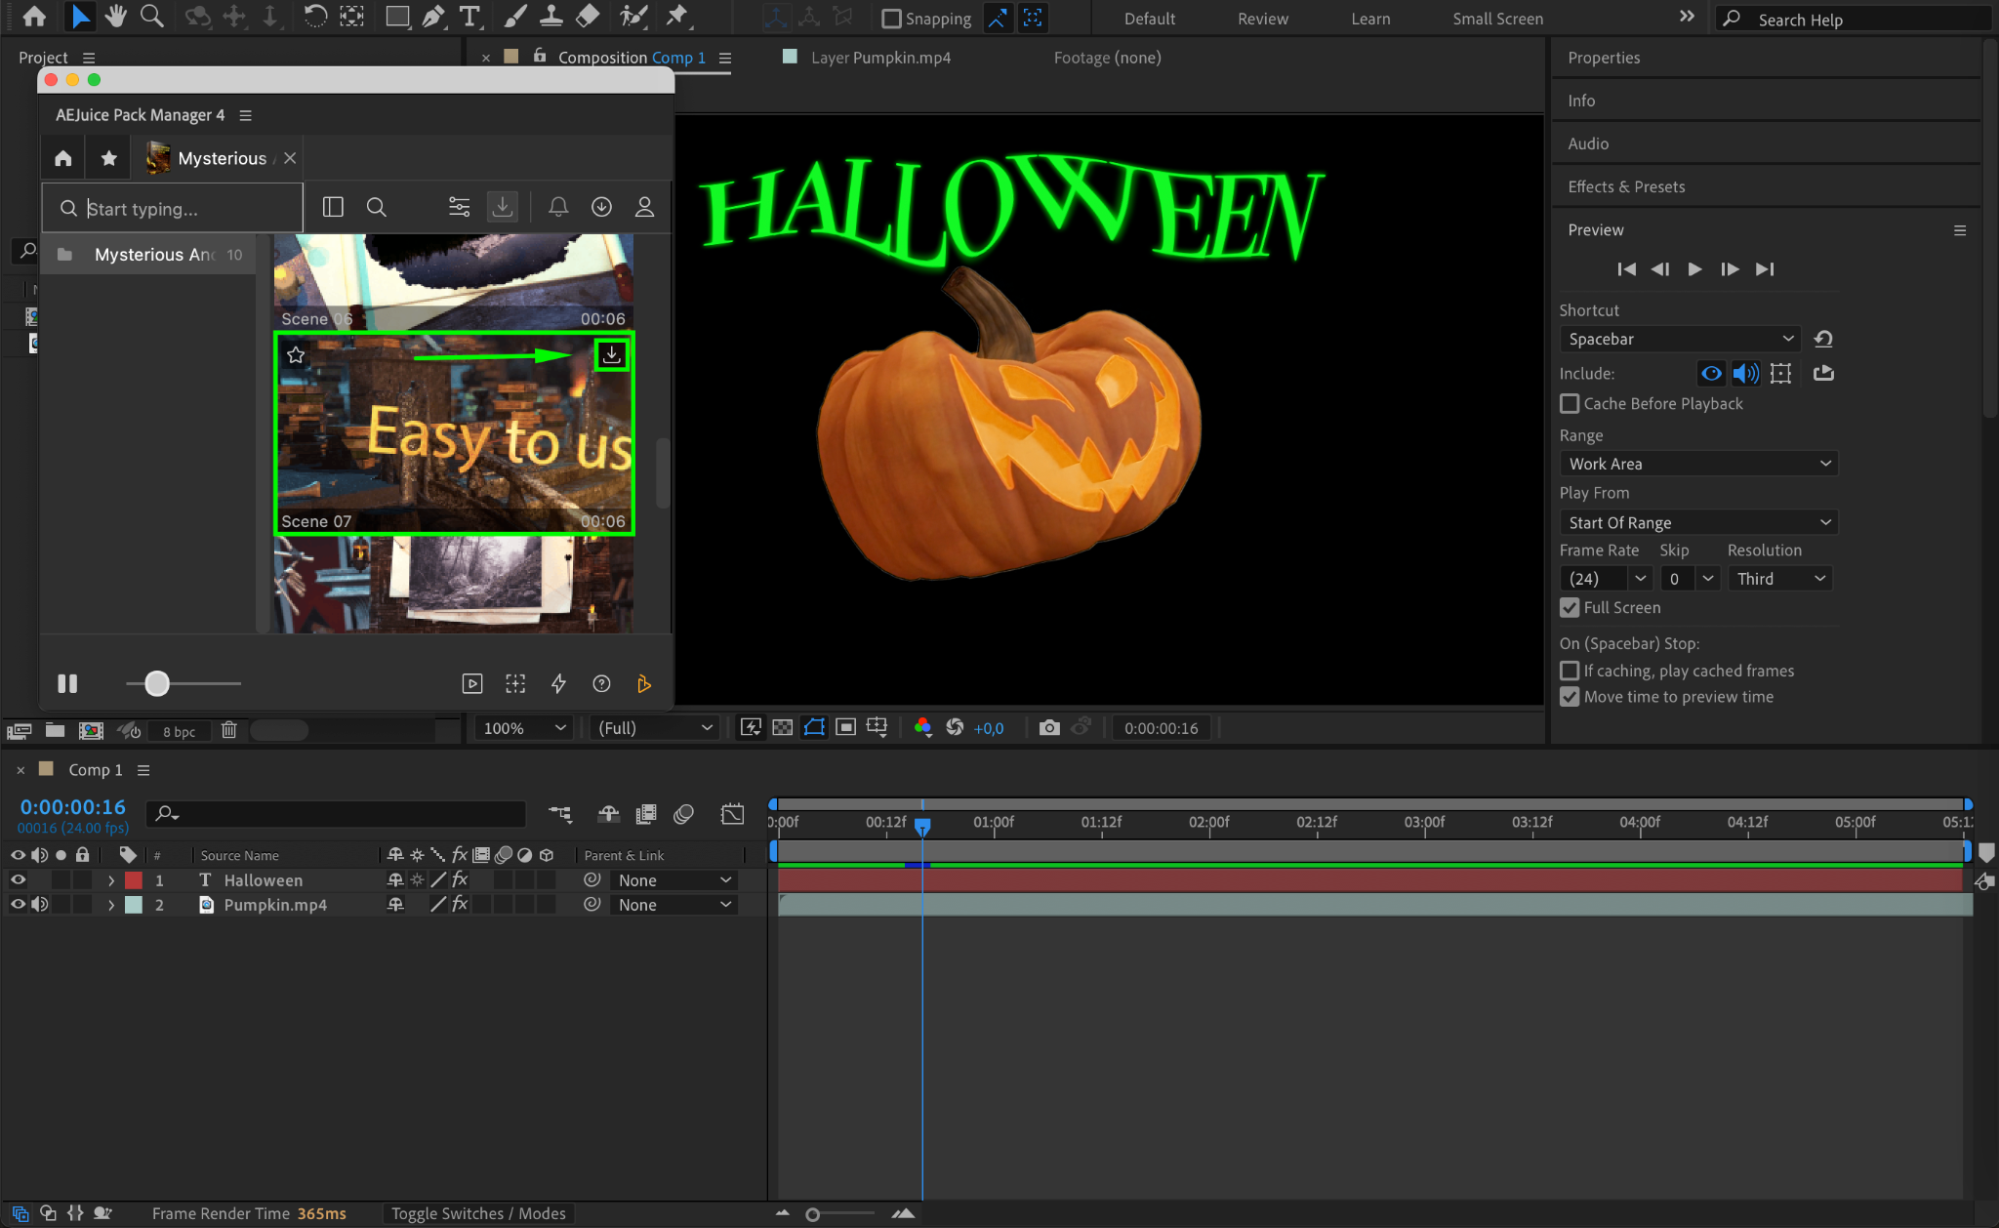
Plugins like AEJuice can offer unique effects and animations that are not available by default in After Effects. These plugins often come with pre-made animations or tools that simplify complex tasks. Incorporating plugins into your workflow can save time and provide you with creative options to make your animations stand out.
 Step 10: Preview Your Animation
Before finalizing your project, use the Preview function to play back your animation. Make sure everything runs smoothly and that the timing and effects are as you intended. You can adjust any keyframes or effects that need tweaking. Previewing your work is crucial for catching errors and ensuring that your final product meets your expectations.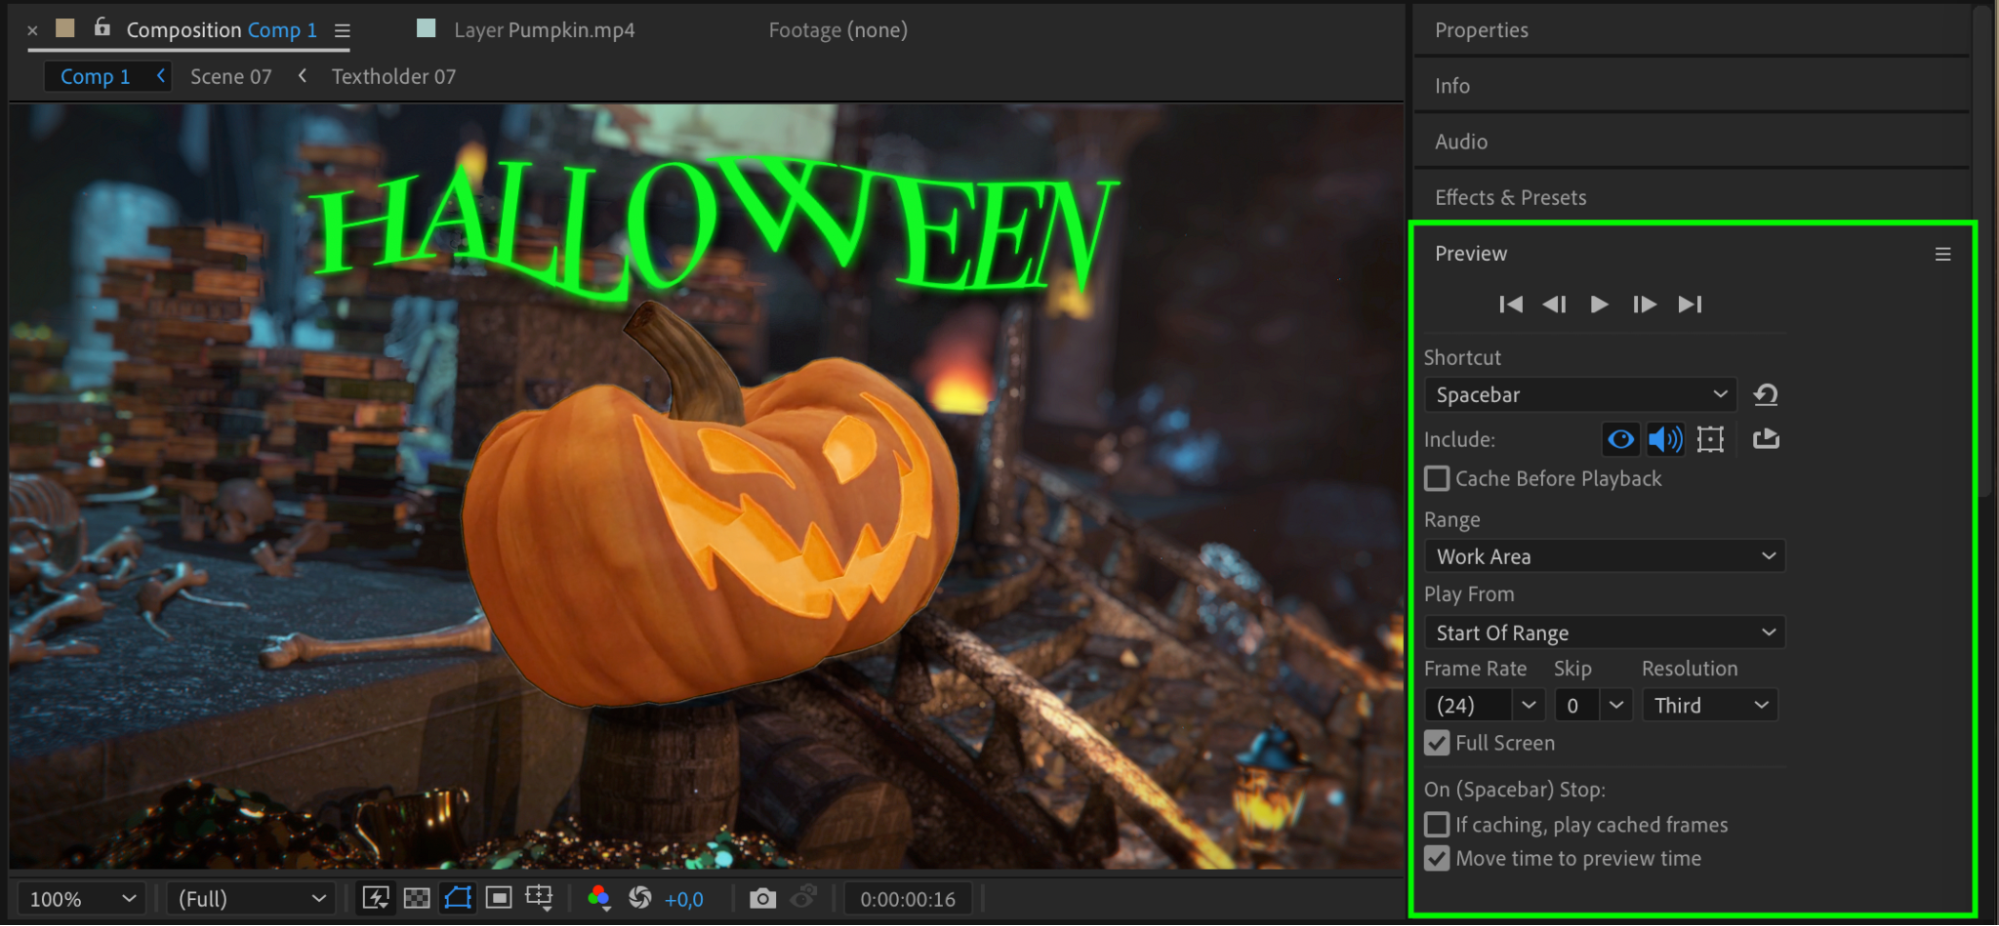
Conclusion
And there you have it! By following these steps, you can create stunning animations in Adobe After Effects. Whether you’re keyframing basic transformations or diving into advanced expressions and effects, After Effects provides all the tools you need to bring your ideas to life. So, unleash your creativity and start animating your designs today!
With Adobe After Effects, you have the power to transform your static designs into dynamic and captivating animations. By mastering keyframing, utilizing effects and presets, harnessing the power of expressions, and fine-tuning your animations, you can create visuals that truly stand out.
So, get ready to unleash your creativity and dive into the world of animation in Adobe After Effects. Let’s bring your designs to life!
Our Bestsellers


