Step-by-Step Guide to Creating Dust Particles in After Effects
Introduction: Adding Magic with Dust Particles in After Effects
Dust particles can transform your video into something truly enchanting. Whether you’re aiming for a dreamy, vintage aesthetic or adding subtle movement to your scenes, dust particles can enhance the visual appeal of your project. This tutorial will walk you through the process of creating dust particles in After Effects, offering tips and techniques suitable for both beginners and professionals.
Step 1: Create a New Composition
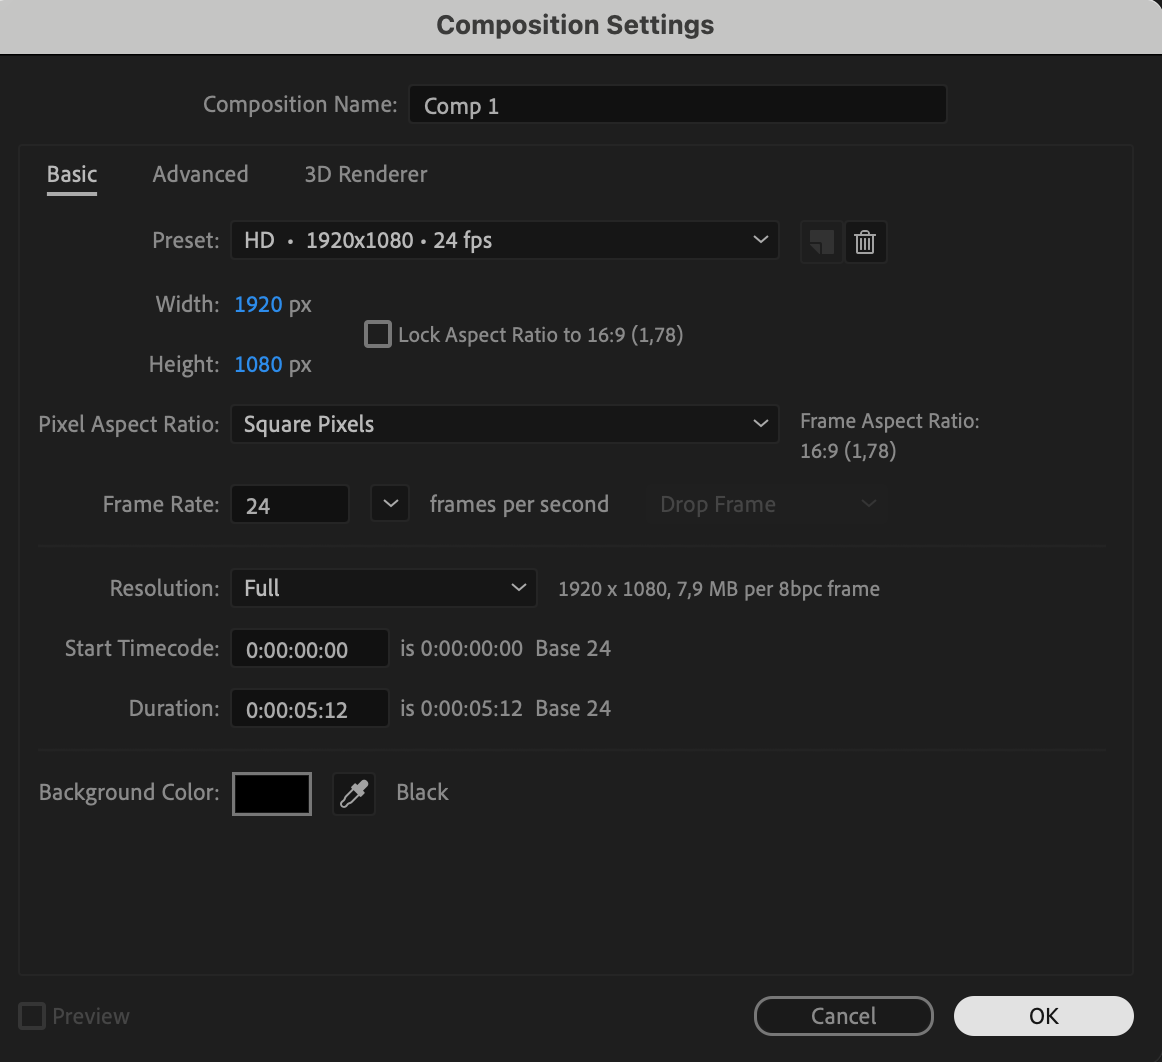
Start by creating a new composition. Go to Composition > New Composition or use the shortcut “Ctrl/Cmd + N”. Set the parameters like resolution, frame rate, and duration according to your project’s needs. This composition will be the canvas for your dust particles.

 Step 2: Add a Black Solid Layer
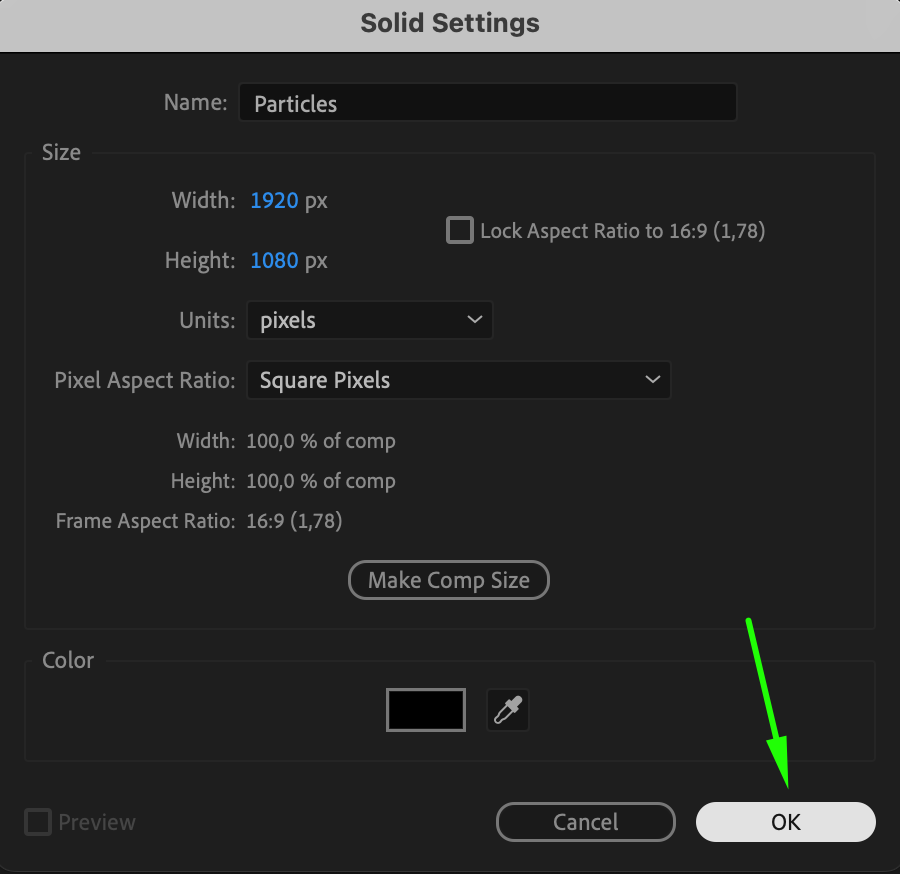
Next, create a black solid layer to serve as the background for your dust particles. Navigate to Layer > New > Solid and choose black as the color. This solid will be the foundation upon which the dust particles will be generated.

 Step 3: Apply the CC Particle System II Effect
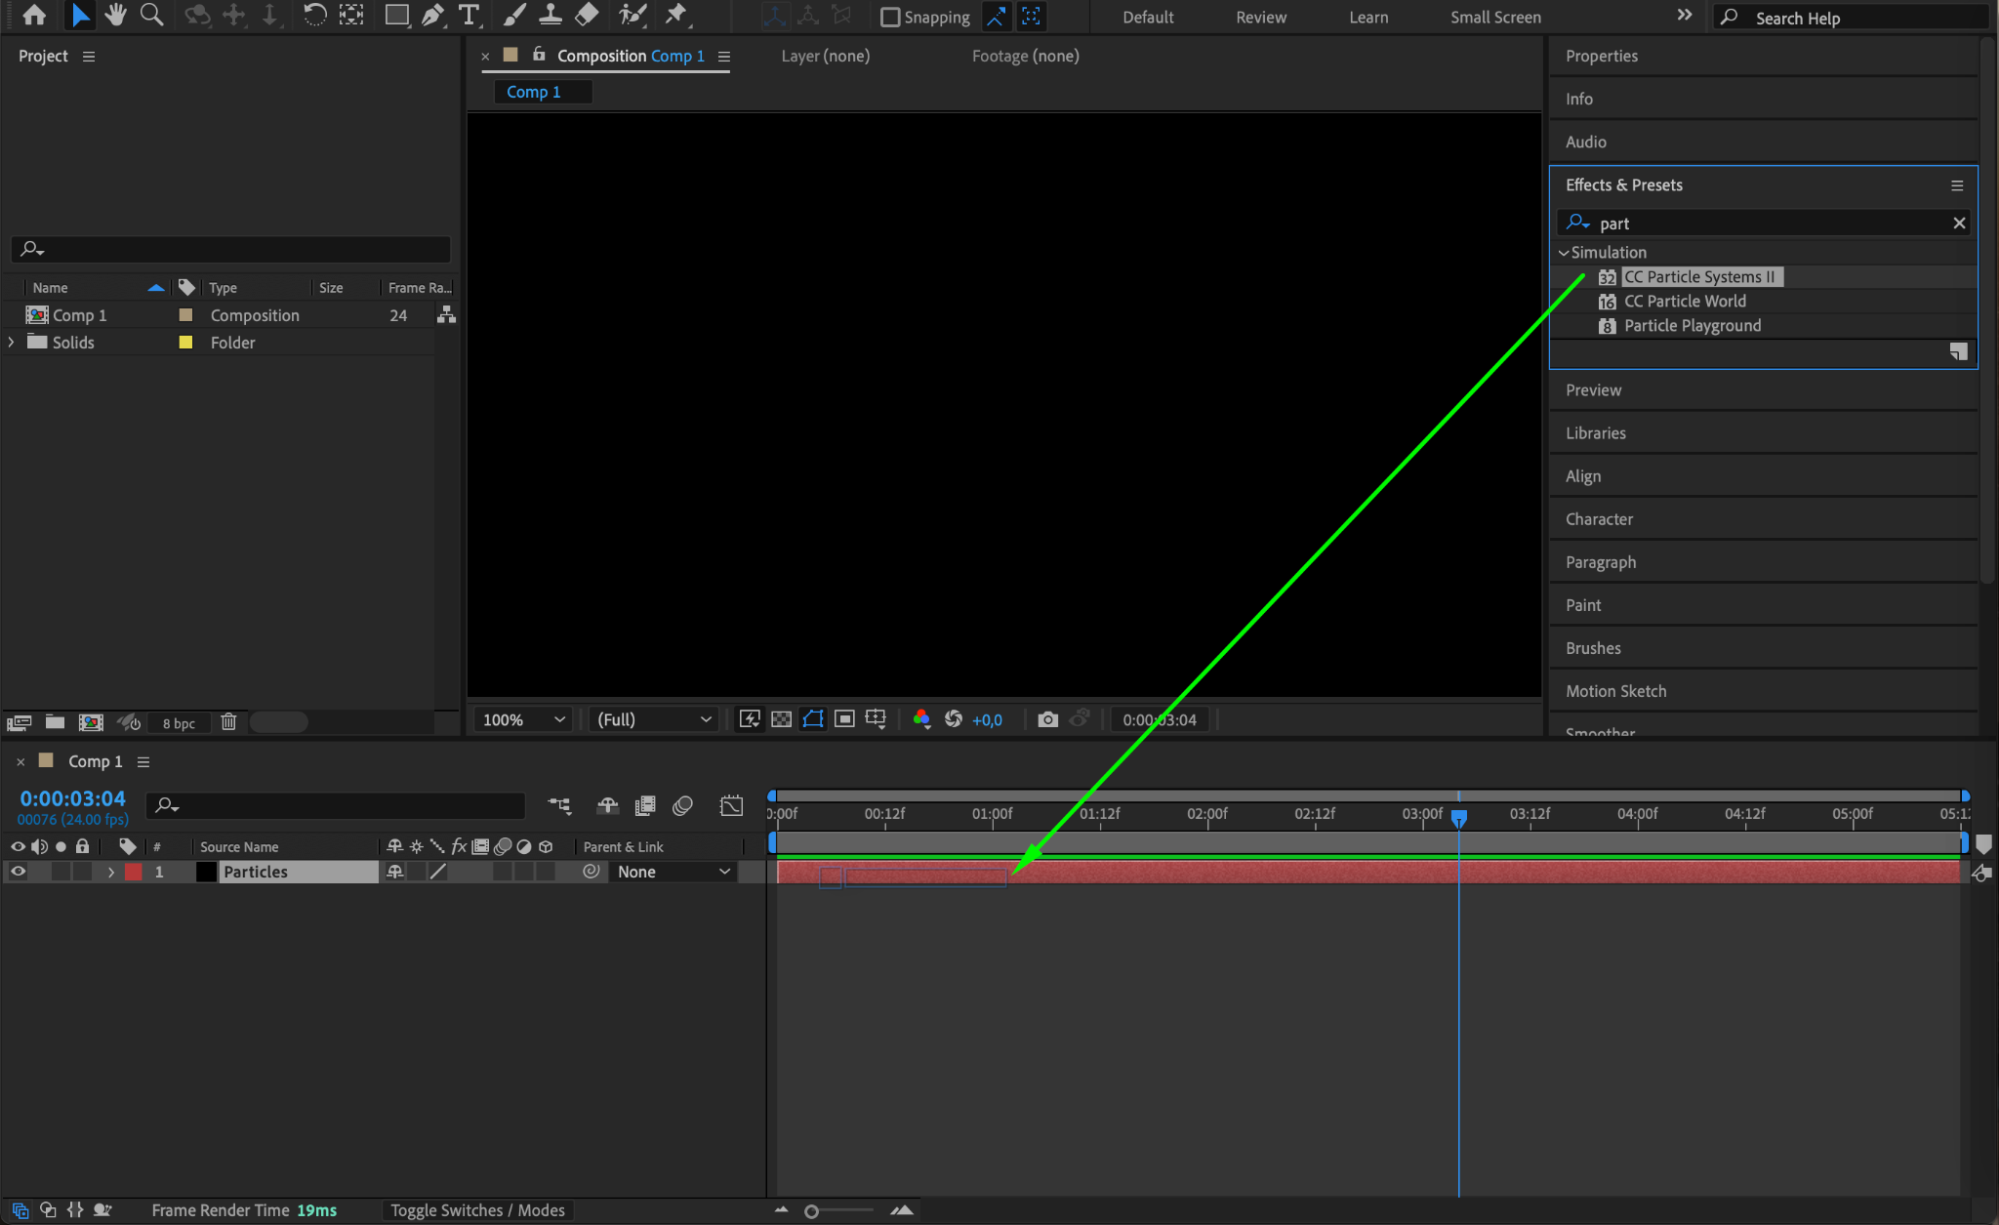
Now, it’s time to generate the dust particles. In the Effects & Presets panel, search for the CC Particle System II effect. Drag and drop this effect onto the black solid layer. This powerful effect allows you to create a wide range of particle systems, including the delicate dust particles we’ll be creating.
 Step 4: Adjust the Particle System Settings
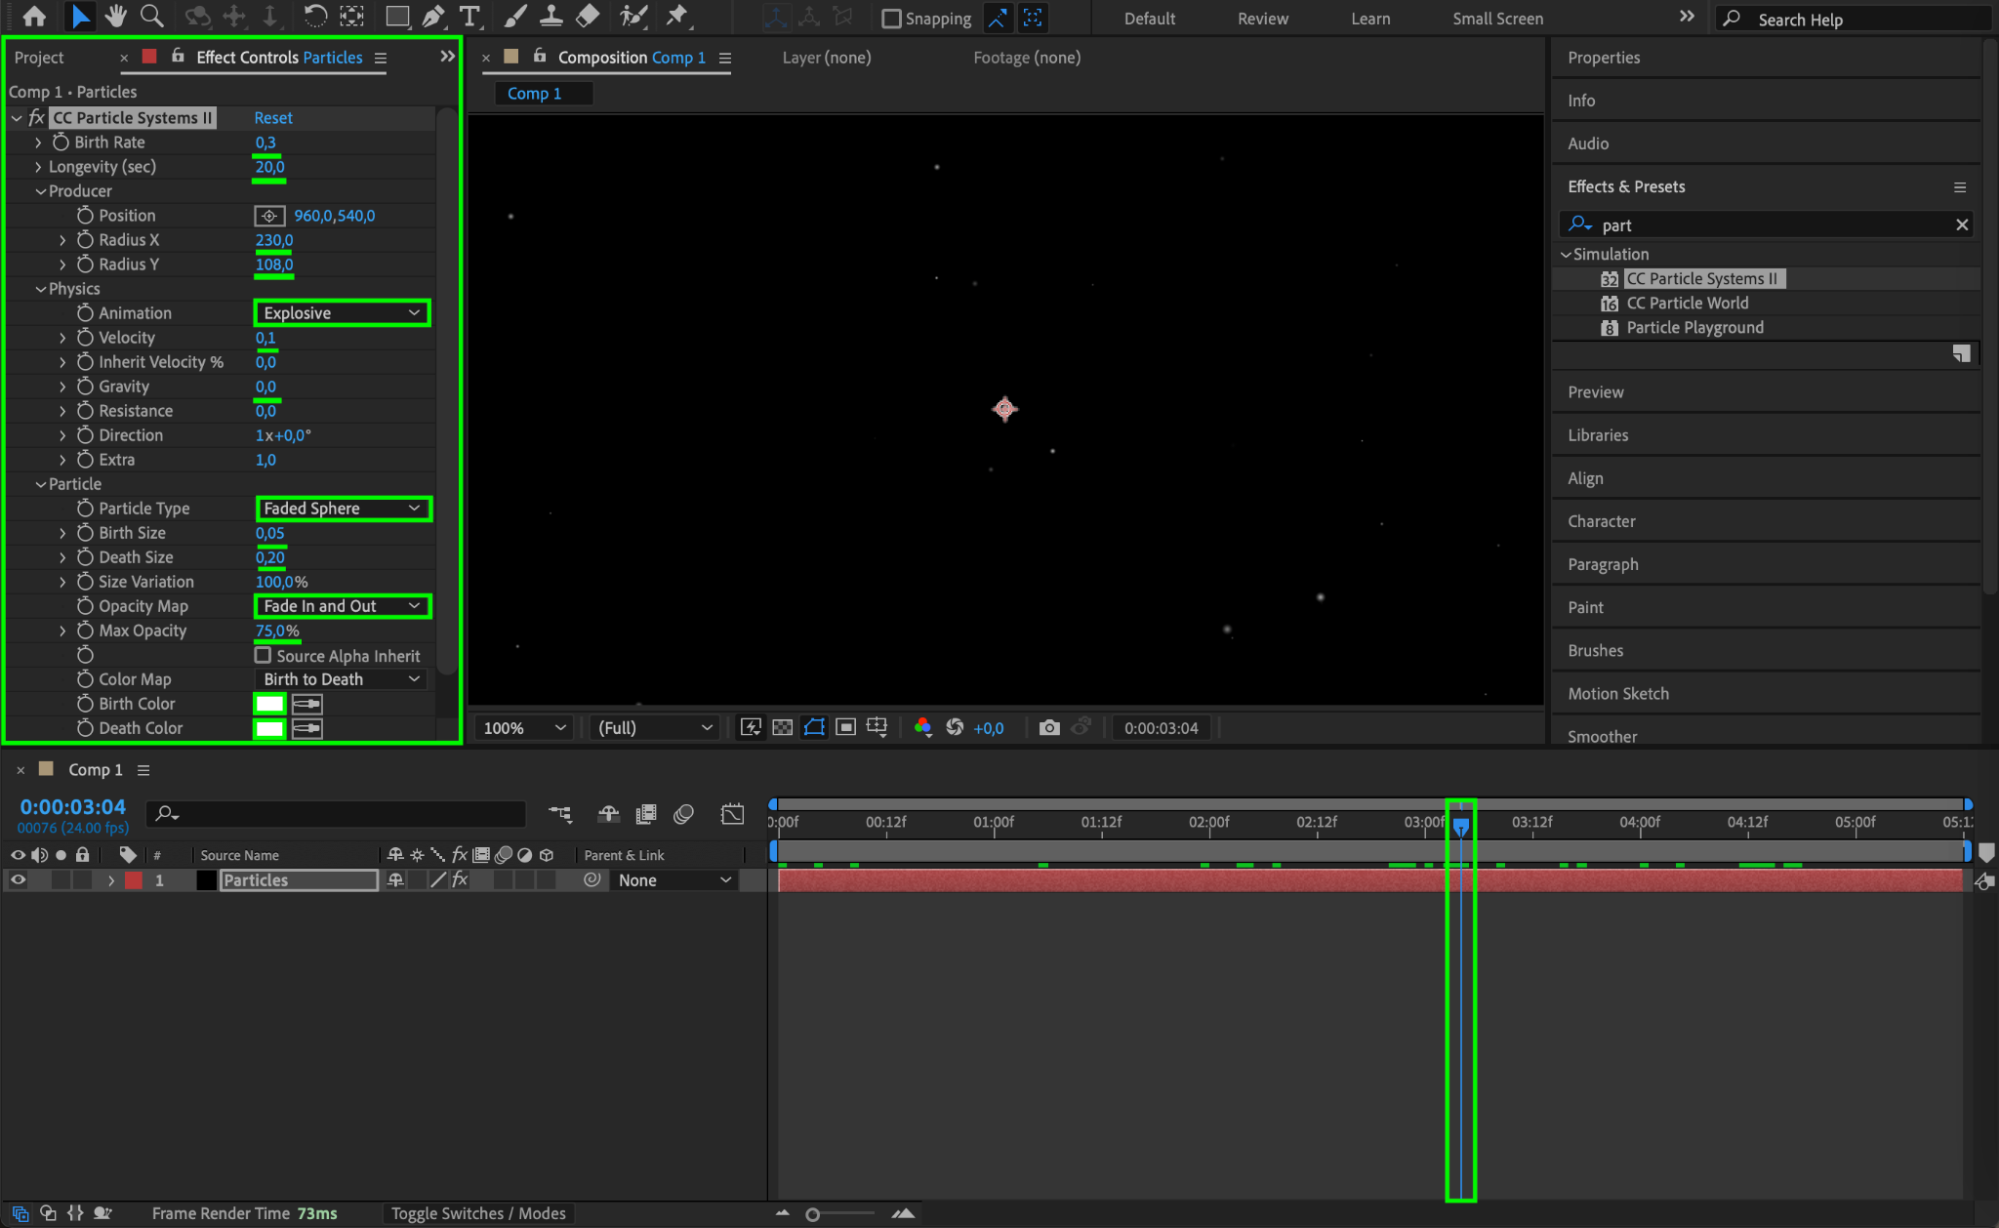
To create realistic dust particles in After Effects, adjust the key settings in the Effect Controls panel for the CC Particle System II effect. Set the Birth Rate to 0.3 for a sparse dust effect and Longevity to 20 to allow the particles to drift slowly across the screen. Use a Radius X of 230 and Radius Y of 108 to create a wide and natural spread of particles. Choose Explosive for the Animation to scatter the particles gently, and set Velocity to 0.1 for a slow, drifting motion. Remove Gravity by setting it to 0, keeping the particles suspended in the air, and select Faded Sphere for the Particle Type to give them a soft, round shape. Adjust the Birth Size to 0.05 and Death Size to 0.2 to mimic the behavior of dust, and use the Fade In and Out Opacity Map for a gradual appearance and disappearance. Set Max Opacity to 75 for visibility without being too harsh, and choose White for both Birth Color and Death Color to keep the particles light and ethereal. These settings will help you create a subtle, magical dust effect in your video.
Step 5: Import and Place Your Footage
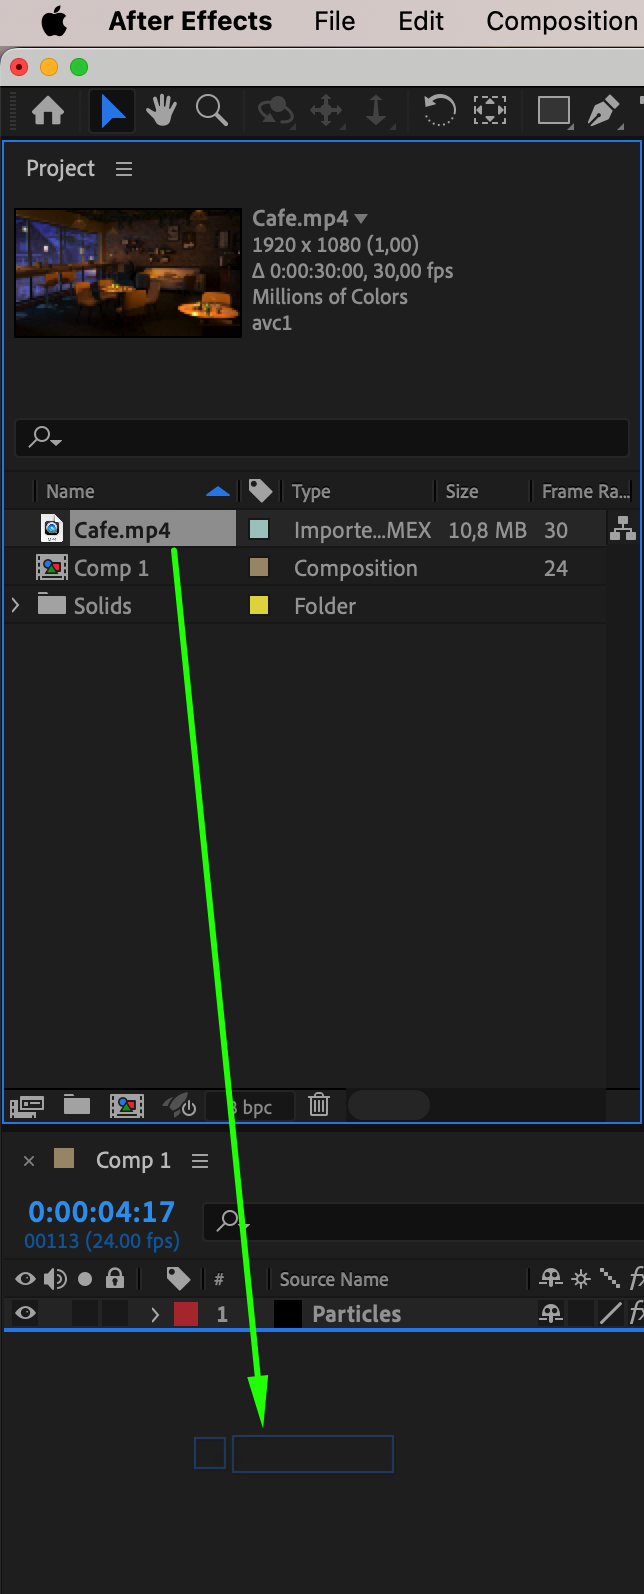
After creating the dust particles, import the video footage you want to enhance with this effect. Go to File > Import > File and select your video. Once imported, drag the video layer onto the timeline below the dust particles layer. This positions the dust particles in front of your video, adding depth and texture.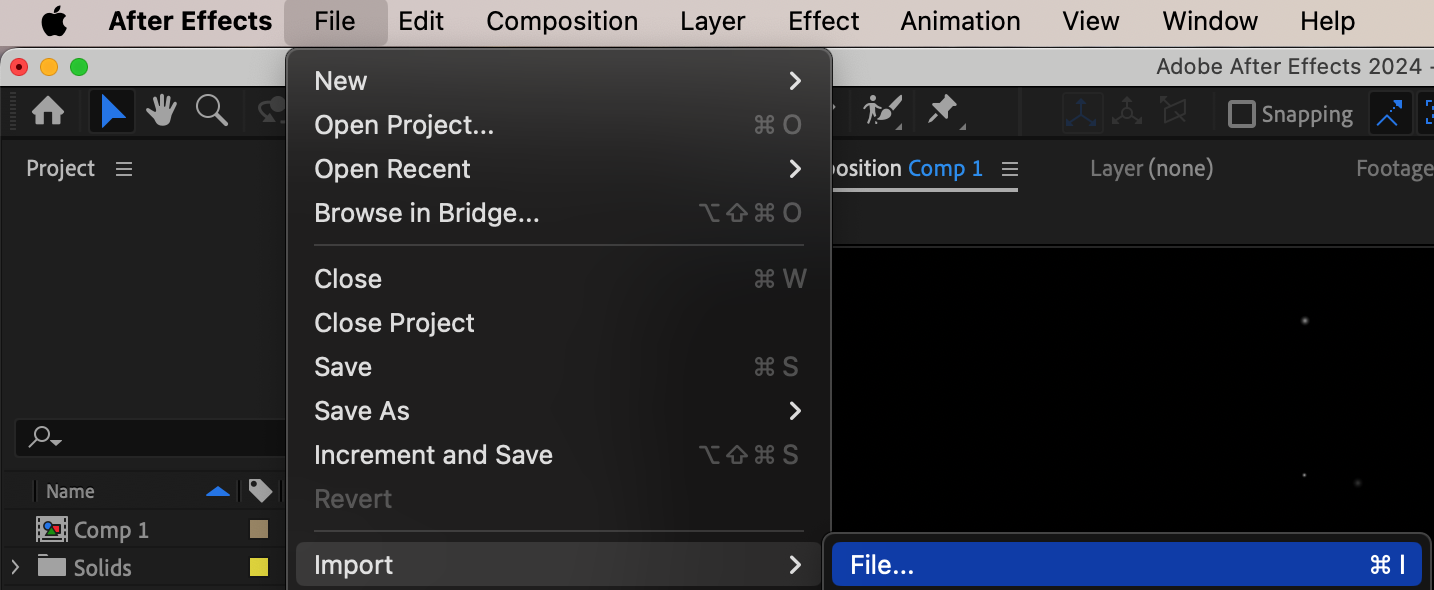
 Step 6: Experiment with Blending Modes
Get 10% off when you subscribe to our newsletter

To blend the dust particles more naturally into your footage, right-click on the solid layer with the particle effect and explore different Blending Modes. Modes like Screen, Add, or Overlay can help the particles blend seamlessly with the video, depending on the lighting and color tones of your footage. Experimenting with these modes allows you to achieve the best visual integration.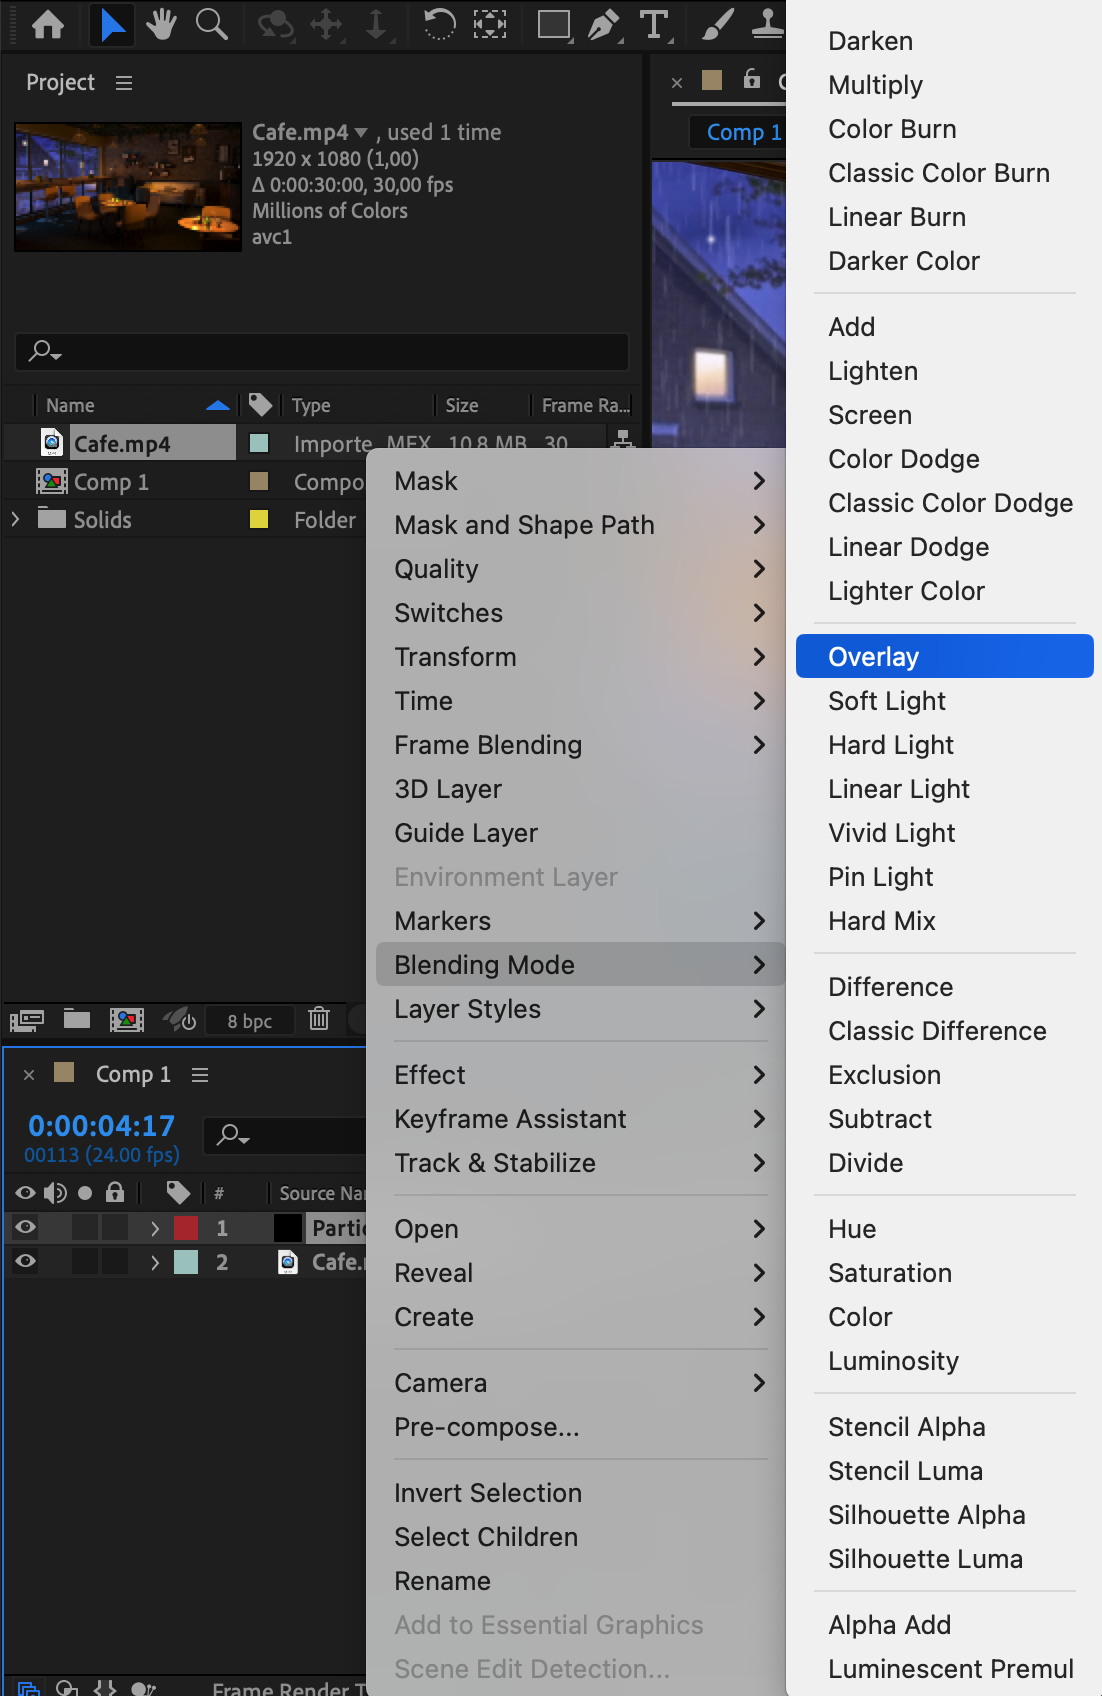 Step 7: Preview and Make Adjustments
Use the Preview panel to play through your composition and see how the dust particles interact with your video. If needed, make adjustments to the particle settings, blending mode, or position to perfect the effect. This step ensures that your dust particles enhance the video without overpowering it.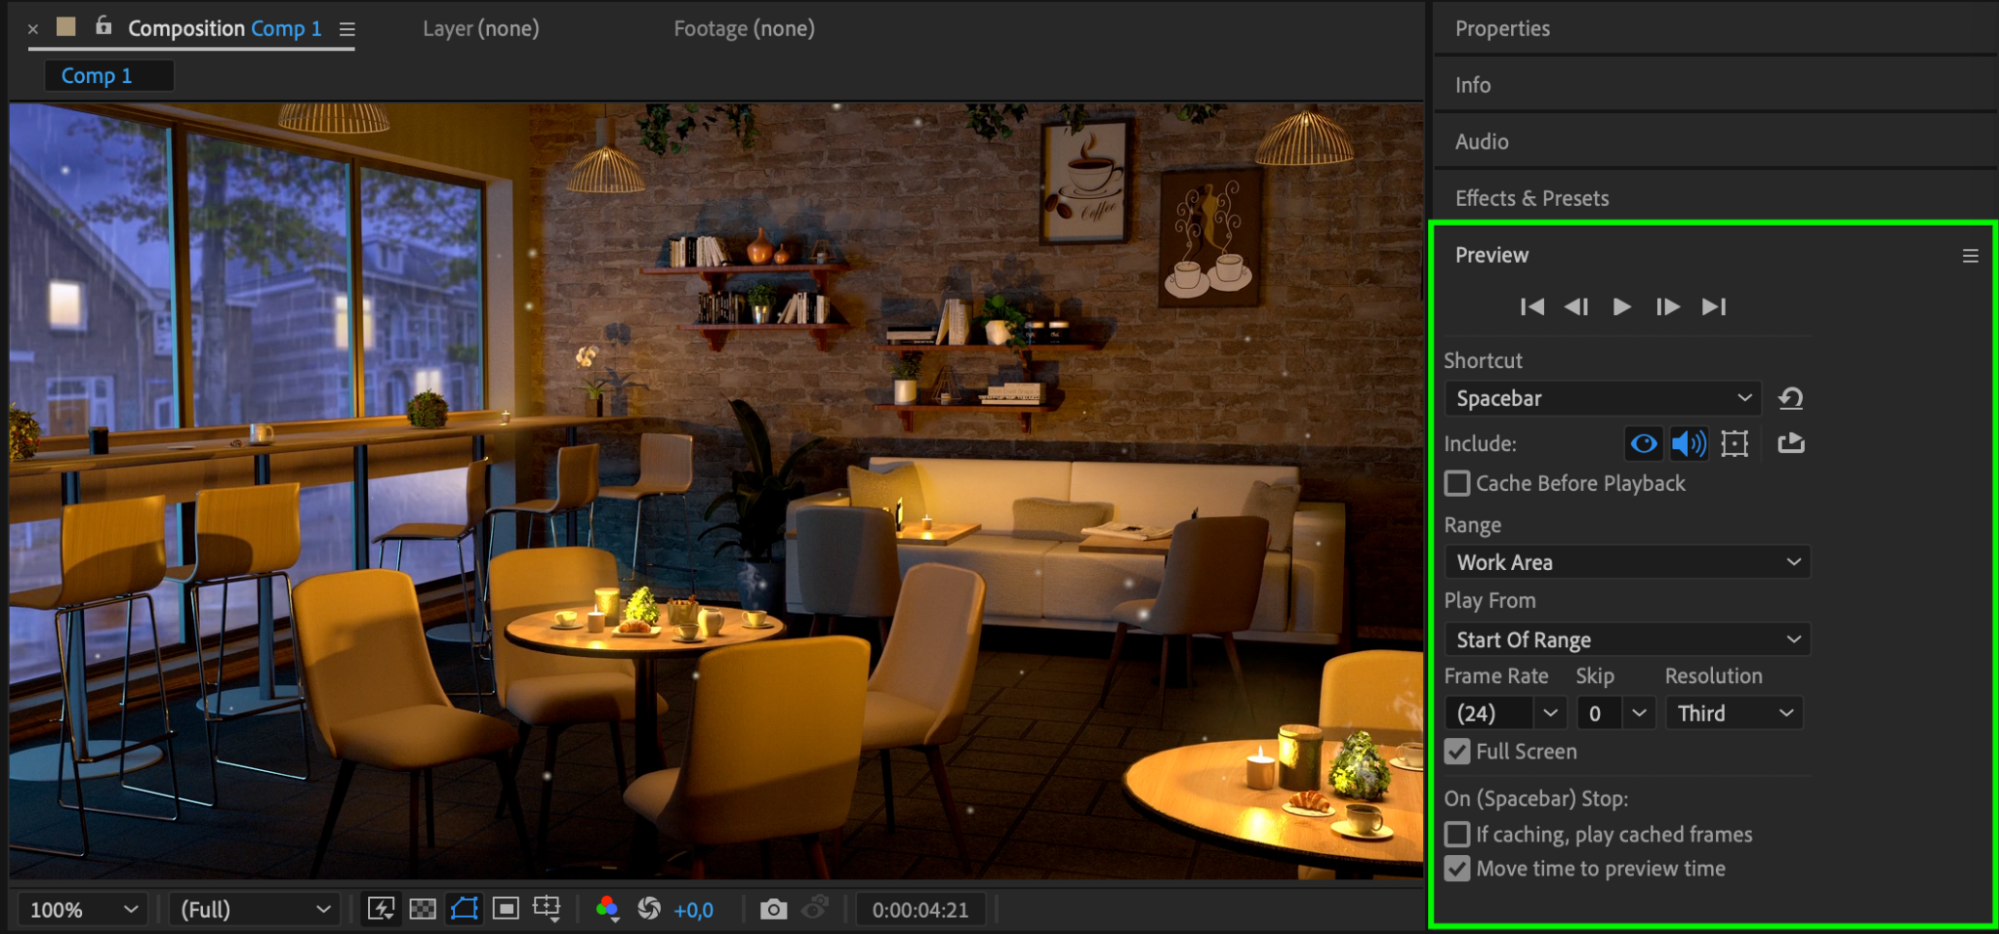 Conclusion
By following these steps, you can easily create stunning dust particles in After Effects that add depth and charm to your videos. Whether you’re aiming for a nostalgic, vintage feel or simply looking to enhance your scene with subtle movement, mastering this effect will elevate your editing skills. Experiment with different settings, and don’t be afraid to push your creative boundaries. Happy editing!
Our Bestsellers


