How to Create Explosions in After Effects
Introduction to Creating Explosions in After Effects
Are you looking to add dynamic explosion effects to your videos in Adobe After Effects? In this guide, we’ll show you how to create stunning explosions using various methods, from built-in effects to plugins. Whether you’re new to After Effects or a seasoned pro, mastering this technique can elevate your visual projects to the next level. We will explore a no-plugin method as well as a method that uses third-party plugins. Let’s get started!
Method 1: Creating an Explosion Without Plugins
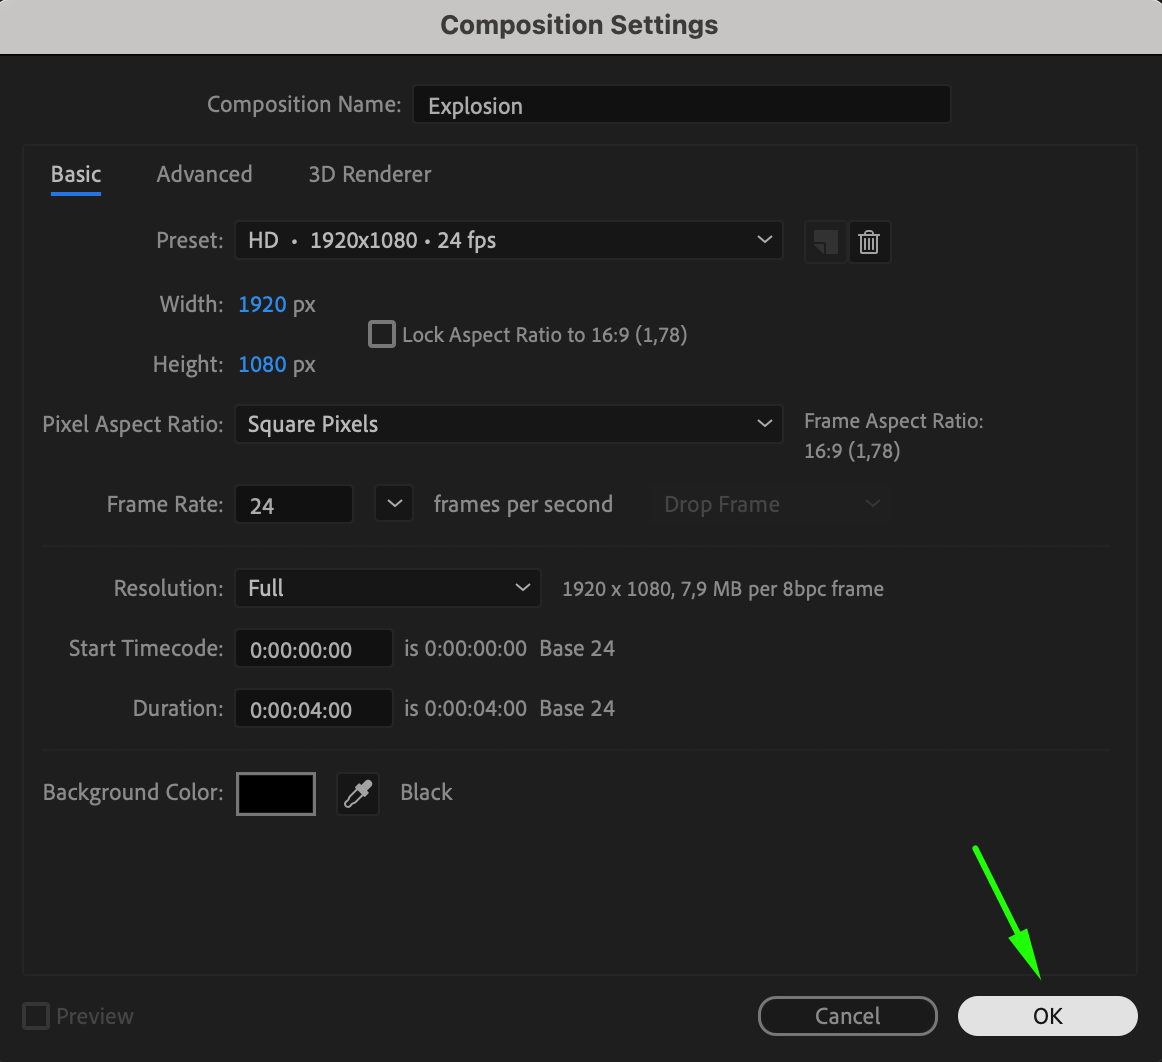
Step 1: Create a New Composition
Start by creating a new composition. Adjust the settings according to your project requirements, such as frame rate, resolution, and duration.

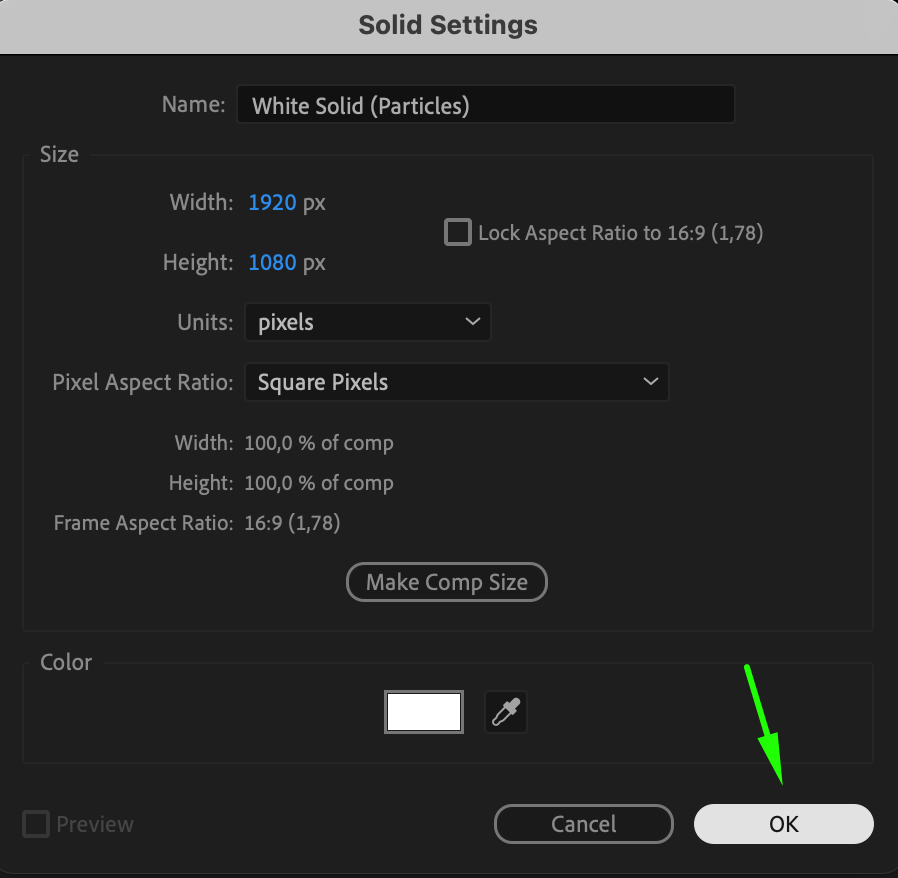
Step 2: Create a White Solid Layer
Next, go to Layer > New > Solid and create a white solid layer. This will serve as the base for the explosion effect.
Get 10% off when you subscribe to our newsletter


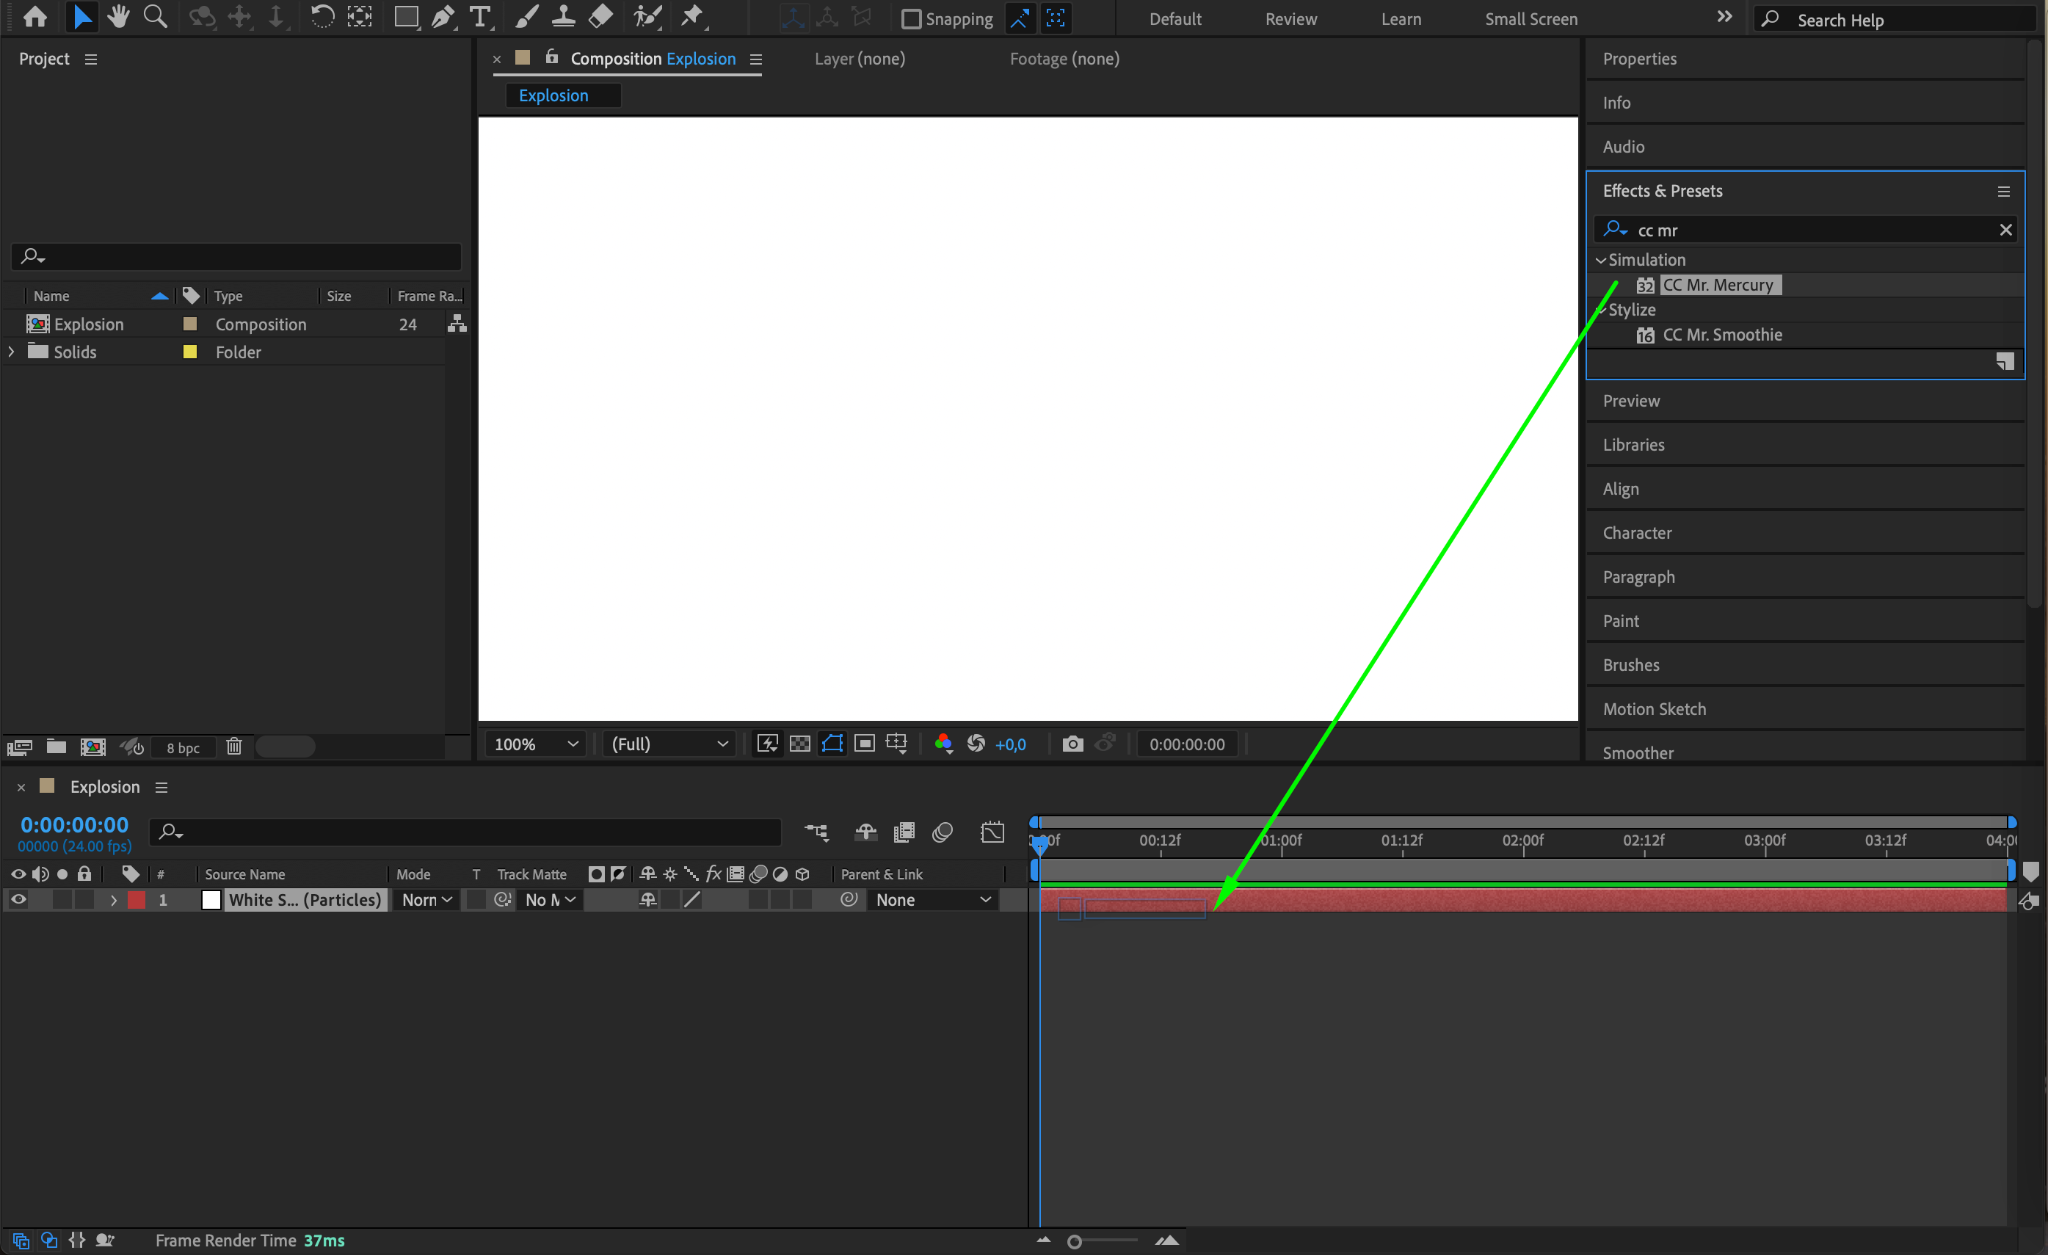
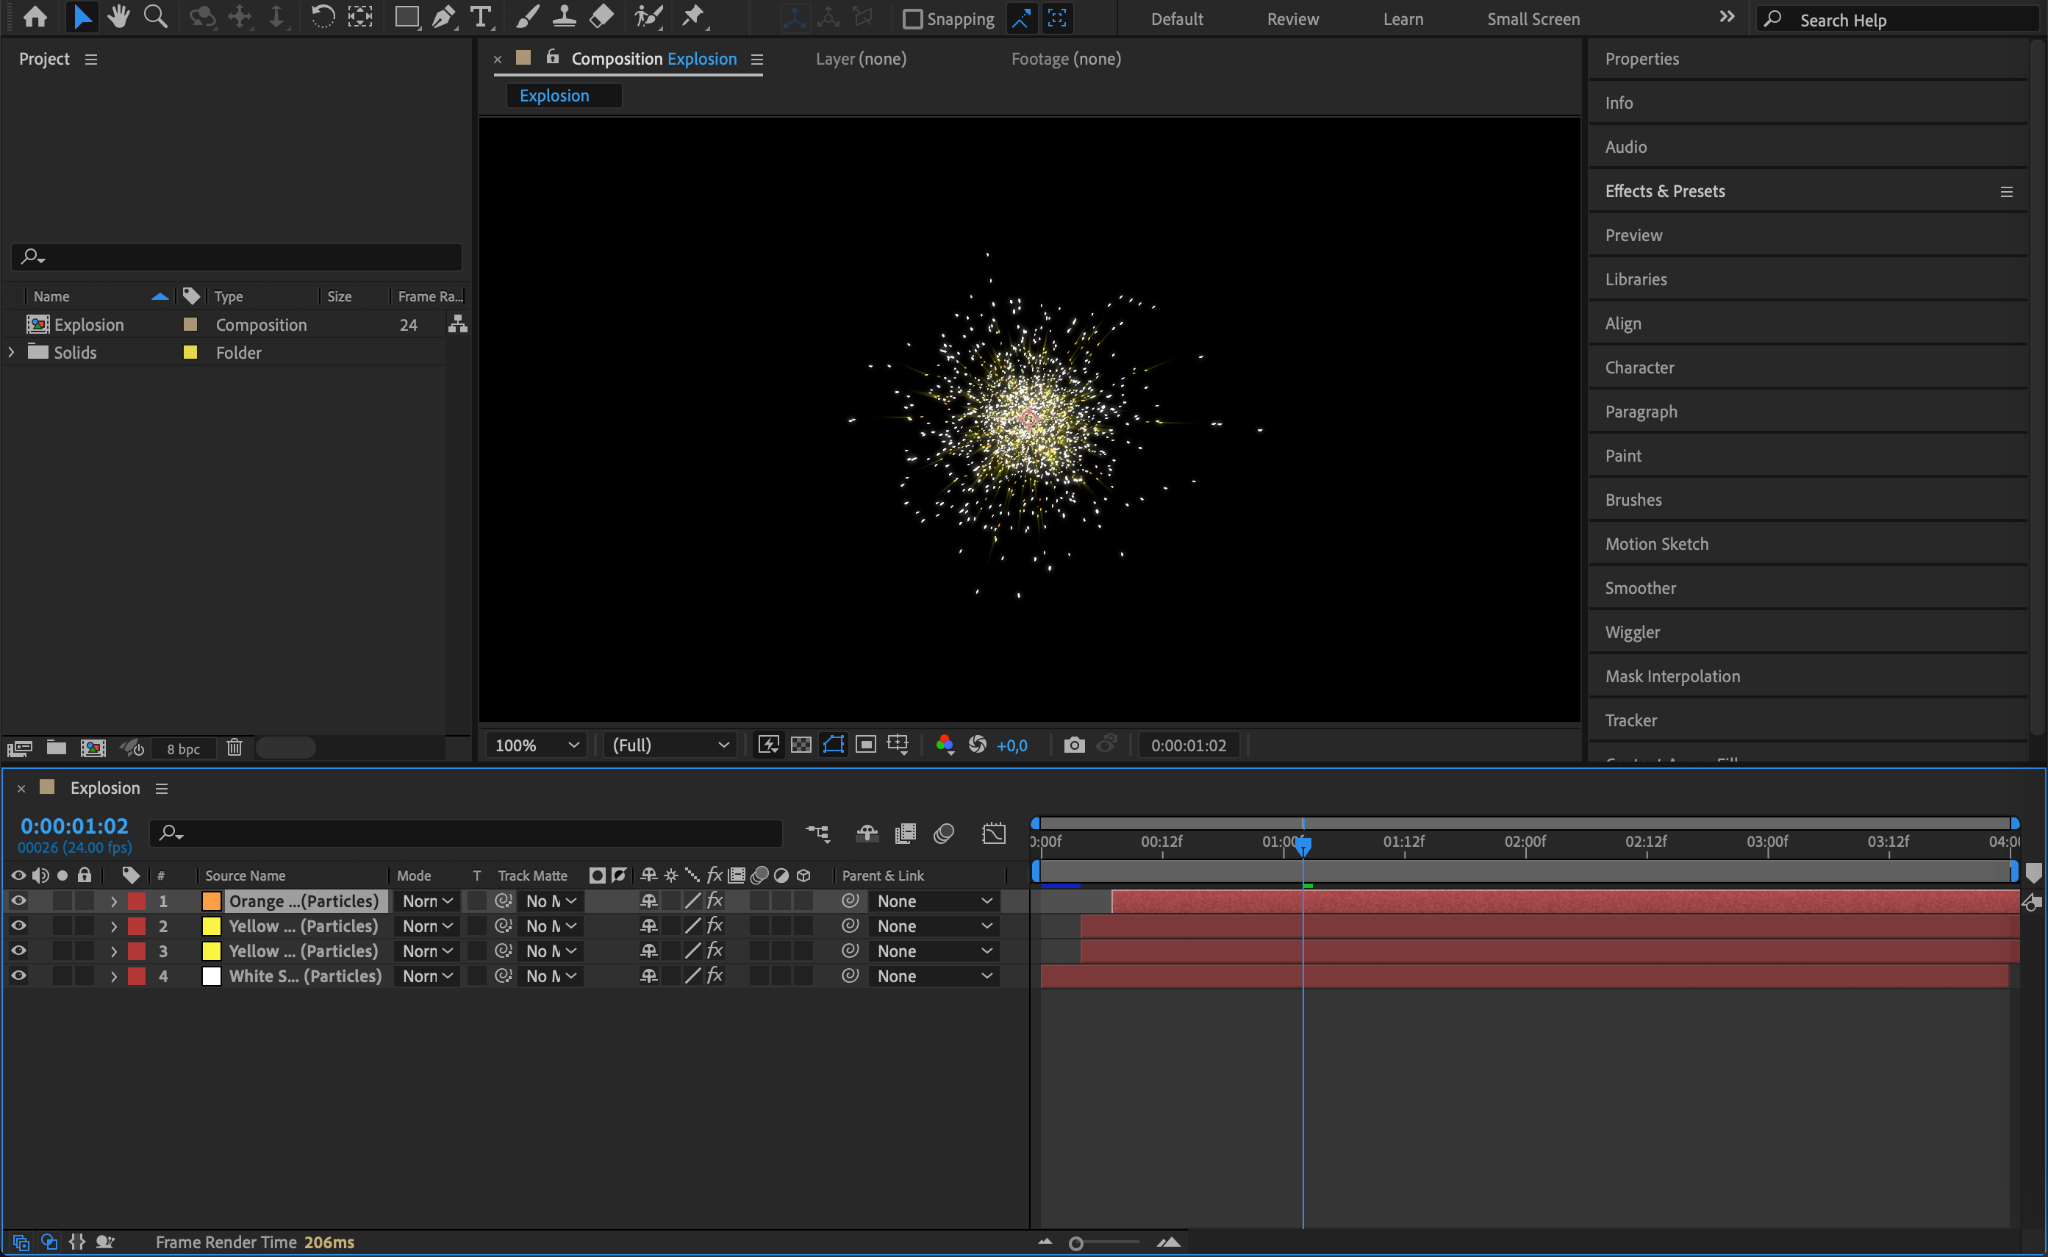
Step 3: Apply the CC Mr. Mercury Effect
In the Effects & Presets panel, search for the CC Mr. Mercury effect and apply it to your solid layer. This effect will generate the fluid-like particles that form the explosion.
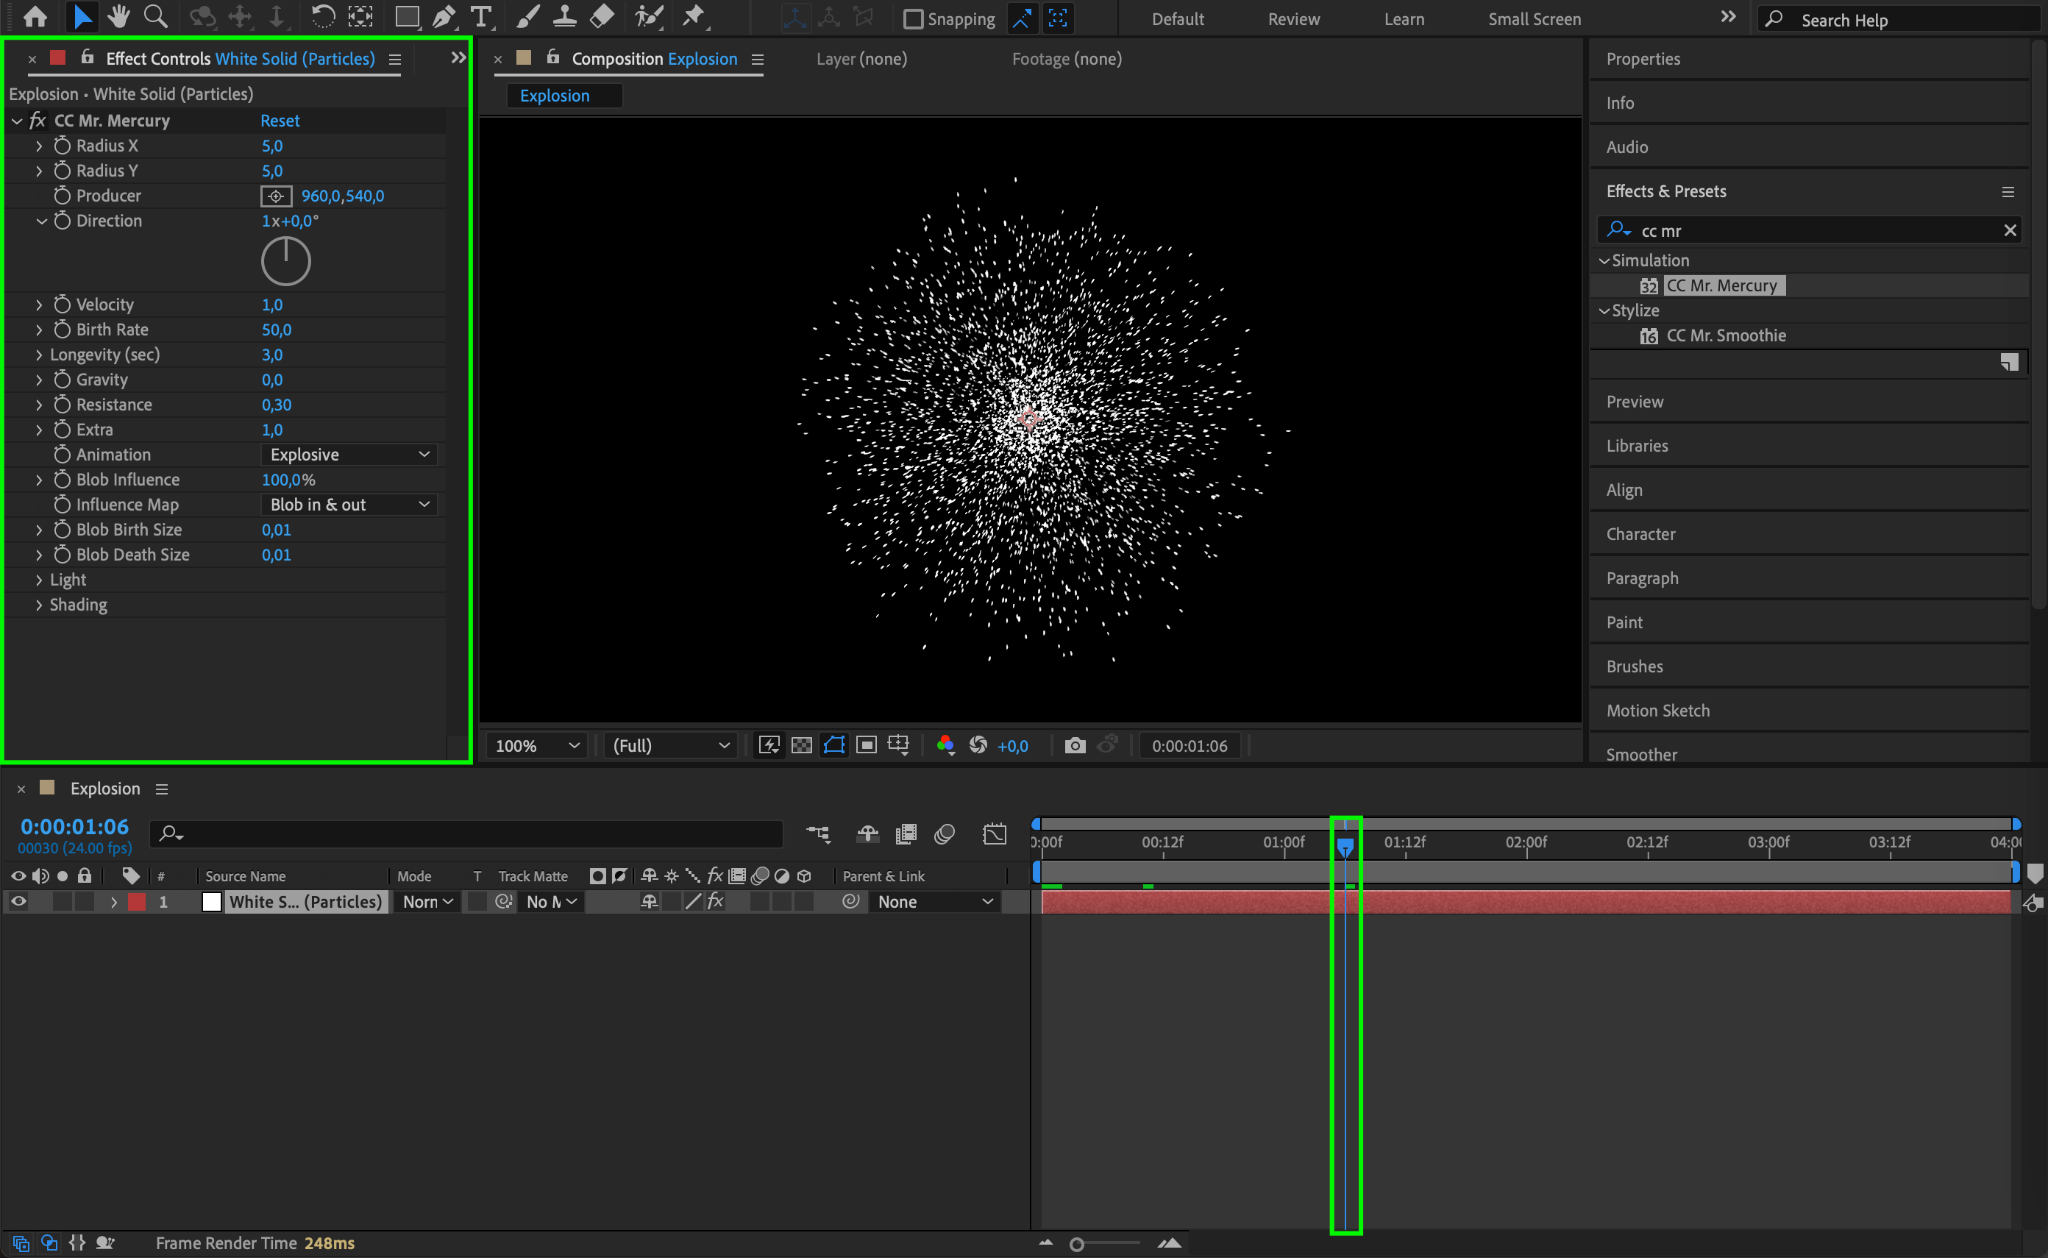
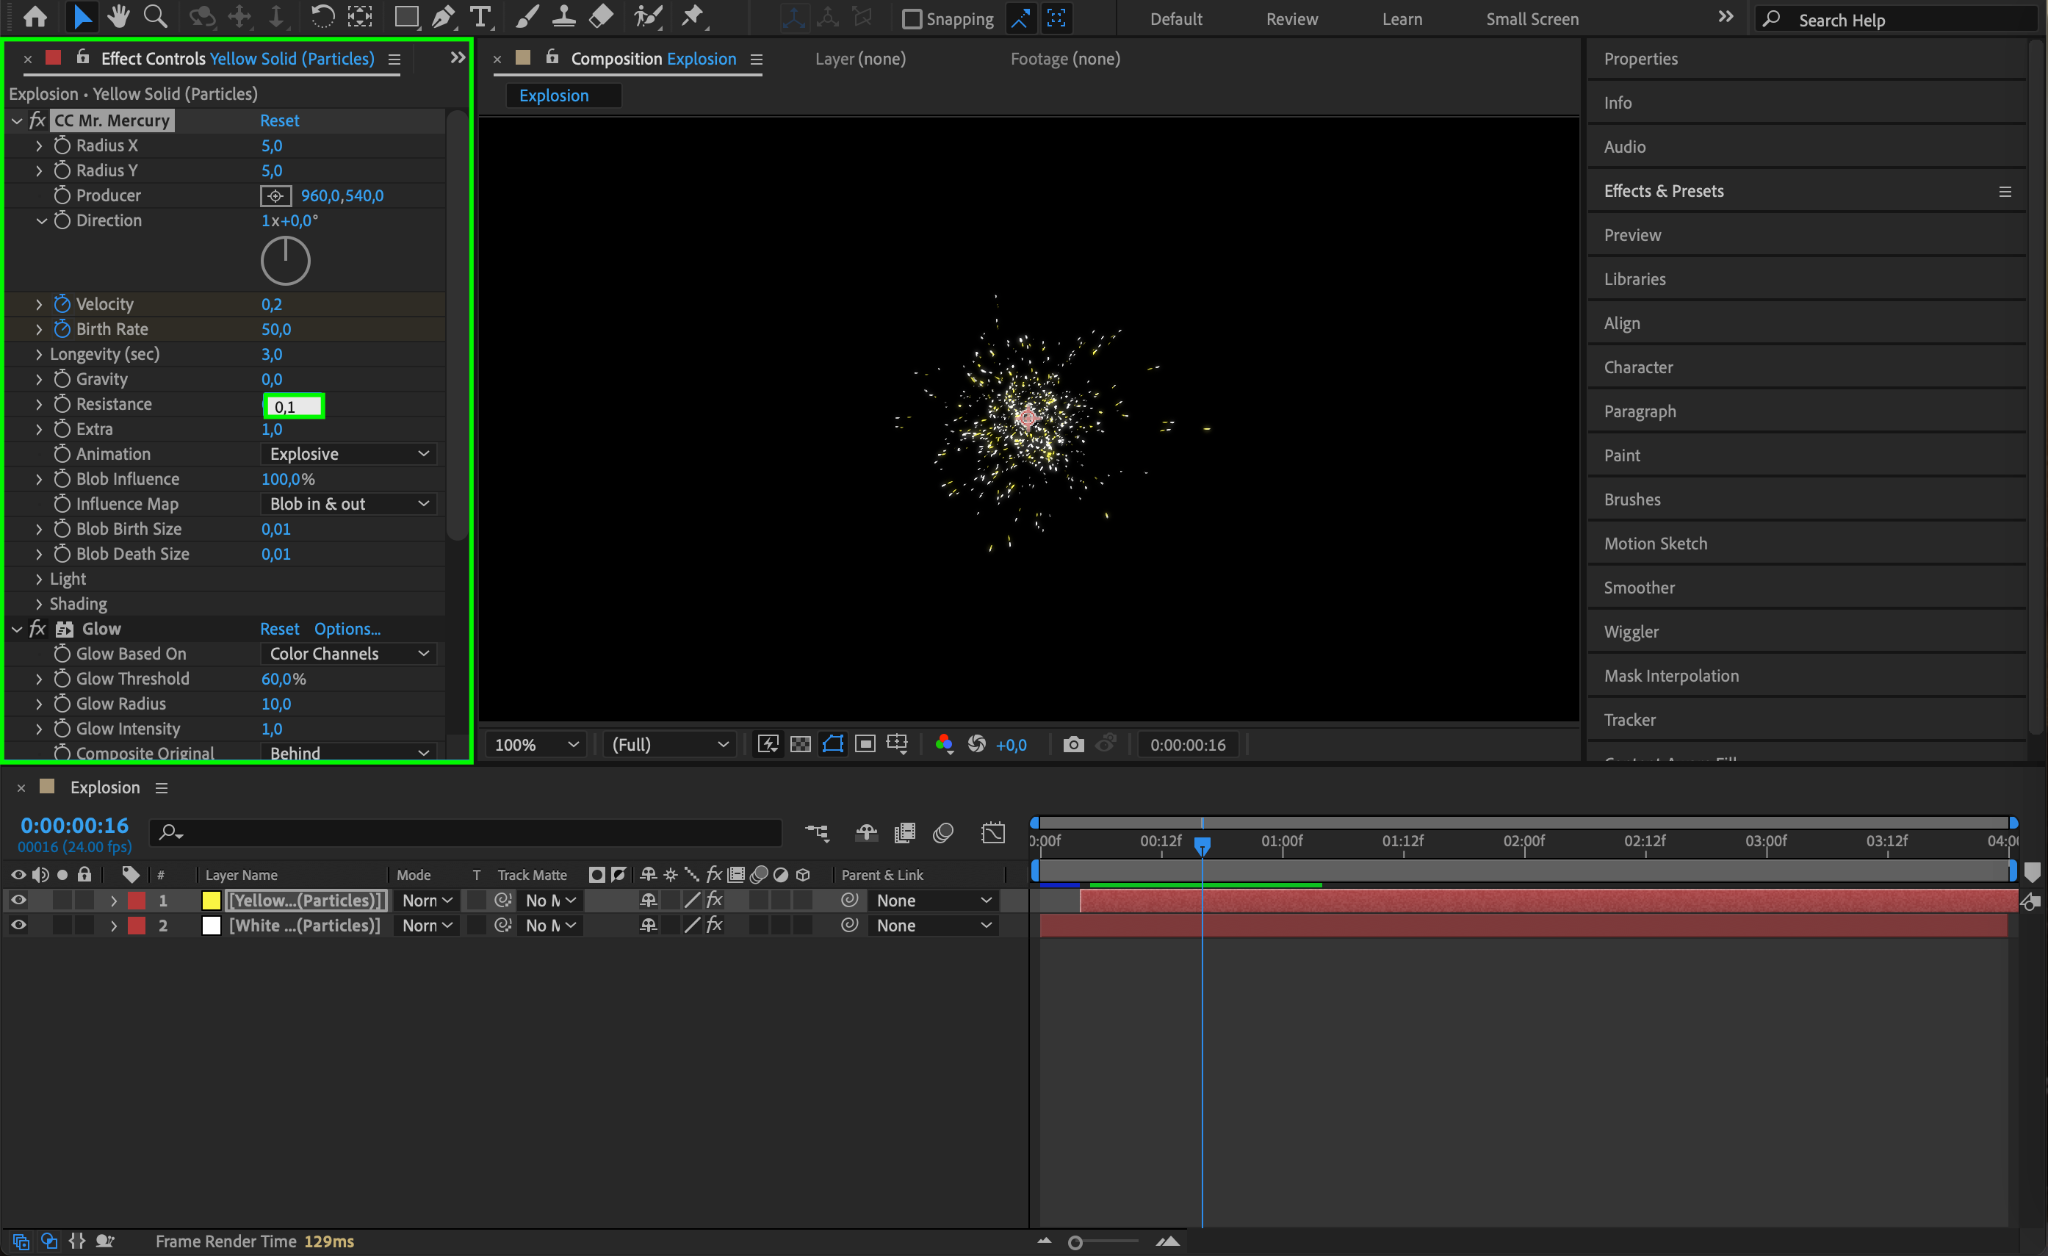
Step 4: Adjust the CC Mr. Mercury Settings
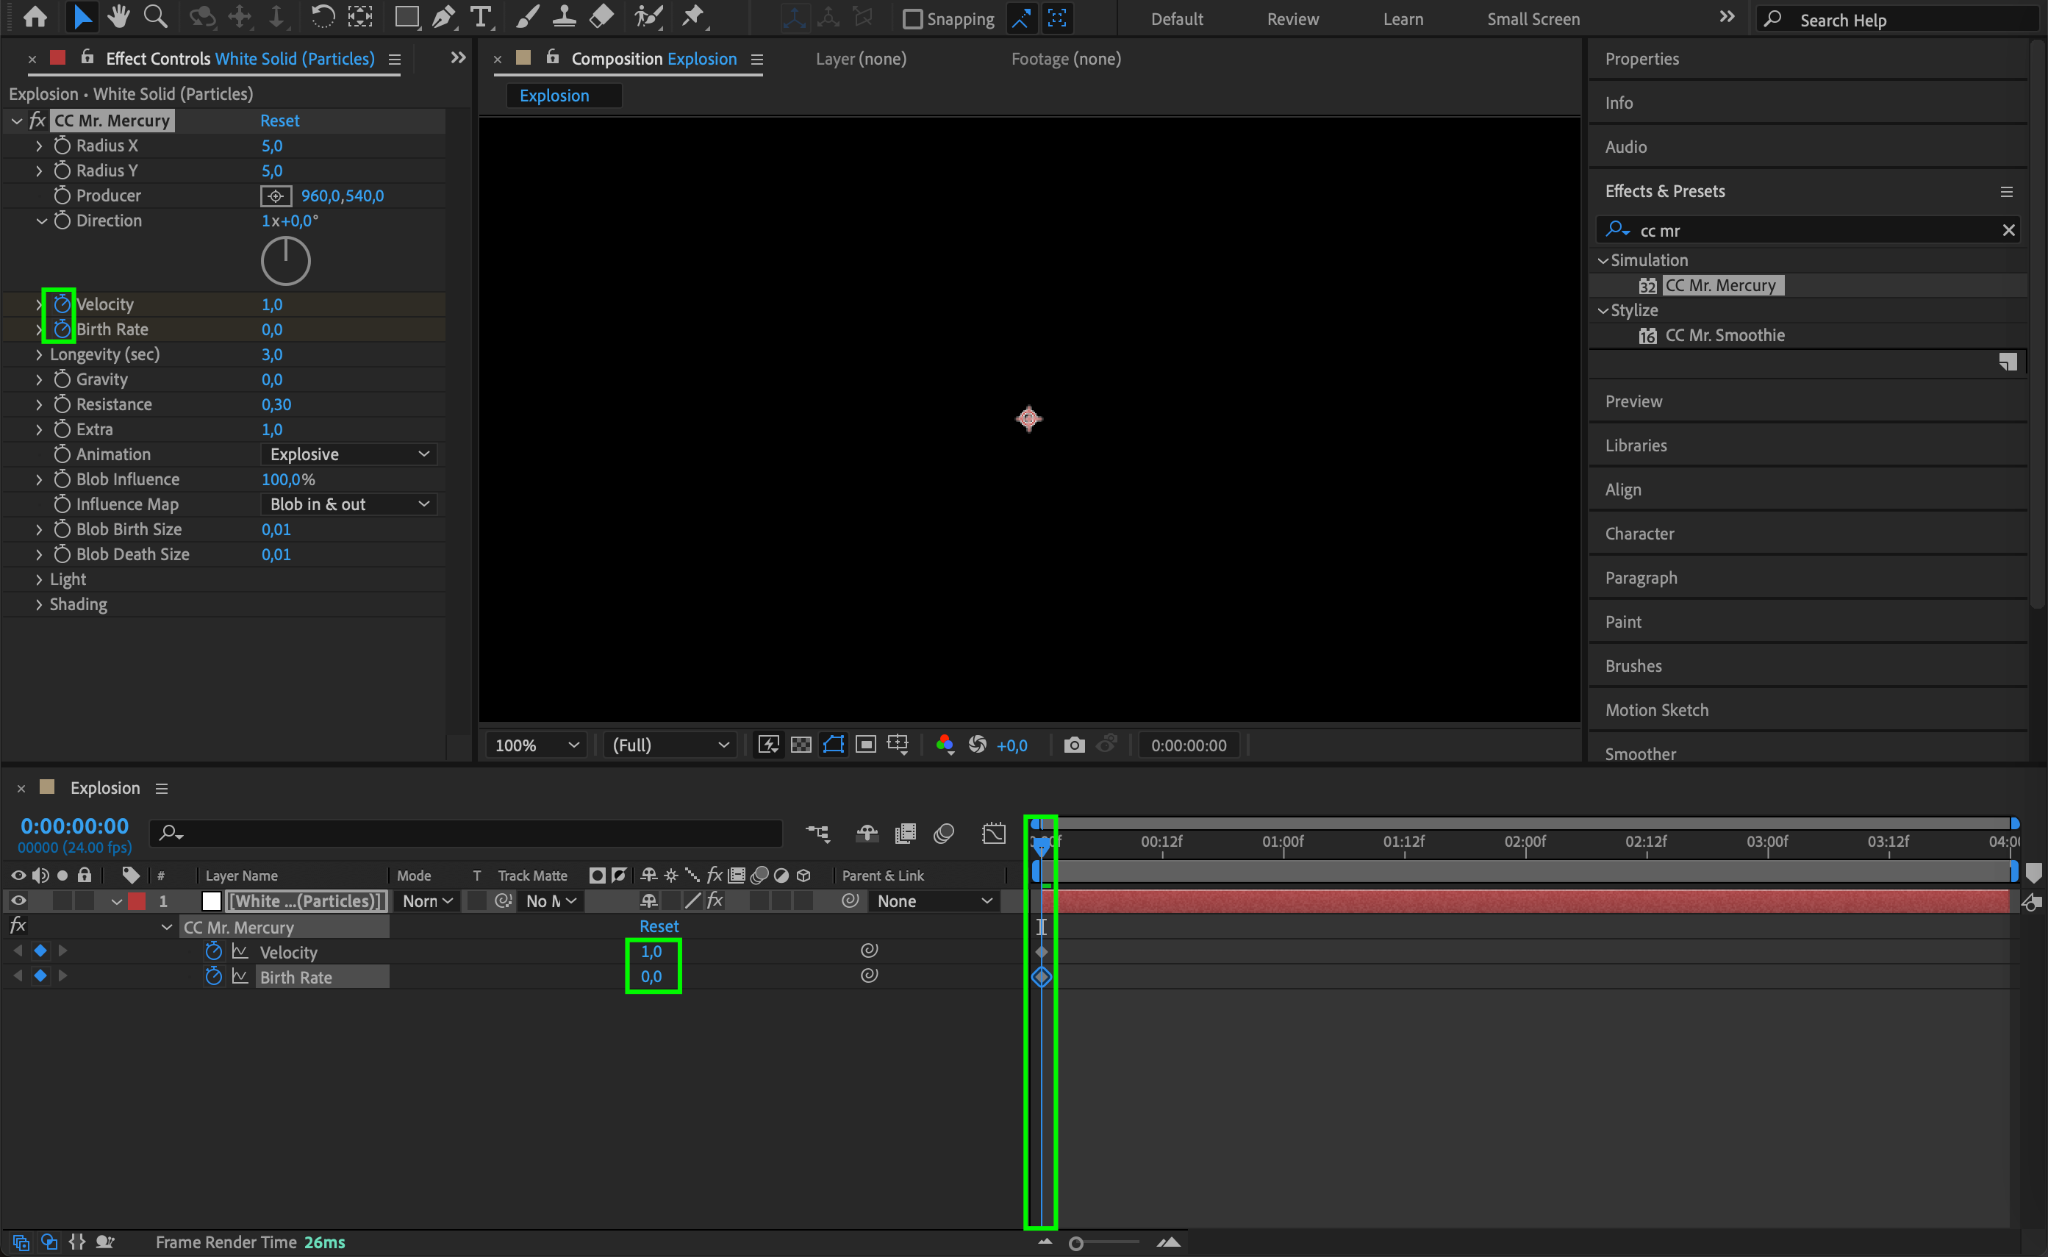
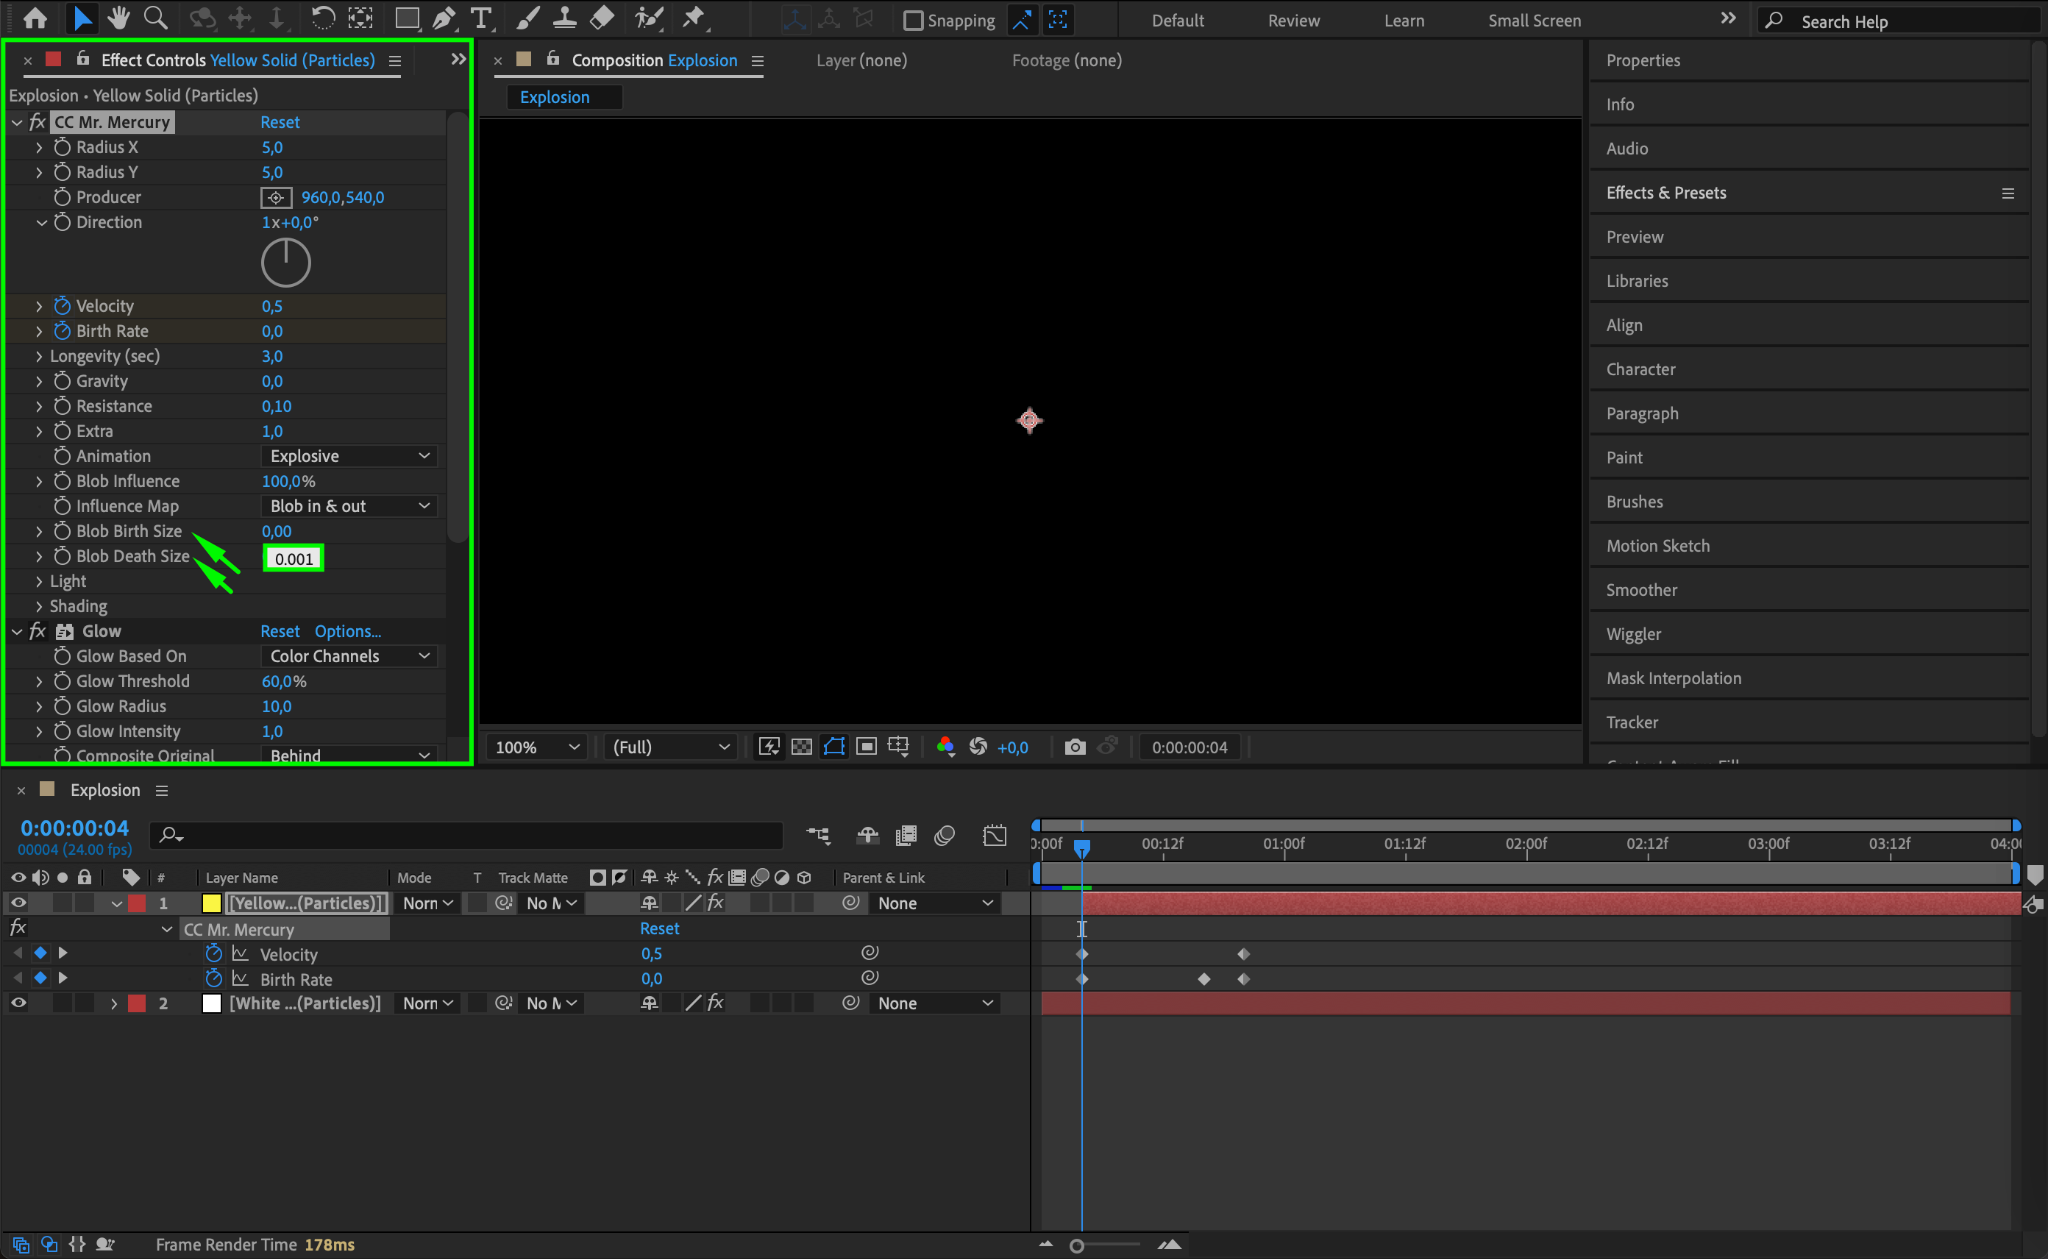
In the Effect Controls panel, adjust the settings for the CC Mr. Mercury effect to create a realistic explosion. Set the Velocity to 1, Birth Rate to 50, and Longevity to 3 for an intense burst of particles. Reduce Gravity to 0, and set Resistance to 0.3 for a more controlled explosion. Choose Explosive as the Animation type, and adjust both the Blob Birth Size and Blob Death Size to 0.01 to create smaller, finer particles that simulate a realistic explosion.
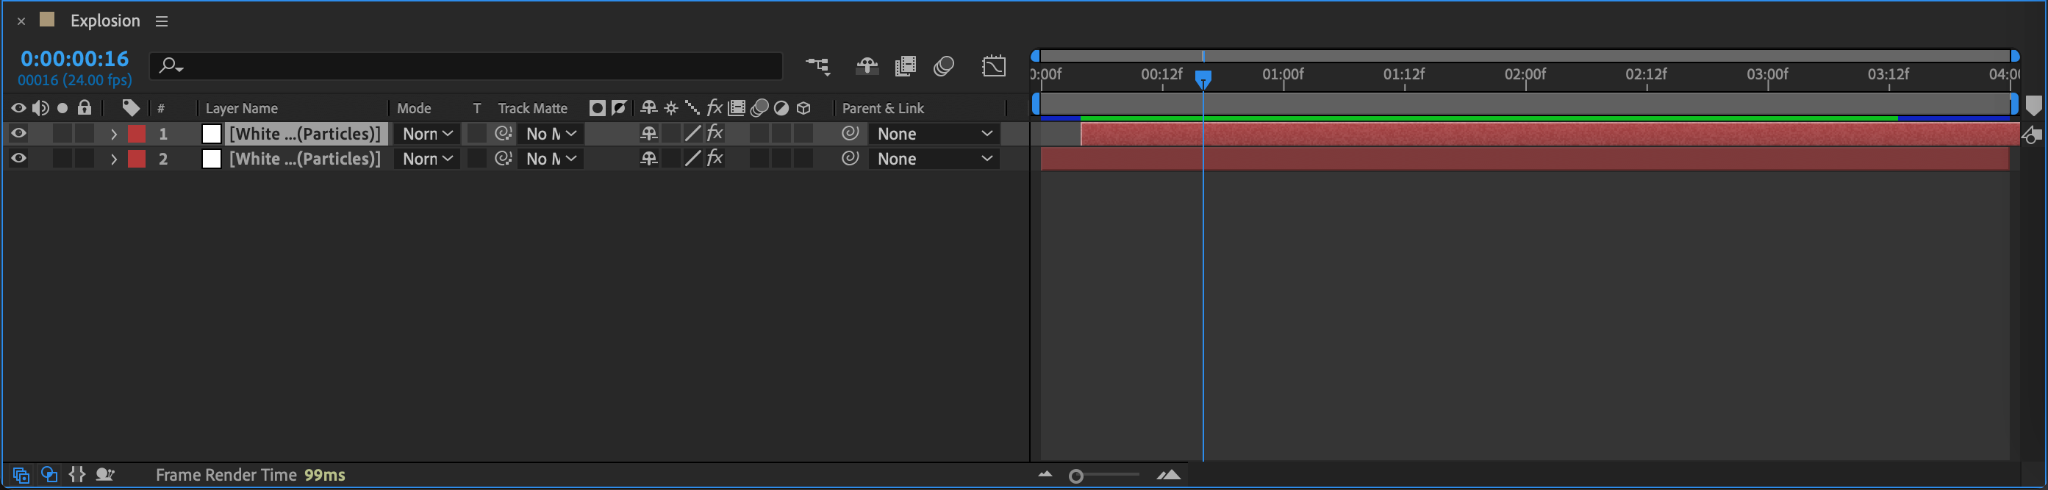
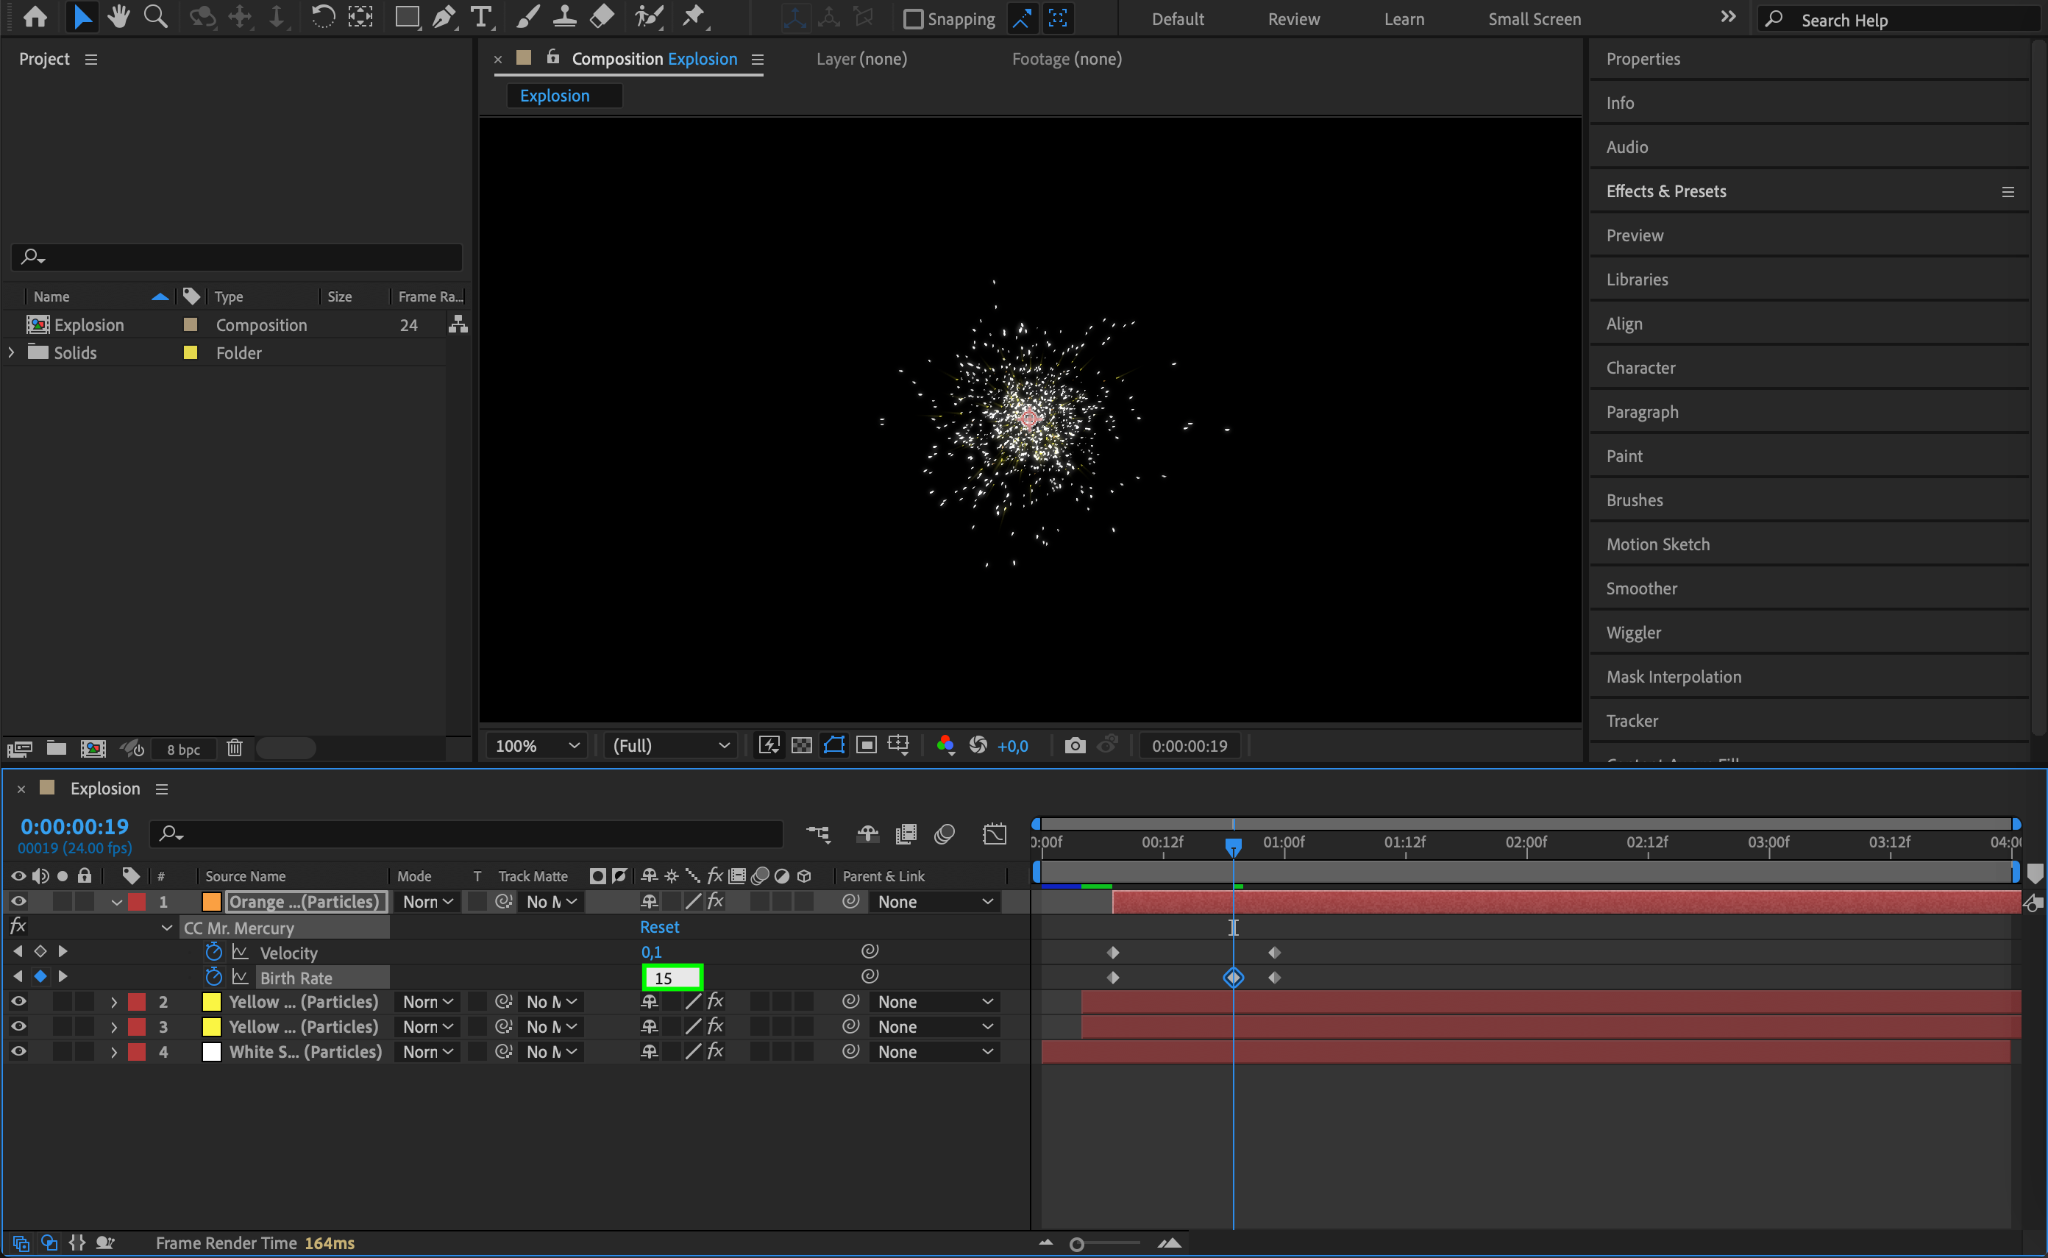
Step 5: Animate the Explosion
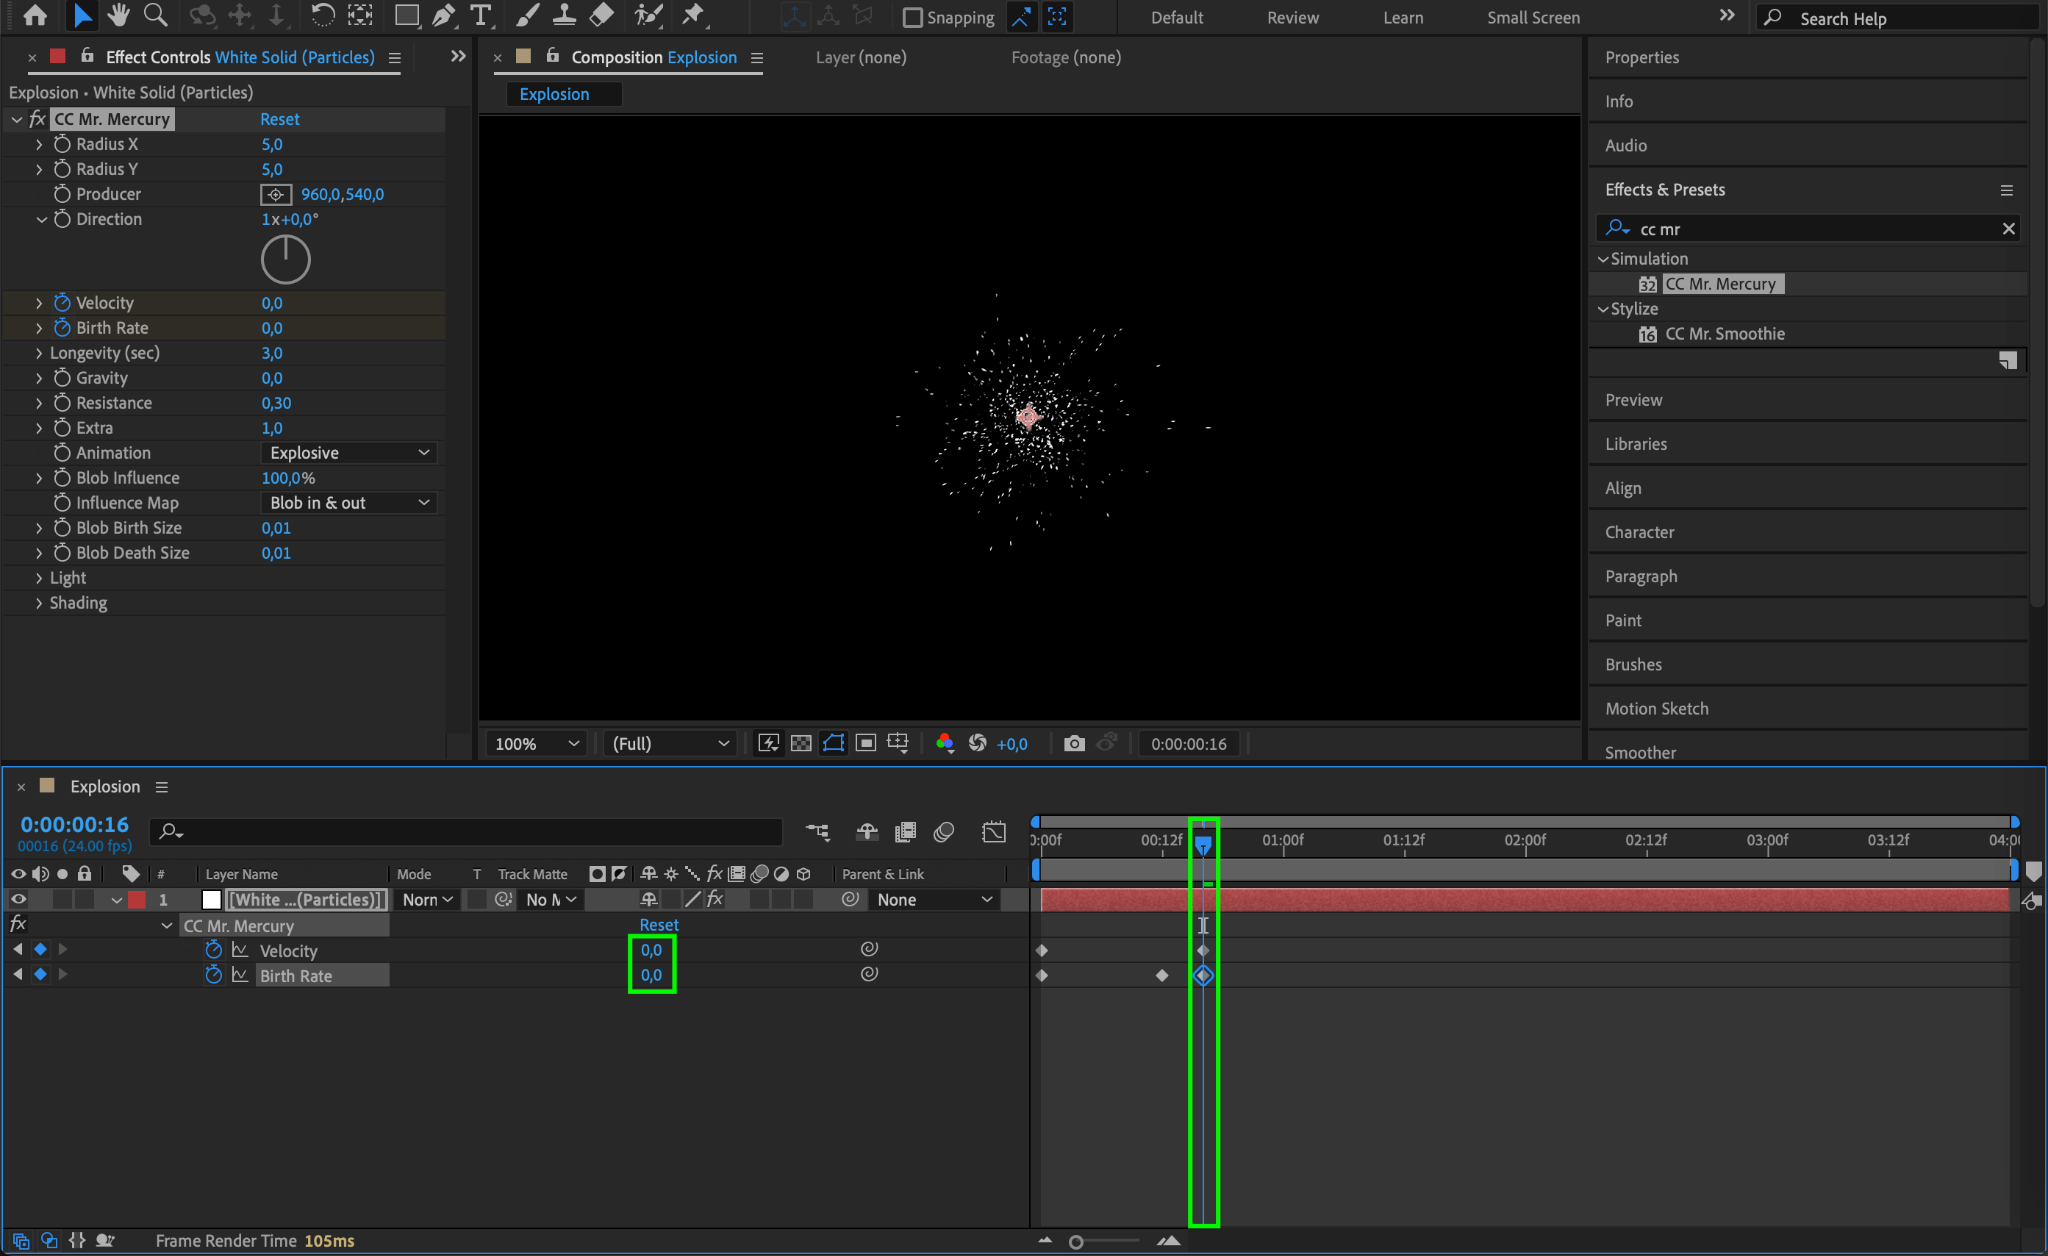
To animate the explosion, create keyframes for the Velocity and Birth Rate. Set the Birth Rate to 0 and Velocity to 1 at the start of the composition. Move the Current Time Indicator (CTI) forward, increase the Birth Rate to 50, then set both the Birth Rate and Velocity back to 0 after a few frames to simulate the explosion’s peak and fade.

Step 6: Apply the Glow Effect
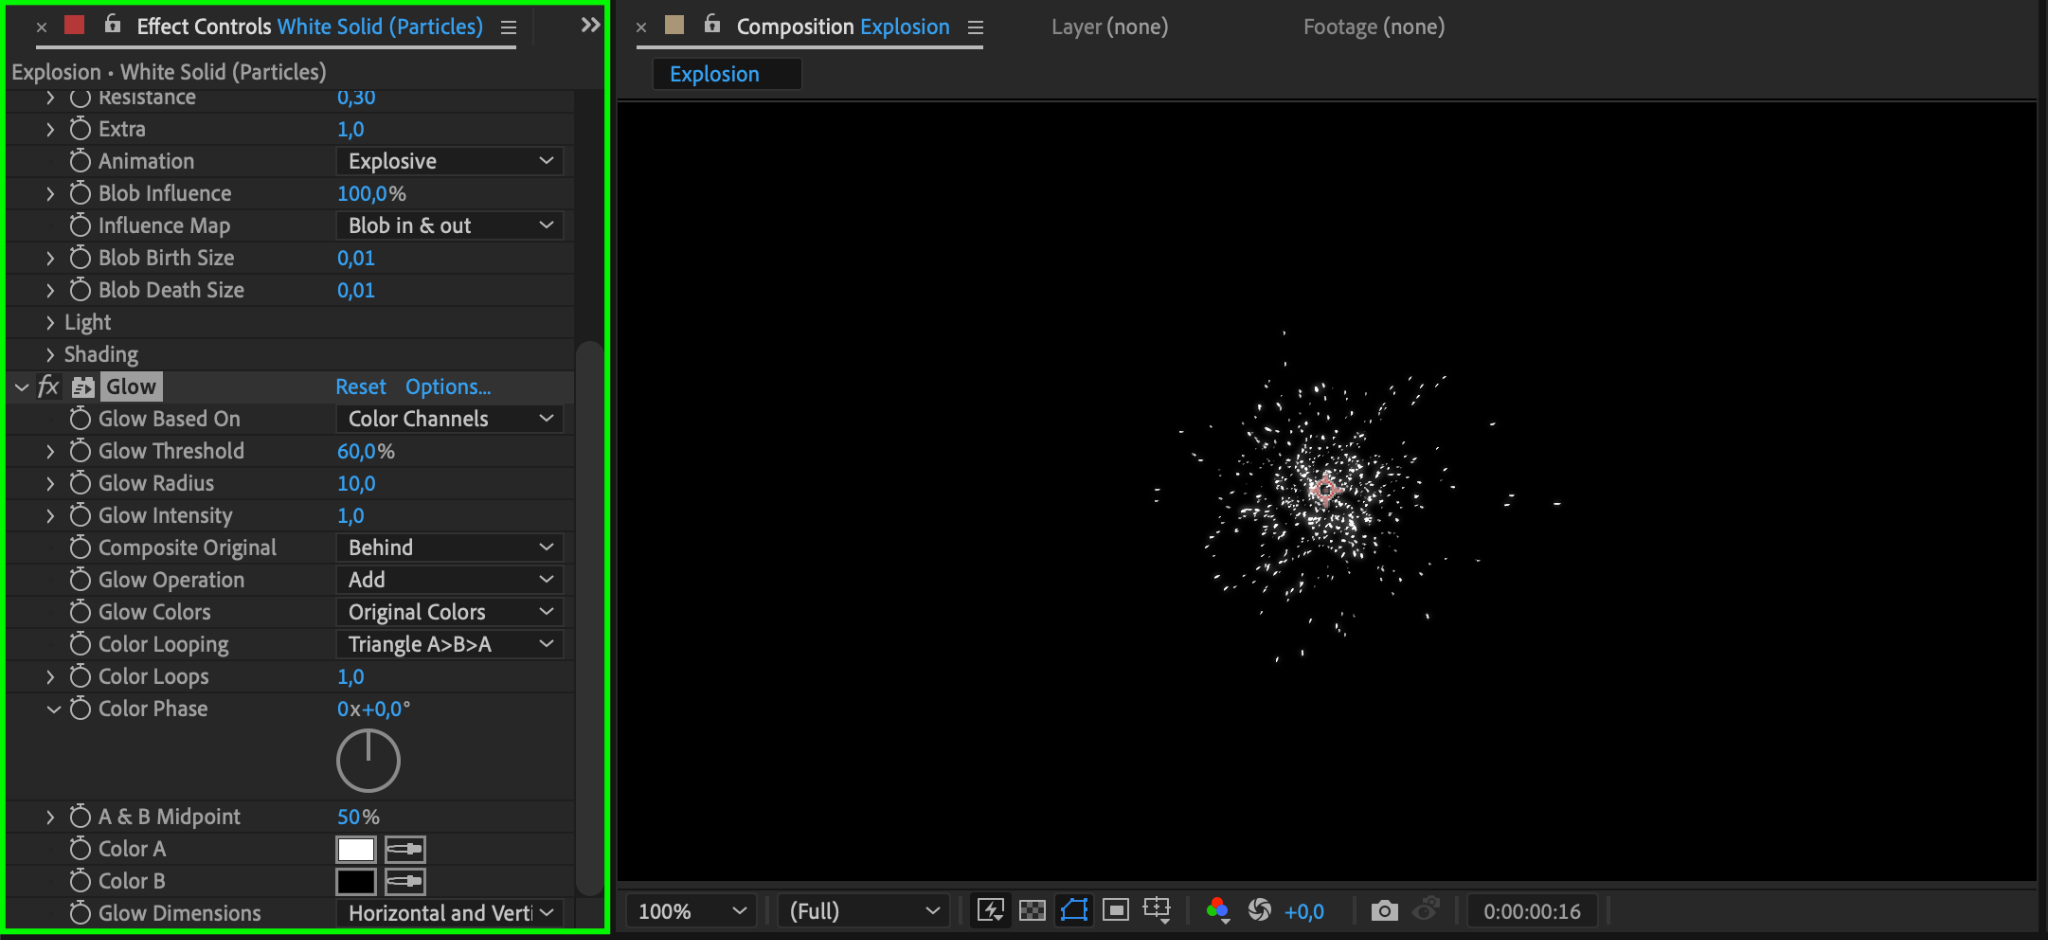
To enhance the brightness of the explosion, apply the Glow effect from the Effects & Presets panel to the solid layer.

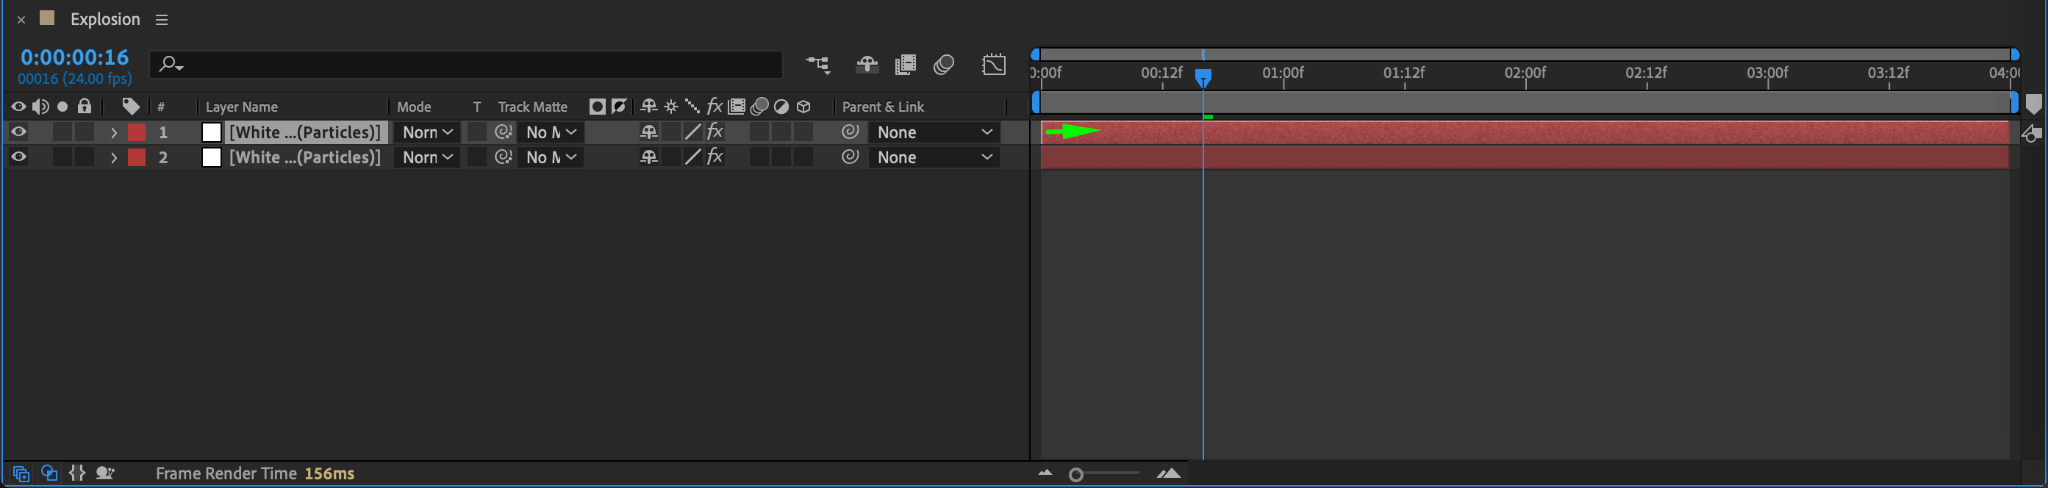
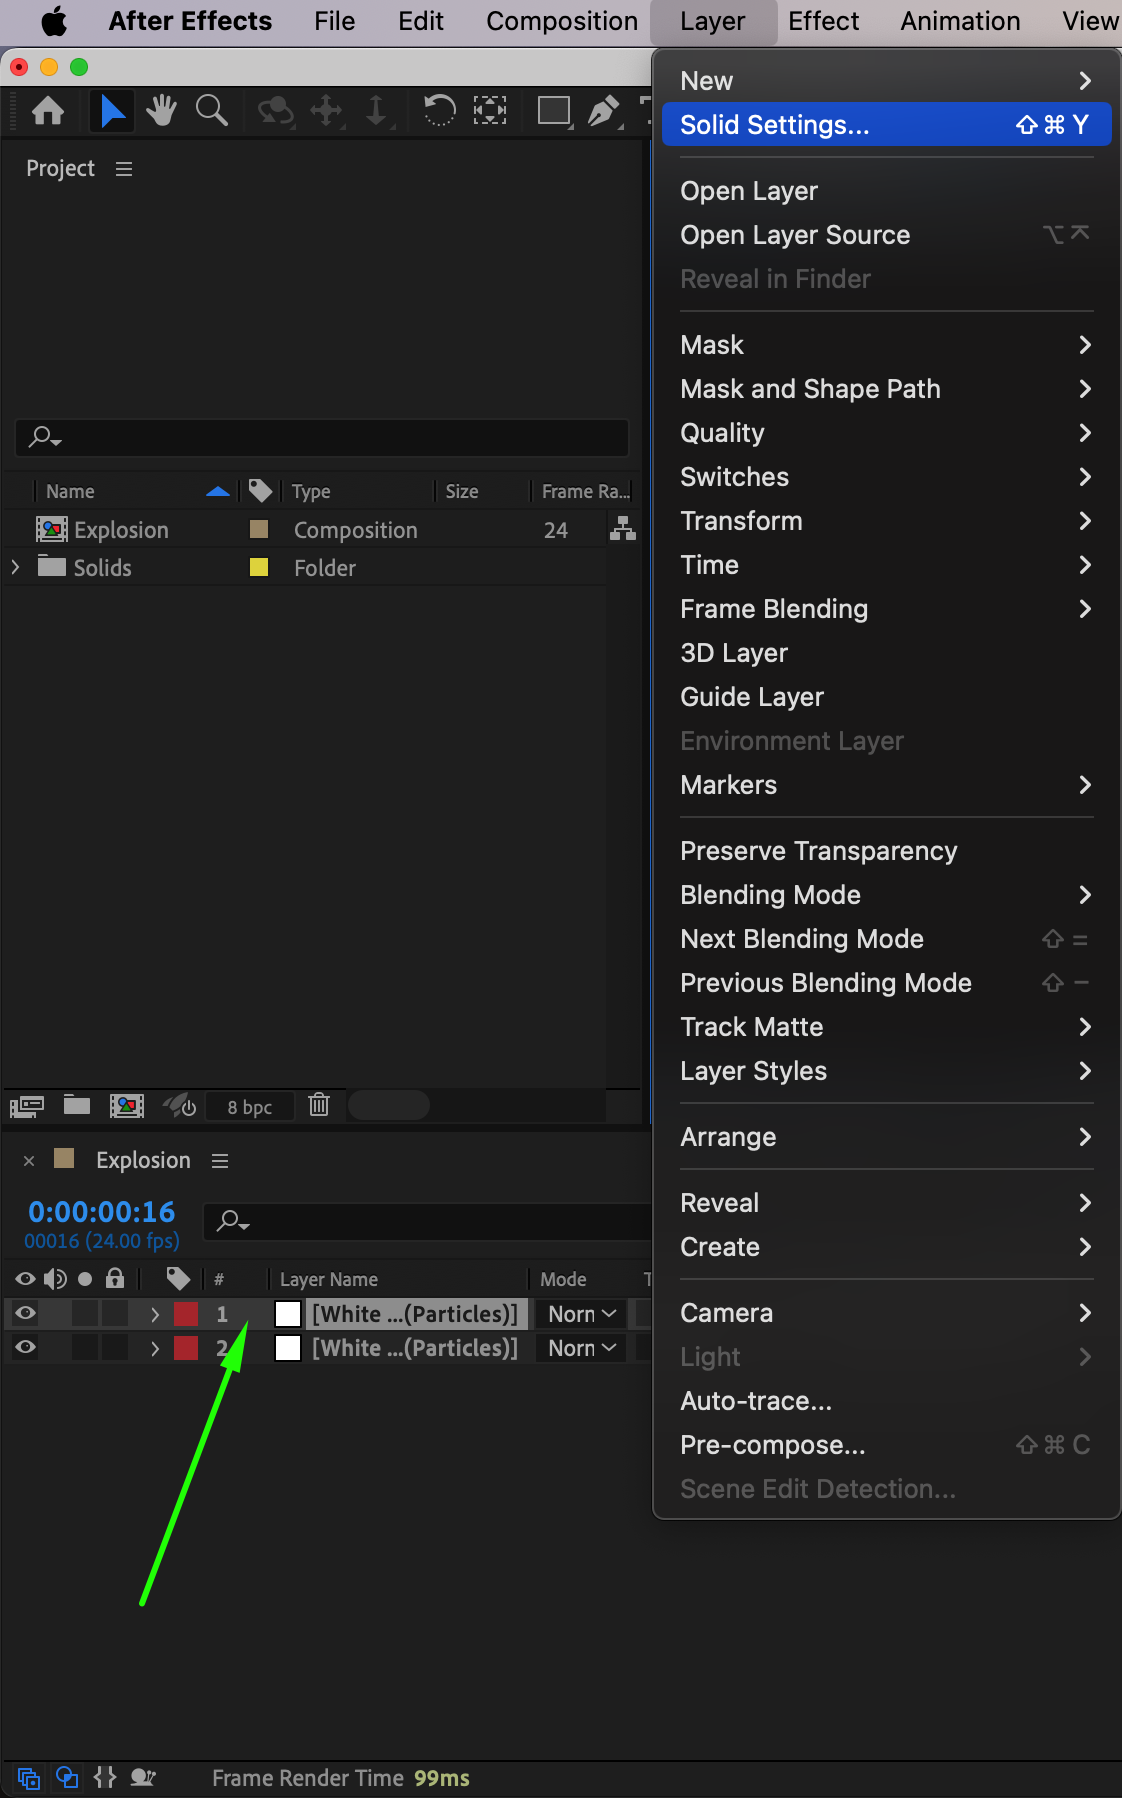
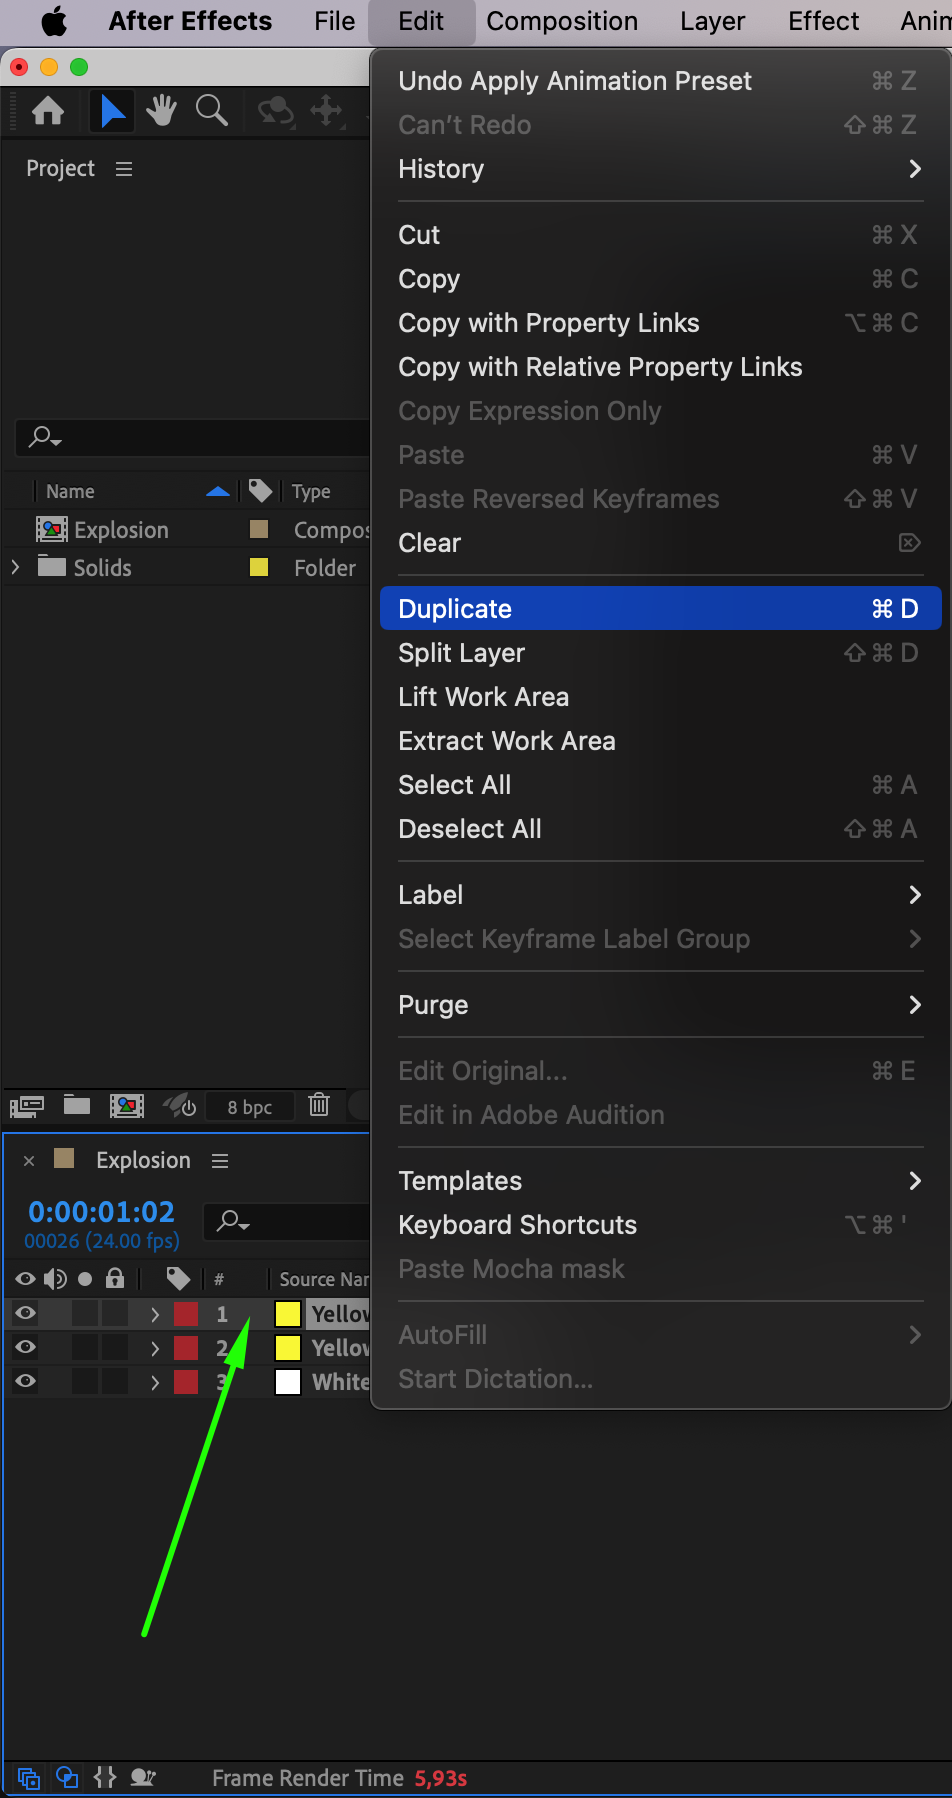
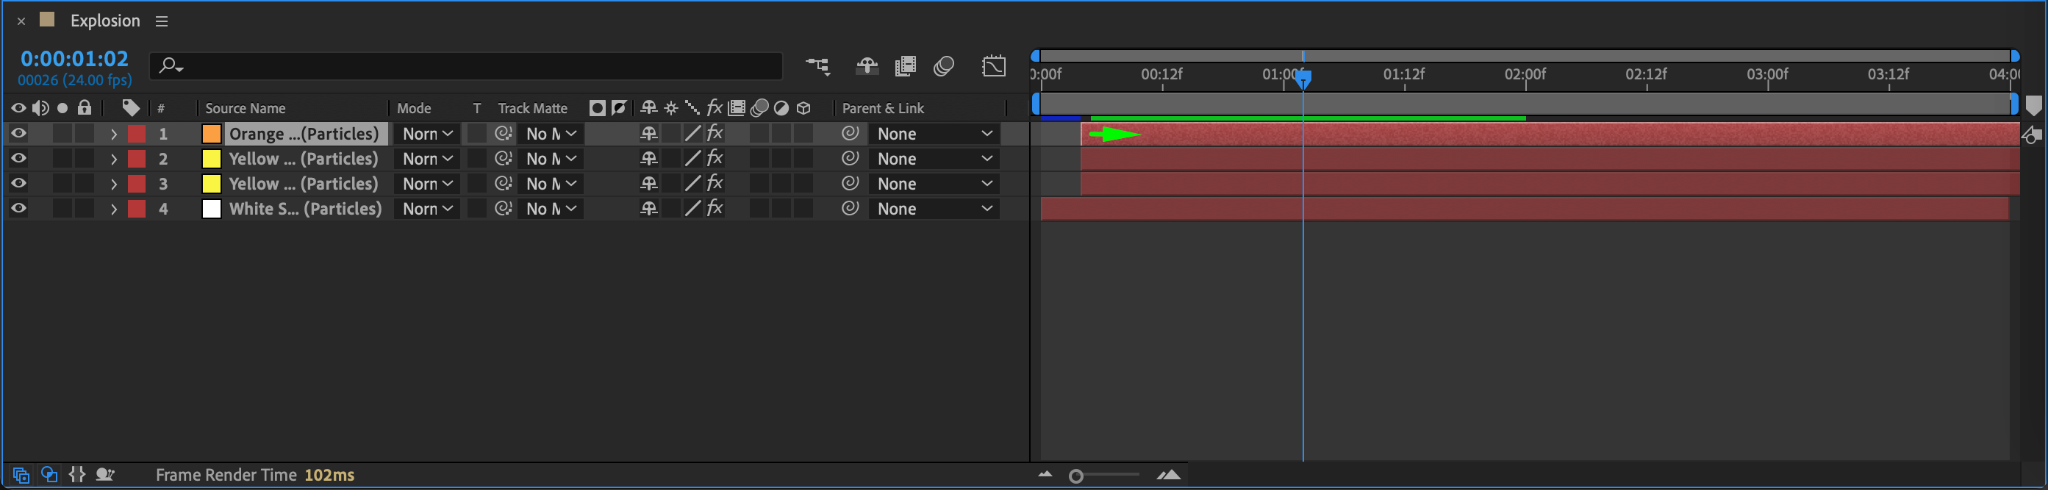
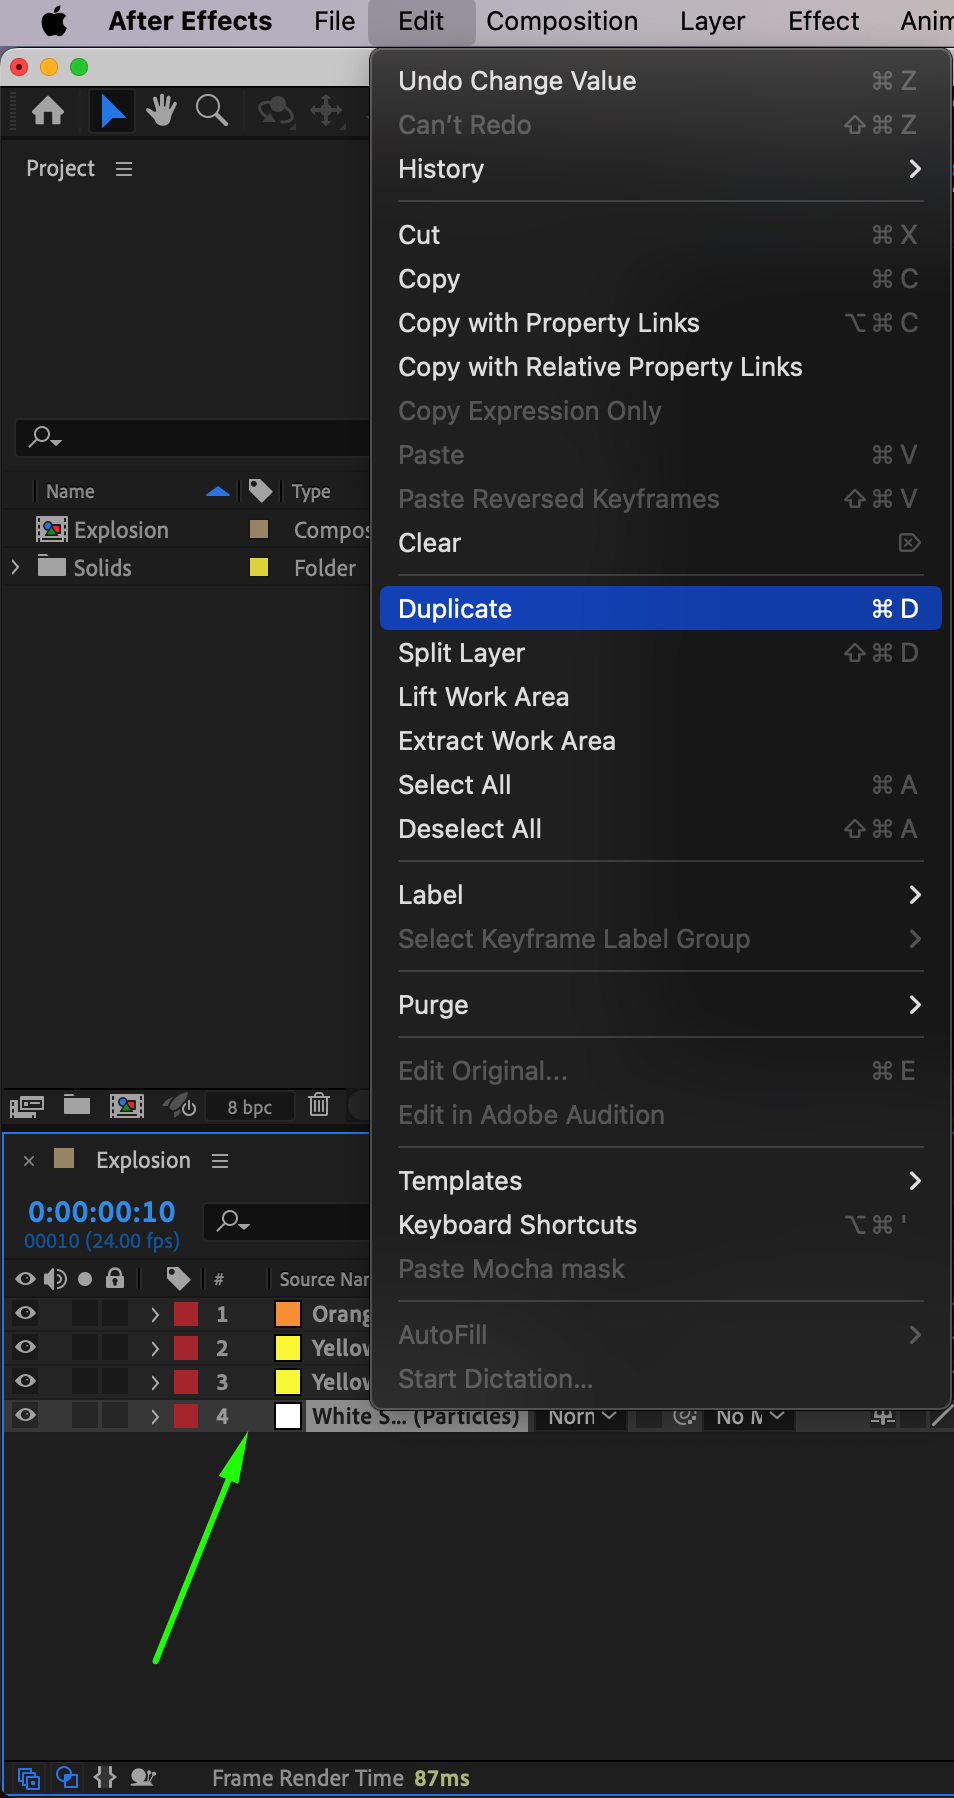
Step 7: Duplicate the Solid Layer
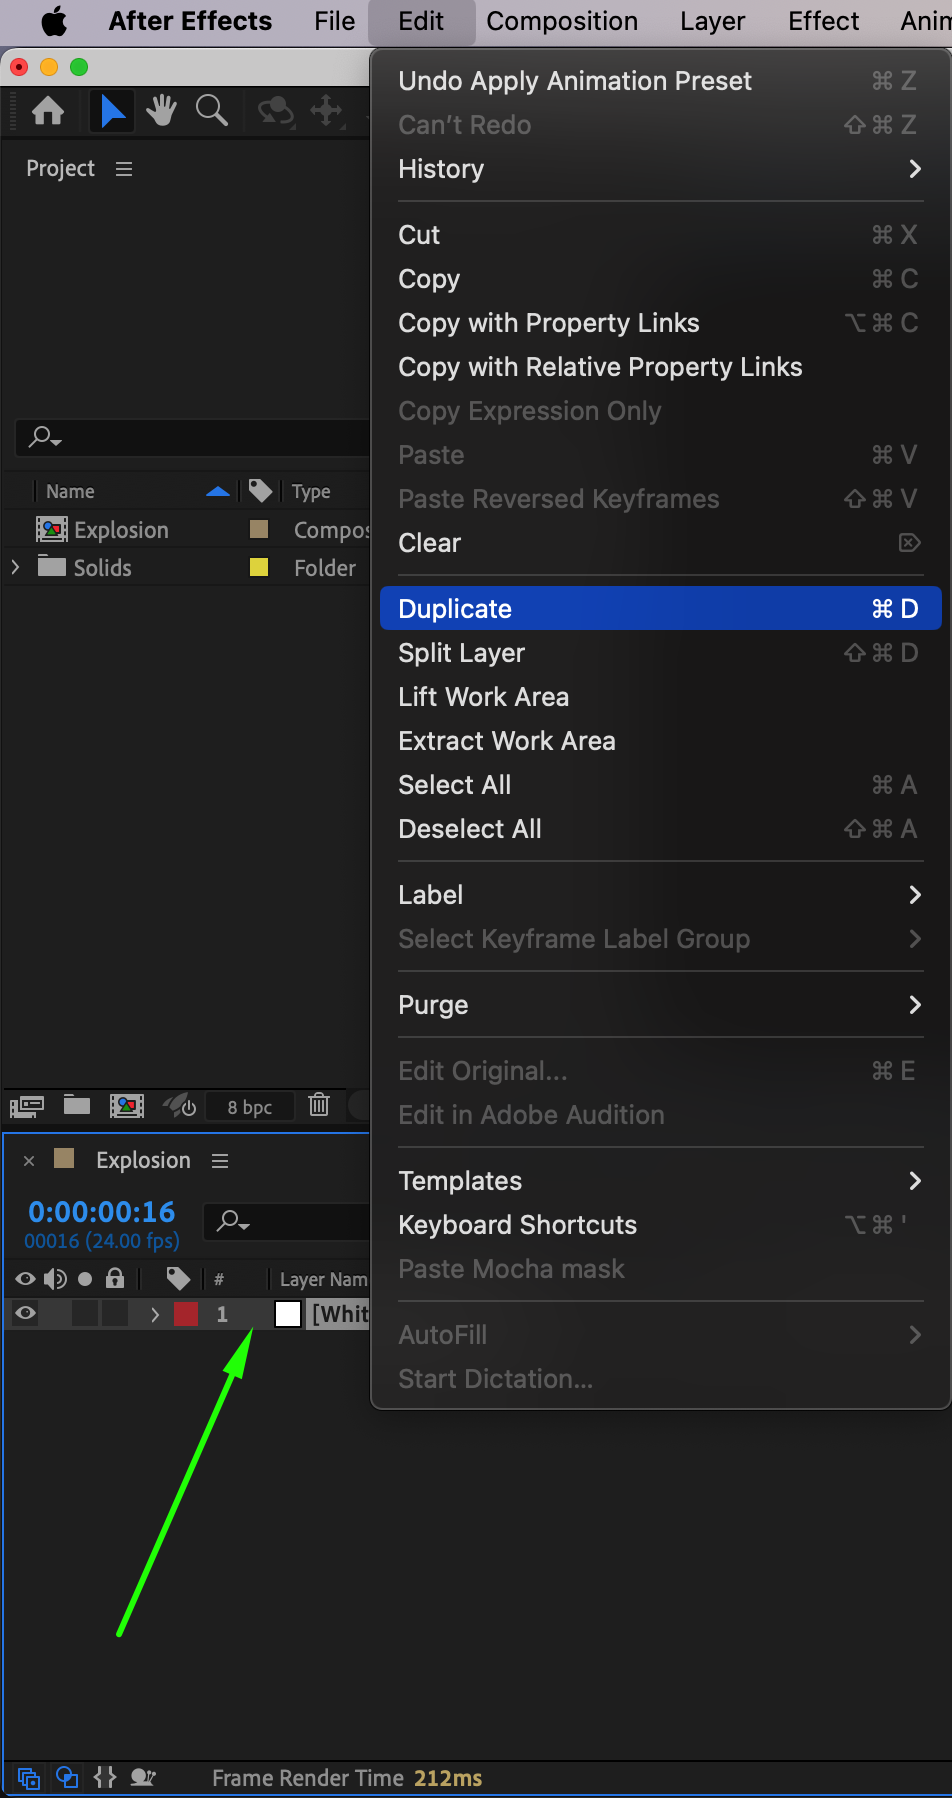
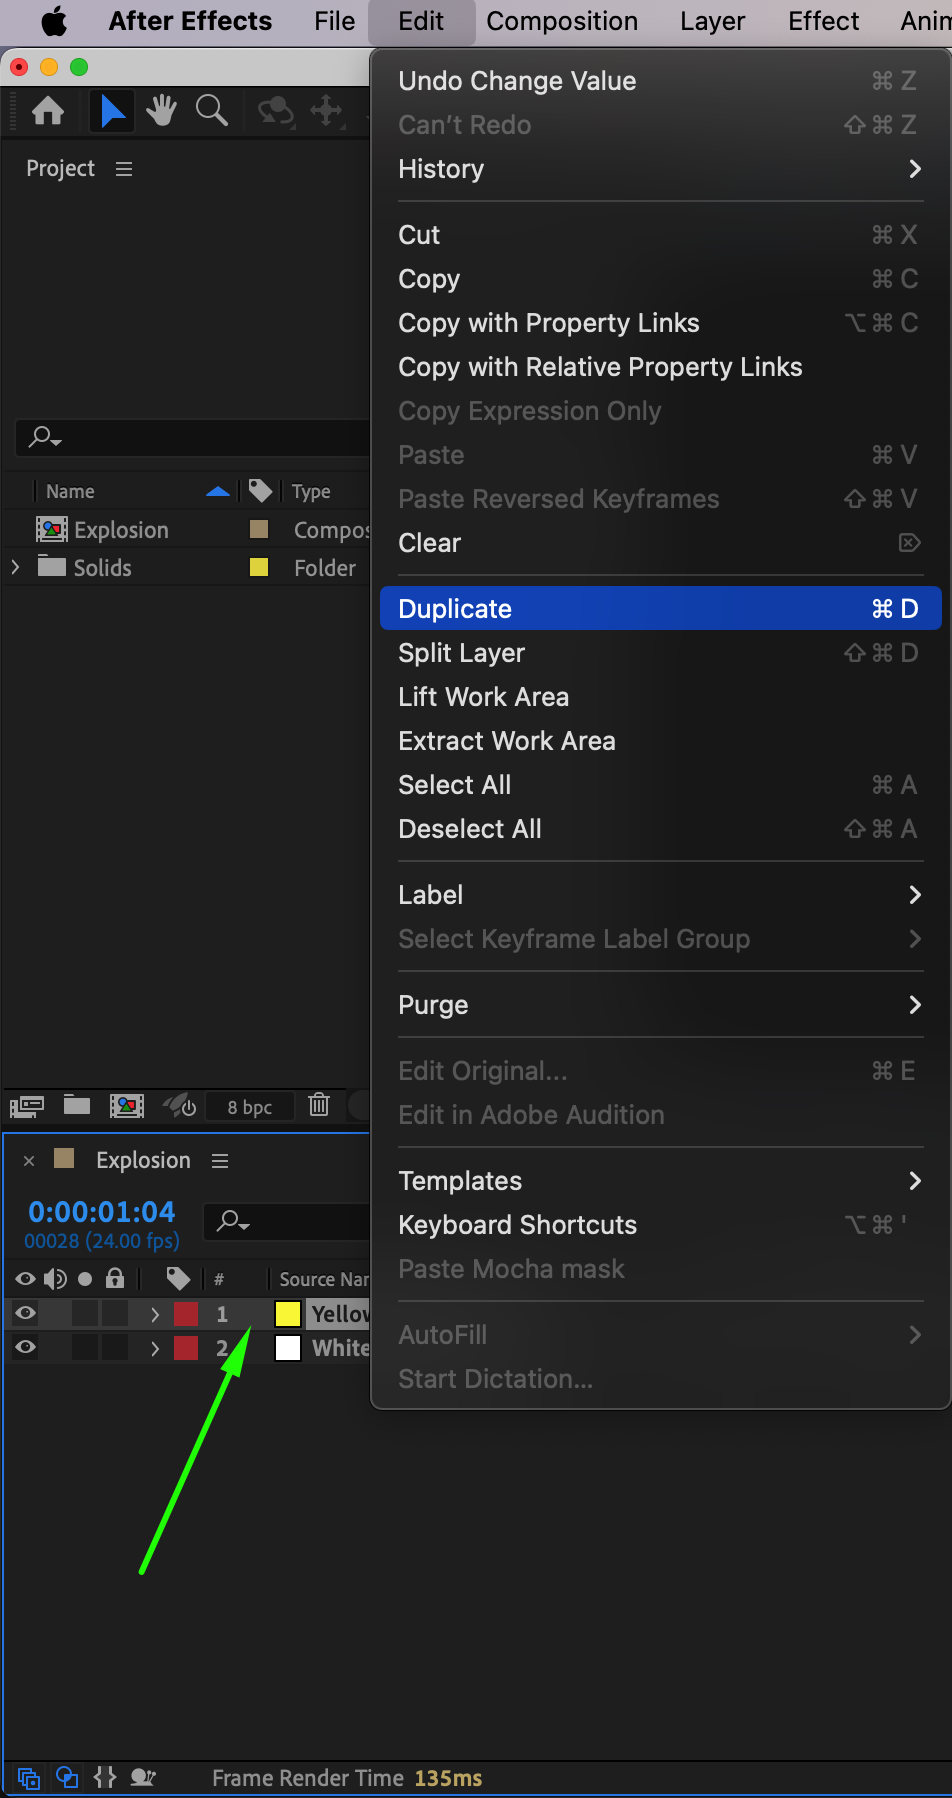
Duplicate the solid layer by pressing “Ctrl/Cmd + D”. Offset the duplicated layer by a few frames in the timeline. Change the duplicate’s color by going to Layer > Solid Settings and rename it to Yellow Solid.

Step 8: Adjust Yellow Solid Properties
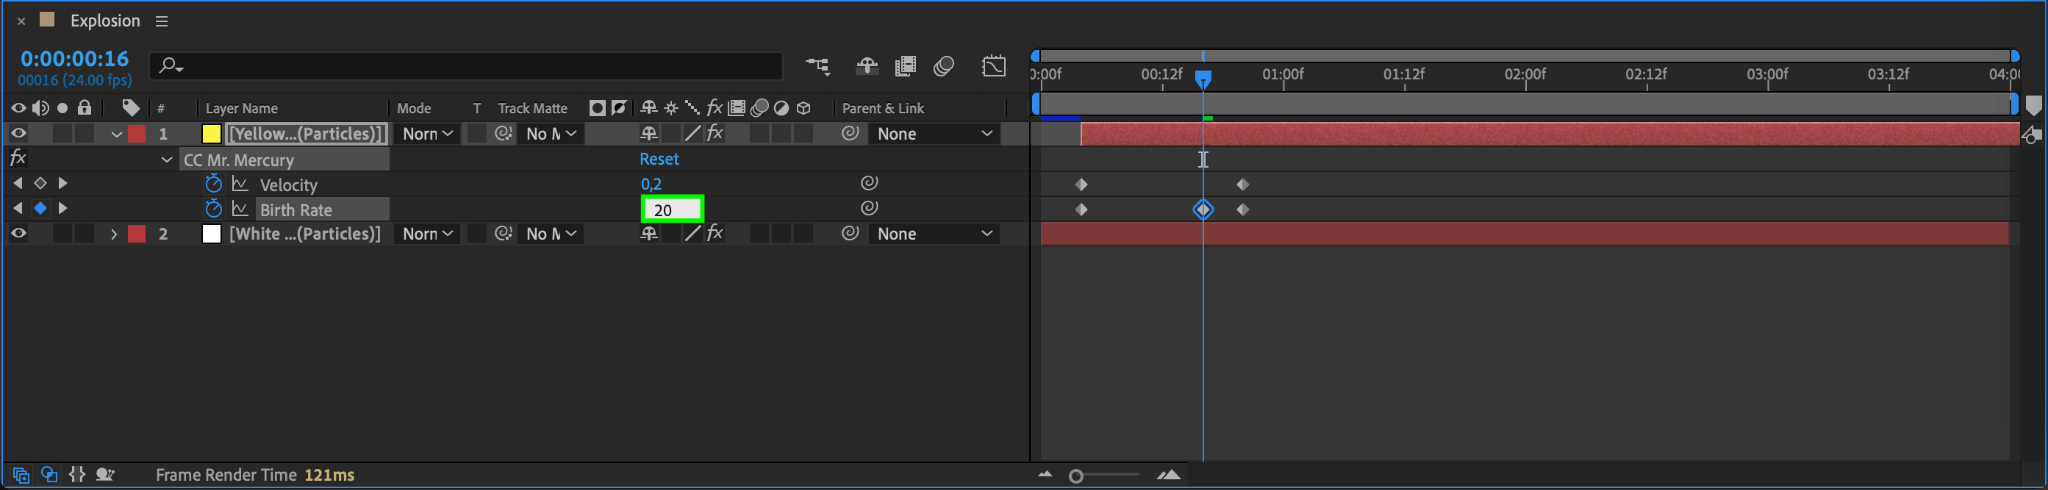
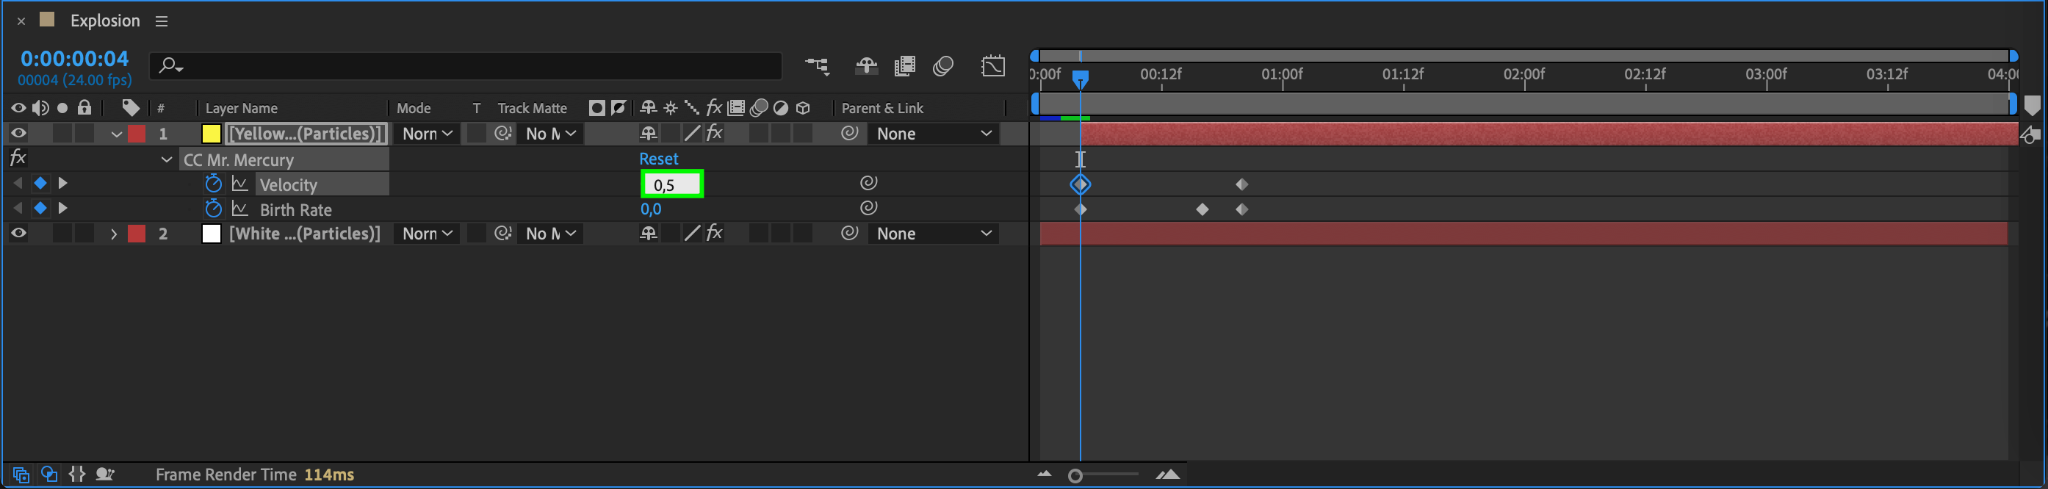
In the Effect Controls panel for the yellow solid, change the Resistance to 0.1 and Blob Birth Size and Death Size to 0.001. Adjust the second keyframe of Birth Rate to 20 and the first keyframe of Velocity to 0.5 for smoother animation.
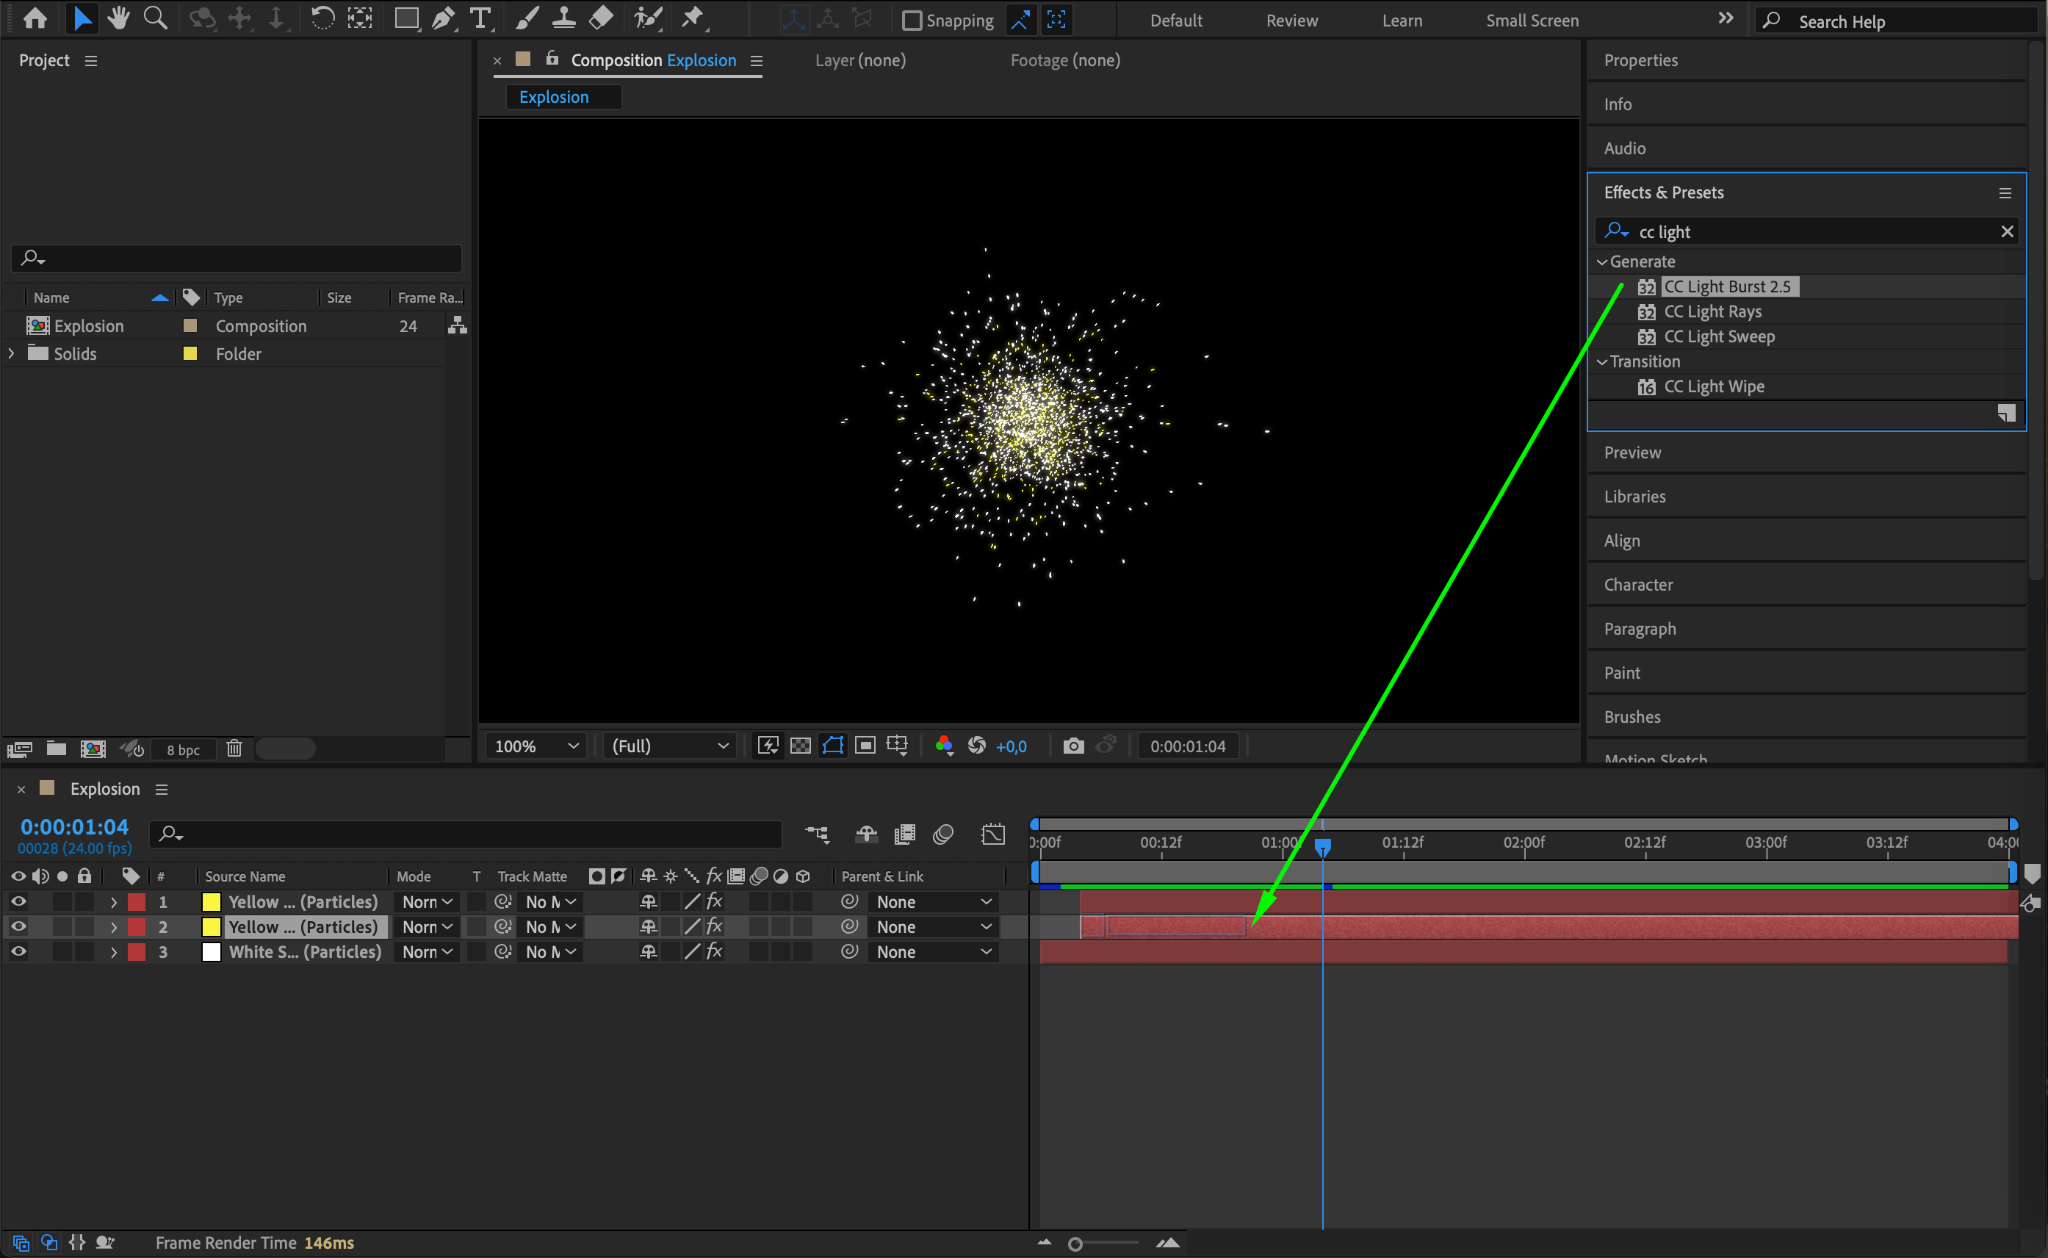
Step 9: Add Light Burst
Duplicate the Yellow solid layer by pressing “Ctrl/Cmd + D”. Apply the CC Light Burst 2.5 effect to the original yellow solid layer to create a glowing burst of light.

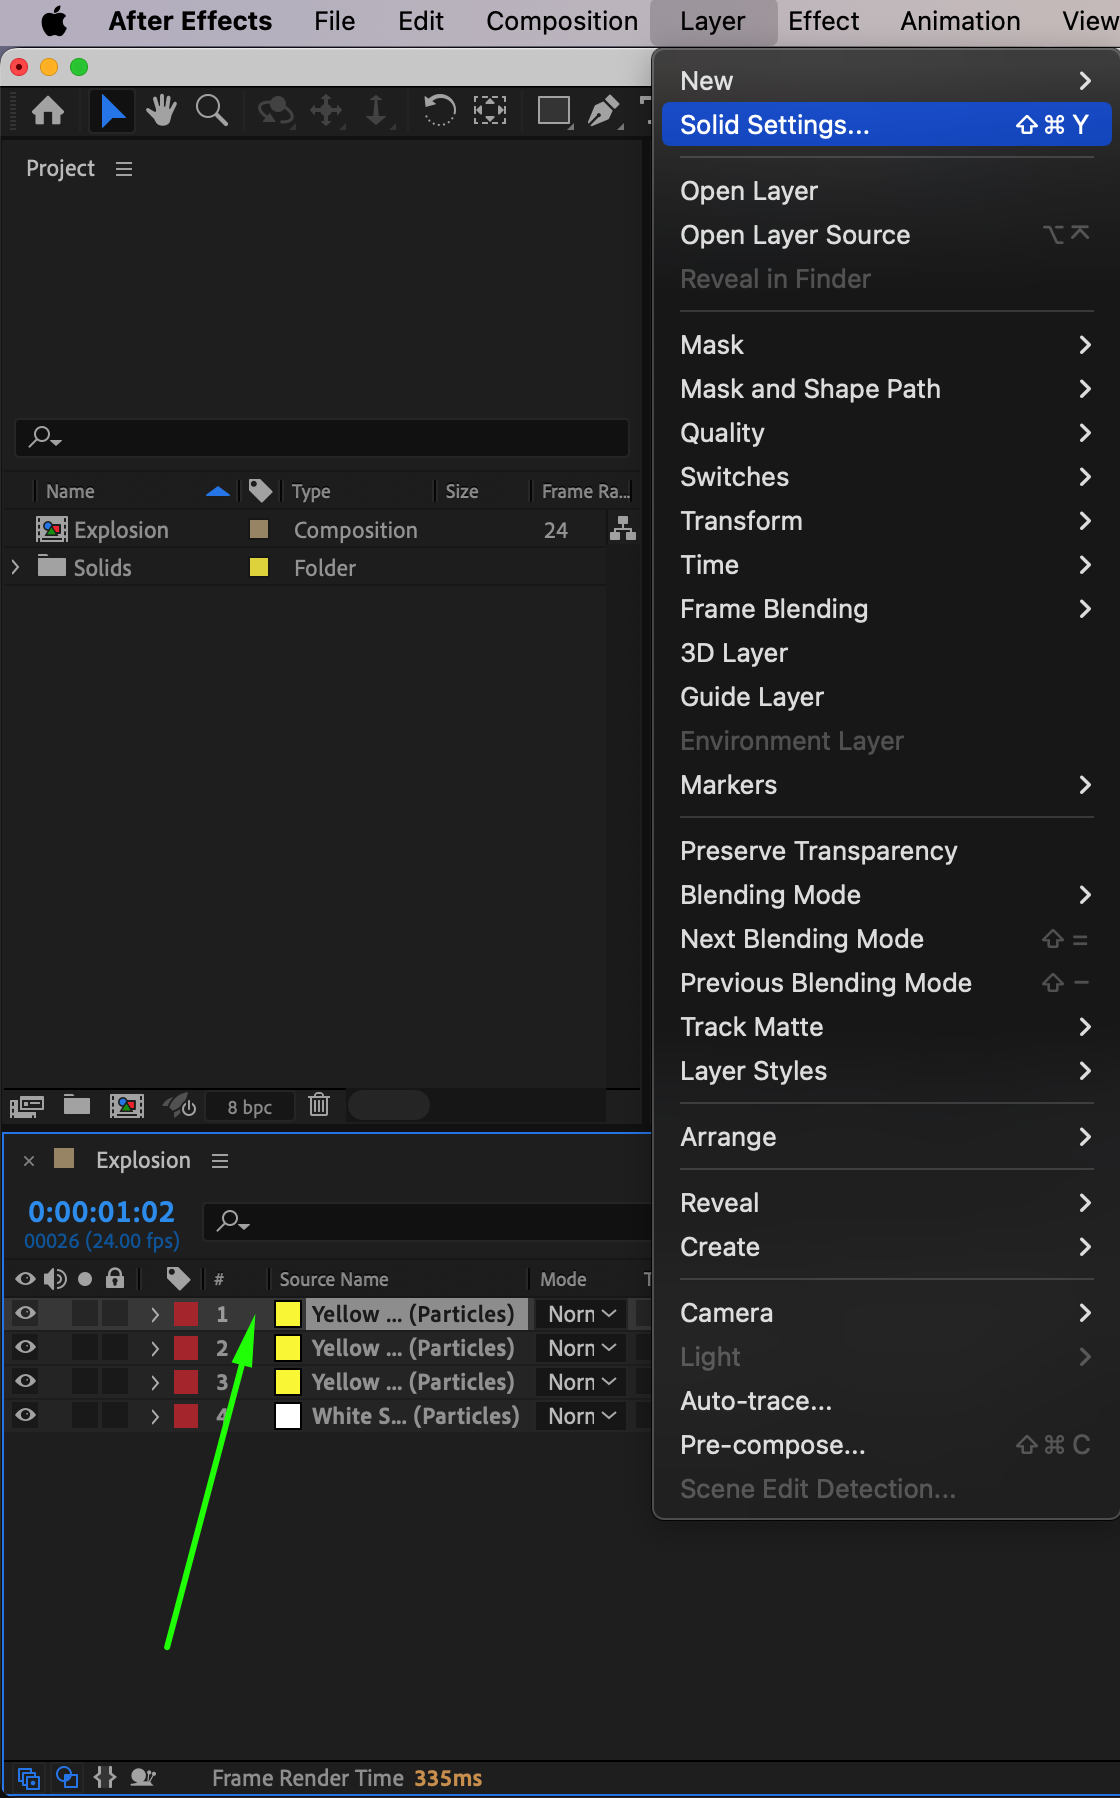
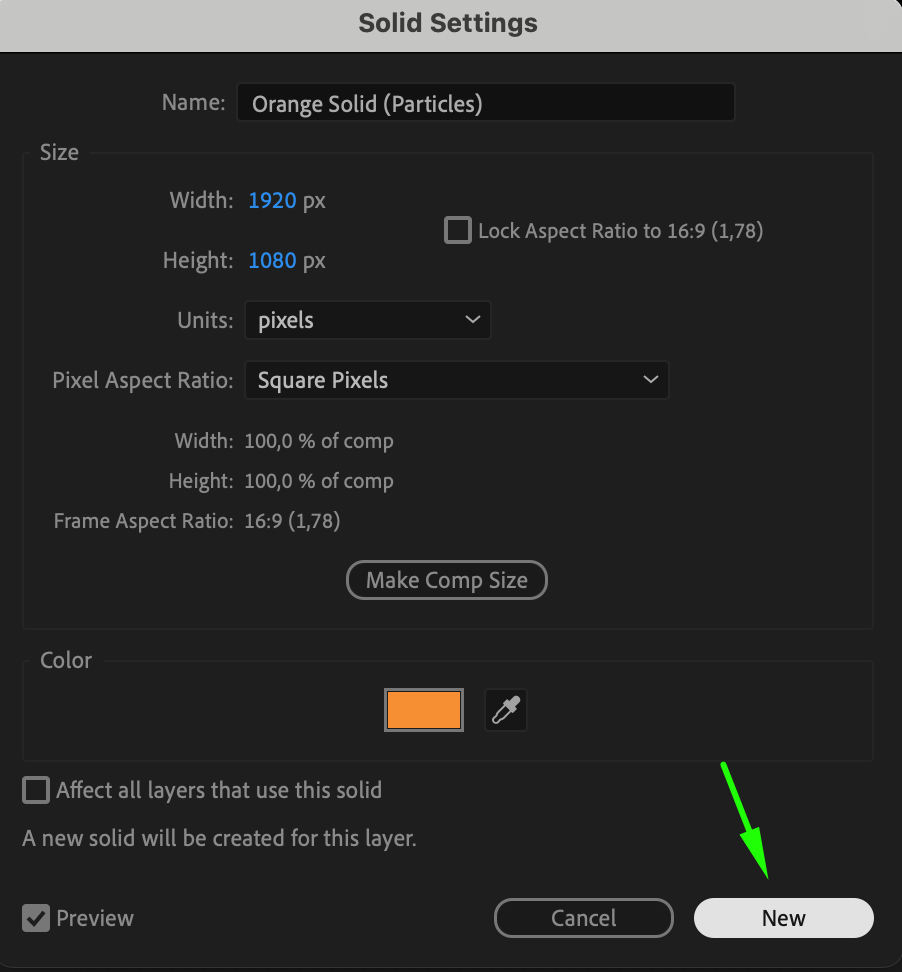
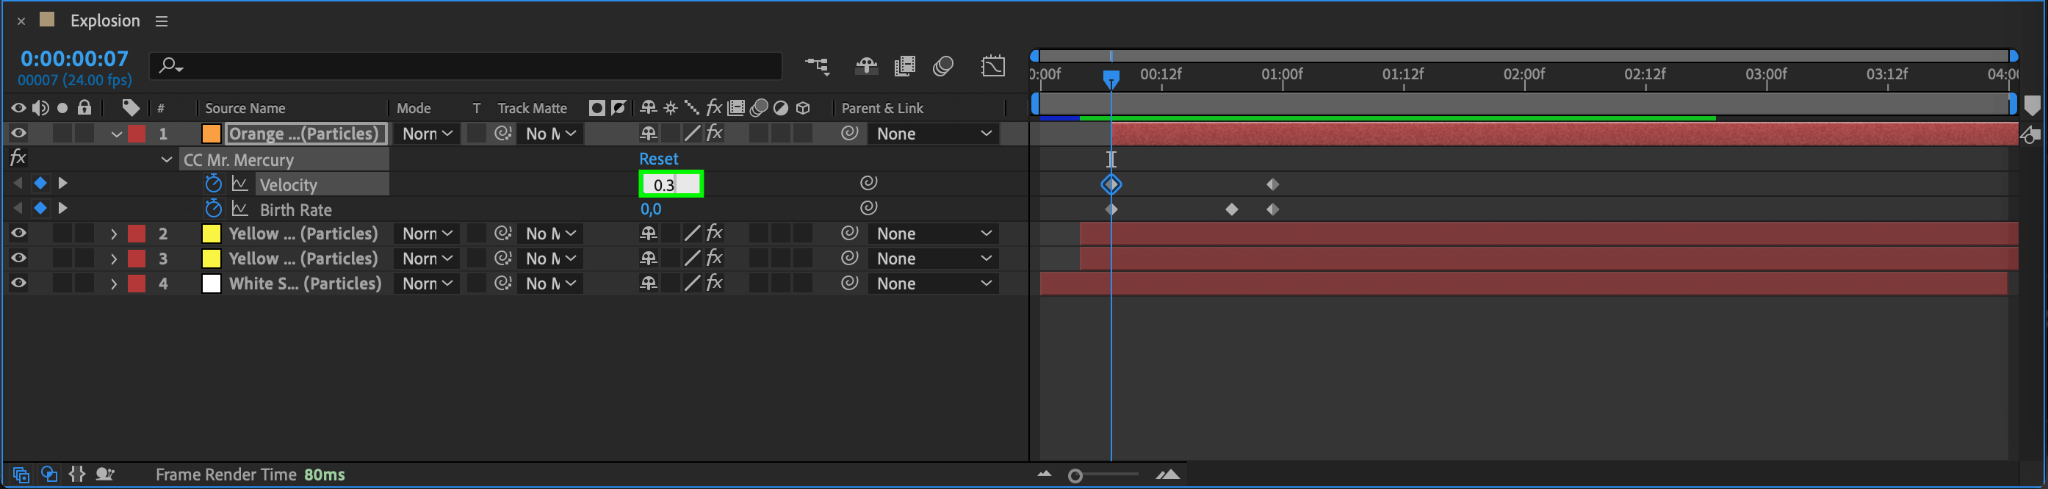
Step 10: Create an Orange Solid
Duplicate the yellow solid, and in the Solid Settings, change its color and name it Orange Solid. Offset this new layer by a few more frames, then adjust the Birth Rate to 15 and Velocity to 0.3 at the appropriate keyframes.
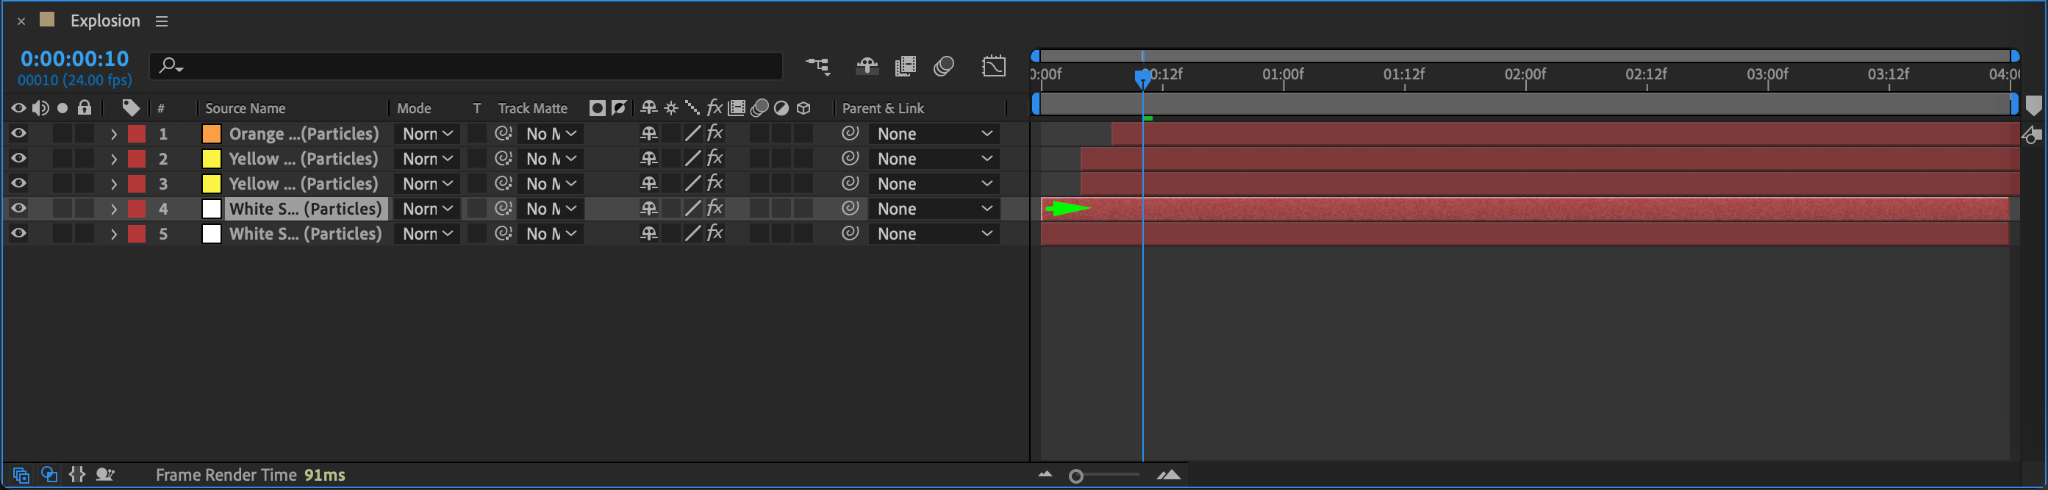
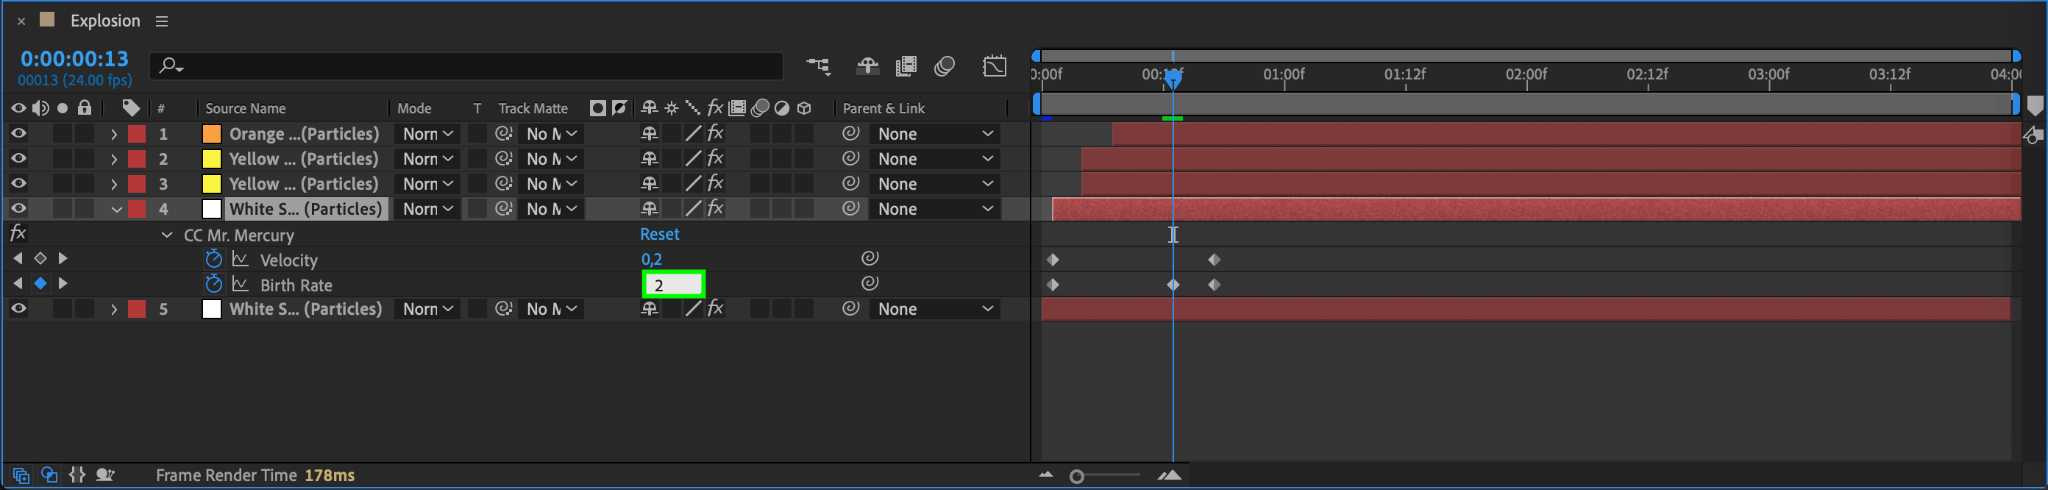
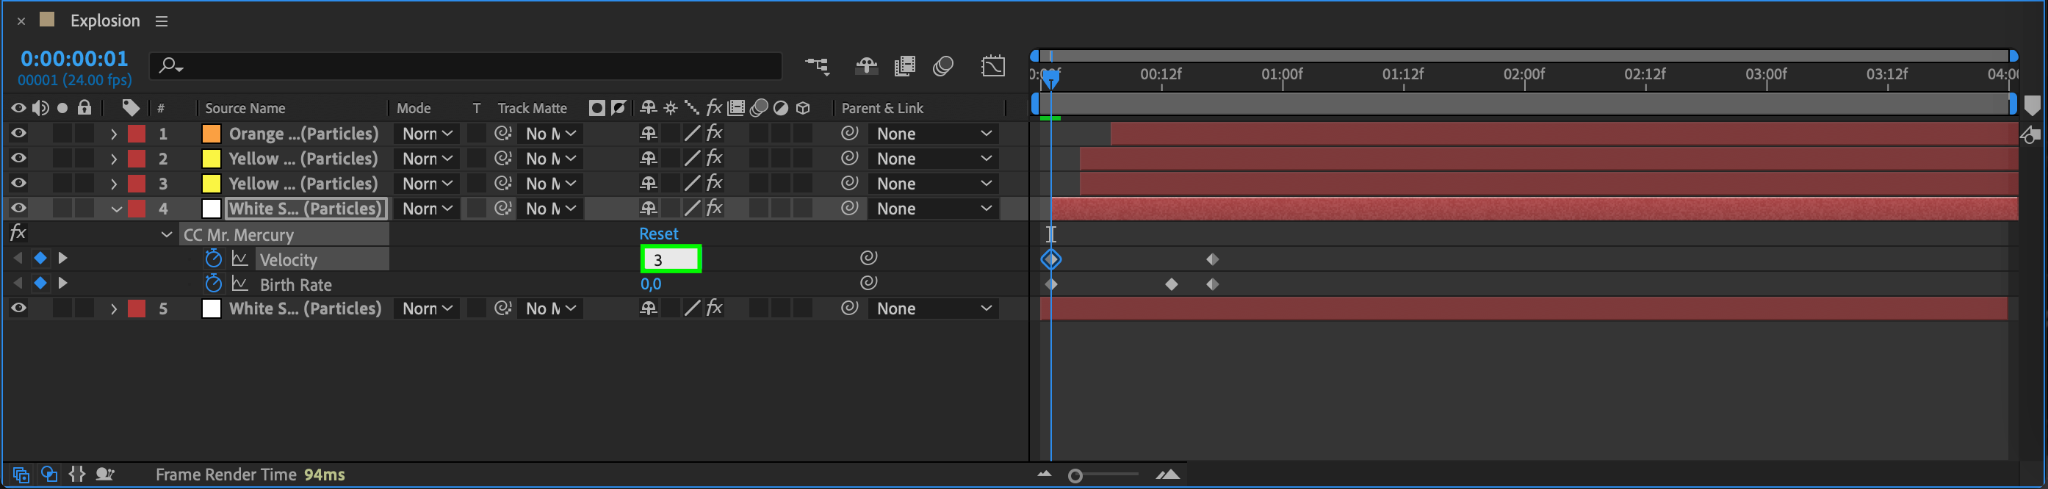
Step 11: Duplicate the White Solid
Duplicate the original white solid and move it forward in the timeline. Adjust the Birth Rate to 2 and Velocity to 3 at their respective keyframes for variation in the explosion effect.
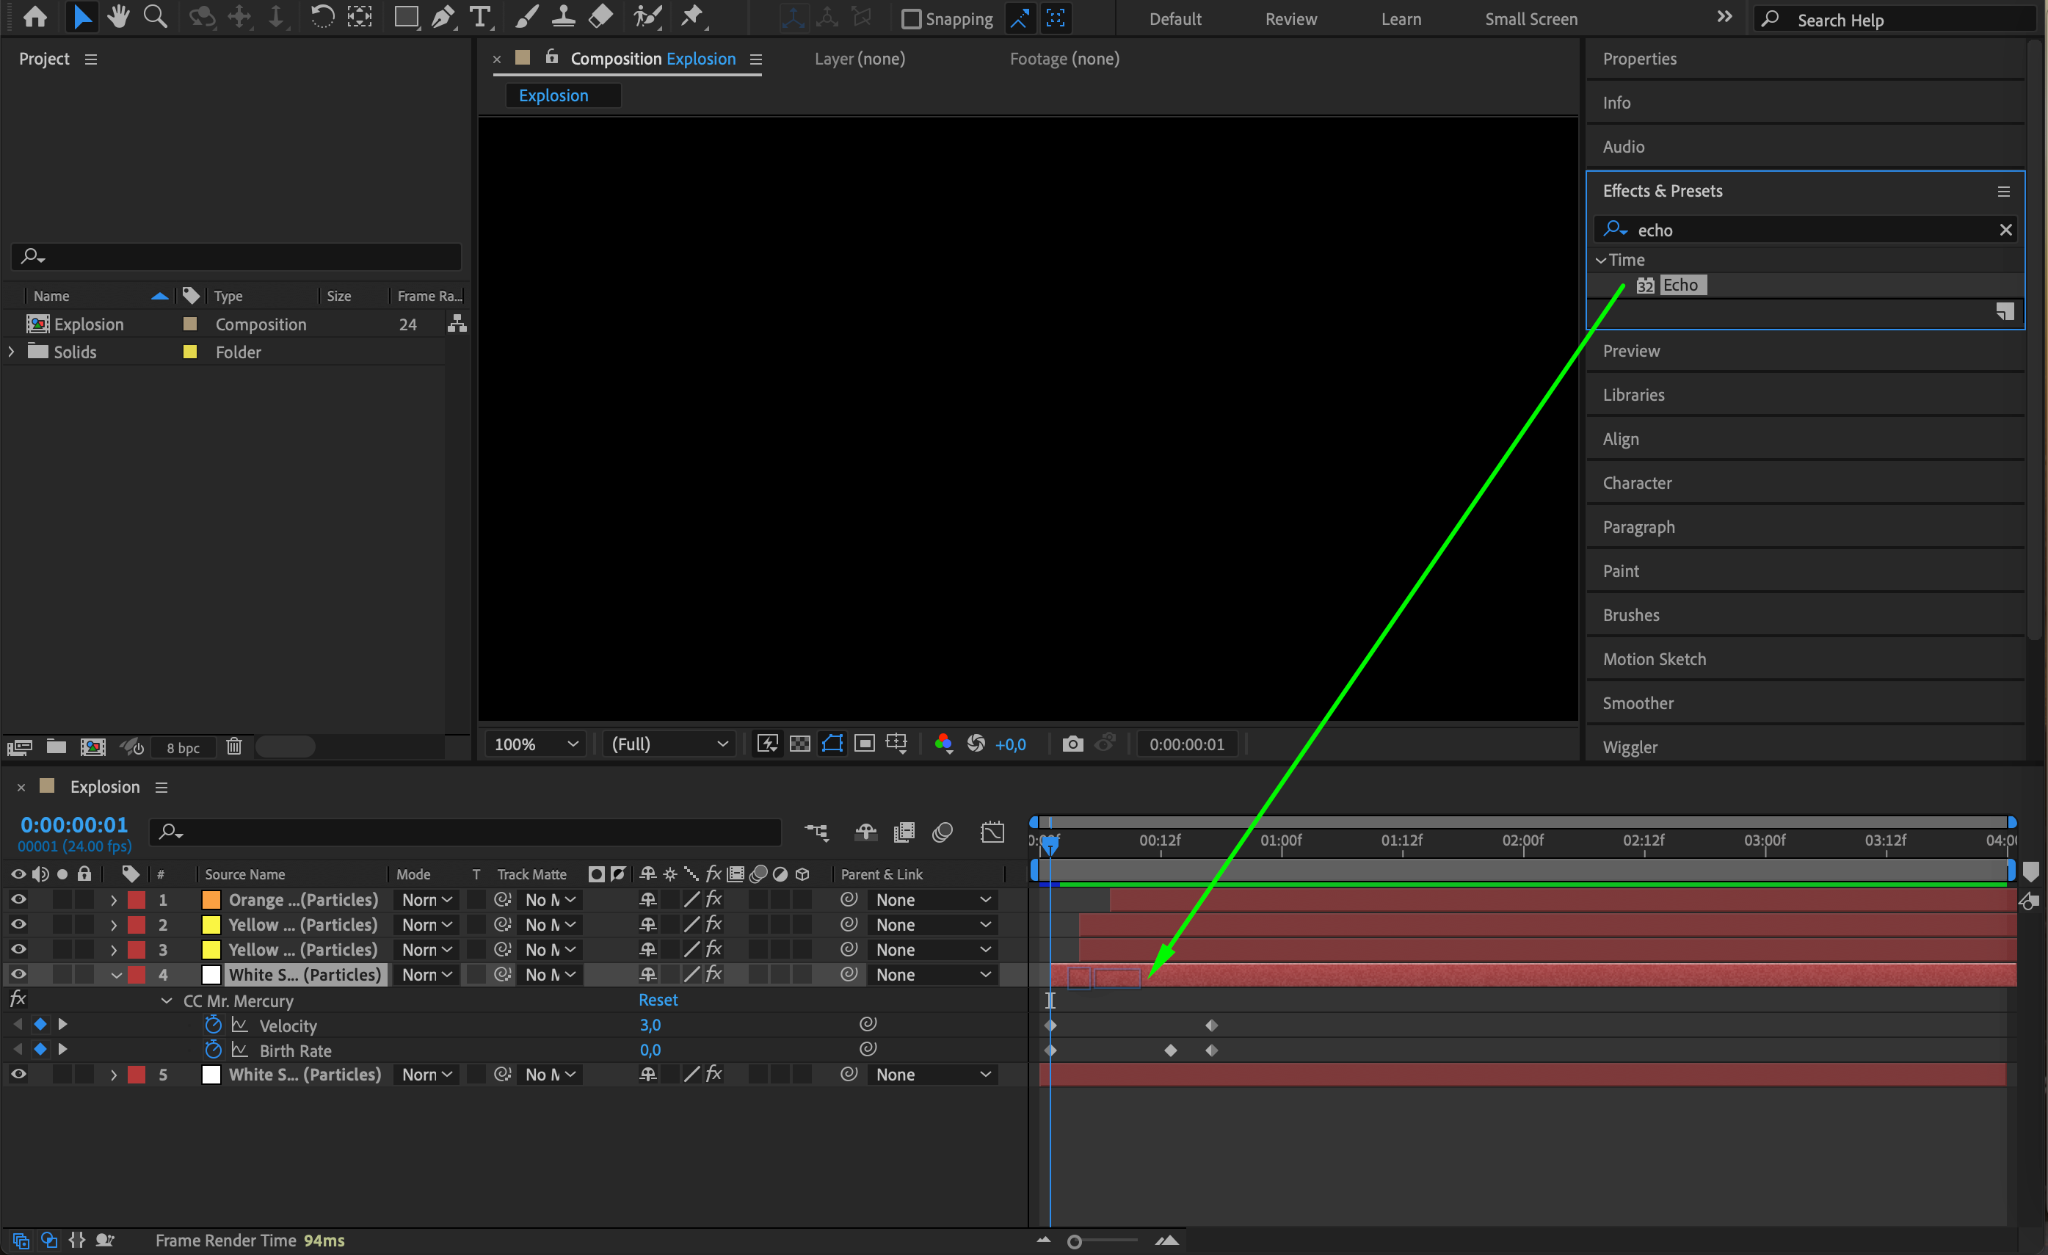
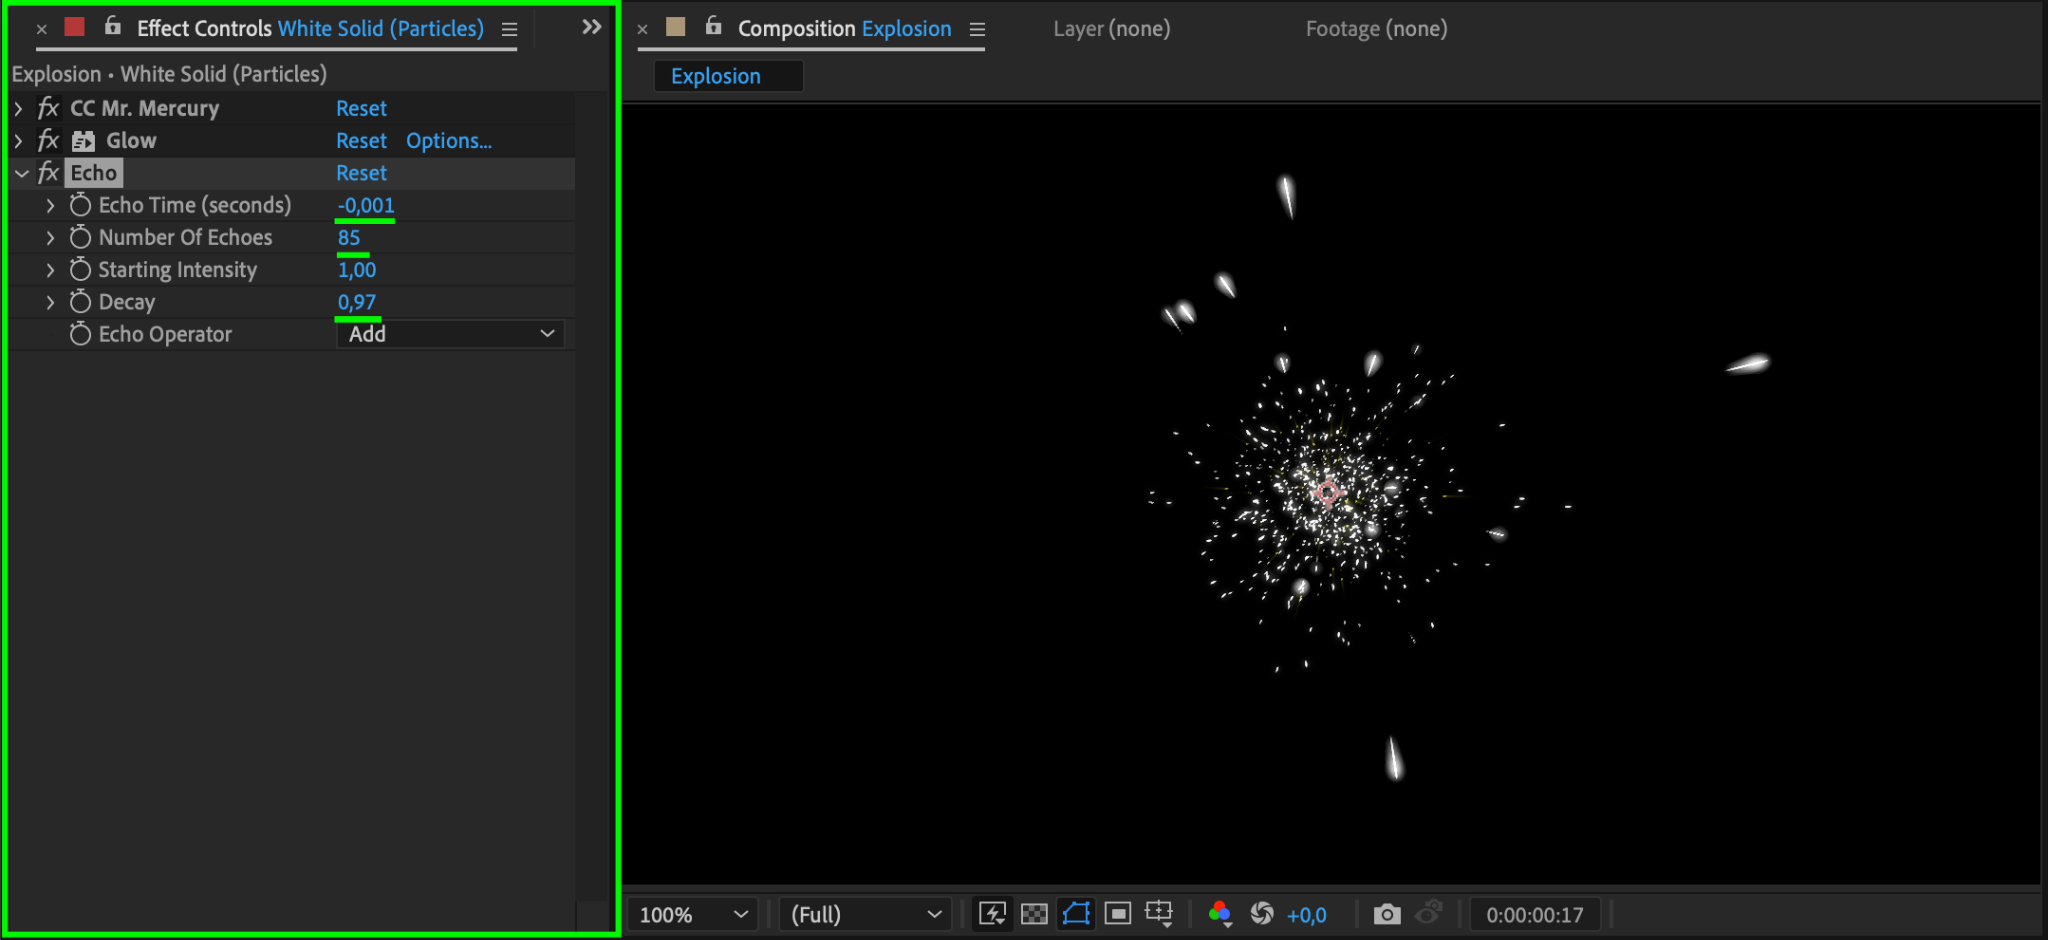
Step 12: Apply Echo Effect
To smooth out the explosion’s movement, apply the Echo effect to the duplicated white solid. Set Echo Time to -0.001, Number of Echoes to 85, Starting Intensity to 1, and Decay to 0.97 for a trail-like effect.
Step 13: Preview the Explosion
Use the Preview button to see the explosion in action. Tweak any settings if needed to achieve the desired look.

Method 2: Creating Explosions Using Plugins
If you prefer a faster method with pre-made effects, you can use third-party plugins such as AEJuice Pack Manager to add explosions.
Step 1: Import Footage
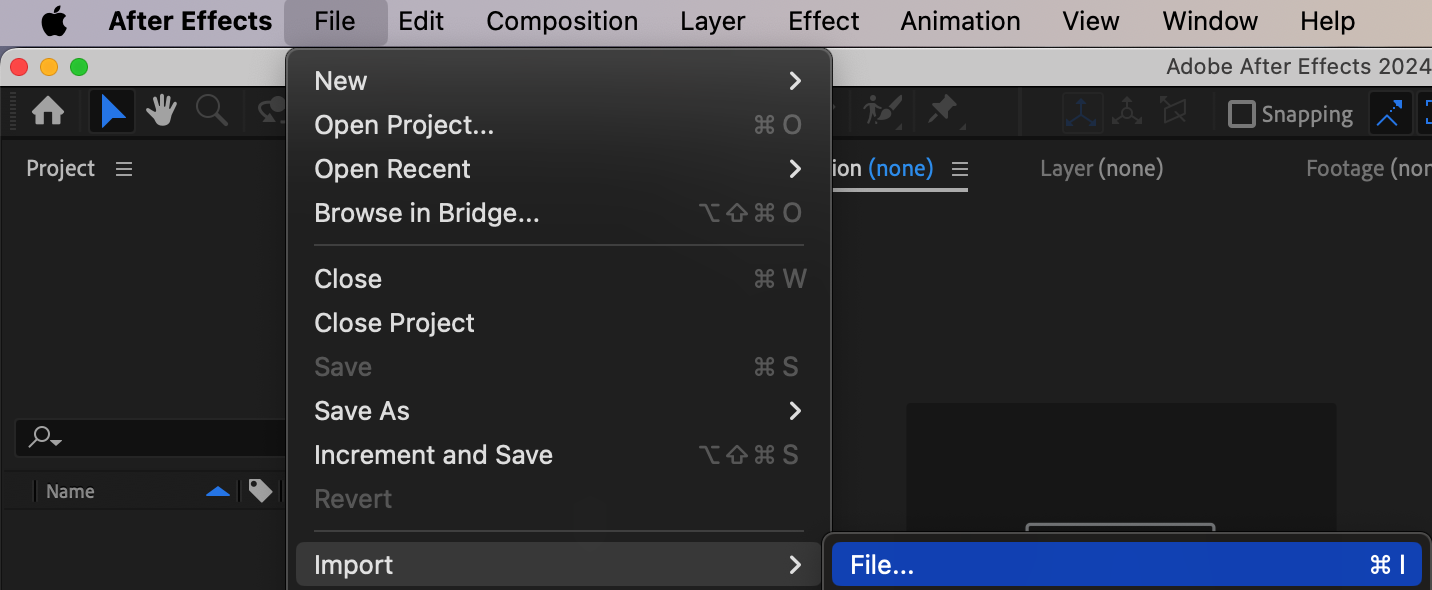
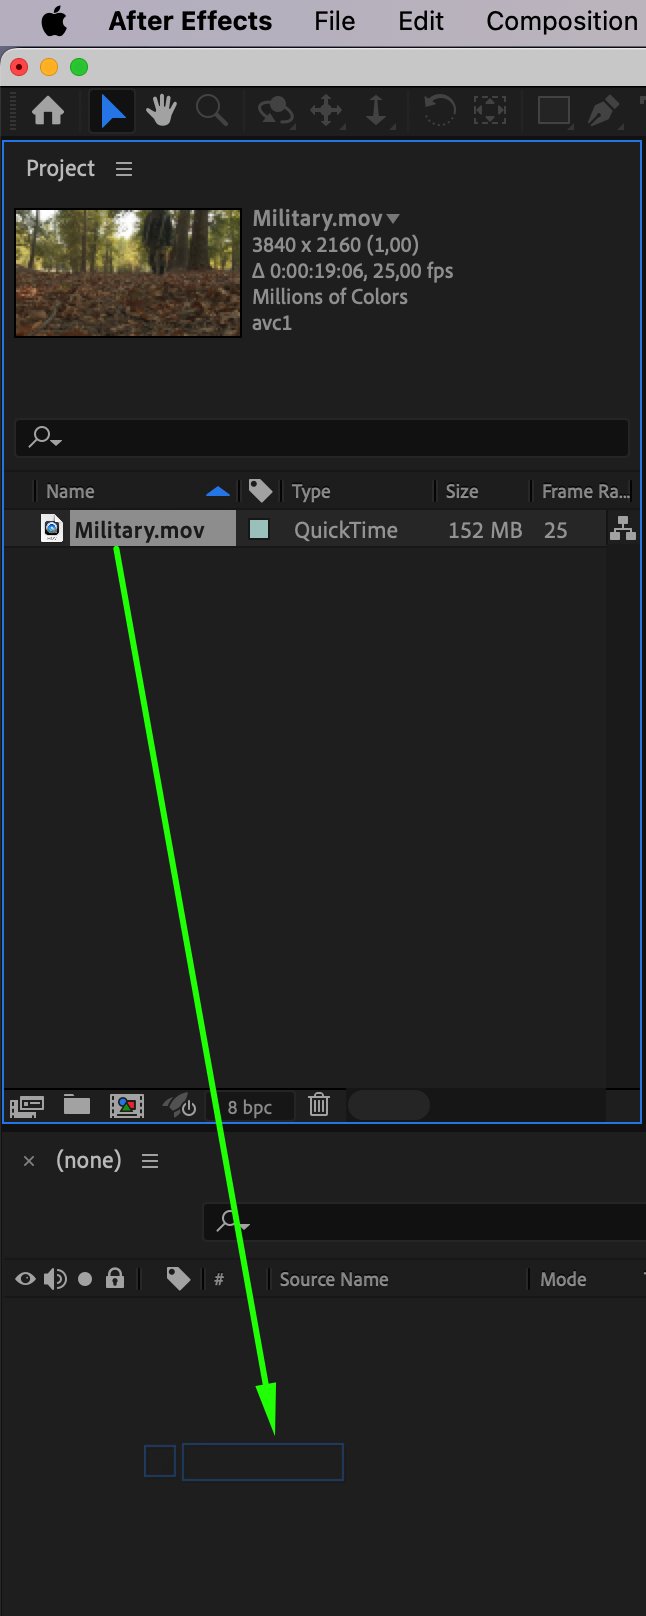
Import the footage where you want to add the explosion effect by going to the File menu and selecting Import > File. Once the footage appears in the Project Panel, drag it onto the Timeline to begin working with it.
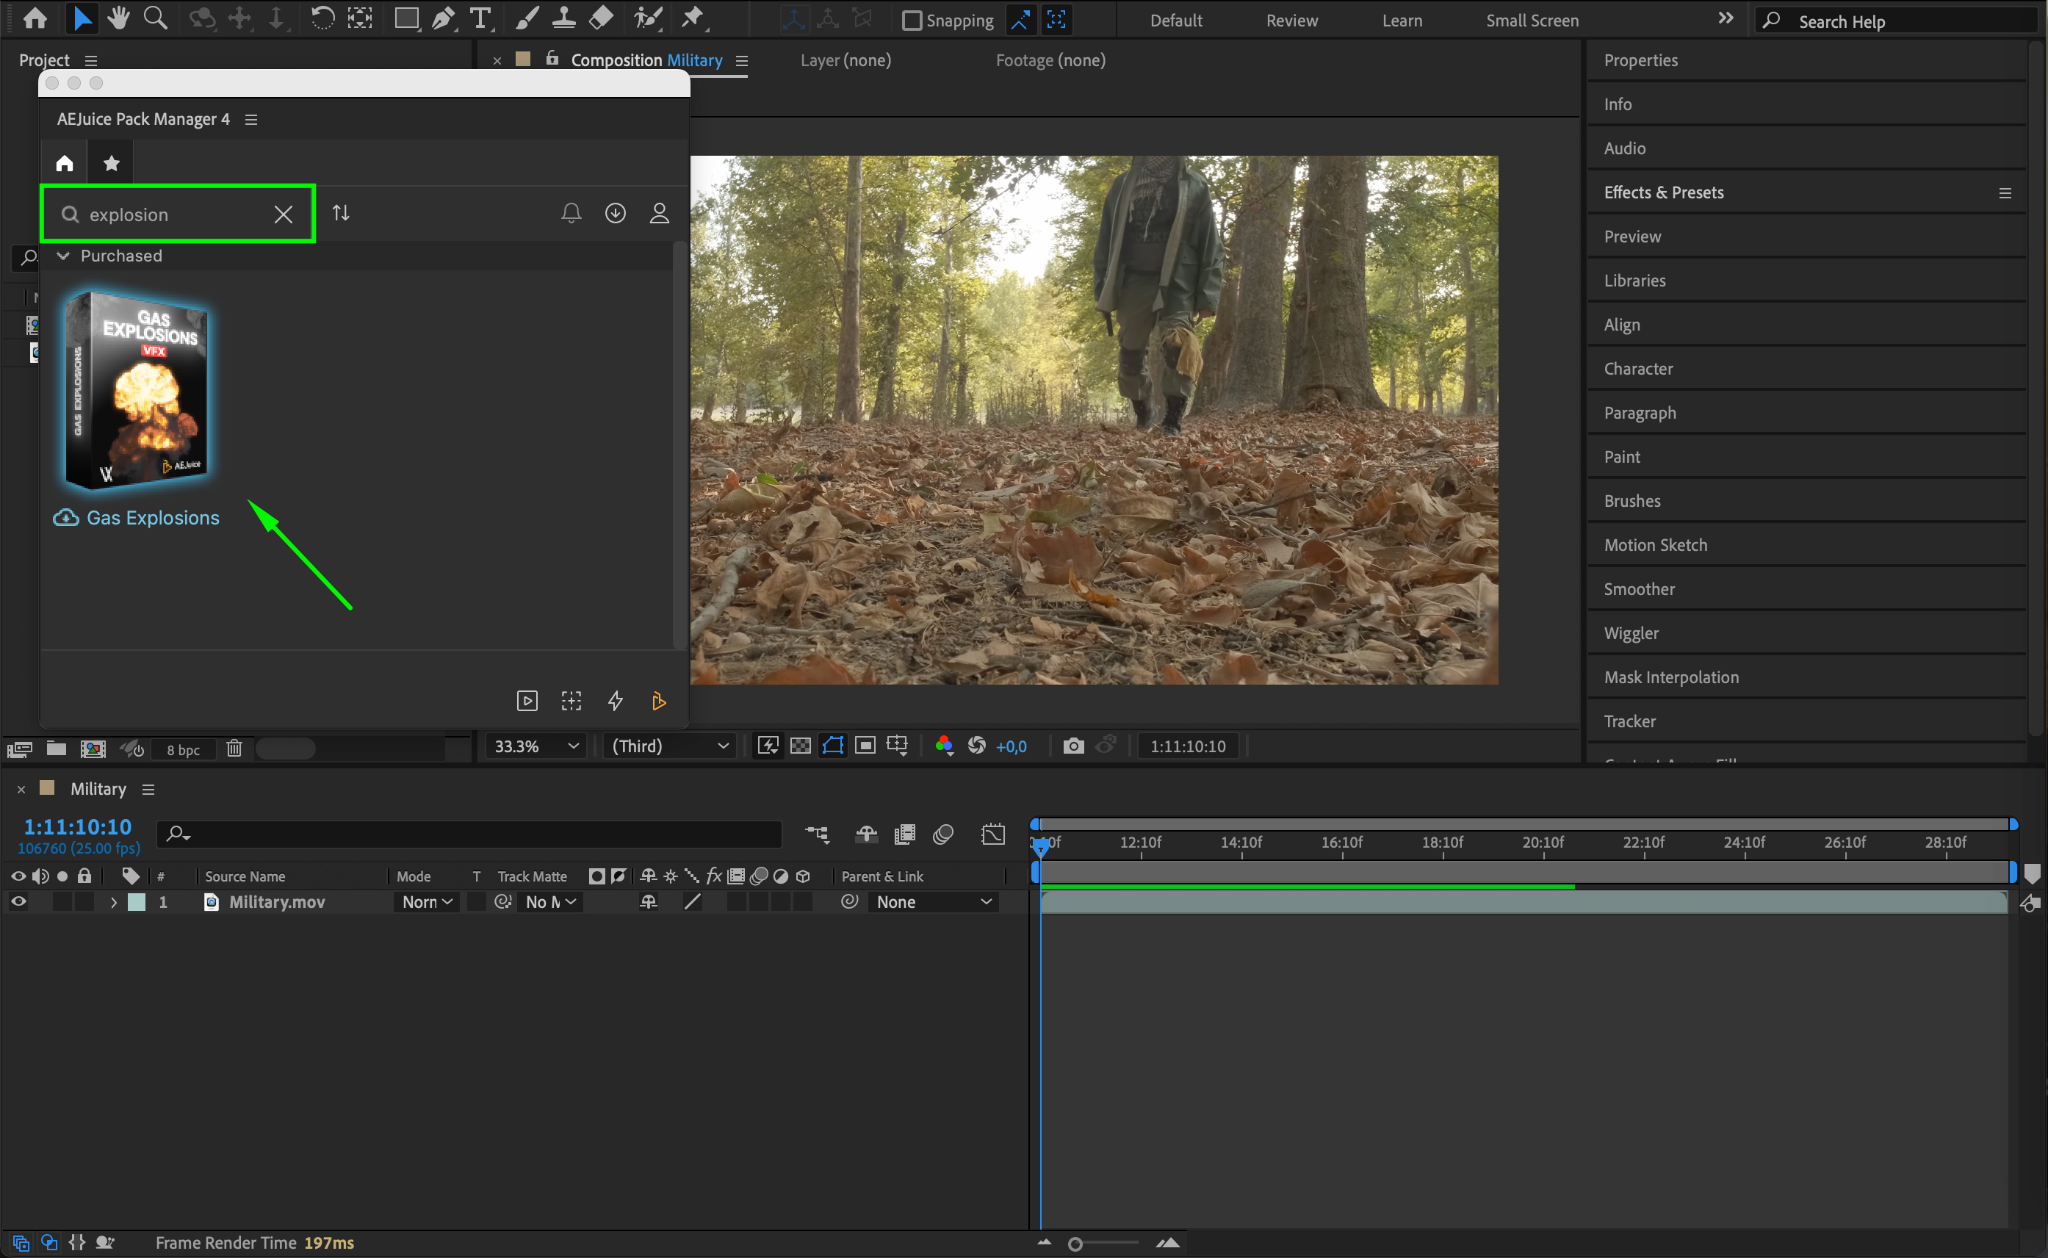
Step 2: Open Plugin
Open the AEJuice Pack Manager 4 plugin (or any similar plugin you have installed). Navigate through the available packs to find an explosion effect that suits your project.

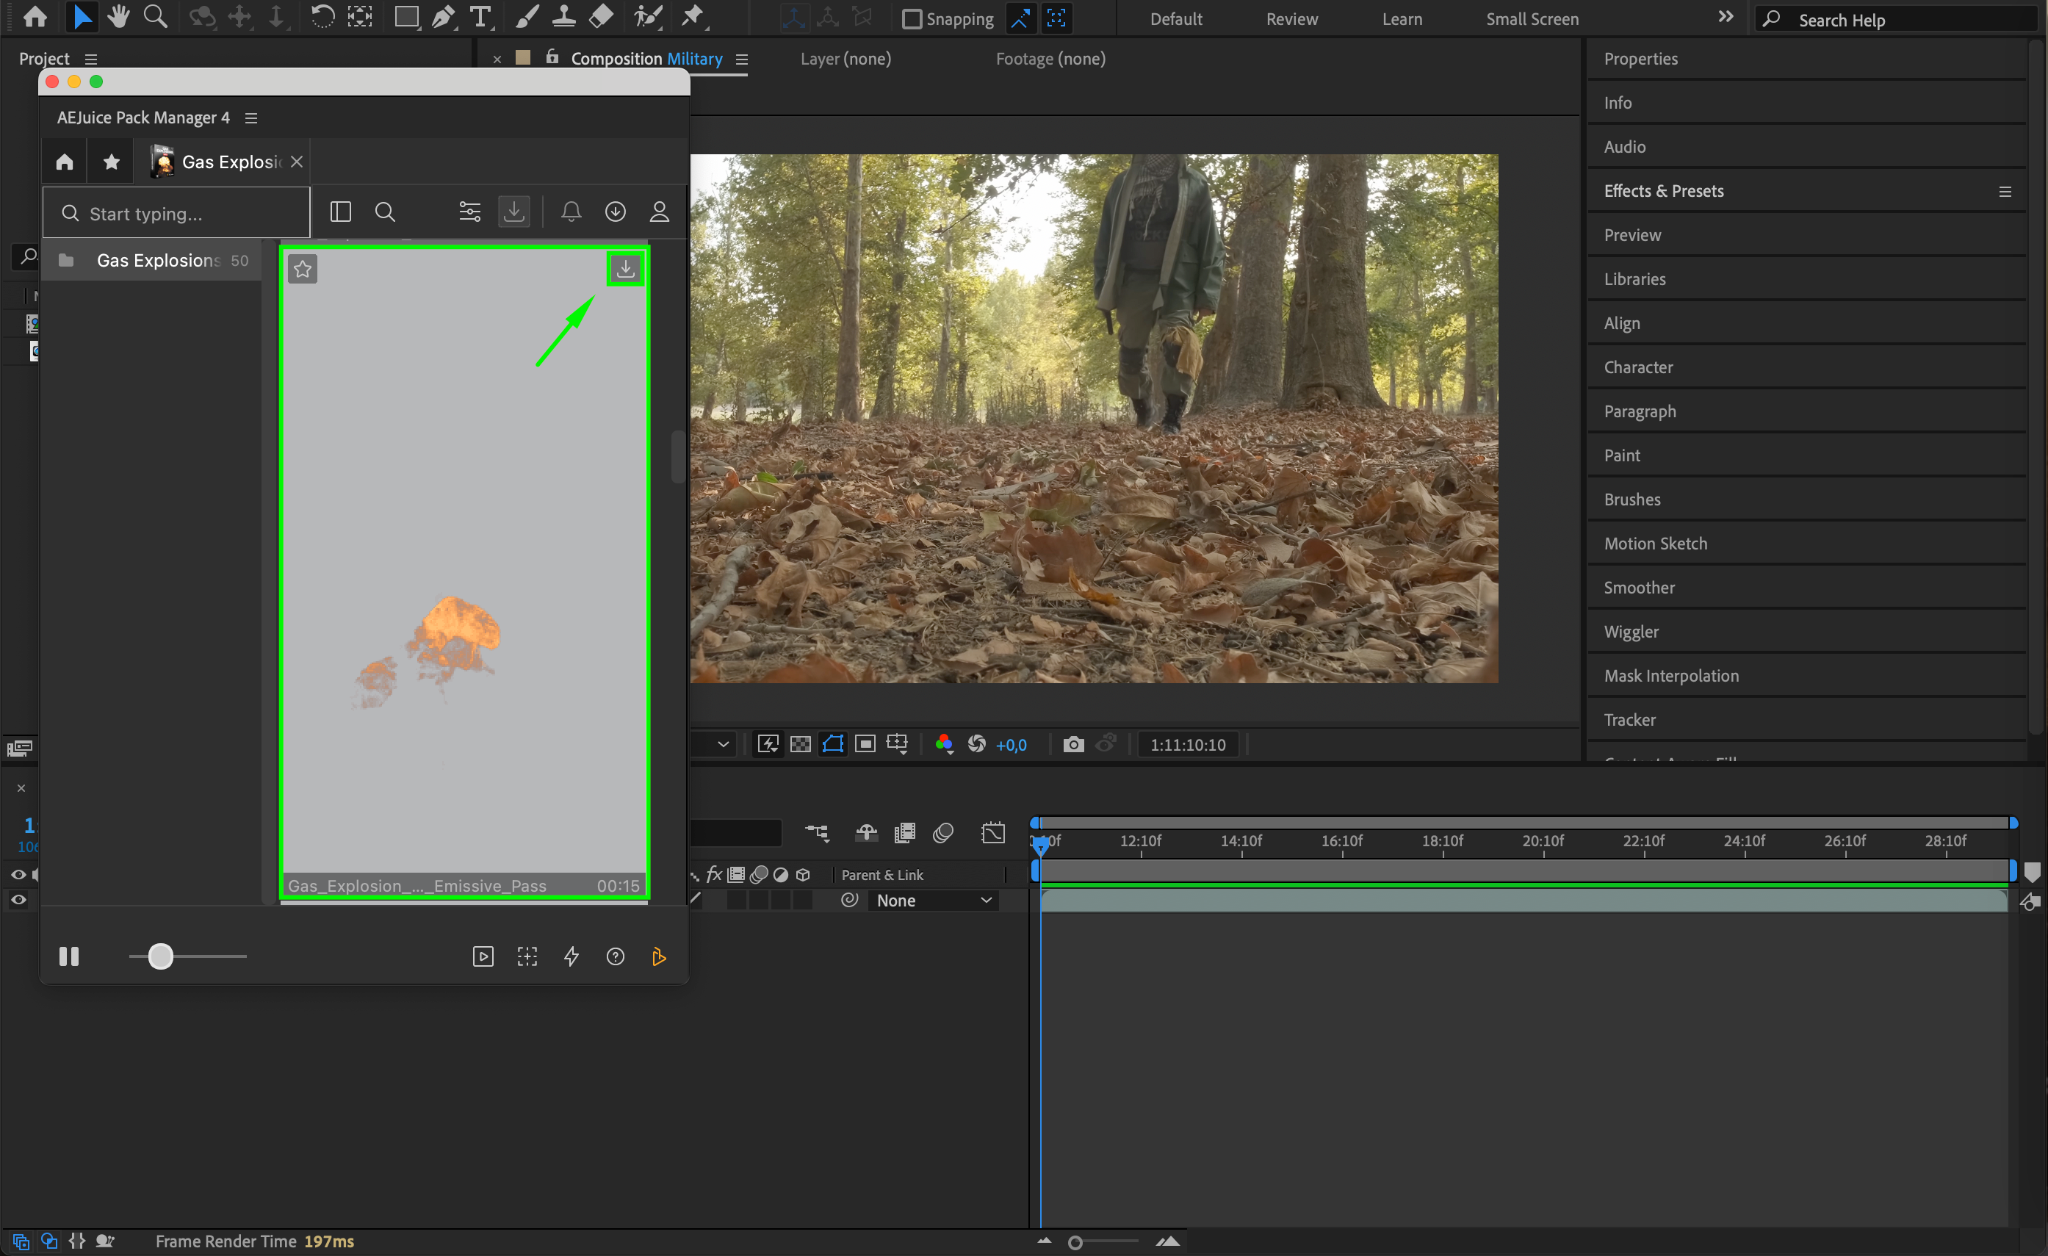
Step 3: Download Explosion Pack
Find a pack, such as Pack Gas Explosions, that contains explosion effects. Download the desired explosion by clicking on it.
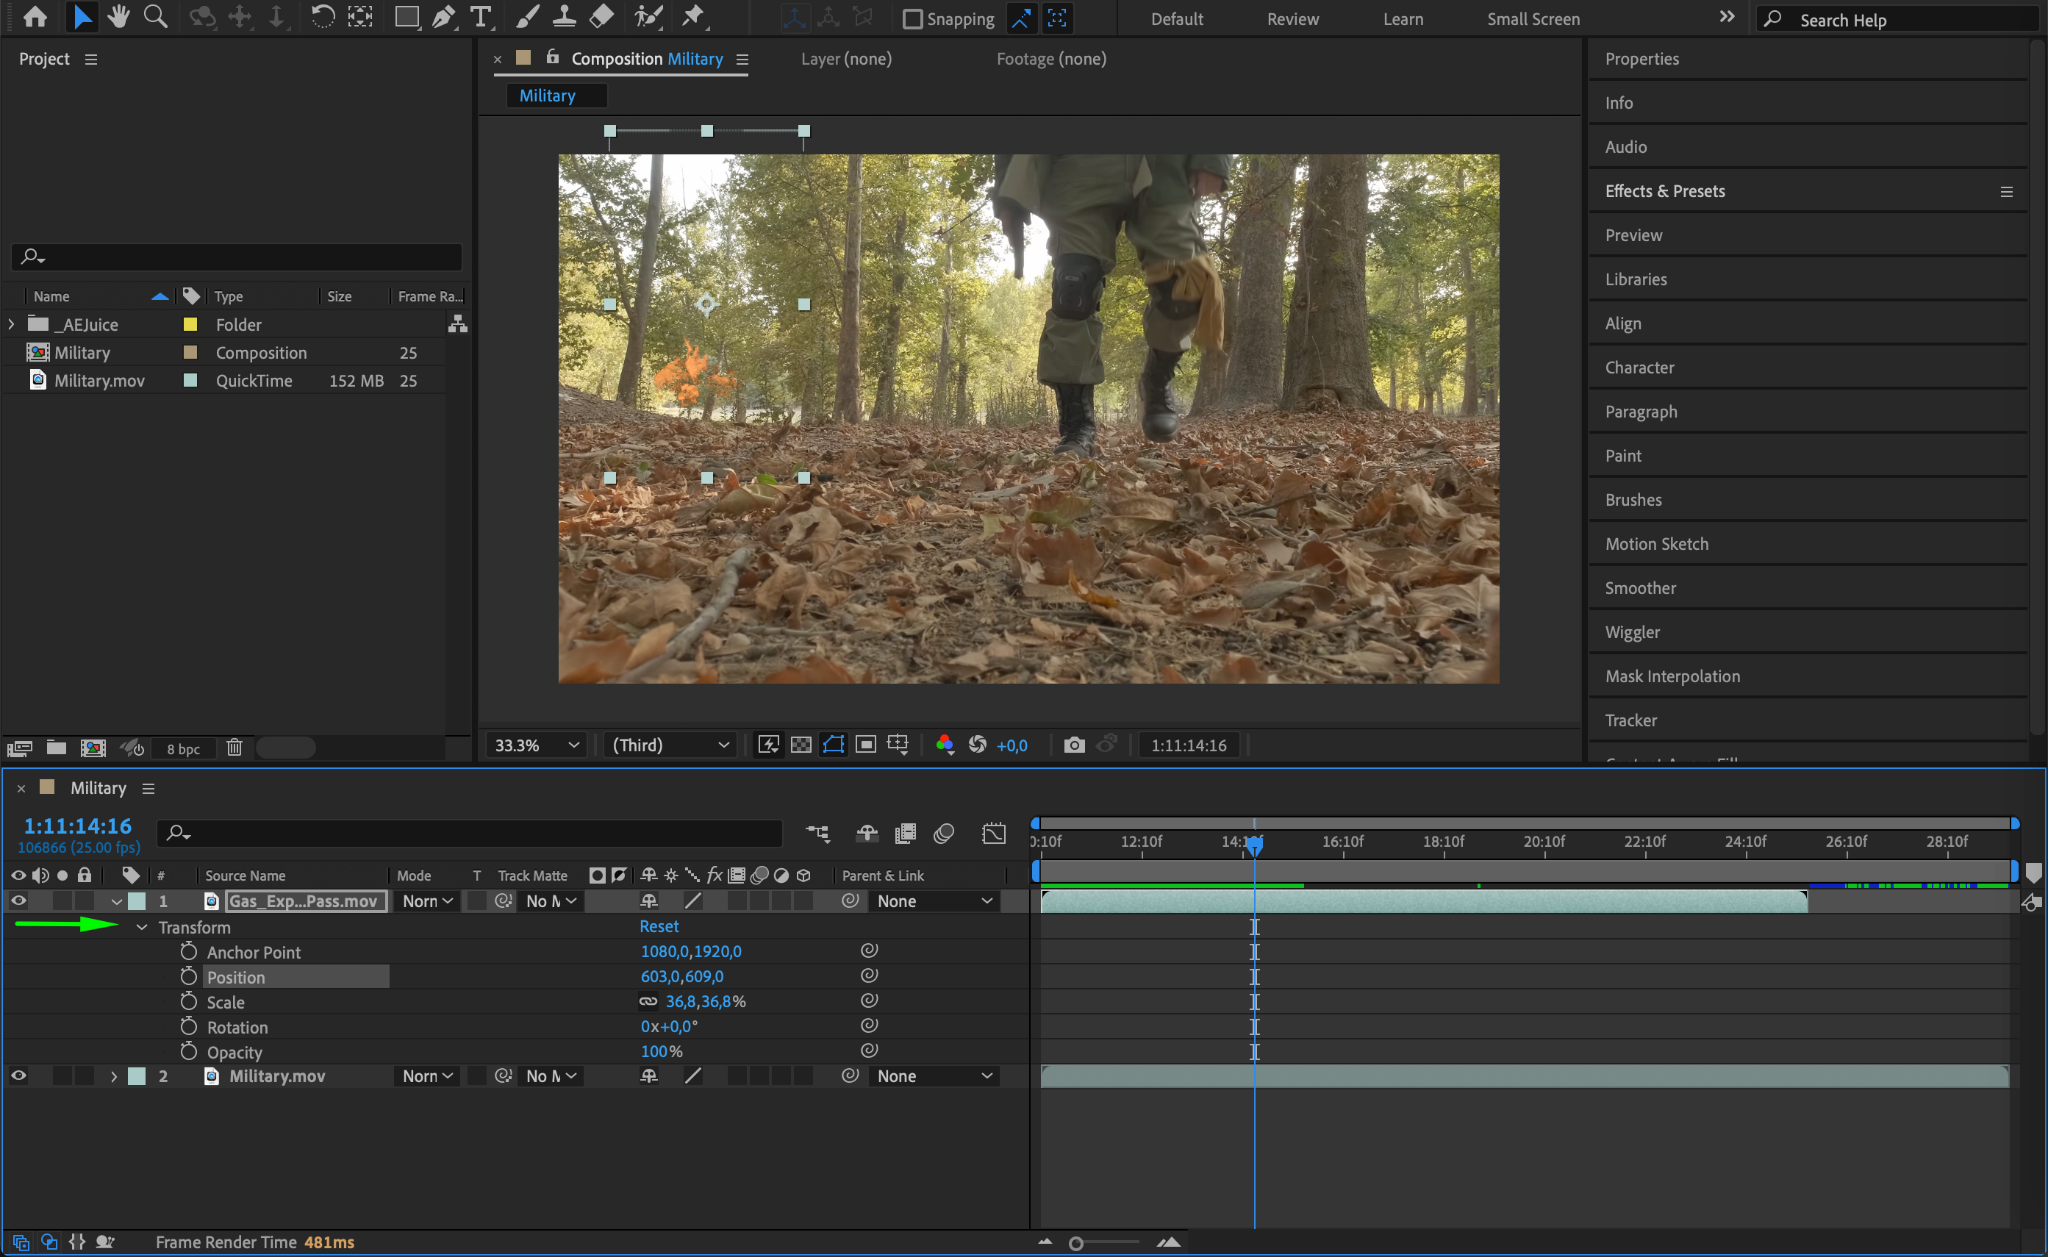
Step 4: Apply Explosion Effect
Once downloaded, find the explosion effect you want to use in the pack and apply it to your composition. Adjust its position, scale, opacity, and rotation using the Transform parameters to seamlessly integrate it into your scene.
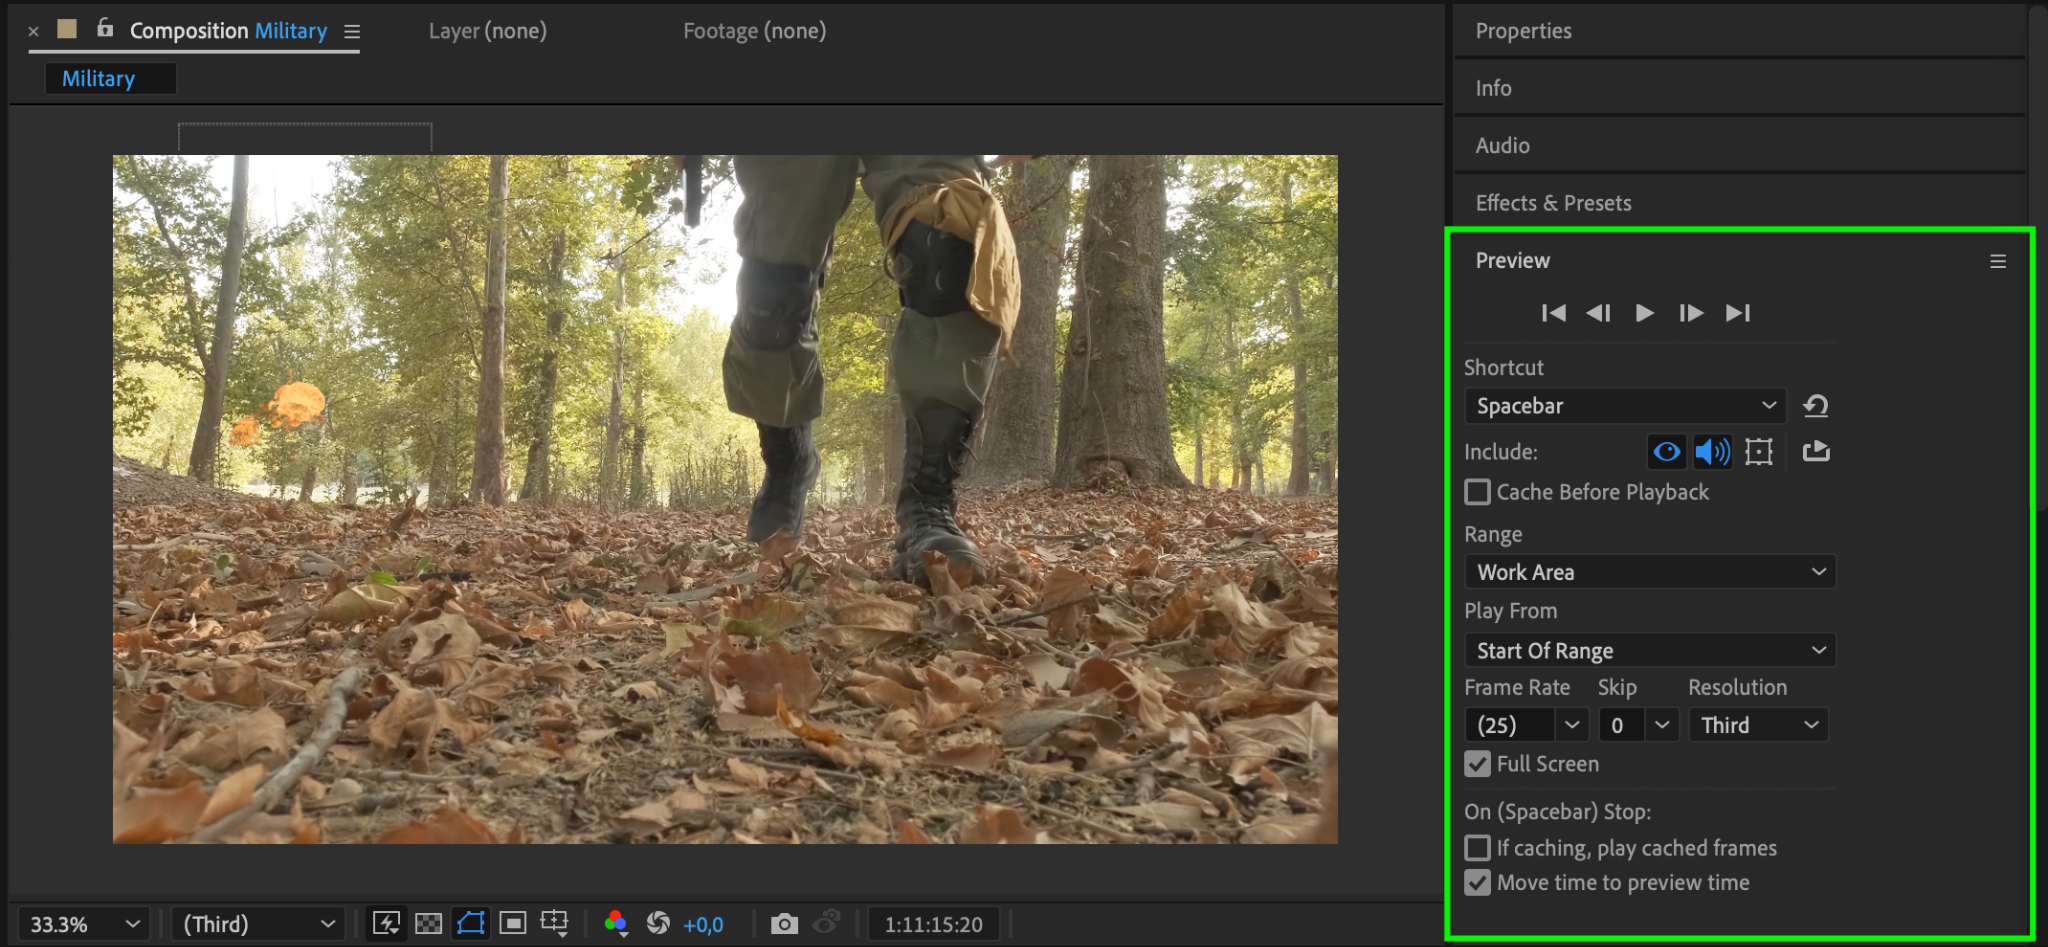
Step 5: Preview the Explosion
Finally, preview the effect to ensure it fits your scene. You can make further adjustments if needed by altering the effect’s timing or visual properties.
Conclusion
Creating explosions in After Effects offers a wide range of possibilities, whether you prefer working with built-in effects or using plugins. The methods outlined in this guide provide both flexibility and control over the explosion effects you create. Whether you’re adding explosions to action scenes or simply experimenting with visual effects, mastering these techniques will help you bring your vision to life. So, go ahead – try out these methods and take your video editing to the next level!


