Mastering Realistic Fire Animation in After Effects
Introduction – Unveiling the Secrets of Lifelike Fire Effects in After Effects
Welcome to the world of After Effects mastery, where we unveil the secrets of crafting lifelike fire animations. In this step-by-step guide, you’ll discover the art of creating dynamic and captivating fire effects that breathe life into your projects. Follow along as we delve into various effects and settings, empowering you to master the intricate dance of flames within the digital realm. Let’s embark on a journey to elevate your visual storytelling with the mesmerizing power of realistic fire animation in After Effects.
Get 10% off when you subscribe to our newsletter

Creating dynamic and realistic fire animations in After Effects can add a captivating element to your projects. In this tutorial, we’ll guide you through the step-by-step process to achieve a lifelike fire effect using various effects and settings.
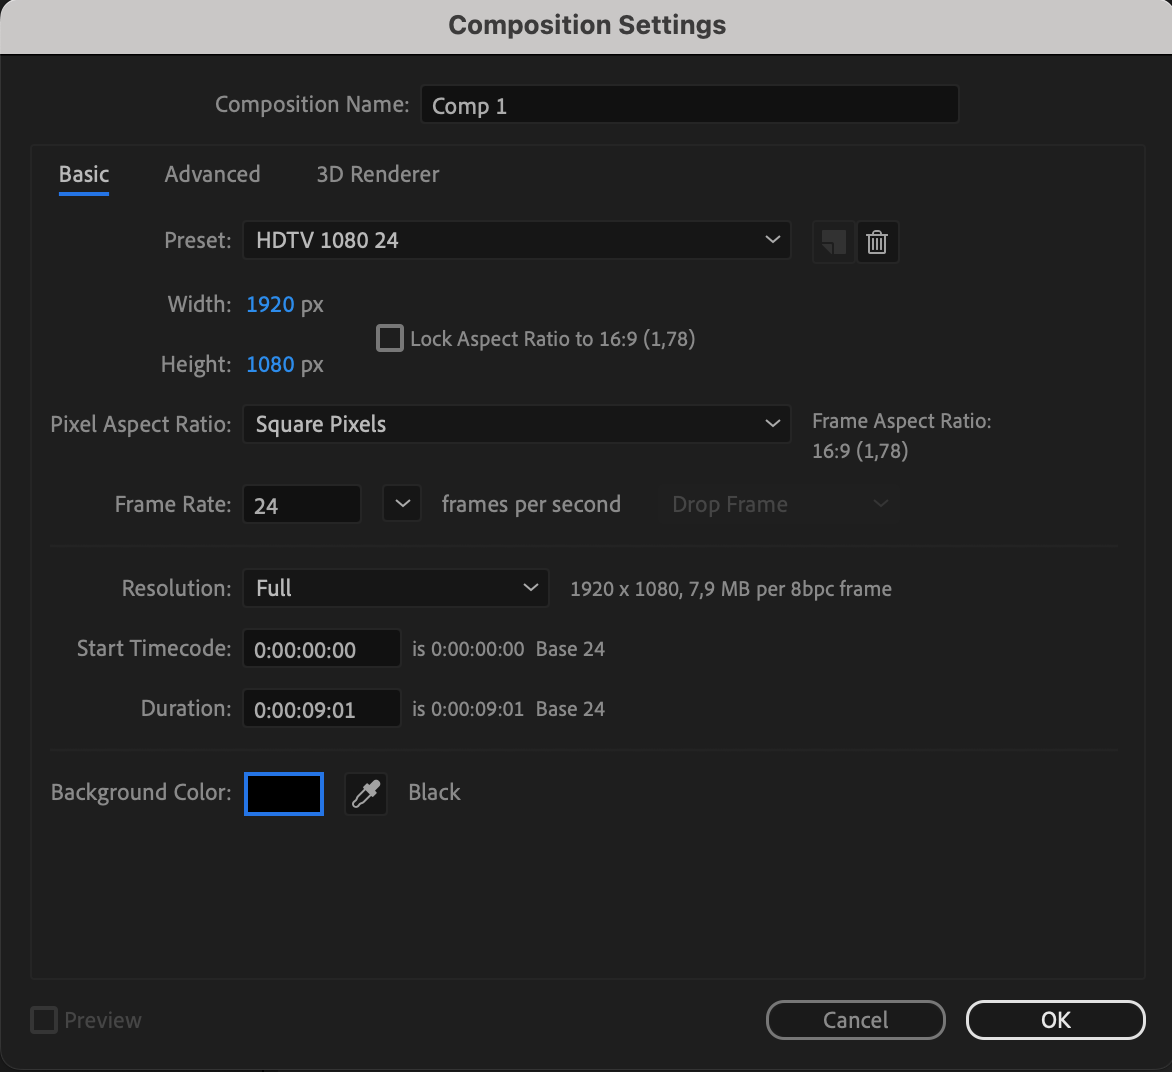
Step 1: Set Up Composition
Create a new composition and set the parameters. Make sure to set the background color to black.

Get 10% off when you subscribe to our newsletter

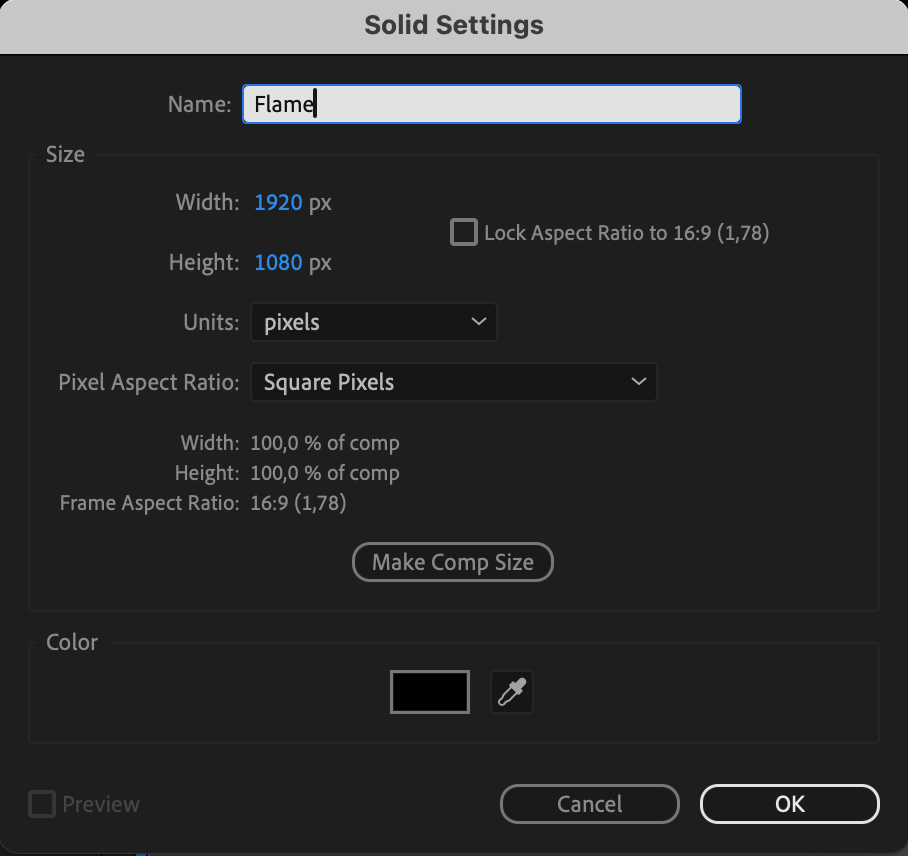
Step 2: Add Solid Layer
Create a new Solid layer, adjusting the settings and selecting a black color.

Get 10% off when you subscribe to our newsletter

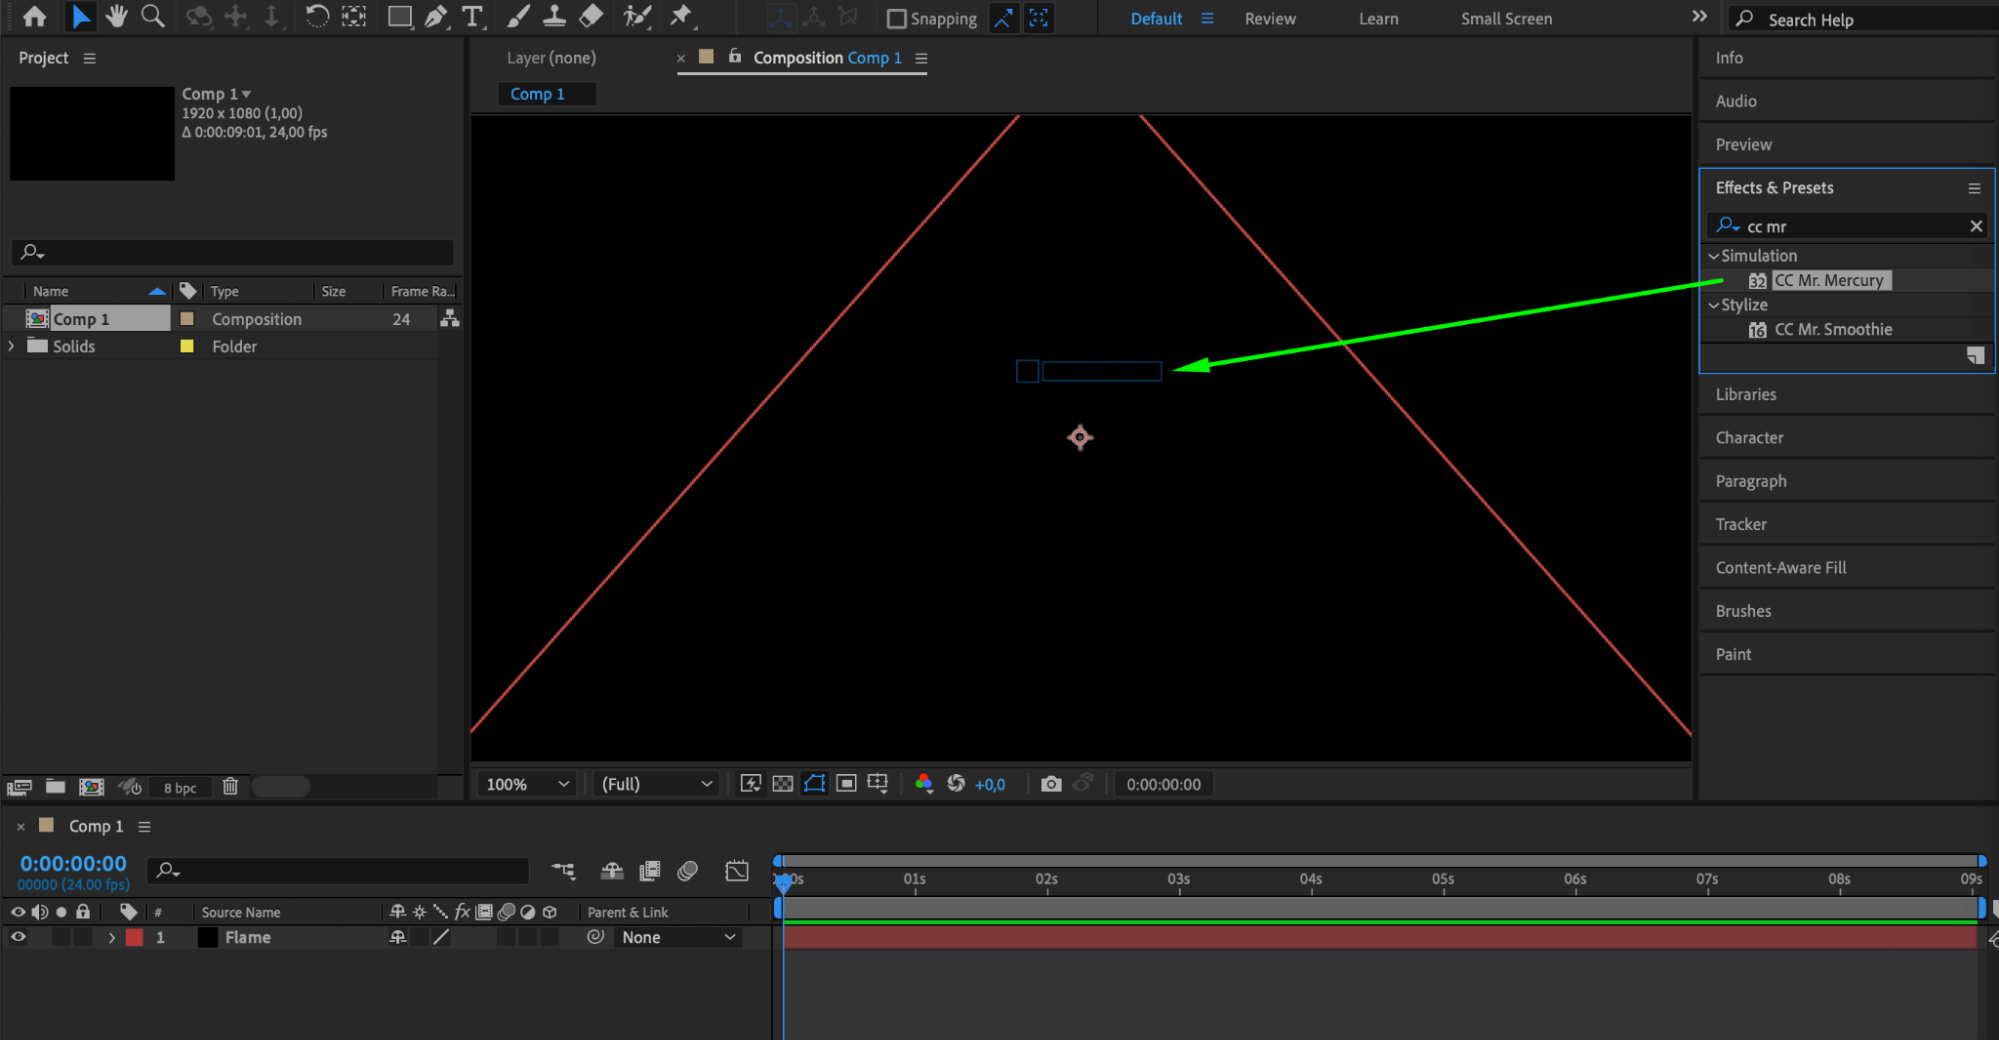
Step 3: Apply CC Mr. Mercury Effect
Navigate to the Effects & Presets panel and apply the CC Mr. Mercury effect to your layer.
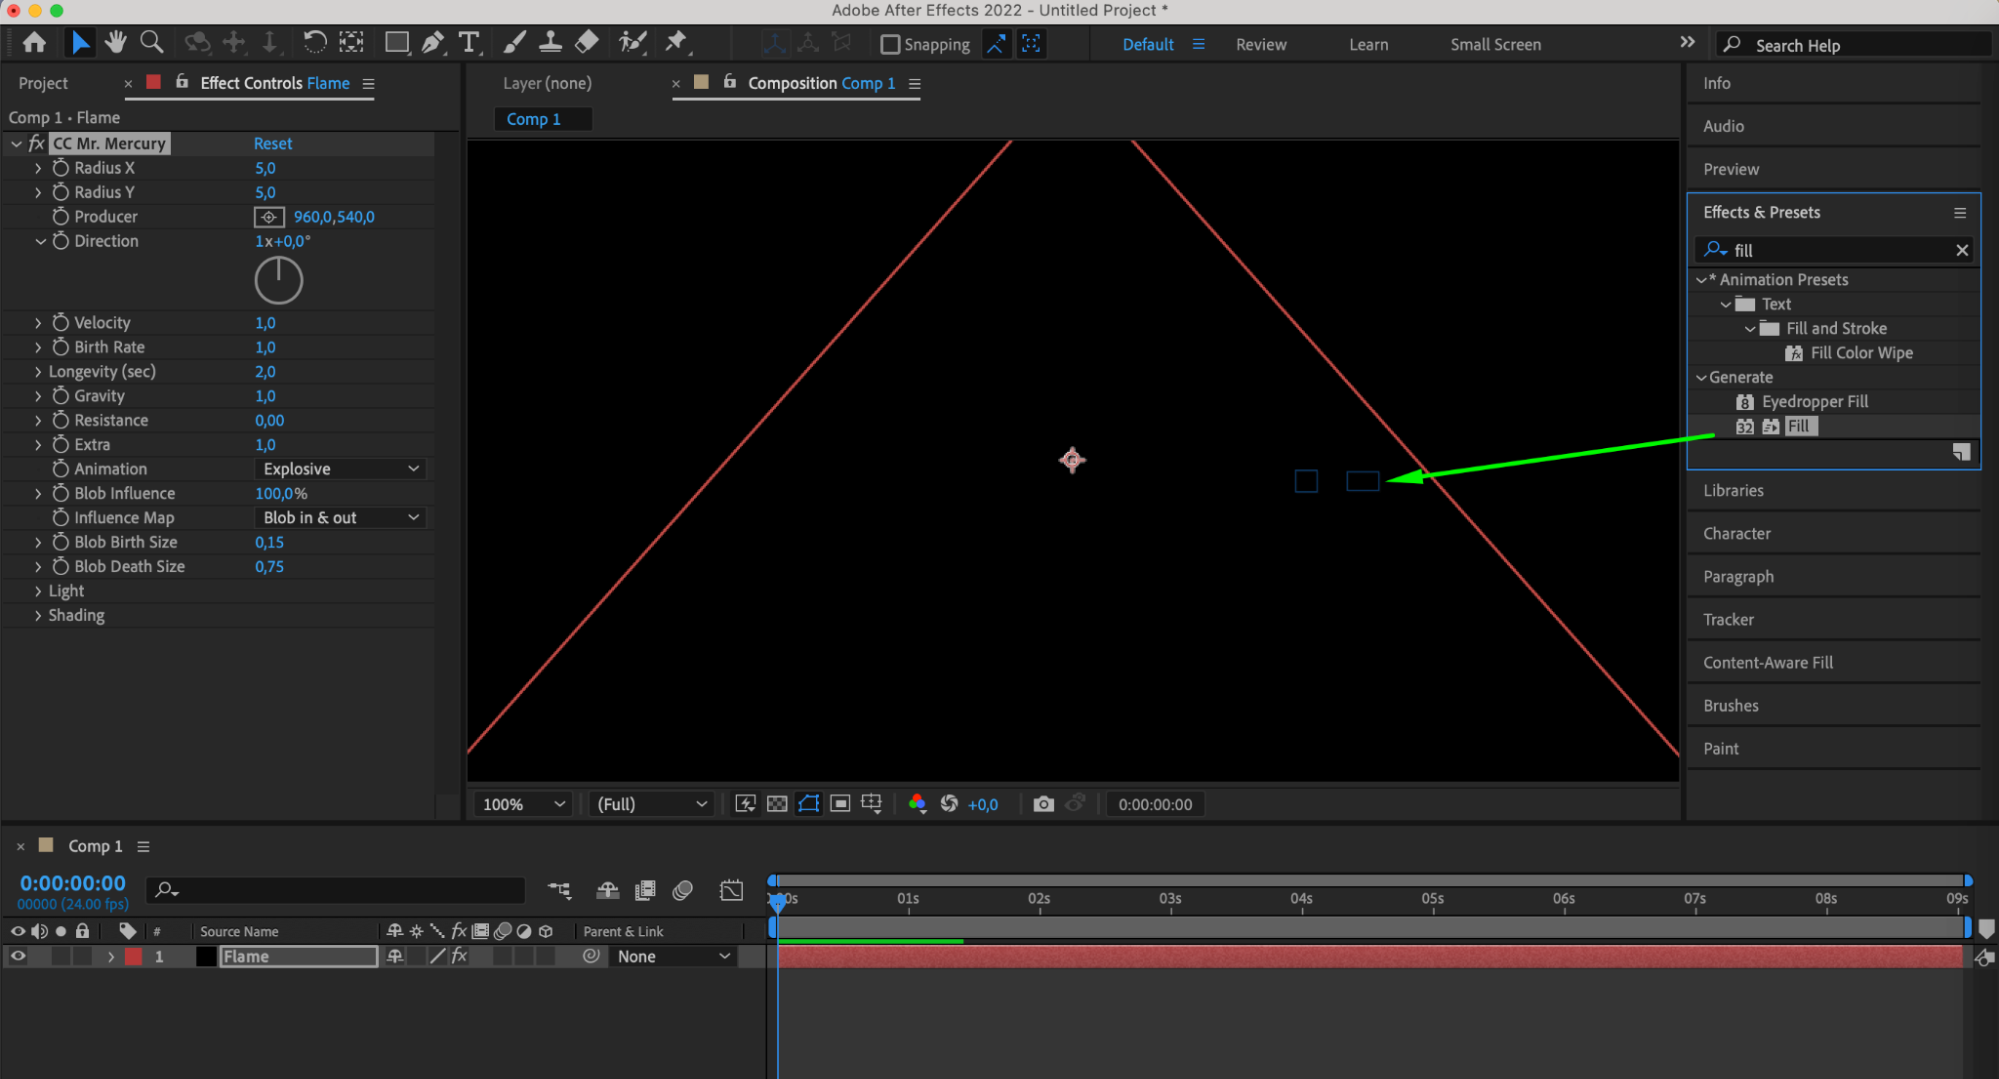
Step 4: Apply Fill Effect
Add the Fill effect to your layer.
Step 5: Customize CC Mr. Mercury Effect
Move the timeline indicator forward, choose an orange color, and select the fire animation type. Adjust parameters like Radius X and Y. Use the Selective Tool to move the Anchor Point down.
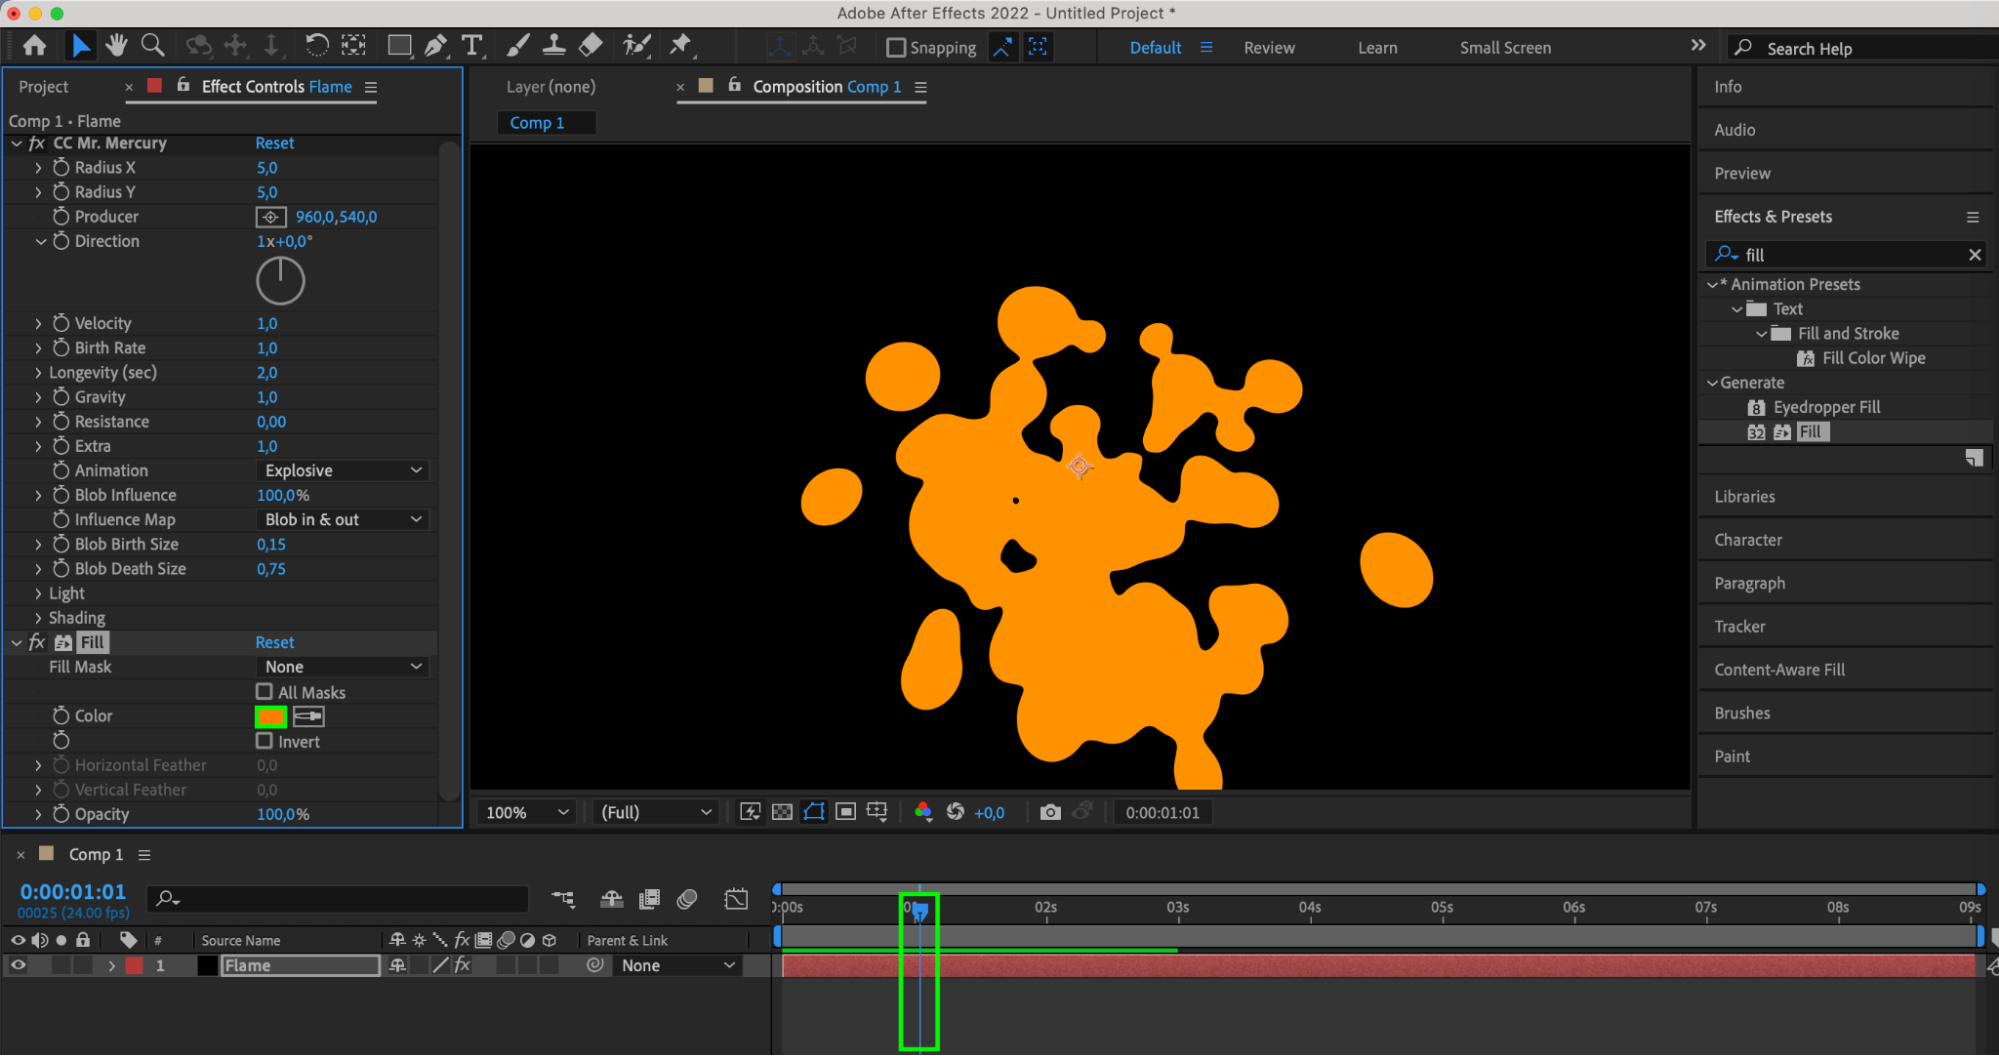
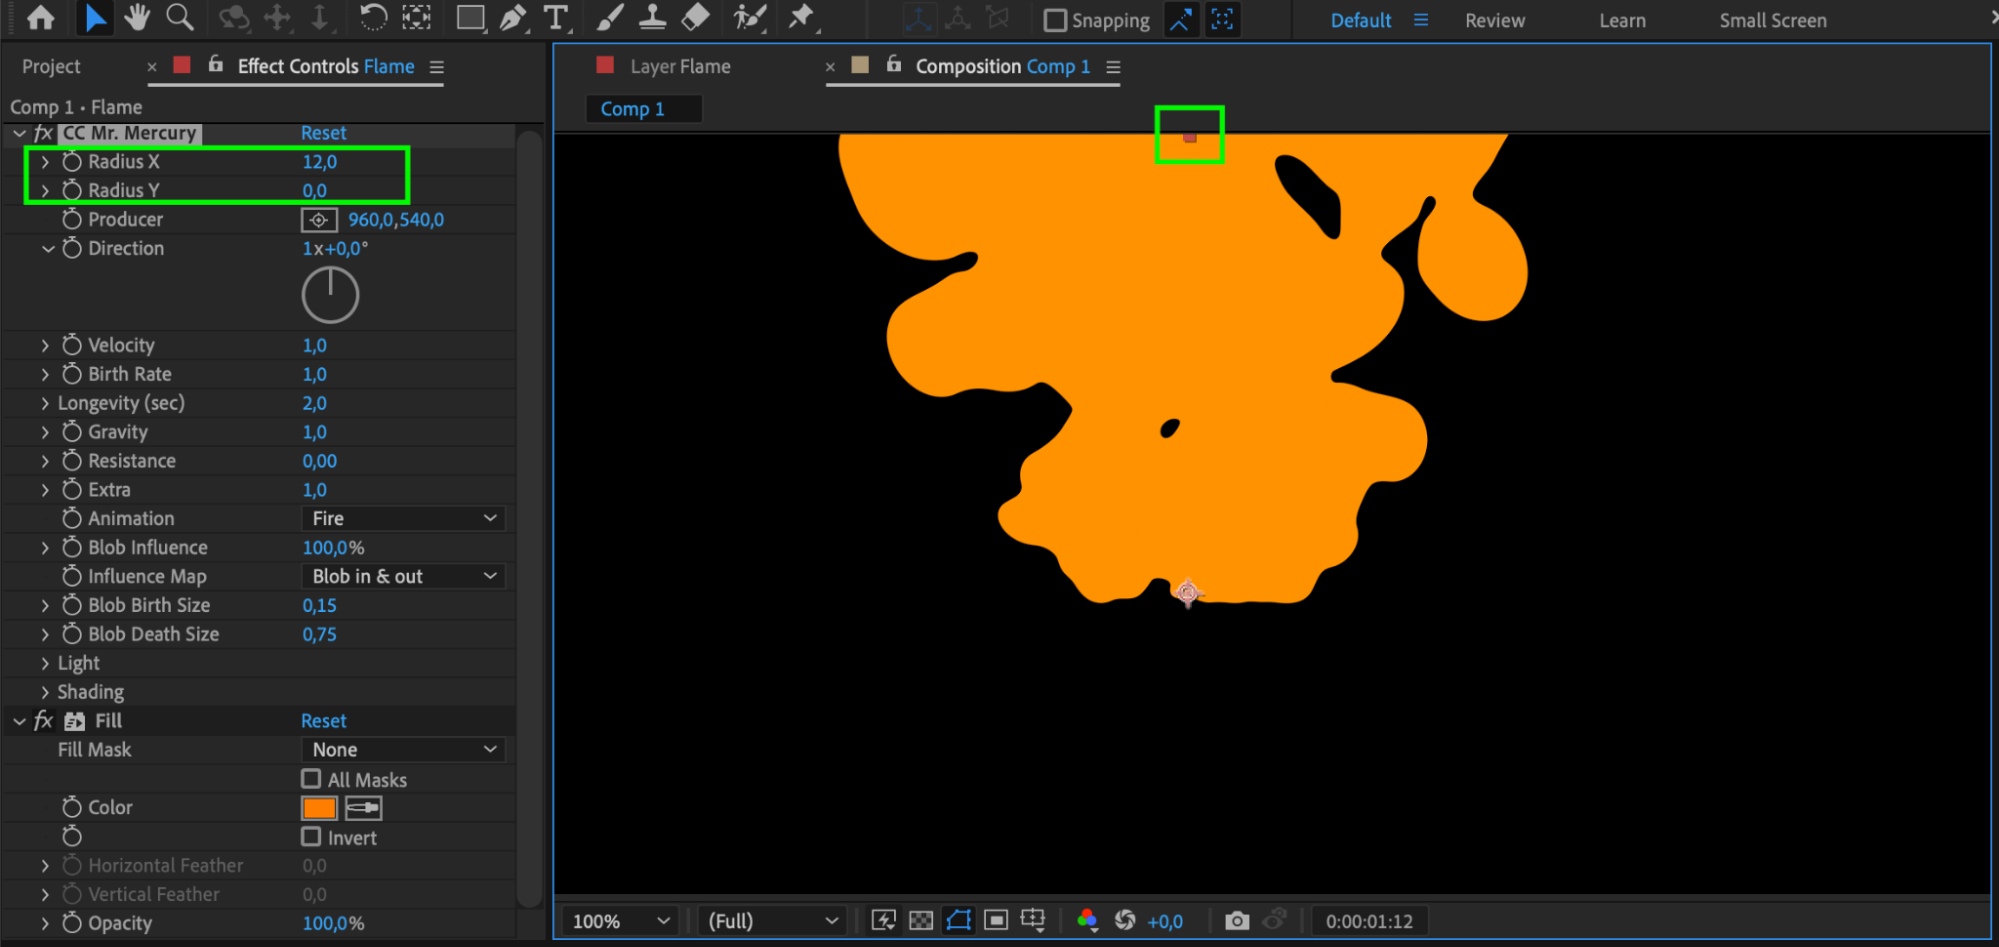
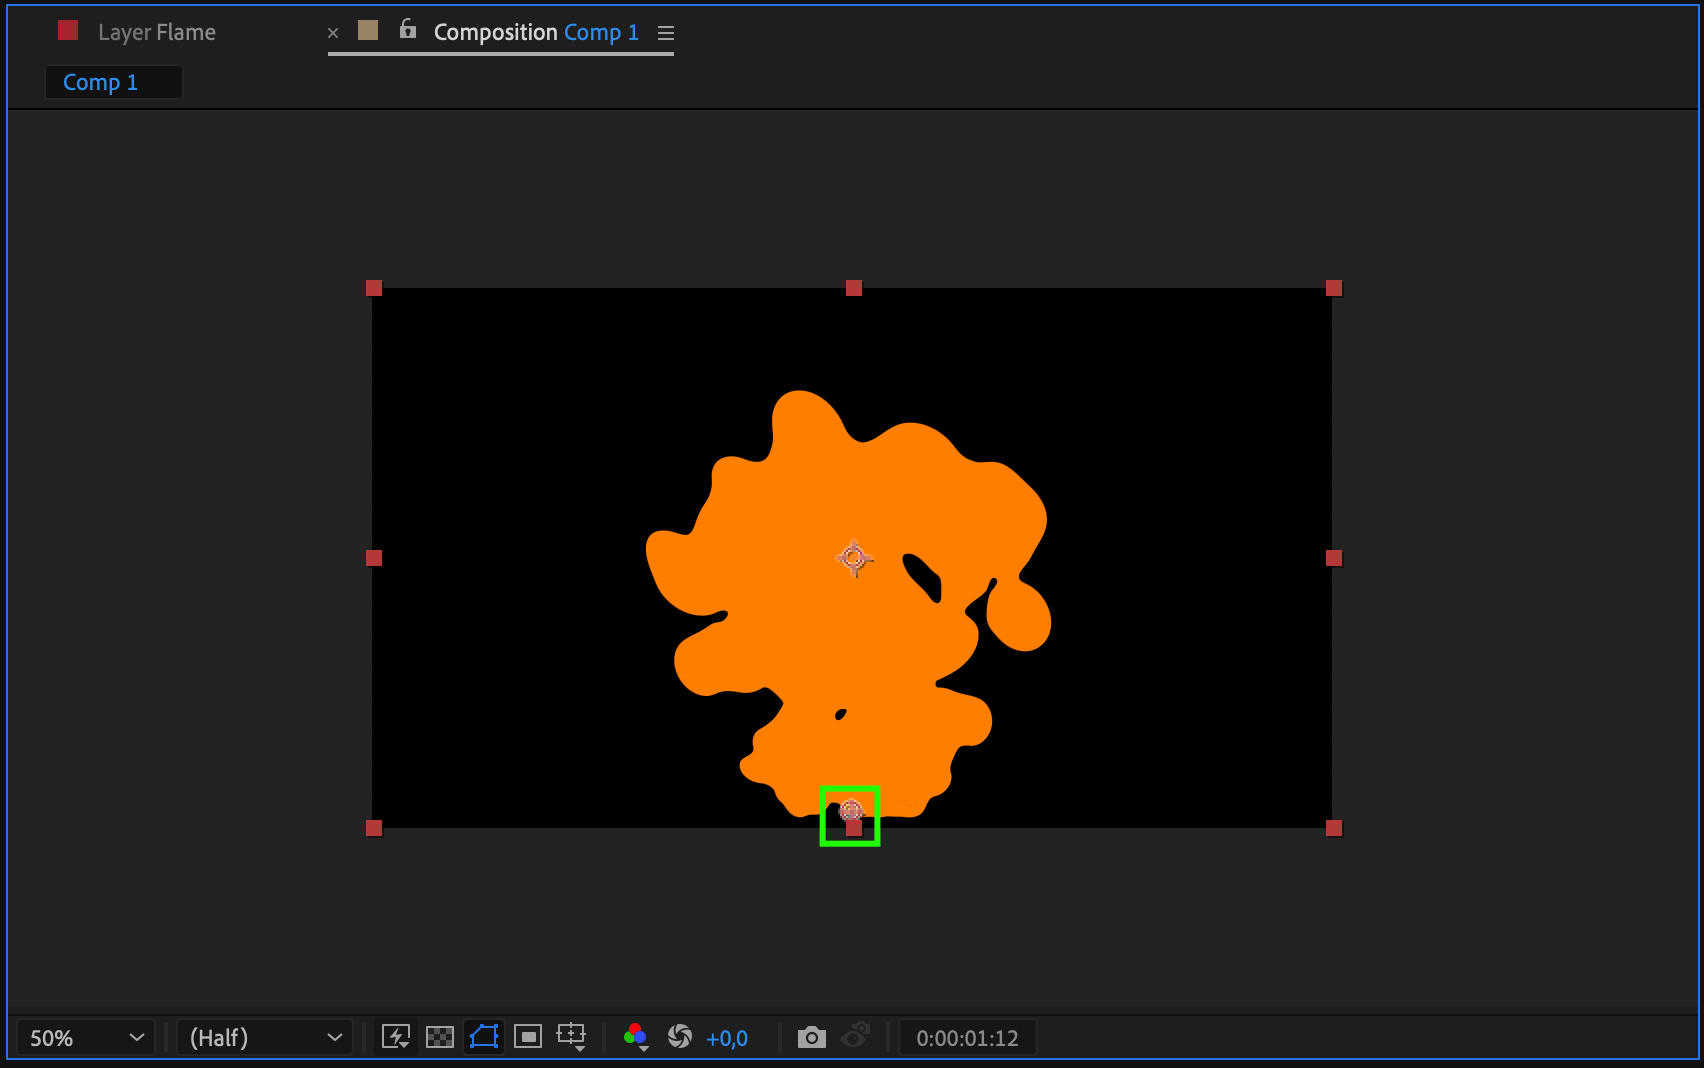
Step 6: Further CC Mr. Mercury Adjustments
Fine-tune the remaining CC Mr. Mercury effect parameters.
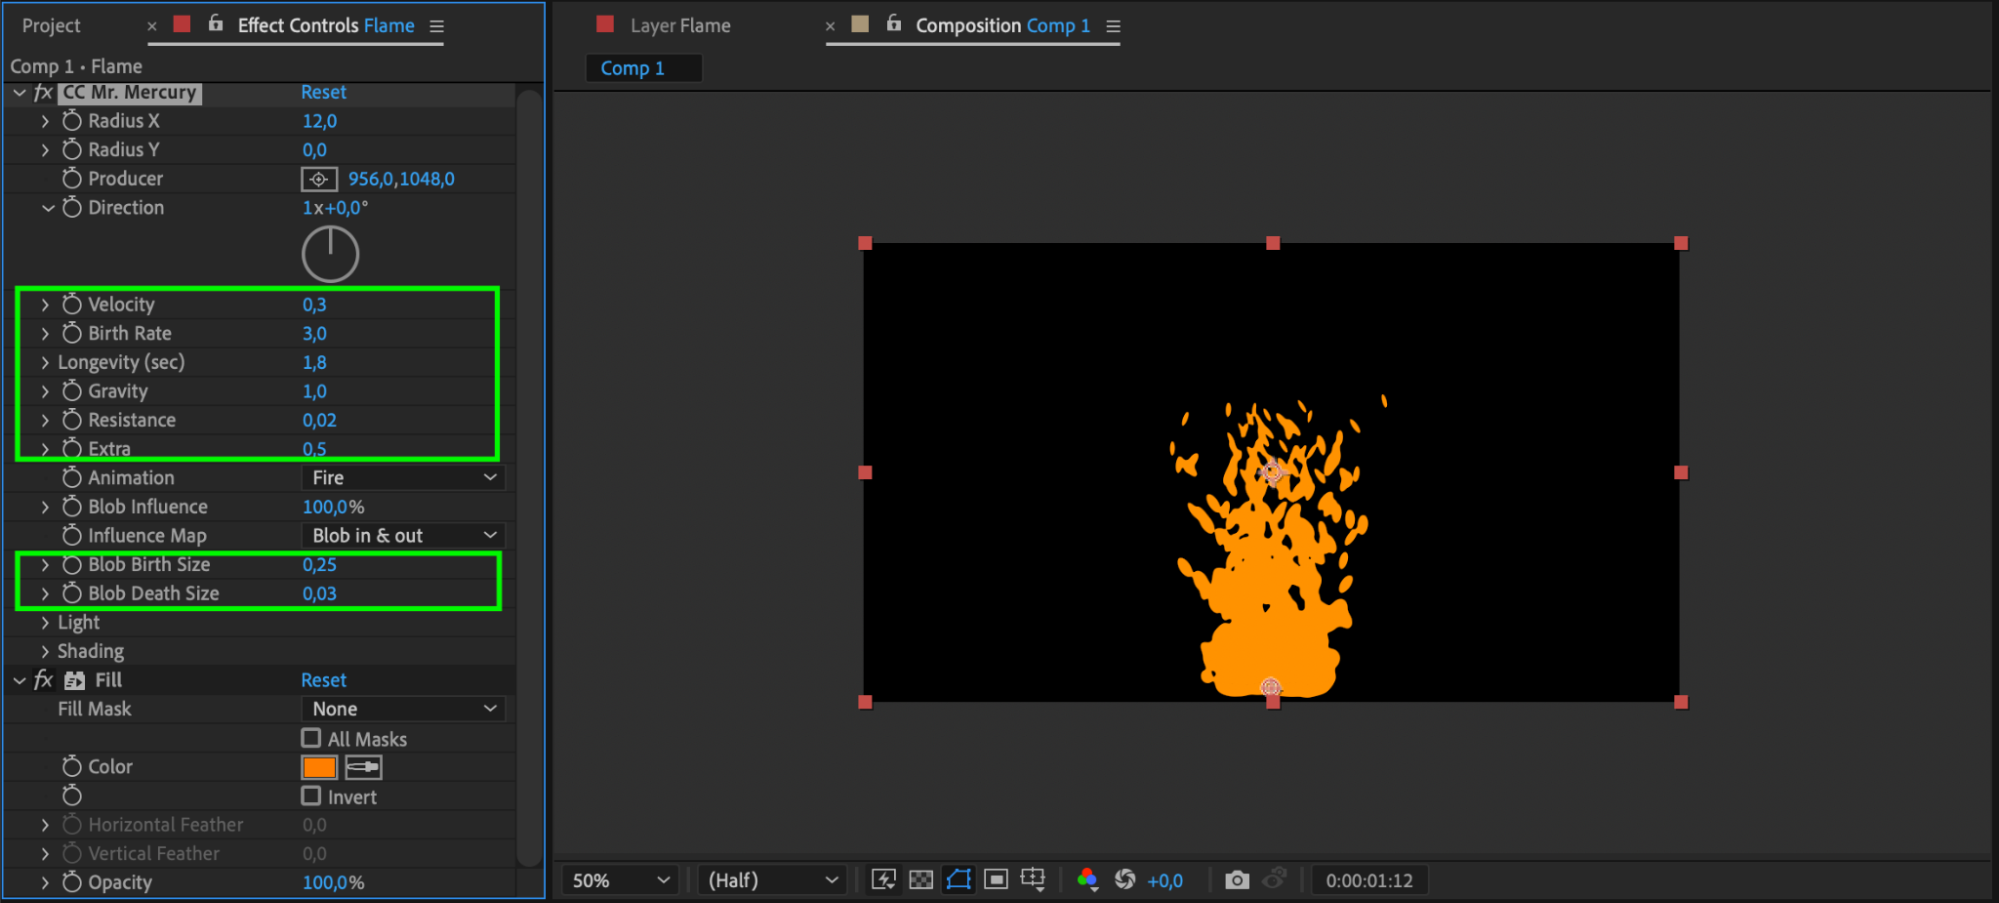
Step 7: Apply Fast Box Blur
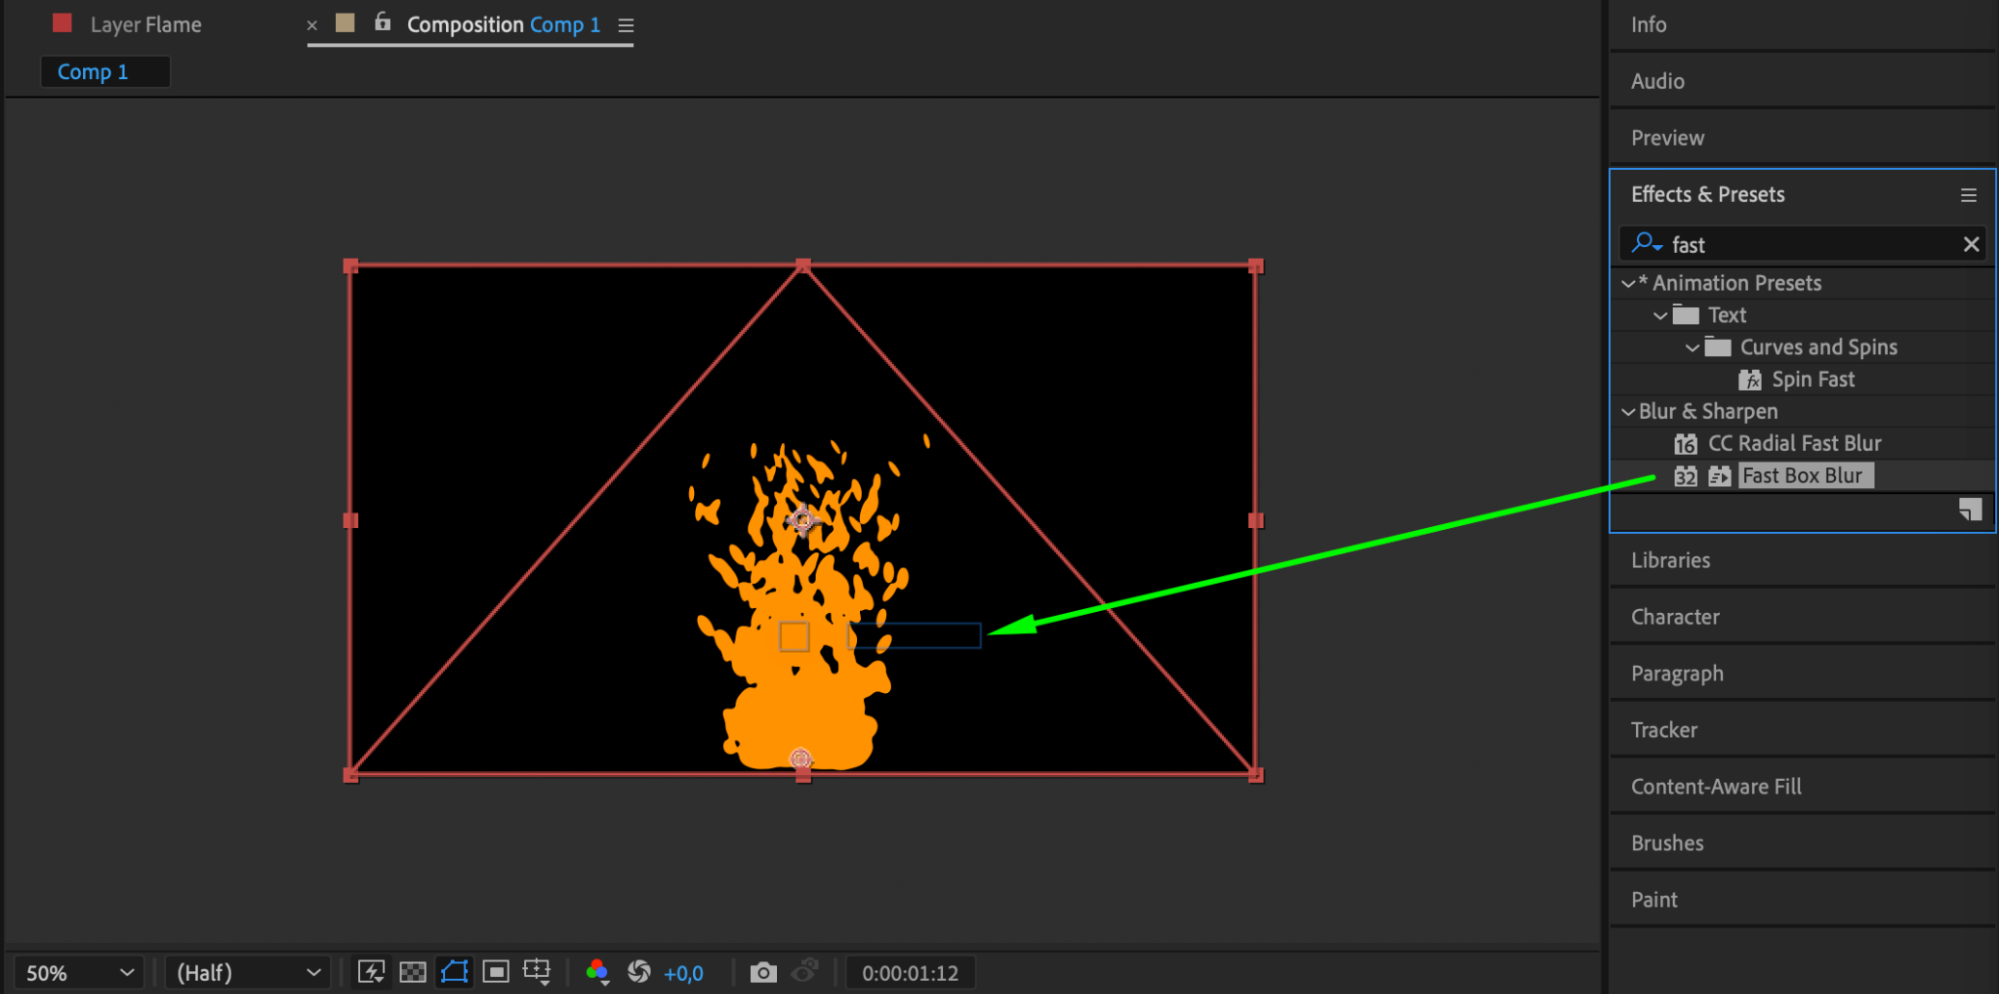
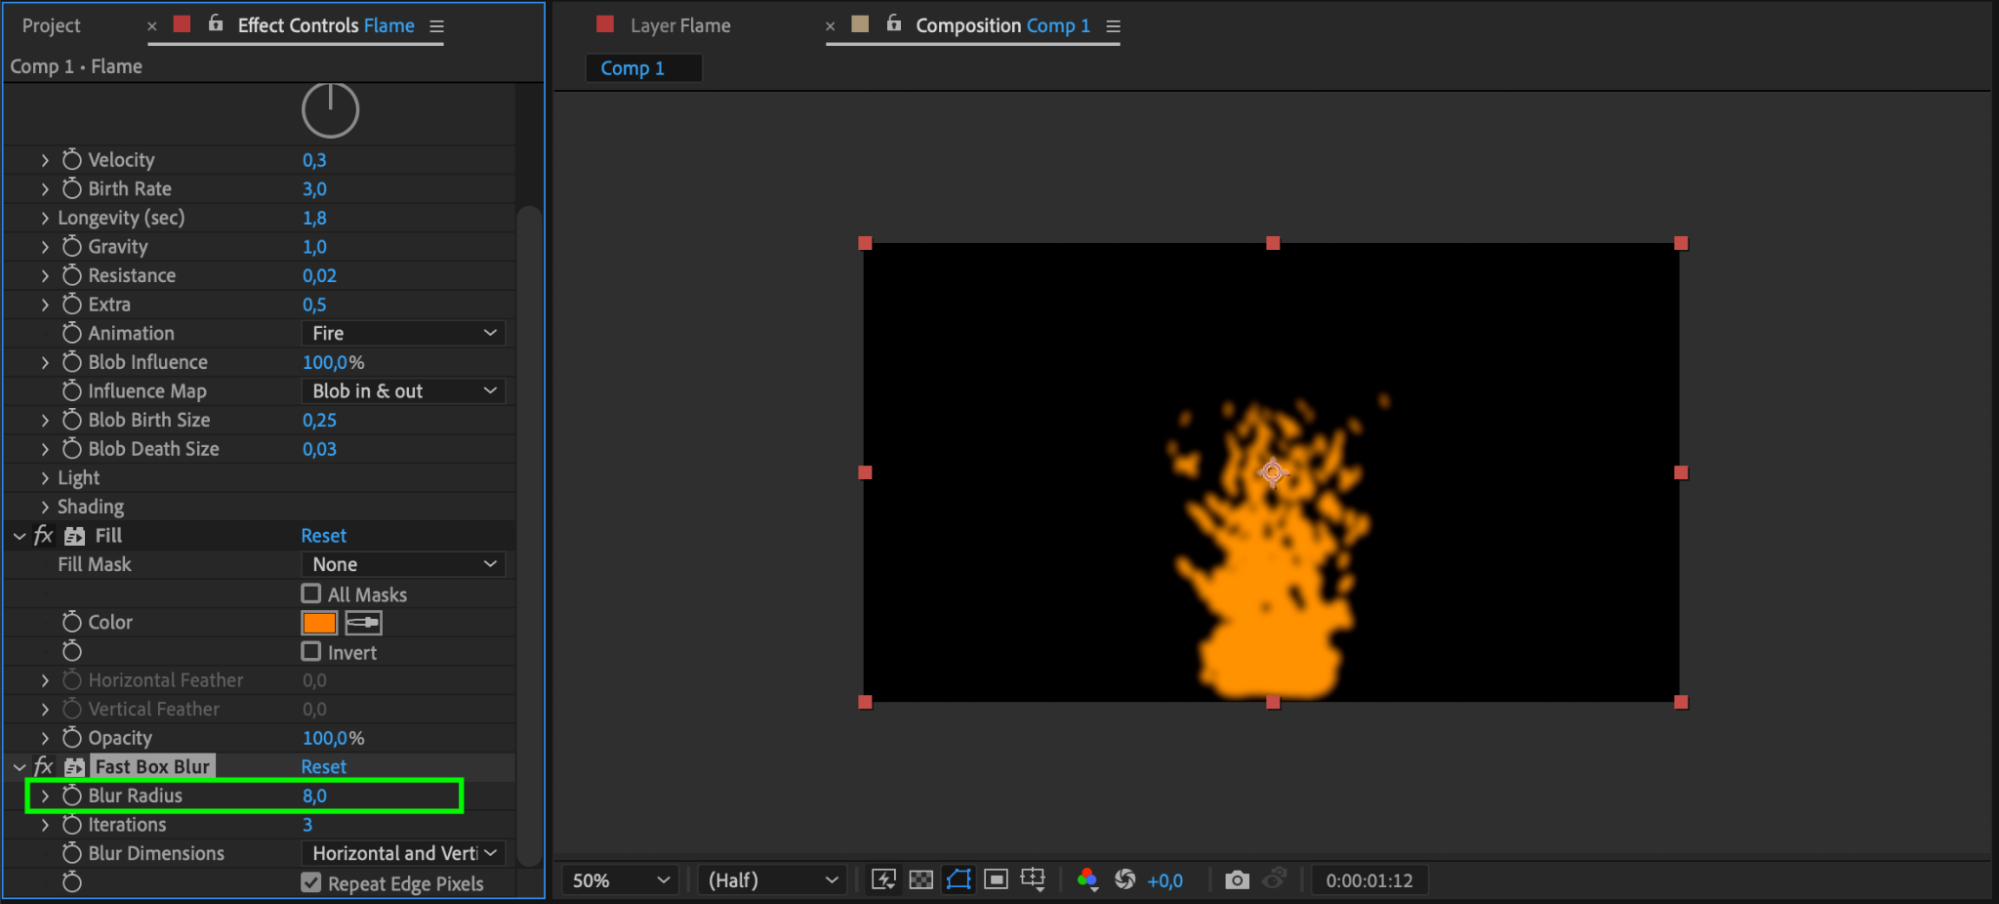
Add the Fast Box Blur effect and set the Blur Radius to 8.
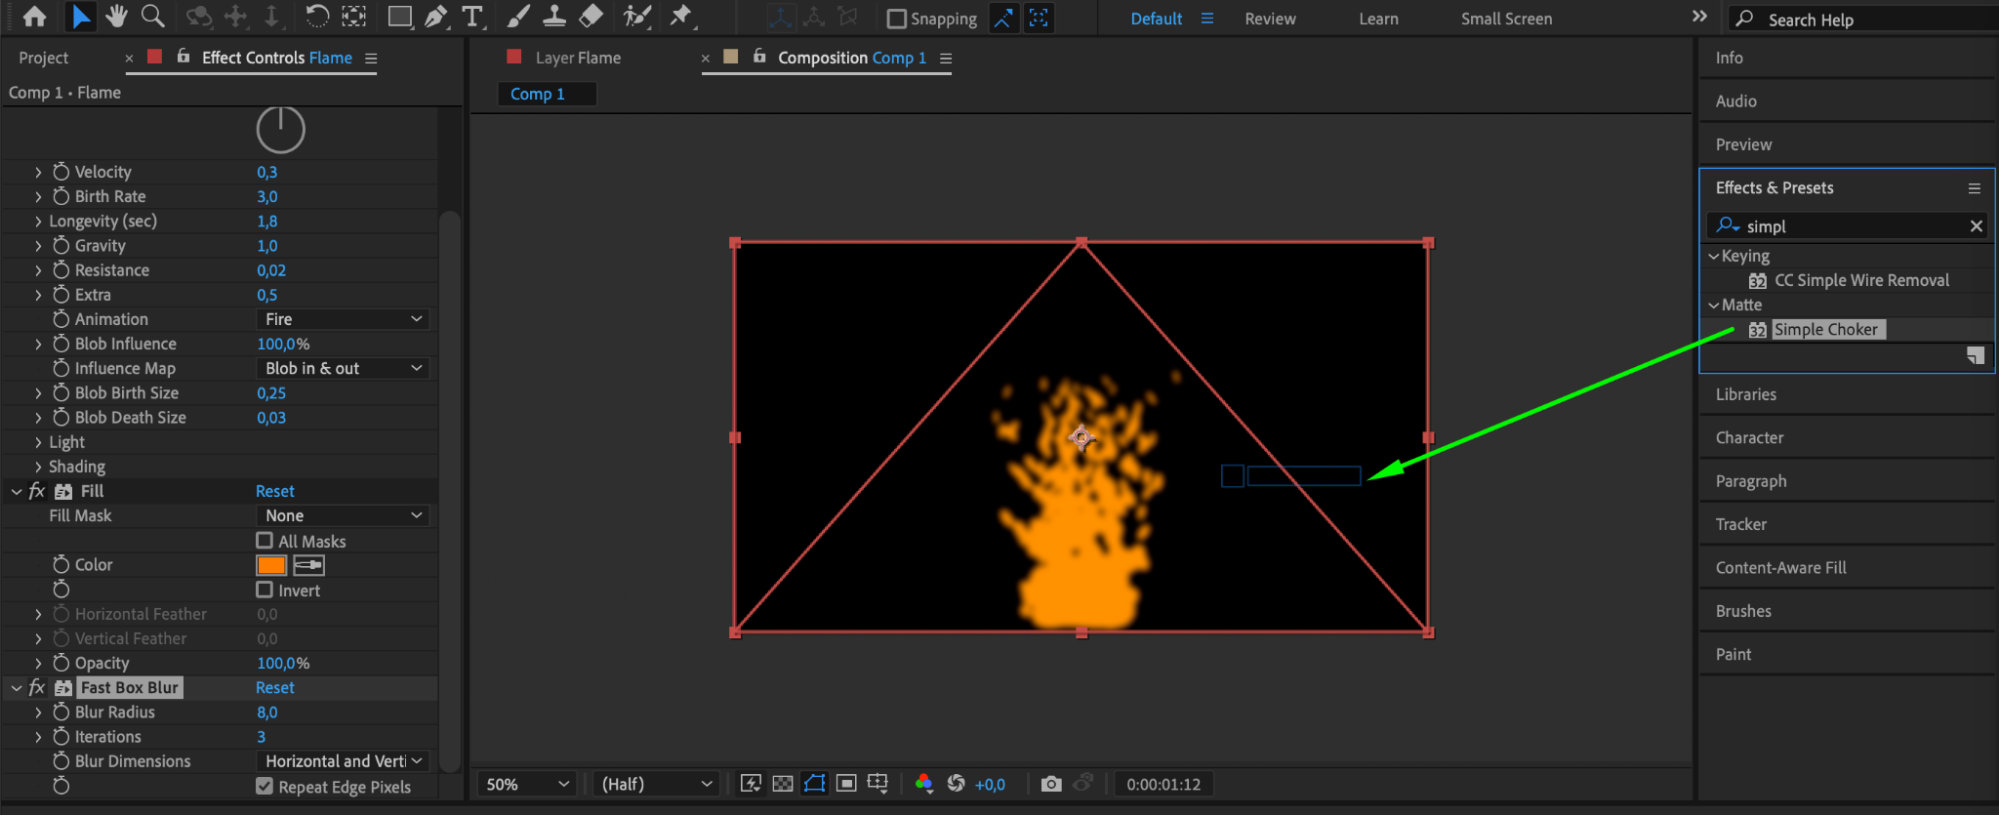
Step 8: Add Simple Choker
Get 10% off when you subscribe to our newsletter

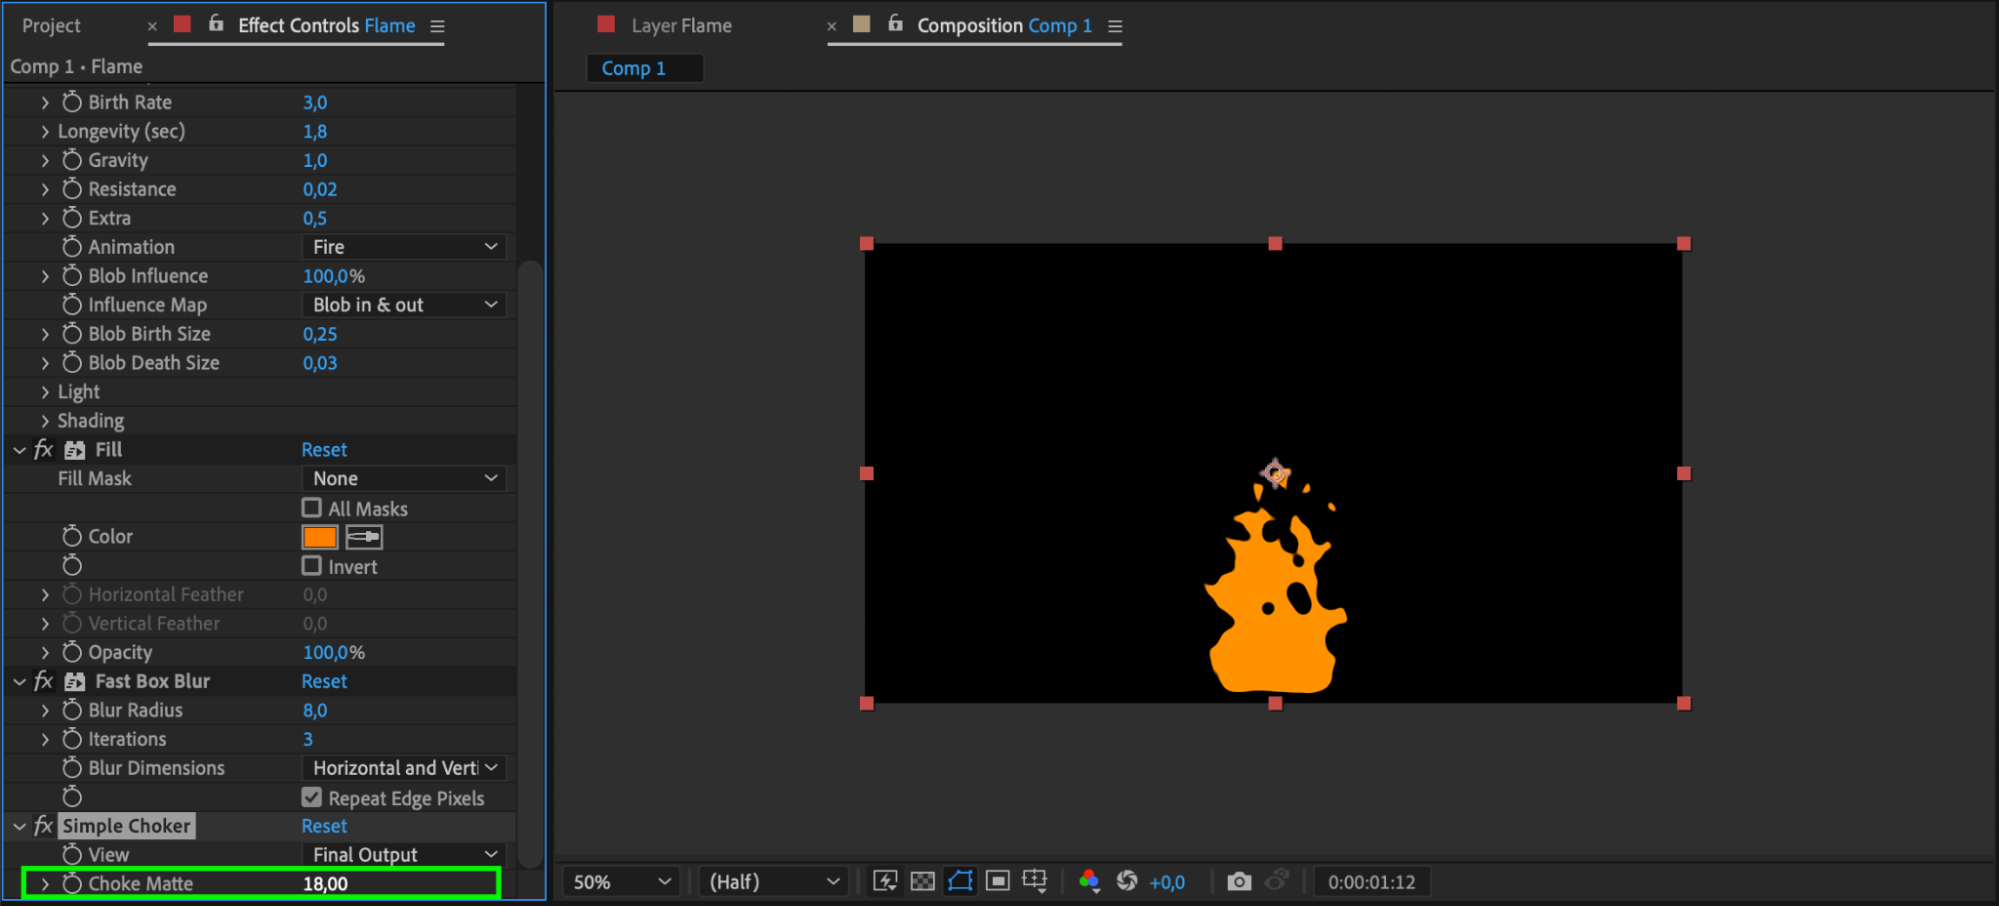
Apply the Simple Choker effect and set Choke Matte to 18.
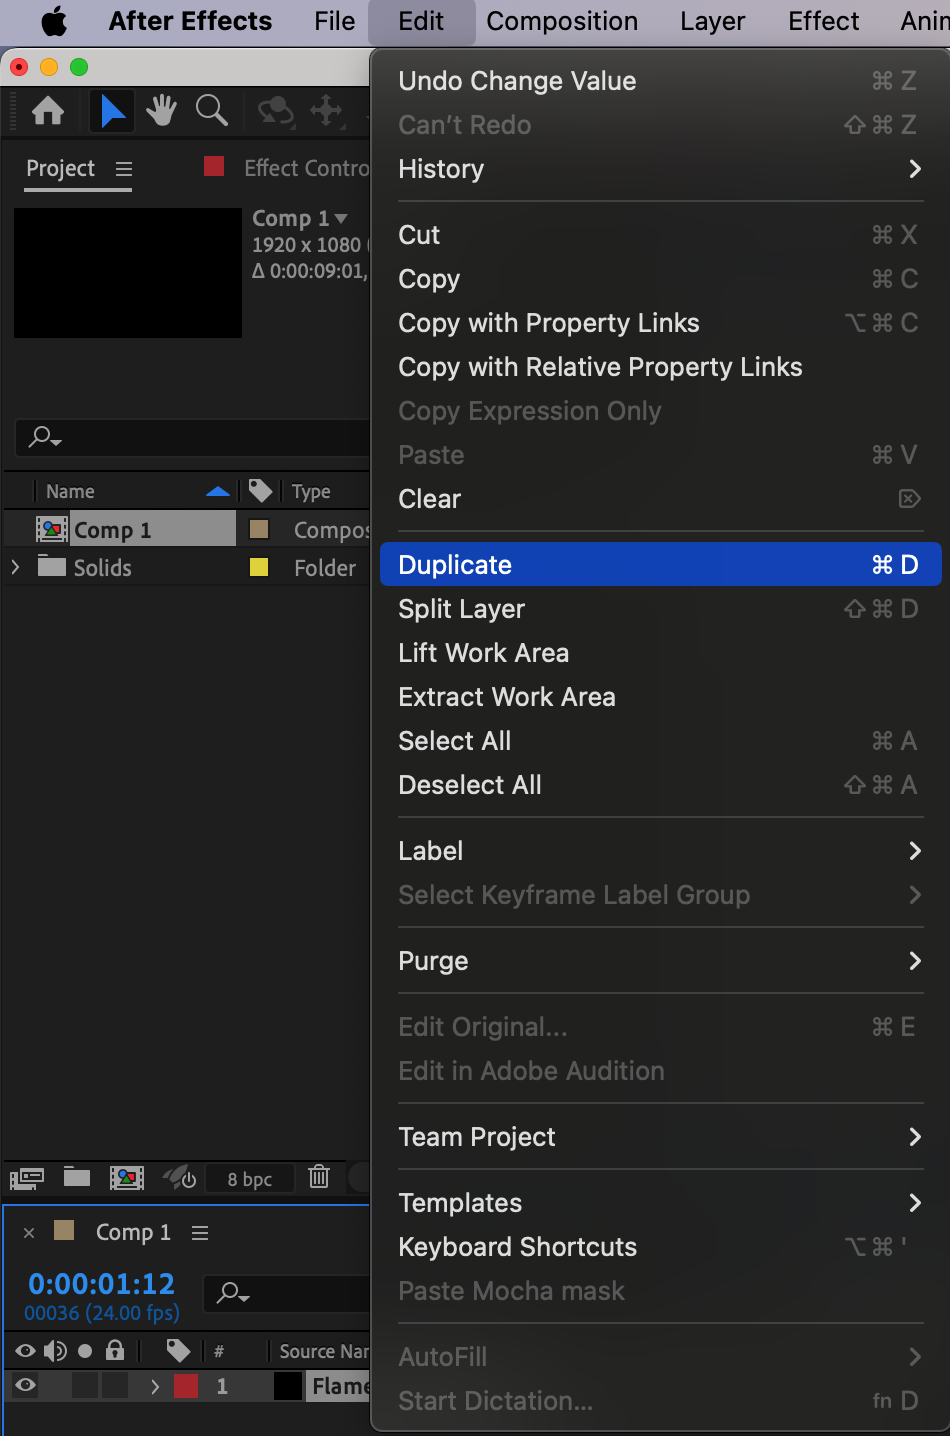
Step 9: Duplicate Layer
Duplicate the layer.
Get 10% off when you subscribe to our newsletter

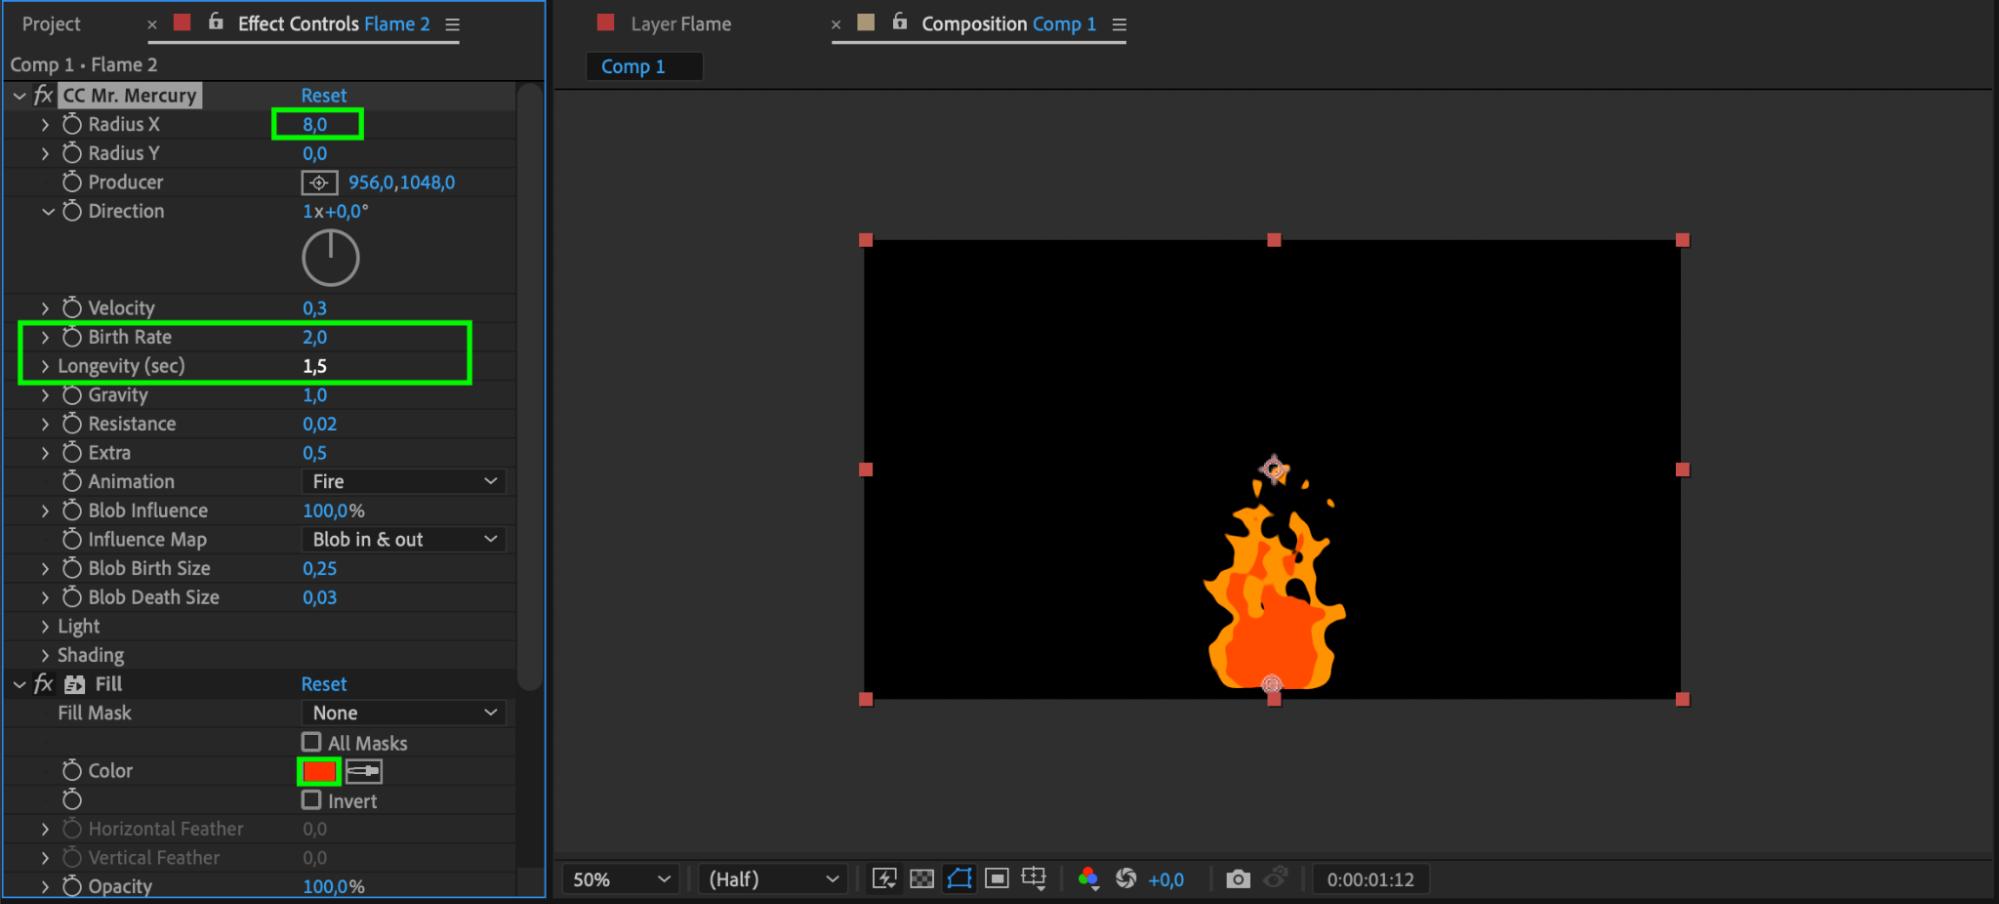
Step 10: Adjust Duplicate Layer
Modify parameters such as Radius X, Birth rate, Longevity, and color for the duplicated layer.
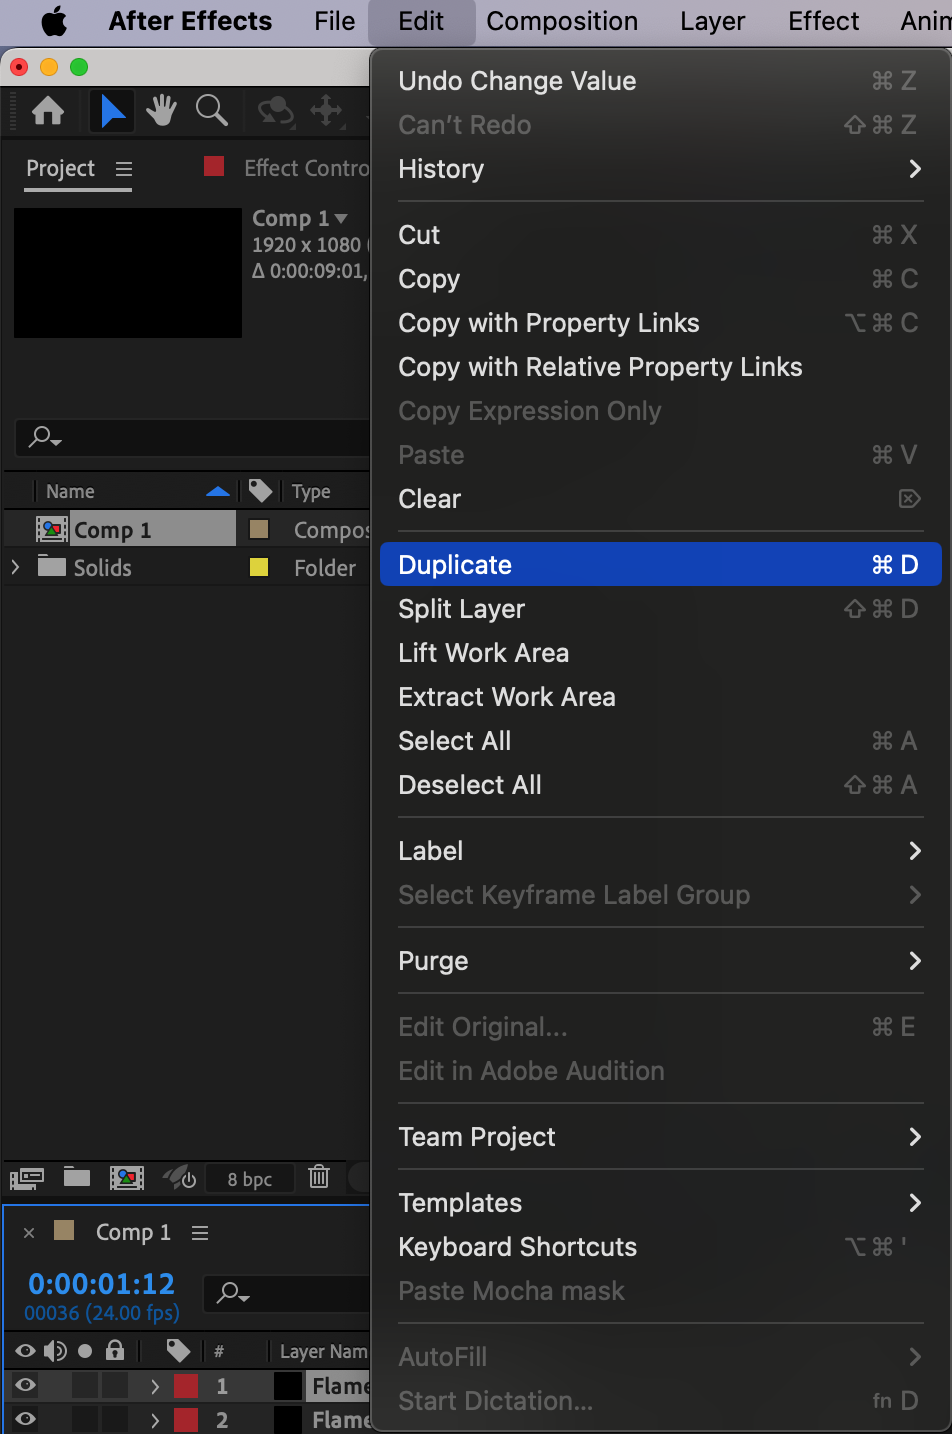
Step 11: Duplicate Again
Create another duplicate of the layer.
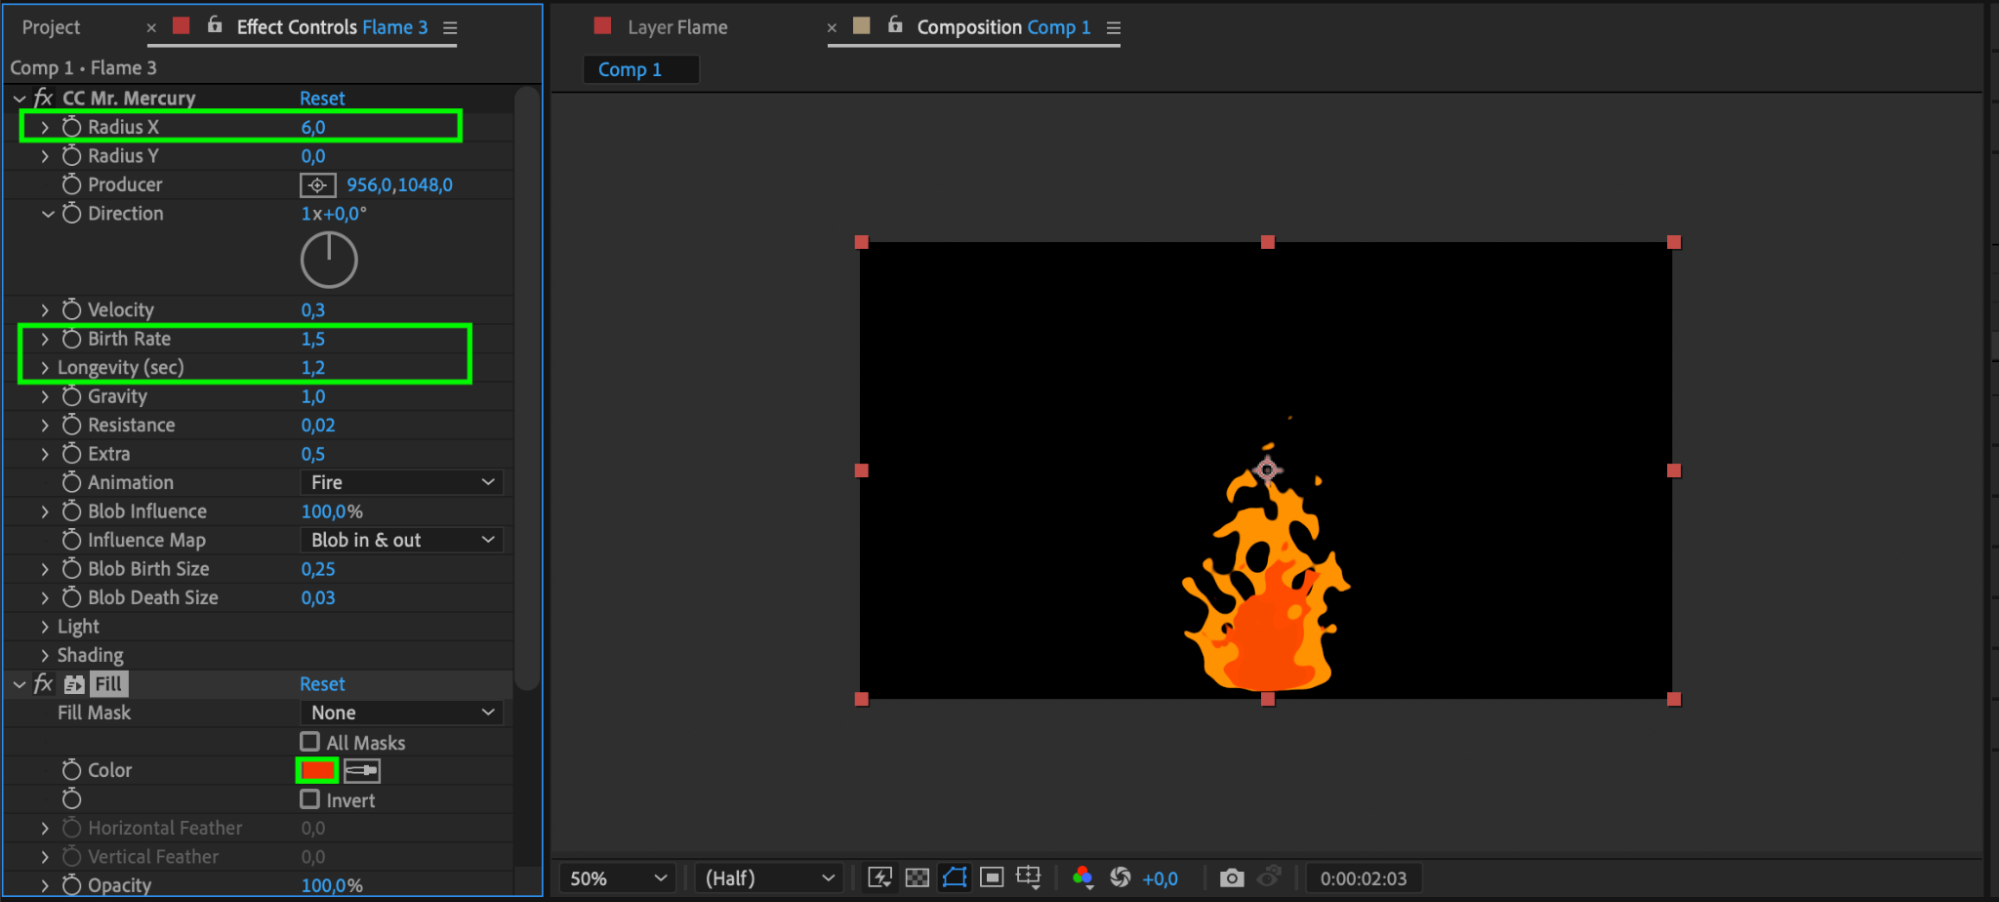
Step 12: Adjust Second Duplicate
Modify parameters such as Radius X, Birth rate, Longevity, and color for the duplicated layer.
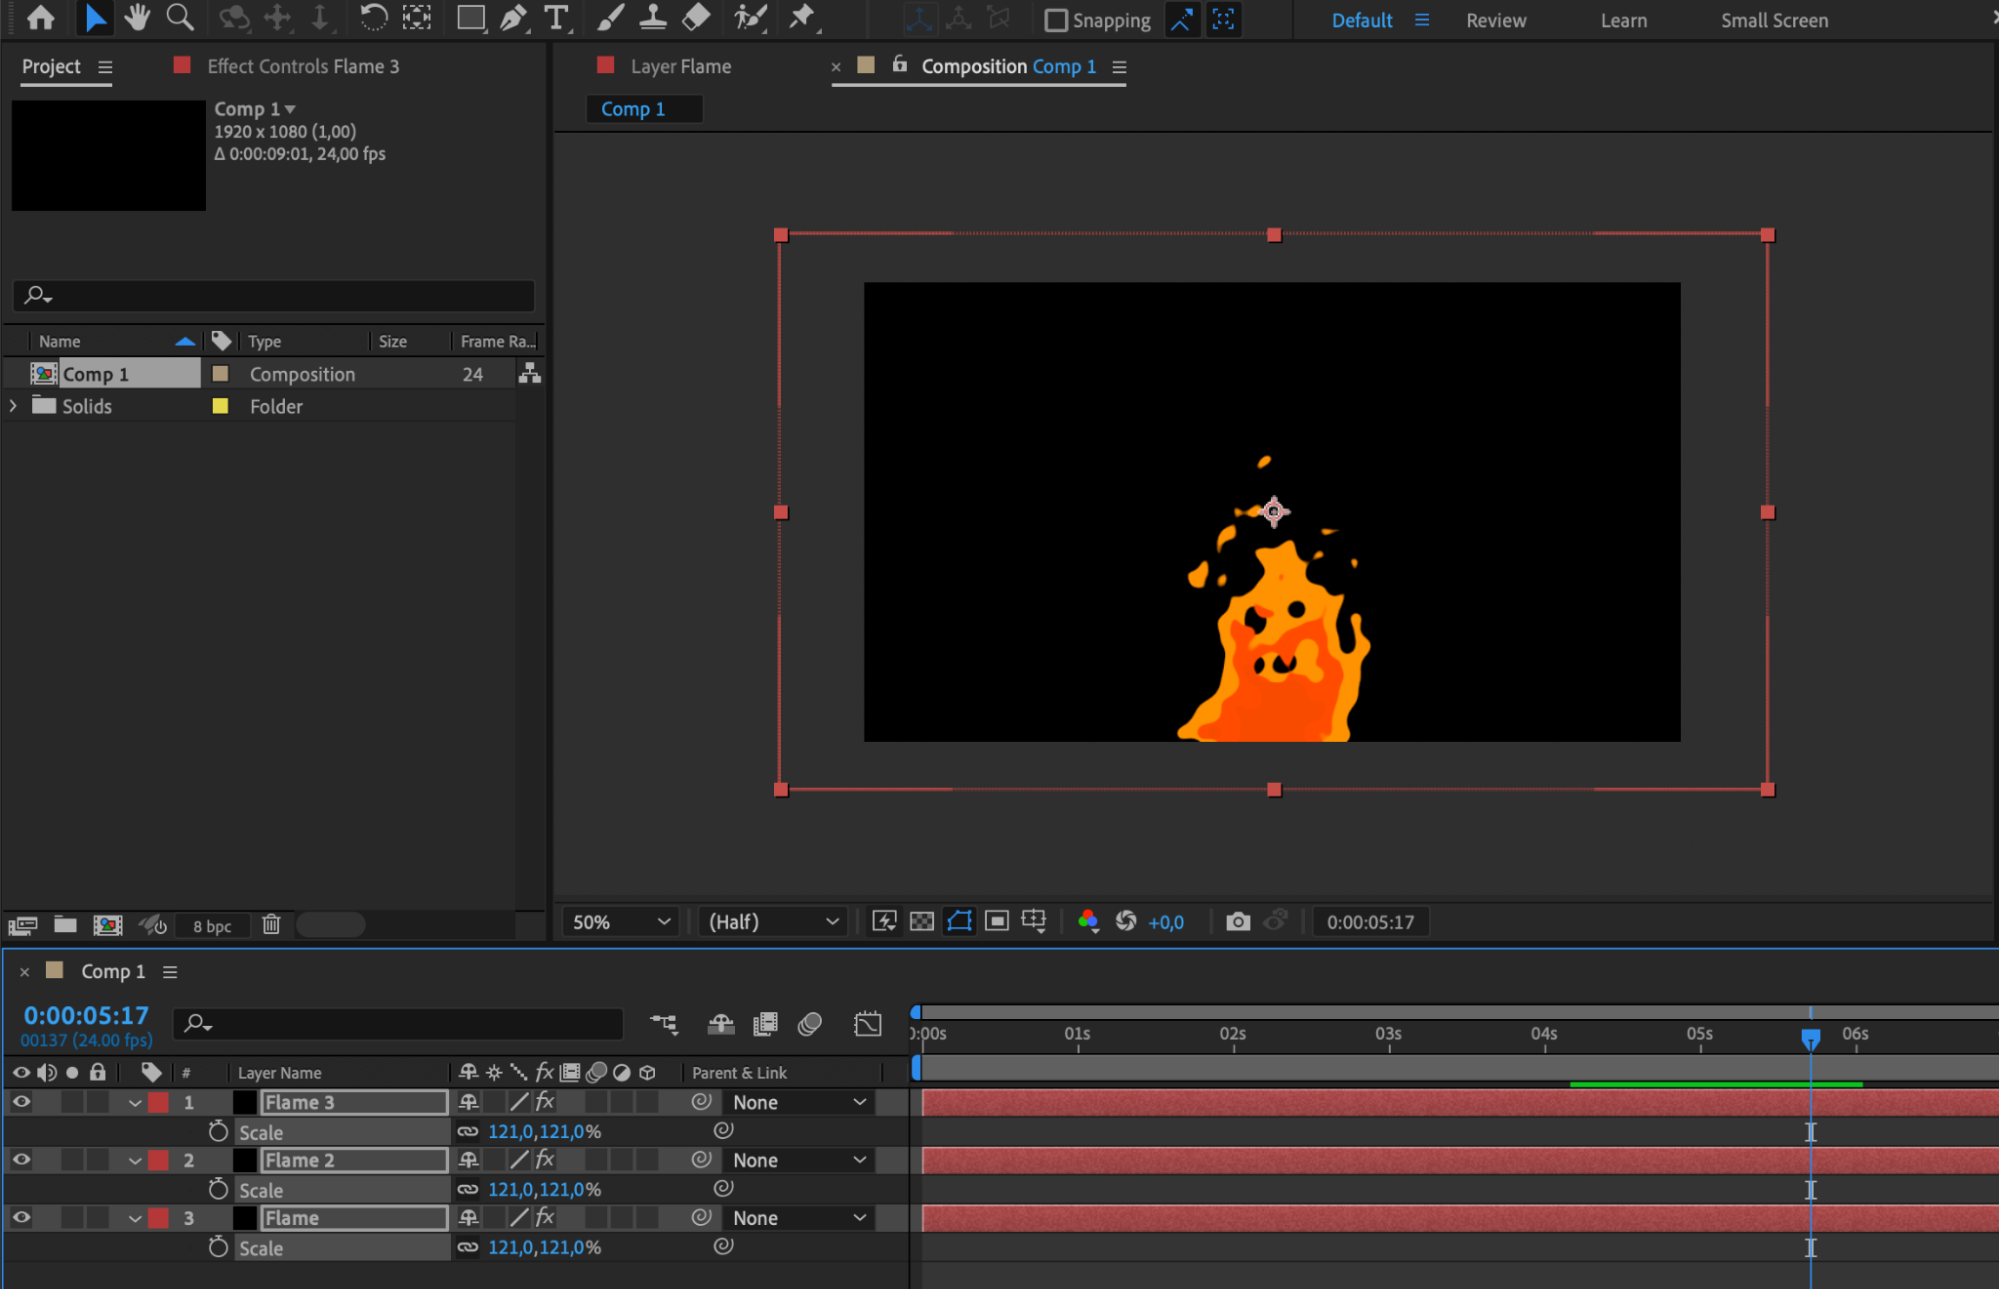
Step 13: Scale Layers
Select all three layers, press ‘S’ to open the Scale parameter, and increase the value to 121.
Get 10% off when you subscribe to our newsletter

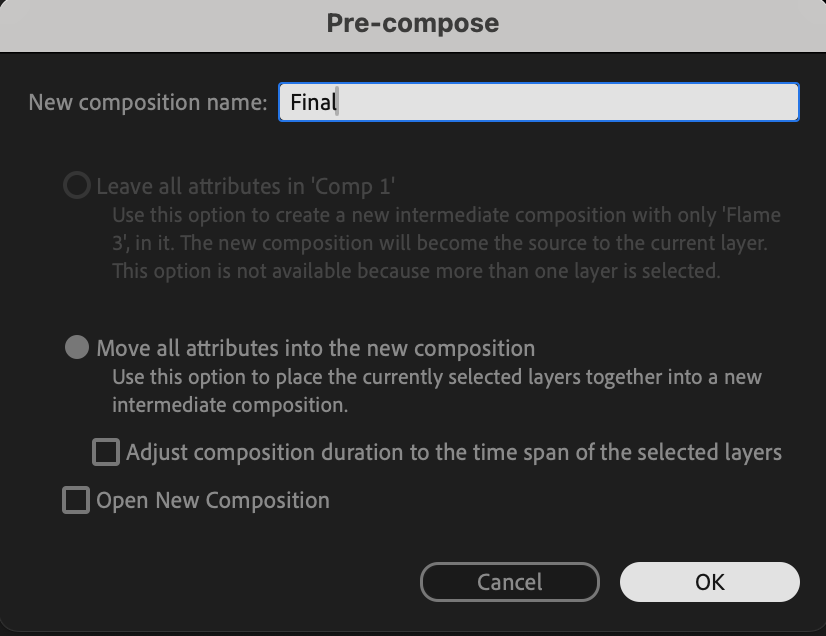
Step 14: Create Pre-Compose
Create a pre-composition with the three scaled layers.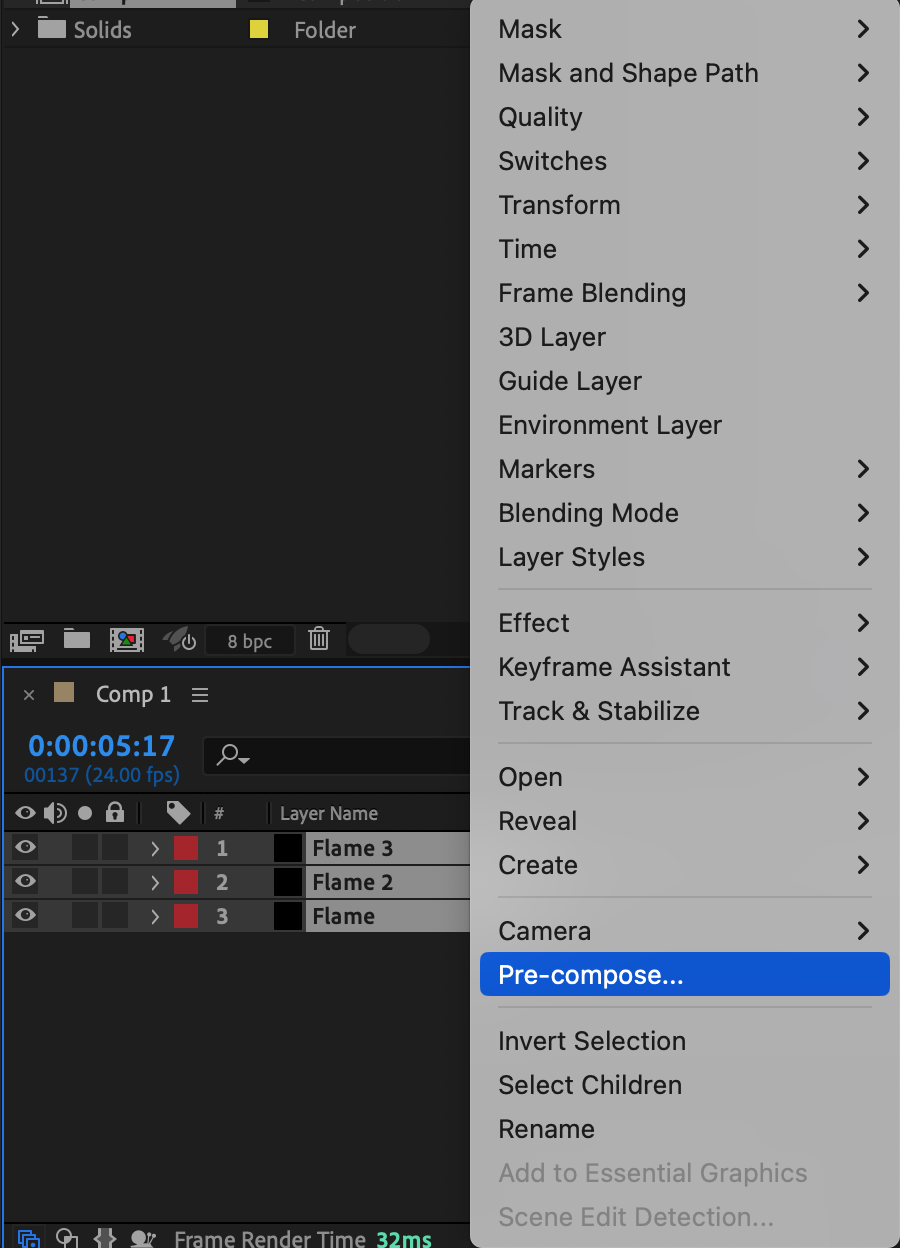
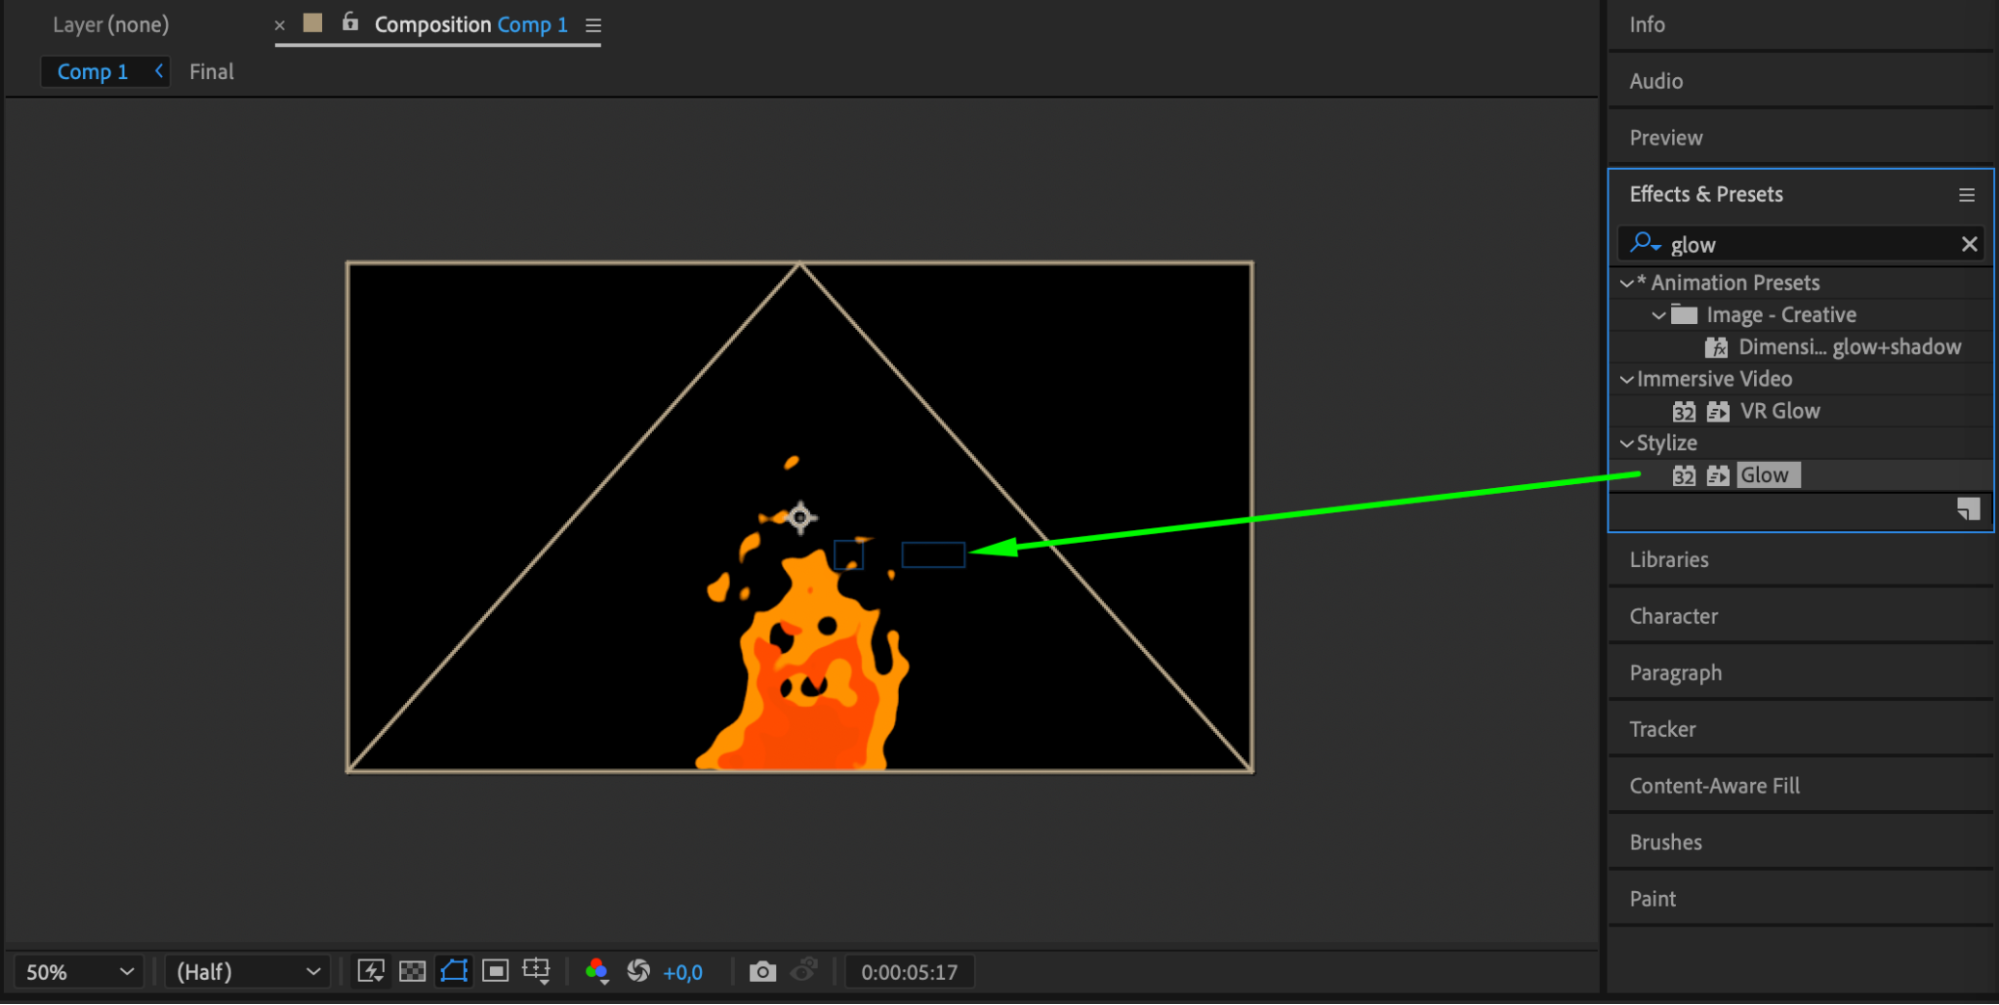
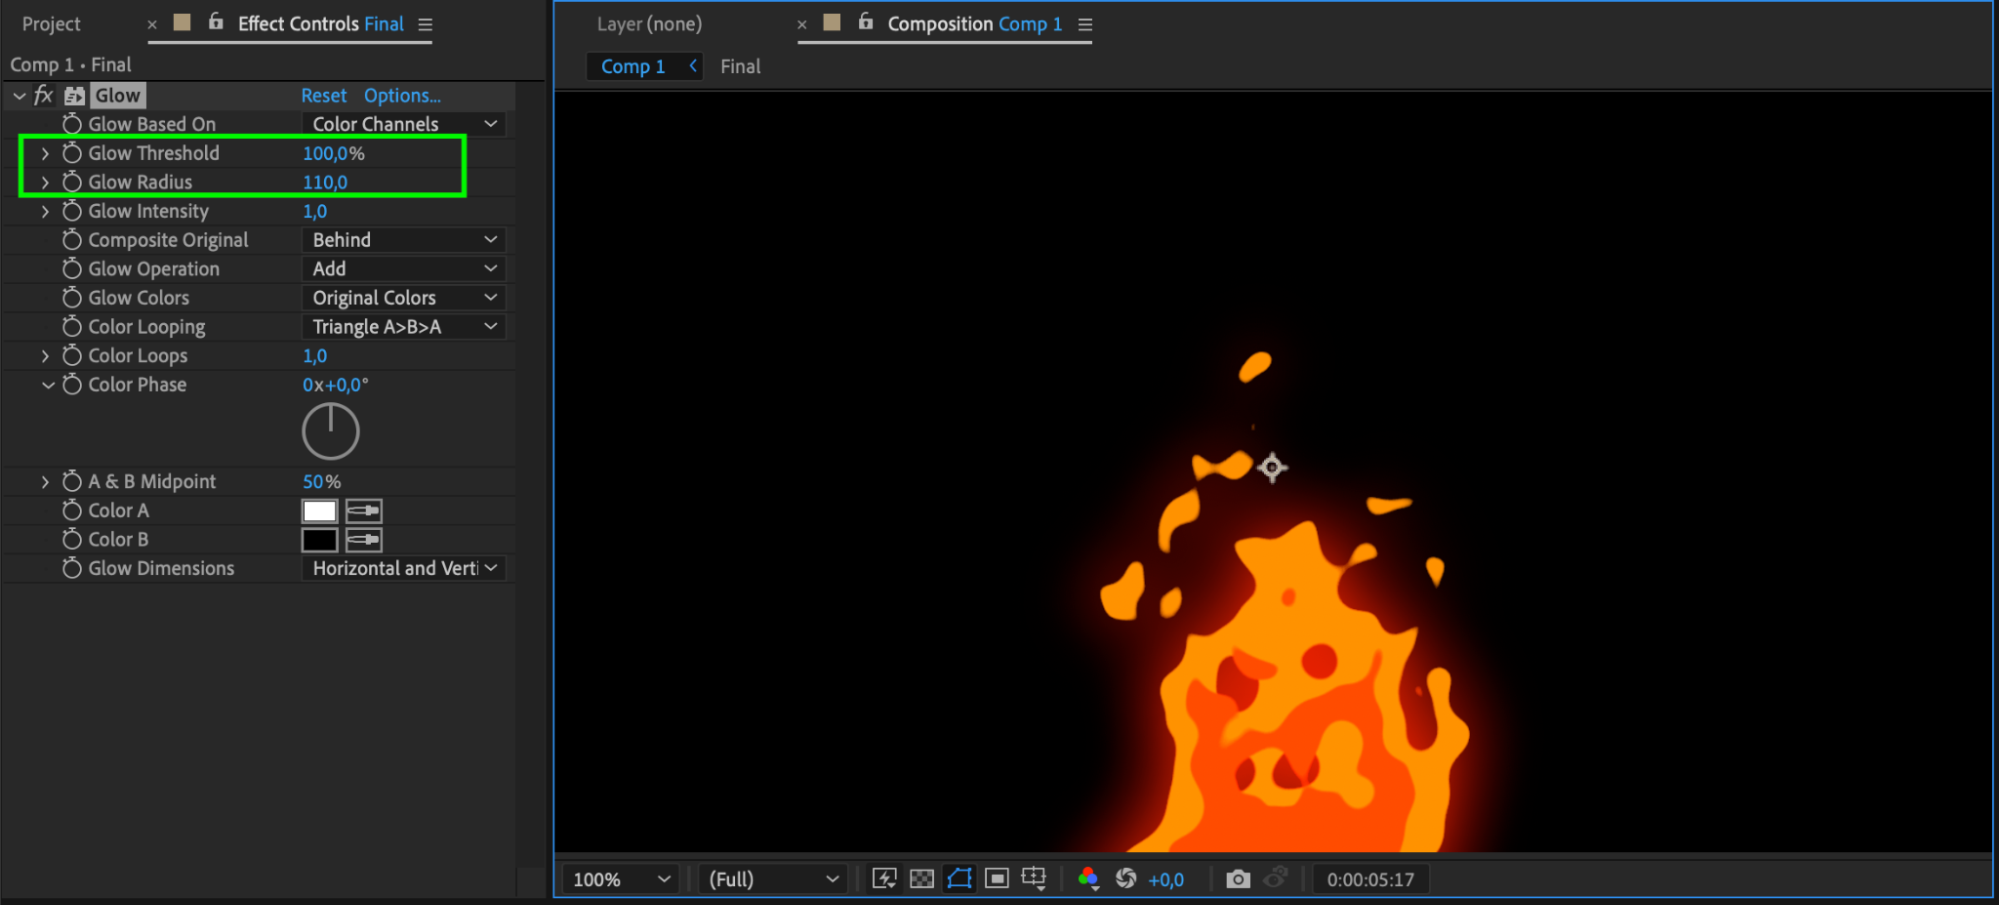
Step 15: Apply Glow Effect
Add the Glow effect to the pre-composed layer.
Step 16: Adjust Glow Settings
Fine-tune Glow Threshold and Glow Radius settings.
Get 10% off when you subscribe to our newsletter

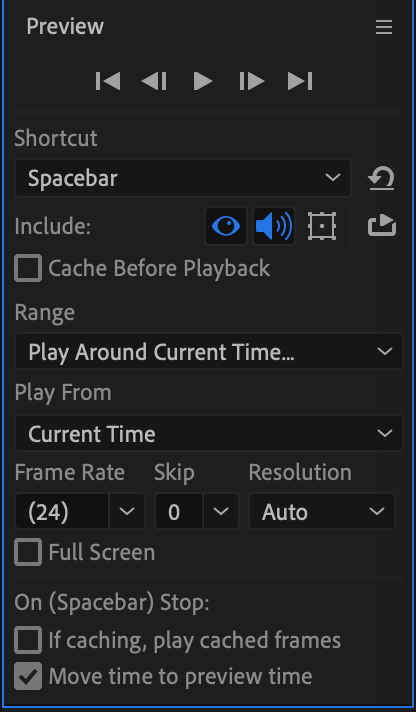
Step 17: Preview and Enjoy
Use the preview option to ensure the realistic and smooth fire animation.
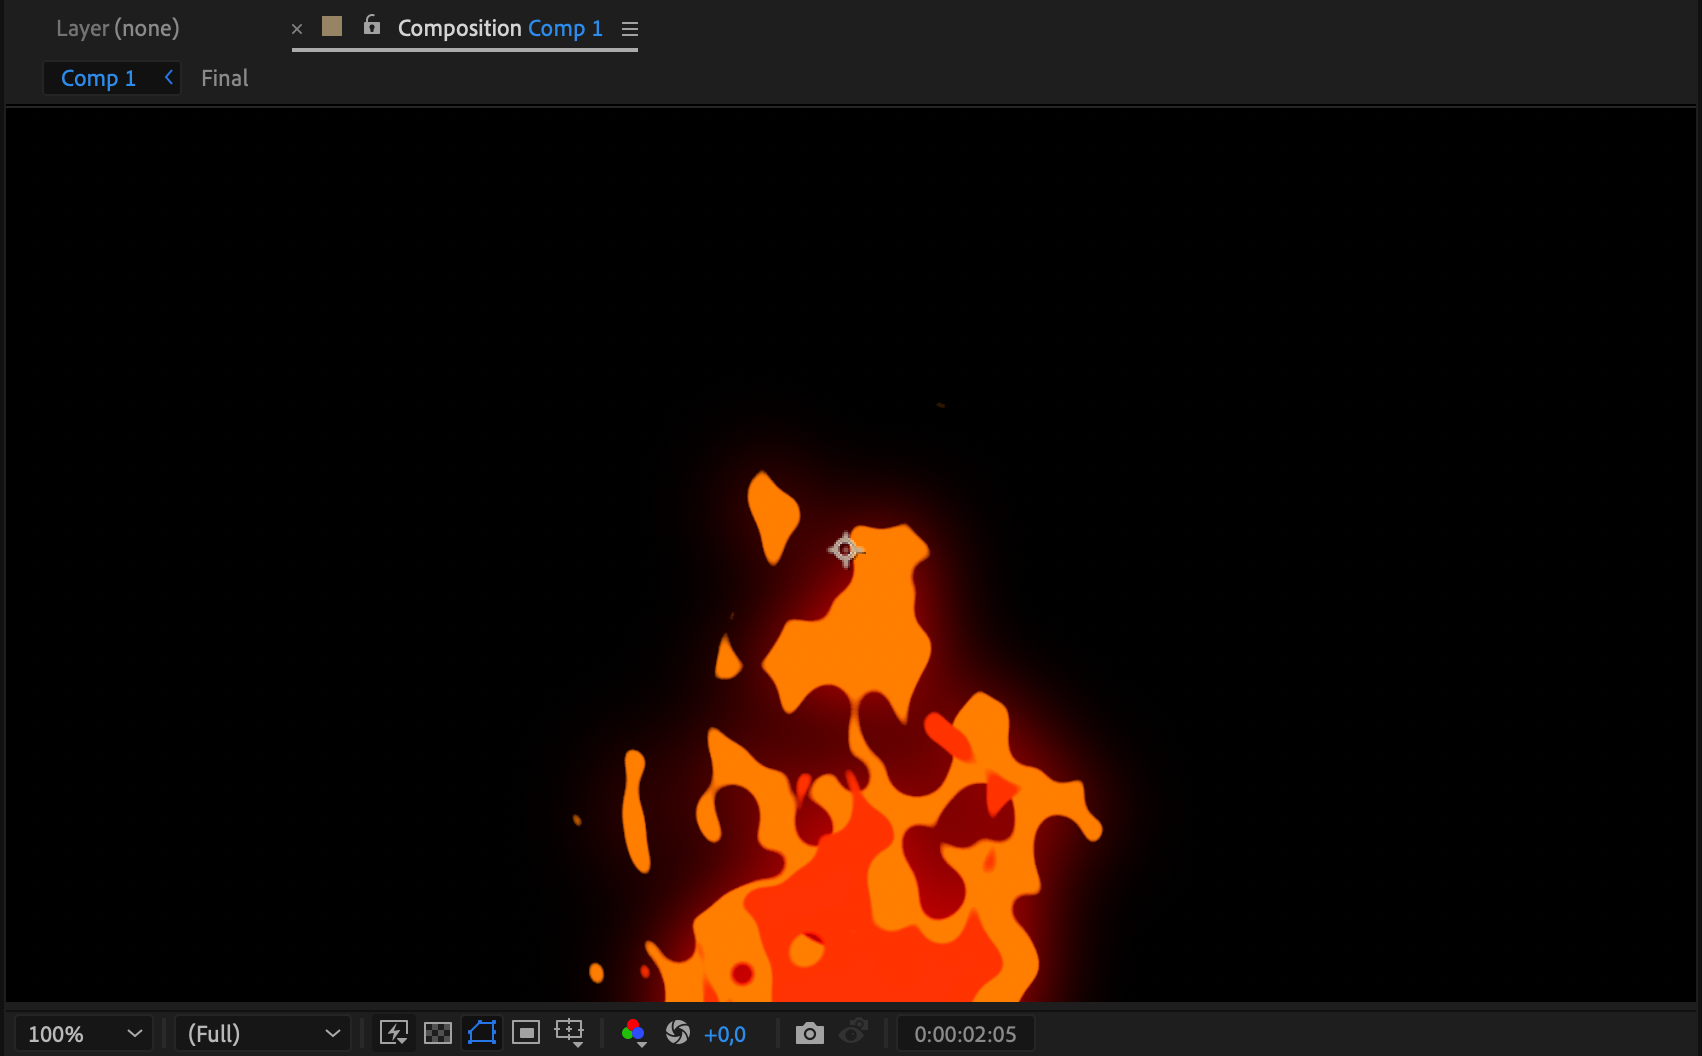
By following these steps, you’ll be able to create a mesmerizing fire animation in After Effects. Experiment with the settings to achieve the desired look for your project. Enjoy your newfound skills in crafting dynamic and visually appealing fire effects!
Conclusion:
Creating realistic fire animations in After Effects is a skill that can elevate your projects to new heights. By mastering the step-by-step process outlined in this tutorial, you’ve gained the ability to infuse dynamism and lifelike qualities into your visual content. Experiment with the settings, unleash your creativity, and watch as your projects come to life with captivating fire effects.


