Are you ready to unleash your creativity and create stunning graphics that captivate your audience? Look no further than Adobe After Effects, a powerful software that allows you to turn your imaginative ideas into reality. Whether you’re a seasoned graphic designer or a beginner exploring the world of motion graphics, this comprehensive guide will walk you through the step-by-step process of creating visually appealing graphics in After Effects.
With its vast array of tools and features, After Effects offers limitless possibilities for crafting unique and eye-catching designs. From motion typography to animated infographics and logo animations, this software allows you to push the boundaries of your creativity and bring your concepts to life. In this article, we will equip you with the essential knowledge and techniques to harness the full potential of After Effects and create graphics that leave a lasting impact.
But before we dive into the nitty-gritty of After Effects, it’s important to understand the fundamentals. We’ll explore the basic principles of motion graphics, including composition, keyframes, and animation principles, so you can have a solid foundation to build upon. As we progress, we’ll introduce you to various tools and effects within After Effects, teaching you how to utilize them effectively to enhance the visual appeal of your graphics.
Creating graphics in After Effects is not just about selecting the right tools; it’s about having a clear vision and understanding the message you want to convey. We’ll guide you through the creative process, starting from brainstorming ideas and sketching rough concepts to refining your designs and adding that extra touch of professionalism. Additionally, we’ll share tips on finding inspiration and staying up-to-date with the latest design trends to keep your graphics relevant and engaging.
Get 10% off when you subscribe to our newsletter

Whether you want to create graphics for personal projects or enhance your professional portfolio, After Effects provides a versatile platform for realizing your artistic vision. With this ultimate guide, you’ll gain the knowledge, techniques, and confidence to create graphics that stand out in a crowded digital landscape. So, let’s embark on this exciting journey together and unlock the endless possibilities of graphic design in After Effects.
Step 1: Plan Your Design
Before diving into After Effects, it’s essential to plan your design. Consider the purpose of your graphics, target audience, and the message you want to convey. Sketch out your ideas on paper or use design software like Adobe Illustrator or Photoshop to create a visual reference.
Step 2: Set Up Your Project
Open After Effects and create a new project (use Ctrl + N or Cmd + N on Mac). Set the composition settings (Ctrl + K or Cmd + K on Mac), including resolution, frame rate, and duration. Make sure these settings match your intended output (e.g., video, web, social media).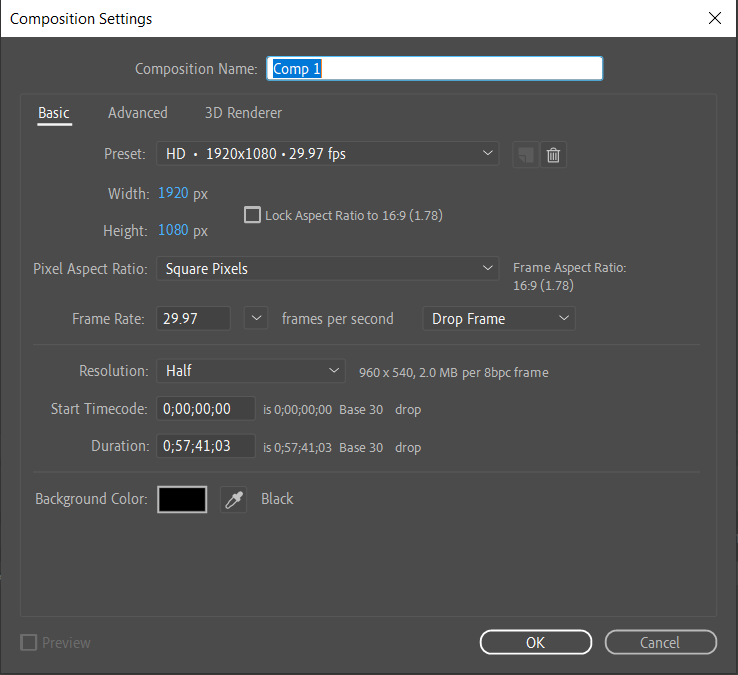 Step 3: Import Assets
Import the assets you’ll need for your graphics (Ctrl + I or Cmd + I), such as images, videos, logos, and audio files. After Effects supports various file formats. To import, go to “File” > “Import” > “File” and select your files.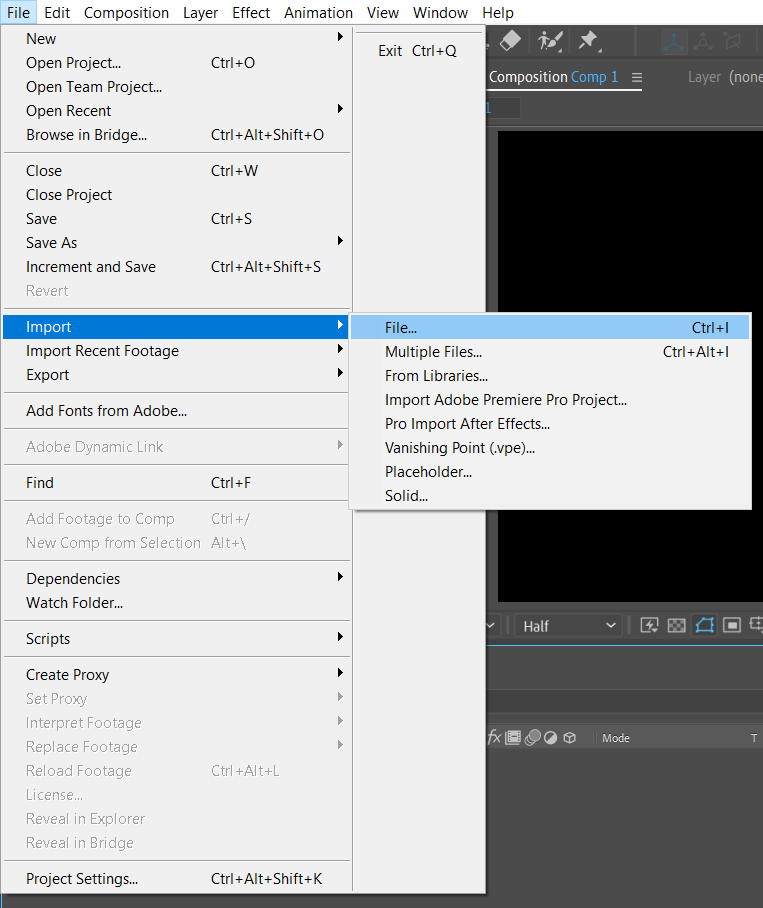 Step 4: Or Create a New Composition for the Custom Design
In After Effects, compositions are like individual scenes or sequences within your project. To create a new composition, go to “Composition” > “New Composition”. Ensure it matches your project settings.
Step 5: Design Your Graphics
This is where real creativity comes into play. You can create graphics using a combination of tools and techniques:
- Text: Add text layers to display titles, subtitles, and other information. Use the “Text” tool and explore various fonts, styles, and text animations.
![]()
- Shapes: Use the shape tools to create elements like rectangles, circles, and polygons. You can customize their properties, such as fill and stroke color.
![]()
- Images and Videos: Import images and videos and manipulate them using effects, transformations, and layer blending modes.

- Masks: Masks are crucial for isolating and revealing specific parts of your graphics. You can create masks using shapes or with the pen tool

Step 6: Add Motion
One of the strengths of After Effects is its animation capabilities. You can animate your graphics in various ways:
- Keyframes: Create keyframes to set the starting and ending points of an animation. You can animate properties like position, scale, opacity, and rotation

- Expressions: Use expressions to create dynamic animations that respond to specific parameters or data. Choose the property you want to add an expression to and hit the stopwatch icon holding the Alt or Option key (Alt + Shift + = or Option + Shift + = on Mac).

- Parenting: Link layers together to create complex animations. For example, you can parent a text layer to a null object to control its movement.
 Step 7: Work with Timelines
Arrange your graphics in the timeline panel. Adjust the timing of your animations, transitions, and other elements to create a coherent flow. Step 8: Add Audio
If your graphics require sound, import your audio files and synchronize them with your animations. You can adjust the audio in the timeline panel. Step 9: Preview and Refine
Regularly preview your work by pressing the spacebar or using the RAM preview function to see how your graphics look in motion. Make adjustments as needed to improve the visual impact.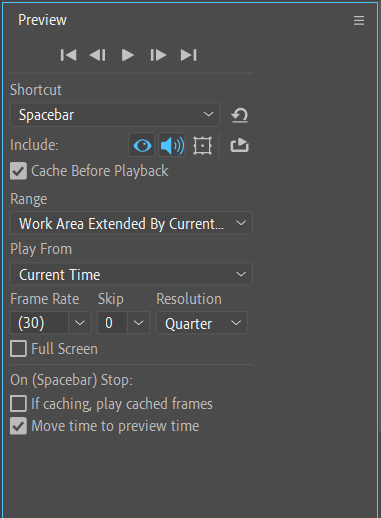 Step 10: Export Your Graphics
Once you’re satisfied with your graphics, it’s time to export them. Go to “Composition” > “Add to Render Queue” (Ctrl + M or Cmd + M) and choose the desired export format, settings, and destination folder. Make sure your export settings match your project requirements.
Now that you’re familiar with the fundamentals and ready to dive deeper into the world of graphics creation in After Effects, let’s explore some essential tips and tricks to enhance your workflow and productivity. So, let’s get started!
Essential Tips and Tricks for Creating Graphics in After Effects
1. Utilize Keyboard Shortcuts:
After Effects is equipped with numerous keyboard shortcuts that can significantly speed up your workflow. Memorize some of the essential hotkeys like “Ctrl + C” for copying, “Ctrl + V” for pasting, “Ctrl + Z” for undoing, and “Ctrl + Shift + Z” for redoing. By making use of these shortcuts, you can navigate through the software more efficiently and accomplish tasks in a fraction of the time.
2. Organize Your Project:
As your project starts to grow, it’s crucial to keep everything organized. Utilize the Project panel to create folders and subfolders for different assets, such as footage, images, and audio. You can also use color labels to categorize your elements and make them easily identifiable. By staying organized, you can locate and manage your assets with ease, saving valuable time during the editing process.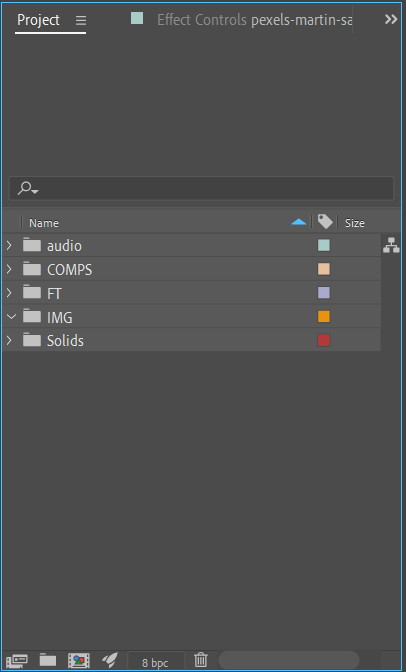 3. Customize Your Workspace:
After Effects offers a flexible interface that allows you to customize your workspace to suit your preferences. Take advantage of this feature by rearranging panels, creating custom workspaces, and saving them for future use. Tailoring your workspace to your needs will streamline your workflow and improve your overall efficiency.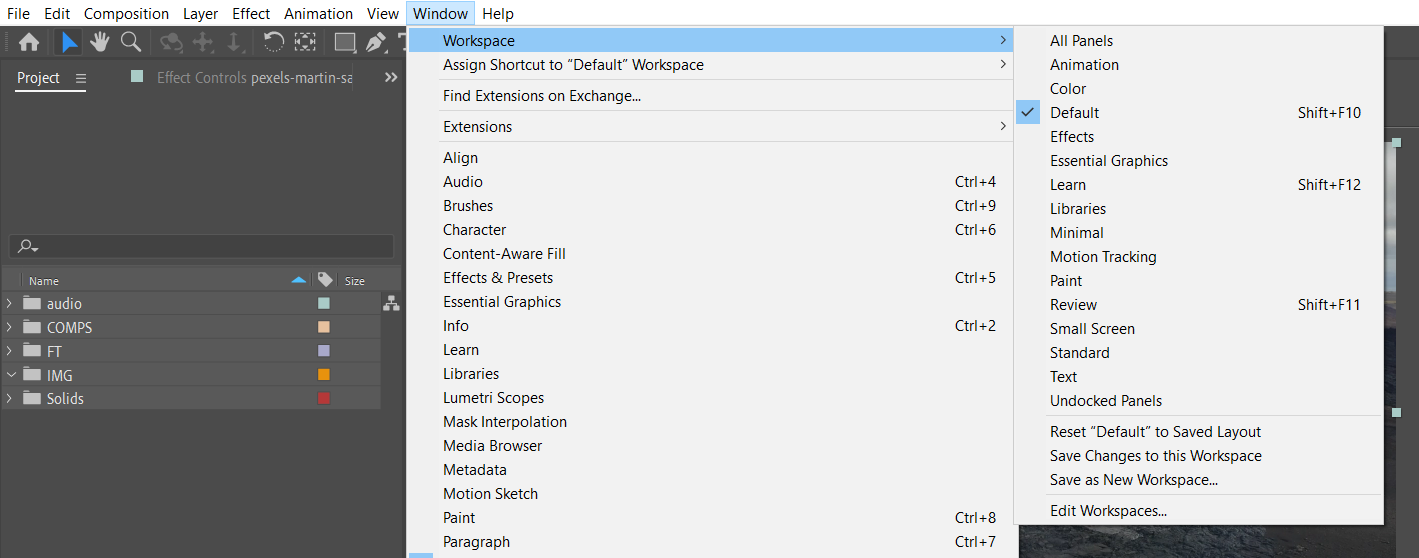
4. Take Advantage of Pre-Compositions:
Pre-compositions are a powerful feature in After Effects that allows you to group multiple layers together and treat them as a single layer. By pre-composing elements, you can apply effects and transformations to multiple layers simultaneously, saving you from duplicating efforts. This technique also helps to keep your composition tidy and manageable.
5. Use Animation Presets and Templates:
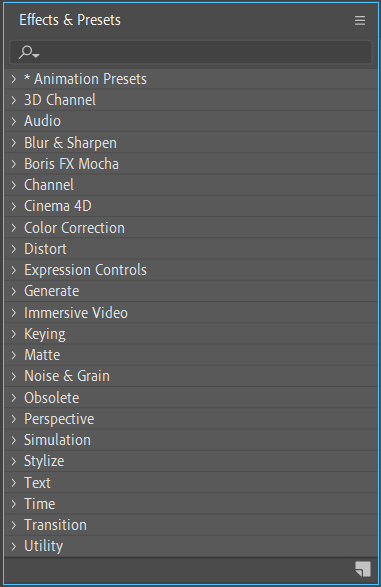
After Effects provides a wide range of animation presets and templates that can be a great starting point for creating graphics. These ready-made assets can save you time and inspire new ideas. Experiment with different presets and modify them to suit your needs or use them as a springboard for creating your own unique animations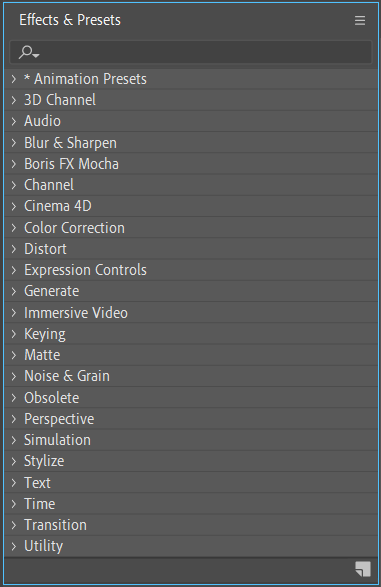 6. Experiment with Blending Modes and Effects:
After Effects offers a plethora of blending modes and effects that can add depth and creativity to your graphics. Experiment with different blending modes to create interesting combinations, and don’t be afraid to apply effects such as glow, blur, or color correction to enhance the visual impact of your designs. The possibilities are endless, so don’t shy away from exploring and unleashing your creativity. 7. Preview and Render Smartly:
As you work on your graphics, regularly preview your composition to see how your animation is developing. Utilize the “Ram Preview” (shortcuts: Space or “0” on the numeric keypad) to playback your animation in real-time. Once you’re satisfied with the results, render your composition using the appropriate settings for your intended output, whether it’s for web, broadcast, or social media.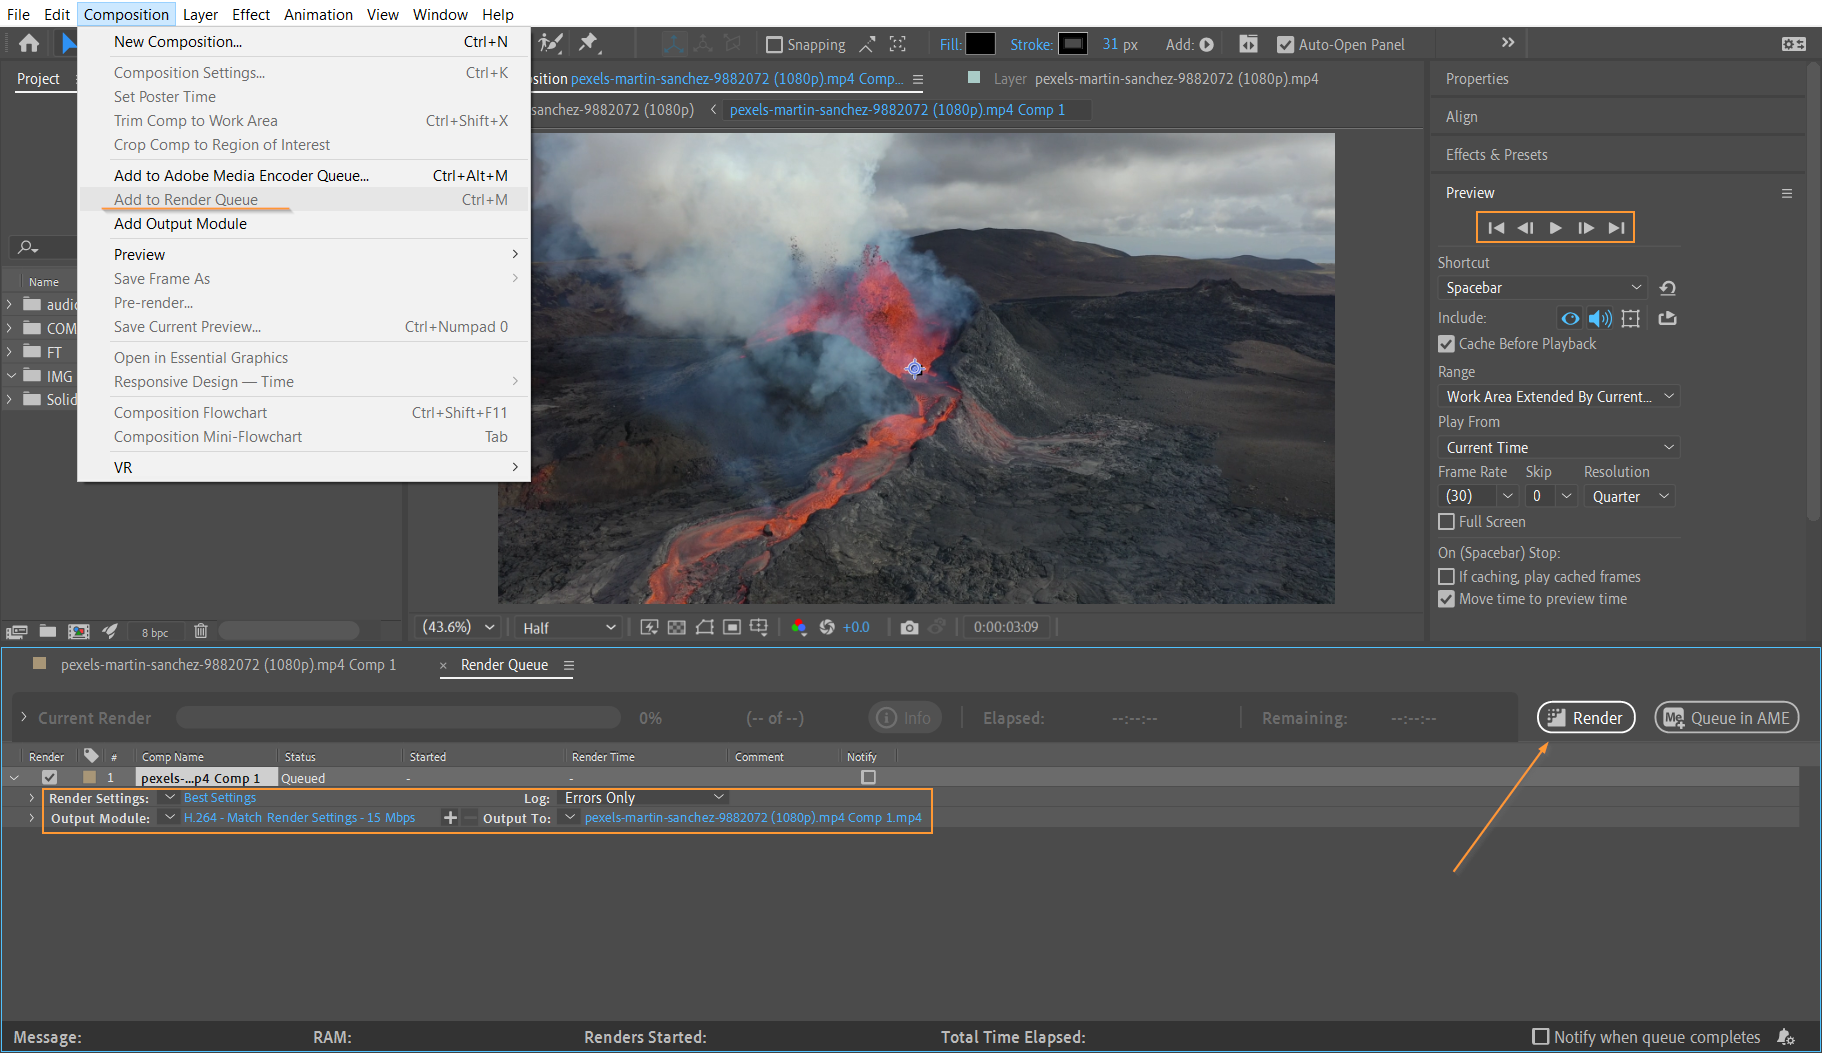
With these essential tips and tricks, you’re on your way to mastering the art of graphics creation in After Effects. Remember to practice, experiment, and explore new techniques to continually improve your skills. So go ahead, let your imagination run wild, and bring your unique visions to life with stunning graphics in After Effects.
Congratulations!
You’ve now reached the end of our comprehensive guide on creating graphics in After Effects. By exploring the fundamental principles, mastering essential techniques, and utilizing efficient workflow tips, you have equipped yourself with the tools necessary to bring your creative visions to life.
After Effects offers a vast array of possibilities for graphic designers, allowing you to push the boundaries of your imagination and create visually captivating animations and designs. From motion typography to logo animations and infographics, you now have the knowledge and confidence to craft graphics that leave a lasting impact on your audience.
Remember to continue experimenting, practicing, and delving into the world of After Effects. With each project, you’ll learn new techniques and discover unique approaches that will further refine your skills. Stay inspired by following industry trends, exploring online resources, and participating in creative communities to continually enhance your craft.
As you continue your journey with After Effects, don’t forget to balance creativity with functionality. Graphics that effectively communicate your message and engage your audience will have the most impact. Take the time to plan and conceptualize your designs, ensuring that every element supports and enhances your intended message.
Lastly, don’t be afraid to unleash your creativity and take risks. After Effects is a versatile platform that encourages exploration and experimentation. Embrace its vast range of tools, effects, and customization options to create graphics that are truly unique and reflective of your artistic vision.
Now, armed with a solid understanding of After Effects and with essential tips and tricks, it’s time to put your skills to the test. Create captivating graphics, share your creations with the world, and continue to hone your craft.
So, go forth and create. Let your imagination shine and turn ordinary visuals into extraordinary designs with the power of After Effects. Elevate your graphics, tell compelling stories, and leave a lasting impression on your audience. The world is waiting to see what you can create, so unleash your creativity and show them the magic of After Effects graphics.


