Create Incredible Movies with Adobe After Effects
Introduction: Let Your Creativity Soar with Movie Making in Adobe After Effects
Adobe After Effects is a filmmaker’s dream. Whether you want to create dynamic motion graphics, integrate breathtaking visual effects, or produce a seamless cinematic experience, After Effects provides the tools you need. This step-by-step guide will walk you through creating your first movie, covering everything from pre-production to exporting the final product. Let’s dive into the magic of After Effects and learn how to turn your vision into a cinematic masterpiece!
Step-by-Step Guide: How to Make a Movie in Adobe After Effects
Step 1: Pre-production Planning
Before jumping into After Effects, it’s crucial to plan your project. Start by brainstorming ideas and outlining your vision for the movie. Create a storyboard that includes key scenes, camera angles, and transitions. This step will give you a clear roadmap and help streamline the editing process. A solid plan can save you time later, ensuring that your final movie matches your initial concept.
Get 10% off when you subscribe to our newsletter

Step 2: Importing and Organizing Footage
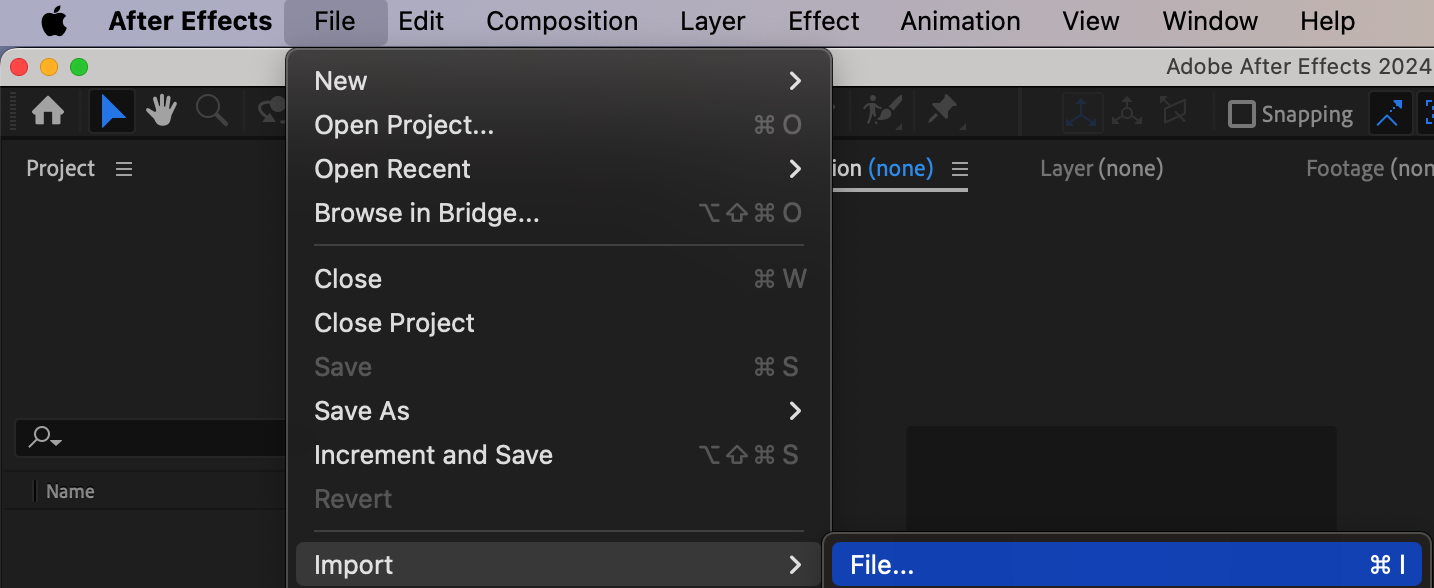
To get started, import your video clips, audio files, and other assets into After Effects by navigating to File > Import > File. Organizing your media is key to keeping your workflow smooth. Use folders within the project panel to group similar elements together, like video, audio, and images. Well-organized assets will help you quickly find what you need as you build your movie.
 Step 3: Setting Up a New Composition
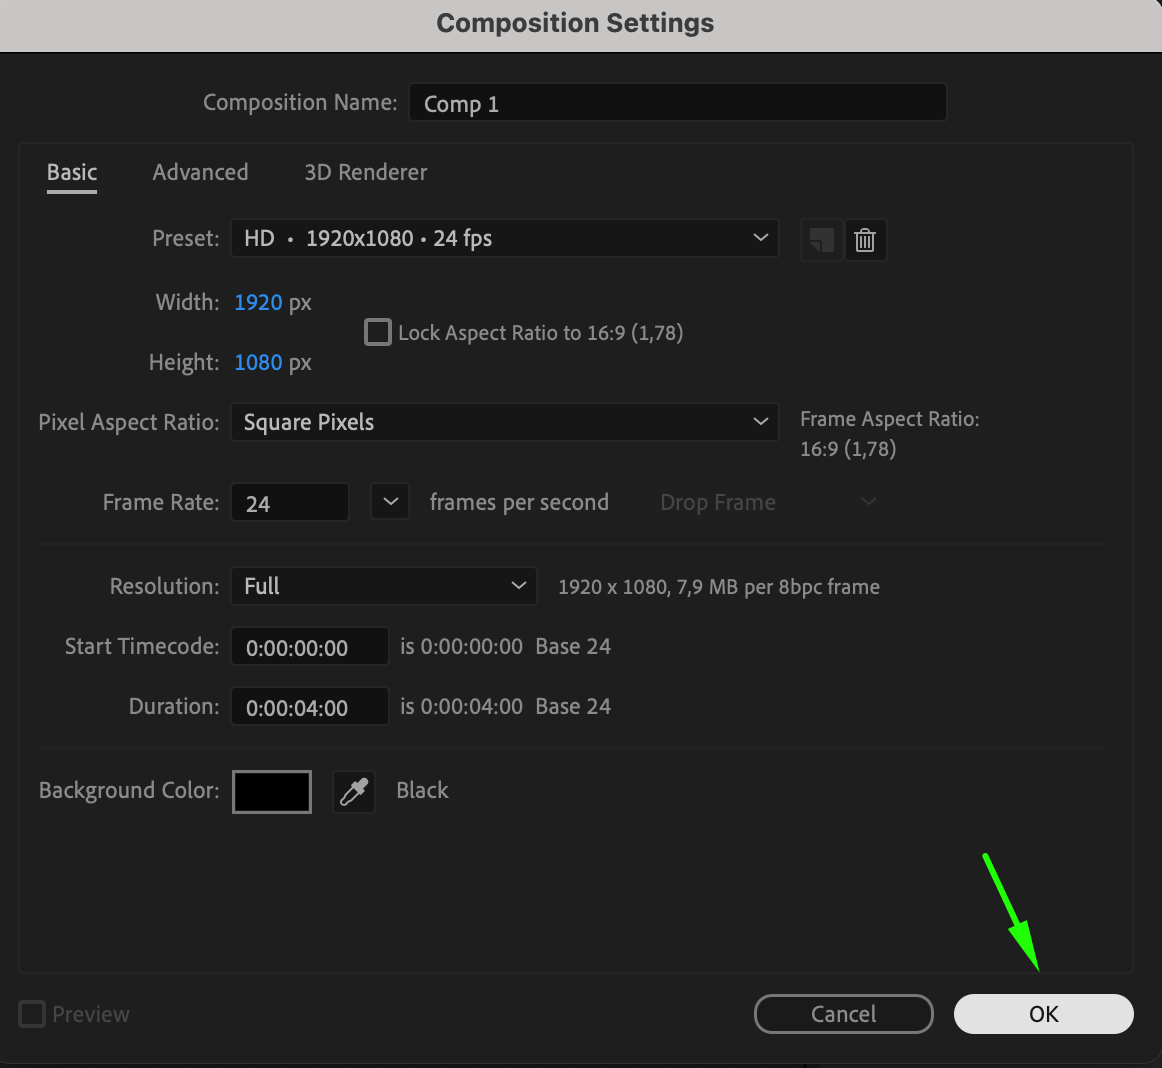
Once your assets are ready, create a new composition by going to Composition > New Composition. Choose your desired resolution, frame rate, and duration based on the platform where you will share your movie (e.g., YouTube, Instagram, etc.). The composition is the canvas where you’ll piece together all your footage and effects, so setting it up correctly from the start is essential.
 Step 4: Arranging Footage on the Timeline
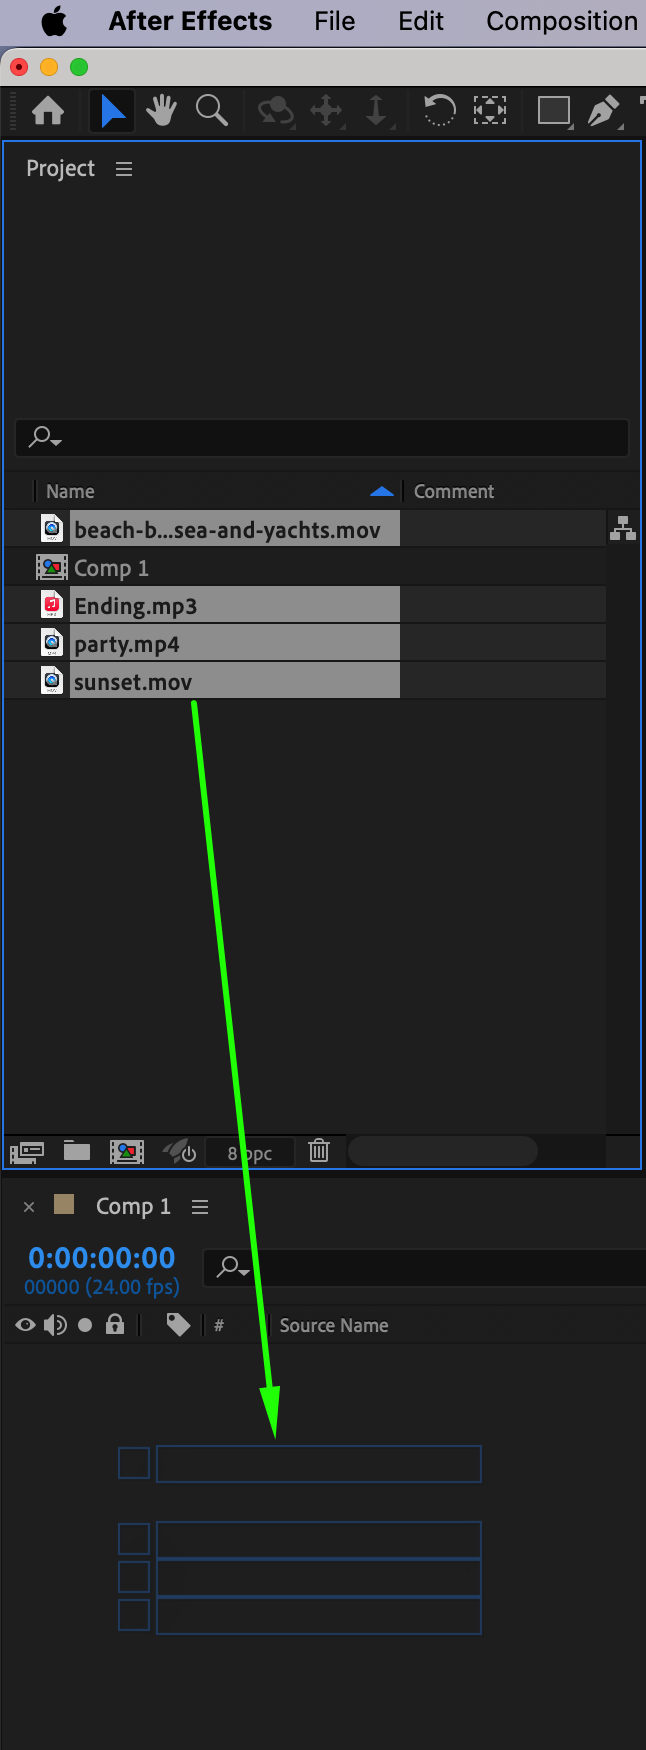
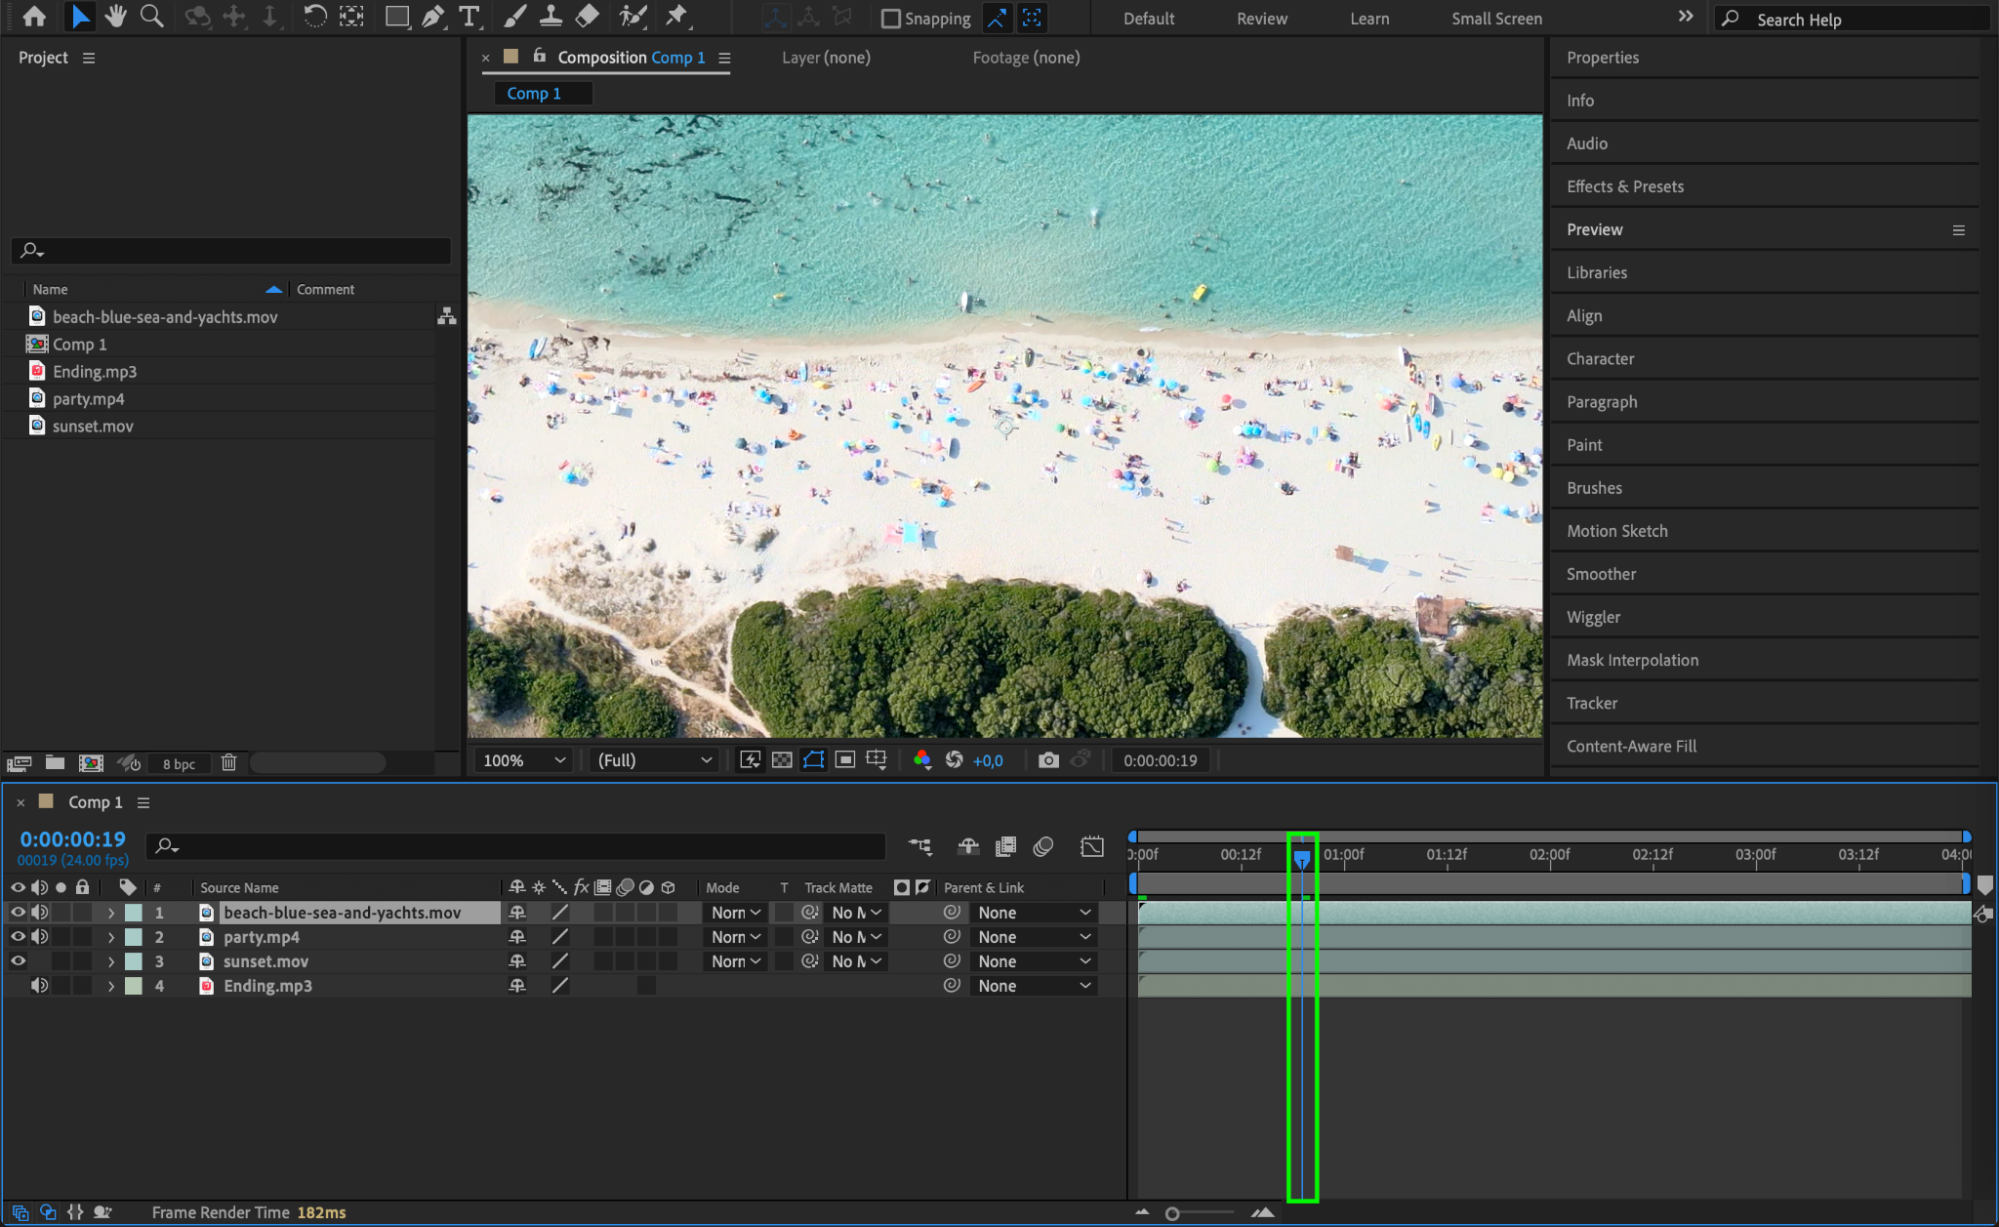
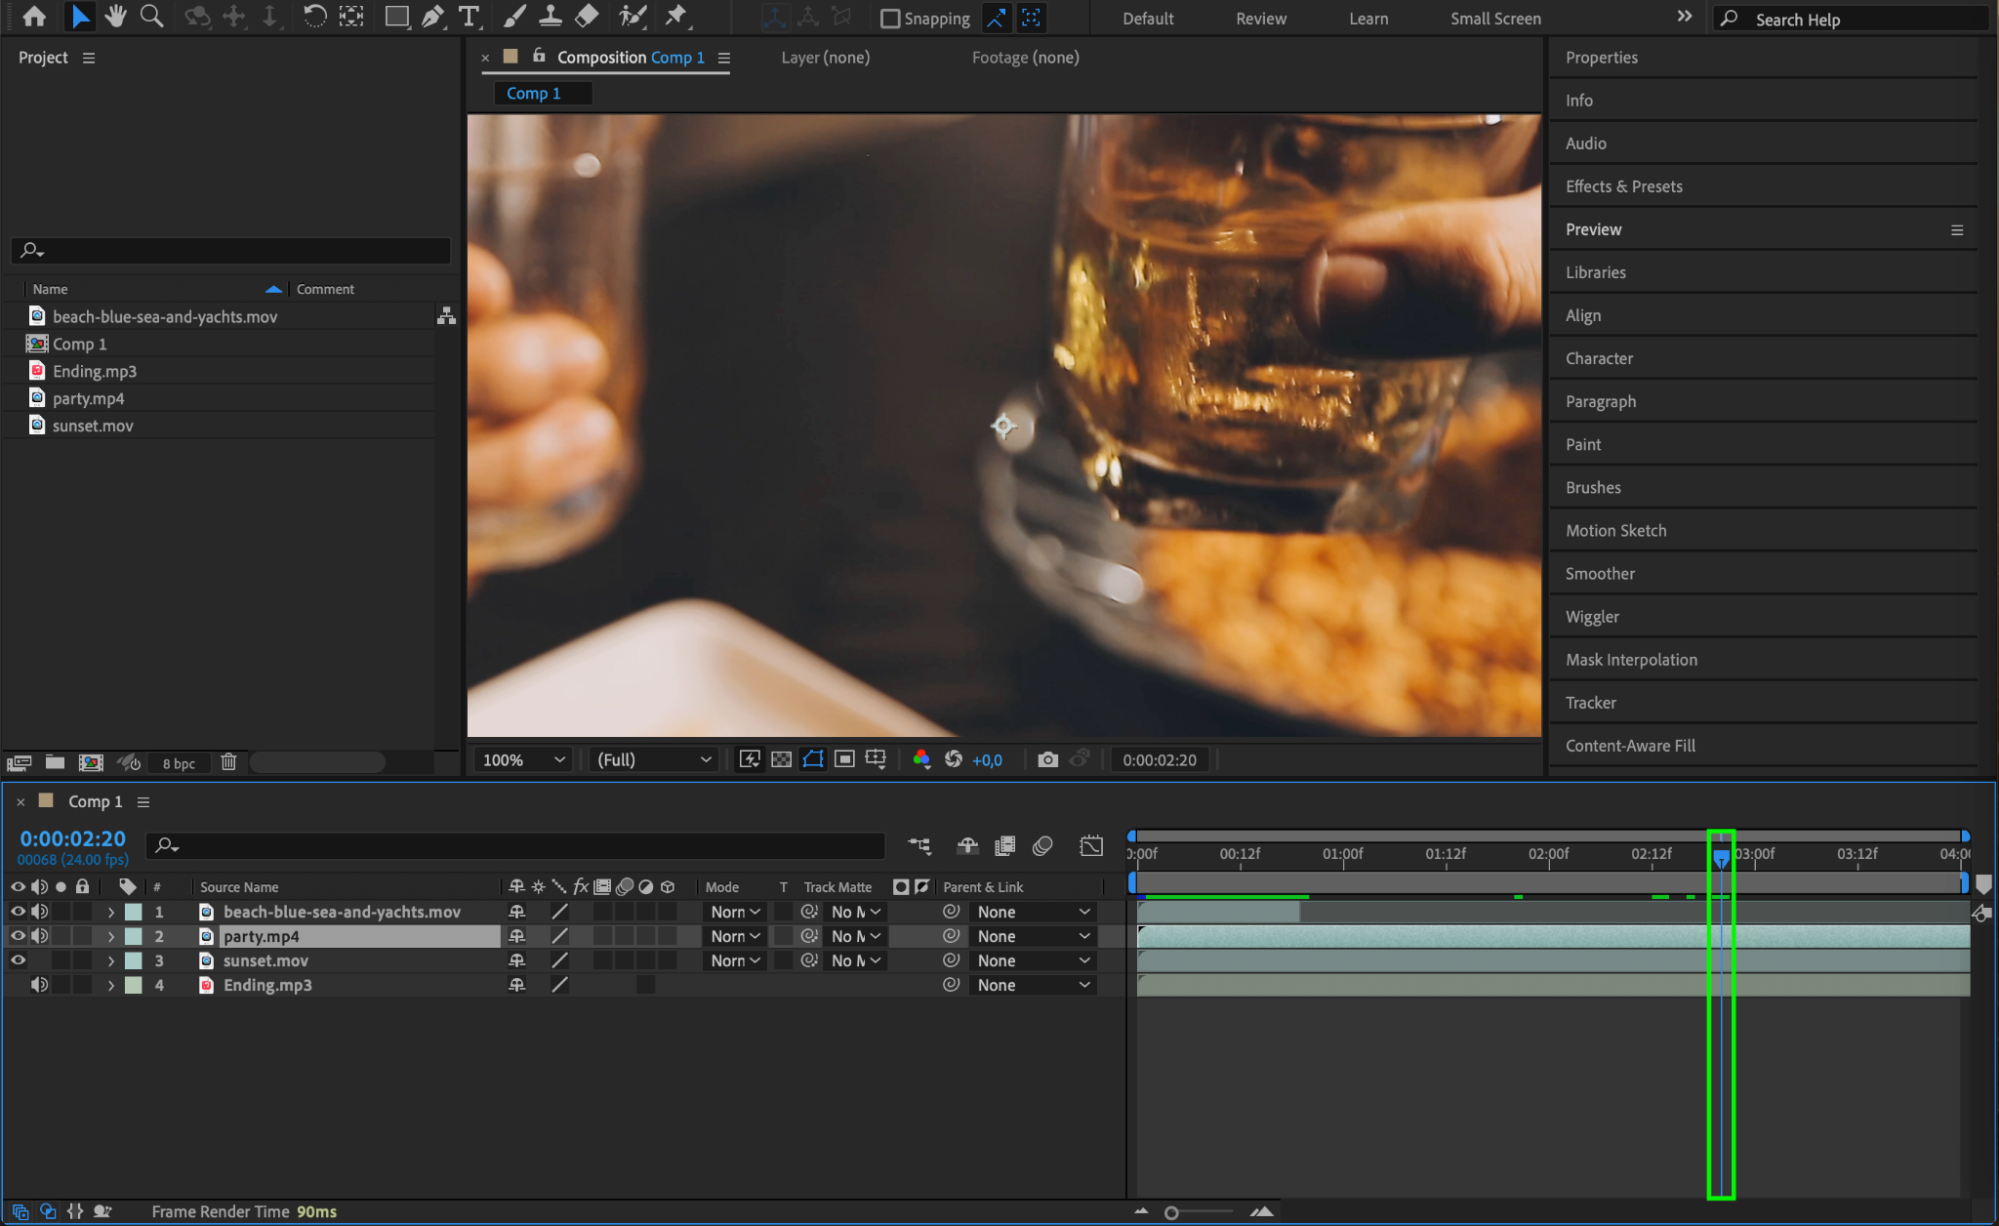
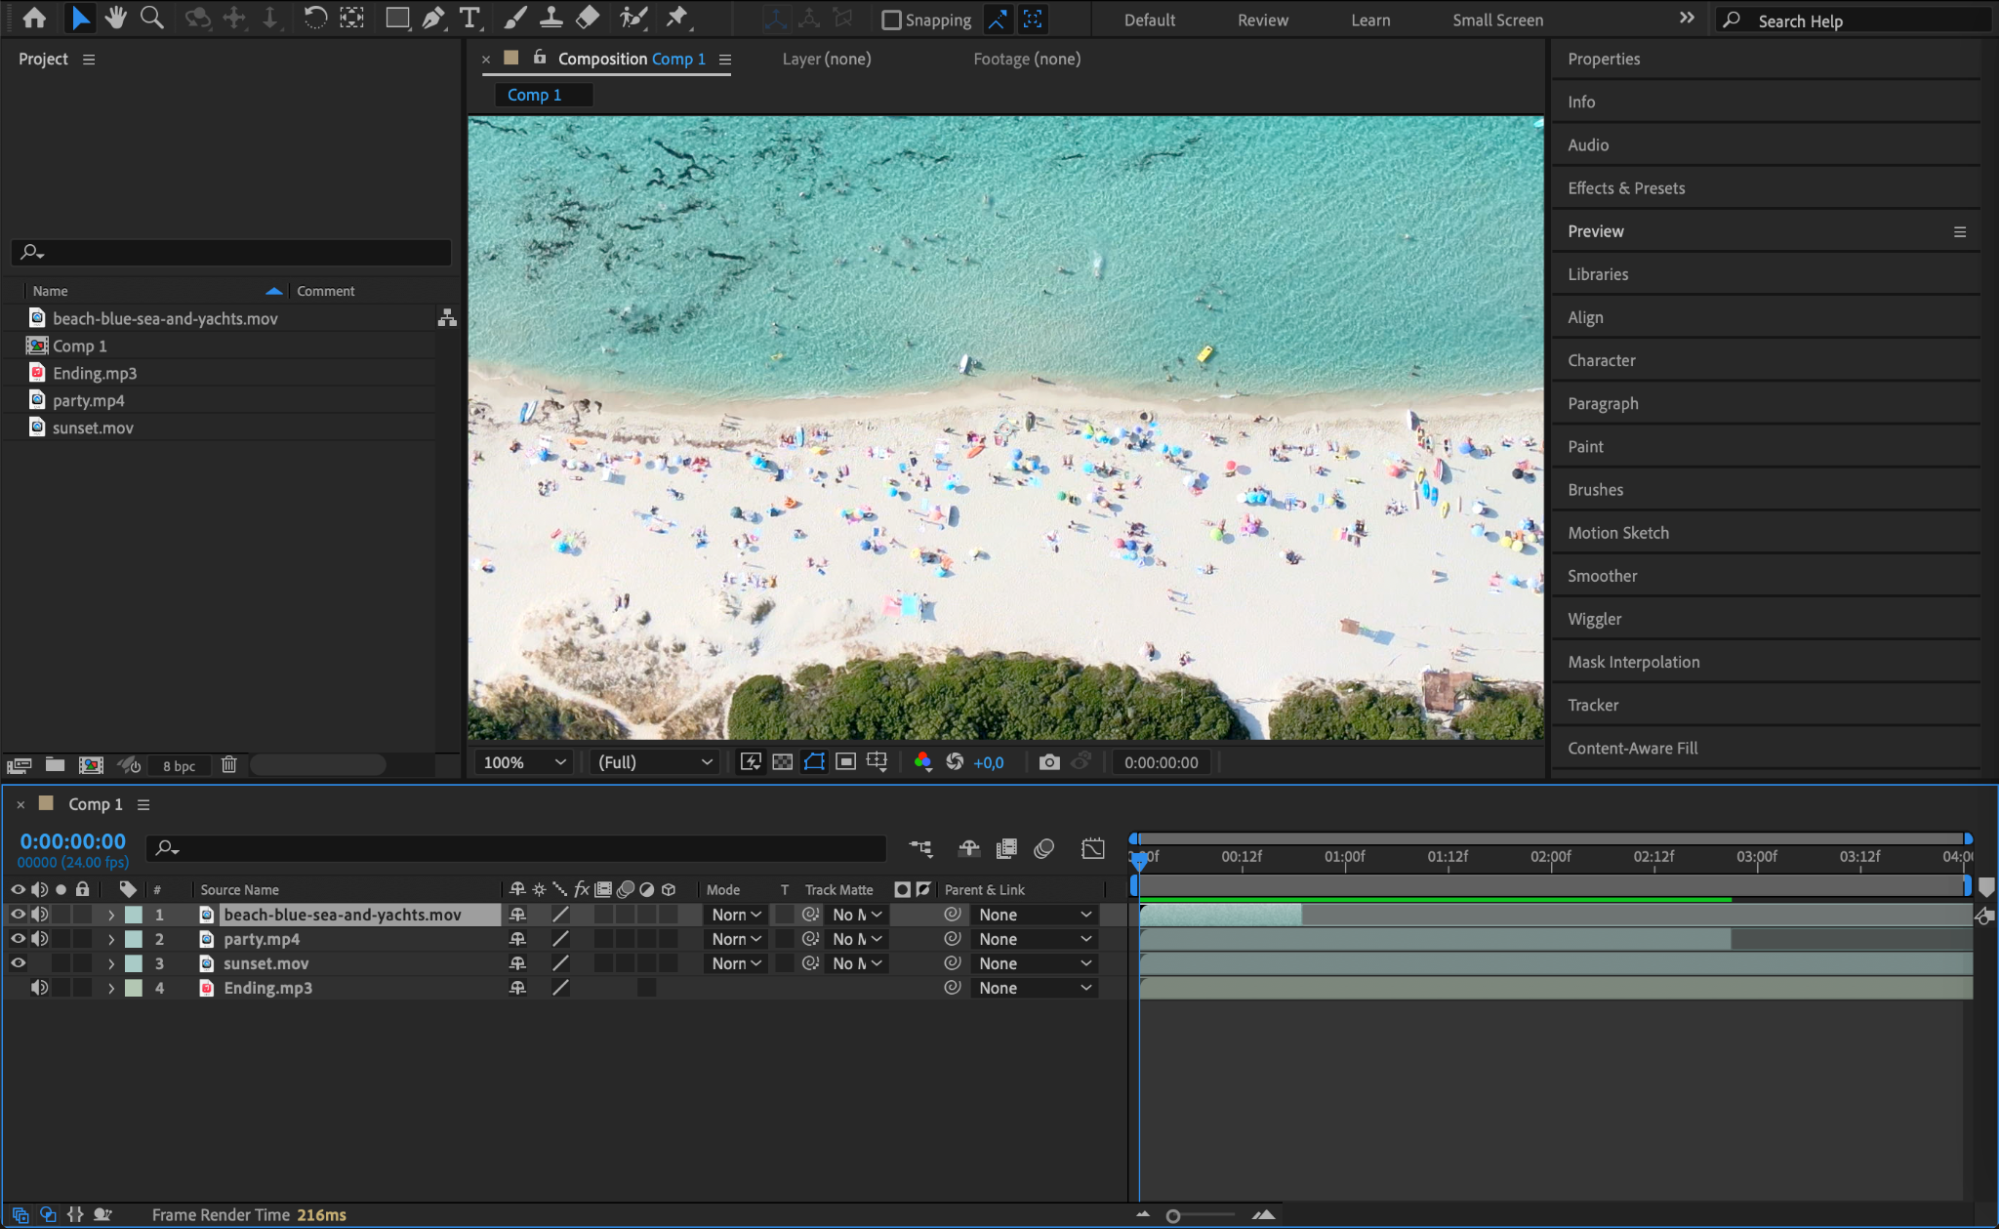
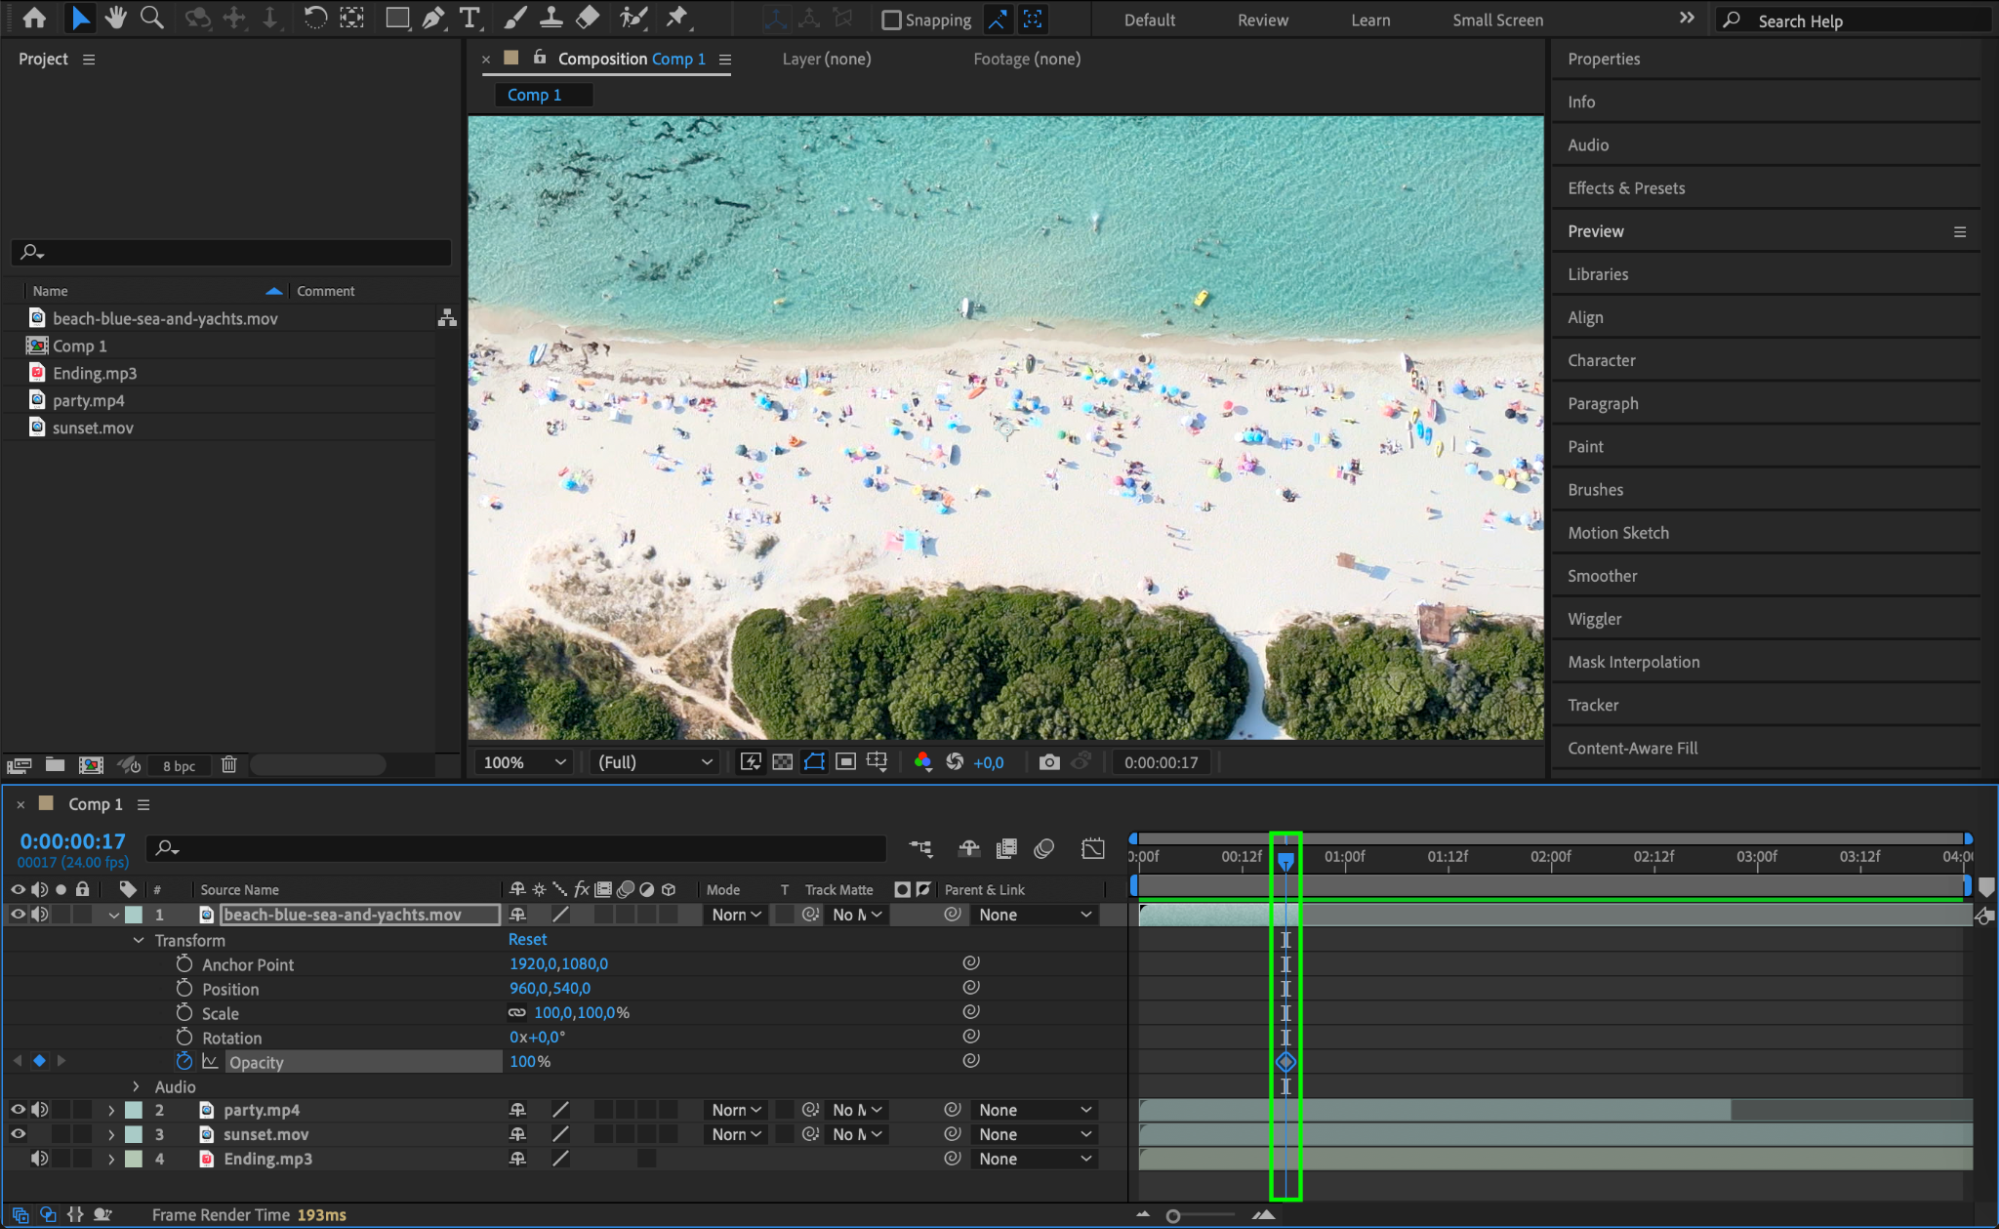
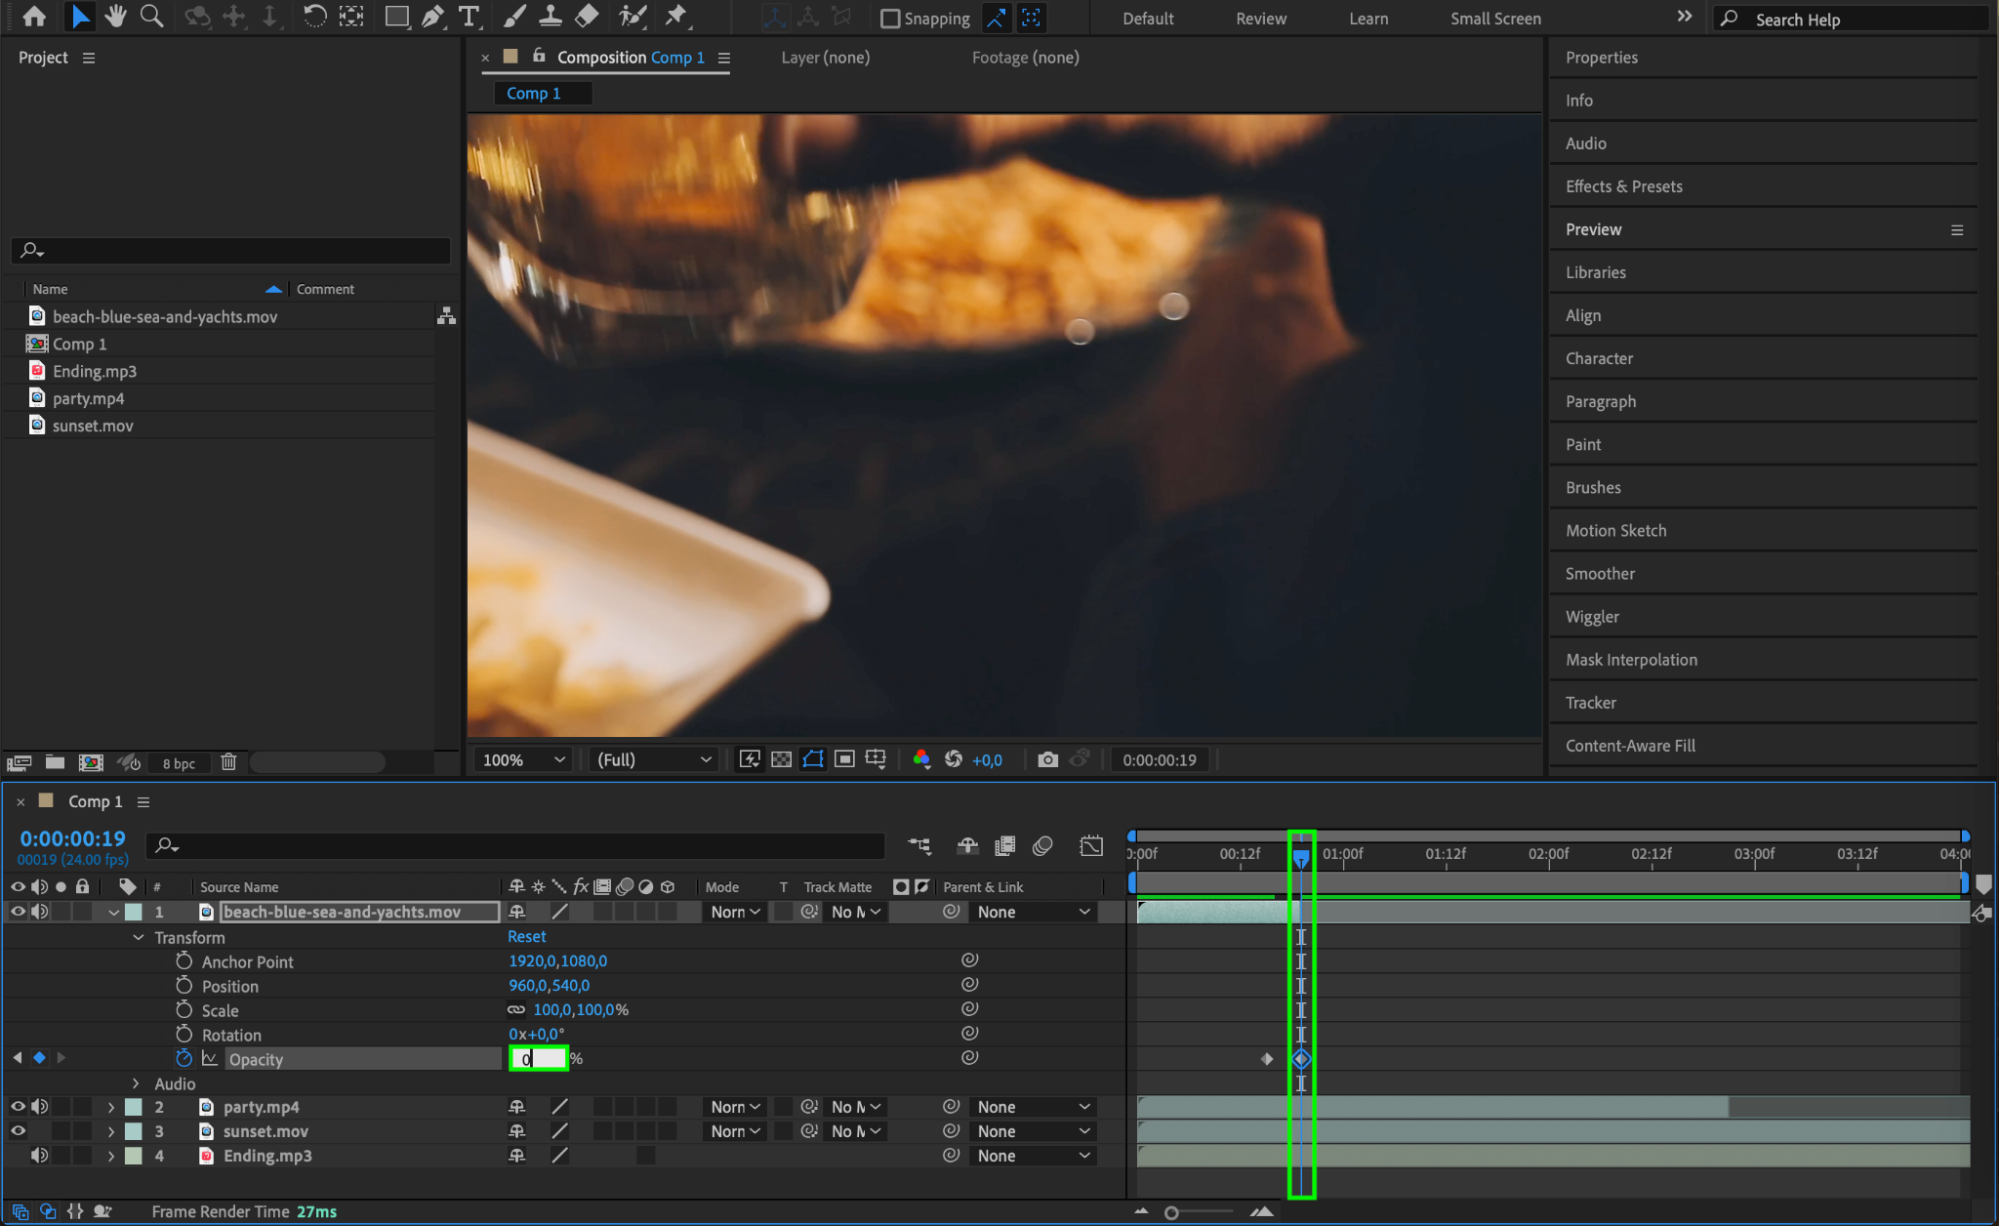
Next, drag your imported clips from the project panel to the timeline. Arrange them in the order outlined in your storyboard. To trim clips, use the shortcuts “Alt/Option + [” to set the beginning of the clip, and “Alt/Option + ]” to set the end. This lets you refine your timeline by cutting unwanted parts of the footage. You can also add transitions between clips from the Effects & Presets panel or manually animate properties like opacity for smooth fades.
Step 5: Applying Visual Effects
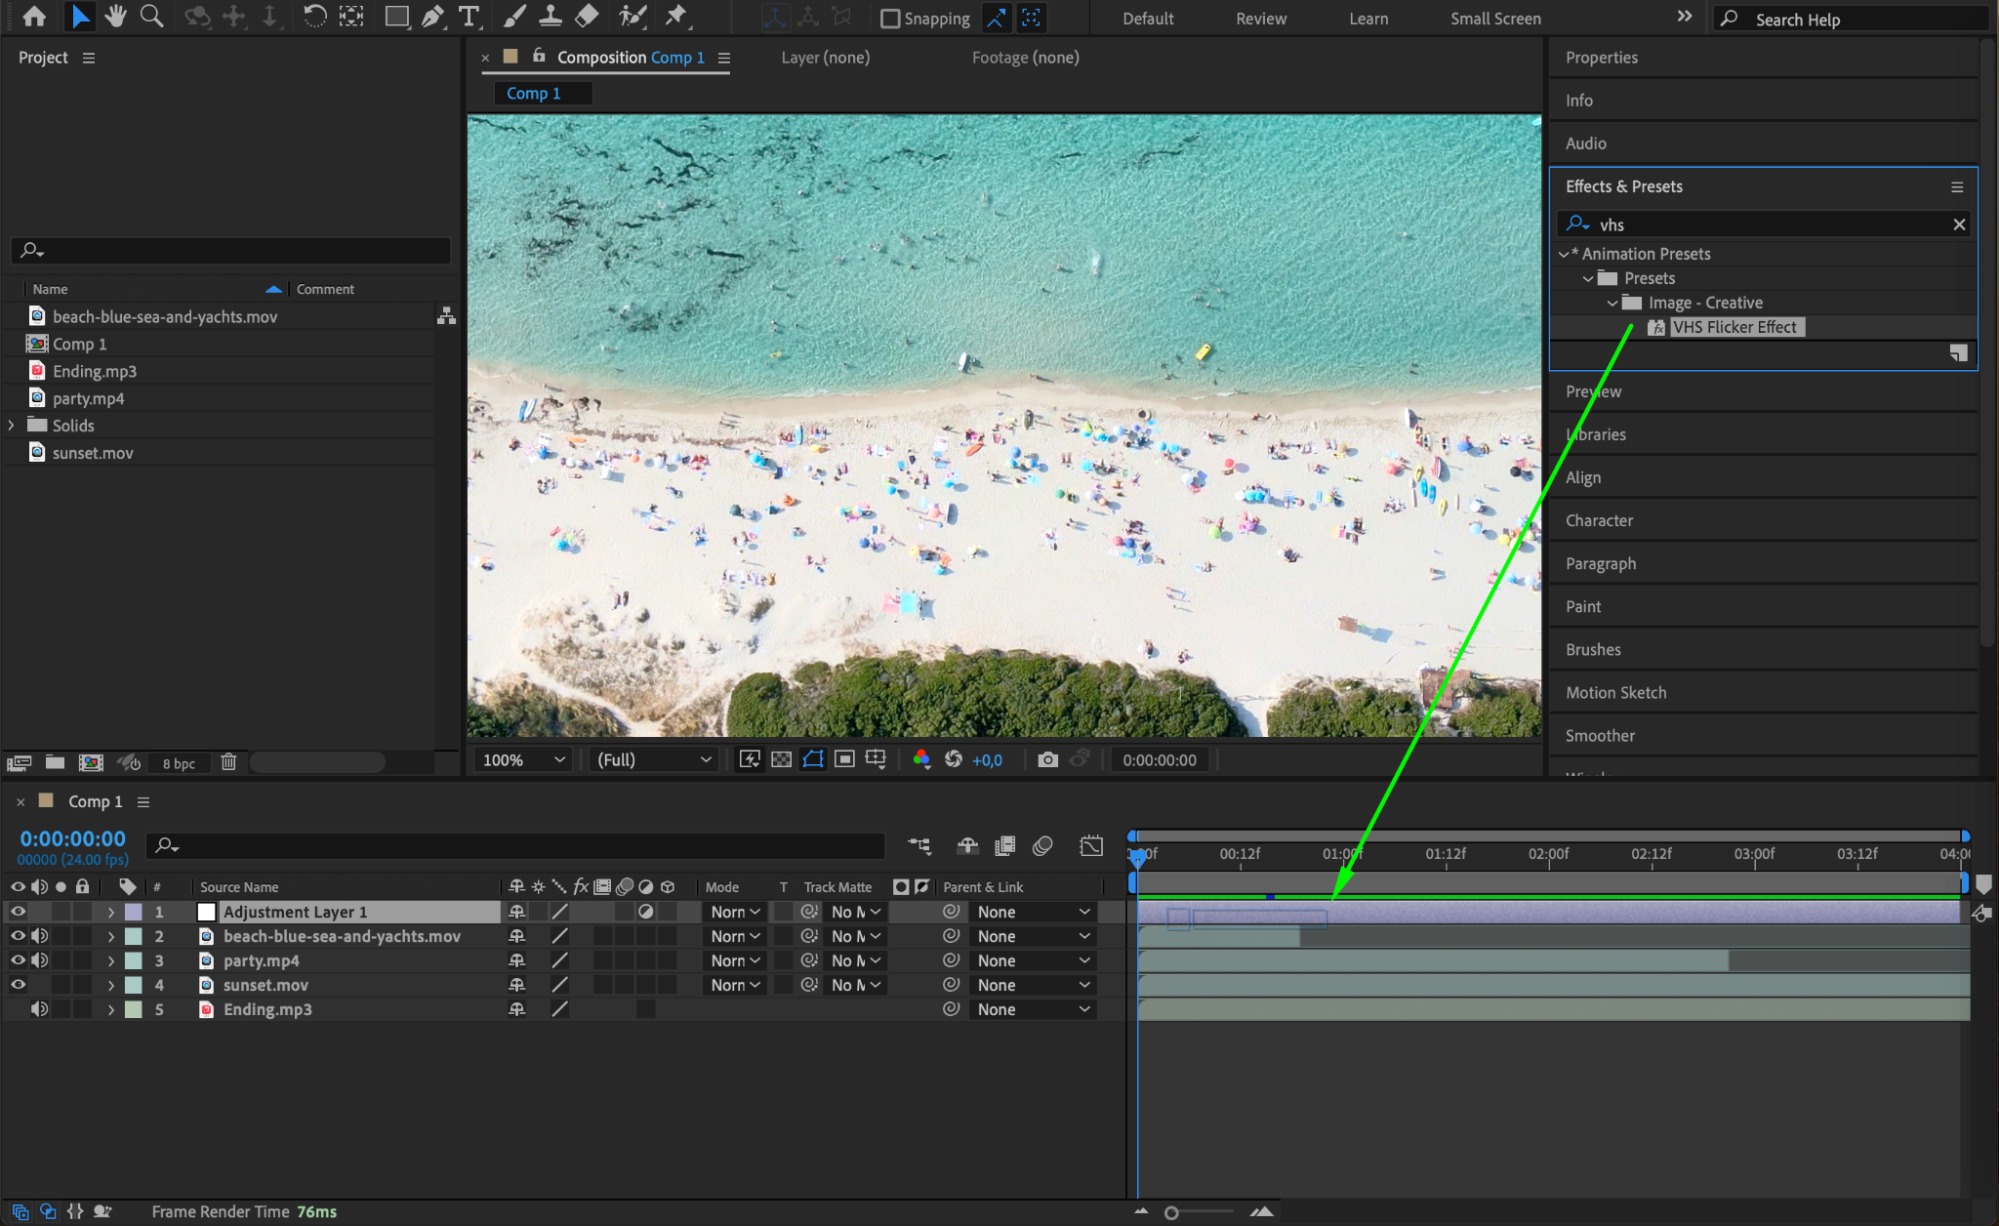
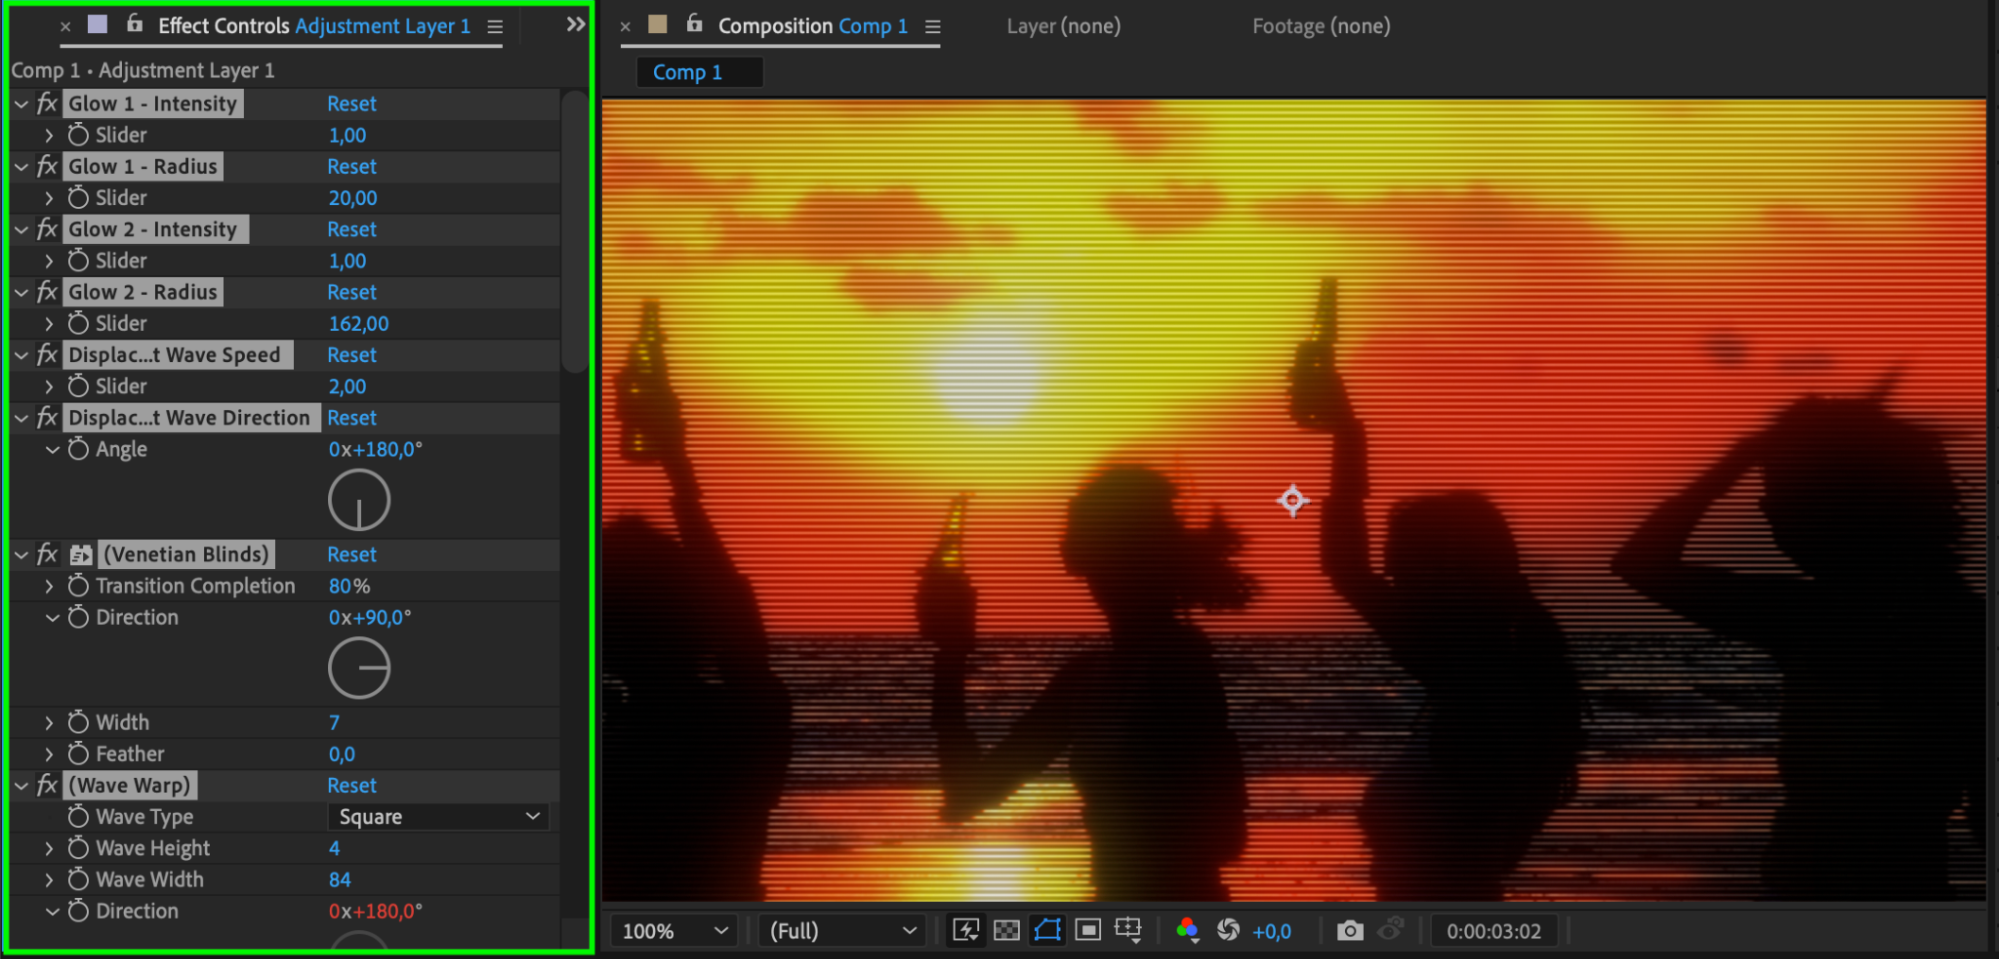
Now comes the fun part – adding visual effects. Explore After Effects’ wide range of built-in effects by selecting a clip and applying effects from the Effects & Presets panel. Use keyframes to animate effects over time for dynamic visuals. You can also use Adjustment Layers to apply effects to multiple clips simultaneously. This is where After Effects truly shines, allowing you to create everything from subtle color corrections to mind-blowing visual effects that enhance the movie’s storytelling.
Step 6: Audio Editing and Sound Design
Great visuals need great sound to create an immersive experience. Import your soundtrack or sound effects and add them to the timeline. Use After Effects to synchronize audio with your video clips, and edit audio levels by pressing “L” to adjust the volume or “LL” to visualize the audio waveform. For dynamic audio effects, animate the Audio Levels property to fade in/out or boost specific sounds.


Step 7: Enhancing with Plugins
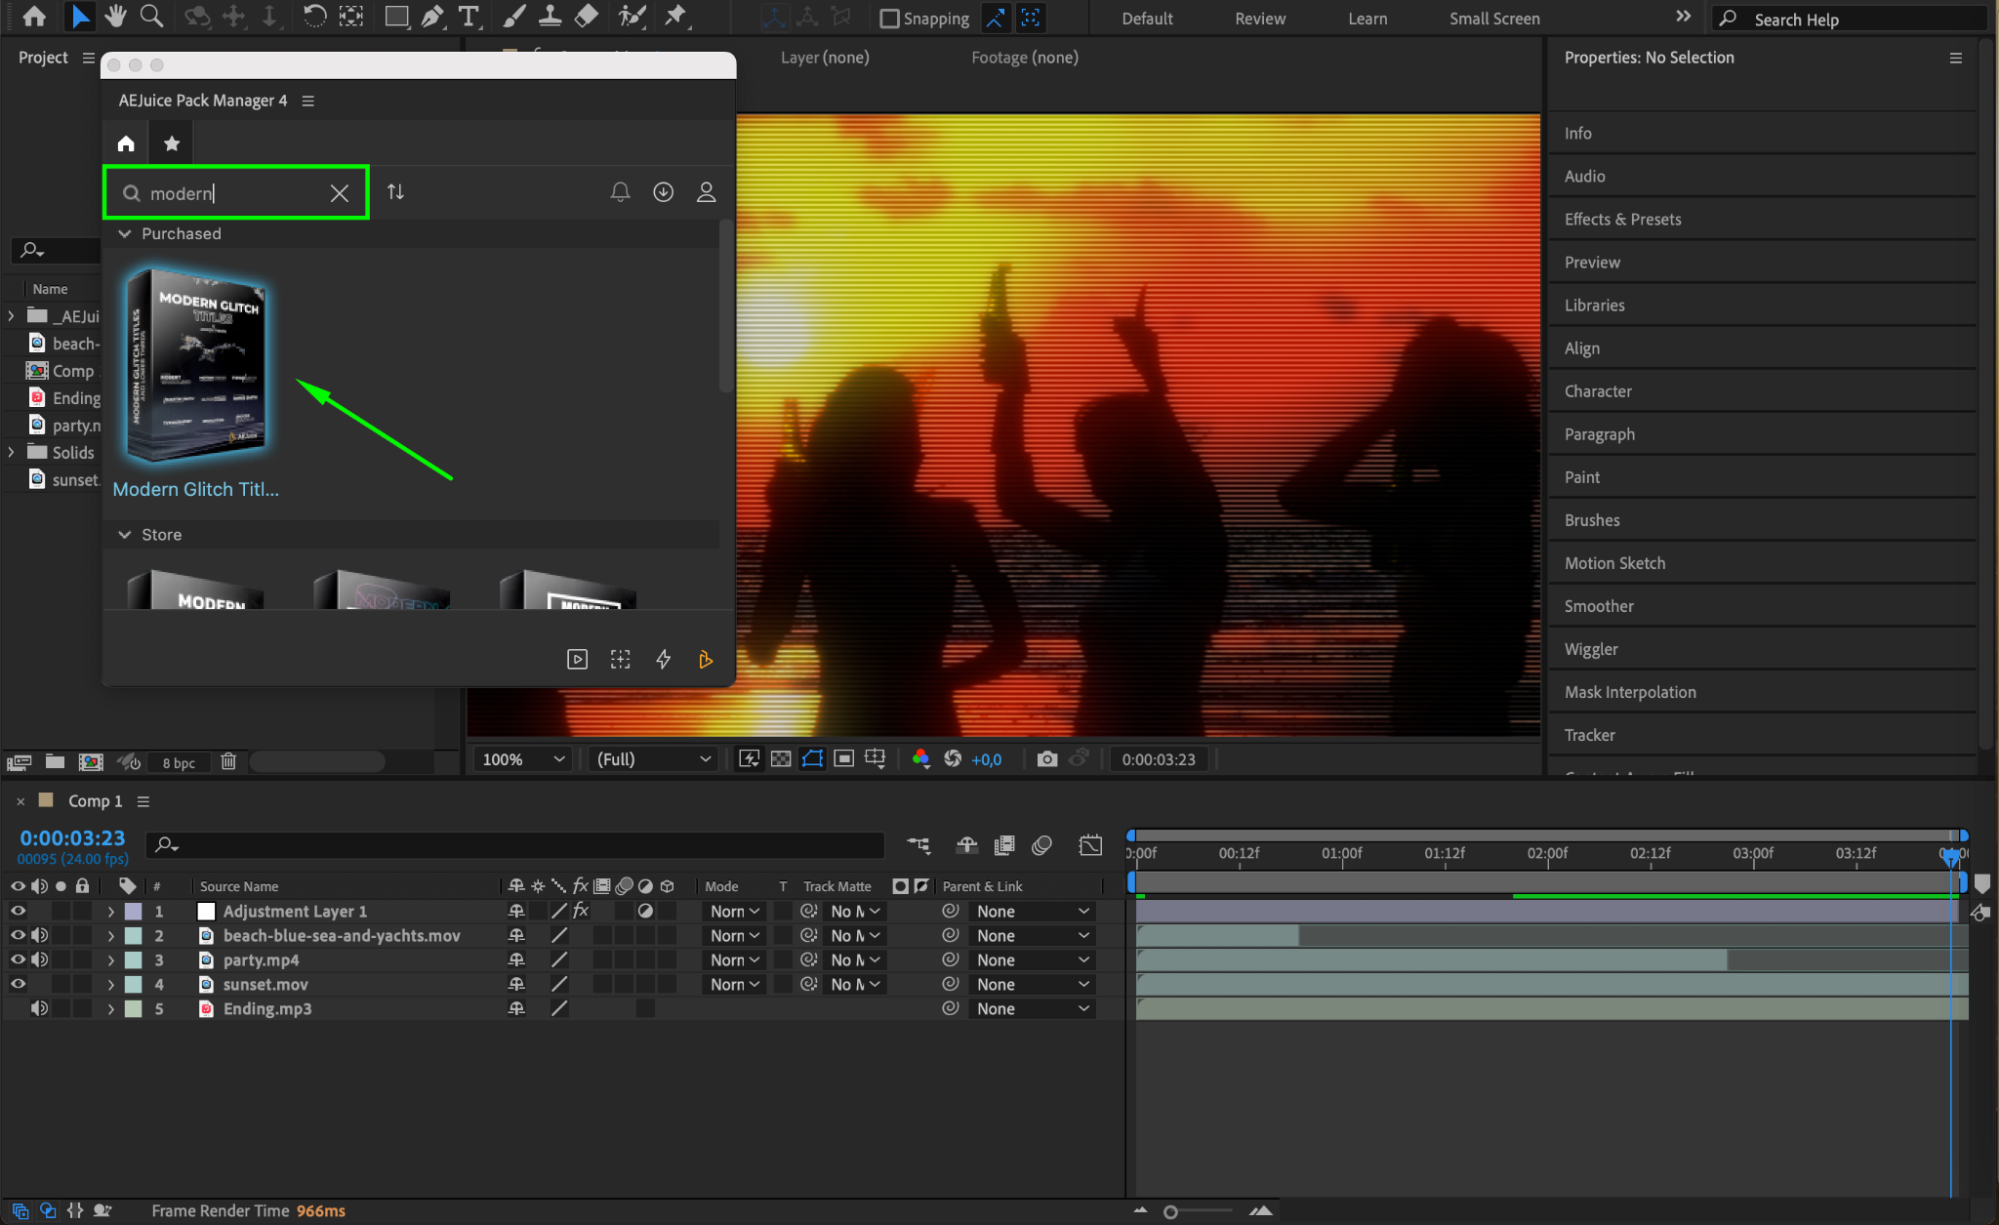
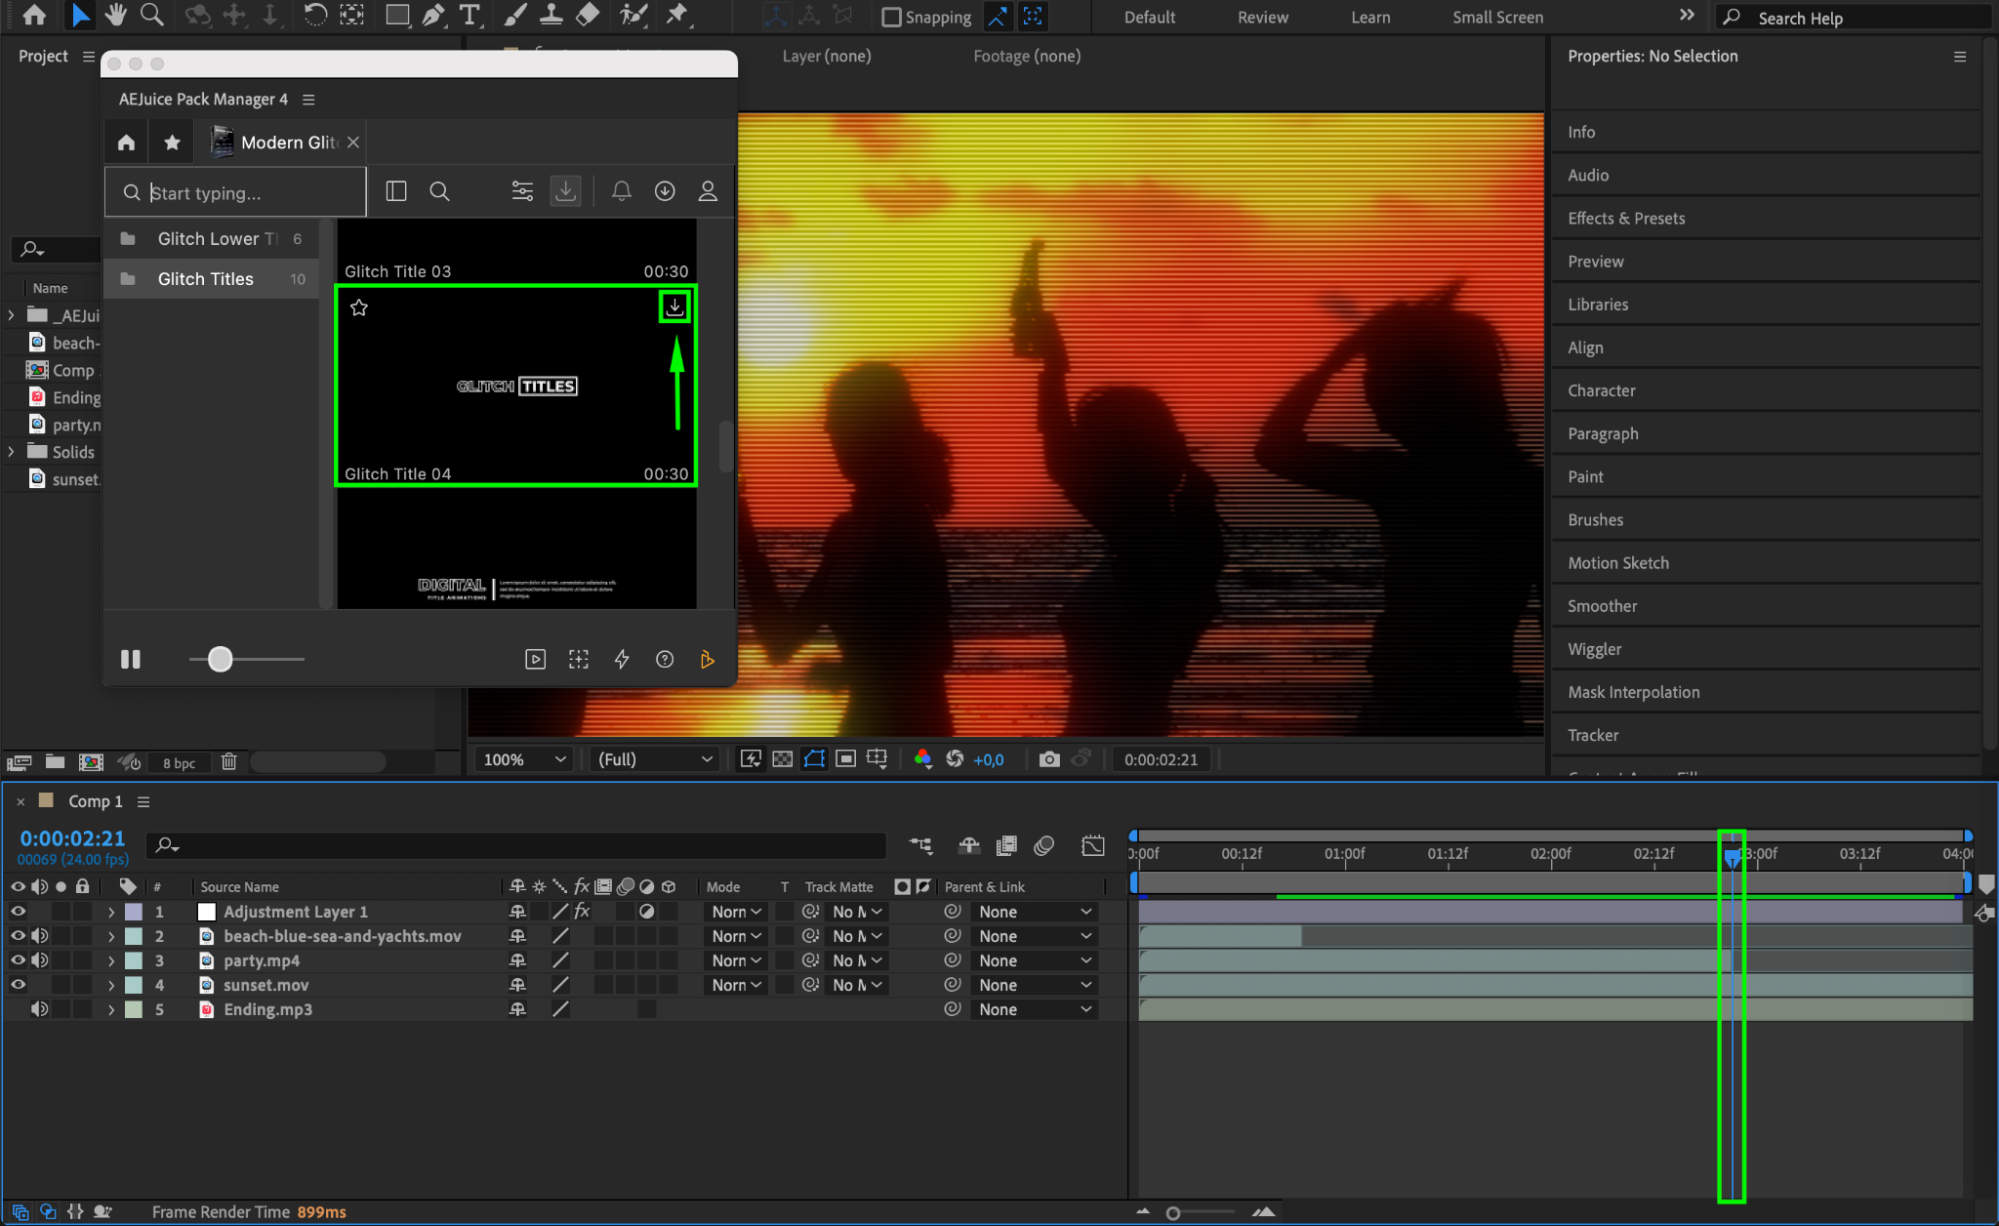
To take your movie to the next level, consider incorporating third-party plugins like AEJuice. Plugins can offer additional effects, transitions, and tools to speed up your workflow. They provide pre-built templates, animated backgrounds, fonts, and expressions that can add polish to your final production, saving you time and delivering professional-grade results.
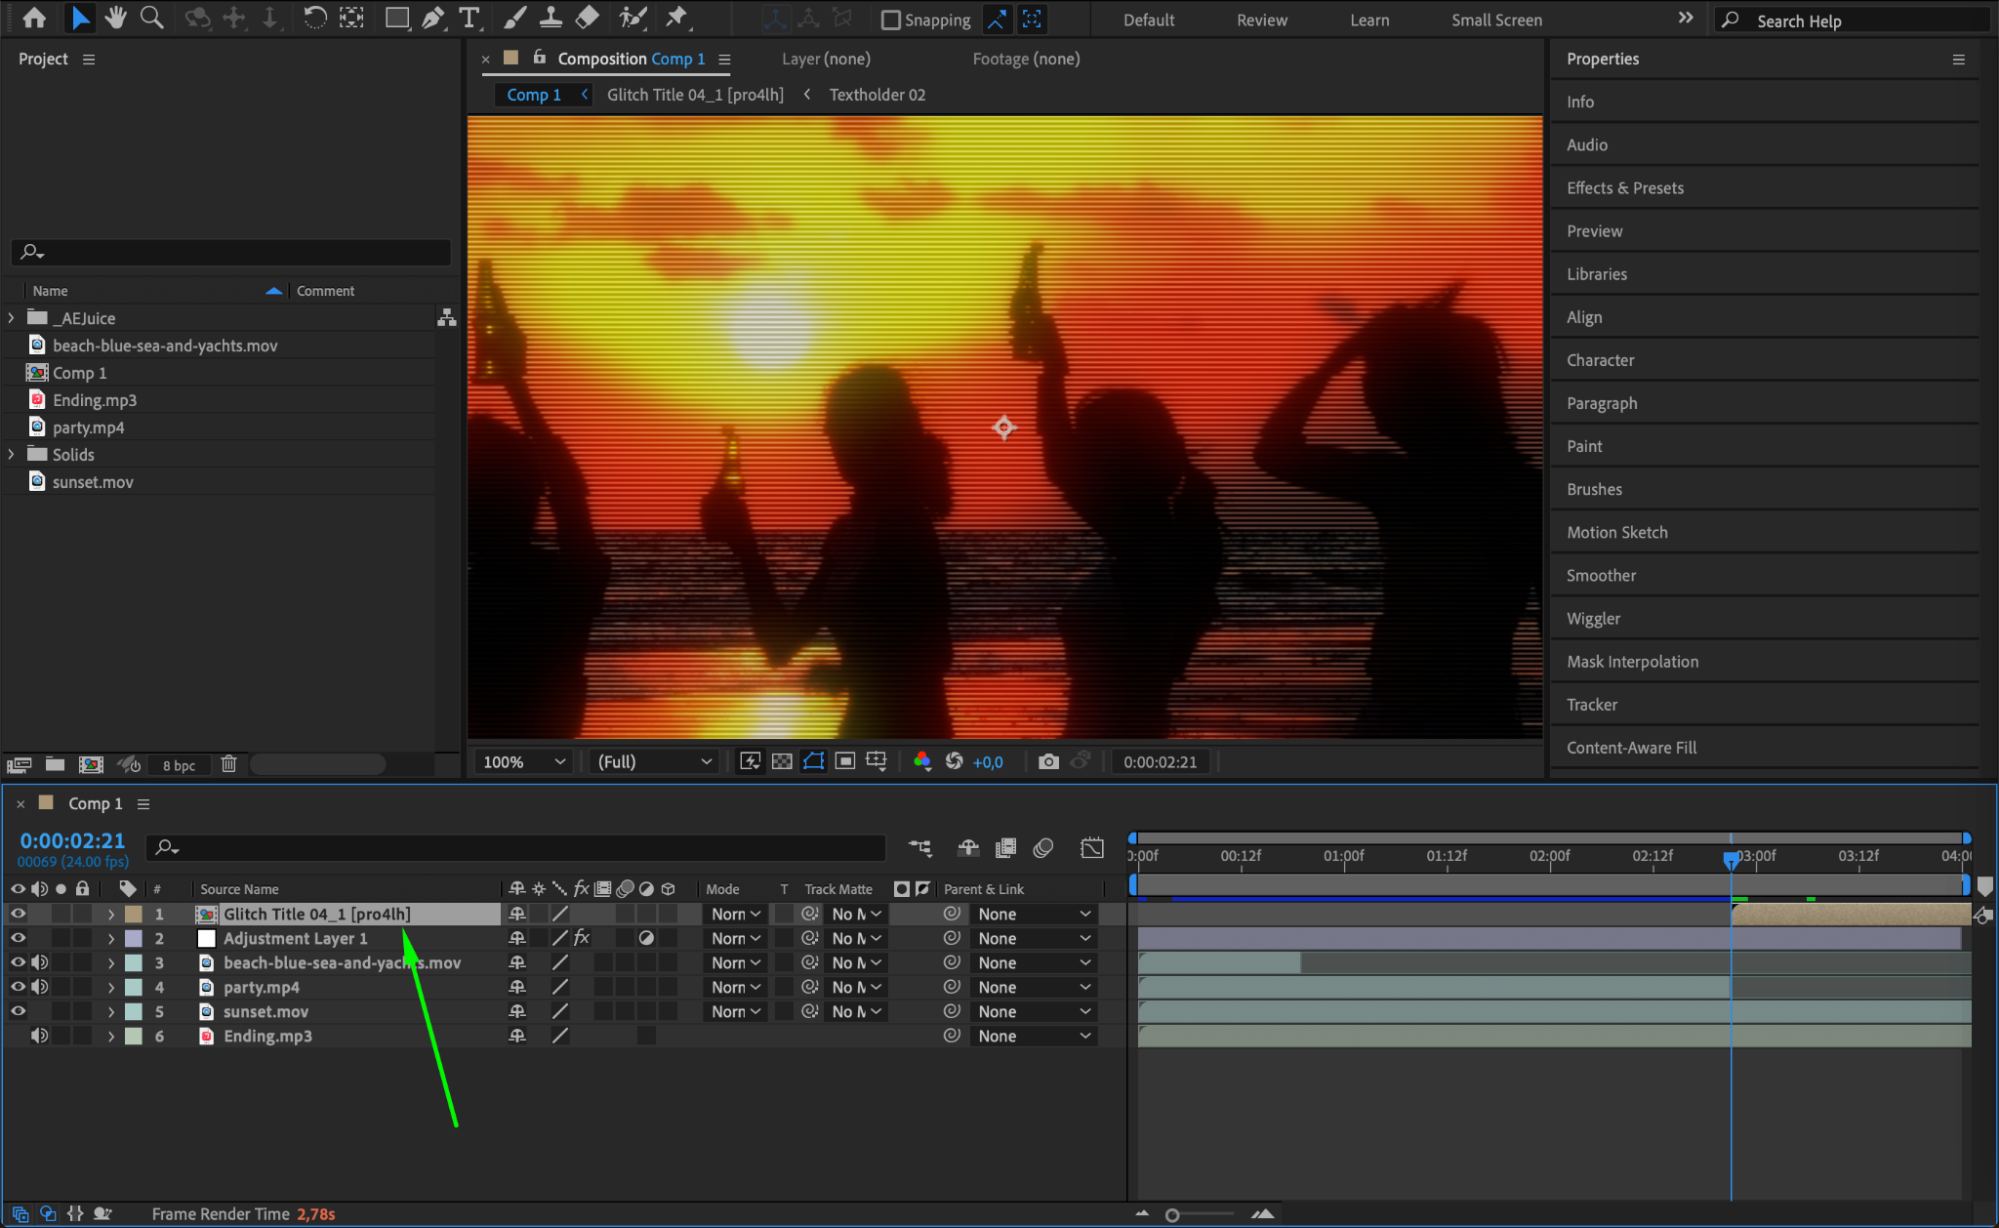
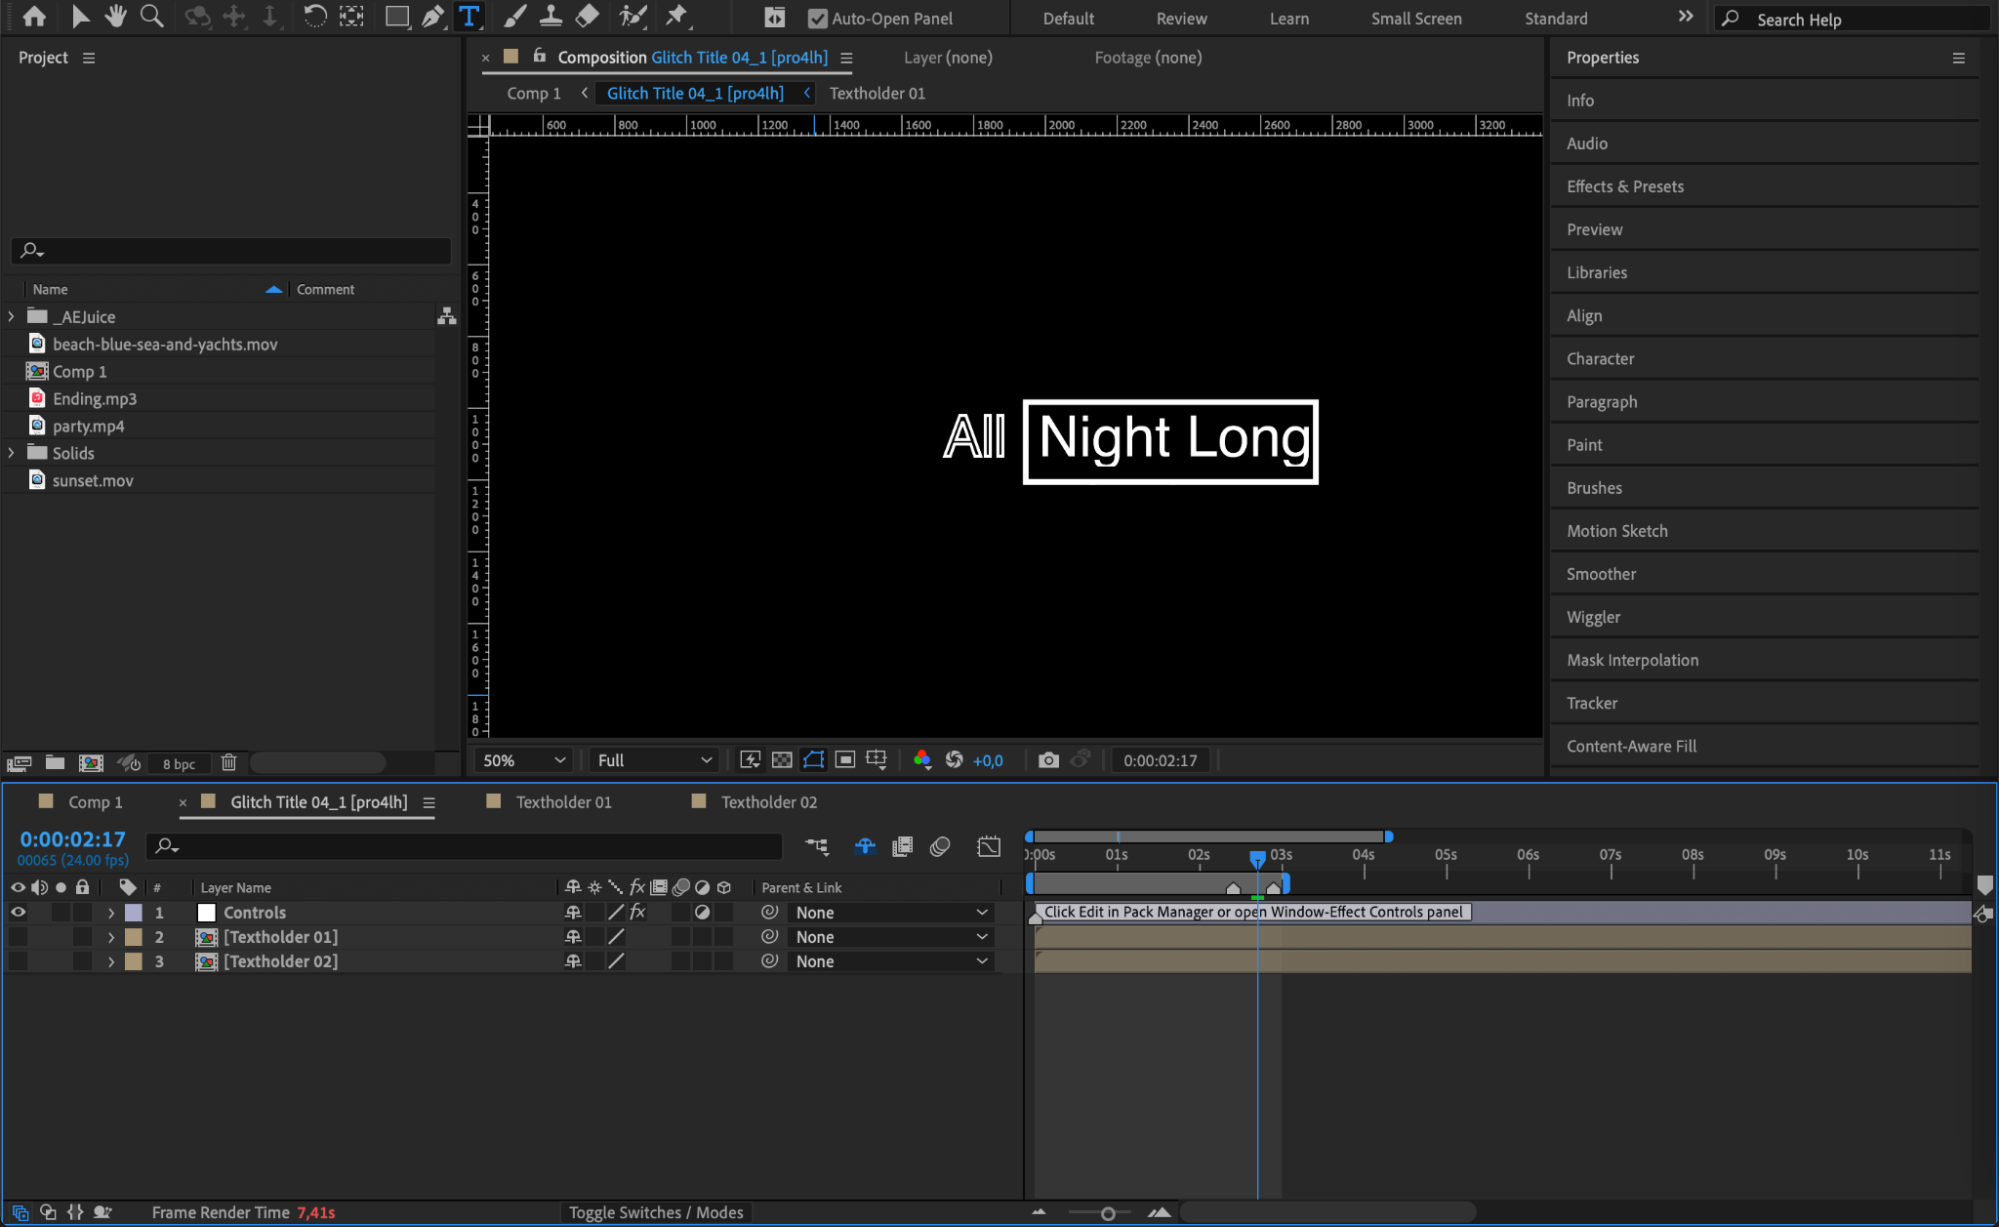
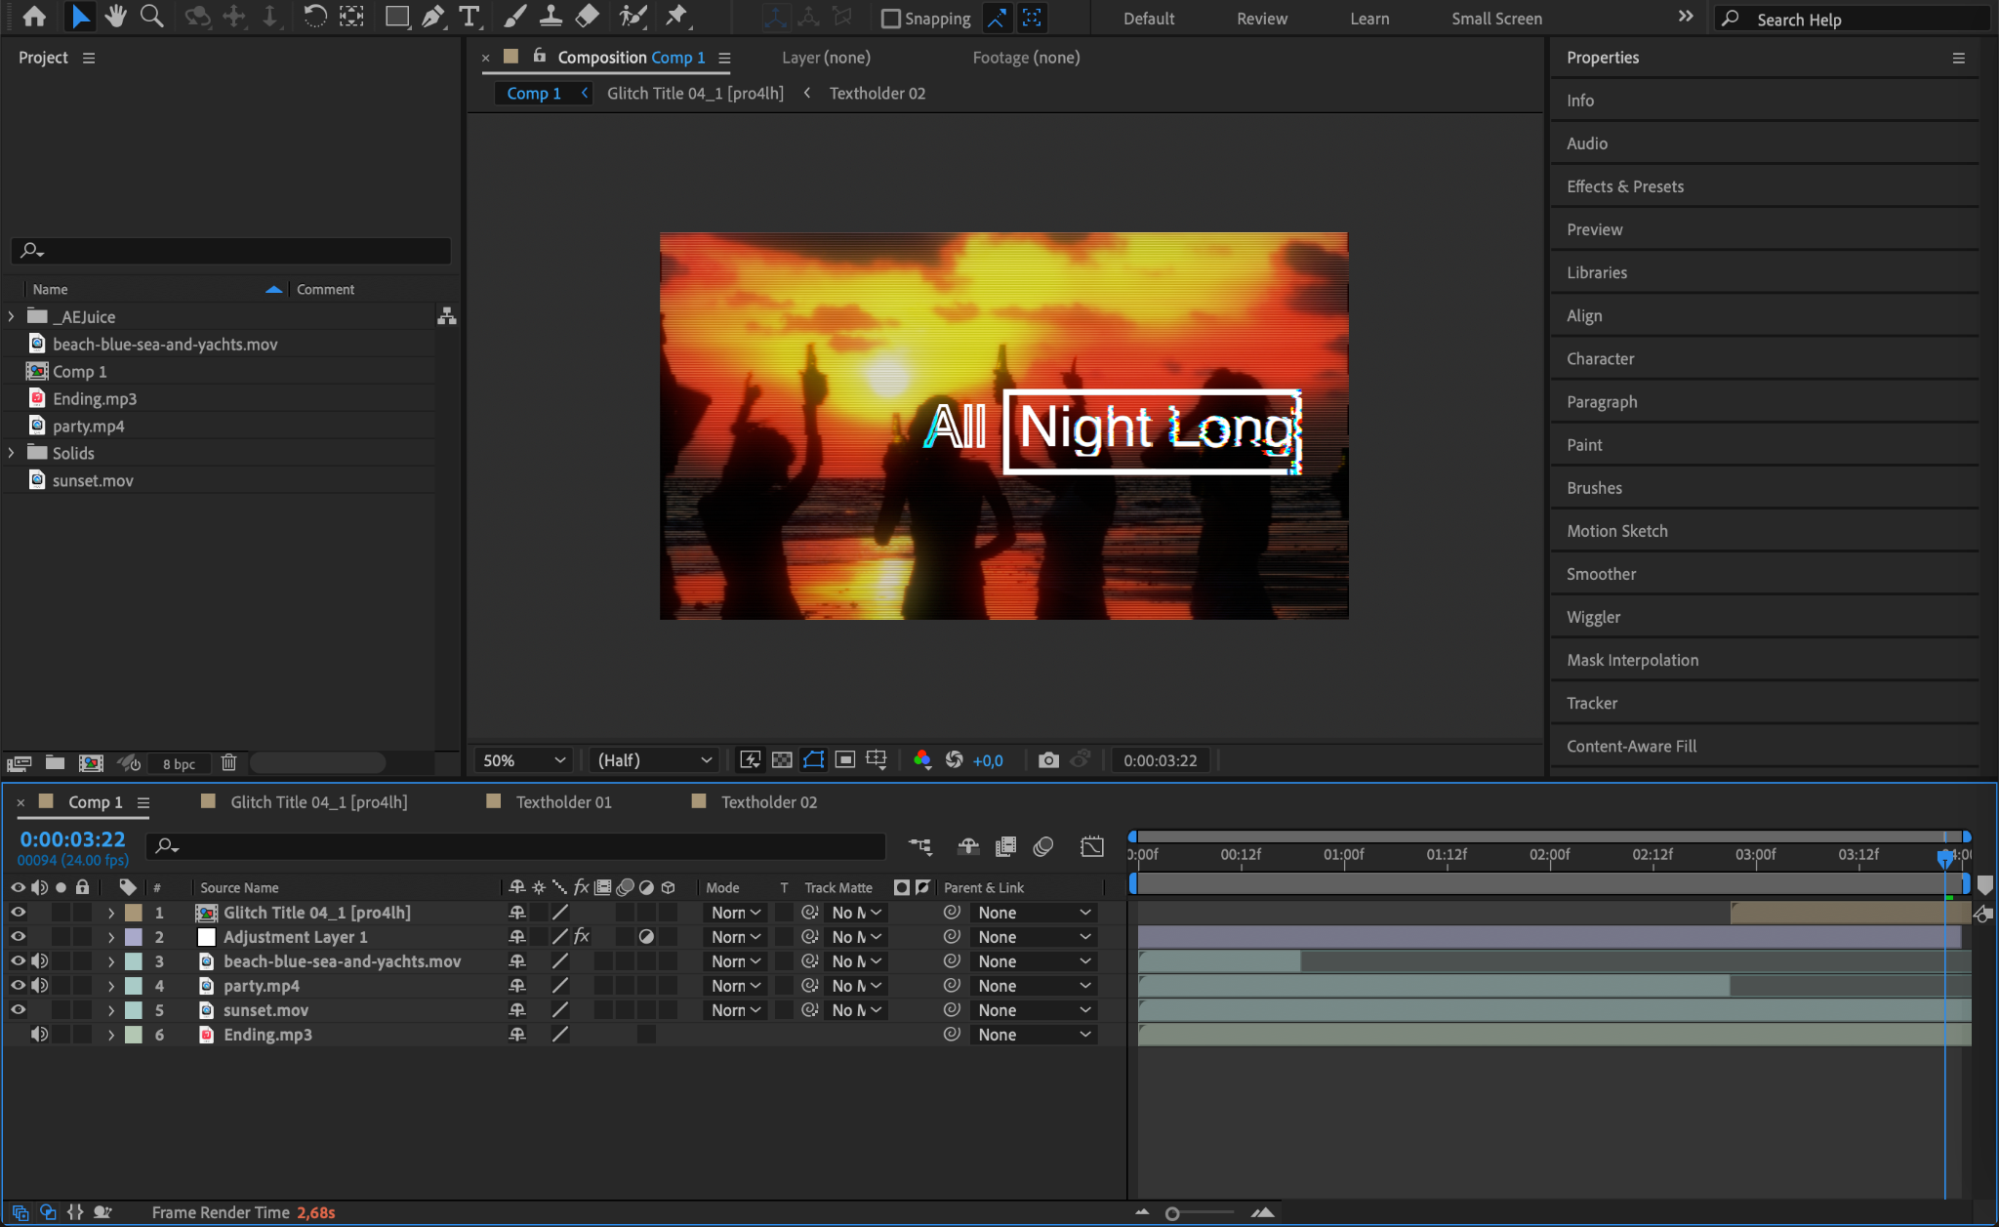
Step 9: Preview and Refine
Before you finalize your movie, preview your composition by pressing Spacebar to ensure that everything looks and sounds as intended. Check the timing of your edits, the smoothness of transitions, and the quality of visual effects. Make any necessary adjustments to enhance the overall flow and pacing of your movie.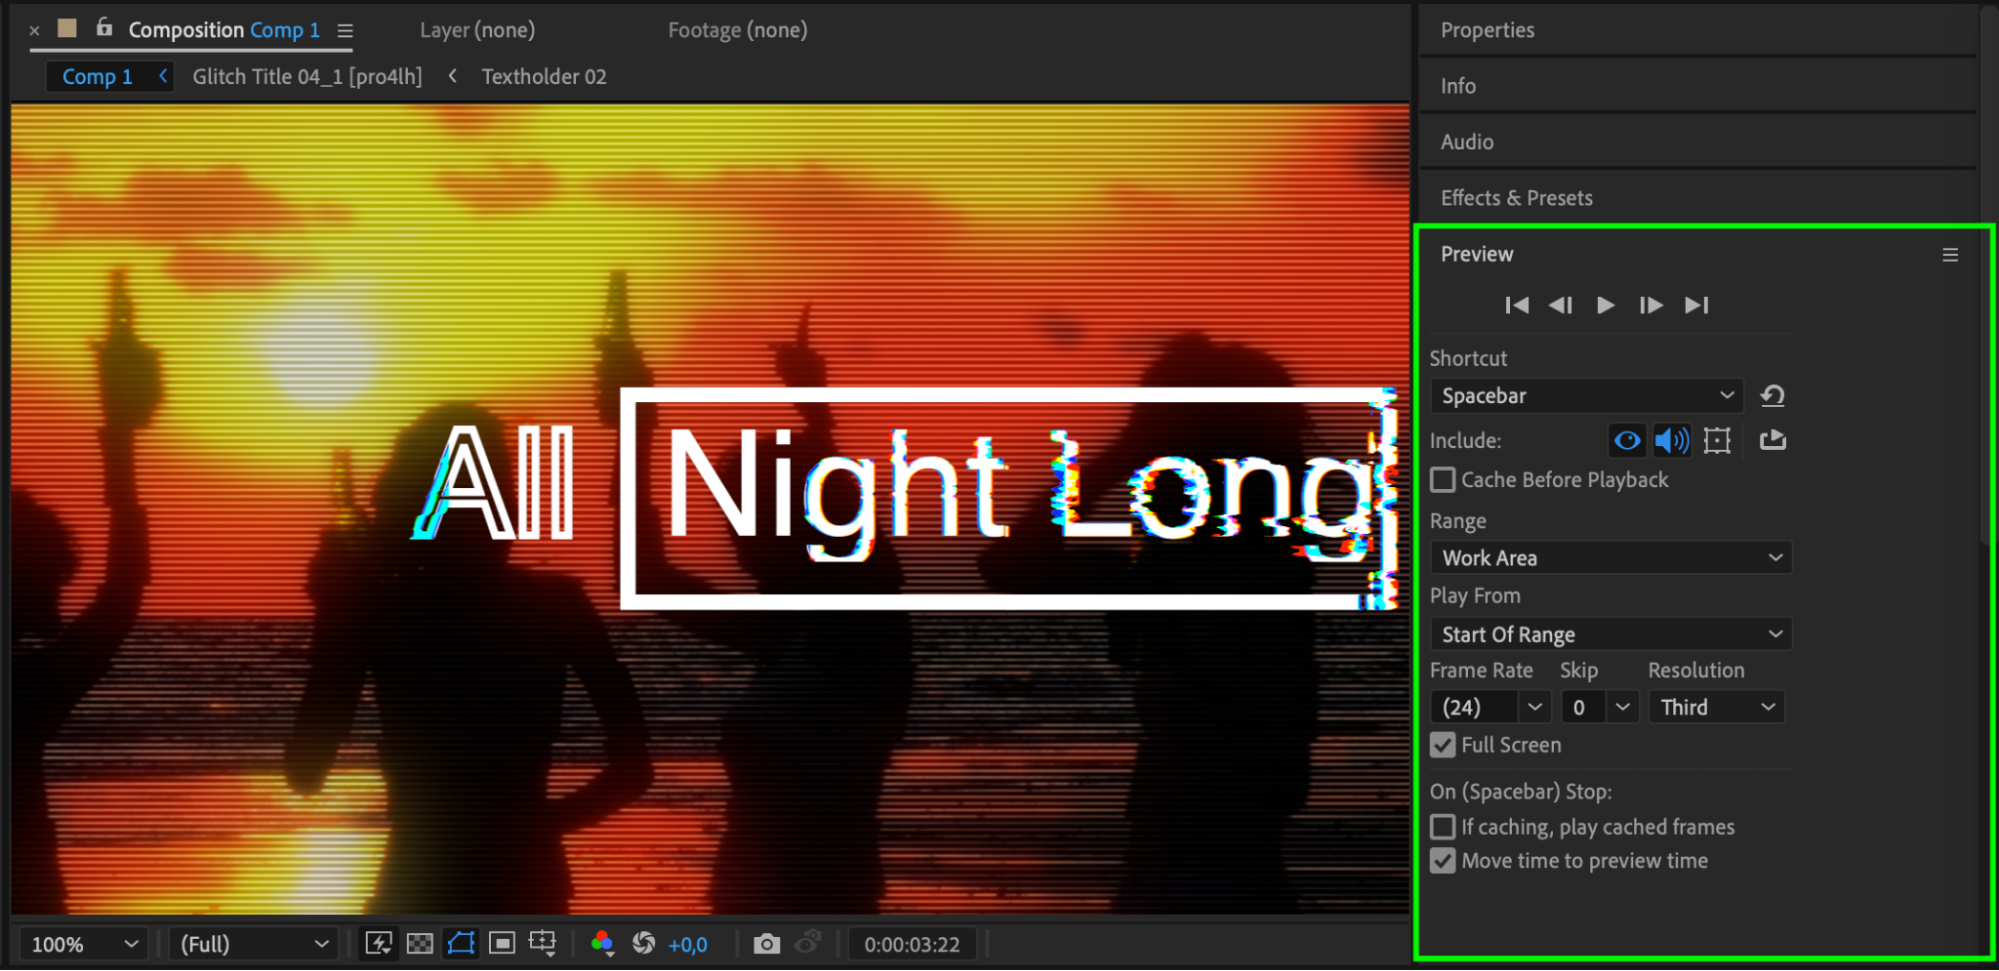
Step 10: Exporting Your Movie
Once you’re happy with your project, it’s time to export. Go to Composition > Add to Render Queue and adjust the output settings. Choose the format and compression that best suits your needs, such as H.264 for MP4 or QuickTime for higher-quality formats. When you’re ready, click Render to export your movie. After Effects will process your composition and generate a final video file that you can share or upload to your preferred platform.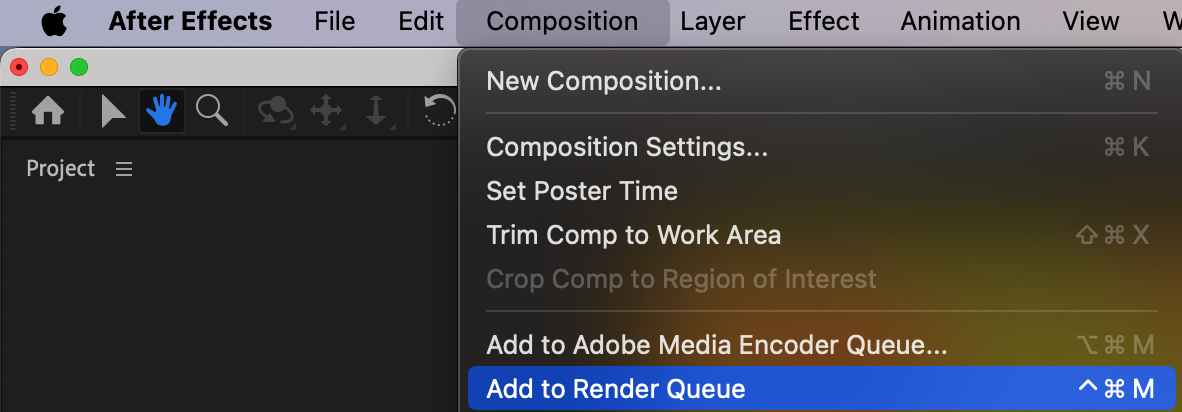

Conclusion
Adobe After Effects is a powerhouse for creating stunning, cinematic movies. With the ability to incorporate visual effects, motion graphics, and dynamic editing tools, you can create professional-grade films that captivate and inspire. By following these steps and exploring the many features of After Effects, you’ll be able to produce a movie that truly shines. Whether it’s a personal project or the next viral hit, After Effects gives you the creative freedom to bring your vision to life. So grab your camera, open After Effects, and start creating incredible movies today!


