Creating Motion Graphics in After Effects
Introduction to Motion Graphics Design
Motion graphics are widely used in video production to create engaging visual elements. In After Effects, you can design professional motion graphics using shape layers, gradients, 3D effects, and camera depth. Follow these steps to build a dynamic motion graphic animation.
Step 1: Create a New Composition
Get 10% off when you subscribe to our newsletter

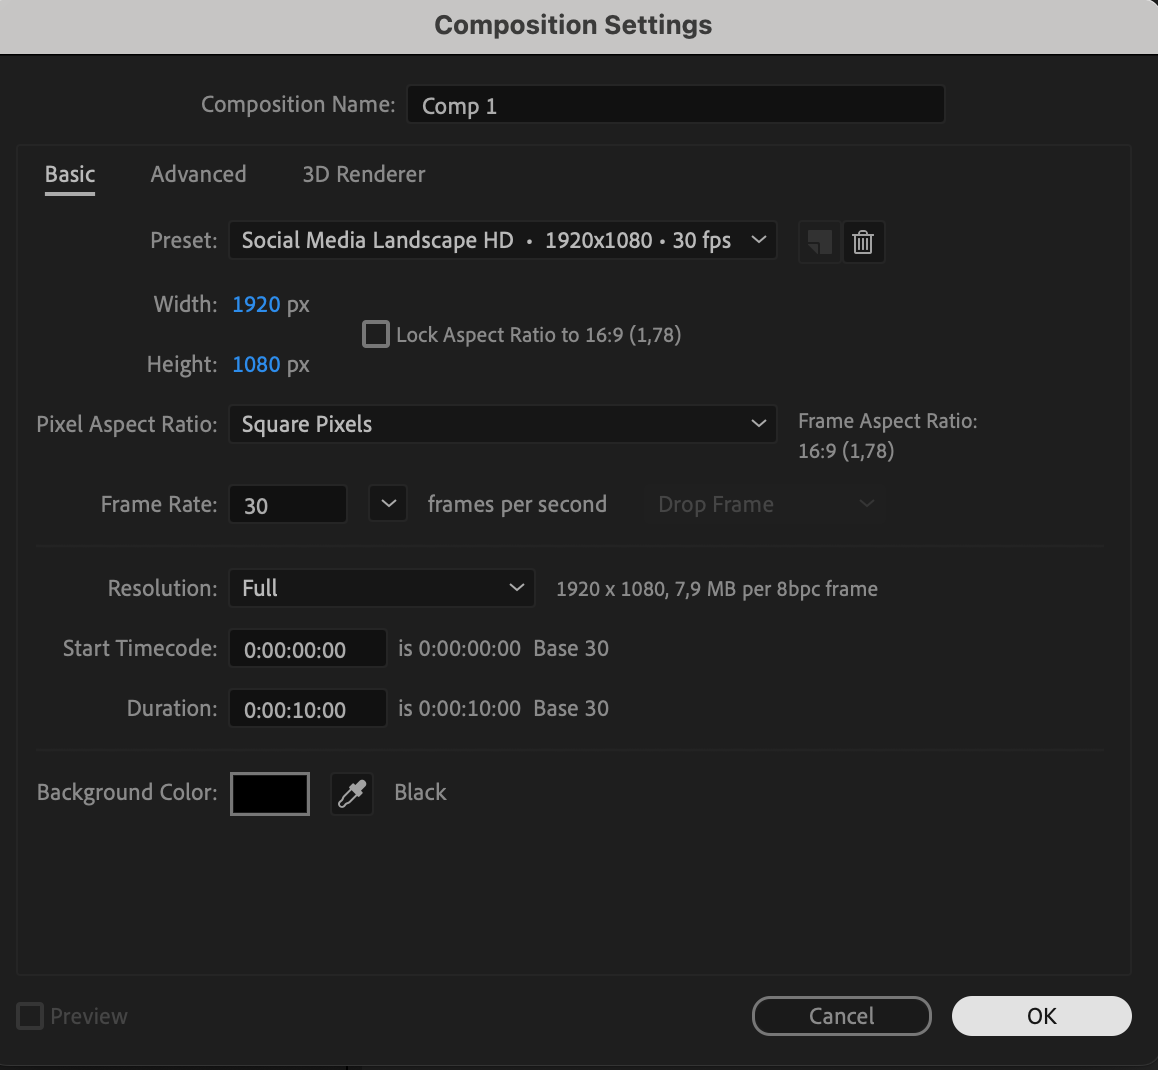
Go to Composition > New Composition and set your preferred resolution, frame rate, and duration. This will be the workspace for your motion graphics.
 Step 2: Create a Solid Background
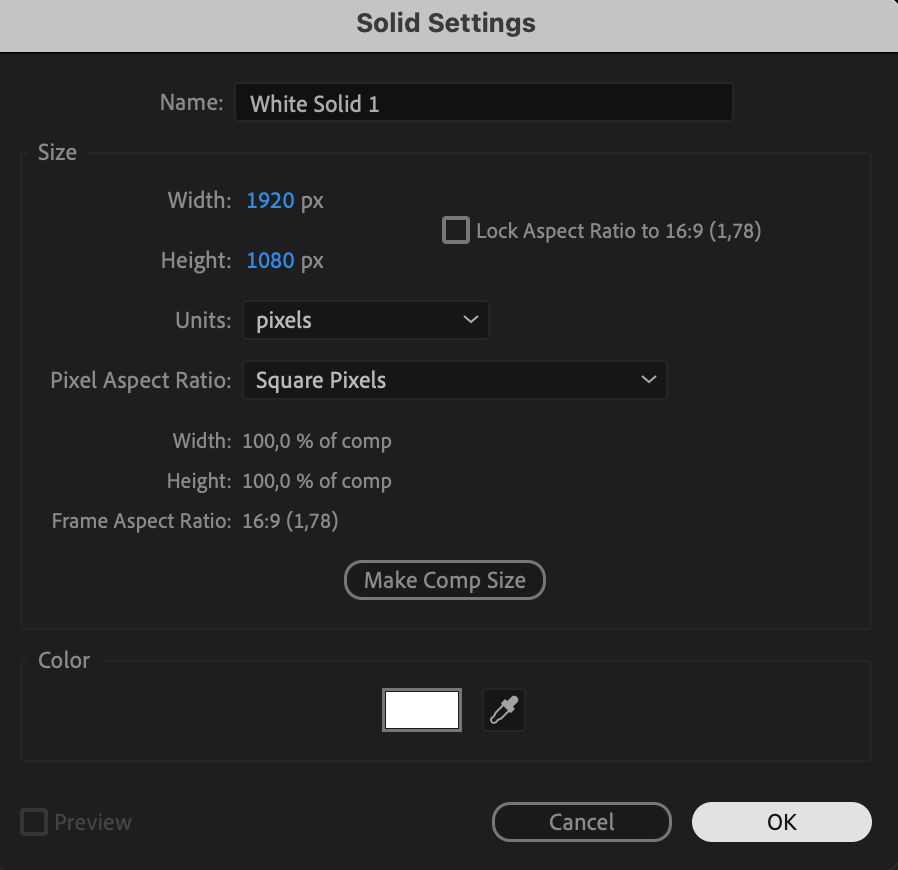
Go to Layer > New > Solid and choose a white color. This solid layer will serve as the base for your design.
 Step 3: Apply a Gradient Background
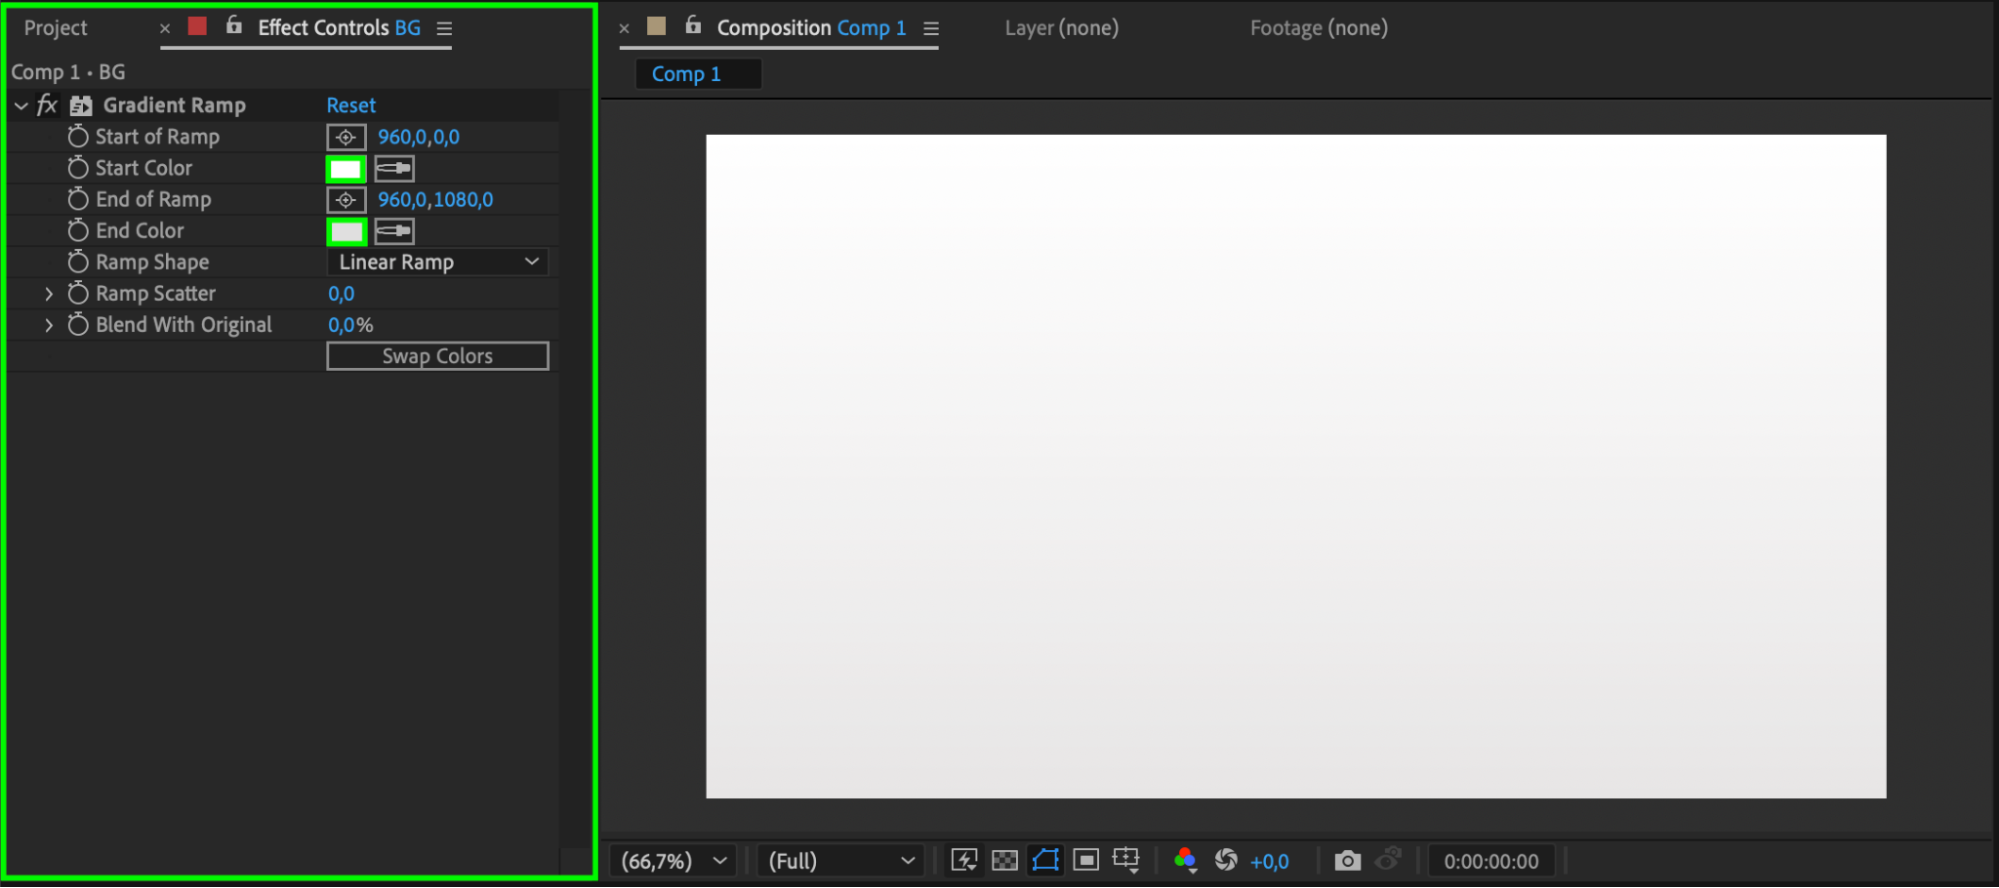
Search for the Gradient Ramp effect in the Effects & Presets panel and apply it to the solid layer. Set both colors to white, but make one slightly darker to create subtle depth.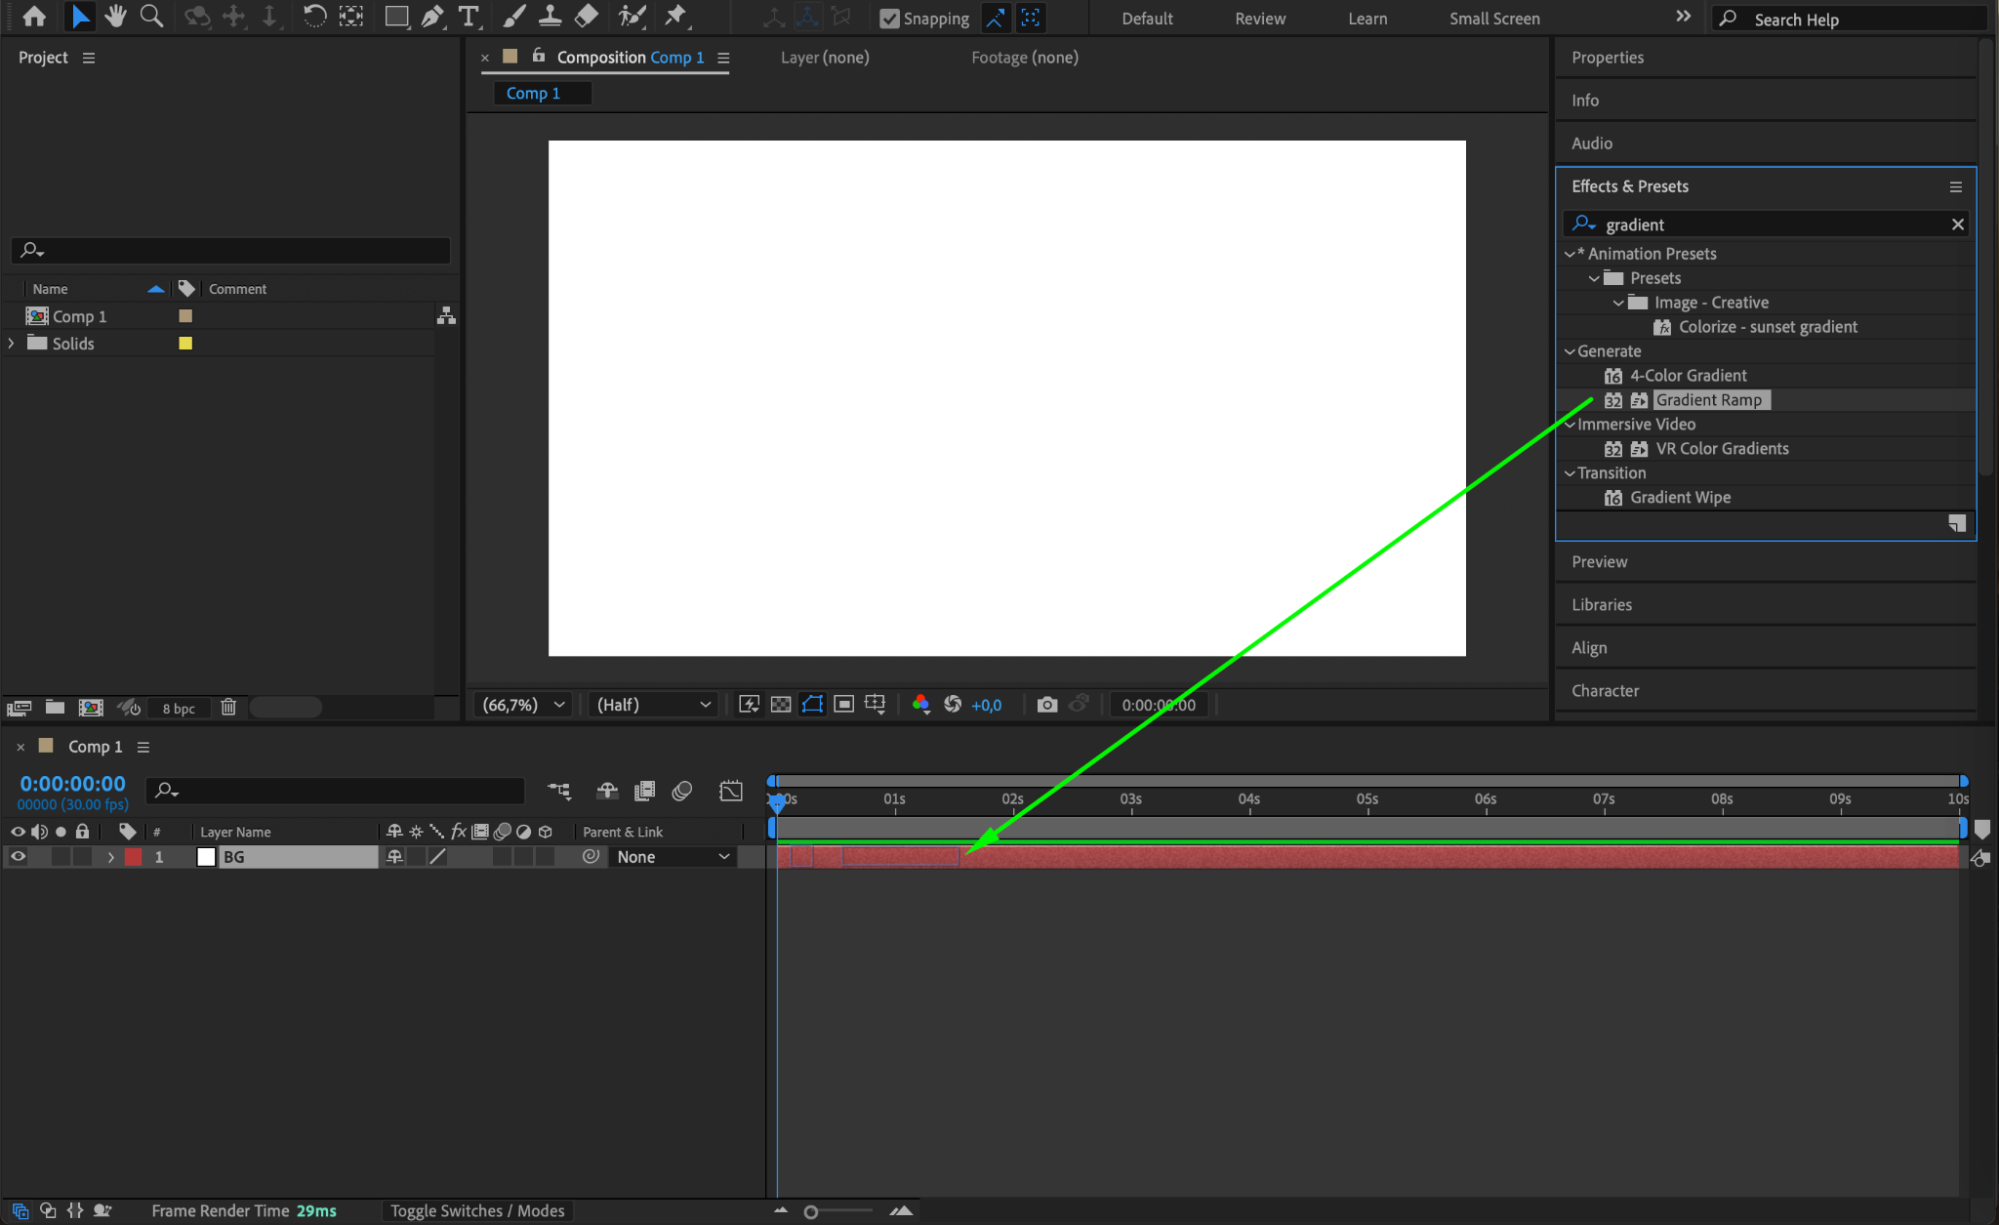
 Step 4: Create a Circle Shape
Select the Ellipse Tool (Q) and draw a circle in the center of the composition. Hold Shift while dragging to create a perfect circle.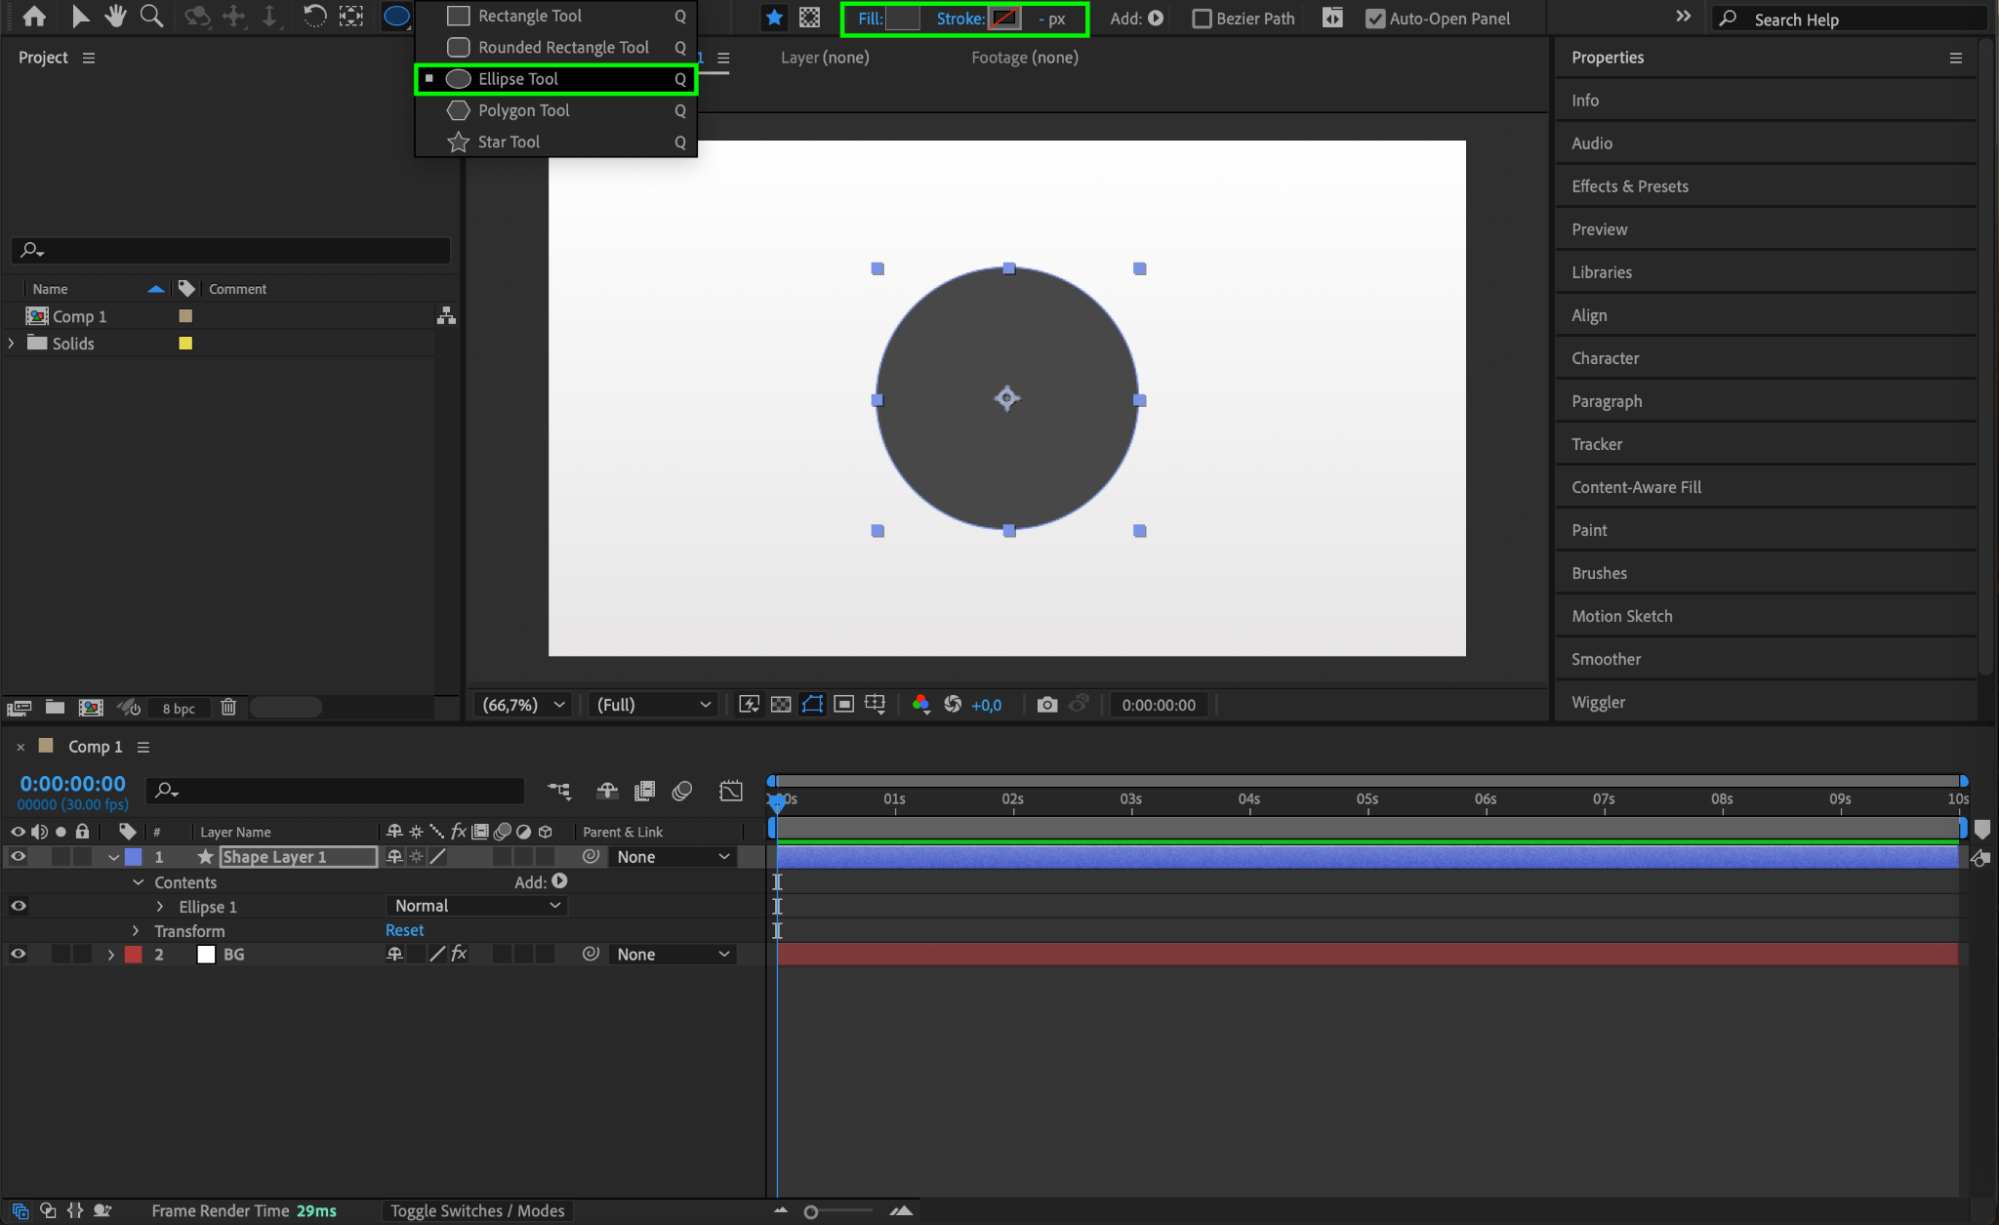 Step 5: Apply Gradient Overlay to the Circle
Right-click on the circle layer and choose Layer Styles > Gradient Overlay. This will give the circle a more dimensional look.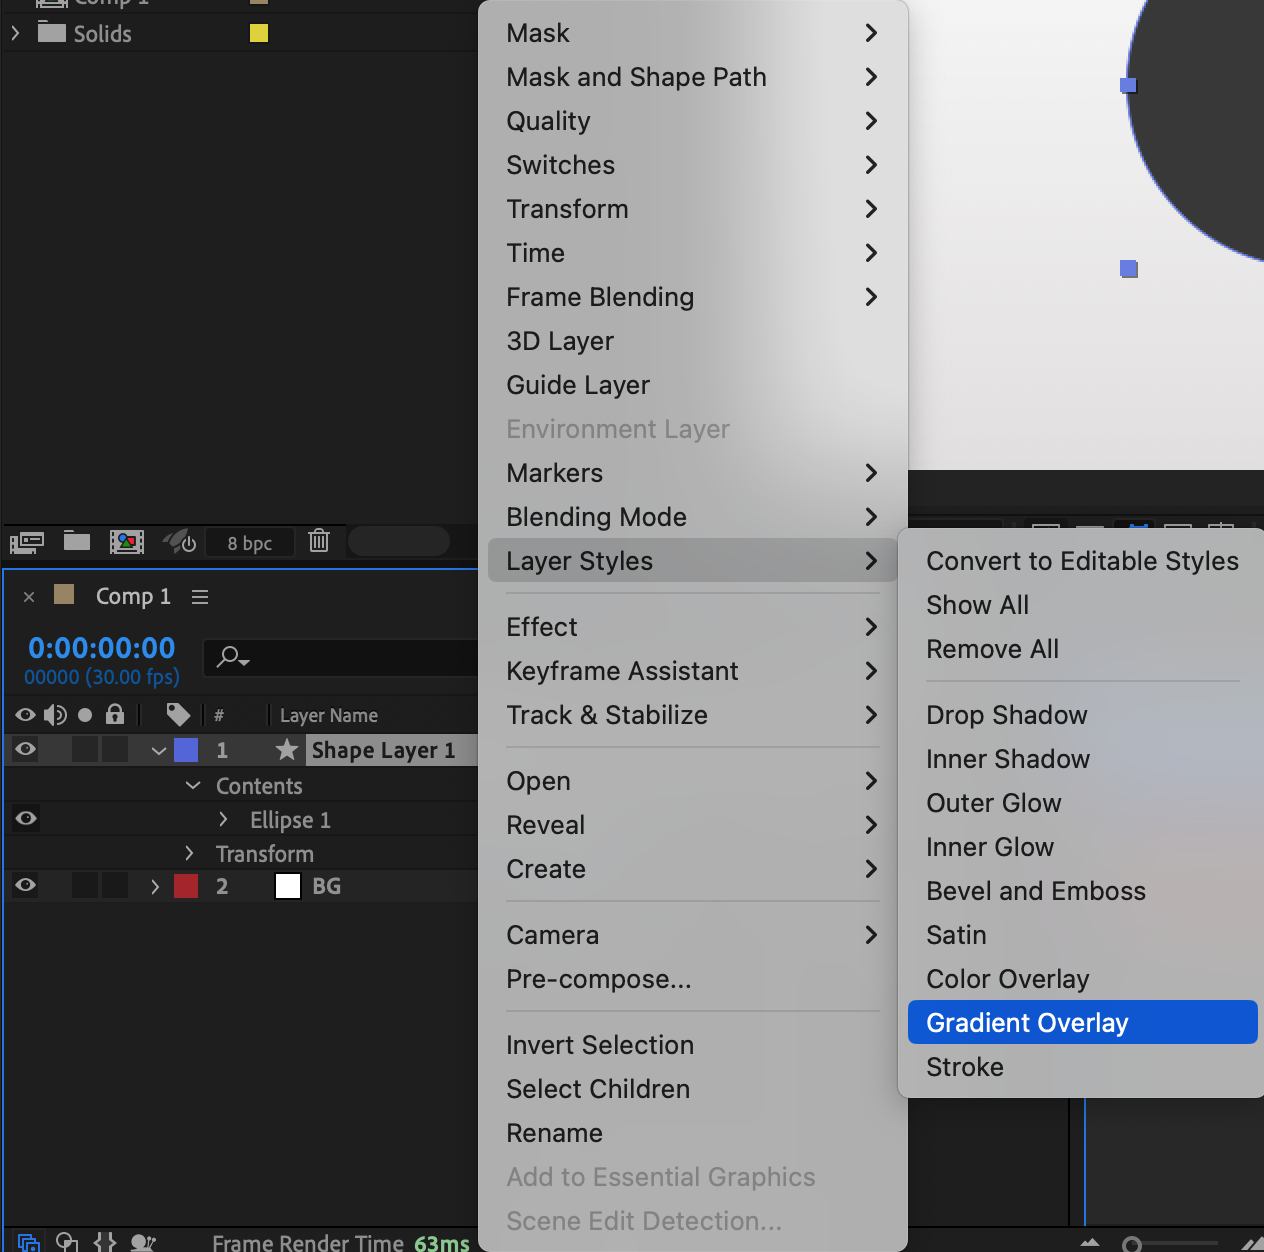 Step 6: Edit Gradient Colors
Expand the Gradient Overlay settings. Click on Edit Gradient, then choose white for the outer edges, a slightly darker white for the center, and a gray tone in between to create smooth shading.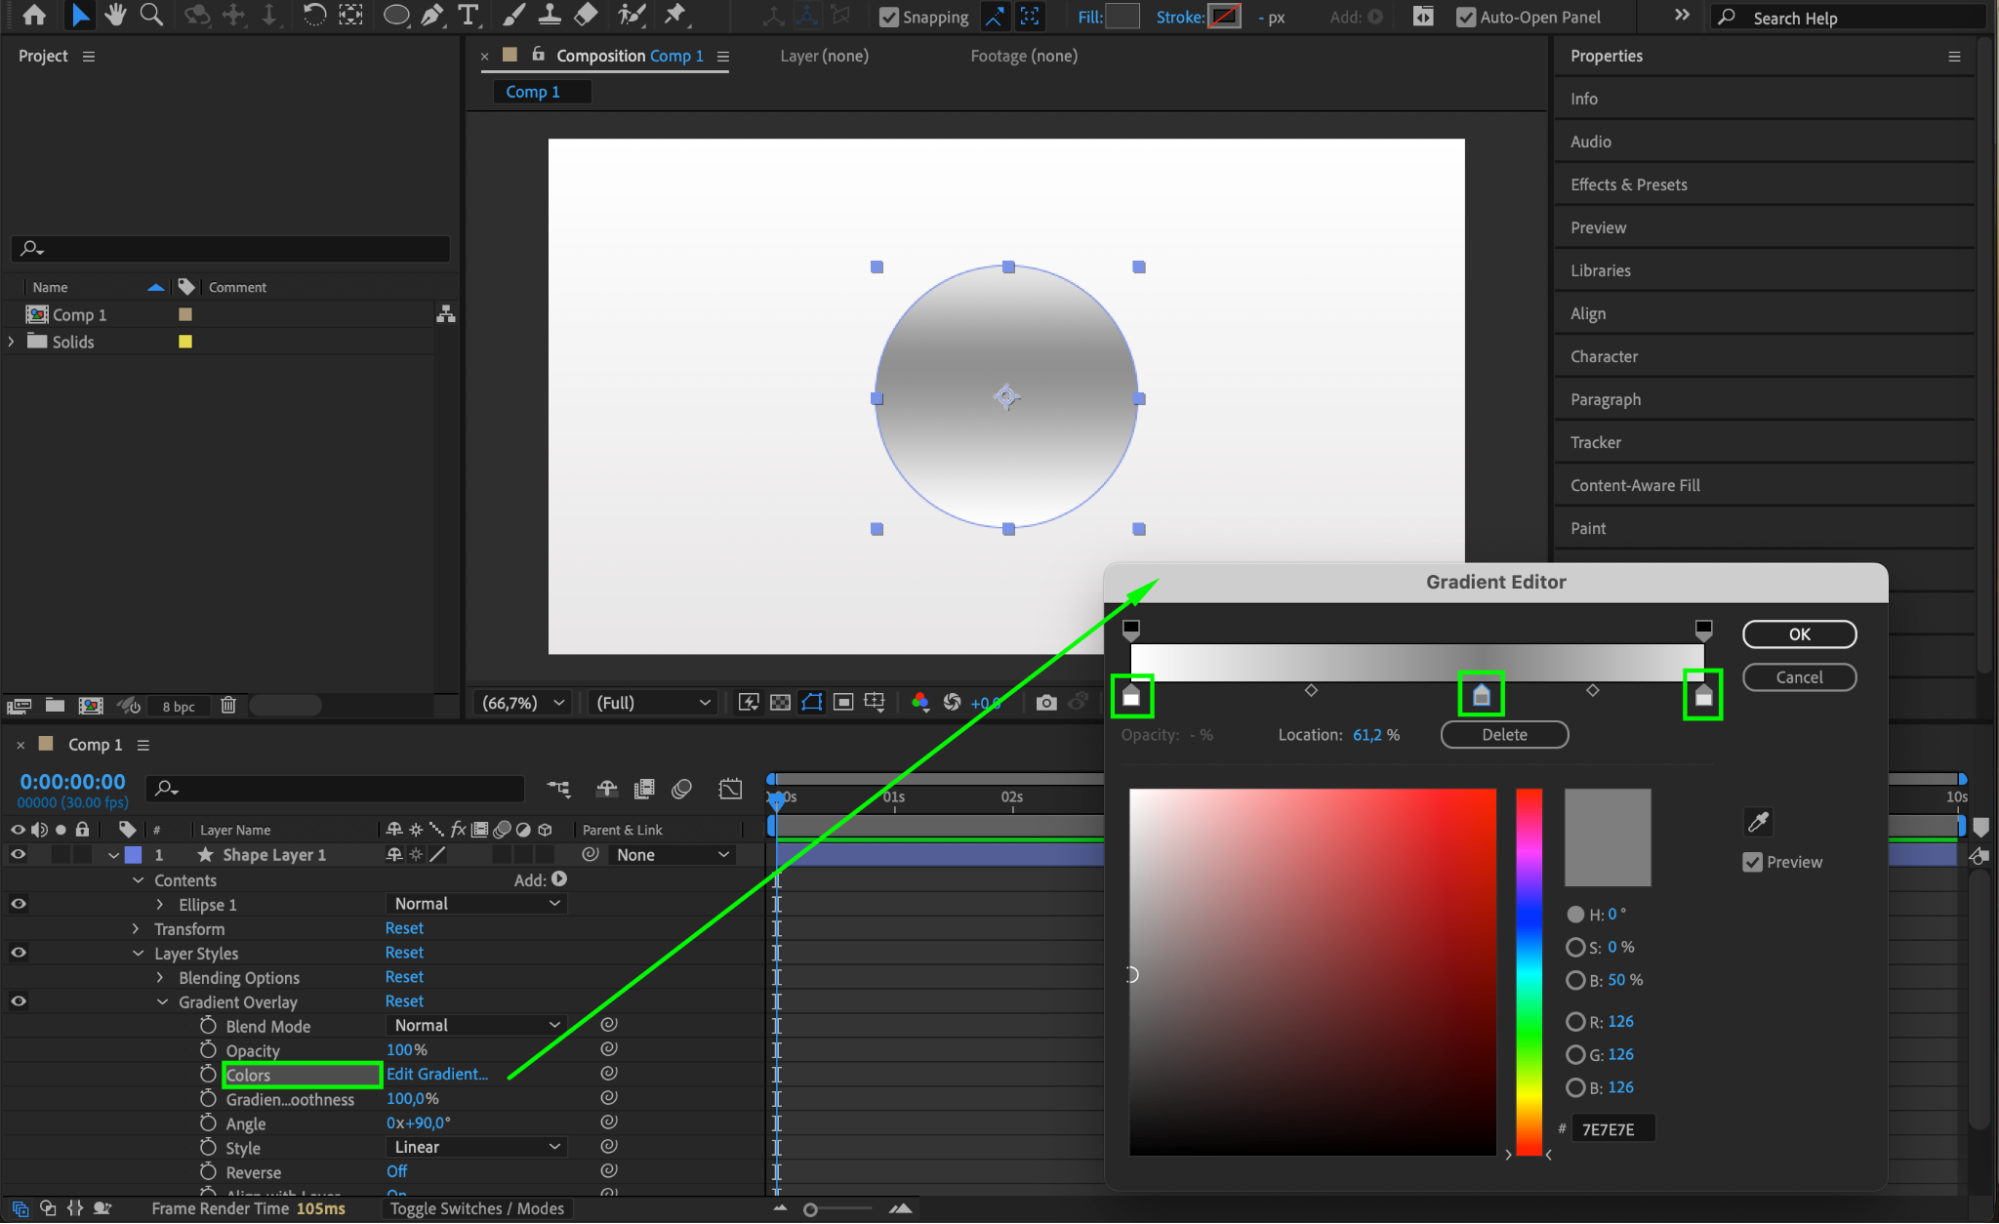 Step 7: Adjust Gradient Angle
Set the Gradient Angle to 289 degrees to create a realistic light direction effect.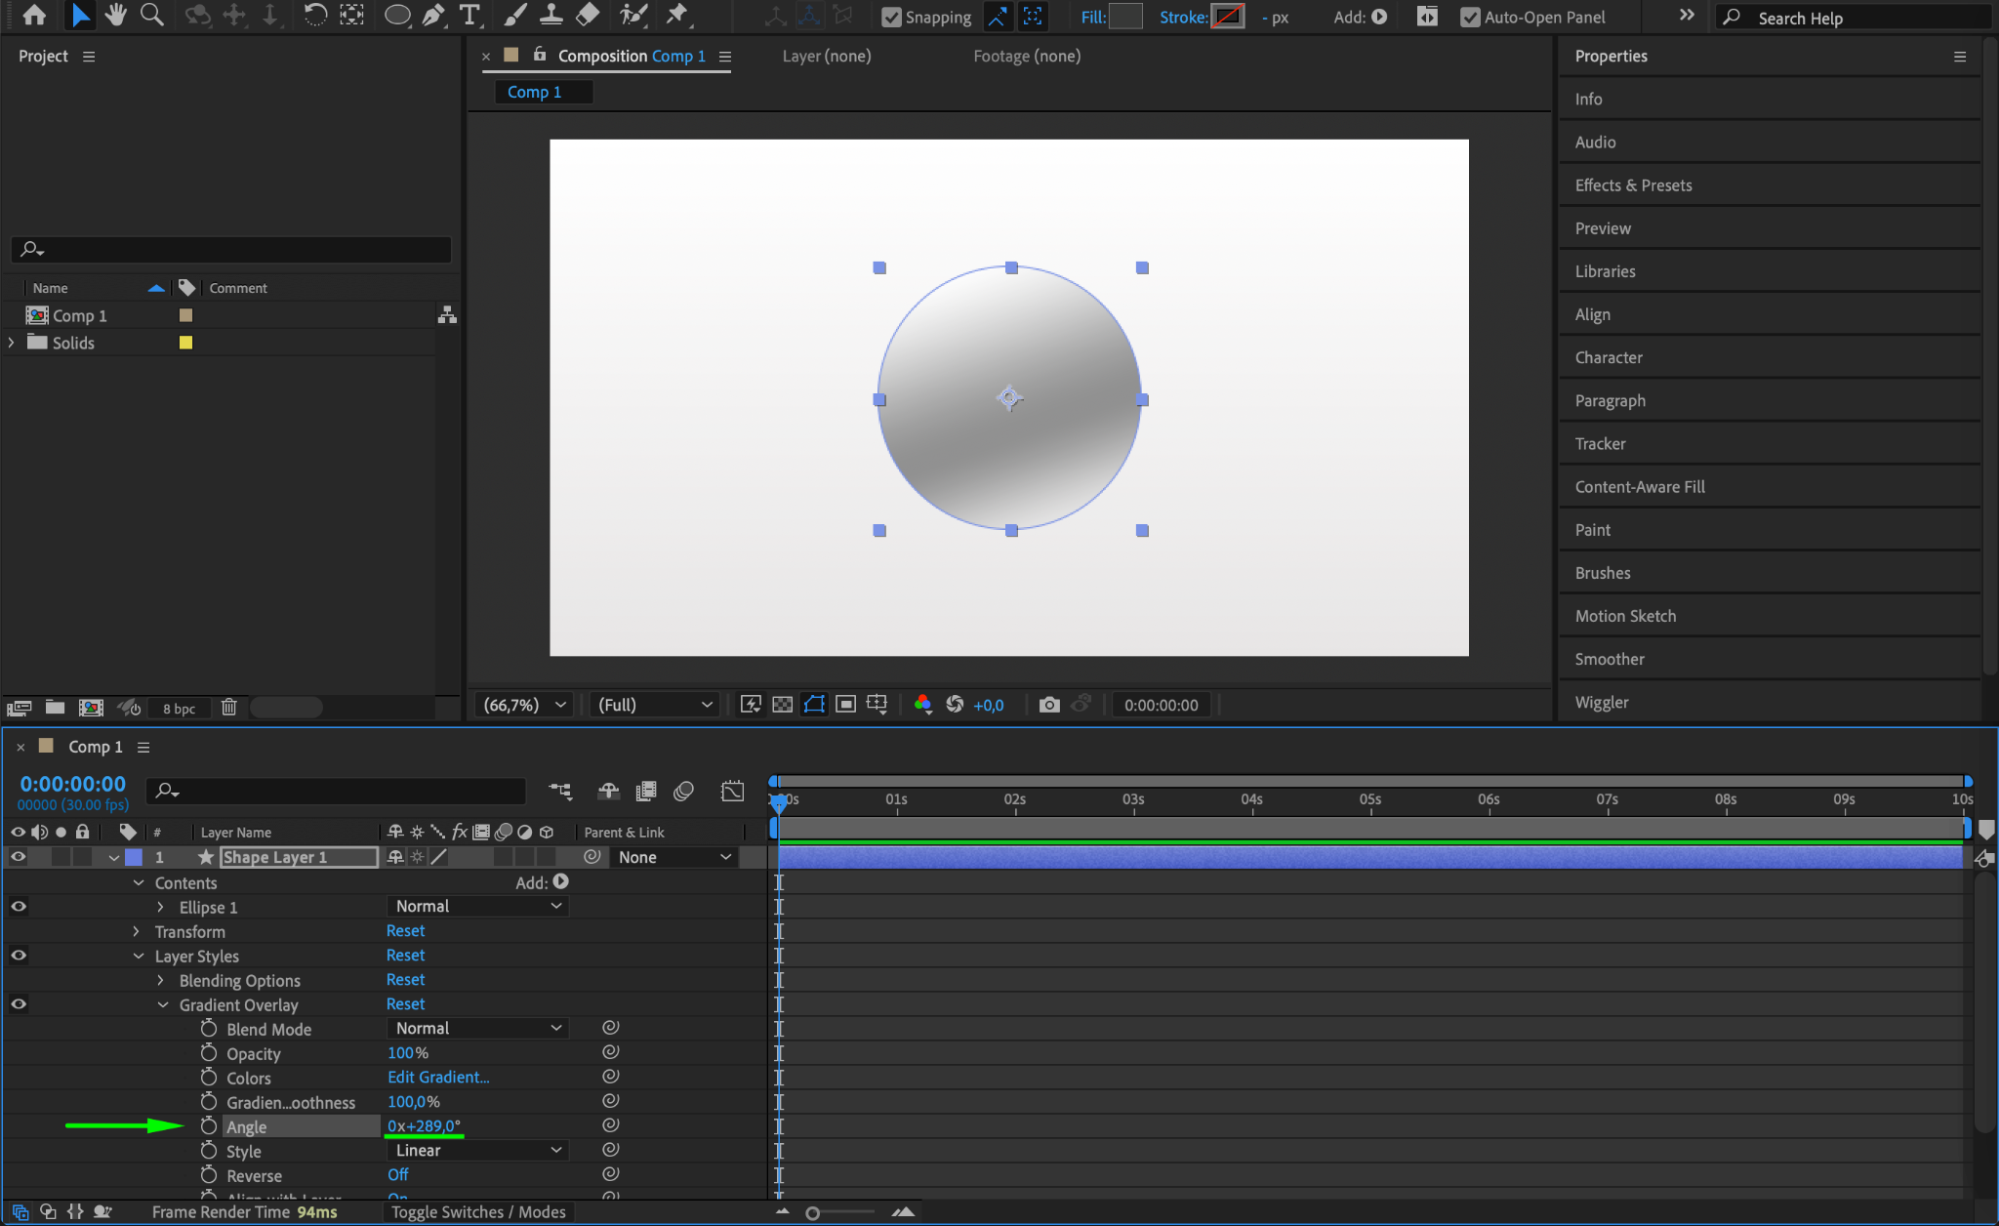 Step 8: Add Inner Shadow
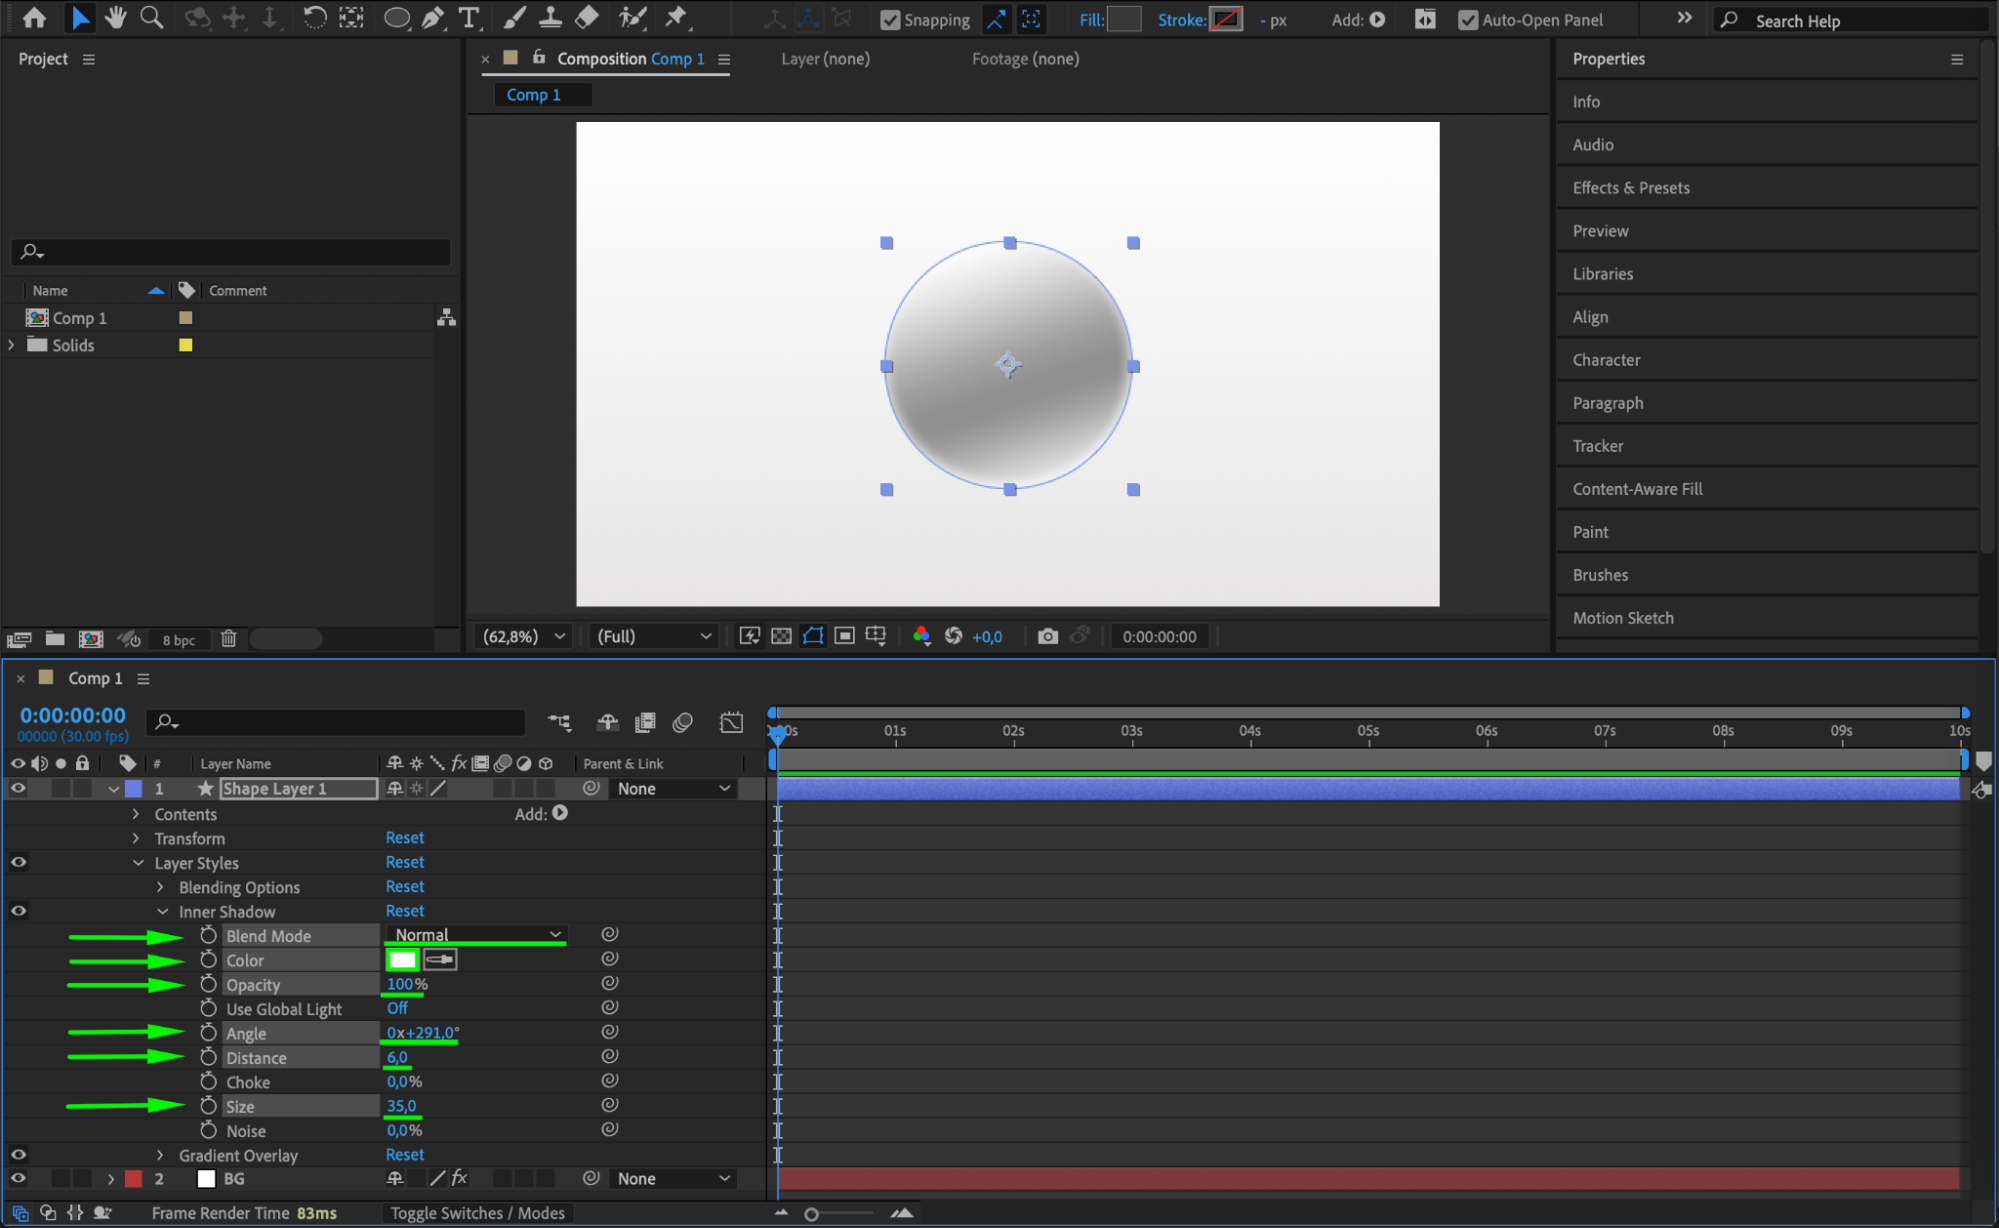
Right-click on the circle layer, select Layer Styles > Inner Shadow, and adjust the following settings:
Blend Mode: Normal
Color: White
Opacity: 100%
Angle: 291°
Distance: 6
Size: 35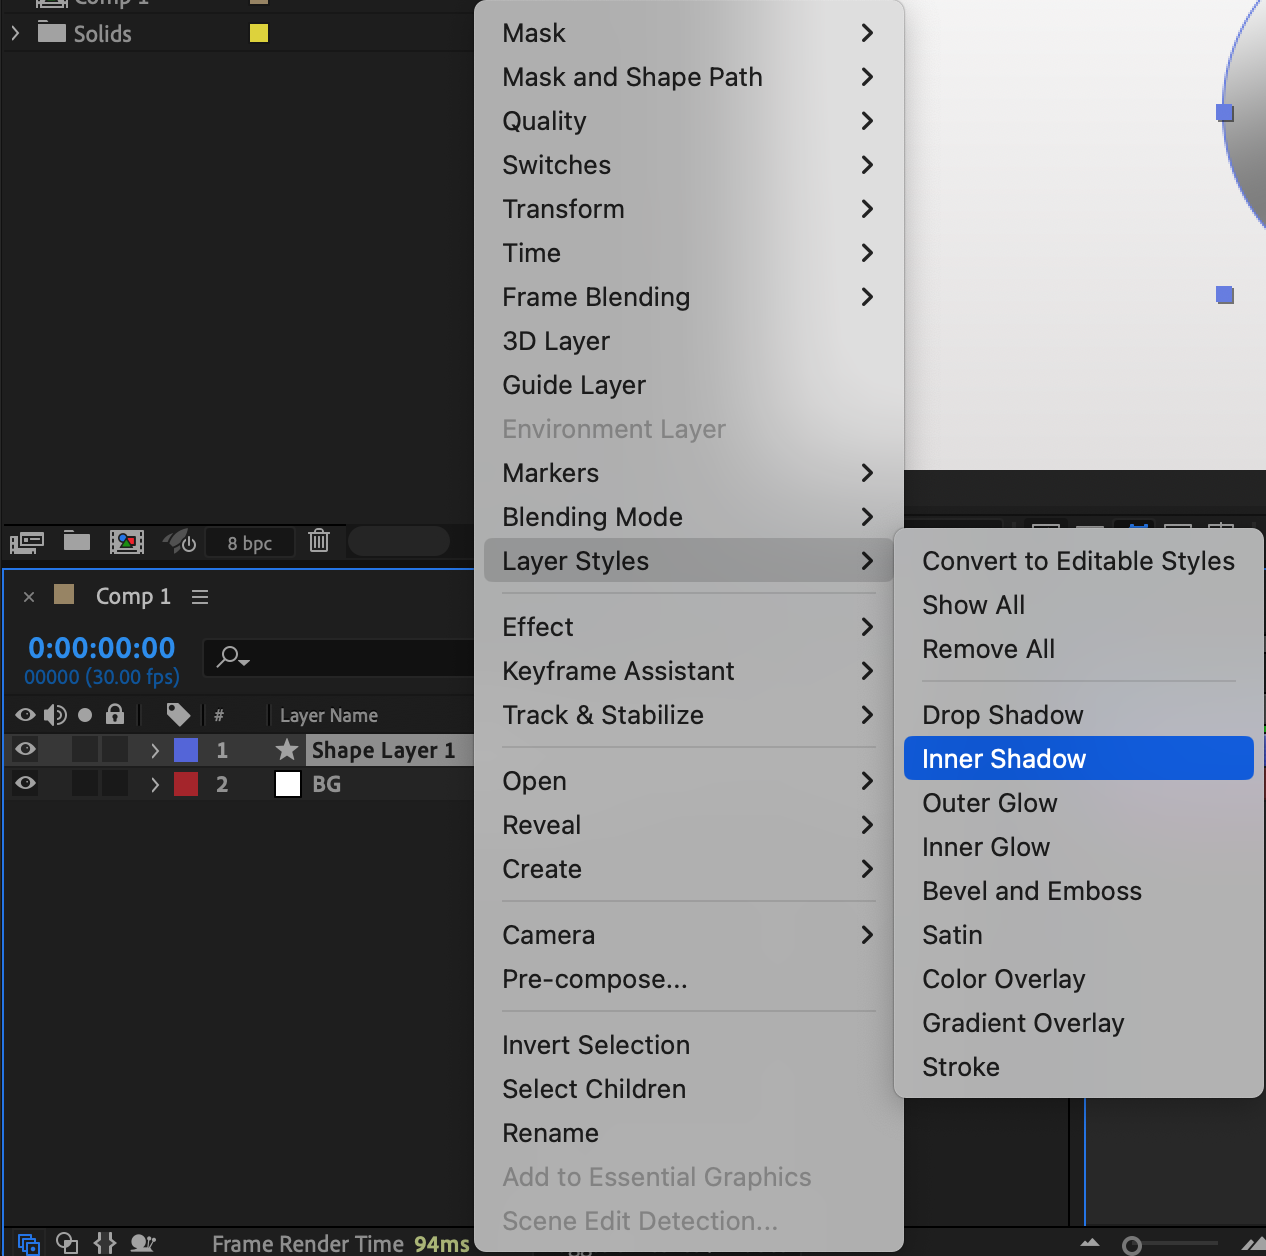
 Step 9: Apply Satin Effect
Right-click on the circle layer again, select Layer Styles > Satin, and adjust the following settings:
Blend Mode: Normal
Color: White
Opacity: 100%
Distance: 11
Size: 70
Invert: Off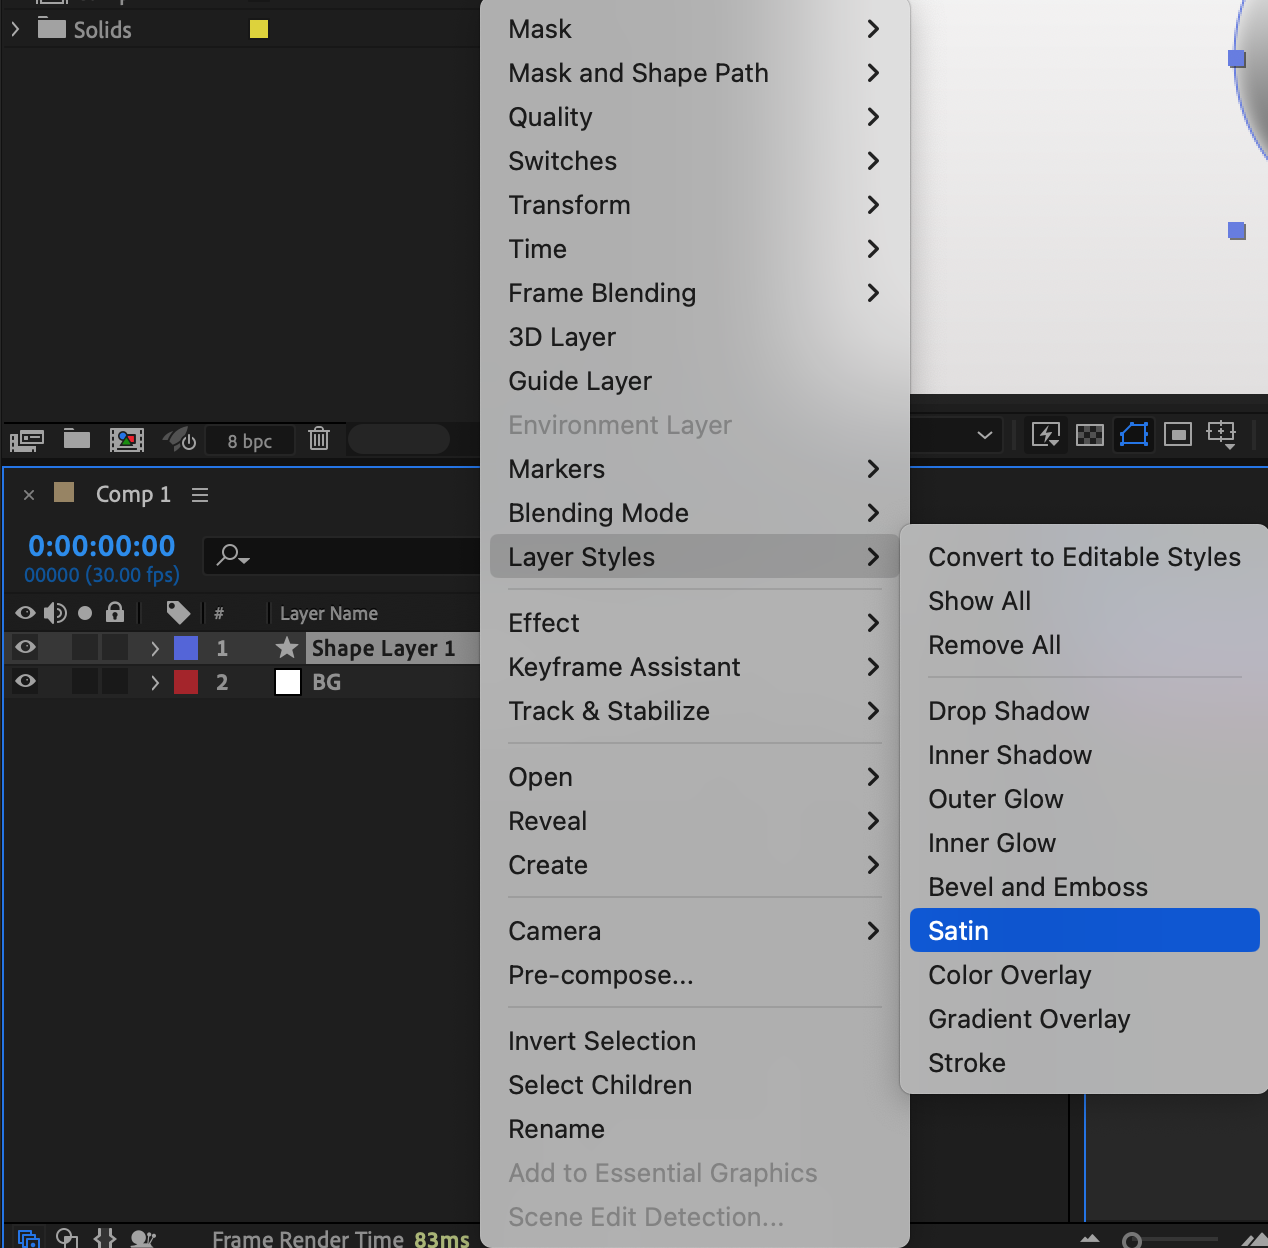
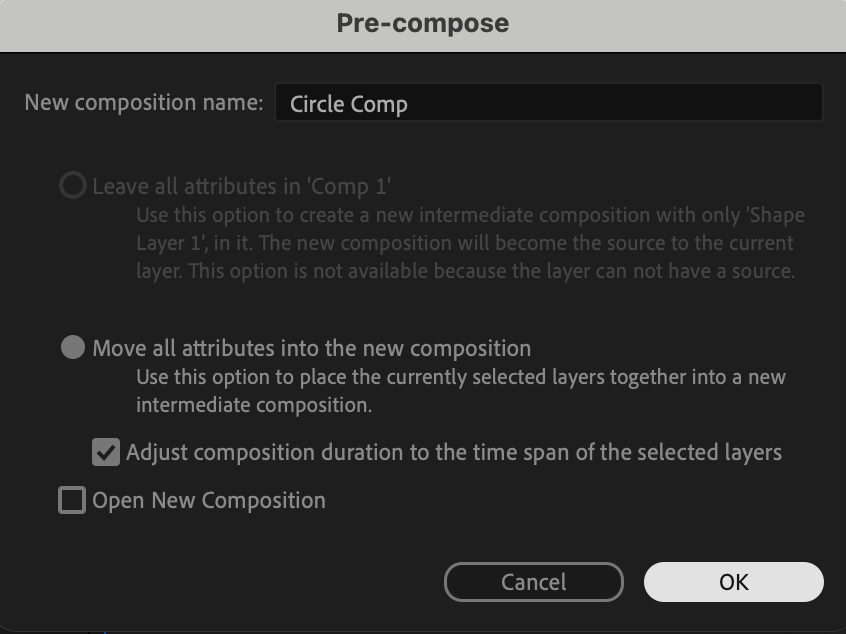
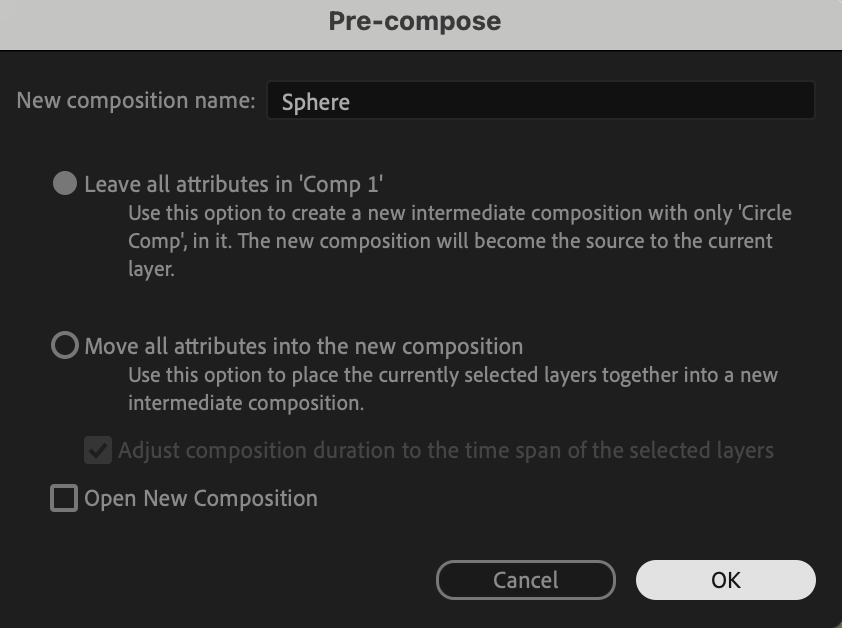
 Step 10: Pre-Compose the Circle
Right-click on the circle layer and select Pre-Compose. Name it “Sphere” to group all effects into a single layer.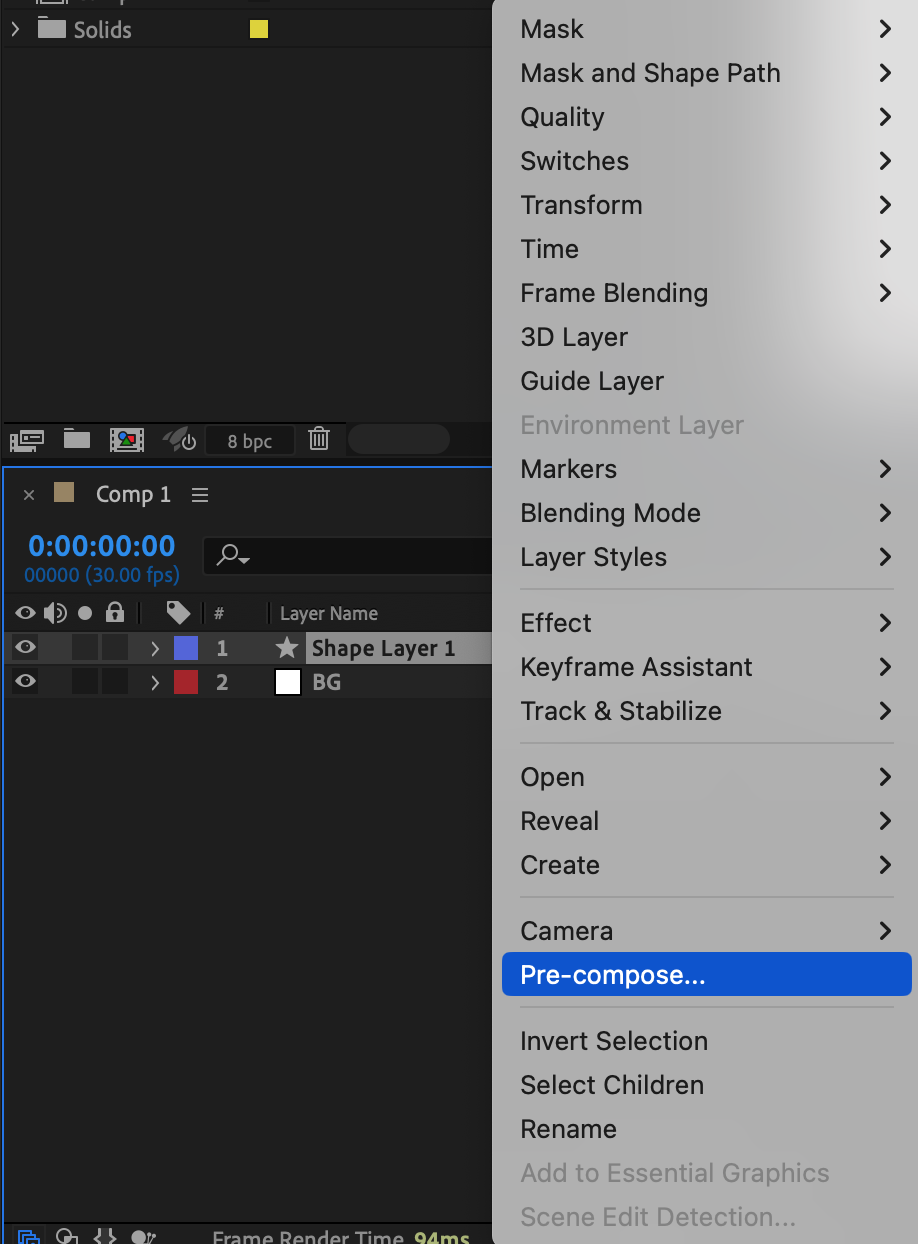
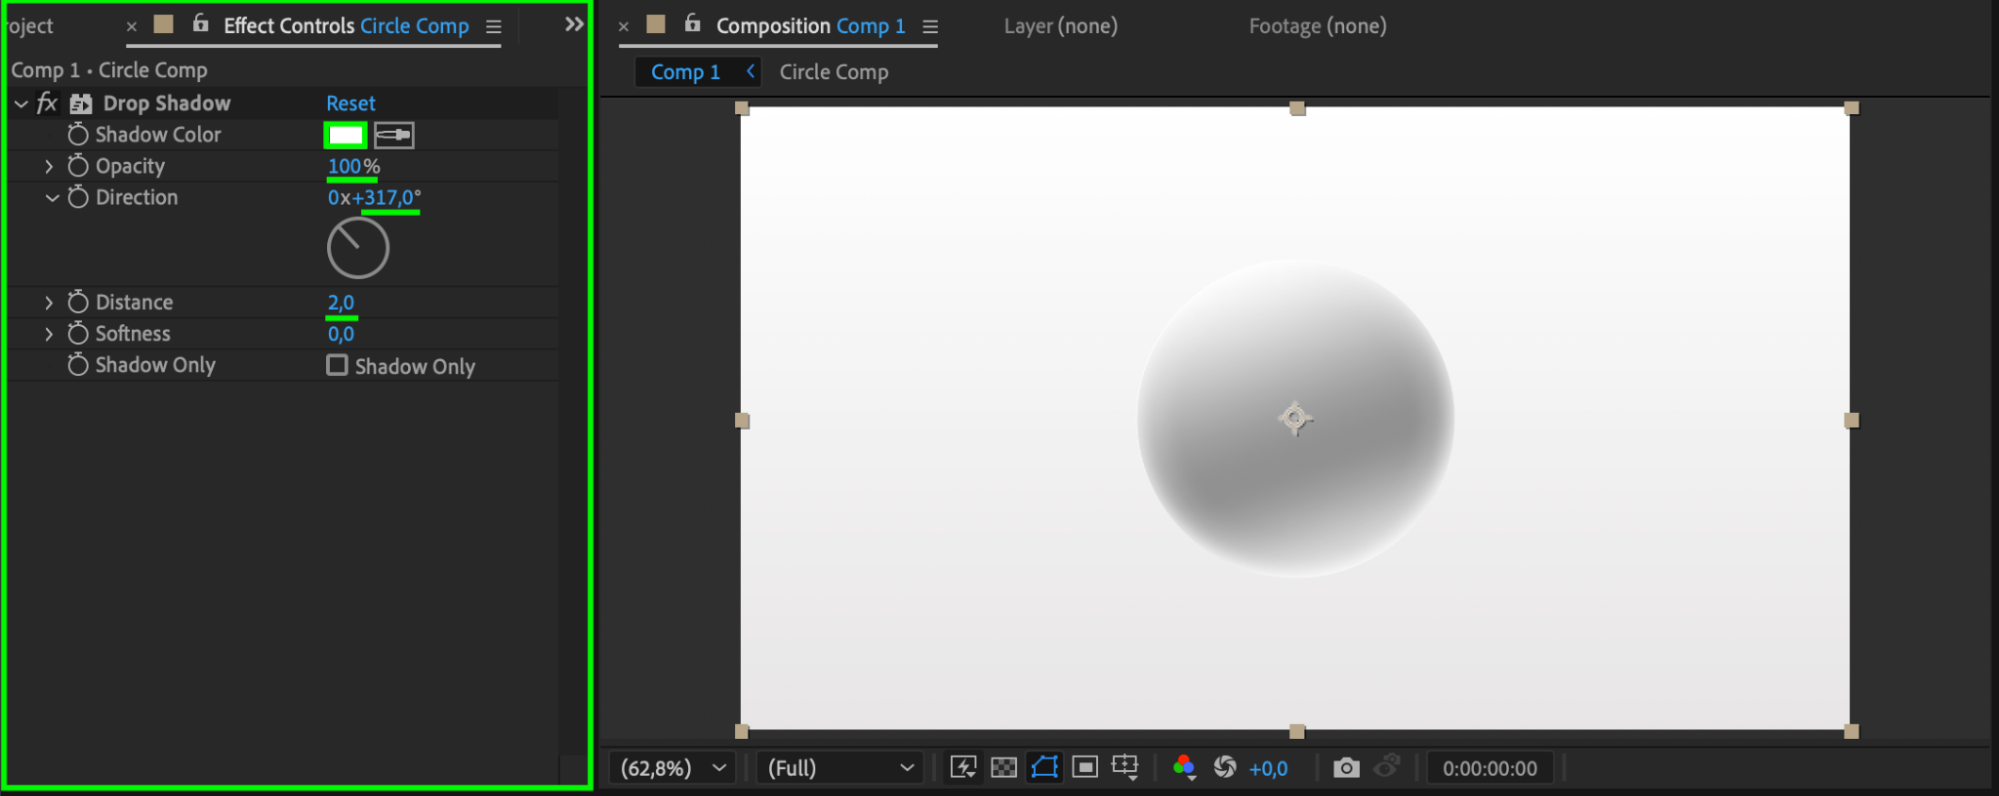
 Step 11: Apply Drop Shadow
Search for the Drop Shadow effect in the Effects & Presets panel and apply it to the pre-composed sphere. Use these settings:
Shadow Color: White
Opacity: 100%
Direction: 317°
Distance: 2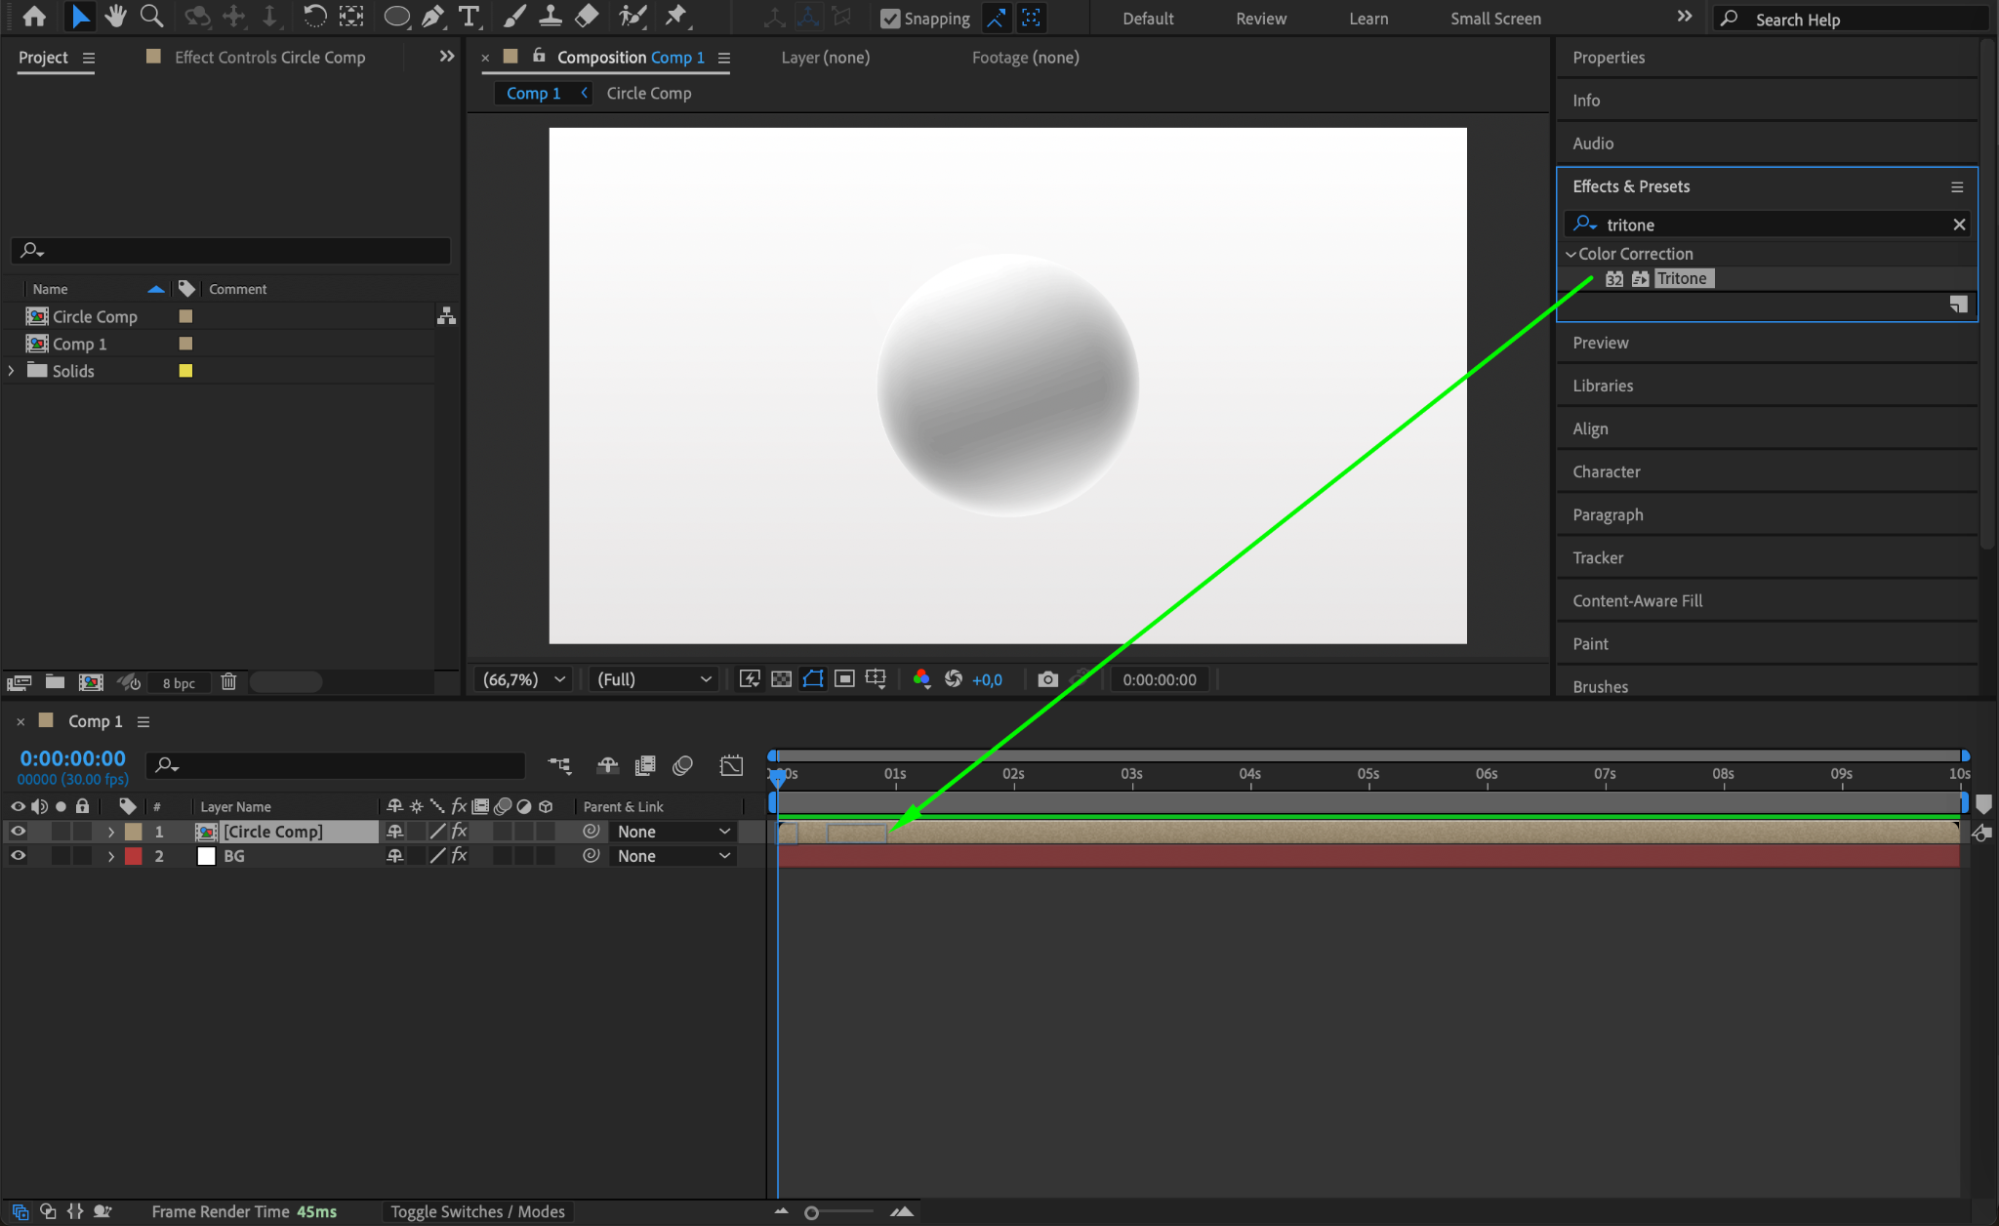
 Step 12: Apply Glow Effect
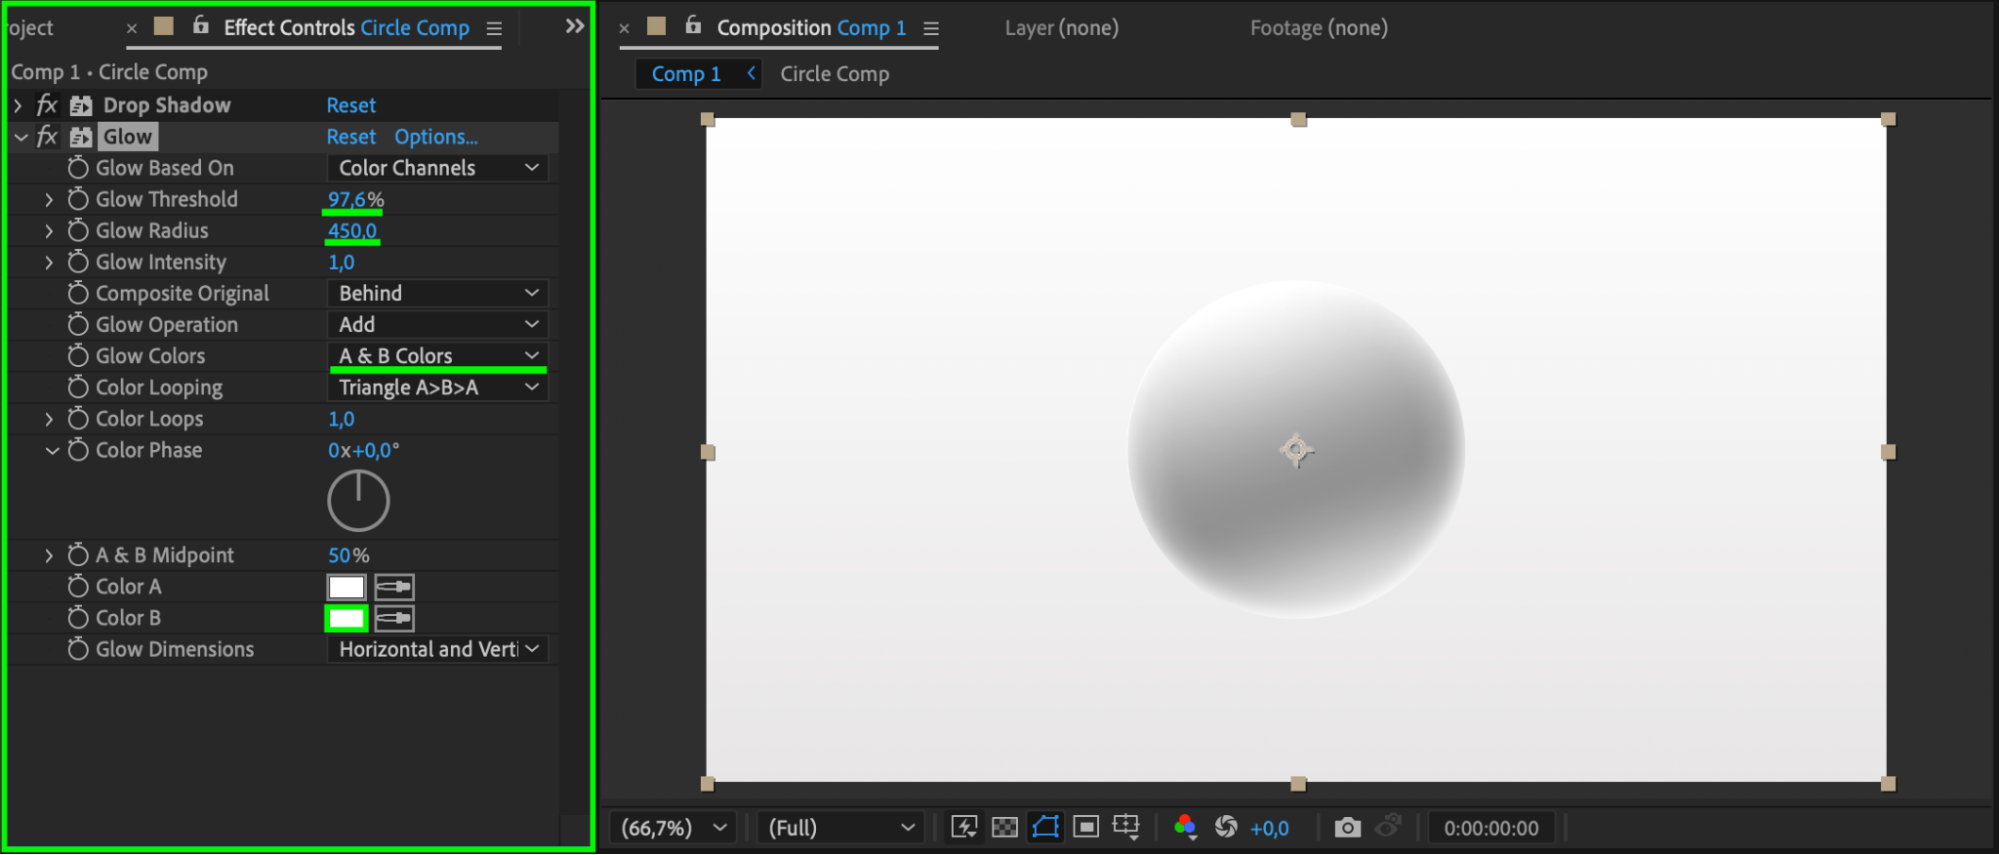
Search for the Glow effect and apply it to the sphere. Set:
Glow Threshold: 97
Glow Radius: 450
Glow Colors: A & B Colors
Color B: White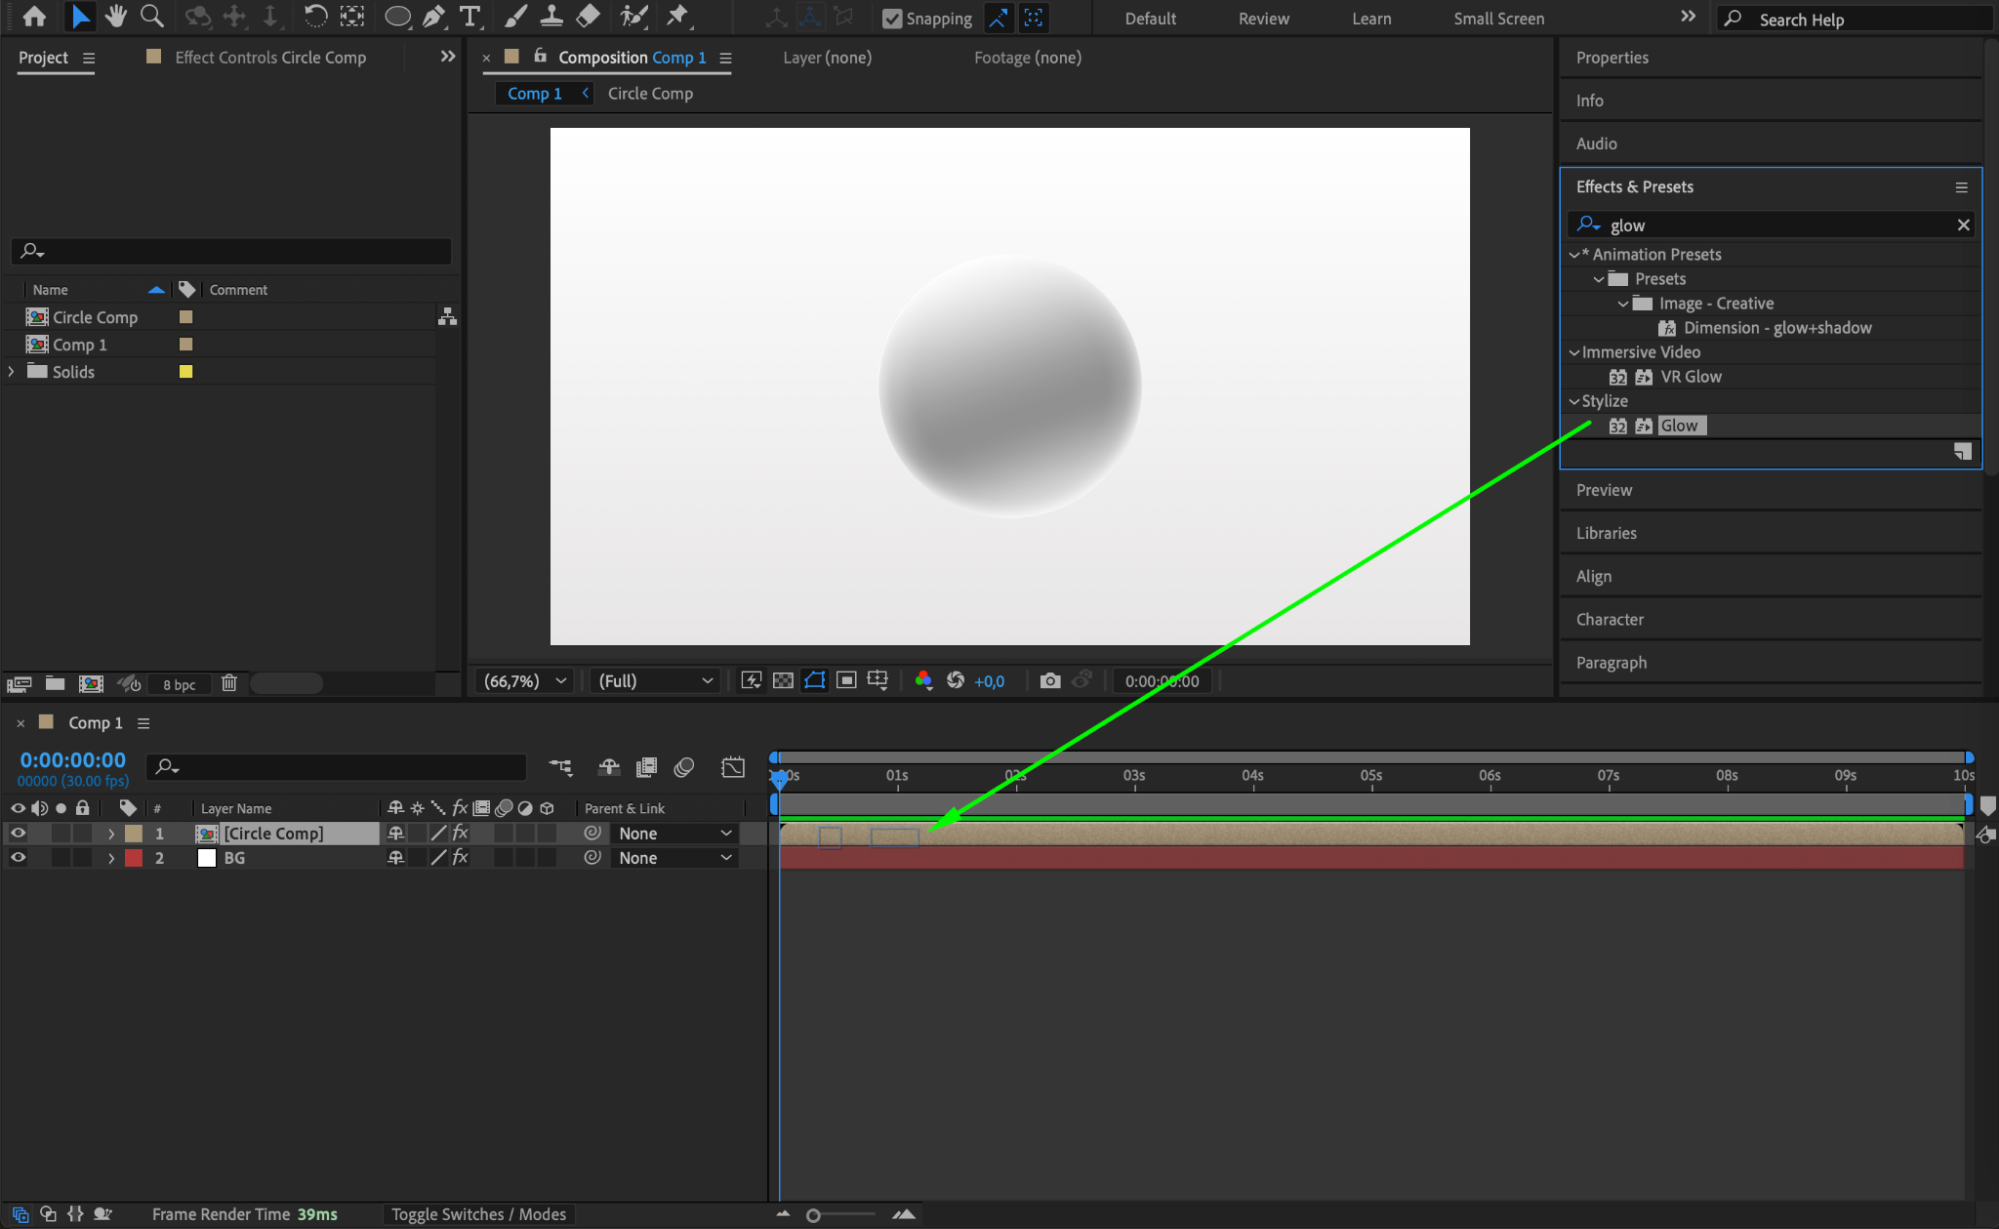
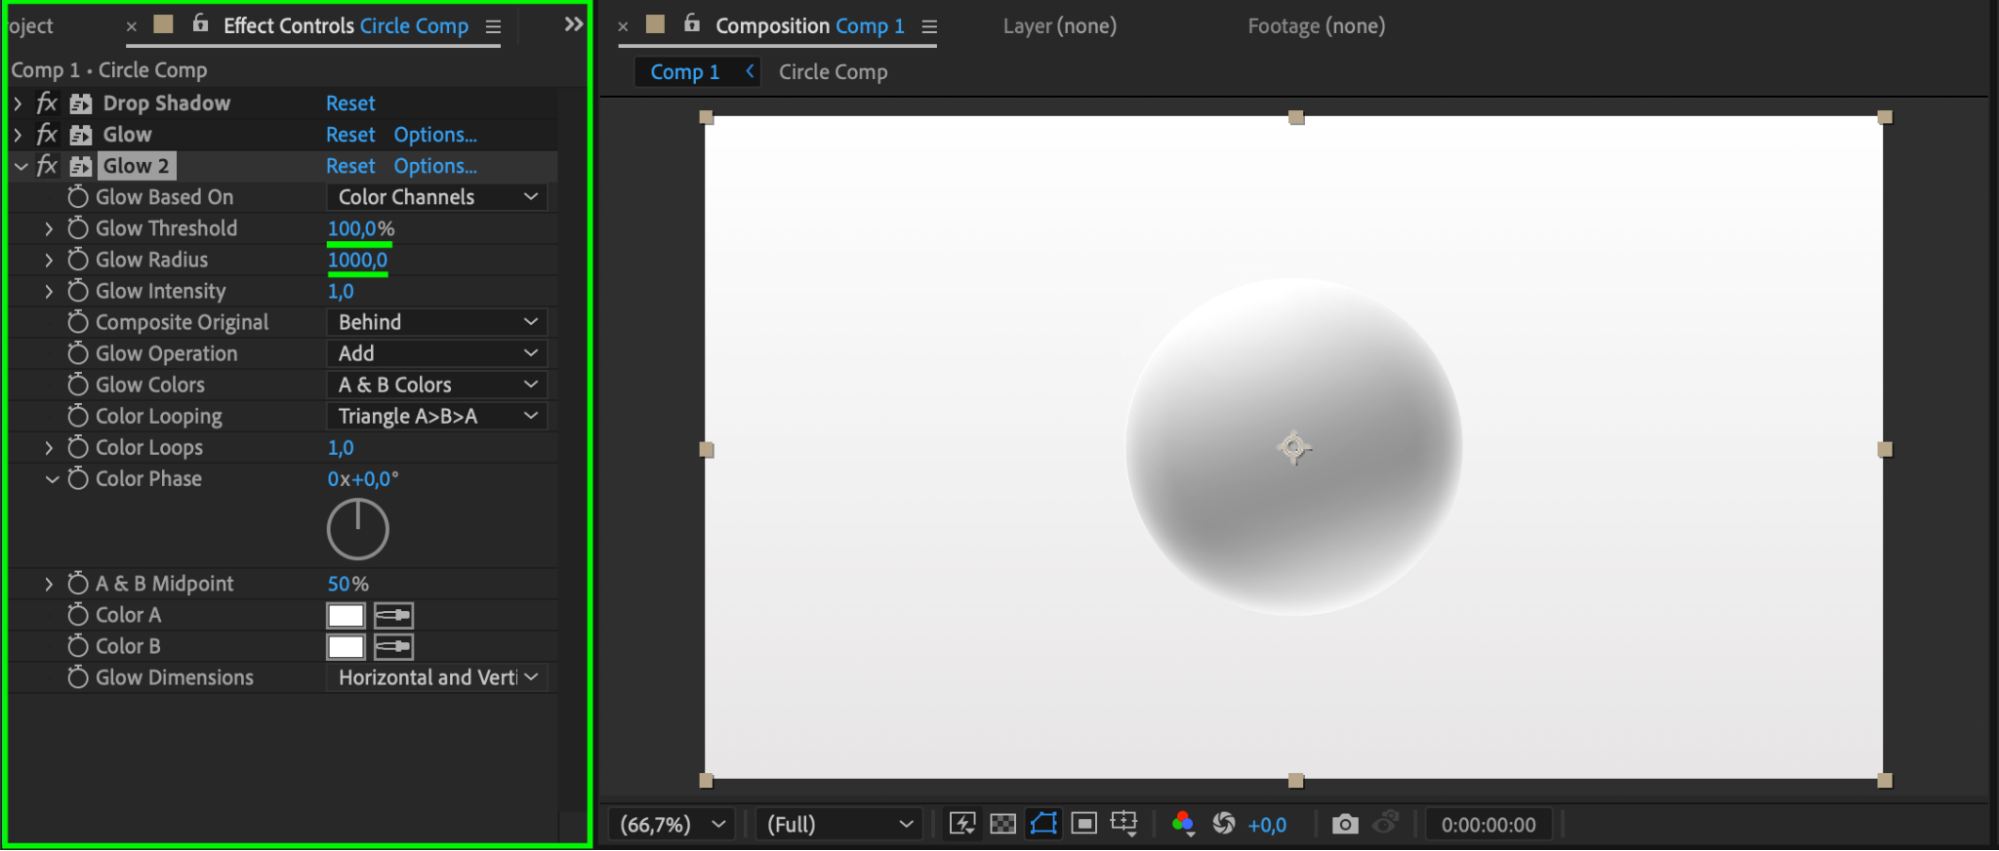
 Step 13: Duplicate Glow for a Stronger Effect
Duplicate the Glow effect and adjust the second Glow Threshold to 100 and Glow Radius to 1000 for a soft glowing effect.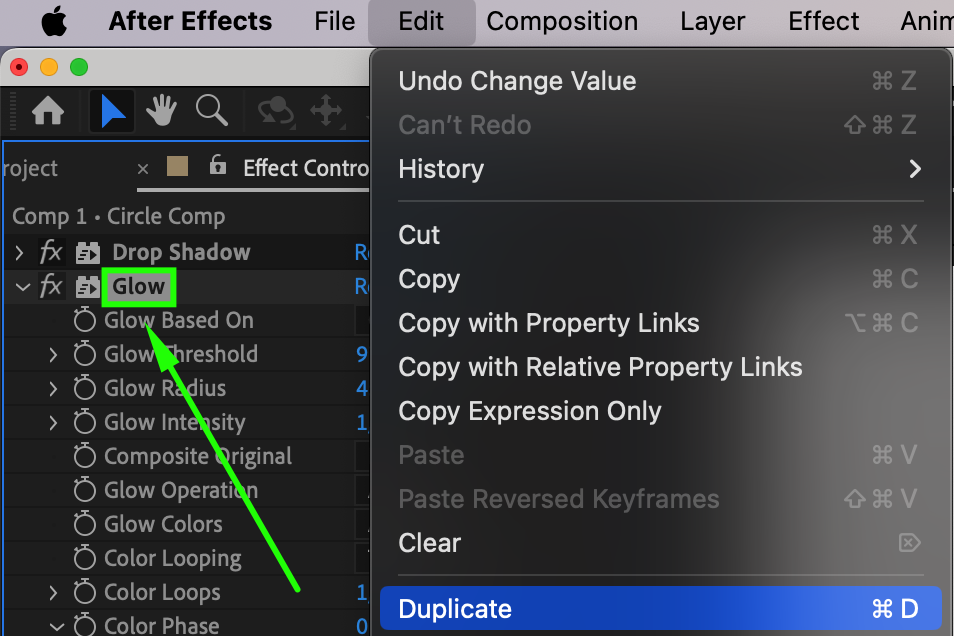
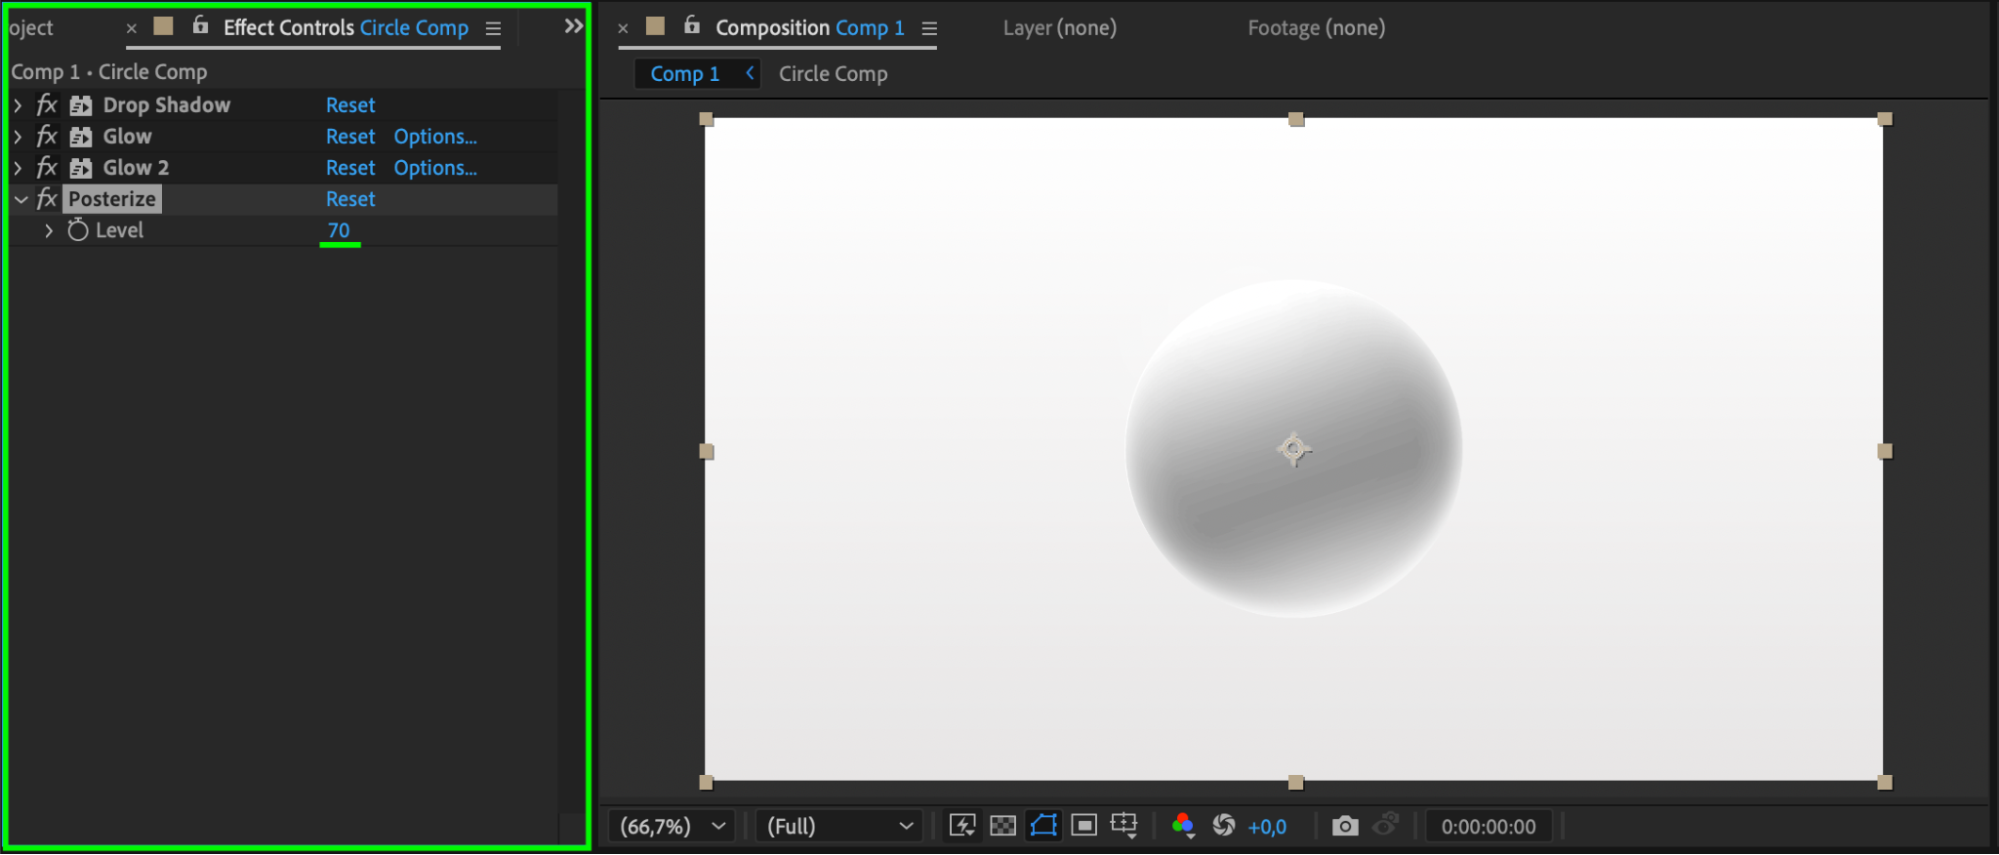
 Step 14: Add Posterize Effect
Apply the Posterize effect and set Levels to 70 to create a stylized look.
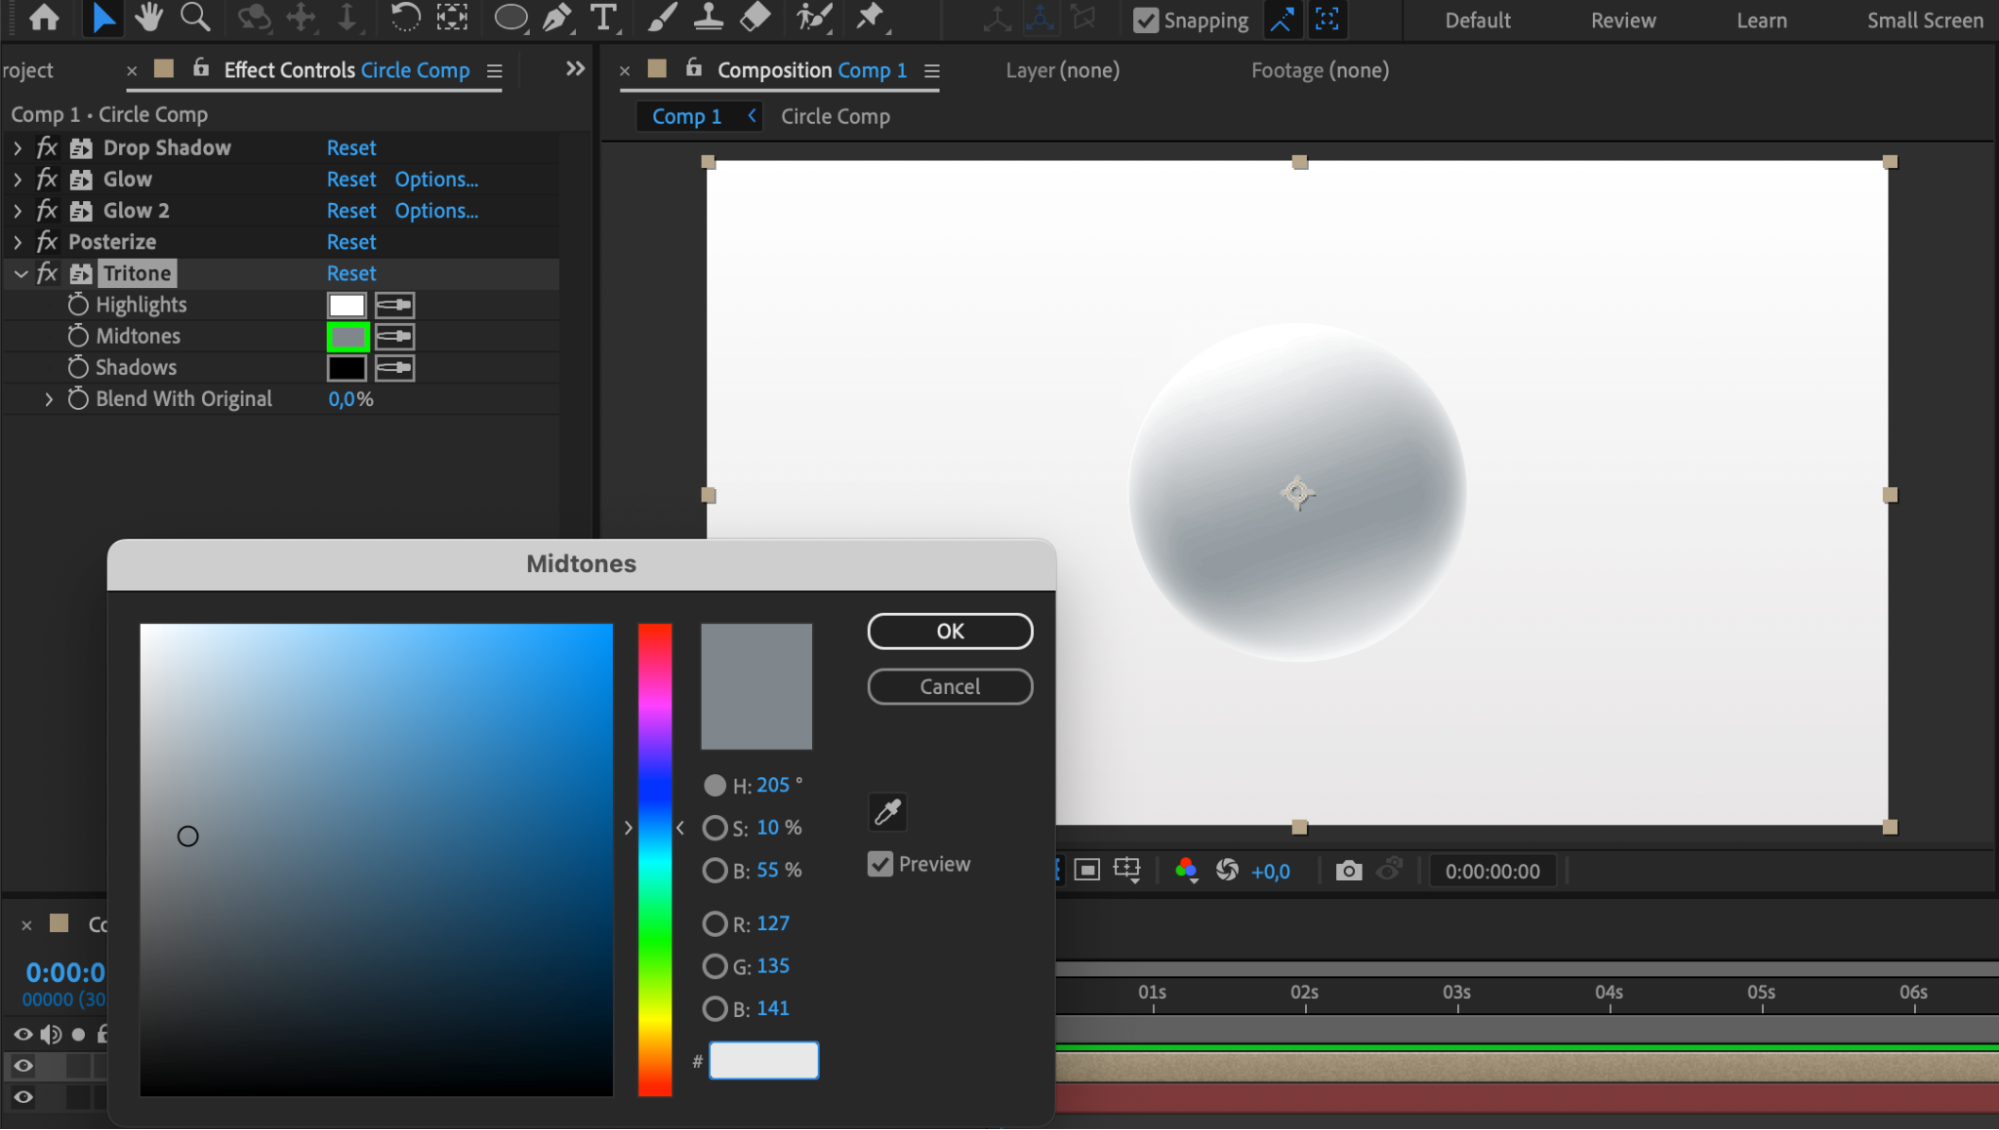
 Step 15: Adjust Color Tones with Tritone Effect
Apply the Tritone effect and set the Midtones to a soft gray-blue to add subtle color variation.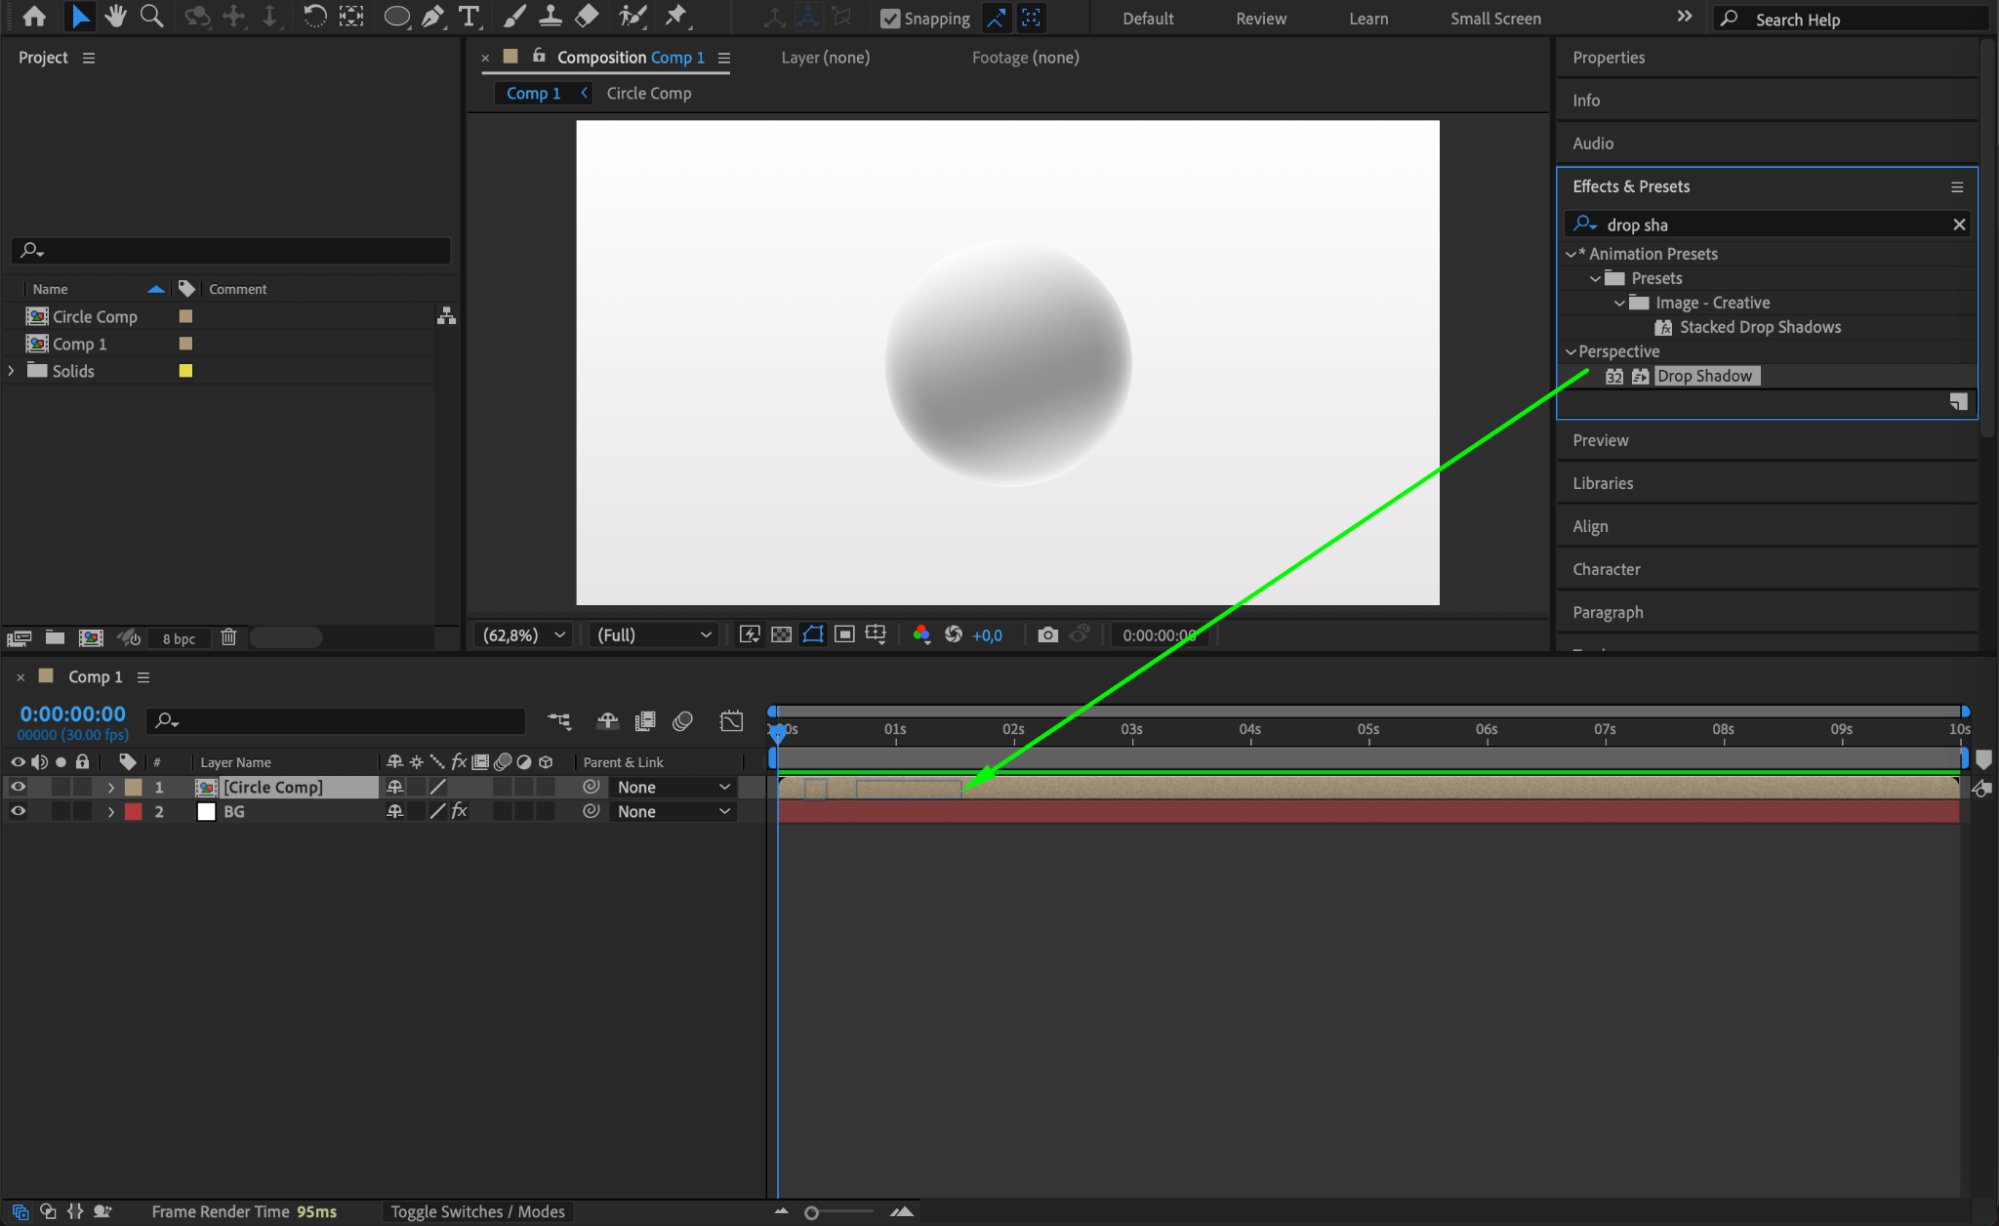
 Step 16: Pre-Compose the Sphere Again
Right-click on the pre-composed sphere layer and select Pre-Compose again to fix all changes into a single layer.
 Step 17: Convert the Sphere to 3D
Enable the 3D Layer option by clicking the cube icon next to the layer name in the Timeline. Step 18: Duplicate and Arrange Spheres
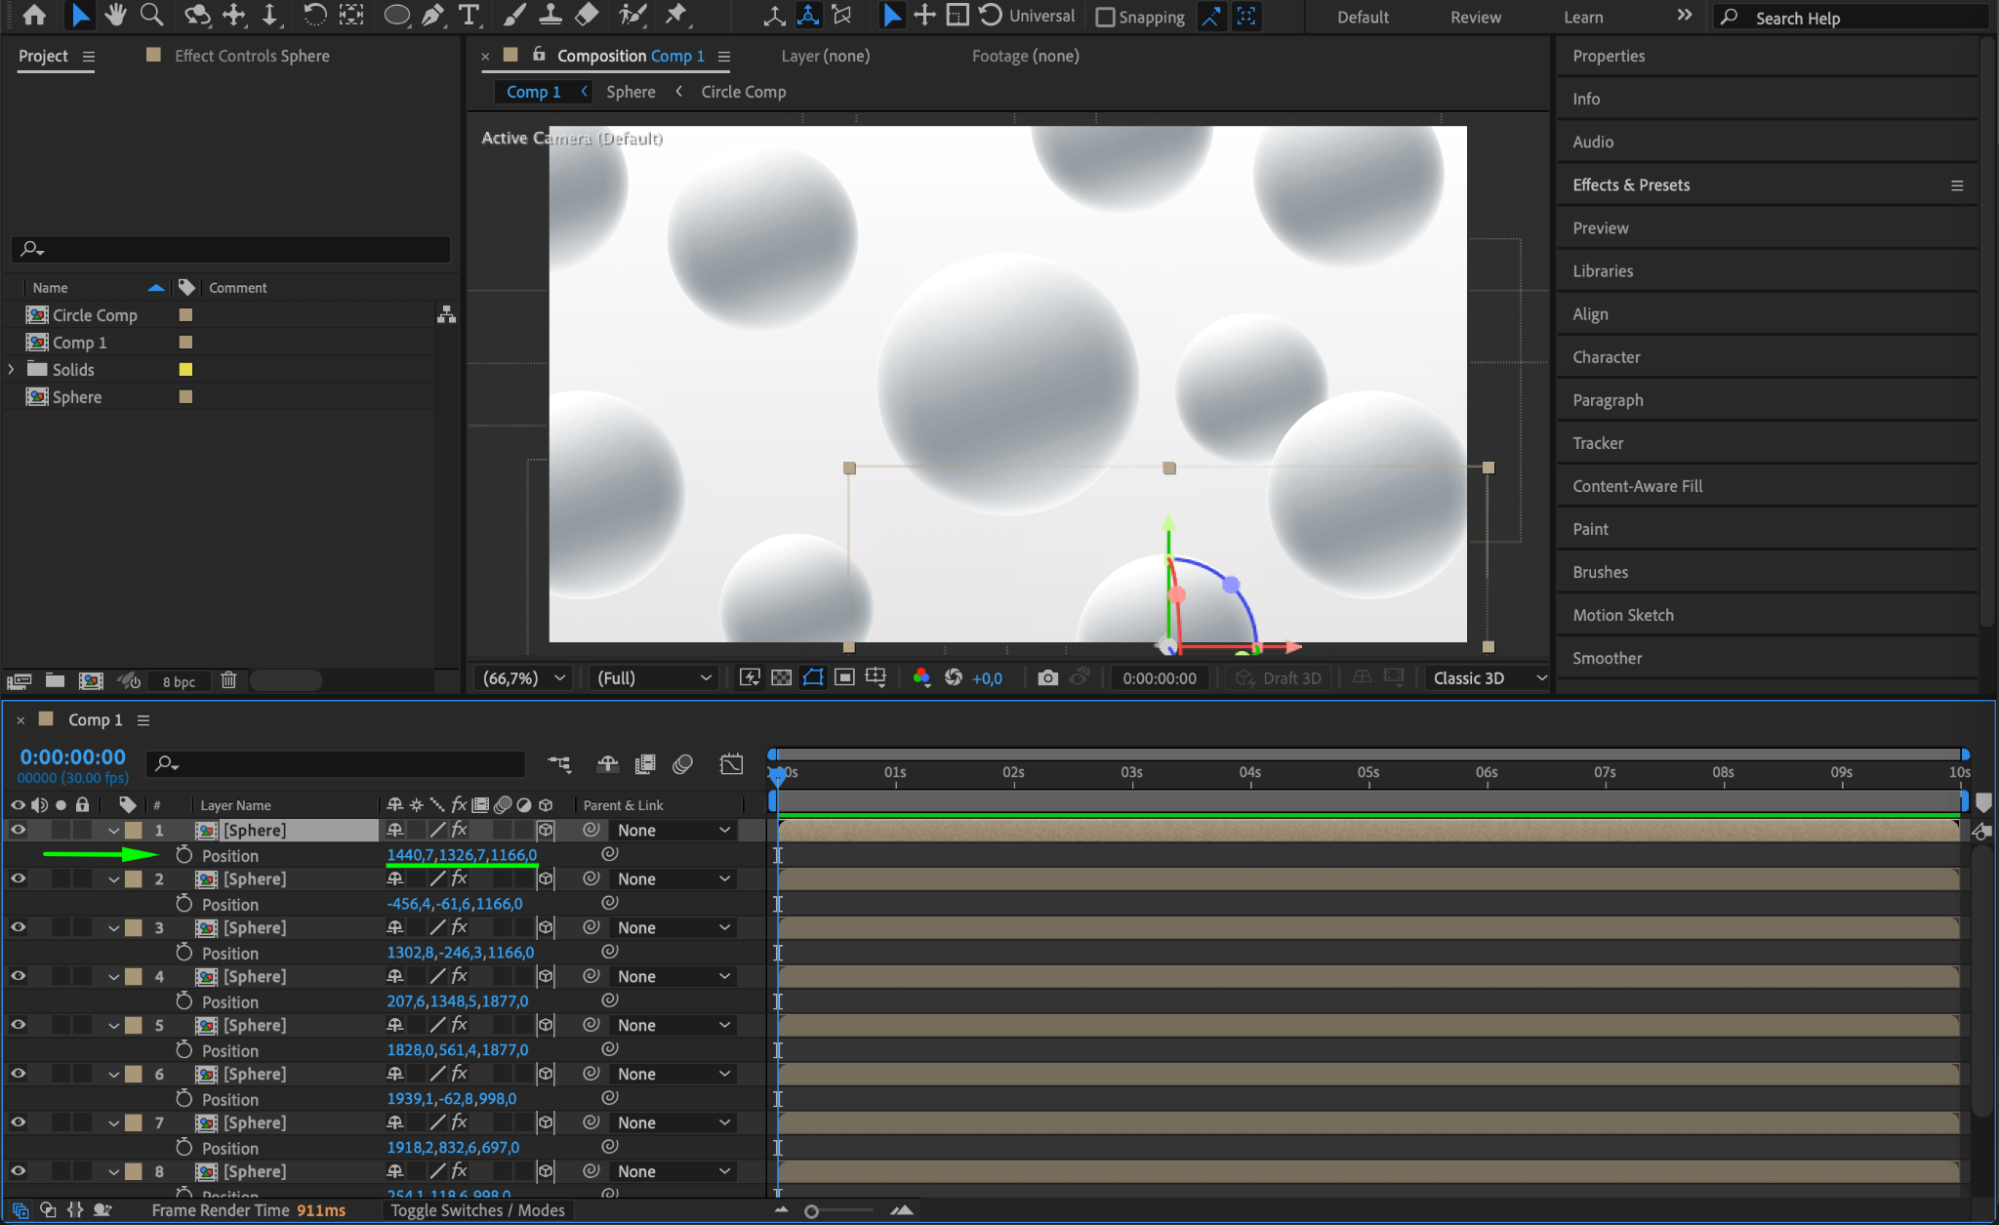
Duplicate the sphere multiple times to create a pattern. Adjust X and Y values to position them and modify the Z value to scale some of them differently.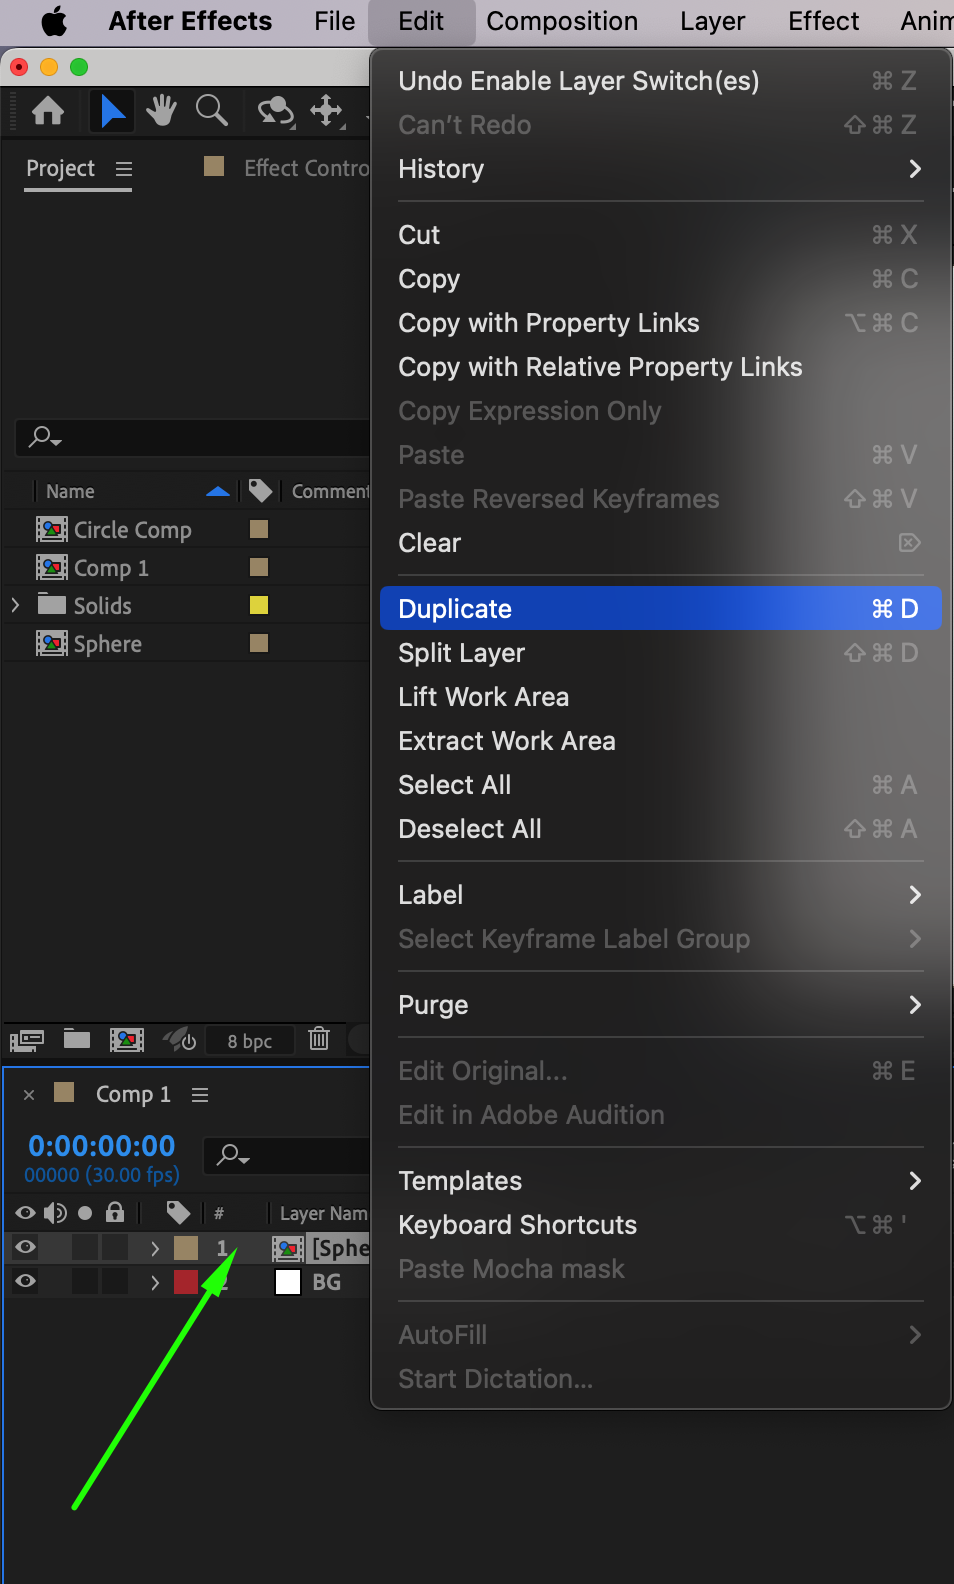
 Step 19: Add a Camera for Depth
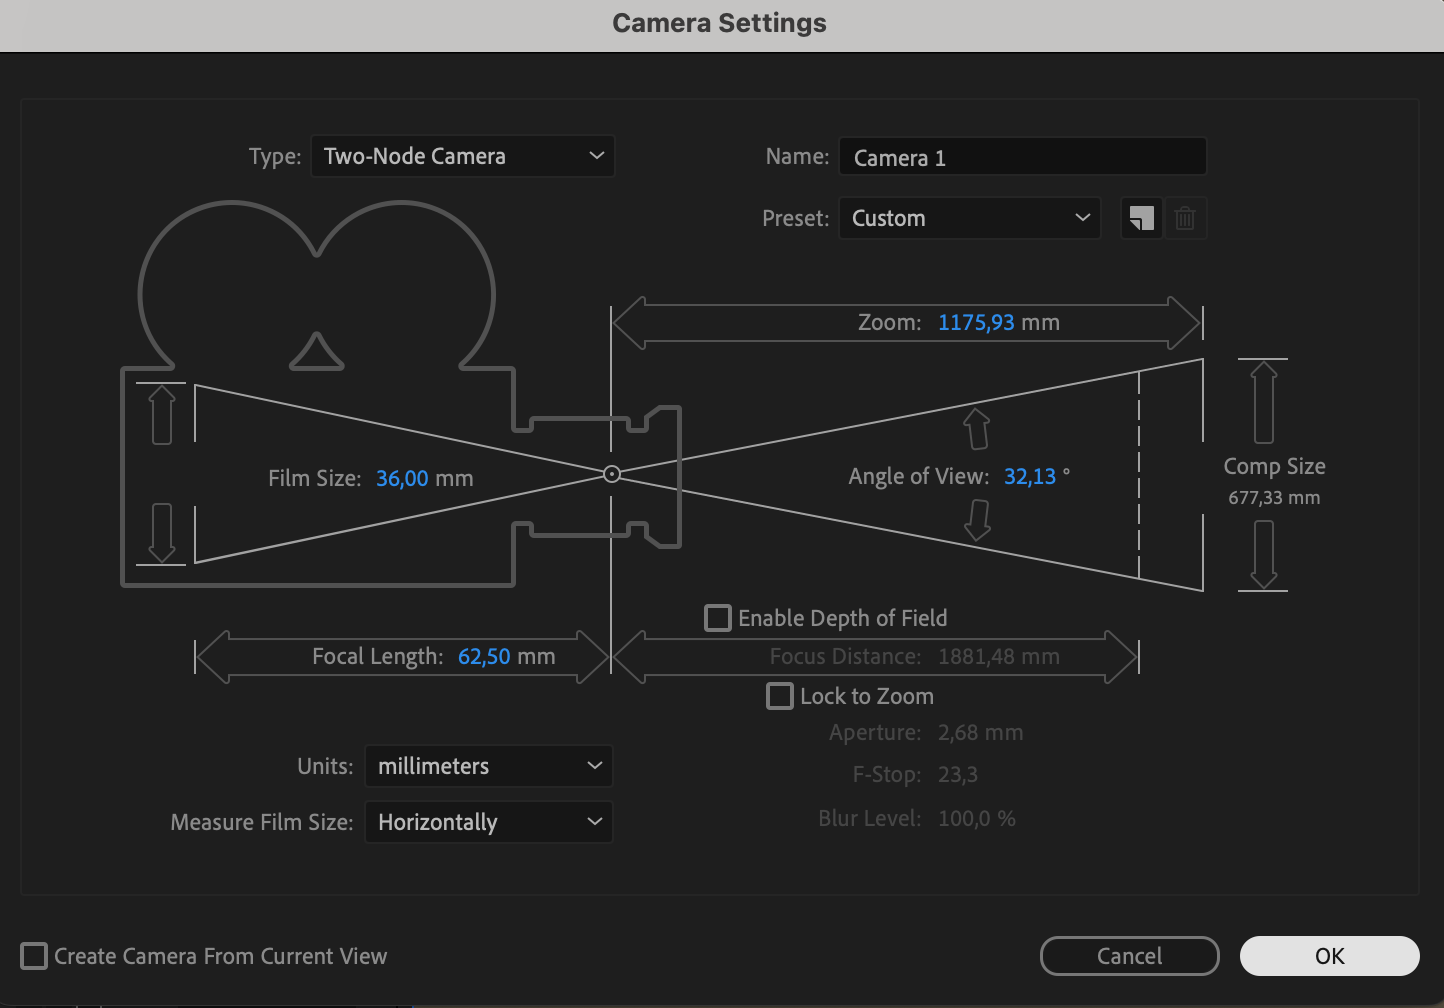
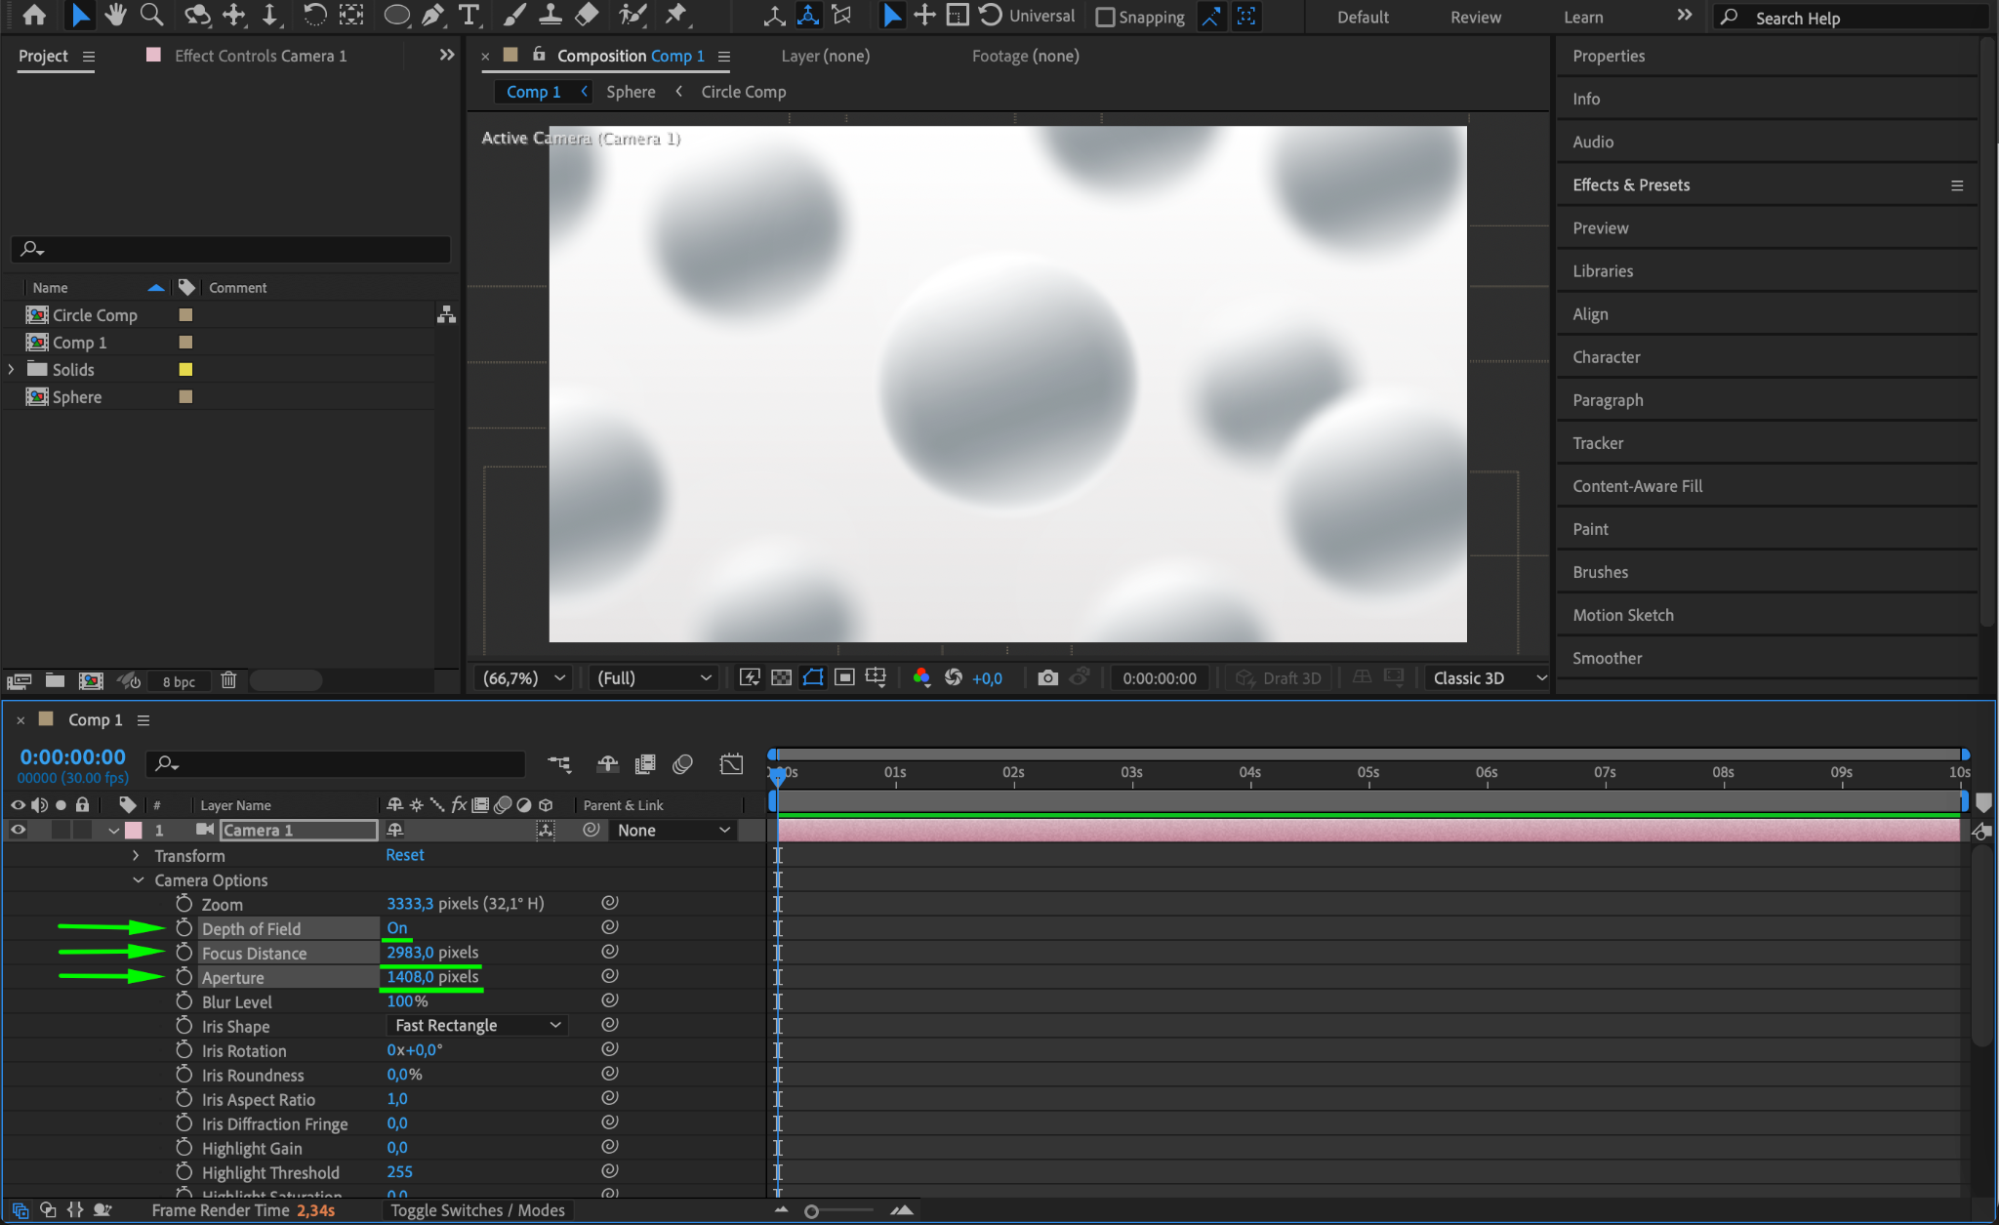
Go to Layer > New > Camera and turn on Depth of Field in the Camera settings. Adjust:
Focus Distance: 2983 (example)
Aperture: 1408
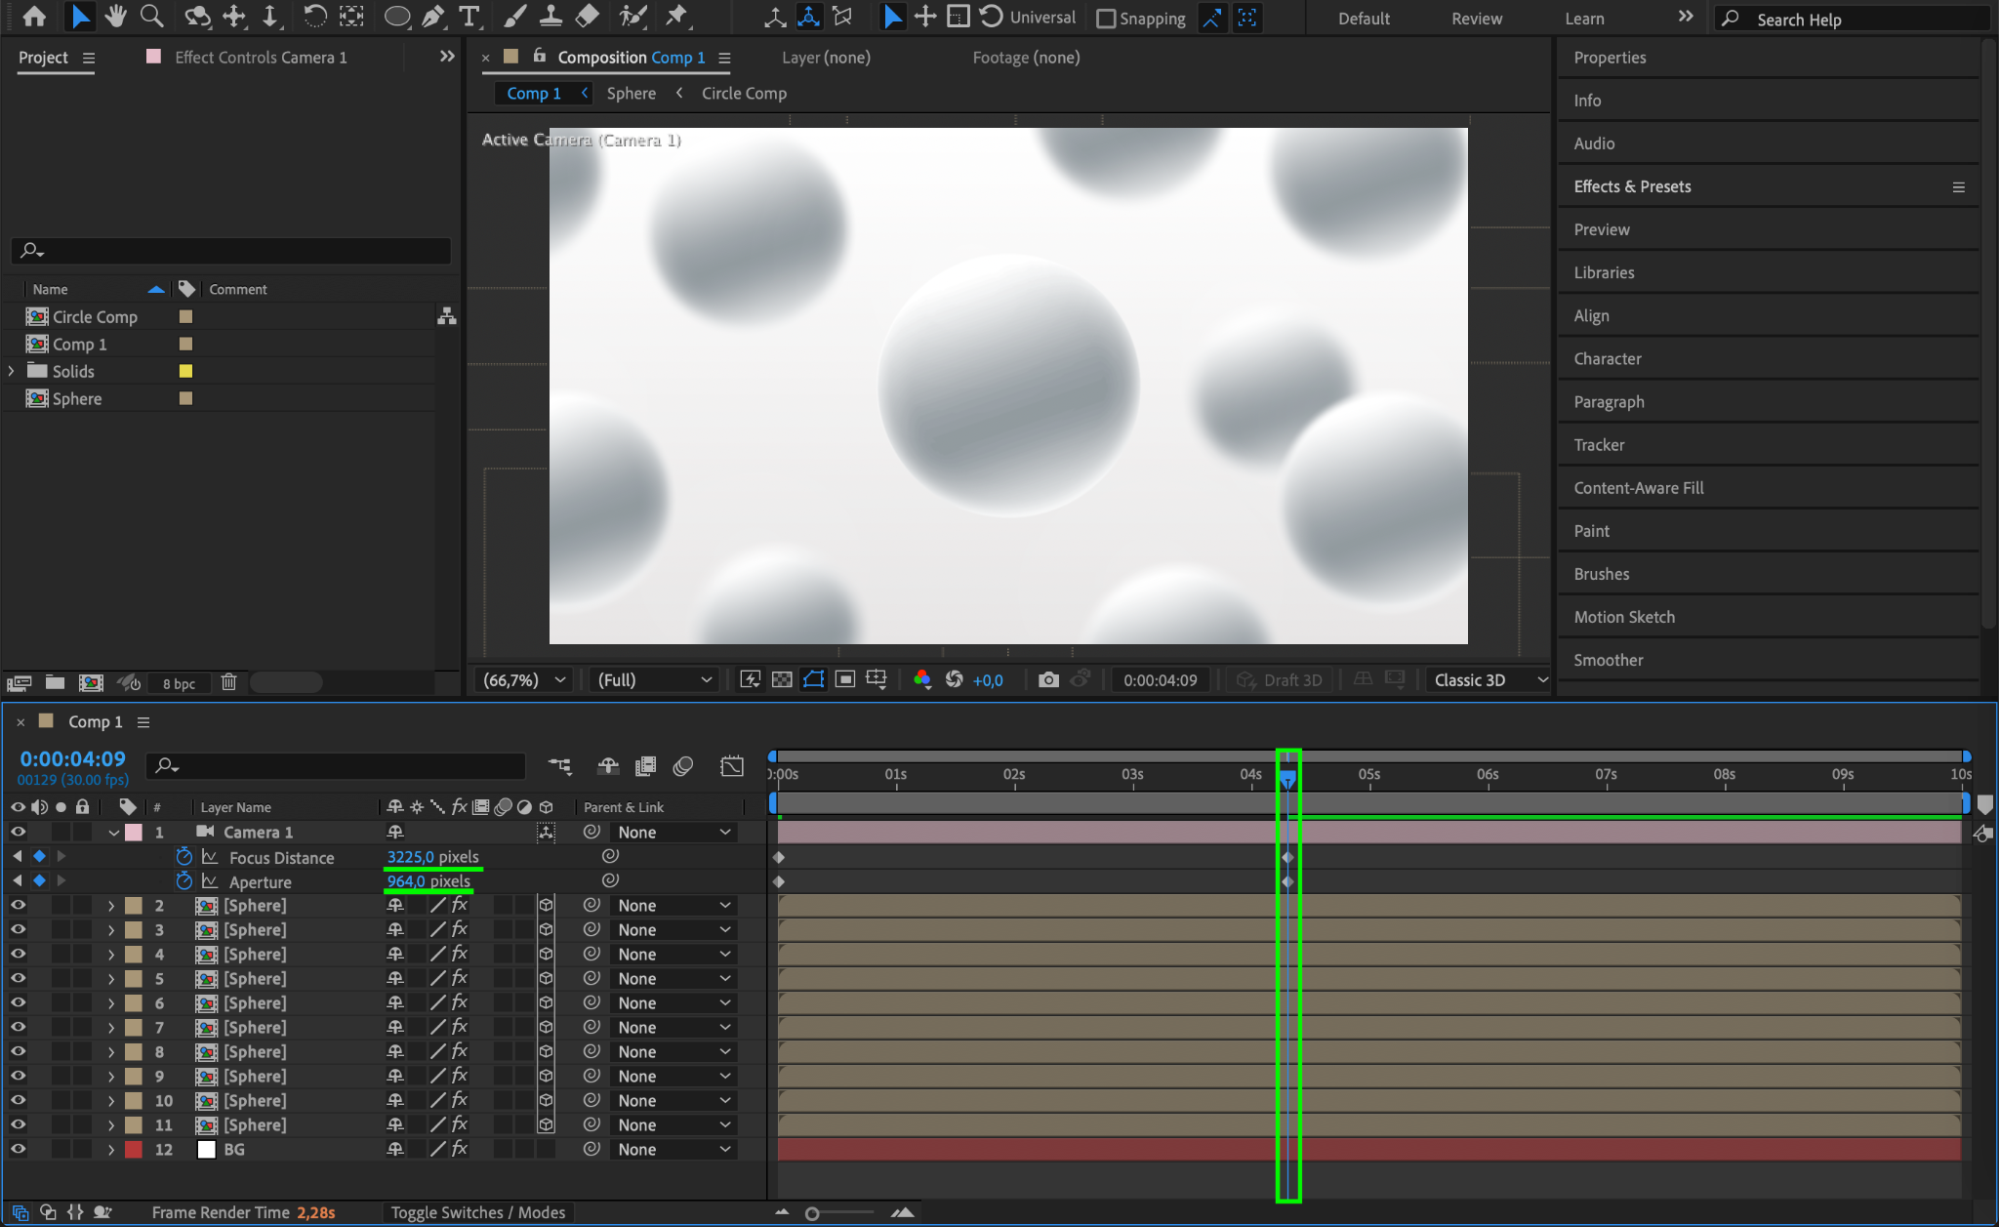
You can animate these values to create dynamic camera movement.
 Step 20: Create an Adjustment Layer
Go to Layer > New > Adjustment Layer to apply final effects.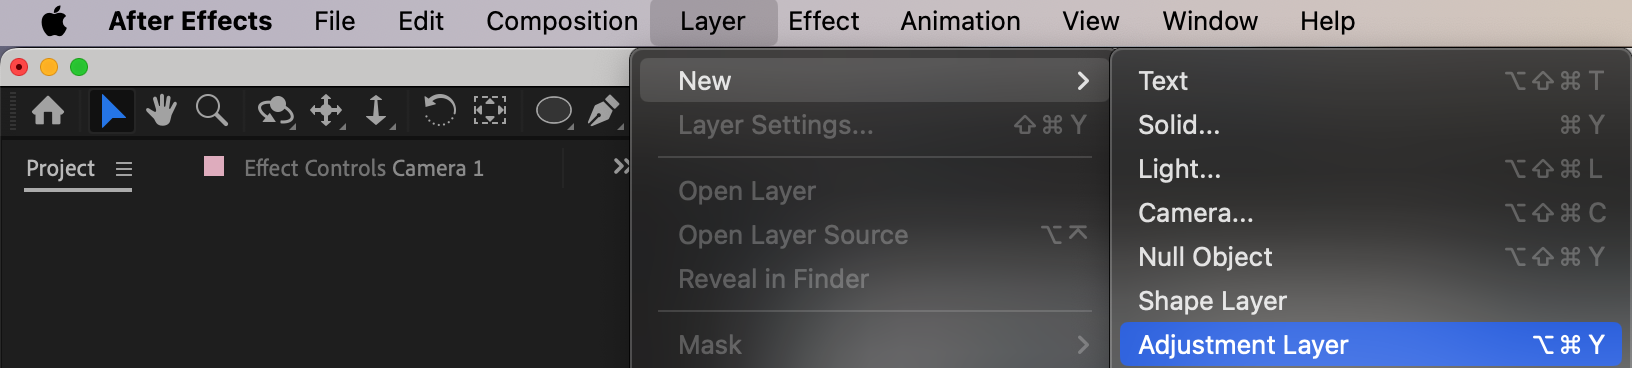
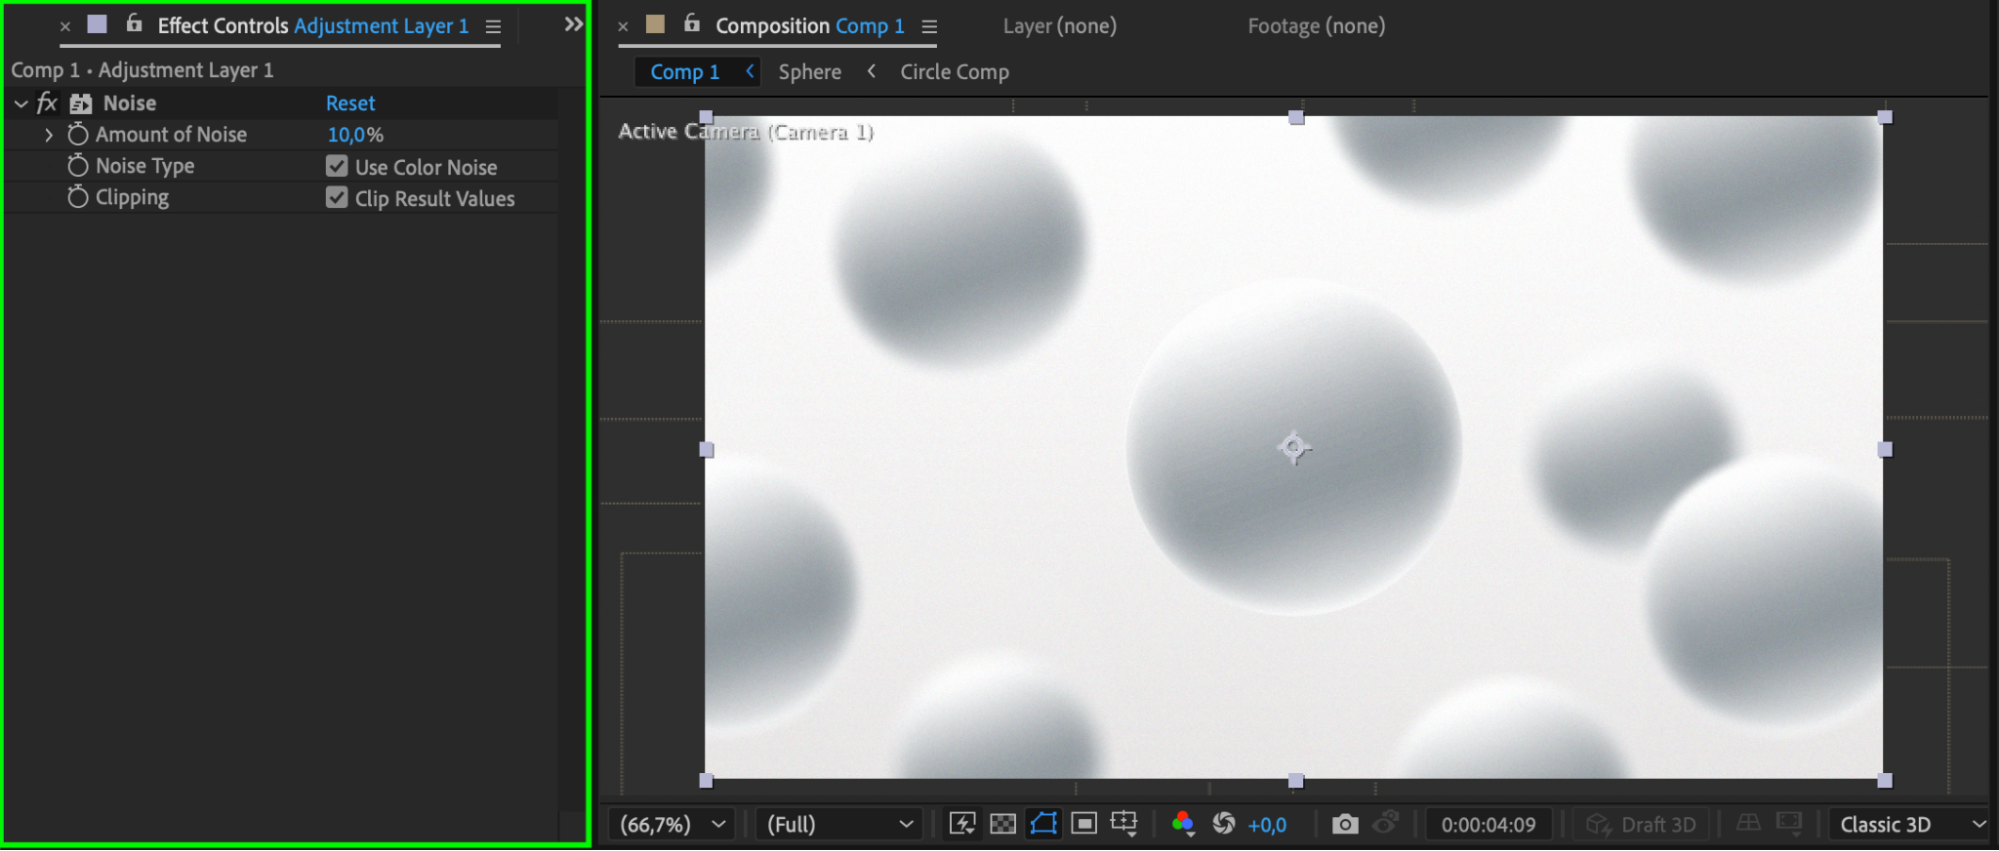
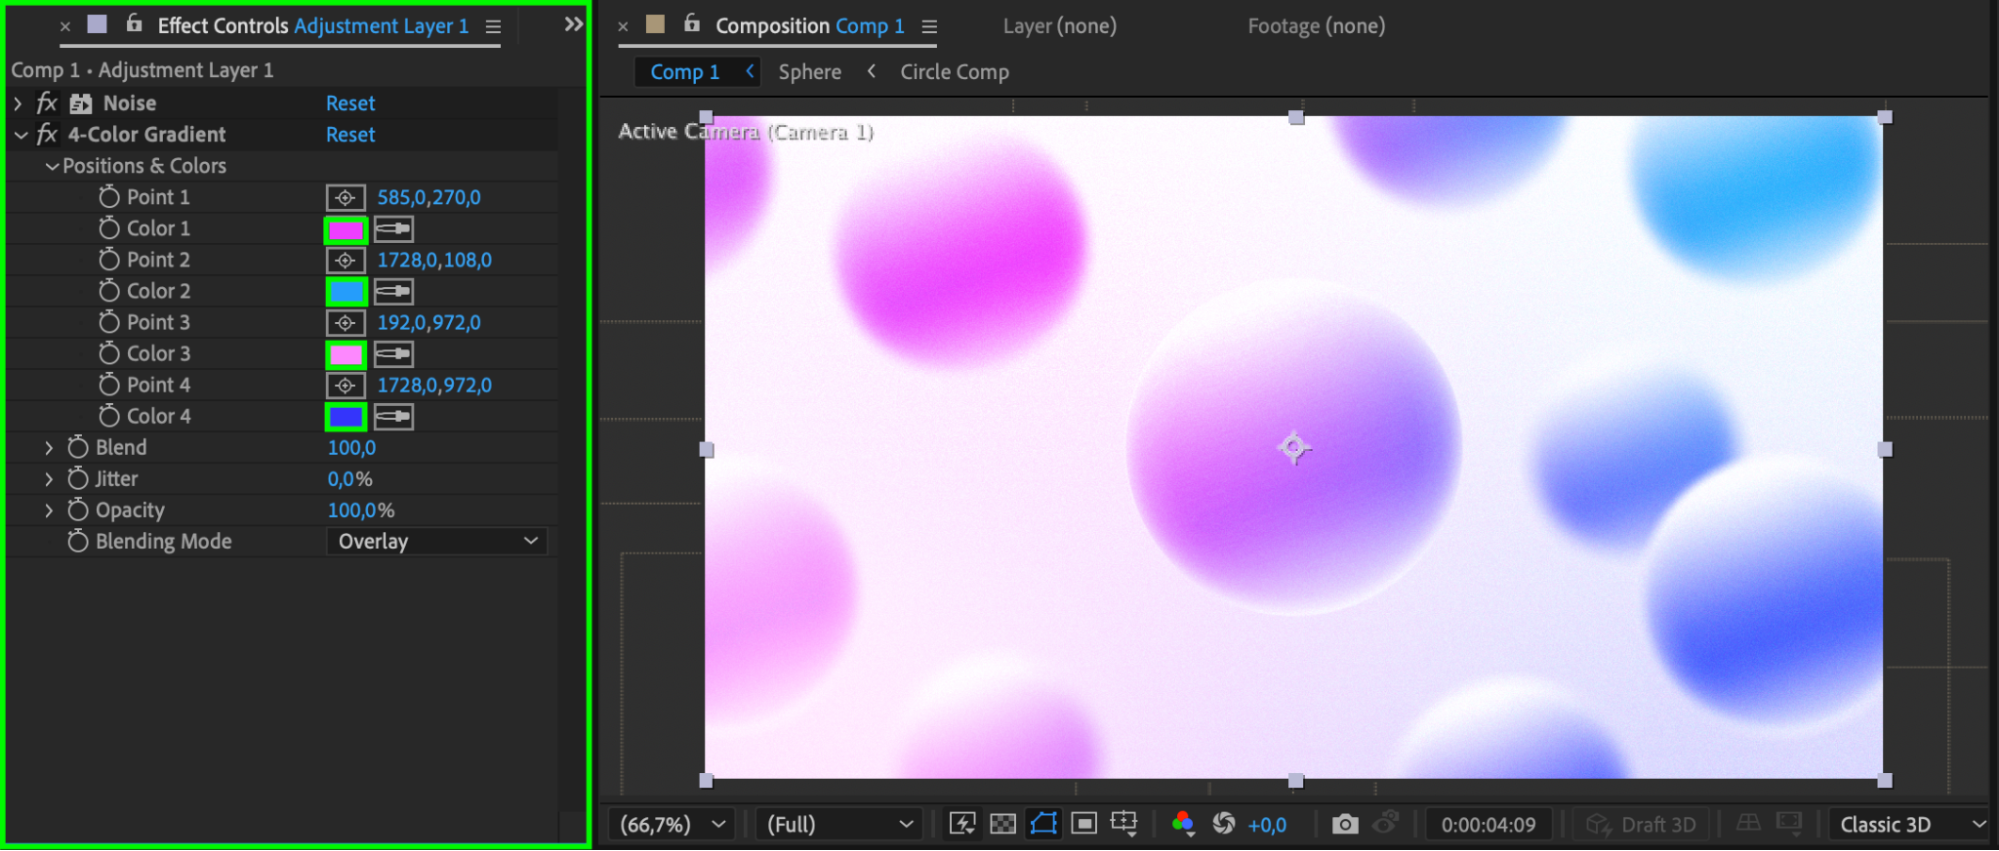
Step 21: Apply Noise and Color Enhancements
Apply the Noise effect and set Amount of Noise to 10% to add texture. You can also apply a 4-Color Gradient to enhance colors.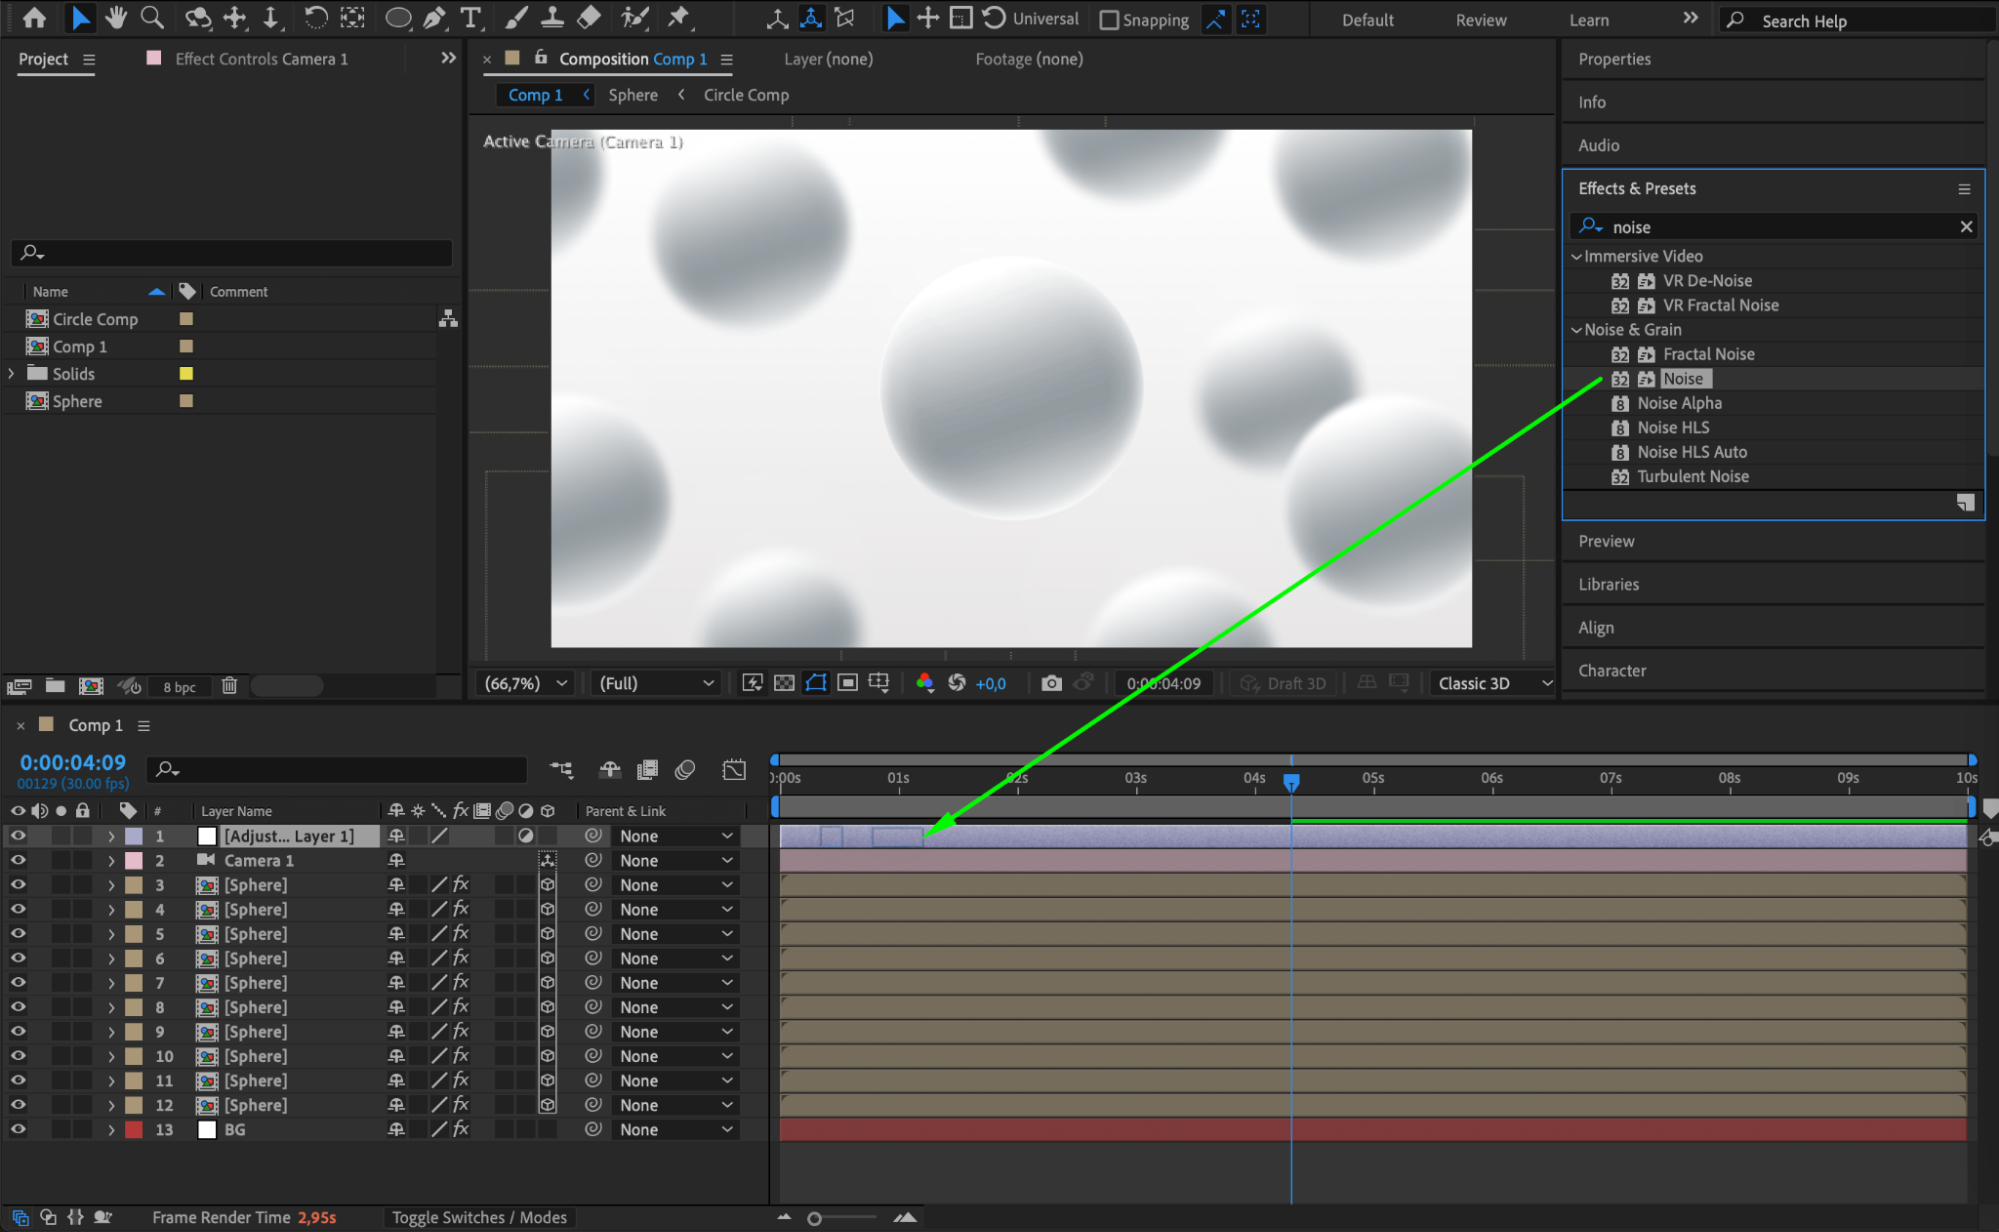
 Step 22: Preview the Animation
Press the Spacebar to play the animation and check how everything looks. Adjust effects, colors, and positions if needed.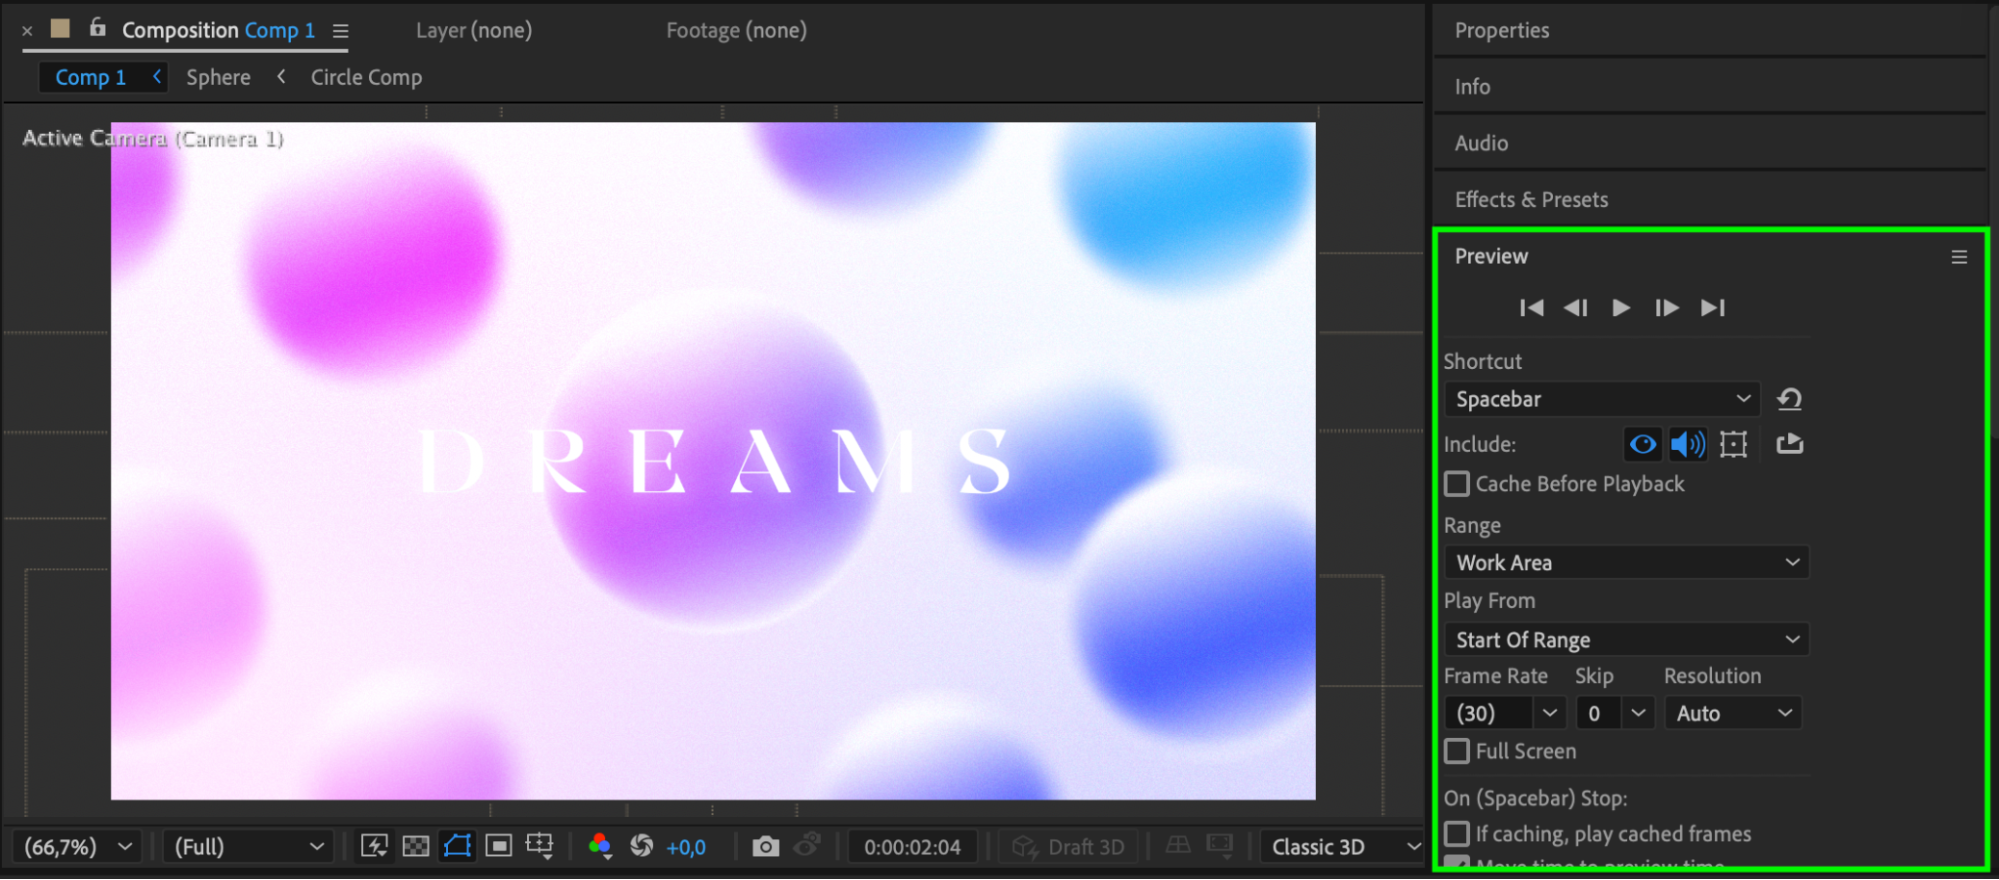
Conclusion
Creating motion graphics in After Effects involves working with shape layers, effects, 3D depth, and animation techniques. By following these steps, you can design high-quality, visually engaging motion graphics for any project.
Our Bestsellers


