Mastering Blood Splatter Effects in Adobe After Effects
Introduction: Adding Intensity with Blood Splatter Effects
Creating blood splatter effects in Adobe After Effects can add a dramatic flair to your videos, enhancing their intensity and impact. Whether you’re working on a horror film or just need a touch of gore, this tutorial will guide you through the process of crafting realistic blood splatter effects from scratch. We’ll cover everything from setting up your composition to fine-tuning your effects for maximum realism.
Get 10% off when you subscribe to our newsletter

Step 1: Create a New Composition
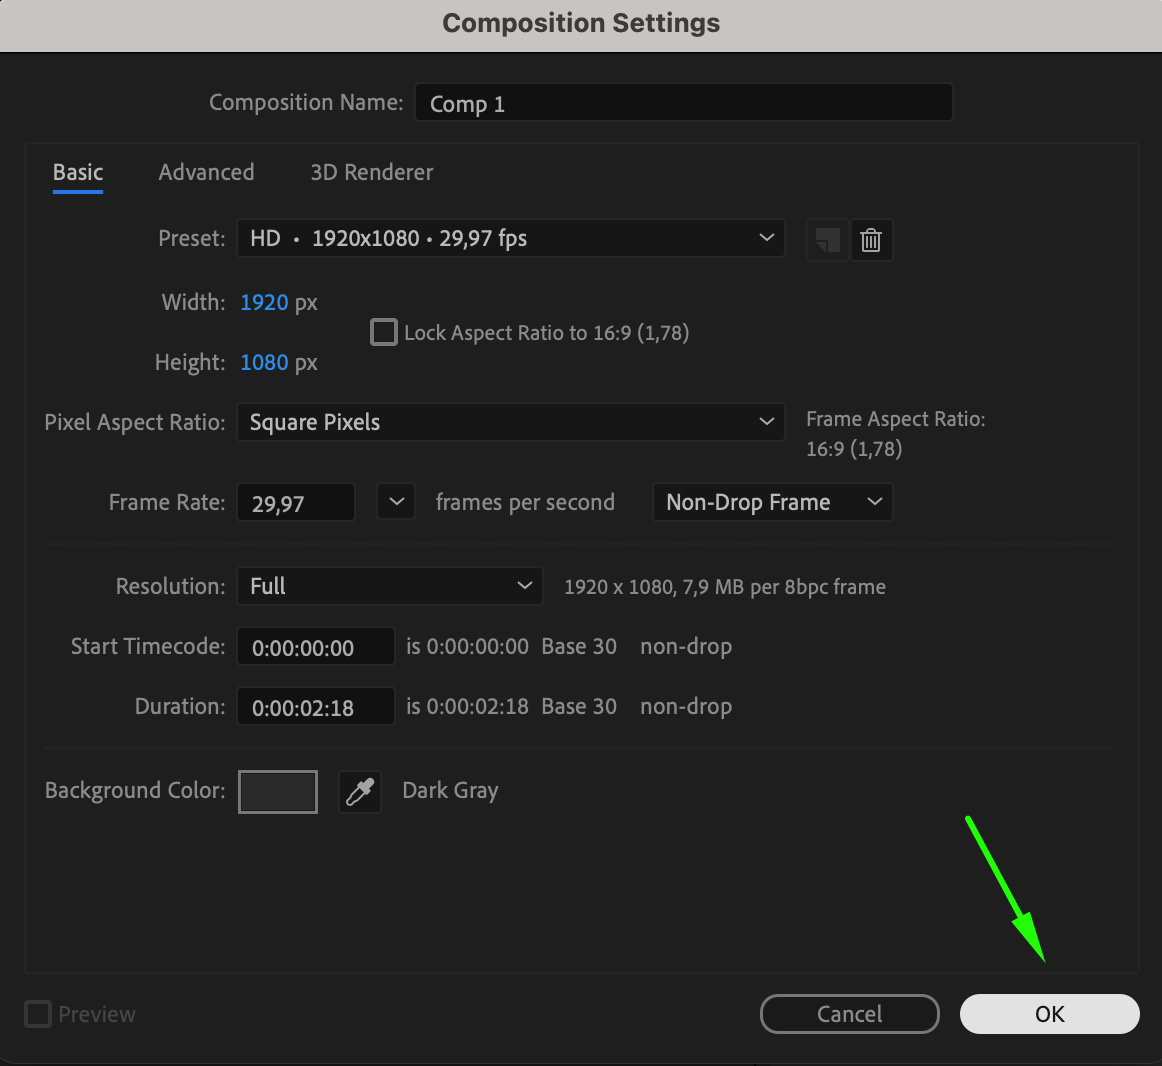
Start by opening Adobe After Effects and creating a new composition. Go to “Composition” > “New Composition” and set your desired resolution, frame rate, and duration. A typical resolution is 1920×1080 for HD, but adjust based on your project needs. This will be the canvas for your blood splatter animation.
 Step 2: Create a Solid Layer
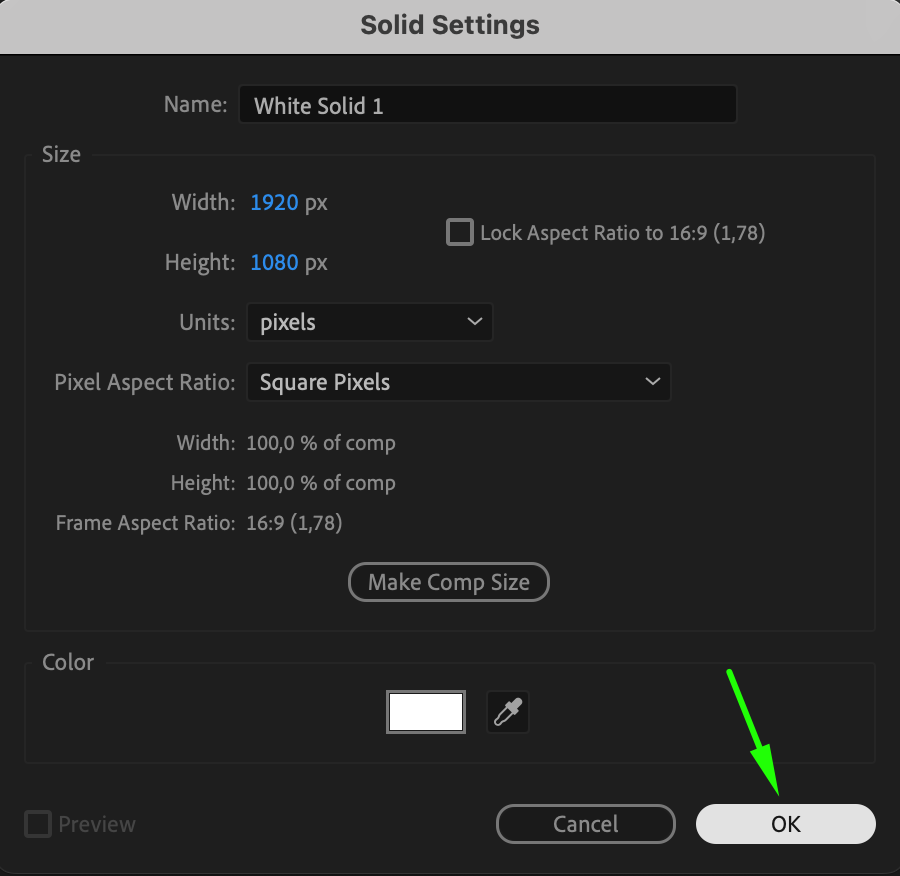
Add a new solid layer to your composition by going to “Layer” > “New” > “Solid.” This solid will be used as the foundation for the particle effect that will simulate the blood splatter.

 Step 3: Apply the CC Particle World Effect
With your solid layer selected, go to “Effect” > “Simulation” > “CC Particle World.” This effect will allow you to generate and animate particles that will mimic the appearance of blood splatter. 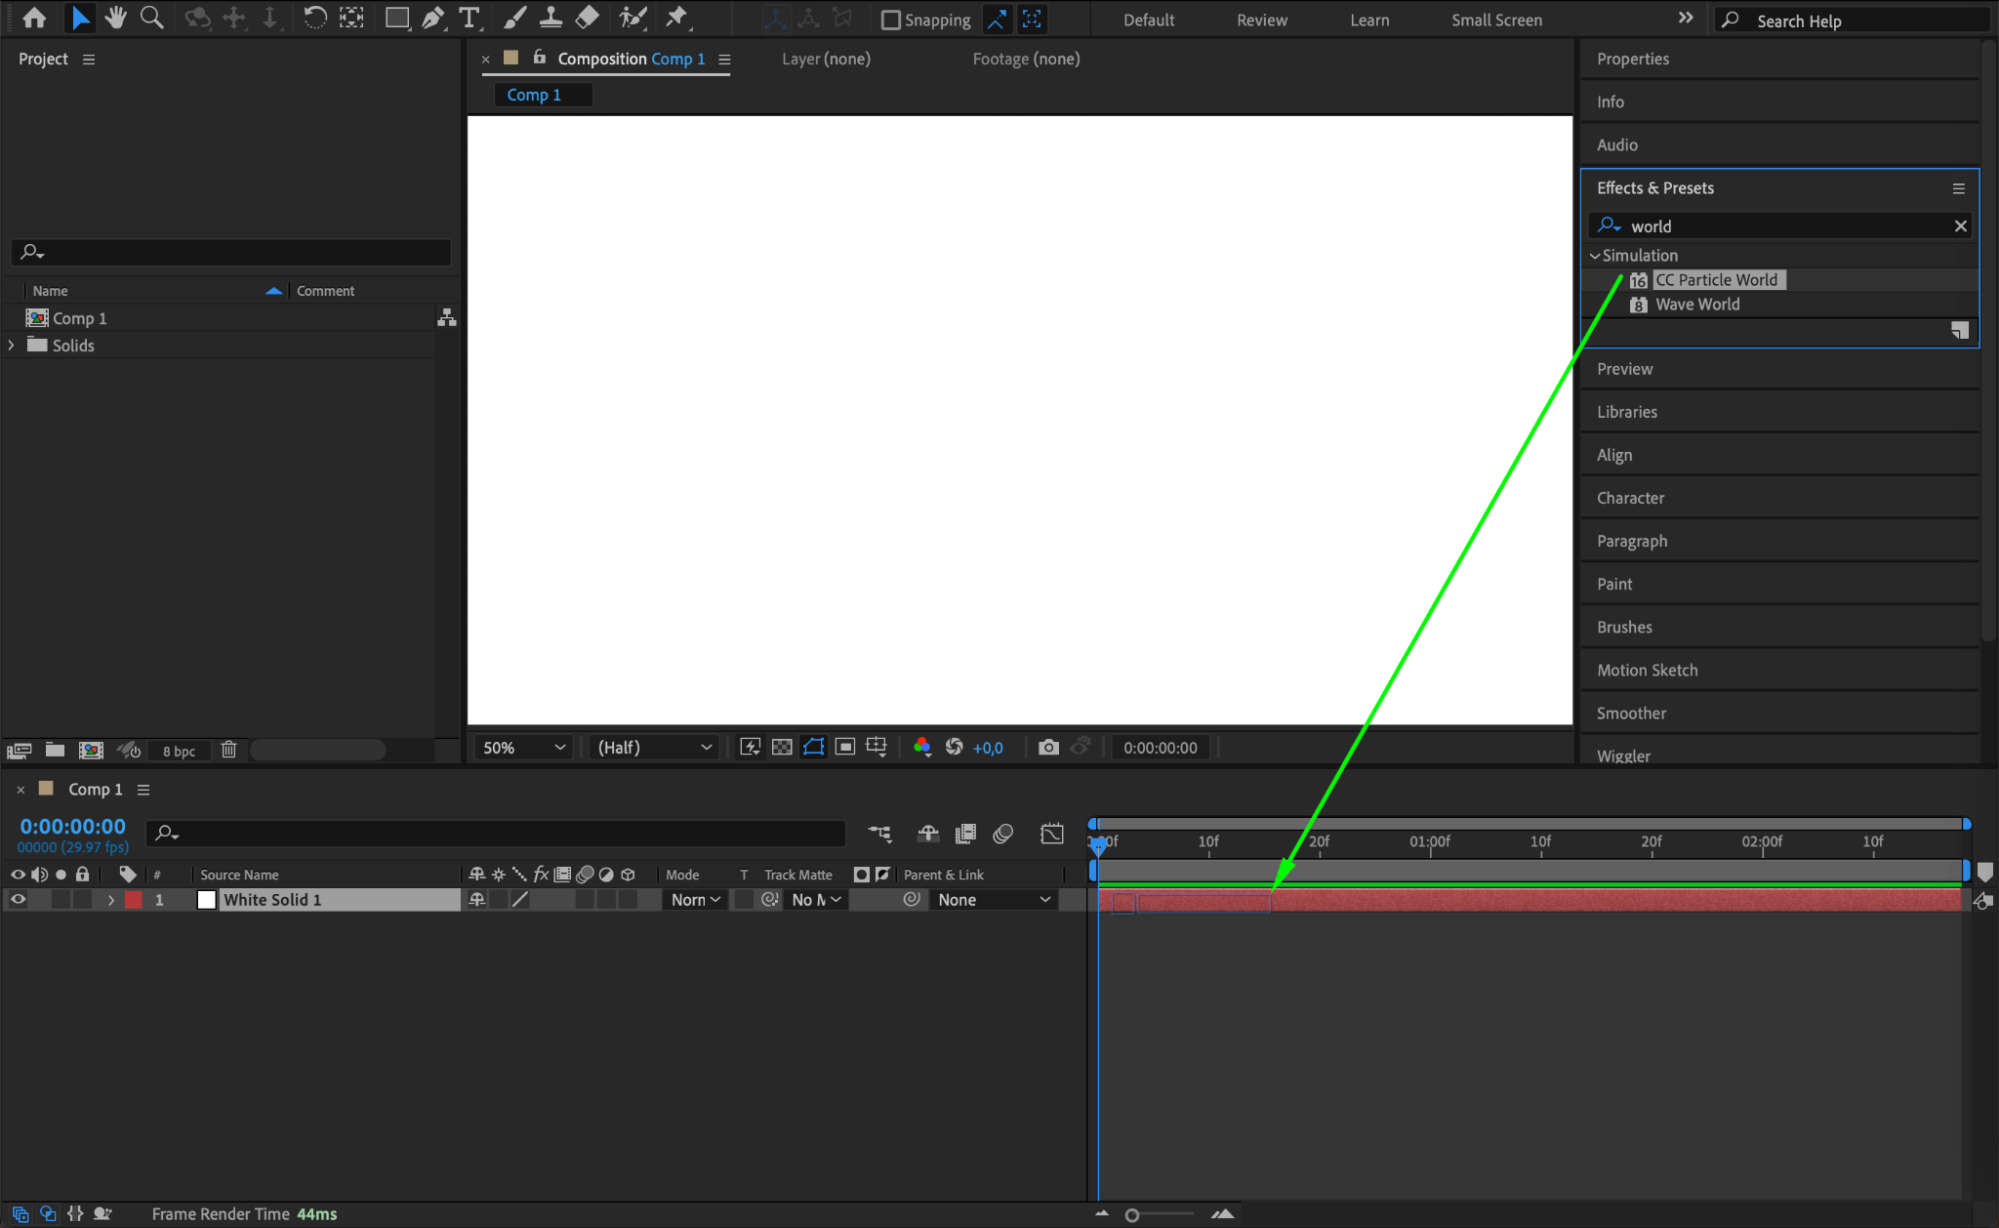 Step 4: Configure Particle World Settings
In the Effect Controls panel, adjust the following settings to fine-tune your blood splatter:
Get 10% off when you subscribe to our newsletter

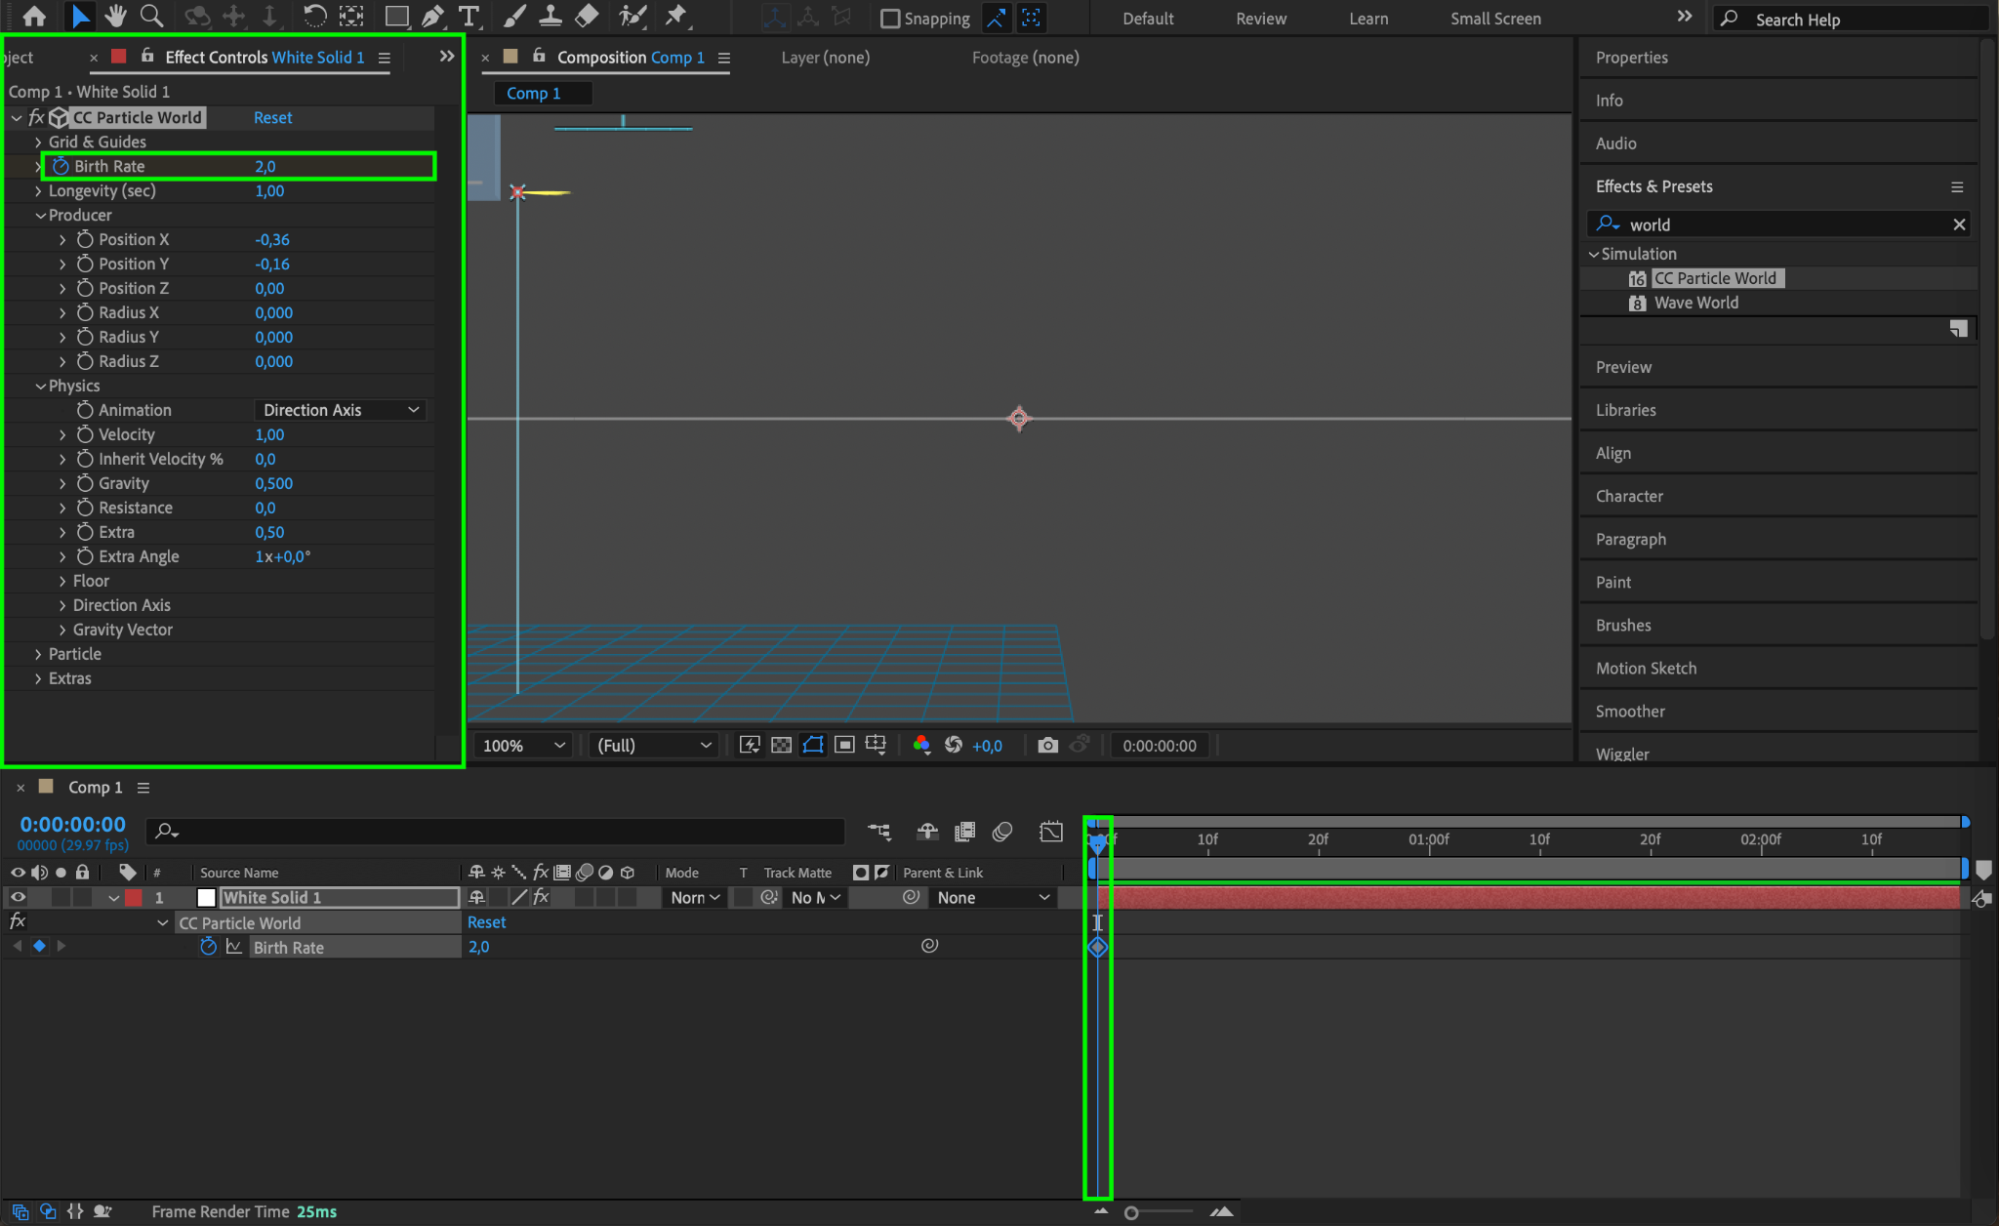
Radius X, Y, Z: Set these values to 0 to create a concentrated burst of particles.
Animation: Set the animation to “Direction Axis” to control the direction of the particle emission.
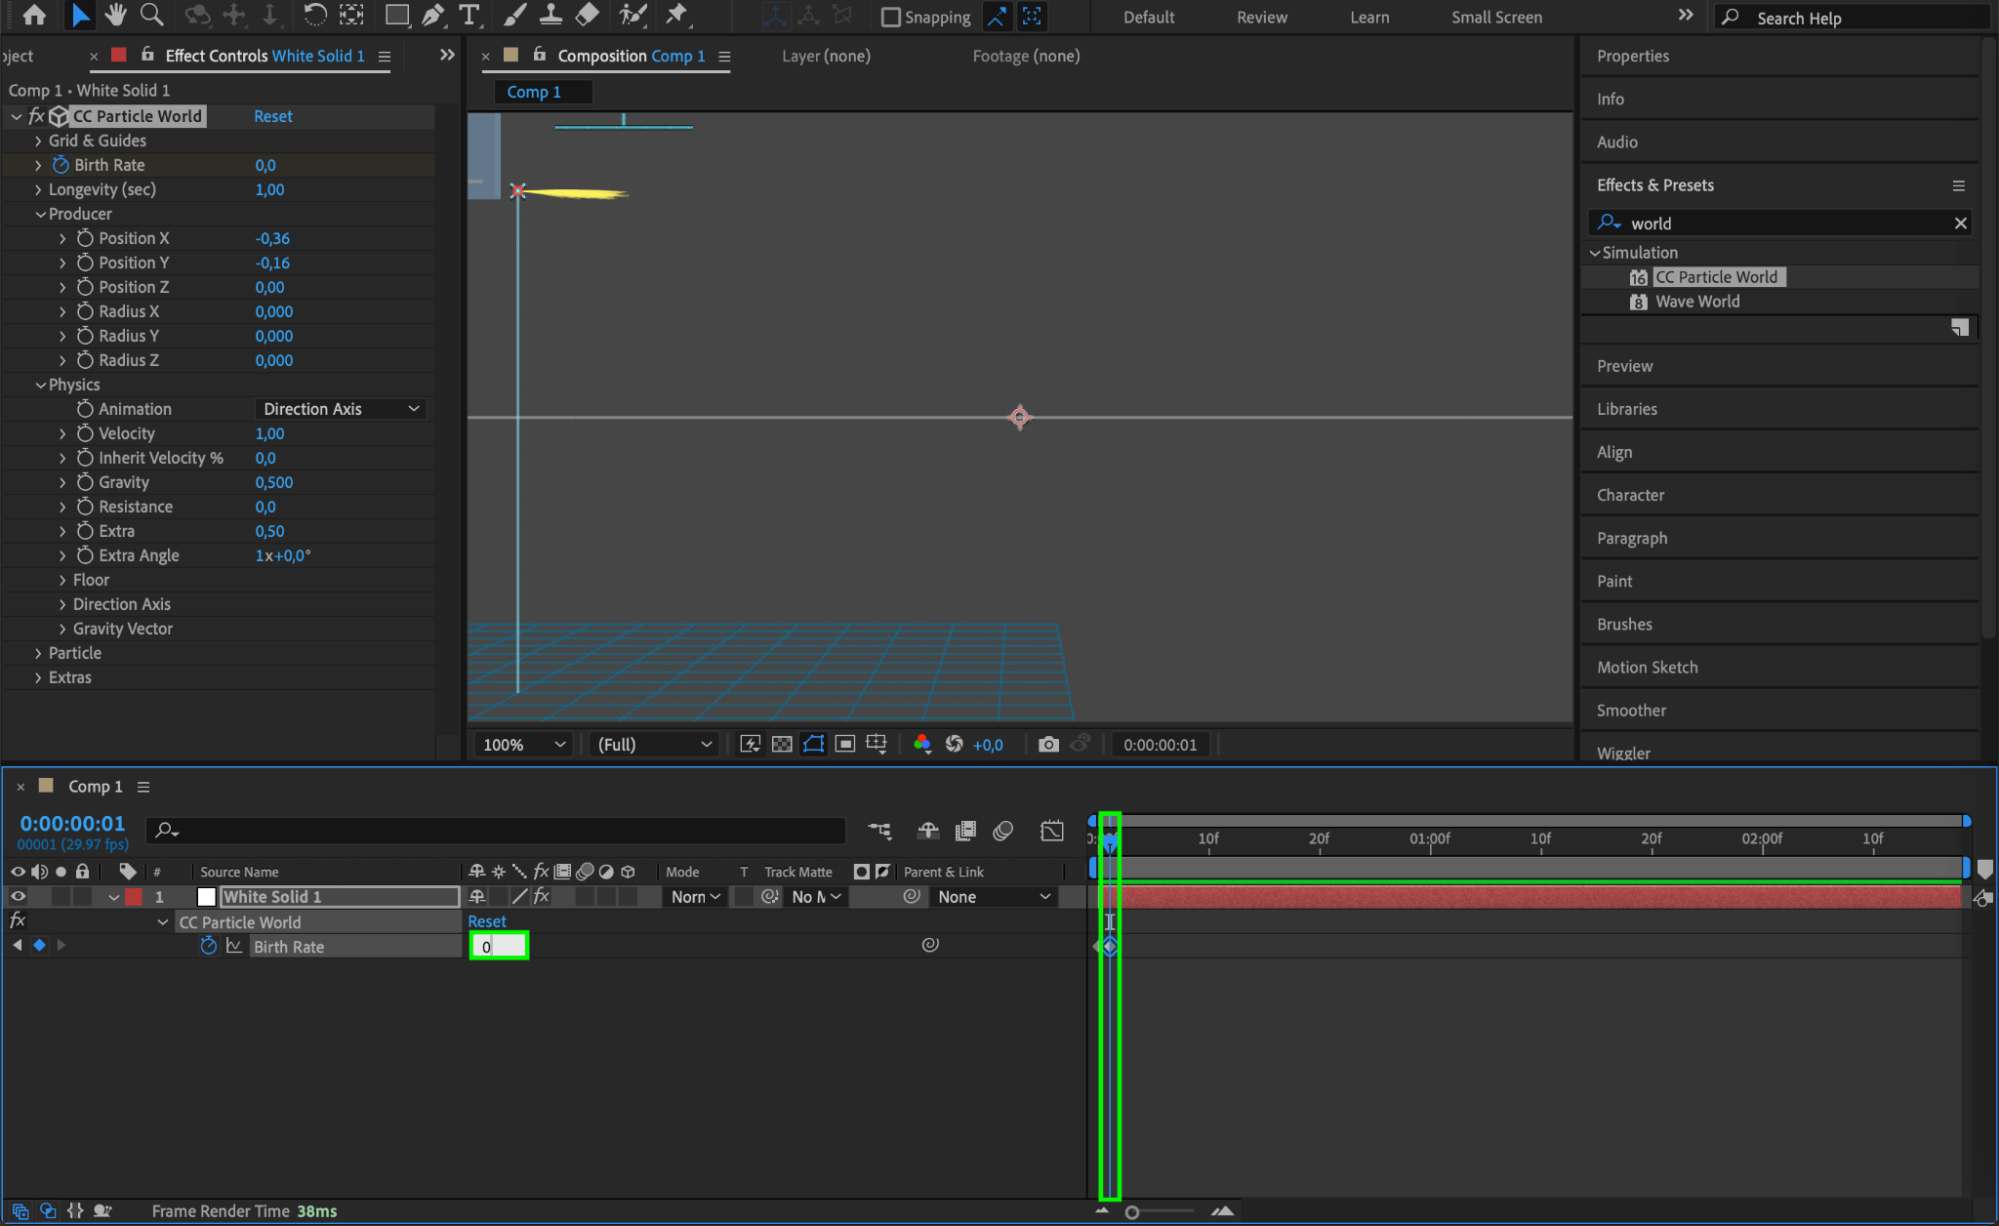
Animate the Birth Rate parameter by clicking the stopwatch icon to set keyframes. Start with a value of 2 at the beginning of the composition, and then reduce it to 0 one frame forward to simulate the initial burst of the splatter.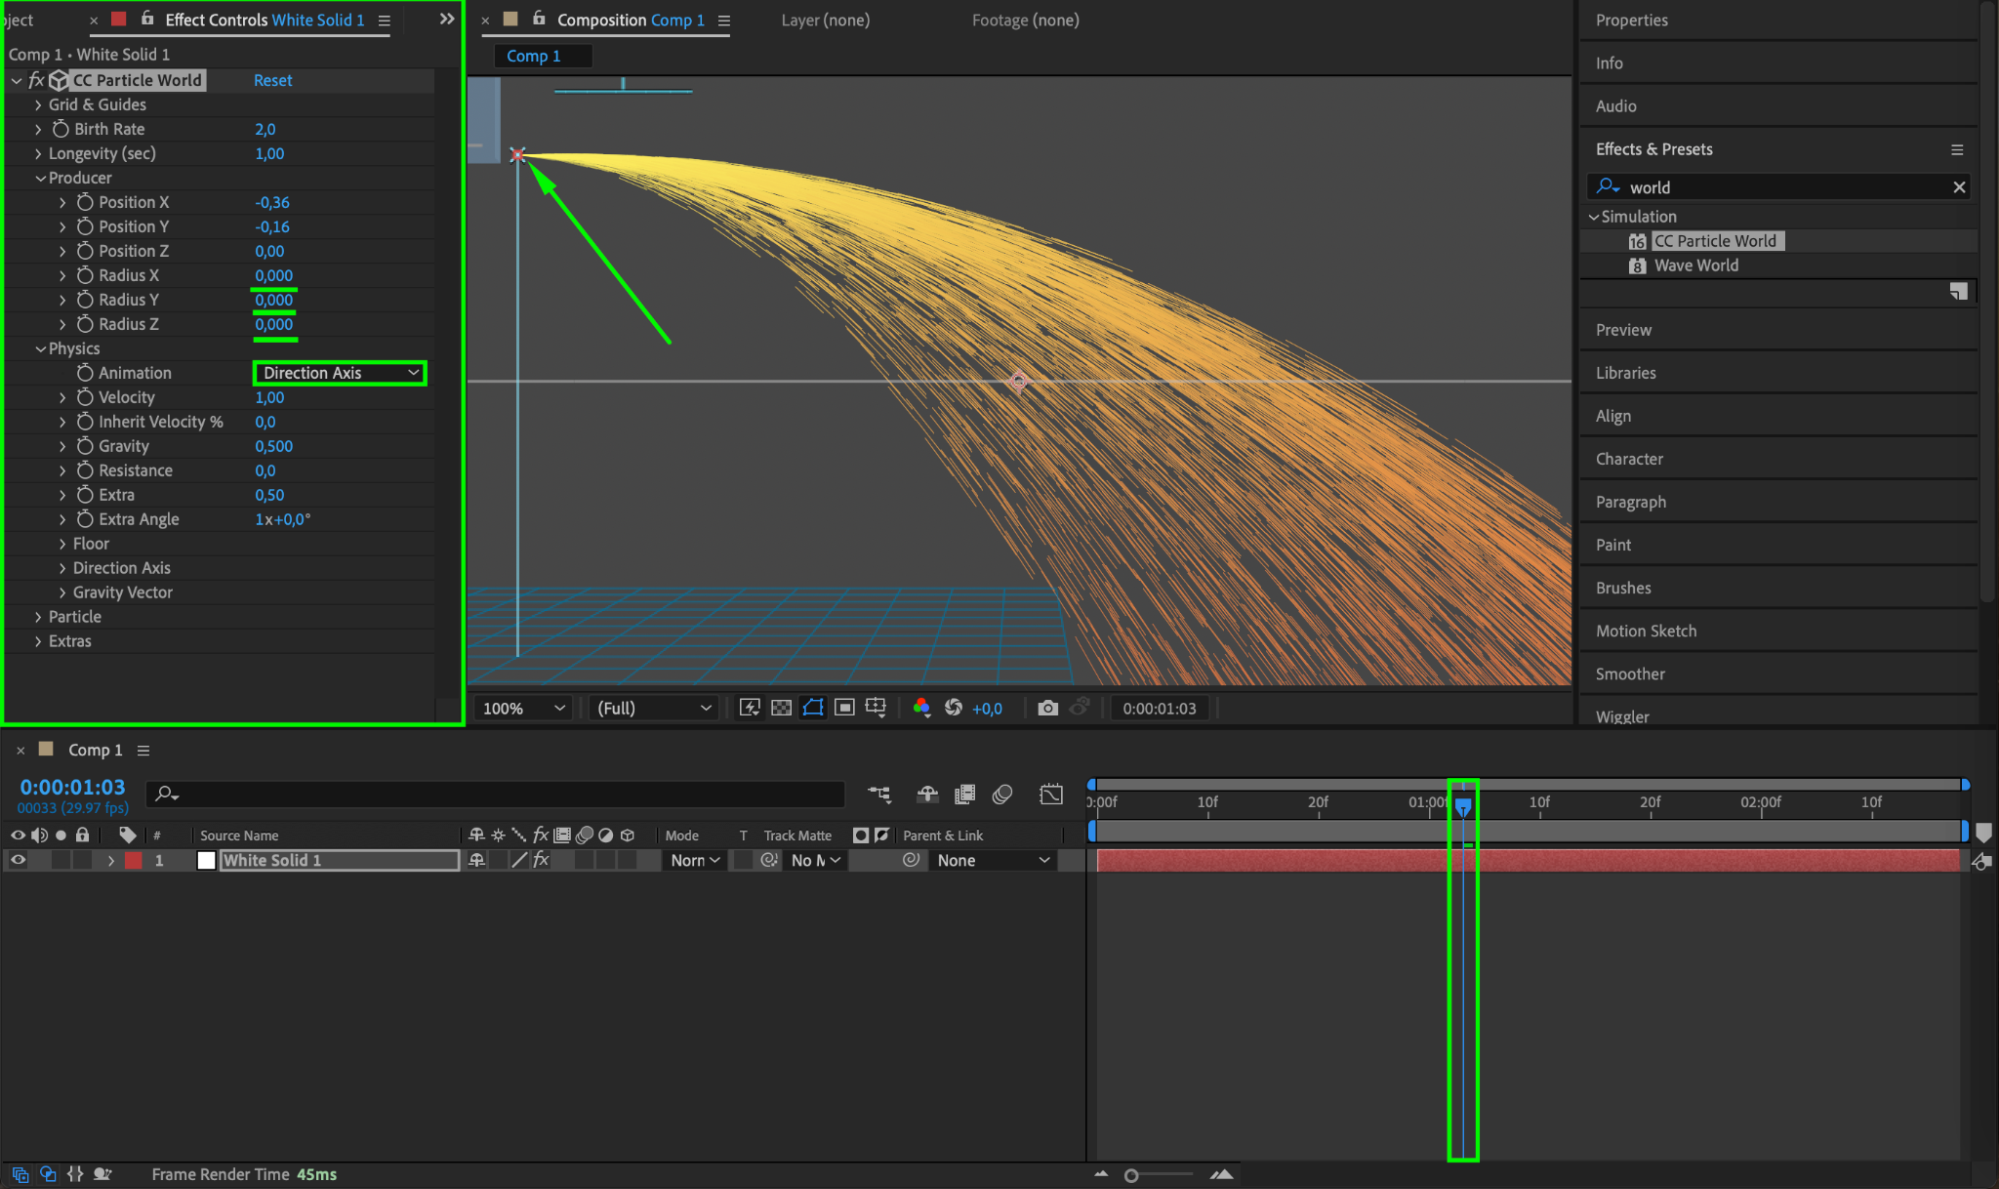
 Step 5: Adjust Particle Settings
Get 10% off when you subscribe to our newsletter

Modify additional particle settings to enhance the realism of the blood splatter:
Birth Rate: Set to 10 to control the density of the particles.
Velocity: Set to 2 to adjust how fast the particles spread.
Resistance: Set to 0.2 to simulate how particles slow down over time.
Particle Type: Choose “Faded Sphere” to achieve a more natural appearance.
Size Variation: Set to 100 to vary the size of the particles.
Color: Set to a dark red to represent blood.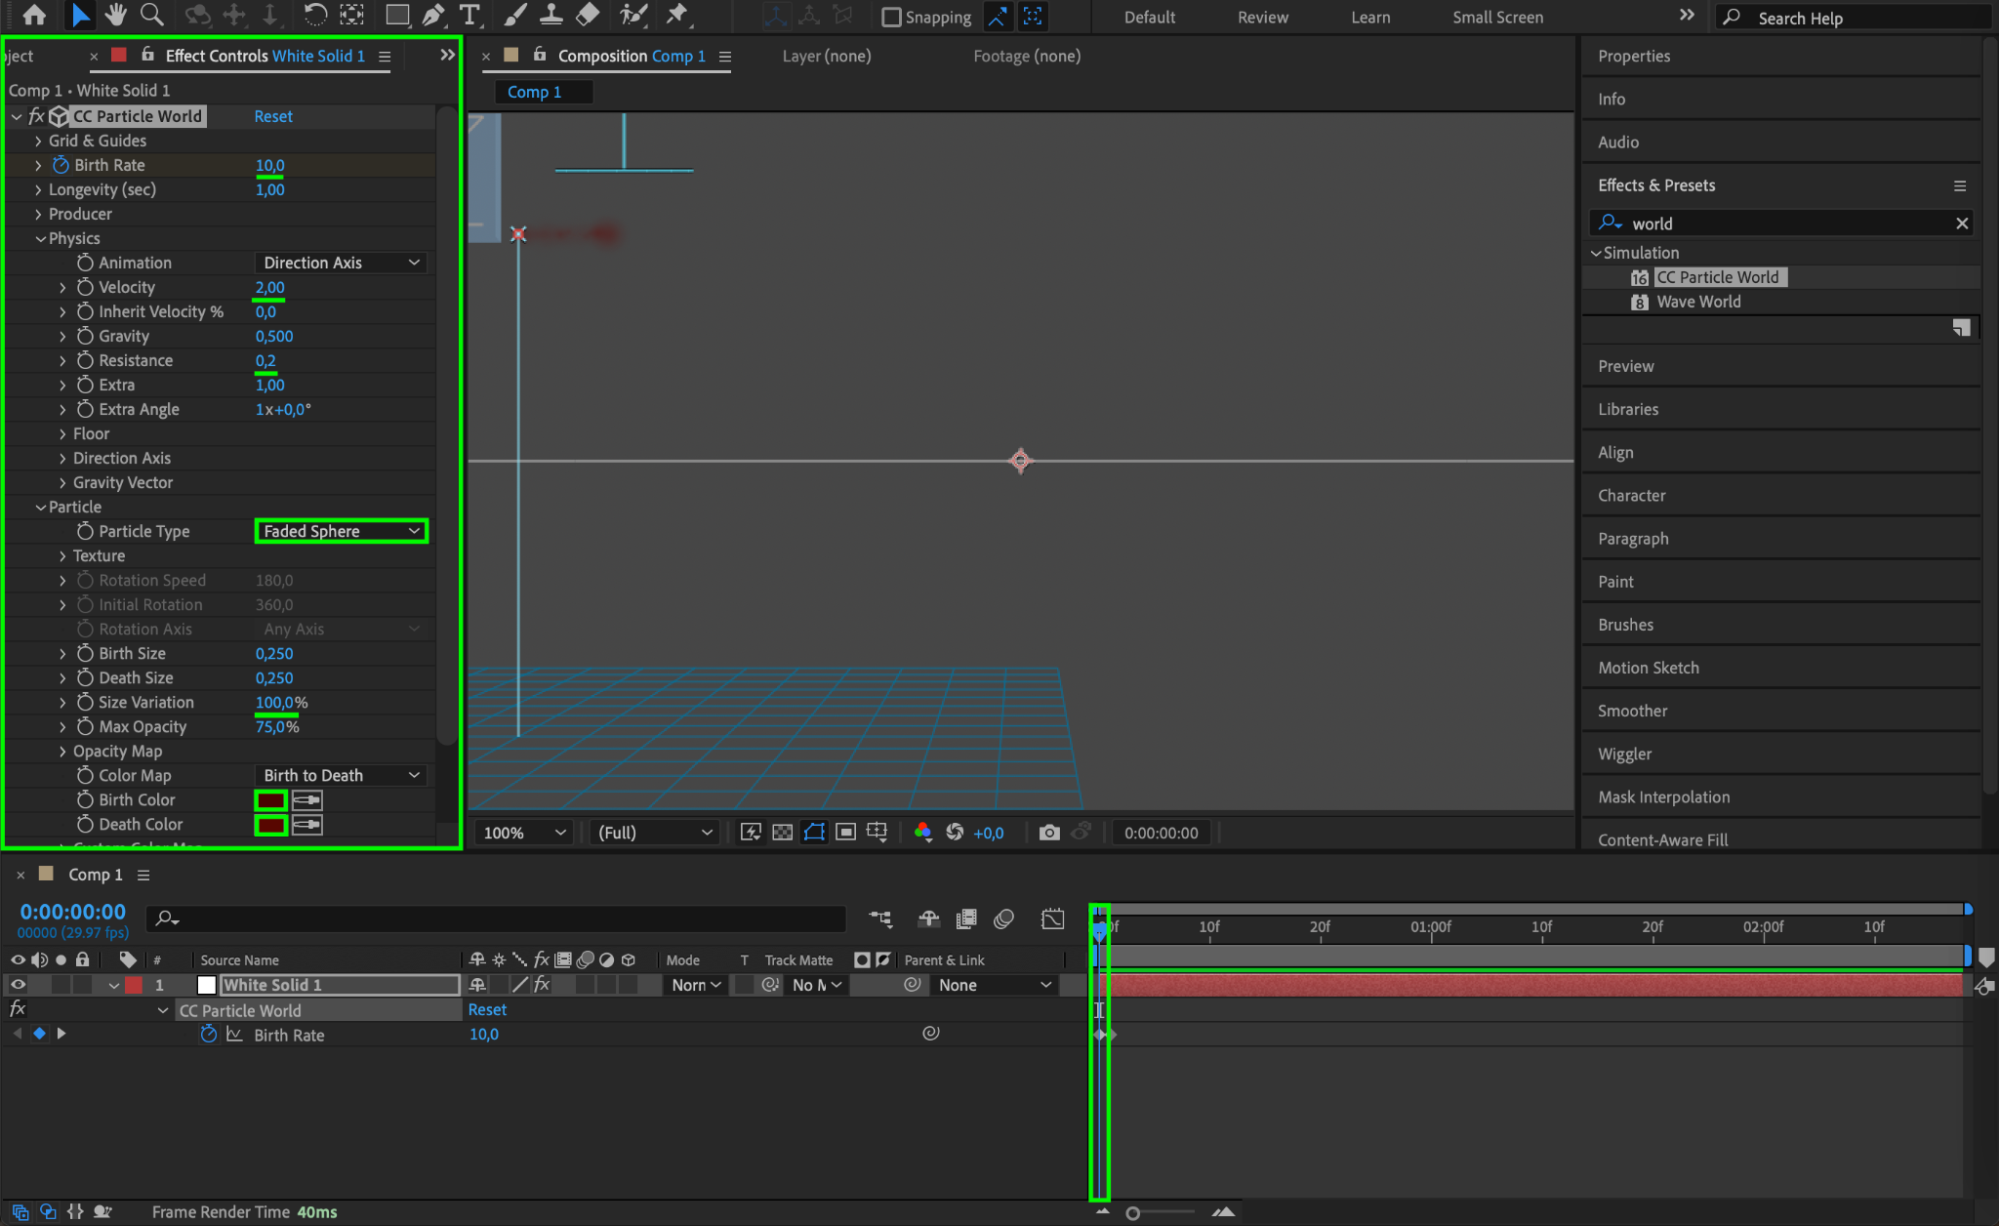 Step 6: Duplicate the Solid Layer
Duplicate the solid layer by selecting it and pressing “Ctrl/Cmd + D”. This will create a copy that you can modify to add additional layers of blood splatter.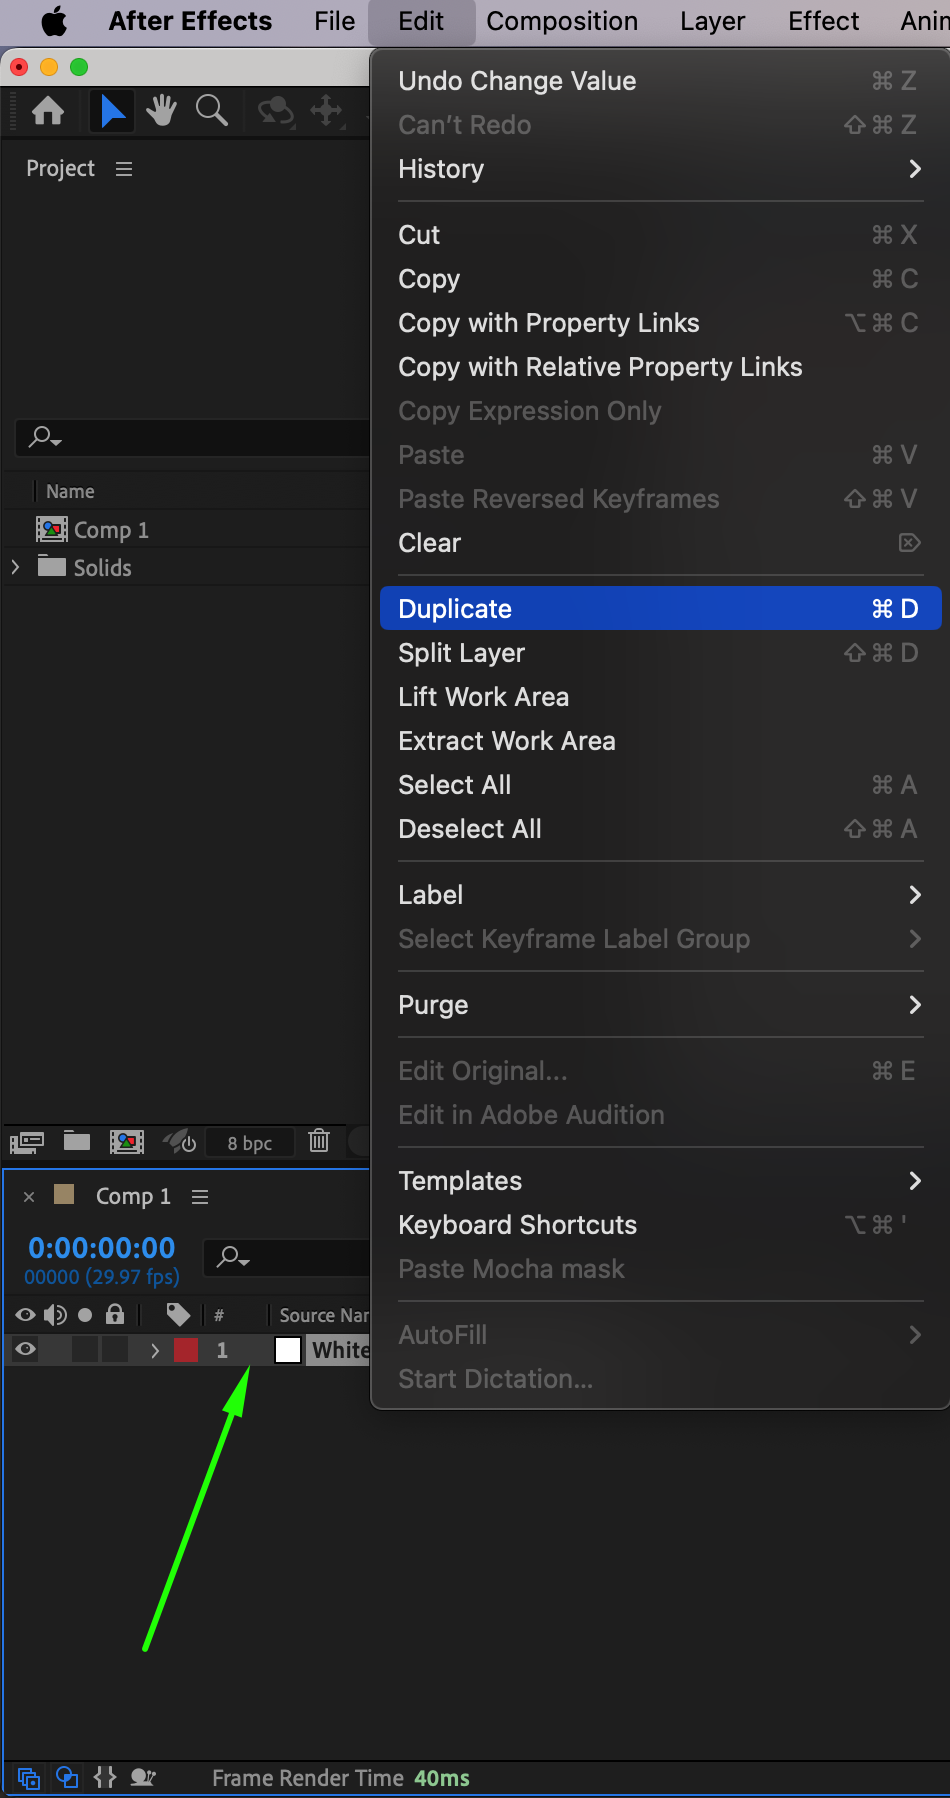 Step 7: Adjust Settings for the Original Solid
Get 10% off when you subscribe to our newsletter

Select the original solid layer and modify the following settings in the Effect Controls panel:
Birth Rate: Set to 17 to increase the number of particles.
Velocity: Set to 2.5 for slightly faster spreading particles.
Resistance: Set to 0.7 to simulate more drag on the particles.
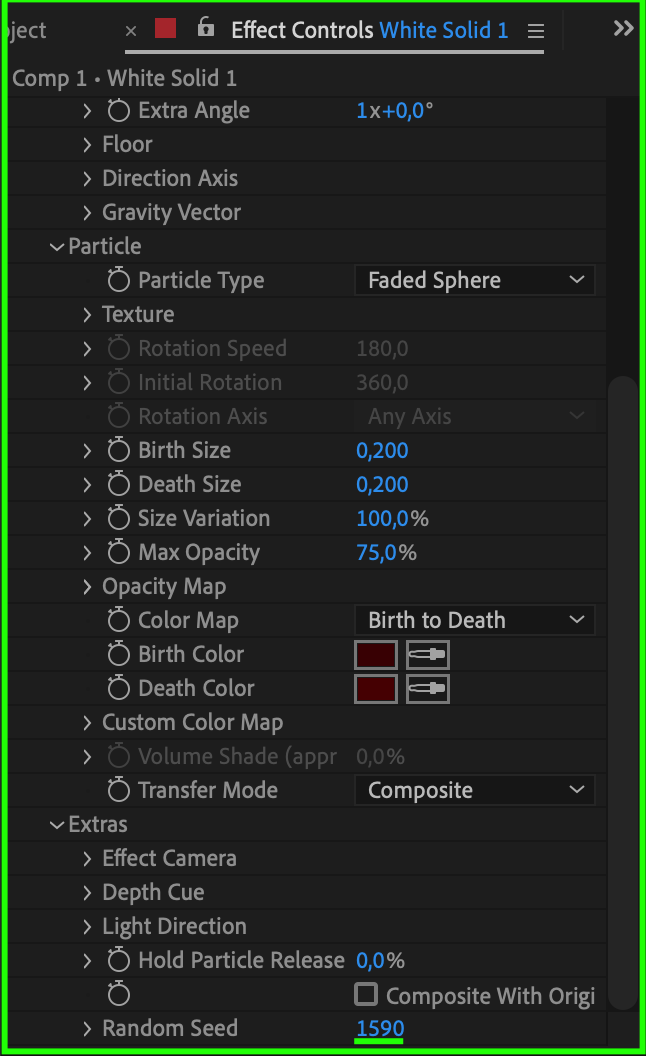
Birth and Death Size: Set to 0.2 to control the size of the particles.
Random Seed: Set to 1590 to vary the appearance of the splatter.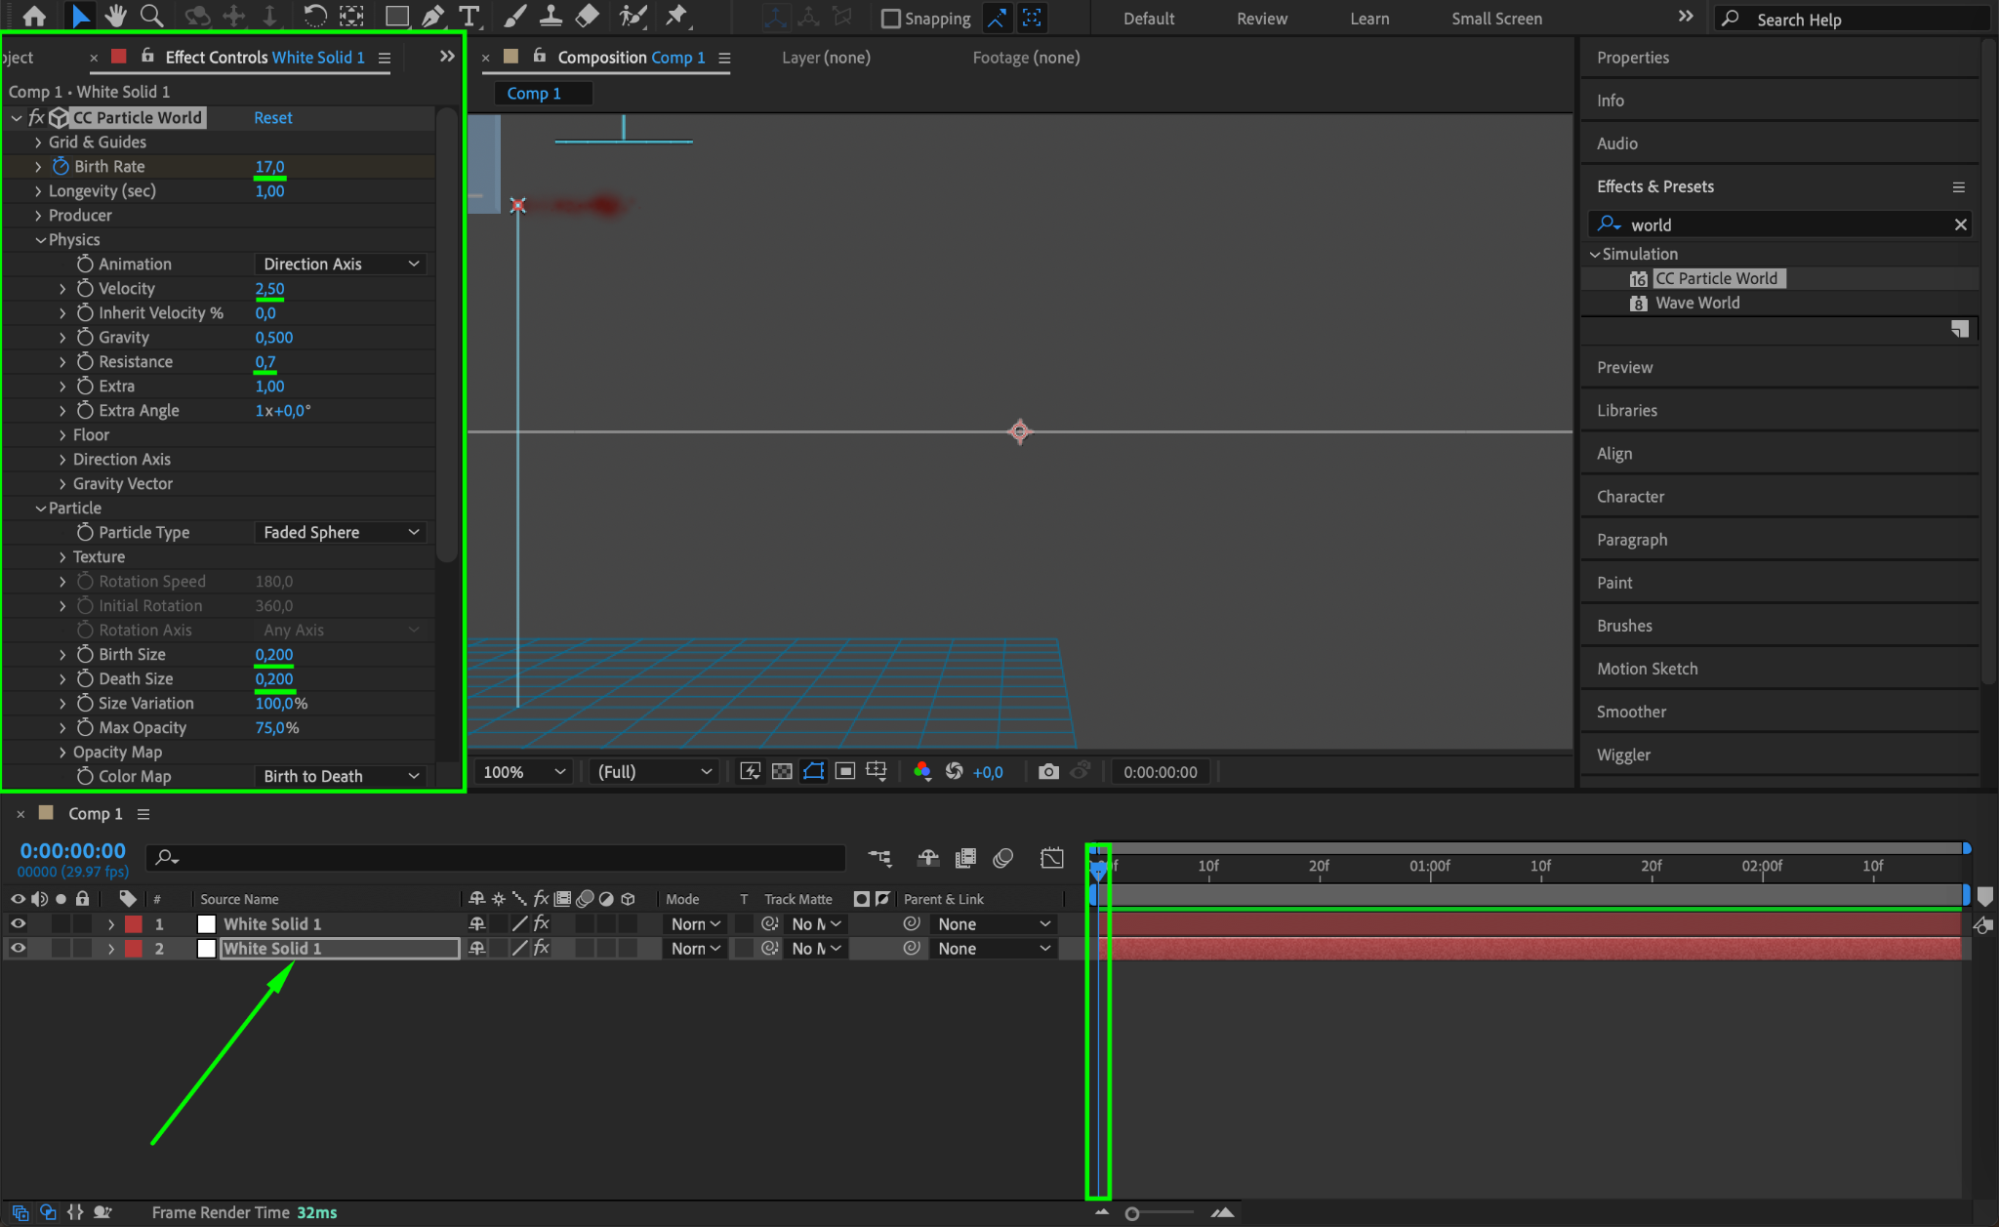
 Step 8: Duplicate the Top Solid Layer
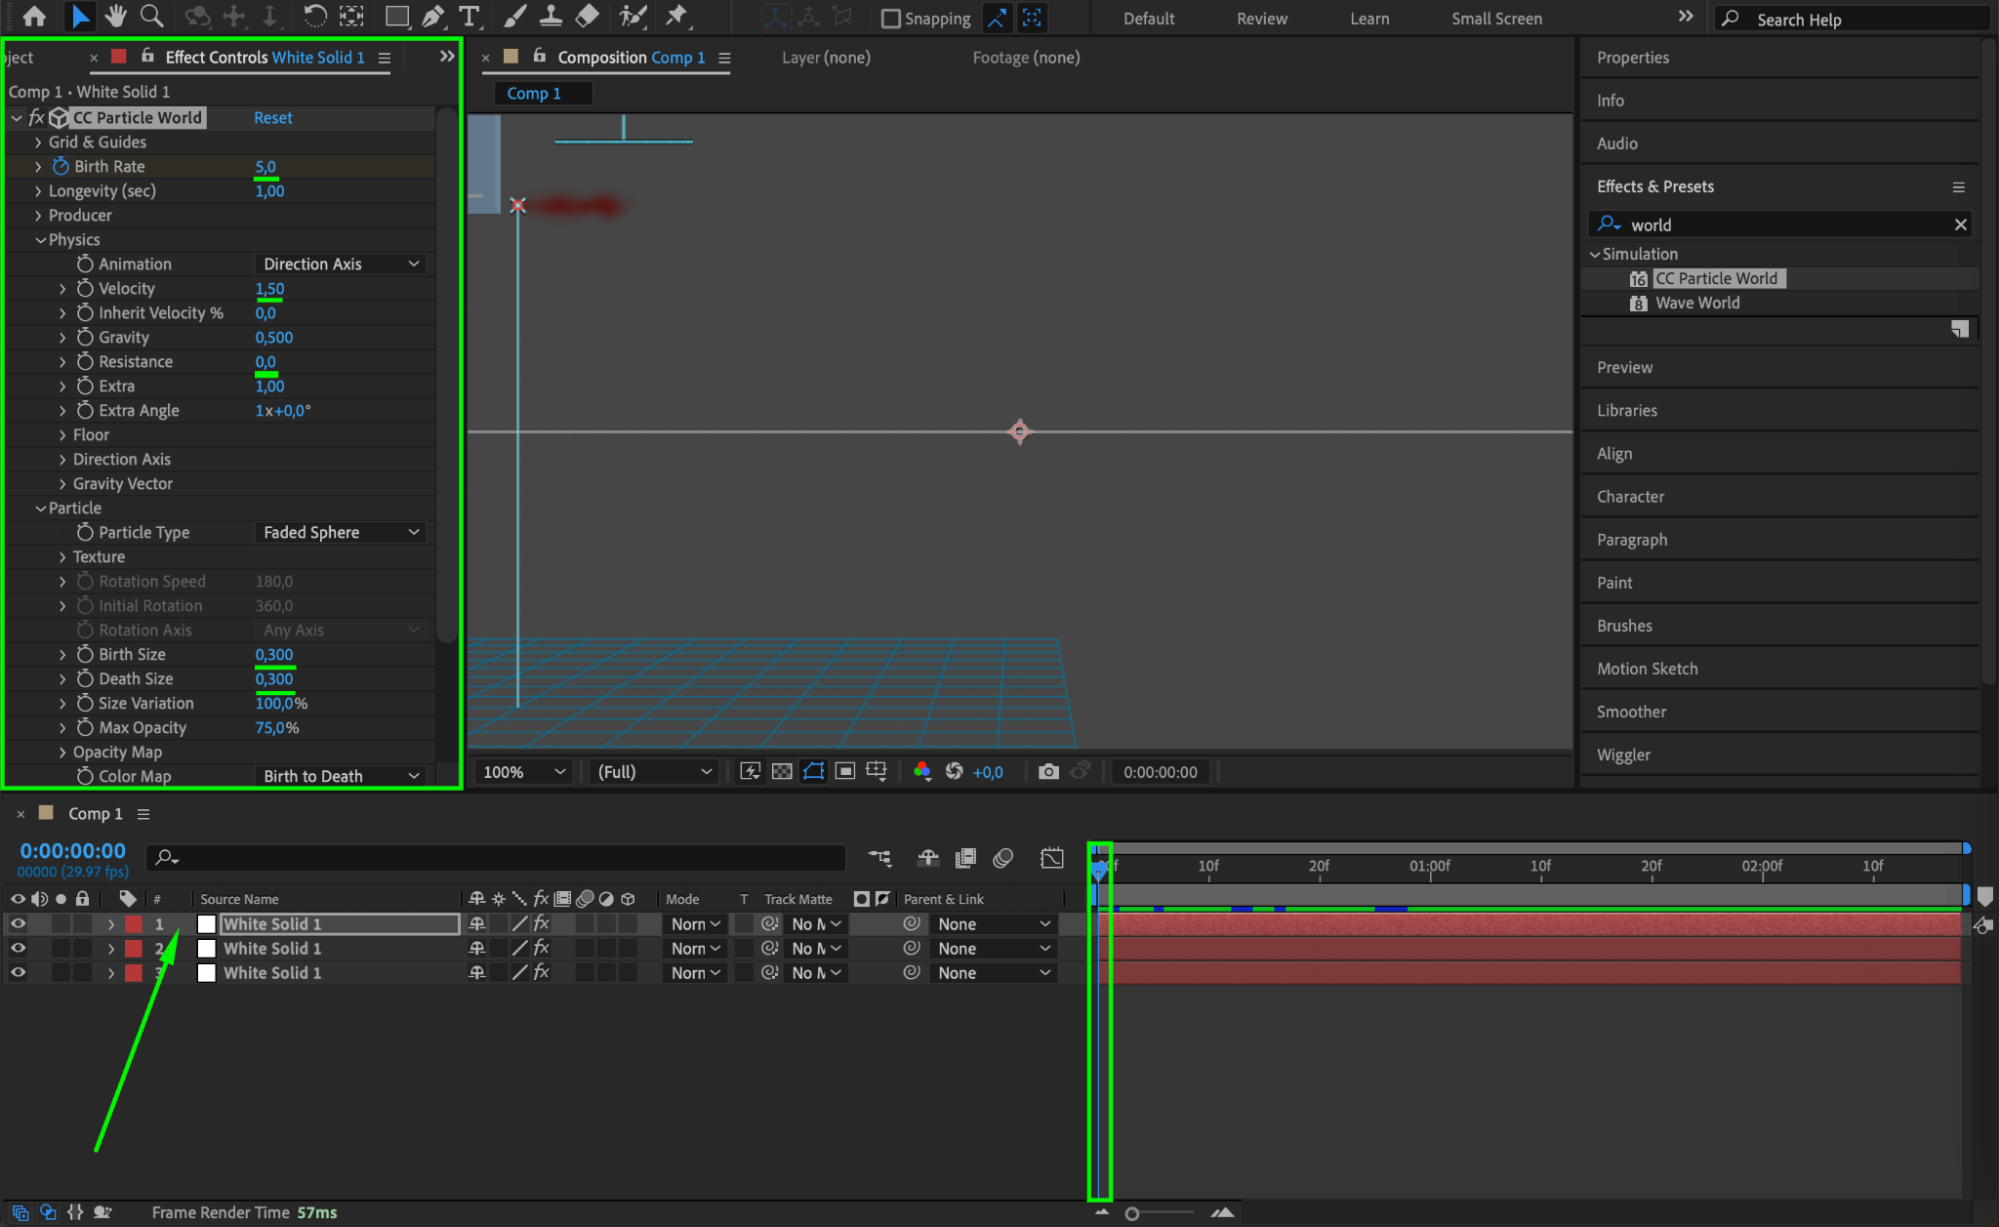
Create another duplicate of the top solid layer. Adjust the settings as follows:
Get 10% off when you subscribe to our newsletter

Birth Rate: Set to 5 for a lighter splash effect.
Velocity: Set to 1.5 for slower particles.
Resistance: Set to 0 for no drag on the particles.
Birth and Death Size: Set to 0.3 to adjust the size.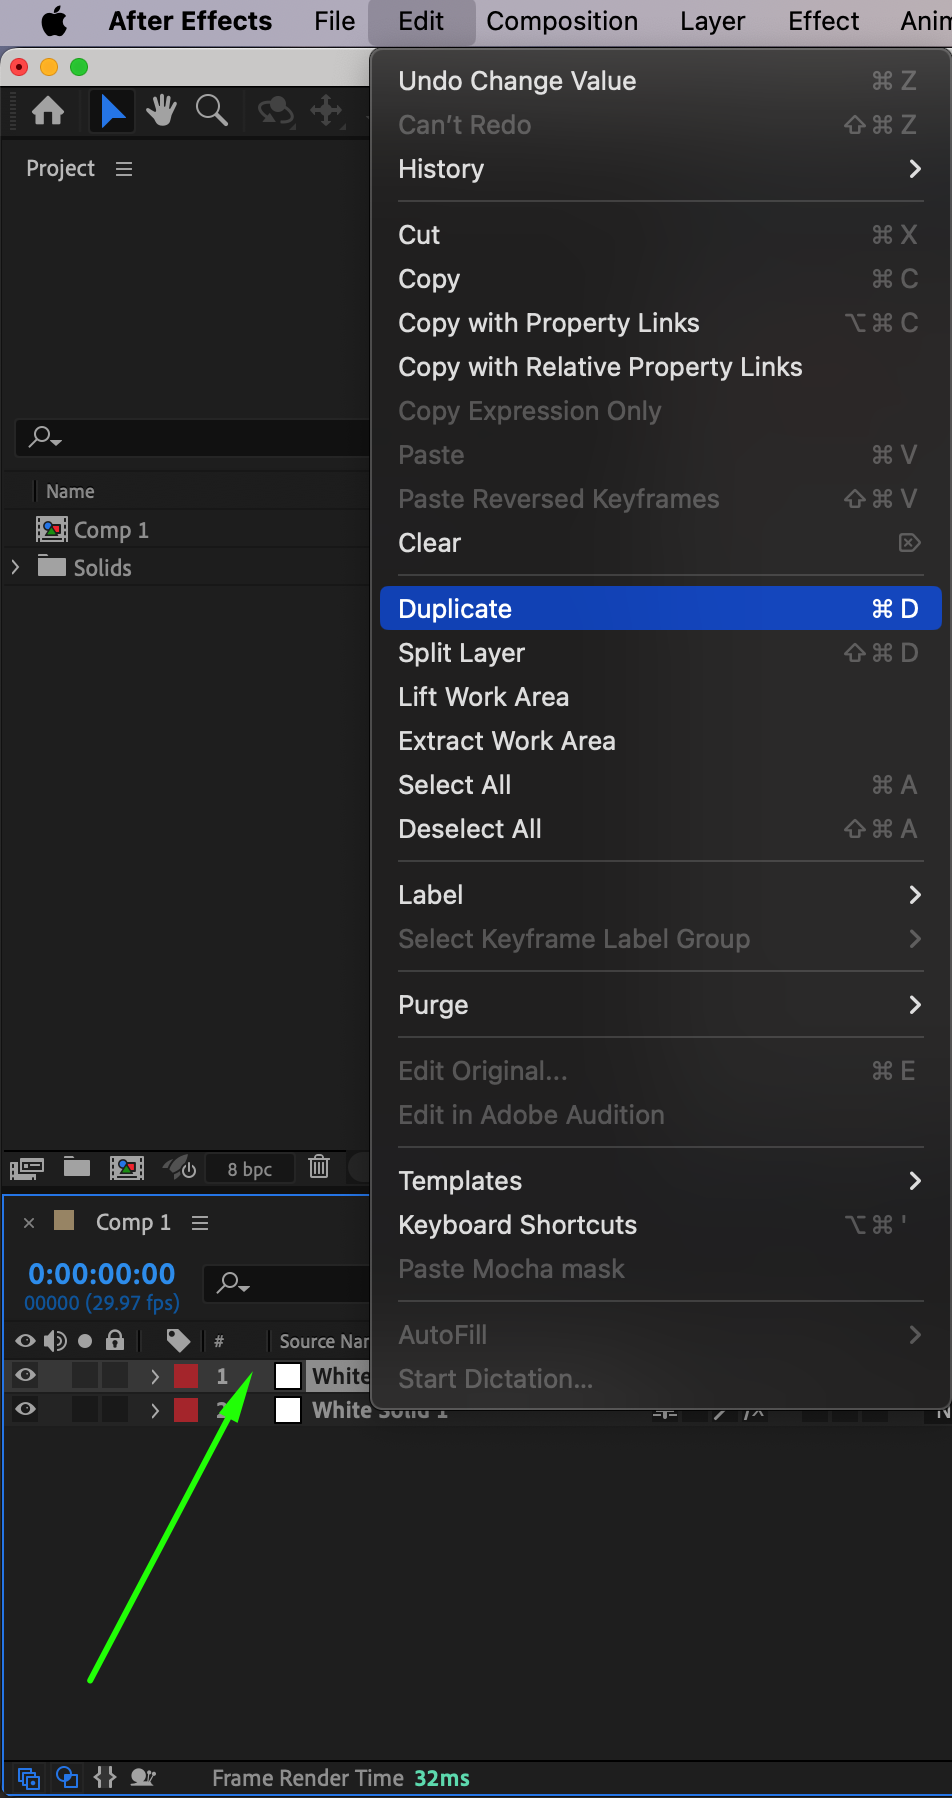
 Step 9: Add Adjustment Layer for Blur
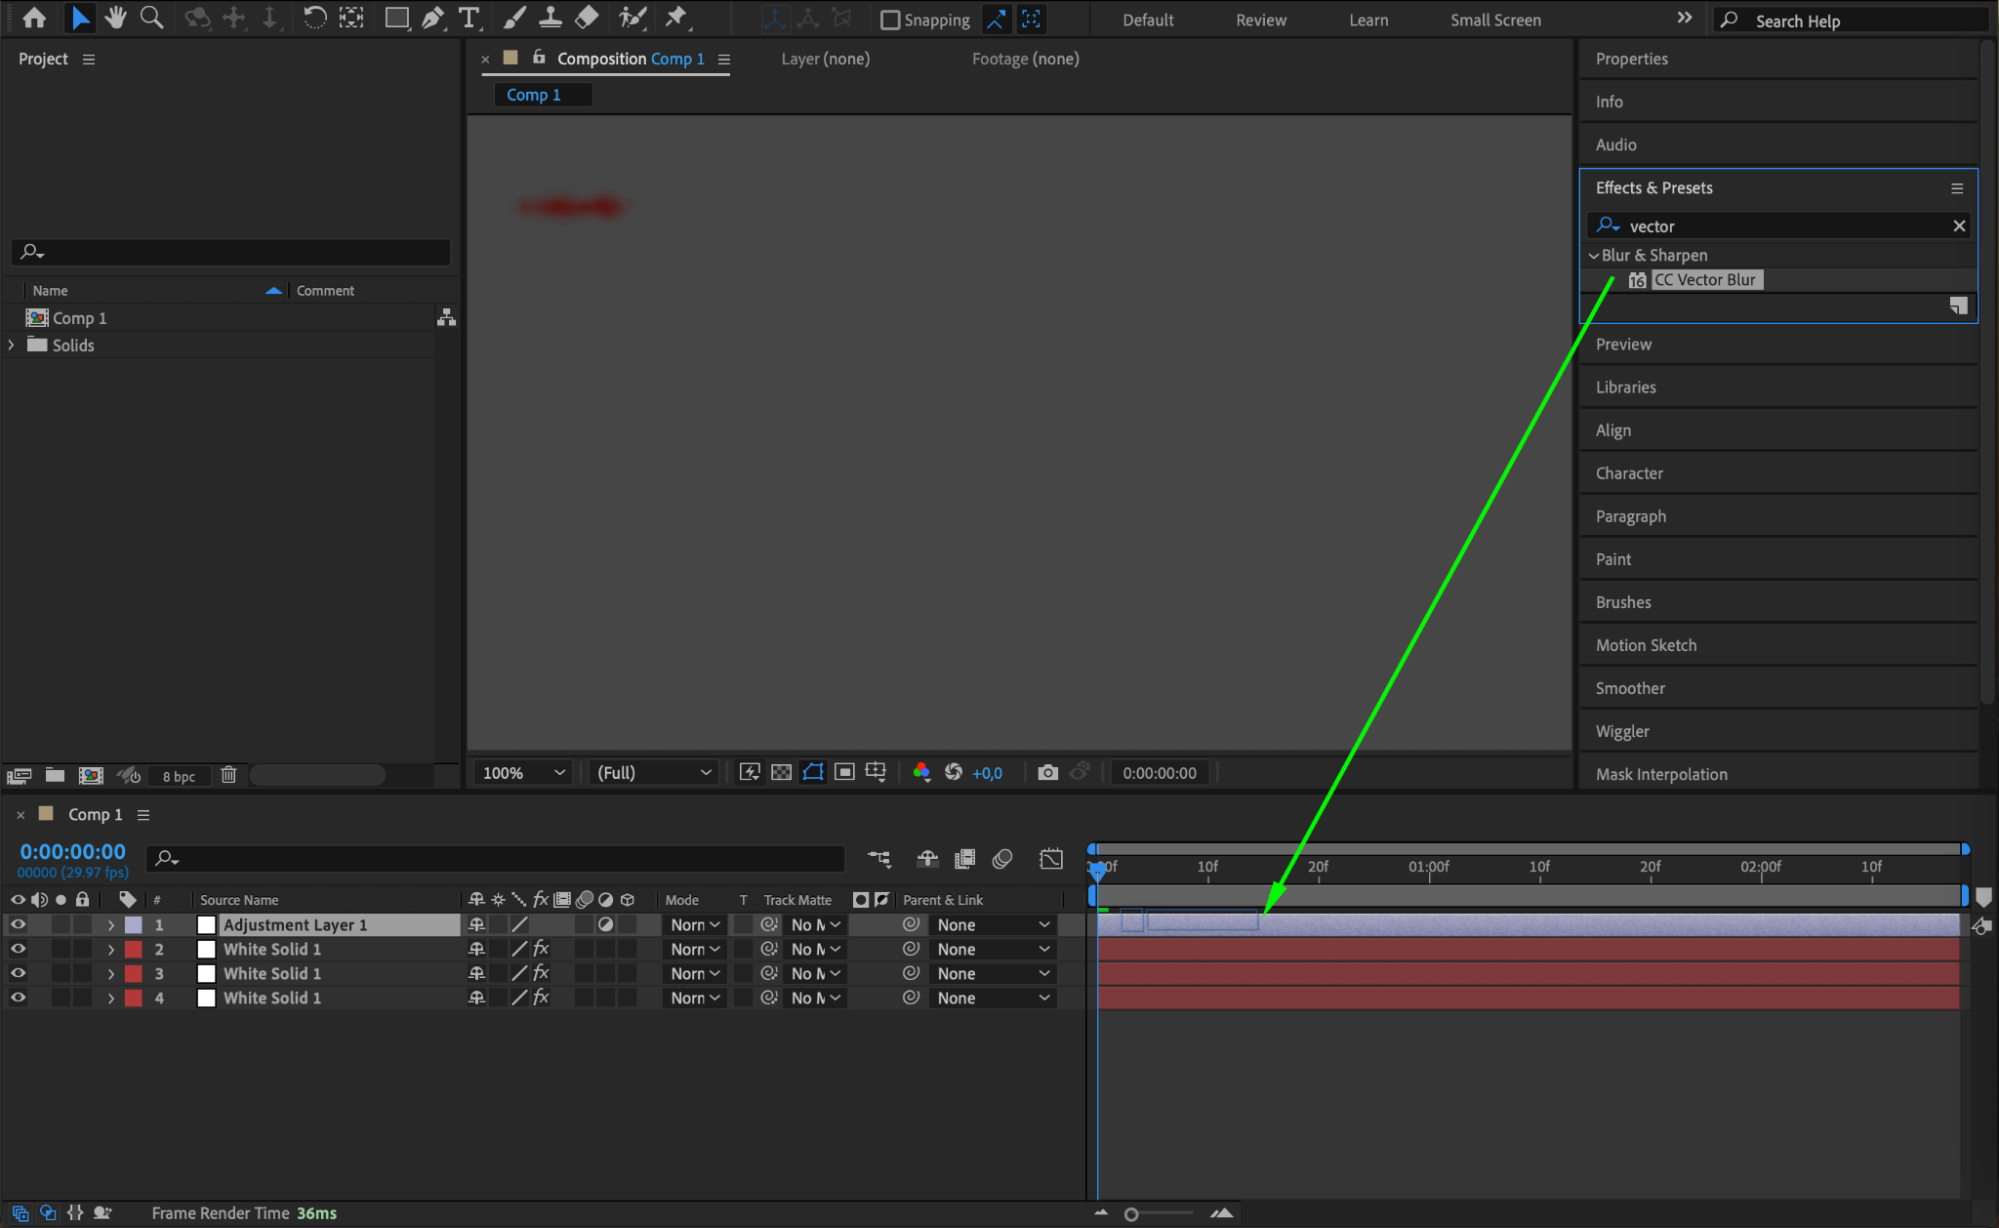
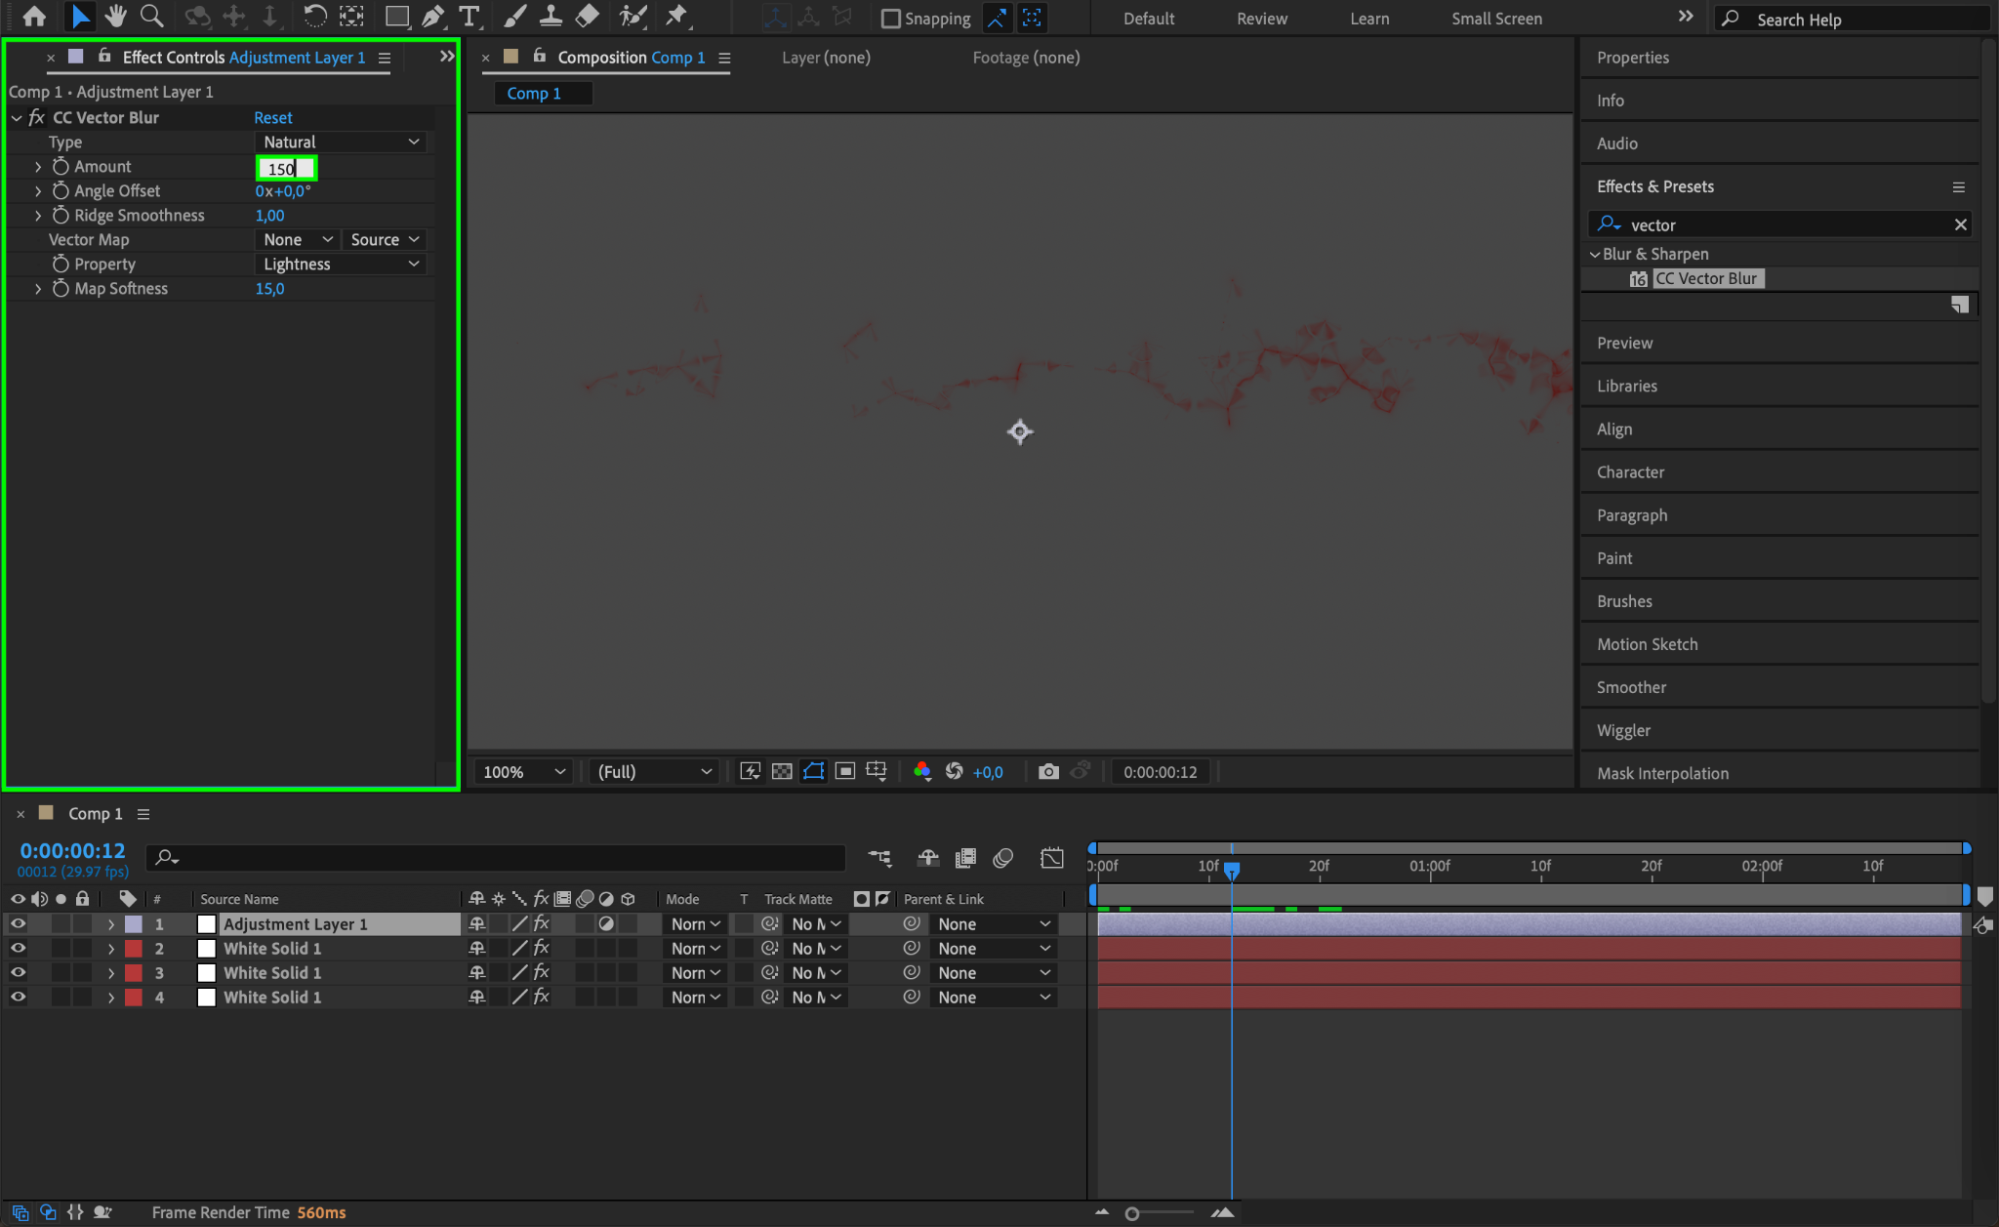
Create a new adjustment layer by going to “Layer” > “New” > “Adjustment Layer.” Apply the “CC Vector Blur” effect by going to “Effect” > “Blur & Sharpen” > “CC Vector Blur.” Set the Amount to 150 to create a blur effect that enhances the splatter’s appearance.
 Step 10: Apply Simple Choker to Adjustment Layer
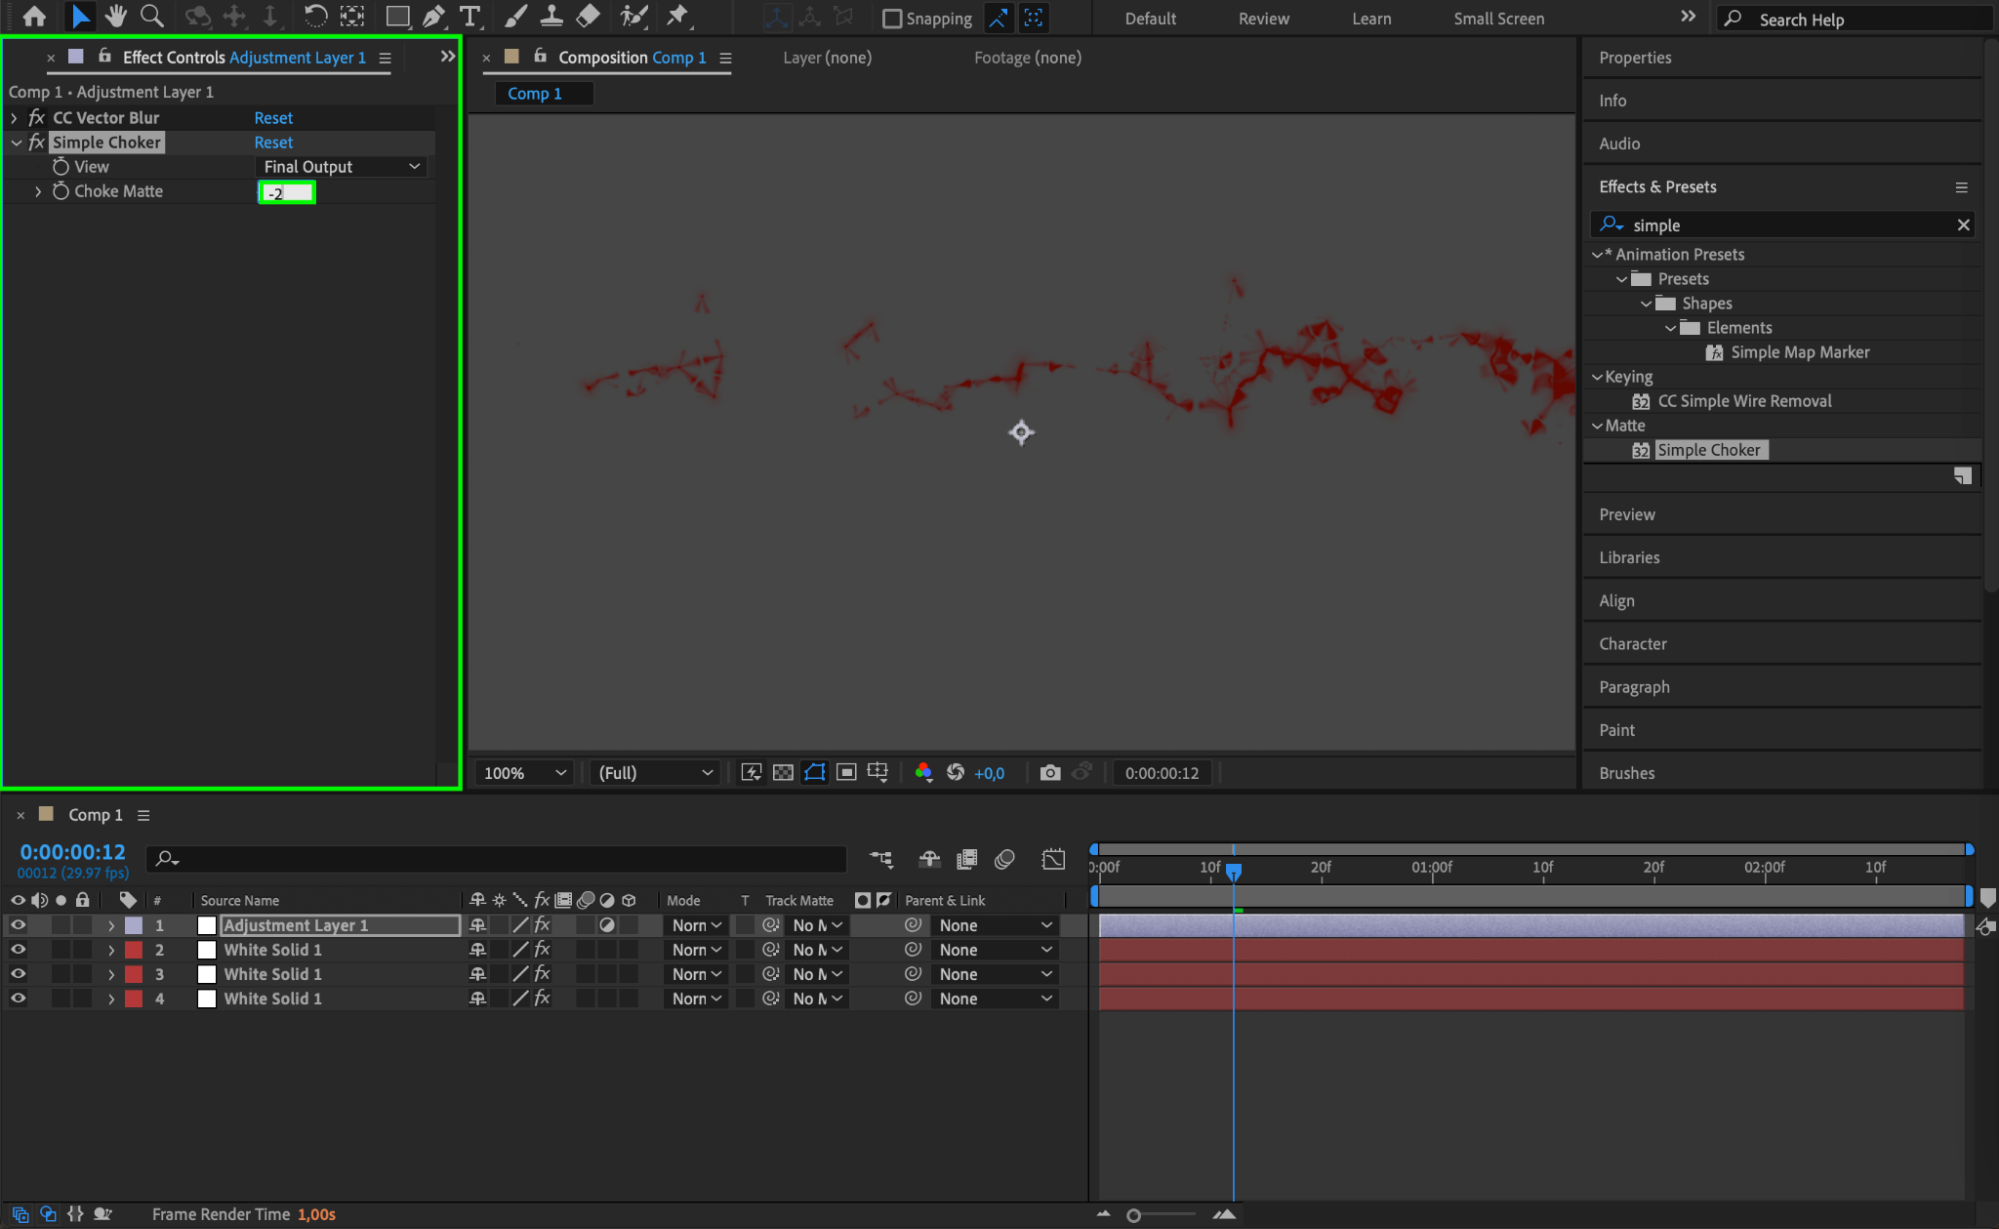
Add the “Simple Choker” effect to the adjustment layer by going to “Effect” > “Matte” > “Simple Choker.” Set the Choke Matte value to -2 to refine the edges of the blood splatter and make the effect look more organic.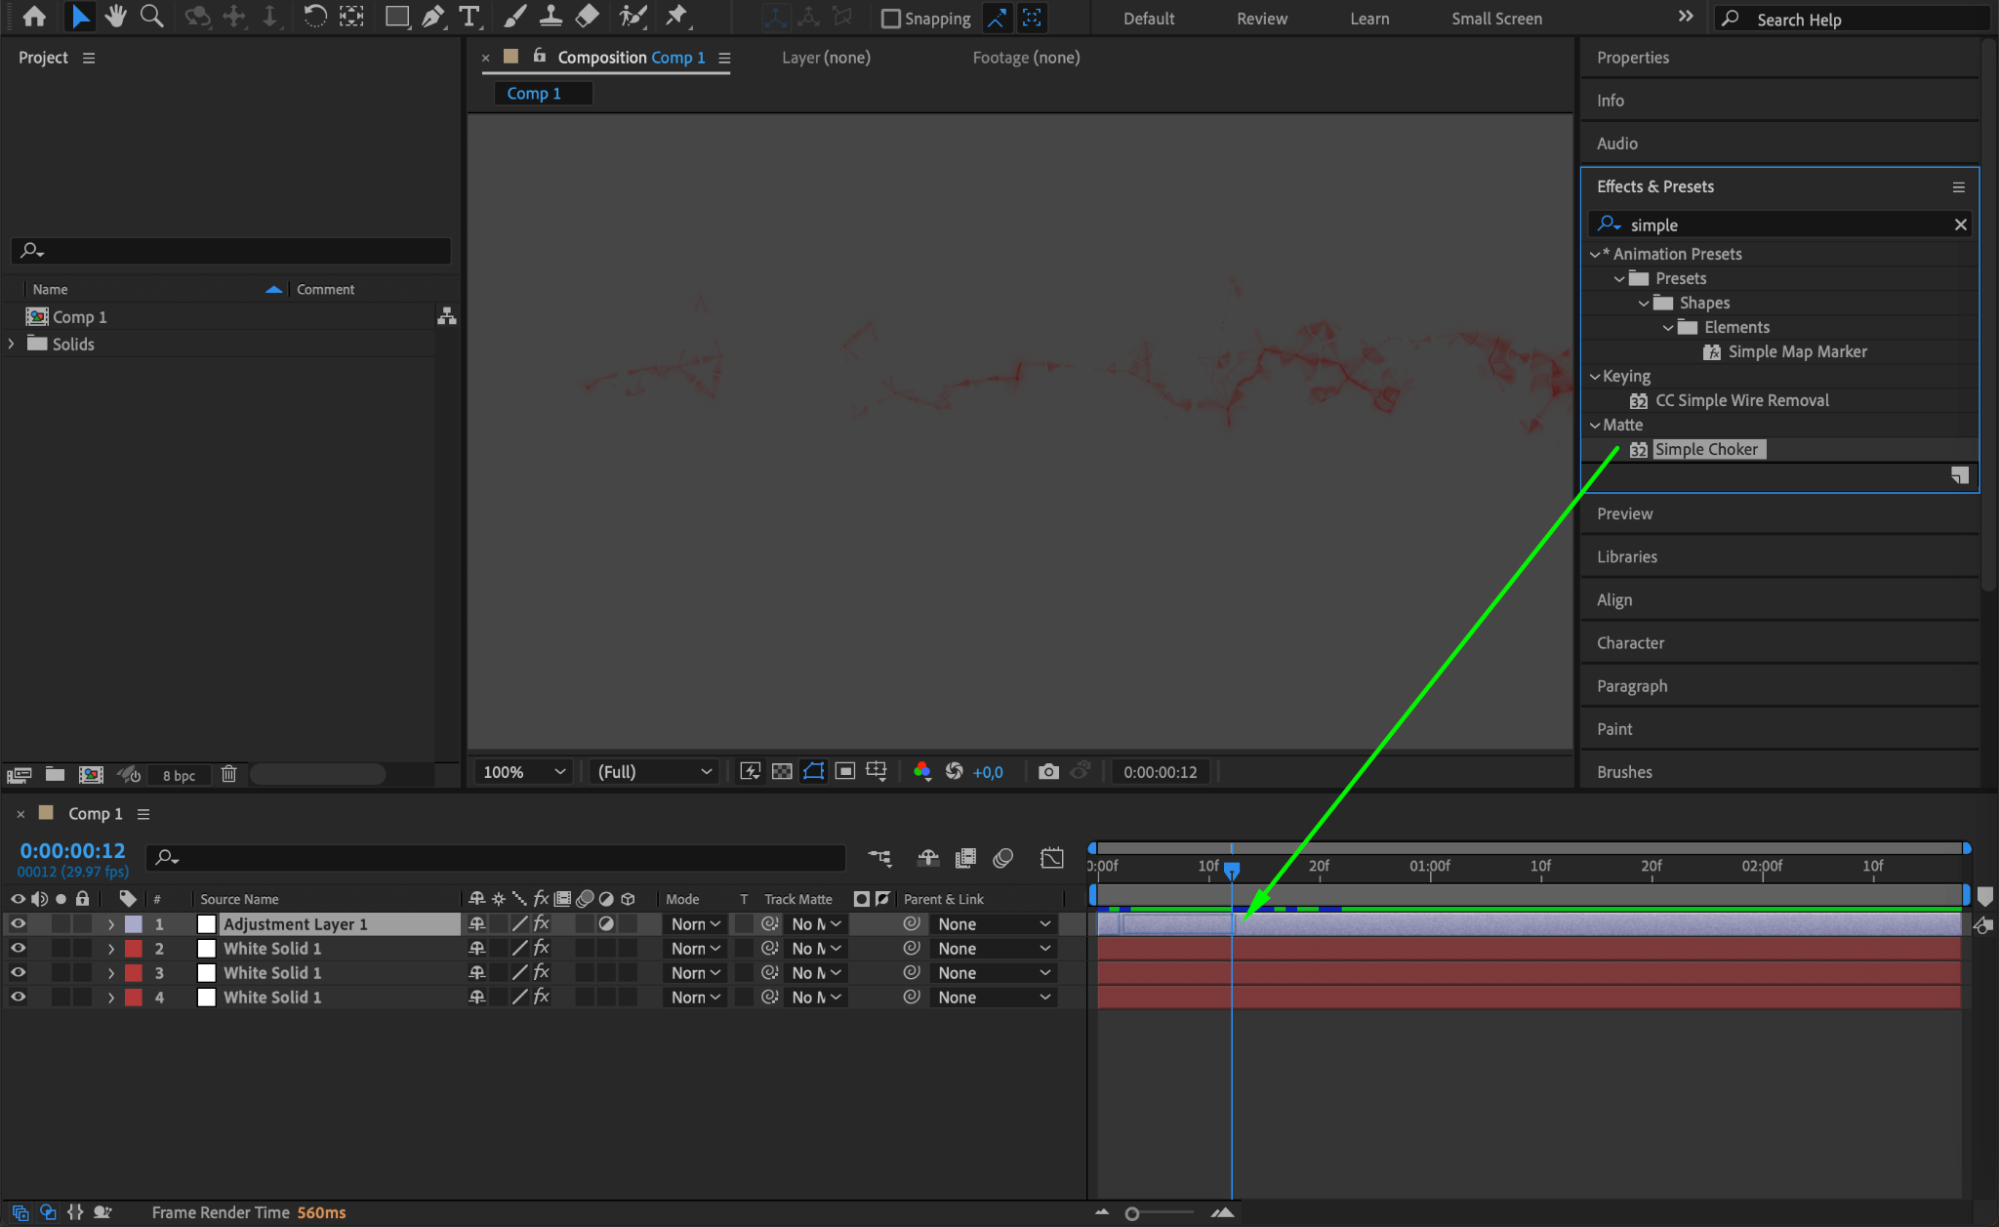
 Step 11: Enable Motion Blur
Get 10% off when you subscribe to our newsletter

To add more realism to your splatter effect, enable motion blur. Click the “Enable Motion Blur” button in the timeline panel and apply it to each solid layer. This will simulate the motion blur that occurs naturally when particles move quickly.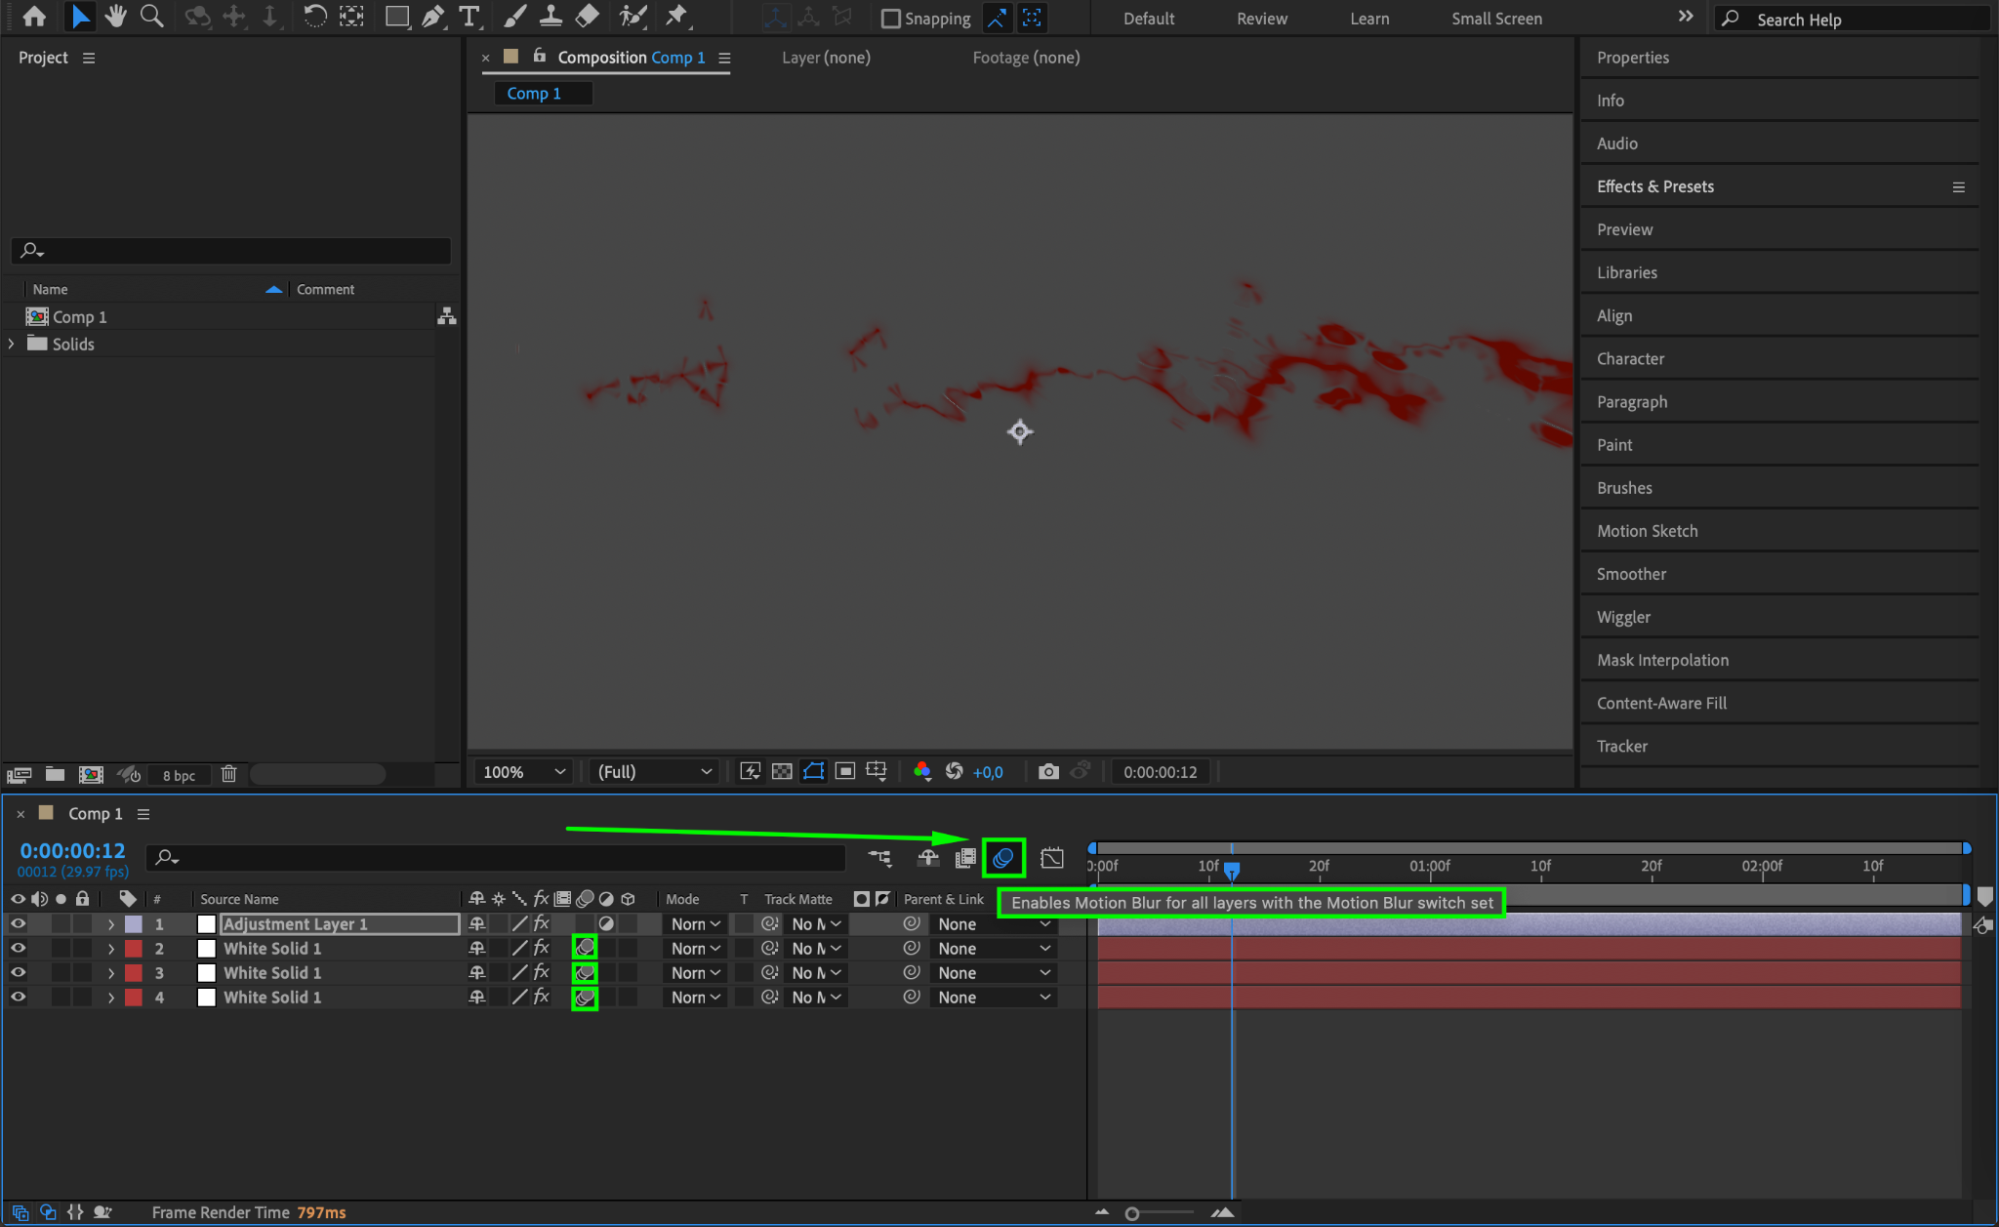 Step 12: Preview Your Animation
Get 10% off when you subscribe to our newsletter

Click the “Play” button in the Preview panel to watch your blood splatter animation in action. Check for any areas that need adjustment, such as particle density or timing, and make refinements as needed to ensure a realistic effect.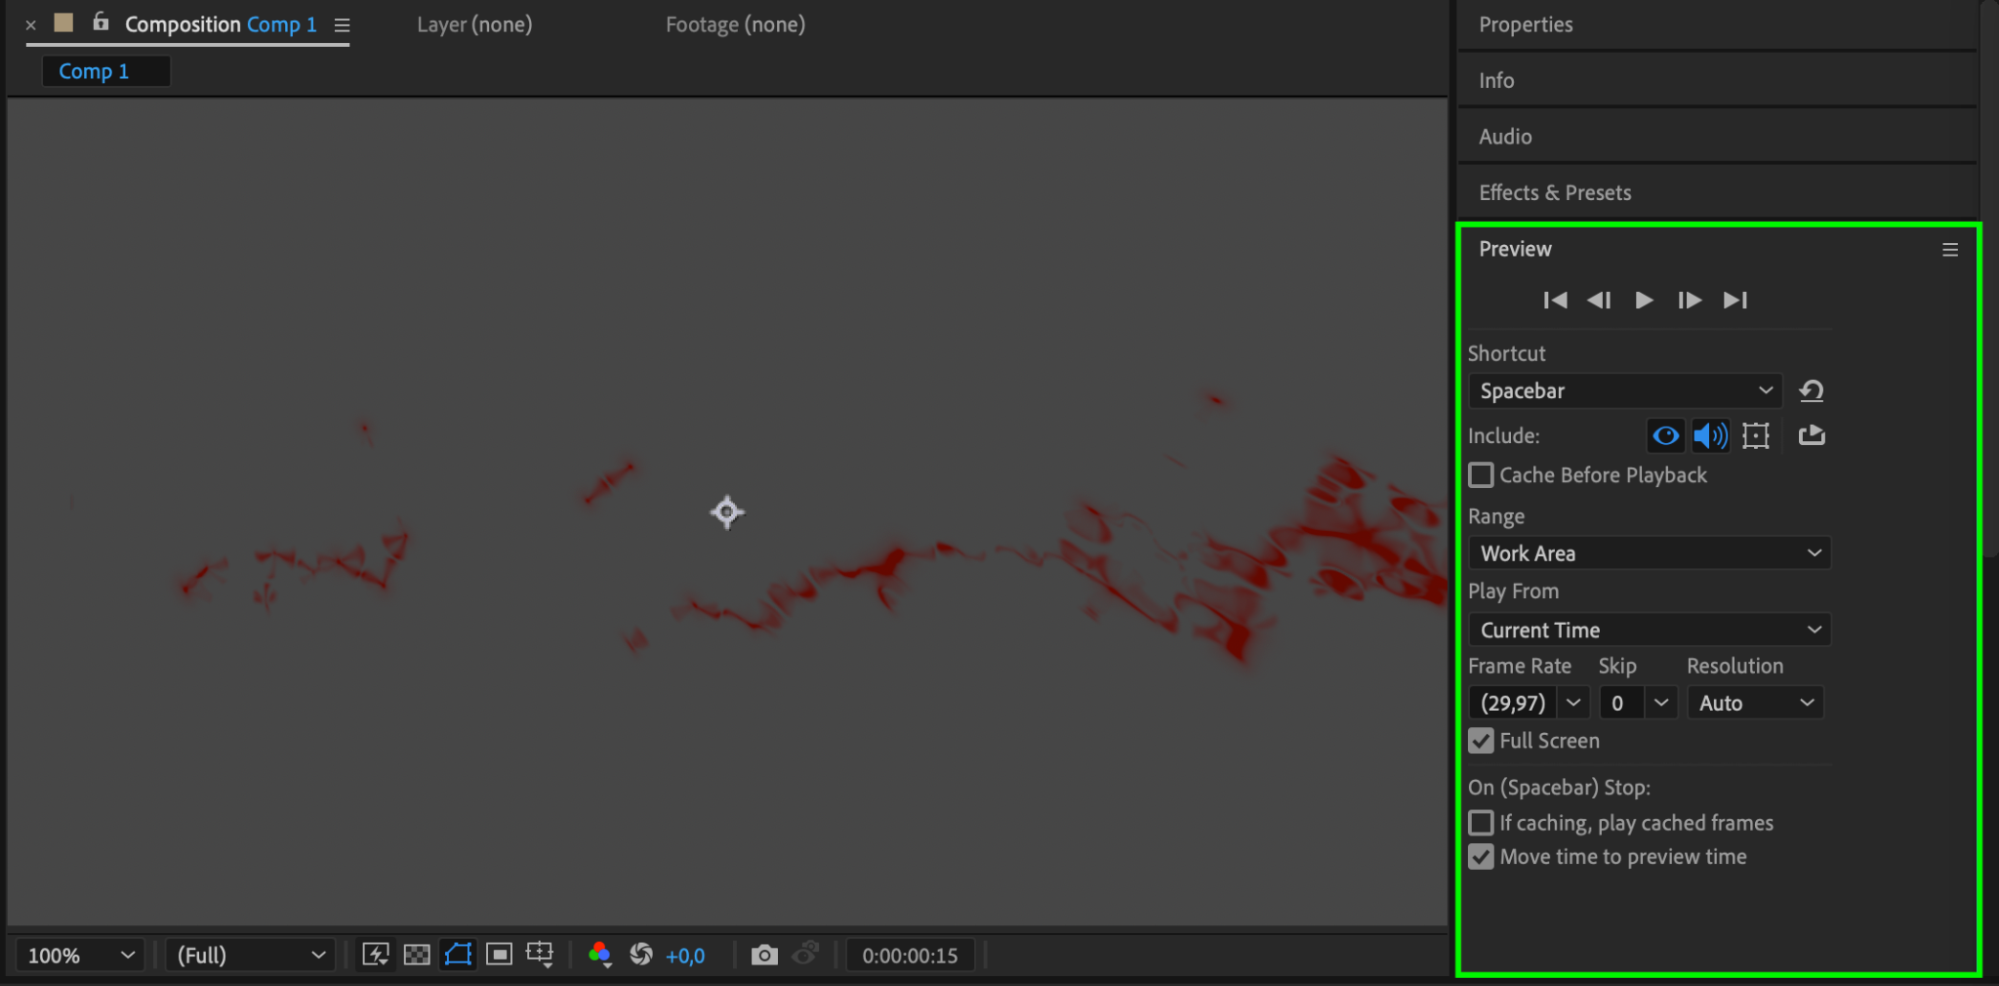
Conclusion
Creating realistic blood splatter effects in After Effects requires patience and experimentation. By adjusting particle settings, layering effects, and applying motion blur, you can achieve a convincing and dramatic blood splatter that enhances the intensity of your visuals. Continue experimenting with different settings to perfect your effect and match it to your project’s narrative. Happy animating!


