How to Create Scrolling Text in After Effects
Introduction
Scrolling text is a great way to add a dynamic element to your video projects. Whether you’re creating credits, news tickers, or a motion graphic, After Effects offers an easy way to animate text to scroll across the screen. In this tutorial, you will learn step-by-step how to create scrolling text in After Effects.
Get 10% off when you subscribe to our newsletter

Step 1: Create a New Composition
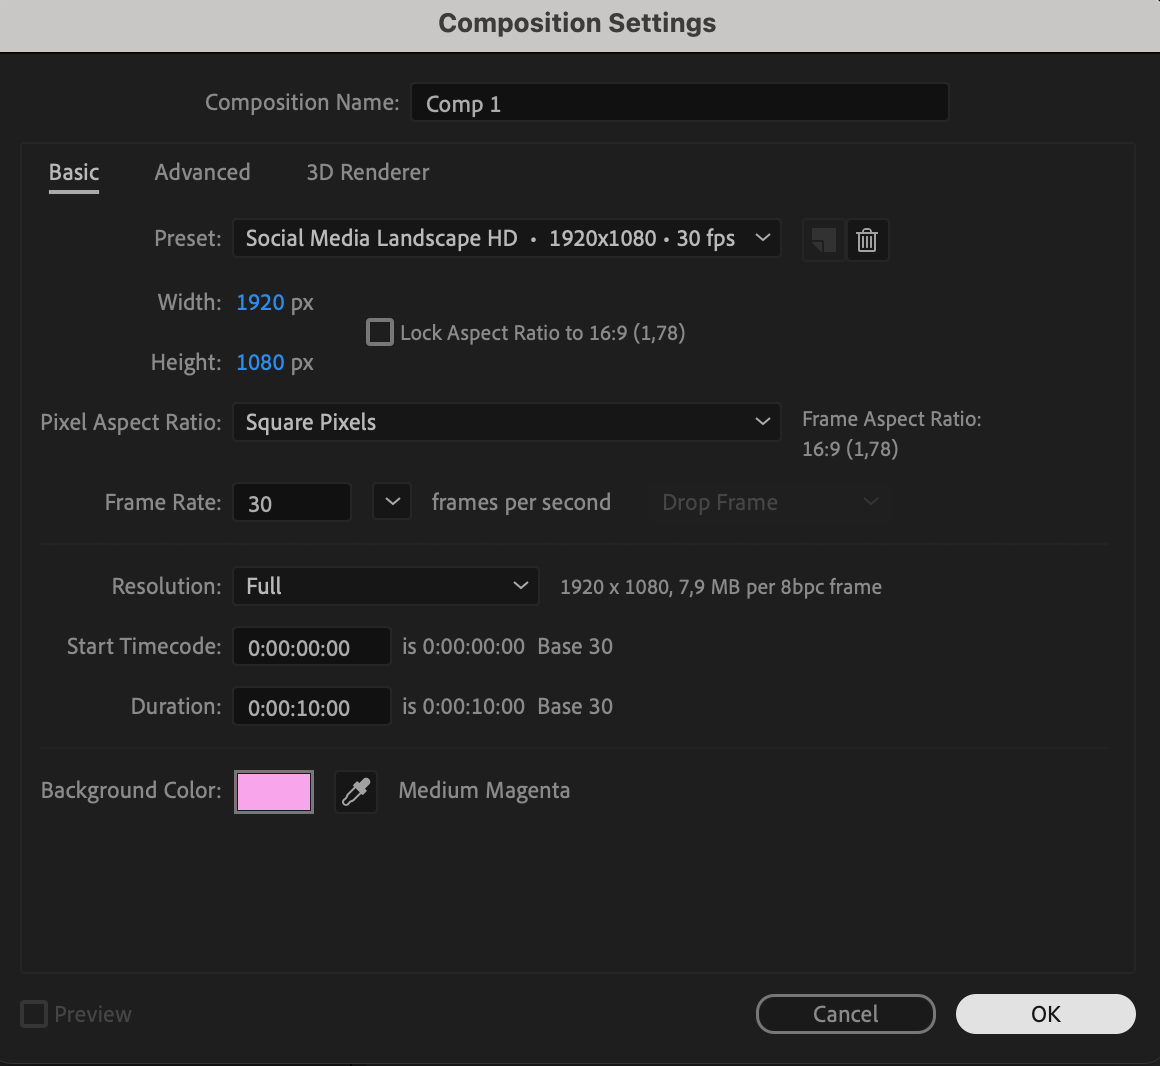
Start by creating a new composition. Go to Composition > New Composition and set your desired resolution, frame rate, and duration. This will be the canvas where you’ll create your scrolling text animation.
 Step 2: Use the Type Tool to Create Text
Select the Type Tool (Ctrl/Cmd + T) to create your text. Type the message or content that you want to scroll. Choose the font, size, and style that fit your project’s needs.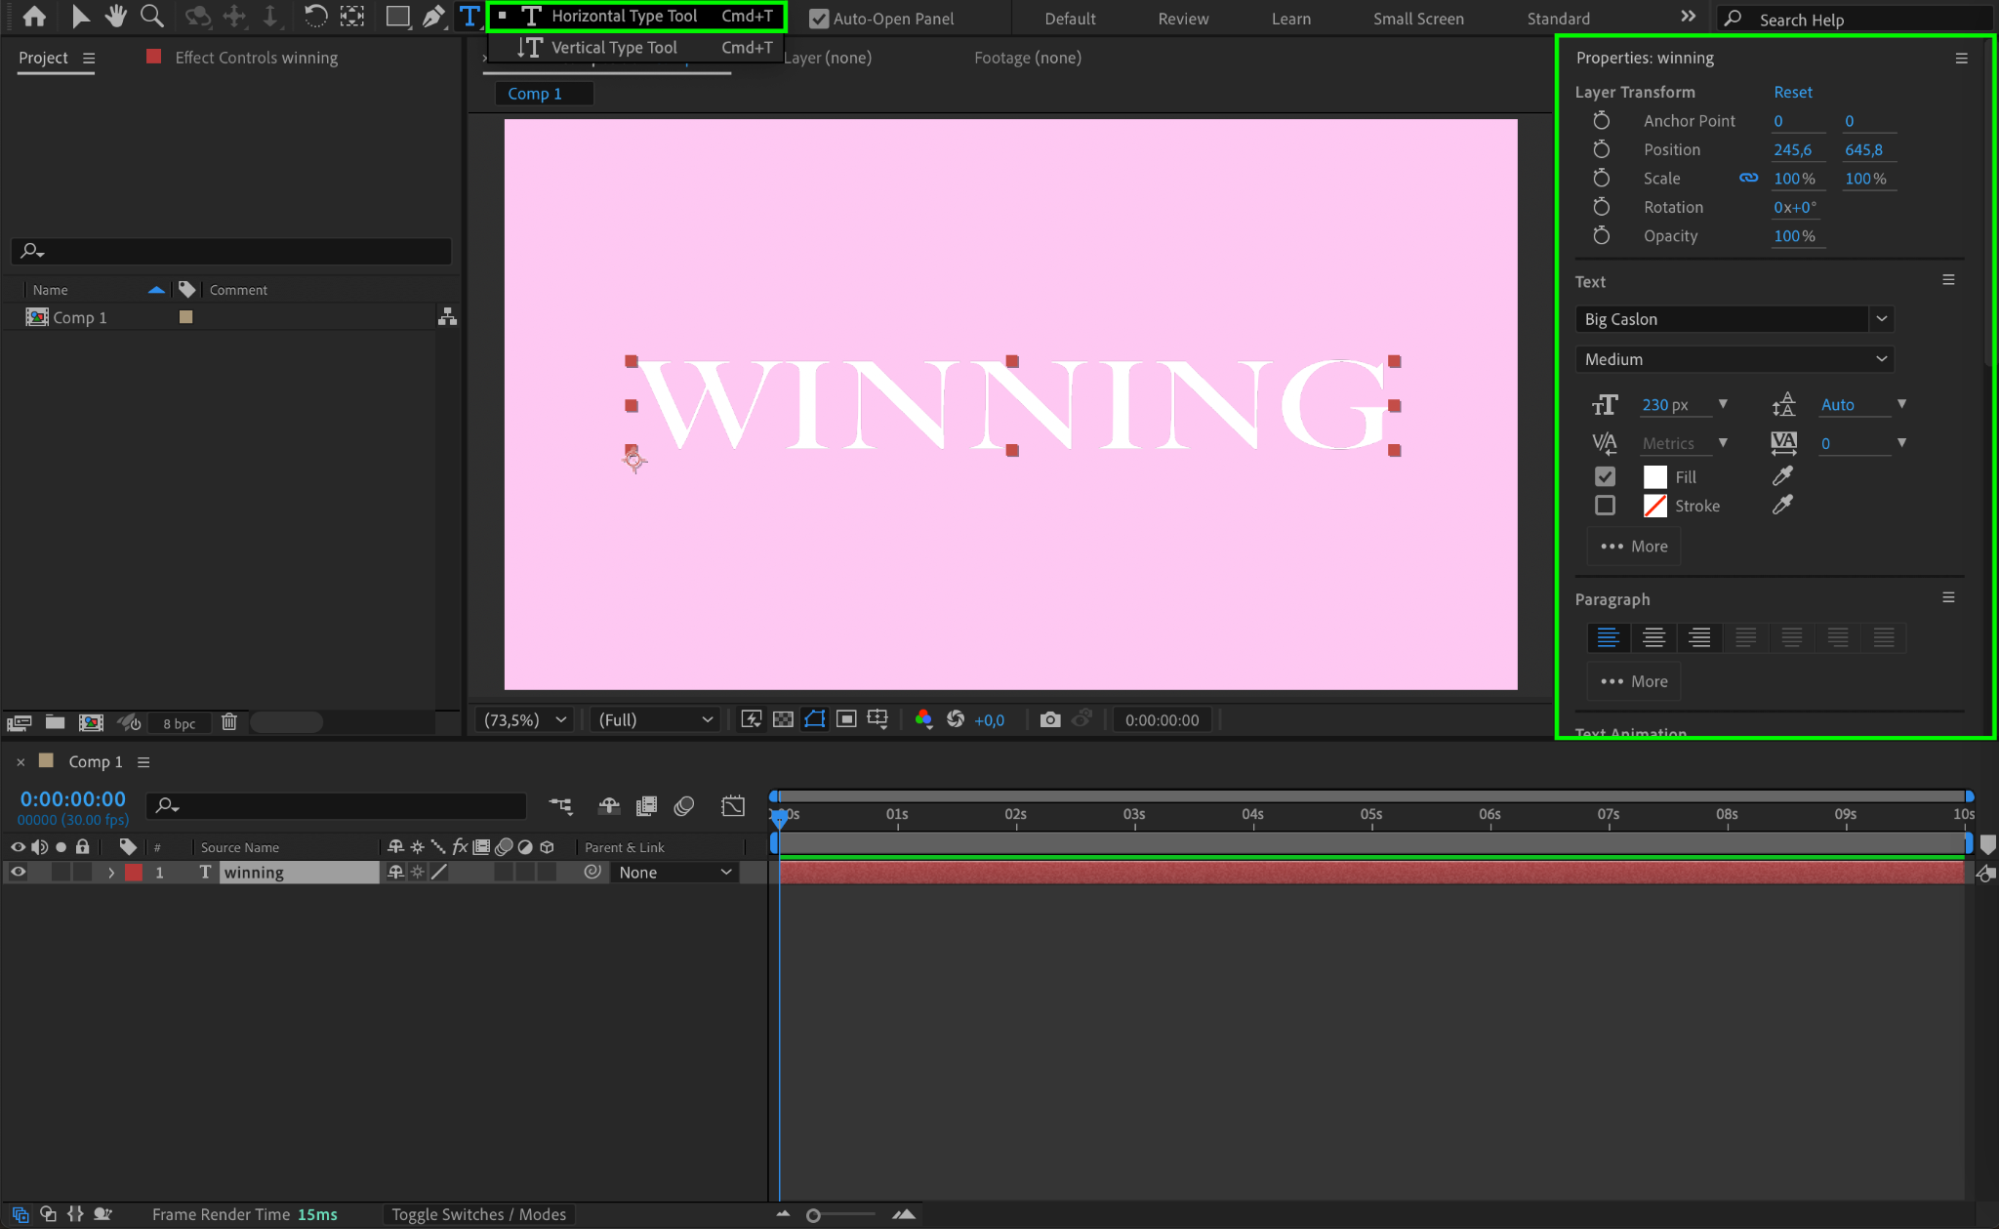 Step 3: Adjust the Anchor Point
Next, select the Pan Behind Tool (Y) and move the anchor point to the center of your text. This will help with positioning and animating the text later on, ensuring that the text scrolls smoothly from one side to the other.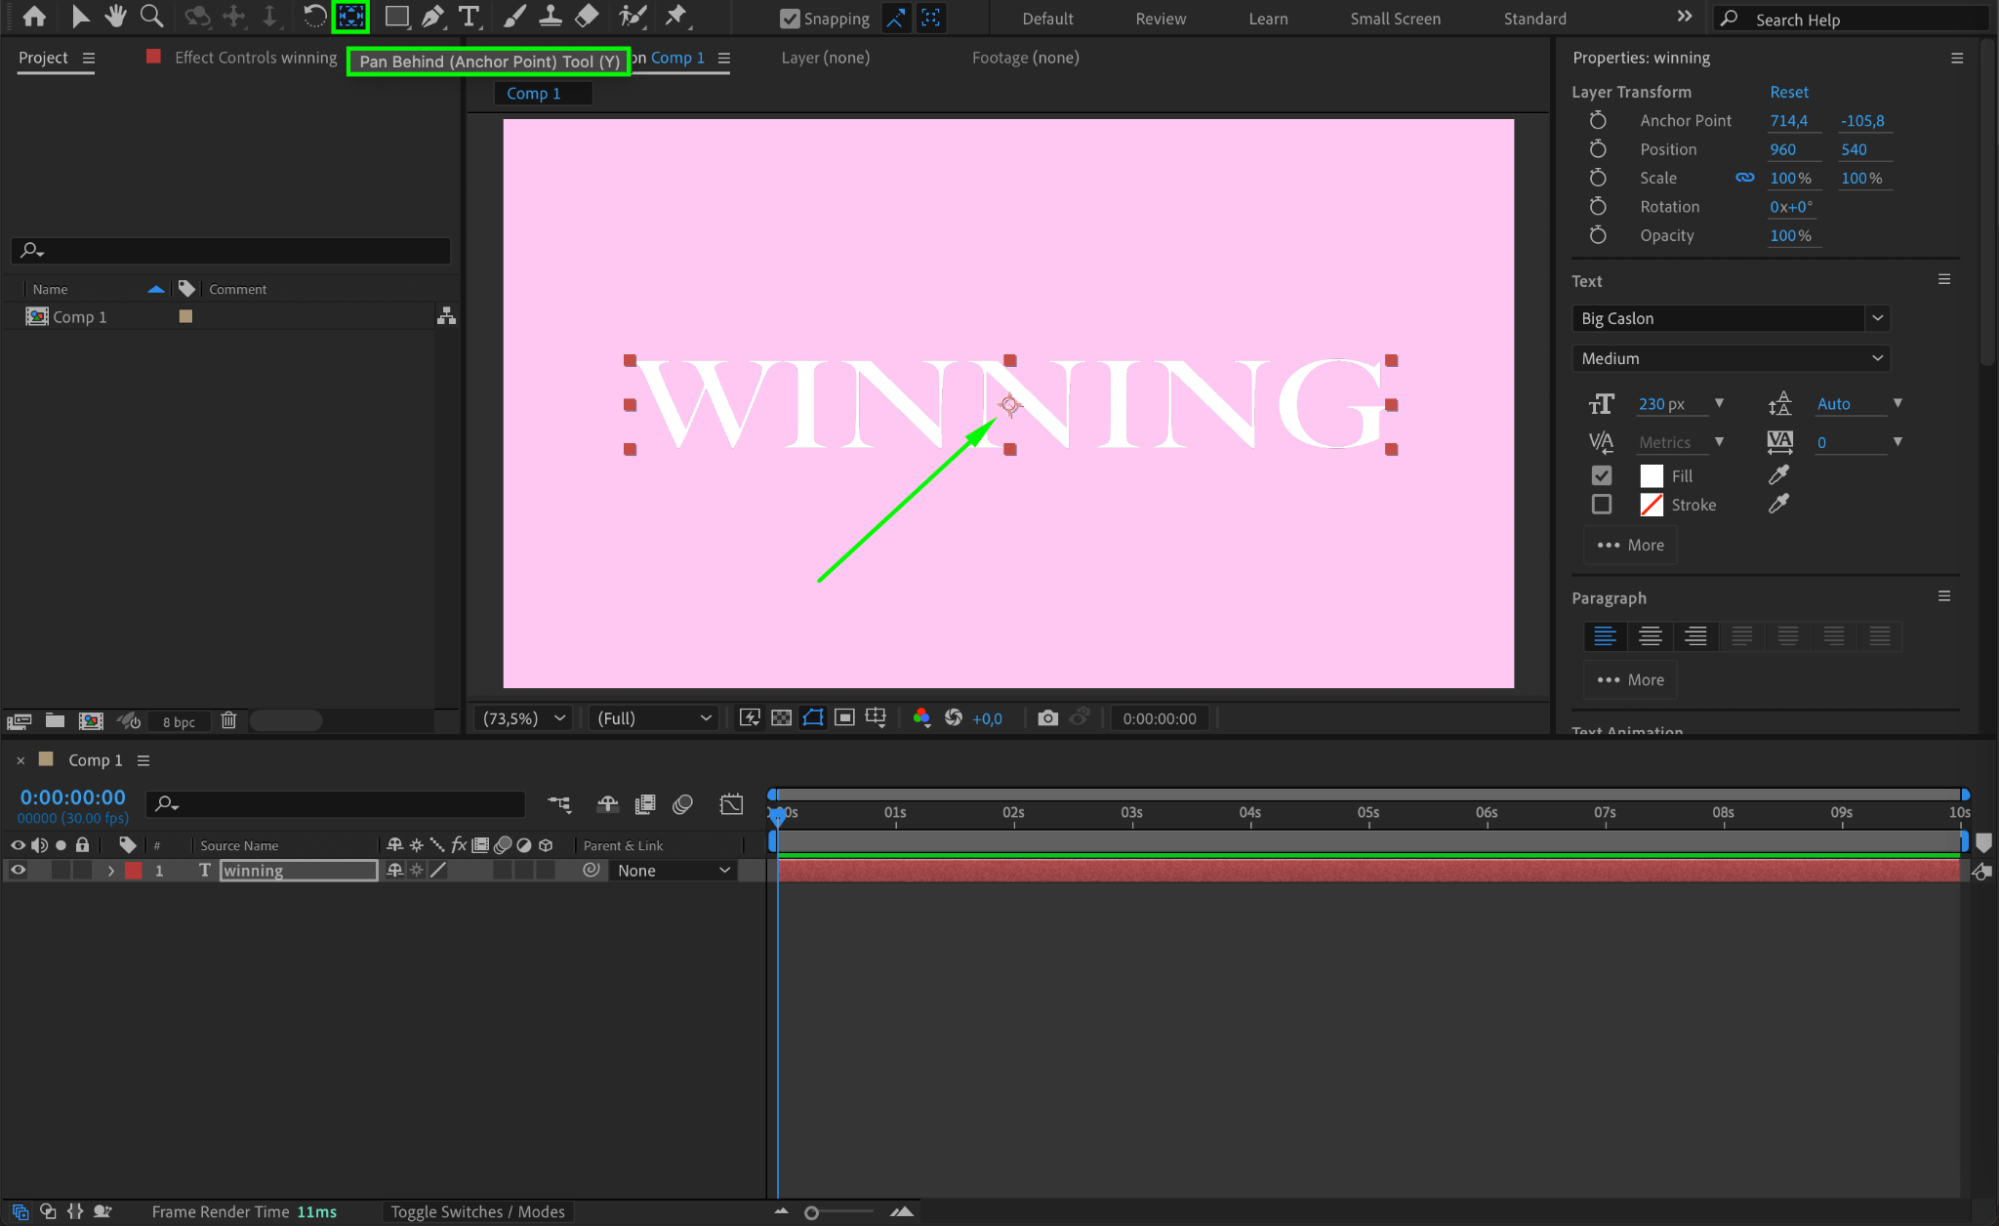 Step 4: Apply the CC Repetile Effect
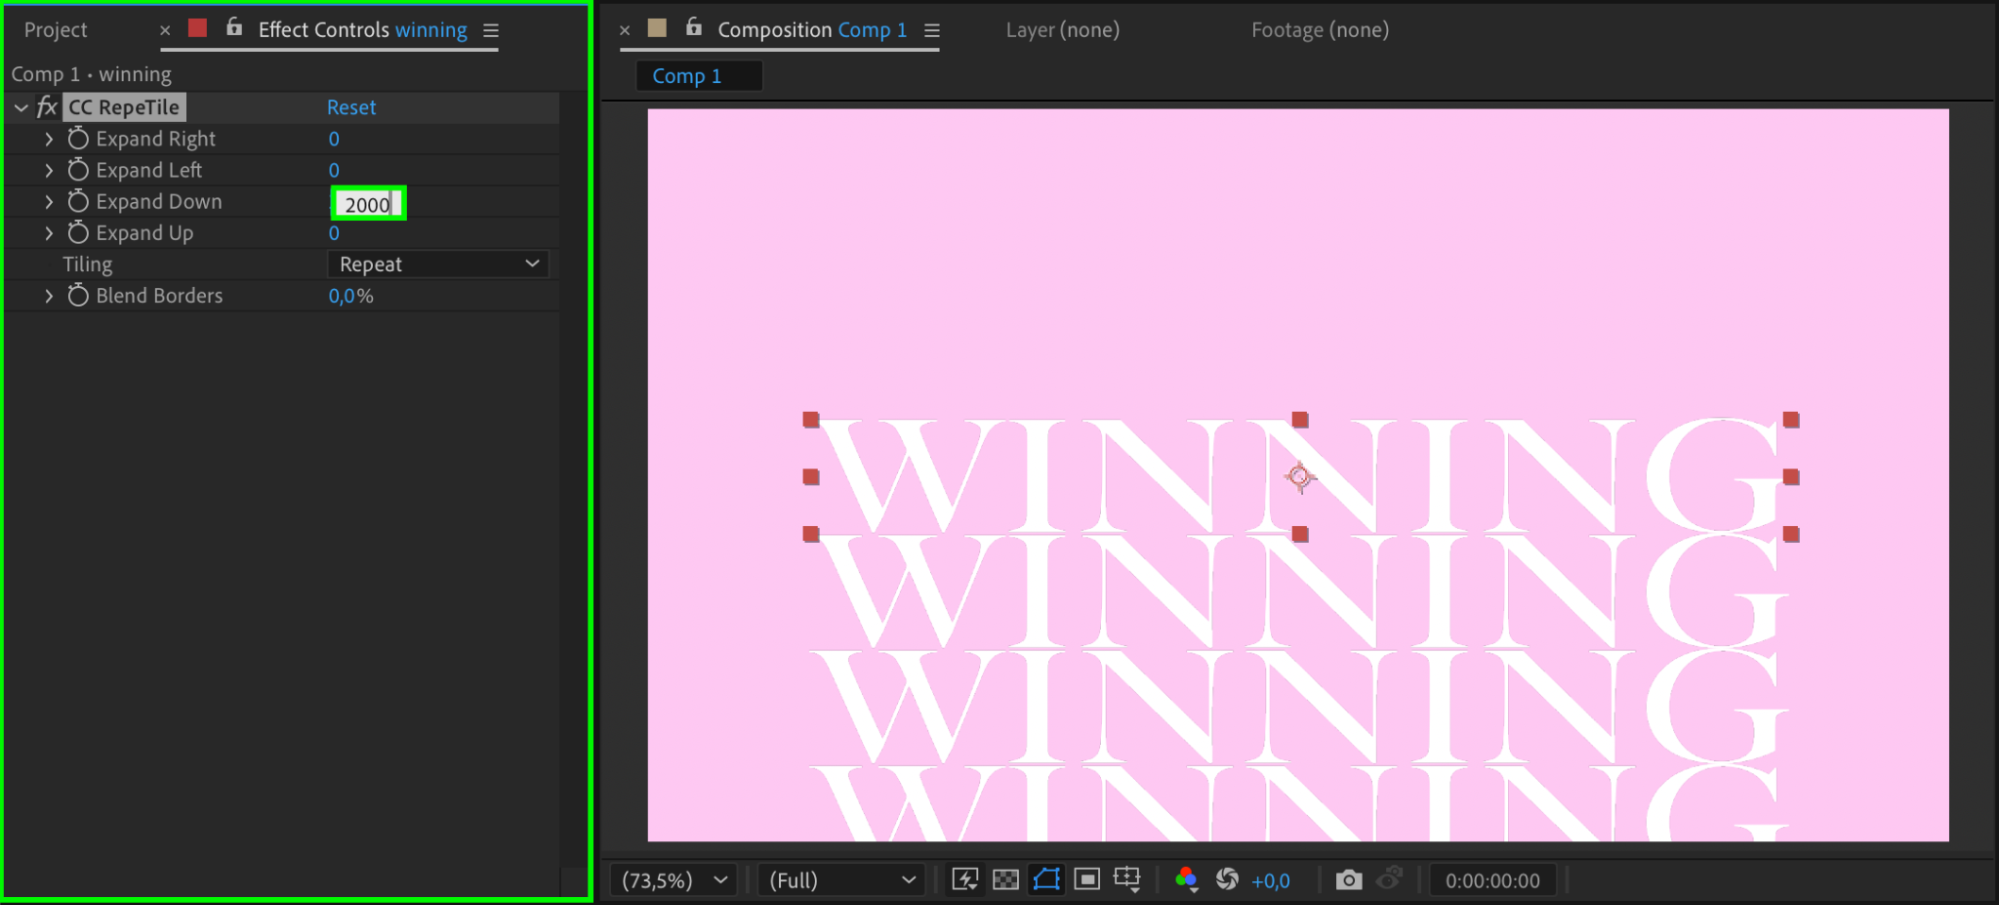
Now, apply the CC Repetile effect. This effect will allow you to expand the text beyond the edges of your composition, creating the illusion of infinite scrolling. Set the Expand Down parameter to 2000 to make sure the text can move freely off-screen.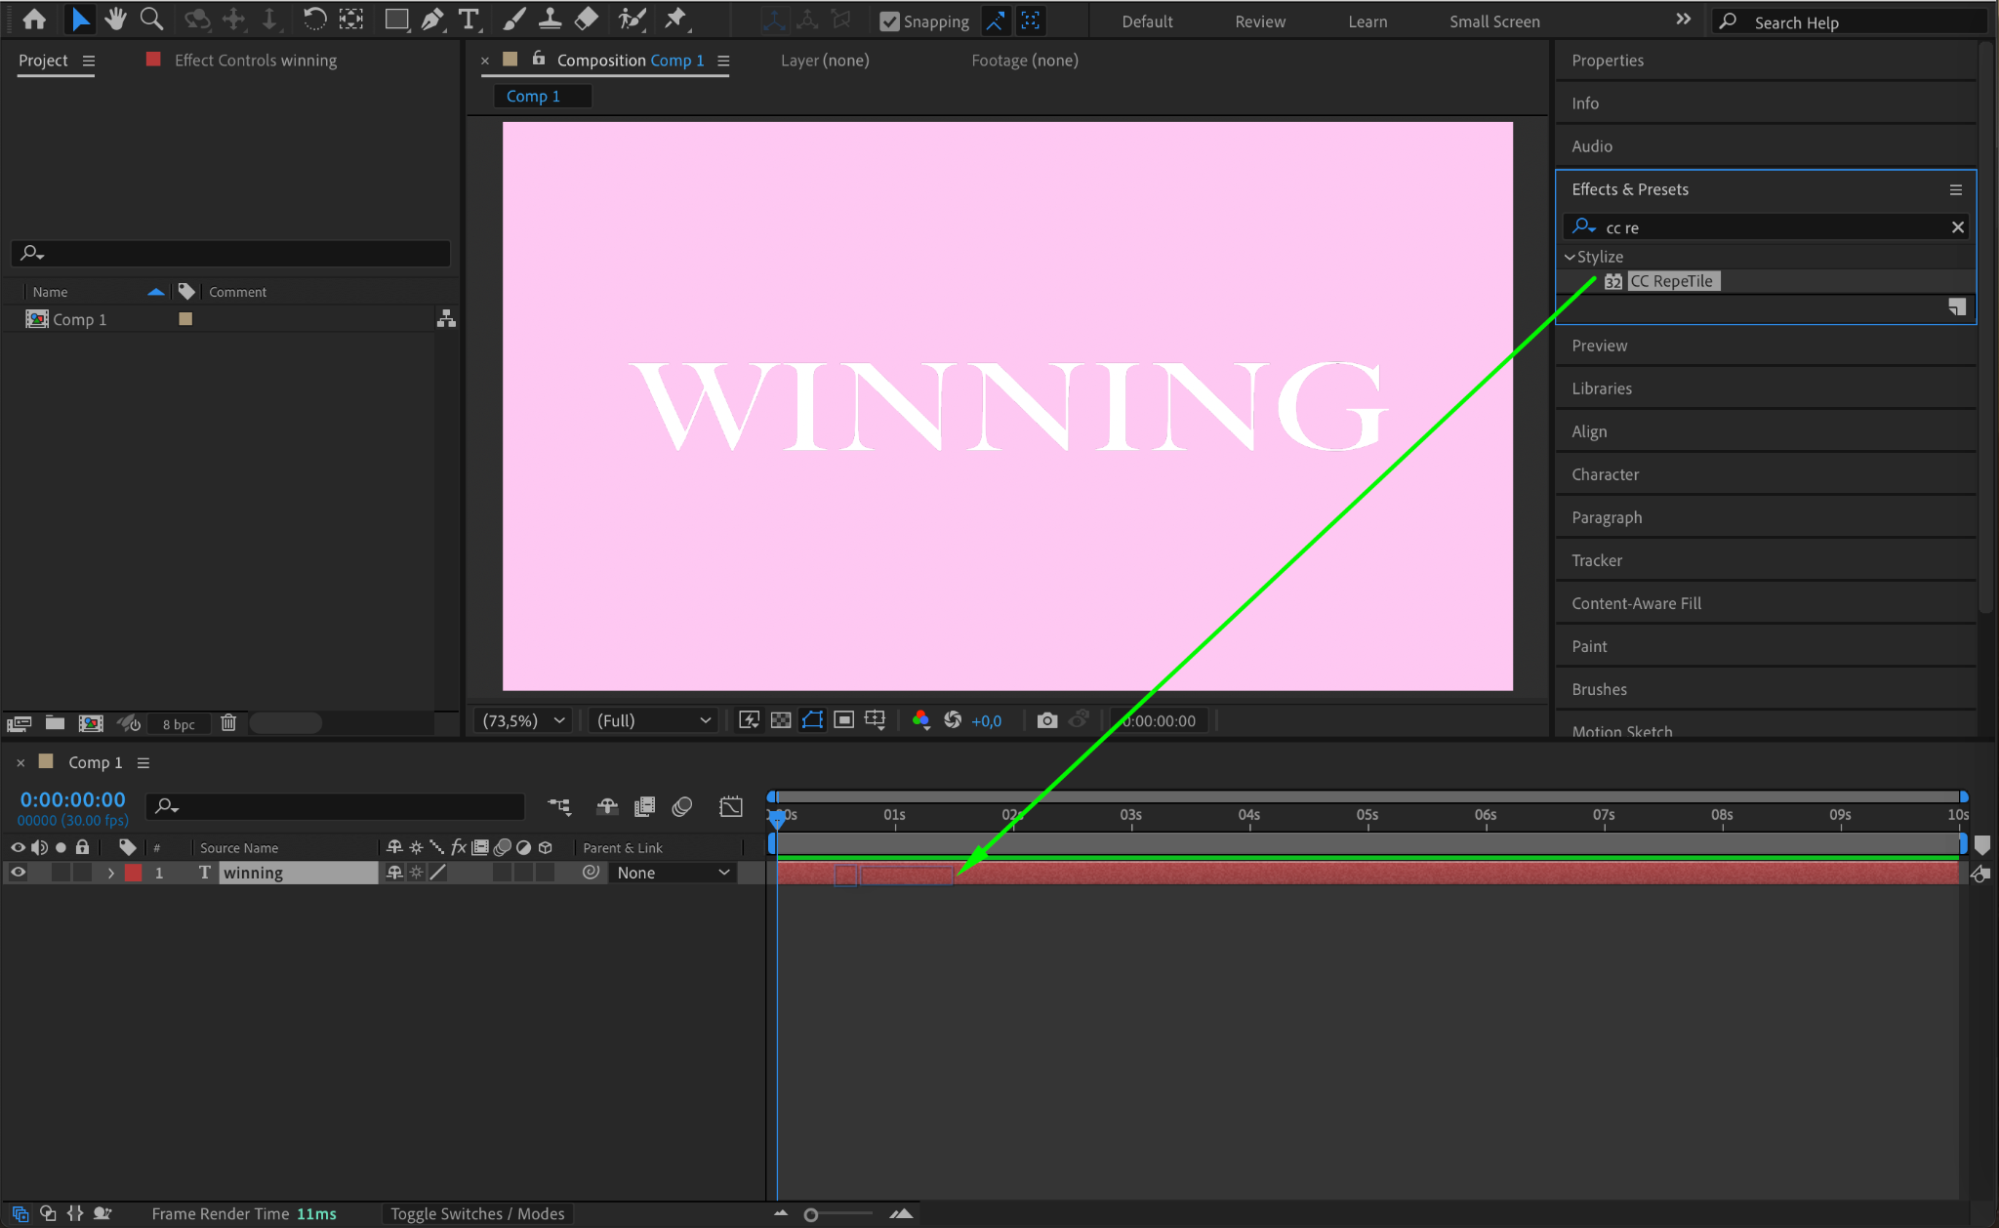
 Step 5: Create a Shape Around the Text
Select the Rectangle Tool (Q) and create a shape that surrounds the text layer. This shape will act as a mask for the scrolling text, making it appear as if the text is moving within a container or frame.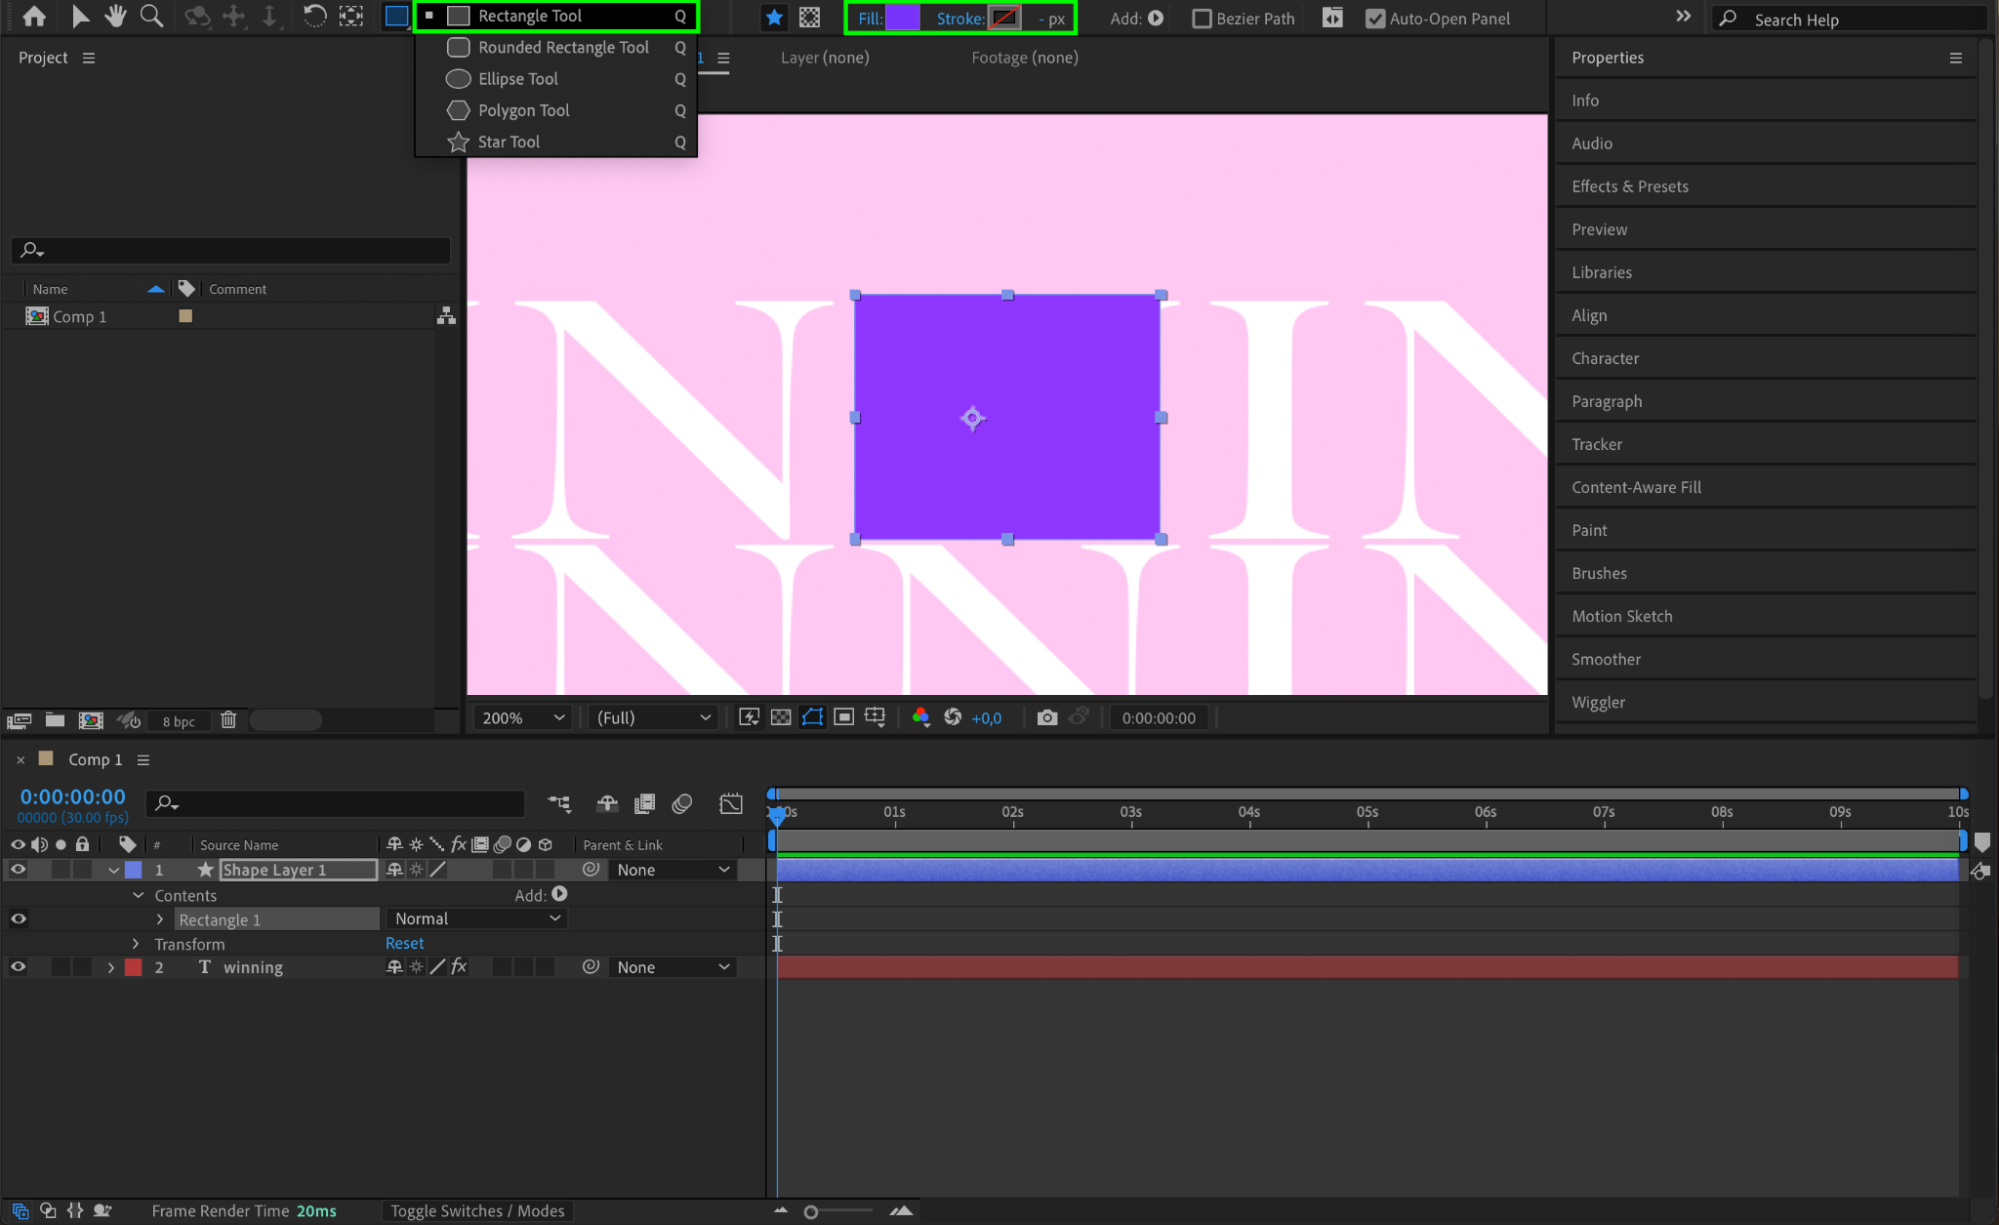 Step 6: Adjust the Scale of the Shape
With the shape selected, unchain the scale properties by clicking the chain link icon. Set the X value to 1185 to completely cover the text. This ensures that the text stays within the boundaries of the shape layer.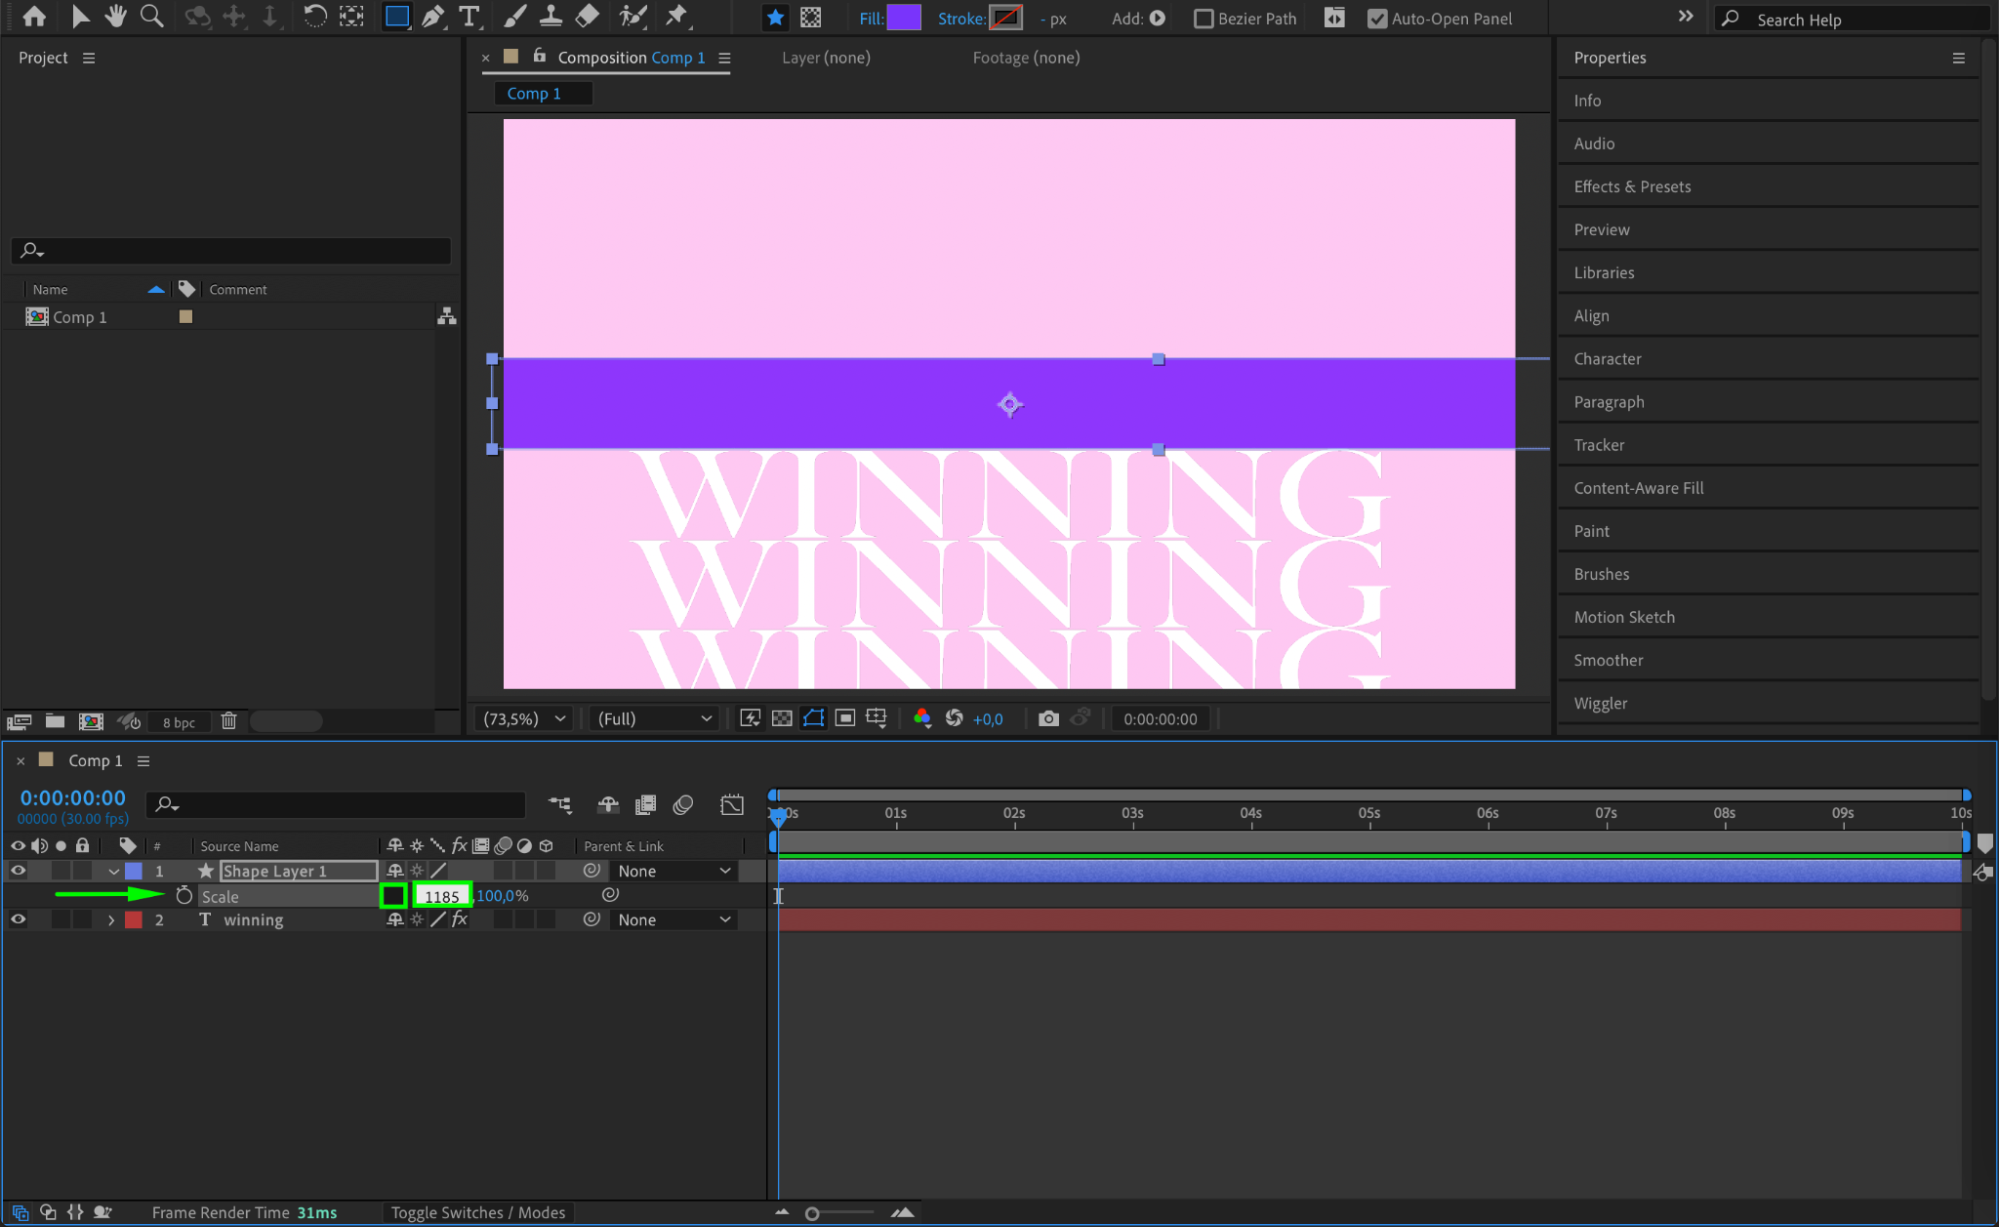 Step 7: Set the Track Matte
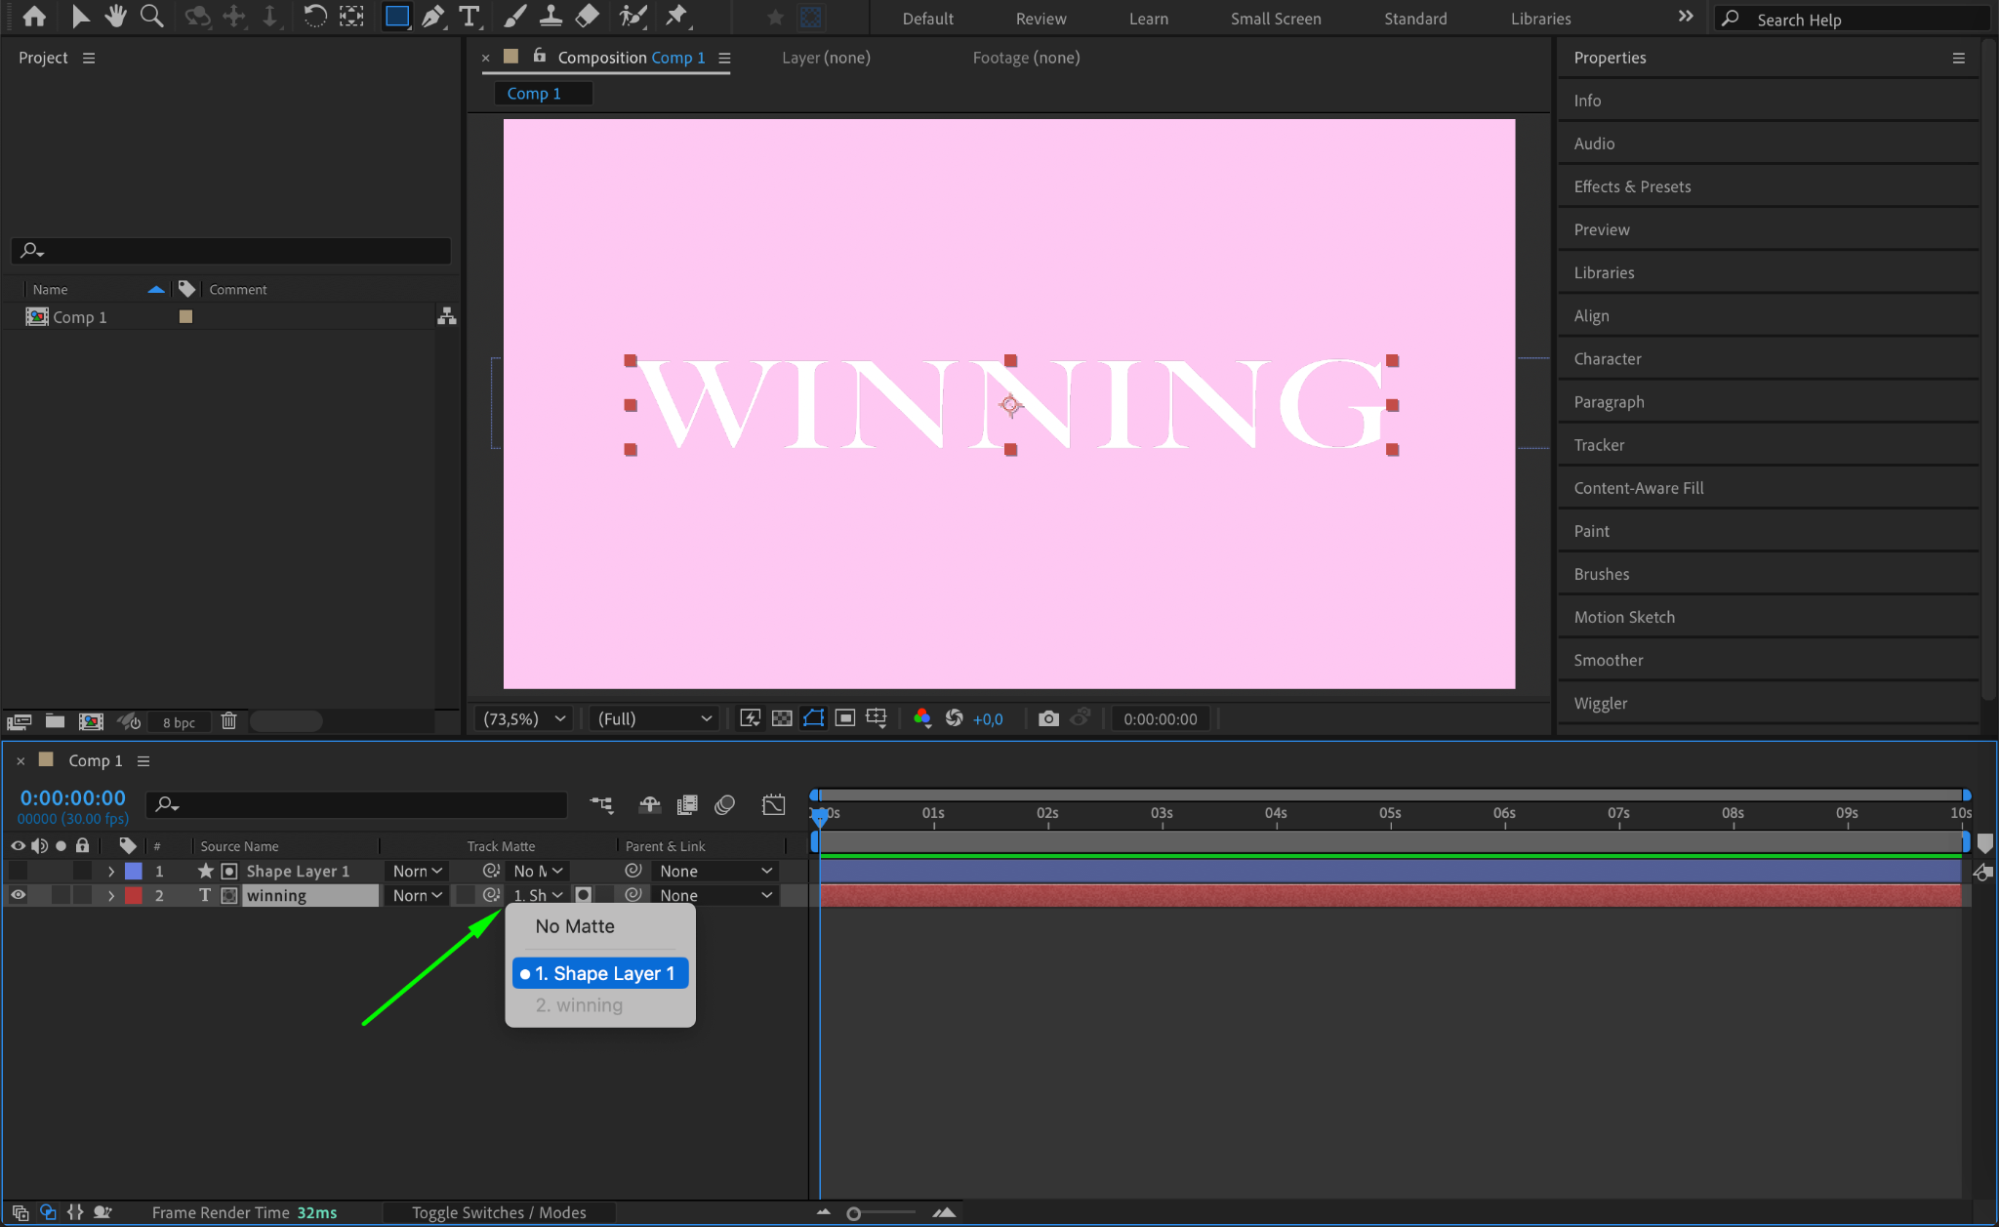
Now, press Toggle Switches/Modes at the bottom of the timeline to reveal the Track Matte column. For the text layer, choose the shape layer in the Track Matte dropdown menu. This will mask the text to make it appear within the shape layer as it scrolls.
 Step 8: Animate the Position of the Text
Next, open the Position property for the text layer. Move the CTI (Current Time Indicator) to the beginning of the timeline, click the stopwatch to set a keyframe, and change the Y value to -1650. This ensures the text starts off-screen and moves up.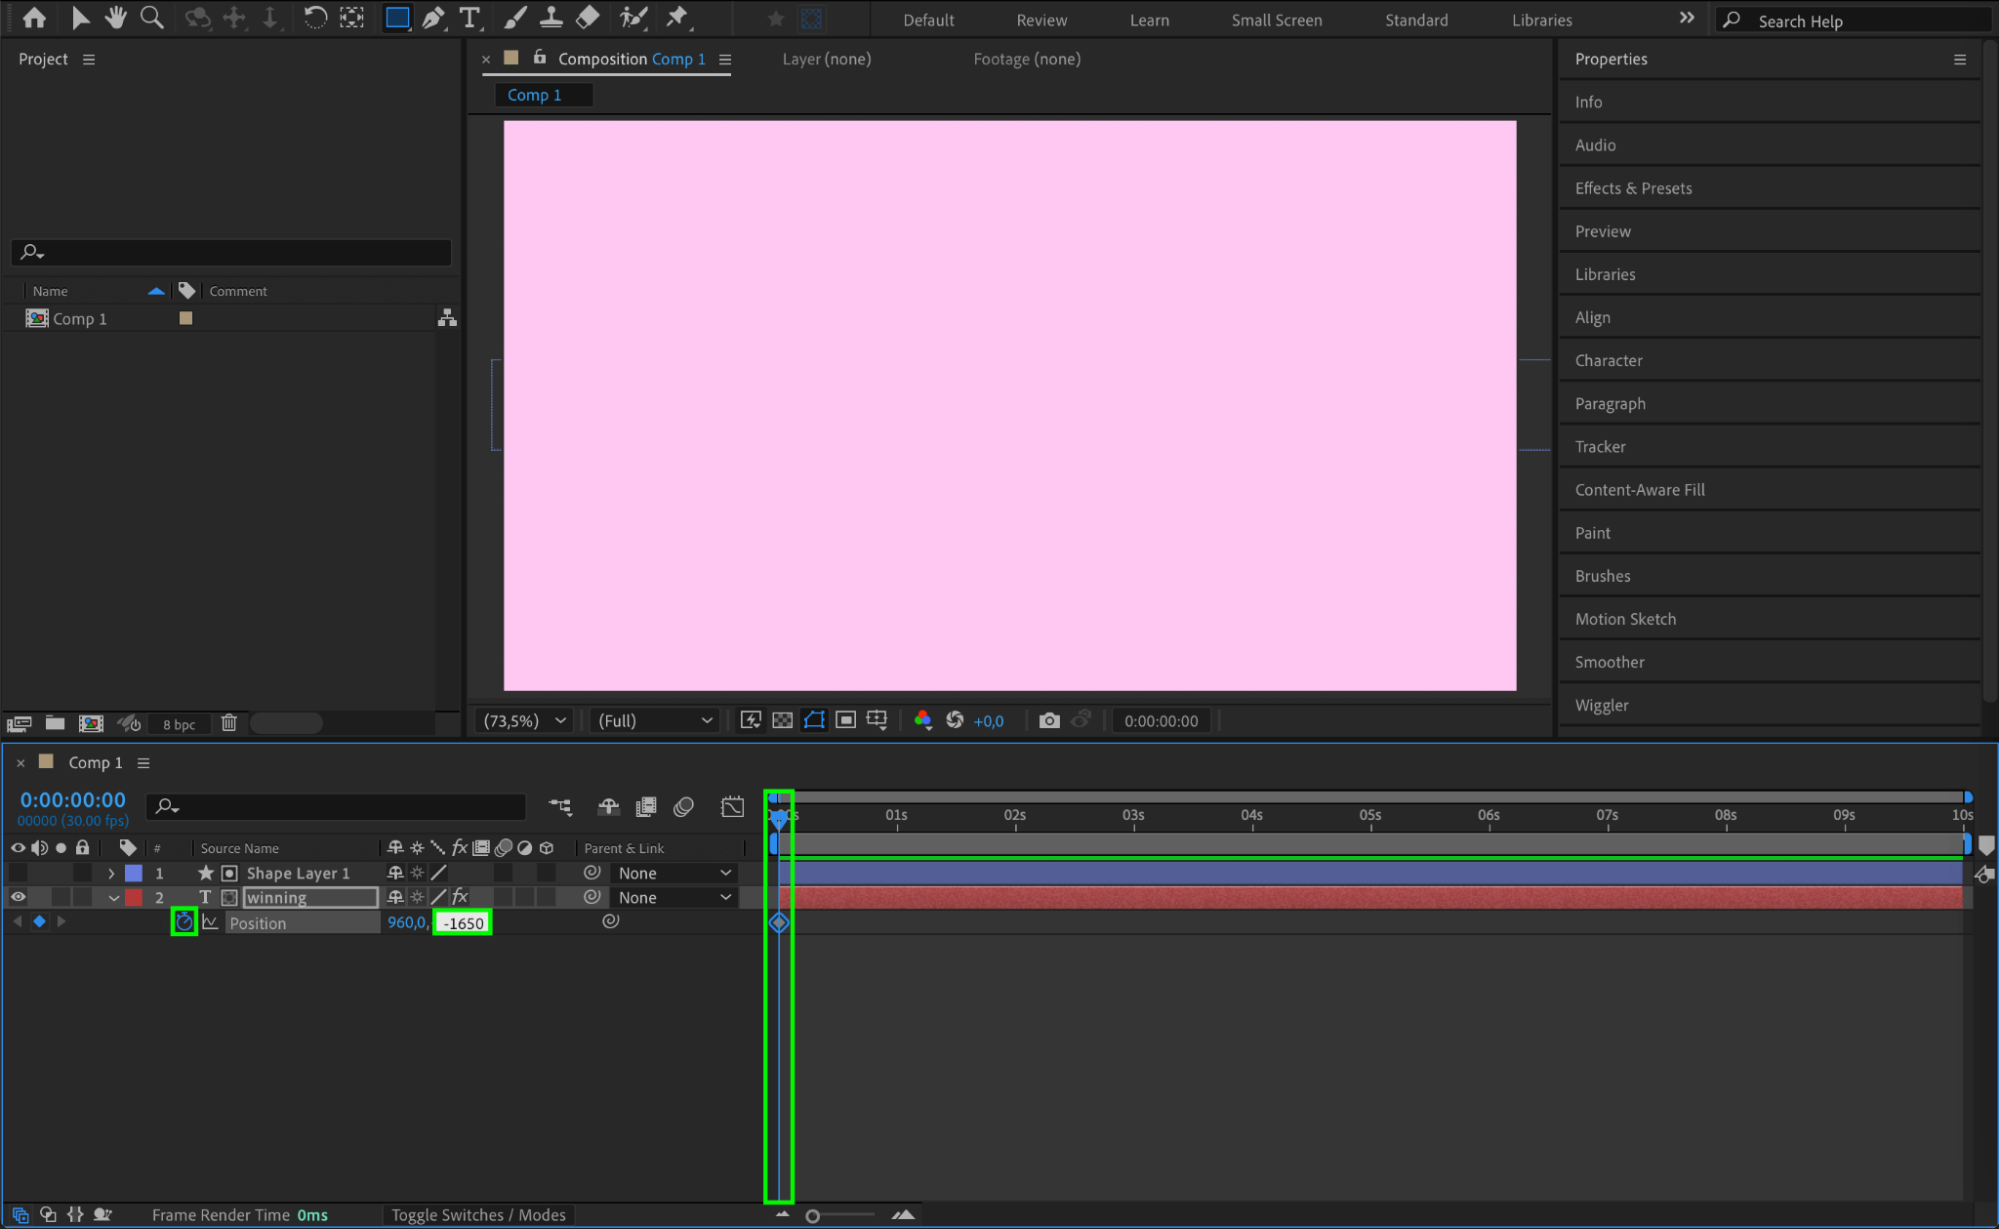 Step 9: Create the Scroll Animation
Move the CTI a few seconds forward and add another keyframe for the Position property. Right-click the position keyframe and select Reset to return the text to its original position. This creates a smooth scrolling effect, as the text will move from bottom to top.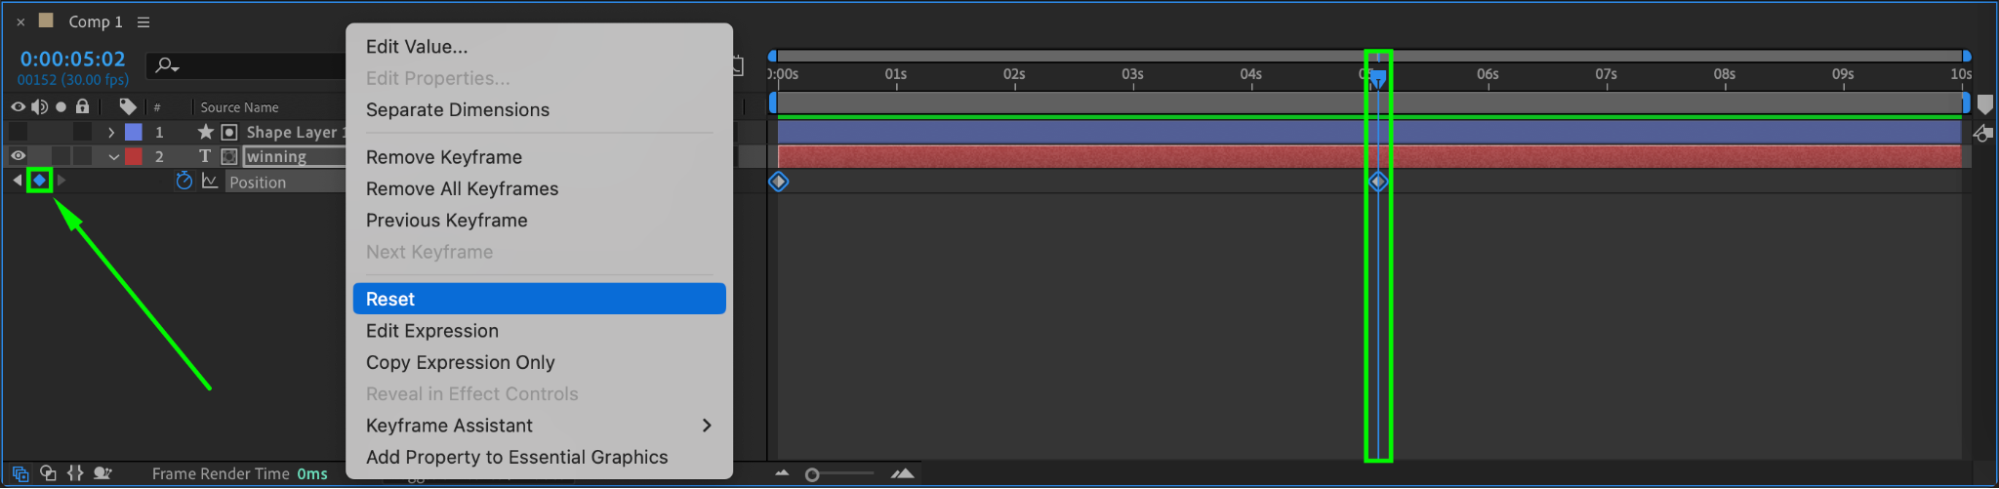
Step 10: Refine the Animation with Ease and Graph Editor
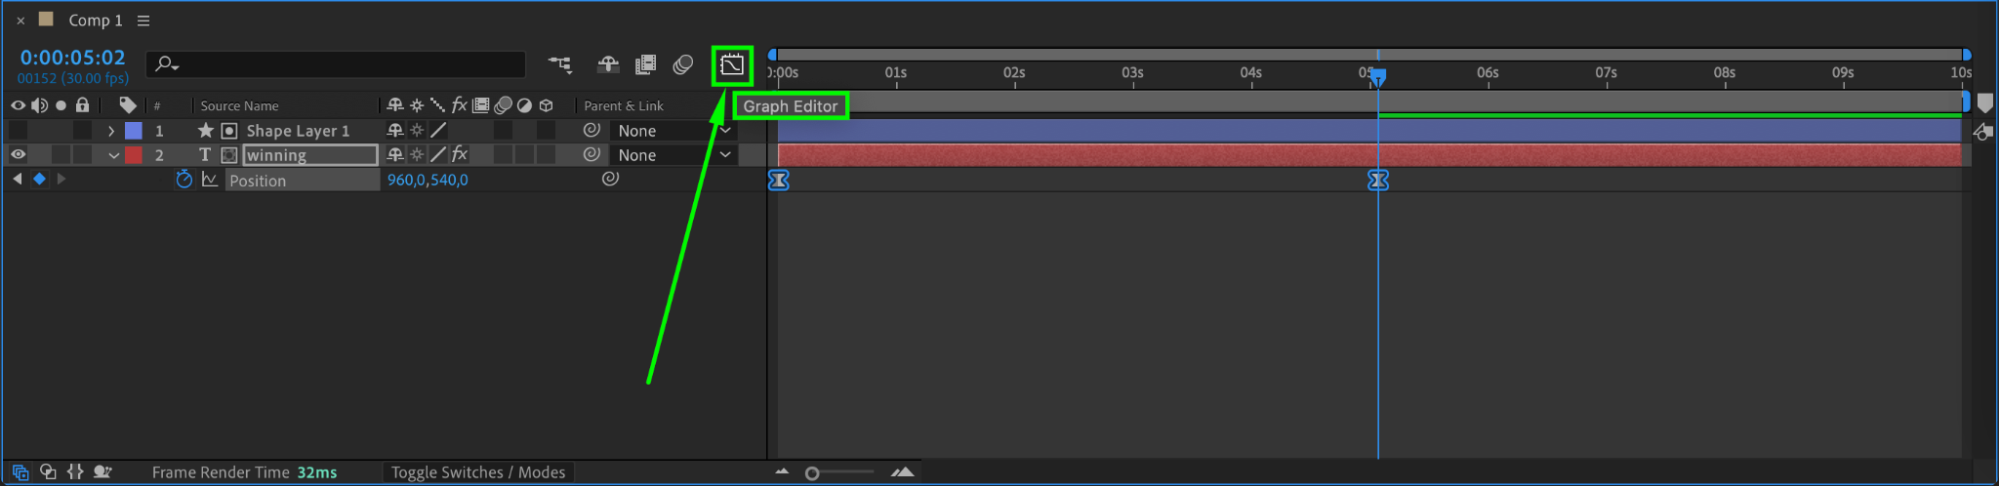
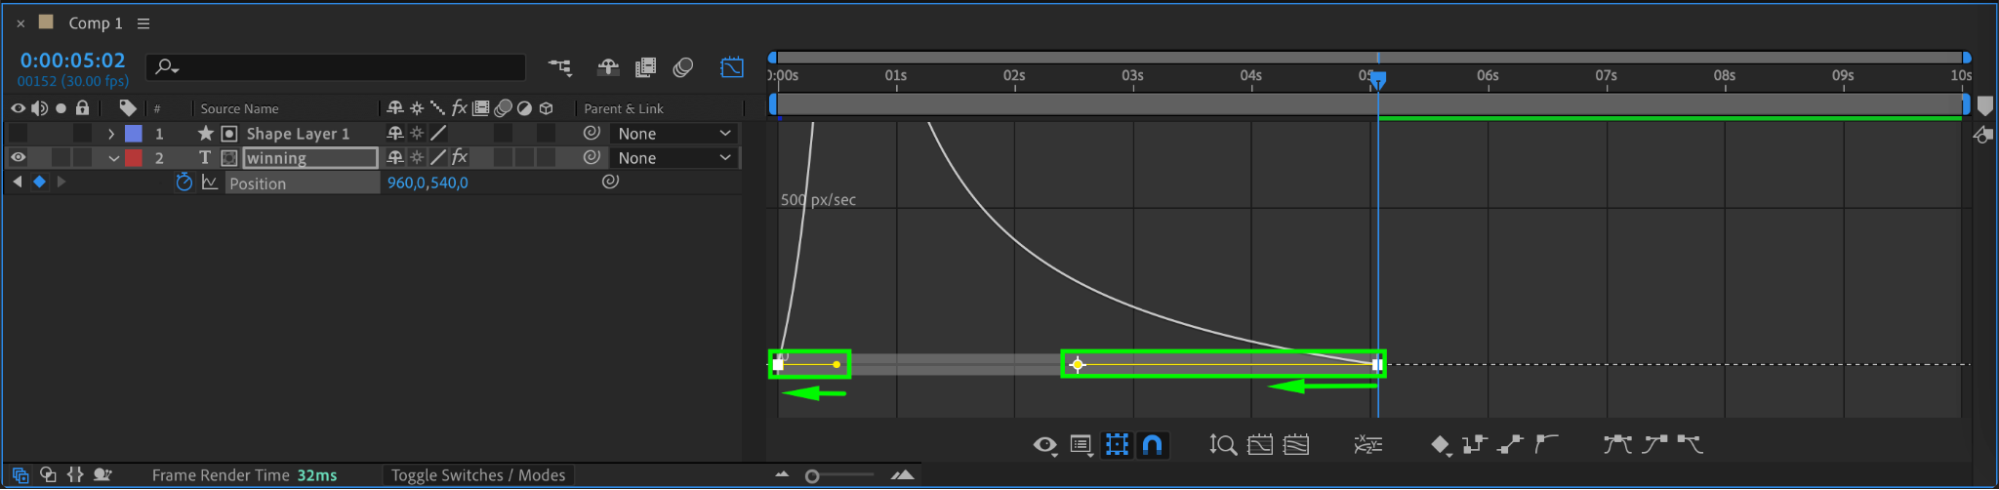
Finally, select all the keyframes for the position and apply Easy Ease by right-clicking the keyframes and selecting Keyframe Assistant > Easy Ease. Open the Graph Editor and adjust the curves to make the scrolling text move more naturally. Fine-tune the animation to get a smooth and continuous scrolling effect.
 Step 11: Enable Motion Blur
To add more realism to the animation, enable Motion Blur for the text layer. This will make the scrolling text look smoother and give it a more fluid, cinematic effect. Simply click on the Motion Blur icon next to the layer in the timeline to activate it.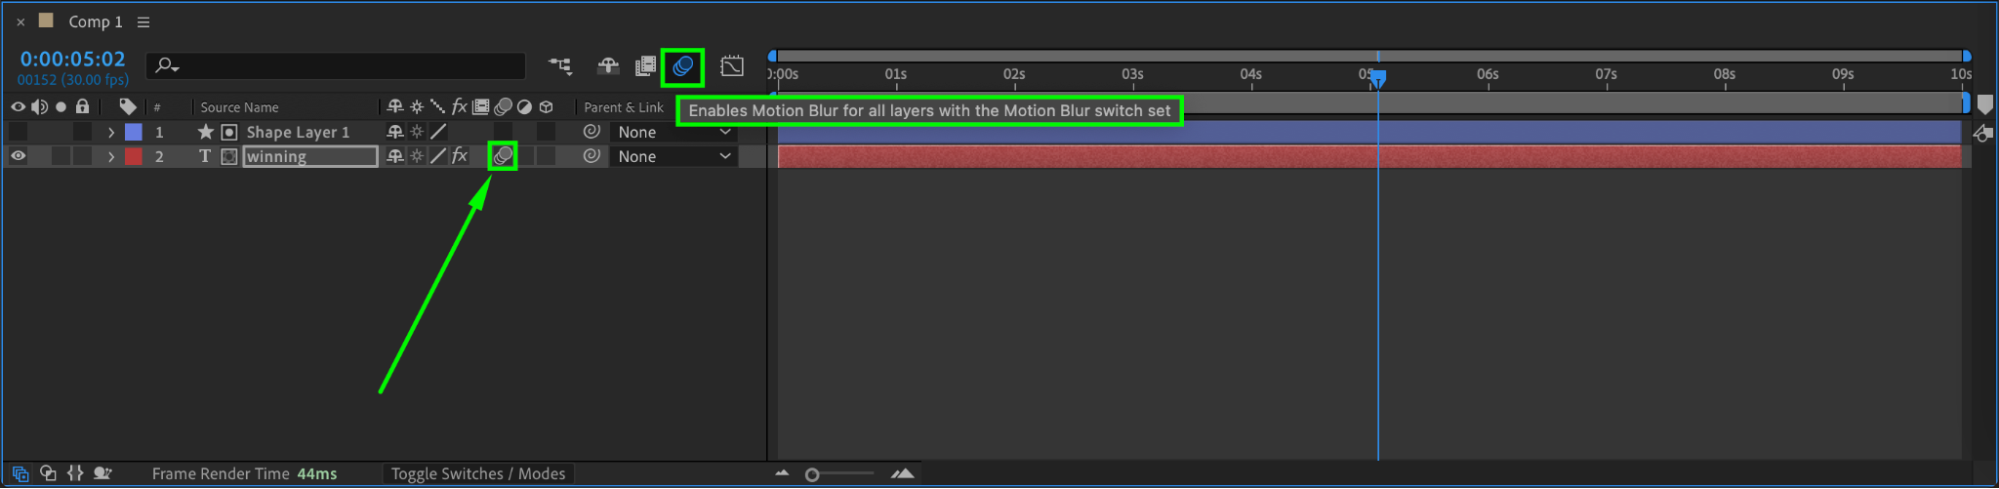 Step 12: Preview the Animation
Once you’ve applied the motion blur and made any necessary adjustments, preview the animation. Press the Spacebar to see how the scrolling text looks. This will help you identify any issues or areas that need tweaking before the final render.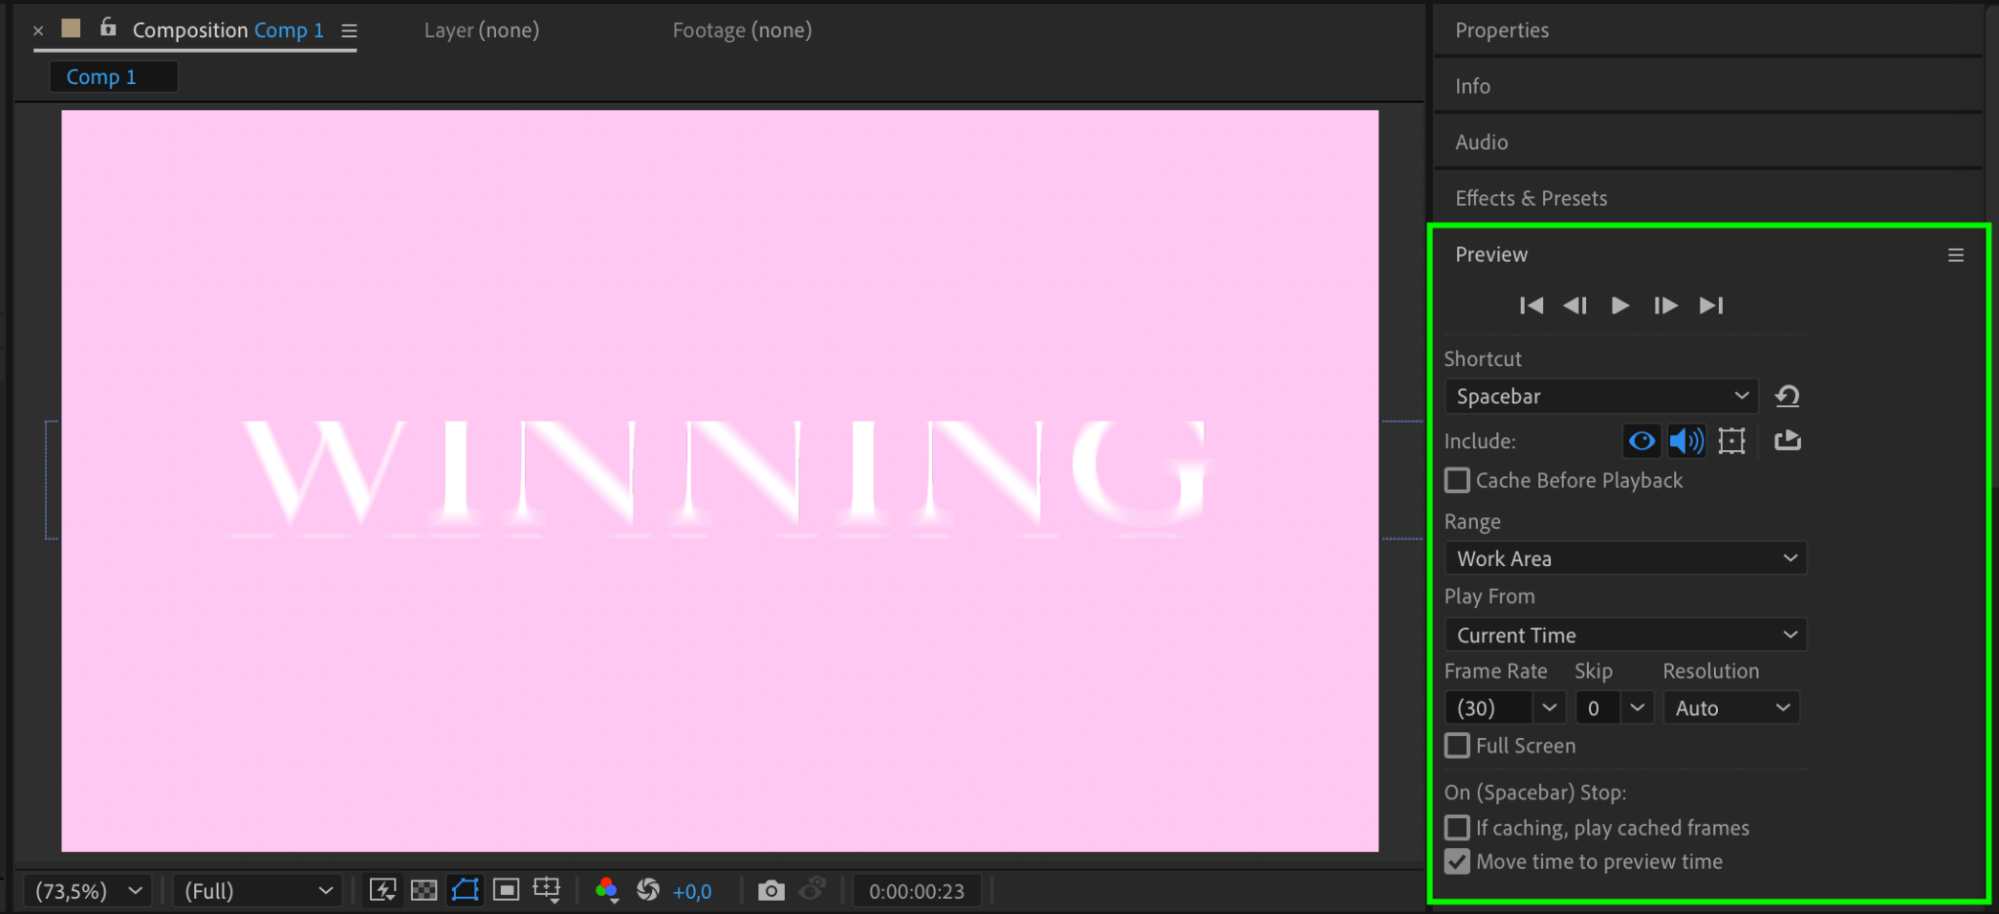
Step 13: Render the Animation
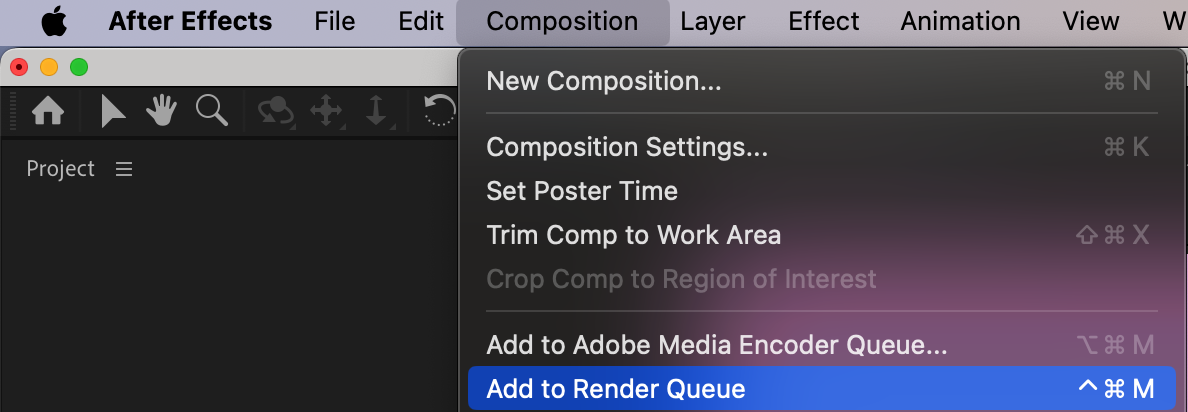
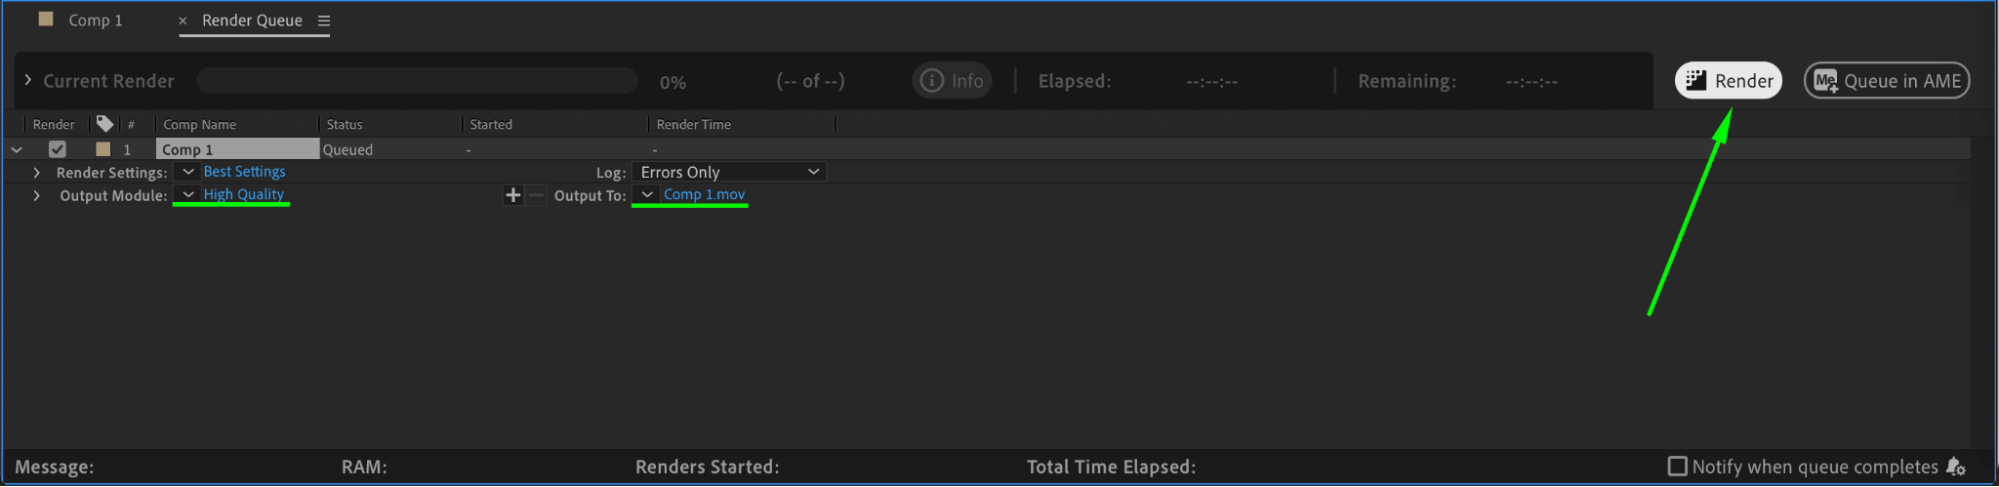
When you’re satisfied with the animation, it’s time to render. Go to Composition > Add to Render Queue, adjust your render settings, and click Render. After Effects will create a final video file with the smooth scrolling text animation.
 Conclusion
With just a few simple steps, you can create a dynamic scrolling text effect in After Effects. This technique can be used for many different projects, from movie credits to promotional content. By adjusting the timing and settings, you can create smooth, professional-looking animations for any type of text in your videos.
Our Bestsellers


