Step-by-Step Guide to Creating Transitions in After Effects
Introduction – Enhance Your Videos with Seamless Transitions
Transitions in After Effects can transform your video edits, creating smooth, professional movement between scenes. One effective way to achieve transitions is by using adjustment layers with effects like Fast Box Blur. This guide will walk you through the process of creating transitions in After Effects step by step.
Get 10% off when you subscribe to our newsletter

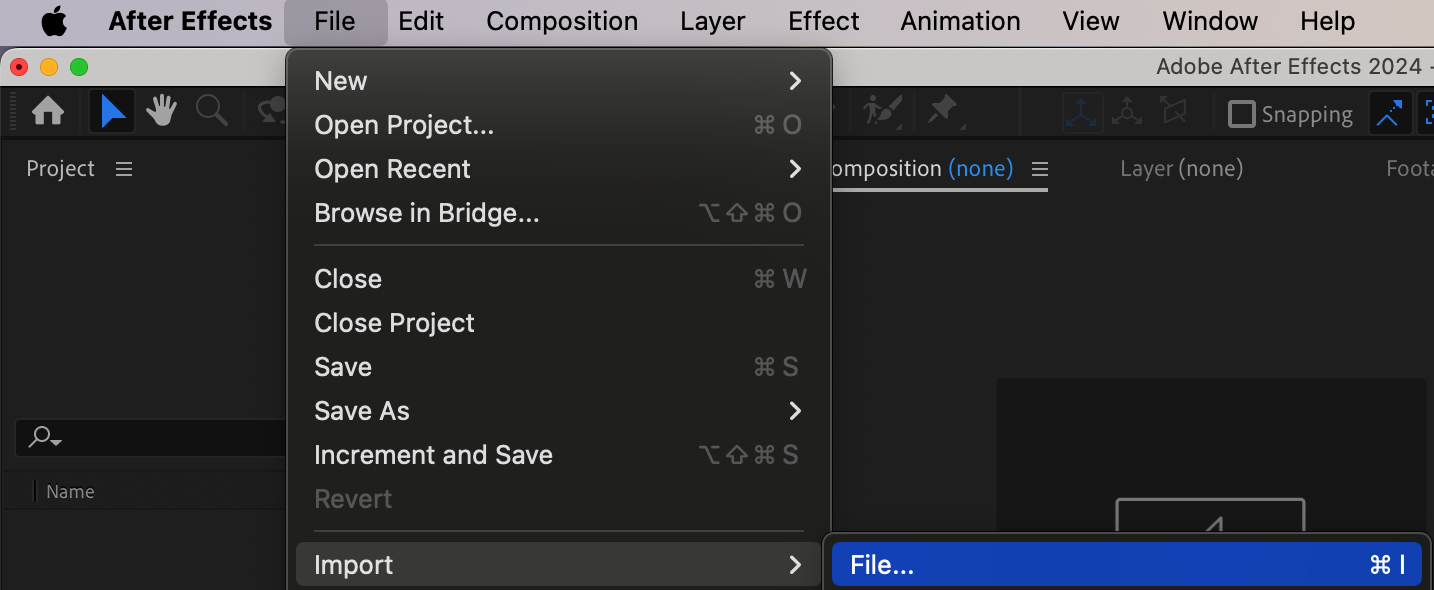
Step 1: Import Your Video Files
Start by importing your video files into After Effects. Go to File > Import > File, select your videos, and click Open. Drag the imported files onto the Timeline Panel to create a new composition. Arrange the clips in the desired sequence.
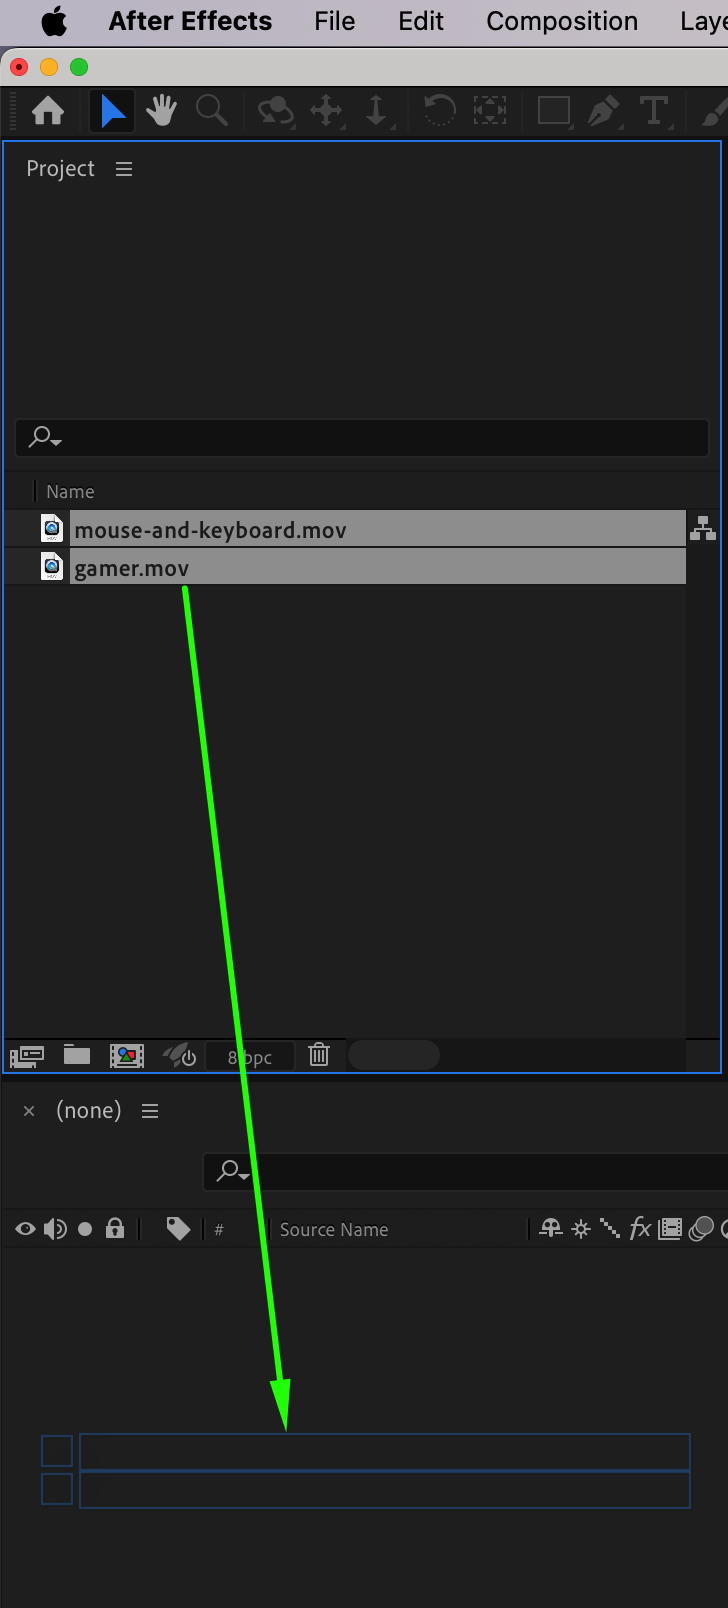 Step 2: Adjust Layer Durations
In the Timeline Panel, adjust the duration of each layer by dragging the ends of the layers to trim or extend them. Ensure that the layers overlap slightly to create a seamless transition point between the two clips.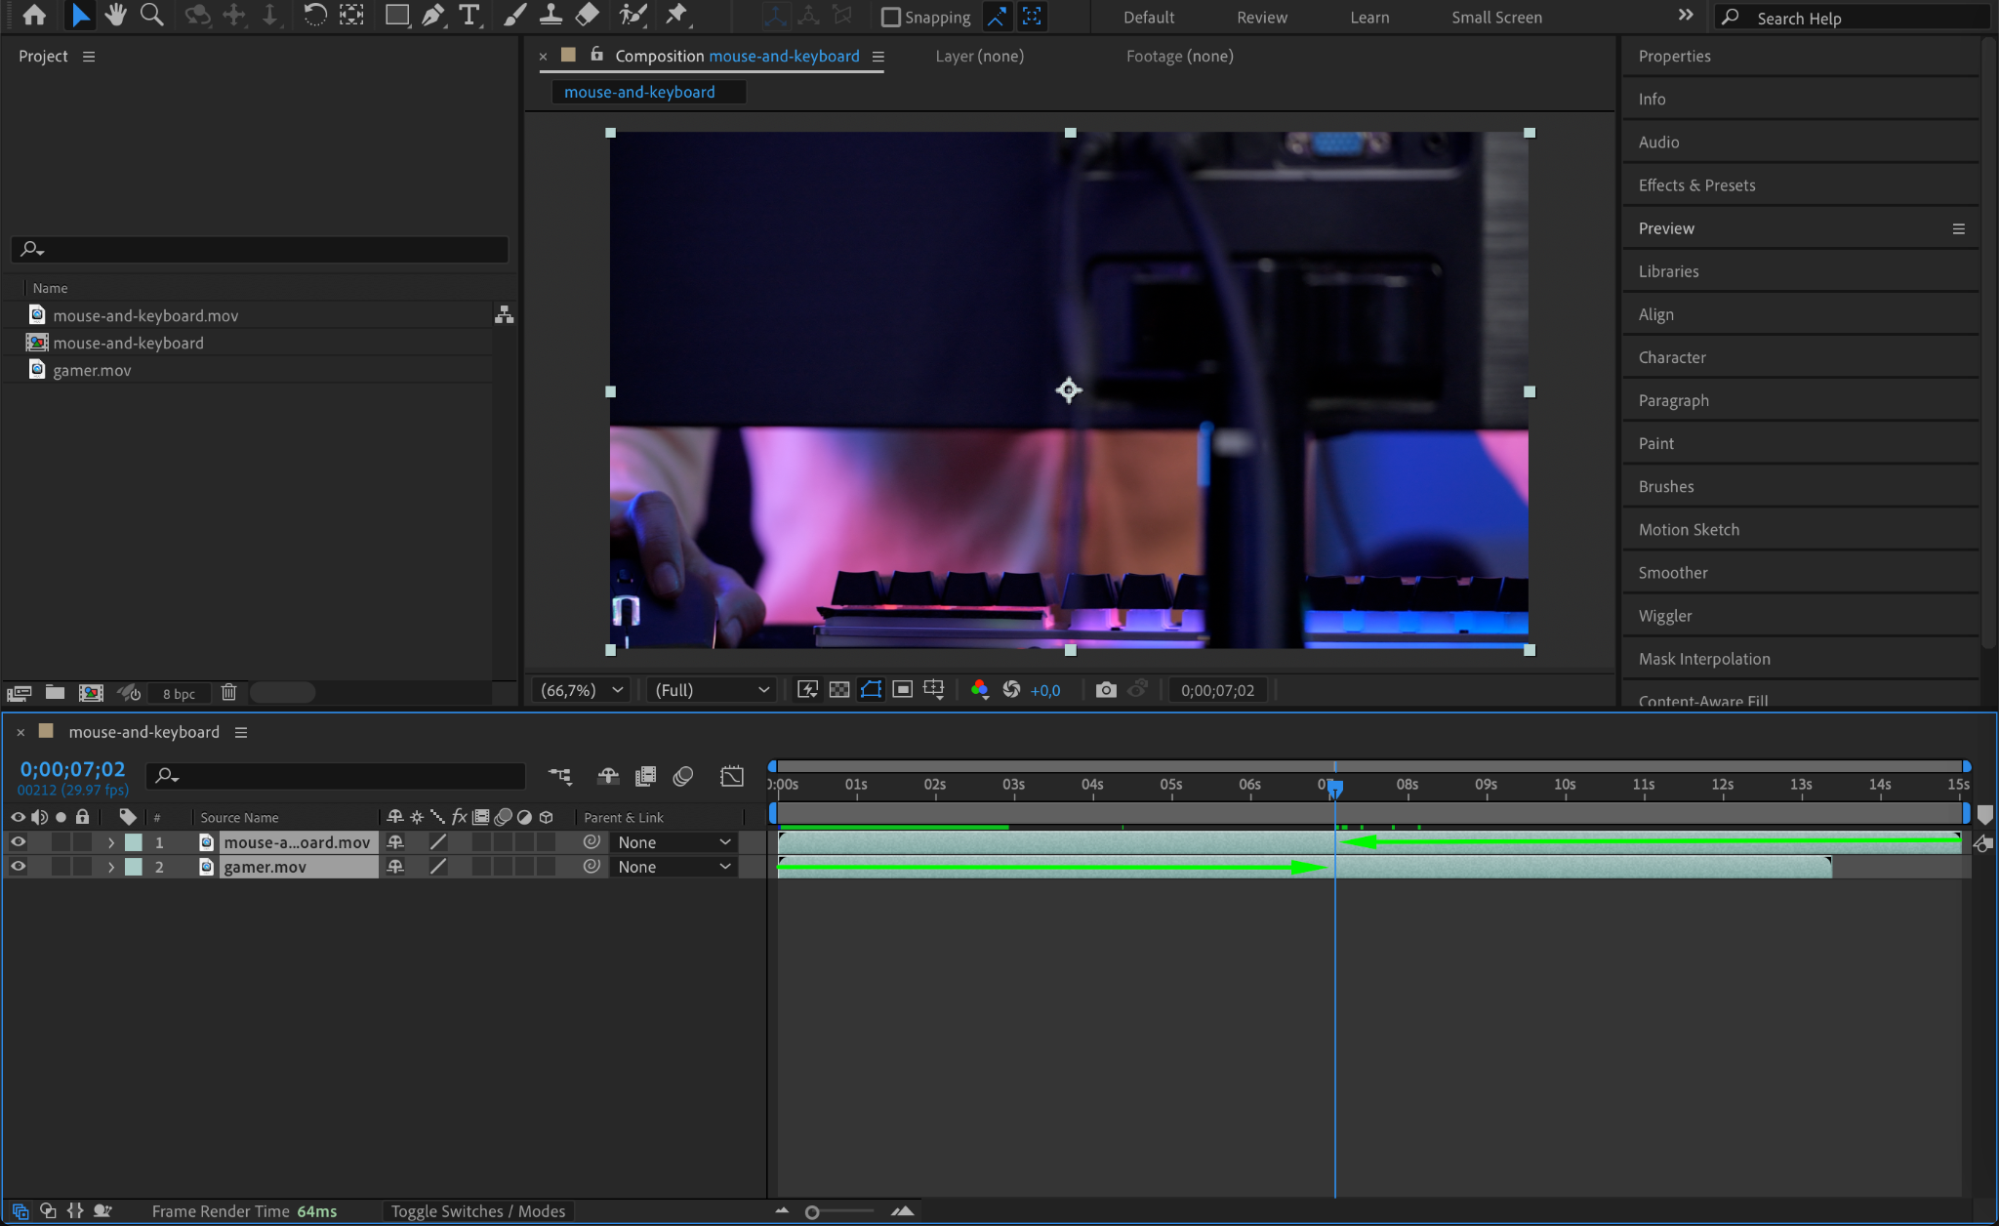
 Step 3: Add an Adjustment Layer
To apply the transition effect, create an adjustment layer. Go to Layer > New > Adjustment Layer. Place this adjustment layer on the timeline above the overlapping sections of your video clips. The adjustment layer serves as a non-destructive way to apply effects.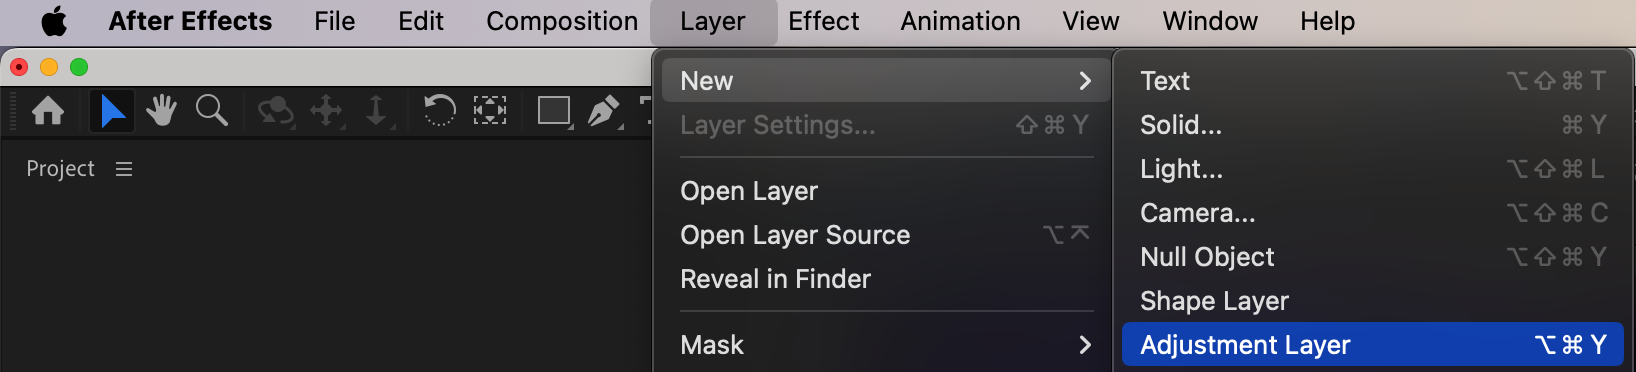
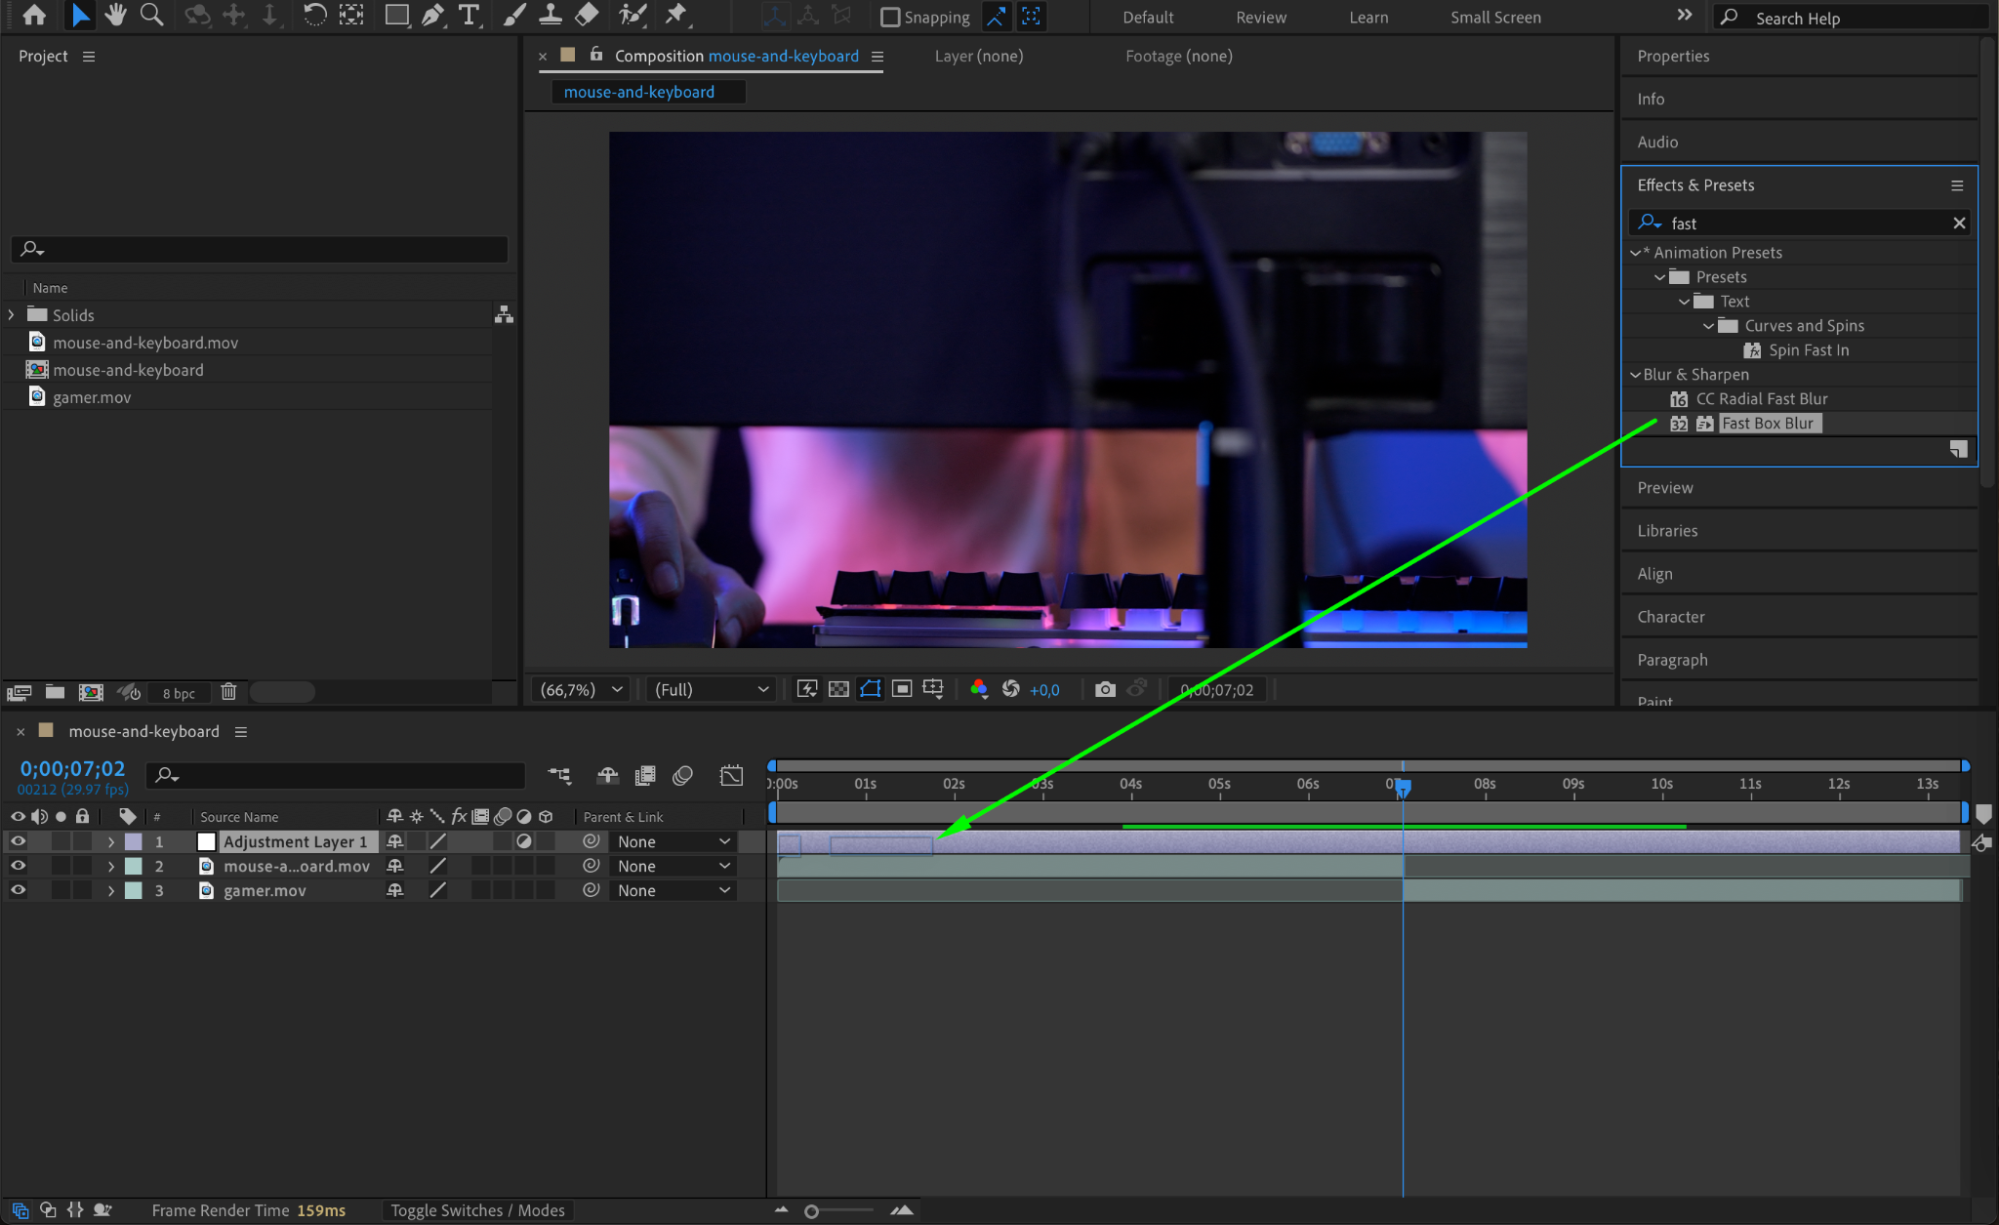
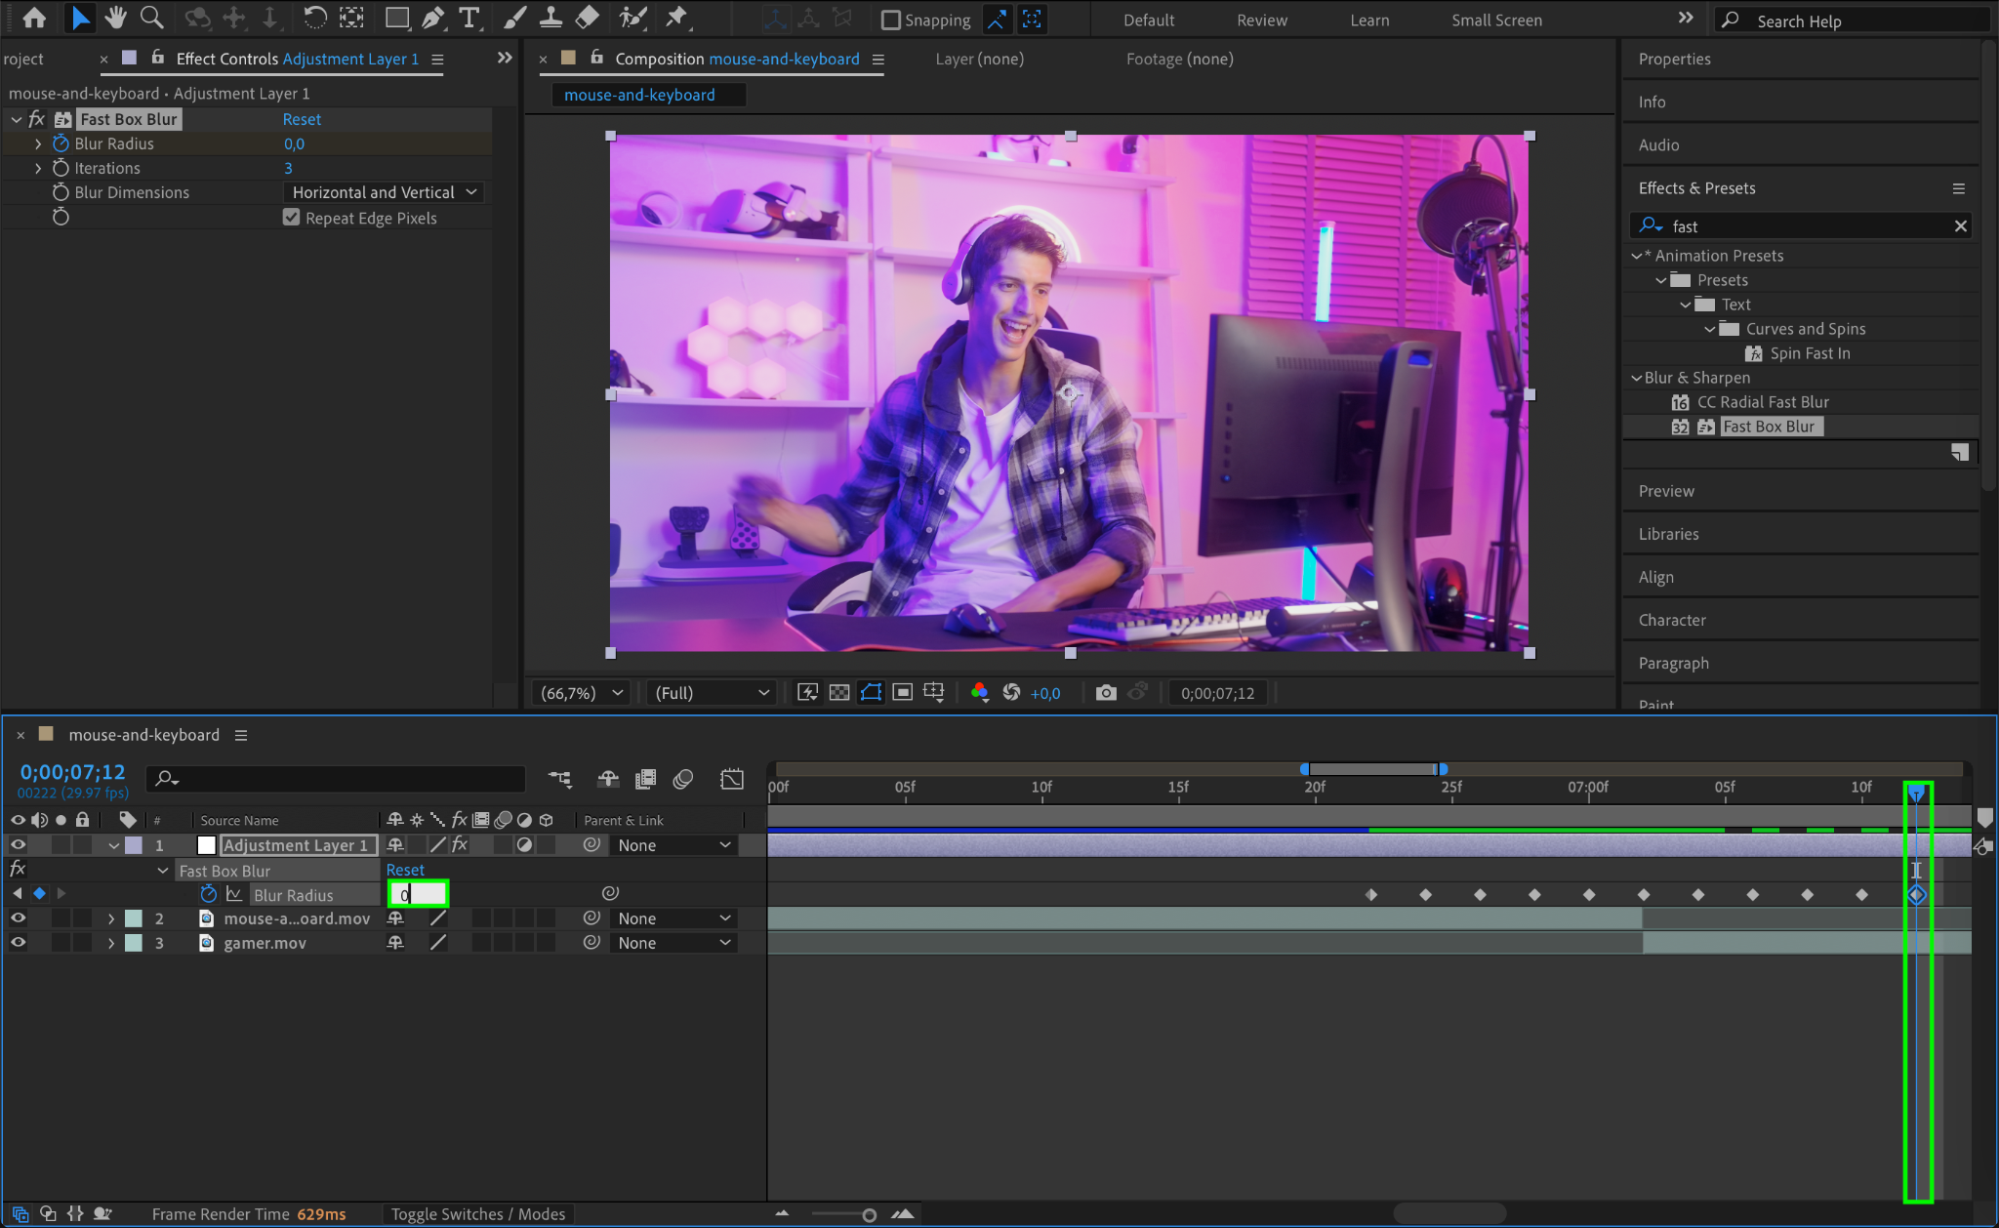
Step 4: Apply the Fast Box Blur Effect
In the Effects & Presets panel, search for the Fast Box Blur effect and drag it onto the adjustment layer. This effect will blur the transition area between the two clips, creating a smooth transition.
 Step 5: Animate the Blur Radius
To create the transition animation, follow these steps:
Position the CTI (Current Time Indicator) at the point where you want the transition to start.
Go to the Effect Controls panel and set the Blur Radius to 0. Click the stopwatch icon next to Blur Radius to create a keyframe.
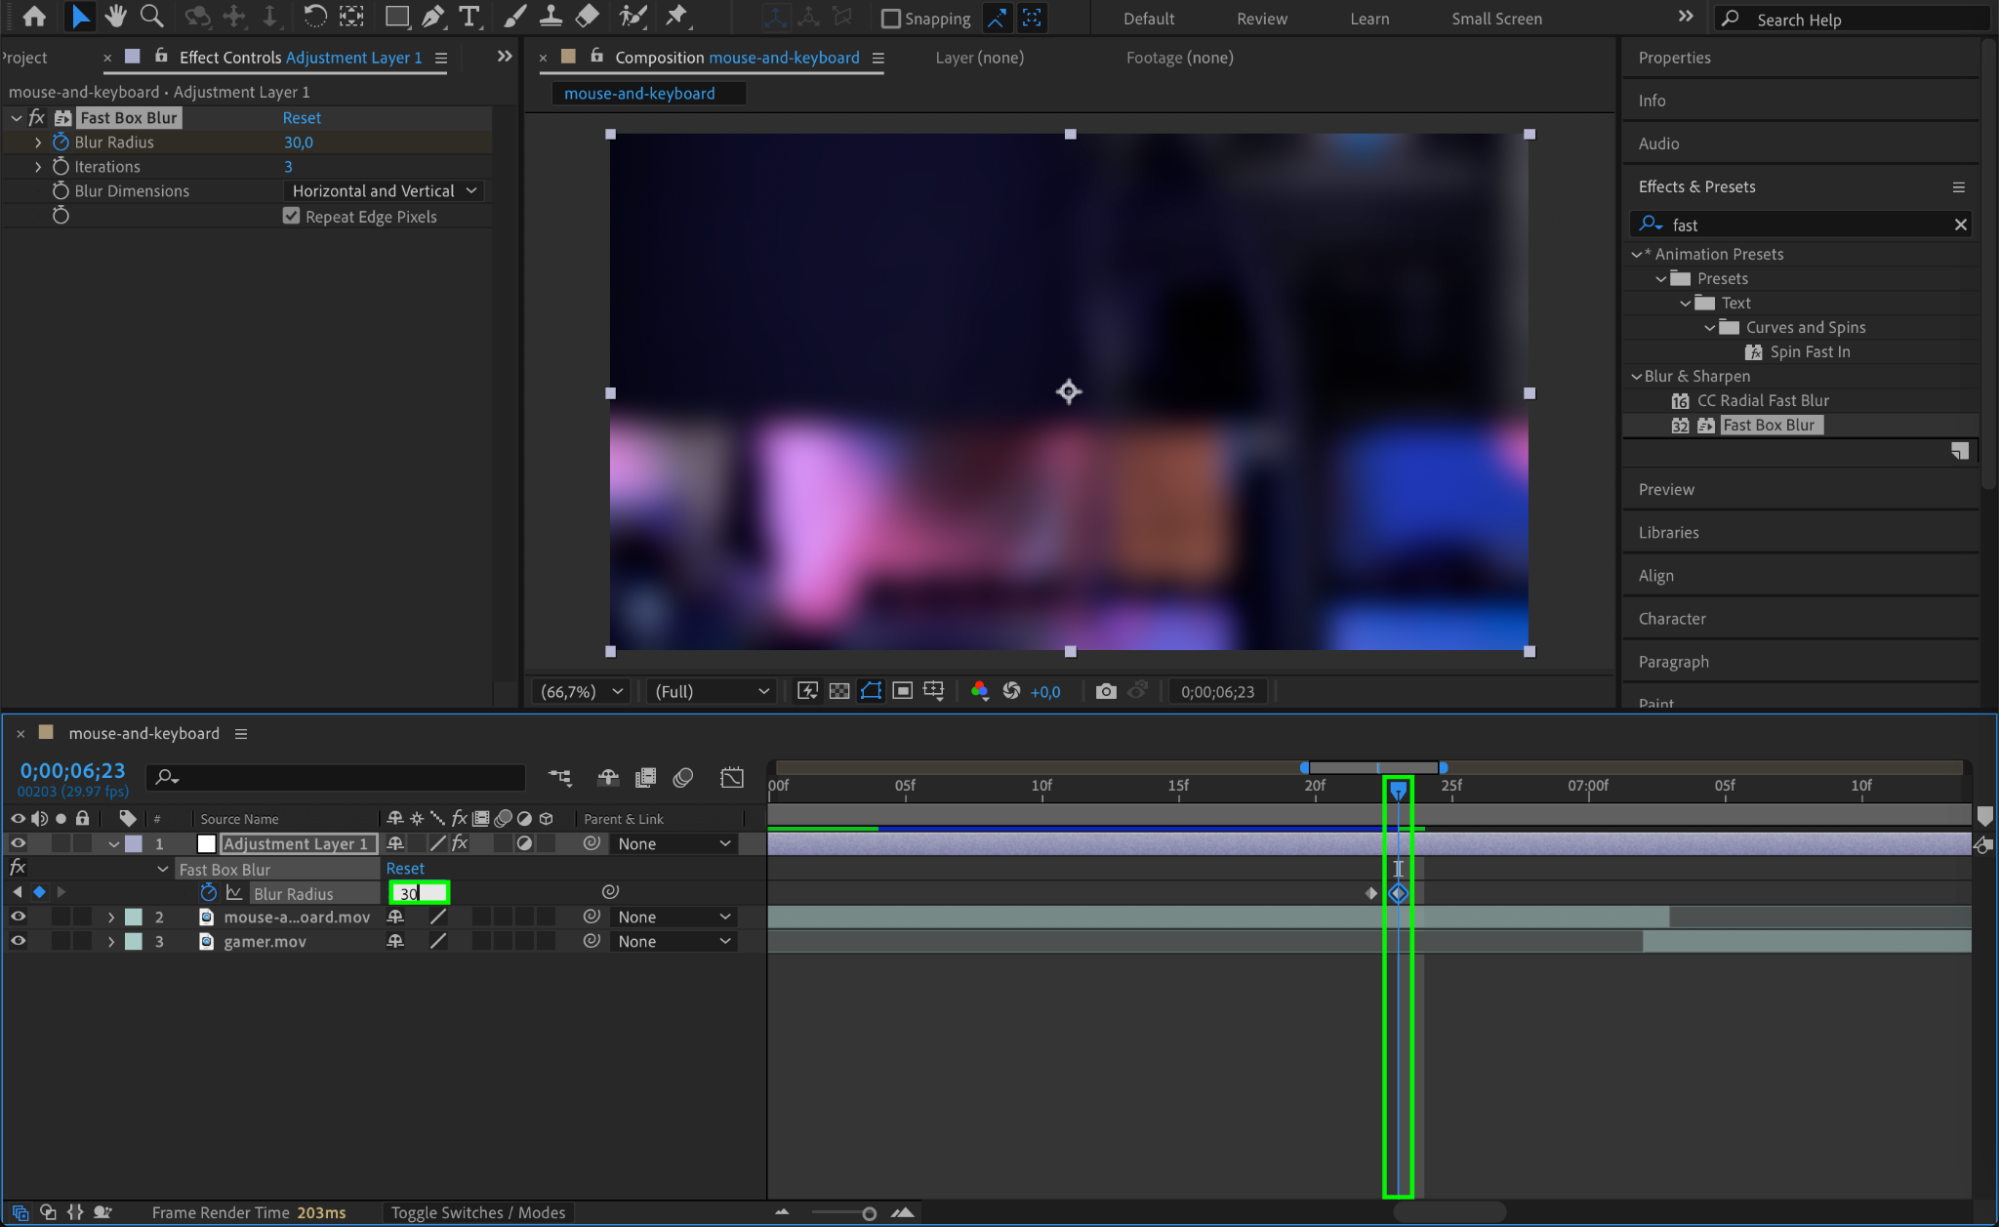
Move the CTI forward by a frame or two and increase the Blur Radius to 30. This will create a blur effect that builds up.
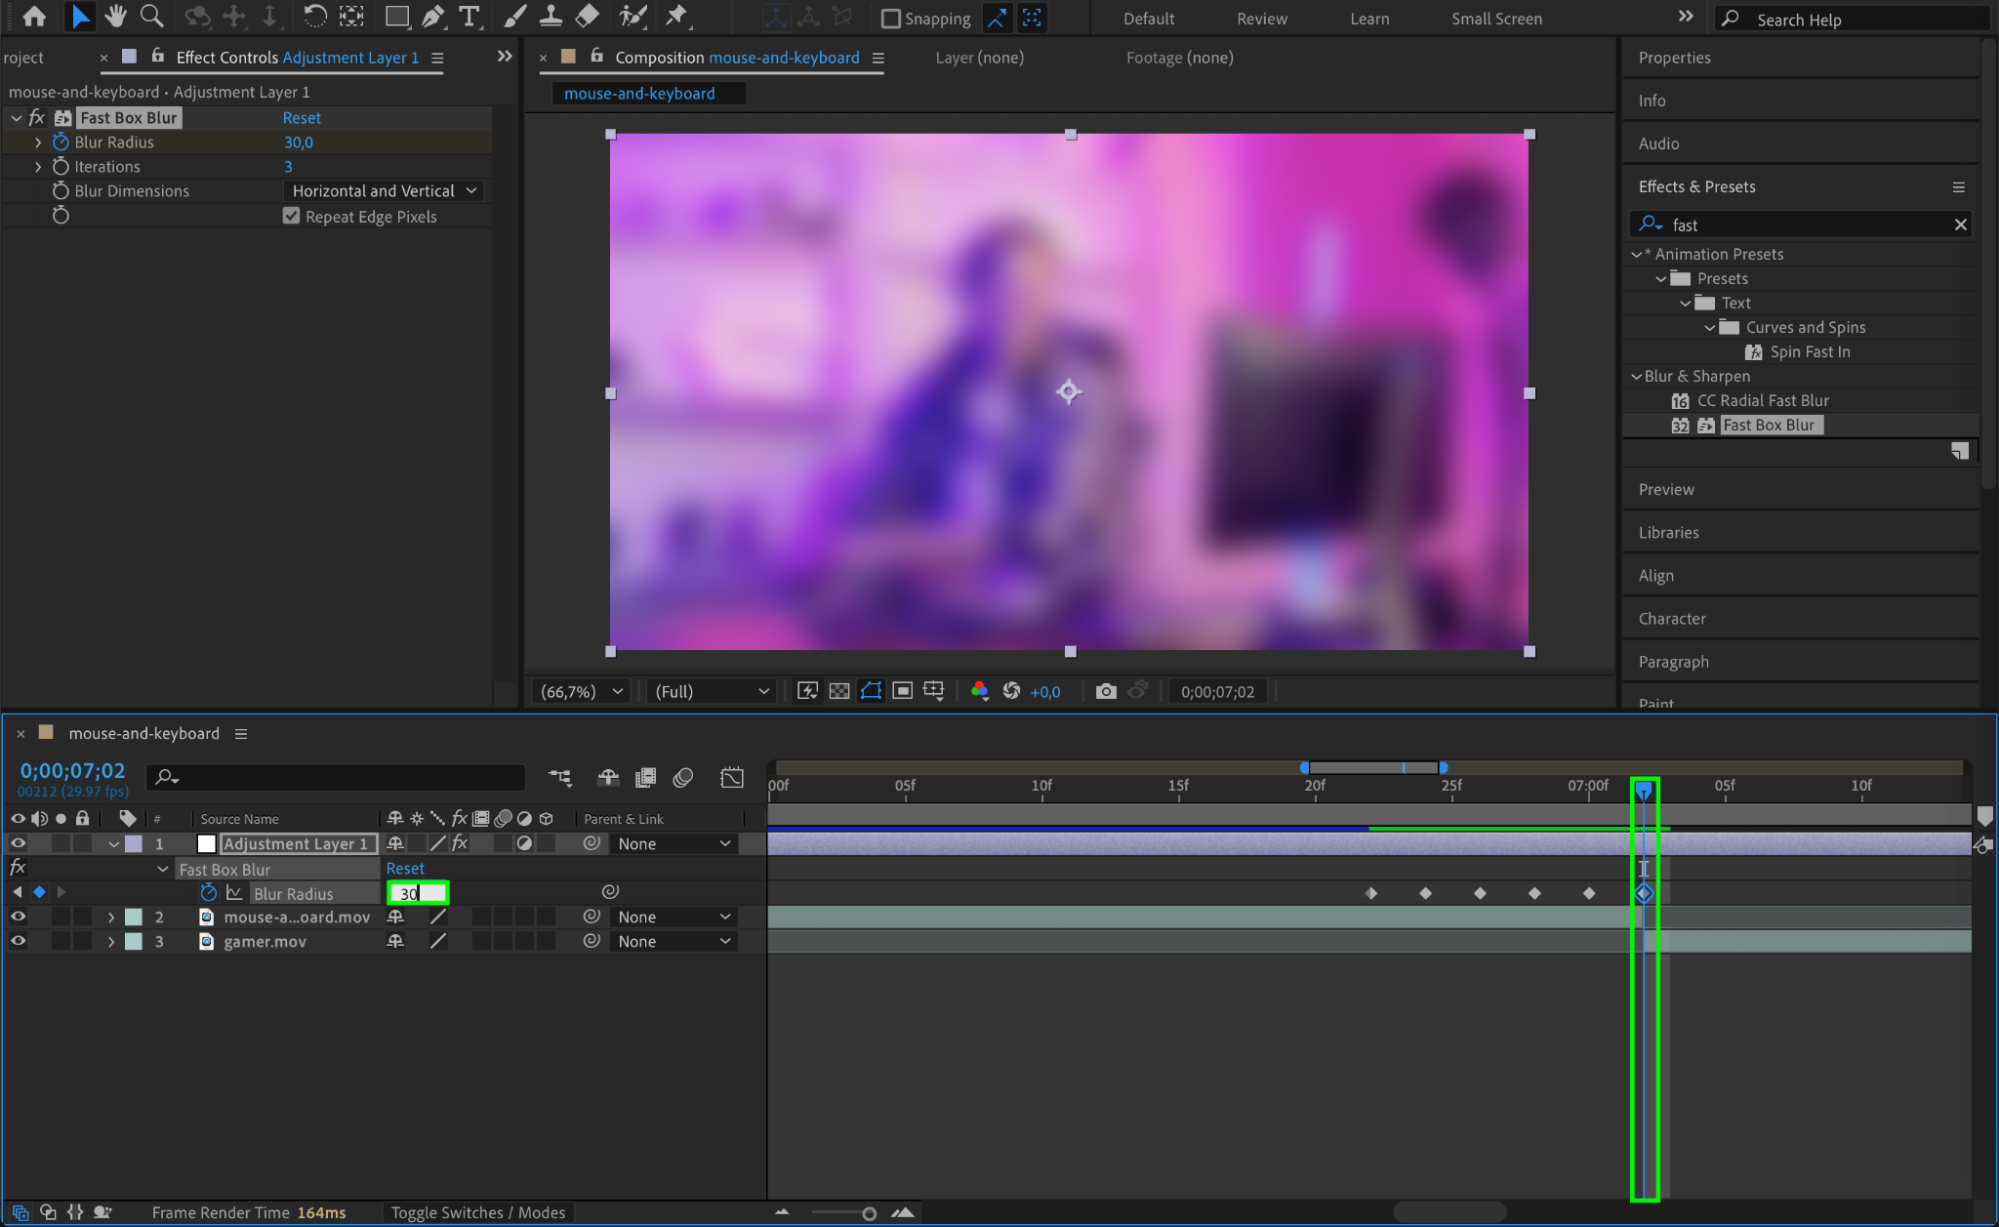
Continue creating keyframes as needed, ensuring the second clip starts at the point where the Blur Radius is 30. Gradually reduce the Blur Radius back to 0 over the next few keyframes.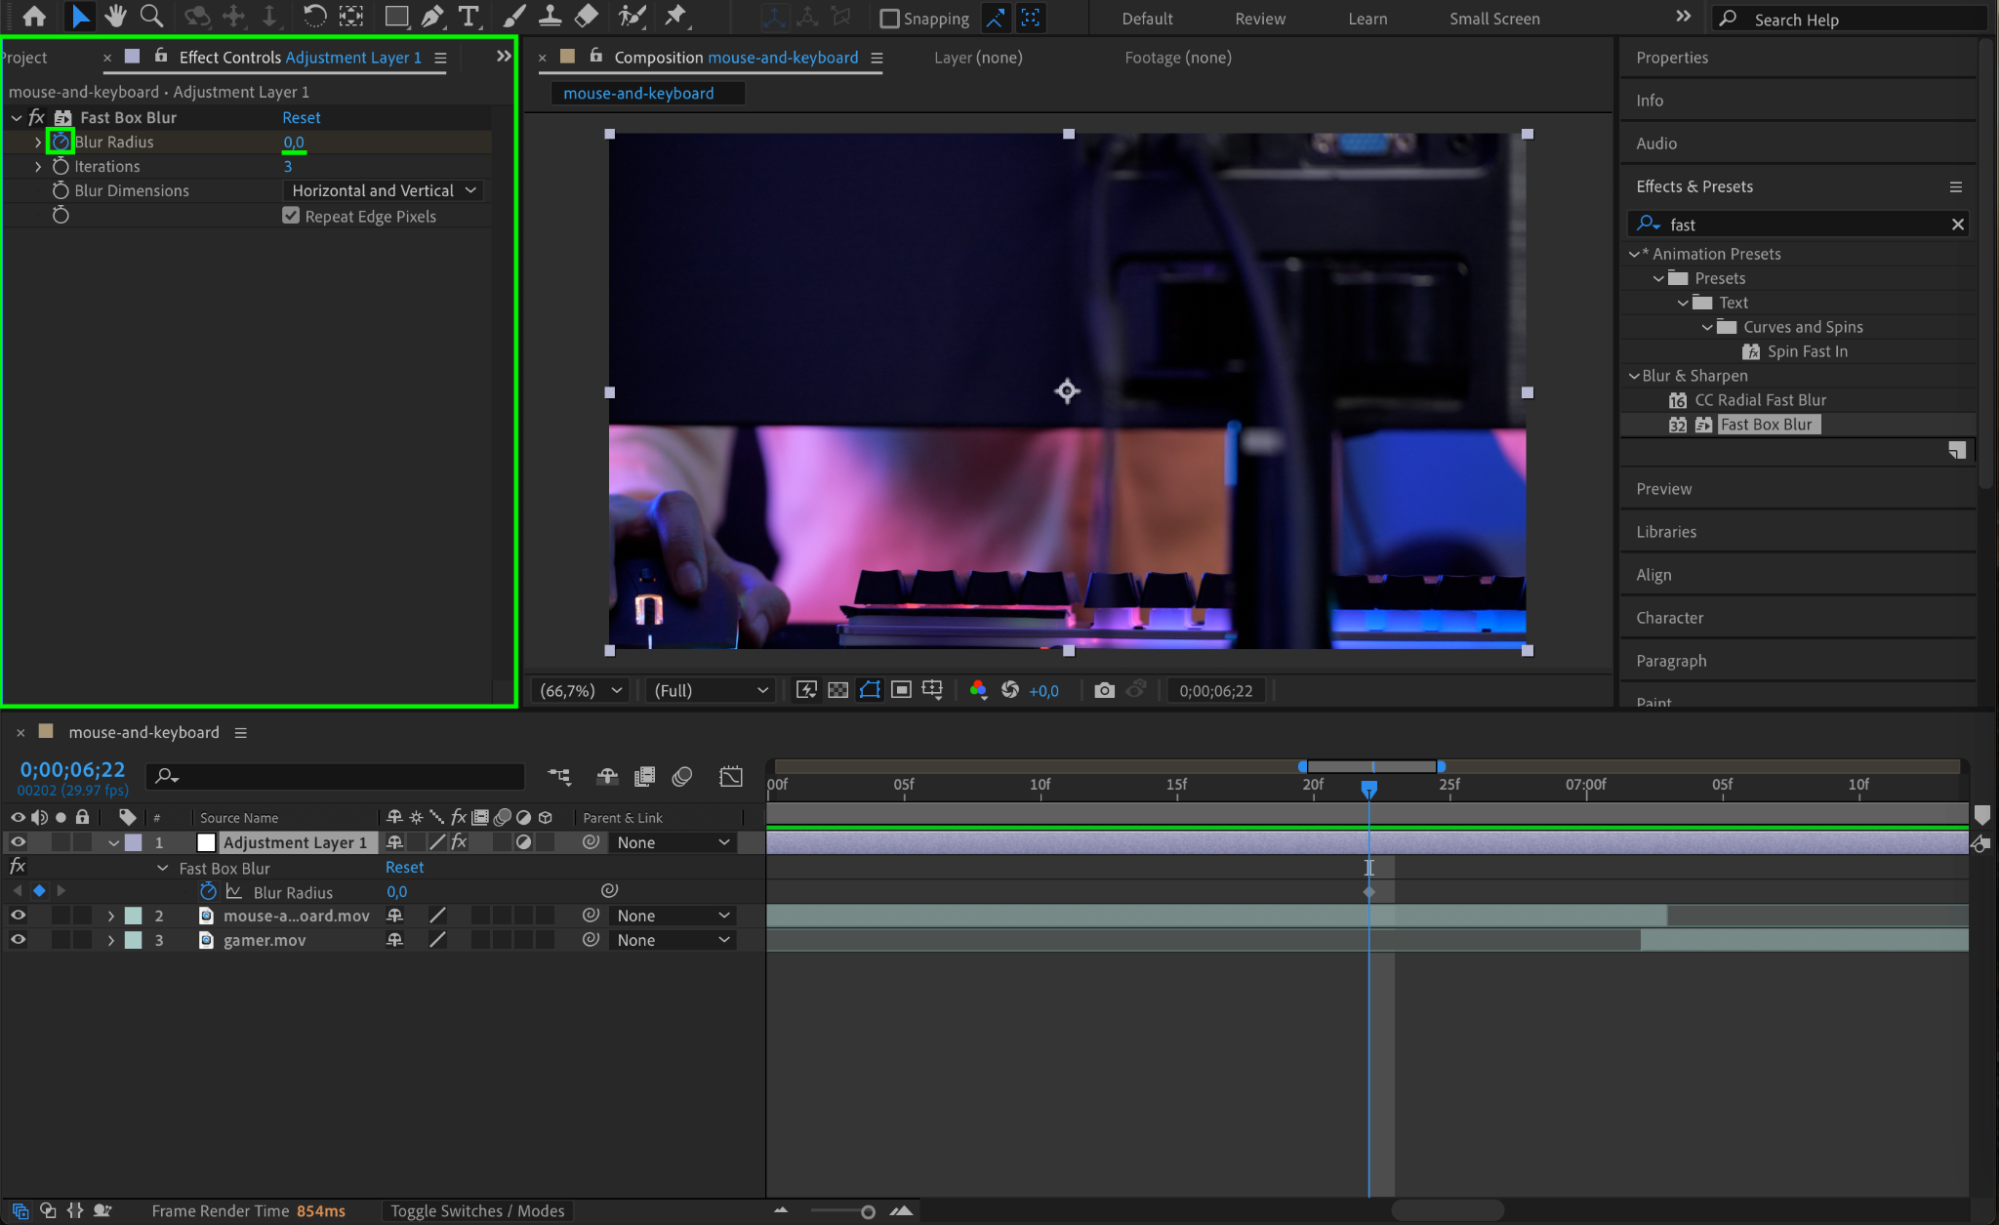
 Step 6: Smooth the Animation with Easy Ease
To make the transition smoother, select all the keyframes you created, right-click, and go to Keyframe Assistant > Easy Ease. This will adjust the motion curves, making the transition flow naturally.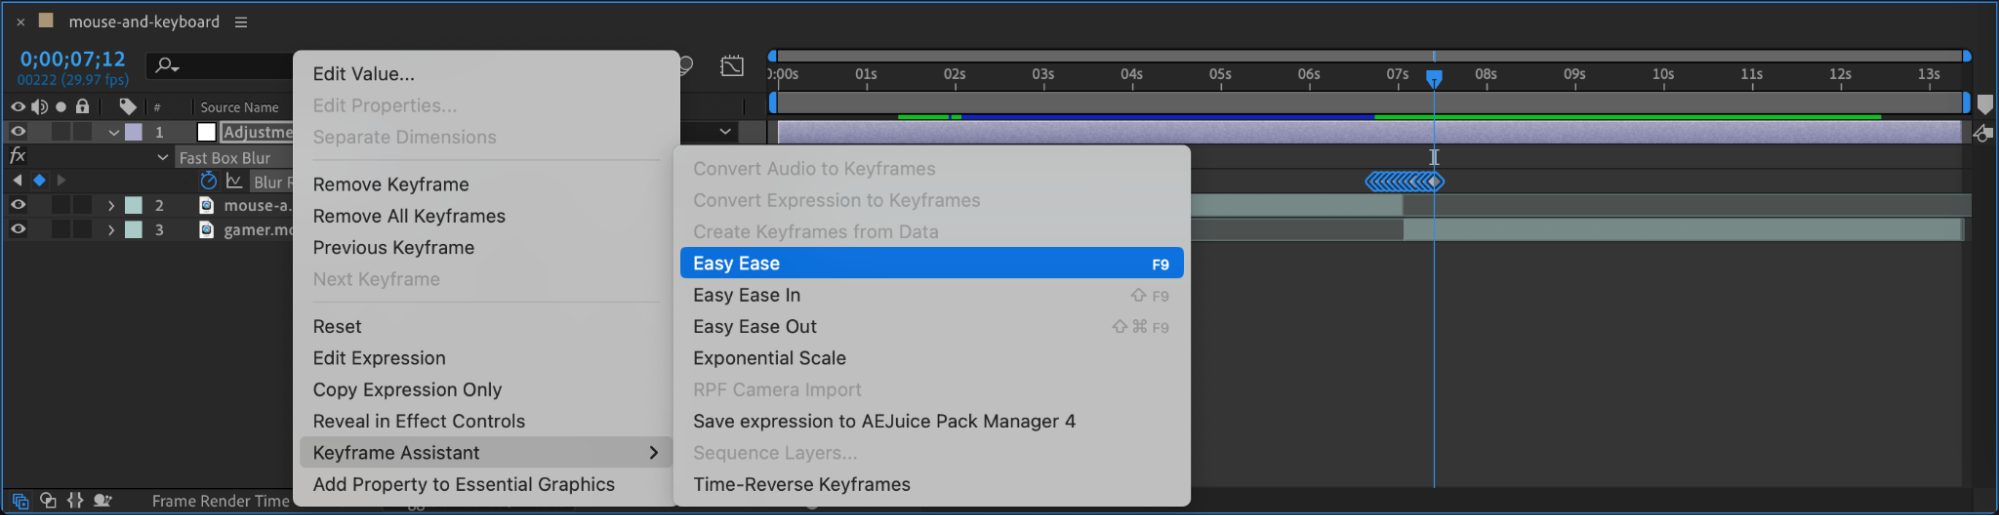 Step 7: Preview Your Transition
Press the spacebar to play back your composition and preview the transition. Make any necessary adjustments to the timing or effect settings to ensure the transition looks seamless.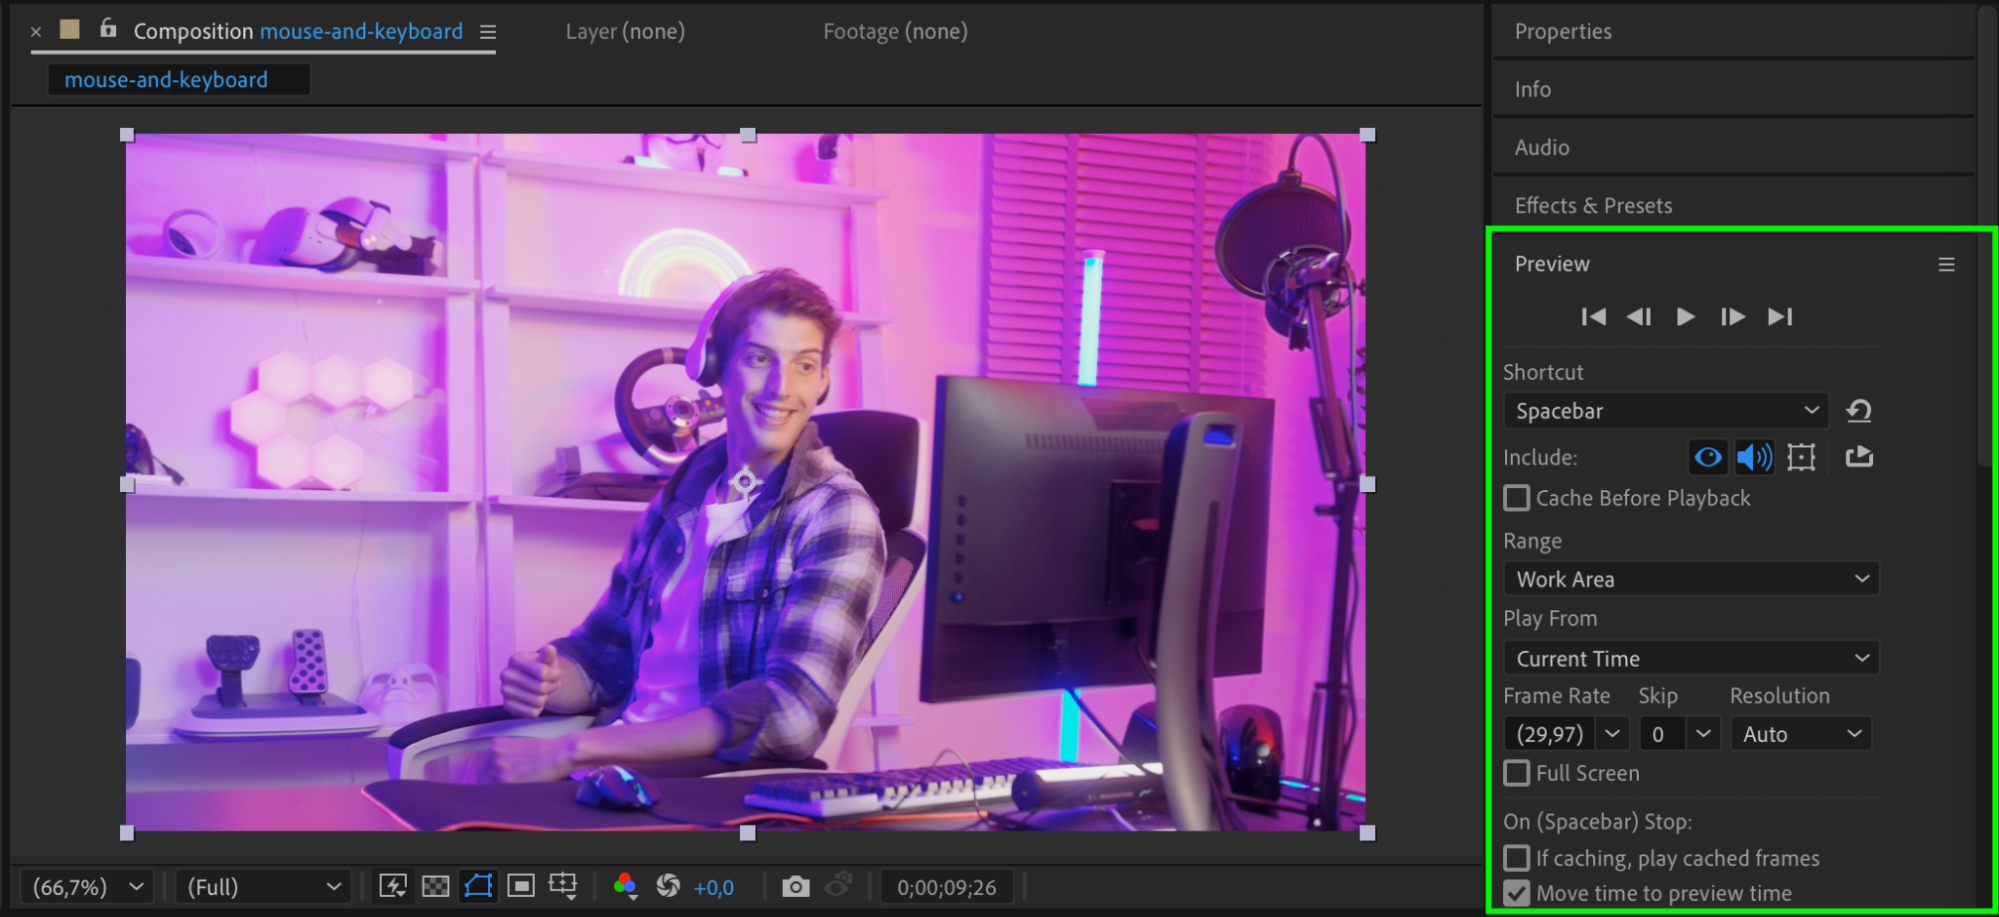 Step 8: Render Your Project
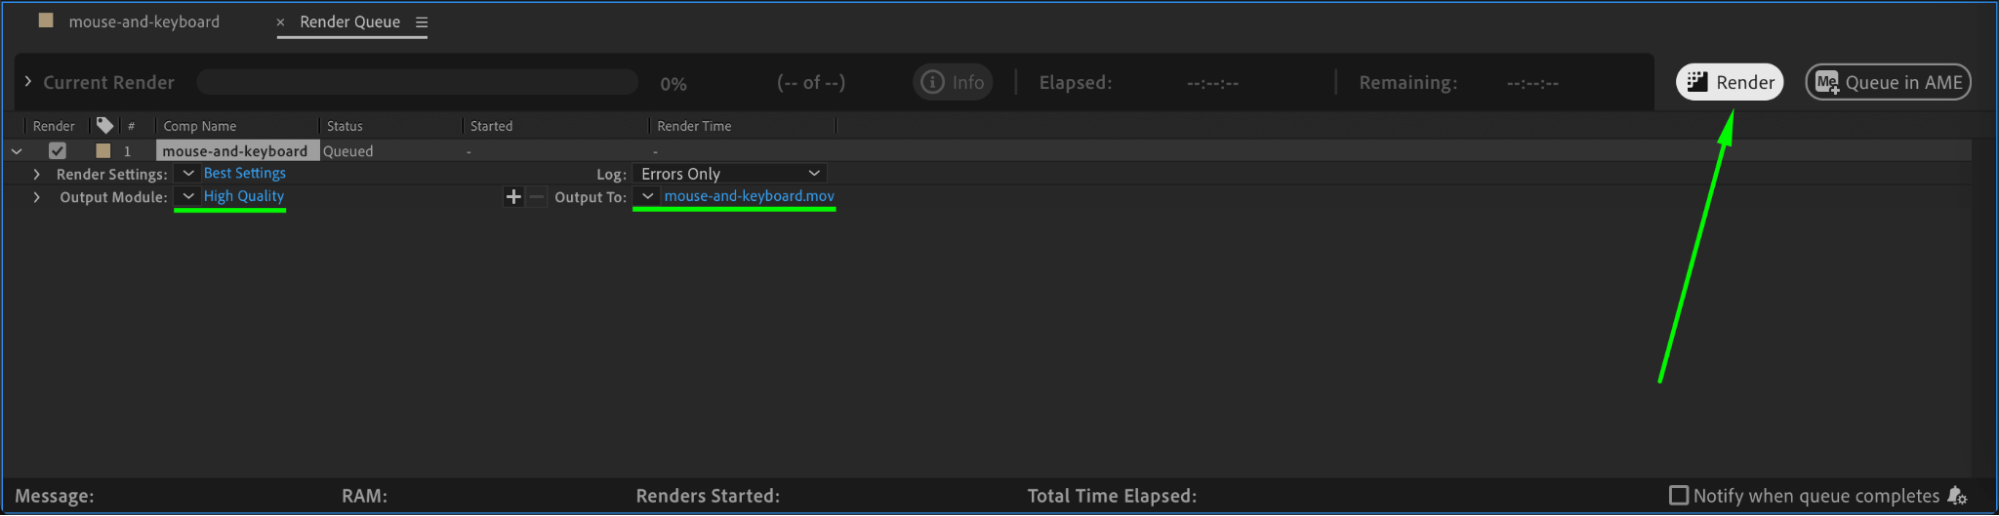
Once satisfied with the result, render your composition. Go to Composition > Add to Render Queue, configure your output settings, and click Render. This will export your project with the applied transition.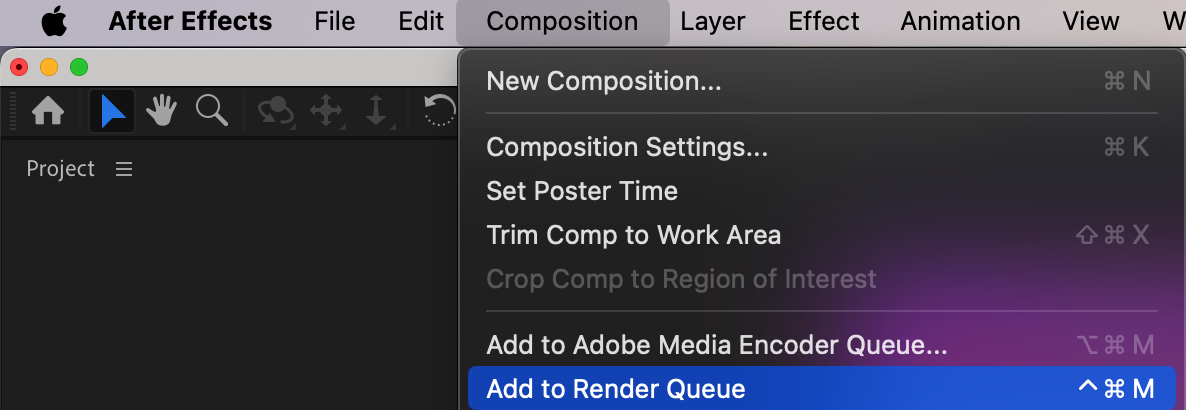
 Conclusion
Creating transitions in After Effects can elevate your video editing projects, making them look more professional and polished. By following these steps, you can use adjustment layers and effects like Fast Box Blur to design custom, smooth transitions between clips. Experiment with different effects to develop your own unique transition styles!
Our Bestsellers


