Step-by-Step Guide to Creating 3D Photos in Adobe After Effects
Introduction: Transform Your Photos into 3D with After Effects
Do you want to elevate your photos and make them stand out in 3D? Adobe After Effects provides all the tools you need to transform flat, 2D images into stunning 3D compositions. This guide will walk you through the process, so you can create dynamic, visually engaging content that impresses your audience.
Get 10% off when you subscribe to our newsletter

Step 1: Import Your Photo
To begin, import your desired photo into After Effects. Go to File > Import > File, and select the image you want to turn into a 3D object. Make sure it’s a high-resolution image for better results.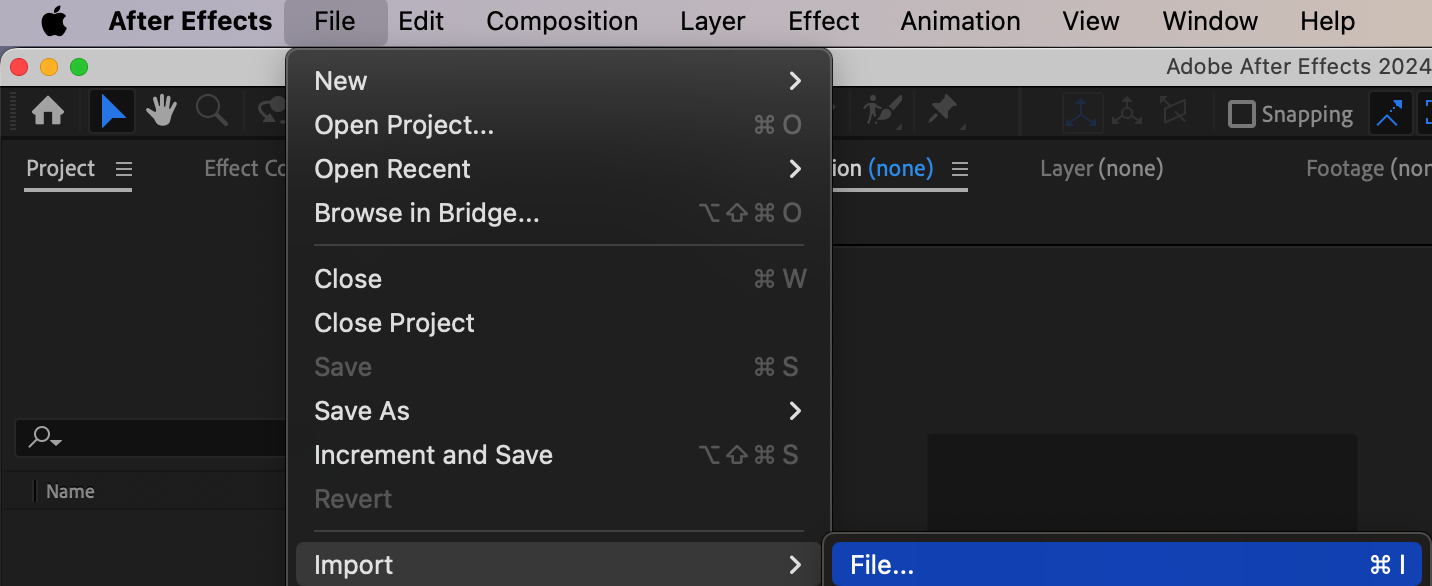 Step 2: Create a New Composition
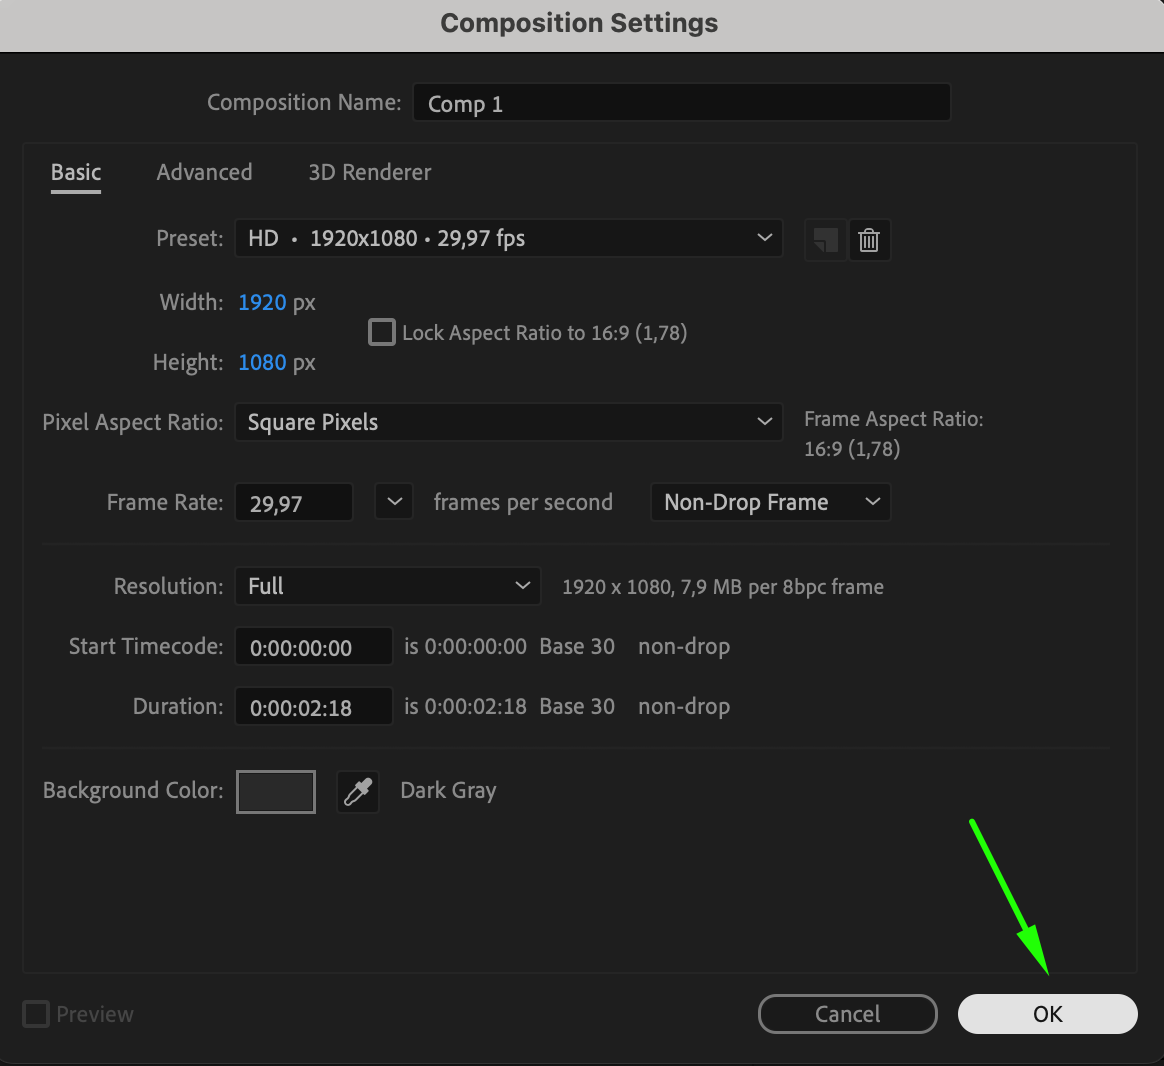
Next, you’ll need to create a new composition. Go to Composition > New Composition, then set the dimensions, duration, and frame rate according to your project needs. A standard 1920×1080 resolution works well for most projects. Once you’re satisfied with the settings, click OK.
 Step 3: Add the Photo to the Timeline
Drag your imported photo from the Project panel to the Timeline panel. This will create a layer in your composition. Now you’re ready to start working with your image.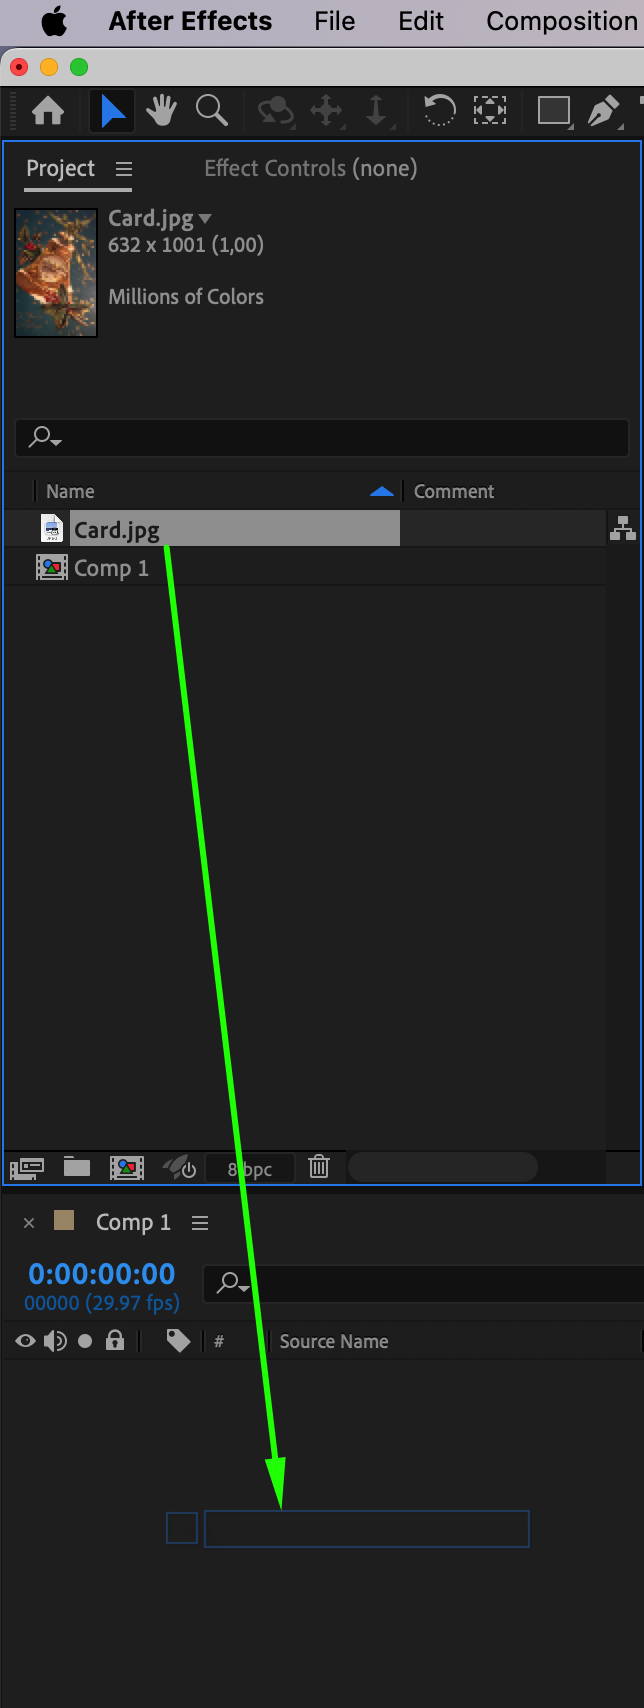 Step 4: Adjust the Transform Parameters
With the photo layer selected, adjust its Transform properties (such as scale, position, and rotation) to fit your composition. Use these settings to center and prepare your photo before turning it into a 3D layer.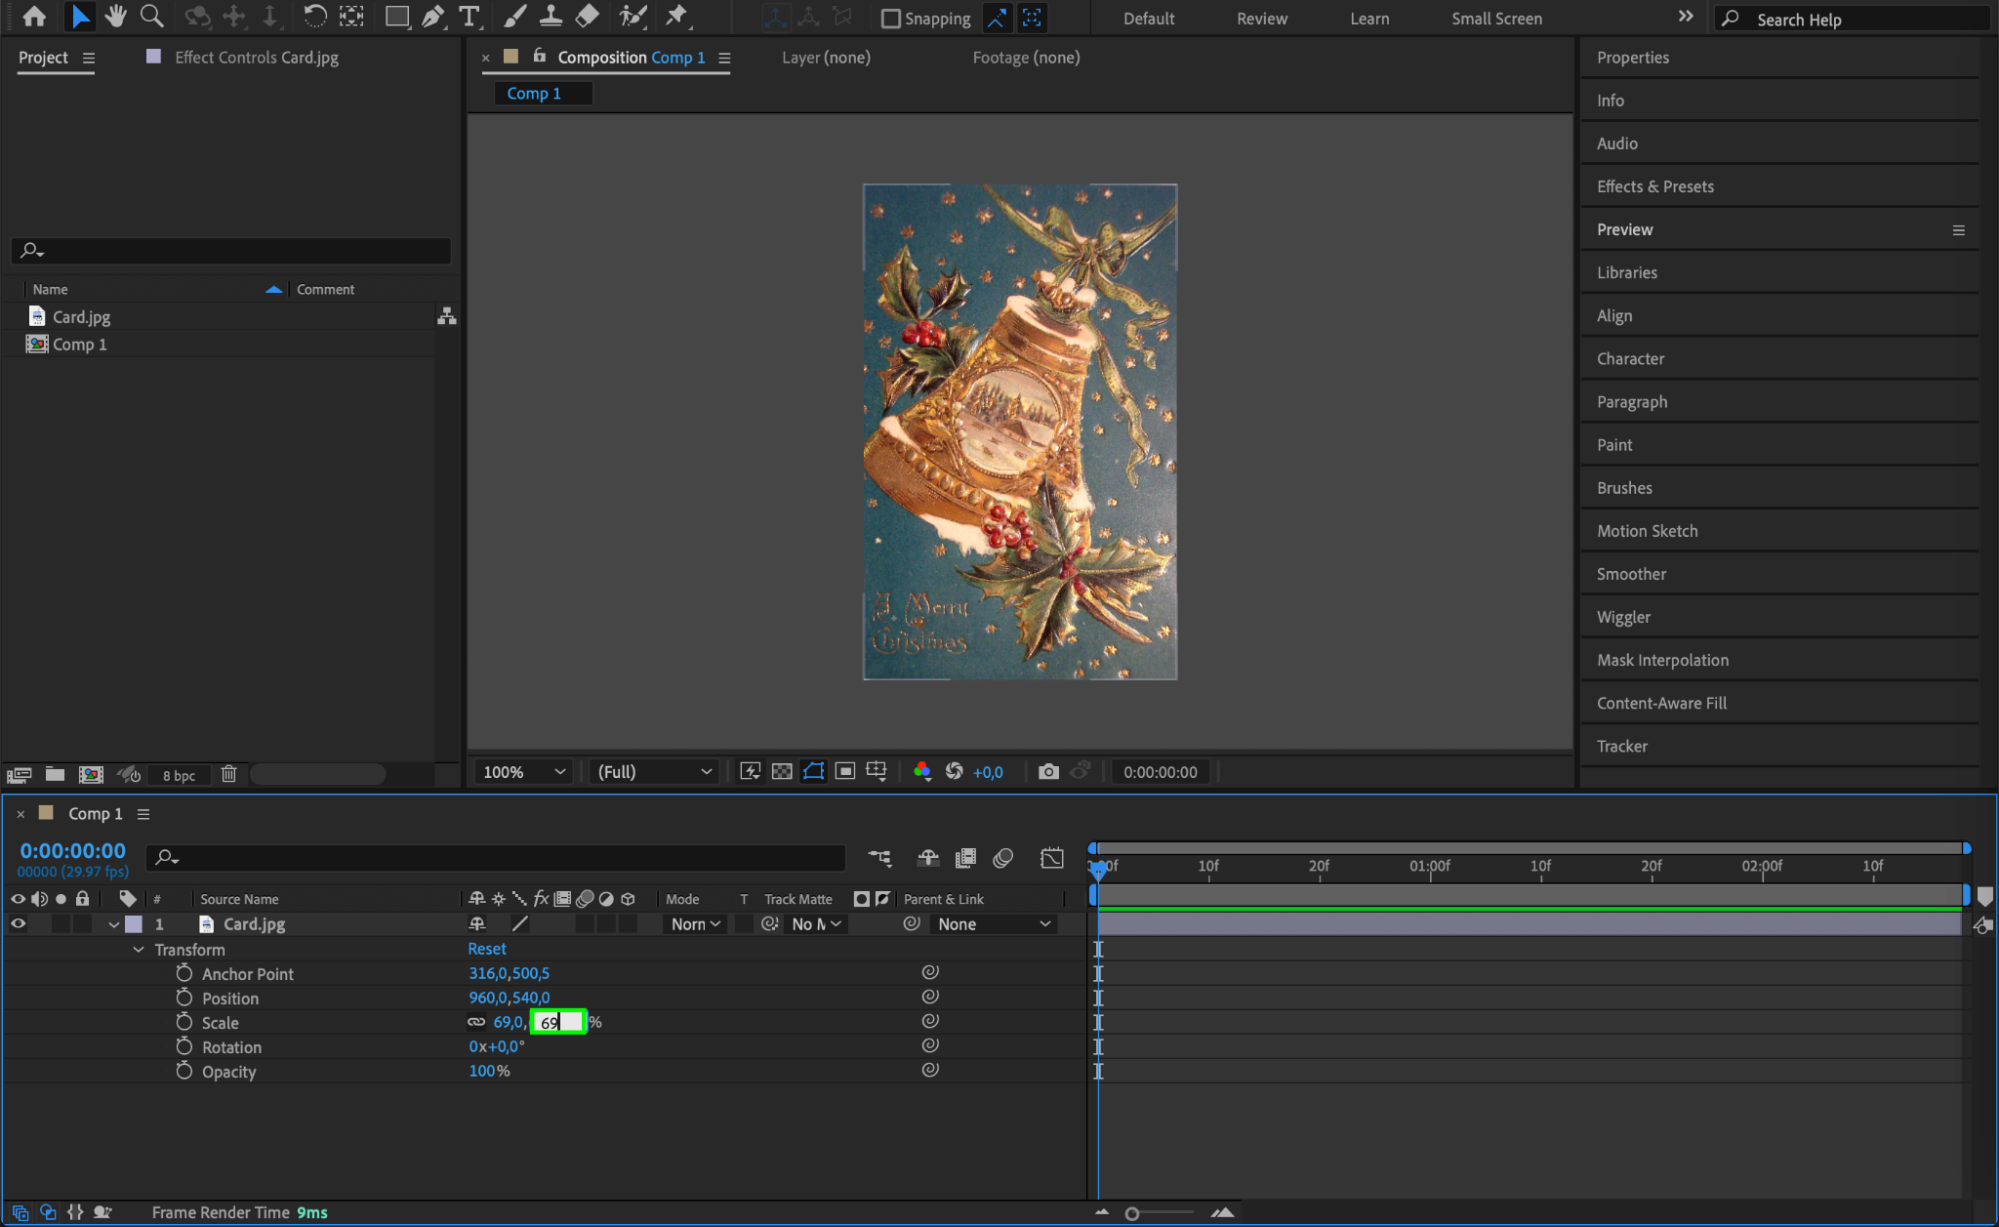 Step 5: Enable 3D for the Layer
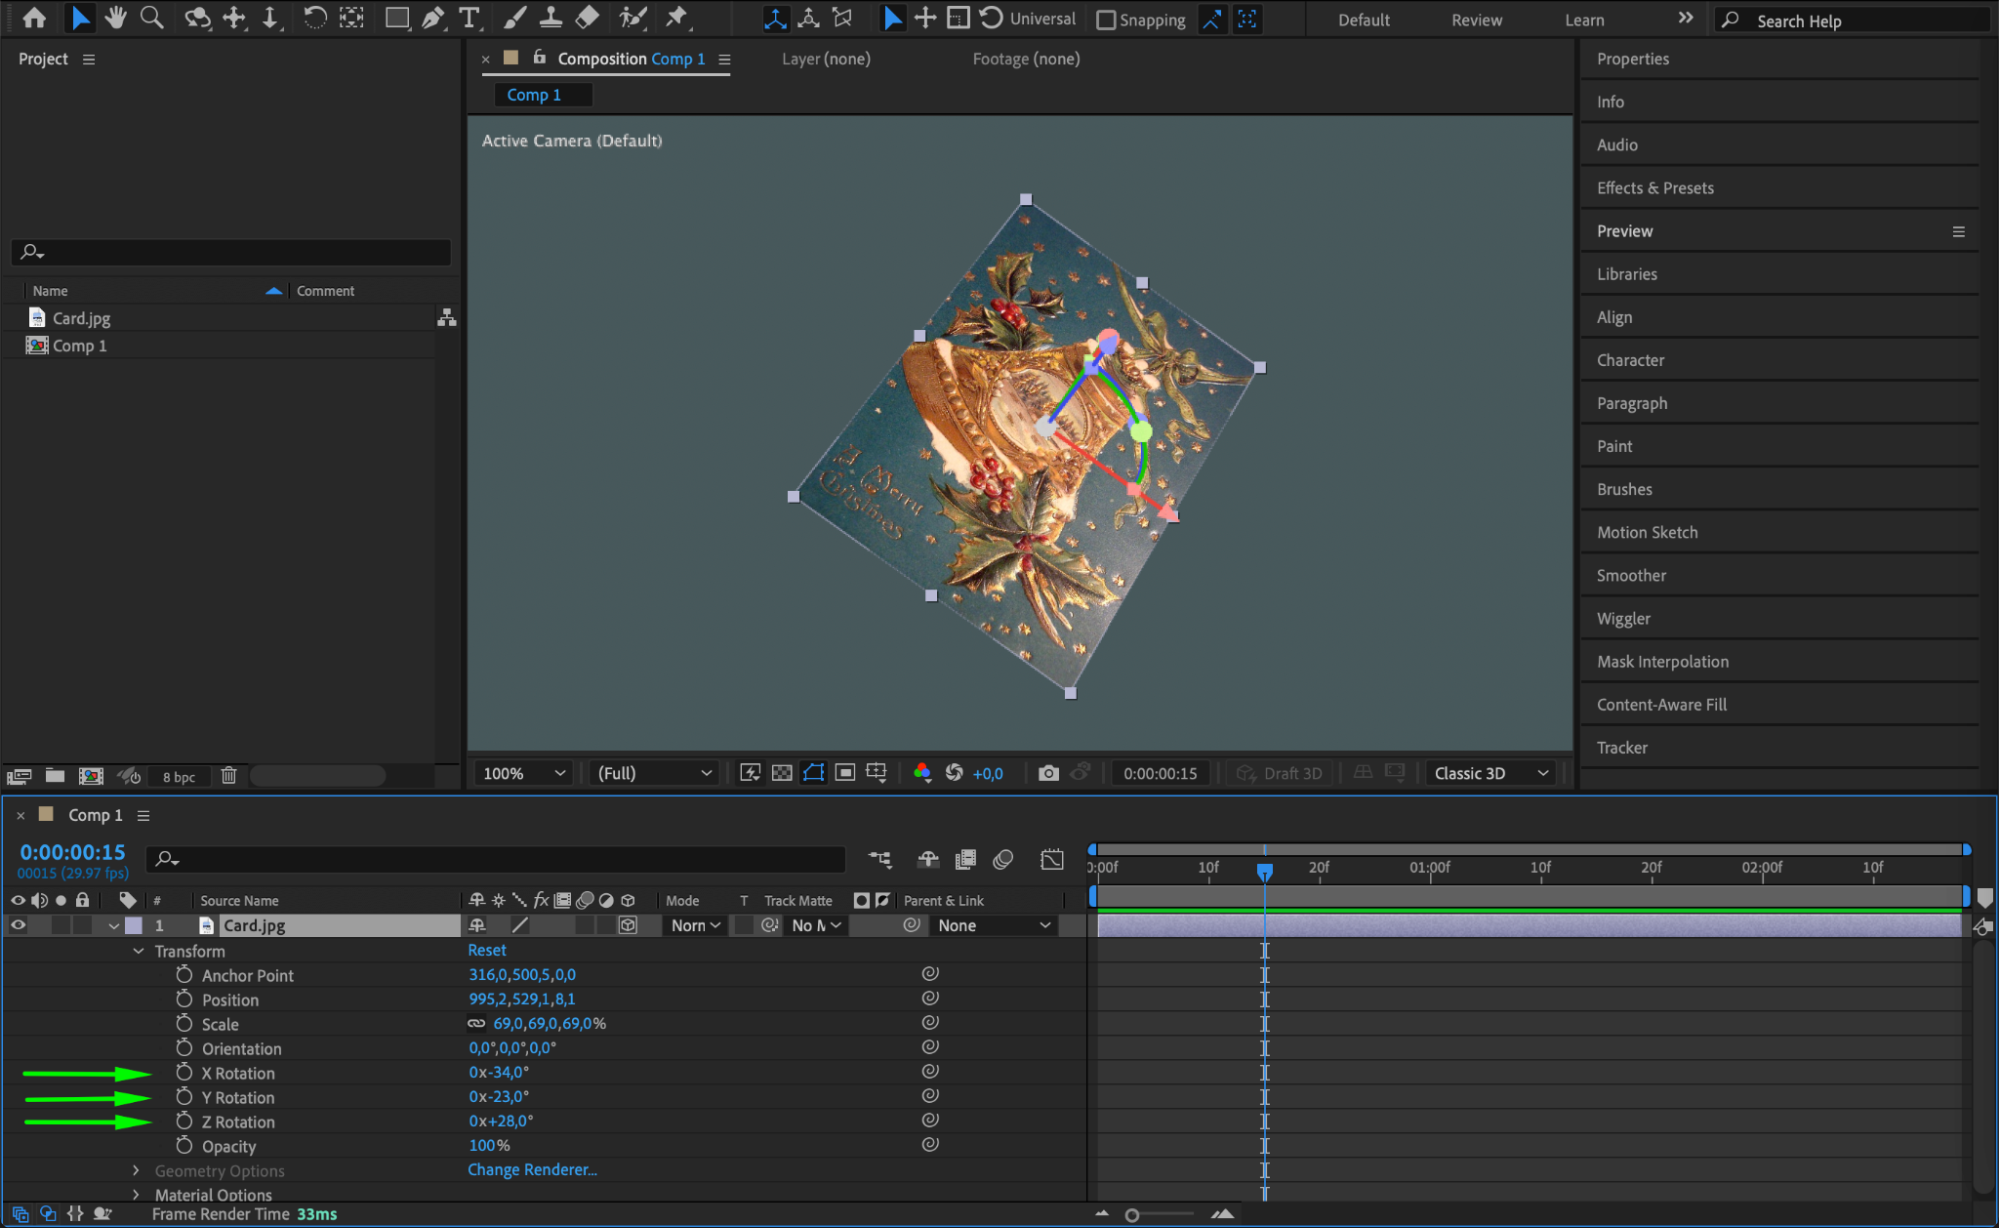
To convert your photo to 3D, click the 3D Cube icon next to the layer in the Timeline panel. This activates 3D properties like X, Y, and Z axes, allowing you to manipulate the photo in a 3D space.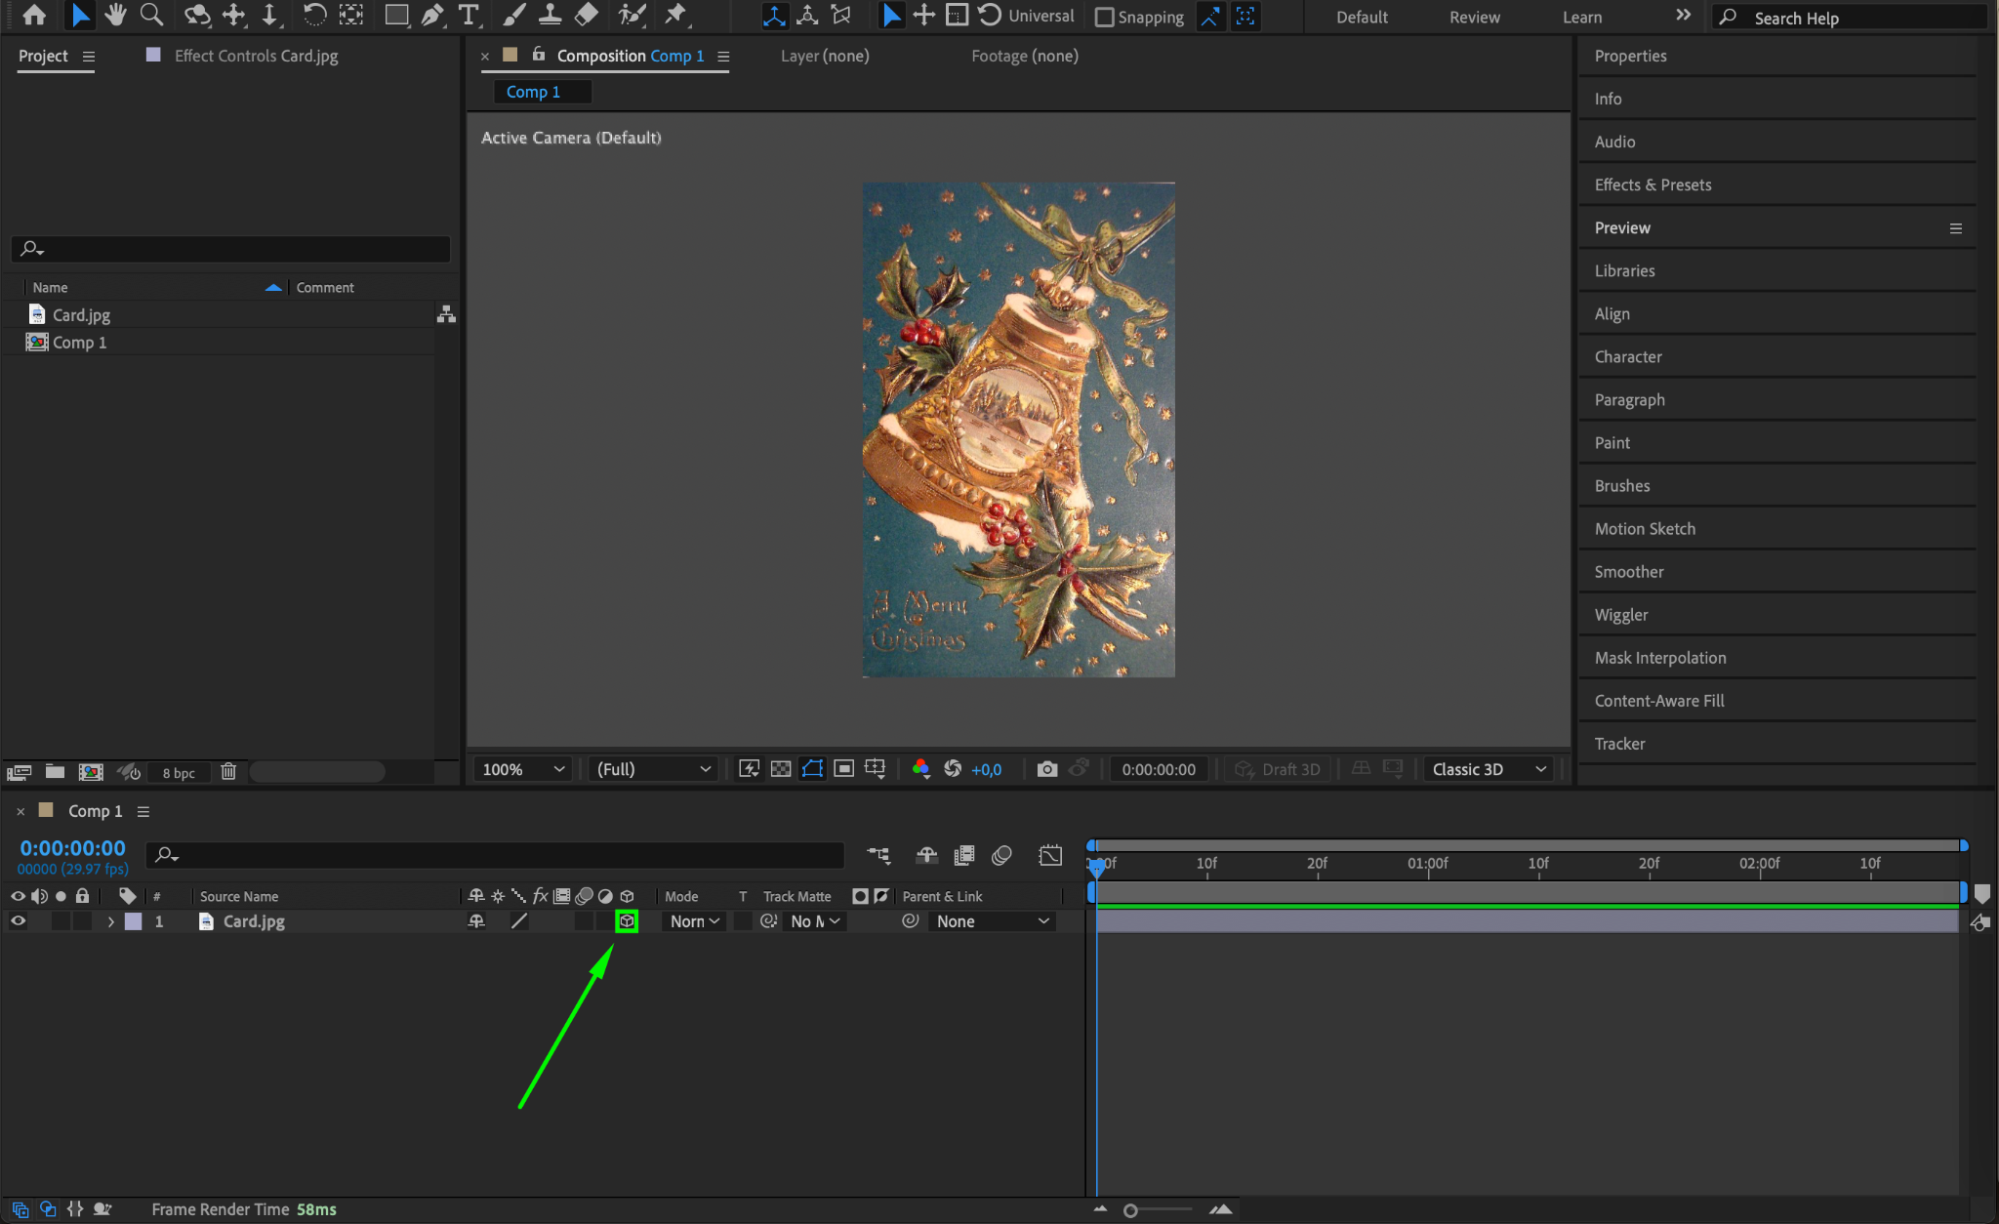
 Step 6: Create a Camera Layer
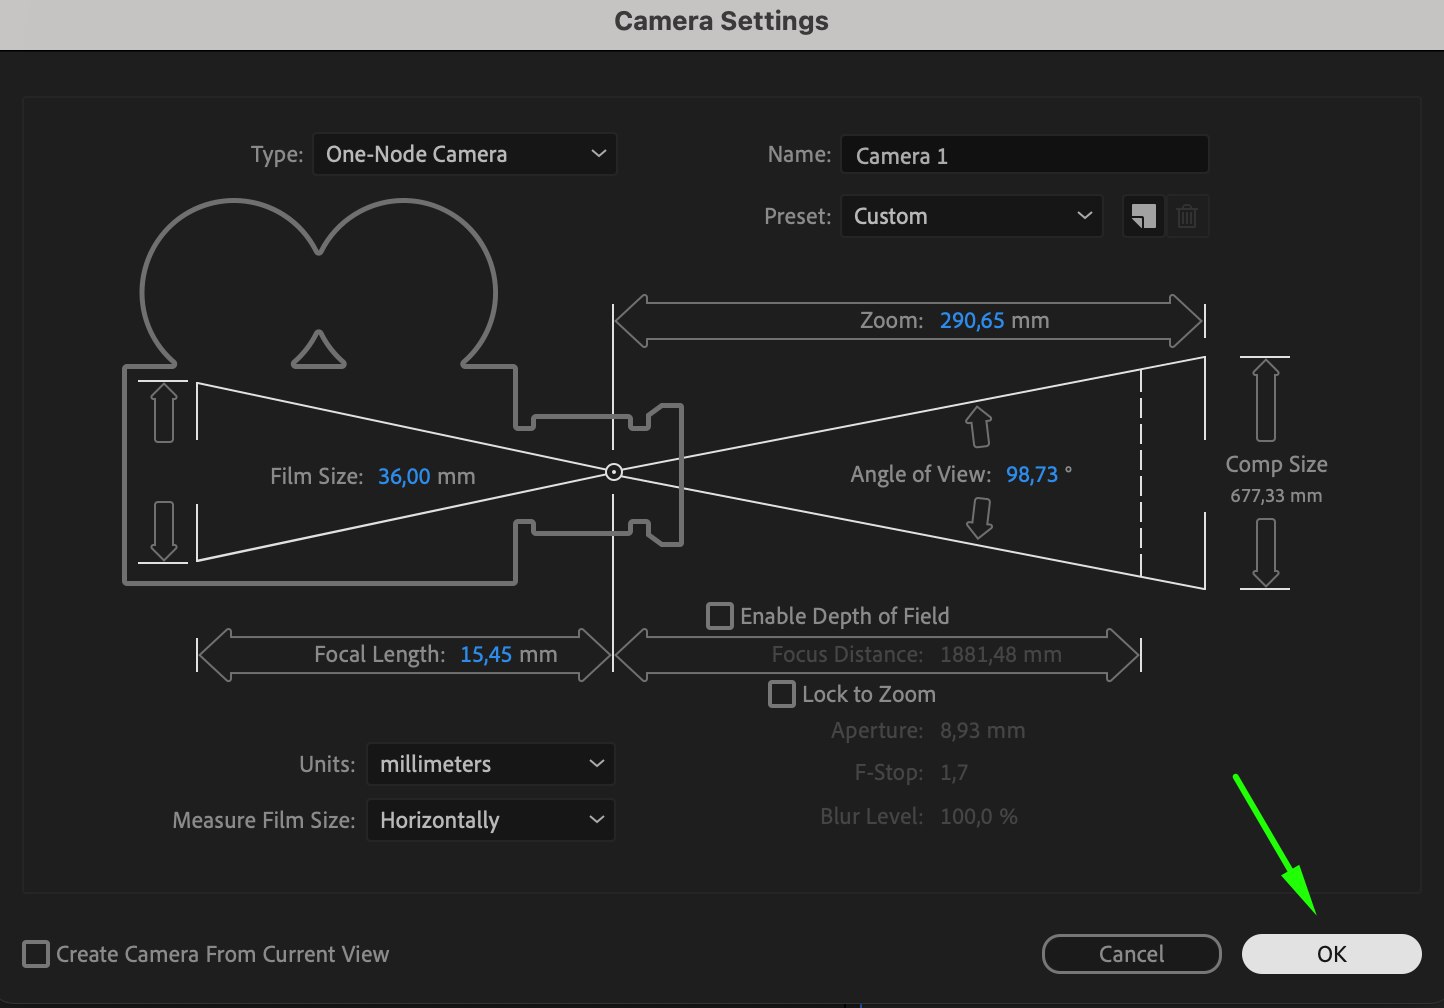
To add depth and perspective to your 3D photo, create a camera. Go to Layer > New > Camera. This allows you to move around the photo in 3D space, creating more dynamic views.
 Step 7: Animate Camera Movements
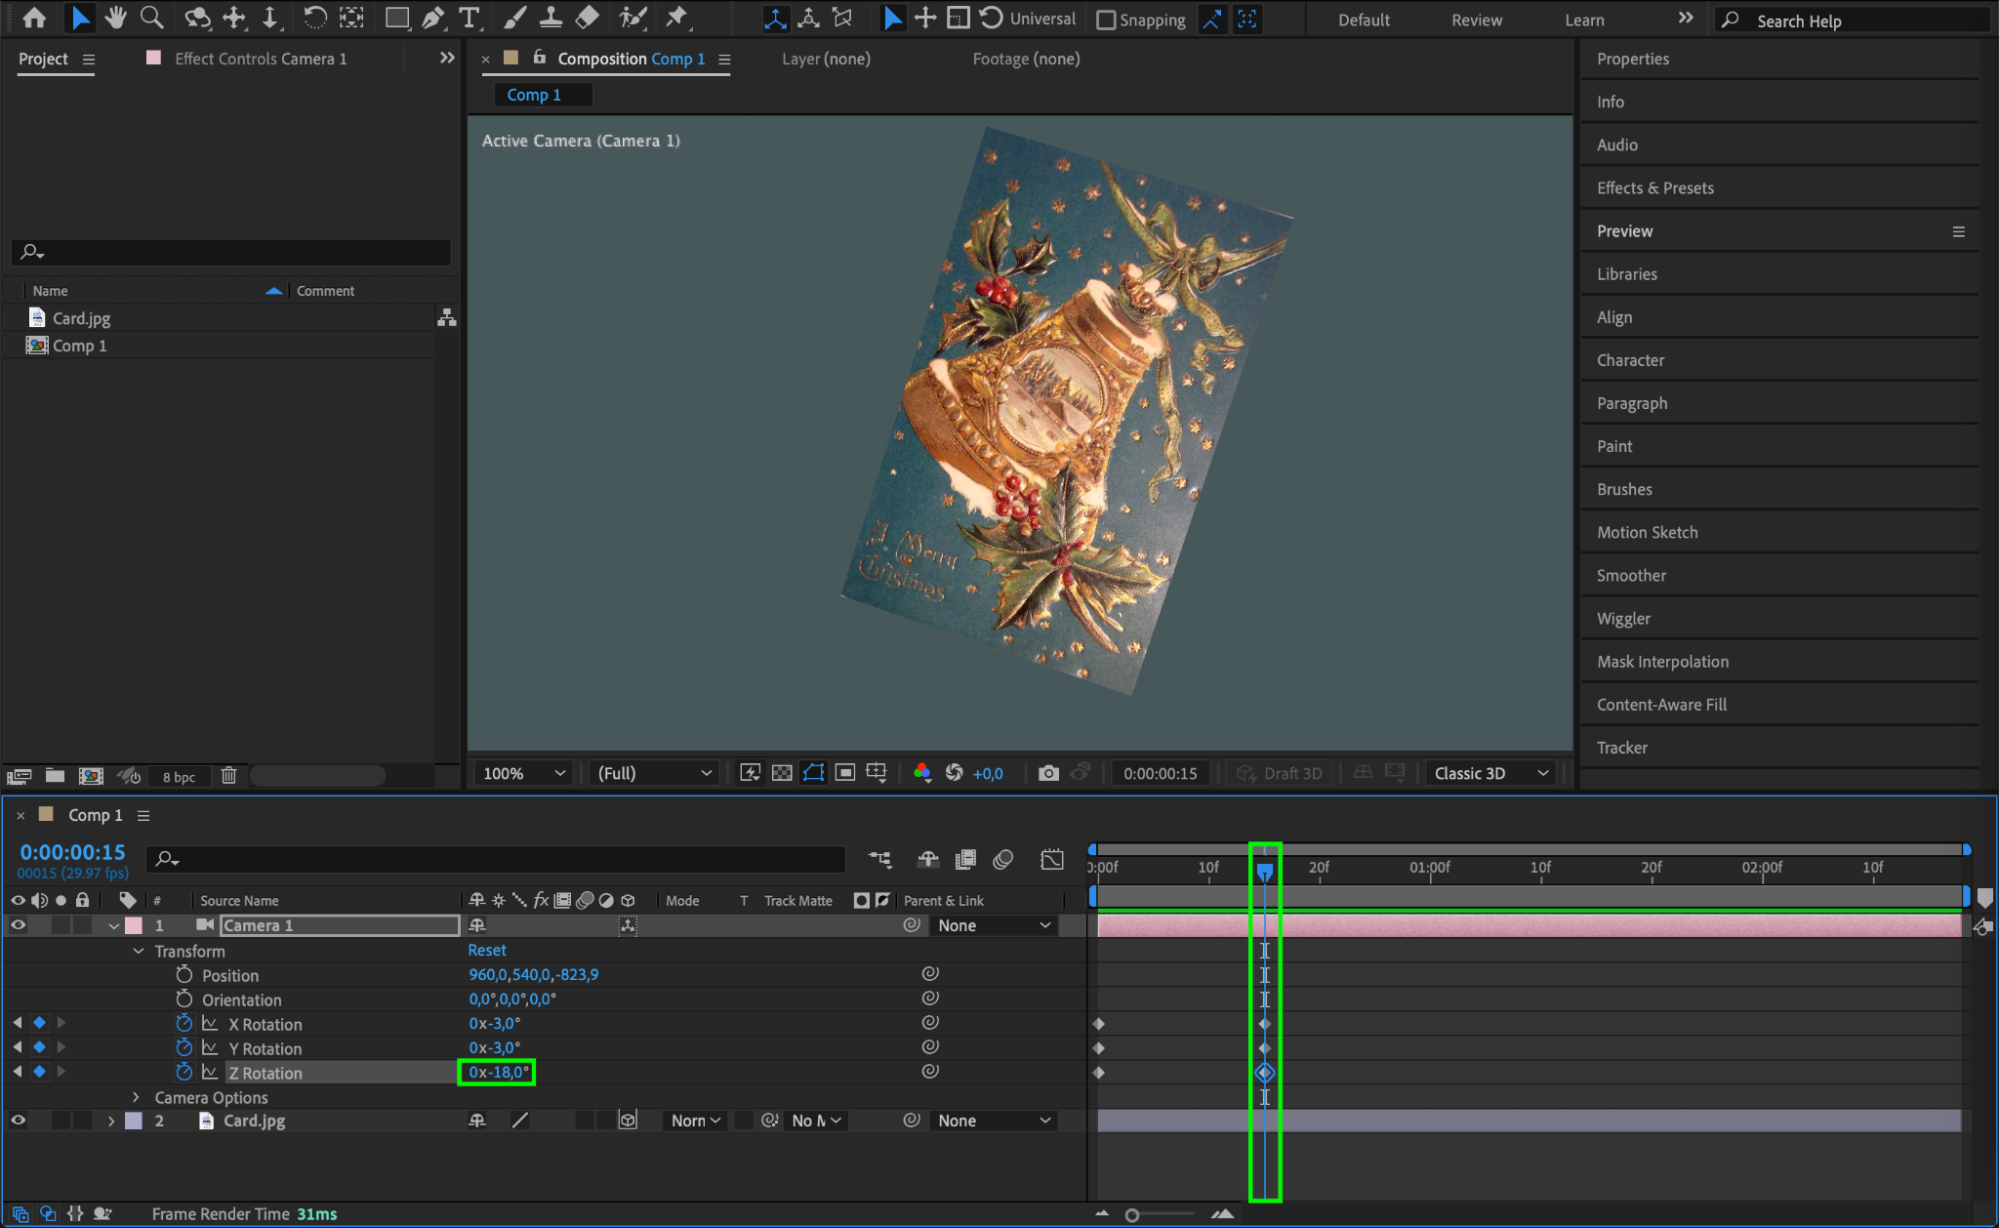
With the camera selected, use keyframes to animate camera movements. In the Timeline panel, adjust parameters like Position and Rotation (X, Y, Z axes) to create smooth transitions and animations. For example, zooming in or rotating around your 3D photo adds depth and intrigue.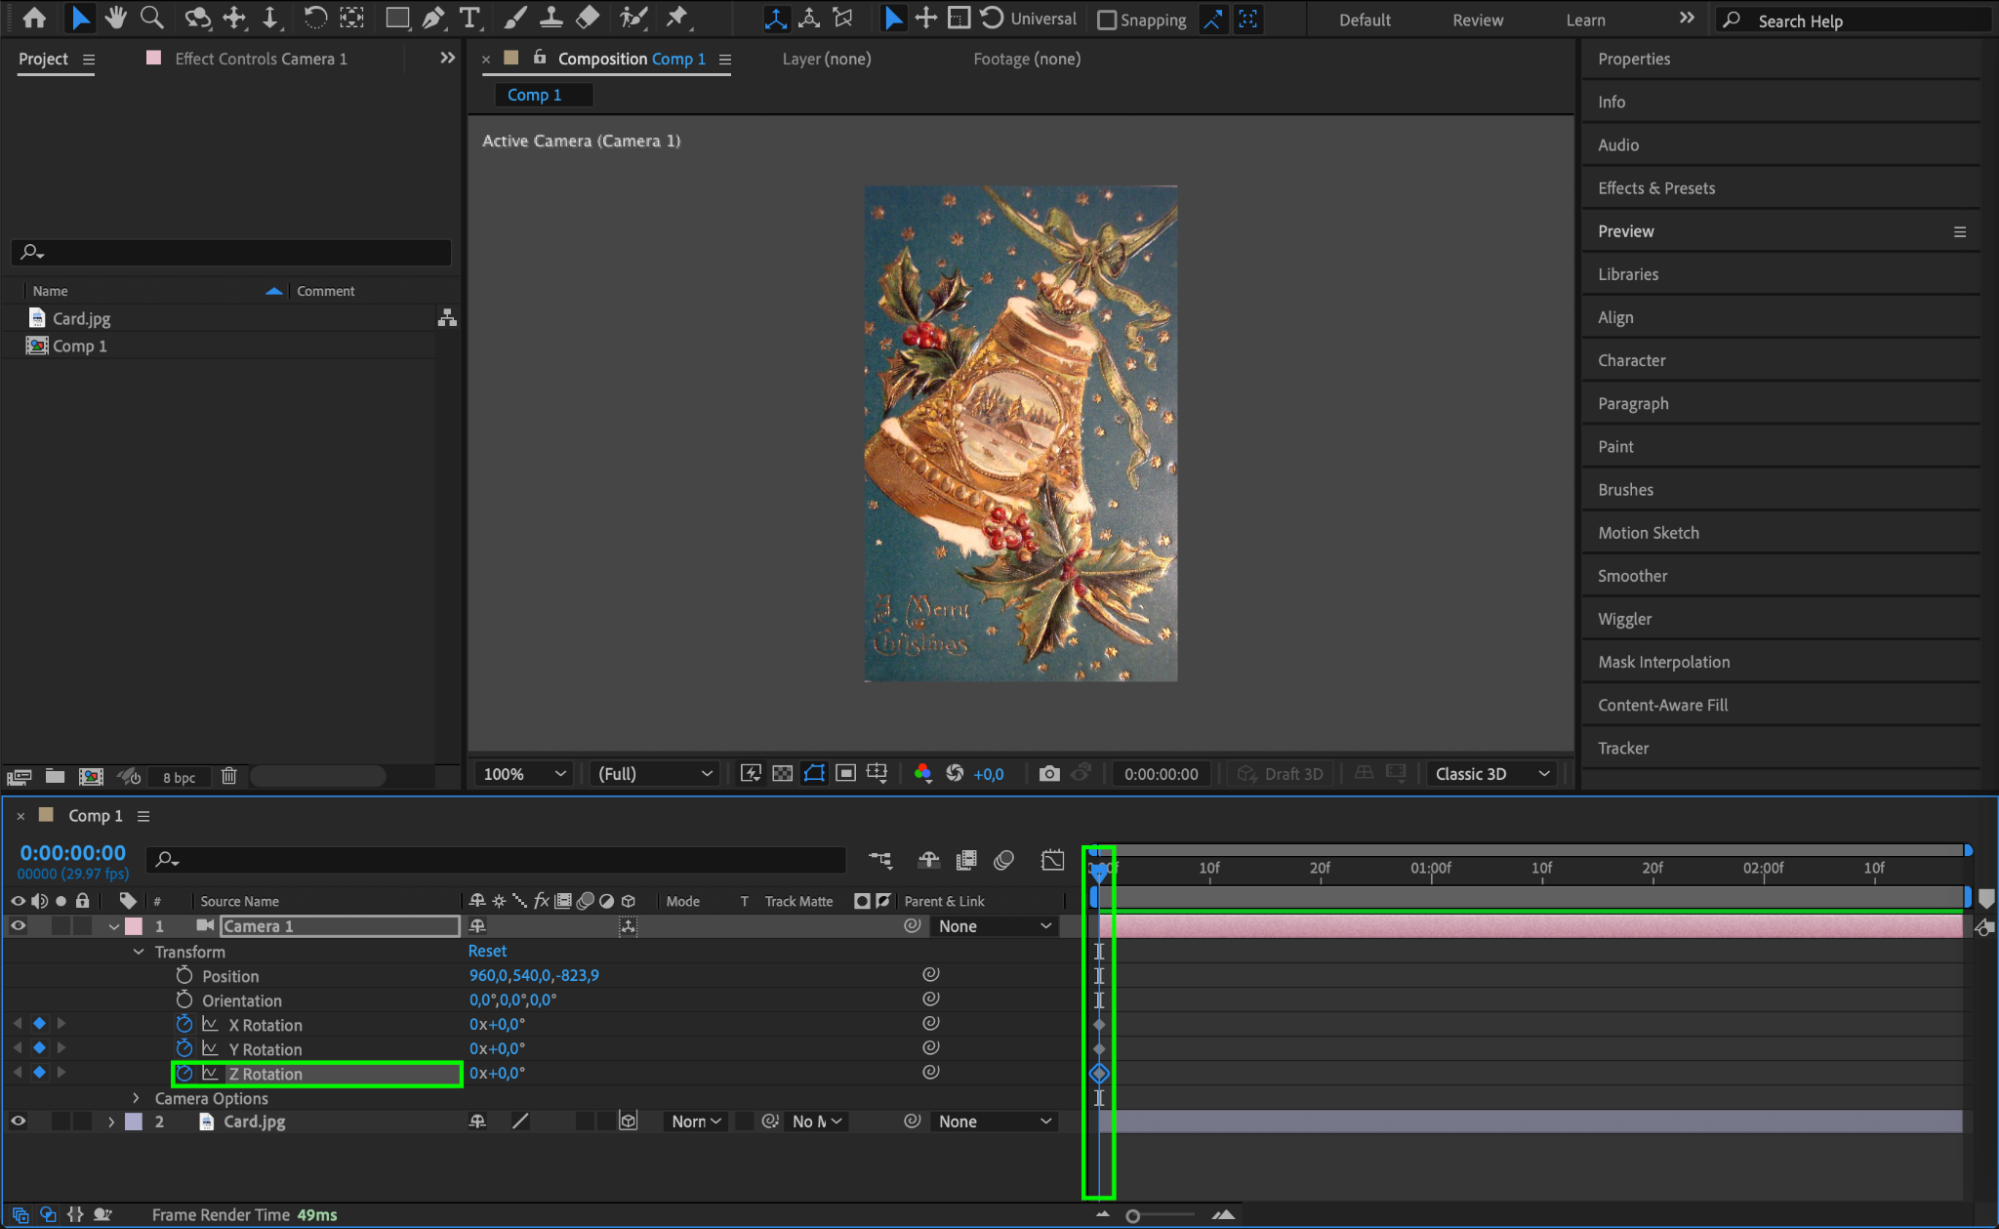
 Step 8: Add a Solid Layer for Background
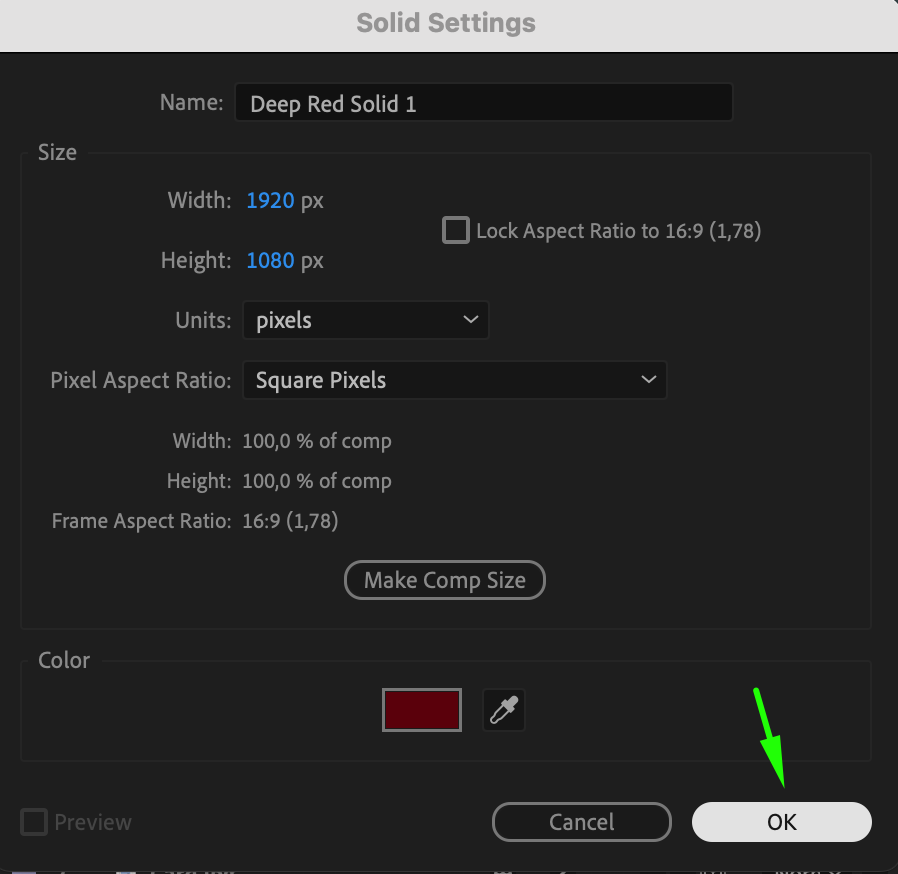
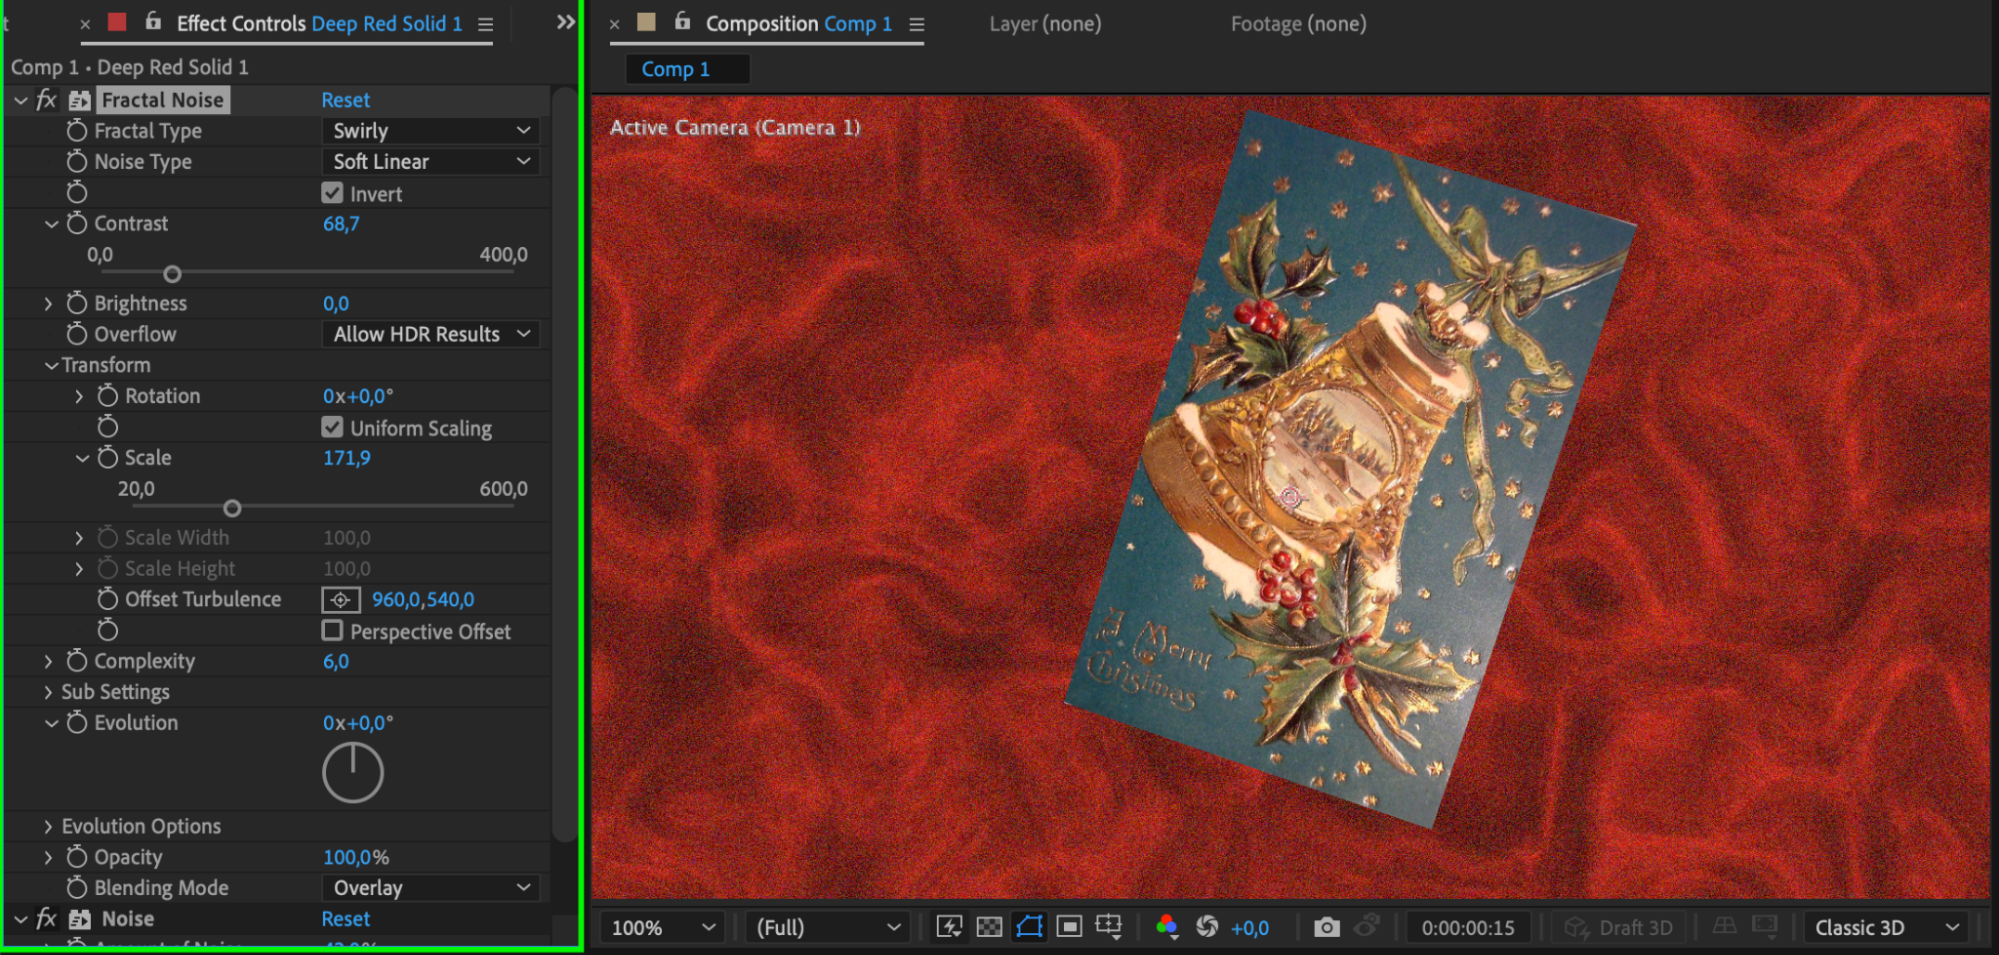
For a customized background, create a new solid layer by going to Layer > New > Solid. Choose a color or texture that complements your photo. This solid layer will act as the backdrop, adding a professional touch to your 3D composition.
 Step 9: Enhance with Effects and Presets
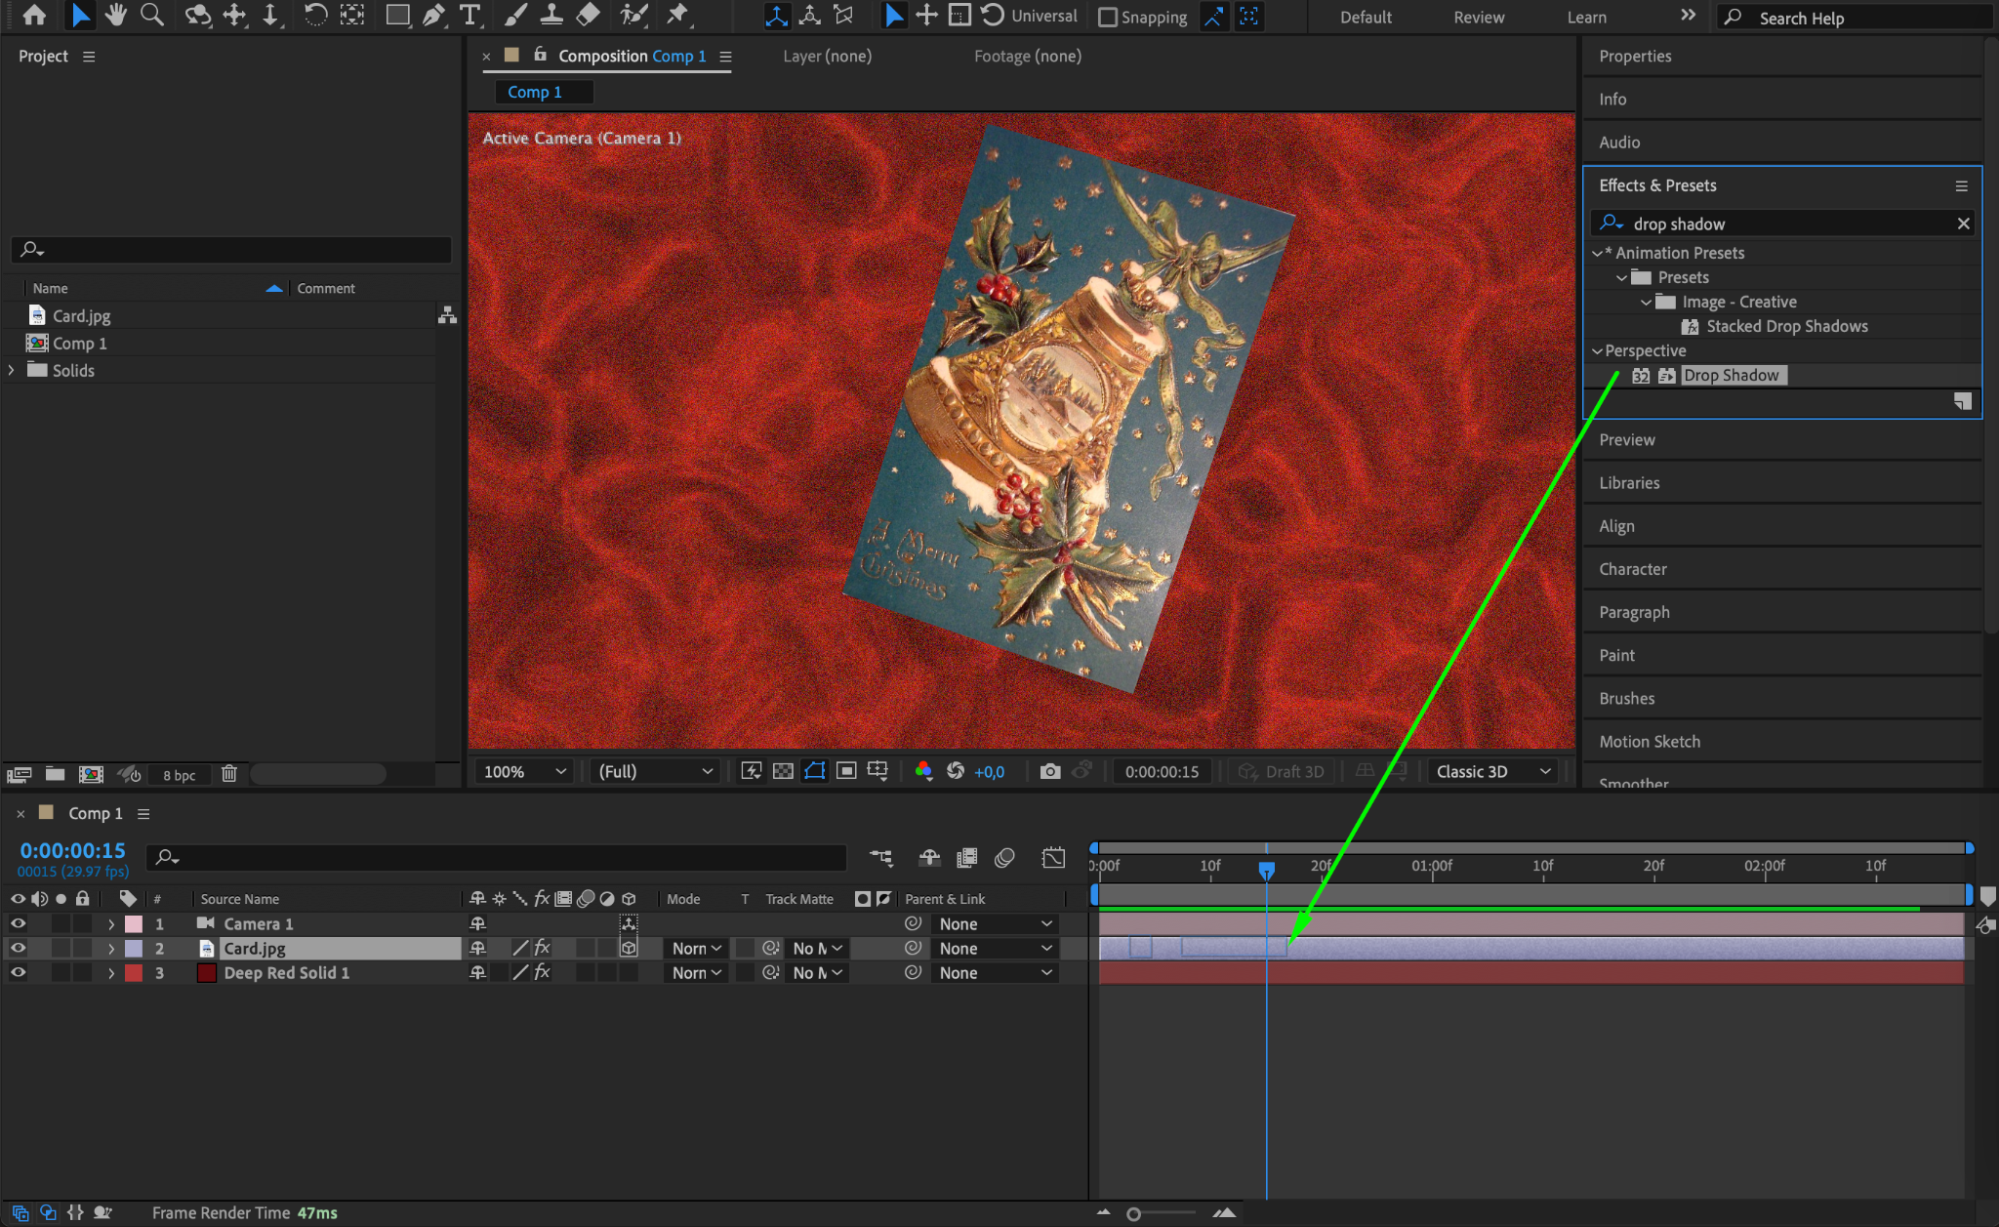
Customize your 3D photo with effects and presets by using the Effects & Presets panel. You can add effects like lighting, shadows, or even a motion blur to create a more realistic or dramatic look. Experiment with different effects to see what works best for your project.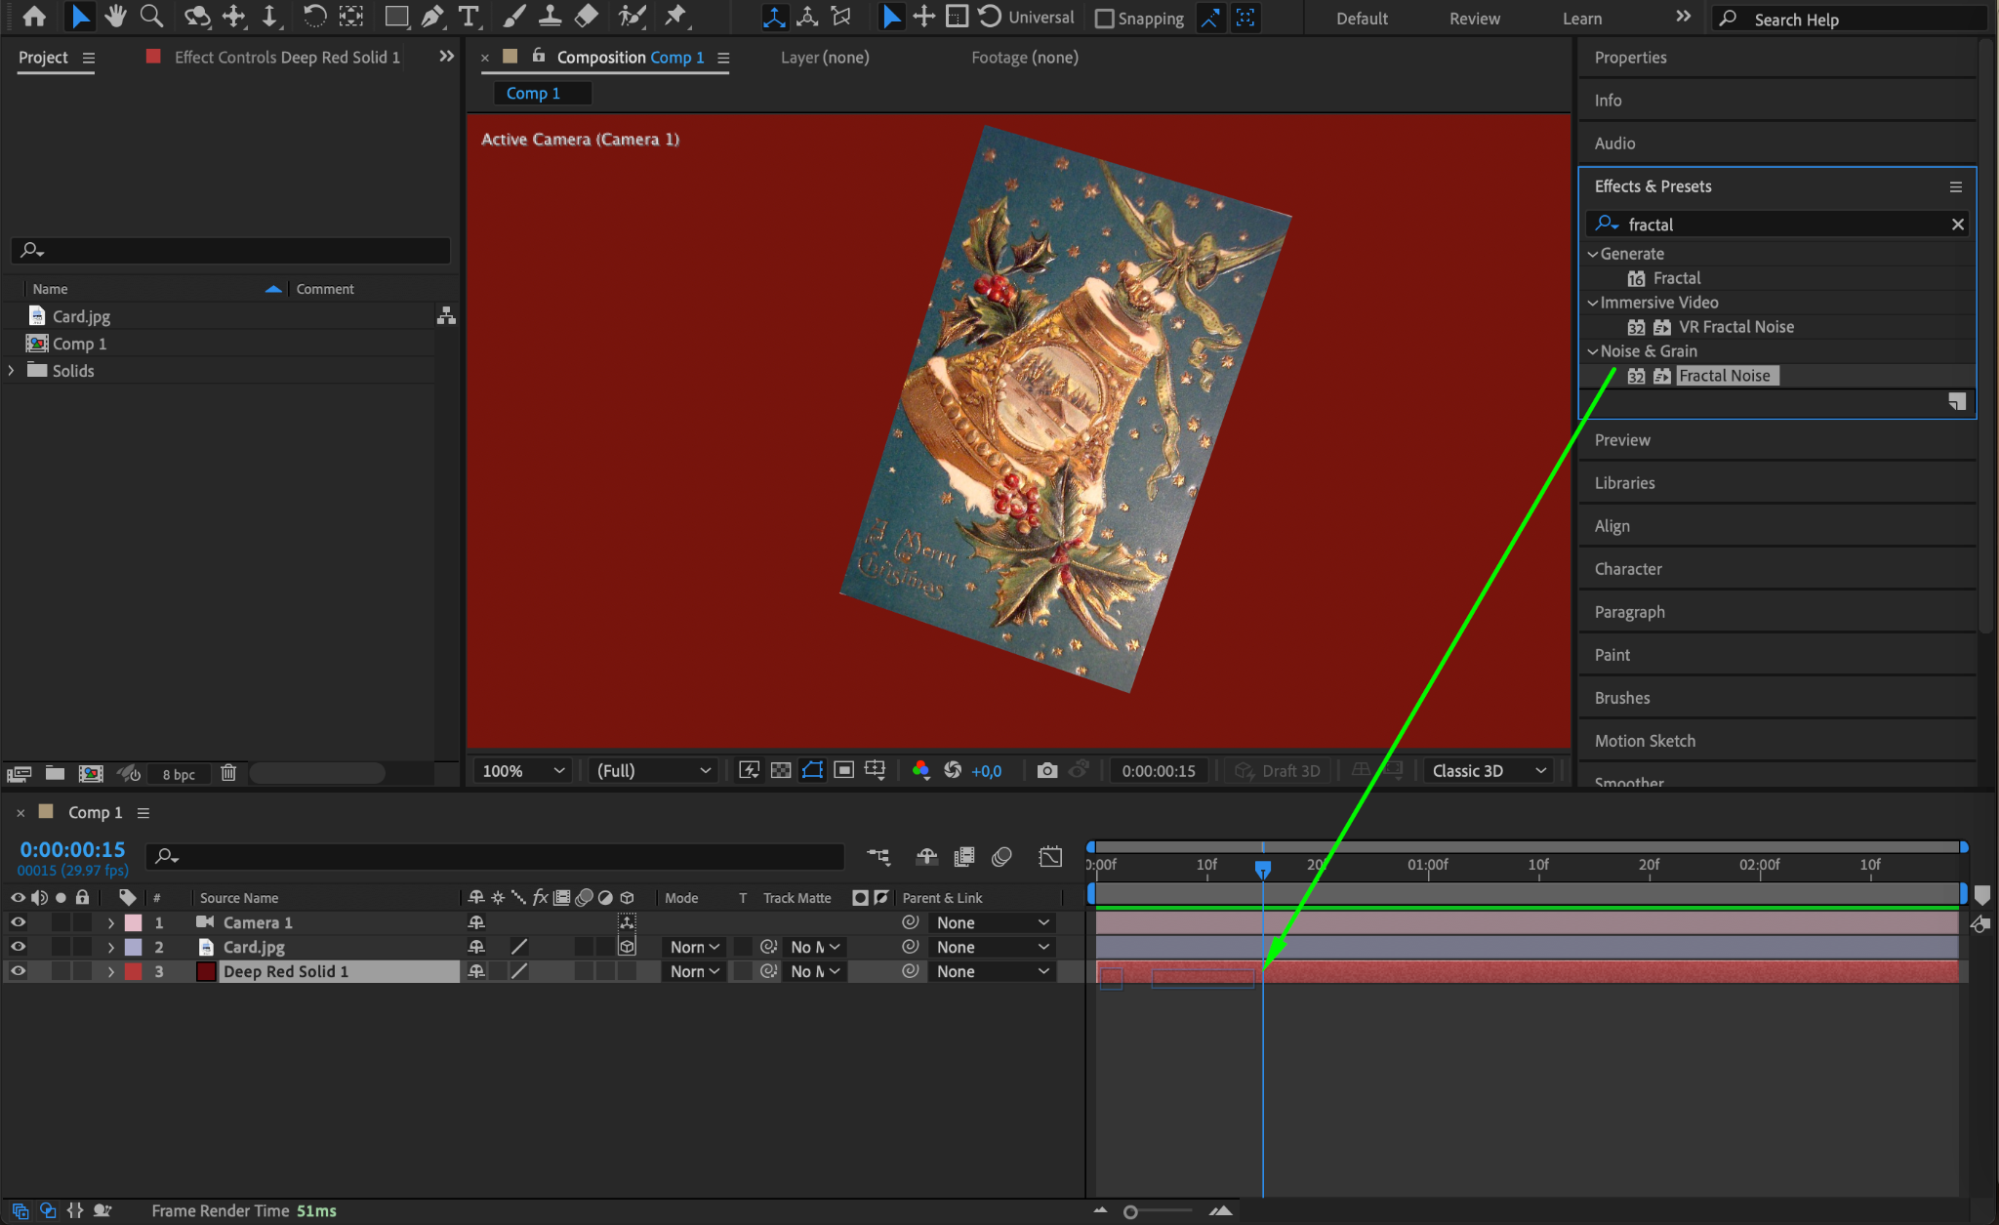

Step 10: Add Text with the Type Tool
To further enhance your composition, use the Type Tool (Ctrl/Cmd + T) to add text. This is great for creating titles or adding additional information to your 3D photo project. Style the text using fonts, colors, and animations to complement your photo.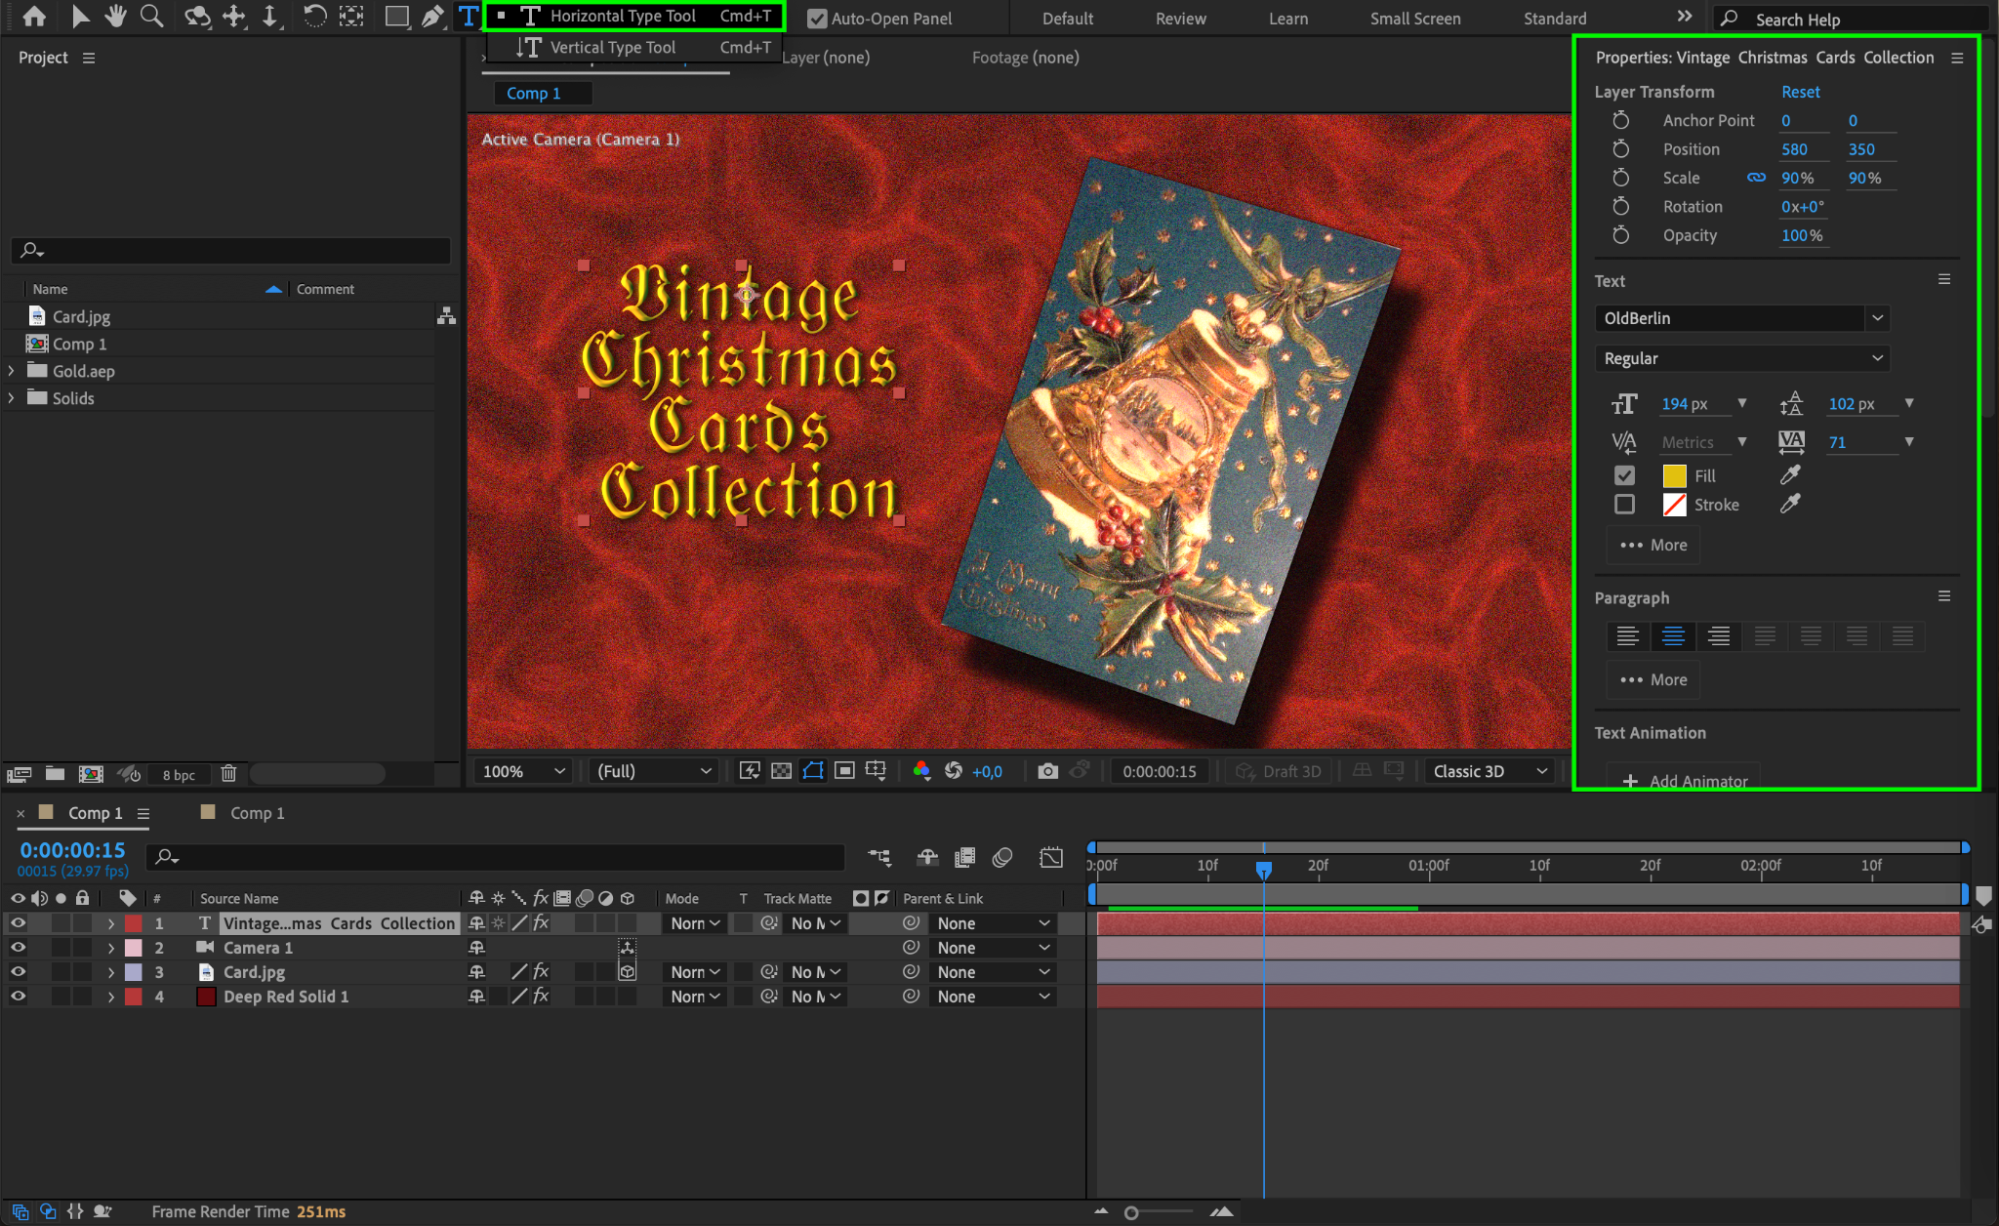
Step 11: Preview Your Composition
Use the Preview button to watch your animation. This step is crucial for catching any adjustments needed to the timing, camera movements, or effects. Make sure everything flows smoothly and looks how you envisioned.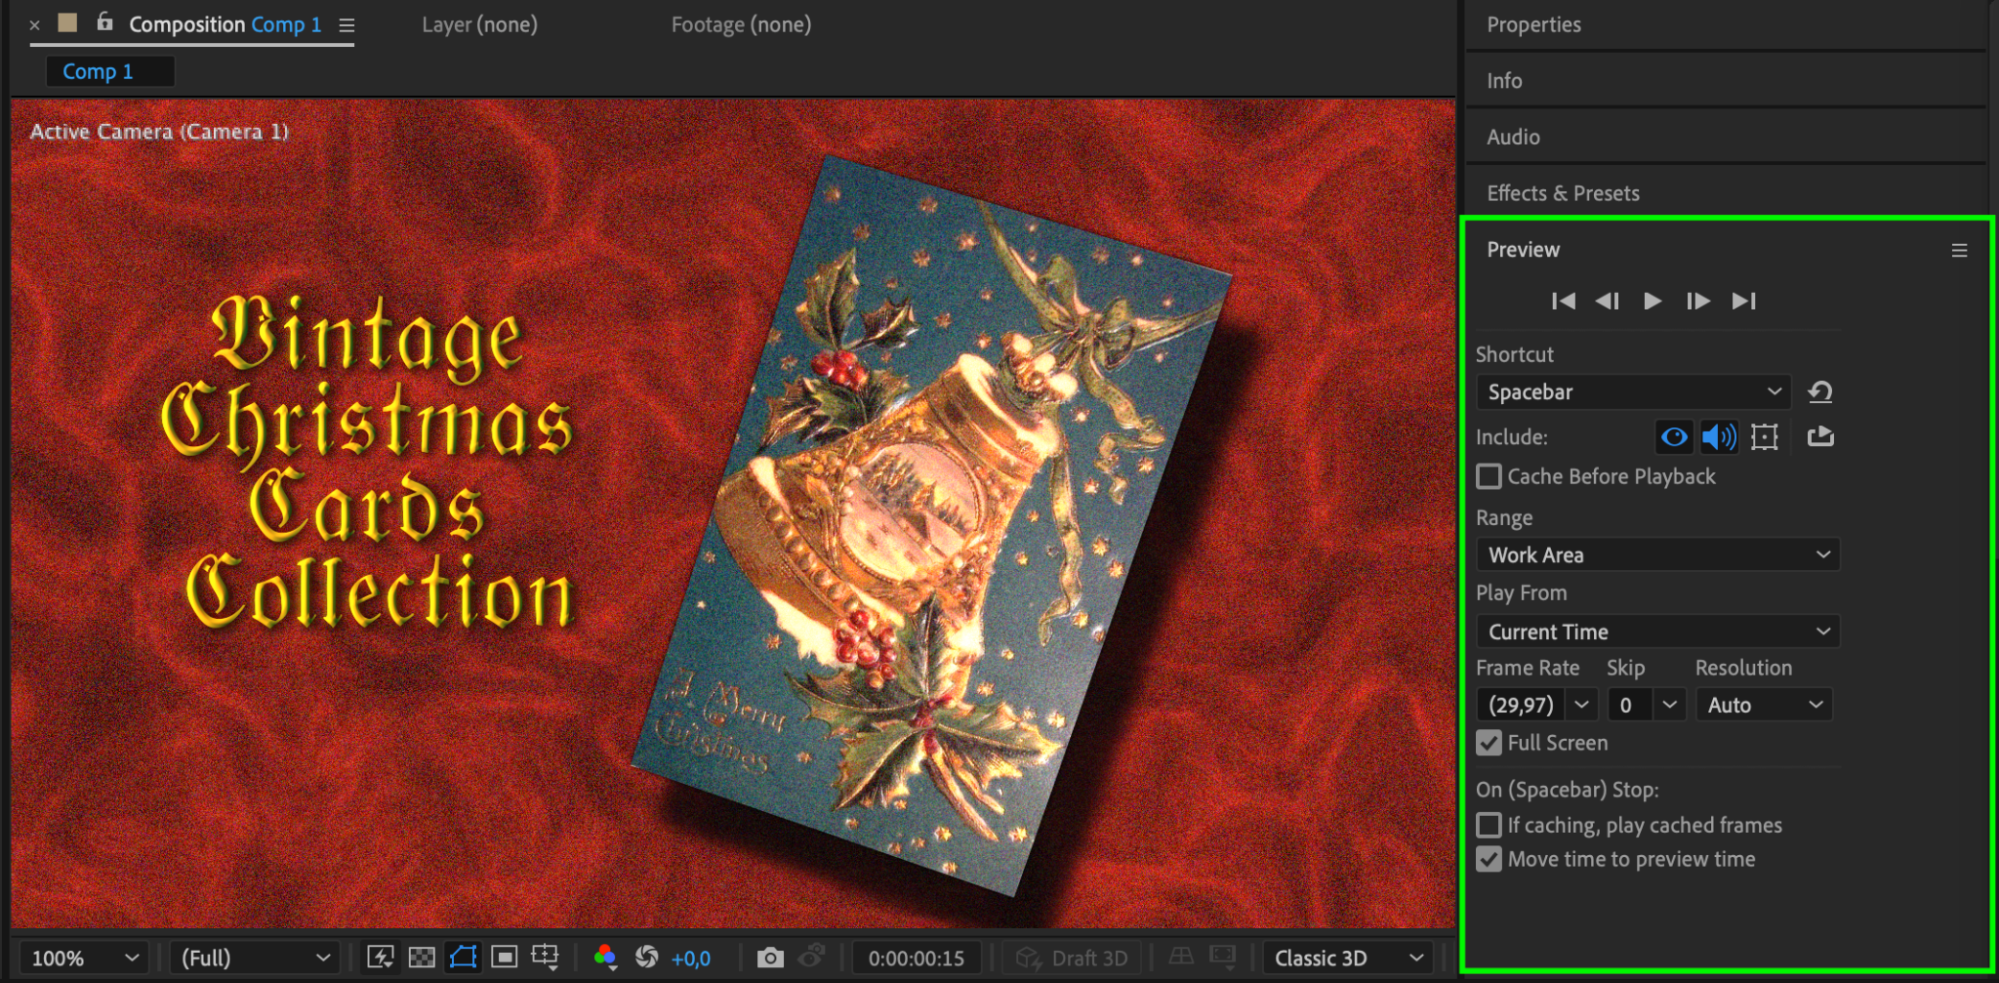 Conclusion
By following these steps, you can easily turn a regular 2D image into an extraordinary 3D masterpiece using Adobe After Effects. Whether you’re creating visuals for social media, presentations, or personal projects, 3D photos will make your content stand out. Unleash your creativity and bring your still images to life today!


