Cutting footage in After Effects is a fundamental skill that every video designer should possess. Whether you’re working on a short film, a music video, or a promotional video, knowing how to make precise cuts in your footage can greatly enhance the overall quality and storytelling of your project. In this step-by-step guide, we will walk you through the process of cutting footage in After Effects, using various techniques and tools available within the software.
Get 10% off when you subscribe to our newsletter

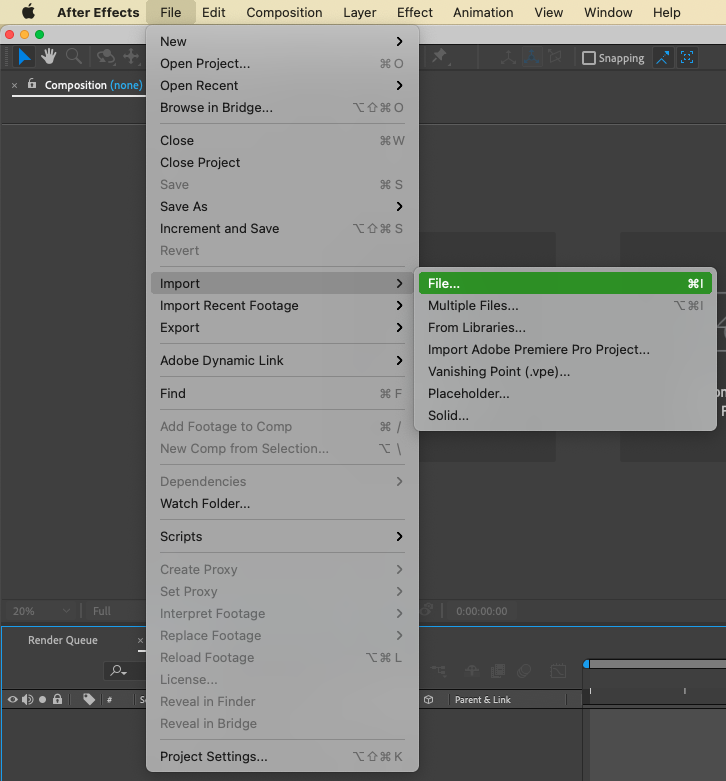
1. Import your footage into After Effects through the “File” menu. Go to the location of your footage files and select them for import.
Alternatively, drag and drop your footage directly into the project panel.
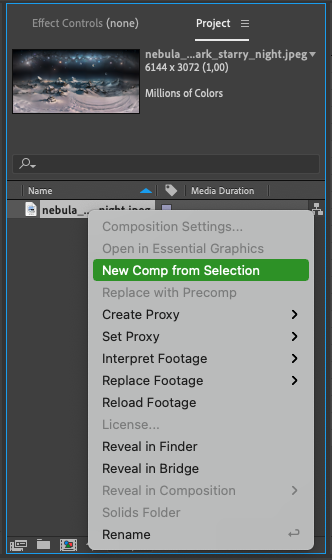
2. Once your footage is imported, right-click on it in the project panel and select “New Comp from Selection”.
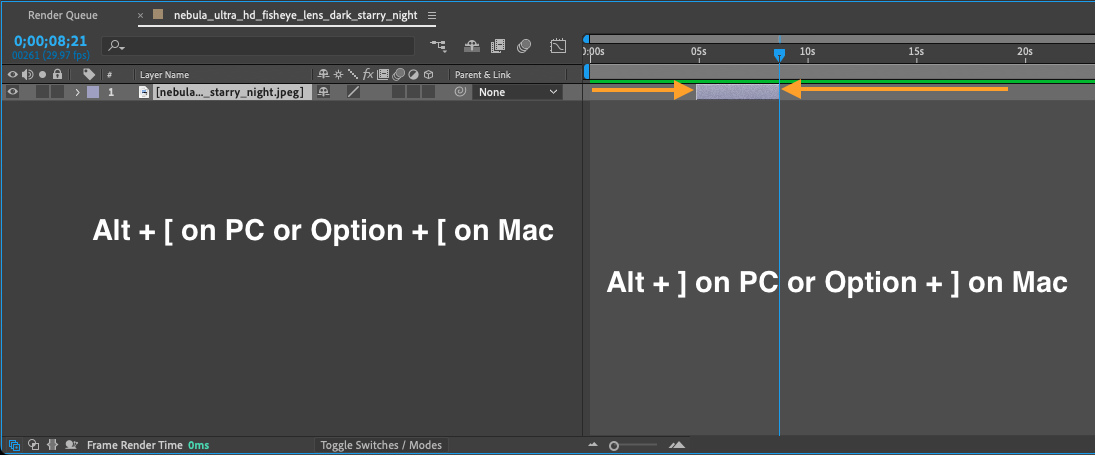
 3. In the Timeline panel, you’ll find your imported footage. To trim a clip, click and drag the start point and endpoint of the clip to the desired position.
You can also use hotkeys. Place the current time indicator (CTI) at the frame you want the footage to start with and hit Alt + [ on PC or Option + [ on Mac. Then go to a desired end frame and use the Alt + ] on PC or Option + ] on Mac. This will trim the clip accordingly.
Get 10% off when you subscribe to our newsletter

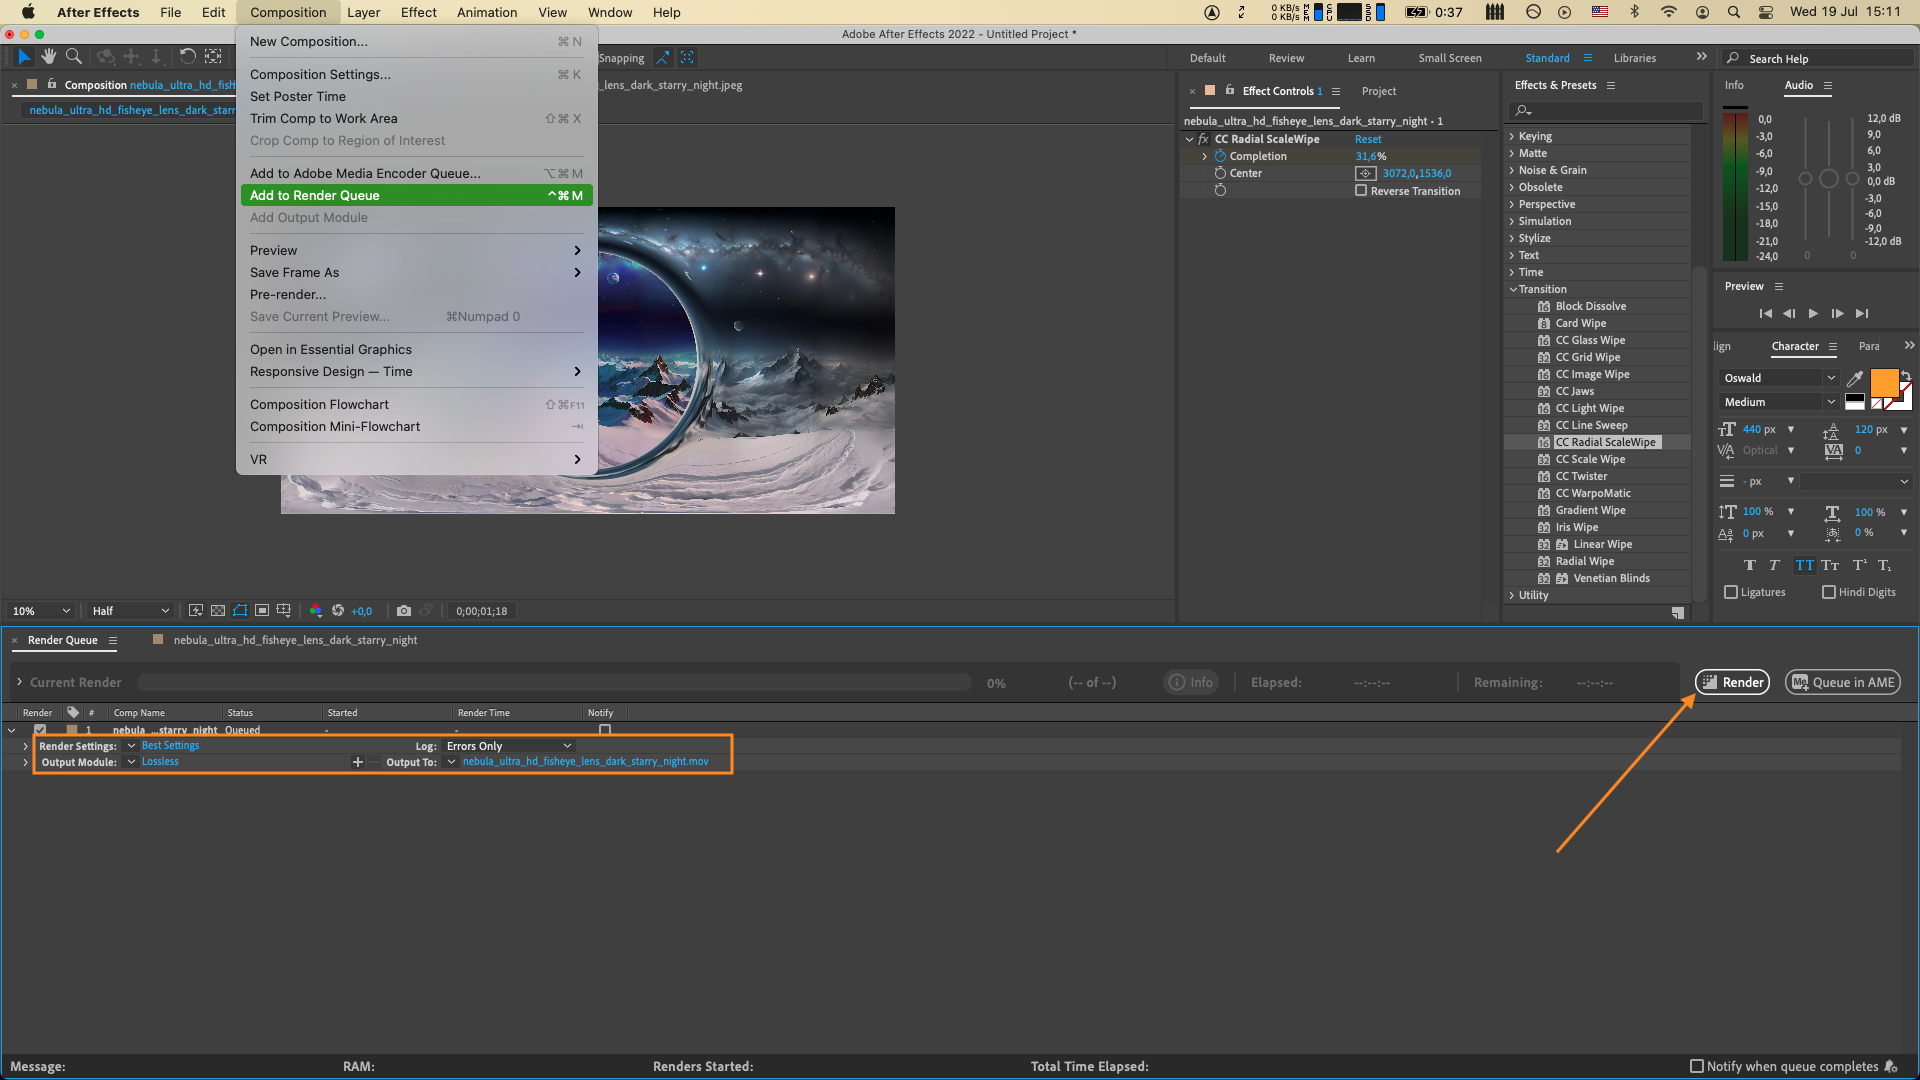
4. When you’re satisfied with the result, go to the “Composition” menu and select “Add to Render Queue”. Configure the render settings, choose the desired output format, and click “Render” to export your edited footage.
Pro Tips:
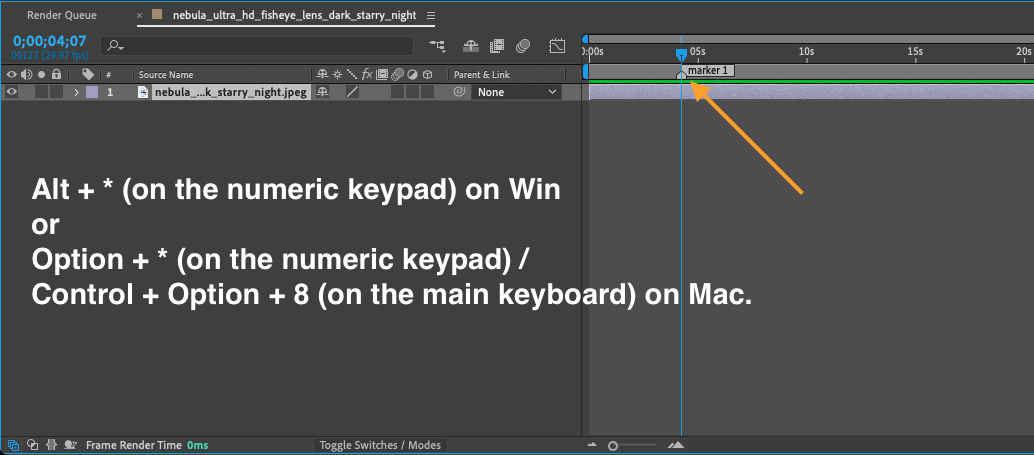
1. Use markers. After Effects provides the option to use markers to indicate specific points of interest or areas that need to be cut. To add a marker, simply move CTI to the desired time, and press Alt + * (on the numeric keypad) on Win or Option + * (on the numeric keypad) / Control + Option + 8 (on the main keyboard) on Mac.
Get 10% off when you subscribe to our newsletter

Or you can add layer markers using * (on numeric keypad) on Win or * (on the numeric keypad) / Control + 8 (on the main keyboard) on Mac
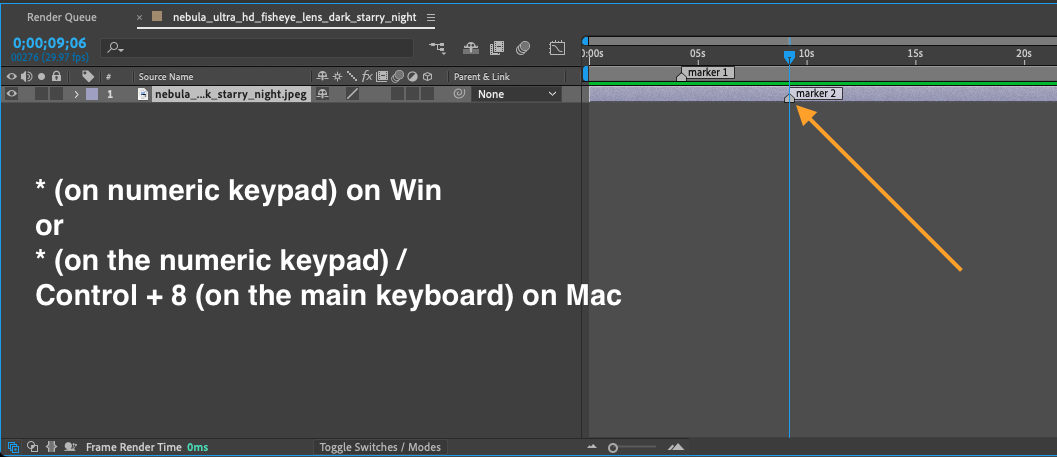
You can also add comments to your markers by right-clicking on the marker and selecting “Settings”. This can help you remember the purpose of each marker during the cutting process.
Get 10% off when you subscribe to our newsletter

2. Use Split Layer. This is a future that allows you to cut a clip into multiple layers. To use it, choose a layer you want to cut, set CTI to a desired position, go to “Edit” > “Split Layer” or hit Ctrl + Shift + D on Win or Command + Shift + D on Mac.
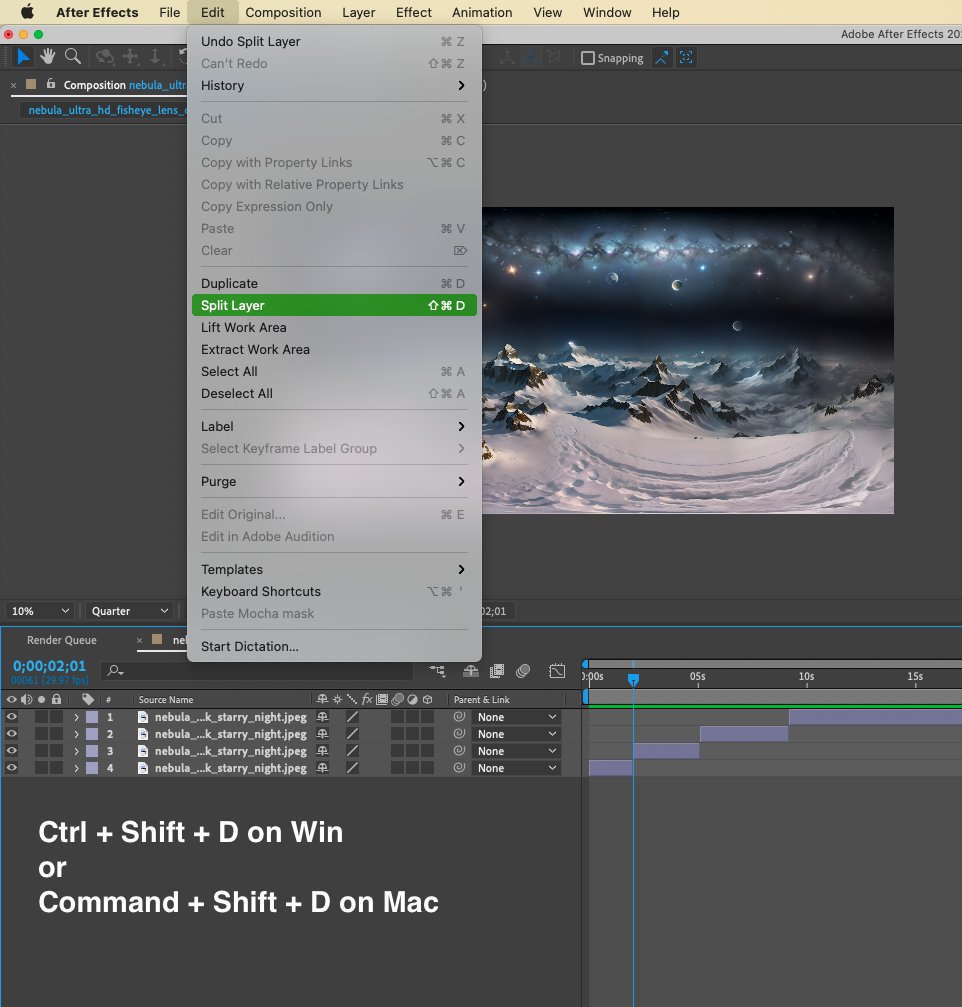
Repeat this process to create as many cuts as needed.
Get 10% off when you subscribe to our newsletter

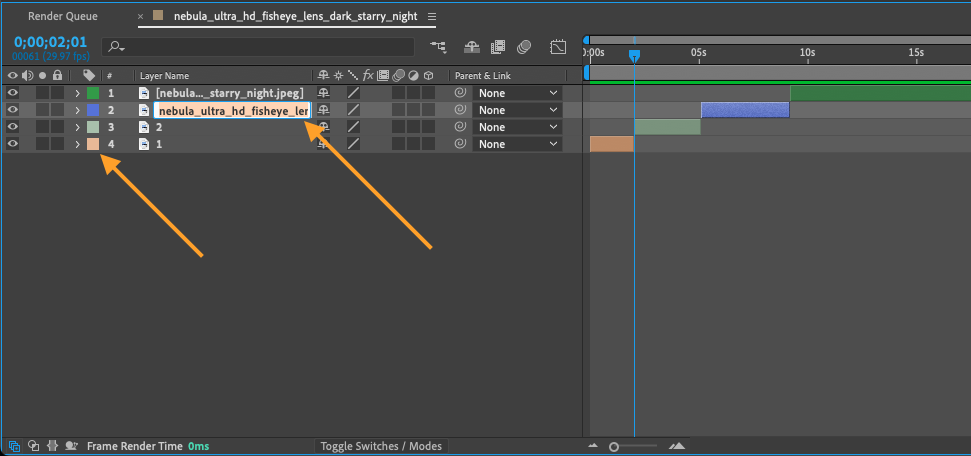
3. Organize your layers. As you cut your footage into multiple segments, it’s important to keep your layers organized for easier management. Use the “Composition” panel to assign colors to your layers, and rename them accordingly. This will help you quickly
identify and navigate through your footage during the editing process.
Get 10% off when you subscribe to our newsletter

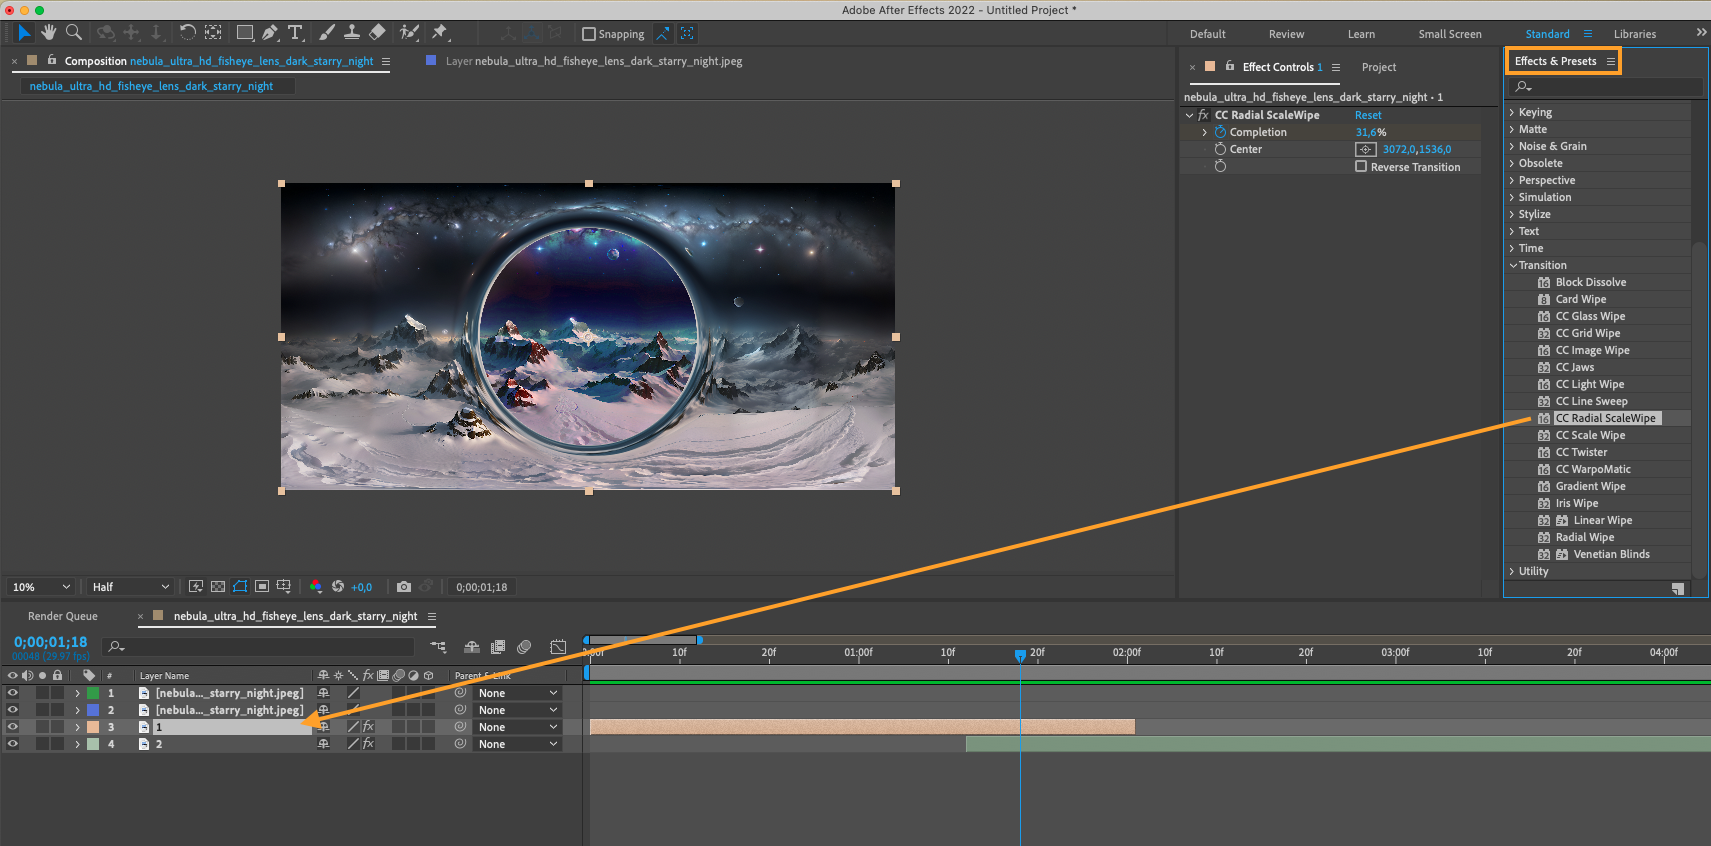
4. Apply transitions and effects. Once your footage is properly cut, you can further enhance your video by applying transitions and effects between the clips. After Effects offers a wide range of built-in transitions and effects that you can easily apply to your footage. Simply drag and drop the transition or effect onto the desired layer in the timeline, and customize its settings as needed.
By following these step-by-step instructions, you’ll be able to effectively cut your footage in After Effects and create professional-looking video edits. Remember to experiment with different techniques and tools to explore the endless possibilities that After Effects offers for cutting and editing footage.
Conclusion:
Cutting footage in After Effects is a crucial step in creating visually engaging and impactful videos. By mastering the techniques and tools outlined in this guide, you’ll be well-equipped to make precise cuts, trim clips, and create seamless transitions in your footage. With practice, you’ll gain confidence in your editing skills and be able to tell compelling stories through your video projects. So, start cutting with After Effects and let your creativity flow!


