Mastering Video Clip Cutting in After Effects: A Step-by-Step Tutorial
Introduction – Unlocking the Secrets of Cutting Video Clips in After Effects
Are you looking to take your video editing skills to the next level? If you’re working with Adobe After Effects, one of the most powerful tools in the industry, you’re in luck! In this article, we’ll be diving into the world of cutting video clips using After Effects.
Video editing can be a daunting task, especially for beginners. However, with After Effects, you have all the necessary tools and features at your fingertips to make the process easier and more efficient. Whether you’re a filmmaker, a content creator, or simply someone who enjoys creating videos, understanding how to cut video clips effectively is essential for producing high-quality content.
In this step-by-step guide, we’ll explore the various methods available within After Effects that allow you to cut video clips seamlessly. By the end of this tutorial, you’ll not only learn the basics of cutting and trimming clips but also discover advanced techniques to enhance your video editing workflow.
So, let’s jump right in and unlock the power of After Effects as we uncover the secrets of cutting video clips to create engaging and visually stunning videos!
How to Cut Video Clips in After Effects: Step-by-Step Guide
When it comes to cutting video clips in After Effects, there are a variety of methods you can employ. Let’s explore each one in detail, along with some essential tips and tricks:
1. Trimming and Splitting Layers with Keyboard Shortcuts –
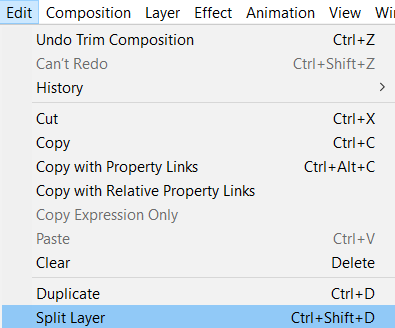
After Effects offers several helpful keyboard shortcuts to make trimming and splitting layers a breeze. For splitting a layer at the playhead position, press ‘Ctrl/Cmd + Shift + D’. This keyboard shortcut is handy when you need to cut multiple layers at specific points simultaneously.
Pro Tip: To cut all layers at once, select all desired layers and press ‘Ctrl/Cmd + Shift + D’ to split them simultaneously.
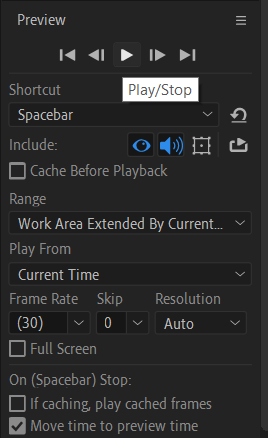
Move the mouse pointer into the limits of the working area, right-click inside it, and choose “Trim Comp to Work Area.” In the next step, set the time indicator at the beginning of the composition or use the “Home” key on the keyboard. Click “RAM Preview” in the “Preview” window if you want to see the result.

2. Precomposing for Precise Cuts –
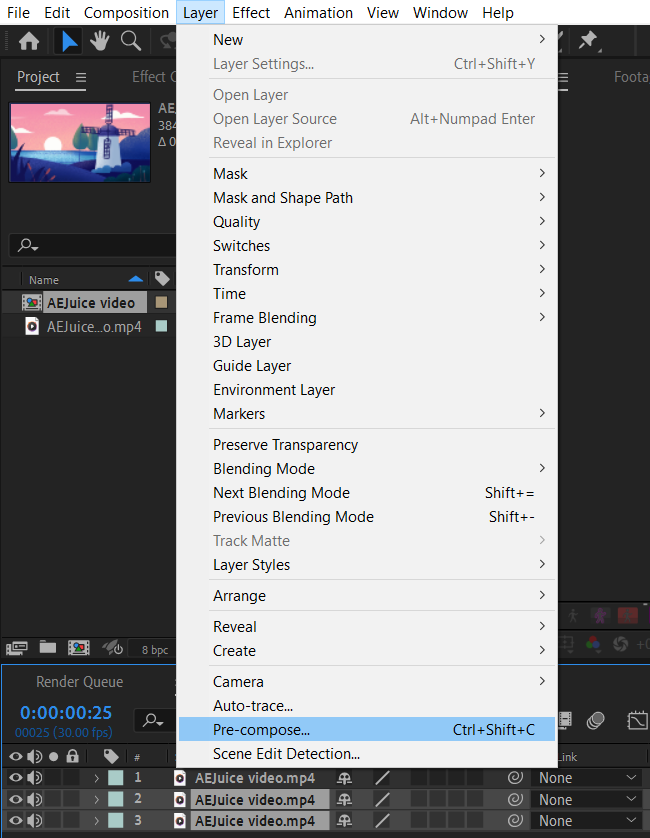
Precomposing is a technique that involves combining multiple layers into a single composition. This method can be useful when you want to make precise cuts on a specific segment of your video clip. To precompose, select the layers you wish to combine, right-click, and choose “Pre-compose” from the contextual menu. You can then proceed to cut and edit the precomposed layer without affecting the other layers in the composition.
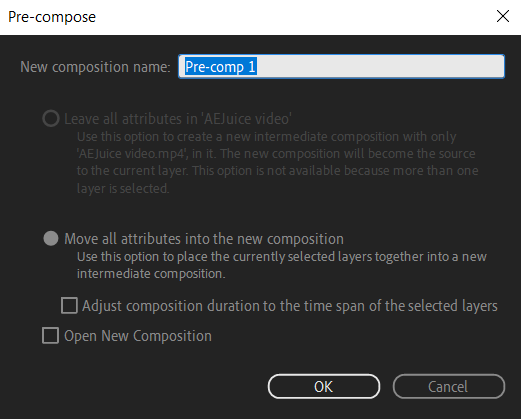
Pro Tip: To access the precomposed layer’s composition, double-click on it in the timeline panel.
3. Utilizing Time Remapping –
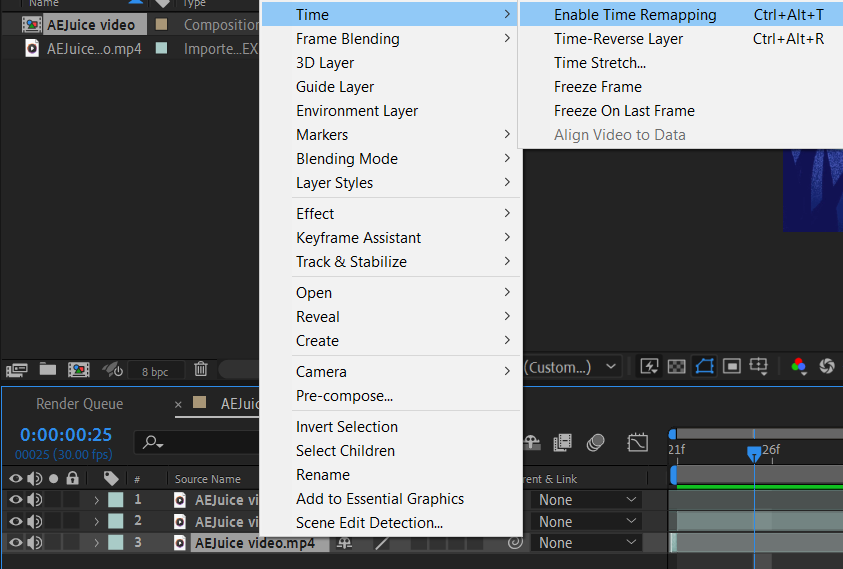
Time remapping is another powerful technique in After Effects for cutting and editing video clips. This feature allows you to adjust the speed of a layer, freeze frames, or create slow-motion effects. By manipulating the keyframes on the time remapping property, you can effectively cut and stitch together clips seamlessly.
Get 10% off when you subscribe to our newsletter

To enable time remapping, select the layer, go to the “Layer” menu, choose “Time” and then “Enable Time Remapping” (or use Ctrl/Cmd + Alt/Option + T). You can add keyframes to define the points you want to cut and manipulate the time using the graph editor or manually move the keyframes in the timeline.
Pro Tip: Use the ‘Alt/Option + Click’ shortcut on the stopwatch icon next to the time remapping property to add or remove keyframes quickly.

Remember, practice makes perfect when it comes to mastering these cutting techniques in After Effects. Experiment with different methods to find the workflow that suits your editing style and project requirements.
By utilizing the Razor tool, keyboard shortcuts, precomposing, and time remapping, you’ll have the necessary skills to cut video clips like a pro in After Effects. So, give these techniques a try, and take your video editing to new heights!
Conclusion
Congratulations! You’ve now learned various methods to cut video clips in Adobe After Effects. By mastering these techniques, you can enhance your video editing skills and create captivating content that stands out.
Throughout this guide, we explored keyboard shortcuts for trimming and splitting layers, precomposing for precise cuts, and utilizing time remapping. Each method offers its unique advantages depending on your editing needs and preferences.
Remember, practice and experimentation are key to becoming proficient in After Effects. Don’t be afraid to explore additional features and tools within the software to further enhance your videos.
By utilizing the power of After Effects to its fullest potential, you can cut video clips seamlessly, create smooth transitions, and produce professional-looking videos that leave a lasting impact on your audience.
So, go ahead and apply what you’ve learned! Whether you’re editing personal videos, working on commercial projects, or pursuing a career in video production, mastering the art of cutting video clips in After Effects will undoubtedly elevate the quality of your work.
Now, get out there and make your videos shine with precision cuts and seamless transitions, all thanks to the power of Adobe After Effects!


