How to Create Smooth Transitions Between Clips in Adobe After Effects
Introduction
Transitions are an essential part of any video editing or motion graphics workflow. In Adobe After Effects, you can build dynamic, stylish transitions using just a few built-in effects. This tutorial shows how to combine Wiggle, Motion Tile, and Echo to create an impactful transition between two video layers in a professional and customizable way.
Step 1: Prepare Your Project with Two Video Clips
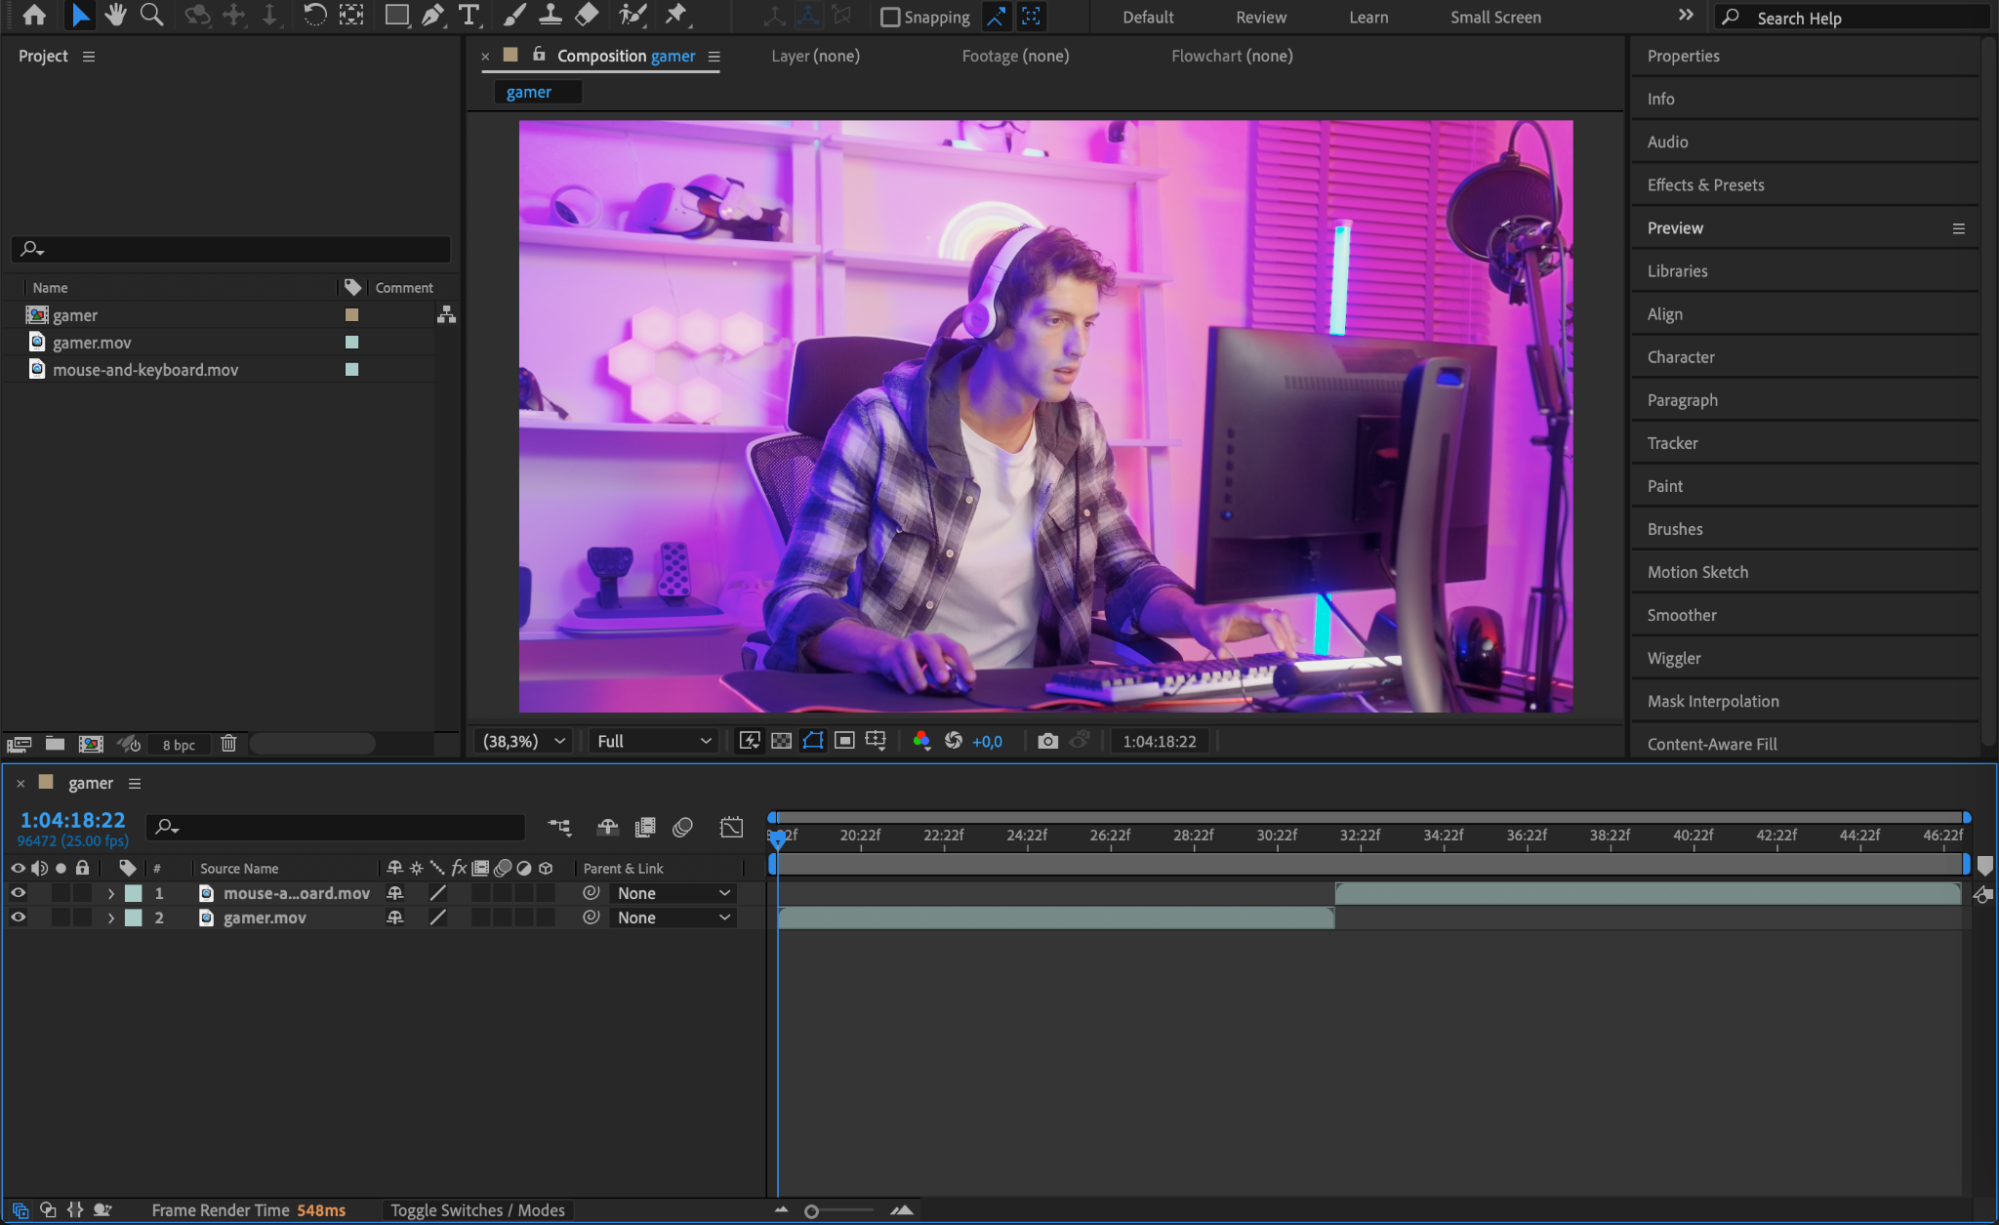
Start by opening your project in Adobe After Effects and placing two video clips on the timeline. Make sure one follows the other directly so that the transition will occur at their seam. Trim them as needed for timing and rhythm.
Get 10% off when you subscribe to our newsletter

Step 2: Pre-compose the Clips
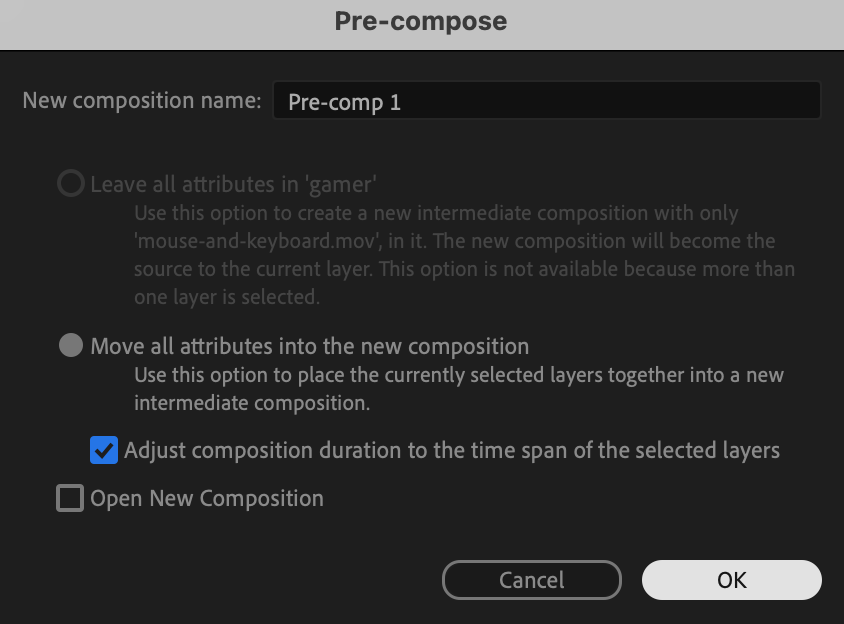
Select both clips on the timeline, right-click, and choose Pre-compose. Name the pre-comp and select Move all attributes into the new composition. This step groups the layers together and makes it easier to apply effects across the transition point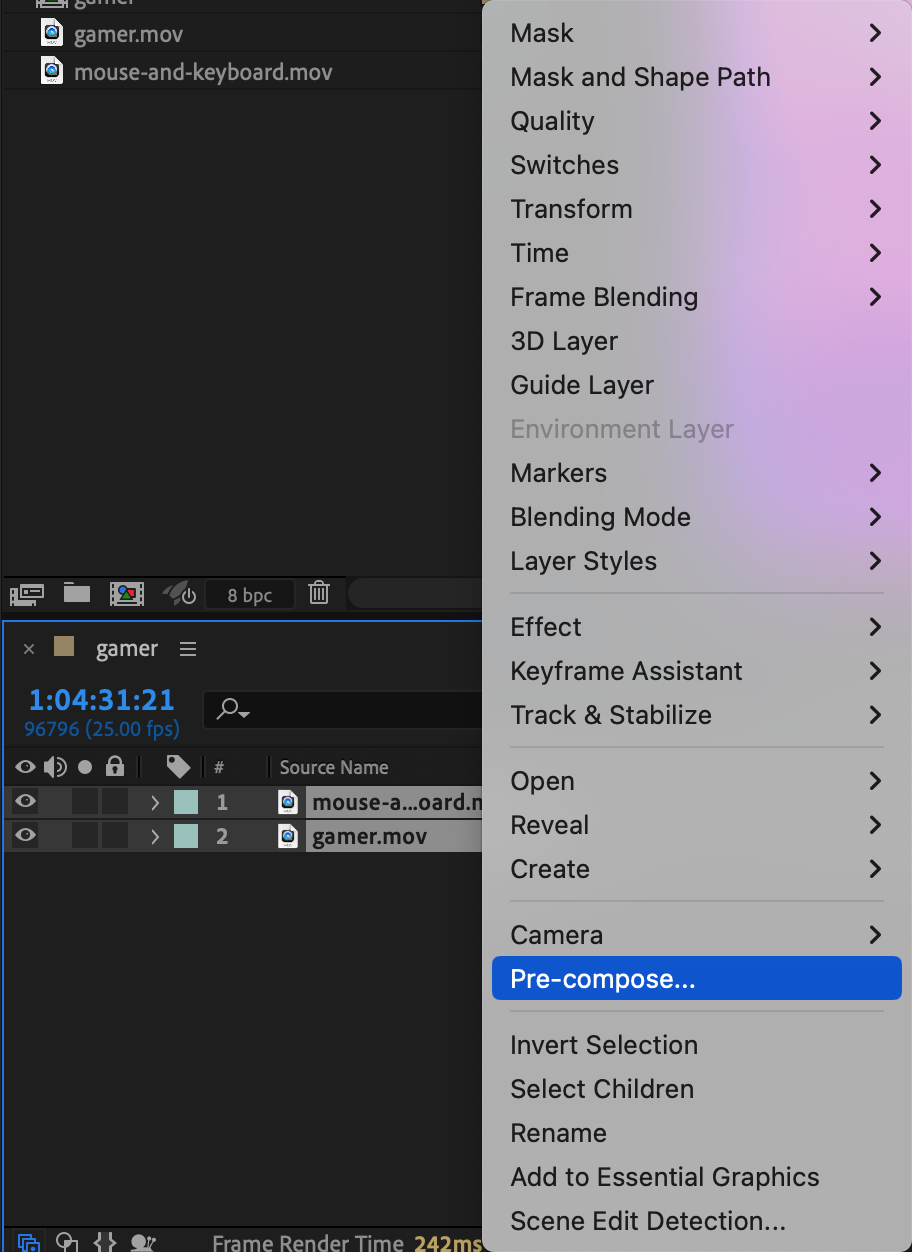
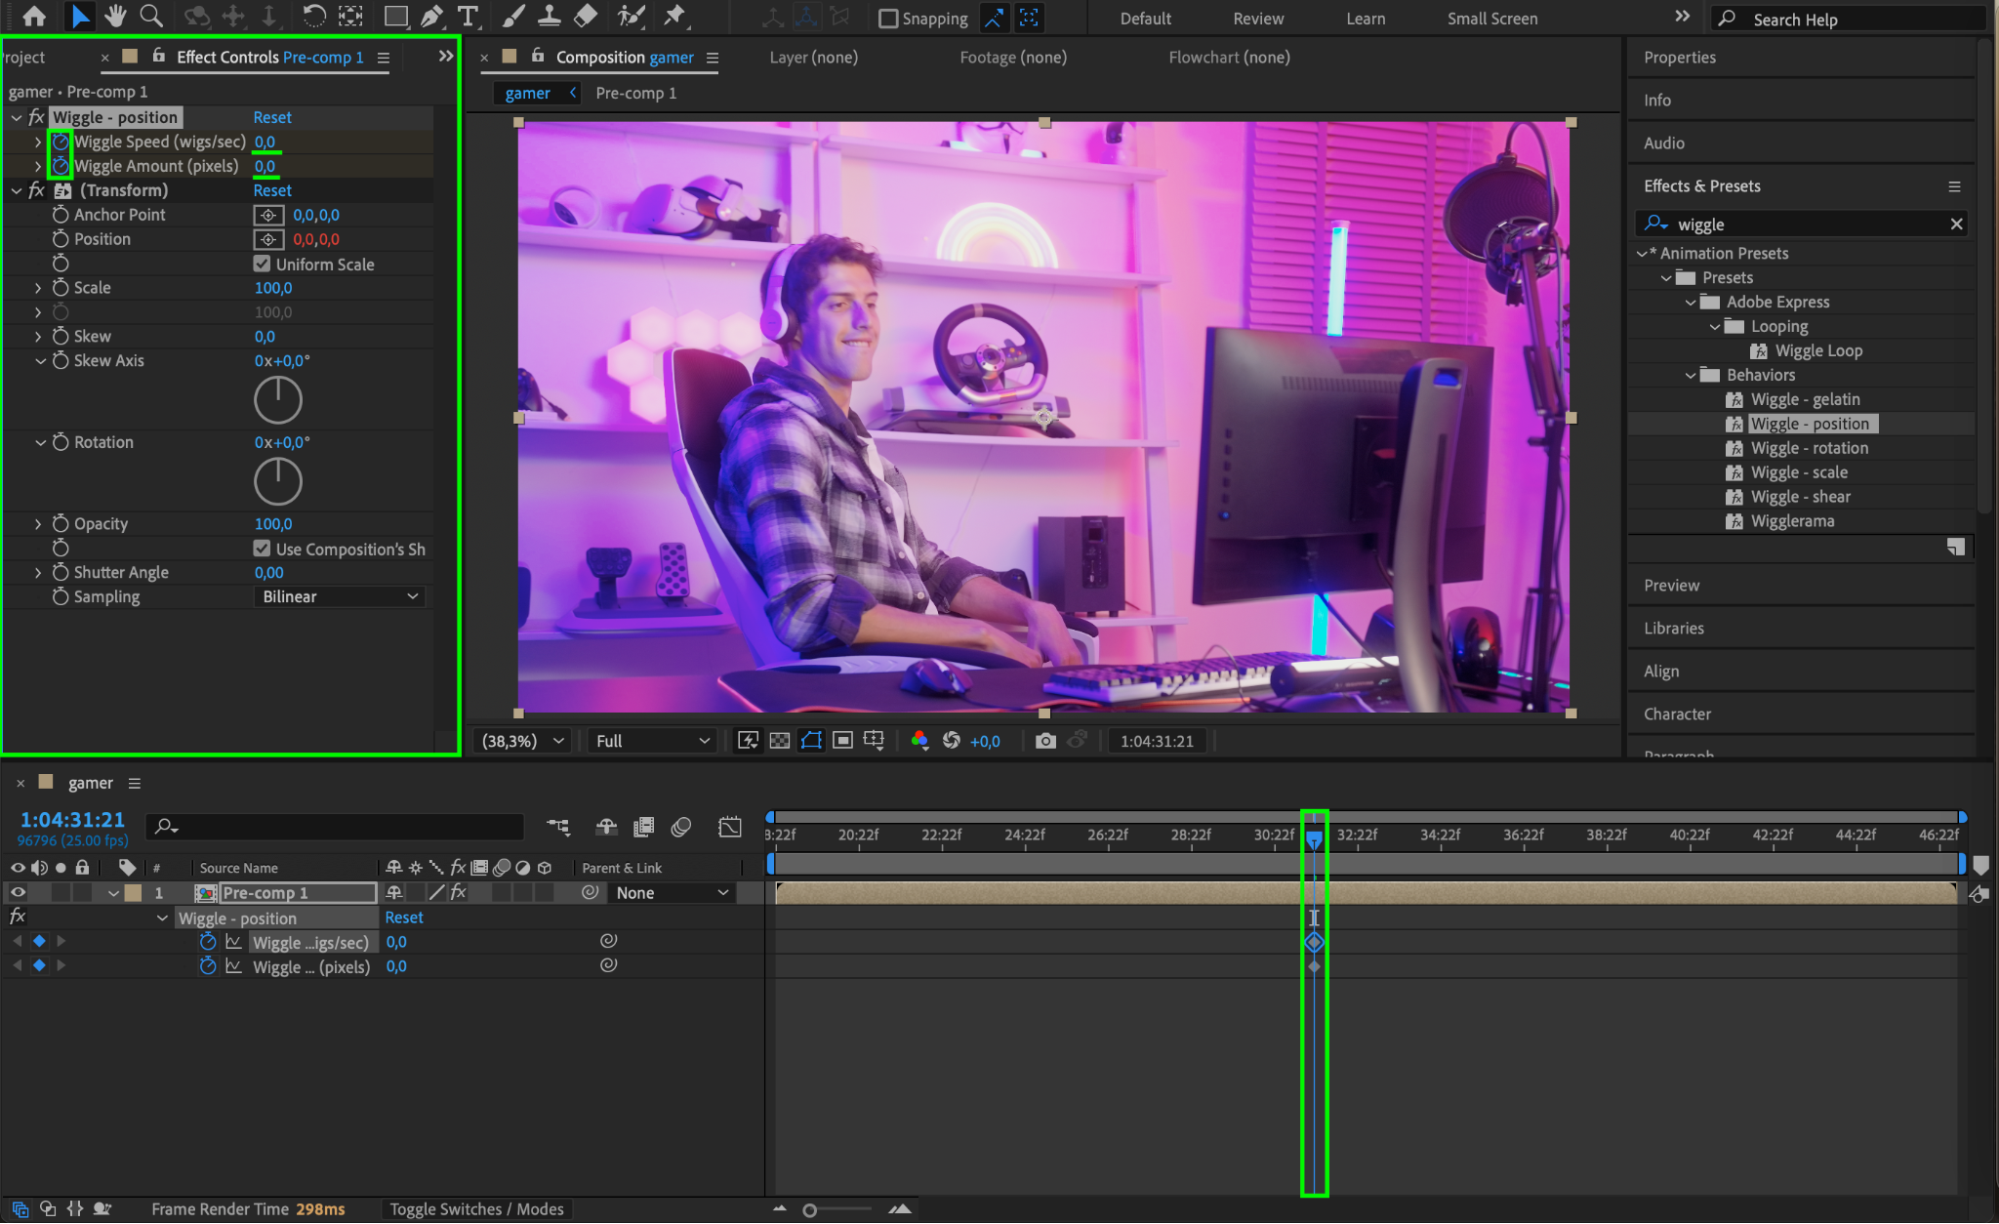
 Step 3: Add and Animate the Wiggle Position Effect
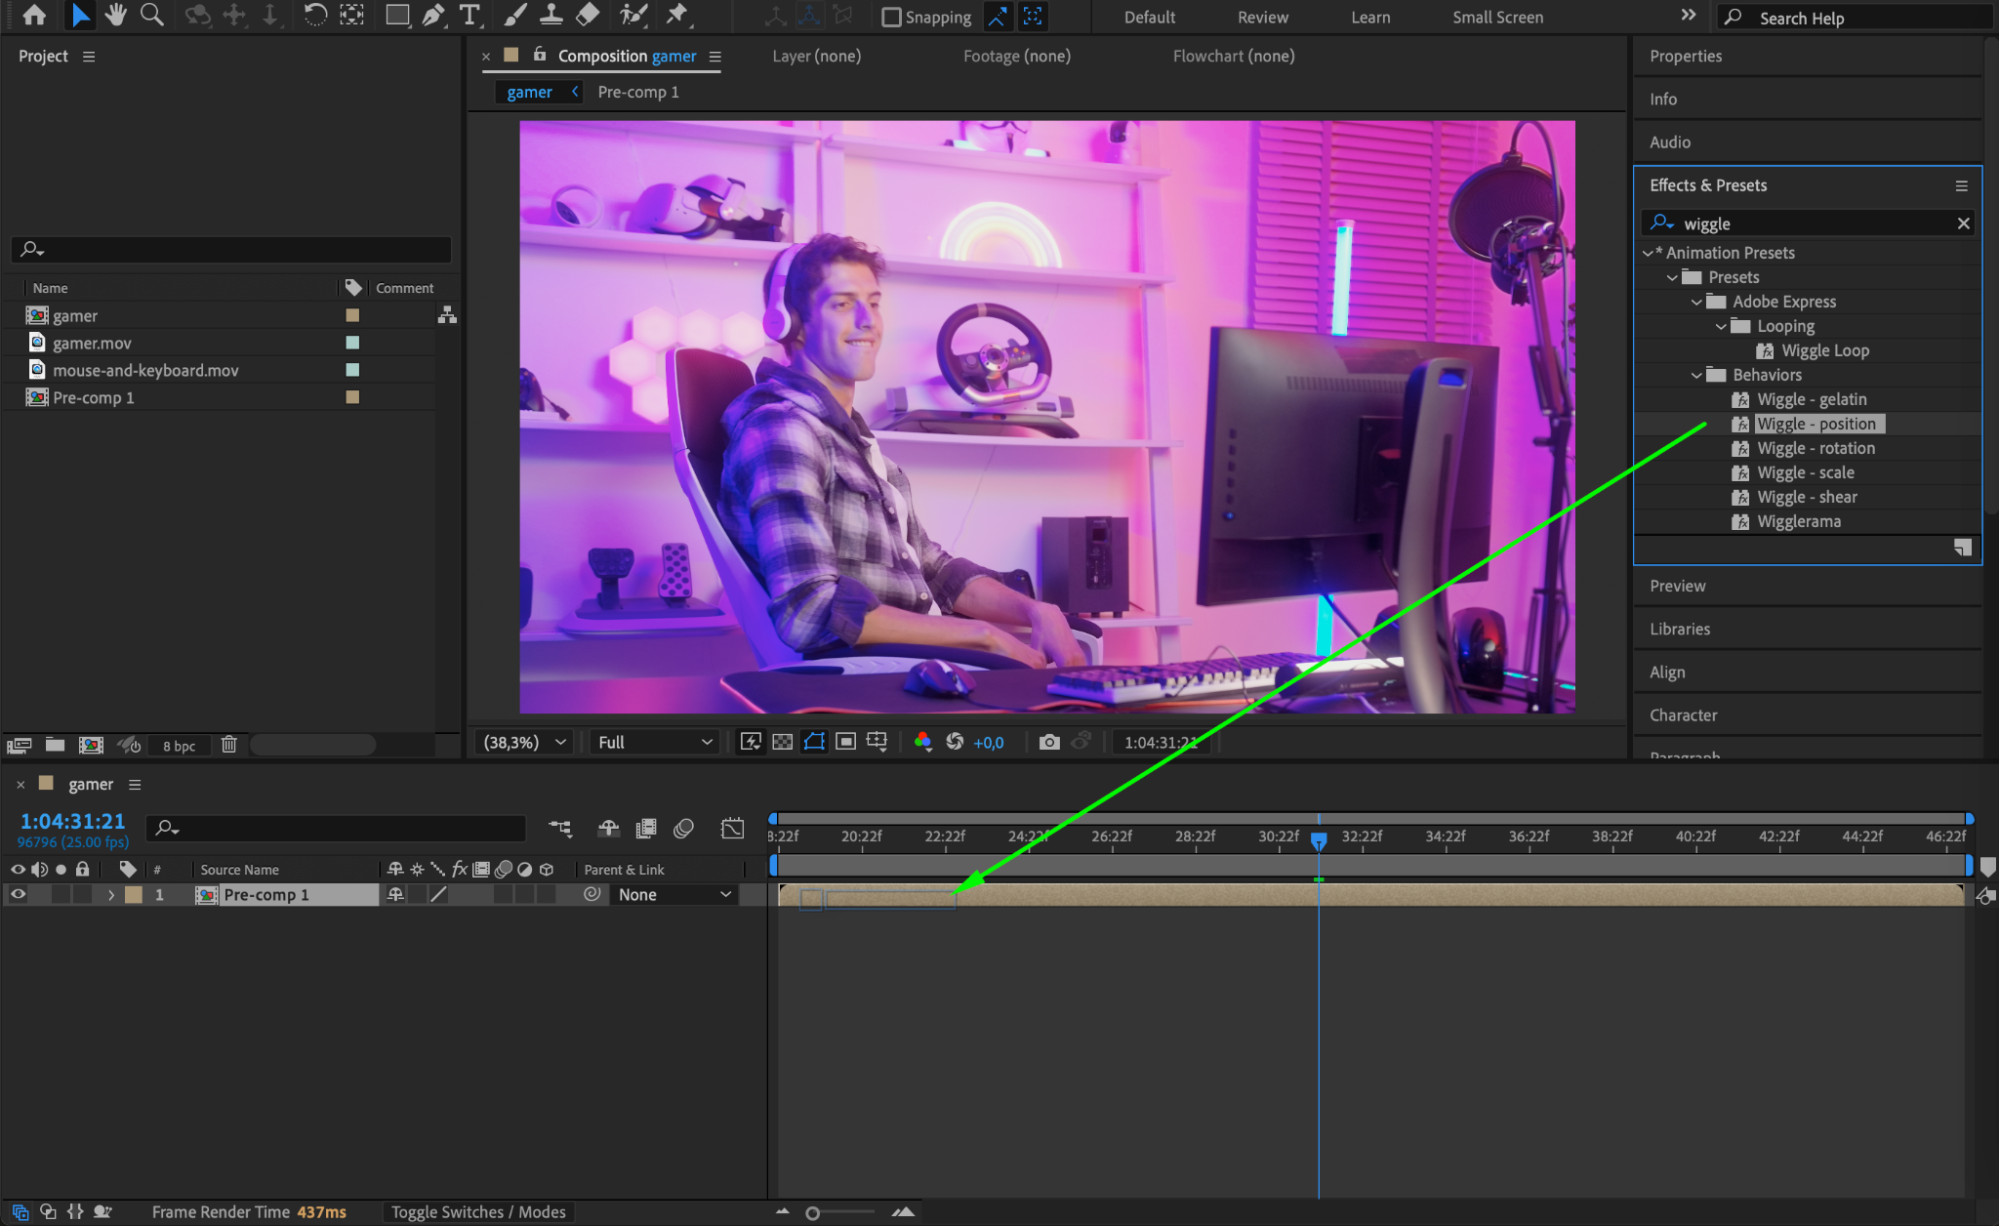
From the Effects & Presets panel, search for Wiggle – Position and apply it to the pre-comp.
Set keyframes starting 10 frames before the cut: Wiggle Amount: 0, Speed: 0
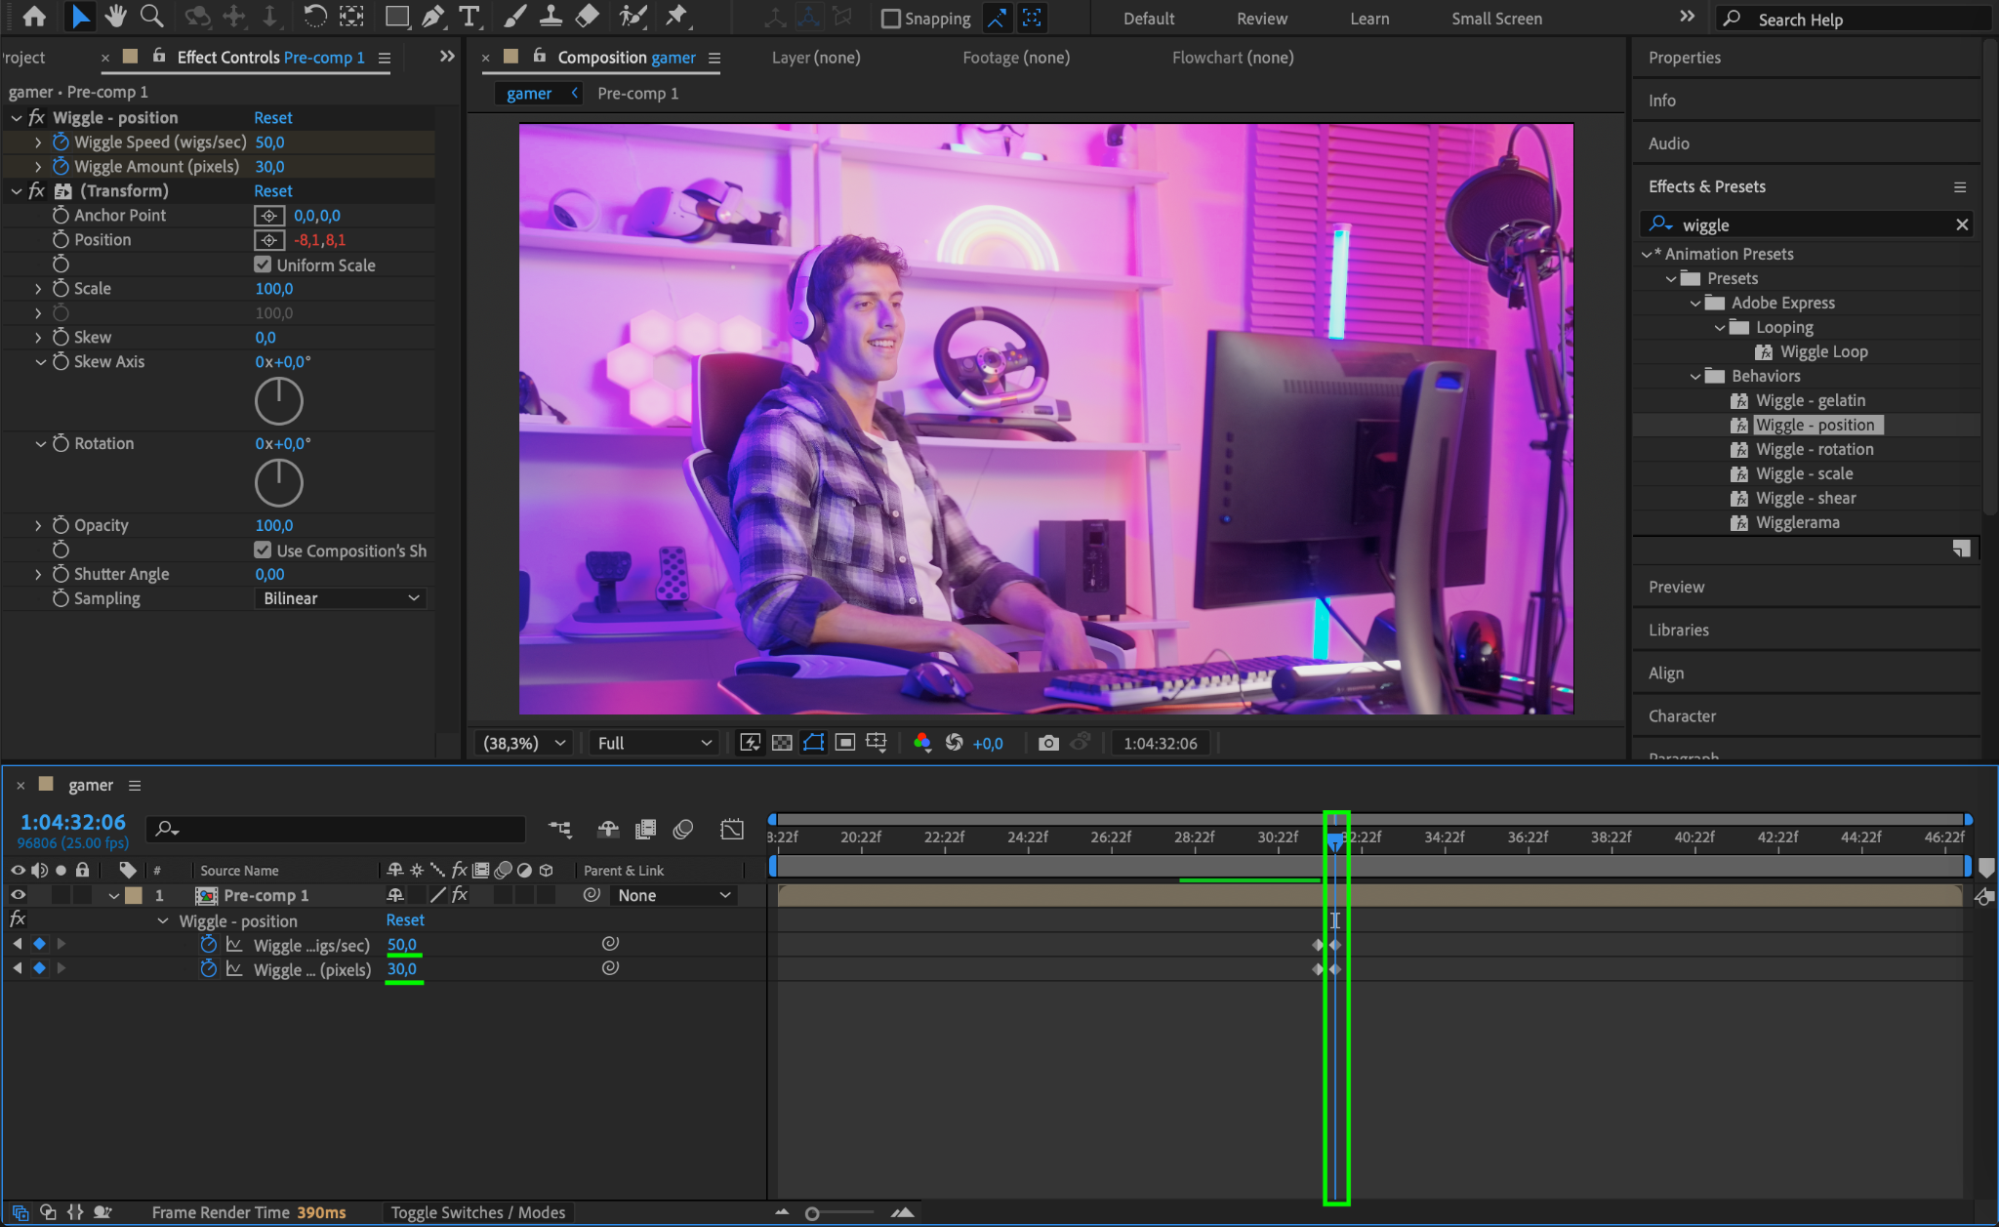
At the exact frame where the two clips meet, set: Wiggle Amount: 30, Speed: 50
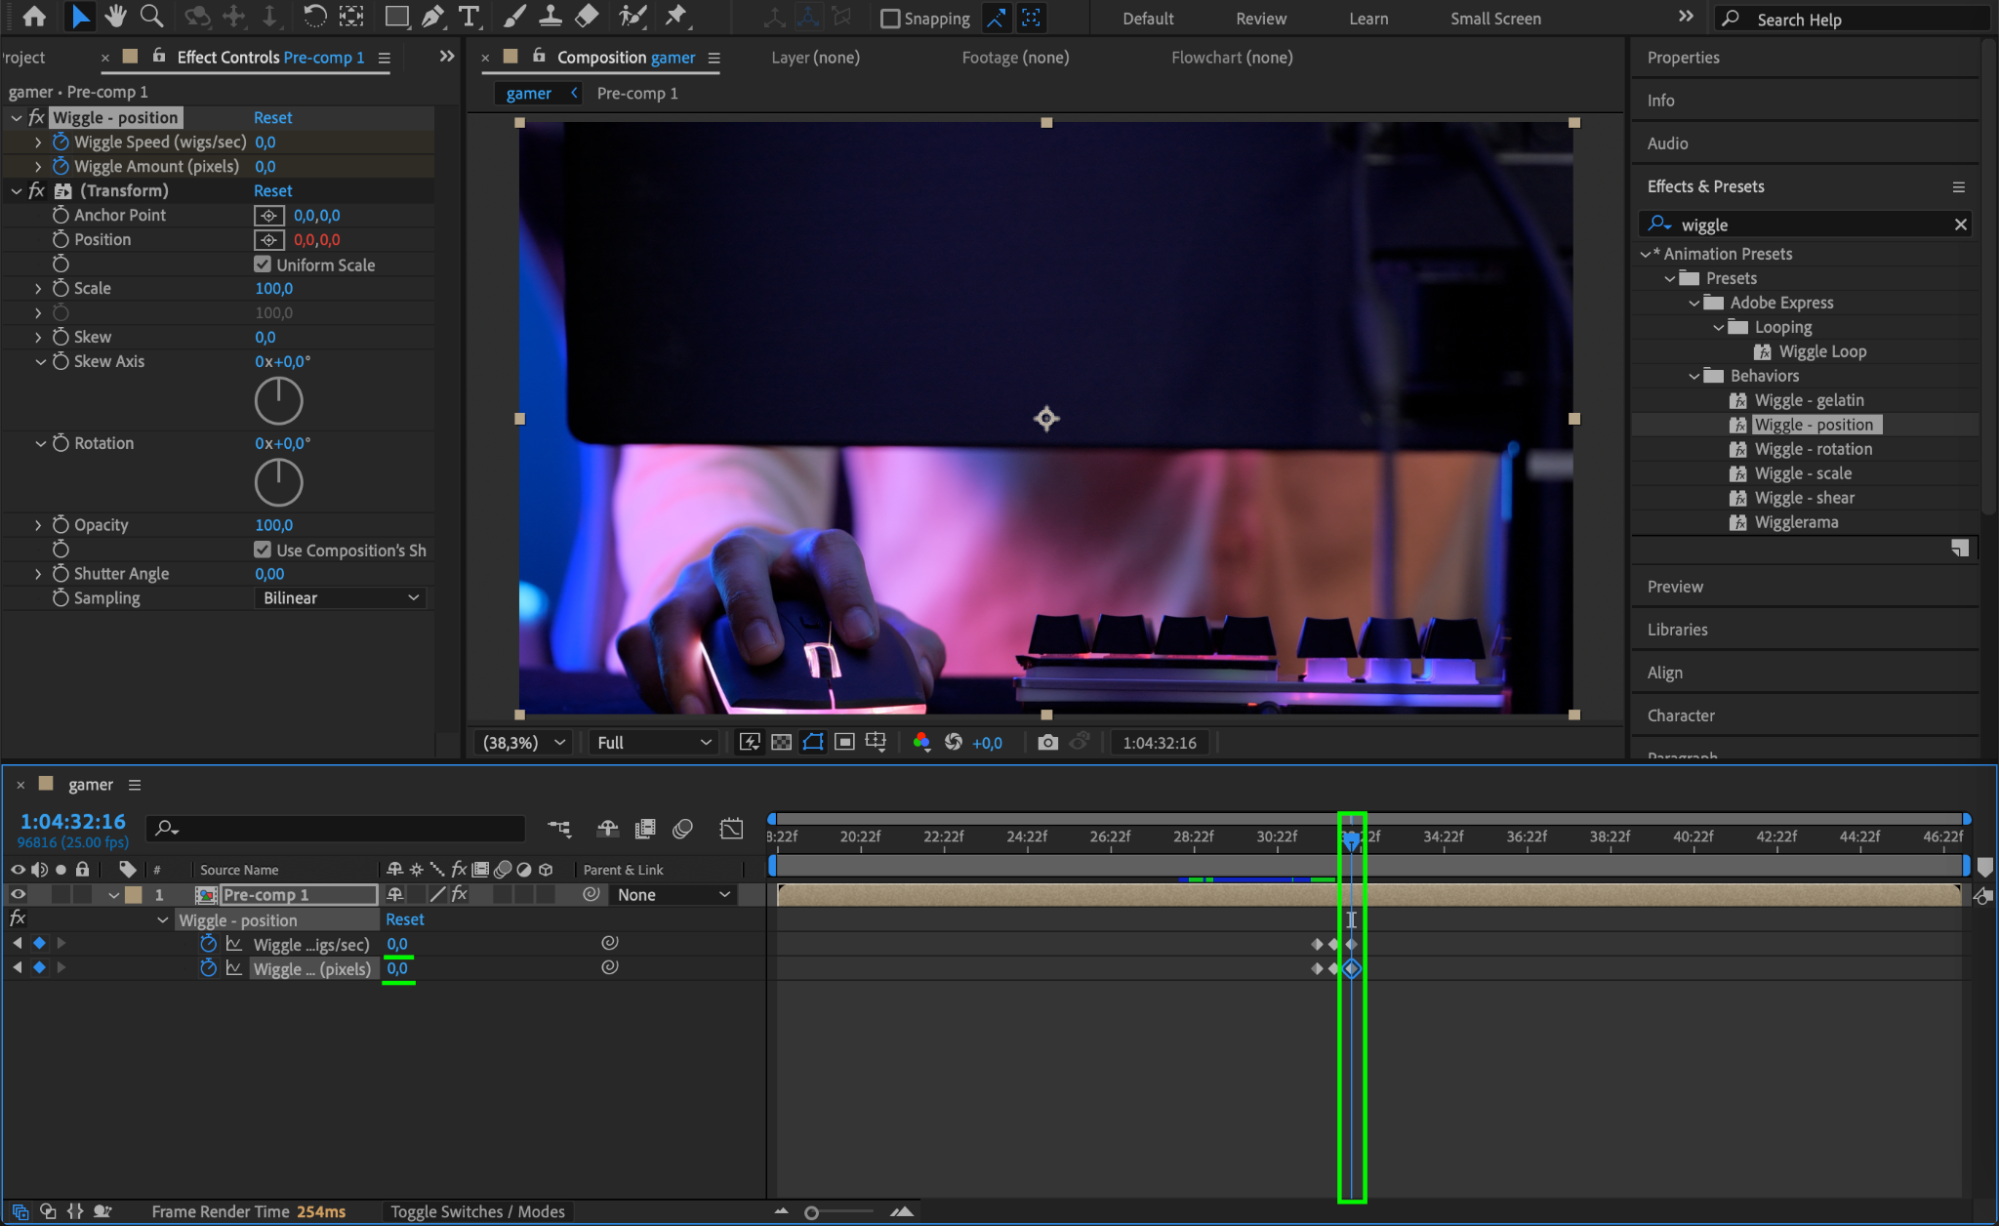
Then, 10 frames after the cut, return to: Wiggle Amount: 0, Speed: 0
This creates a shaking effect that peaks at the transition and fades away smoothly.
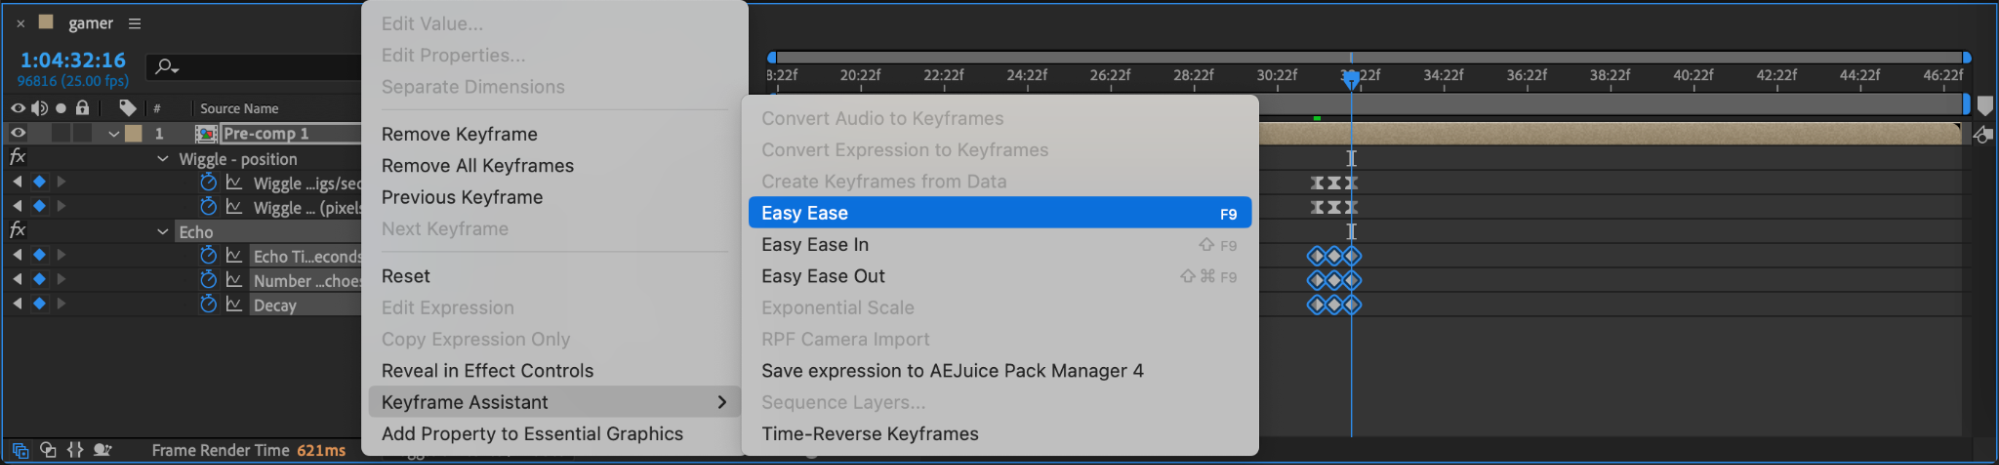
 Step 4: Apply Easy Ease to Keyframes
Select all the wiggle effect keyframes, right-click, and choose Keyframe Assistant > Easy Ease. This makes the motion less mechanical and more natural.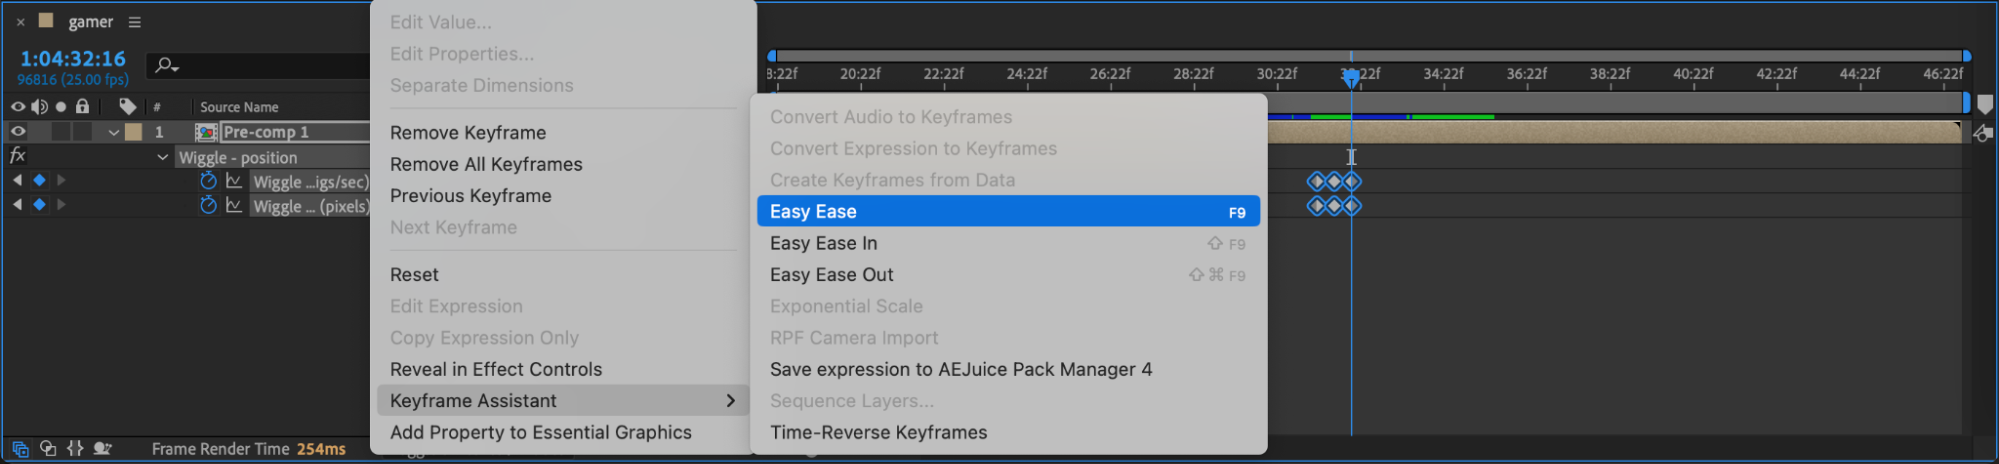
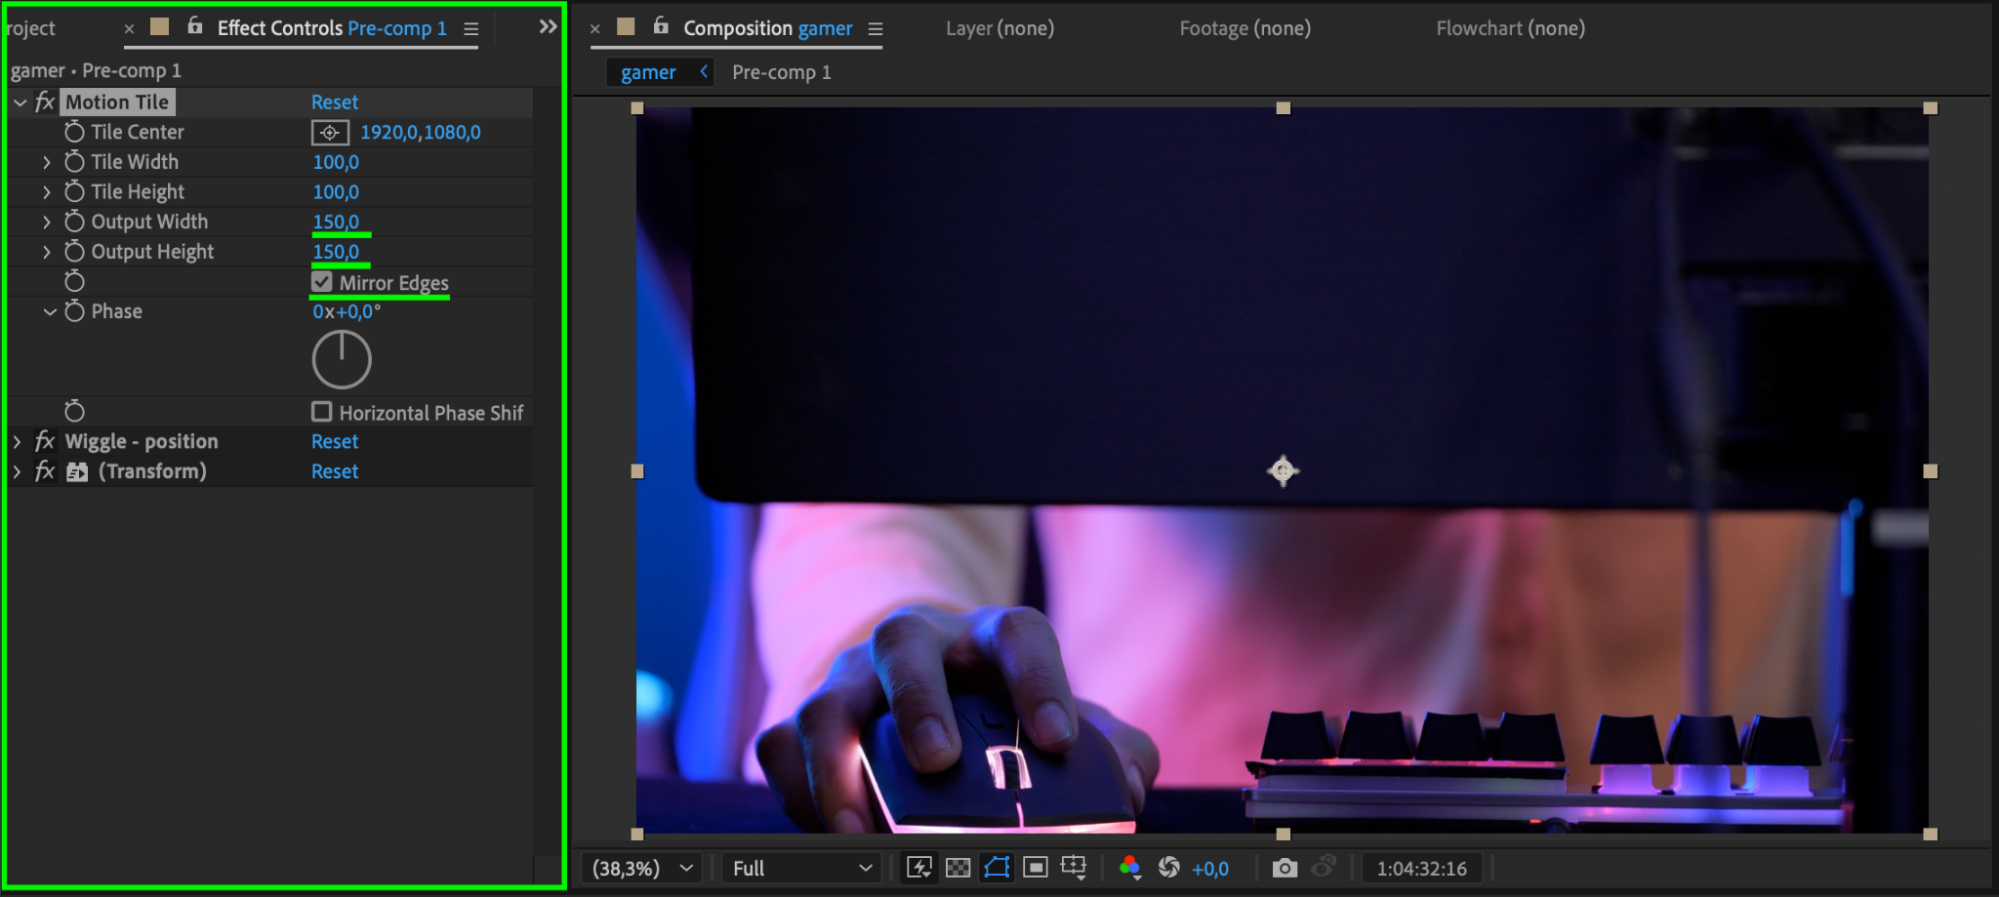
Step 5: Add Motion Tile for Edge Mirroring
Next, search for Motion Tile and apply it to the pre-comp. Move it to the top of the effect stack in the Effect Controls panel. Enable Mirror Edges, and set both Output Width and Output Height to 150. This helps avoid black edges during the shake effect.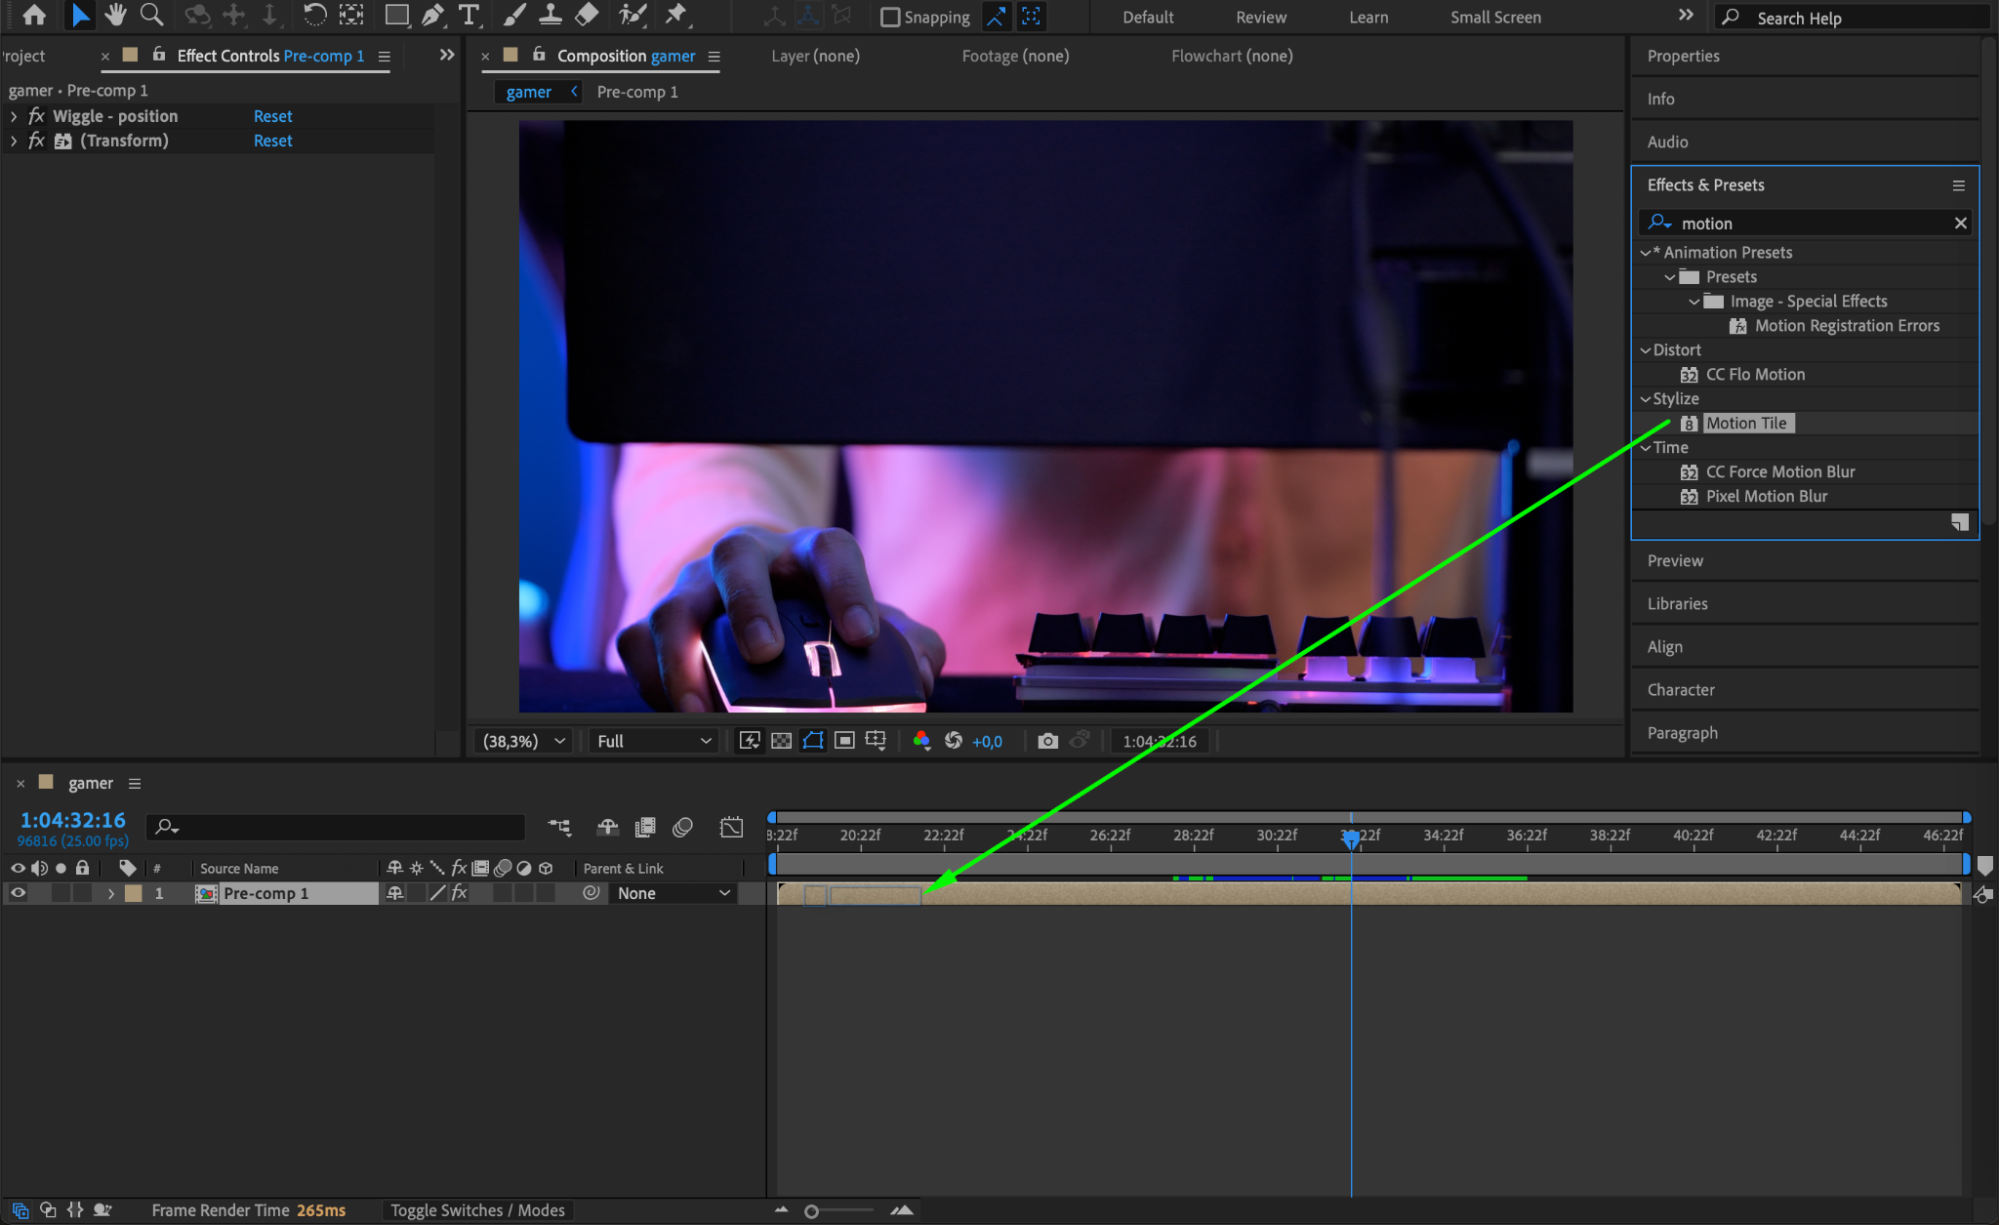
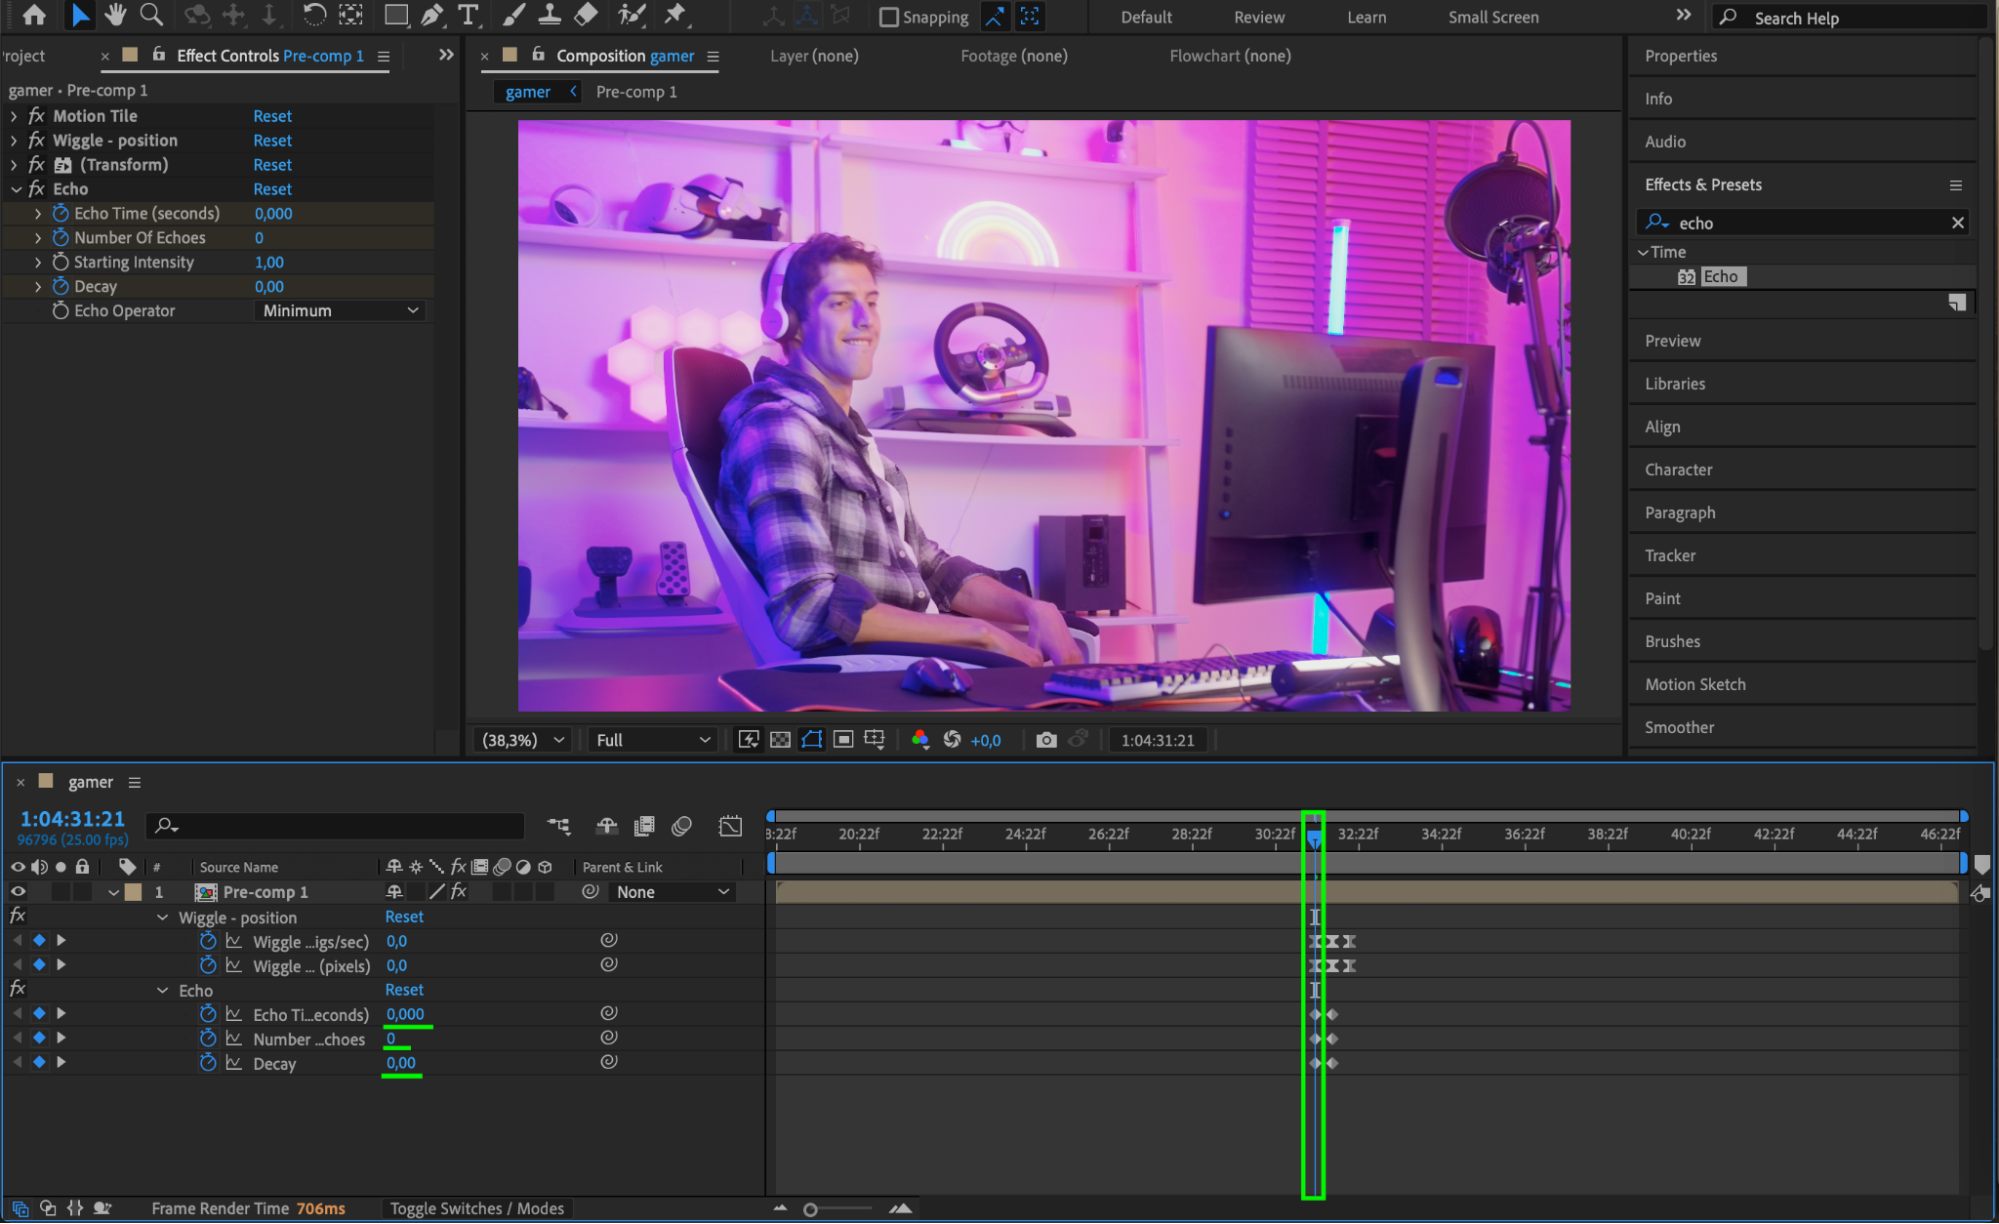
 Step 6: Apply the Echo Effect
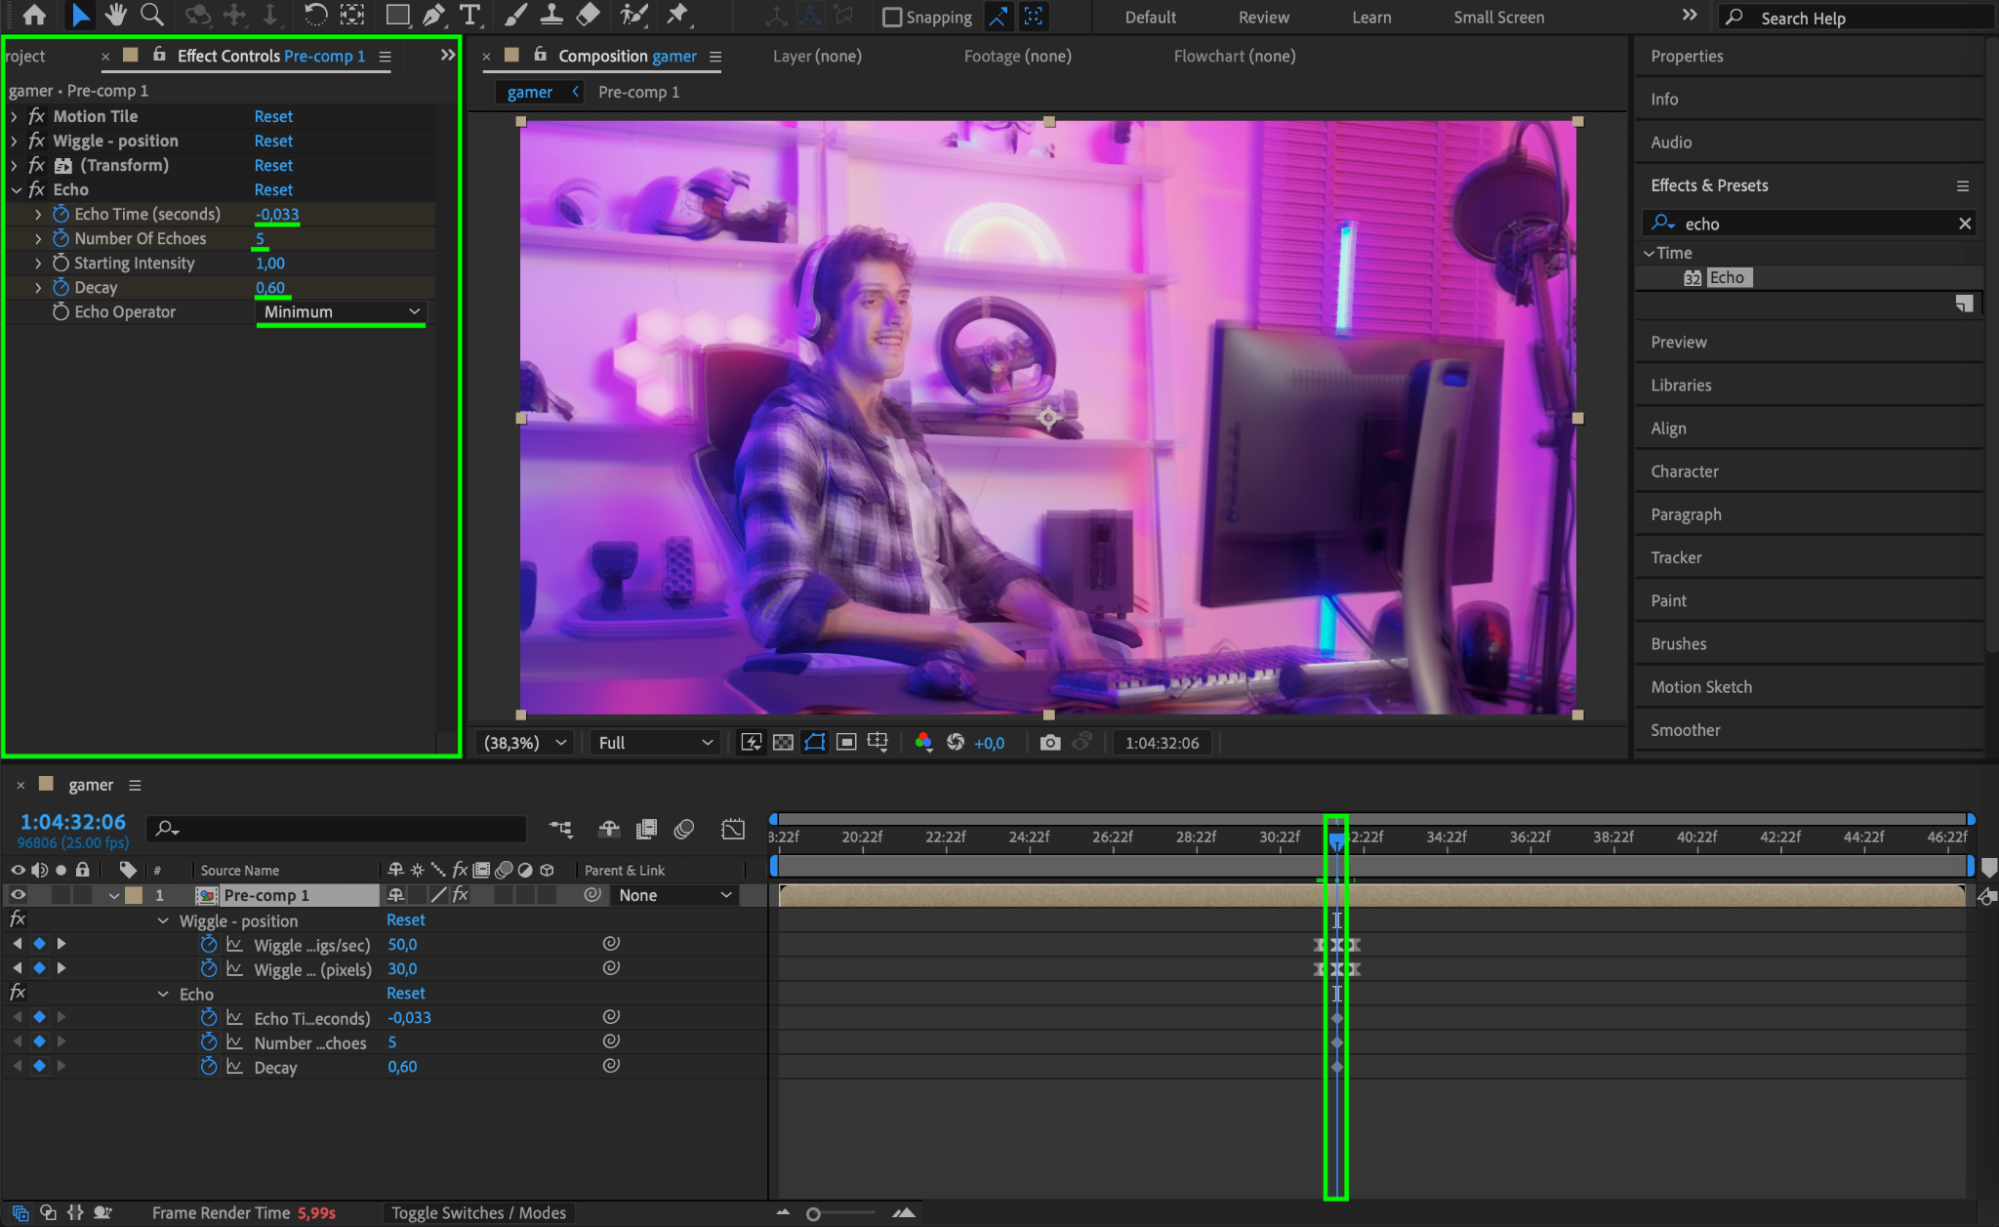
Add the Echo effect from the Effects & Presets panel. At the transition point, use these settings:
Echo Time: -0.03
Number of Echoes: 5
Decay: 0.6
Echo Operator: Minimum
Set all these parameters to 0 ten frames before and after the cut. This creates a motion trail effect during the transition and then fades out cleanly.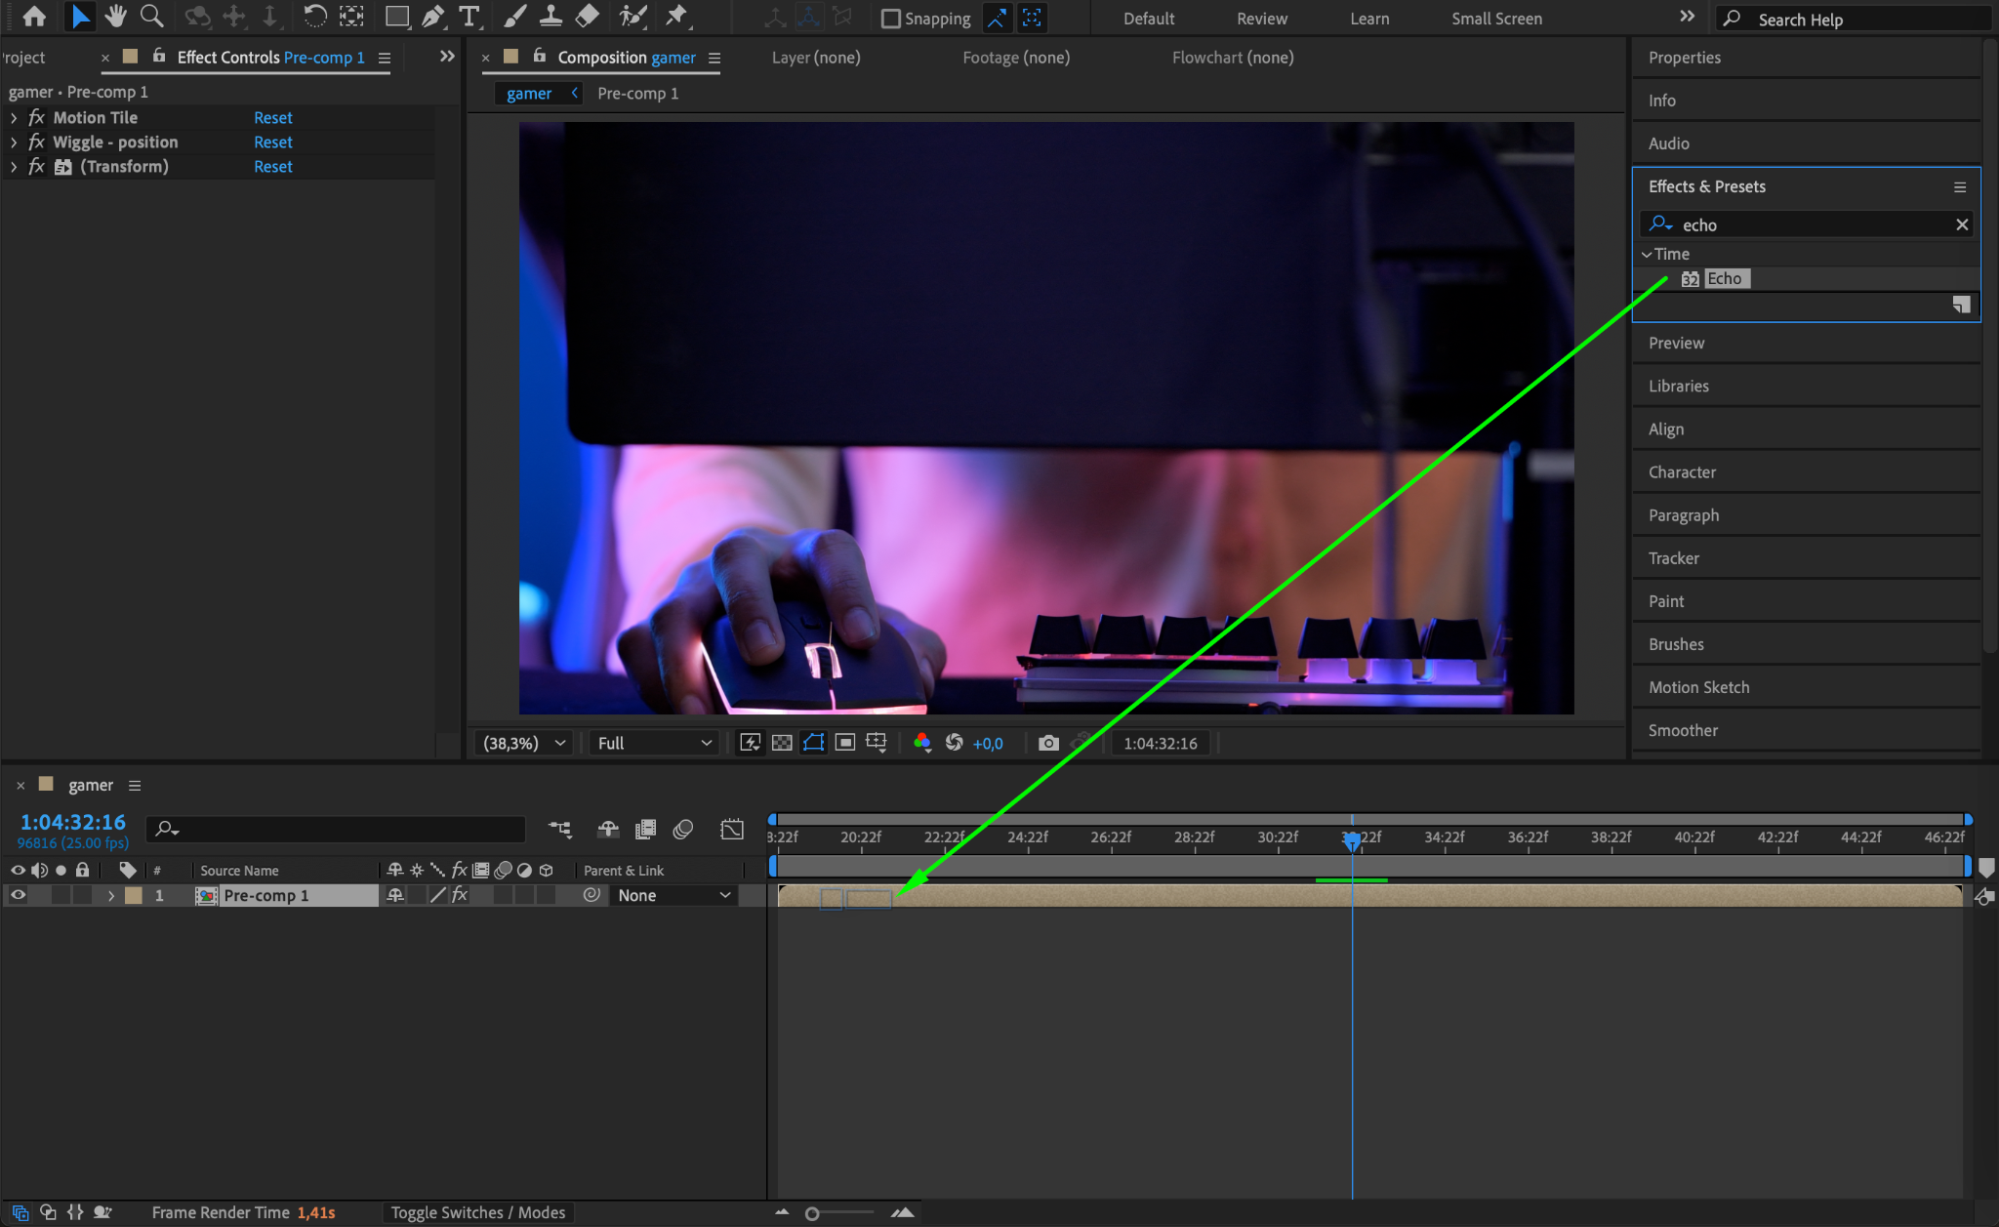
 Step 7: Easy Ease Echo Keyframes
As with the wiggle keyframes, apply Easy Ease to the Echo effect keyframes to make the animation flow more smoothly.
 Step 8: Preview and Final Adjustments
Press the spacebar to preview your transition. If the effect feels too strong or too subtle, adjust the wiggle amount, echo number, or motion tile width. You can also tweak the timing of the keyframes for better flow.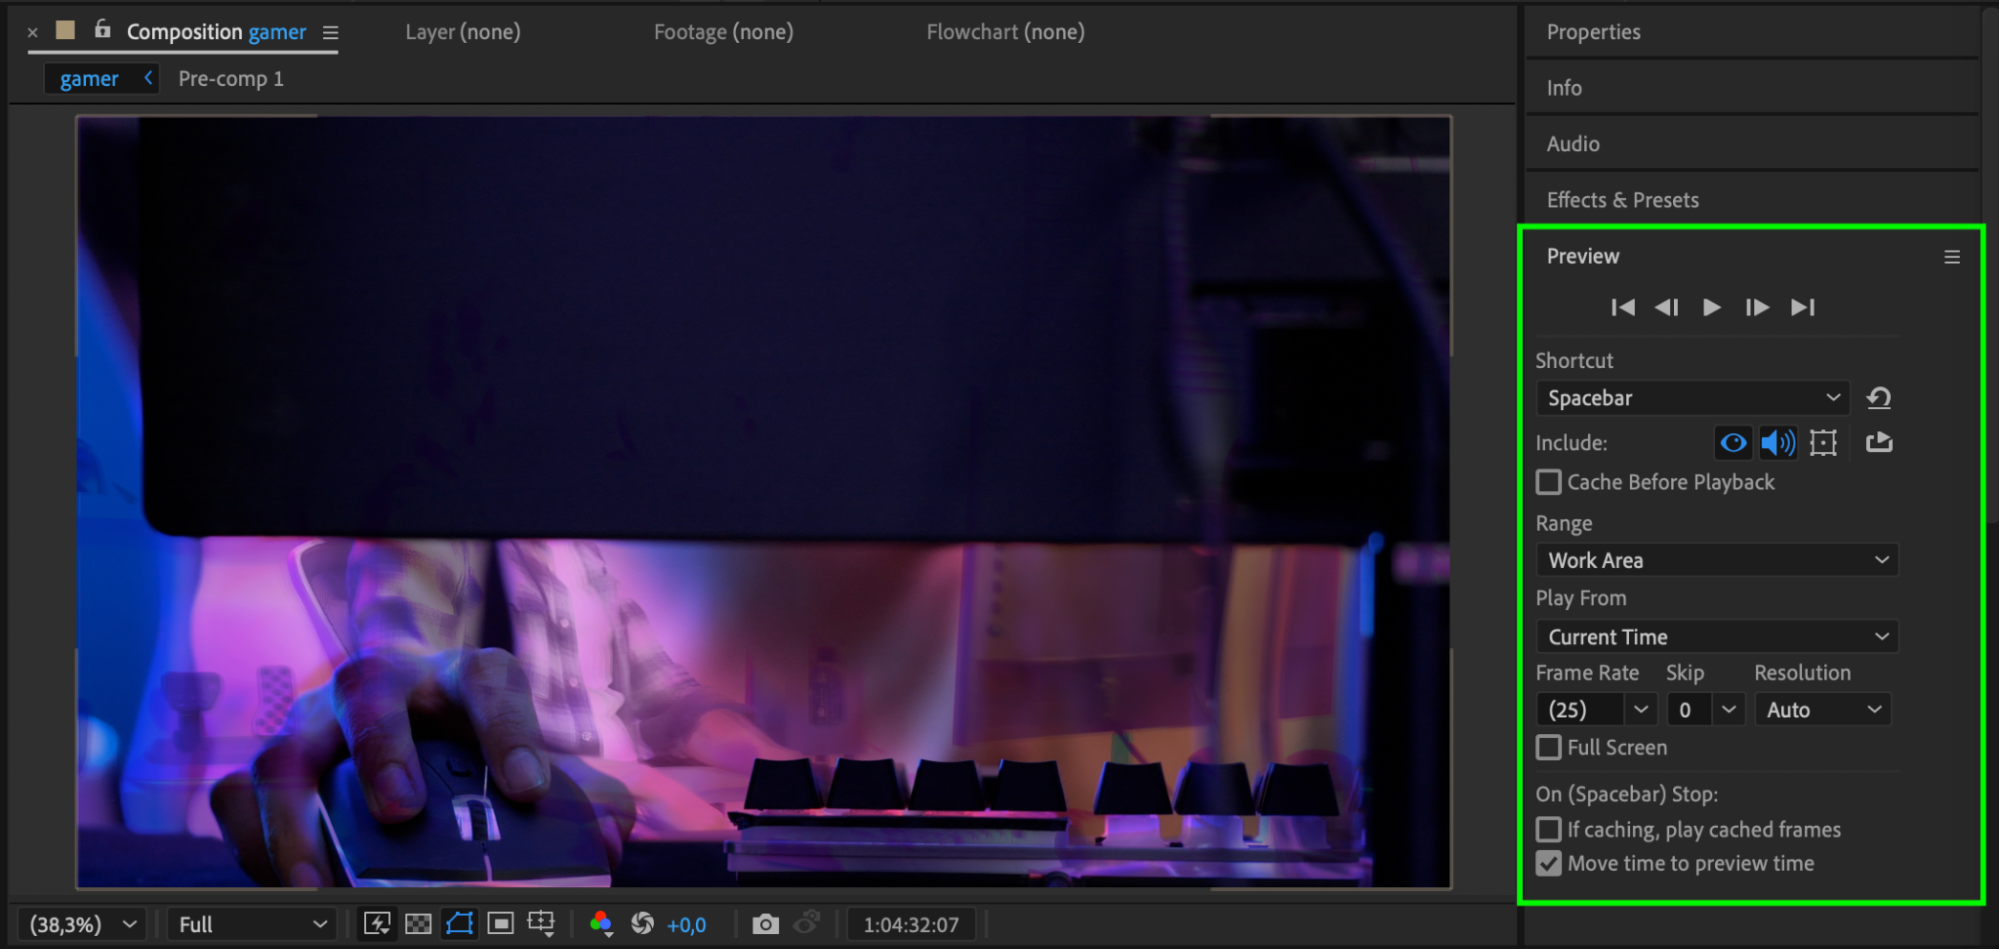
Conclusion
With a combination of Wiggle, Motion Tile, and Echo effects, you can design unique and polished transitions right inside After Effects. These techniques give your edits an extra punch without requiring third-party plugins or templates. Perfect for energetic edits, vlogs, or music videos, these transitions are fast to build and easy to customize.


