A Complete Guide to Adding Camera Shake in After Effects
Introduction: Enhancing Your Footage with Camera Shake
Adding camera shake to your videos in After Effects is an effective way to make them more dynamic and realistic. This technique adds an energetic feel to your footage, enhancing its impact on viewers. After Effects offers powerful tools that allow you to create this effect with precision, adding a professional touch to your video projects.
Get 10% off when you subscribe to our newsletter

Step 1: Create a New Composition
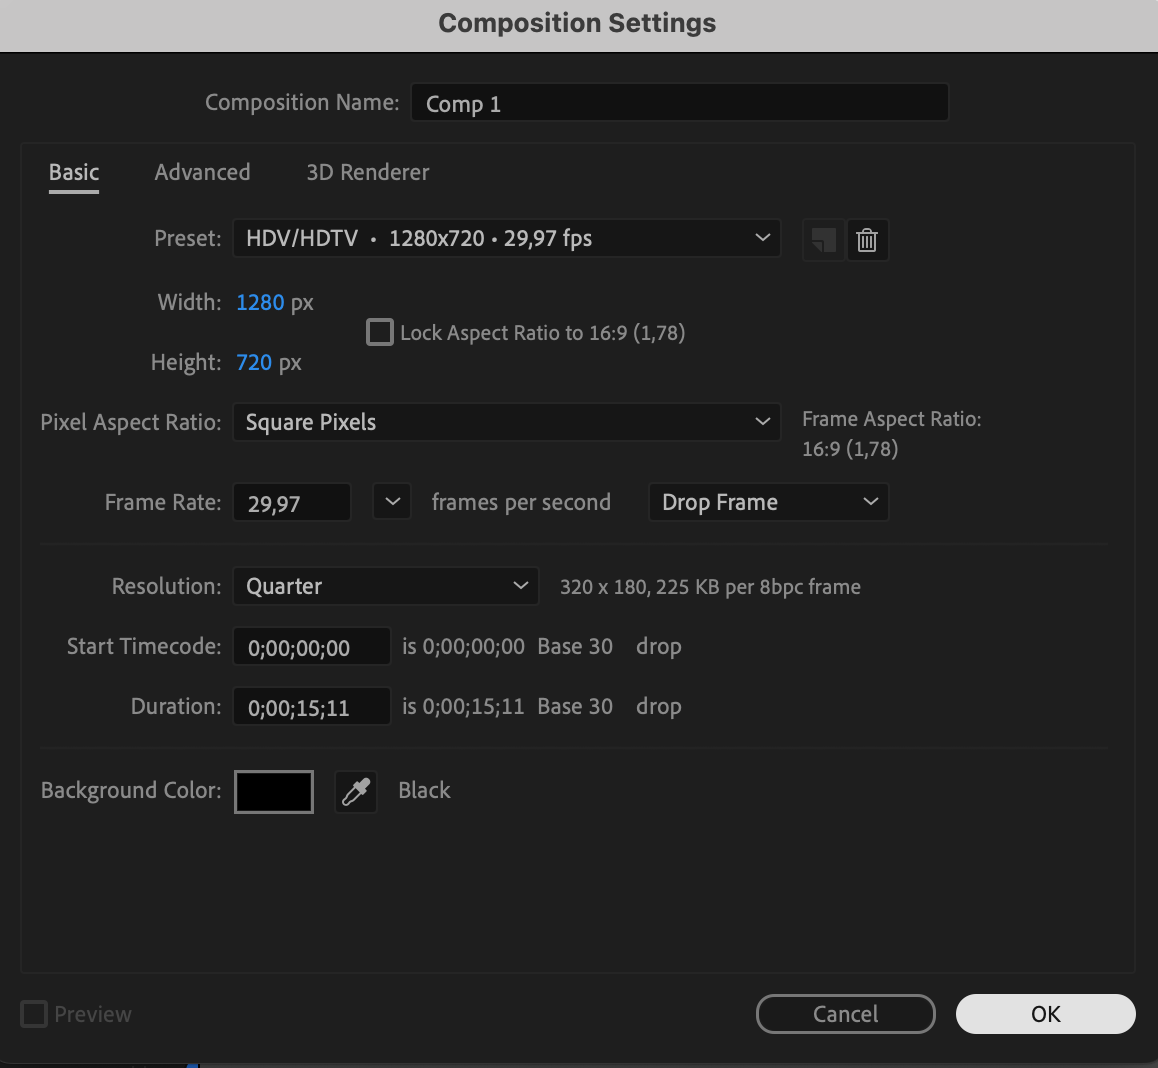
Start by creating a new composition in After Effects. To do this, go to File > New > New Composition and set the desired resolution, frame rate, and duration for your project. This composition will be your workspace for adding the camera shake effect.
 Step 2: Import Your Footage
Get 10% off when you subscribe to our newsletter

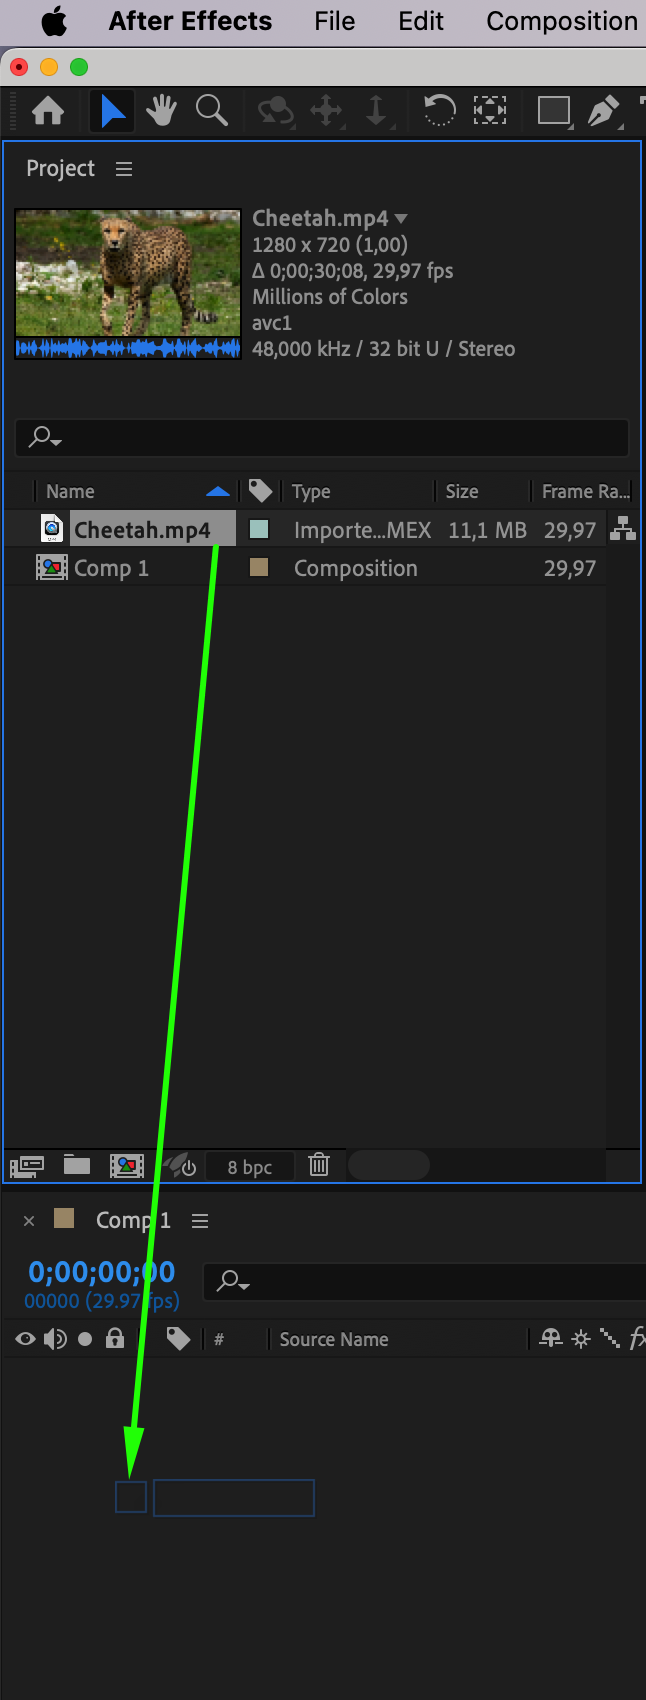
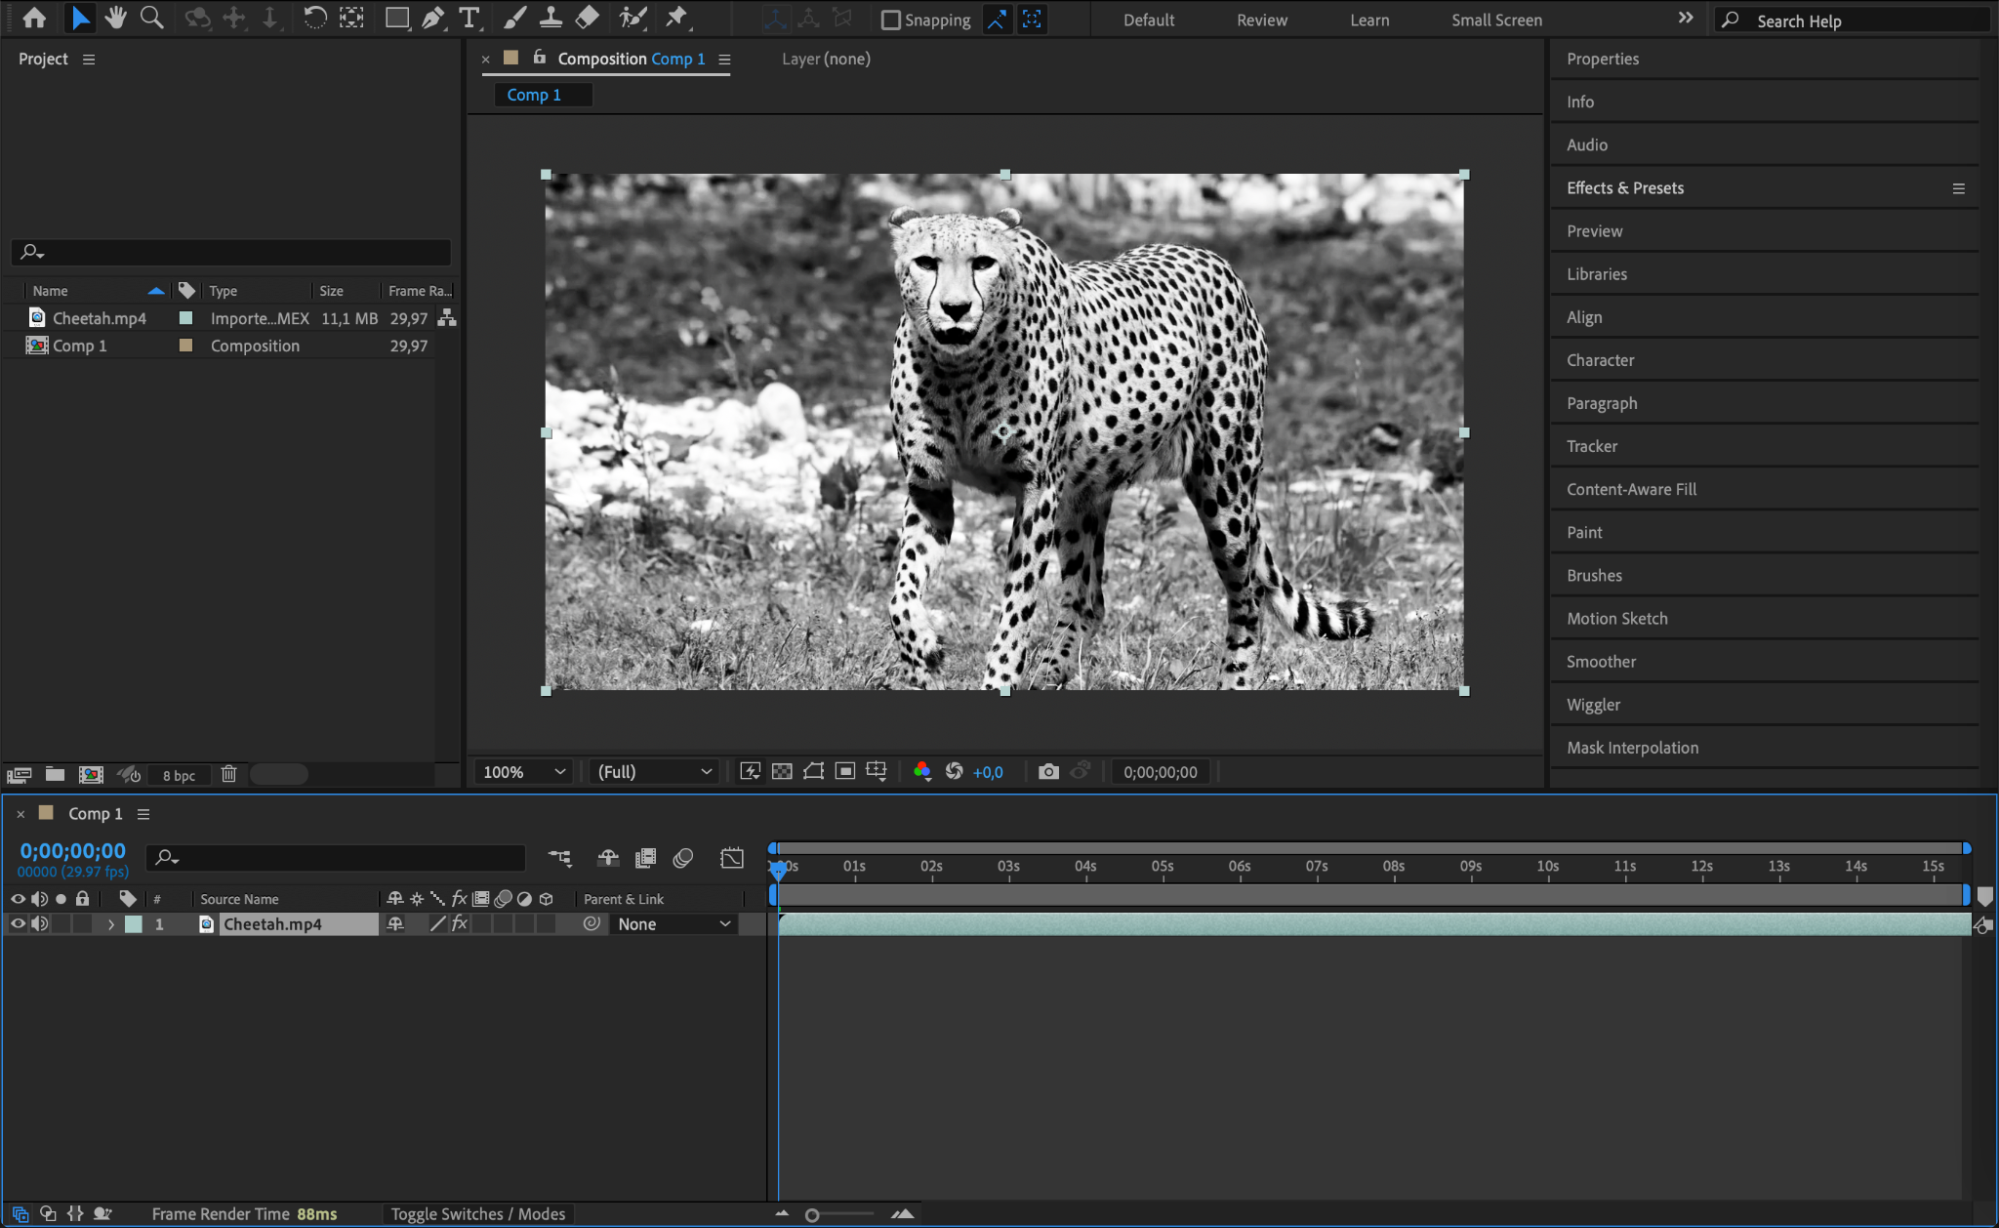
Next, import the footage you want to apply the camera shake effect to. Go to File > Import > File and select your footage. Drag and drop the imported footage onto the timeline panel to add it to your composition.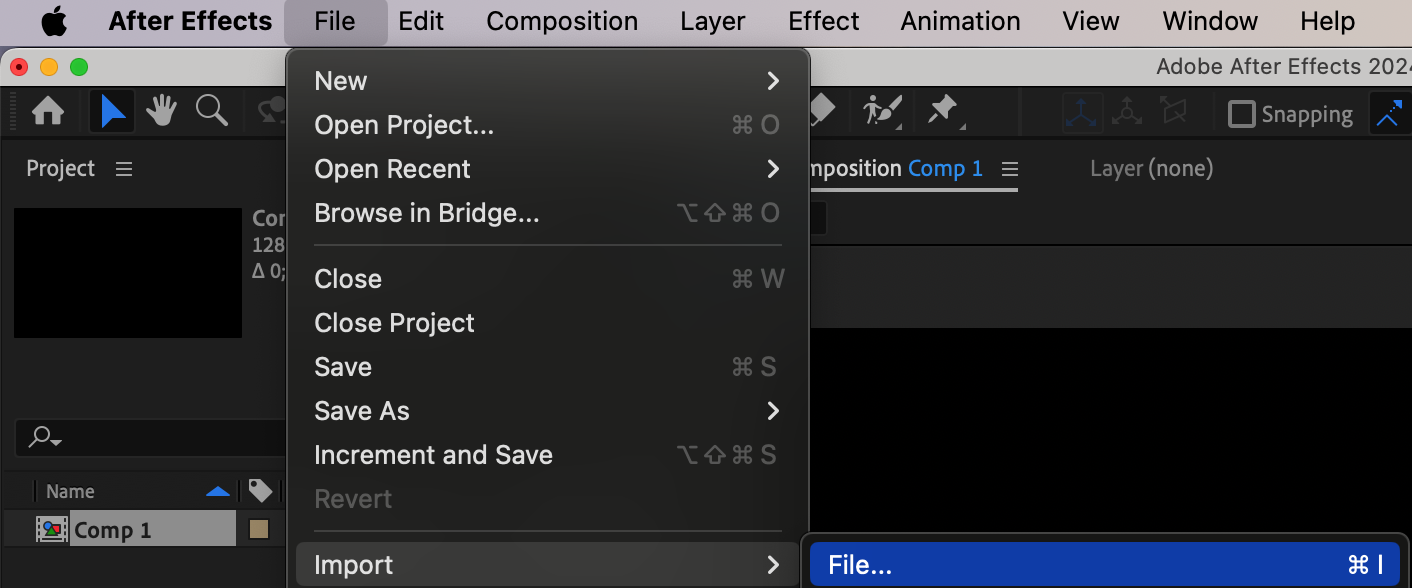
 Step 3: Create a New Camera Layer
Get 10% off when you subscribe to our newsletter

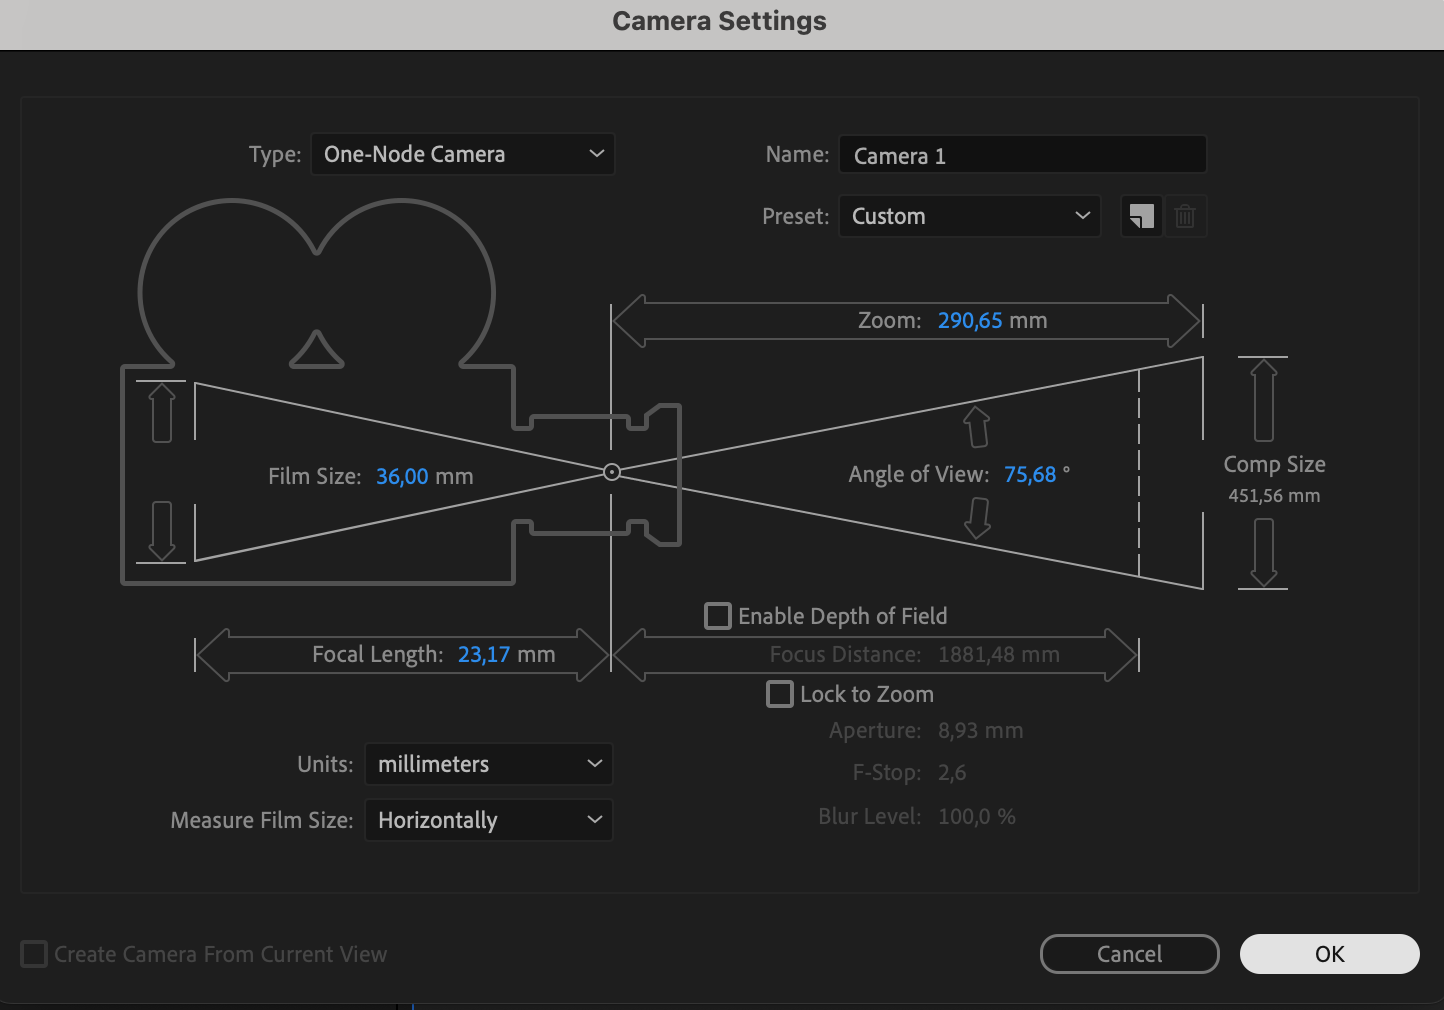
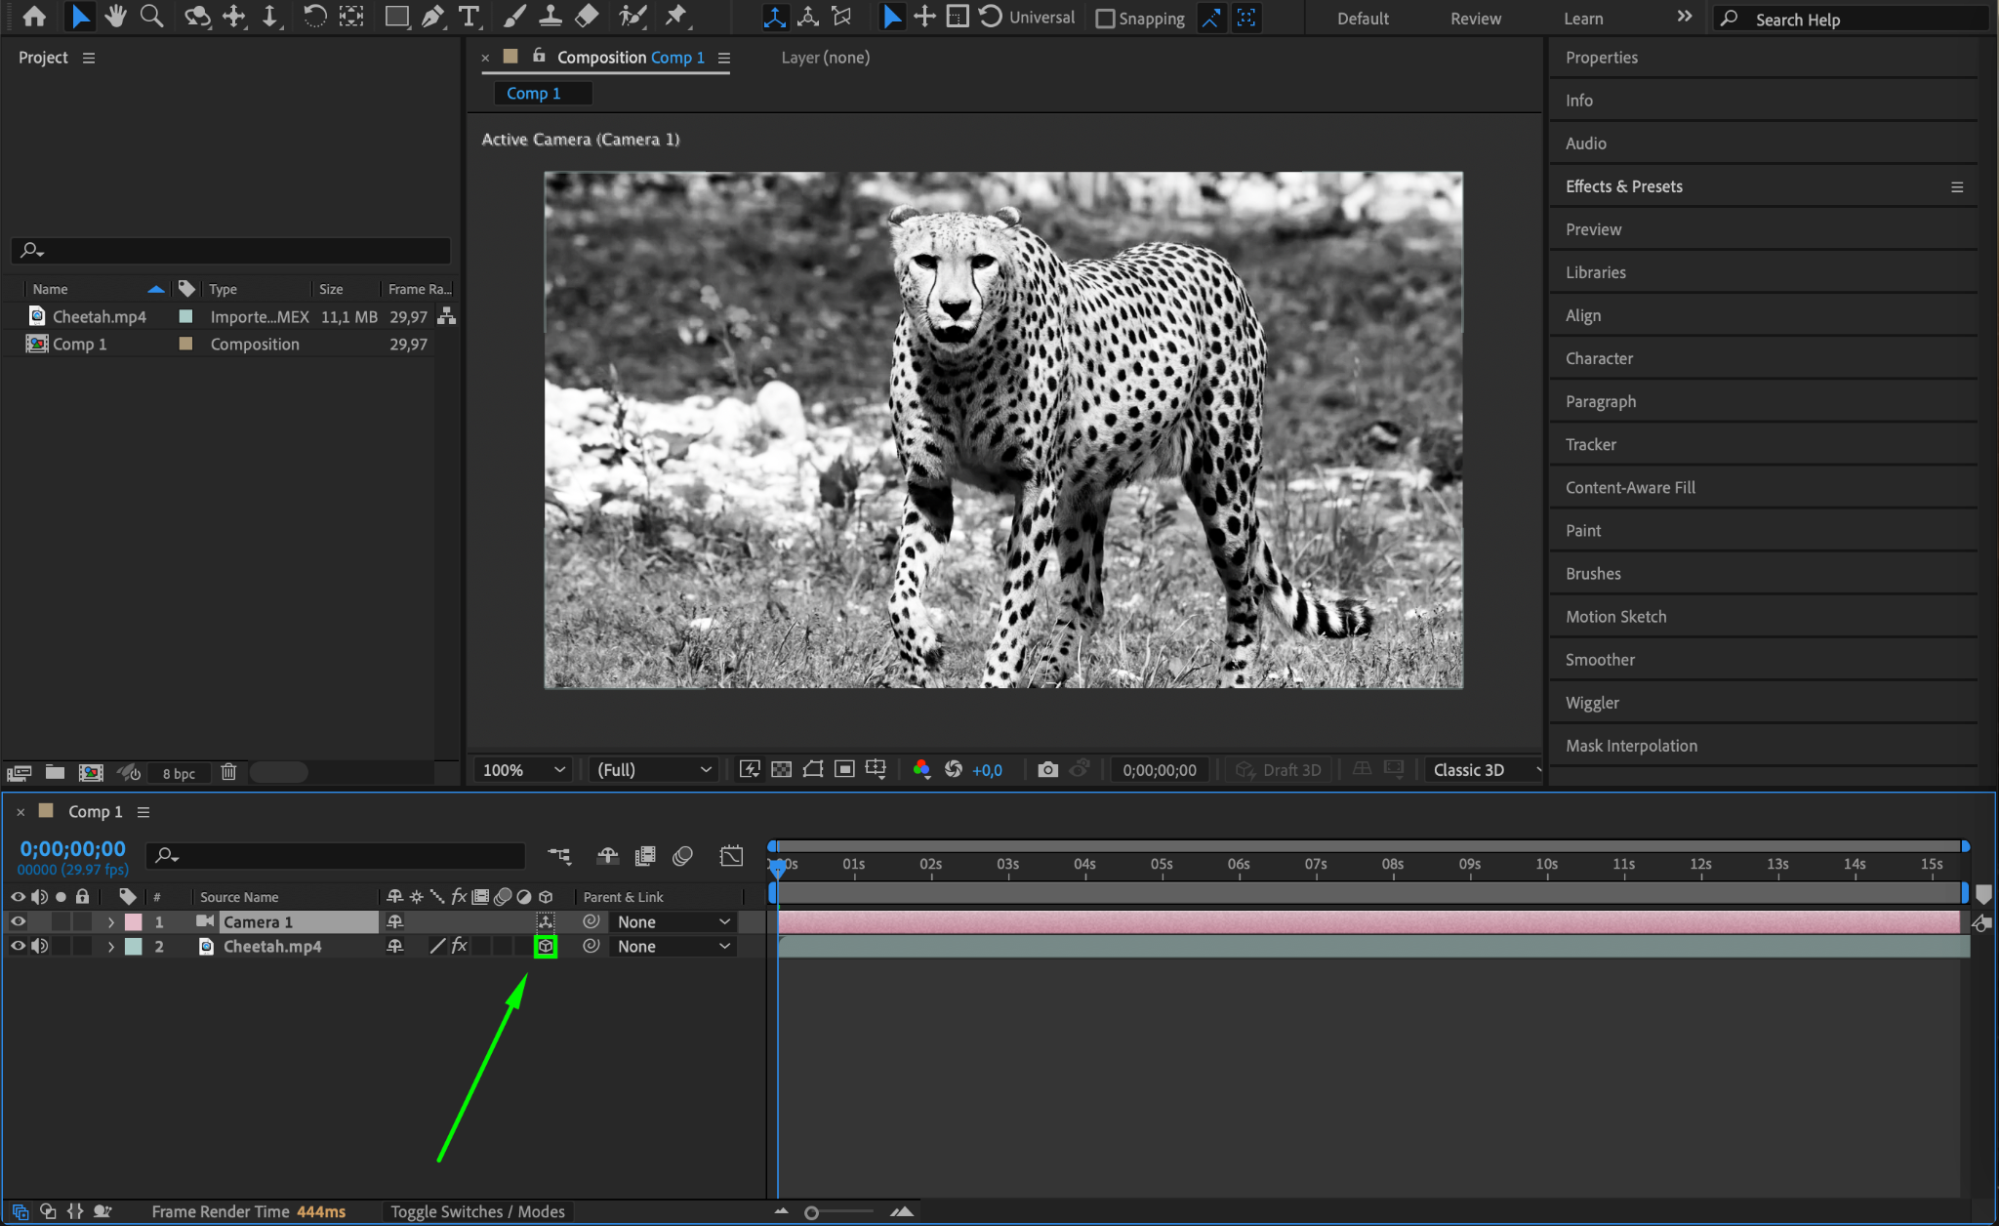
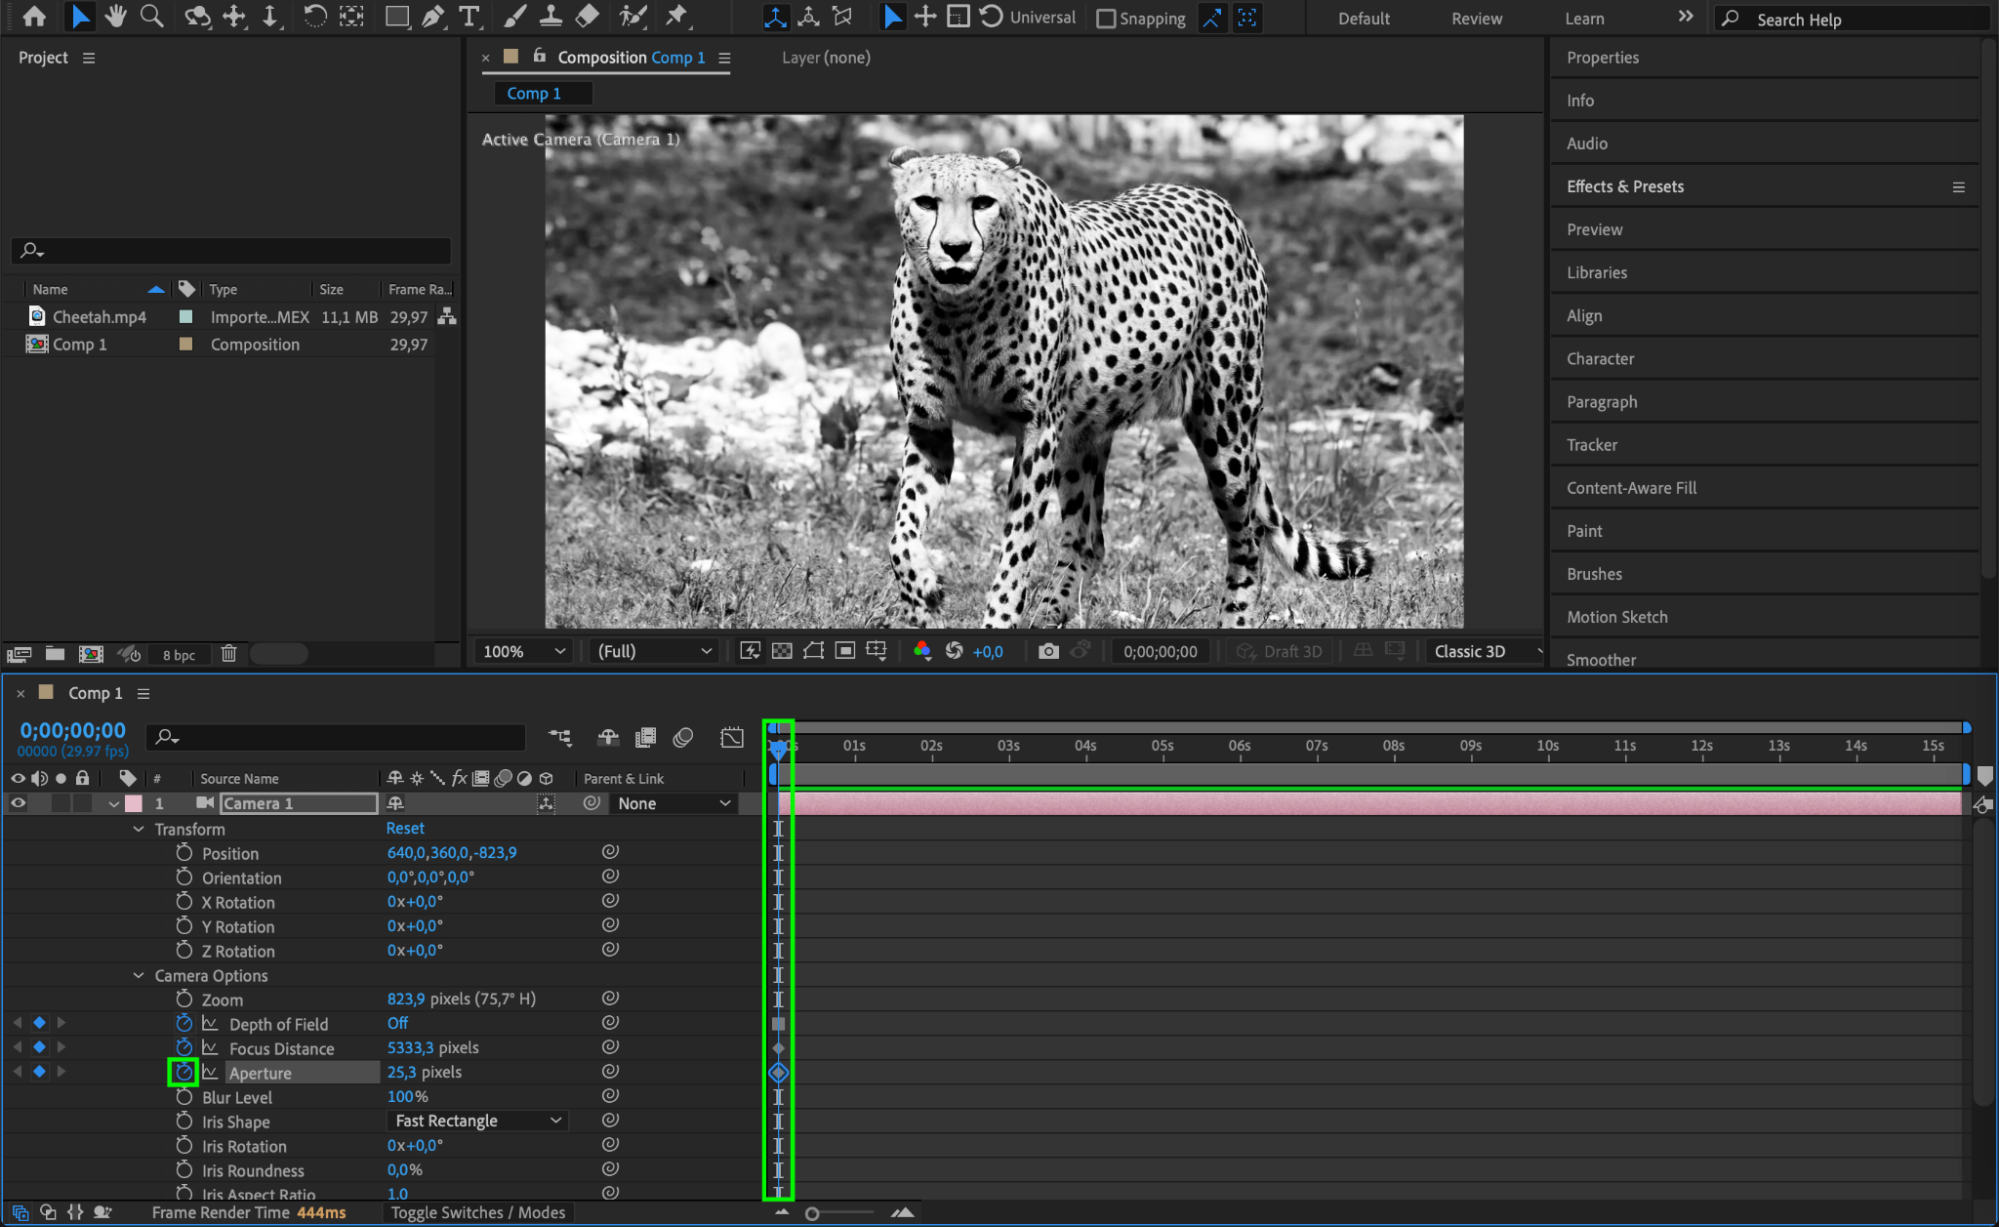
To simulate camera movement, you need to create a new camera layer. Go to Layer > New > Camera to create the camera layer. In the timeline panel, click the cube icon next to the footage layer to enable 3D mode. This will allow you to manipulate the camera in three dimensions. Adjust the camera settings, such as focal length, aperture, and depth of field, to achieve the desired look.

Step 4: Add Keyframes for Camera Shake
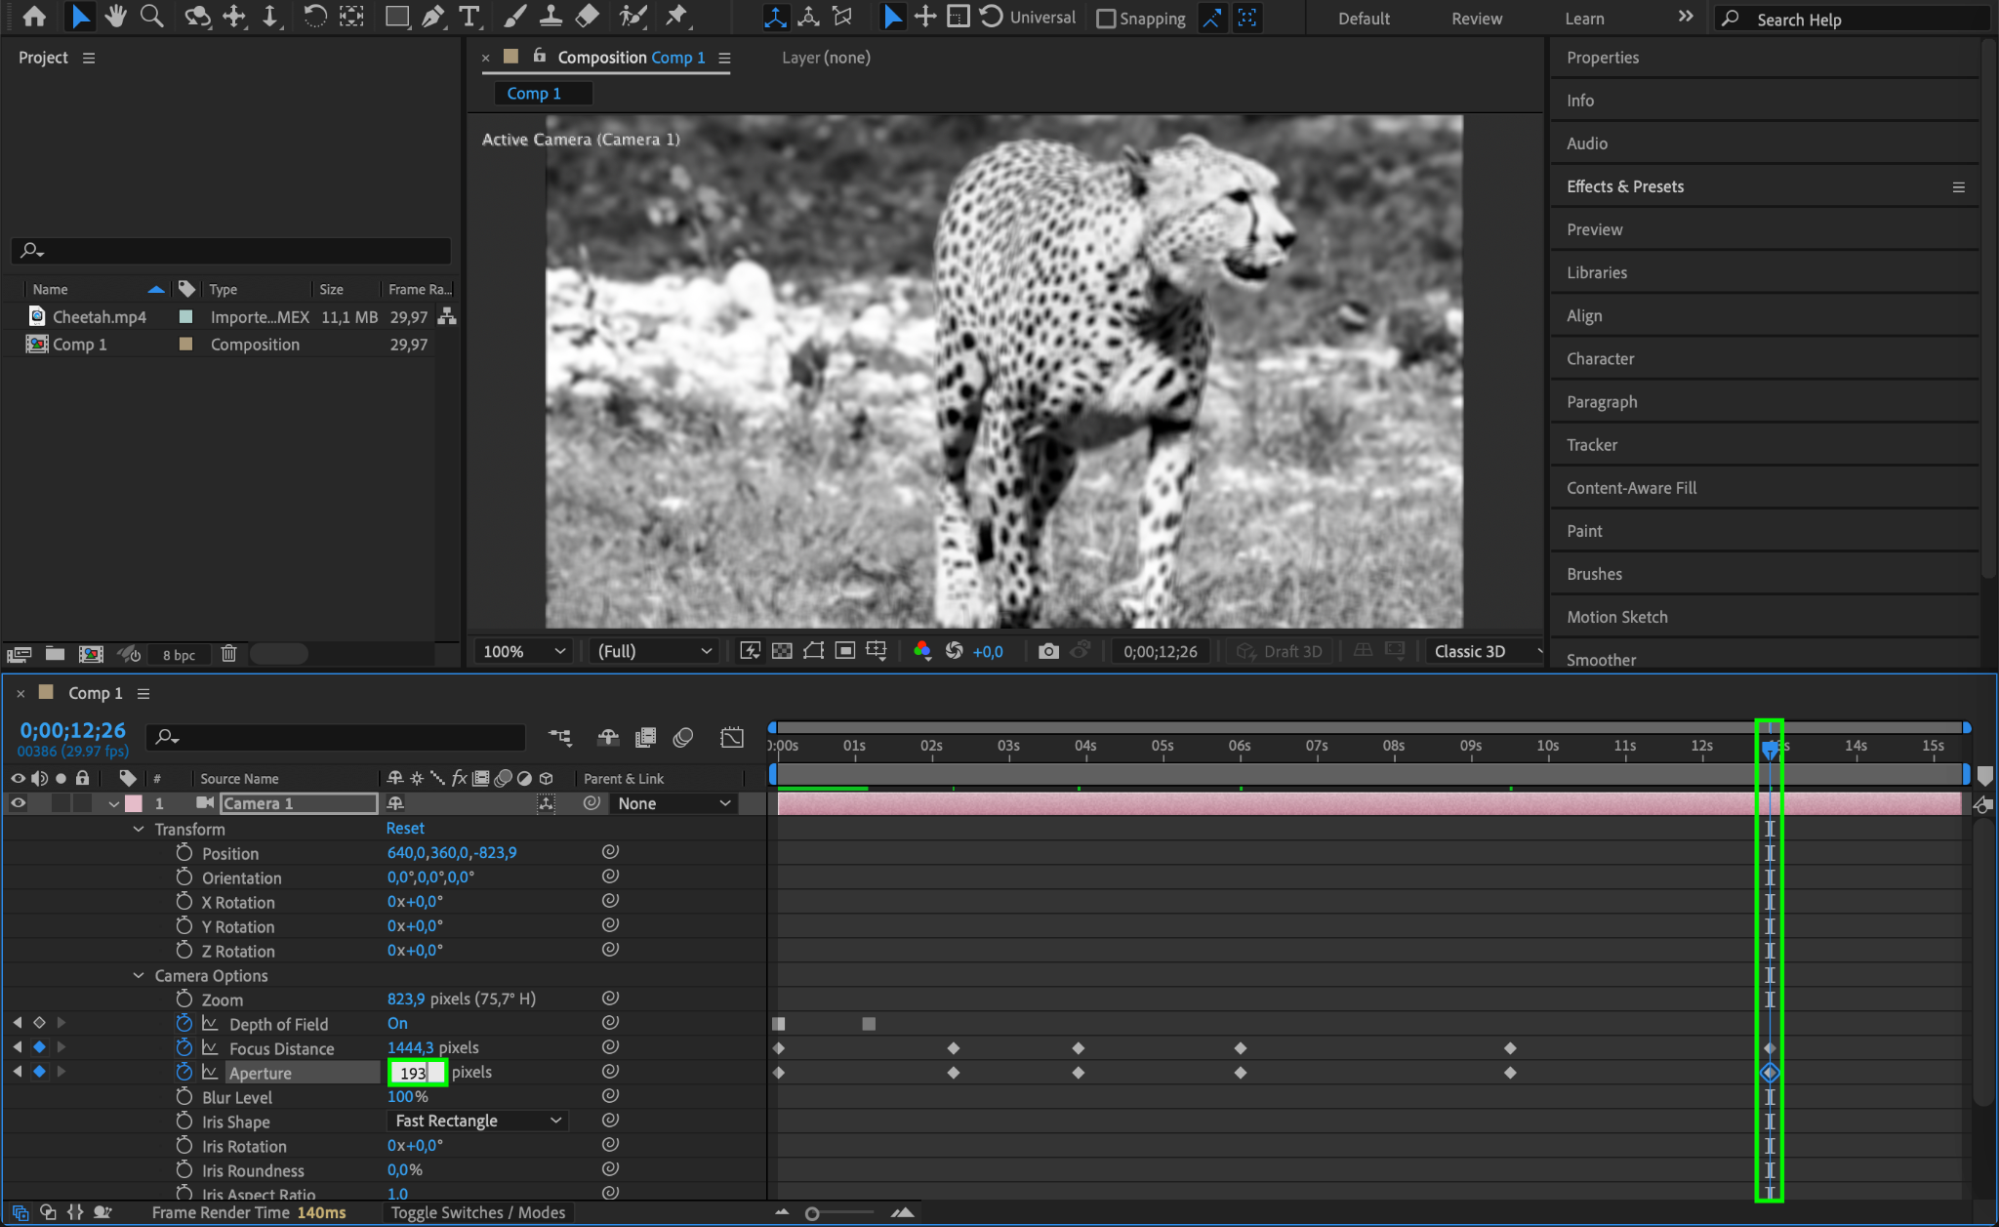
With the camera layer selected, open the Transform options by clicking the arrow next to the camera layer in the timeline. Enable the stopwatch icons next to the Position and Rotation properties to create keyframes. Move the Current Time Indicator to the frame where you want the shake to start and add keyframes for both properties. Then, move a few frames ahead and adjust the values for position and rotation to create the shake effect. Repeat this process at various points in the timeline to add camera shake at different moments in your footage.
Step 5: Use the Wiggle Expression for Organic Shake
For a more natural and random camera shake, use the wiggle expression. Alt-click (Option-click on Mac) on the stopwatch icon next to the Position or Rotation property to open the expression field. Type wiggle(frequency, intensity), where “frequency” is how often the shake occurs per second, and “intensity” is the strength of the shake in pixels. For example, wiggle(5,10) will create a shake that occurs 5 times per second with an intensity of 10 pixels. This expression gives your camera shake a more organic feel, making it look less mechanical.
Get 10% off when you subscribe to our newsletter

Conclusion
Adding camera shake in After Effects is a powerful way to enhance the realism and energy of your footage. By mastering keyframing and the wiggle expression, you can create dynamic camera movements that bring your scenes to life. Experiment with different settings to find the perfect balance for your project, and enjoy the creative possibilities that camera shake adds to your video editing toolkit.


