Mastering Motion Blur in After Effects
Introduction to Motion Blur in After Effects
Motion blur is a critical technique in video design and post-production that adds a layer of realism and depth to animations. By simulating the natural blur that occurs when objects move quickly, motion blur can make your animations appear smoother and more lifelike. Whether you’re aiming for a cinematic effect or simply want to enhance the dynamism of your video, mastering motion blur in After Effects can elevate your project to new heights.
In this article, we’ll explore how to effectively apply motion blur in After Effects, covering various methods and tips to ensure you achieve the desired effect. From using built-in tools to applying advanced effects, you’ll be well-equipped to create stunning visuals that captivate your audience.
1. Enable Motion Blur
After Effects provides a built-in option to enable motion blur for individual layers, which is one of the simplest ways to add this effect. To apply it:
Select the layer you want to add motion blur to.
On the timeline, click the “Enable Motion Blur” button (represented by three overlapping circles) to activate motion blur for that layer.
Additionally, ensure that the main “Enable Motion Blur” switch for the entire composition is turned on (located at the top of the timeline panel).
This method automatically applies motion blur based on the movement of the layer, making it a quick and effective way to add realism to your animations. 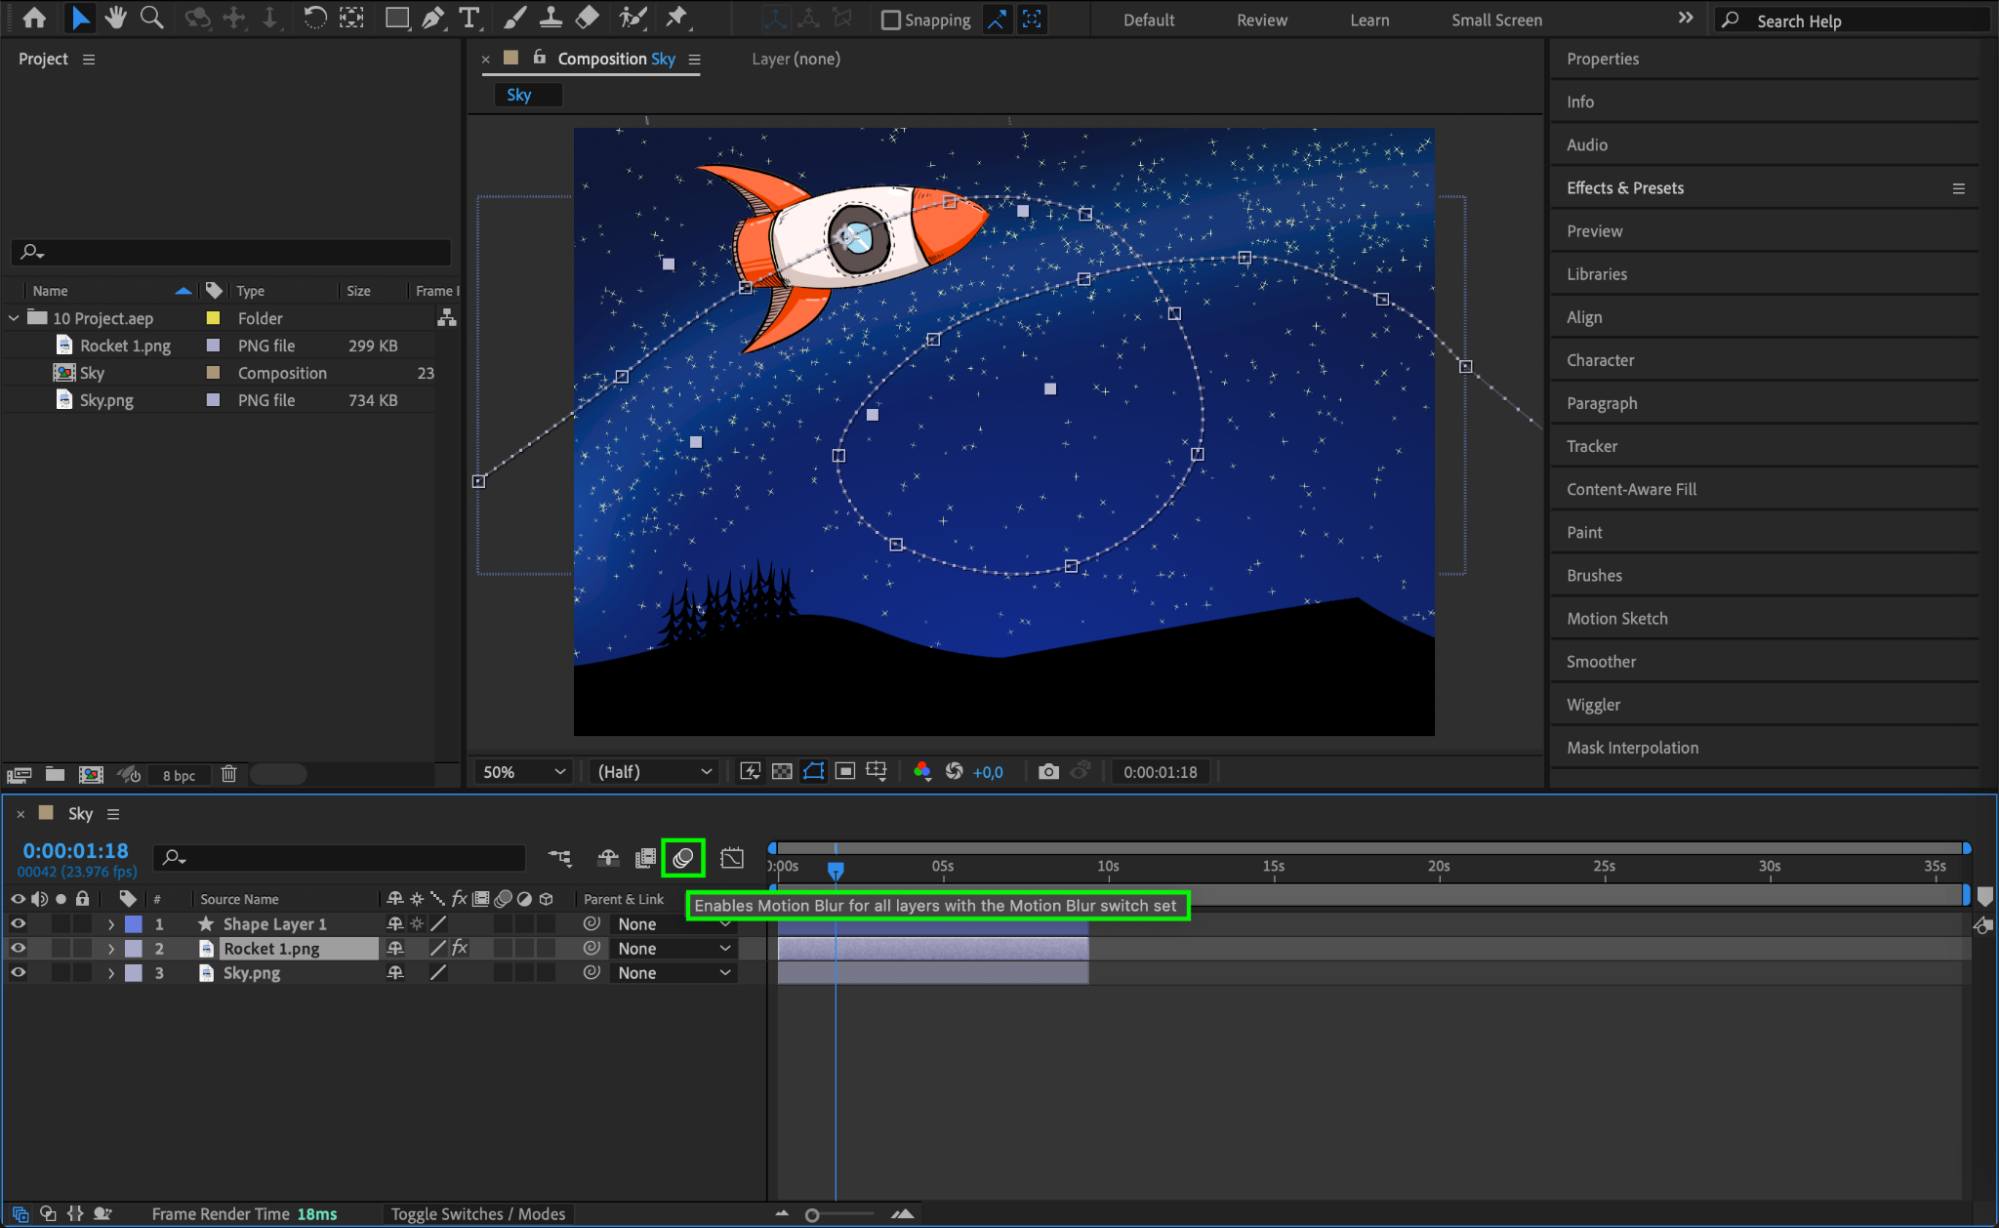
 2. Apply the CC Force Motion Blur Effect
For more control over the motion blur, you can use the CC Force Motion Blur effect, which offers additional settings to fine-tune the effect:
Select the layer to which you want to add motion blur.
Go to the “Effects & Presets” panel, navigate to the “Time” category, and drag the “CC Force Motion Blur” effect onto your layer.
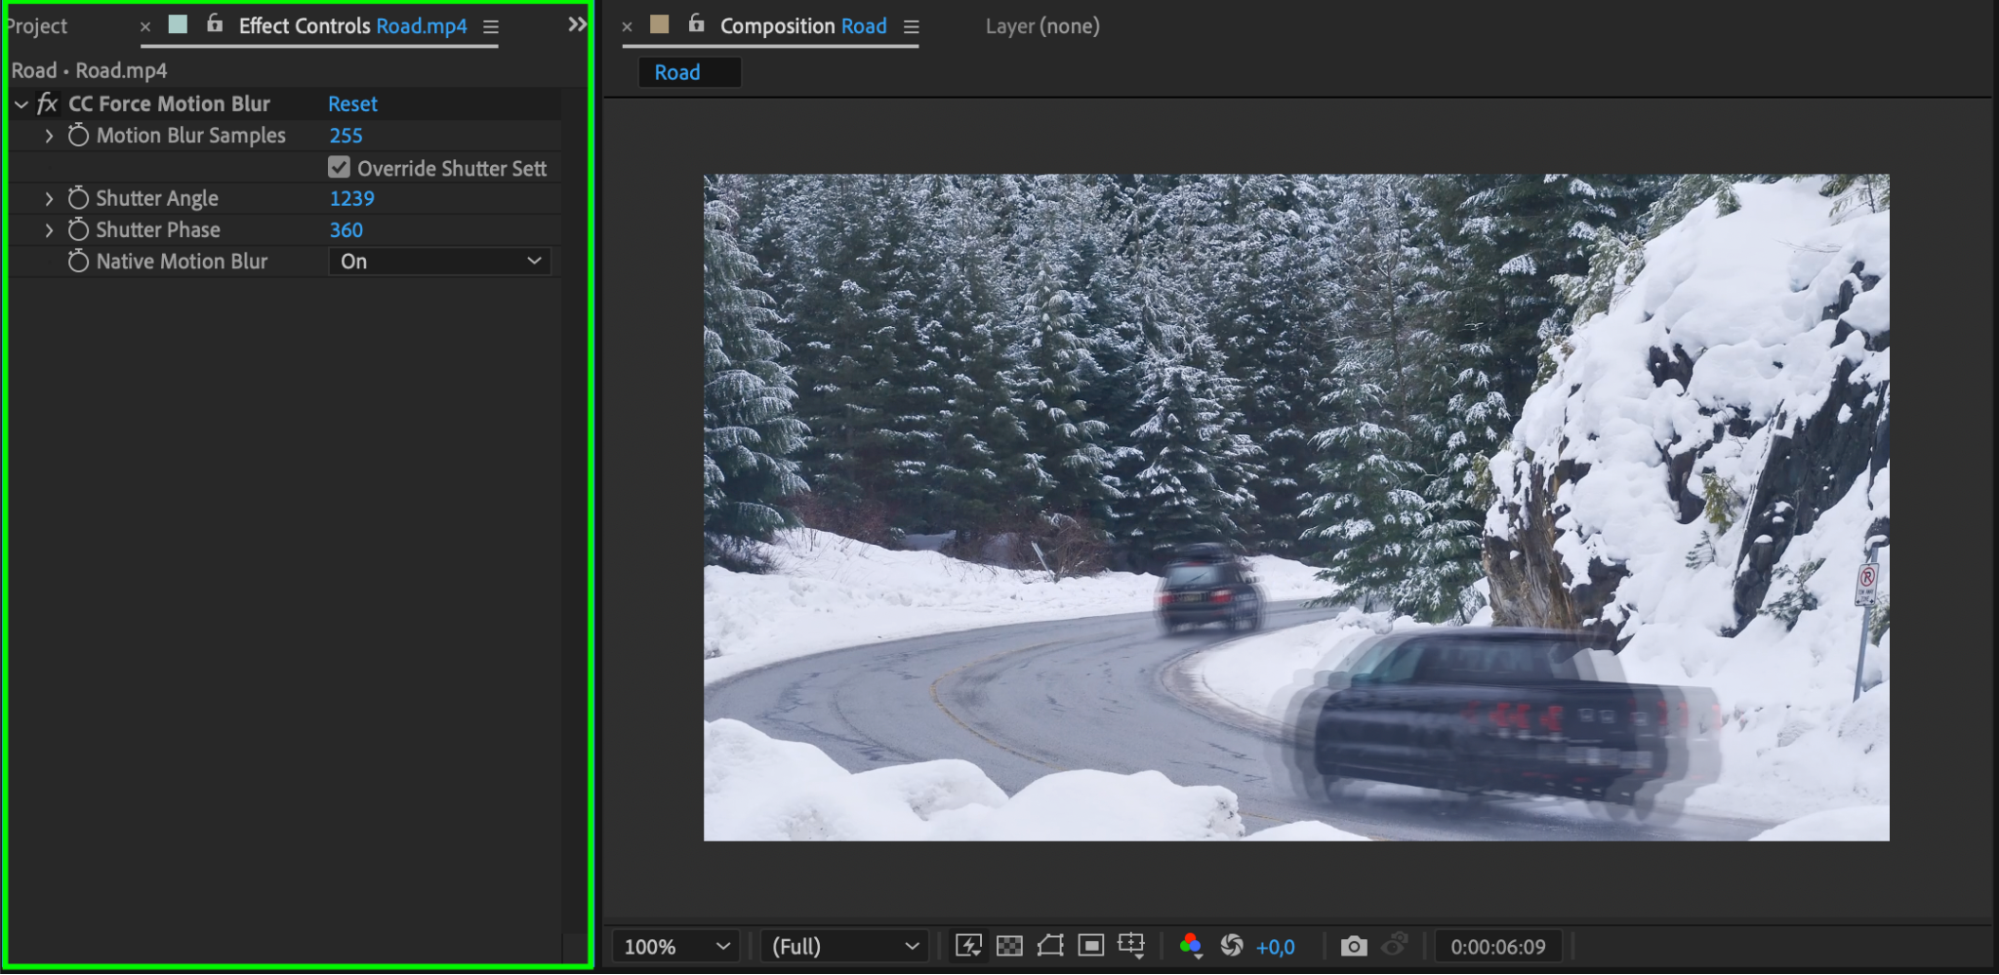
Adjust the effect’s properties, such as “Shutter Angle” to control the amount of blur, “Shutter Phase” to adjust the timing, and “Motion Blur Samples” to set the quality of the blur.
This method is particularly useful for scenes with complex motion or when the built-in motion blur doesn’t achieve the desired look.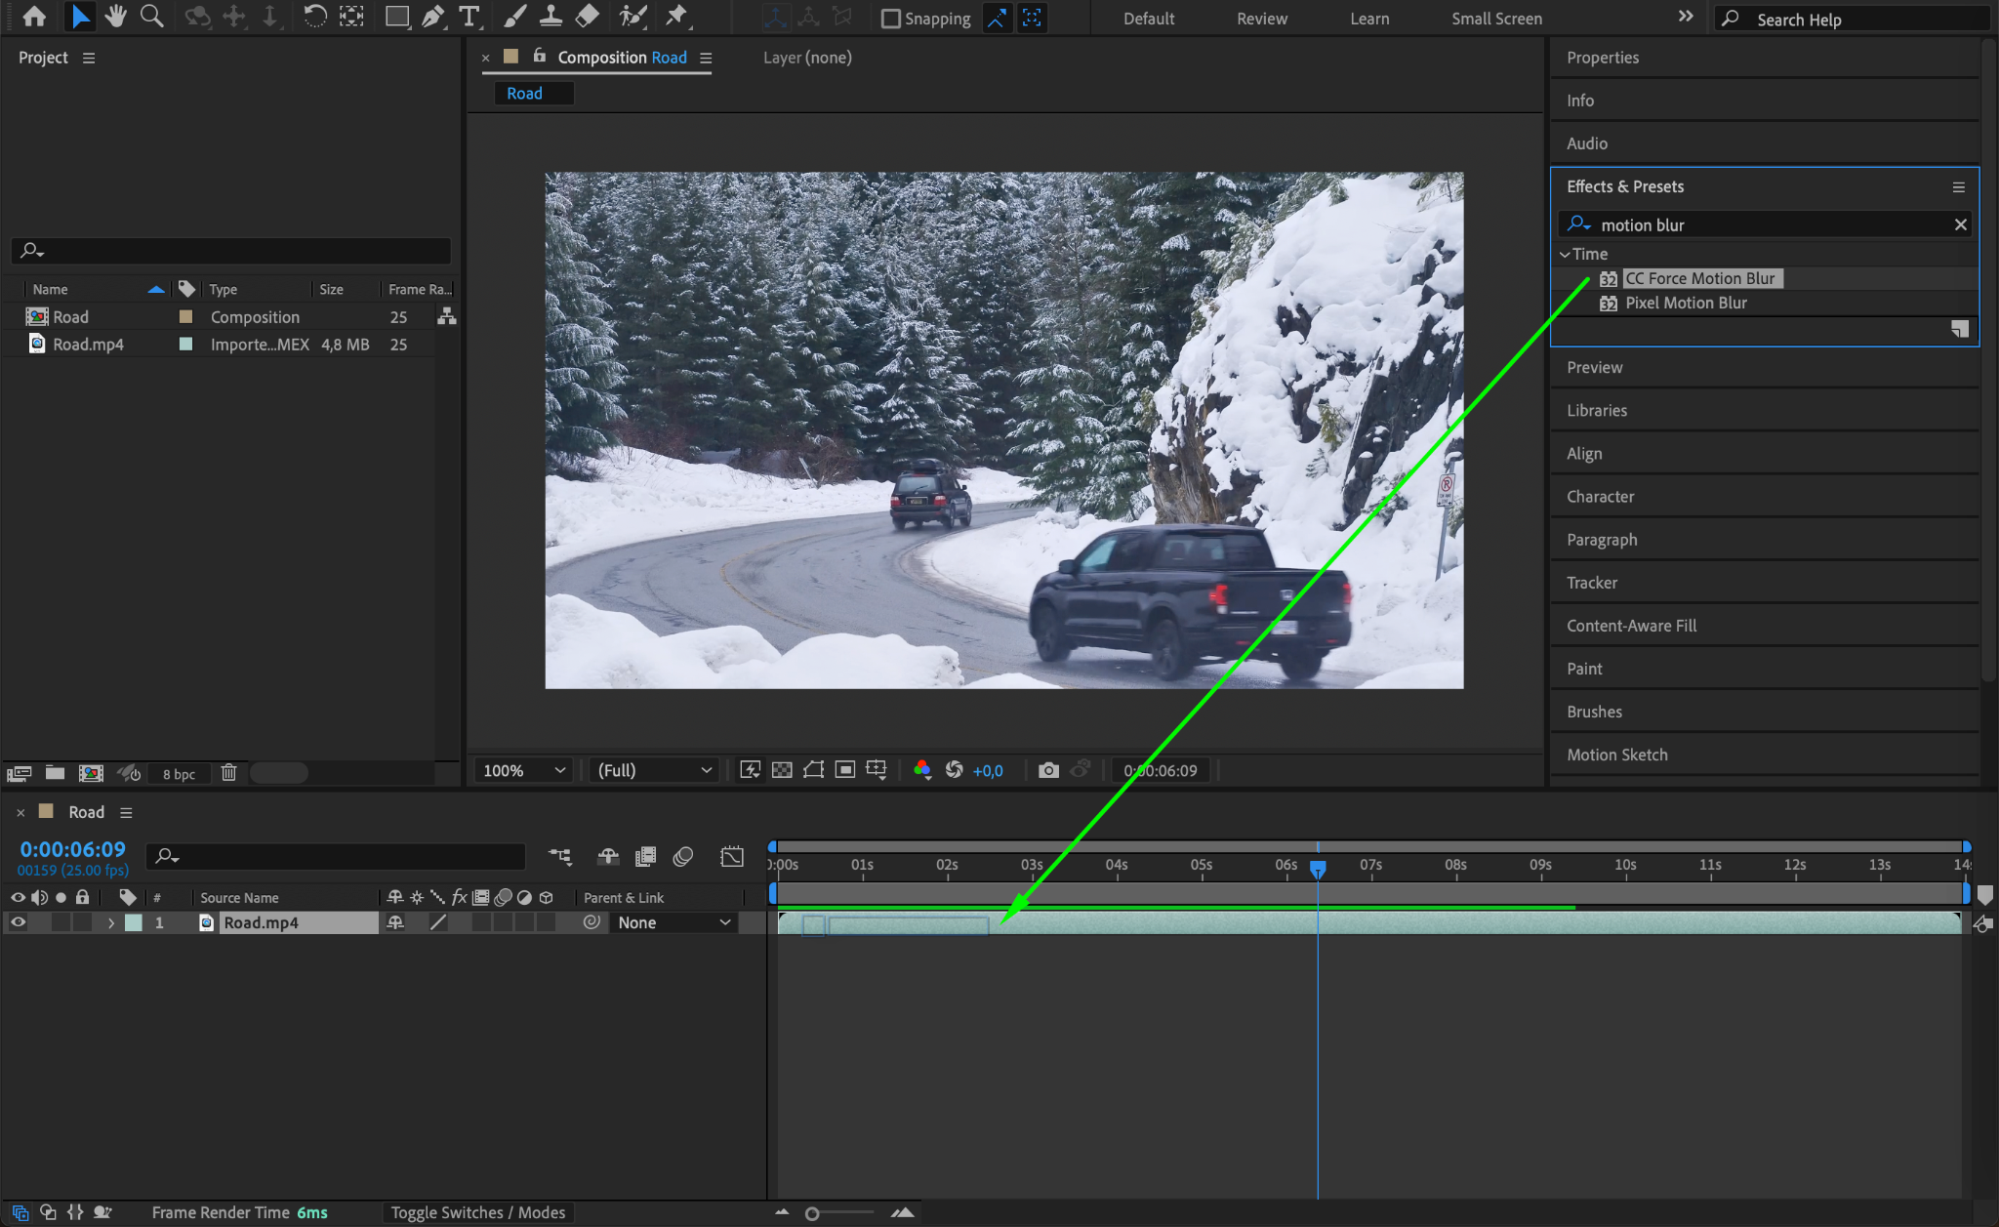
 3. Use the Directional Blur Effect
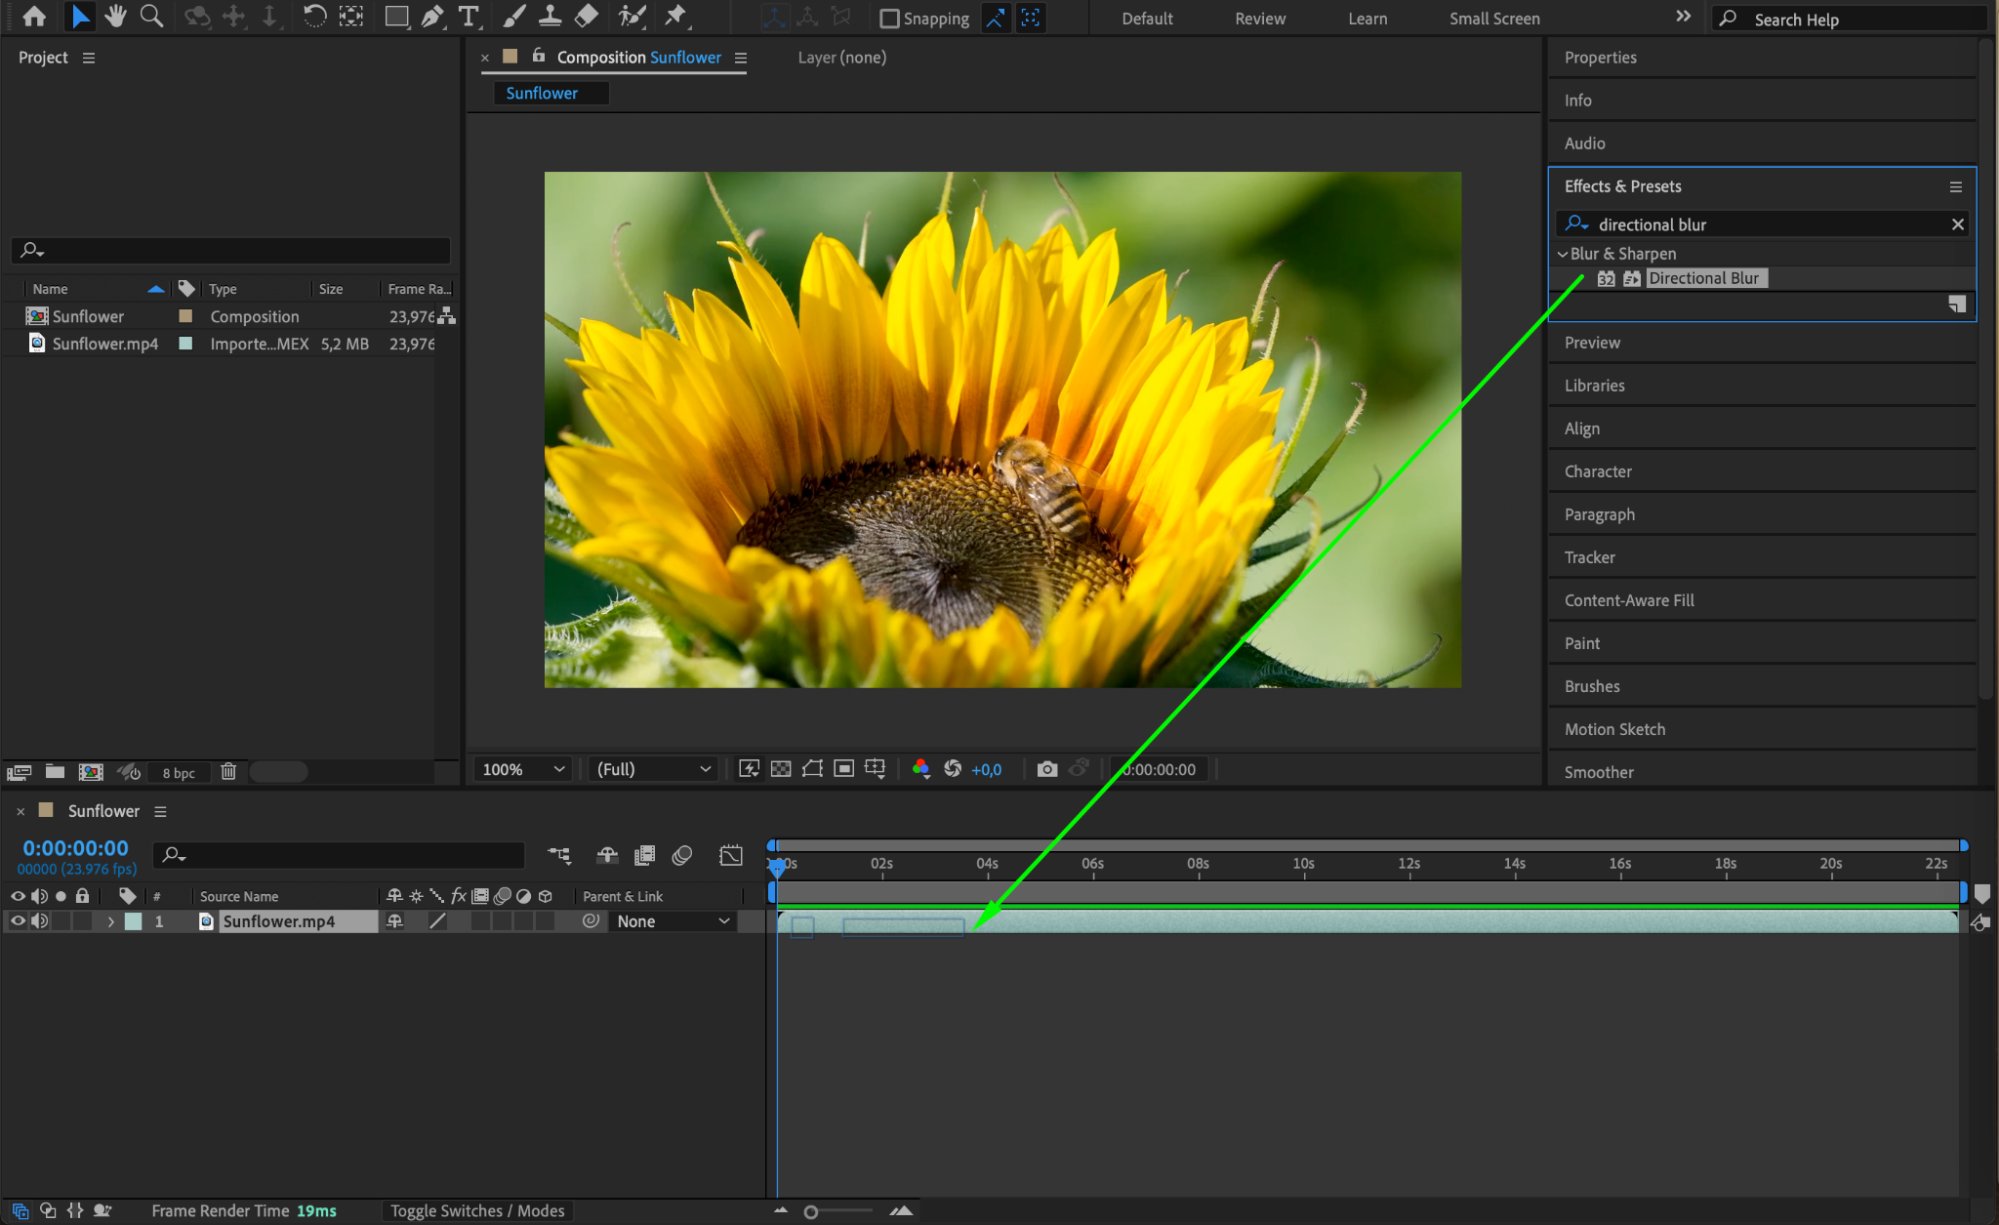
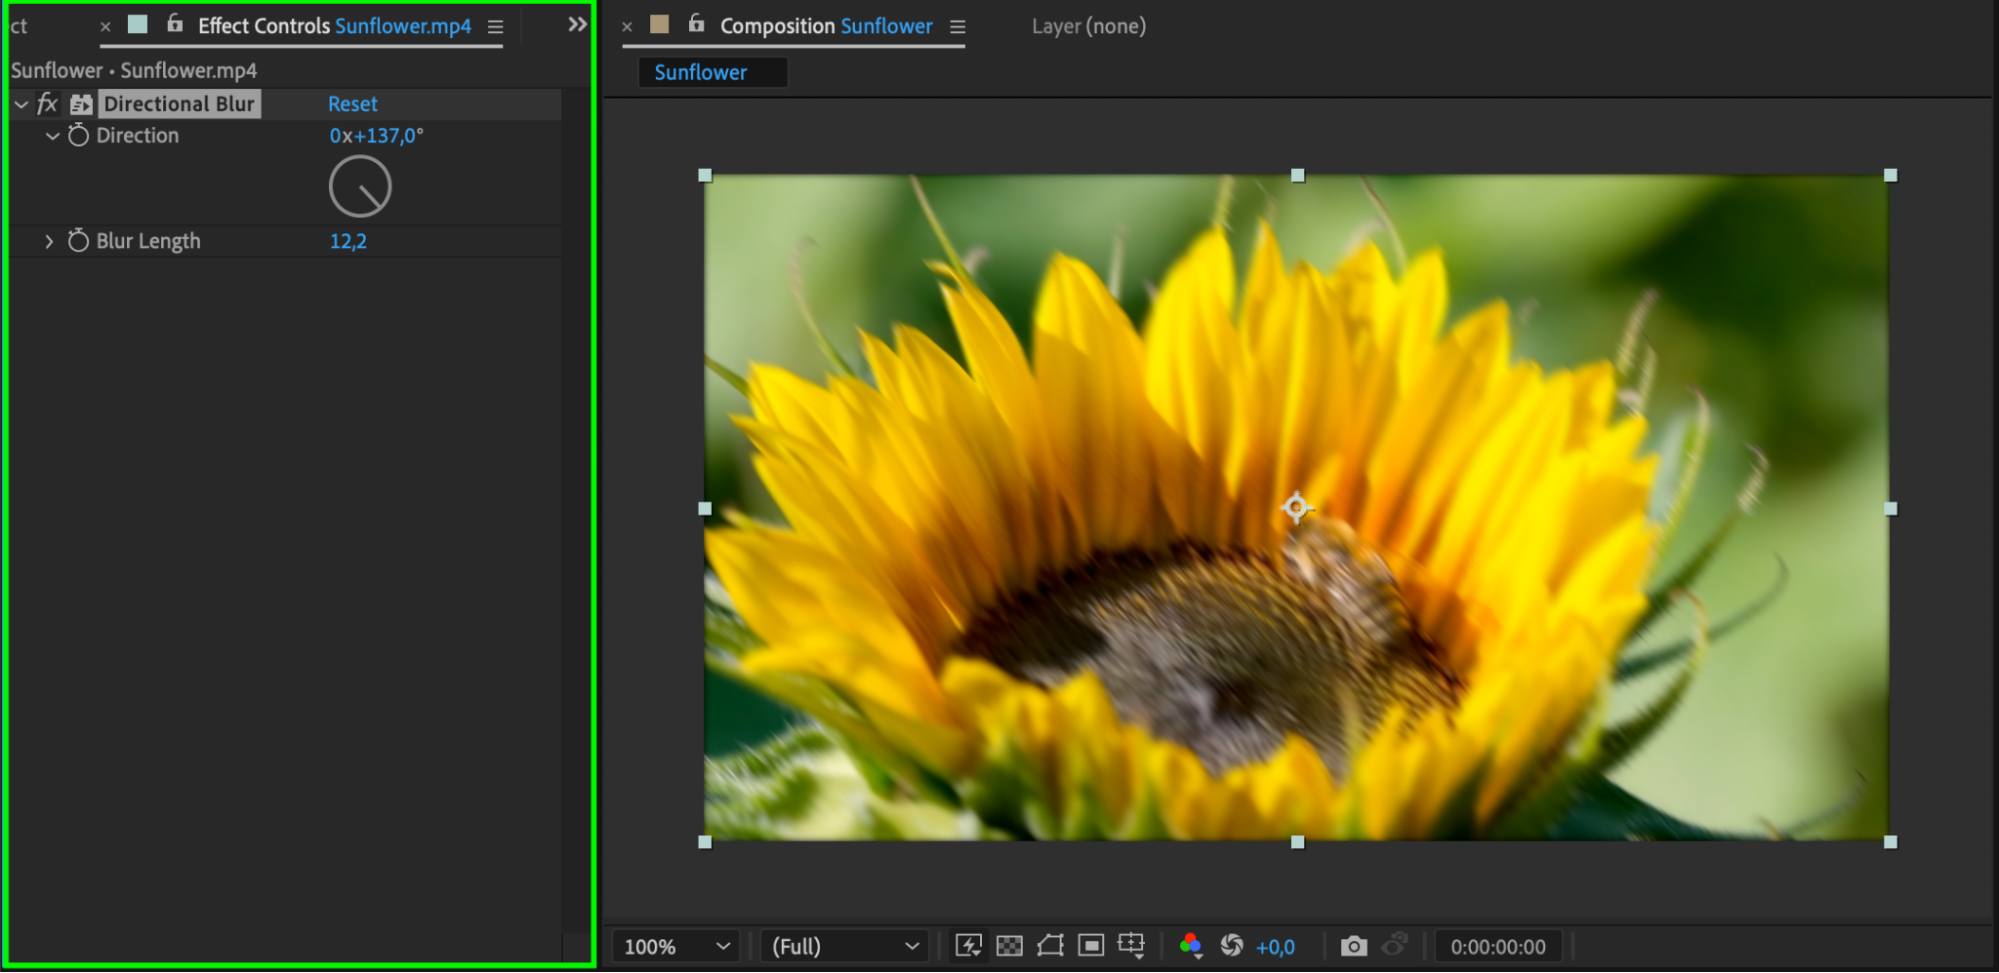
Another method to create motion blur is by using the Directional Blur effect, which allows you to control the direction and intensity of the blur:
Select the layer to which you want to apply the effect.
In the “Effects & Presets” panel, navigate to the “Blur & Sharpen” category, and choose the “Directional Blur” effect.
Adjust the “Direction” parameter to set the angle of the blur, and the “Blur Length” to control the intensity of the effect.
Get 10% off when you subscribe to our newsletter

Directional Blur is ideal for creating motion blur in a specific direction, making it perfect for linear movements such as sliding text or objects moving horizontally or vertically across the screen.
 Conclusion
When using motion blur in After Effects, the key is to find the right balance between the intensity of the effect and the overall style of your animation. Experimenting with different settings and techniques will help you discover the best approach for your specific project.
In conclusion, motion blur is a powerful tool for adding realism and depth to your animations. By mastering the techniques outlined above, you can create visually stunning and engaging videos that capture your audience’s attention. Start experimenting with motion blur in After Effects today and watch your animations come to life!
Our Bestsellers


