How to Master Shakes in After Effects
Enhance Your Videos with Impact and Energy
Are you a video designer looking to add more impact and excitement to your videos? Well, you’re in luck! In this guide, we’ll show you how to create shakes in After Effects, a powerful software used for video editing.
Shakes are a great way to make your footage more engaging and captivating. They can add intensity, energy, and stylistic touches to your videos. Imagine creating a shaky camera effect, simulating an earthquake, or enhancing animated elements – the possibilities are endless!
Step 1: Use Keyframes
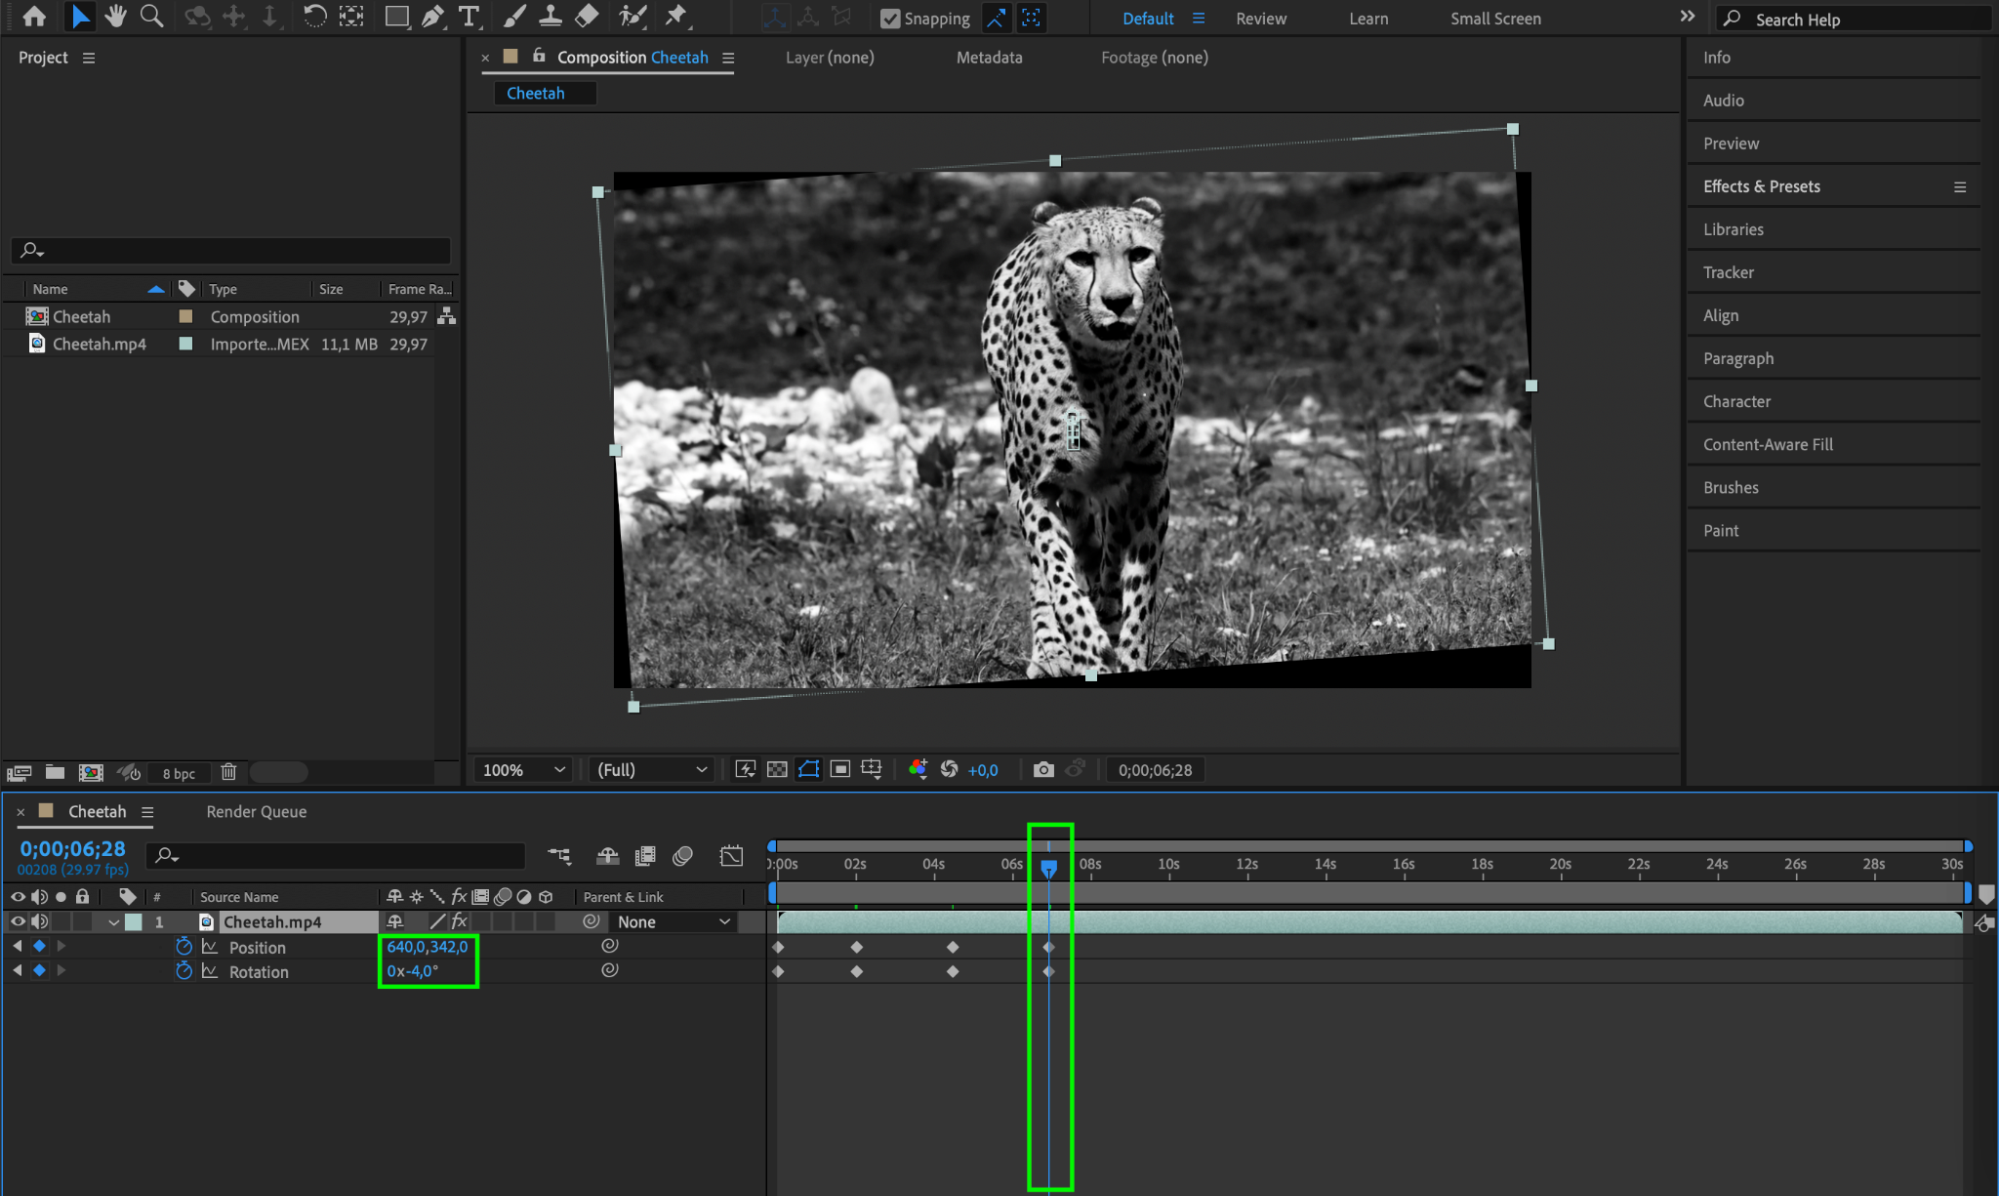
In After Effects, there are various techniques and tools you can use to create shakes. One approach is adjusting the position and rotation properties of your footage. By animating these properties with keyframes, you can simulate realistic shakes, especially for handheld shots. This adds a natural and immersive quality to your videos. The closer together the keyframes are, the faster the shake will be. Additionally, you can use the Easy Ease effect to smooth out the motion. To apply Easy Ease, select all the keyframes, right-click on them, and choose “Keyframe Assistant” > “Easy Ease”. 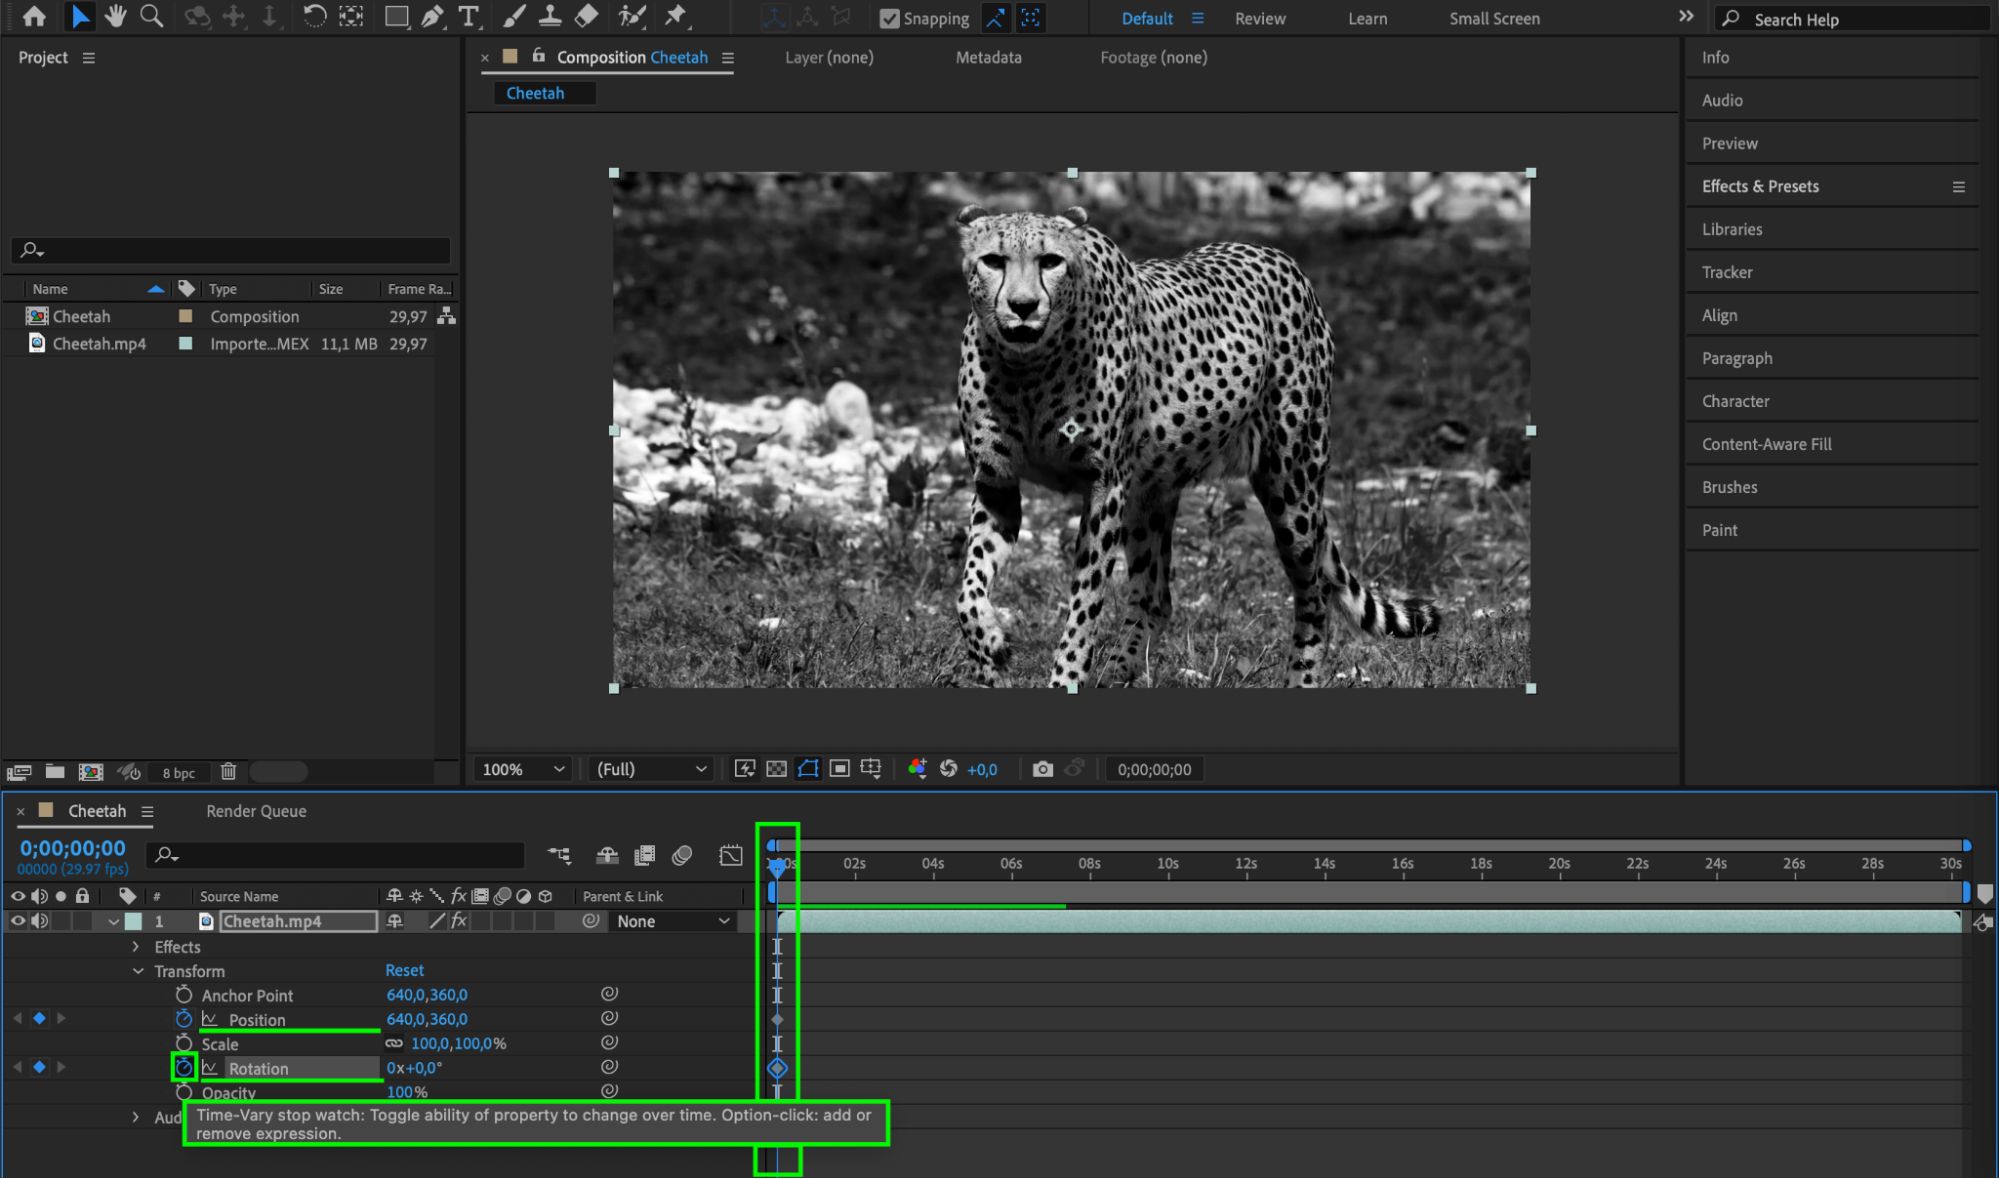

 Step 2: Use Expressions
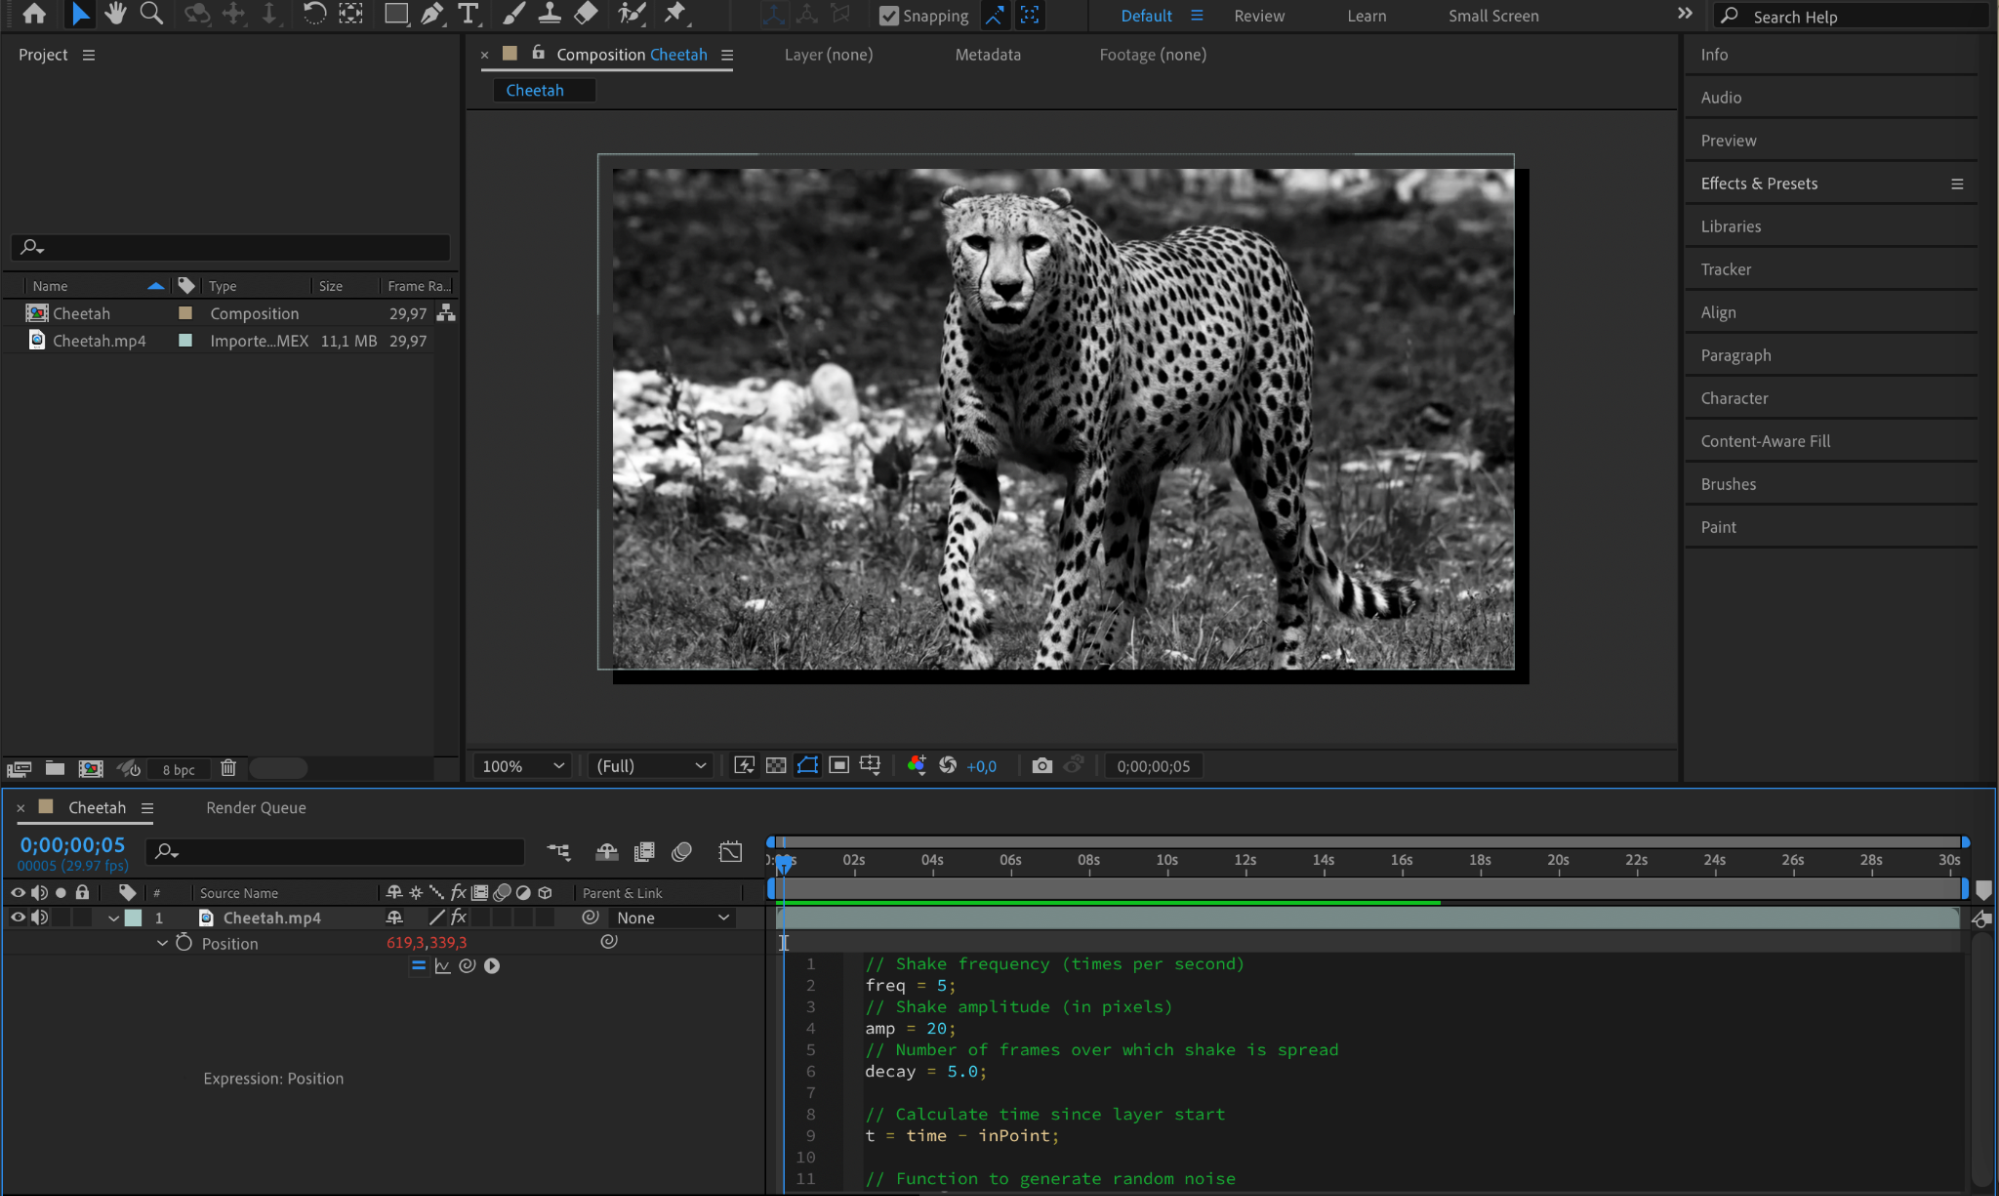
Expressions are another powerful tool for creating dynamic shakes. By utilizing mathematical expressions, you can generate randomized and organic movements, providing your shakes with a more natural feel. This method offers greater control over the intensity and frequency of the shakes.
Here’s an example expression for creating shake effect for the Position property:
// Shake frequency (times per second)
Get 10% off when you subscribe to our newsletter

freq = 5;
// Shake amplitude (in pixels)
amp = 20;
// Number of frames over which shake is spread
decay = 5.0;
// Calculate time since layer start
t = time – inPoint;
// Function to generate random noise
seedRandom(index, true);
n = 0;
if (decay > 0){
n = Math.sin(freq * t * 2 * Math.PI) * amp / (t * decay);
}
x = transform.position[0] + n;
y = transform.position[1] + n;
[x, y]
This expression generates a shake effect for the Position property based on the specified frequency, amplitude, and decay. Adjust the freq, amp, and decay values to customize the shake according to your preferences.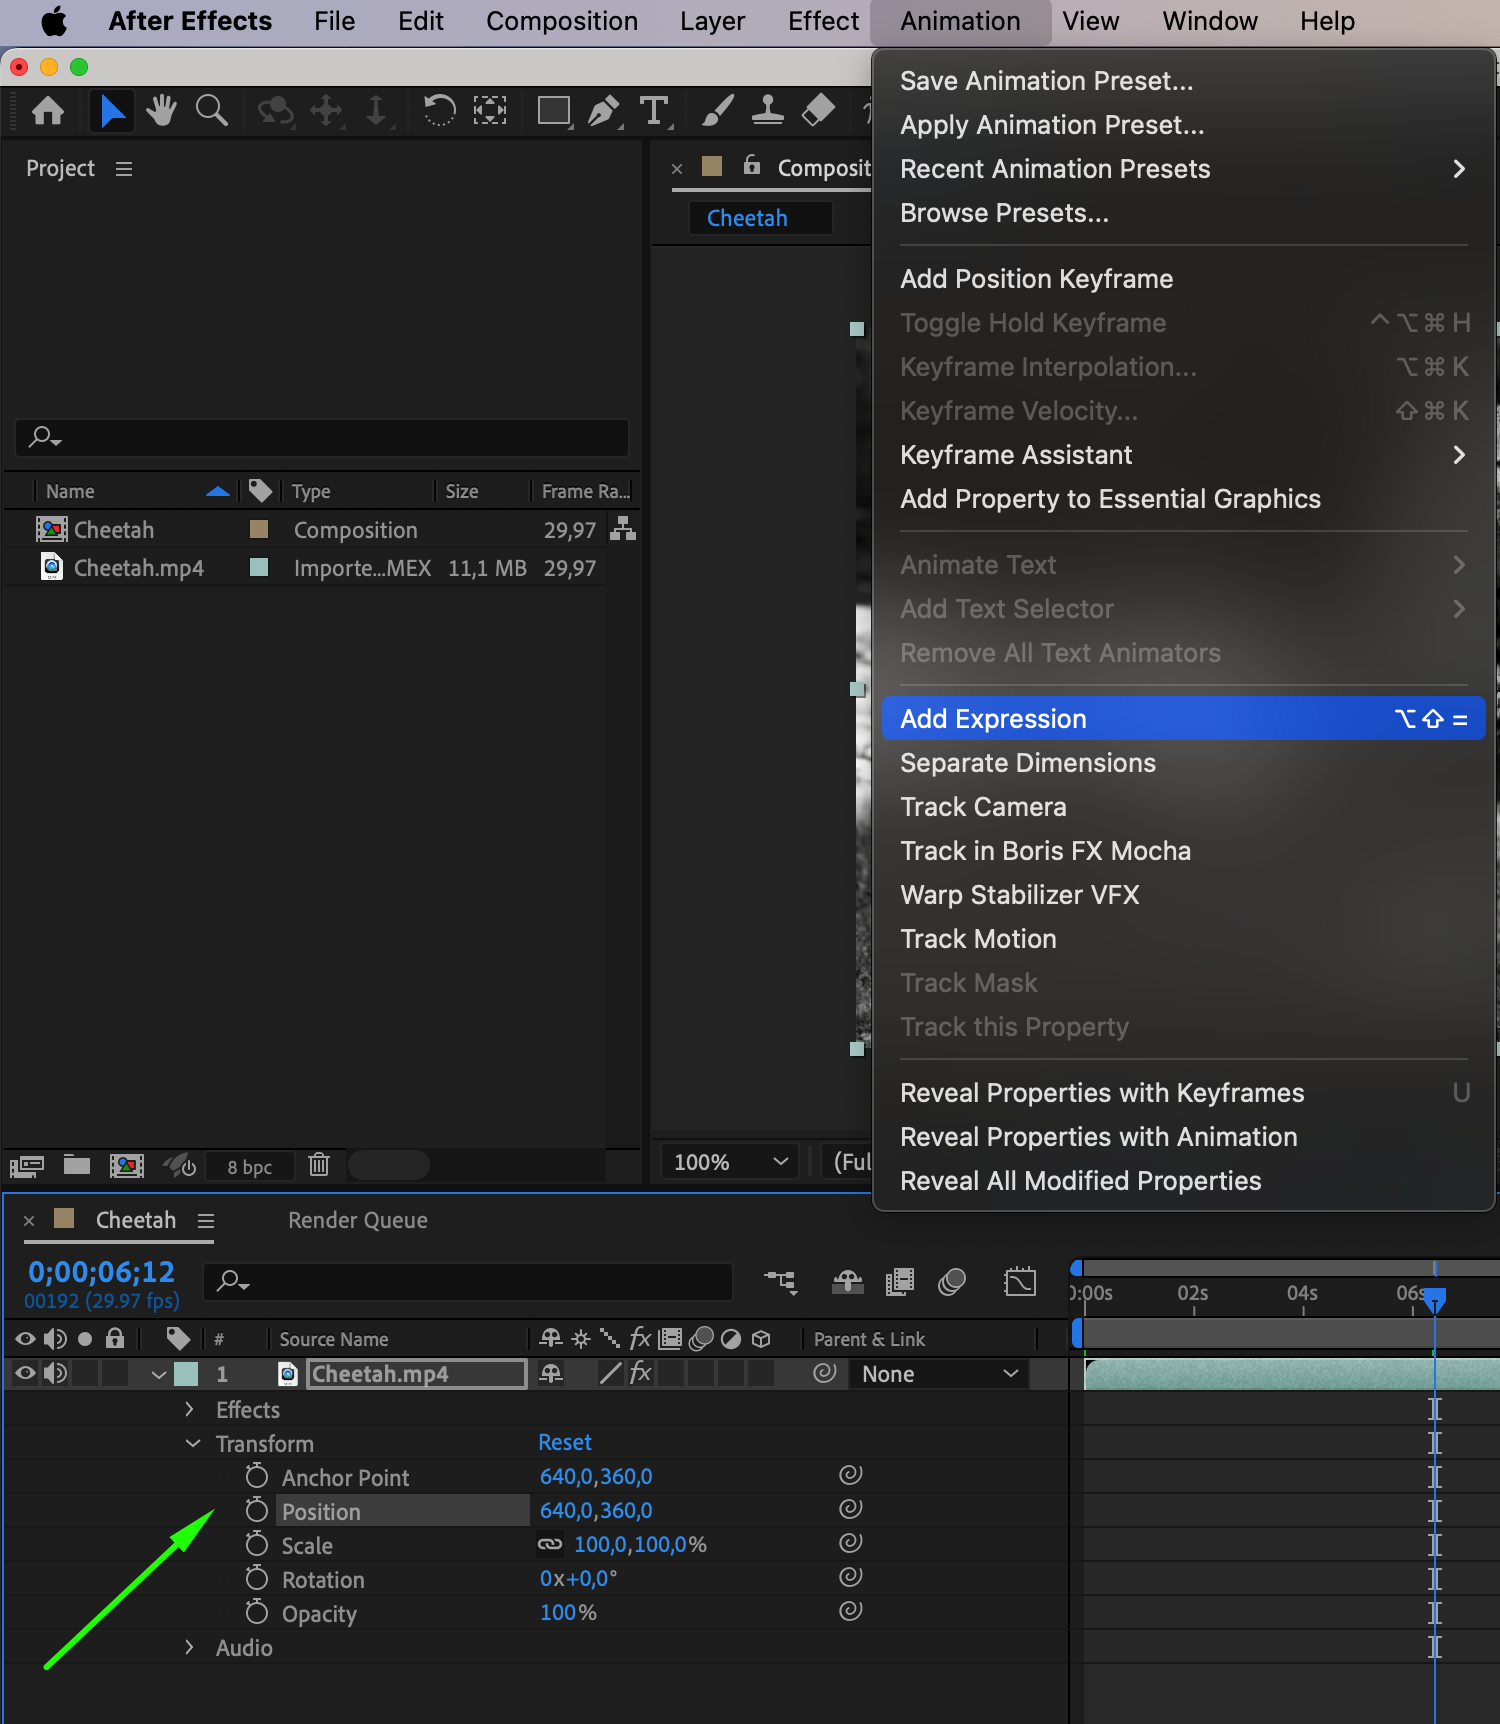
 Step 3: Use Plugins
But wait, there’s more! After Effects also offers a wide range of plugins and presets that can simplify the process of creating shakes. These plugins provide customizable effects, allowing you to achieve shakes with just a few clicks. They often come with additional features like distortion, color correction, and glitch effects, which can further enhance the visual impact of your shakes.
Step 4: Use Track Motion
To make your shakes even more realistic, you can utilize motion tracking techniques. By tracking the movement of specific objects in your footage, you can precisely match the shakes to their motion. This creates a seamless integration and elevates the realism of your shakes.
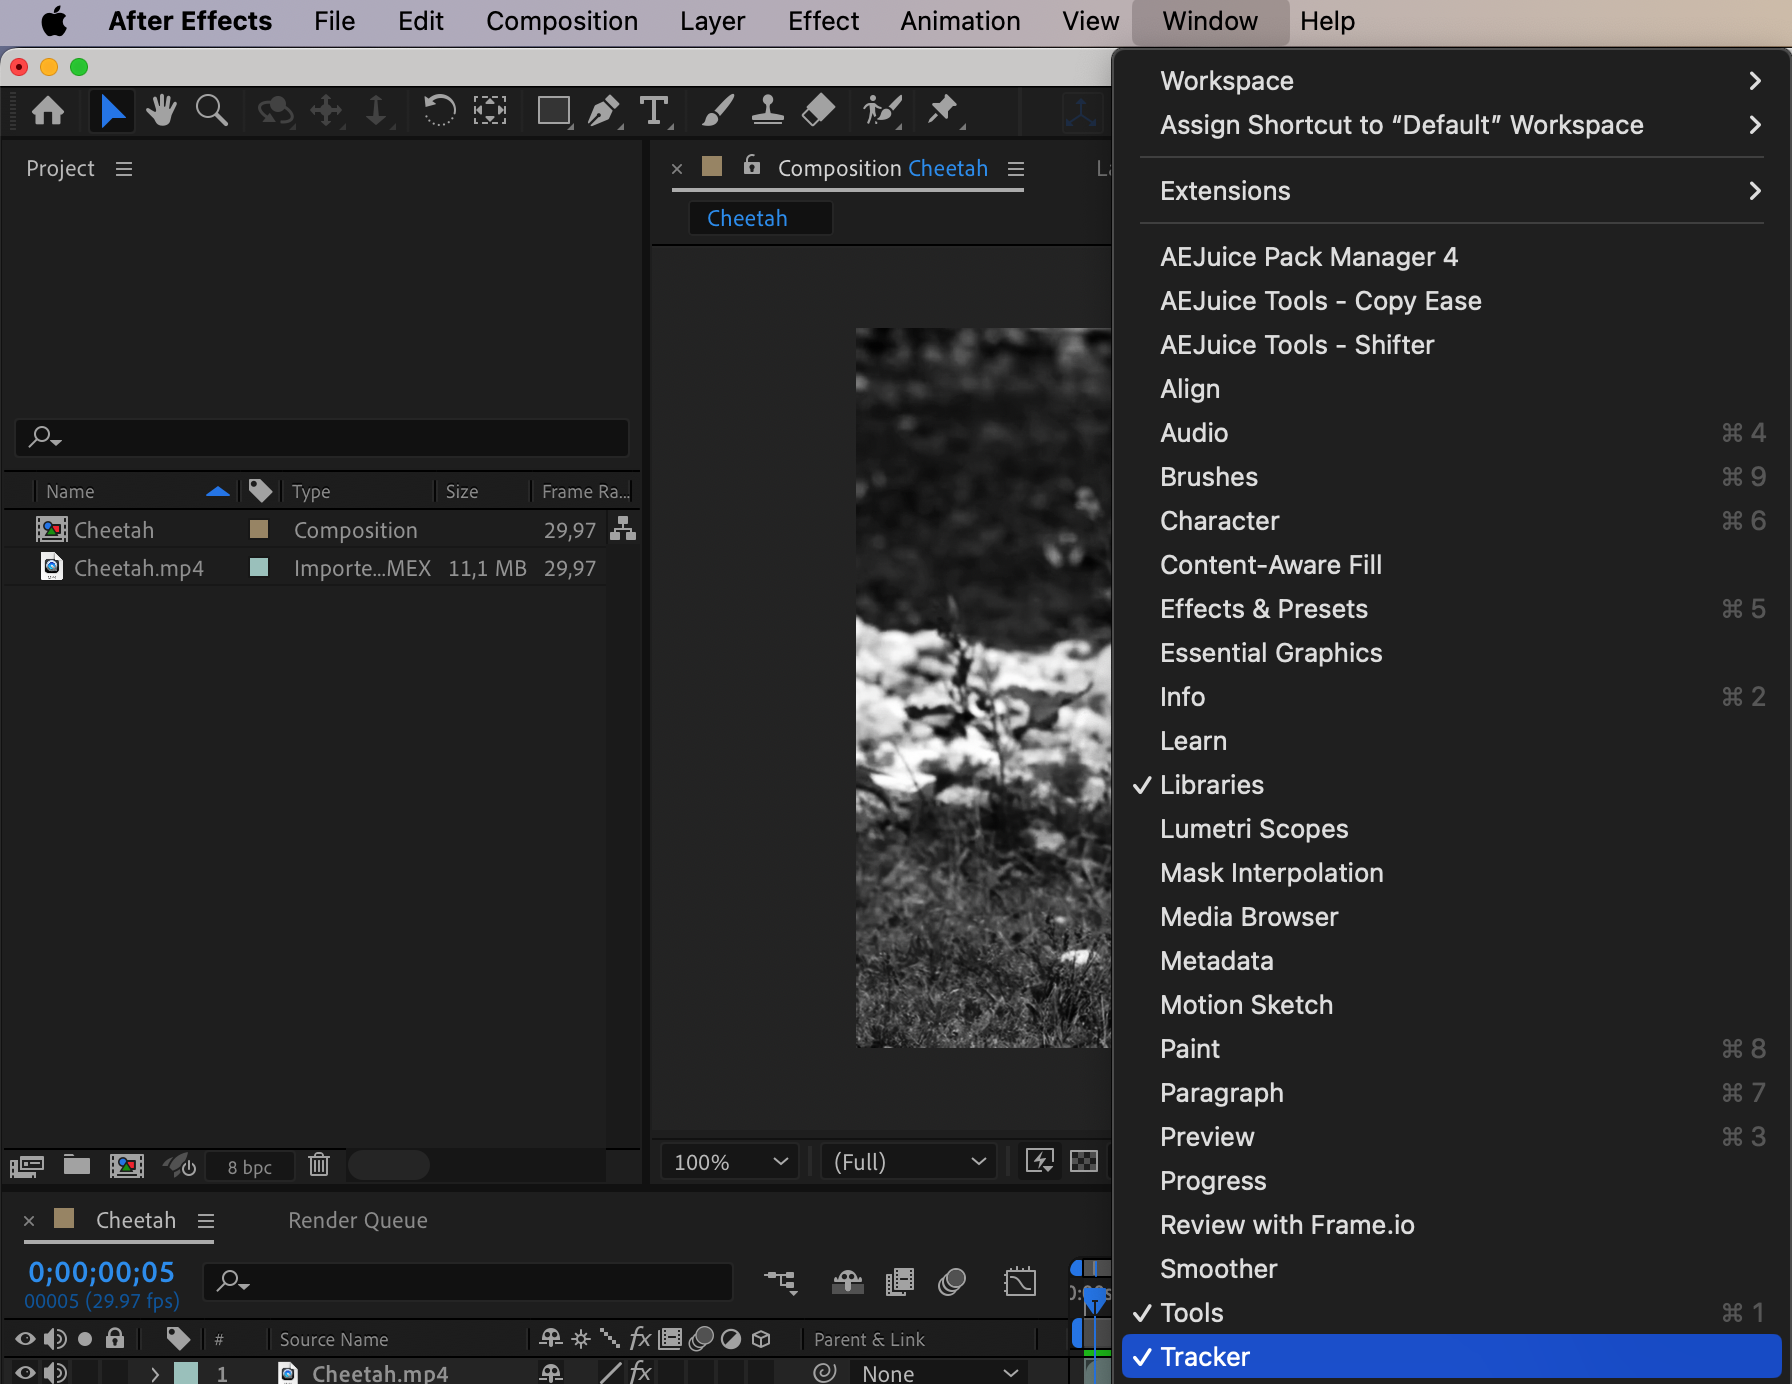
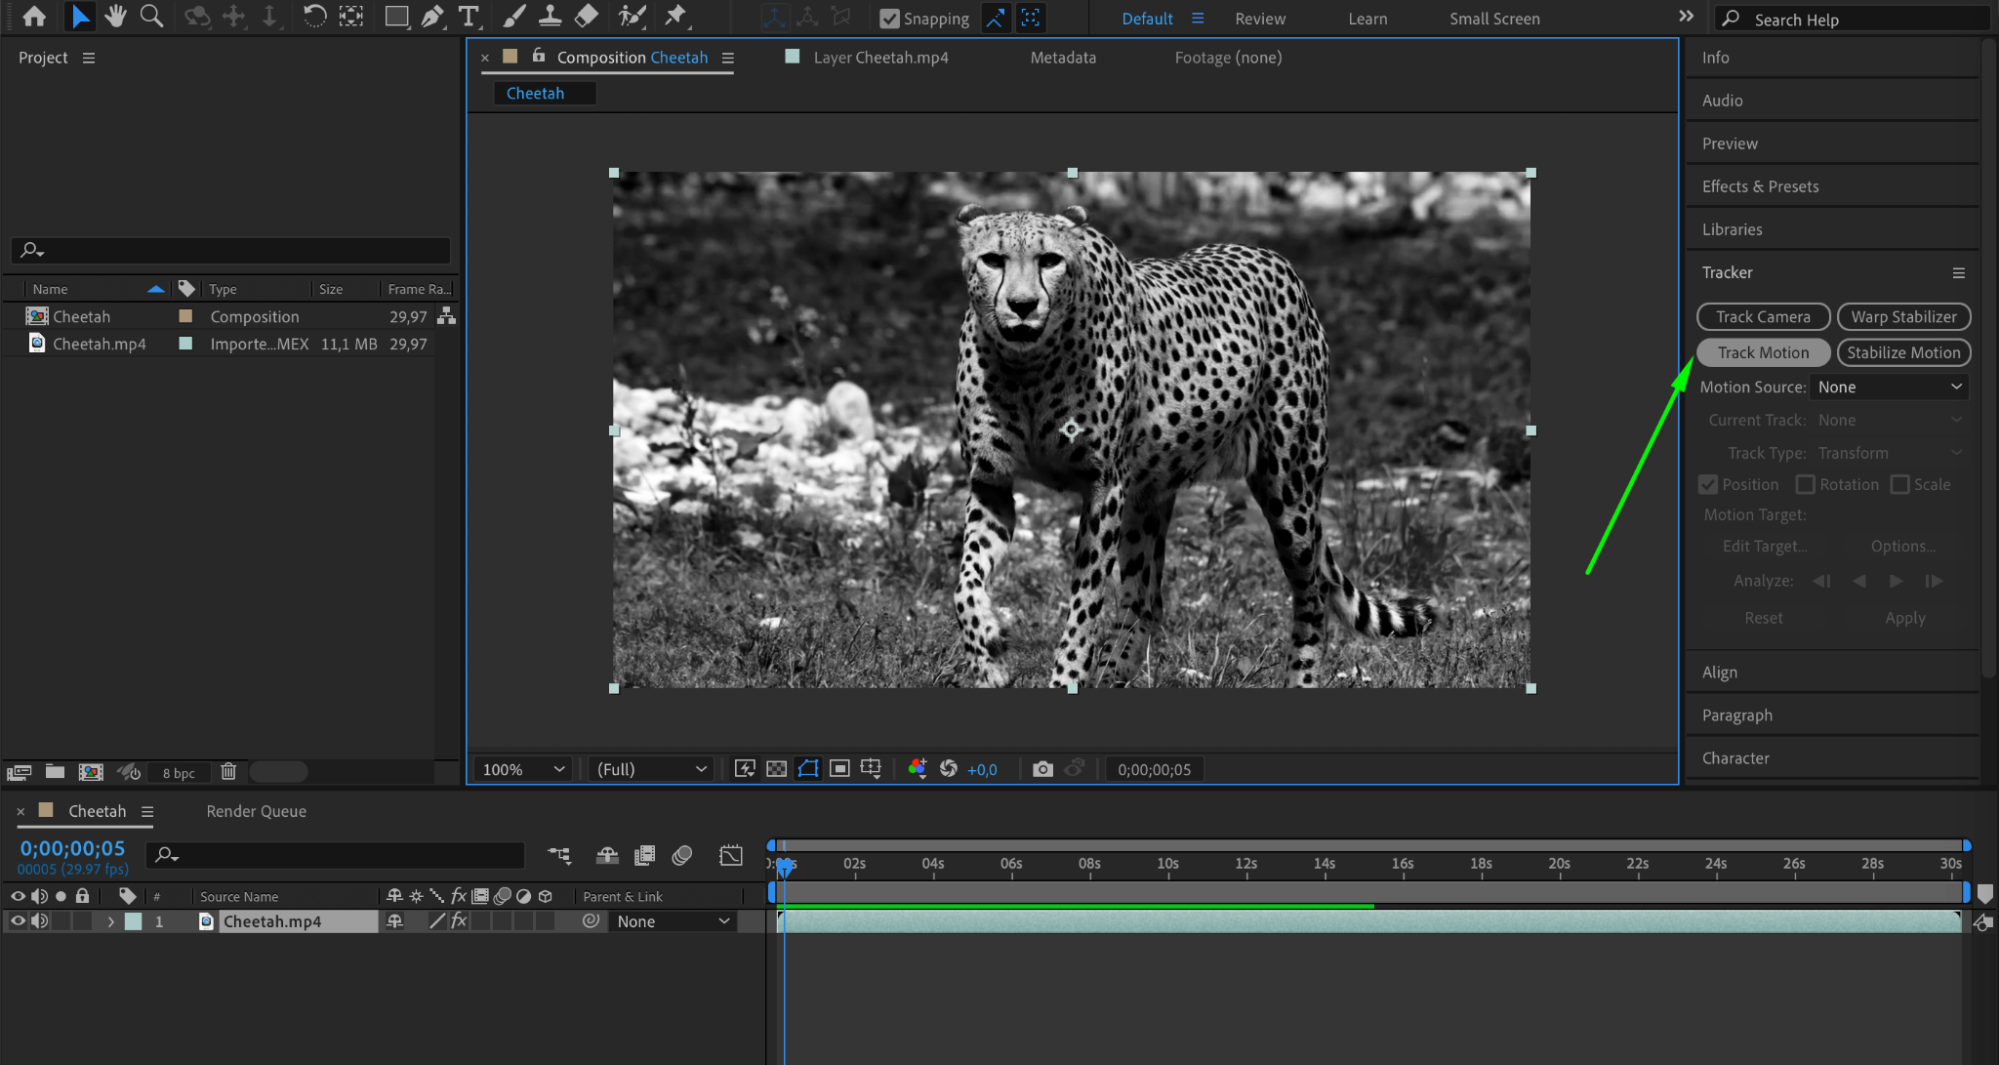
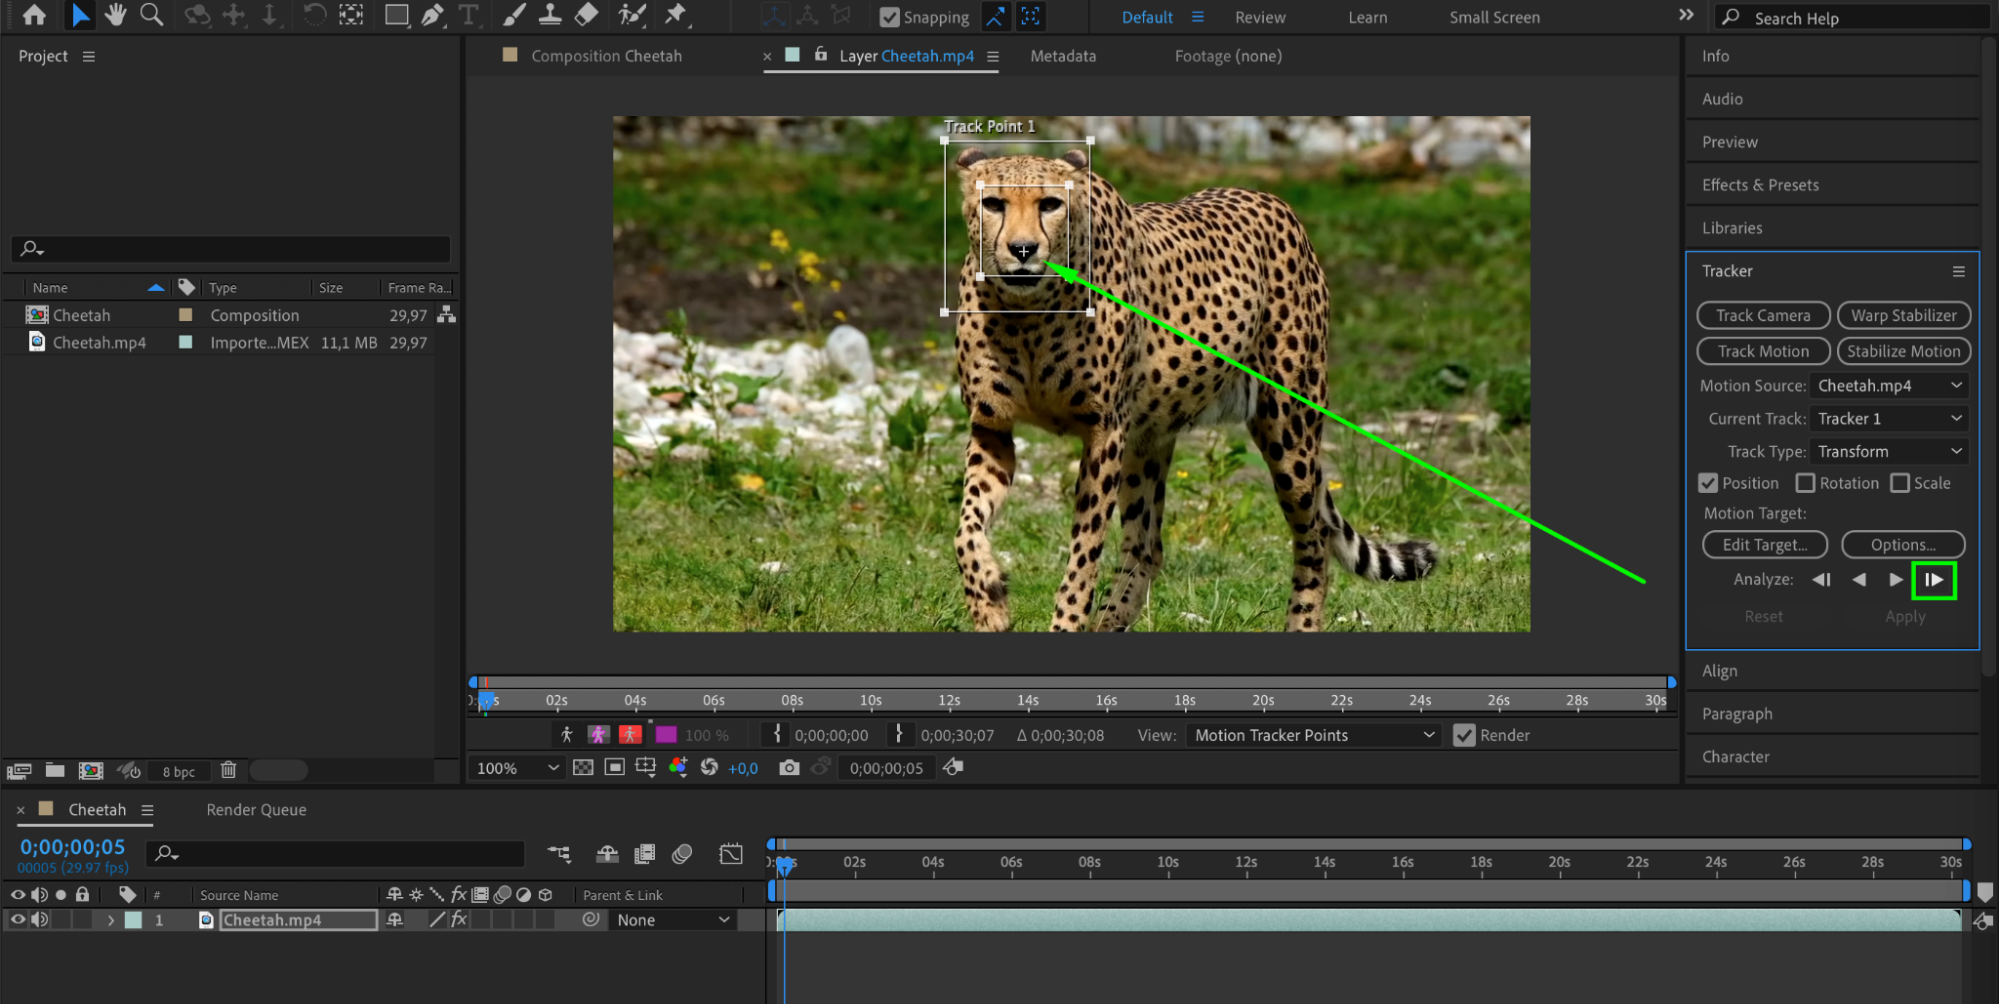
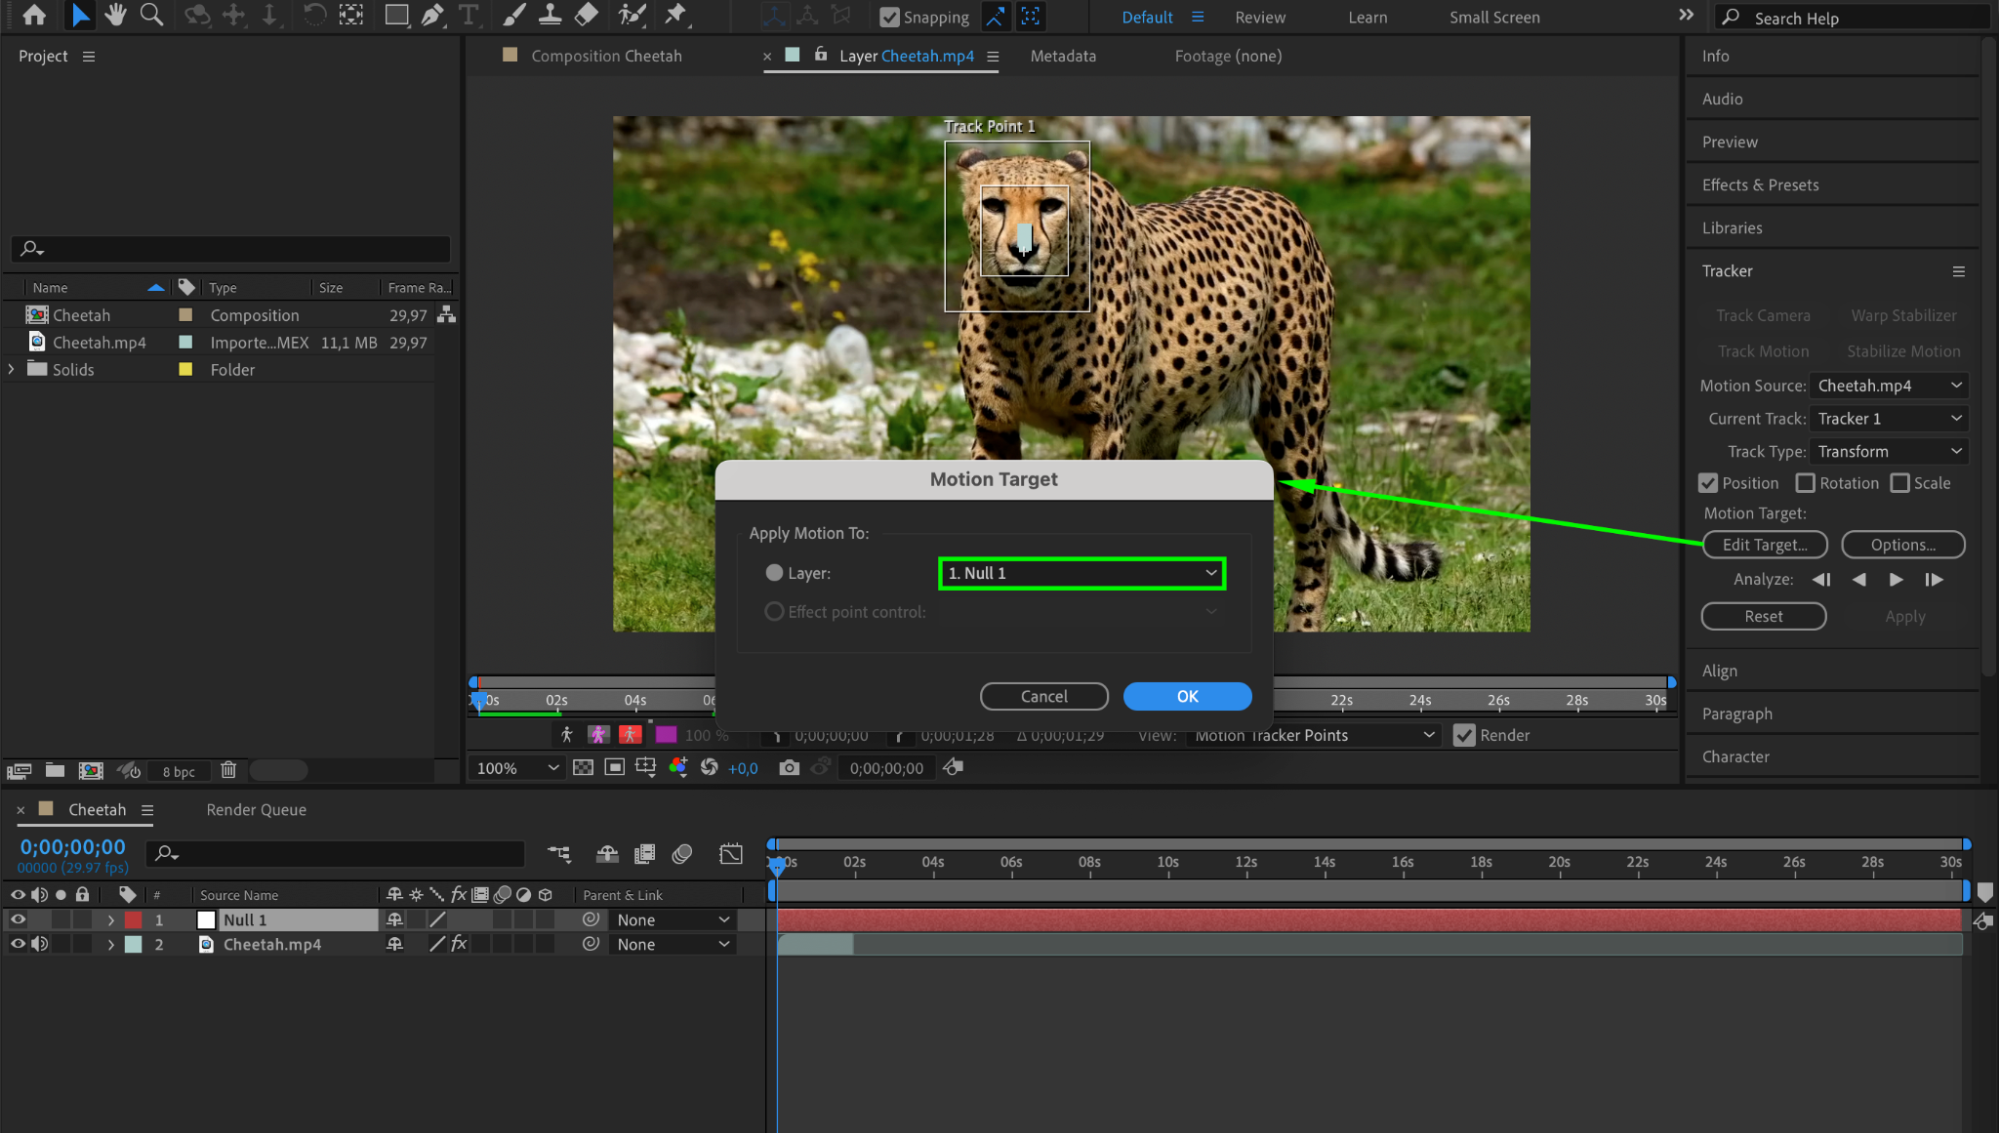
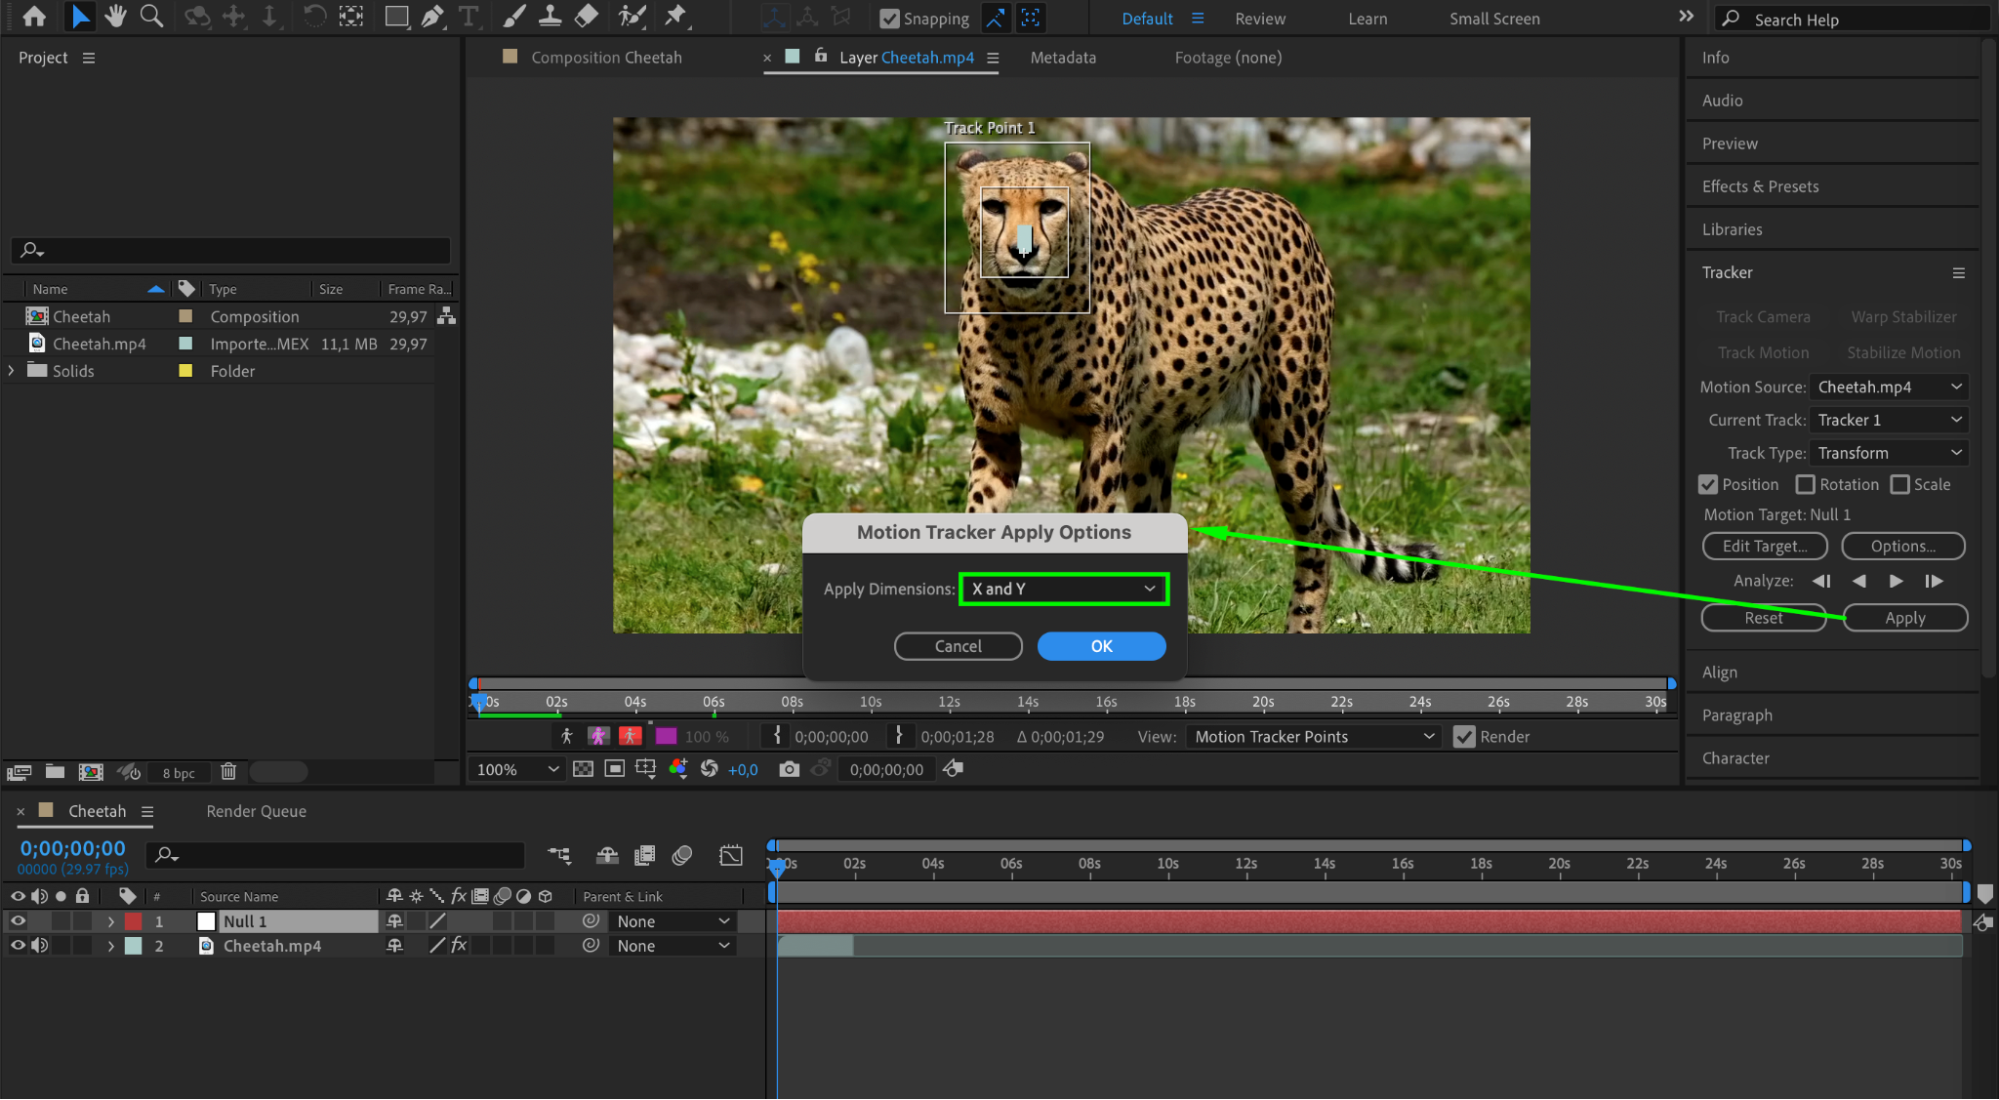
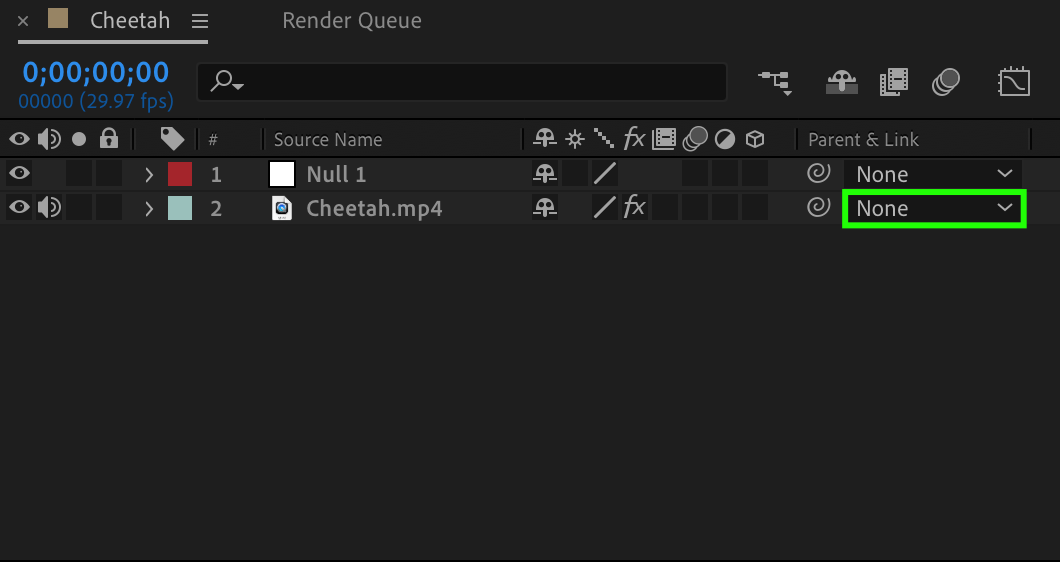
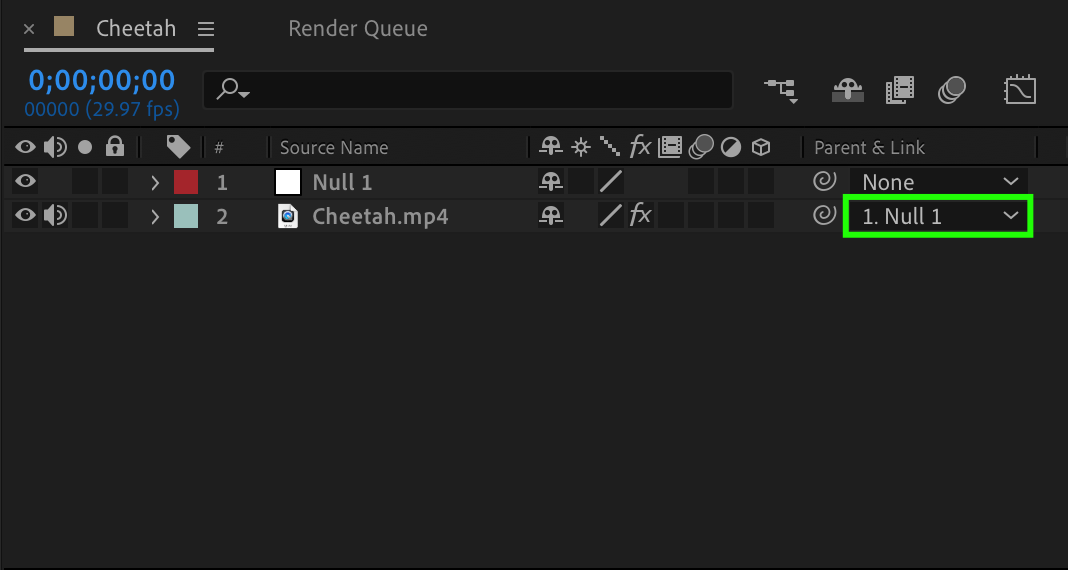
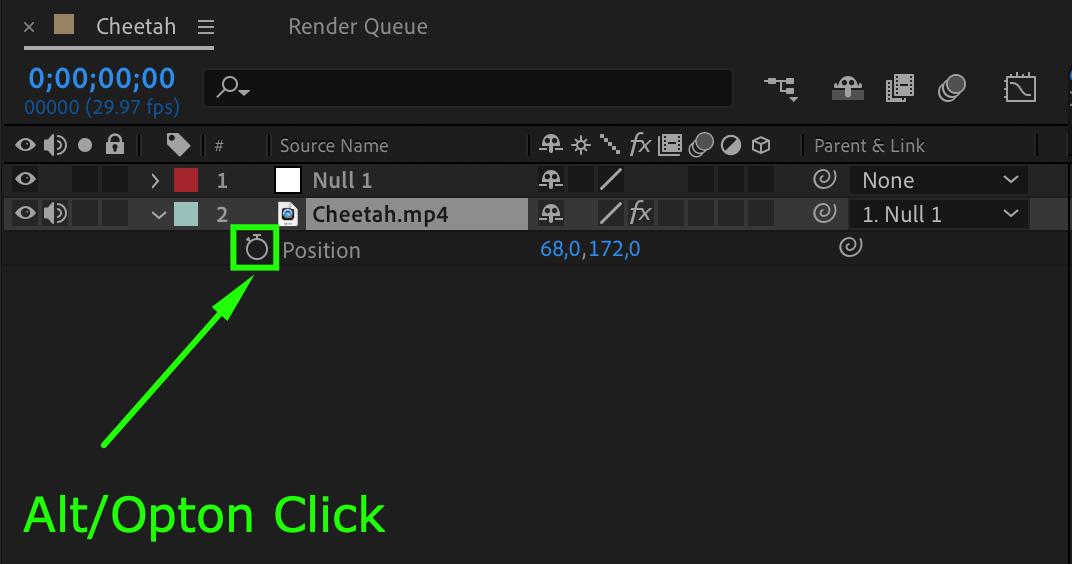
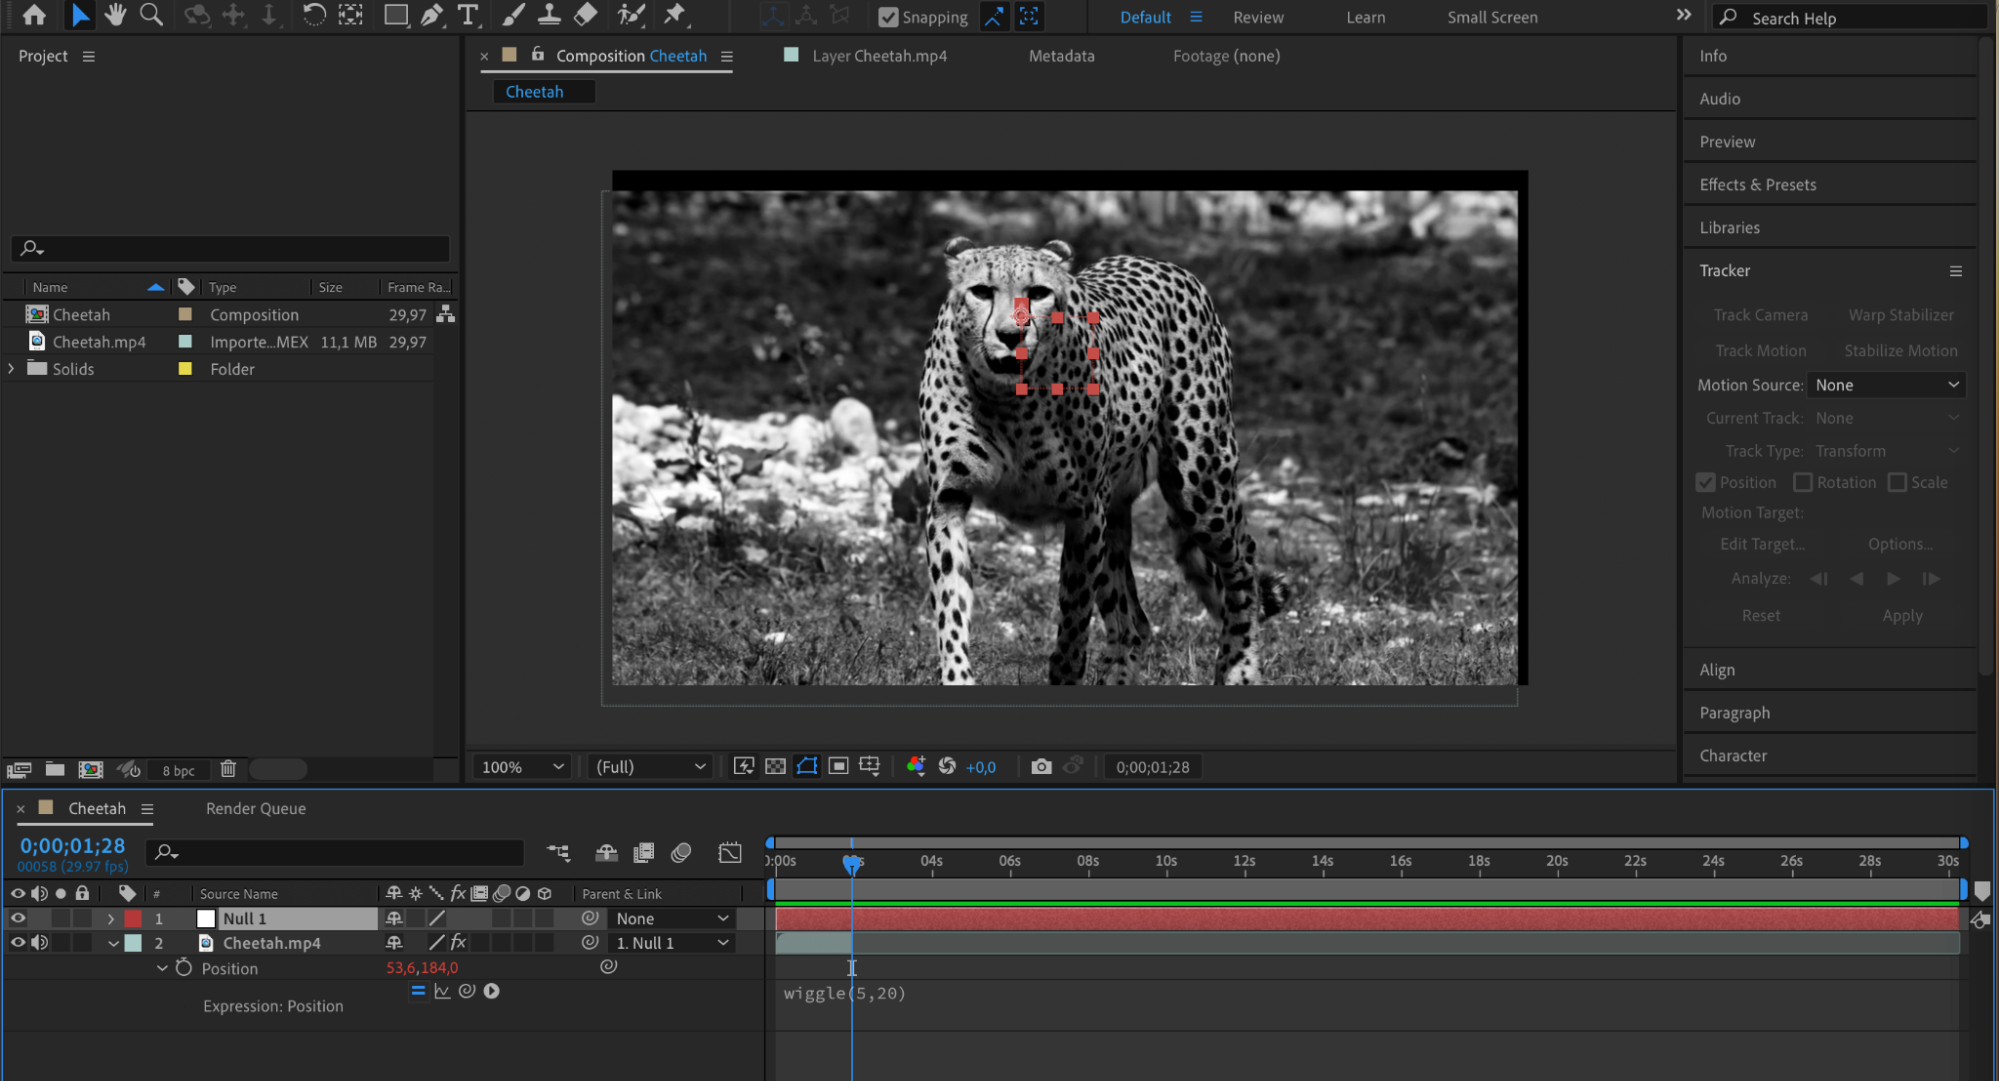
To do this, in the Tracker panel, click on “Track Motion”. Set the Track Point to the object or part of the object you want to track and press the “Play” button to start the process. Create a Null Object via the Layer menu (“Layer” > “New” > “Null Object”). Press the “Edit target” button and choose the Null Object as the layer. Press the “Apply” button and select “Apply Dimensions” as x and y. Make your video layer a child of the Null Object. Select the video layer, press “P” to open the Position parameter, and while holding the Alt/Option key, click on the stopwatch icon next to it. In the appeared expression field on the timeline panel, enter the value: wiggle(5,20).



 Step 5: Use Presets
To save time and streamline your workflow, consider creating shake presets. By saving your settings as presets, you can quickly apply shakes to multiple clips, maintaining consistency throughout your video. This is especially useful when you’re working on projects with tight deadlines or when you want to create a series of videos with a consistent visual style. 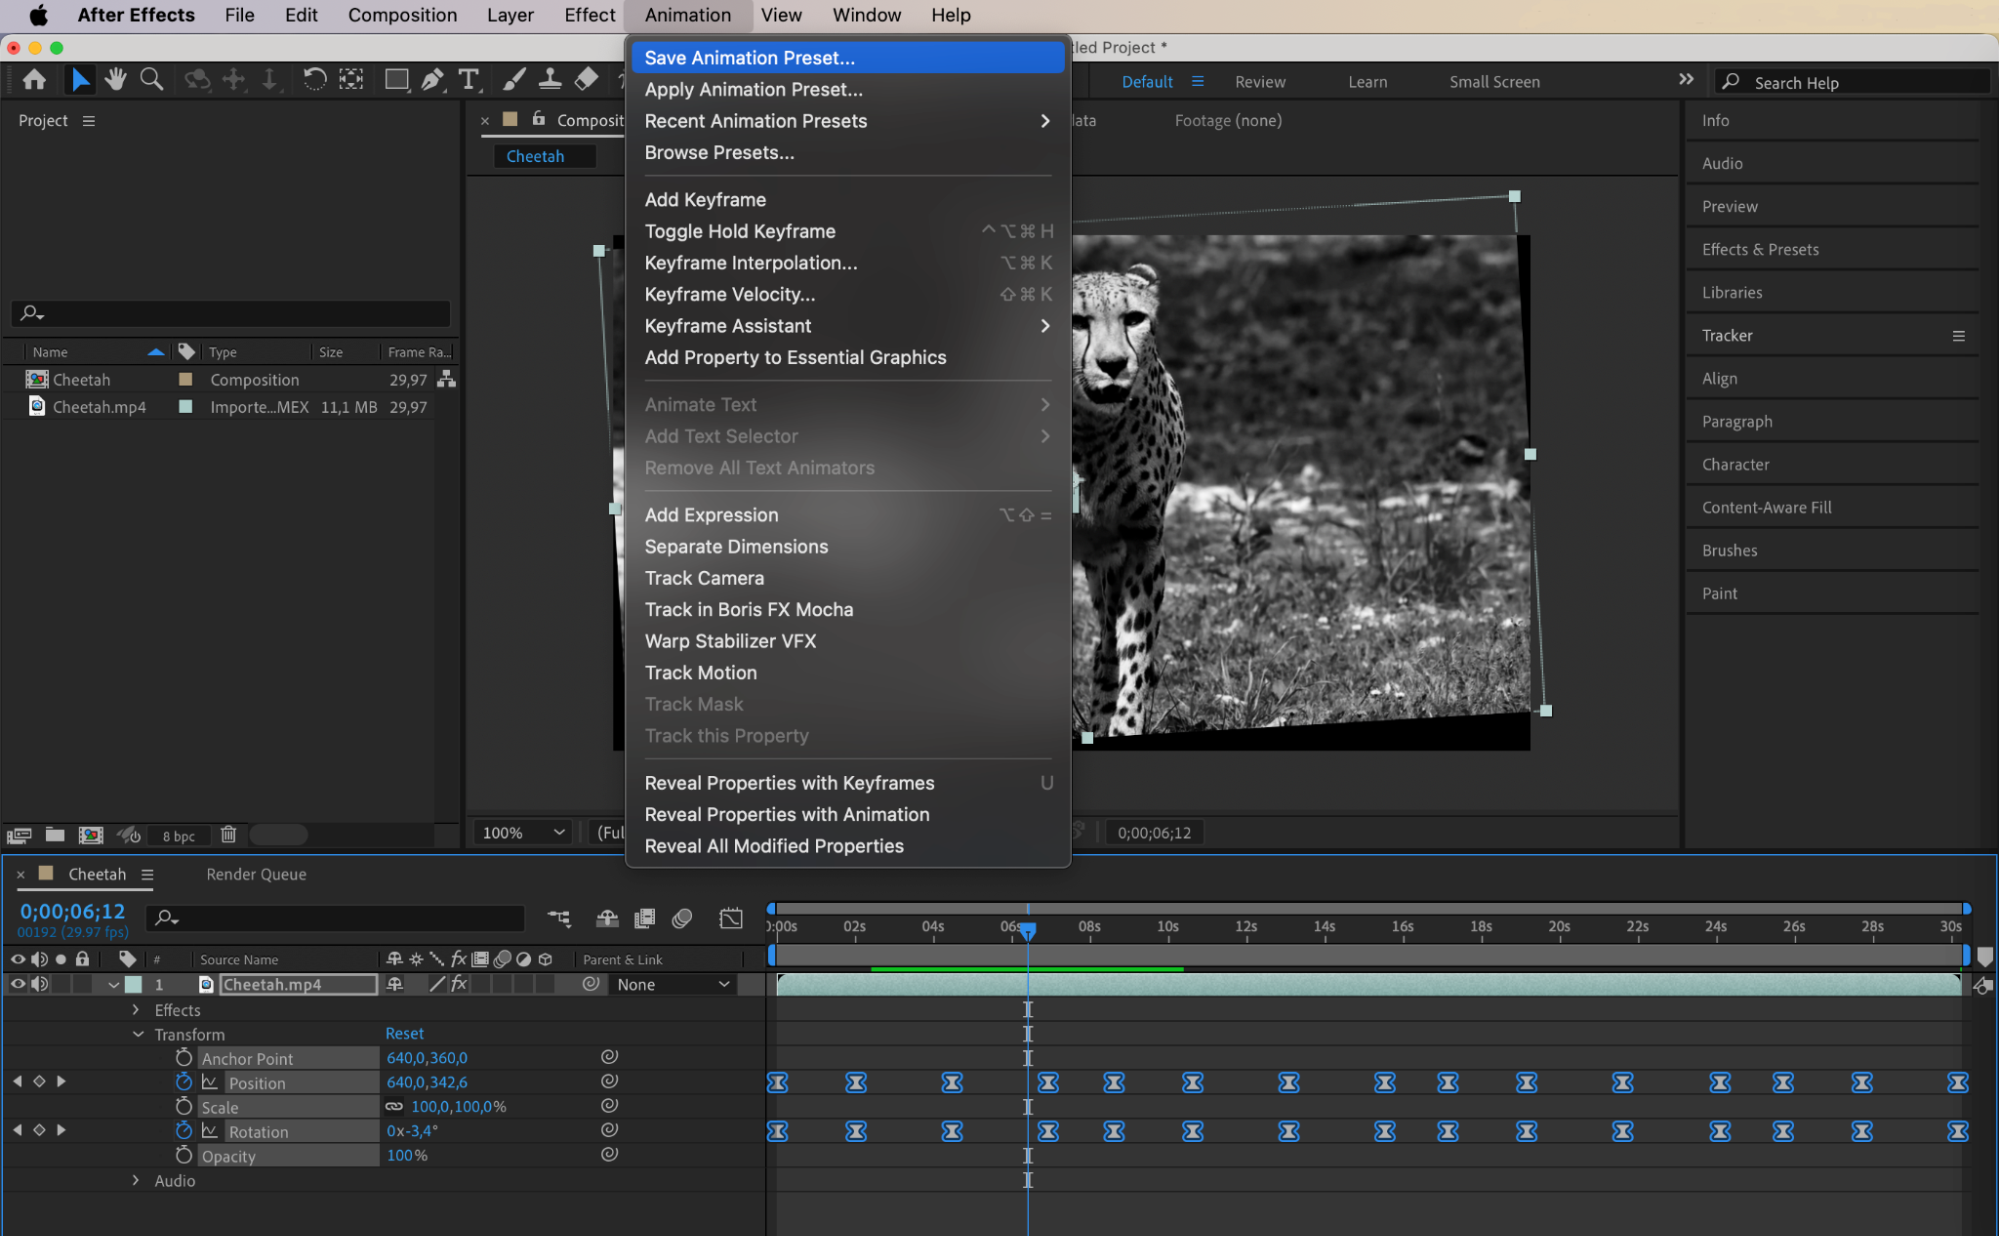
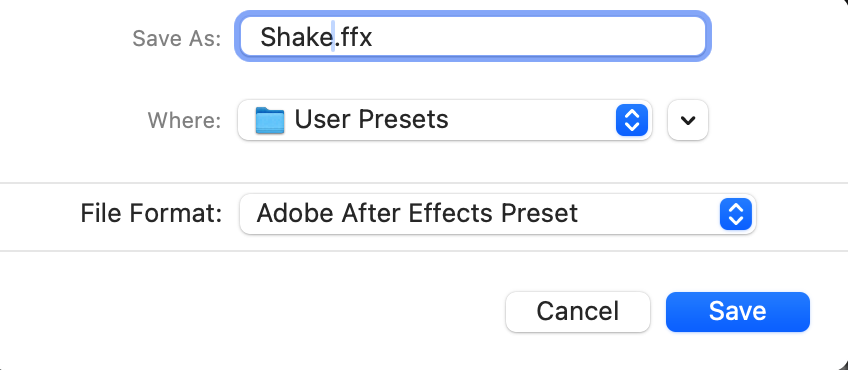
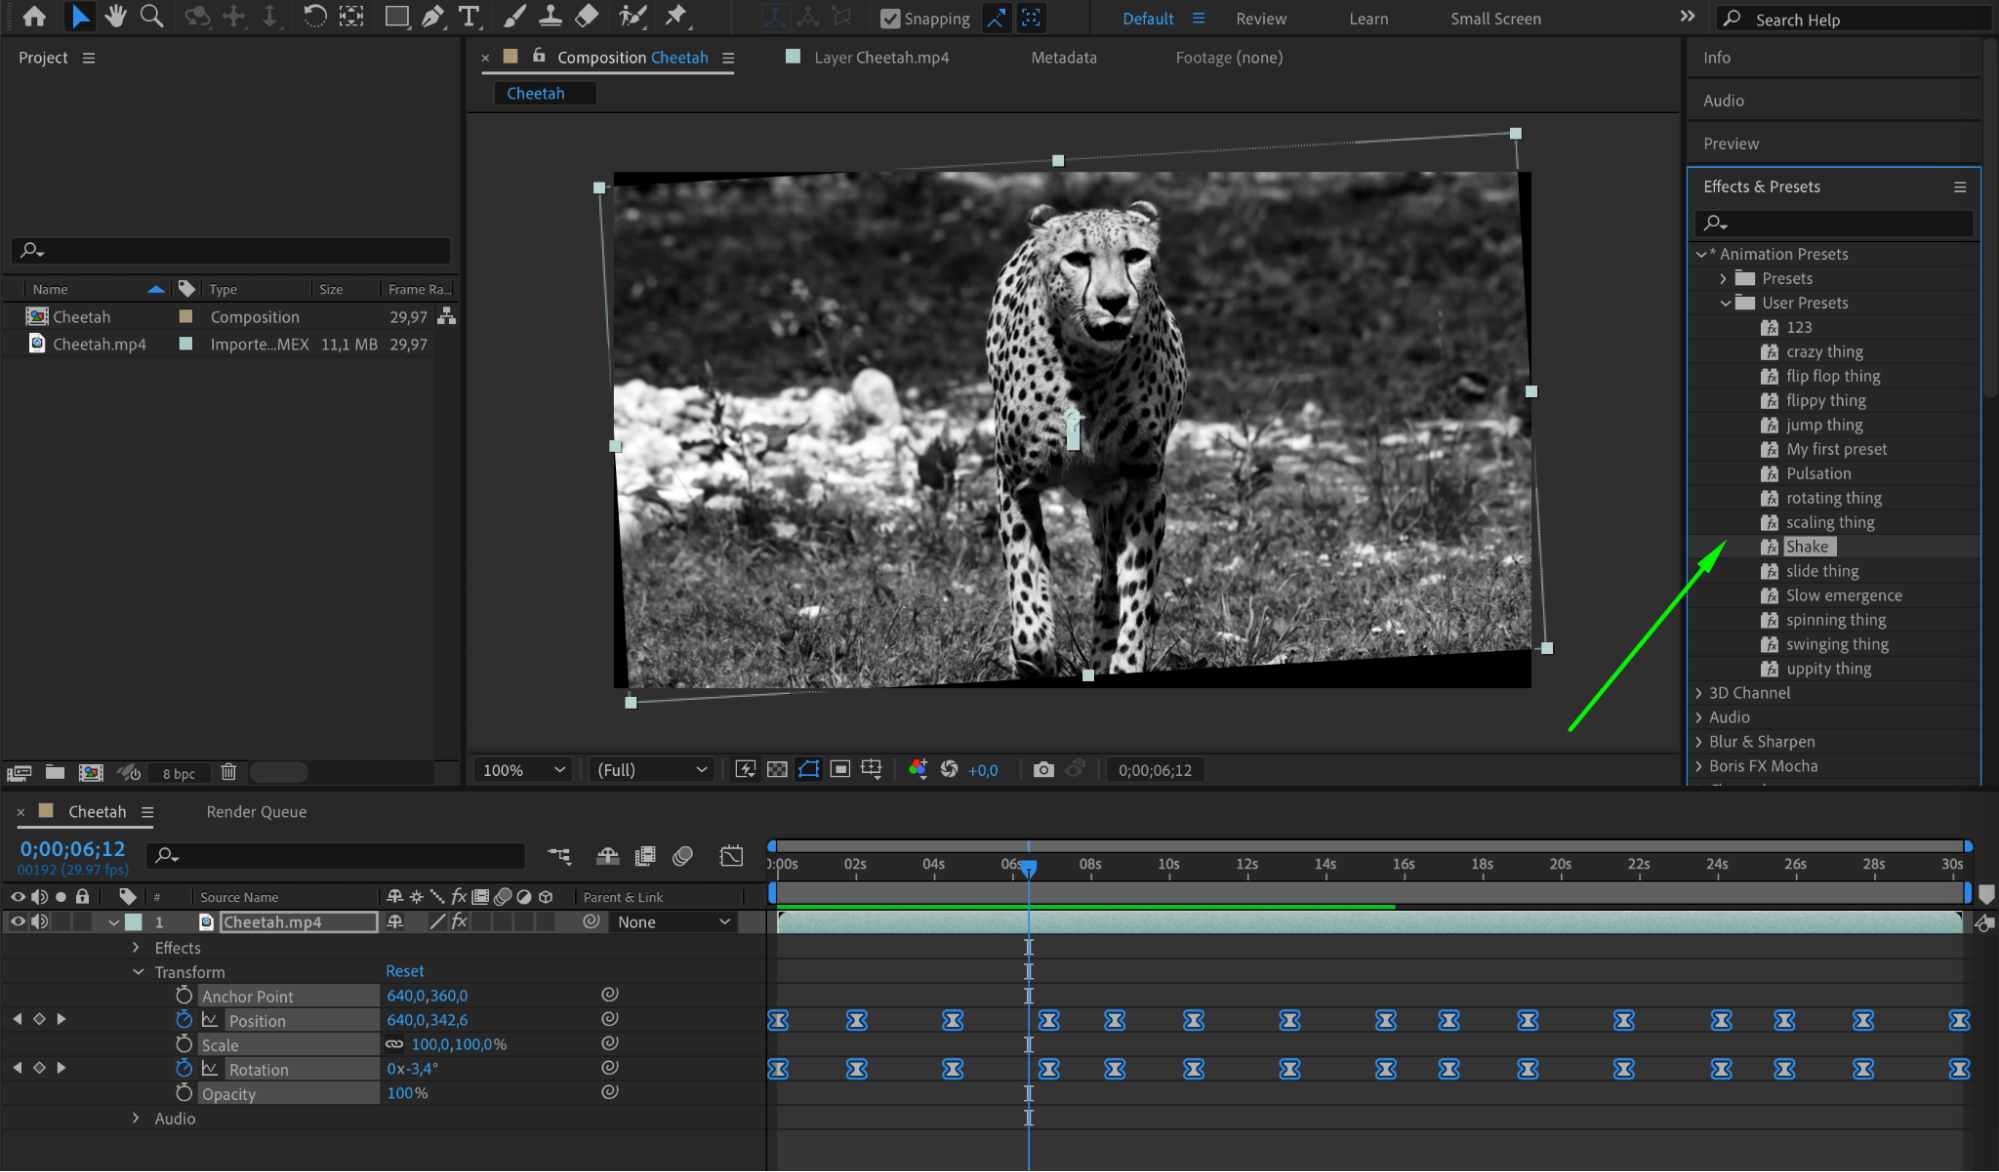 To do this, go to the “Animation” menu and select “Save Animation Preset”.
Conclusion
In conclusion, mastering shakes in After Effects is essential for video designers who want to add impact and energy to their projects. By exploring techniques like position and rotation manipulation, expressions, plugins, presets, and motion tracking, you can create shakes that captivate your audience and elevate the visual appeal of your videos. So, embrace the creative possibilities of shakes in After Effects and take your video editing skills to new heights. Let’s get shaking!


