How to Add Subtitles in After Effects
Introduction
Adding subtitles to your video content not only improves accessibility but also enhances viewer engagement. In this tutorial, we will guide you through the process of creating professional subtitles in Adobe After Effects. Whether you’re working on a film project, tutorial, or online video, these steps will help you add clean, readable subtitles to your work.
Step 1: Import Your Footage
To start, import the video file you want to add subtitles to. Go to File > Import > File, locate your footage, and import it into After Effects. Once the video appears in the Project Panel, drag it onto the Timeline Panel to create a composition. This will be the base layer where you add your subtitles.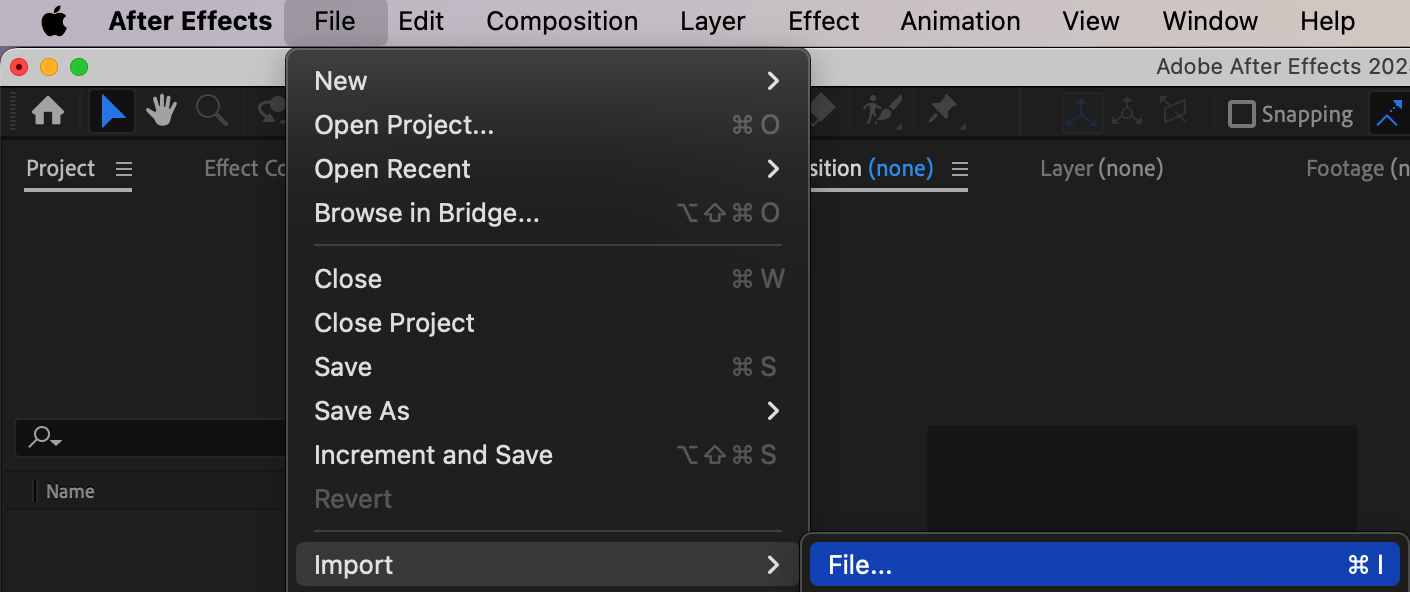
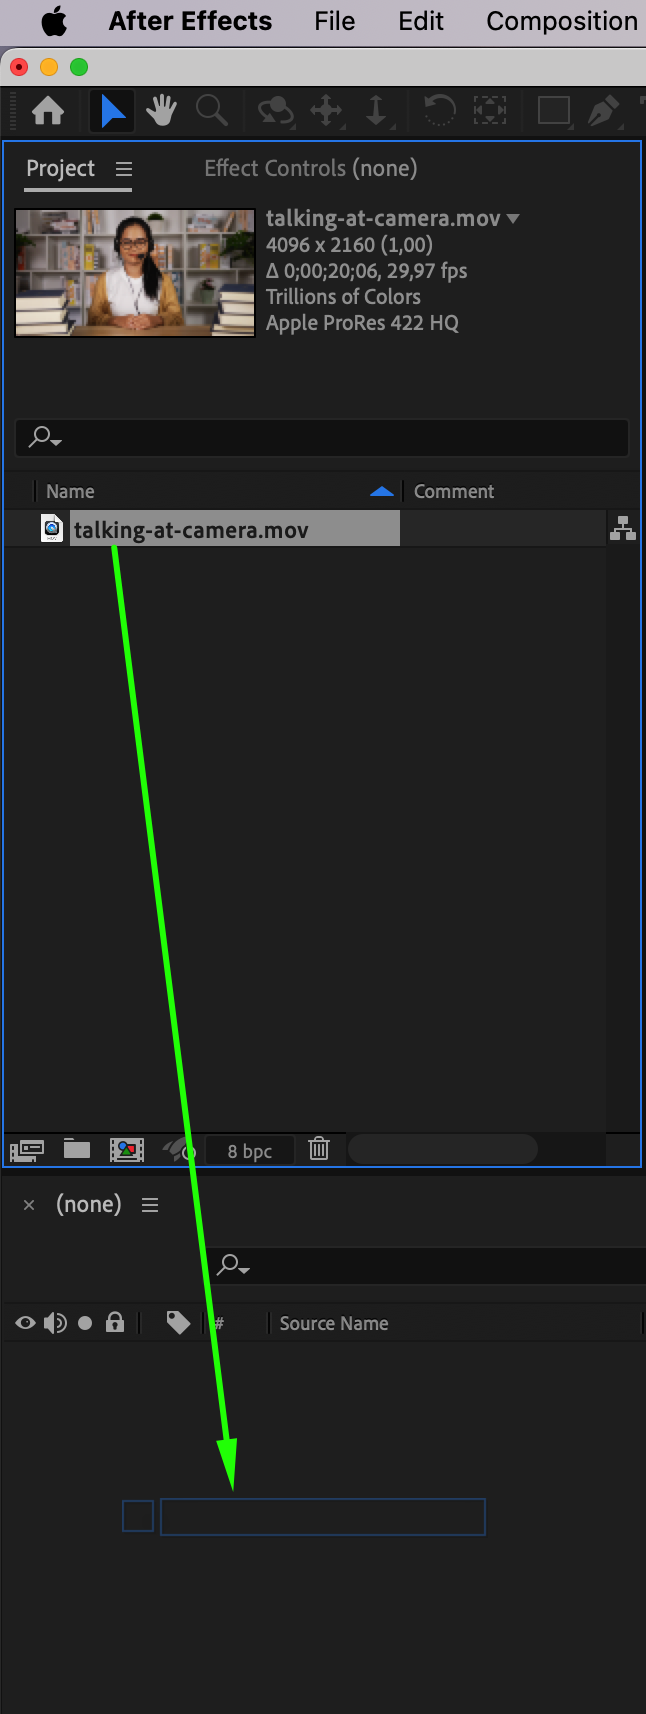 Step 2: Create a Subtitle Background
Using the Rectangle Tool (Q), create a background for your subtitles that contrasts with the video to make the text more readable. This background acts as a canvas to help the text stand out. Adjust the rectangle’s Opacity to make sure it blends well with the video while keeping the subtitles clear and visible.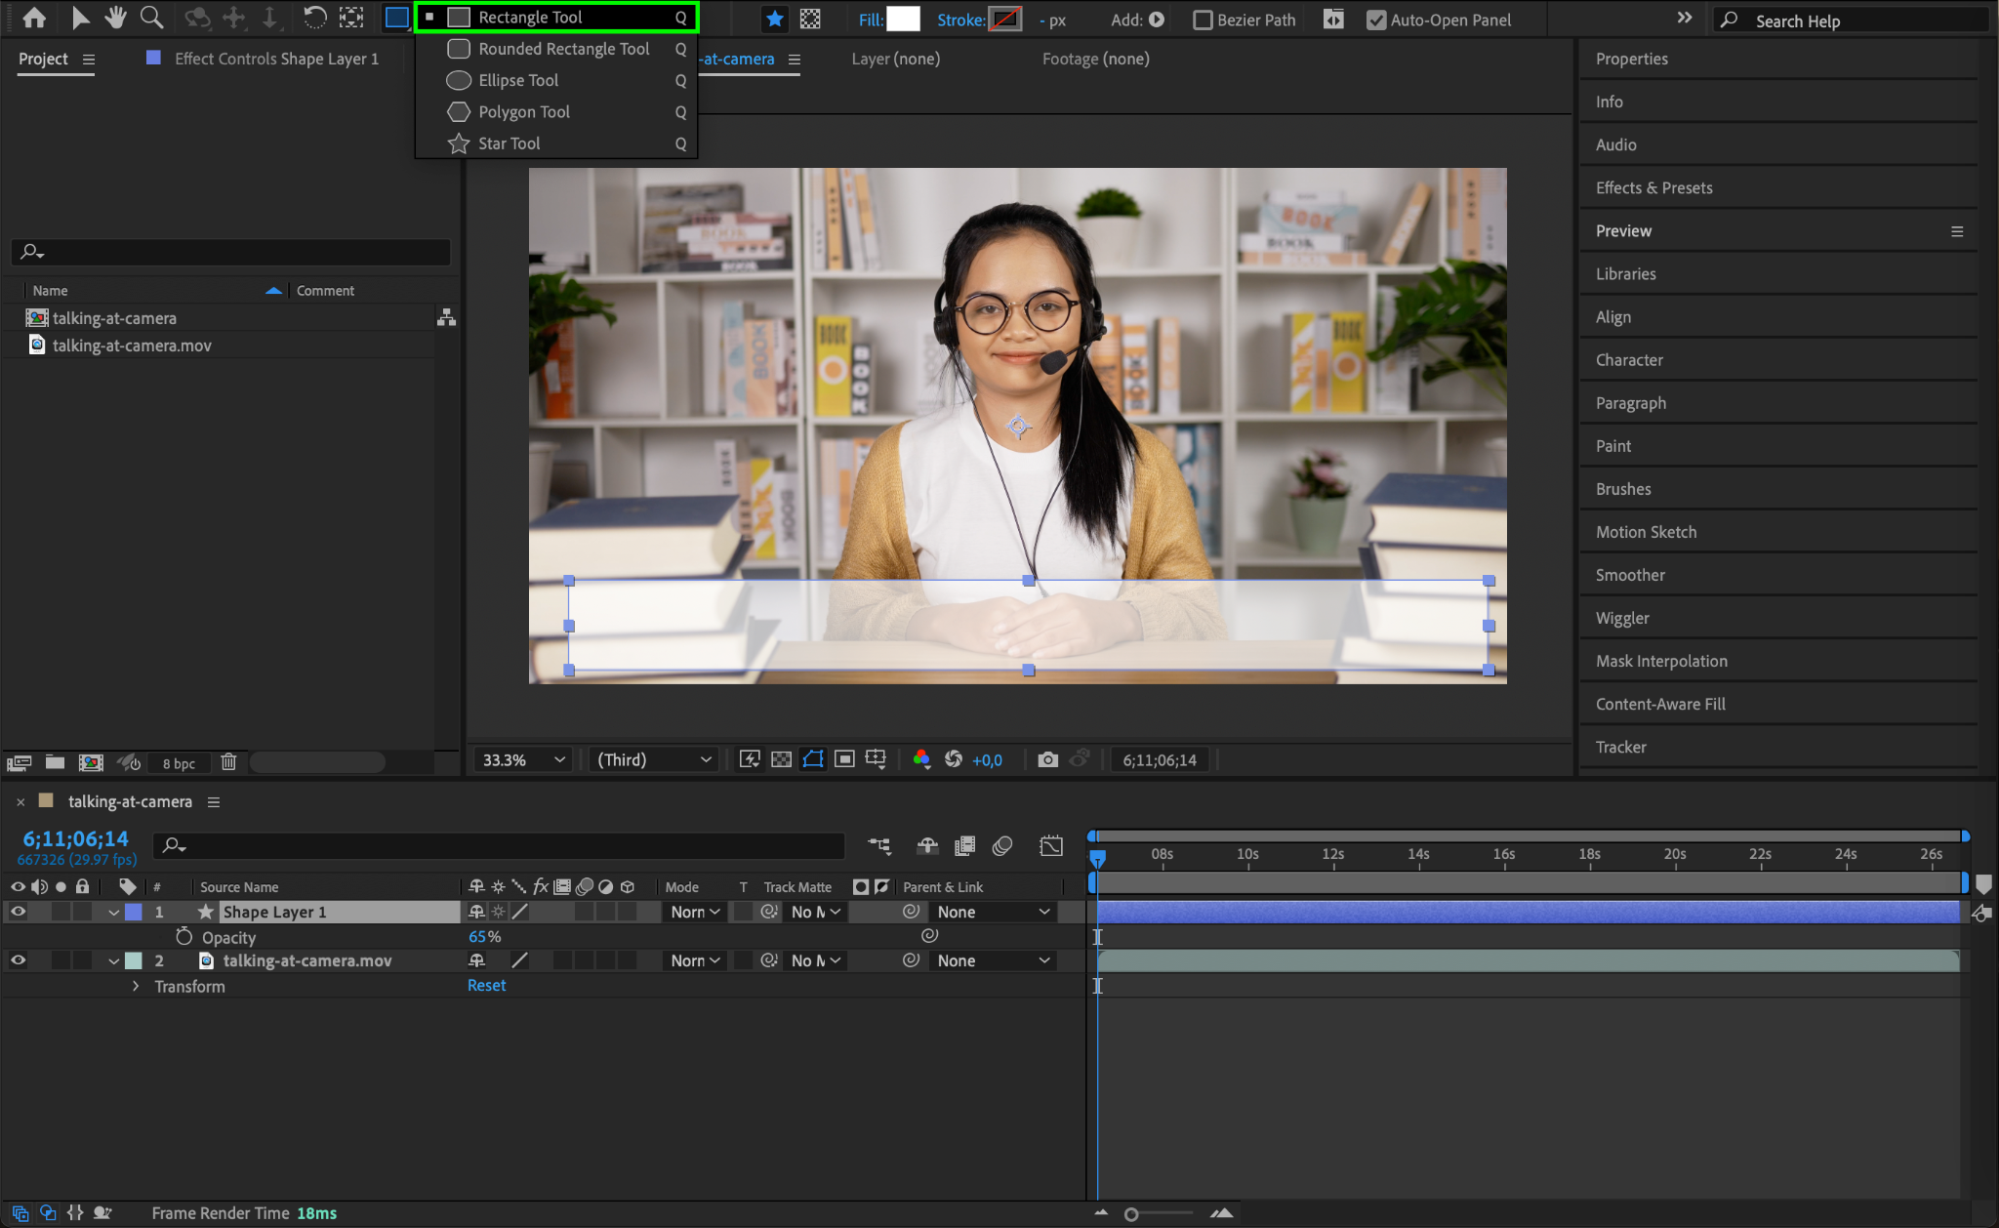 Step 3: Add a Text Layer
Get 10% off when you subscribe to our newsletter

Select the Text Tool (Ctrl/Cmd + T) from the toolbar and click on the Composition Window where you want your subtitles to appear. This creates a new text layer. Before typing, choose a font, size, and style that fits the tone of your video. Make sure the text is large enough to be easily read.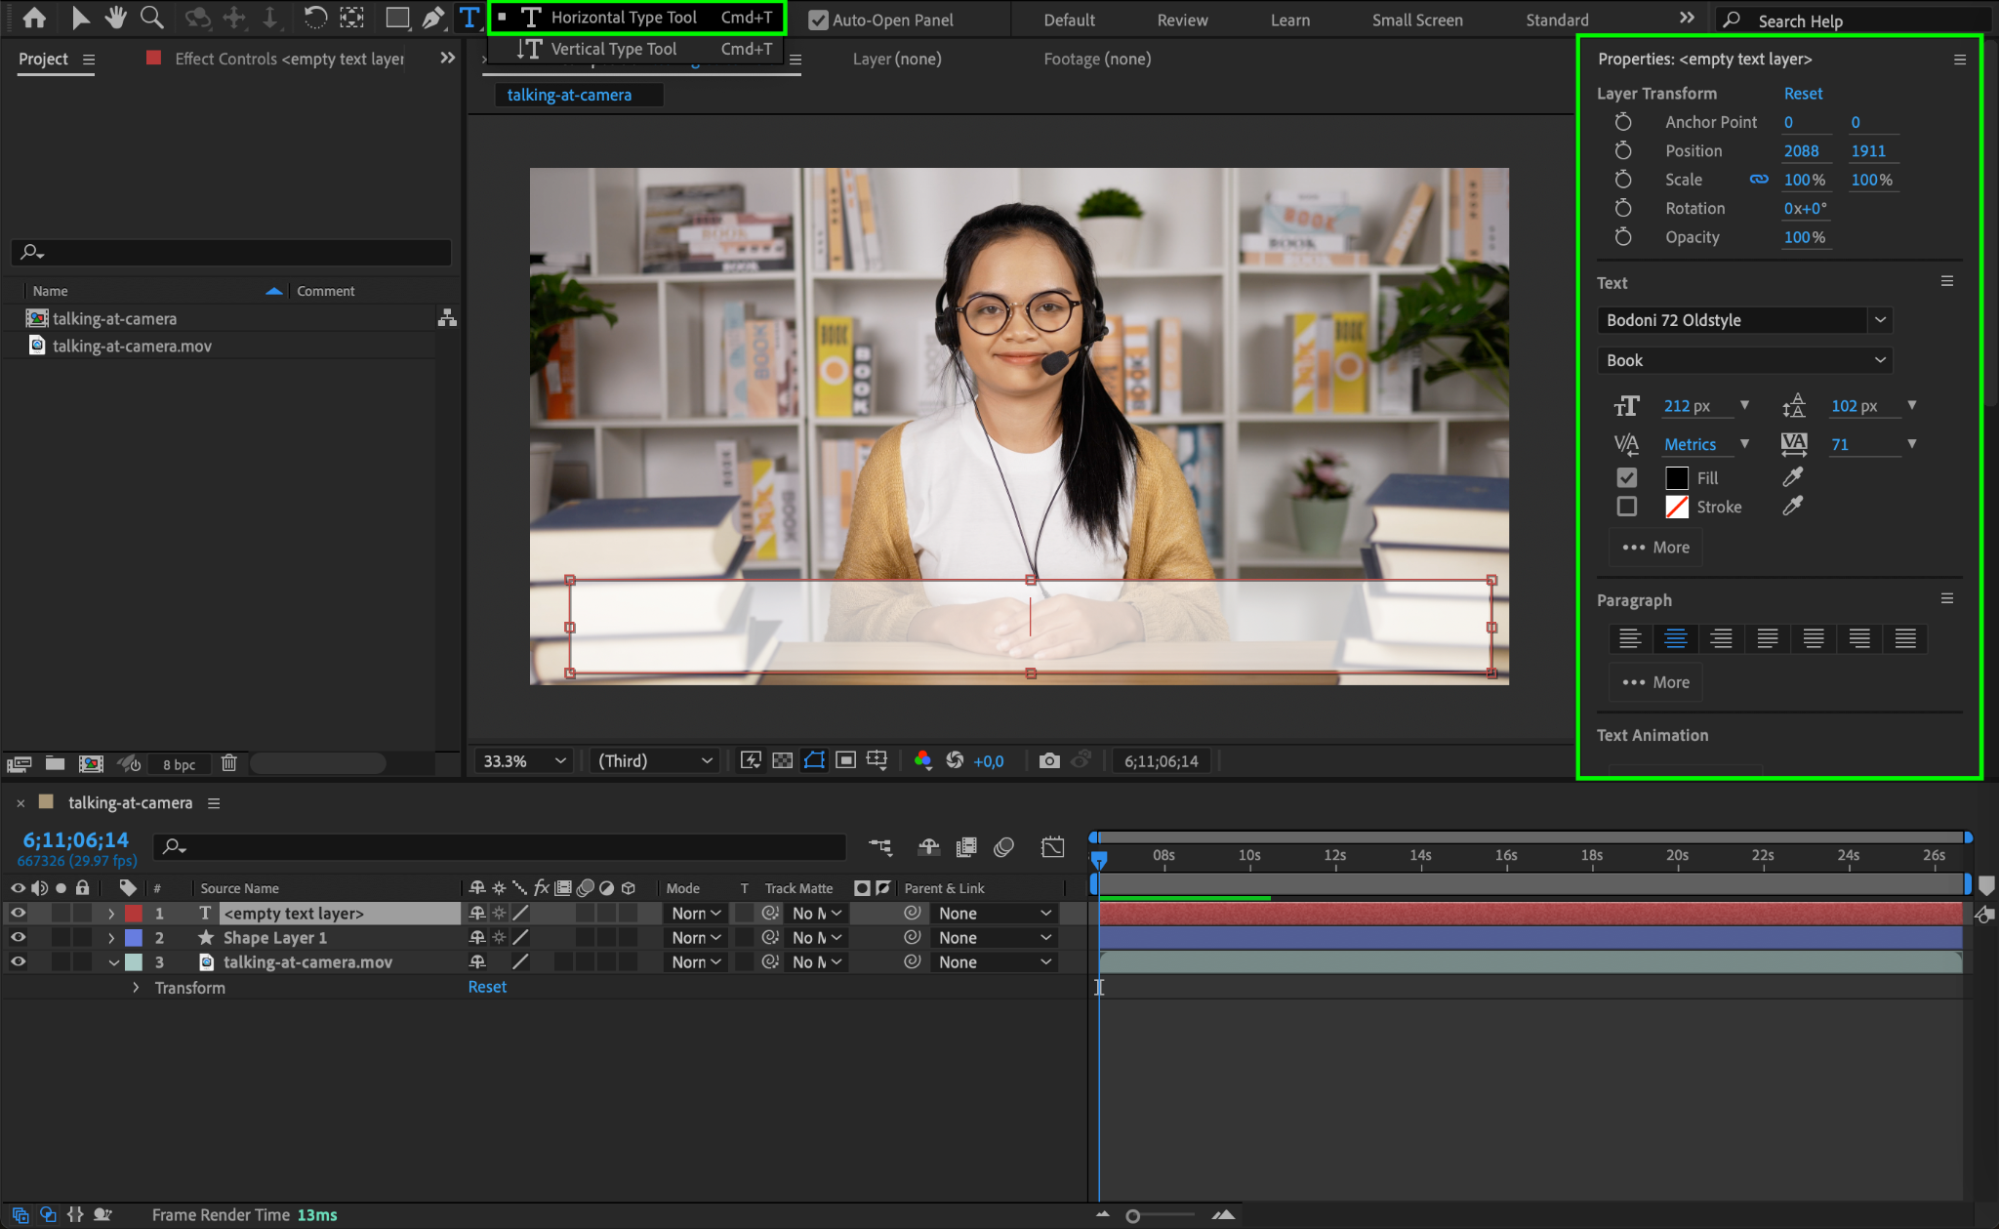 Step 4: Input Your Subtitle Text
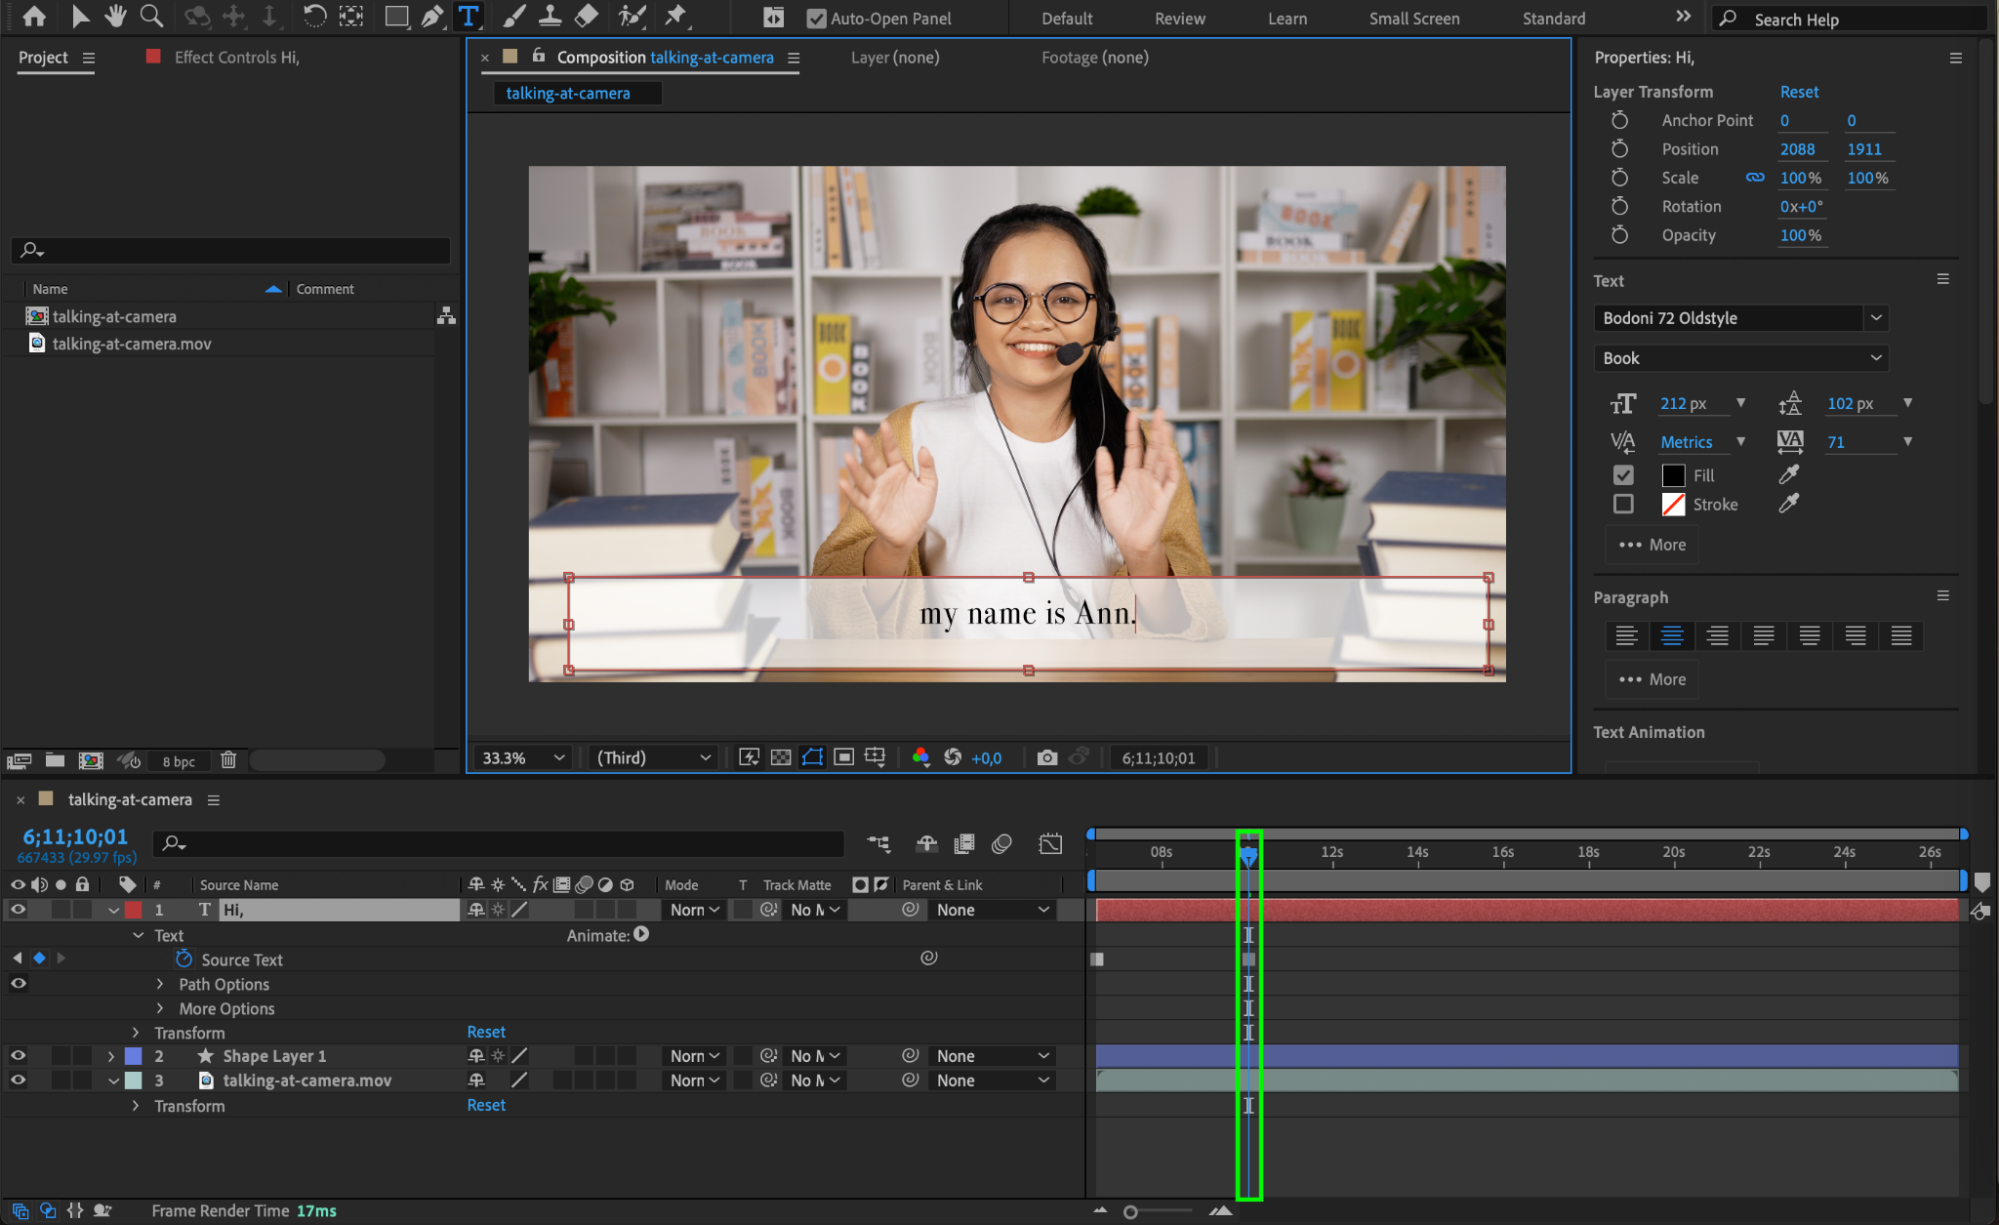
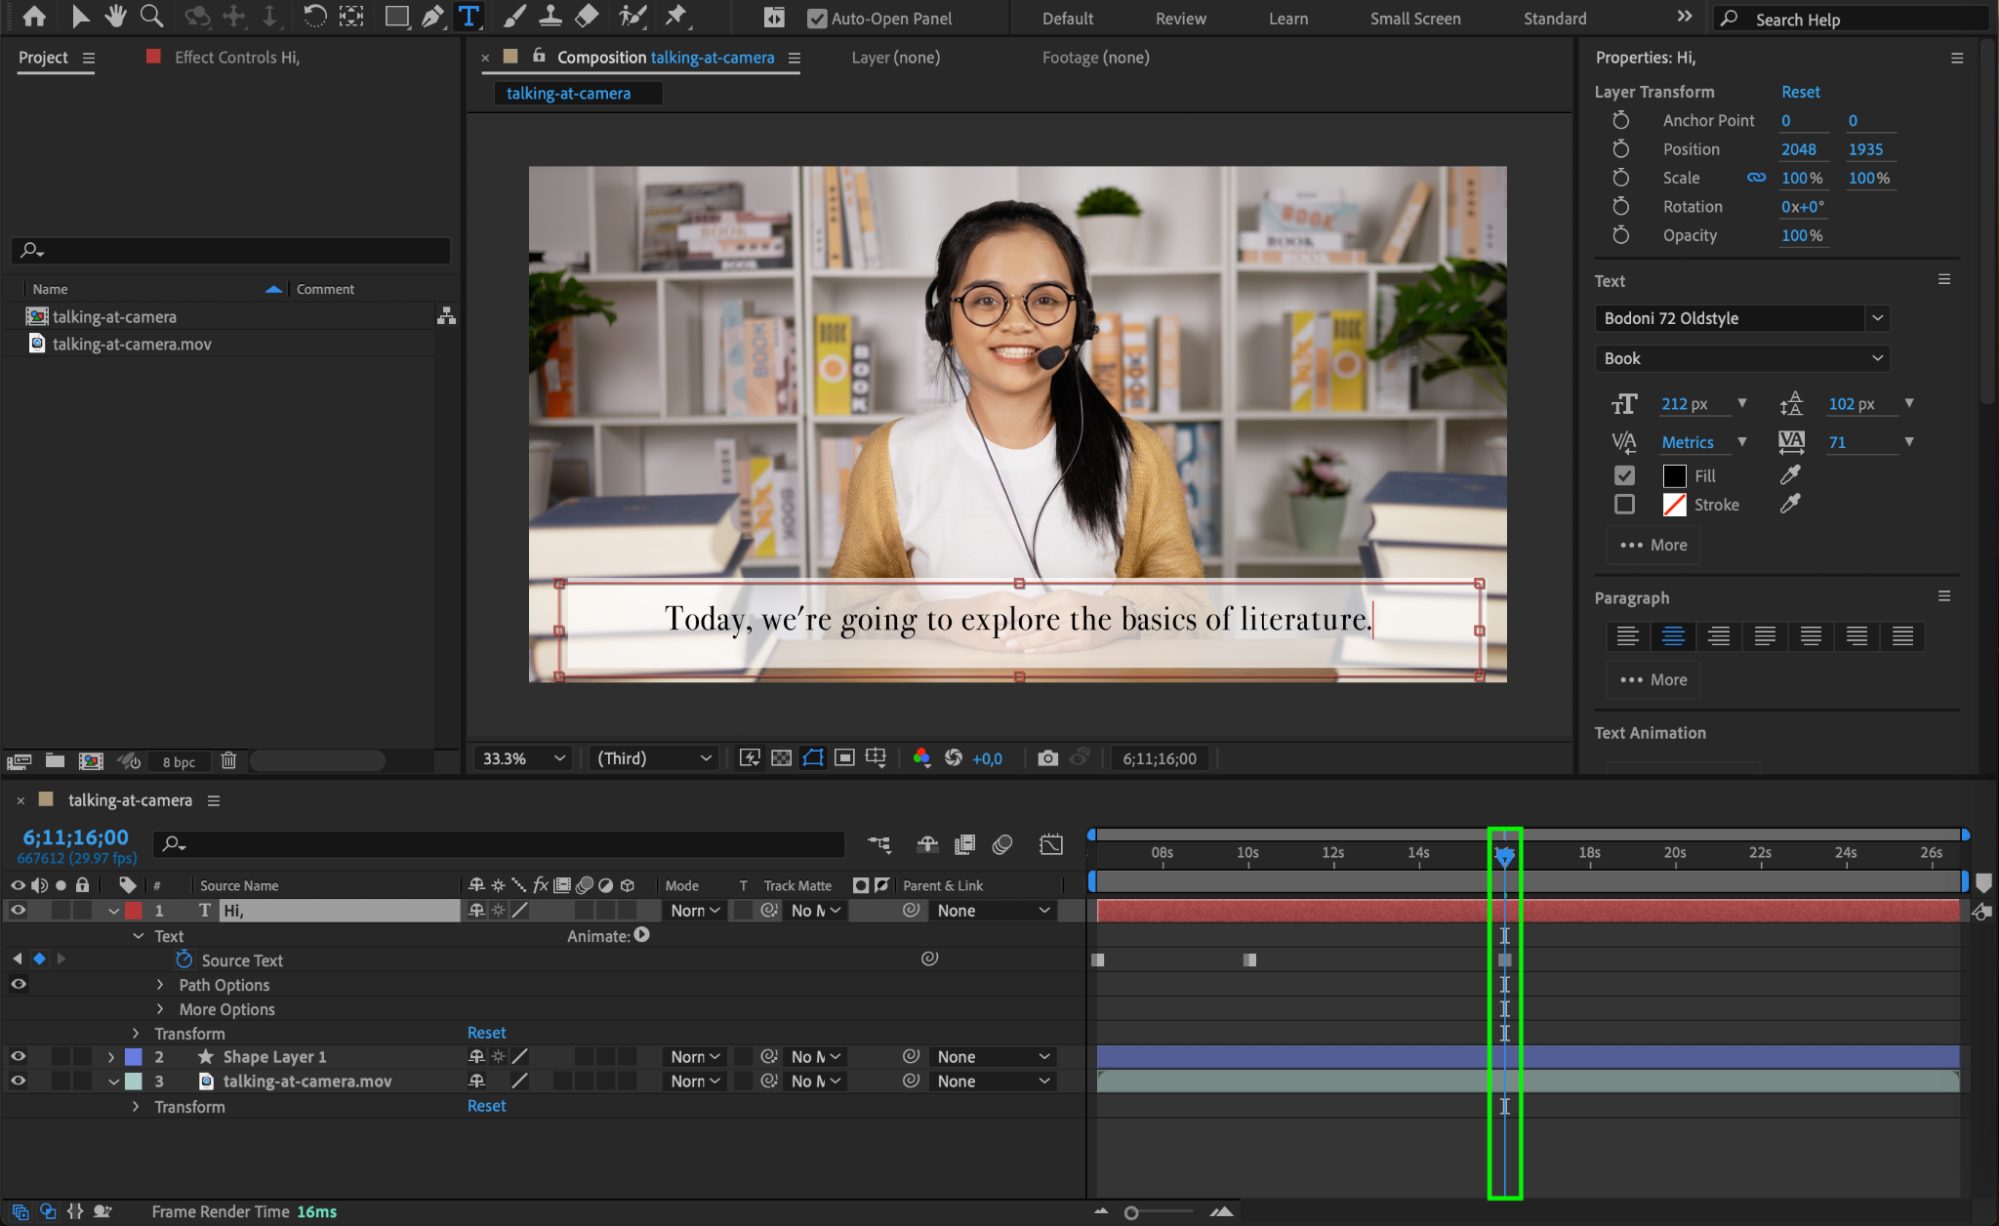
Now, start entering your subtitle text. Once the text is added, expand the Text Layer Properties and find the Source Text parameter. Click the Stopwatch next to it to activate keyframing. As you move the Current Time Indicator (CTI) along the timeline, you can type in different sentences to match the timing of your video’s dialogue or audio.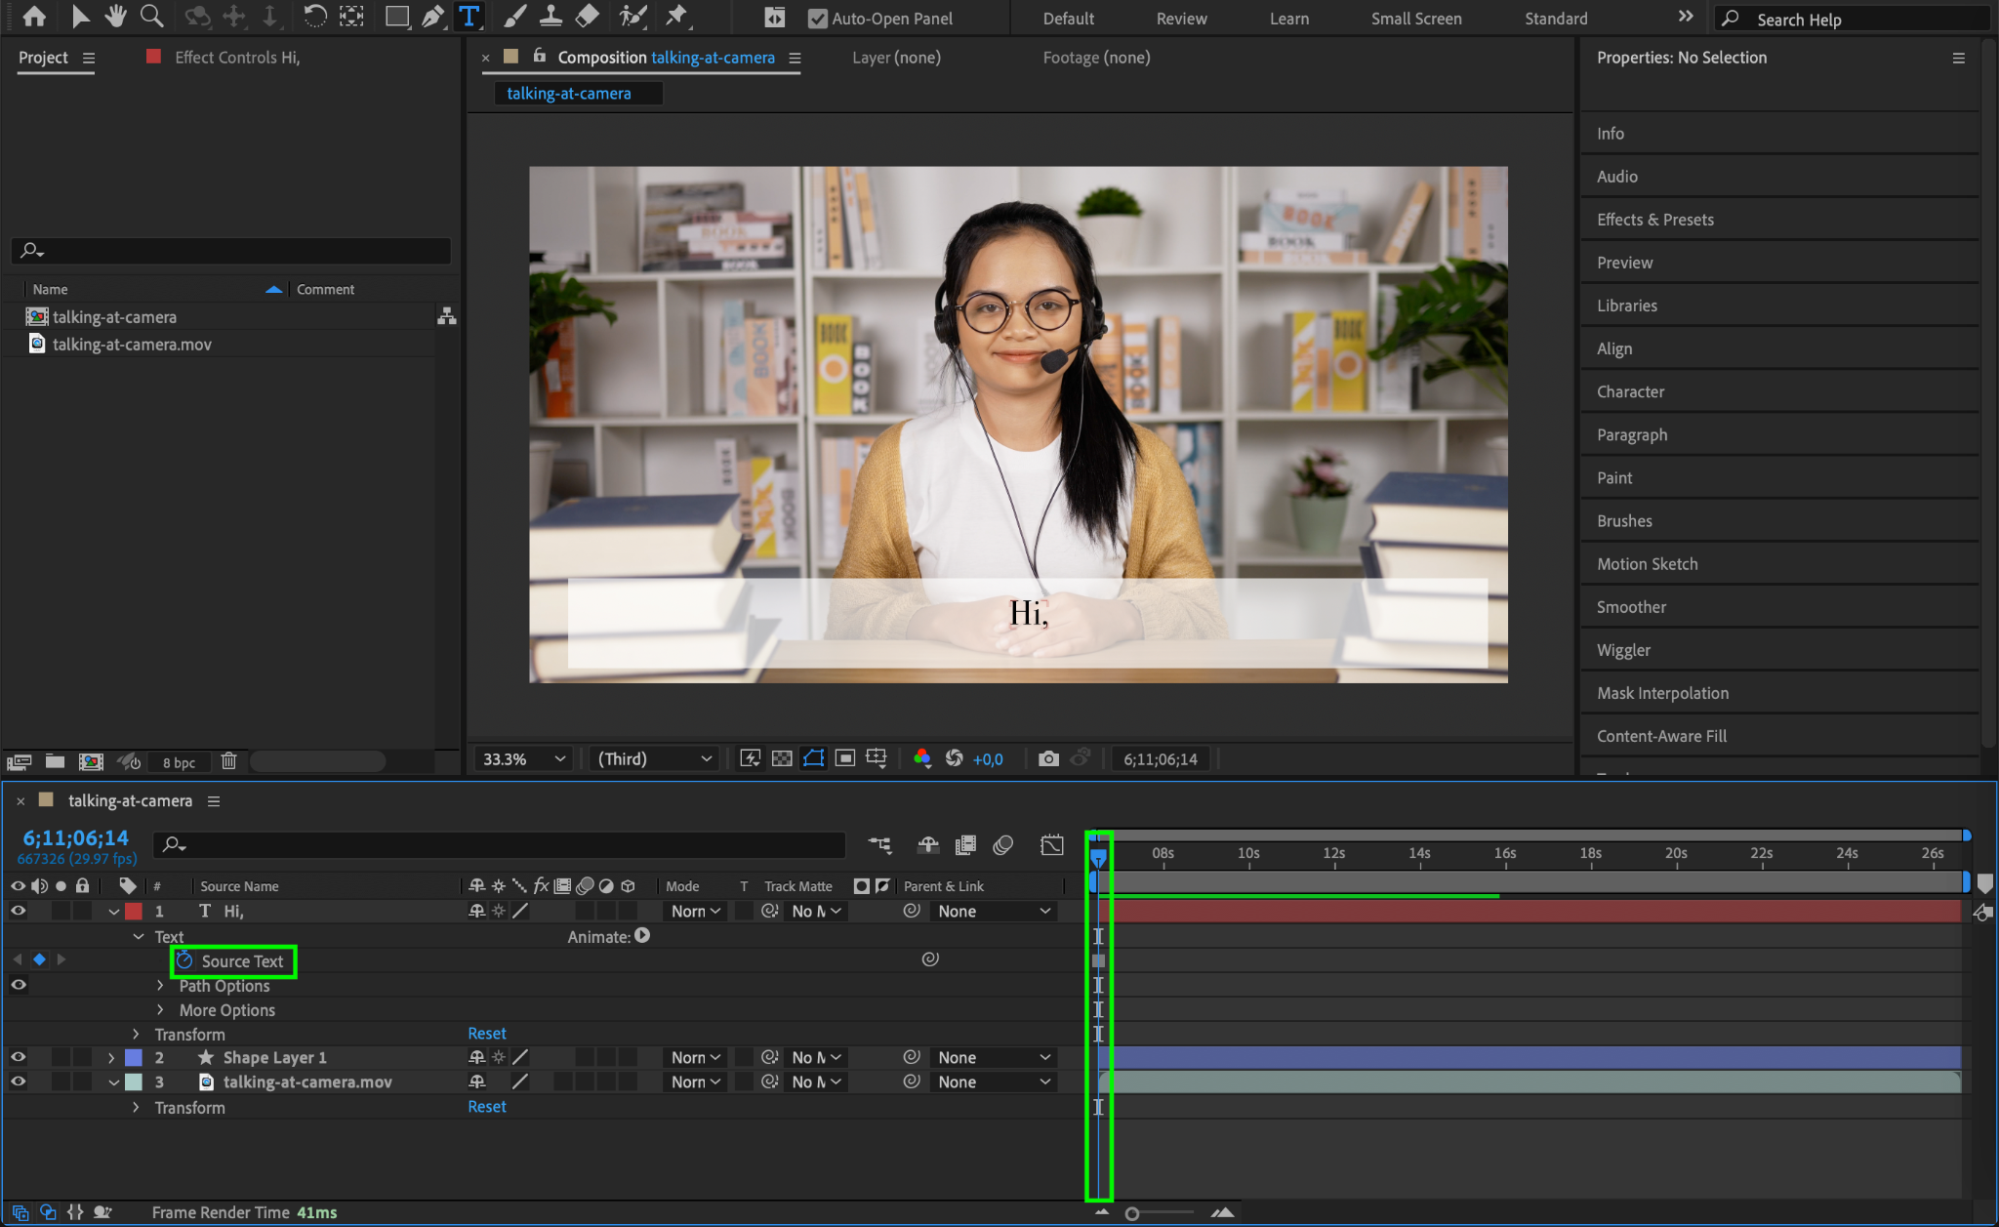
 Step 5: Adjust Subtitle Timing
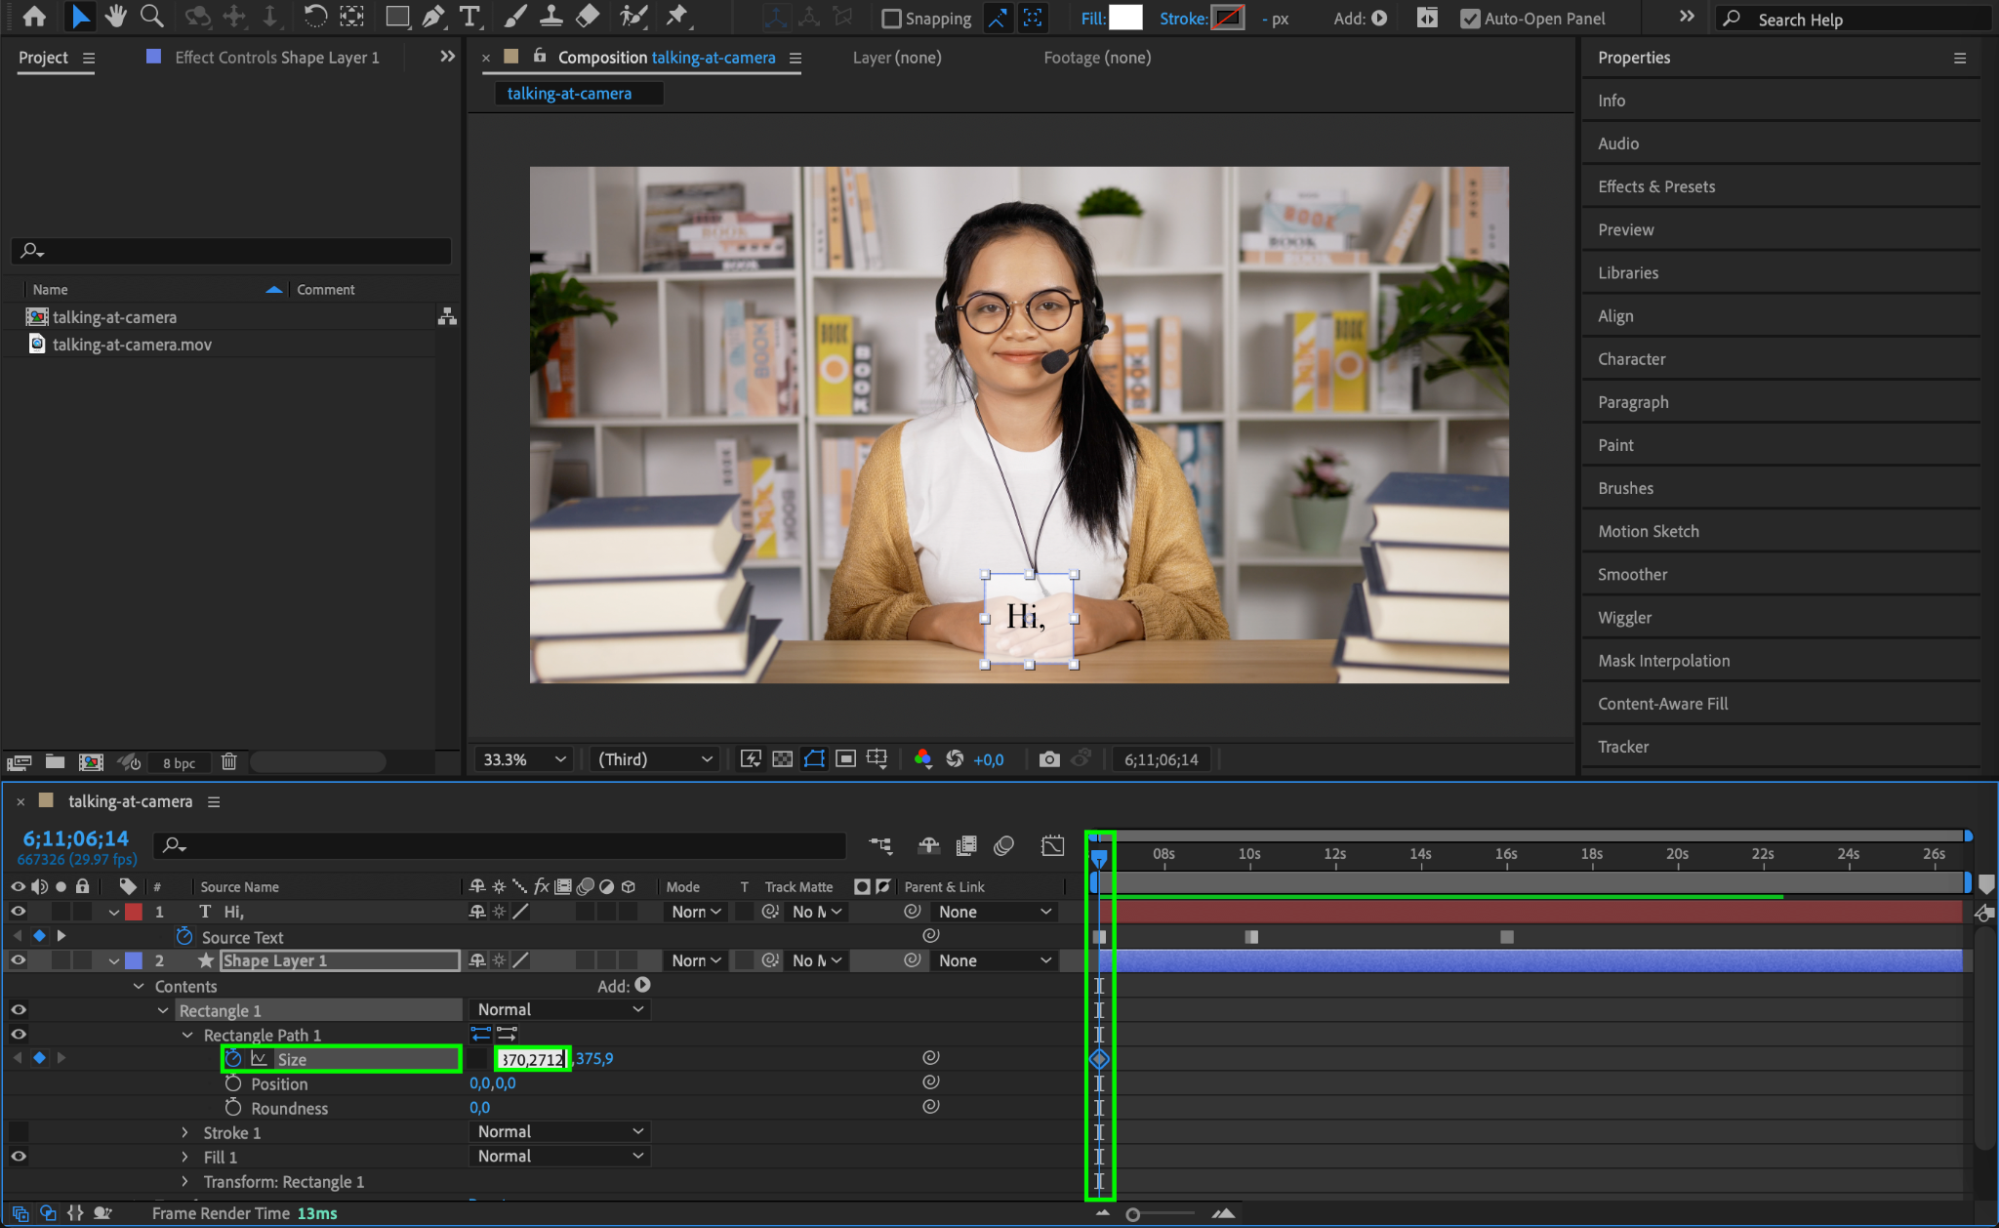
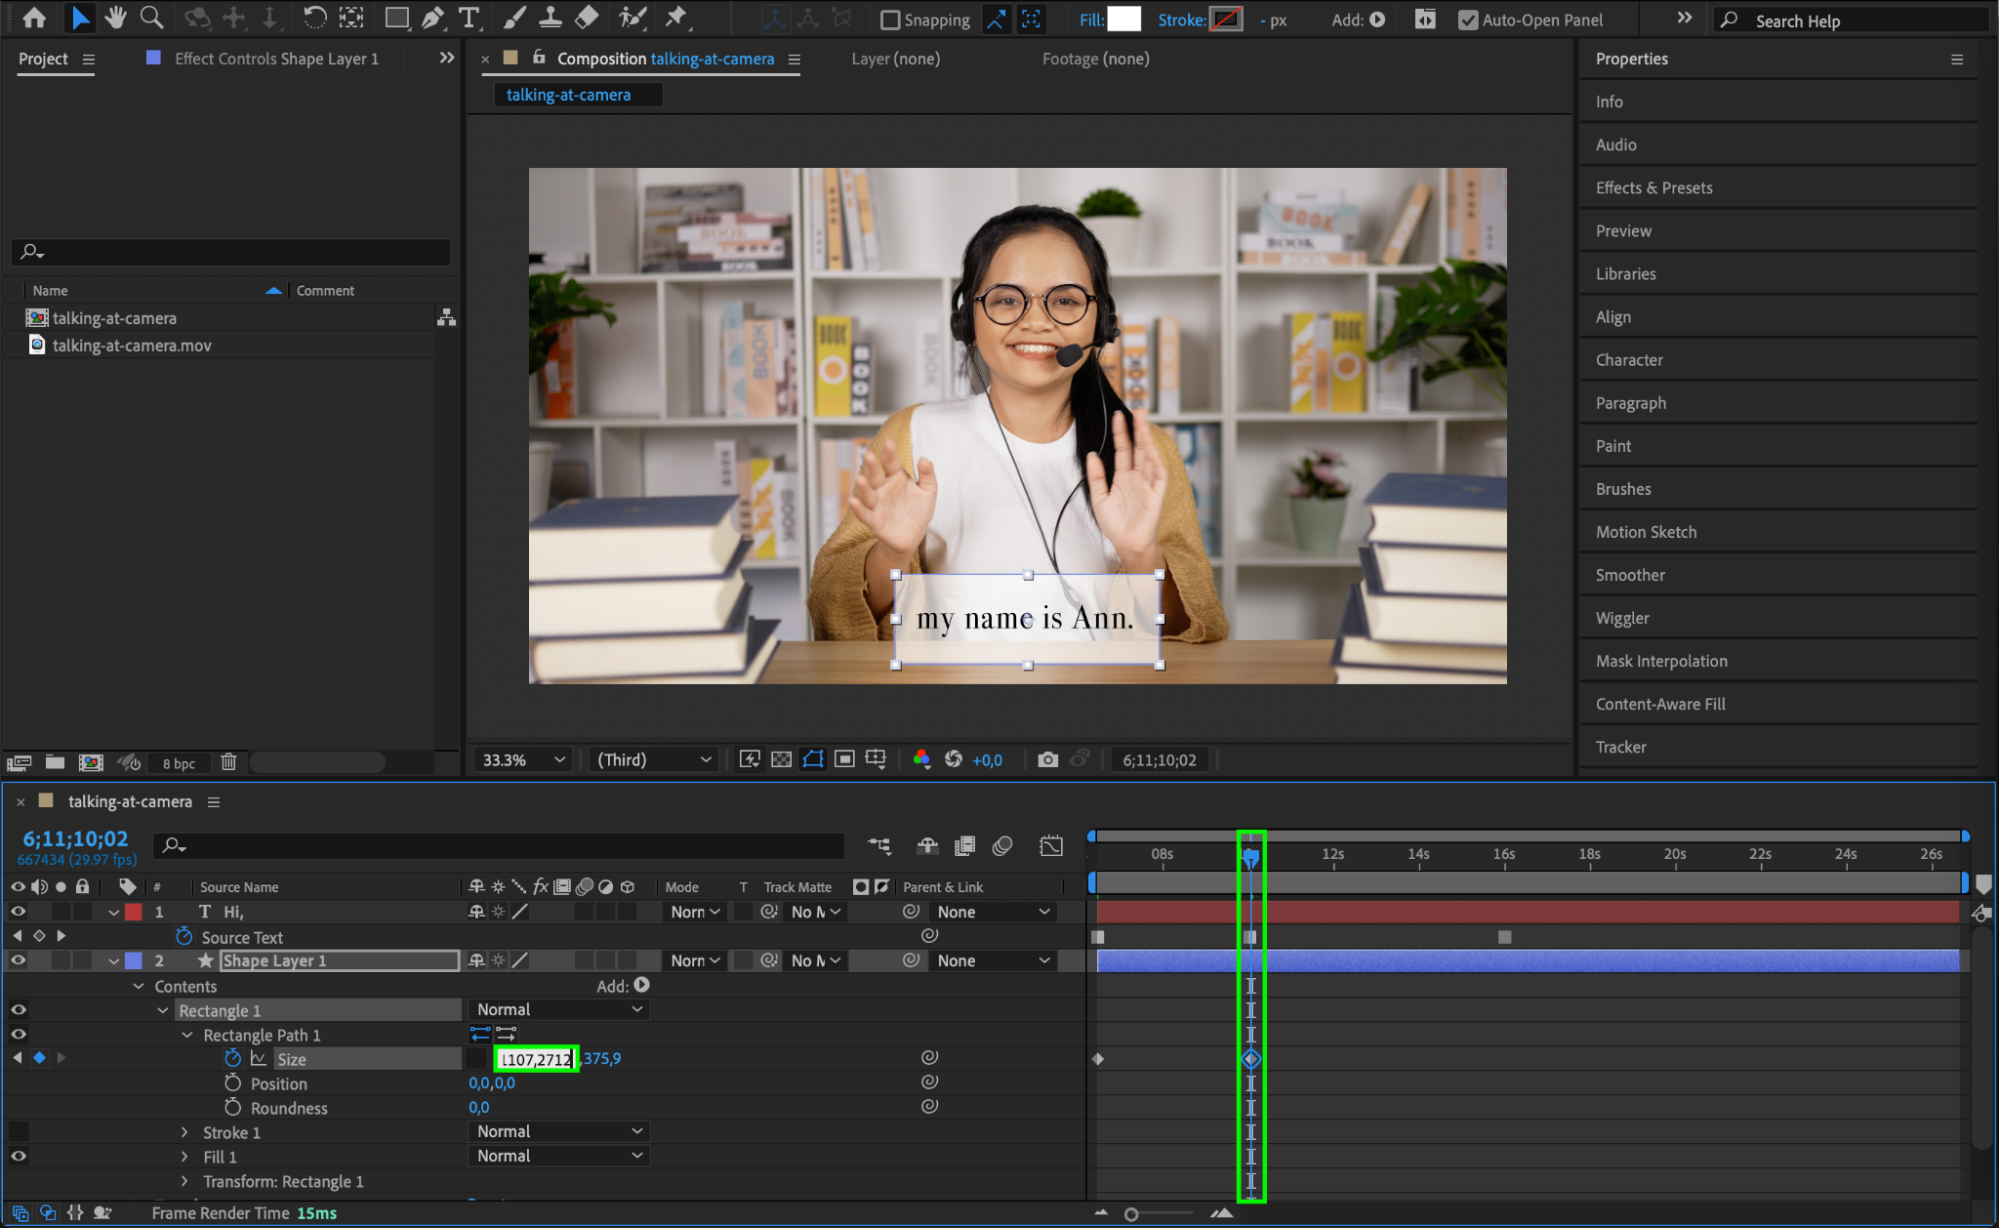
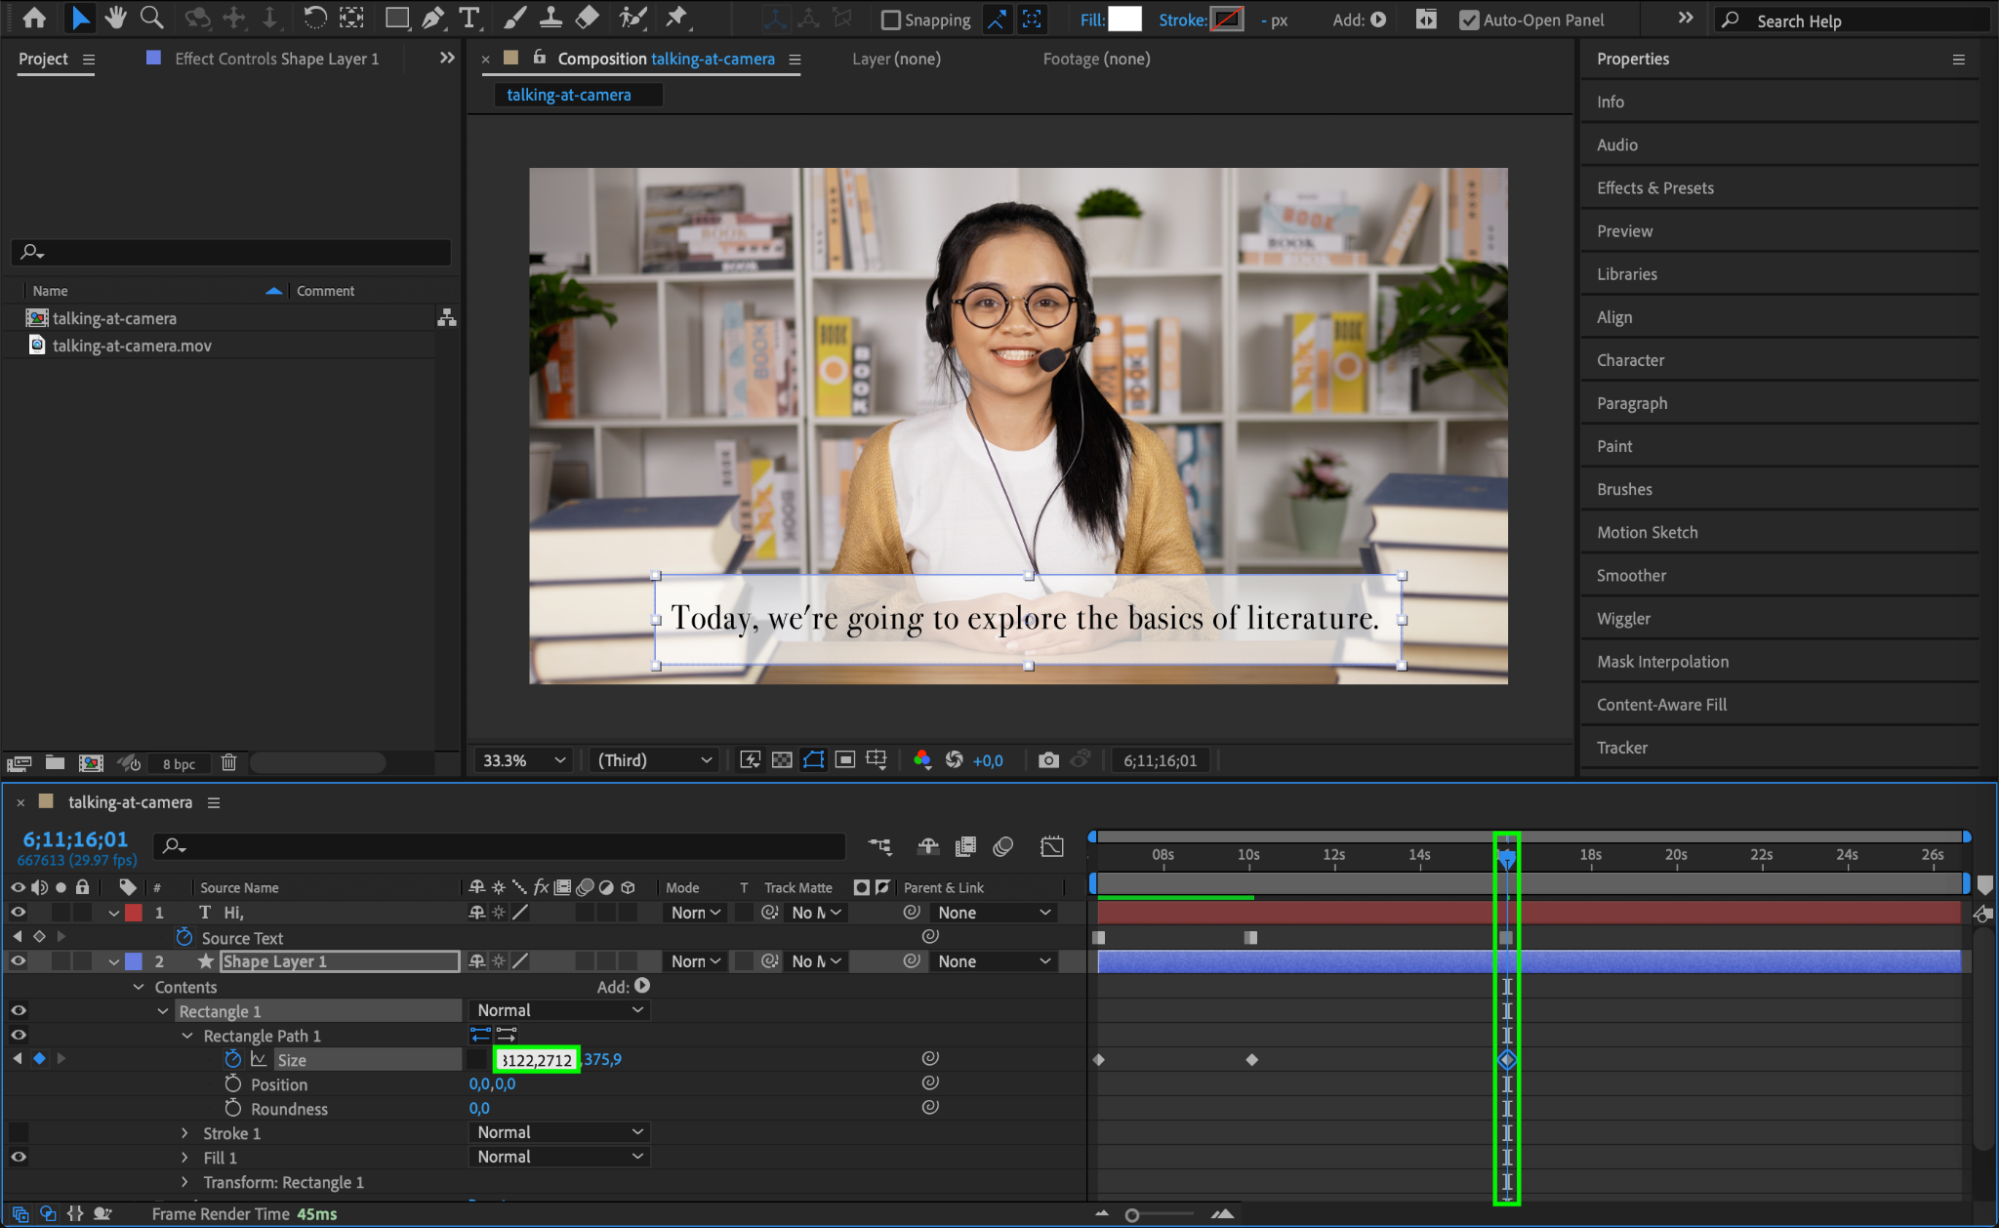
Expand the Shape Layer Properties where you created the rectangle background. Under the Size property, enable keyframing by clicking the Stopwatch and unlink the values by deselecting the chain icon. Adjust the background size to fit each sentence as you add keyframes. This ensures the background adapts to the length of the text as it changes throughout the video.
 Step 6: Preview and Make Adjustments
After you’ve added all your subtitles, use the Play button to watch the video and ensure the subtitles are synchronized correctly with the audio. Make any necessary adjustments by moving keyframes on the timeline.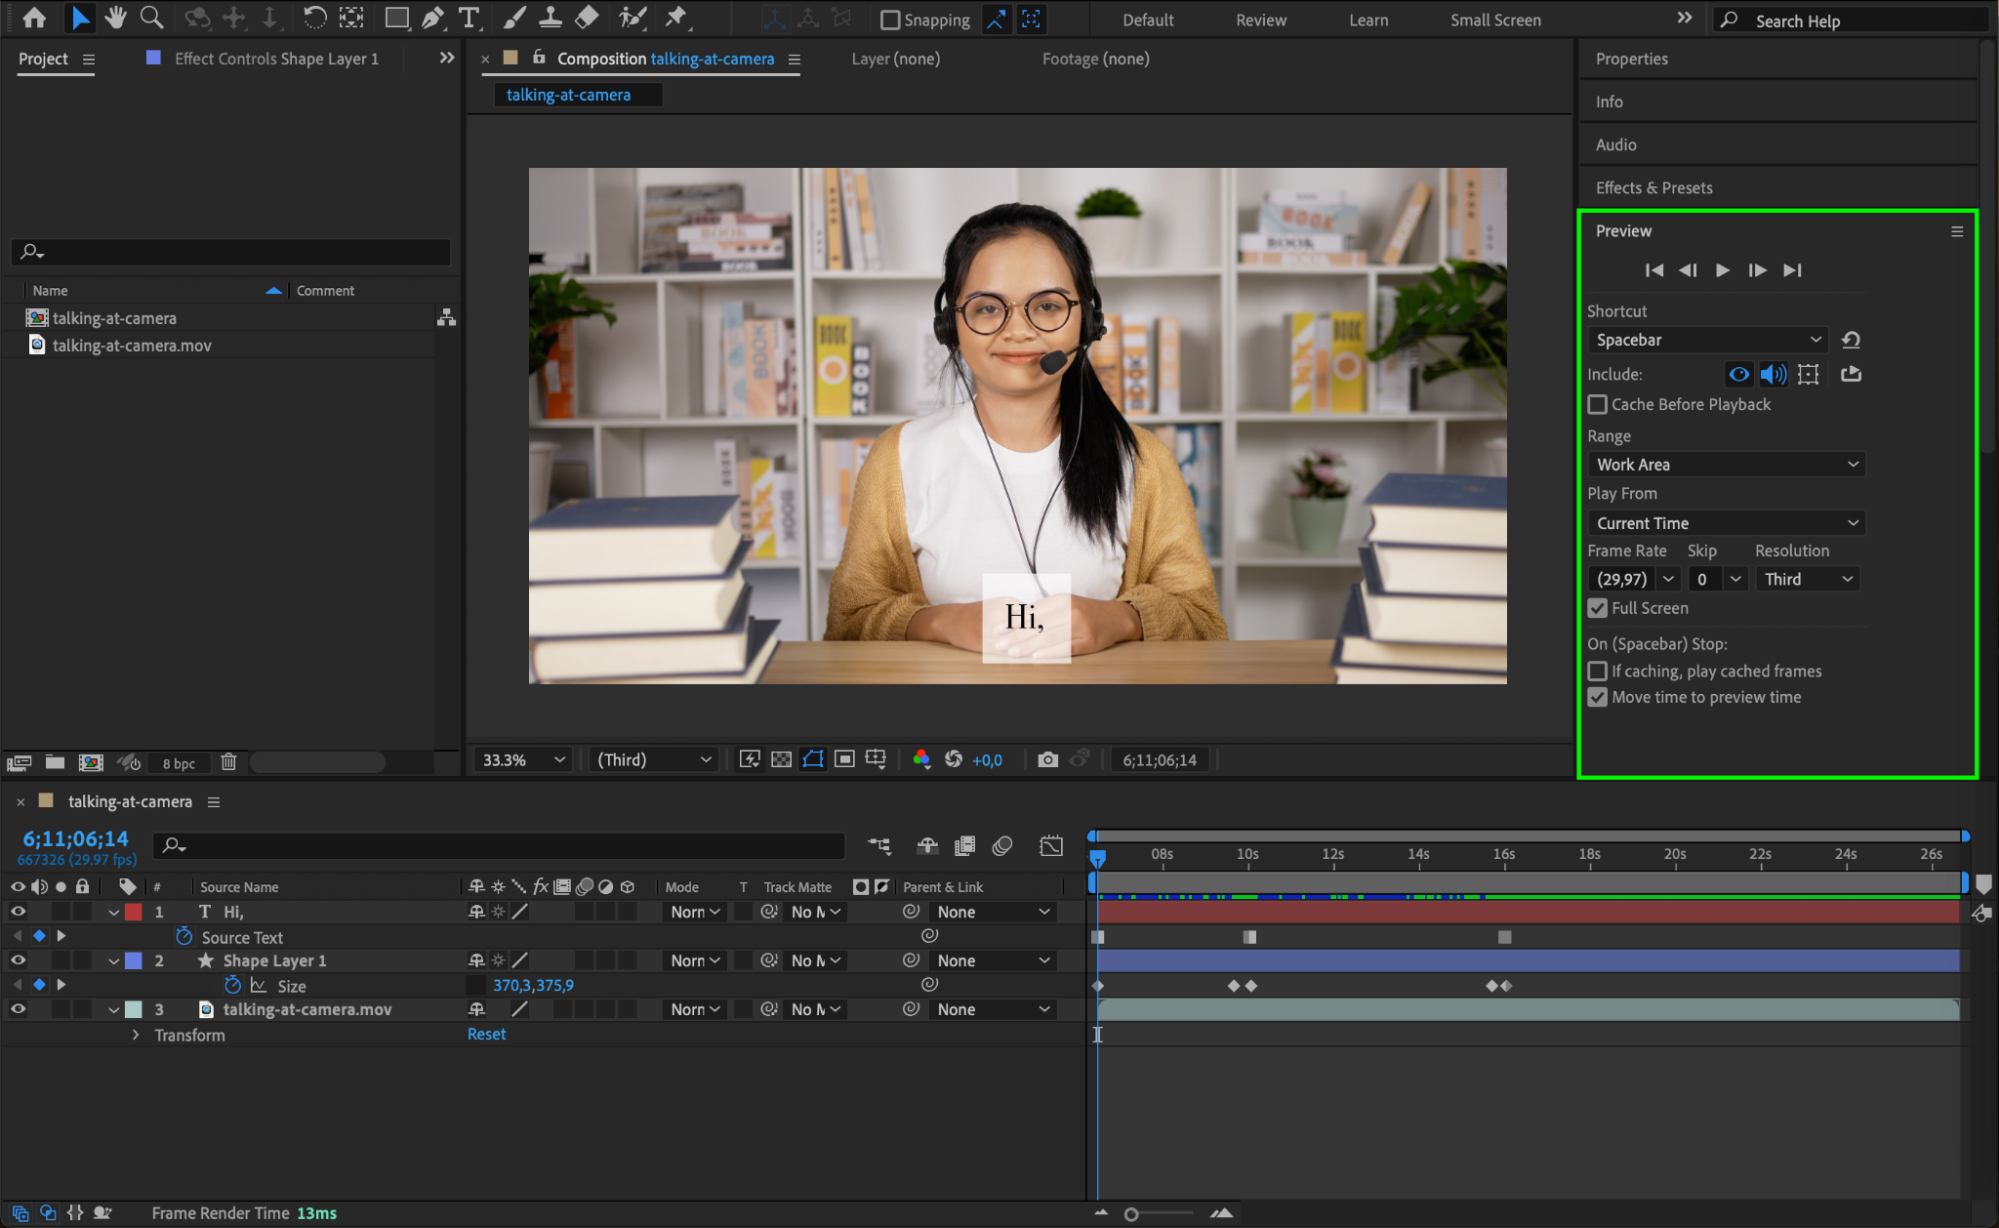 Step 7: Export Your Video with Subtitles
Once you’re happy with the subtitles, it’s time to export the video. Go to Composition > Add to Render Queue. In the Render Queue panel, adjust the output settings for your desired format and quality. Click Render to export the video with embedded subtitles.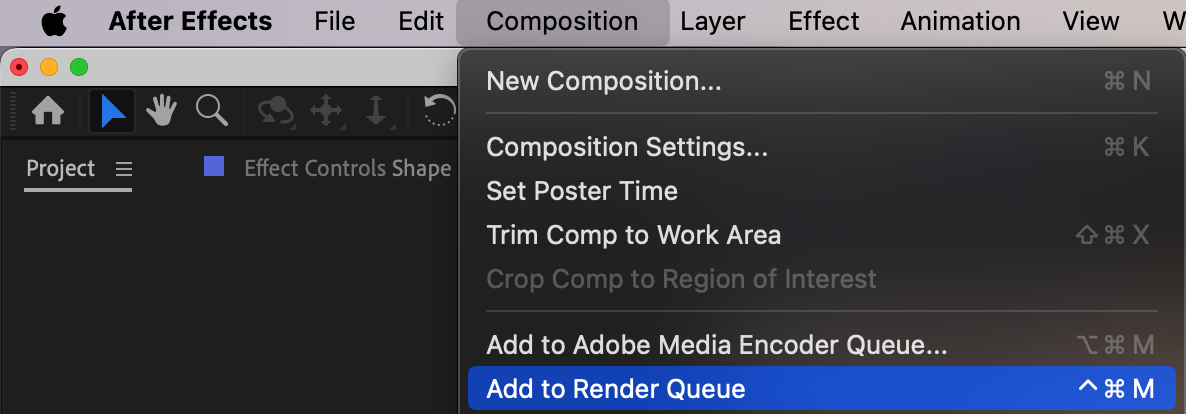
 Conclusion
By following these steps, you’ll be able to create effective and visually appealing subtitles in After Effects. Subtitles are a powerful tool that enhances your video’s accessibility and viewer experience. Be sure to save your project file so you can easily make adjustments or add additional subtitles in the future. Now you’re ready to take your content to the next level with clear, professional subtitles!


