A Step-by-Step Guide to Creating Velocity Edits in After Effects
Introduction – Learn How to Sync Video Speed with Music Beats in After Effects
Velocity edits are a great way to add energy to your videos, especially when syncing visuals to the rhythm of music. In this tutorial, we will walk you through the process of creating velocity edits in After Effects, where the speed of your video changes in sync with the audio beats. This technique is commonly used in music videos and action sequences to create a more dynamic and engaging experience.
Get 10% off when you subscribe to our newsletter

Step 1: Create a New Composition
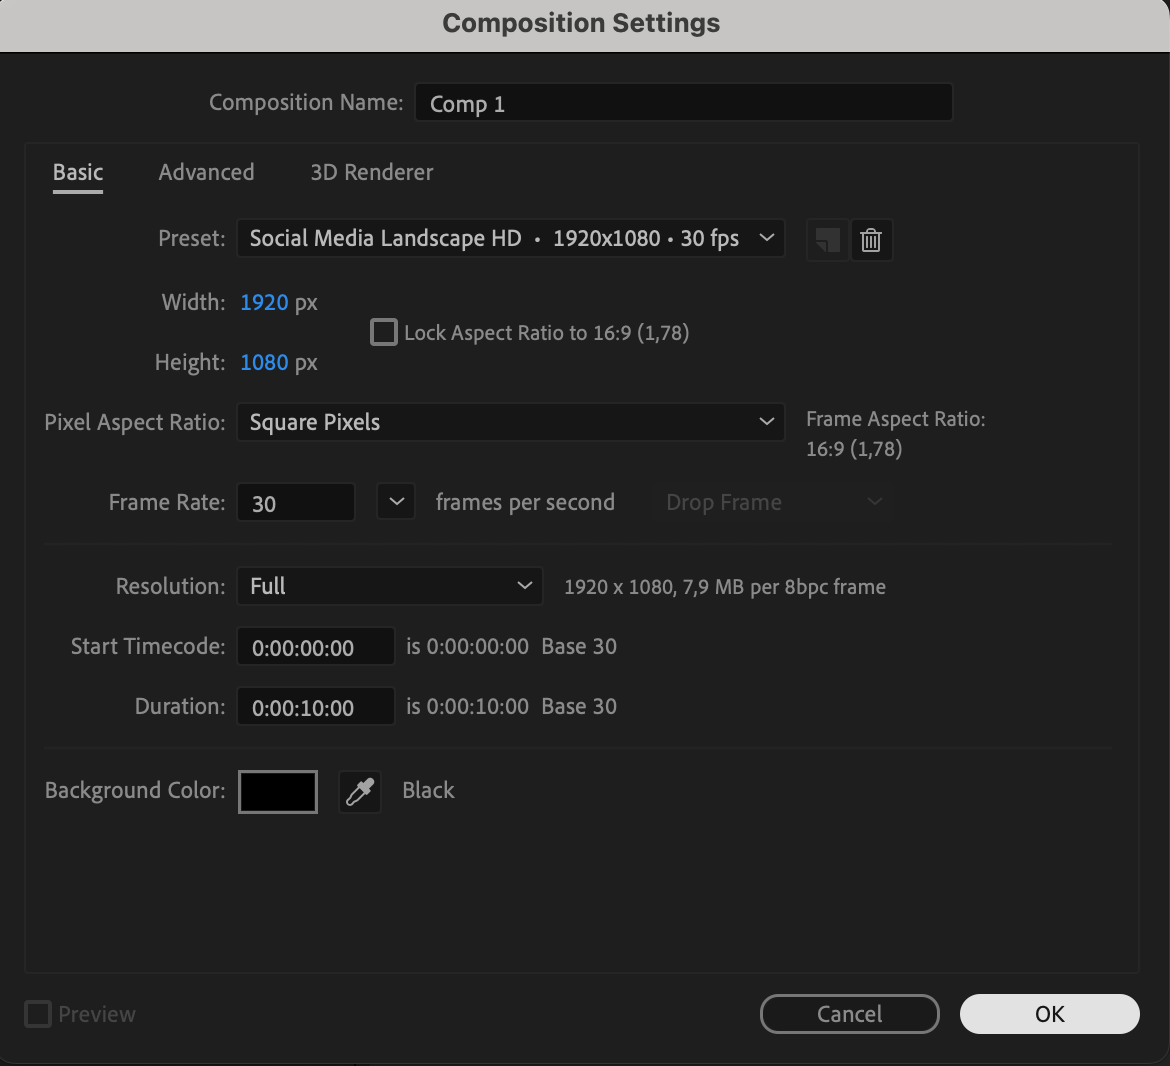
Start by creating a new composition for your project. Go to Composition > New Composition. Set your desired resolution, frame rate, and duration for the composition.
 Step 2: Import Your Audio and Video Files
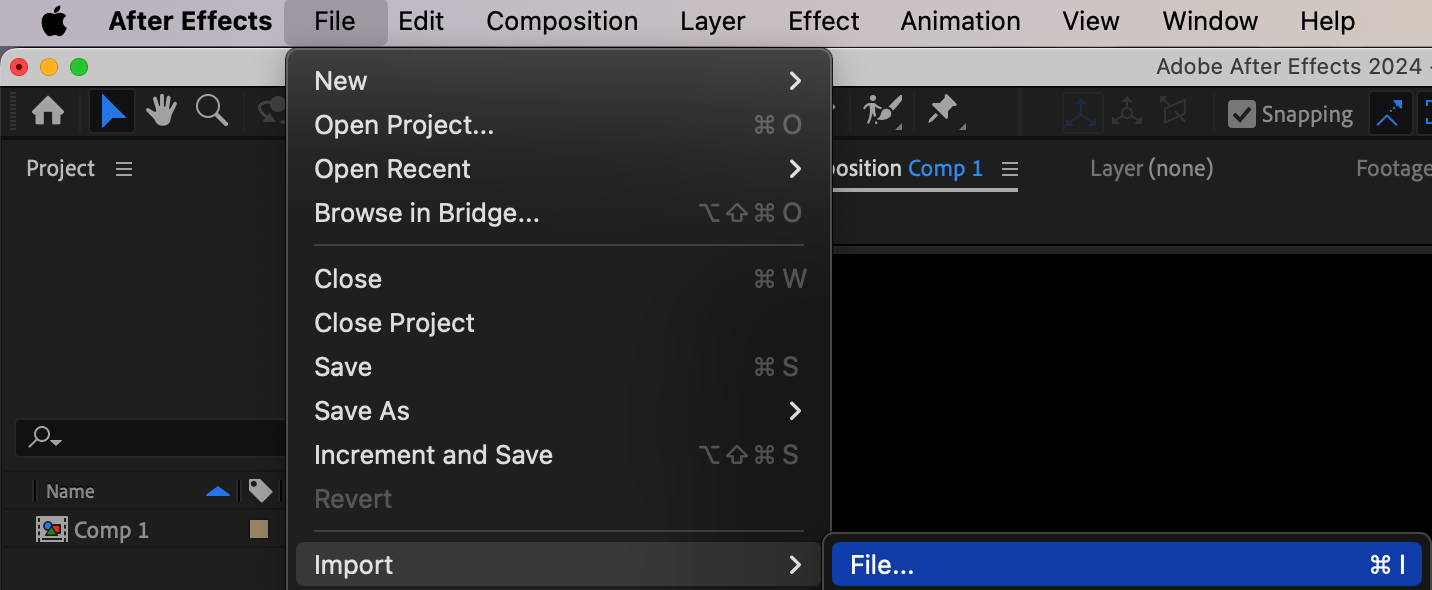
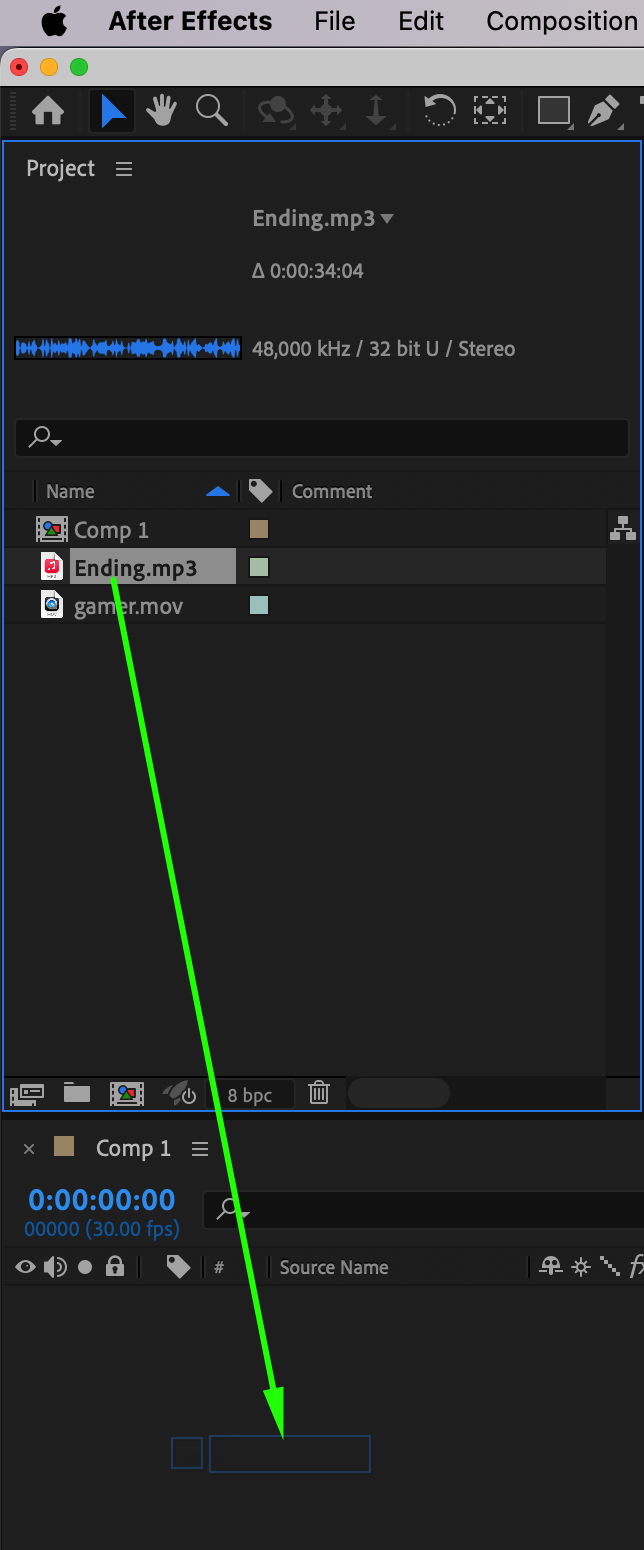
Next, import your video and audio files into the project panel. To do this, go to File > Import > File and select the files you want to use. Drag your audio file onto the timeline first.
 Step 3: Show Audio Waveform and Add Markers
Expand the properties of your audio layer to reveal the Waveform. This will allow you to see the intensity of the beats. Based on the peaks in the waveform, add markers at the points where the beats occur. To add a marker, go to Layer > Markers > Add Marker. This will help you synchronize the video speed with the beats later on.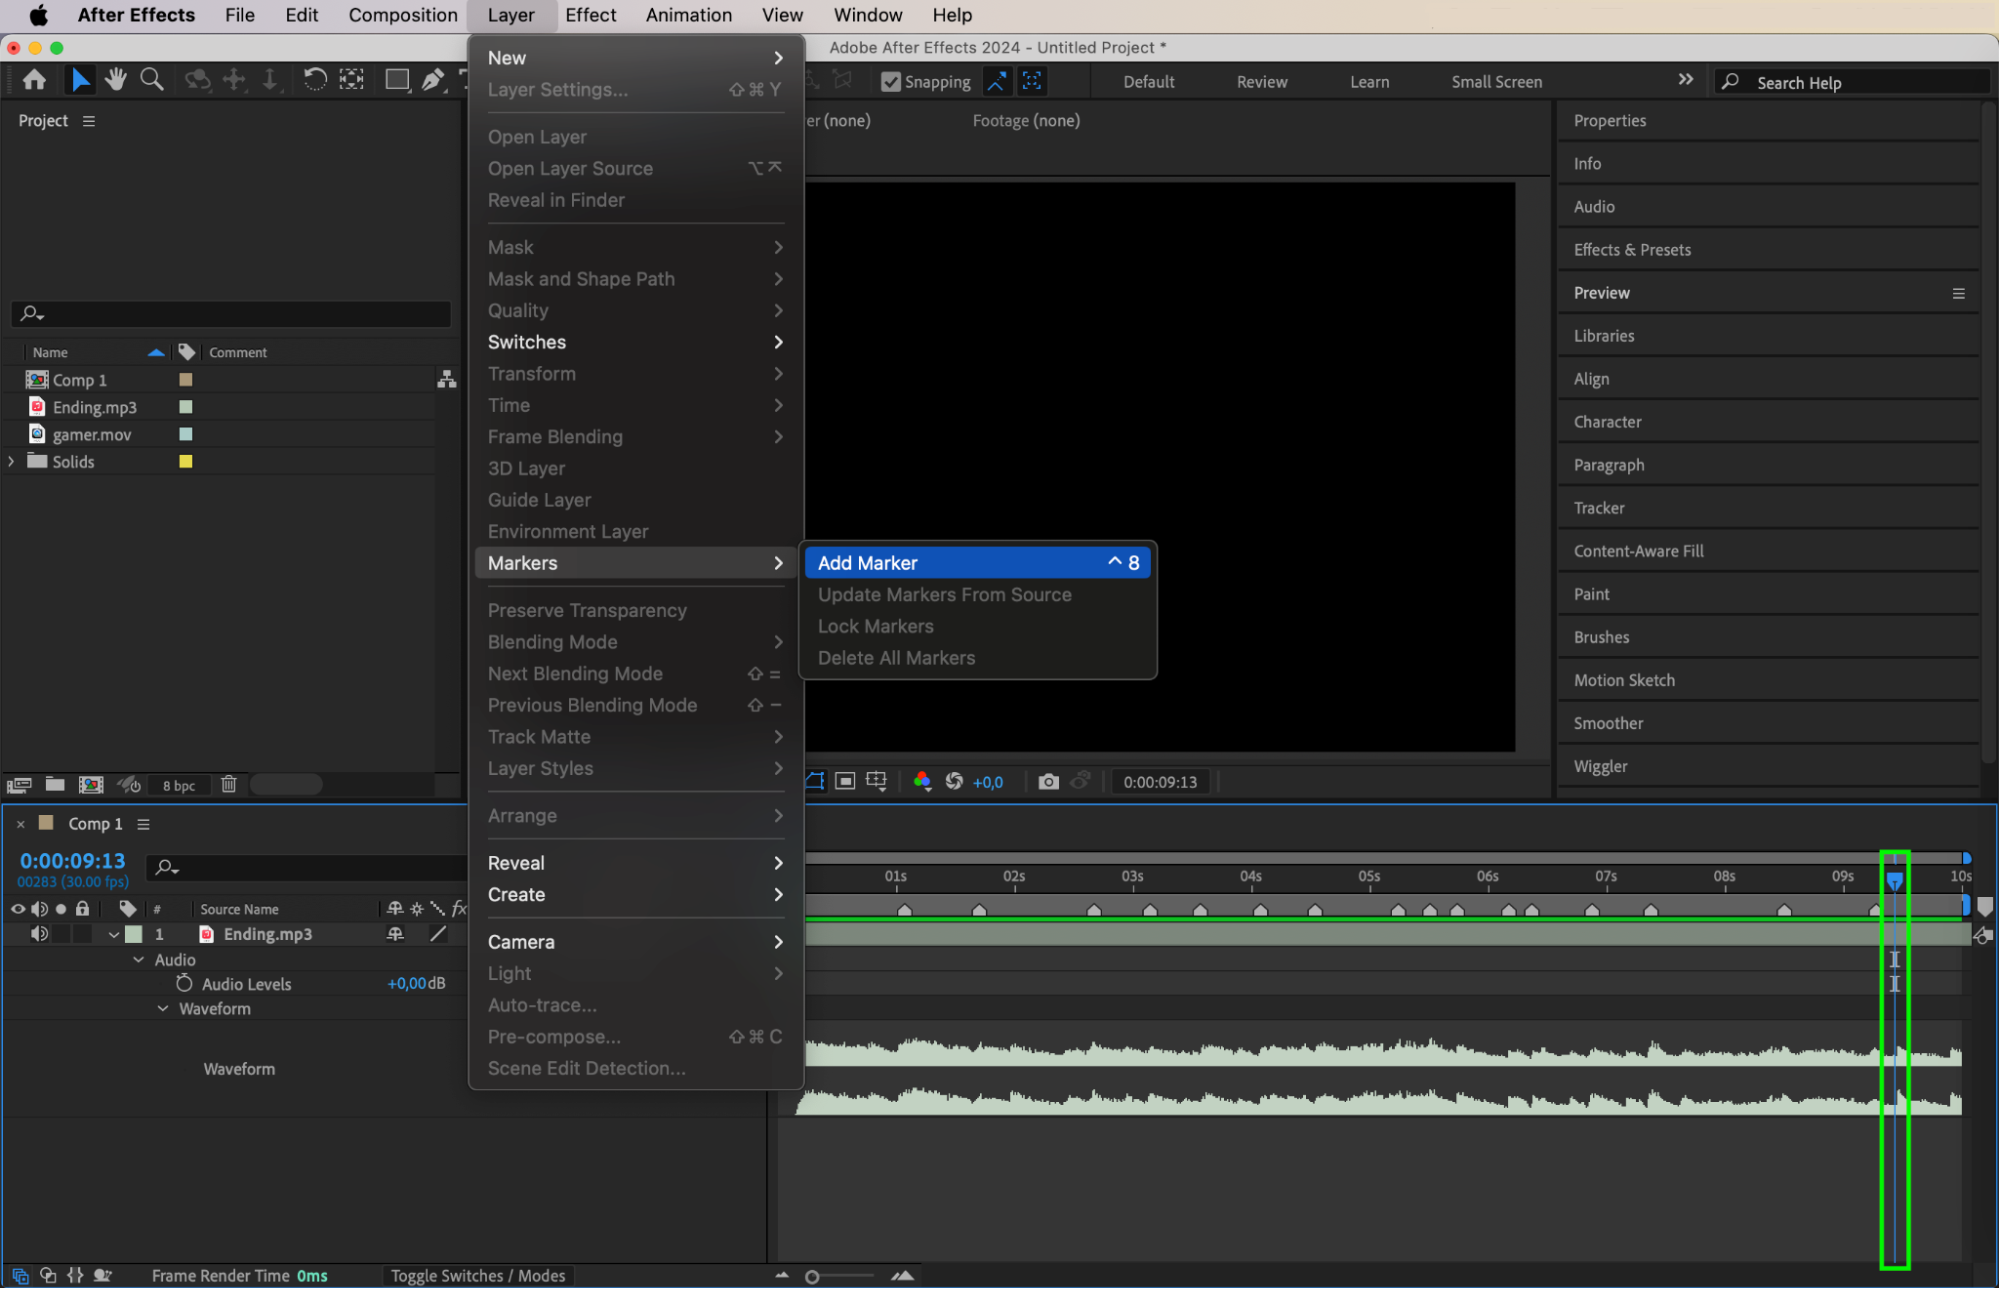 Step 4: Add Your Video to the Timeline
Drag your video file onto the timeline above the audio layer. This will allow you to sync the video to the audio as you make edits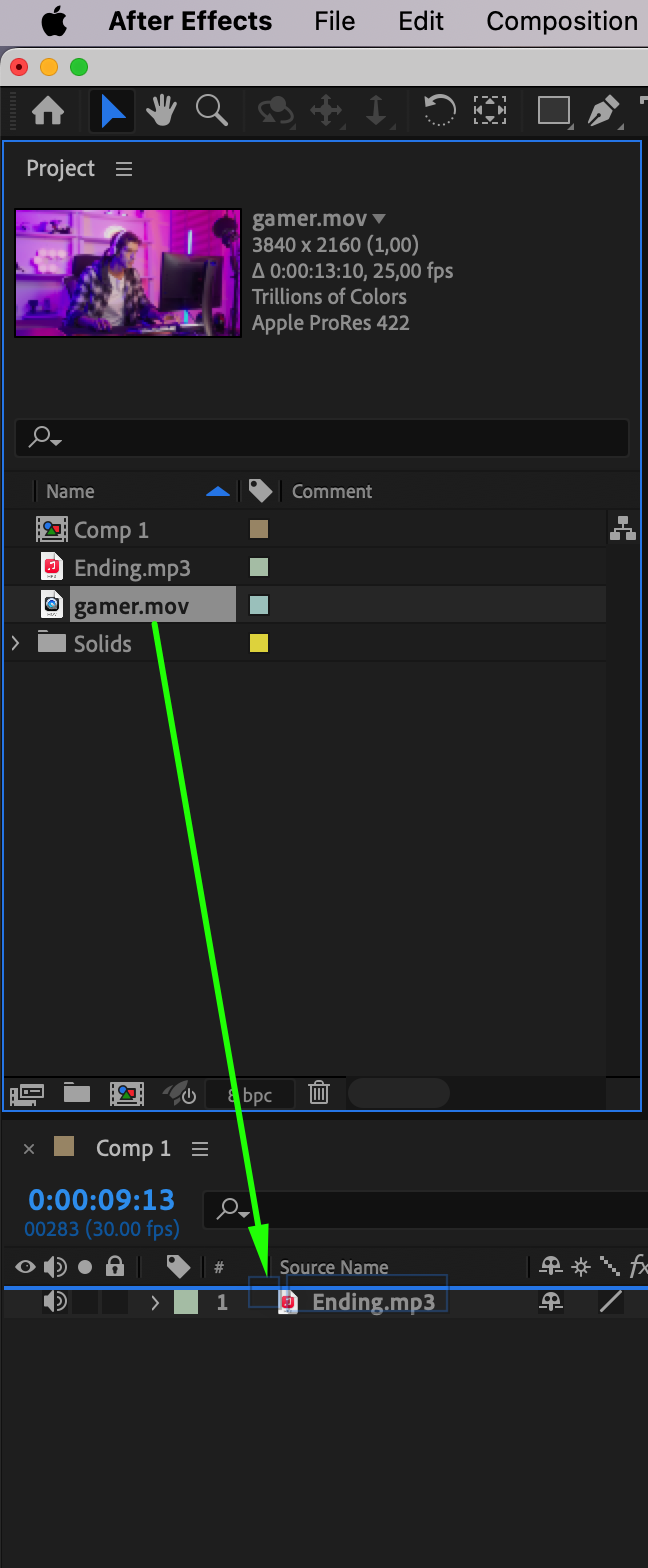 Step 5: Adjust Video Duration for Syncing with Audio
Adjust the duration of your video so that it fits with the beats you marked. Align the video layer with the sections of the audio that have the most intensity and frequency. This will create a smoother sync between the video and the audio.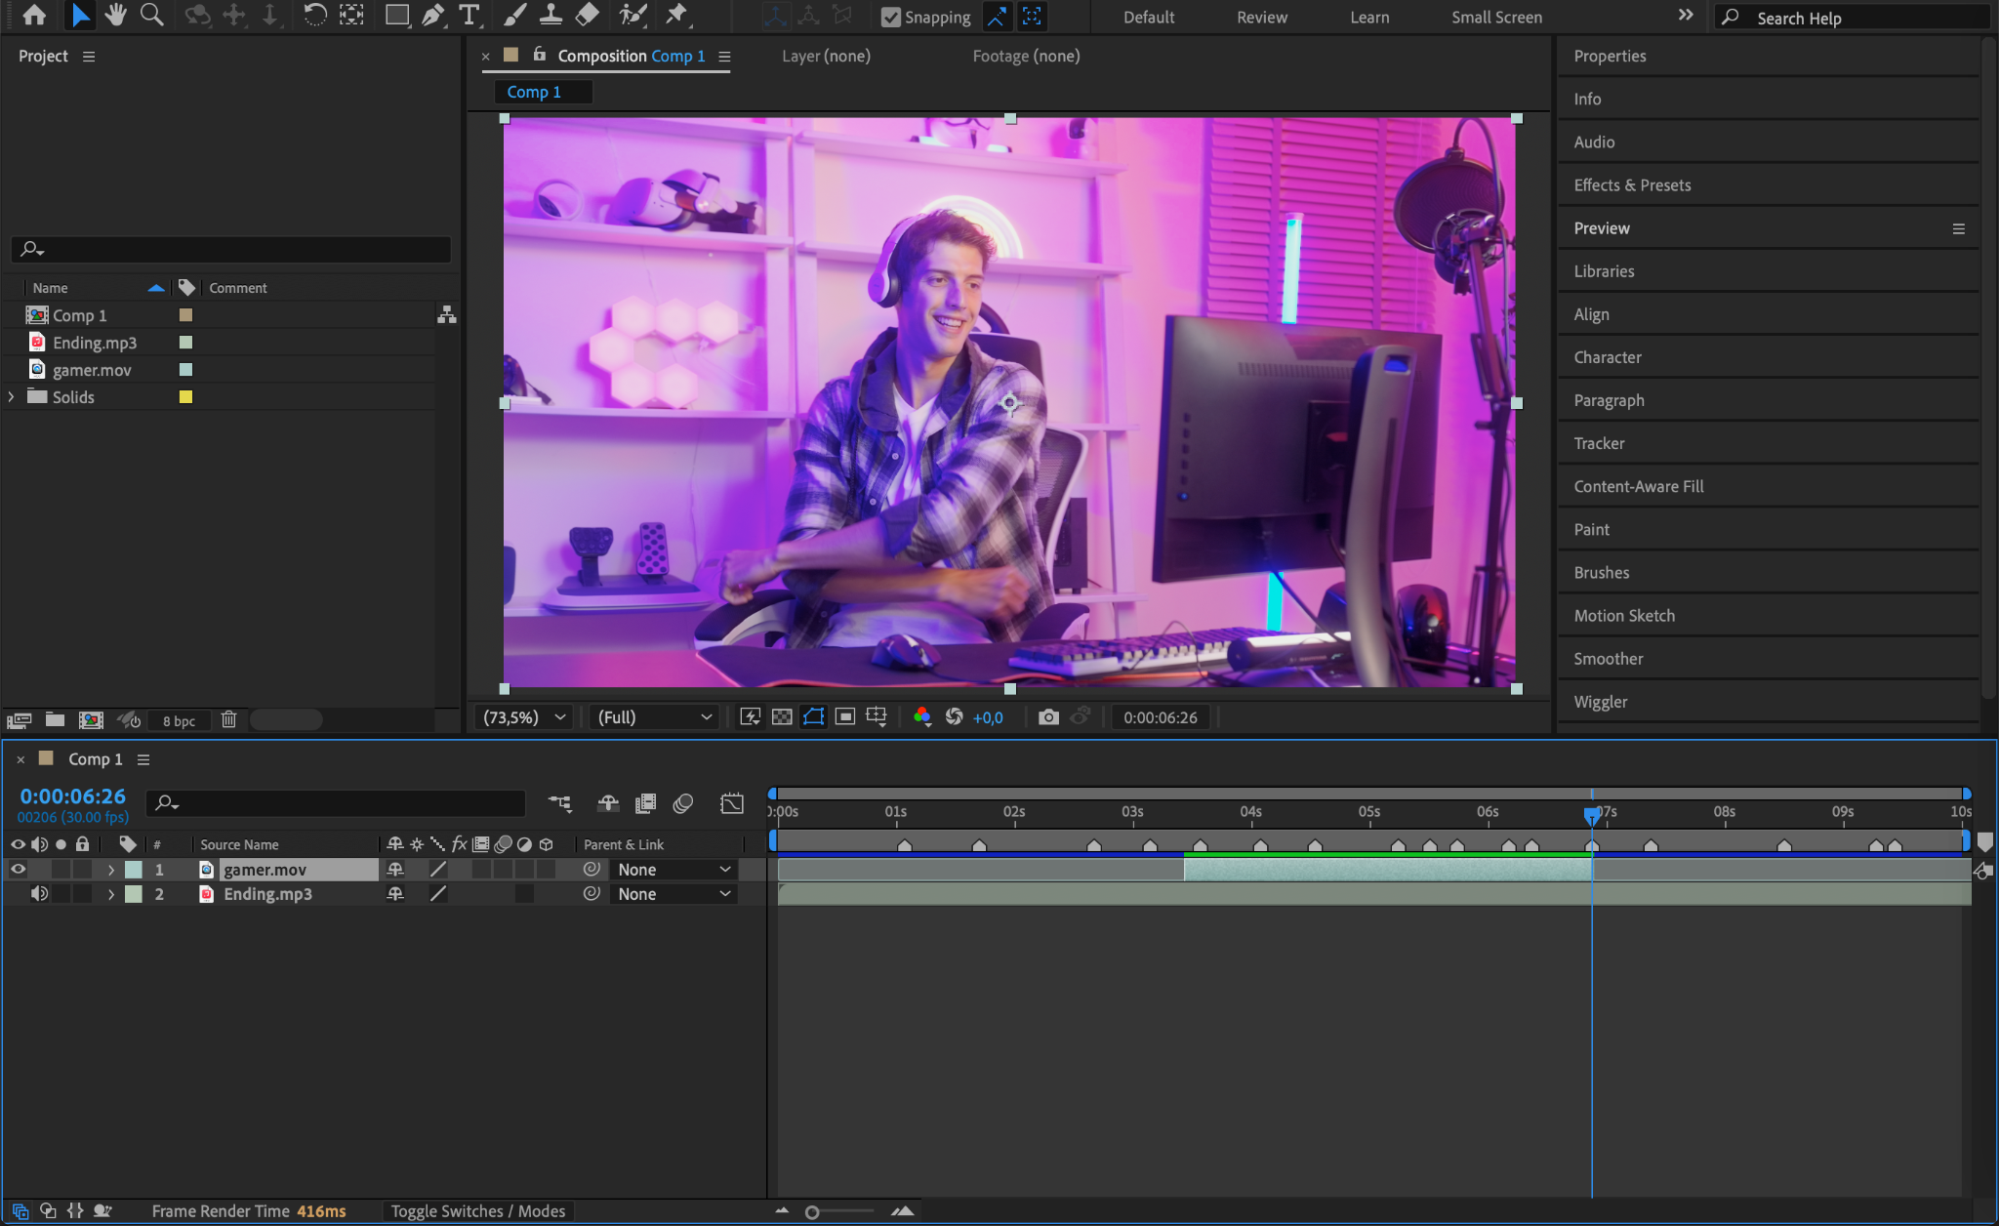 Step 6: Pre-compose Your Video
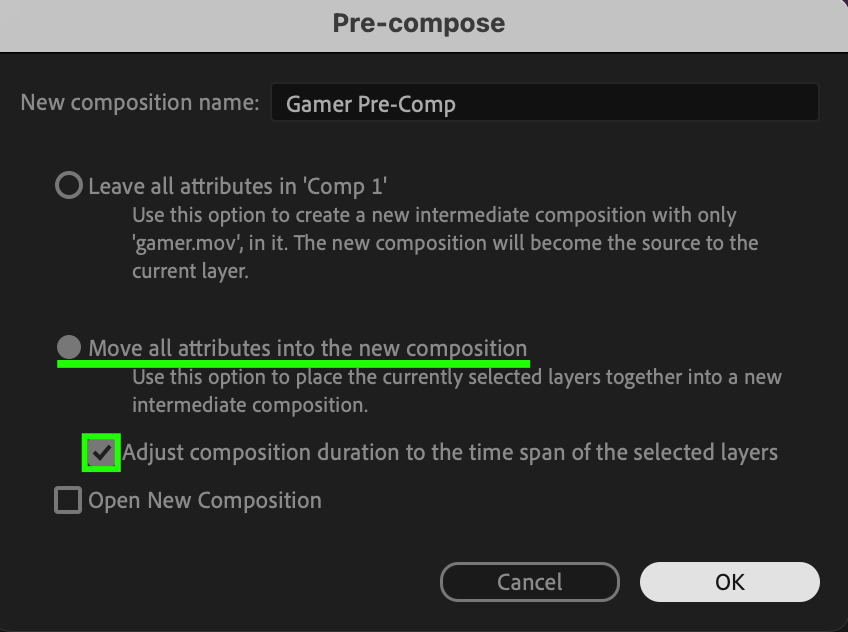
Once the video is in place, pre-compose the video layer. Right-click on the video layer and select Pre-compose. This will group the video into a single layer, making it easier to apply the next effects.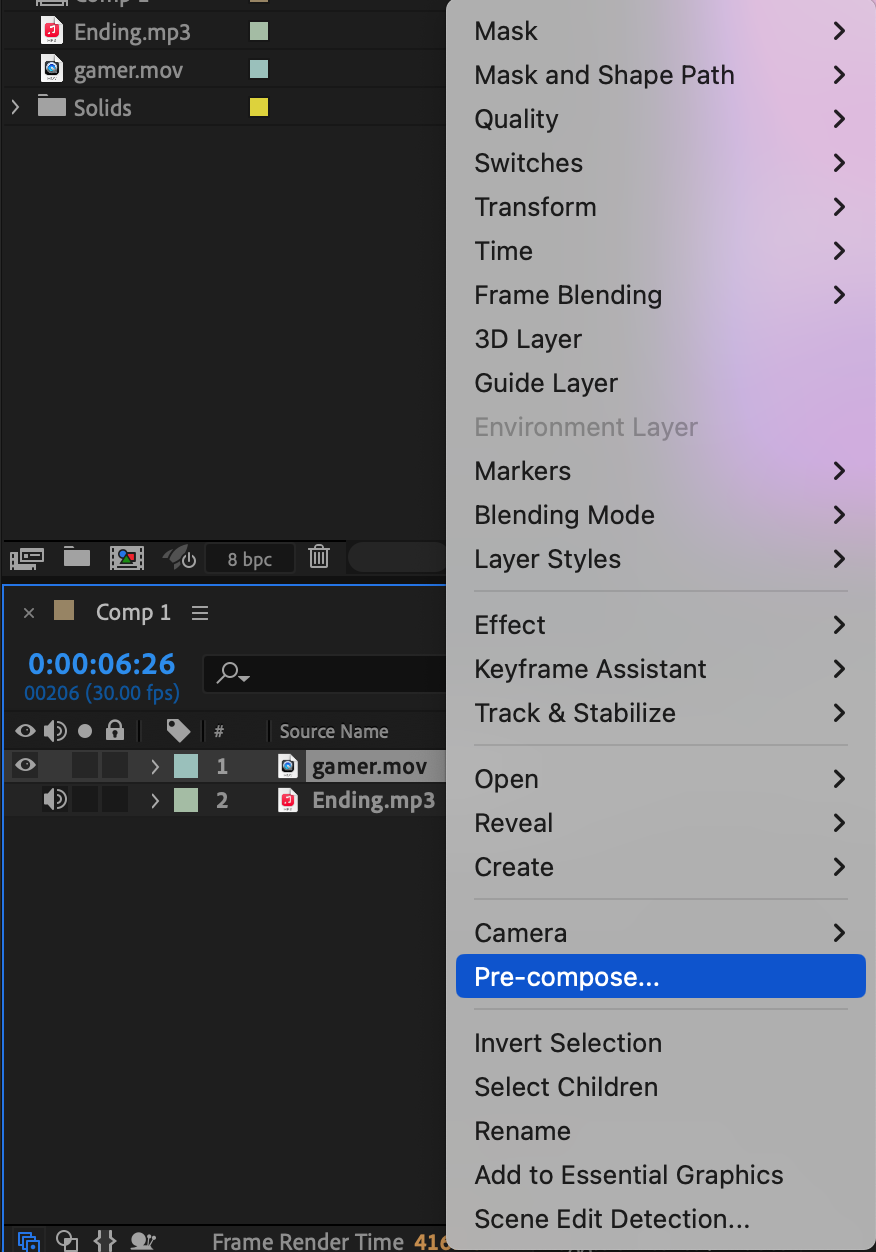
 Step 7: Apply the Timewarp Effect
Now, apply the Timewarp effect to your pre-composed video. You can find this effect in the Effects & Presets panel. Drag and drop the effect onto your video layer.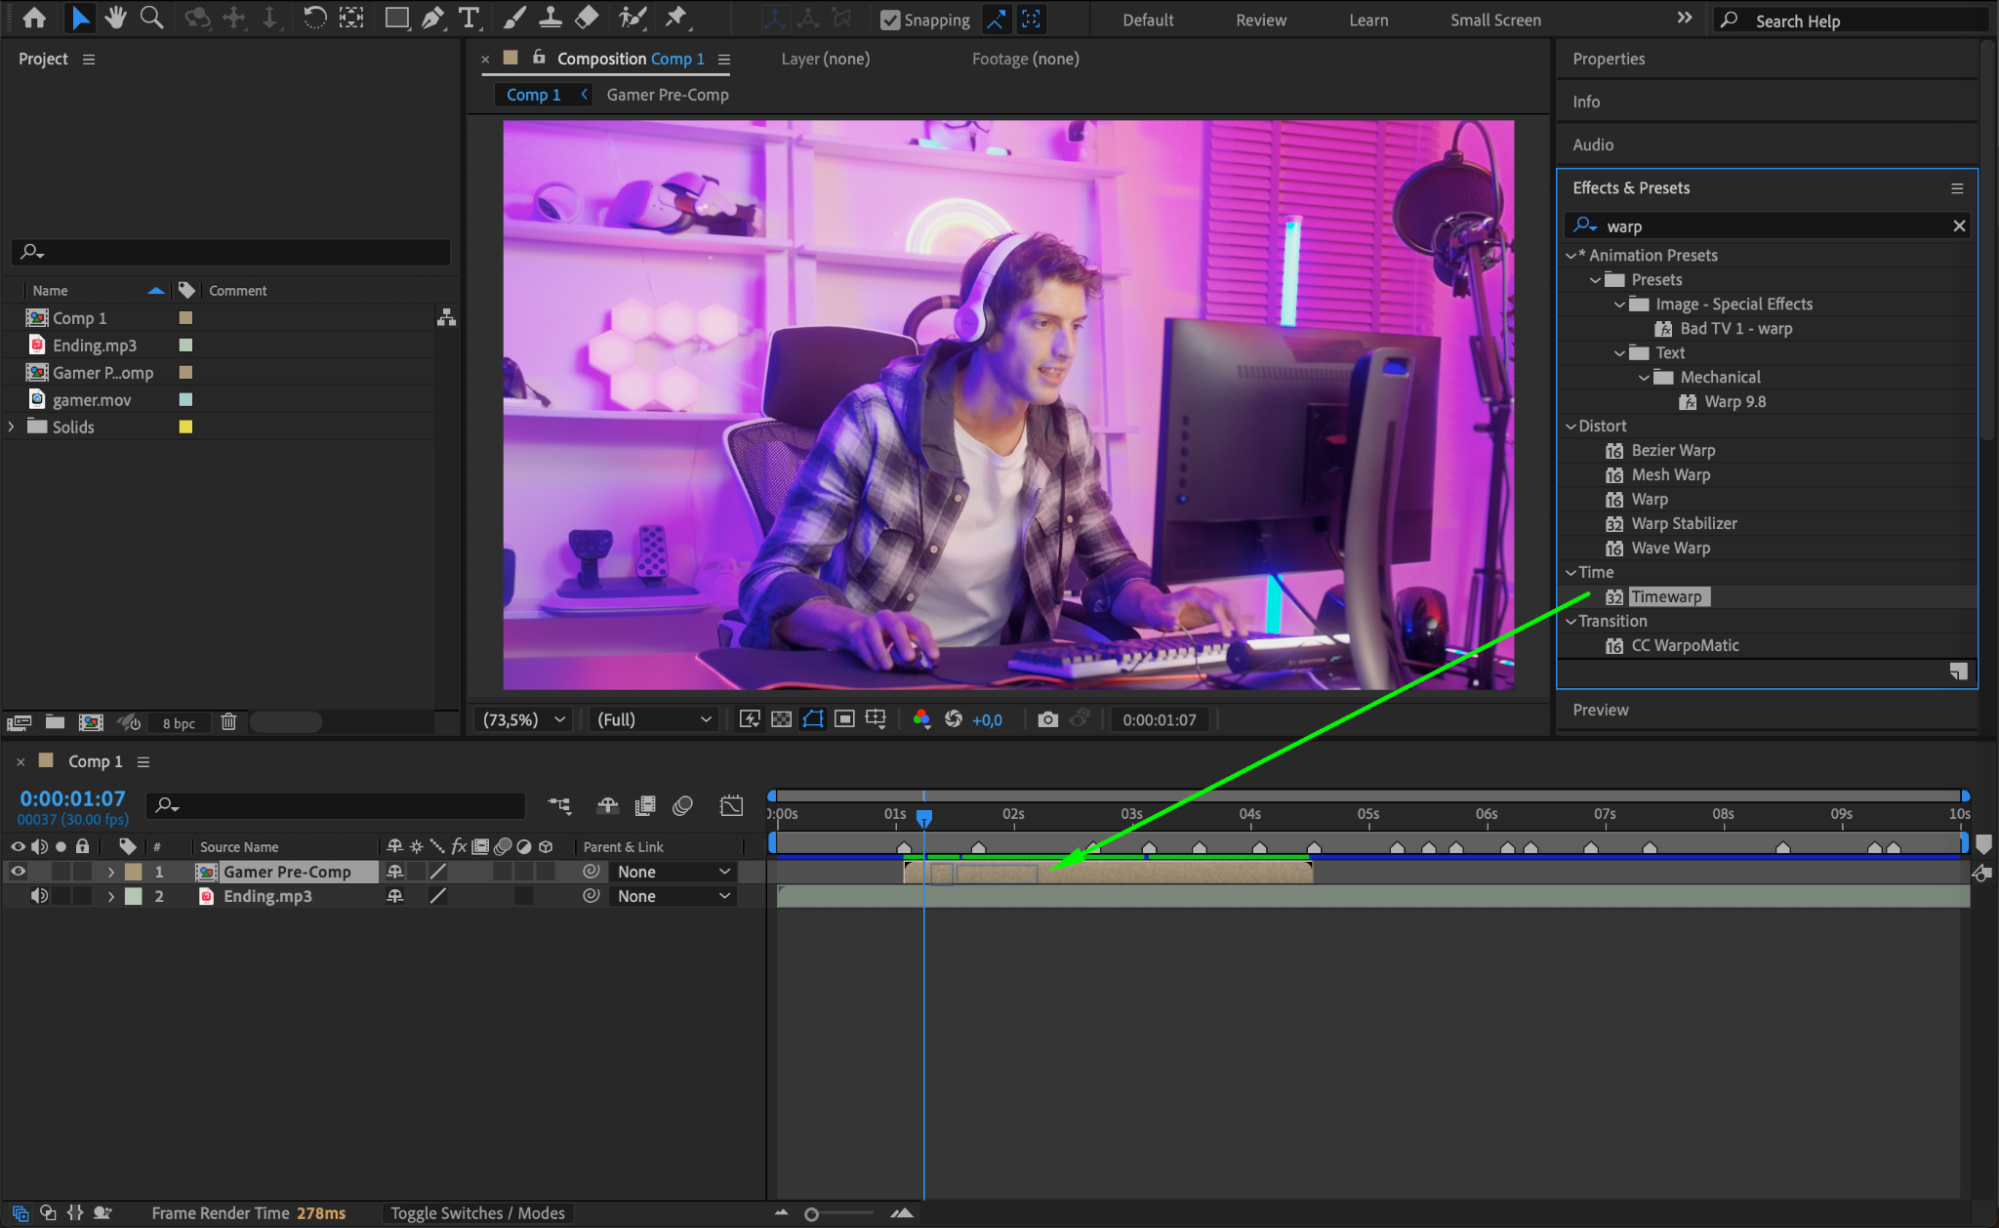 Step 8: Set Speed at the First Marker
In the Effect Controls panel, click on the stopwatch next to the Speed property to create a keyframe. Set the speed to 200 when the CTI (current time indicator) is on the first marker you created.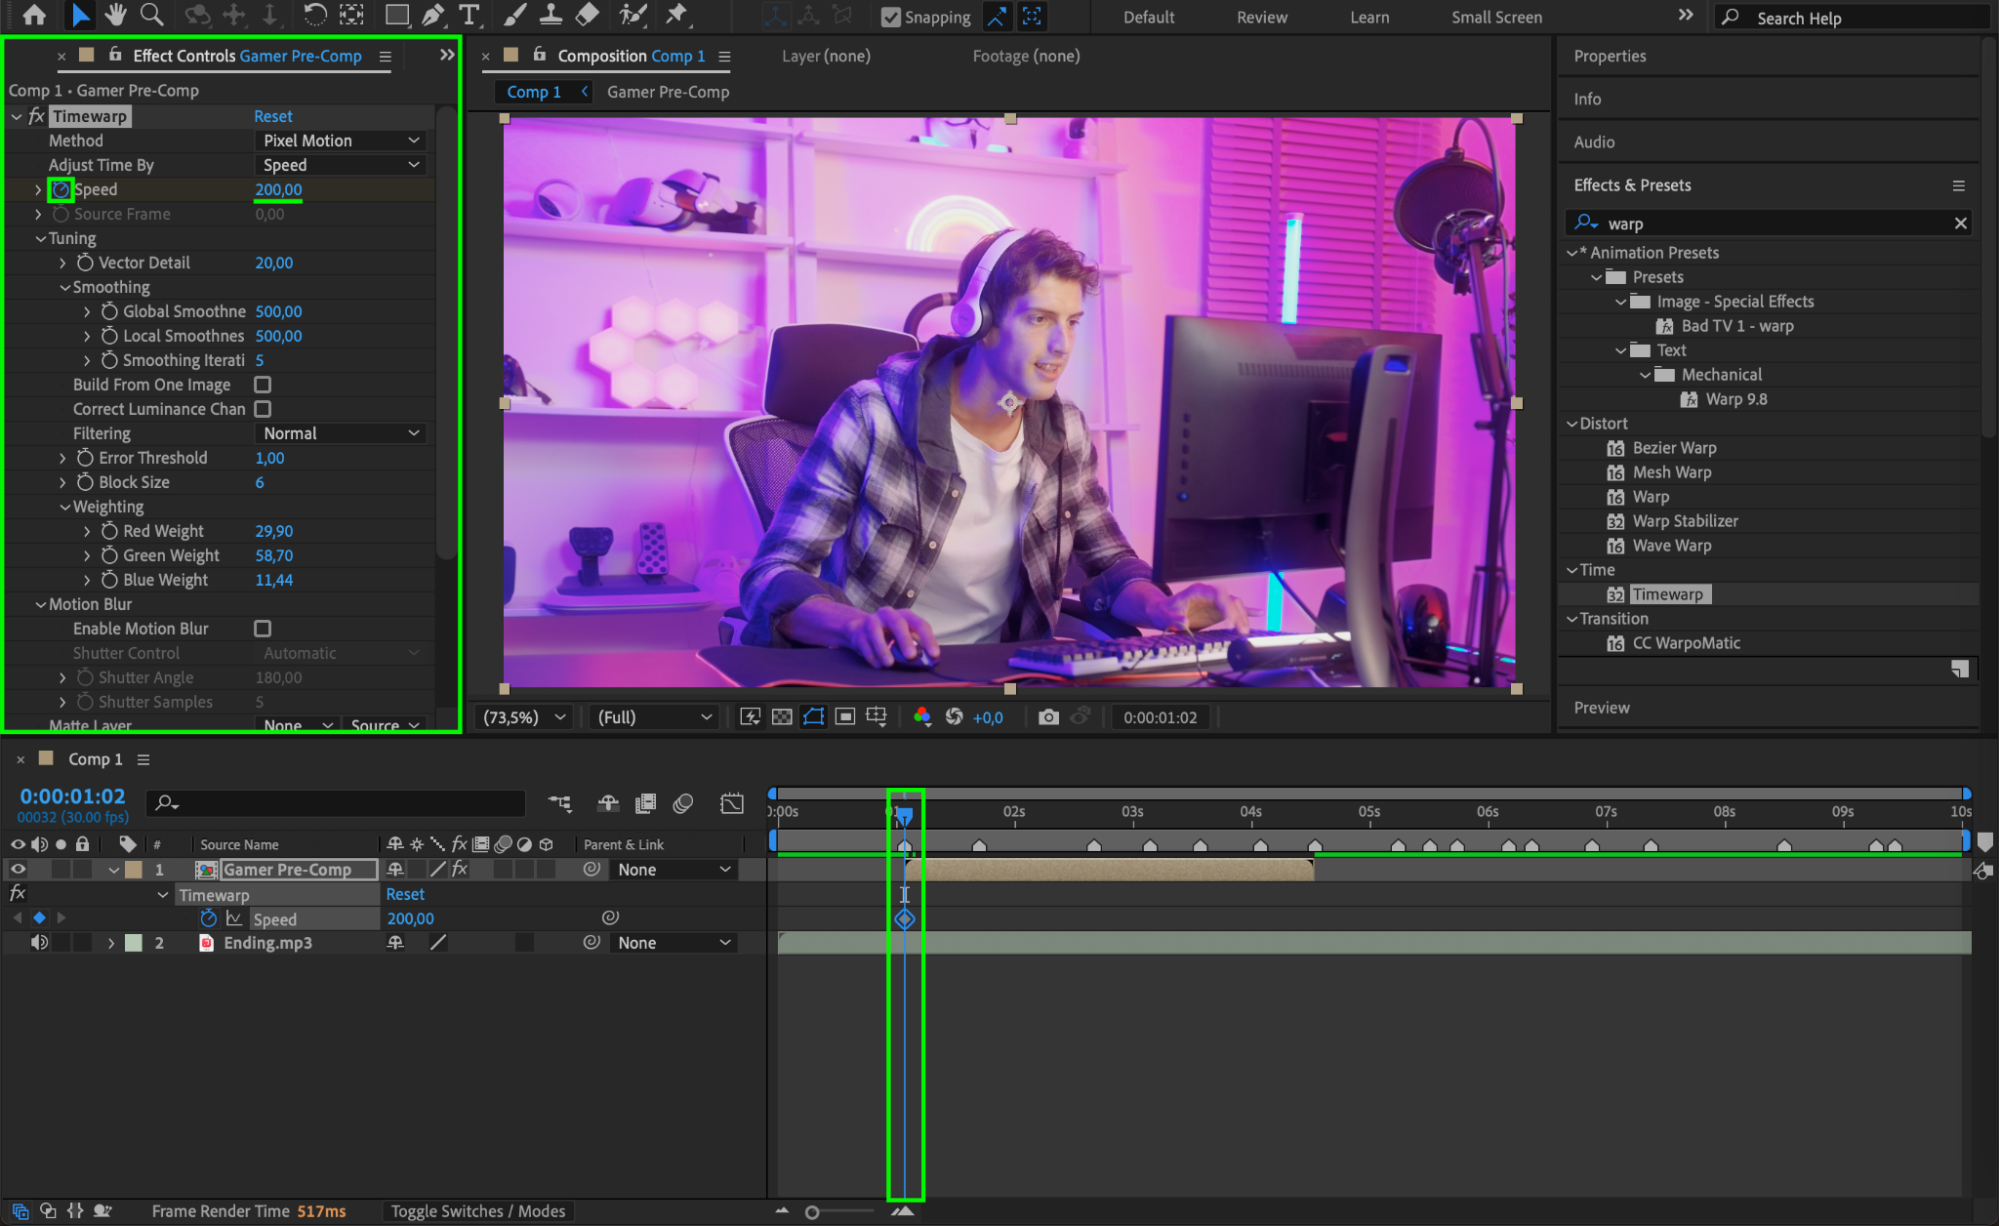
Step 9: Adjust Speed Between Markers
Move the CTI between the first and second markers. Change the Speed value to 20 for this section. This will slow down the video during the quieter moments of the audio.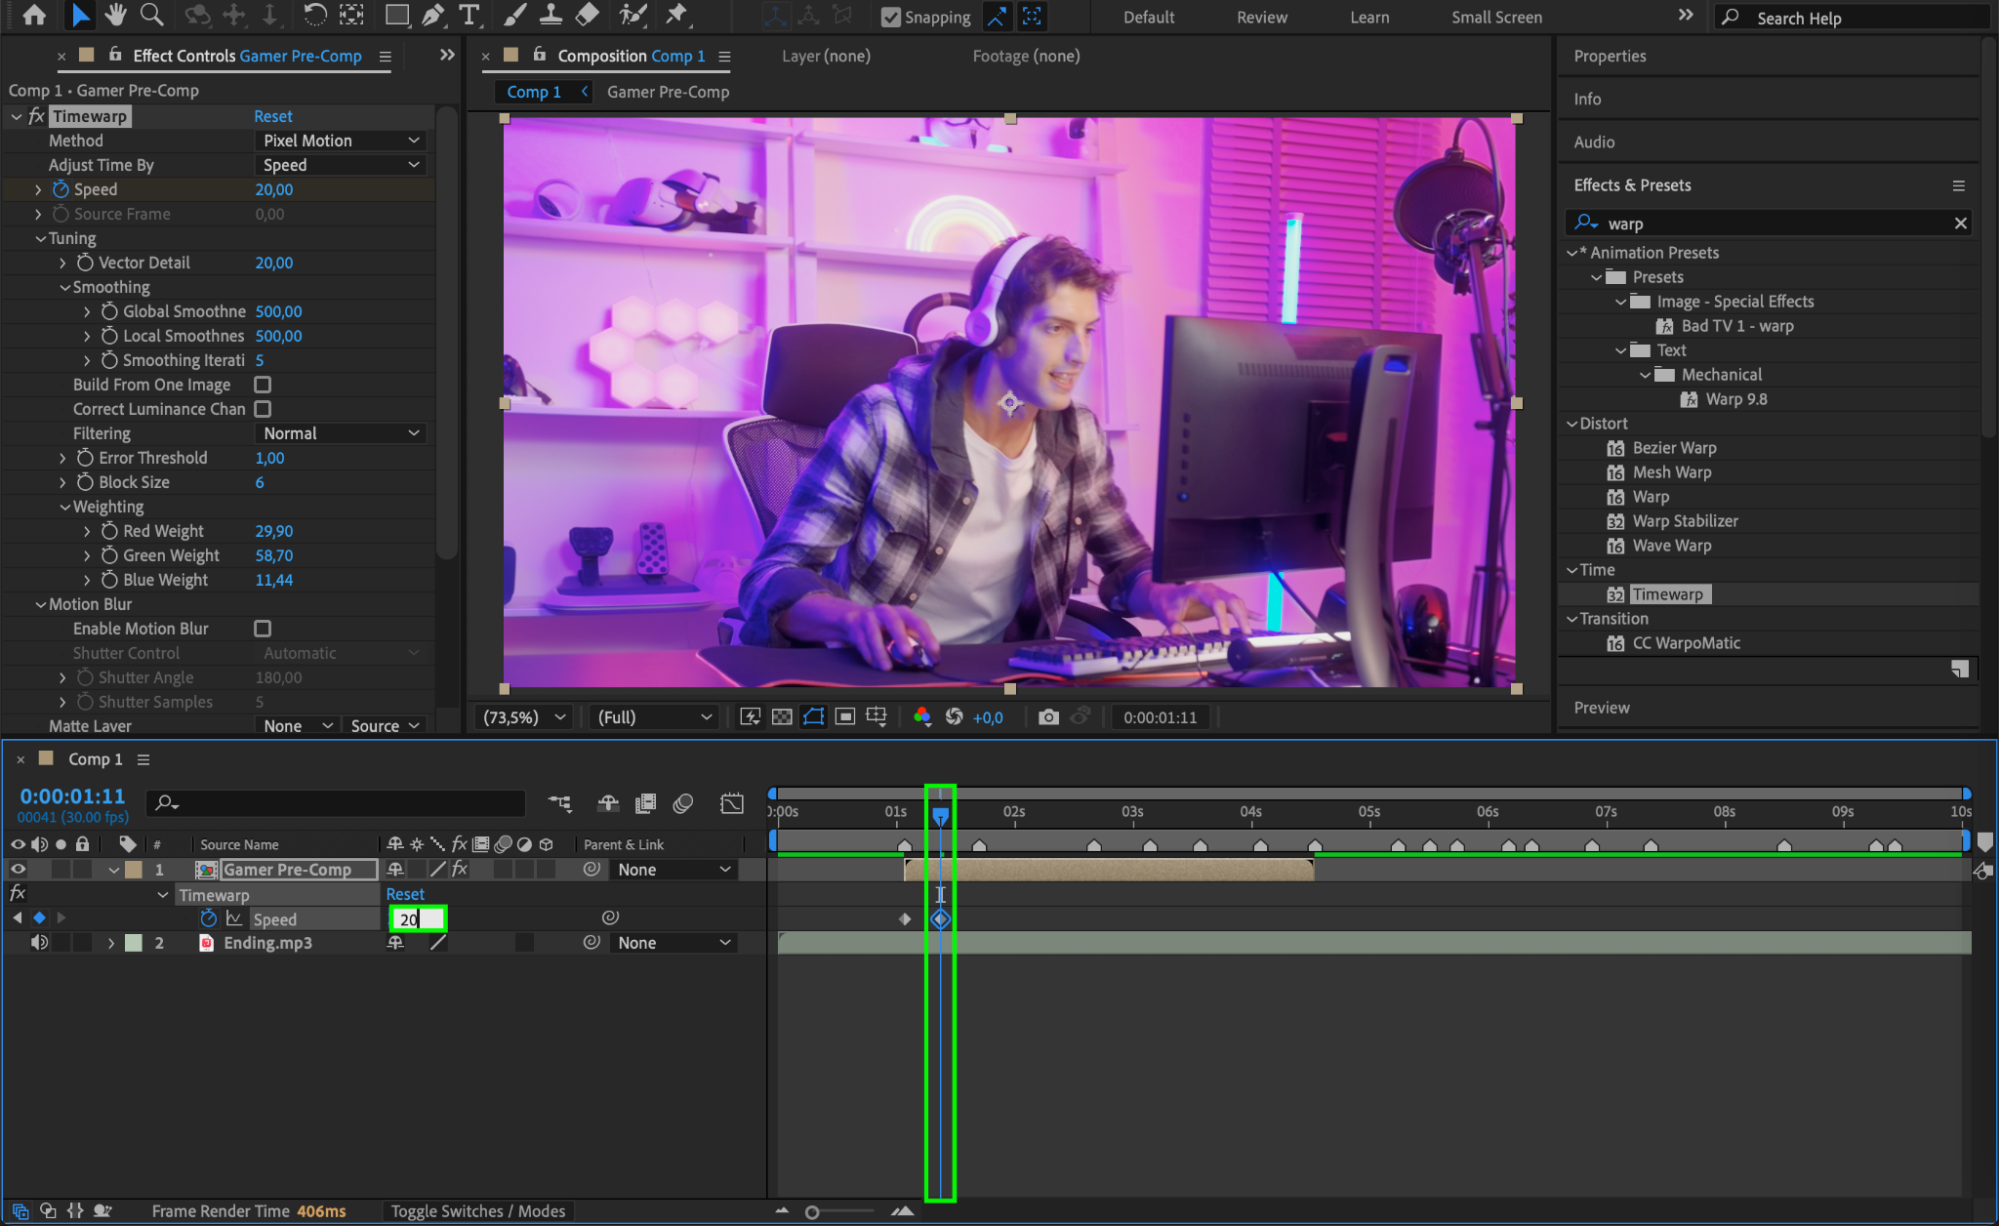 Step 10: Change Speed for Each Marker
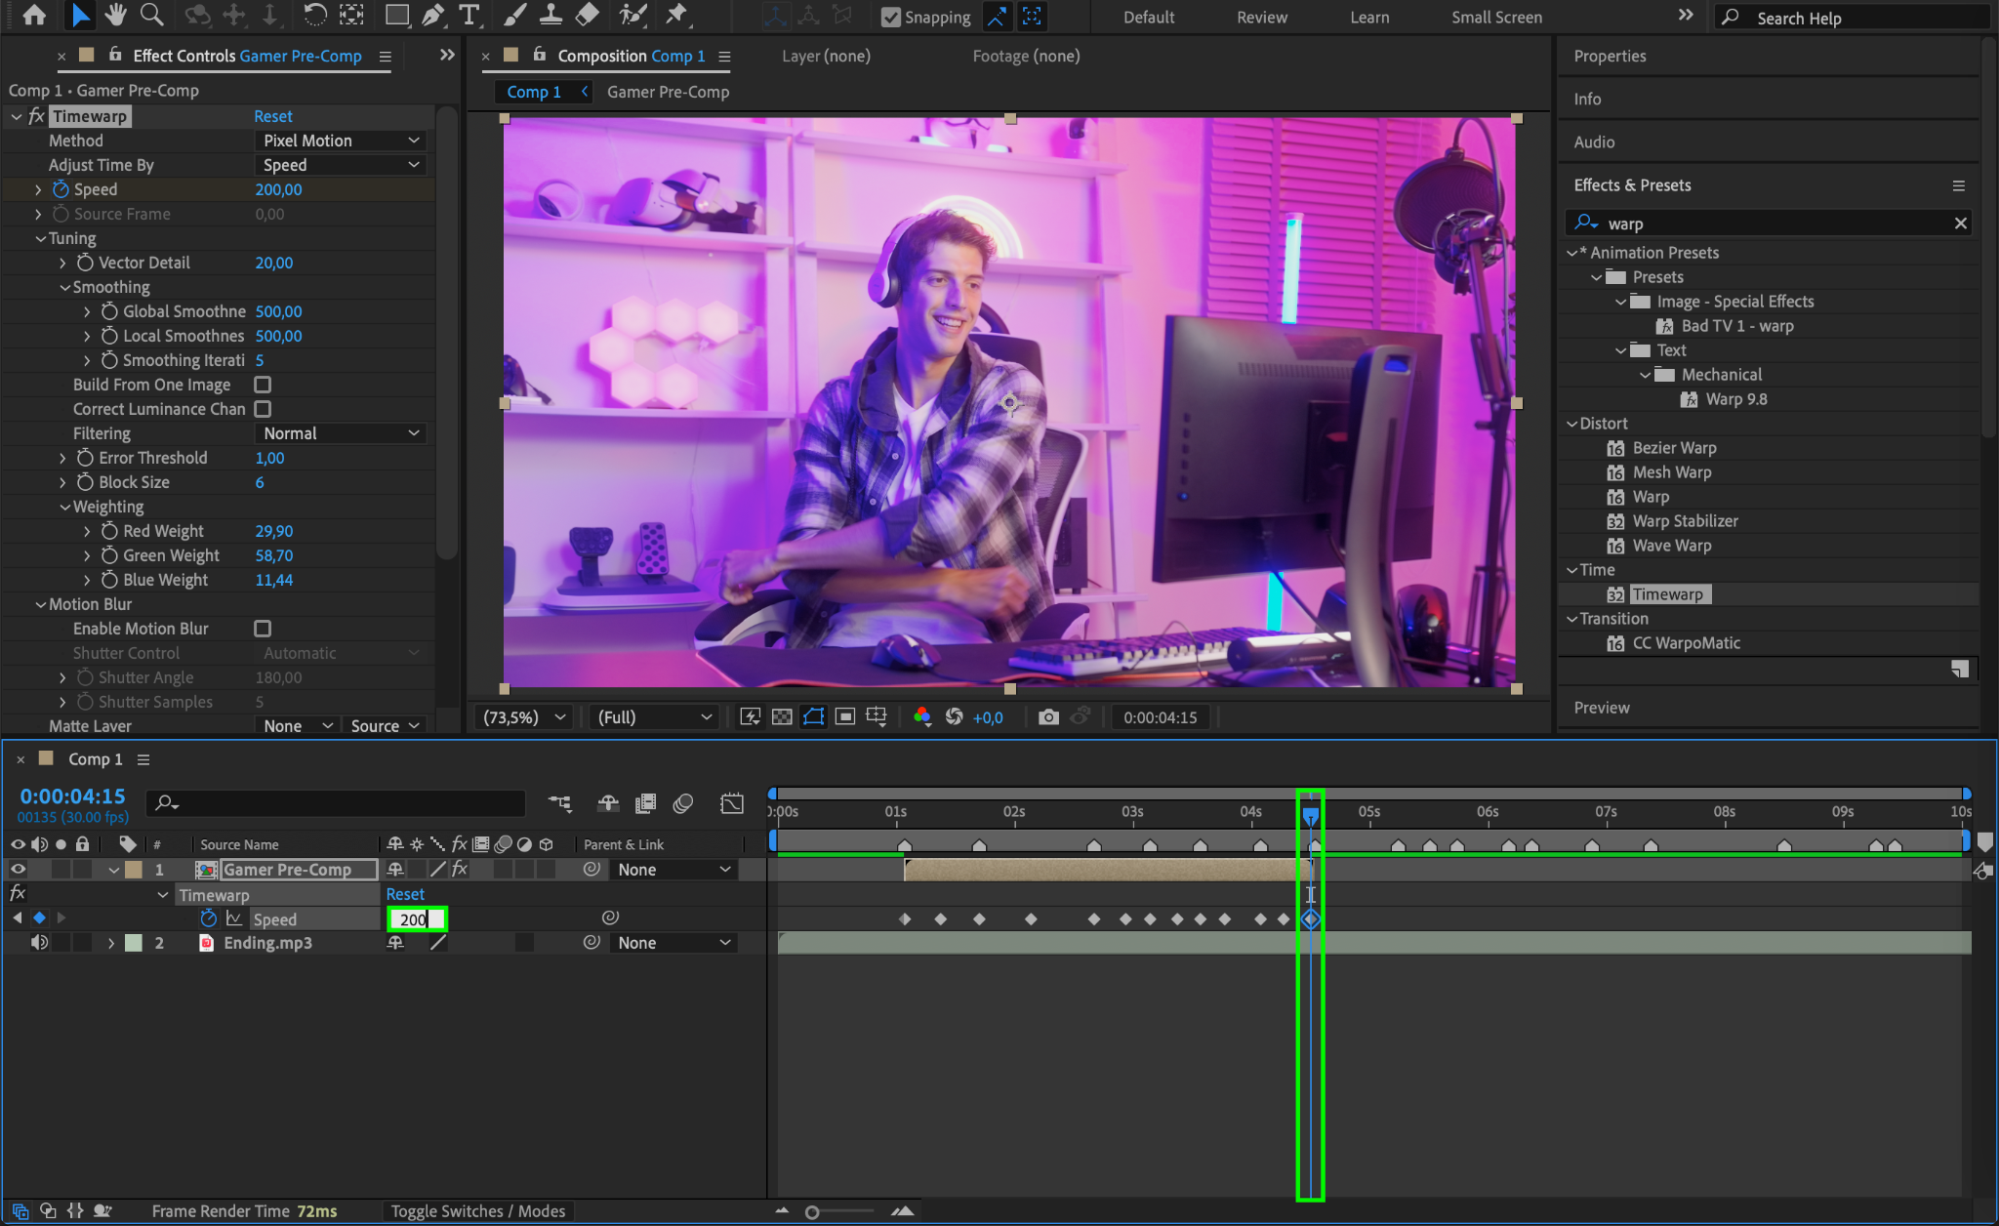
Move the CTI to the second marker, and change the speed back to 200. Continue this process for each marker you’ve added. By doing this, the video speed will change dynamically, matching the intensity of the audio beats.

 Step 11: Apply Easy Ease and Use the Graph Editor
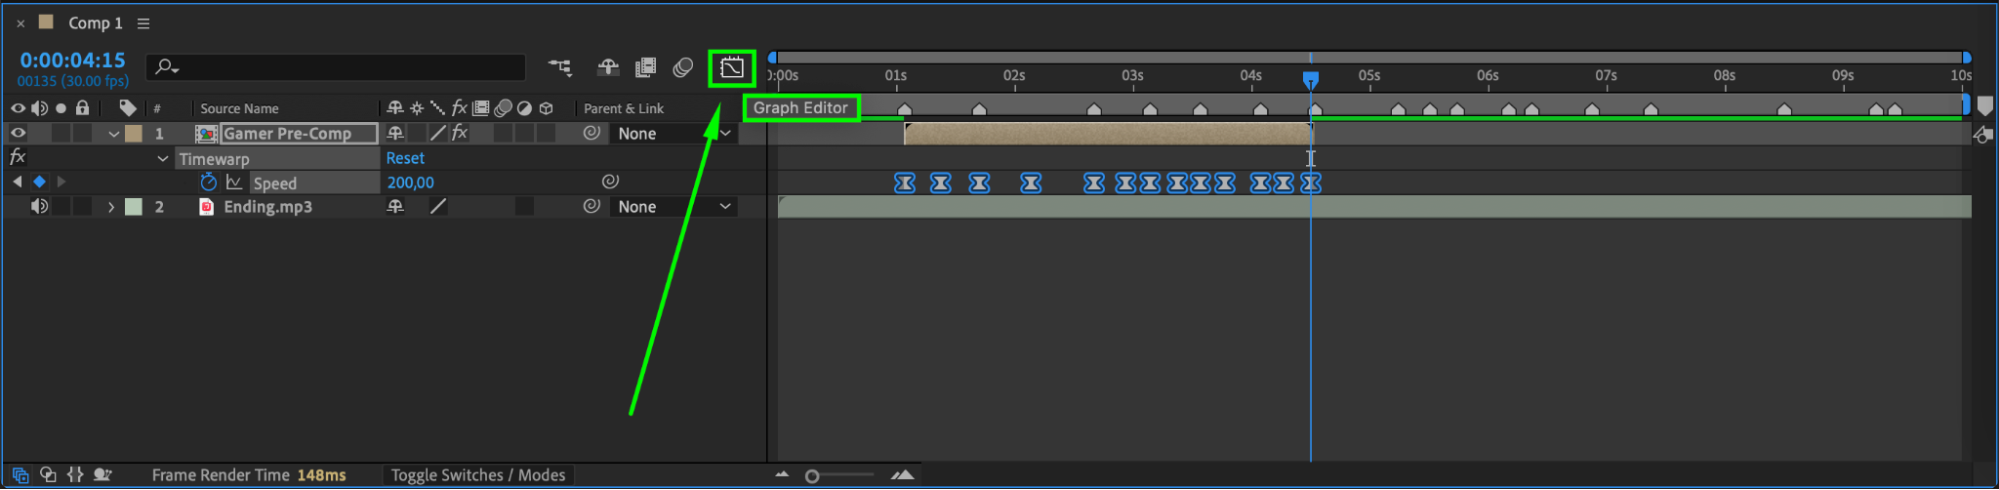
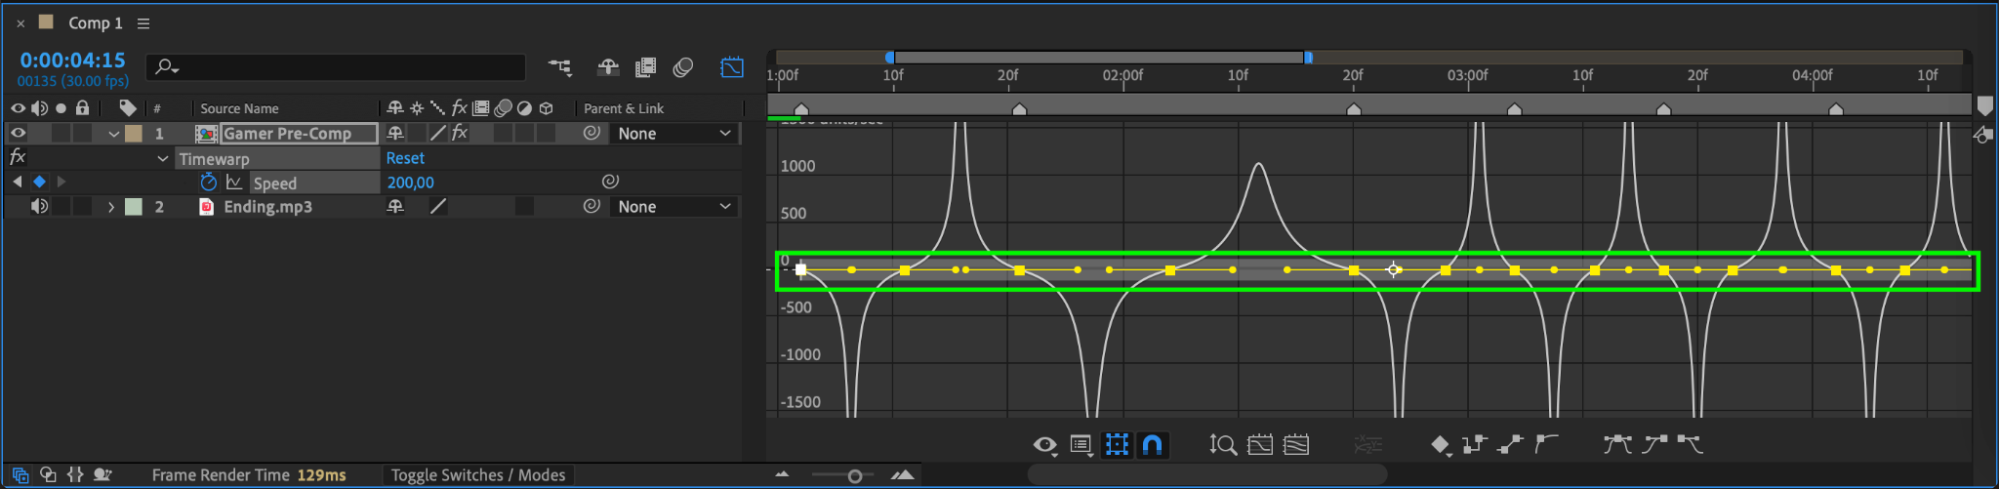
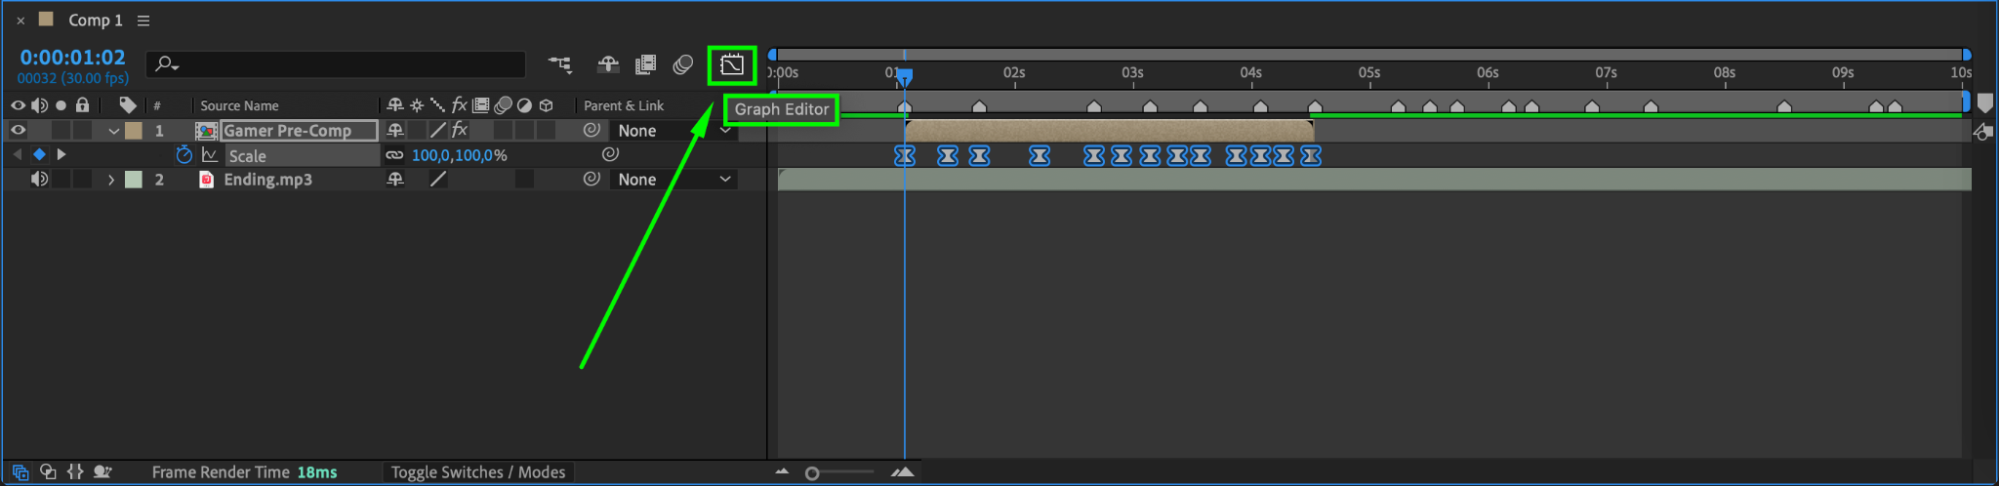
For smoother transitions between speed changes, apply Easy Ease to your keyframes. Right-click on the keyframes and select Keyframe Assistant > Easy Ease. Then, open the Graph Editor to fine-tune the speed transitions for a more polished look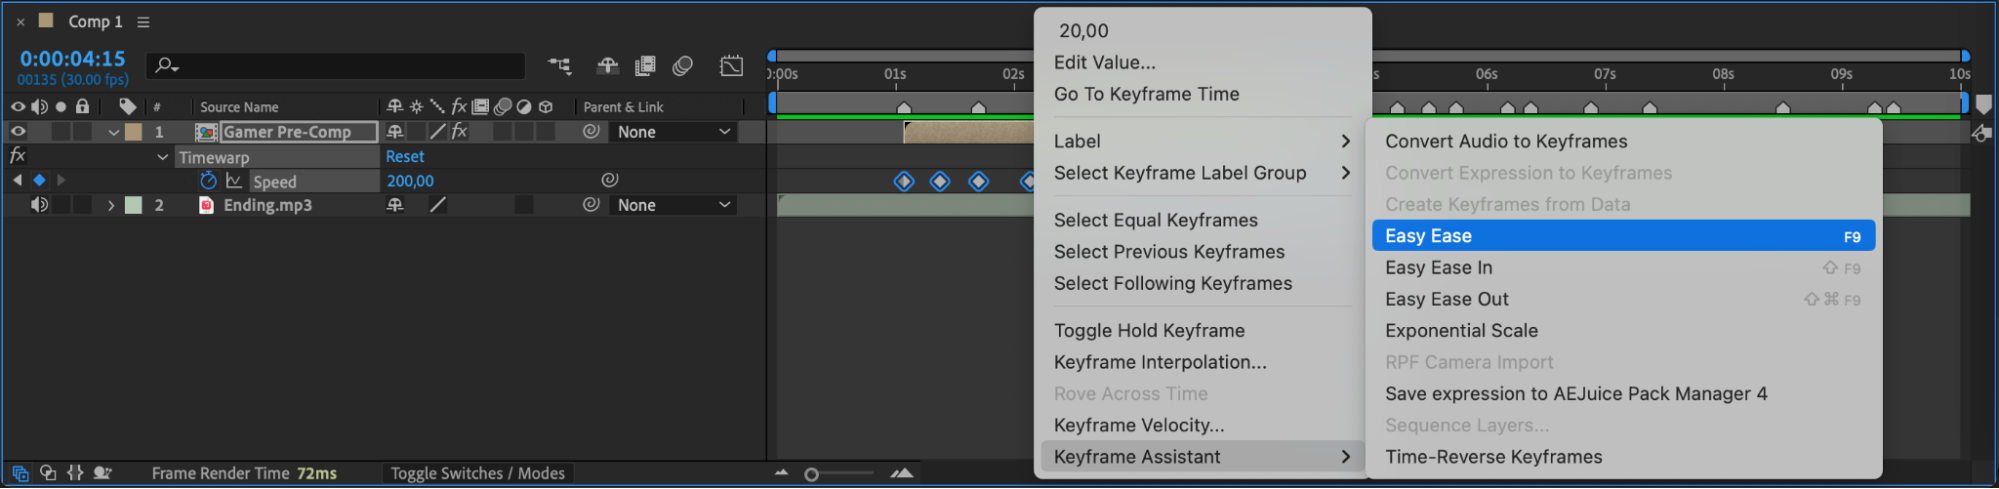
 Step 12: Adjust Video Scale for Added Impact
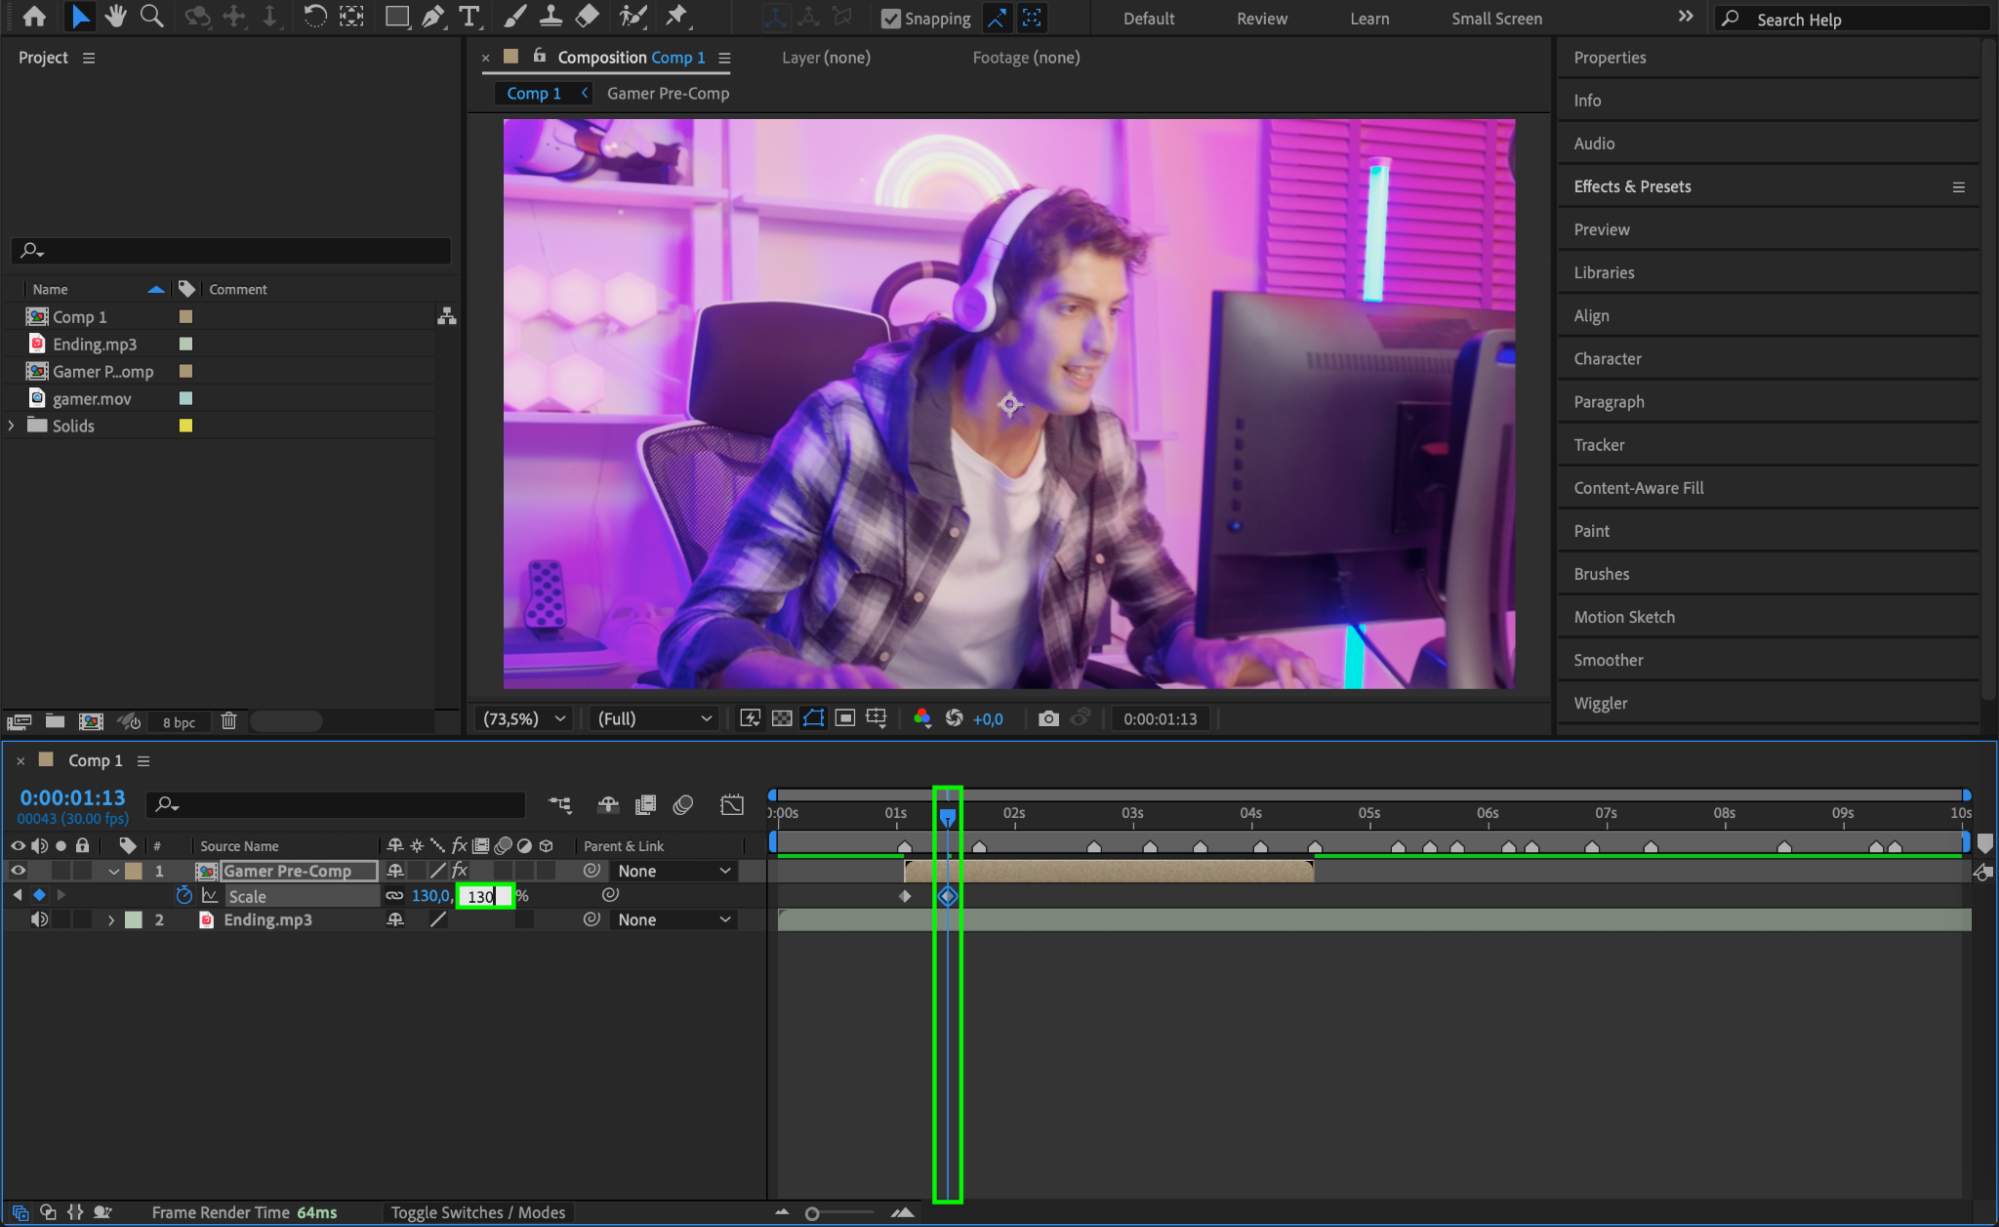
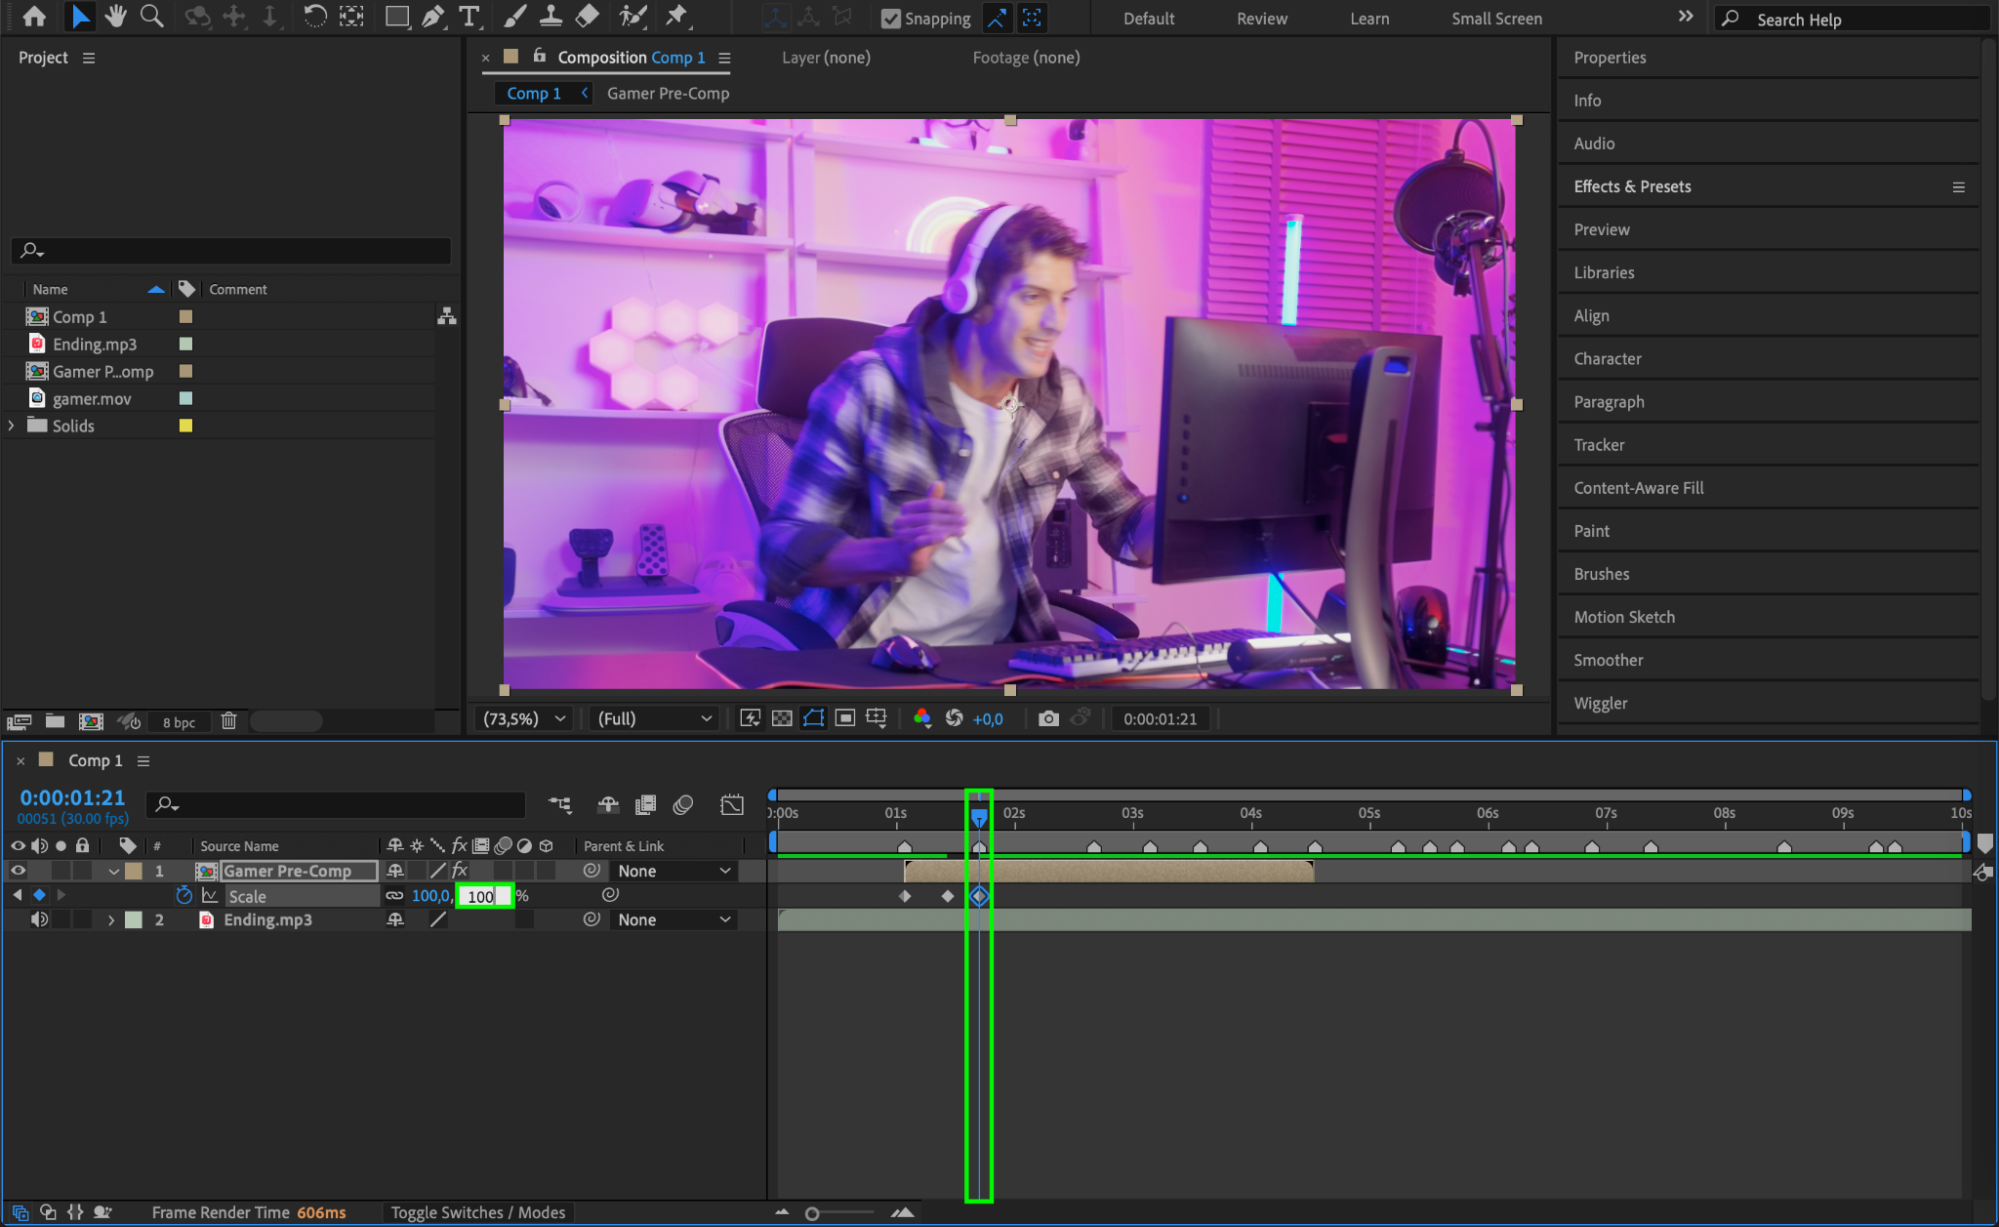
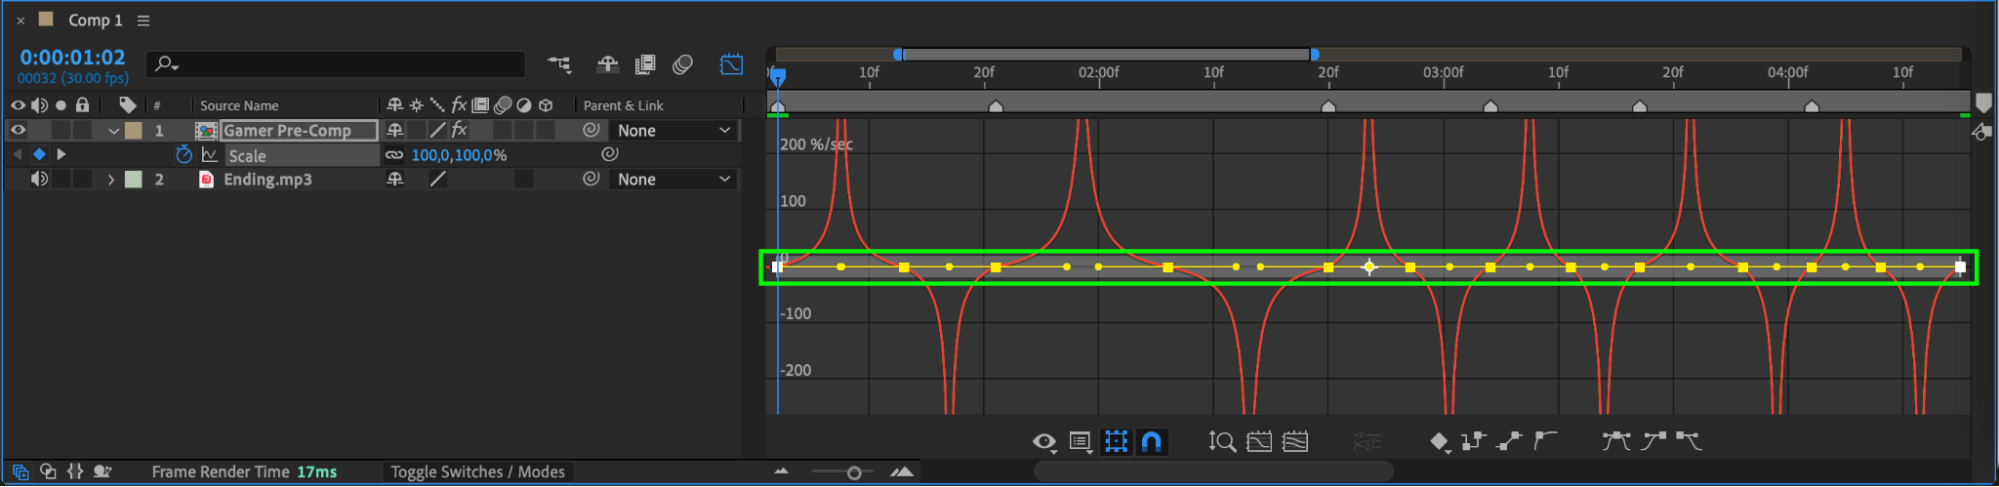
To add a bit more energy to the edit, adjust the Scale of the video layer. Set the scale to 100 when the CTI is on the first marker and click the stopwatch to create a keyframe.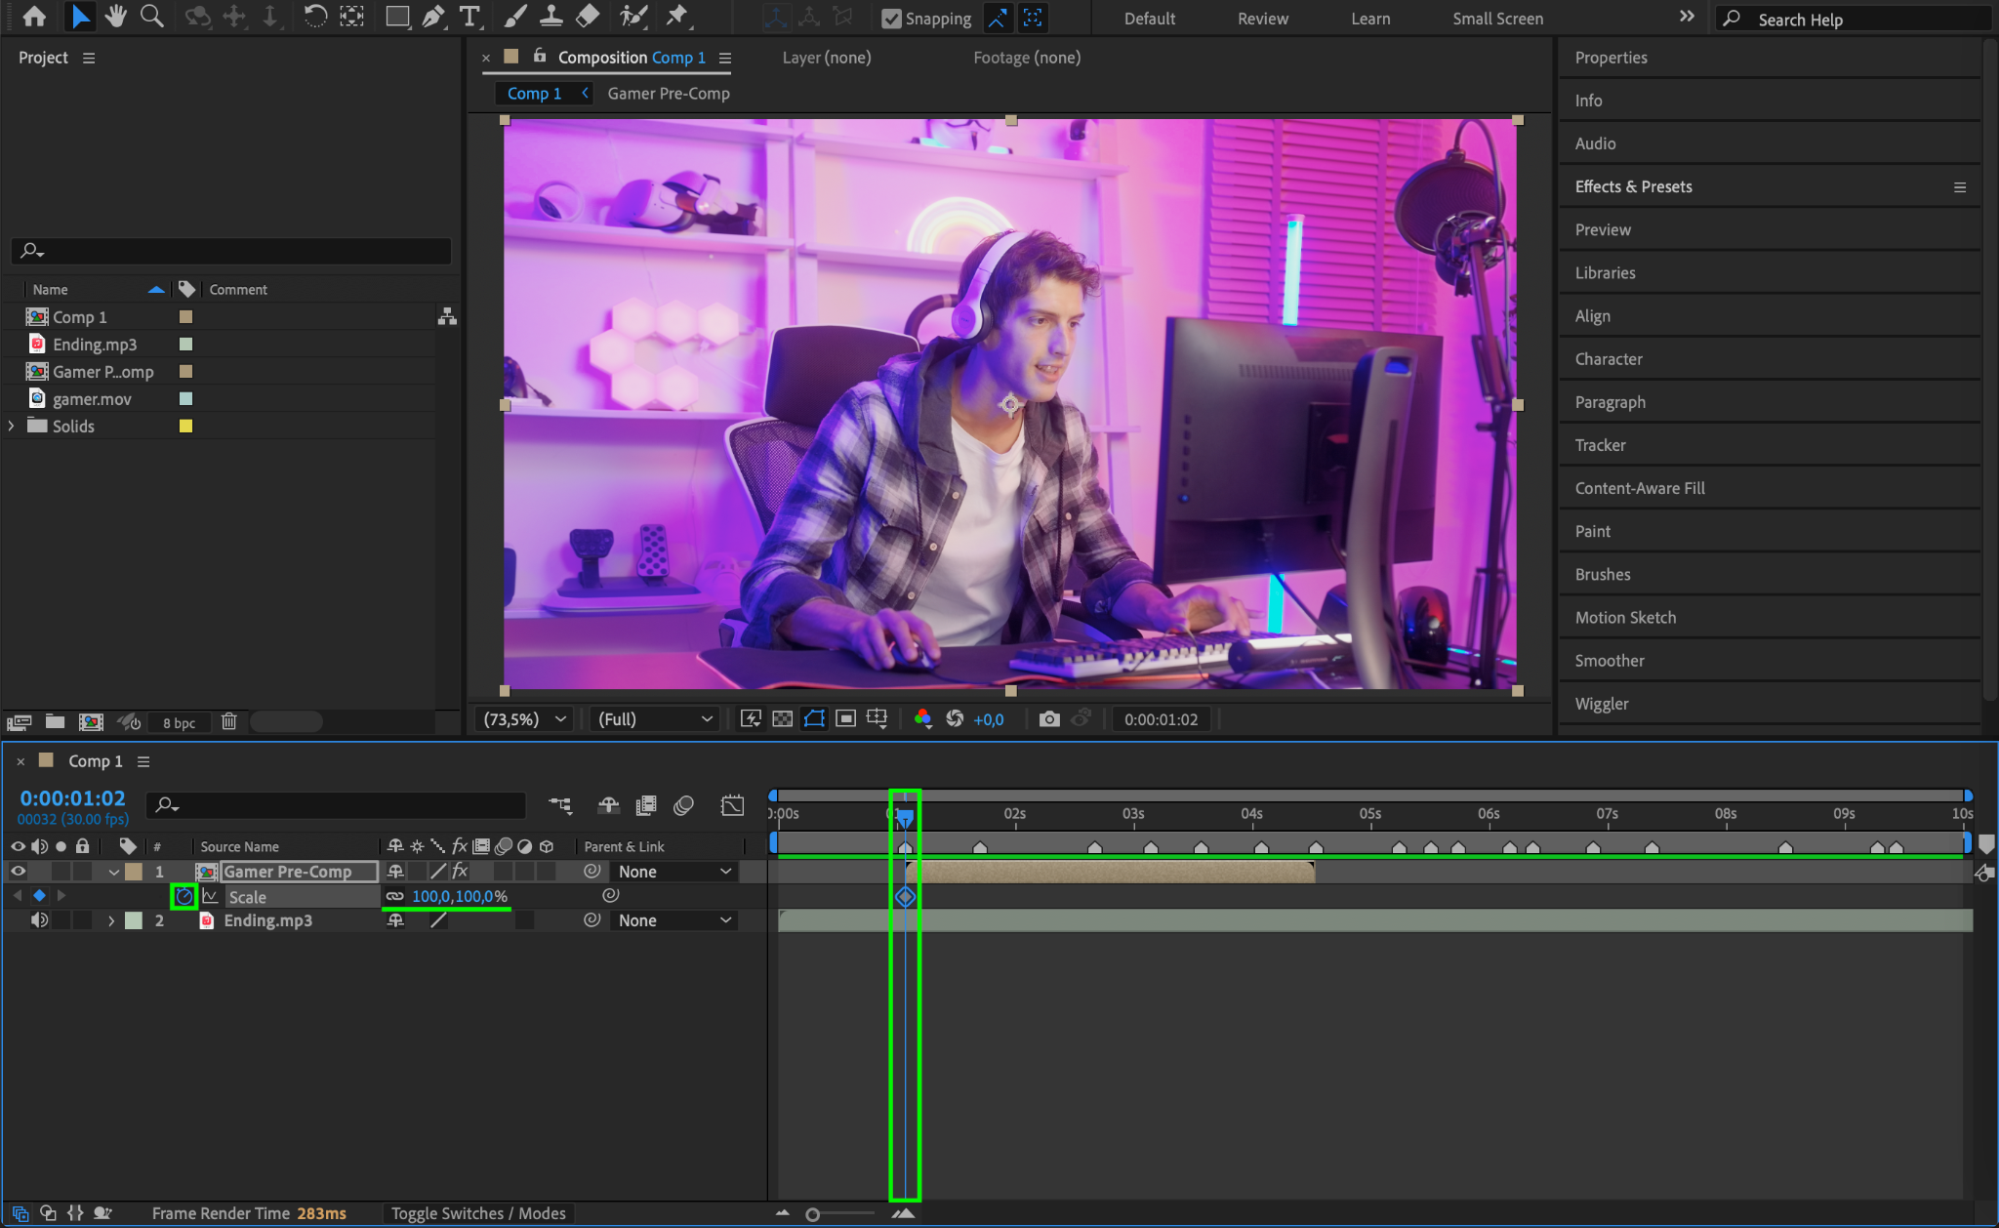 Step 13: Modify the Scale Between Markers
Move the CTI between the first and second markers and change the scale value to 130. This creates a zoom-in effect during the more intense sections. Then, move the CTI to the second marker and change the scale back to 100. Repeat this process as needed for each section of the video.
 Step 14: Apply Easy Ease to Scale Keyframes
Just like with the speed changes, apply Easy Ease to the scale keyframes for smoother transitions. Open the Graph Editor to refine the animation of the scale changes.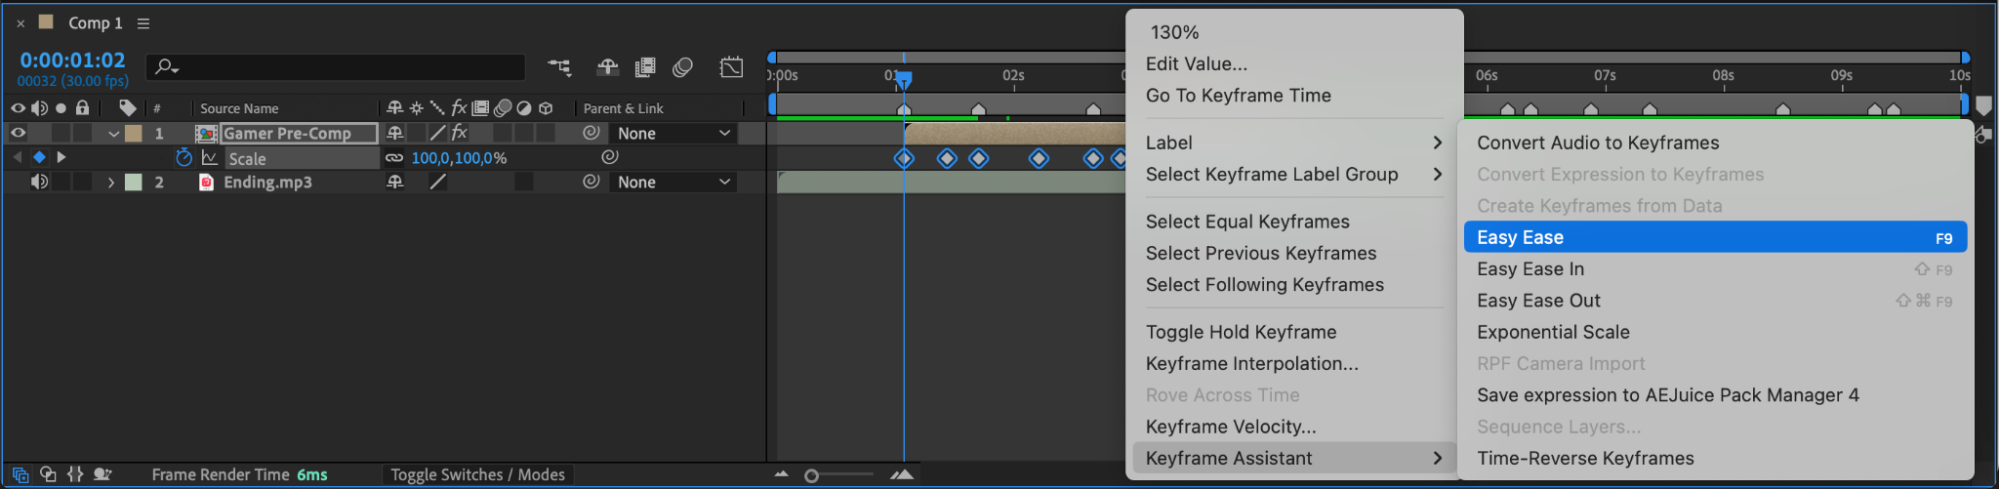
 Step 15: Enable Motion Blur
To add more realism and smoothness to your velocity edits, enable Motion Blur for your video layer. Click the Motion Blur icon next to your layer in the timeline to turn it on. This will create a motion blur effect that will make the speed transitions feel more natural.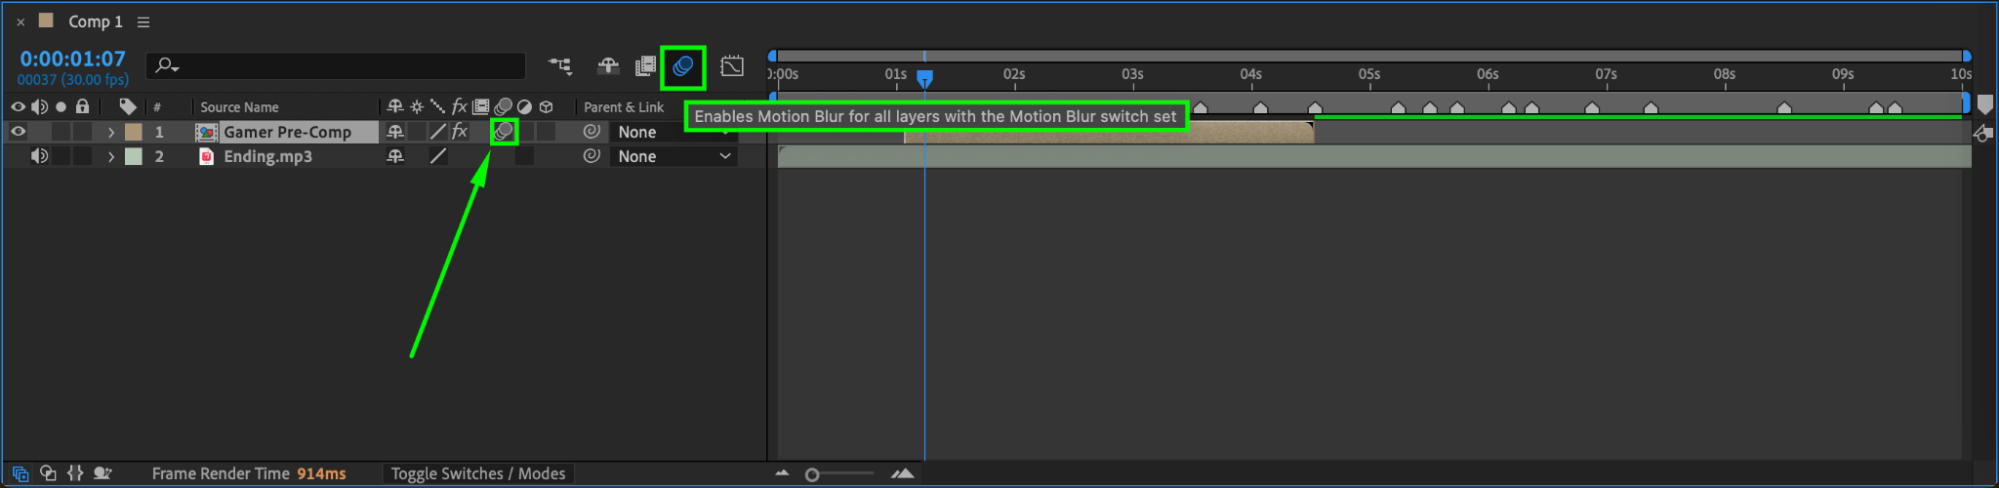
Step 16: Preview the Animation
Once all your adjustments are made, press Spacebar to preview the animation. Check if the speed and scale changes sync well with the audio and if the transitions are smooth.
Conclusion
By following these steps, you can create dynamic and engaging velocity edits in After Effects. This technique is perfect for syncing video to the rhythm of music or adding a unique touch to your action sequences. Experiment with different speed and scale values to find the perfect rhythm for your project.
Our Bestsellers


