A Complete Guide to Editing in Adobe After Effects
Introduction
Adobe After Effects is an industry-leading tool for creating visual effects, motion graphics, and animations. It’s used by professionals worldwide, but even beginners can harness its powerful features to bring their projects to life. Whether you’re new to video editing or looking to enhance your current skills, mastering After Effects will help you take your videos to a professional level.
Get 10% off when you subscribe to our newsletter

In this guide, we’ll walk you through some key editing tips and tricks to help you edit efficiently, work with keyframes, apply effects, and much more. By the end, you’ll feel confident editing in After Effects, and your videos will have that extra polish that sets them apart.
Step 1: Stay Organized from the Start
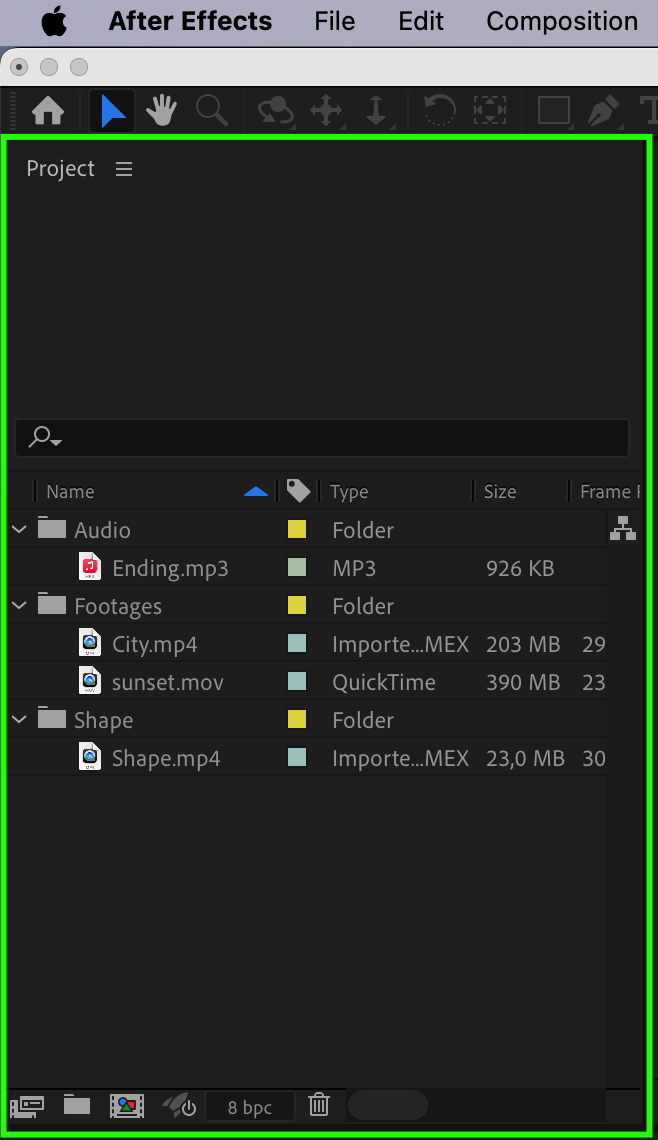
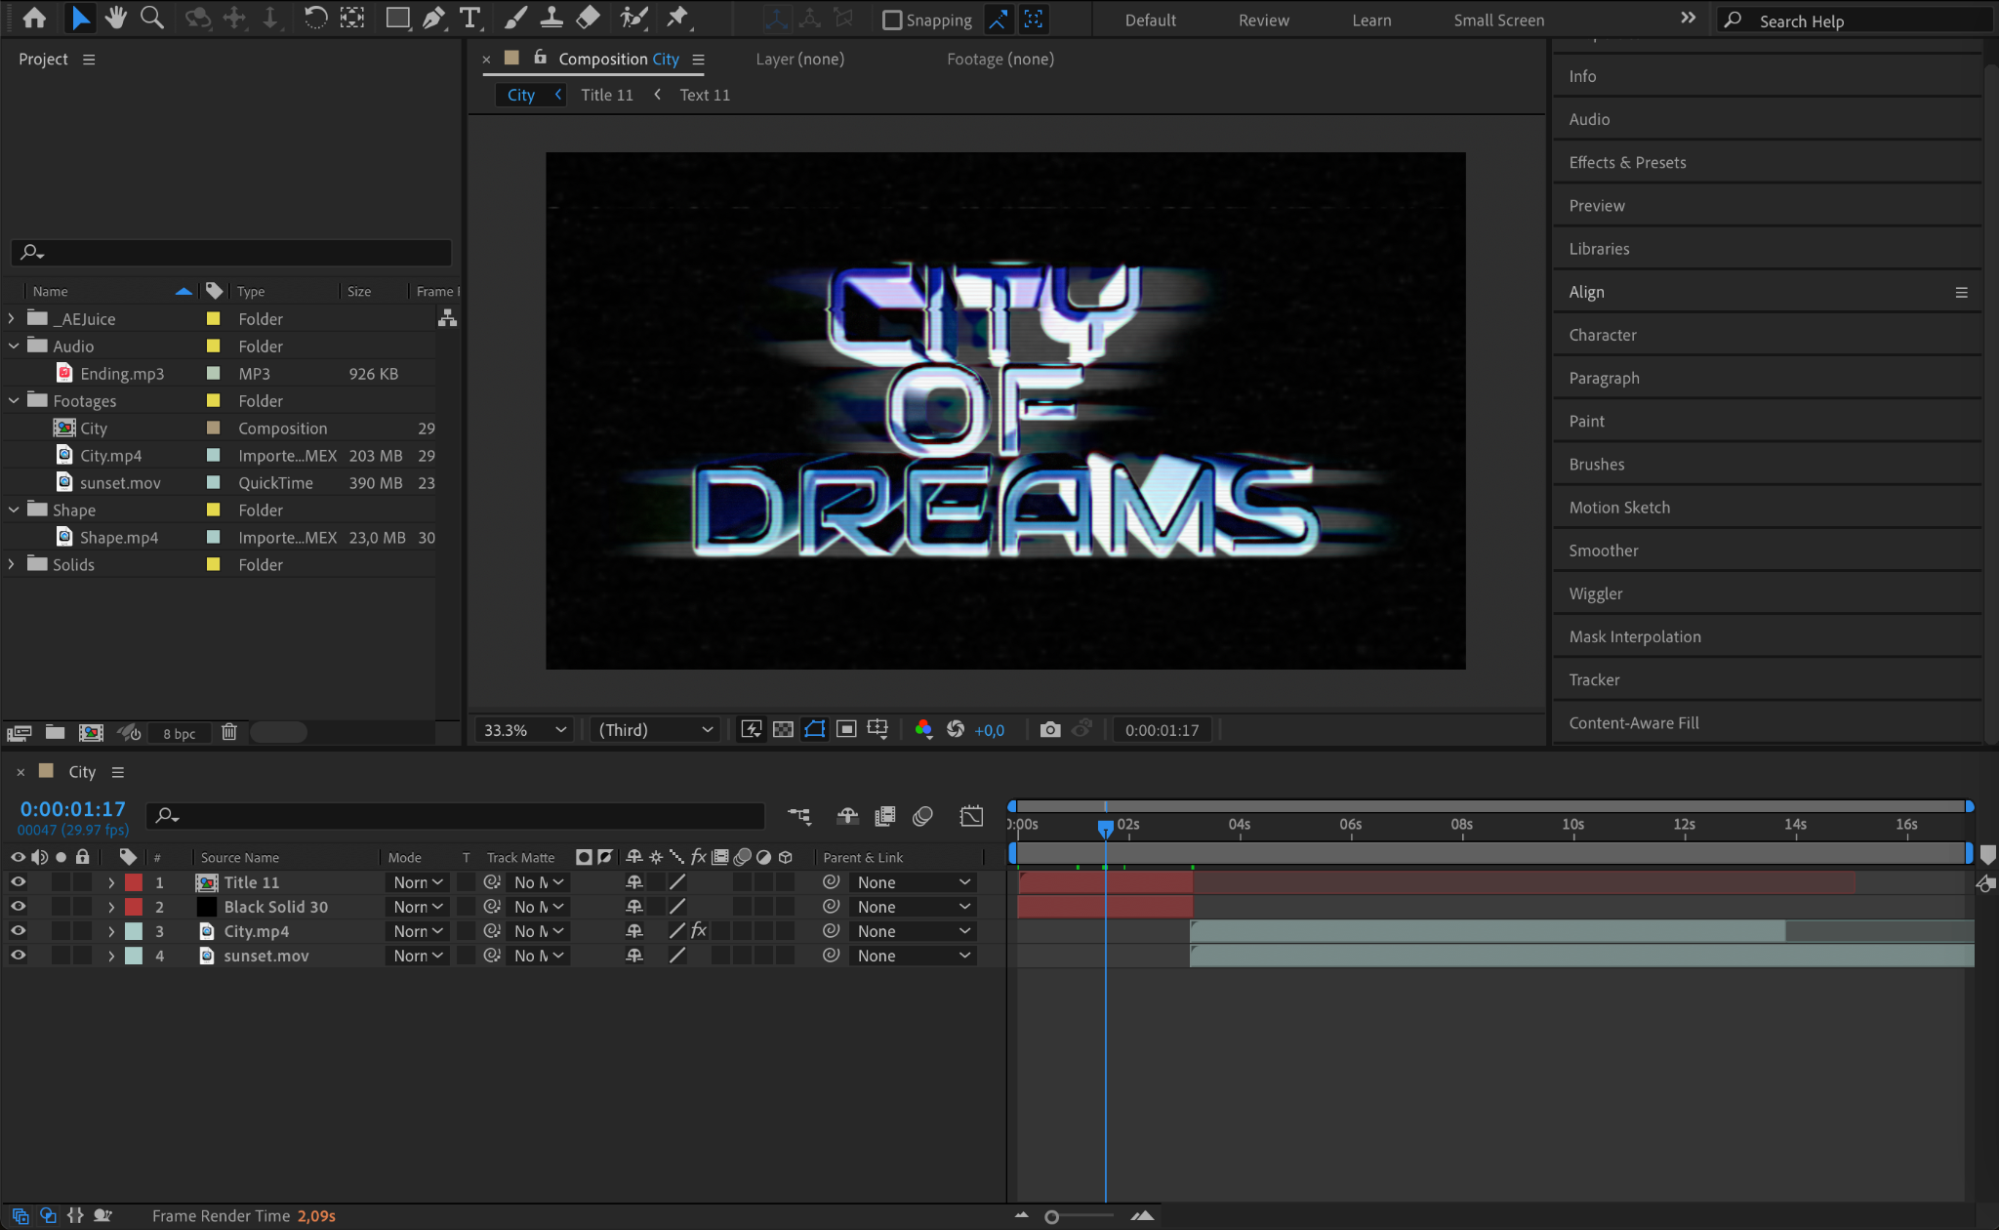
After importing your assets through File > Import > File and seeing them in the Project Panel, the first thing you need to do is keep your project well-organized. Create folders for different asset types, such as footage, audio, and images. This way, you can quickly locate and manage your resources during the editing process.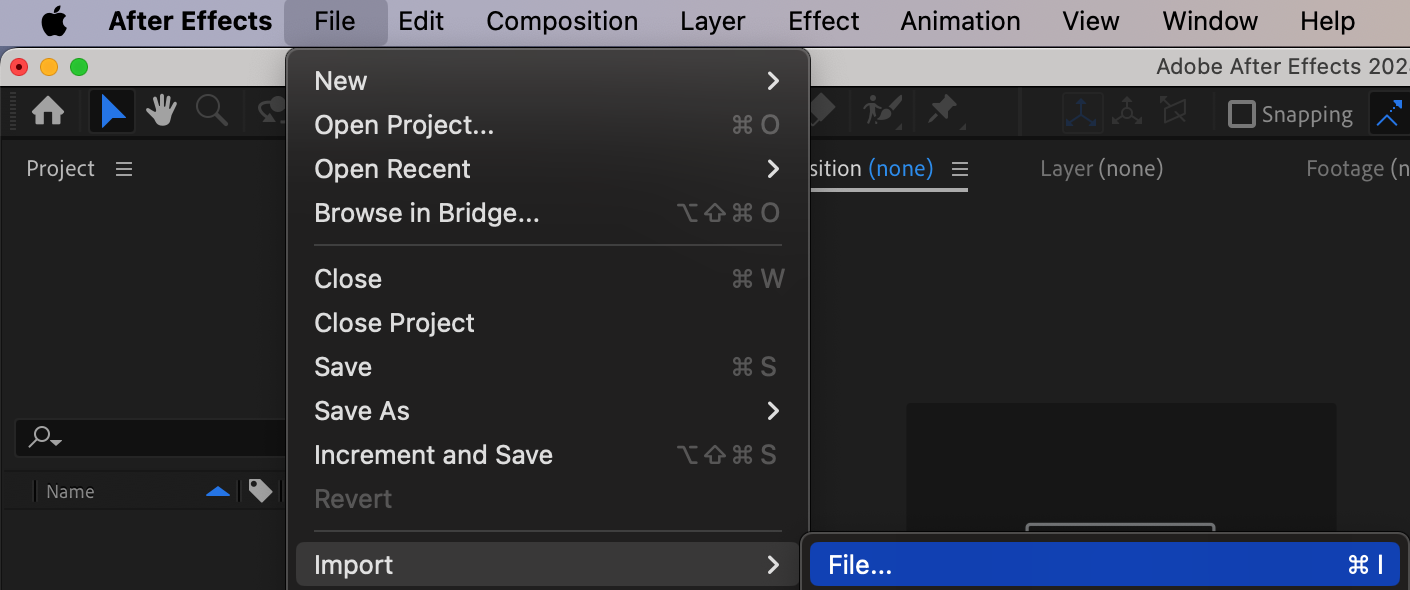
 Step 2: Setting Up Your Timeline
Once you have your files in the project panel, drag them onto the timeline. Doing so will automatically create a composition that matches the settings of your video. From here, you can start editing right away.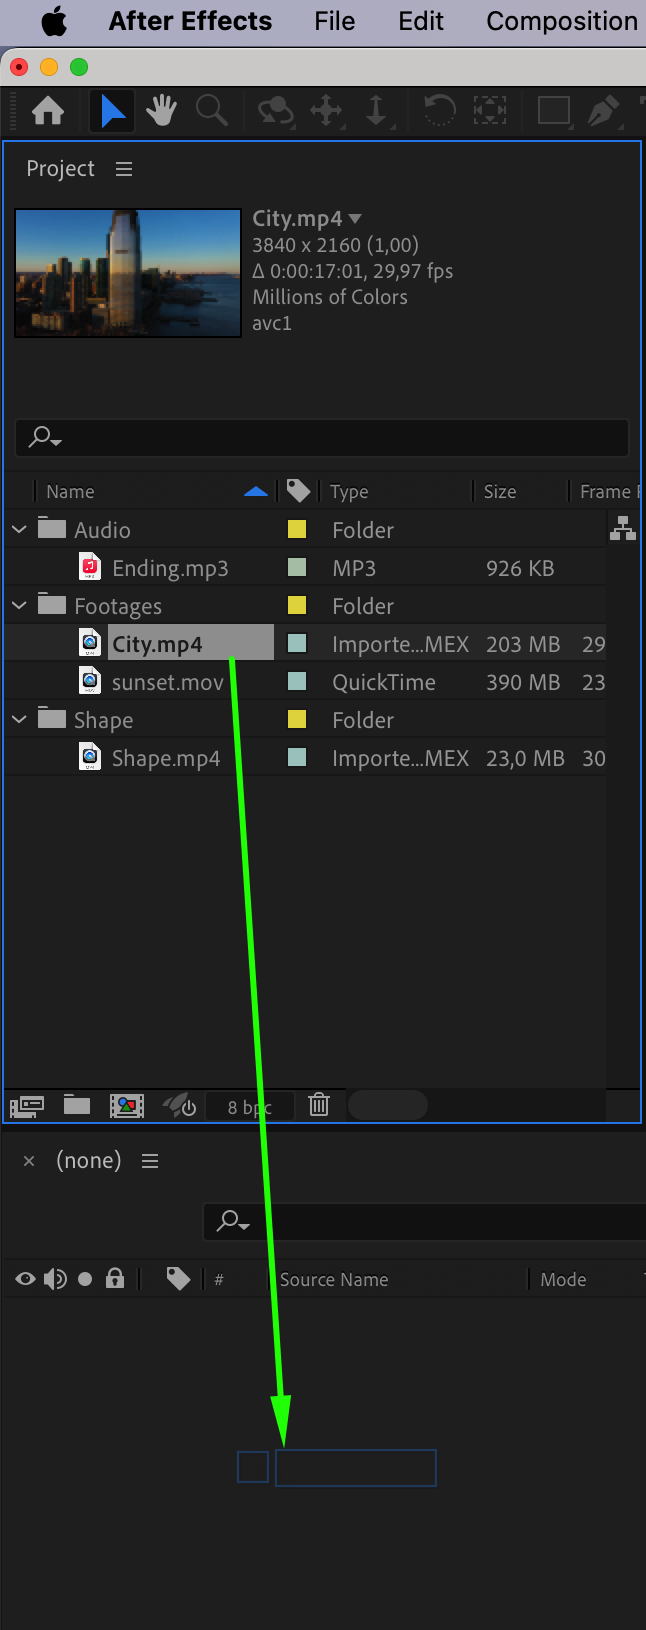 Step 3: Master Keyframes
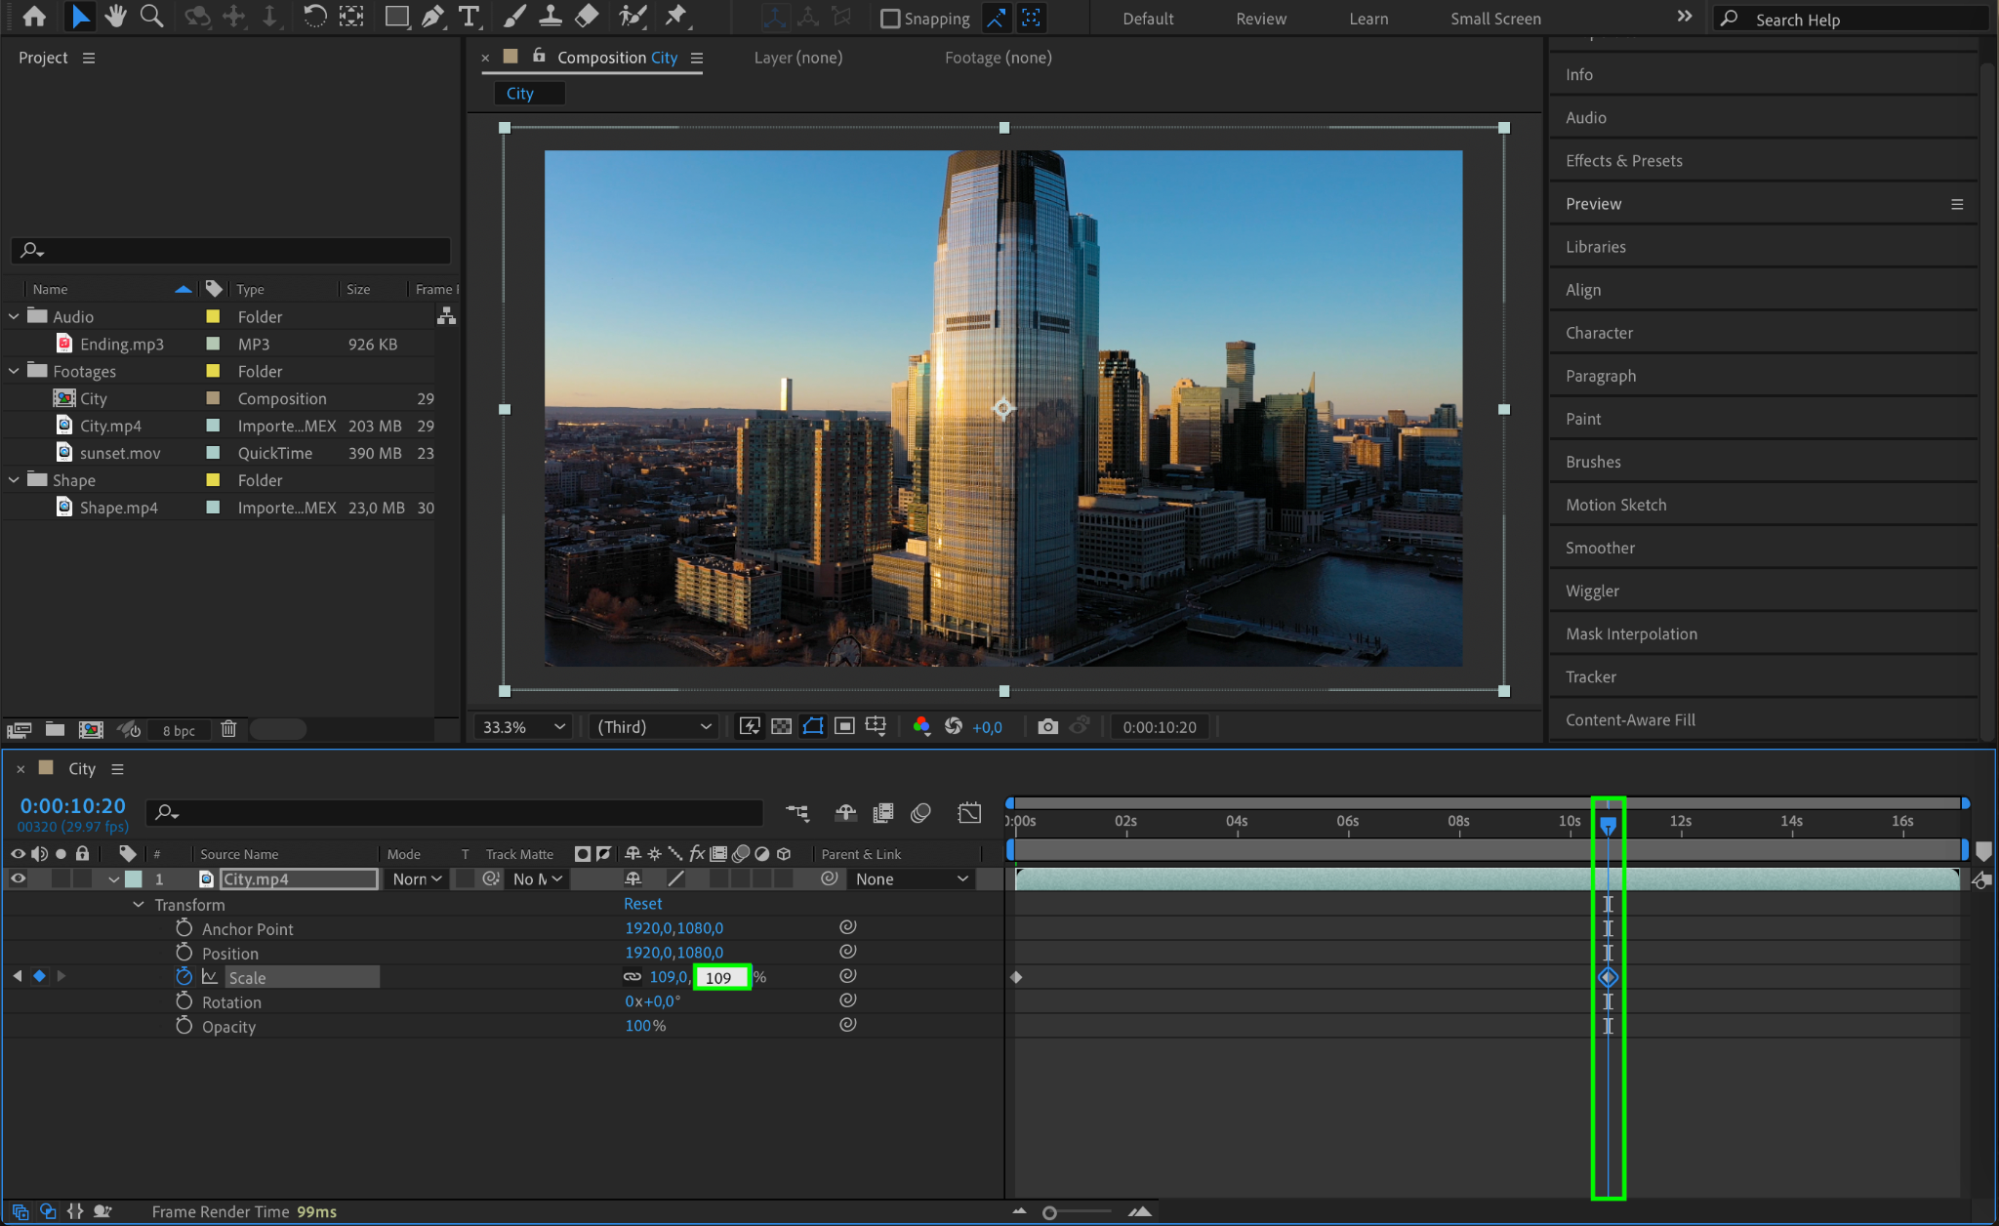
Keyframes are the foundation of animation and effects in After Effects. They allow you to control changes in properties over time, like scale, rotation, opacity, and position. To add a keyframe, expand the layer’s properties, such as Transform, and click the stopwatch icon next to the parameter you want to animate. Then, move the current time indicator (CTI) to a new point and adjust the parameter.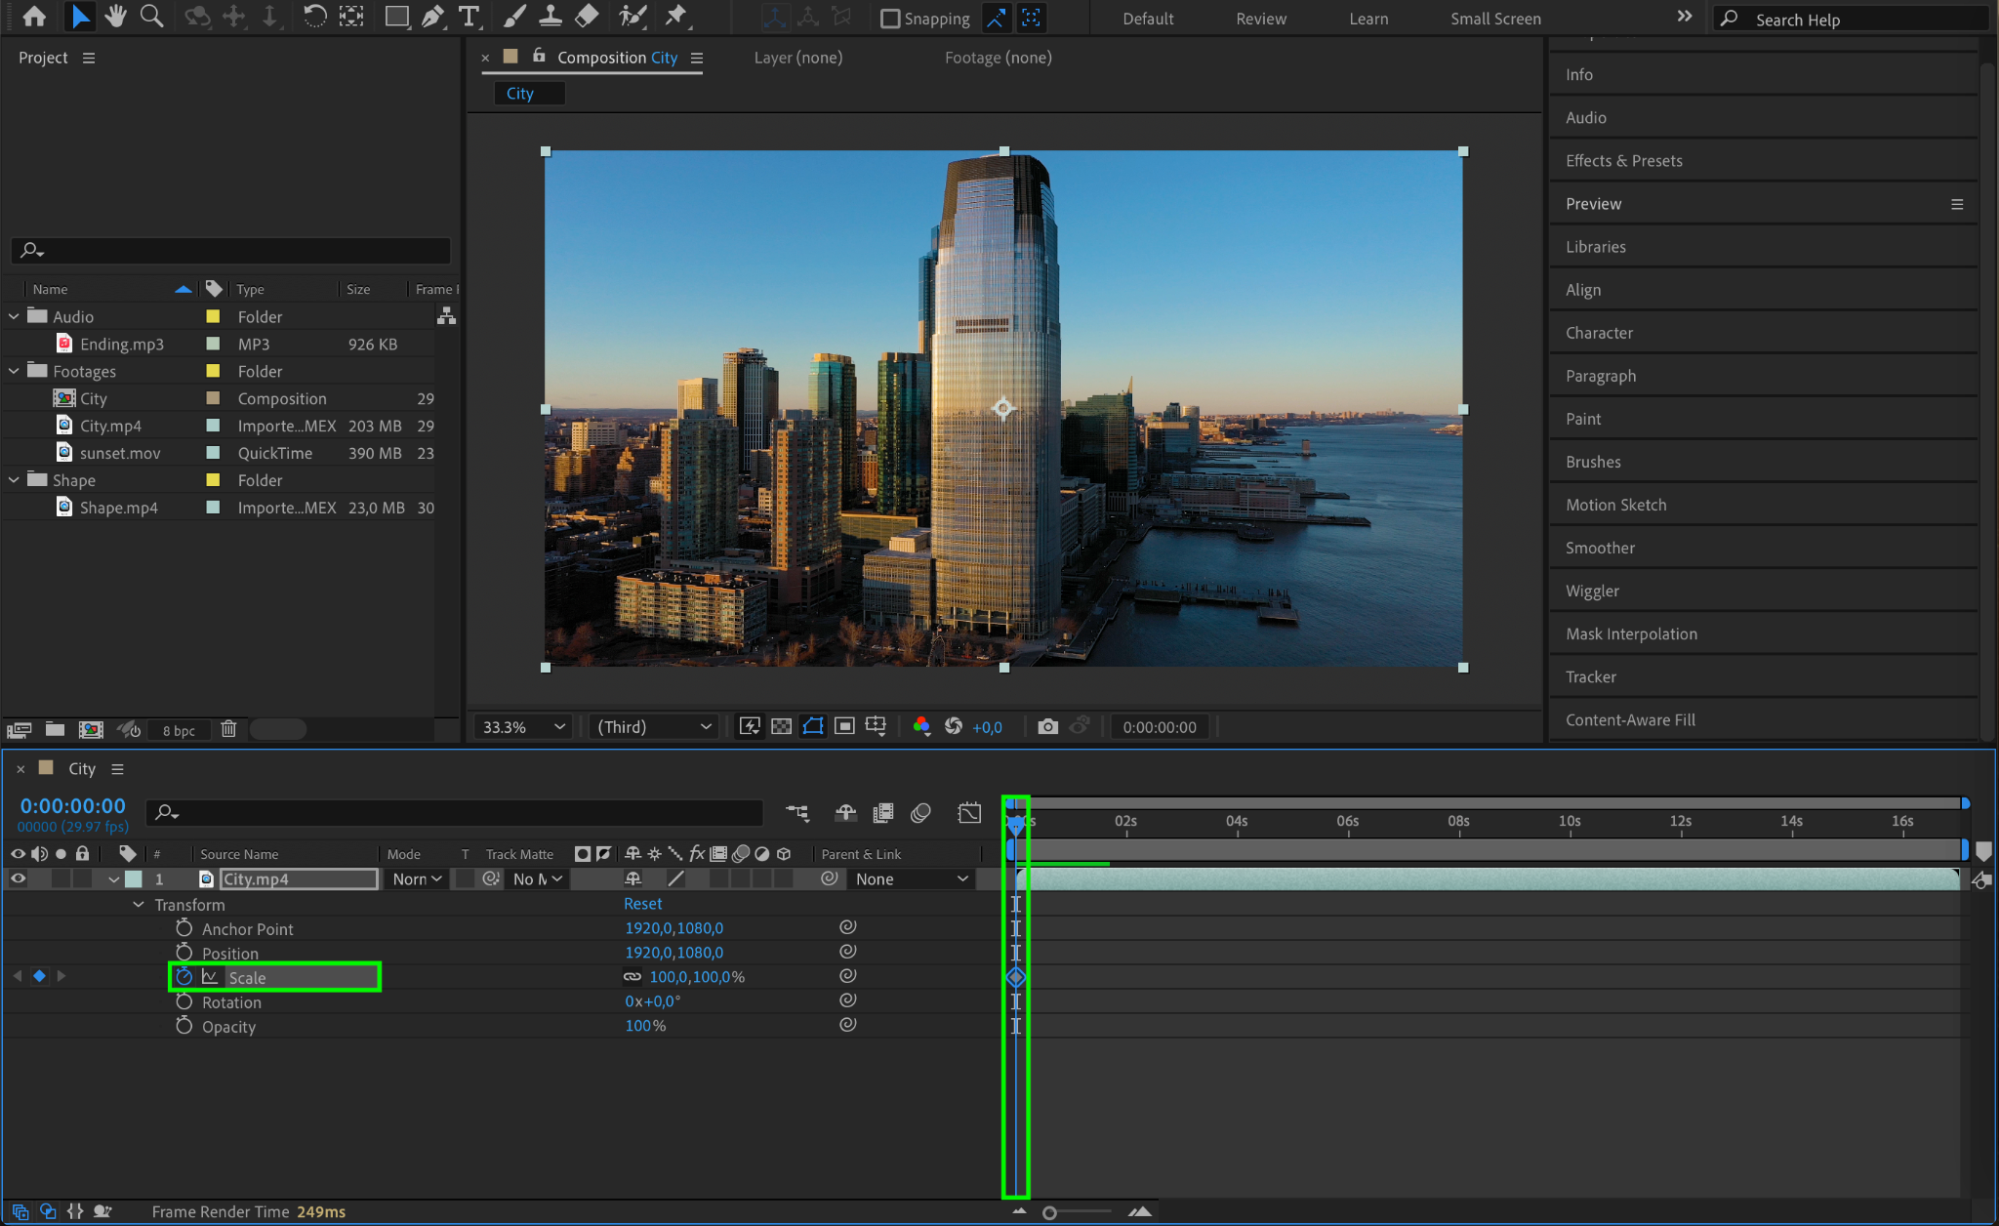
 Step 4: Trim Layers Efficiently
Get 10% off when you subscribe to our newsletter

To control the timing of your layers, it’s essential to know how to trim them. Use the shortcuts “Alt/Option + [” and “Alt/Option + ]” to trim the beginning and end of a layer respectively. This allows you to precisely cut out unwanted parts without affecting the entire layer.
 Step 5: Experiment with Effects
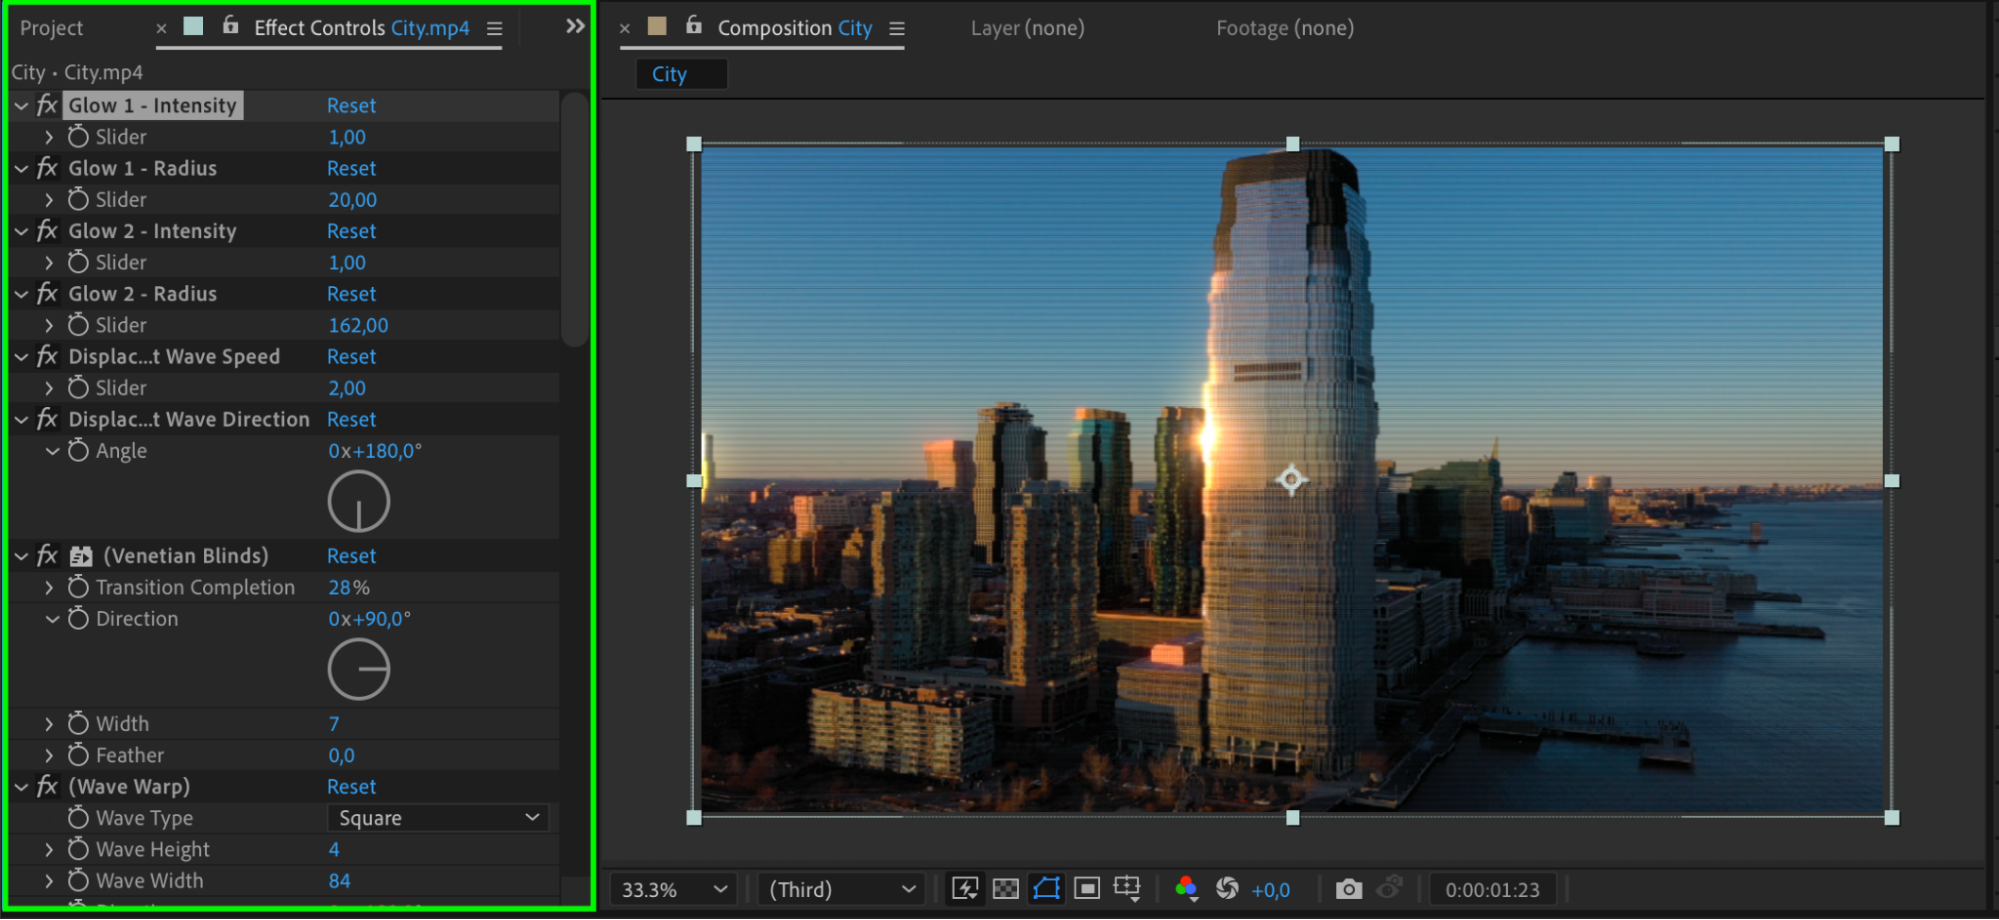
After Effects offers a vast library of effects, from color correction to distortion and blur. Applying effects is easy; simply drag an effect from the Effects & Presets panel onto your layer. You can then tweak its settings in the Effect Controls panel to achieve the desired result.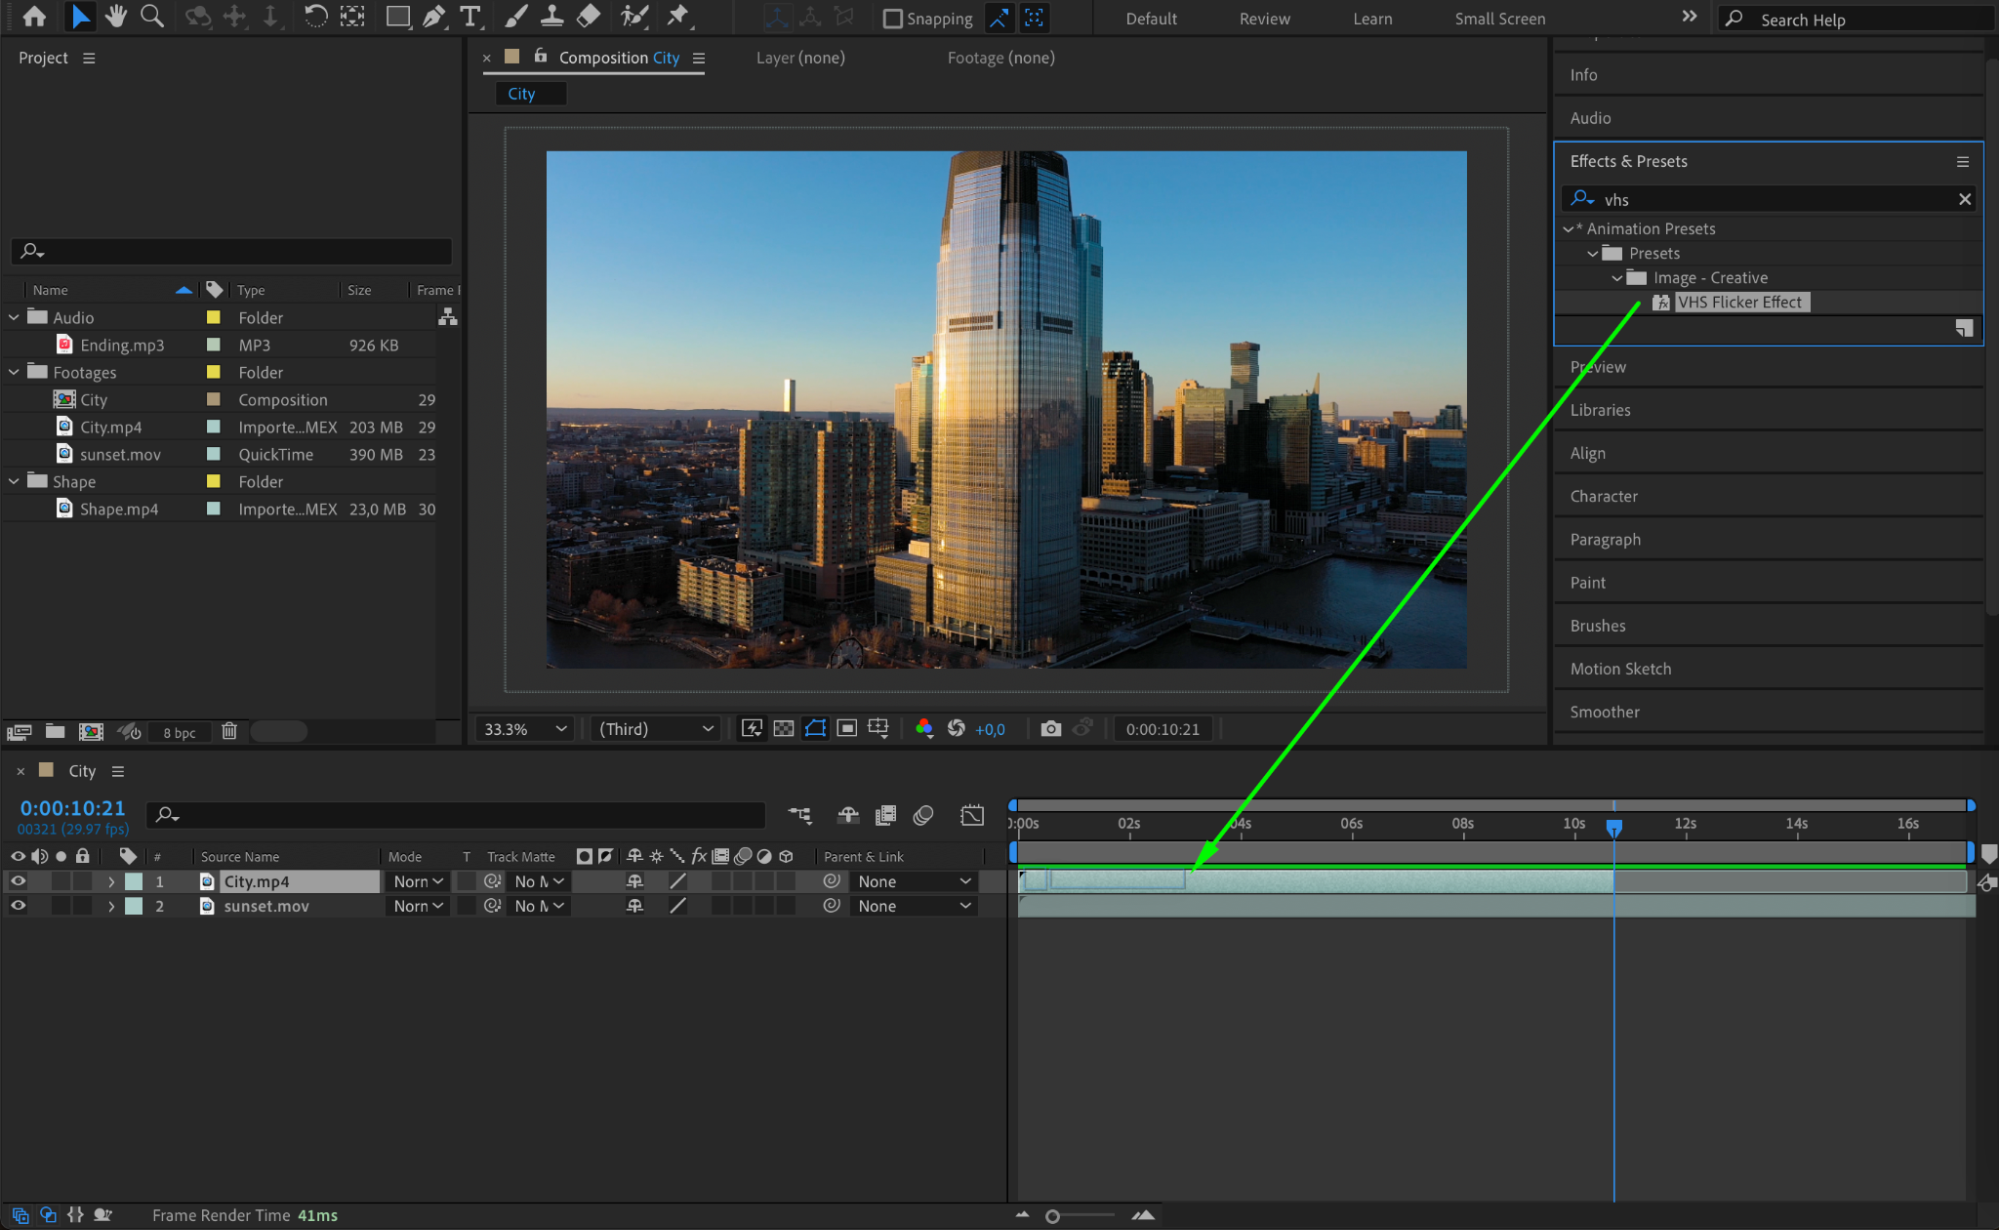
 Step 6: Master Masking Techniques
Get 10% off when you subscribe to our newsletter

Masks are powerful tools for isolating parts of your footage and applying effects selectively. To create a mask, use the Shape Tool (Q) and draw directly on your layer. You can then adjust the mask’s properties, such as feathering, opacity, and expansion.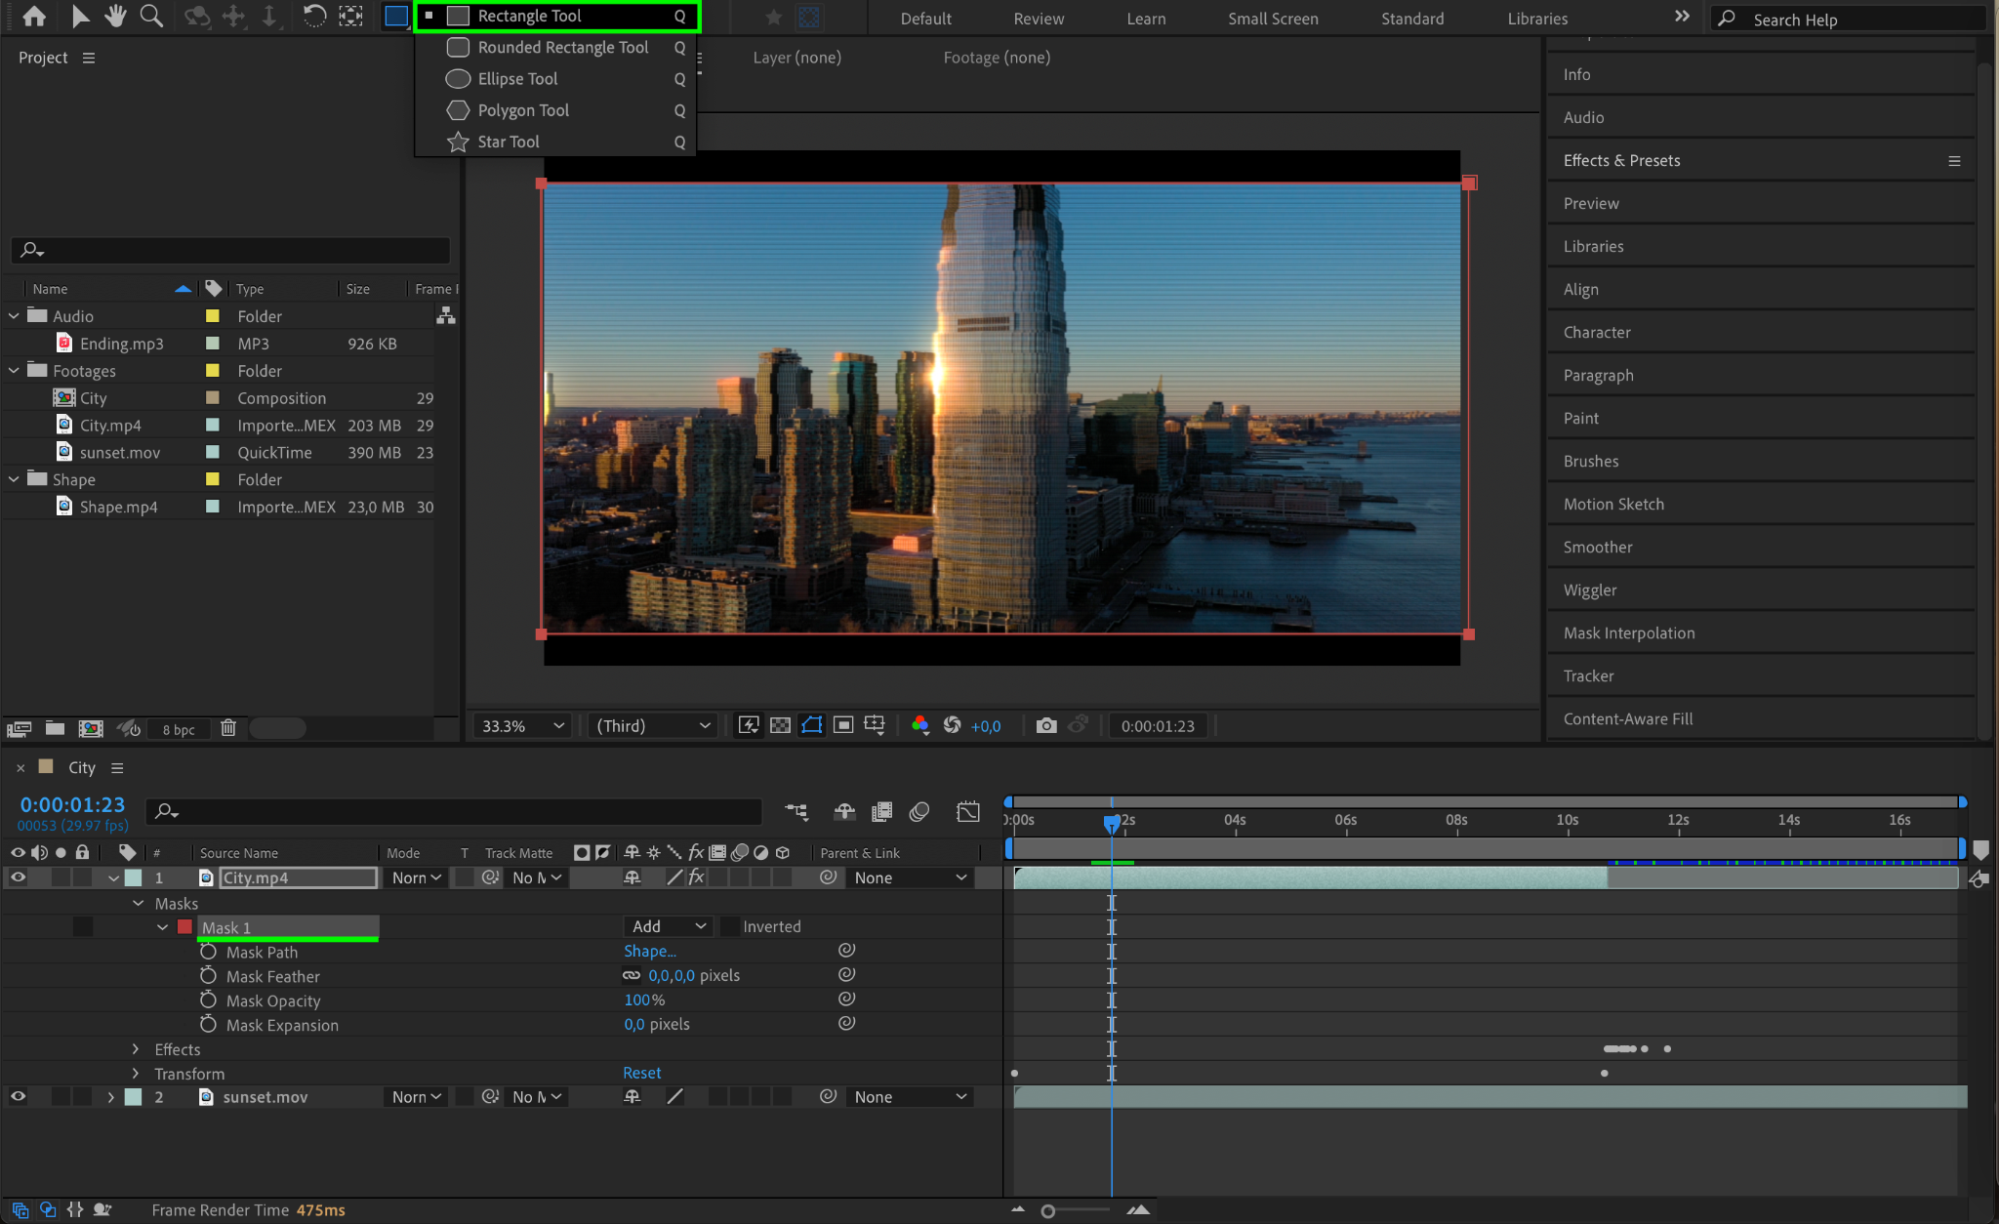 Step 7: Explore the Power of Expressions
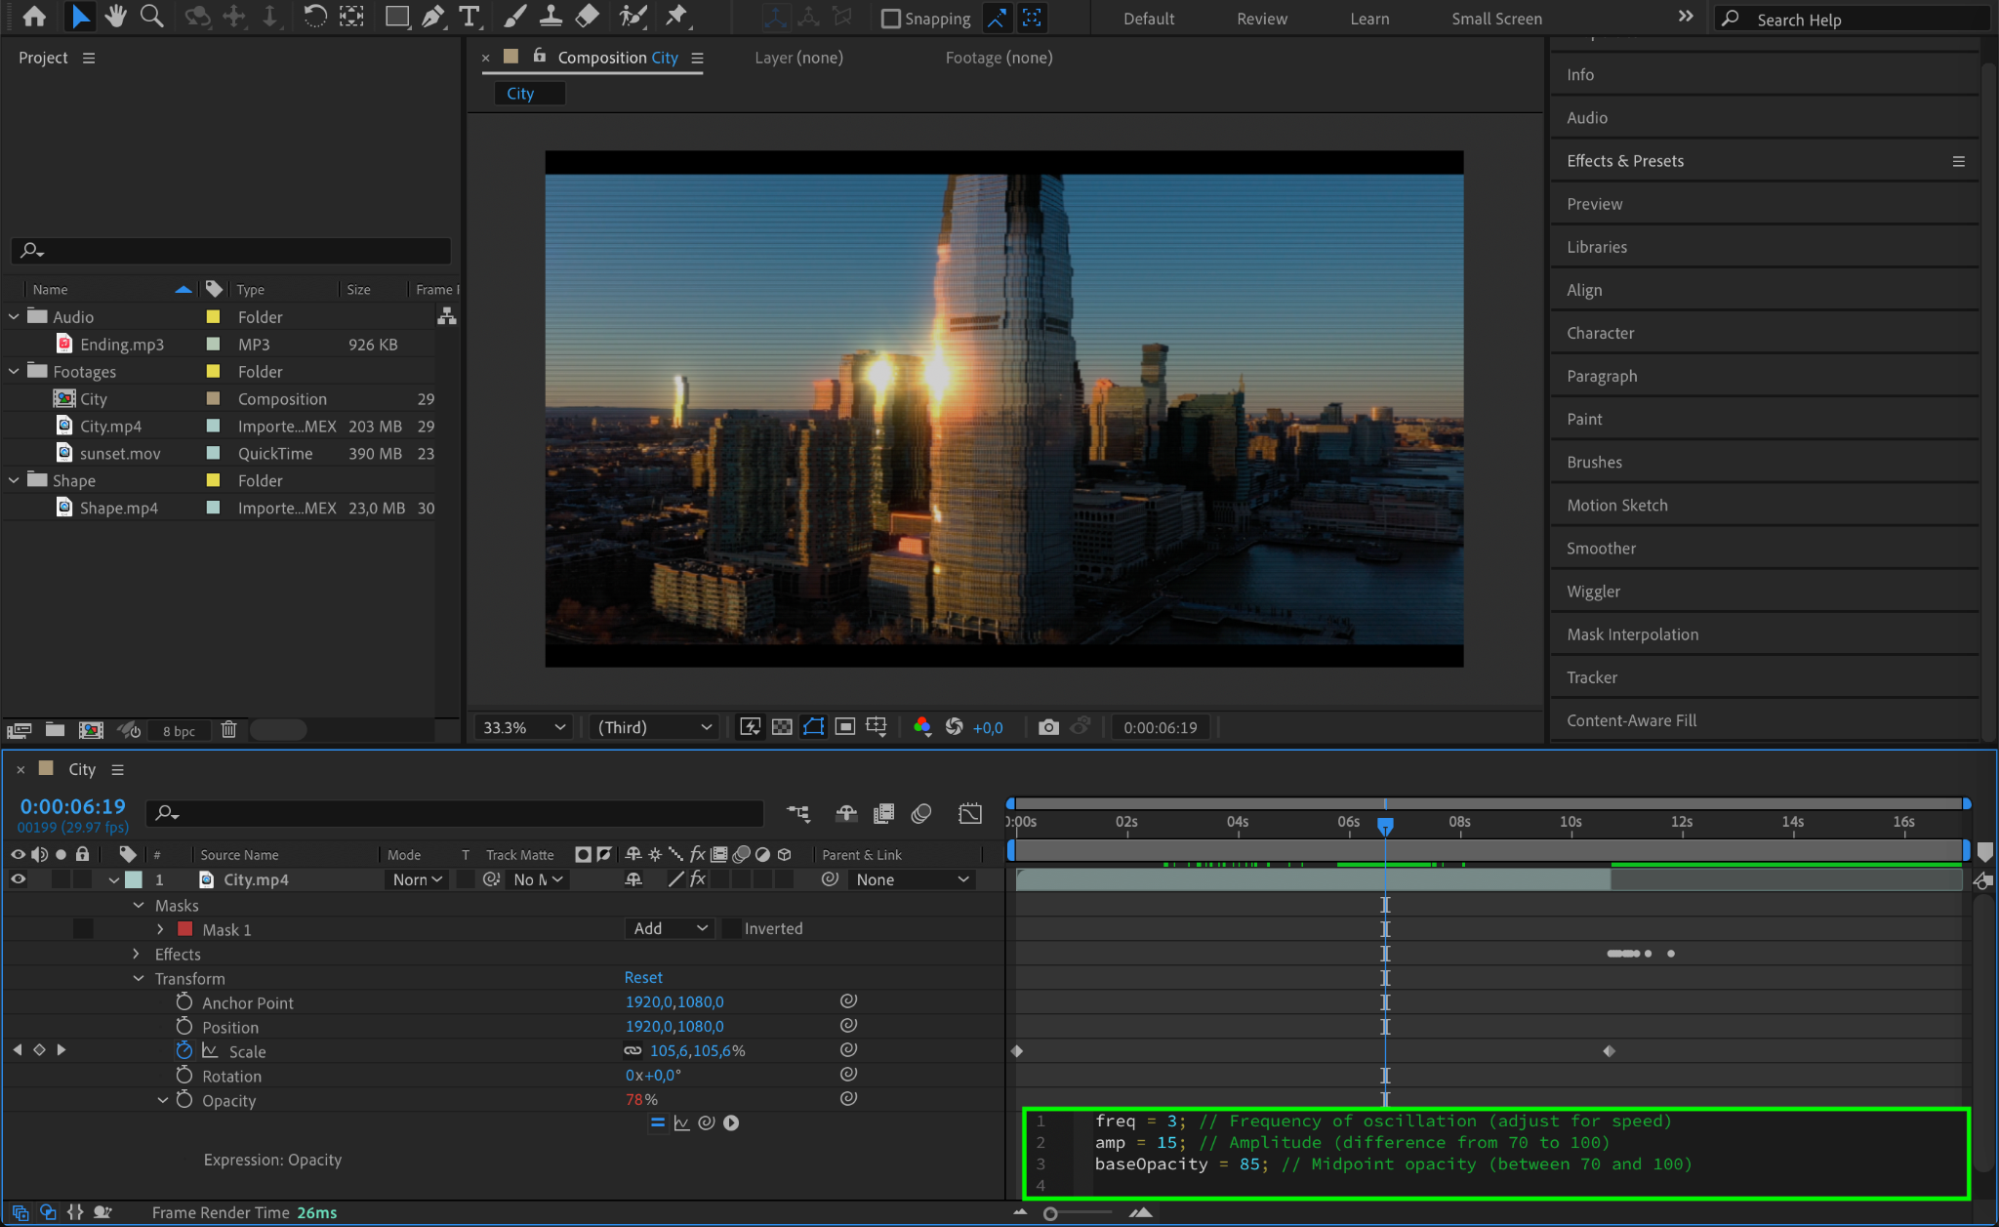
Expressions are small pieces of code that automate animations and effects in After Effects. By using expressions, you can save time and achieve results that would be difficult to animate manually. To add an expression, select a property, hold Alt/Option, and click the stopwatch icon, then type or paste your expression.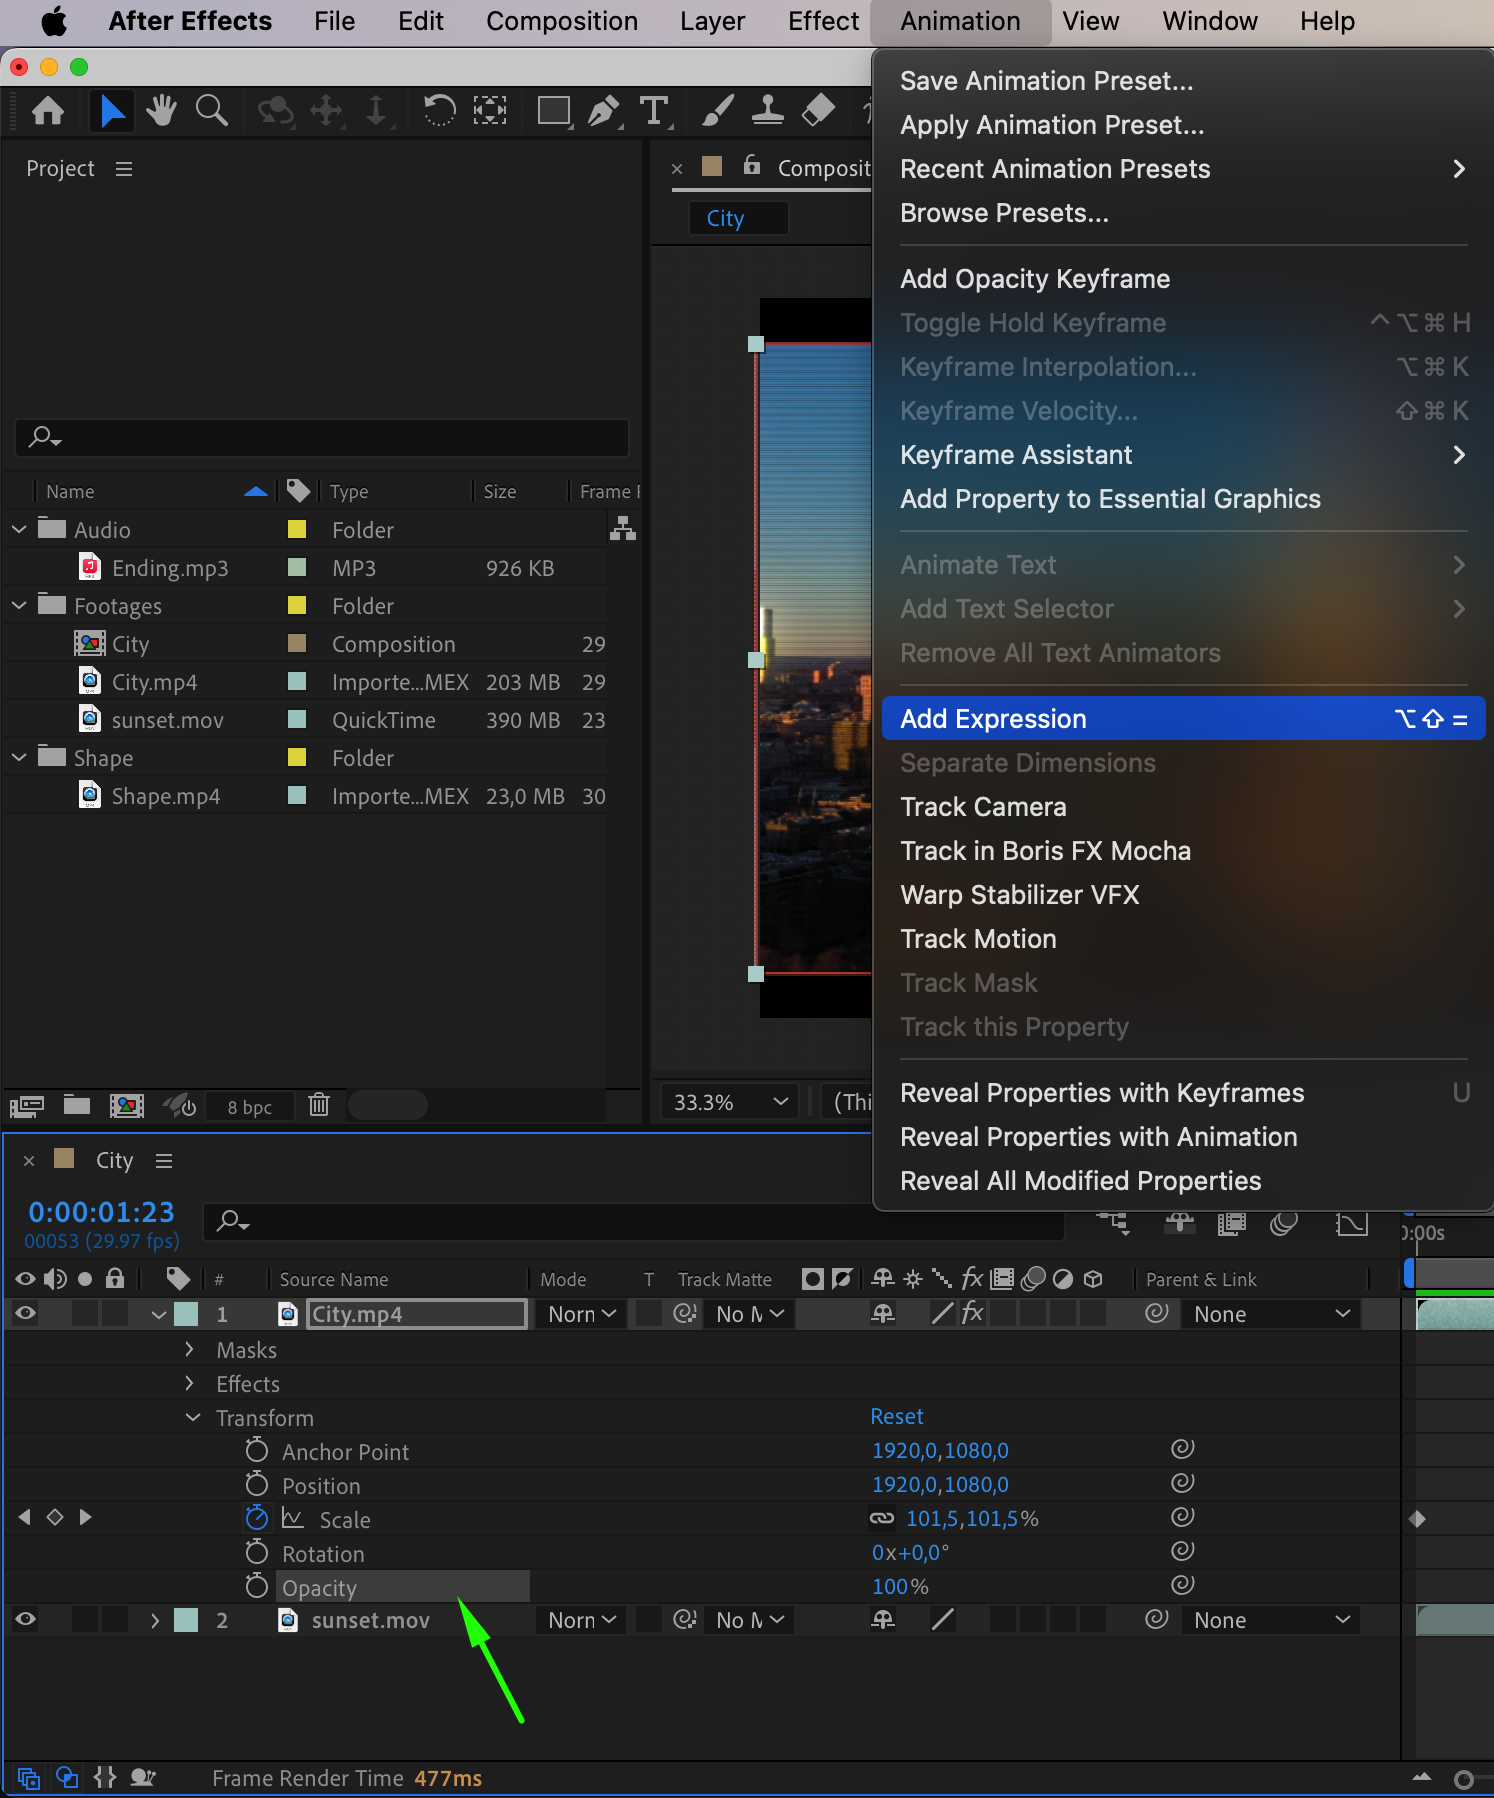
 Step 8: Utilize Third-Party Plugins
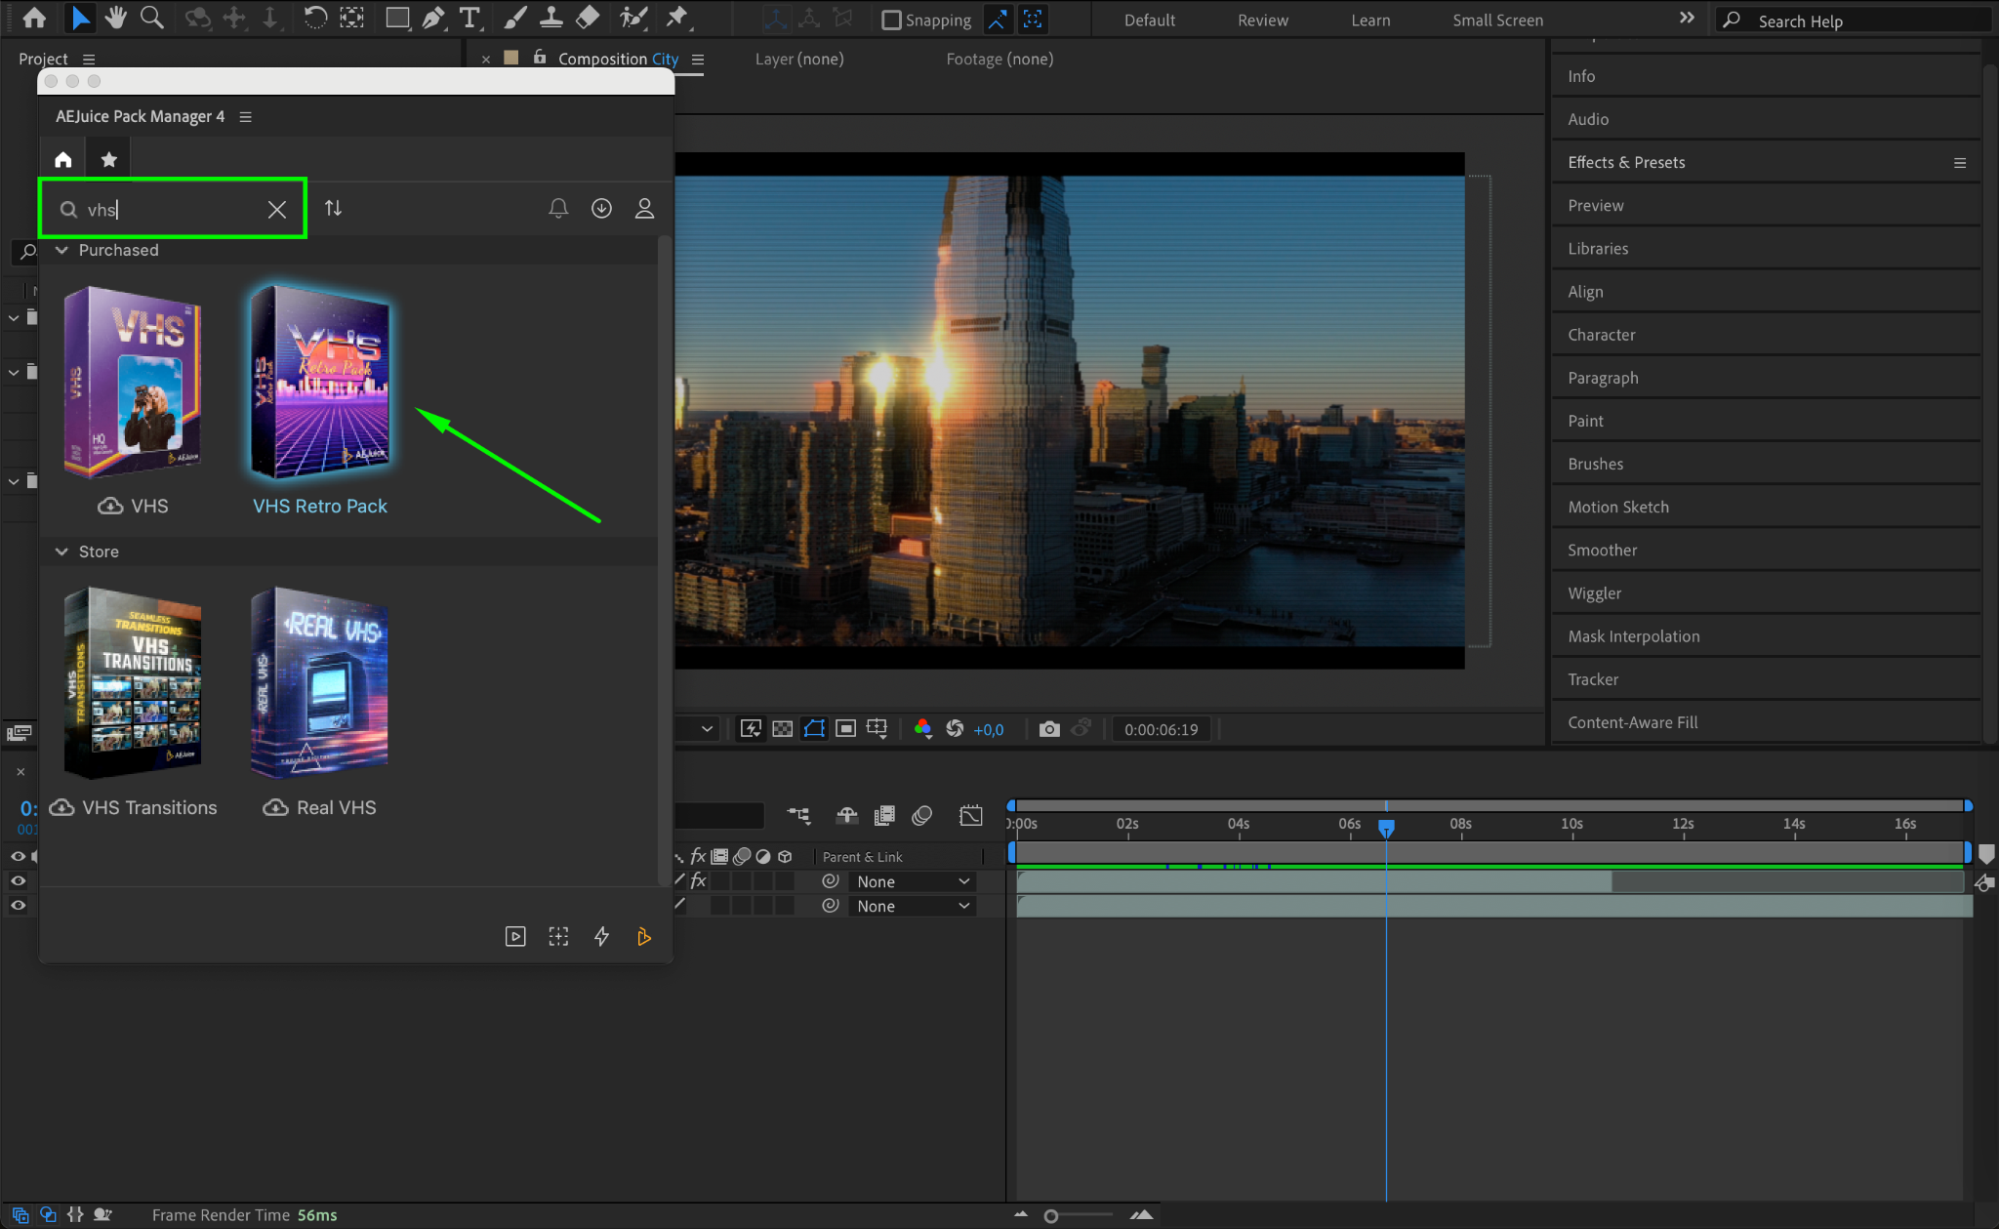
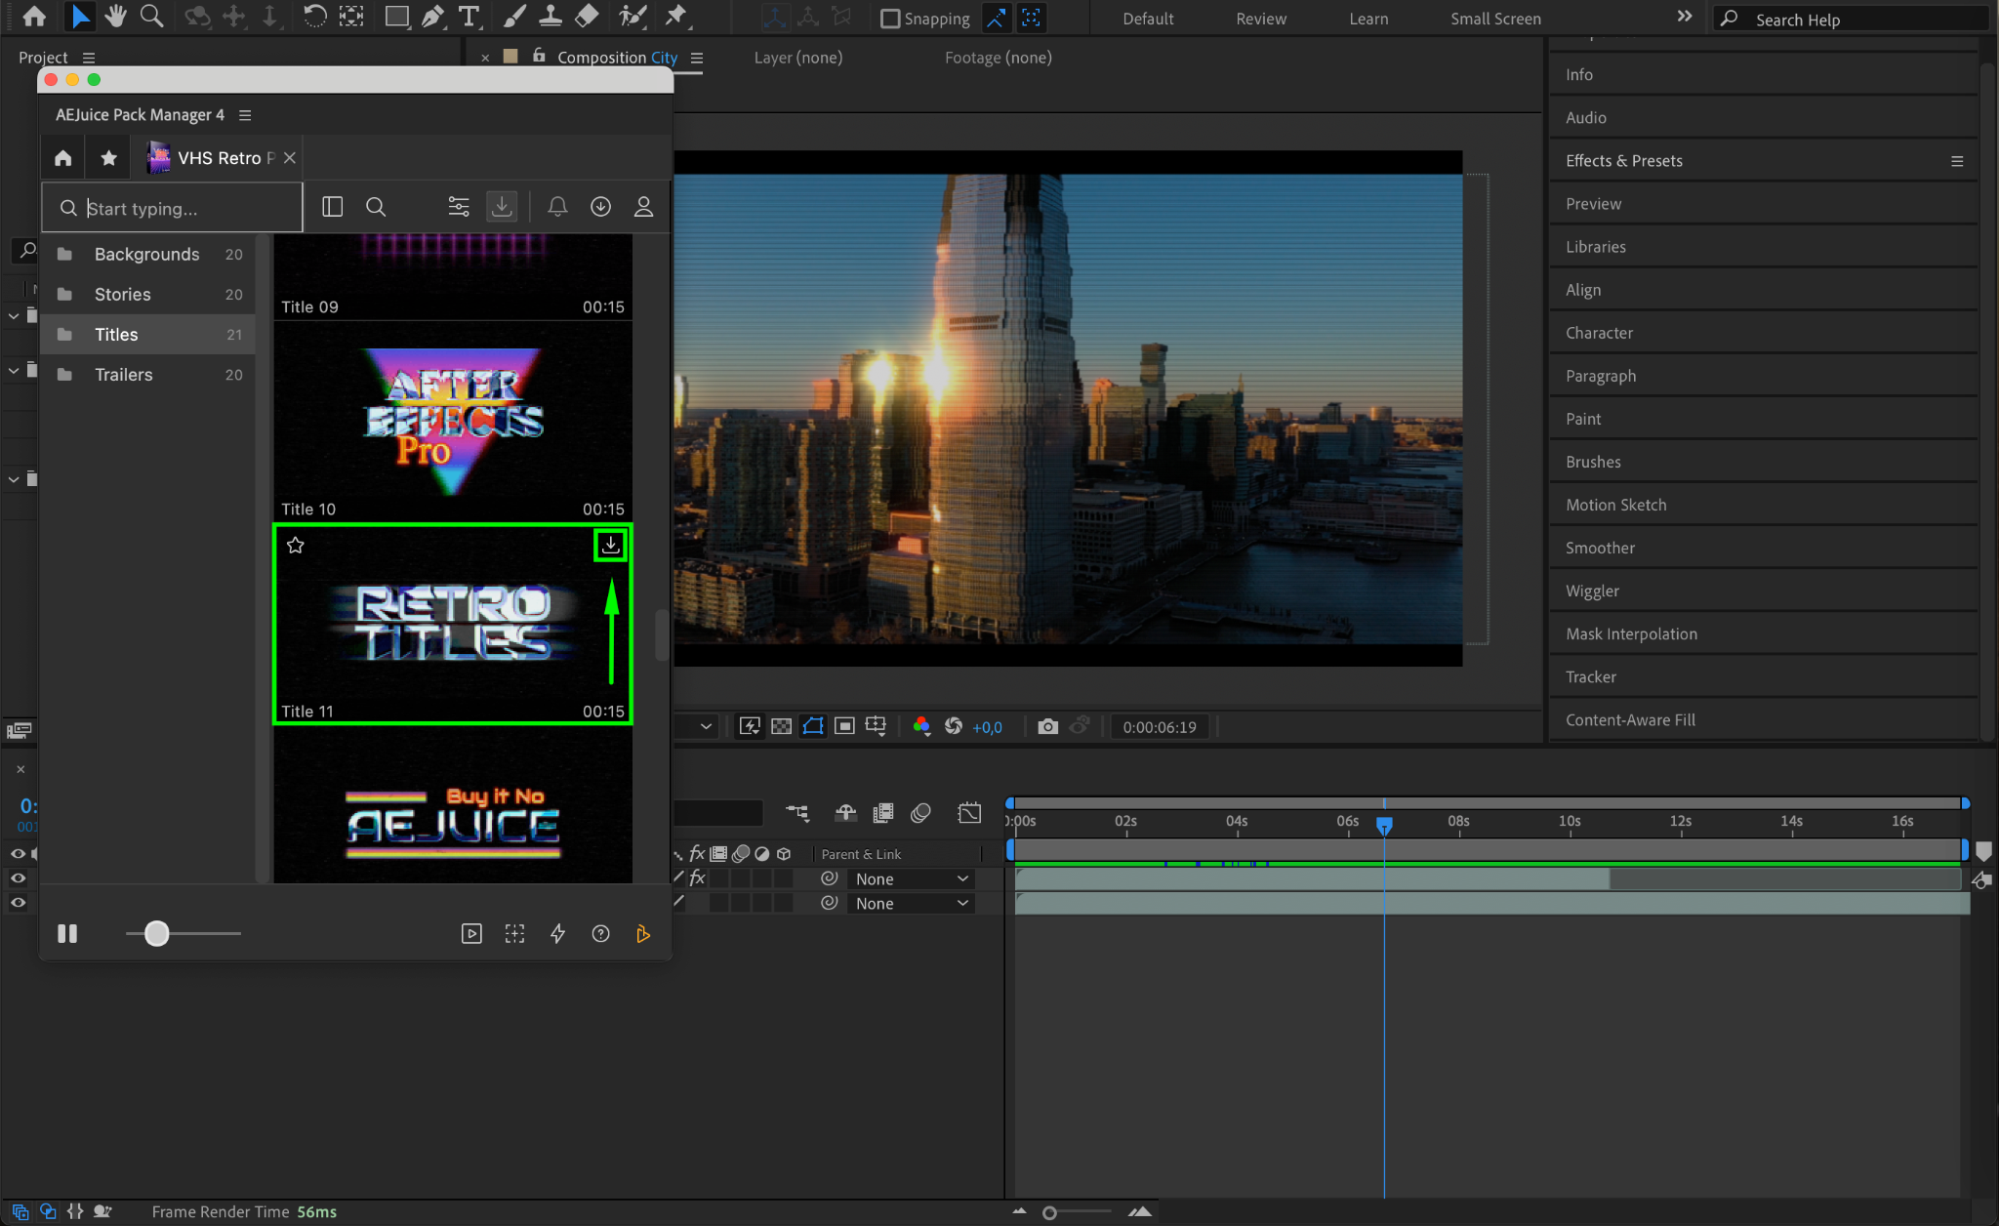
Plugins can significantly expand After Effects’ capabilities. There are numerous third-party plugins available, like AEJuice Pack Manager 4, which offers a wide range of ready-to-use effects, transitions, and animations. These tools can help you achieve complex visuals without having to create them from scratch.
 Step 9: Keep learning and experimenting
After Effects is a constantly evolving software, and there are always new techniques and features to learn. Stay updated with tutorials, online courses, and forums to expand your knowledge and stay up to date with the latest trends in video editing.
Conclusion
By following these essential tips and tricks, you’ll be well on your way to mastering Adobe After Effects. With practice, you’ll be able to create stunning edits and animations that captivate your audience. Keep experimenting, stay creative, and continue learning to unlock the full potential of this powerful software!

