Mastering Video Editing in Adobe After Effects
Introduction to Editing in Adobe After Effects
Adobe After Effects is widely recognized as one of the best tools for creating visually compelling videos, animations, and effects. Whether you’re working on a professional project or just starting out, understanding the fundamentals of editing in After Effects will enhance your video production capabilities. In this guide, we’ll break down essential steps for editing in After Effects, from setting up your composition to applying effects and rendering your final project.
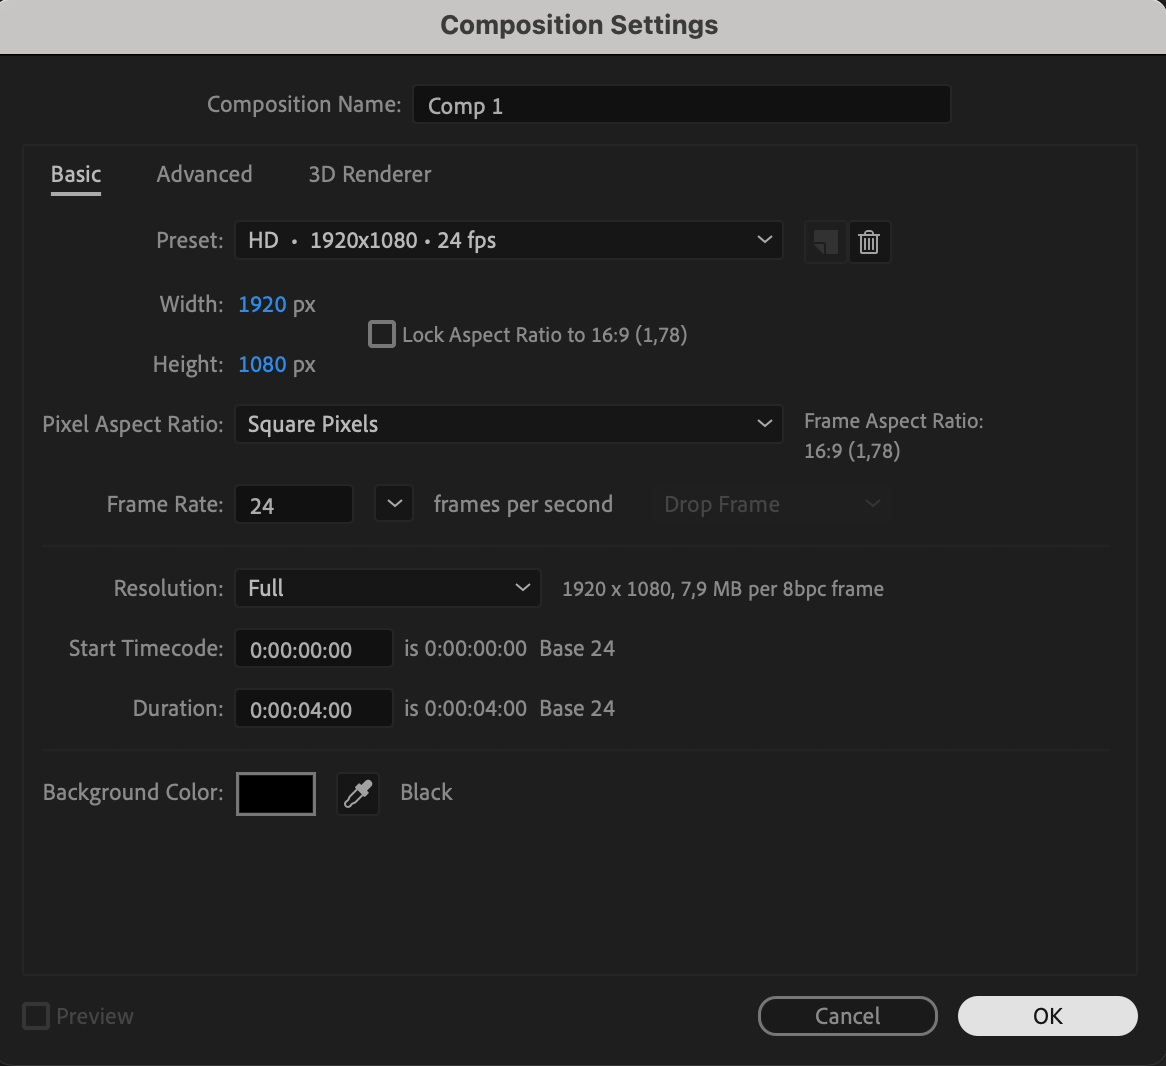
1. Set Up a New Composition
Before starting your edit, you need to create a new composition. Go to the top menu and select Composition > New Composition. Set the resolution, frame rate, and duration based on your project needs. A good understanding of your project’s goals will help you make appropriate settings choices. For instance, if you are working on a YouTube video, setting the resolution to 1920×1080 at 30 frames per second is a great starting point.
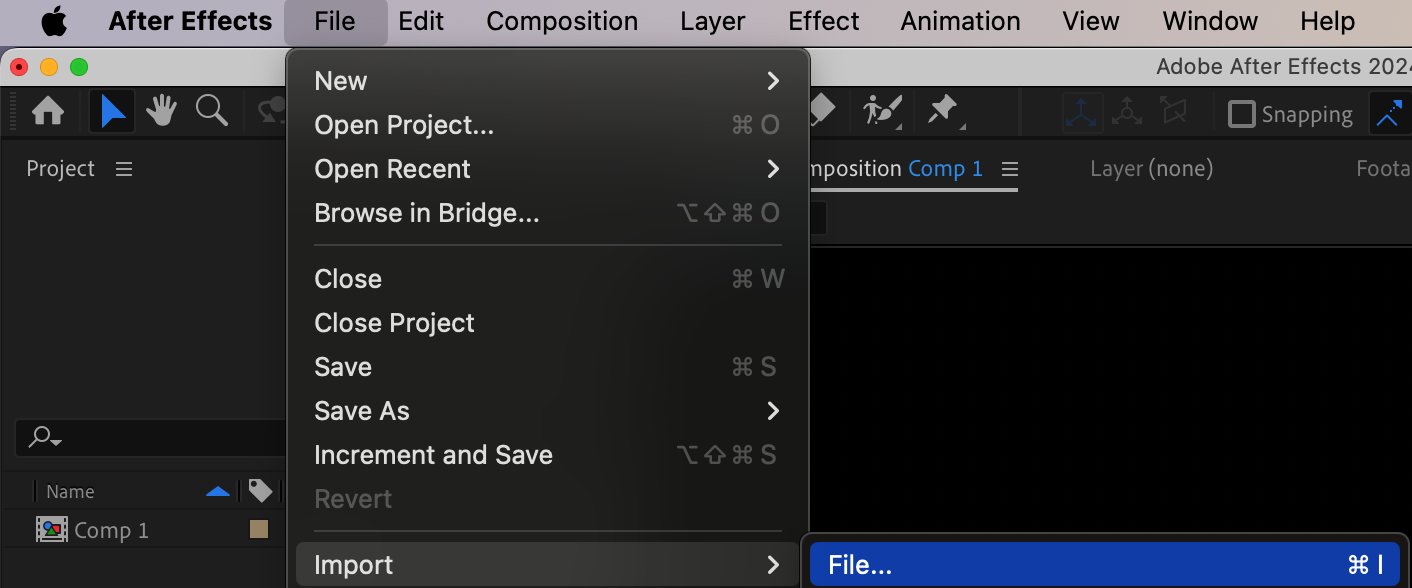
 2. Import Media Files
Once your composition is ready, import your media. Go to File > Import > File or use the shortcut “Ctrl/Cmd + I”. This will allow you to bring in video clips, audio, images, and other assets. After importing, your files will appear in the Project panel. From here, drag and drop the required files into your timeline to begin the editing process. Ensure your assets are organized for easy access later.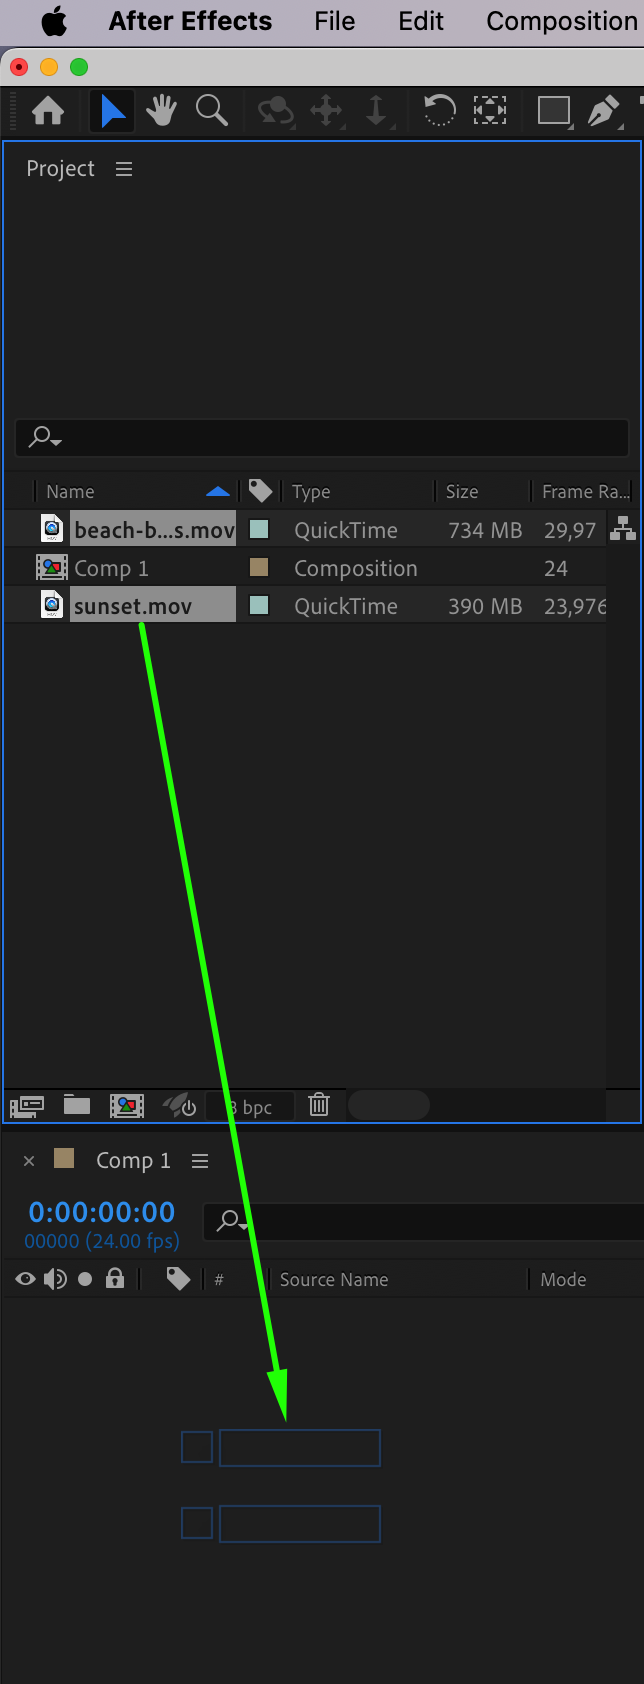
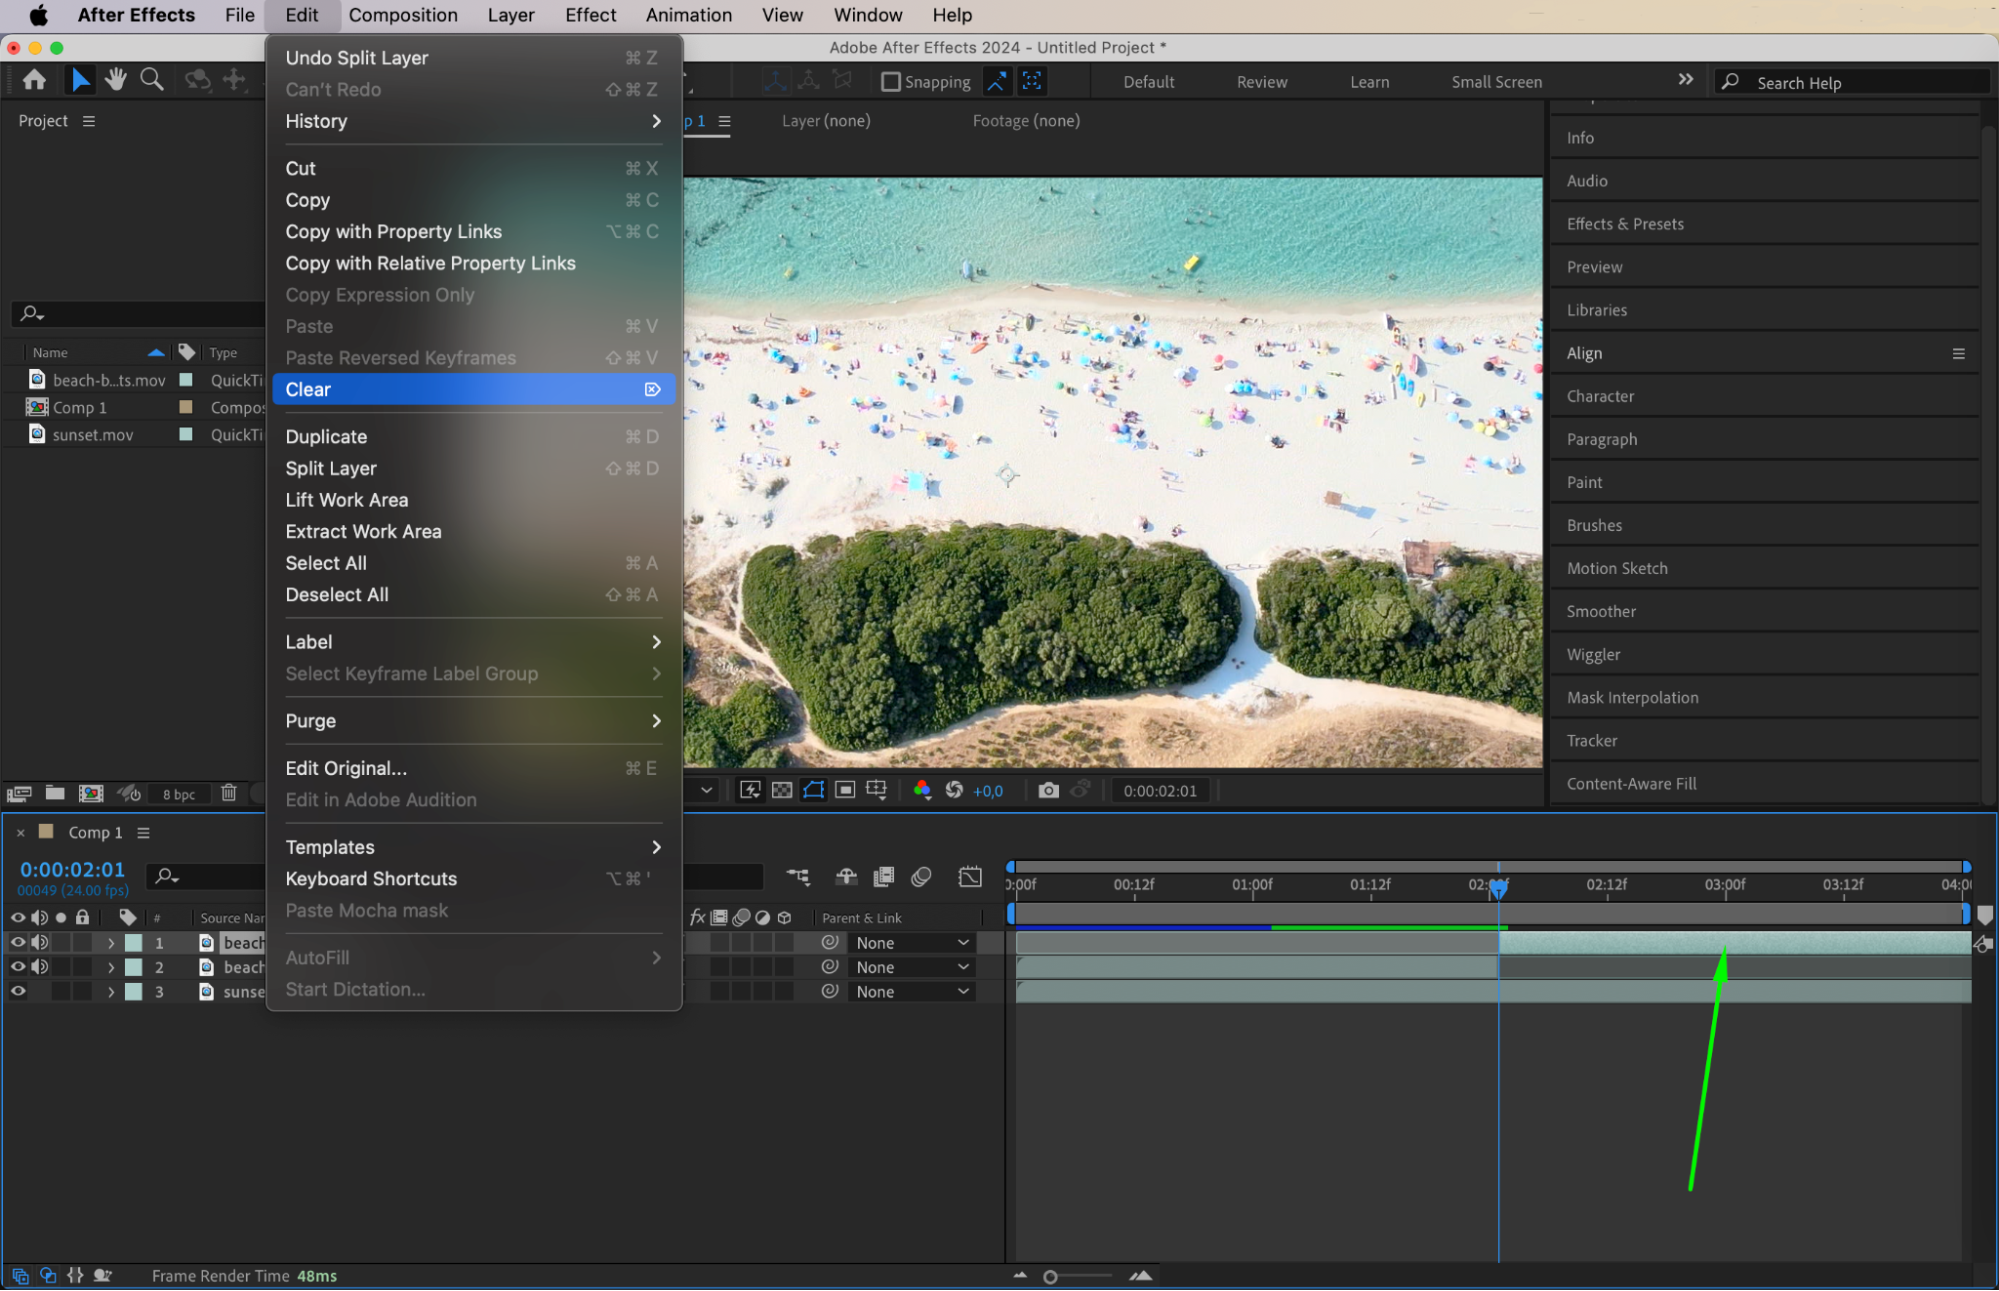
 3. Split and Remove Unnecessary Layers
Get 10% off when you subscribe to our newsletter

To split layers, place the Current Time Indicator (CTI) at the point where you want to divide the clip, and use the shortcut “Ctrl/Cmd + Shift + D”. This will split the layer into two parts. To delete unwanted sections, simply select the layer you wish to remove and press the “Delete” key. Trimming your clips helps keep your timeline clean and precise.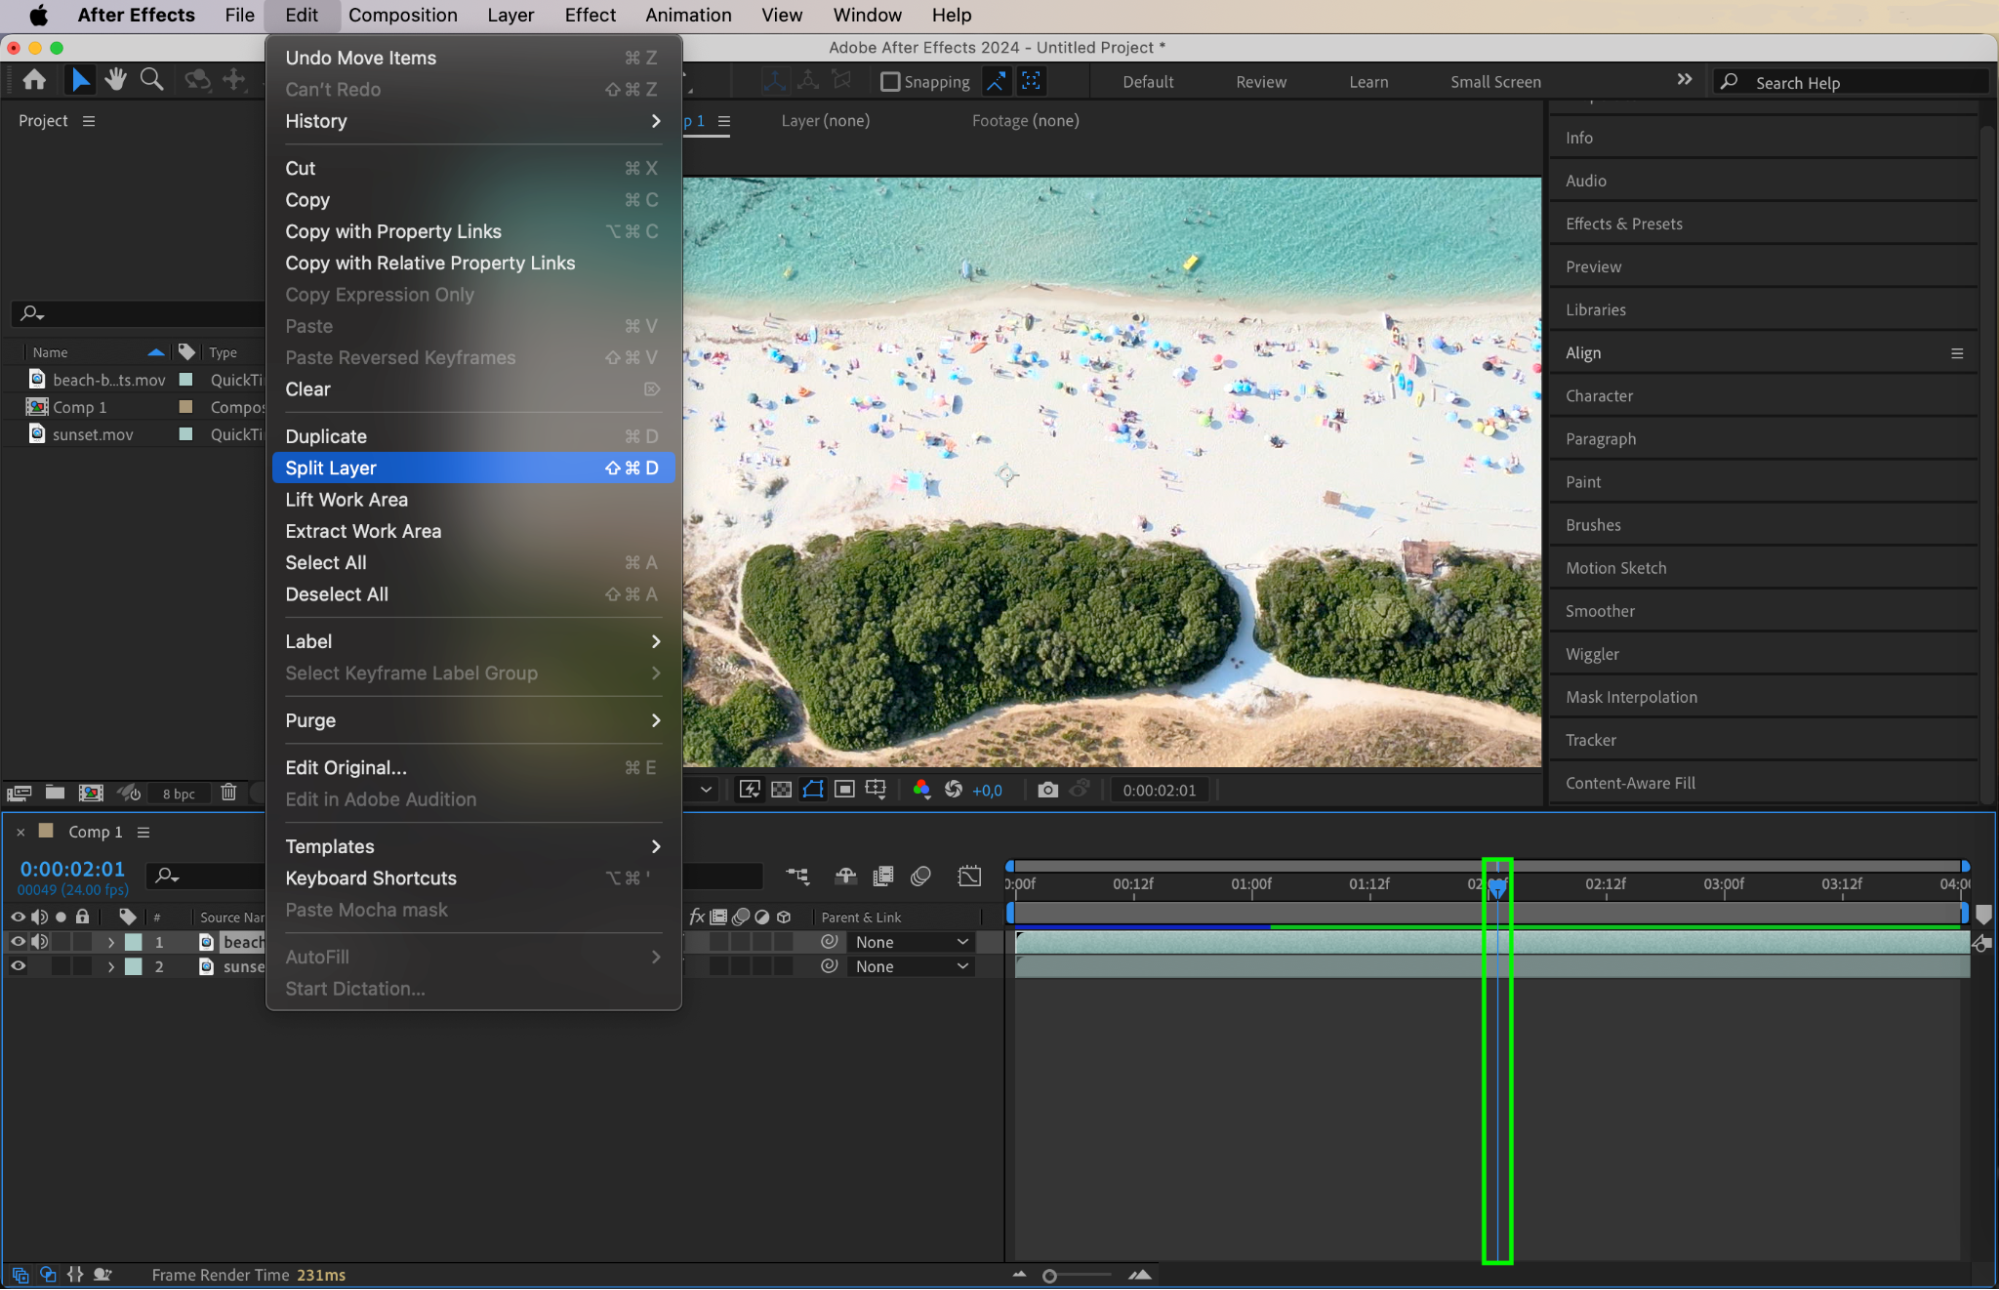
 4. Adjust Layer Transform Properties
In the Timeline panel, expand the layer’s properties by clicking the dropdown arrow next to the layer name. Under the Transform section, you can modify key properties like Scale, Position, Rotation, Opacity, and Anchor Point. For example, if your video layer doesn’t fit correctly within the composition, you can adjust the Scale values to resize it. Similarly, use the Position property to reposition the layer or fine-tune other properties to achieve the desired alignment within the frame.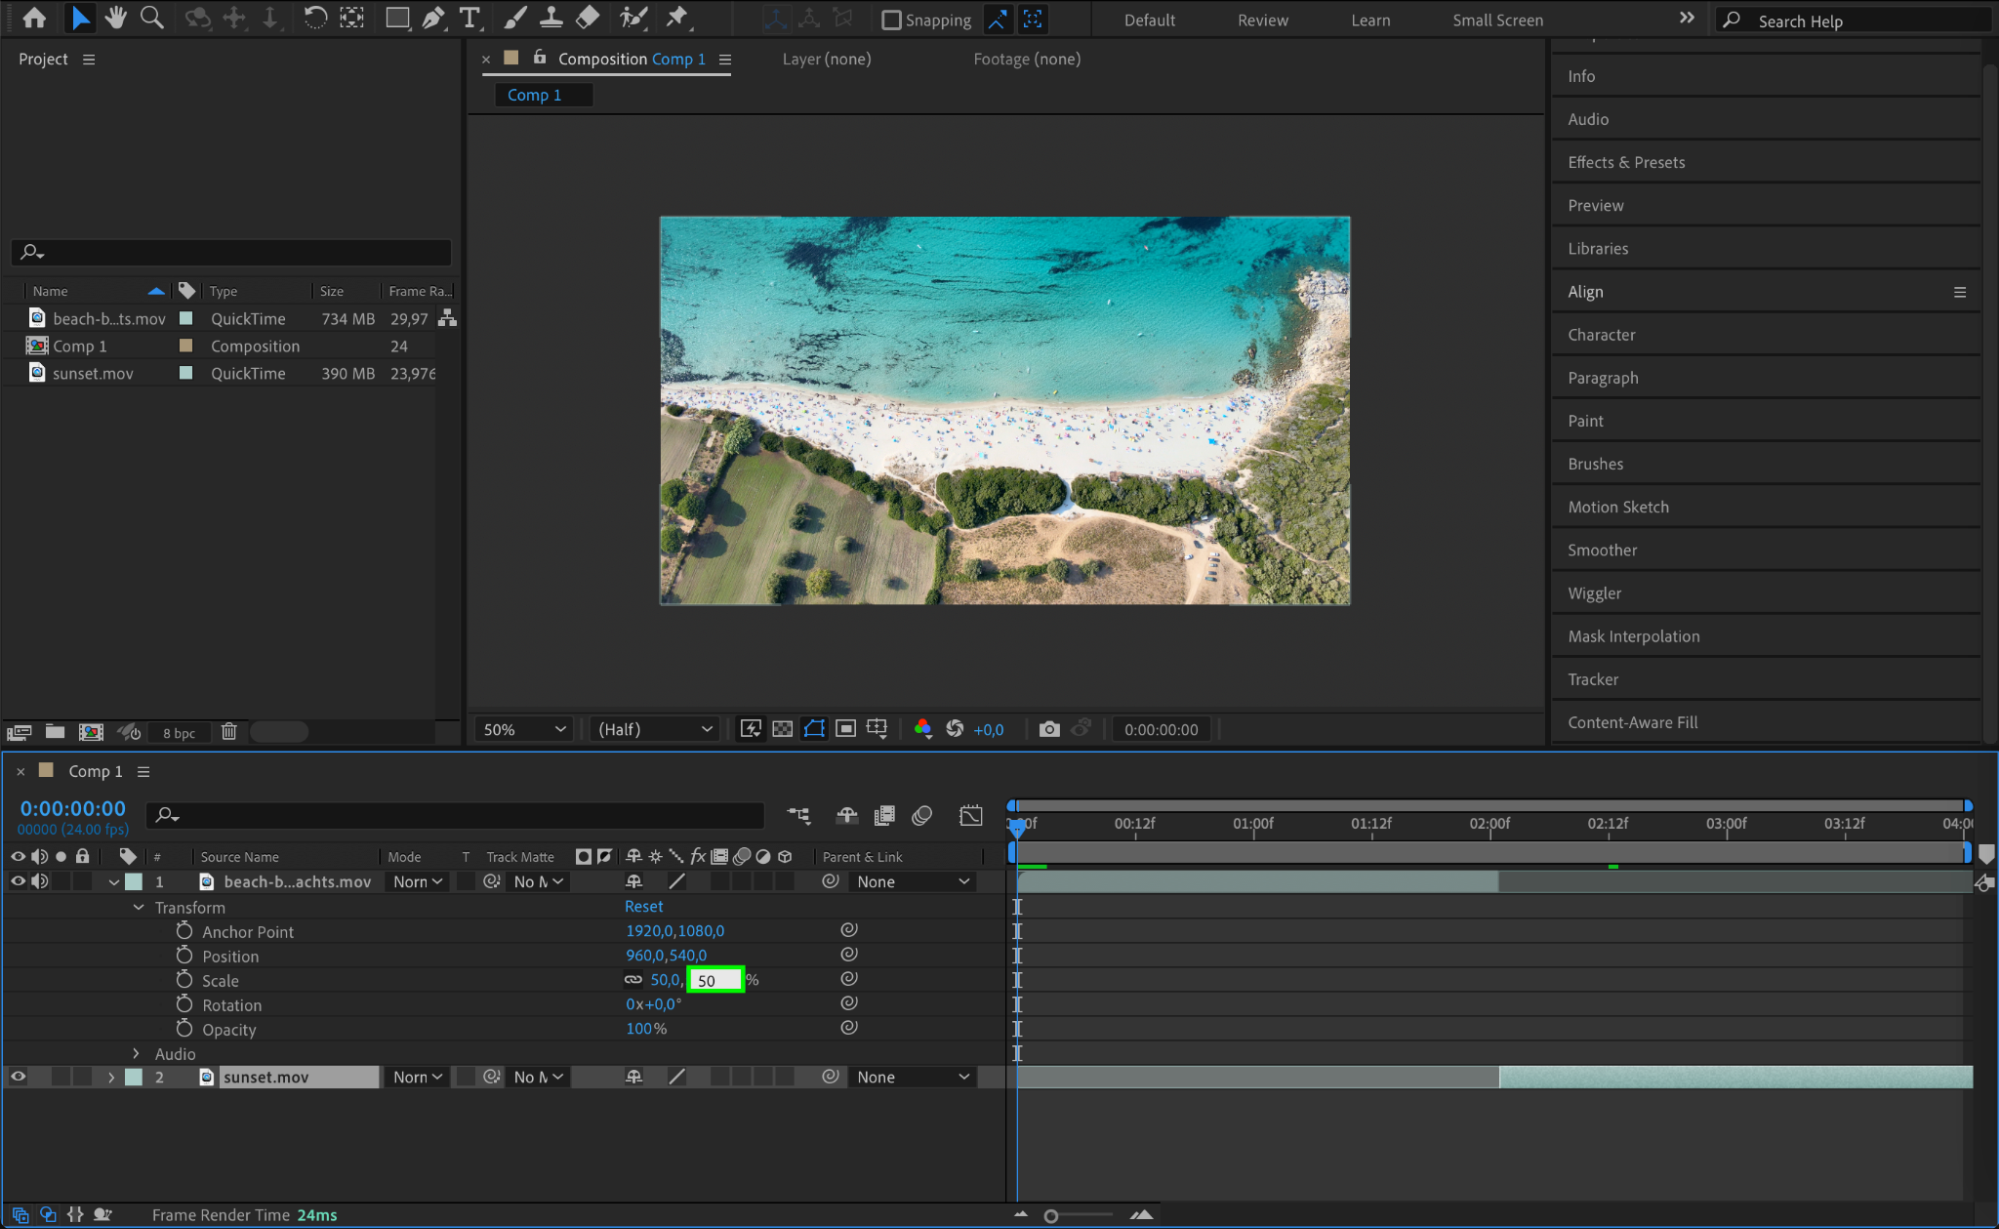 5. Animate Transform Properties with Keyframes
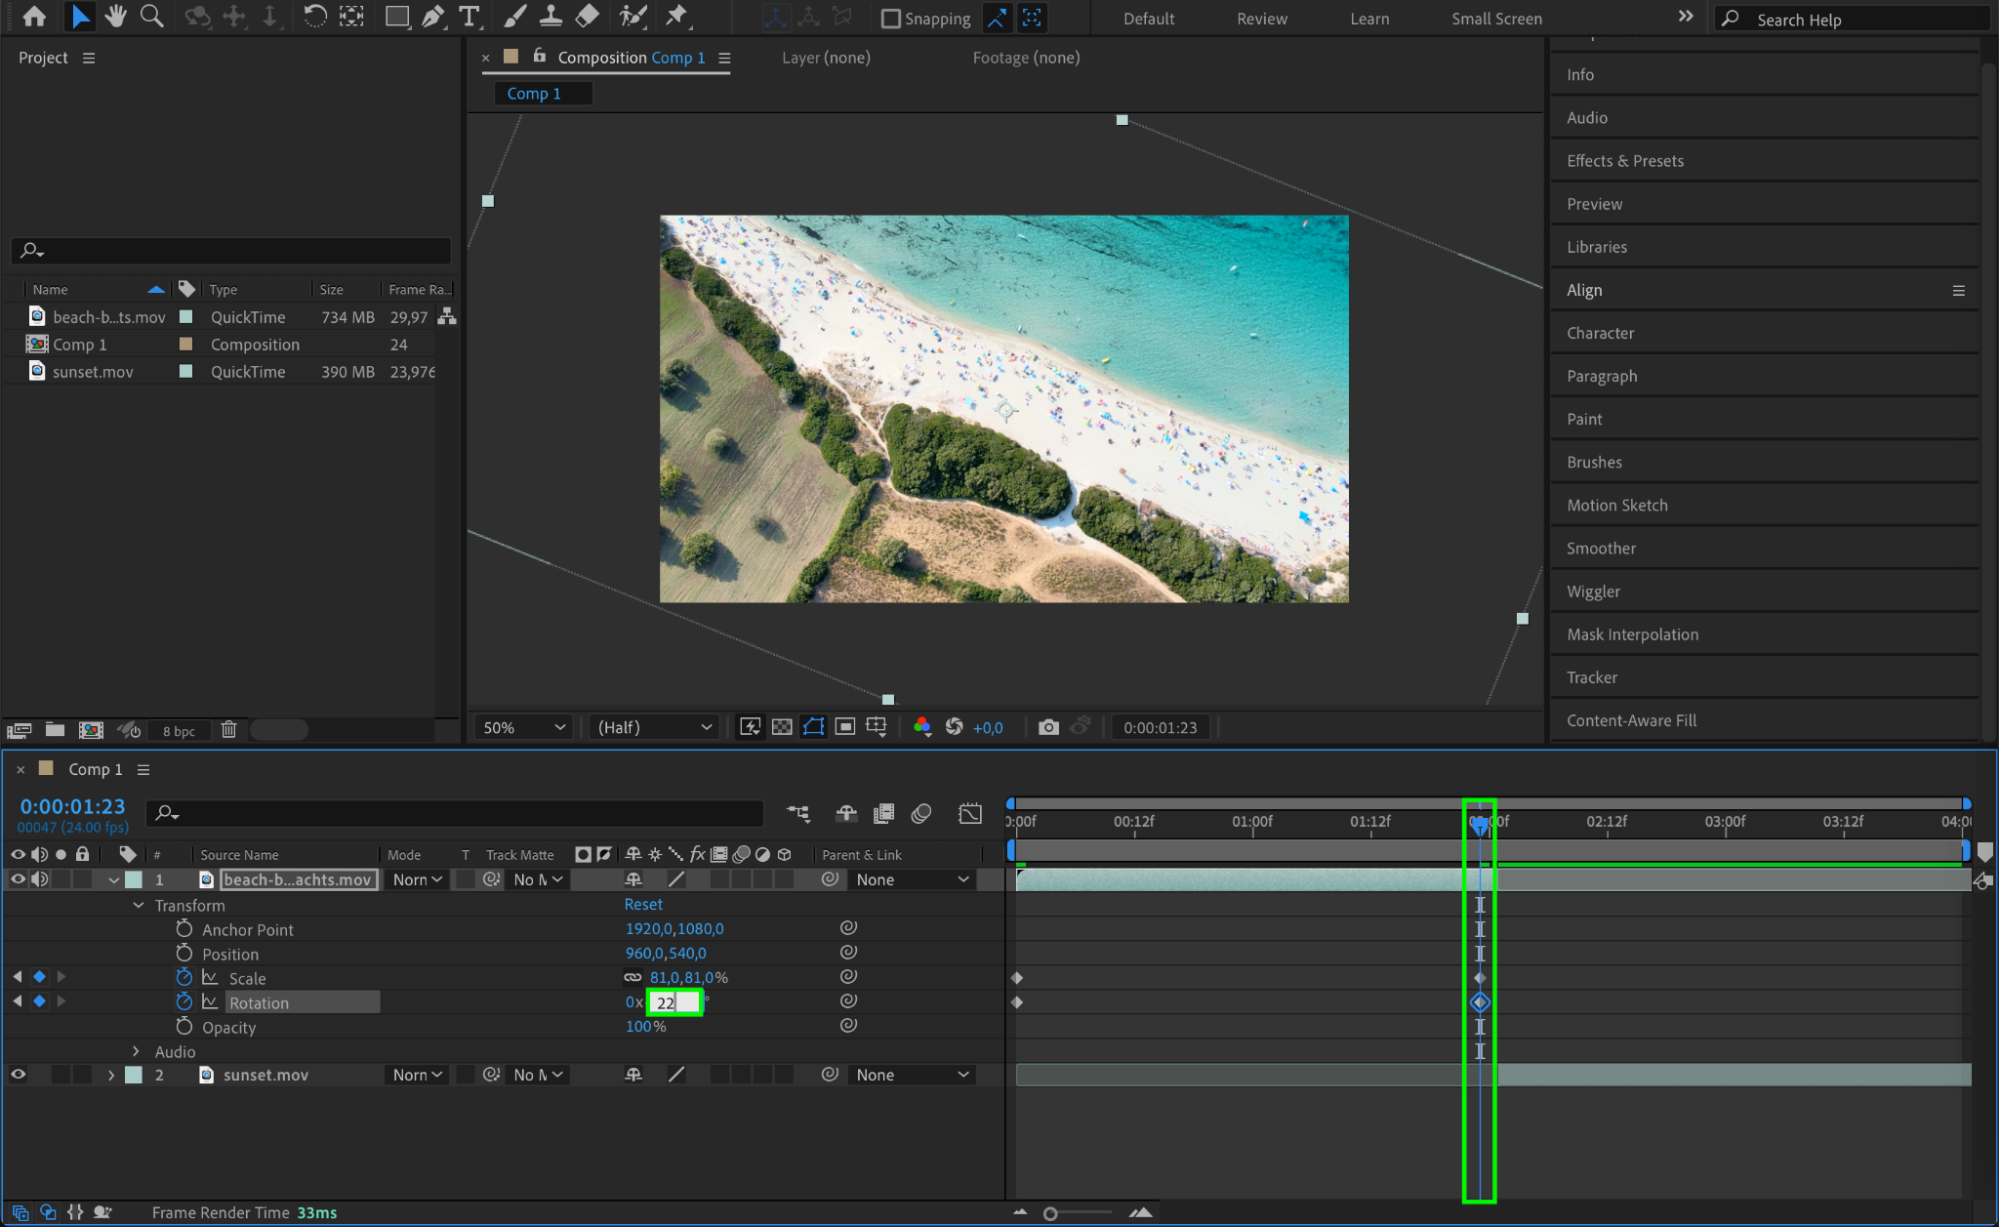
To animate any transform property, click the stopwatch icon next to the property, such as Position or Scale. Move the Current Time Indicator forward in time, then adjust the property’s value. This automatically creates a keyframe at the new point. Animating with keyframes can add dynamic motion to your videos, such as zooming in or out, or panning across the screen.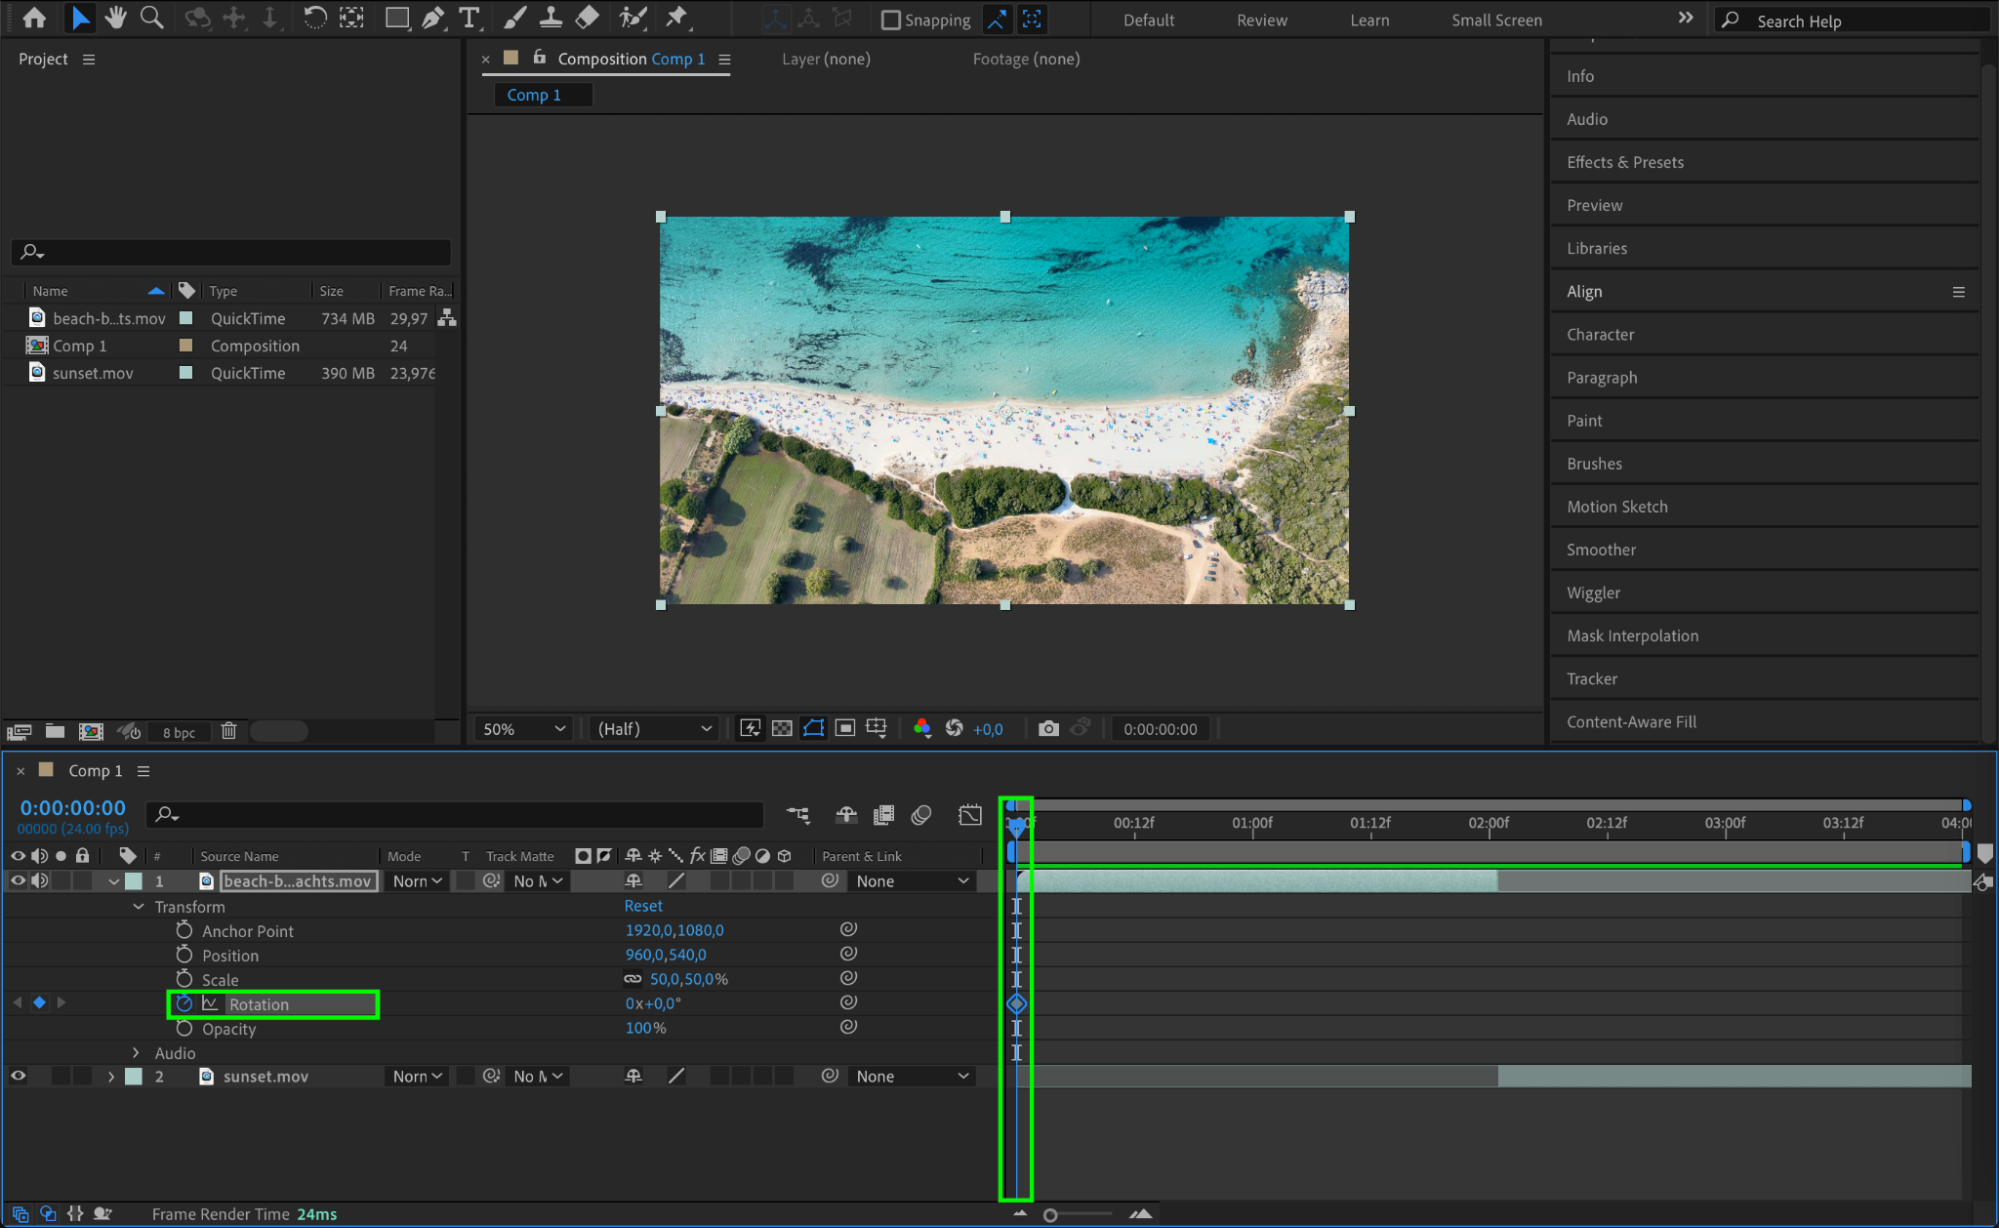
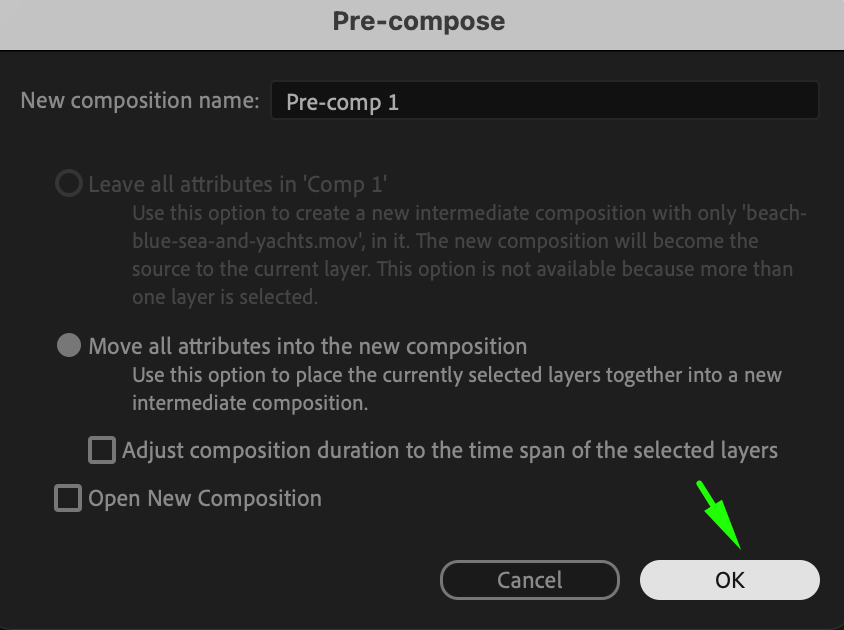
 6. Pre-compose Layers for Better Organization
Pre-compositions (pre-comps) allow you to group multiple layers into a single composition. This is extremely helpful when you want to organize complex animations. Select the layers you want to combine, right-click, and choose Pre-compose. This will make your timeline more manageable and allow you to apply effects to multiple layers simultaneously without cluttering your workspace.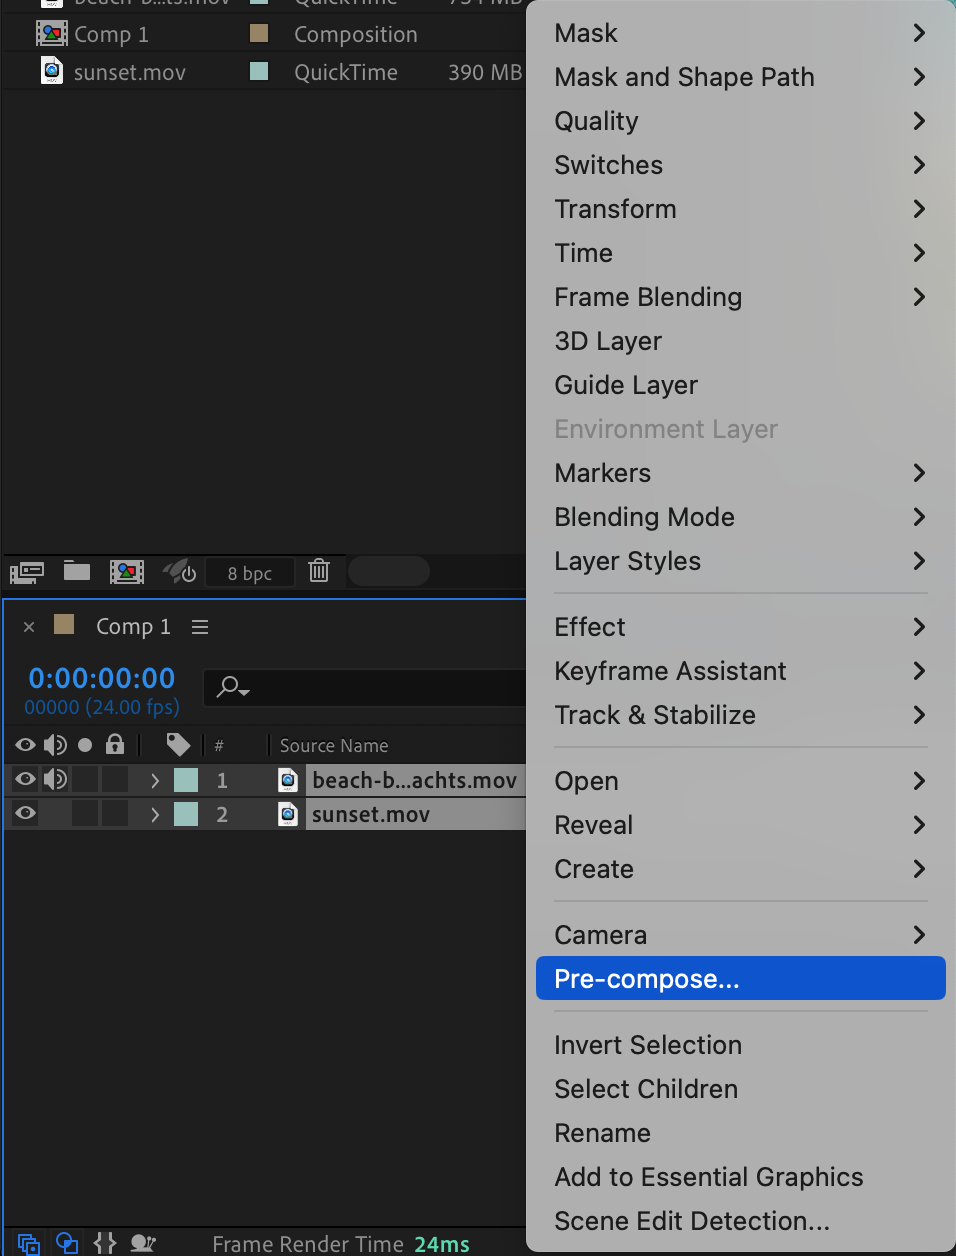
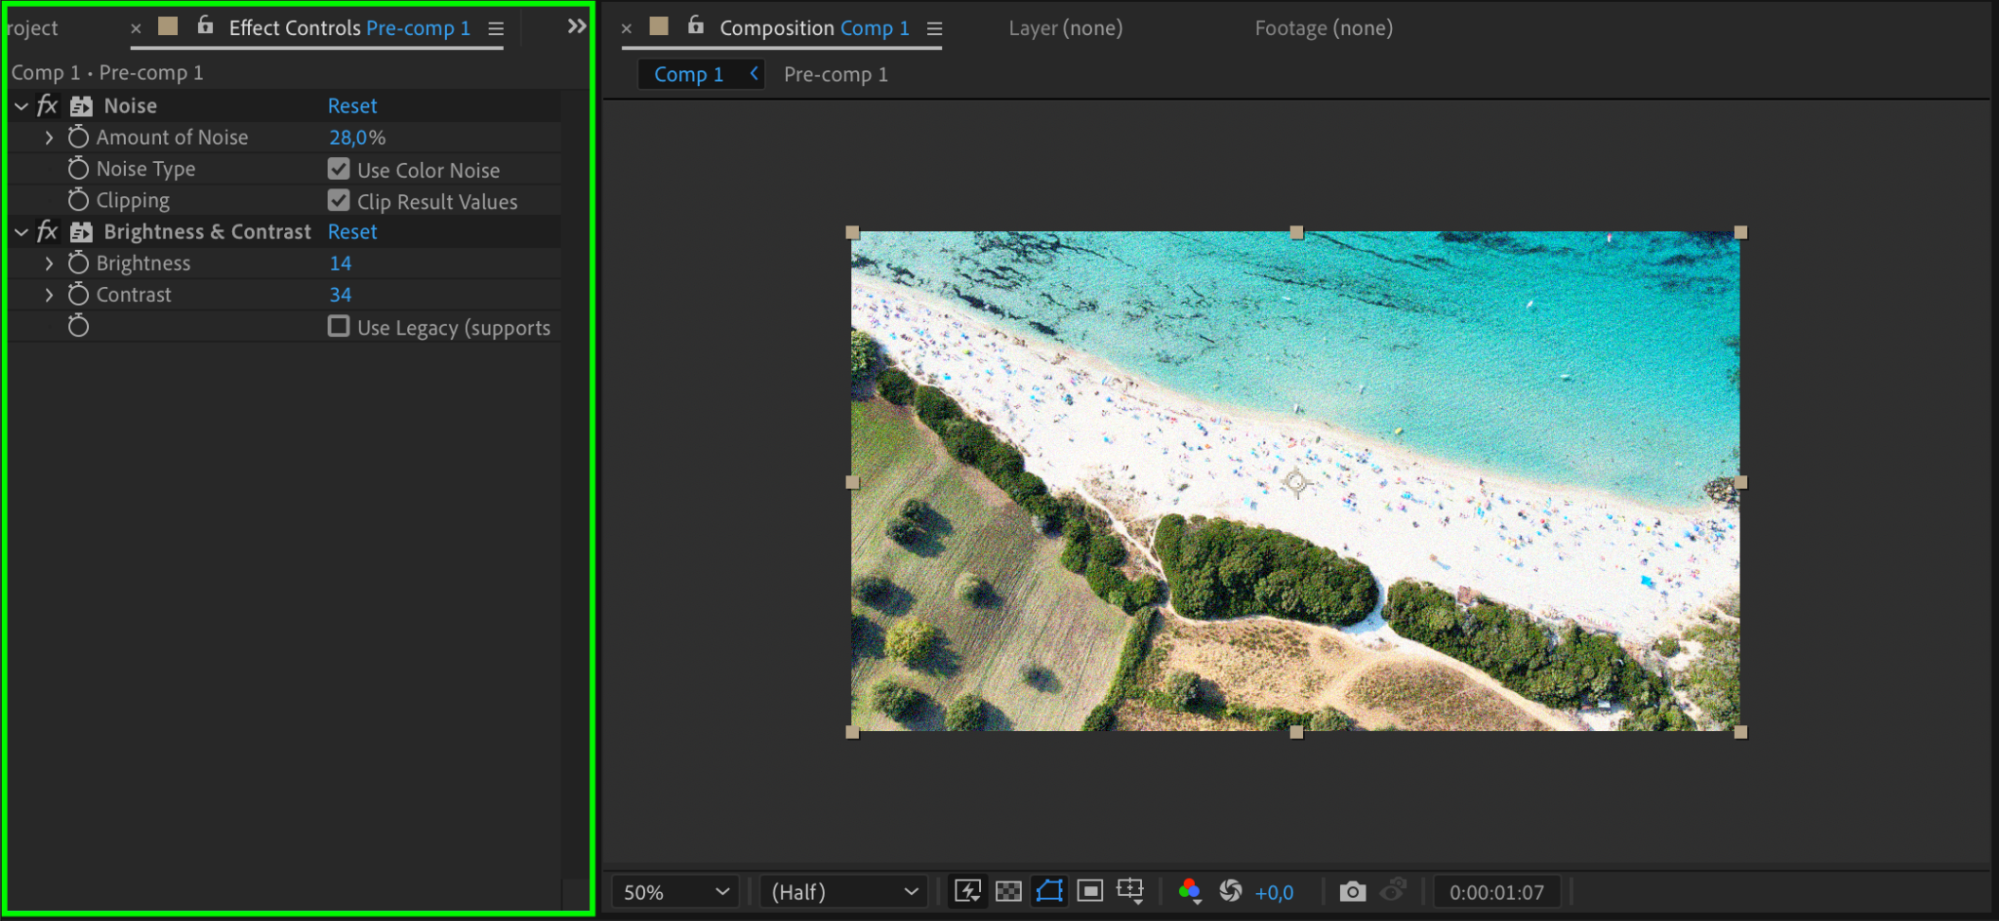
 7. Experiment with Effects and Presets
After Effects offers a rich library of effects and presets that can enhance your videos with professional-looking visual effects. Navigate to the Effects & Presets panel, choose an effect, and drag it onto your layer. After applying the effect, you can tweak its properties in the Effect Controls panel. Experiment with various effects like color correction, blurs, and glows to achieve the desired look.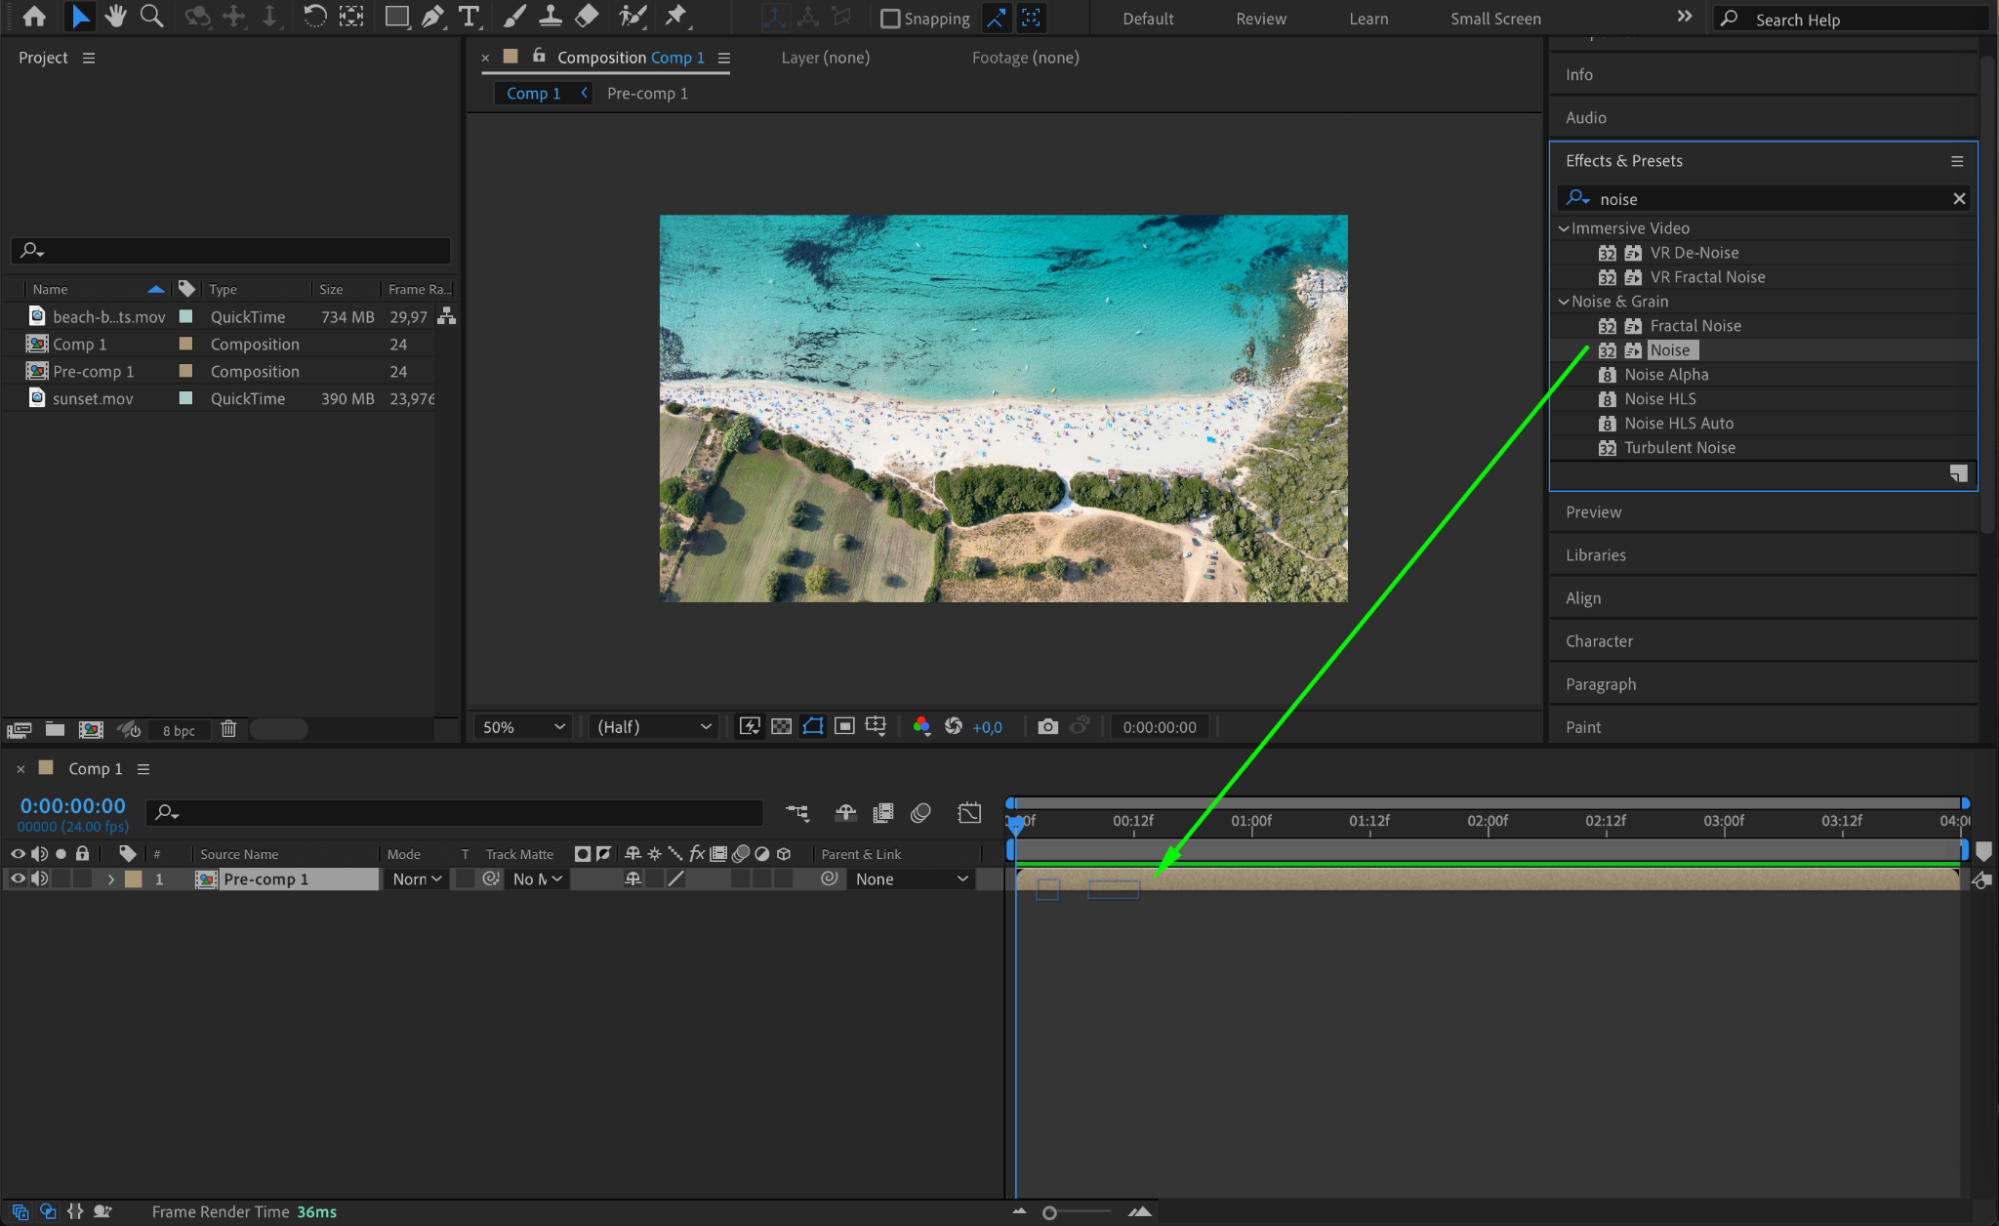
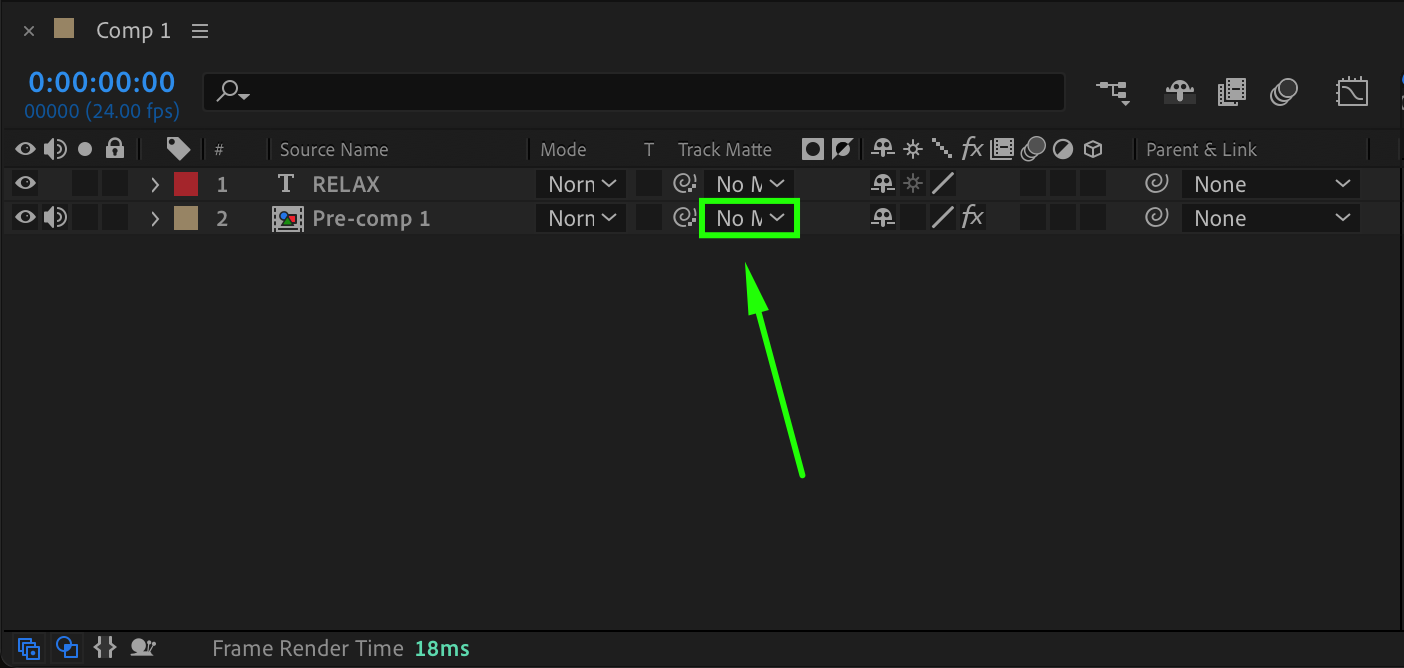
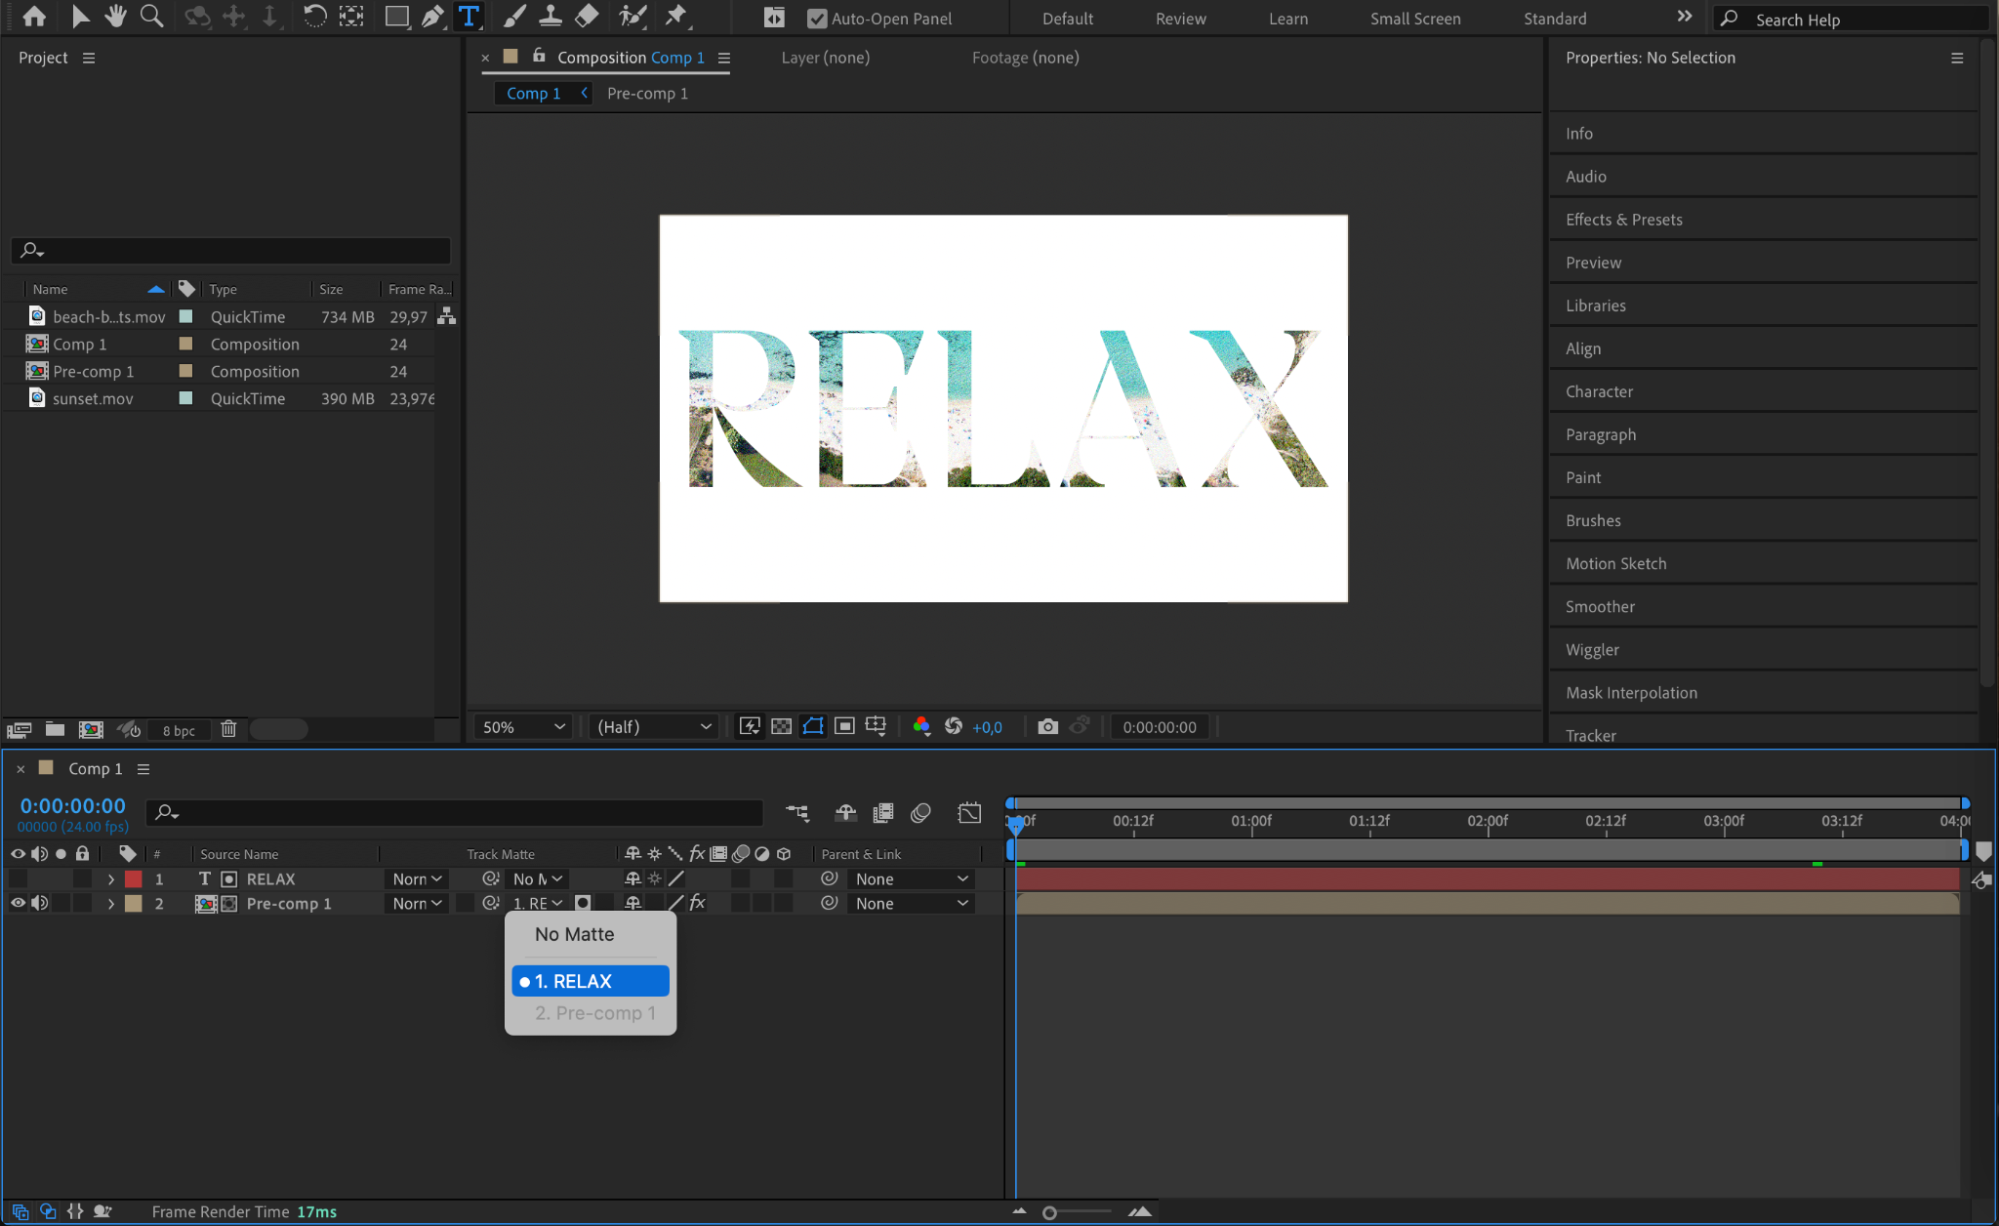
 8. Use Track Matte for Layer Masking
Track Mattes are a powerful feature for masking portions of a layer, which can help you create transitions and compositing effects. To apply a Track Matte, first, place a shape layer or another layer above the layer you want to mask in the Timeline panel. Next, in the Track Matte column of the layer you want to mask, select the shape layer from the drop-down menu. This action uses the shape layer’s transparency or content to define the visible areas of the underlying layer, effectively creating a mask that reveals or hides parts of it based on the shape or transparency of the matte layer.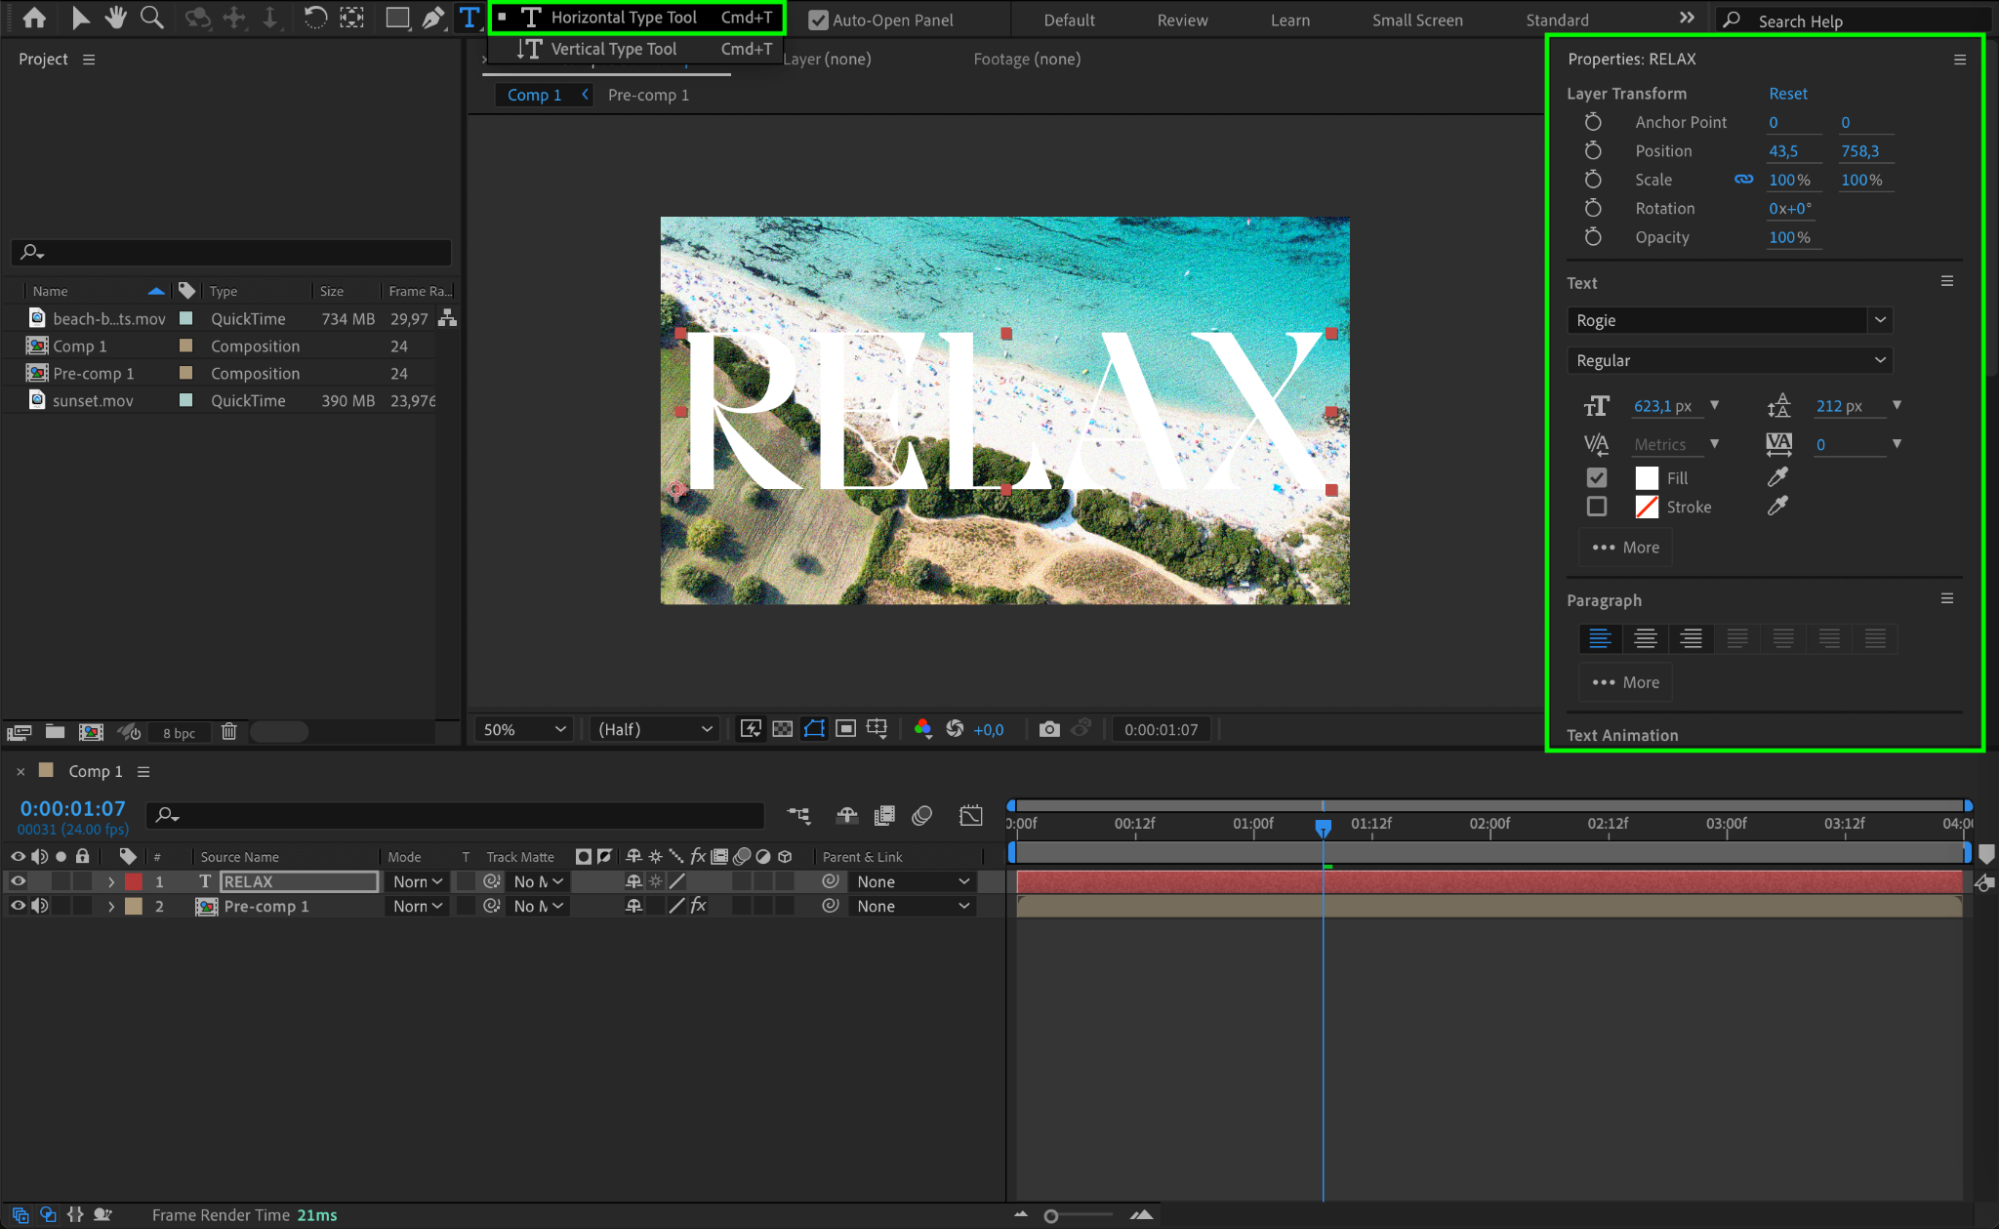
 9. Perfect Your Timing and Rhythm
Editing is about more than just arranging clips – timing and rhythm are crucial for a smooth, impactful video. Watch your project carefully and adjust the timing of cuts, effects, and animations to match the mood and pacing of your video. Syncing visual changes with audio cues like music beats or voiceover can make your video feel more professional and cohesive.
10. Preview Your Work
Use the Preview panel to play through your composition and review your edits. Make sure everything looks smooth and that your animations are running correctly. You can also use the Spacebar to start and stop the preview. If the preview playback is slow, lower the preview resolution or adjust the Preview settings to speed up the review process.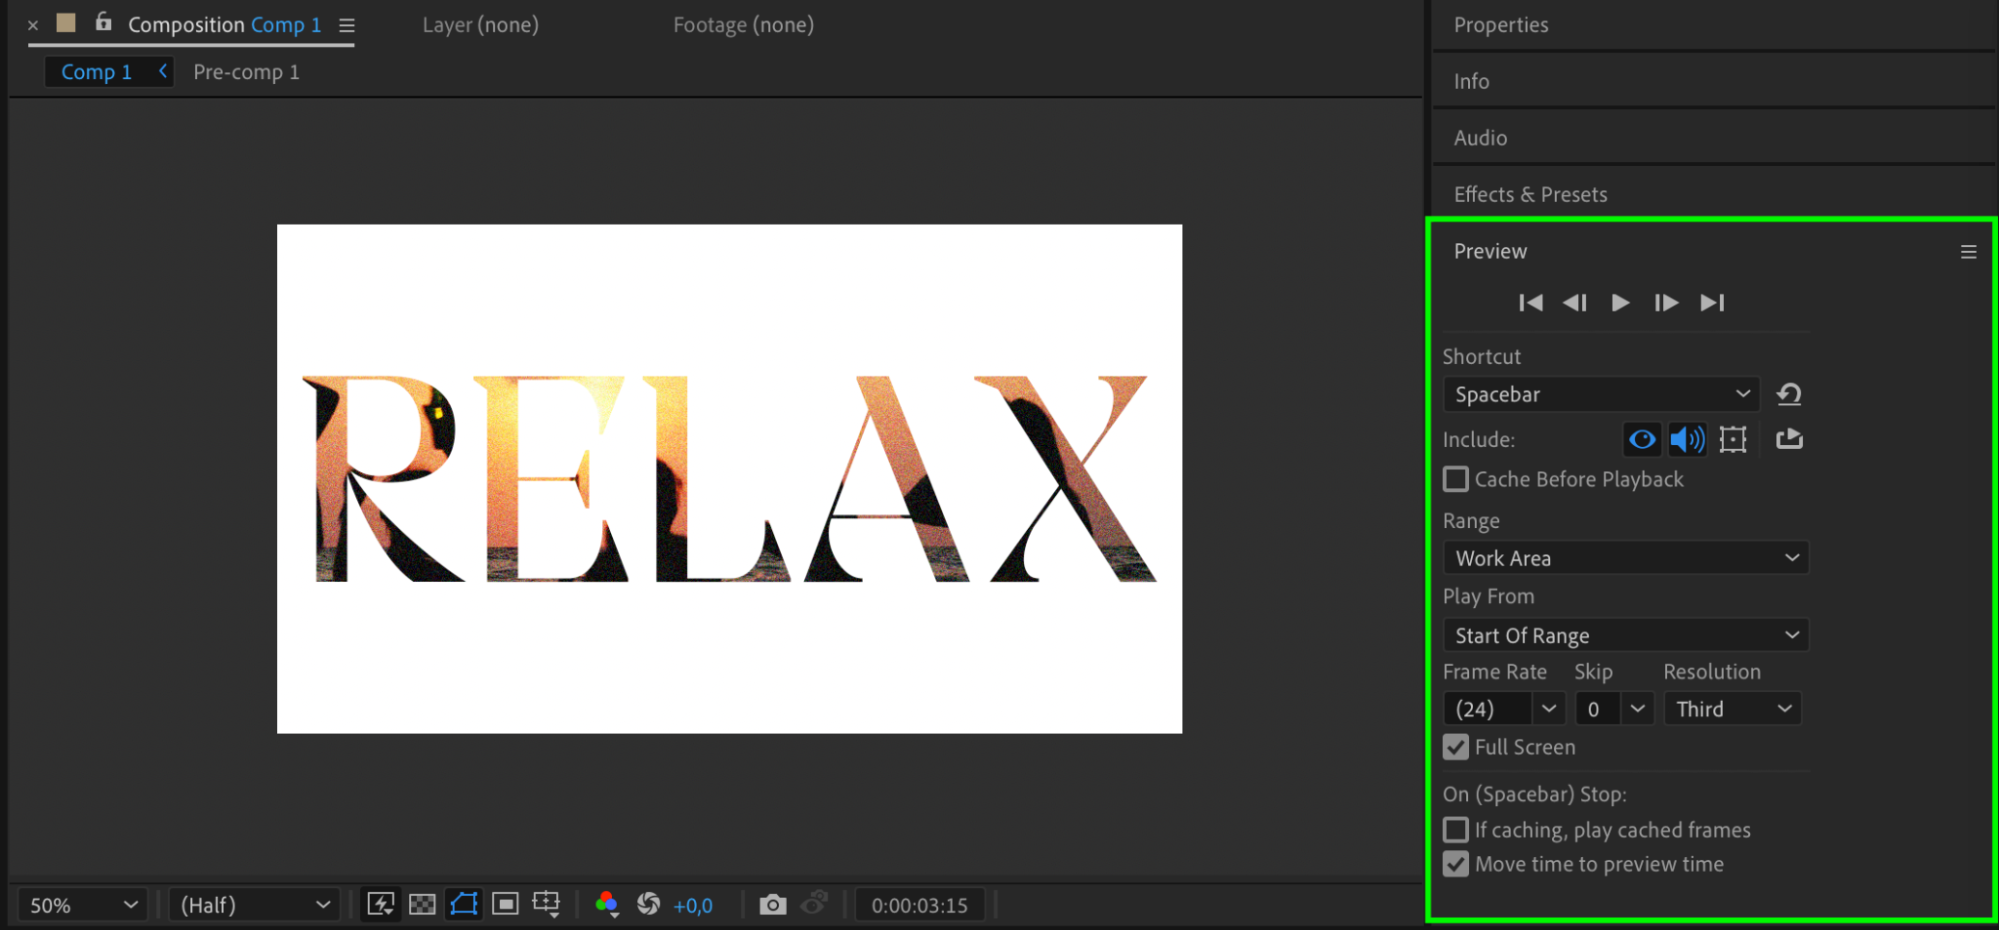 11. Render Your Final Composition
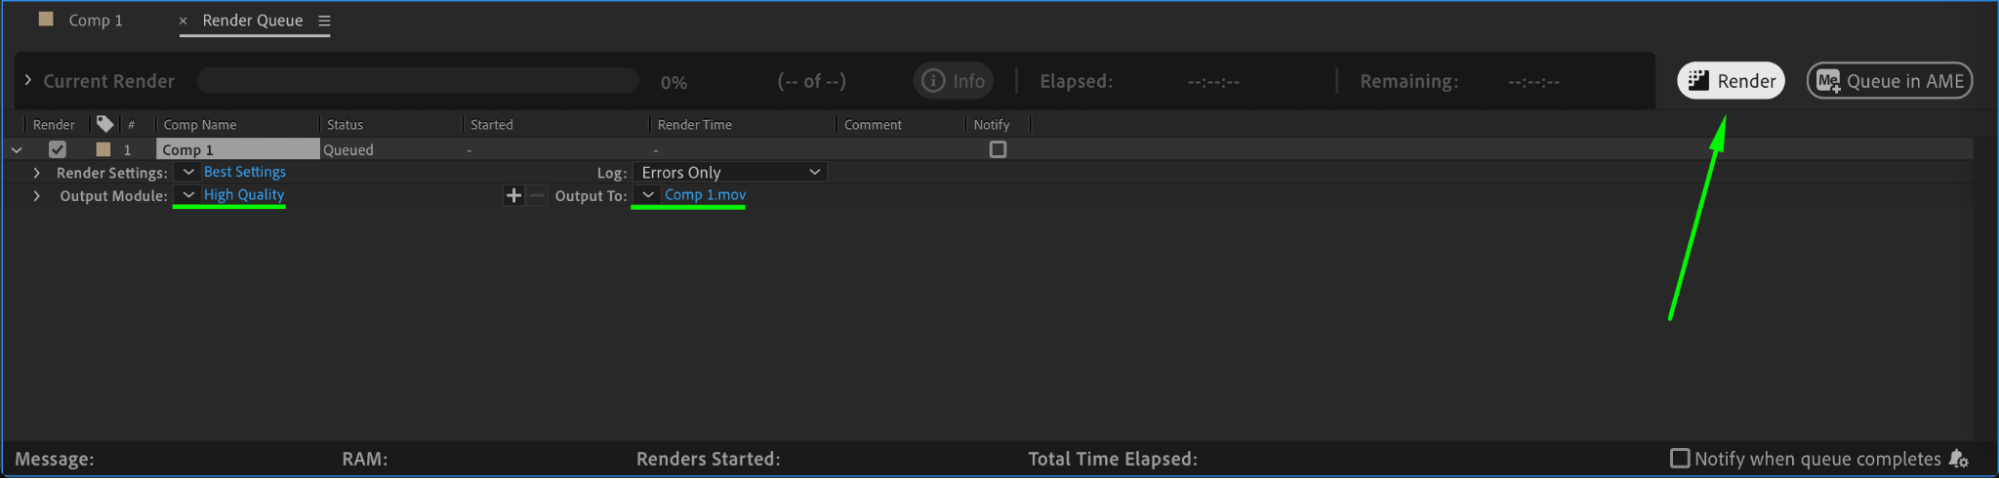
Once you’re satisfied with your edits, it’s time to render your final video. Navigate to Composition > Add to Render Queue. In the Render Queue panel, select your preferred settings, including output format and resolution. For most projects, rendering as an MP4 file using the H.264 format is ideal for online sharing. Alternatively, you can choose the QuickTime format for MOV files if you need higher quality or specific compatibility. After configuring your settings and choosing the destination folder for the export, click Render to start the rendering process and export your composition.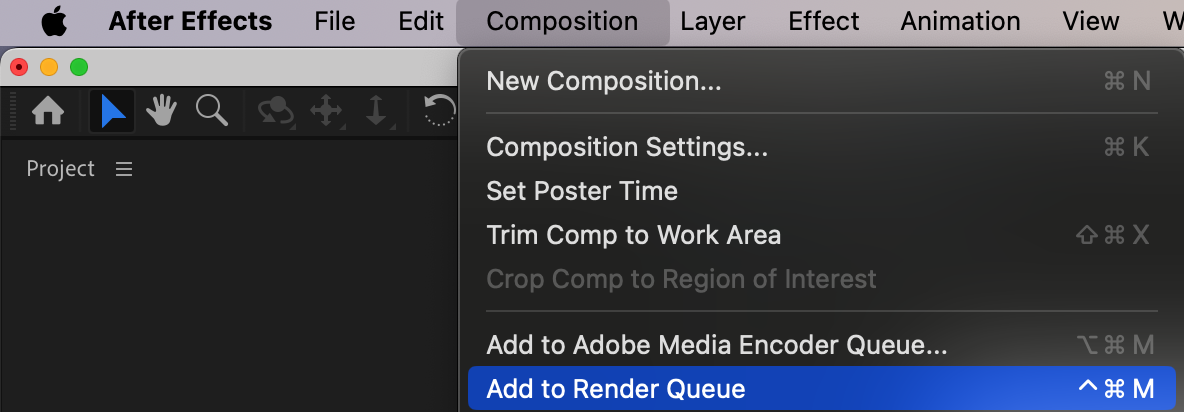
 Conclusion
By mastering these steps, you can greatly improve your editing efficiency and creative control in Adobe After Effects. Don’t be afraid to experiment with new techniques and explore the extensive capabilities of the software. With practice, you’ll be able to craft visually stunning and professional videos that captivate your audience. Let your creativity run wild and continue to learn new tricks to push your edits even further!
Our Bestsellers


