How to Edit Videos in Adobe After Effects: A Step-by-Step Guide
Introduction to Video Editing in After Effects
Editing videos in Adobe After Effects might seem intimidating at first, but with the right approach, you can easily enhance your videos with professional-grade effects and animations. Whether you’re creating a short film, a commercial, or social media content, After Effects offers a wide array of tools to make your videos visually compelling. In this guide, we’ll cover everything from setting up your composition to exporting your final video, ensuring you have the knowledge to edit like a pro.
Get 10% off when you subscribe to our newsletter

Step 1: Setting Up Your Composition
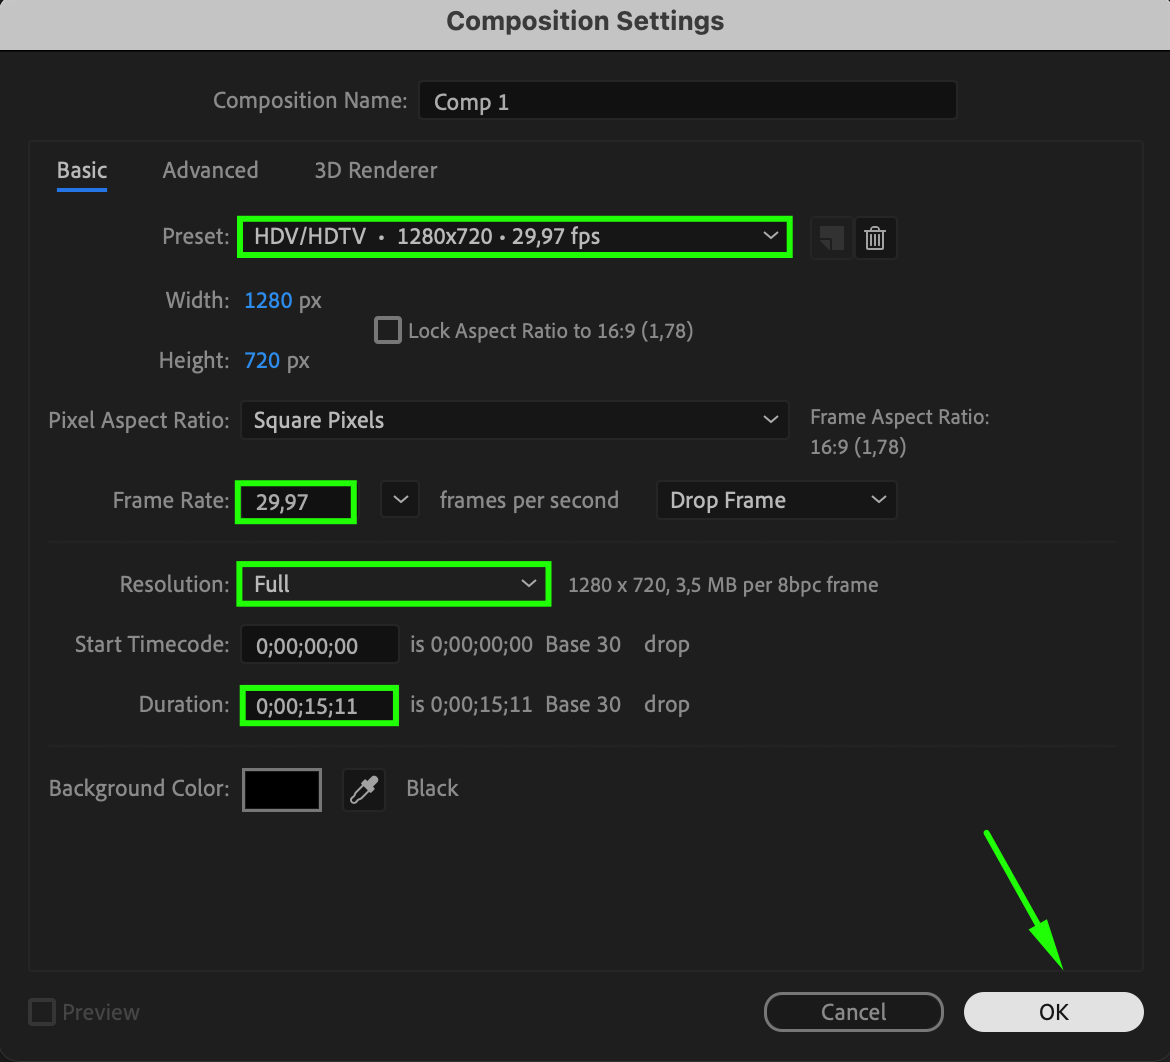
Before you begin editing, you need to set up your composition, which is the canvas for your project. When you open After Effects, start by creating a new composition. Go to Composition > New Composition or press “Ctrl/Cmd + N”. Customize the composition settings according to your project’s requirements, such as resolution, frame rate, and duration.
 Step 2: Importing Your Footage
Get 10% off when you subscribe to our newsletter

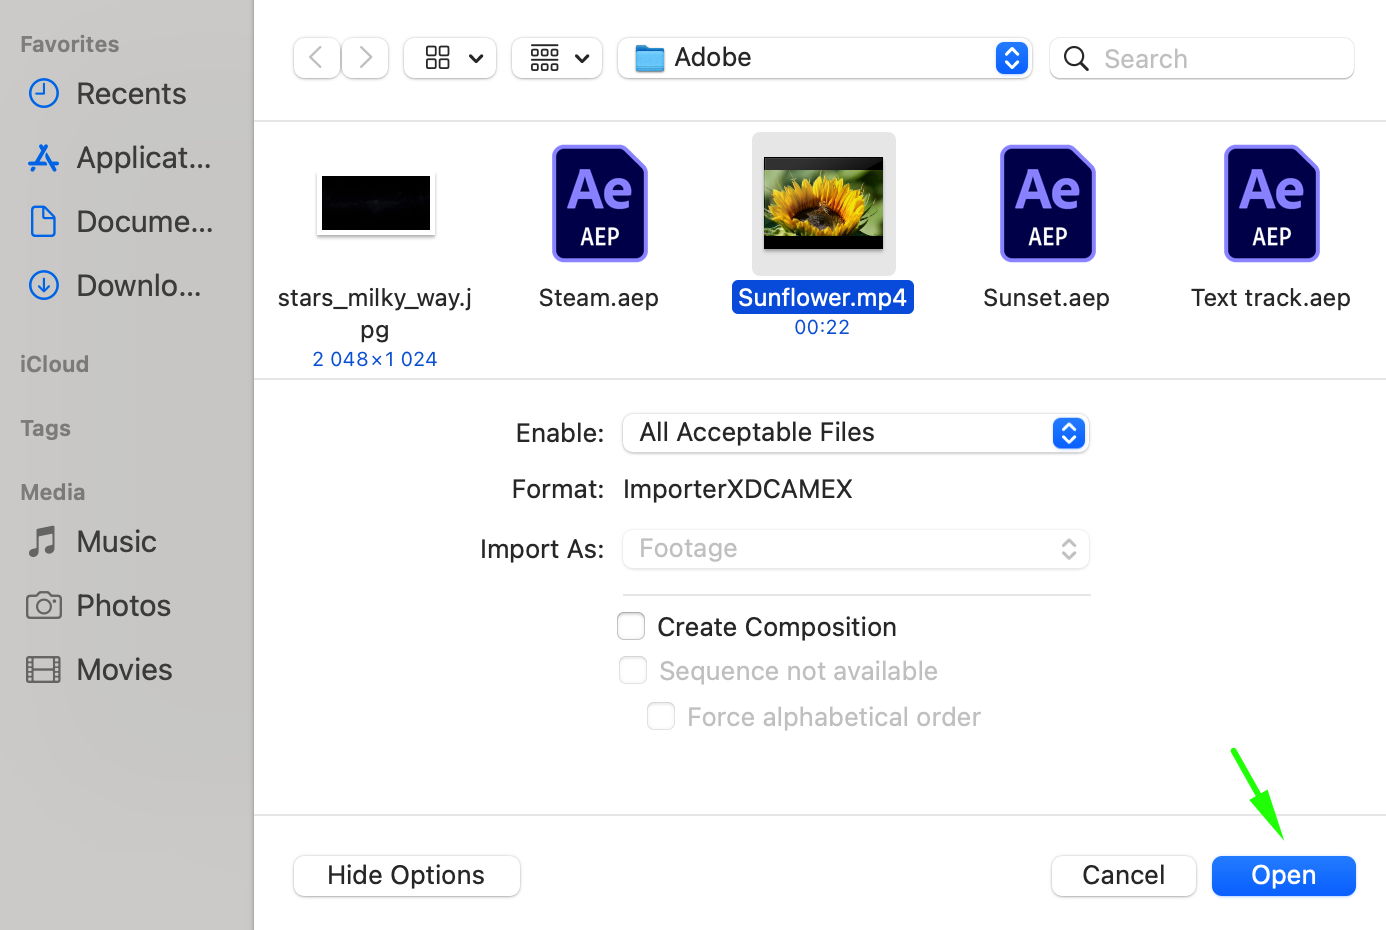
Once your composition is ready, it’s time to bring in your media files. After Effects supports various video and image formats, allowing you to work with different types of content. To import your footage, go to File > Import > File and select the files from your computer. Your imported files will appear in the Project Panel, where you can organize and access them easily.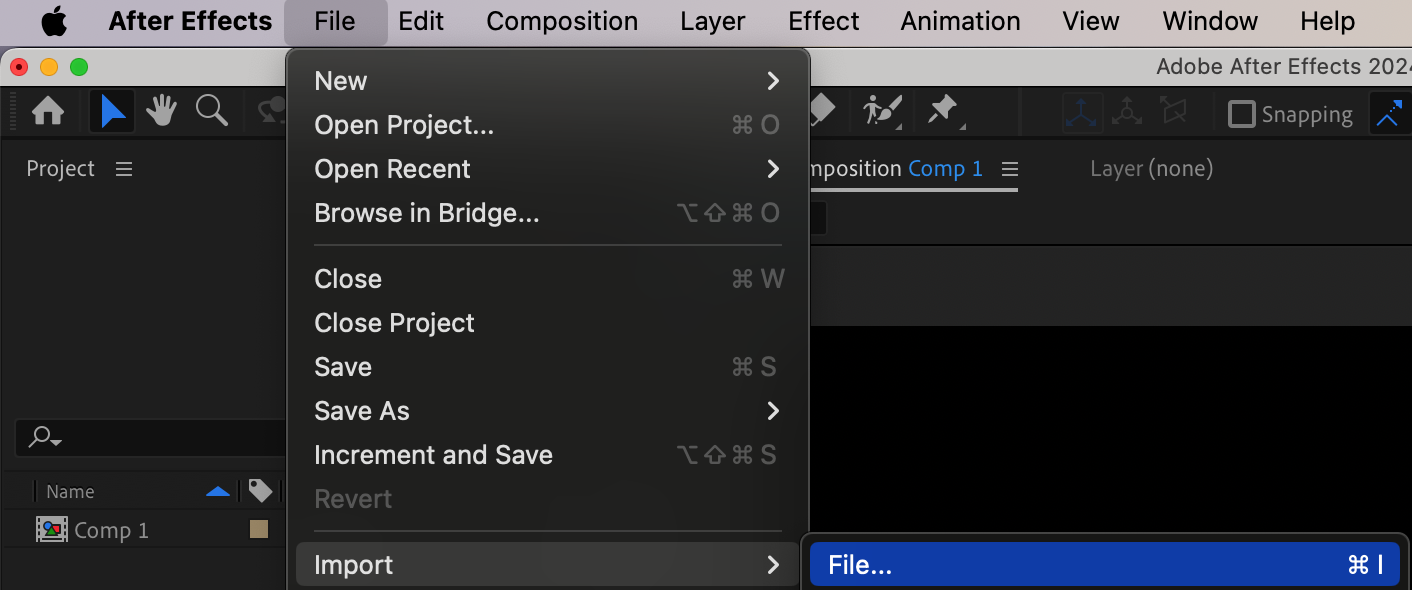
 Step 3: Add Footage to the Timeline
Now that your files are imported, drag them from the Project panel onto the Timeline panel. This is where you’ll assemble and edit your video. The Timeline panel allows you to layer different media, making it easy to manage multiple clips and effects. Arrange your footage in the desired sequence, and you’ll be ready to start editing.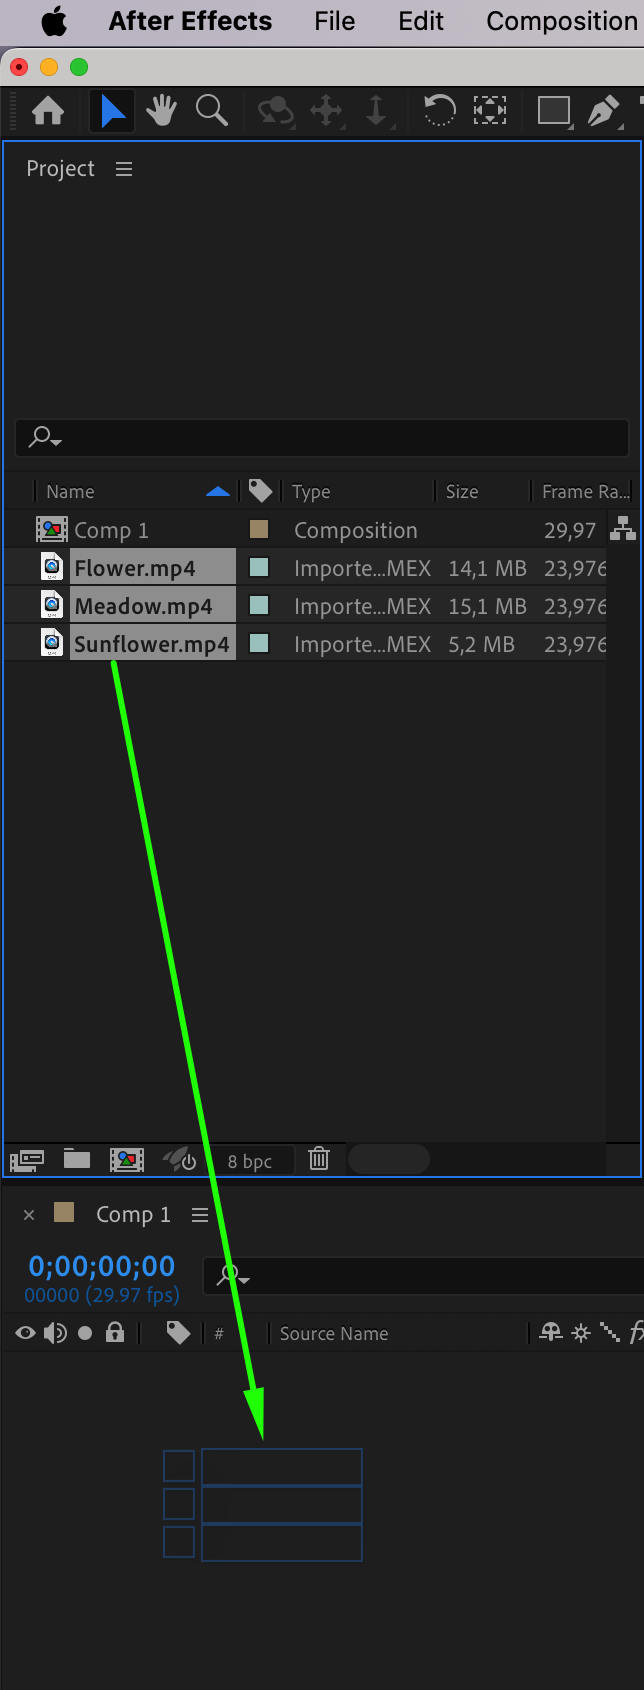 Step 4: Basic Editing Techniques
Get 10% off when you subscribe to our newsletter

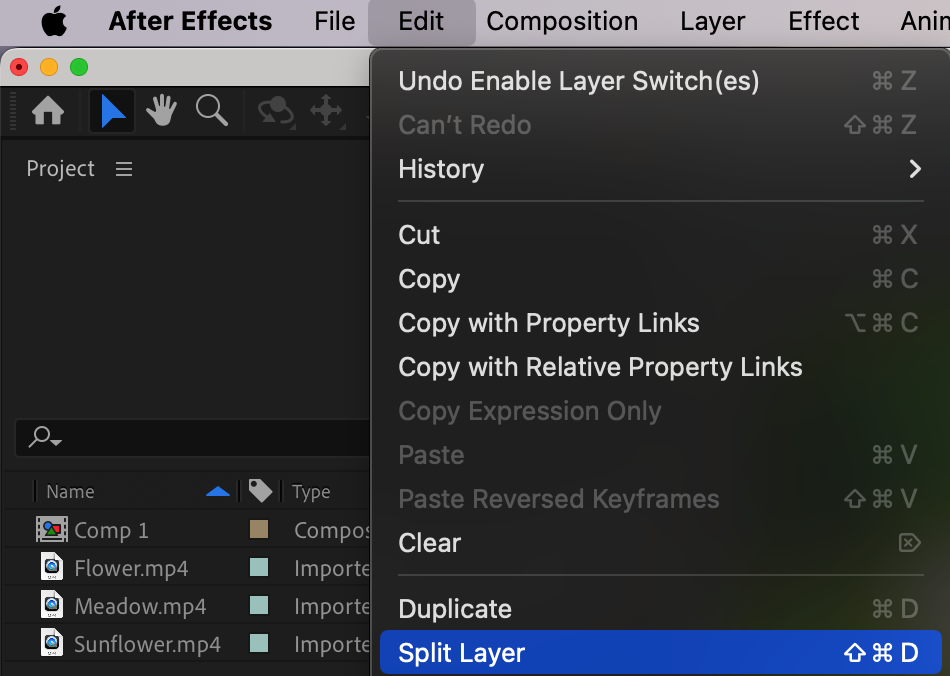
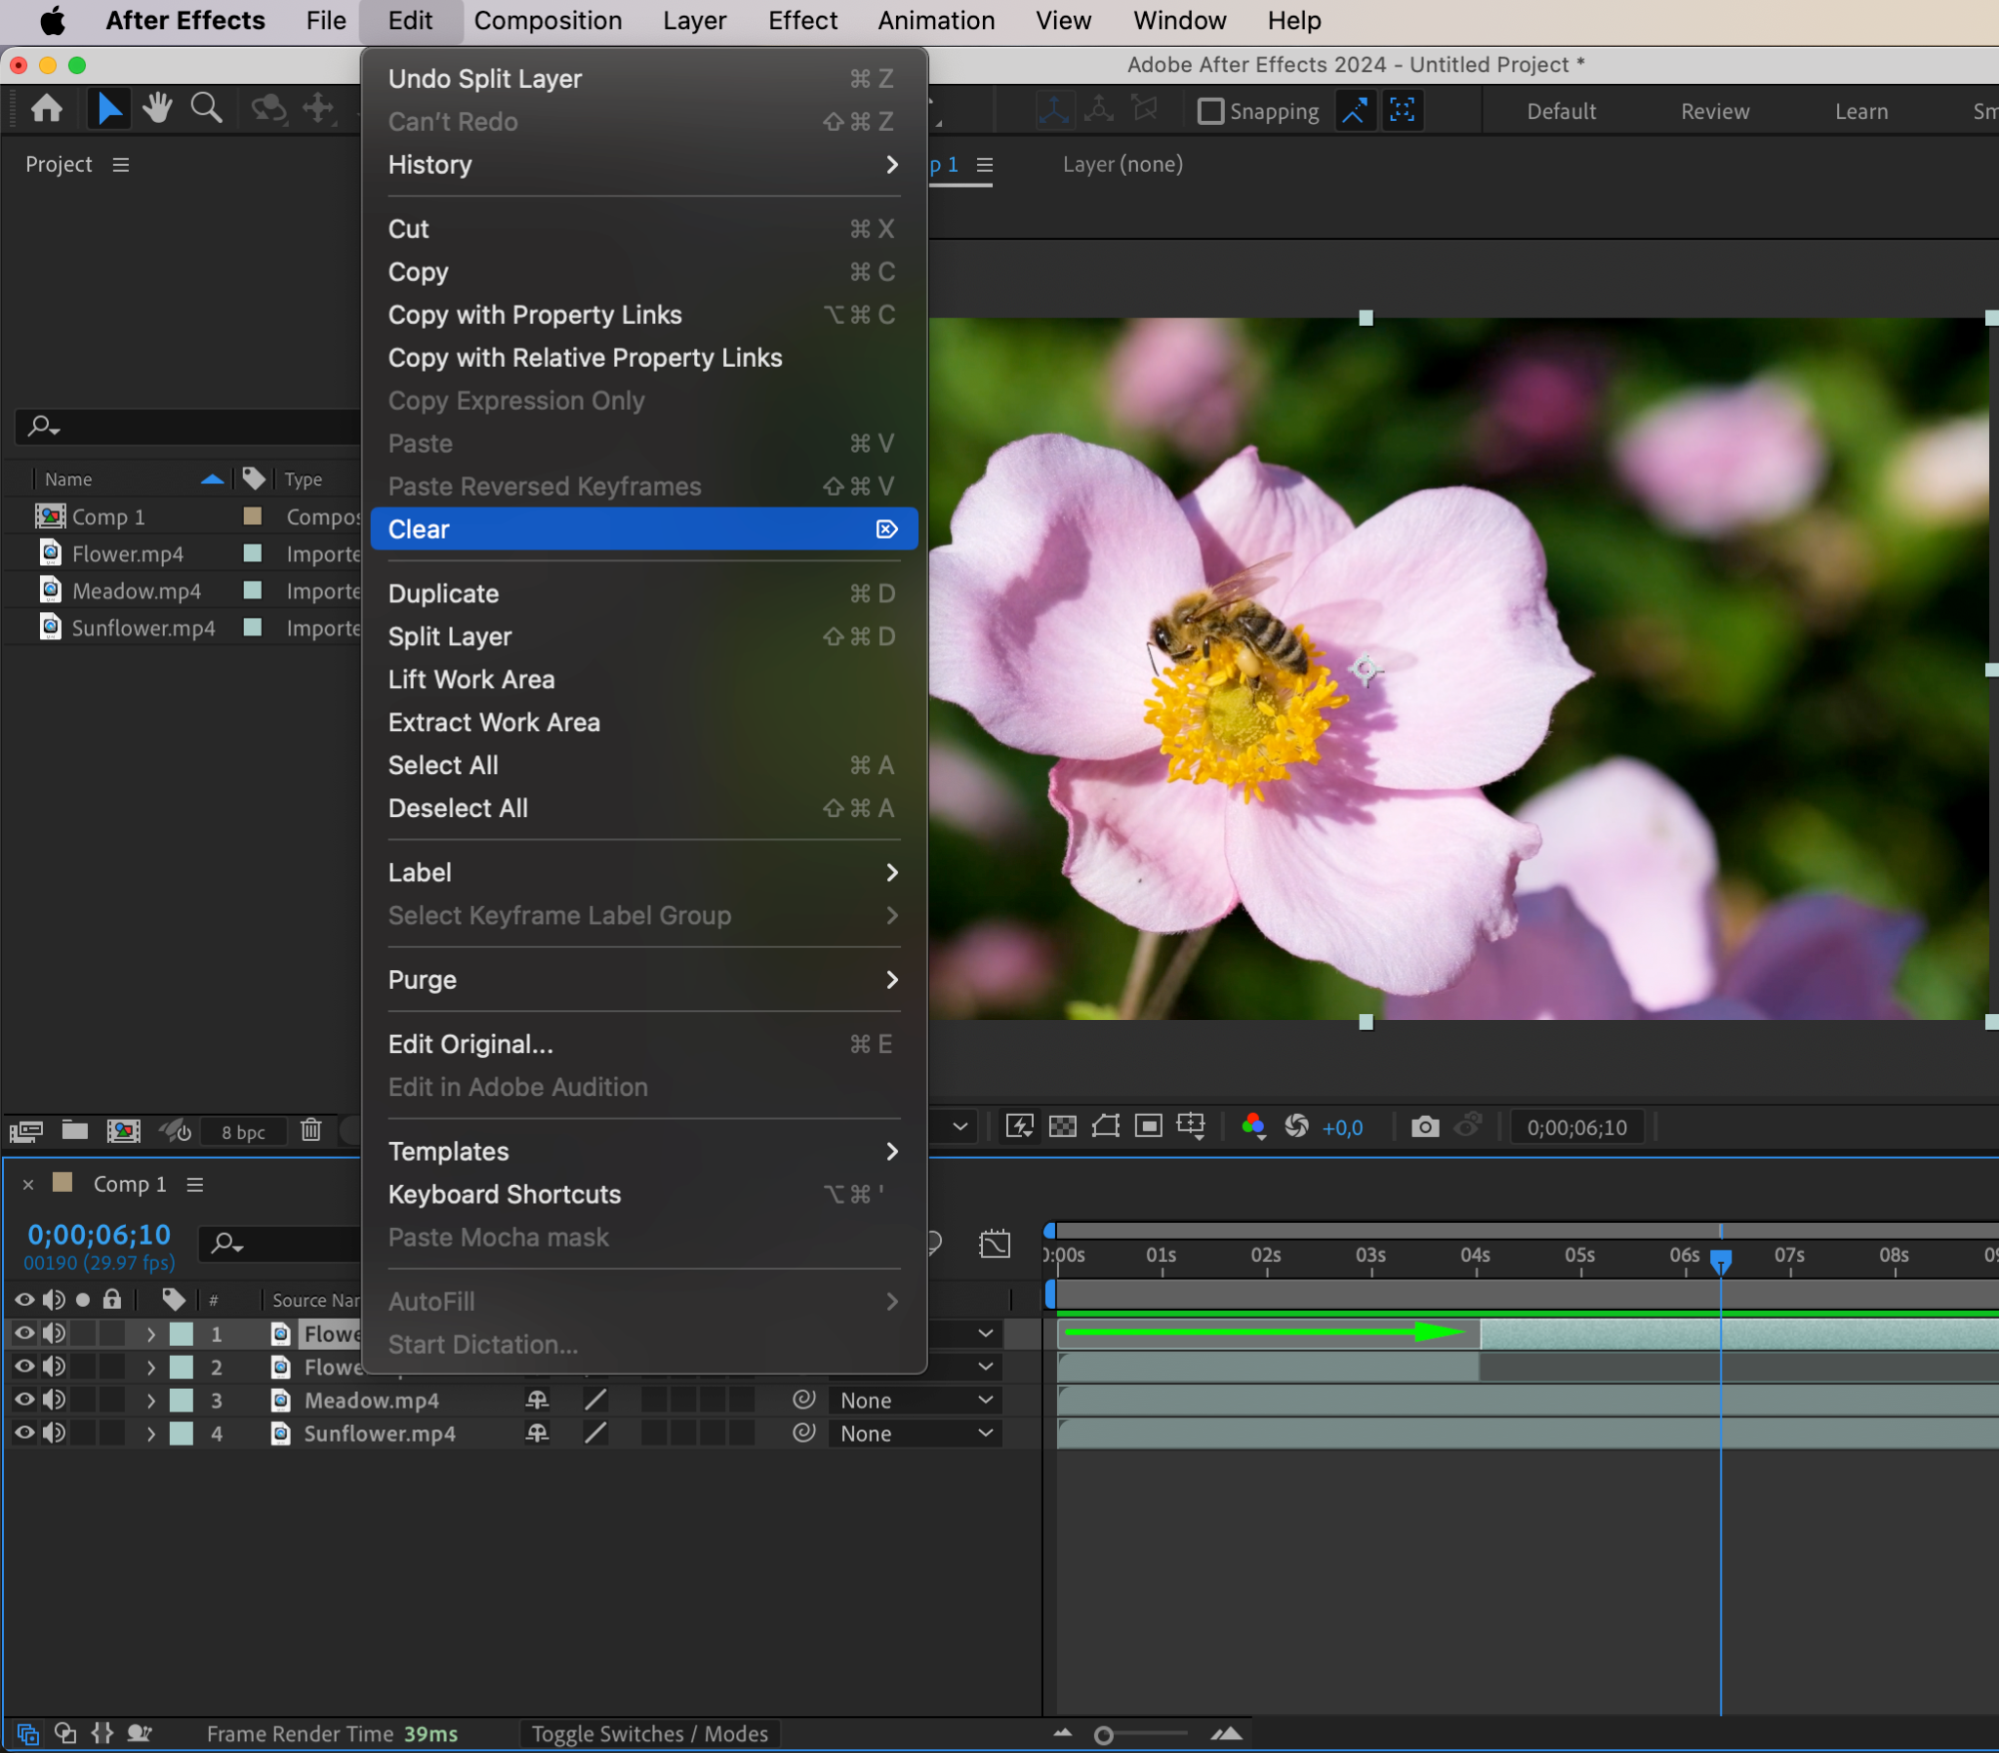
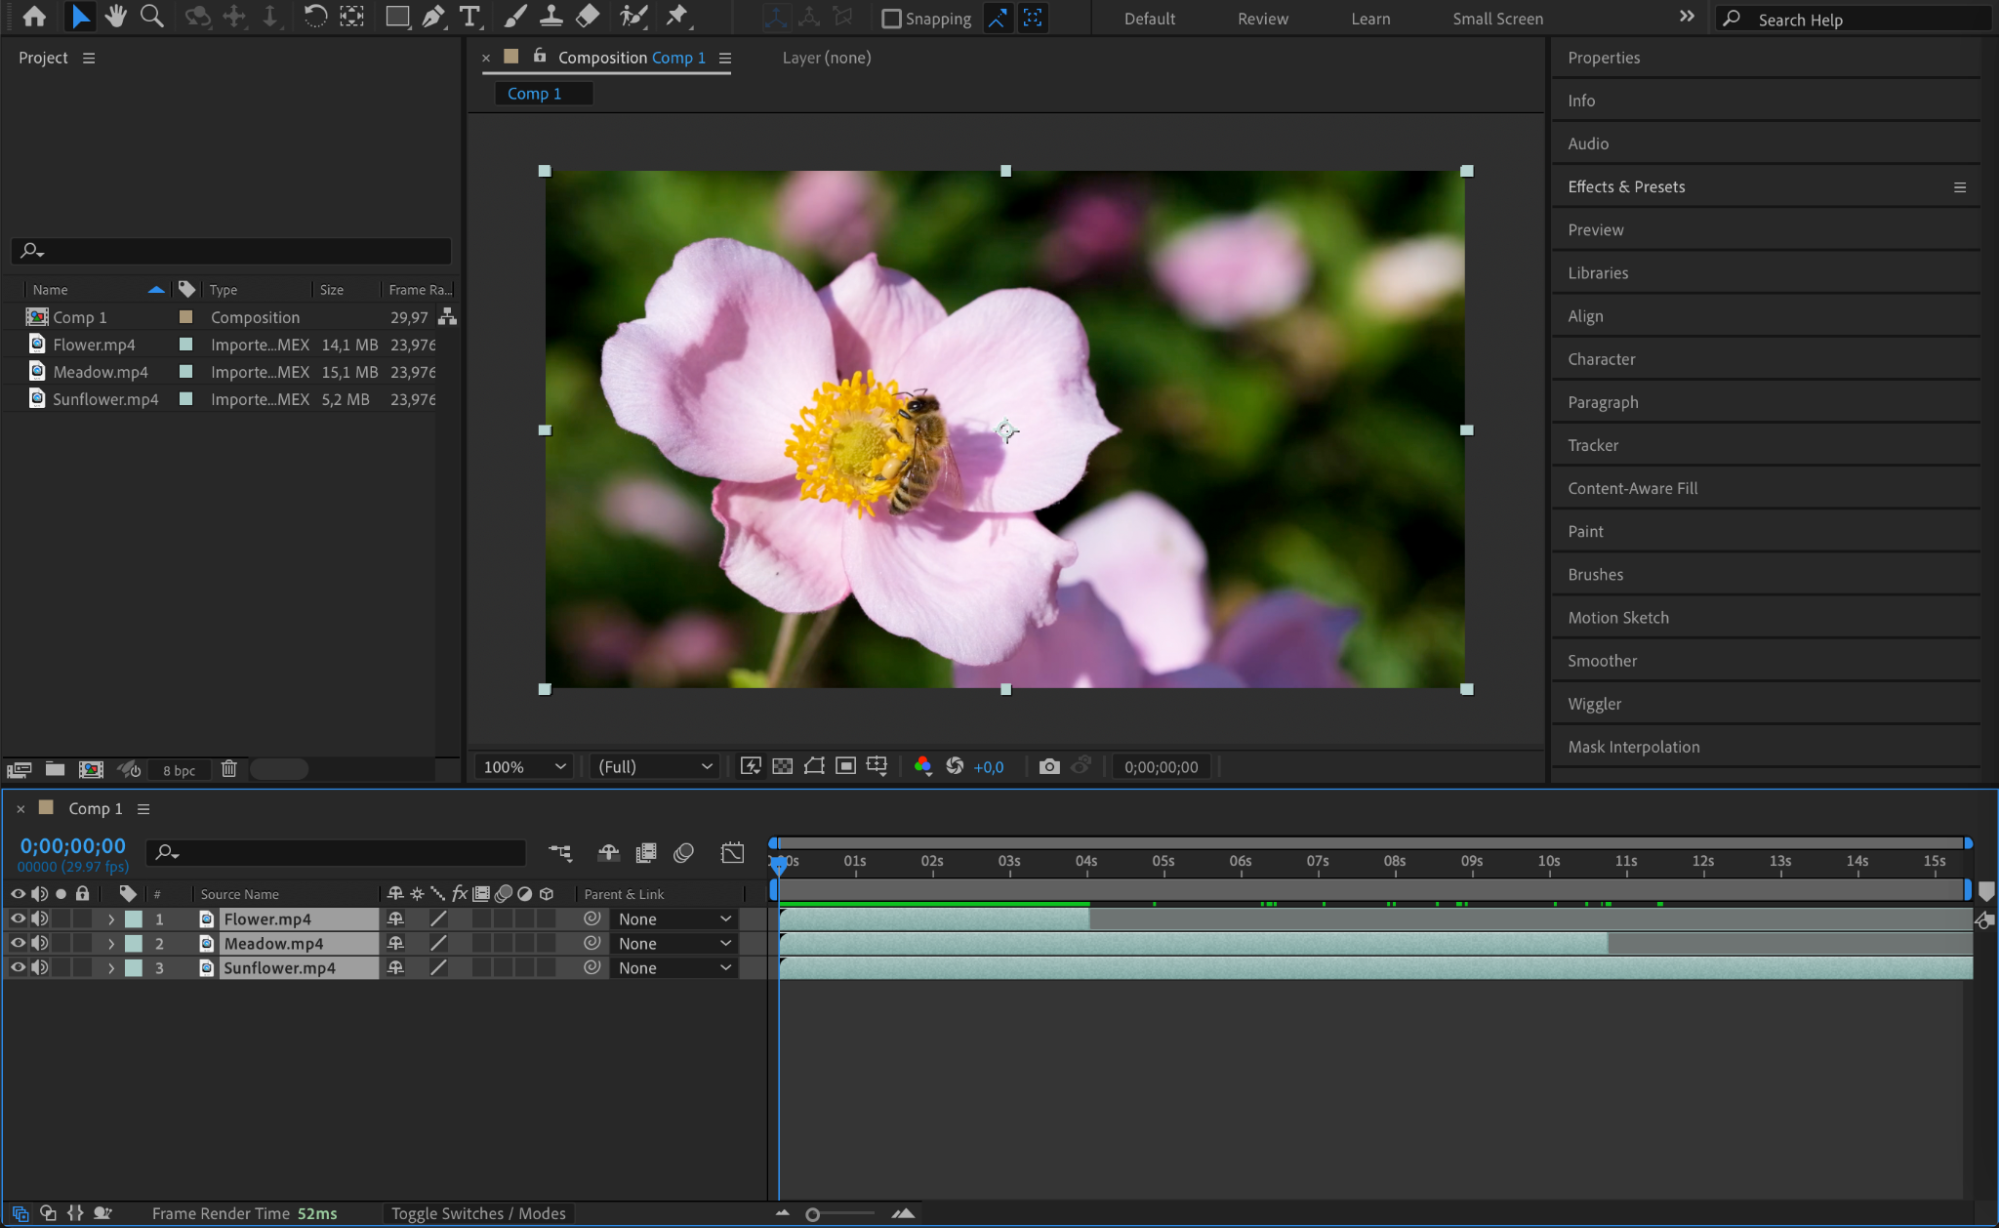
With your clips in place on the timeline, you can begin editing. After Effects offers a variety of tools to help you trim, cut, and rearrange your clips. To split a clip at a specific point, place the Current Time Indicator (CTI) at the desired location and press “Ctrl/Cmd + Shift + D”. This will divide your clip into two separate layers. You can move and adjust the timing of your clips using the Selection Tool, and delete any unnecessary portions with the “Delete” key. These basic techniques will help you create a seamless and dynamic video sequence.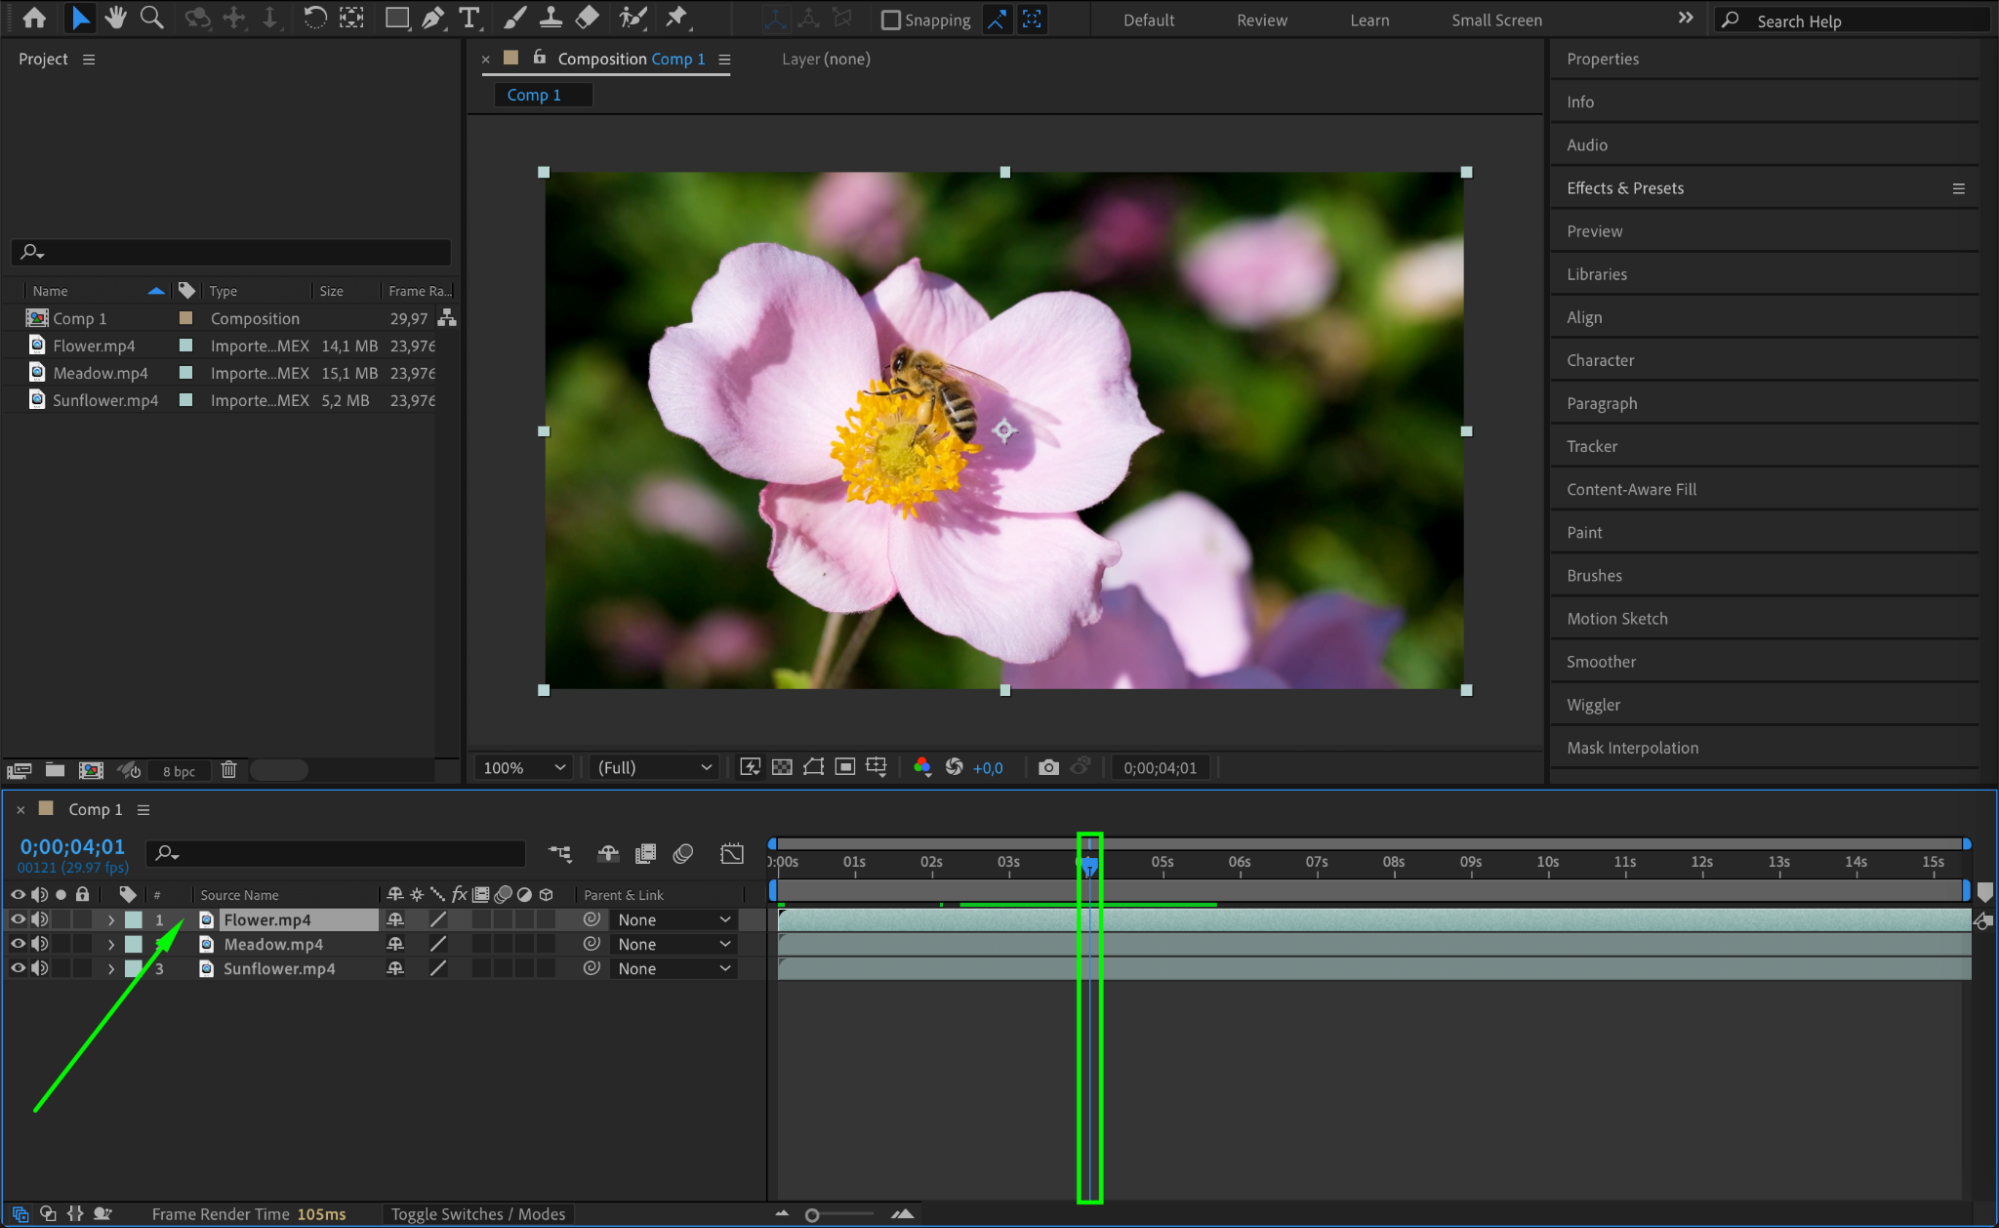
 Step 5: Applying Effects and Presets
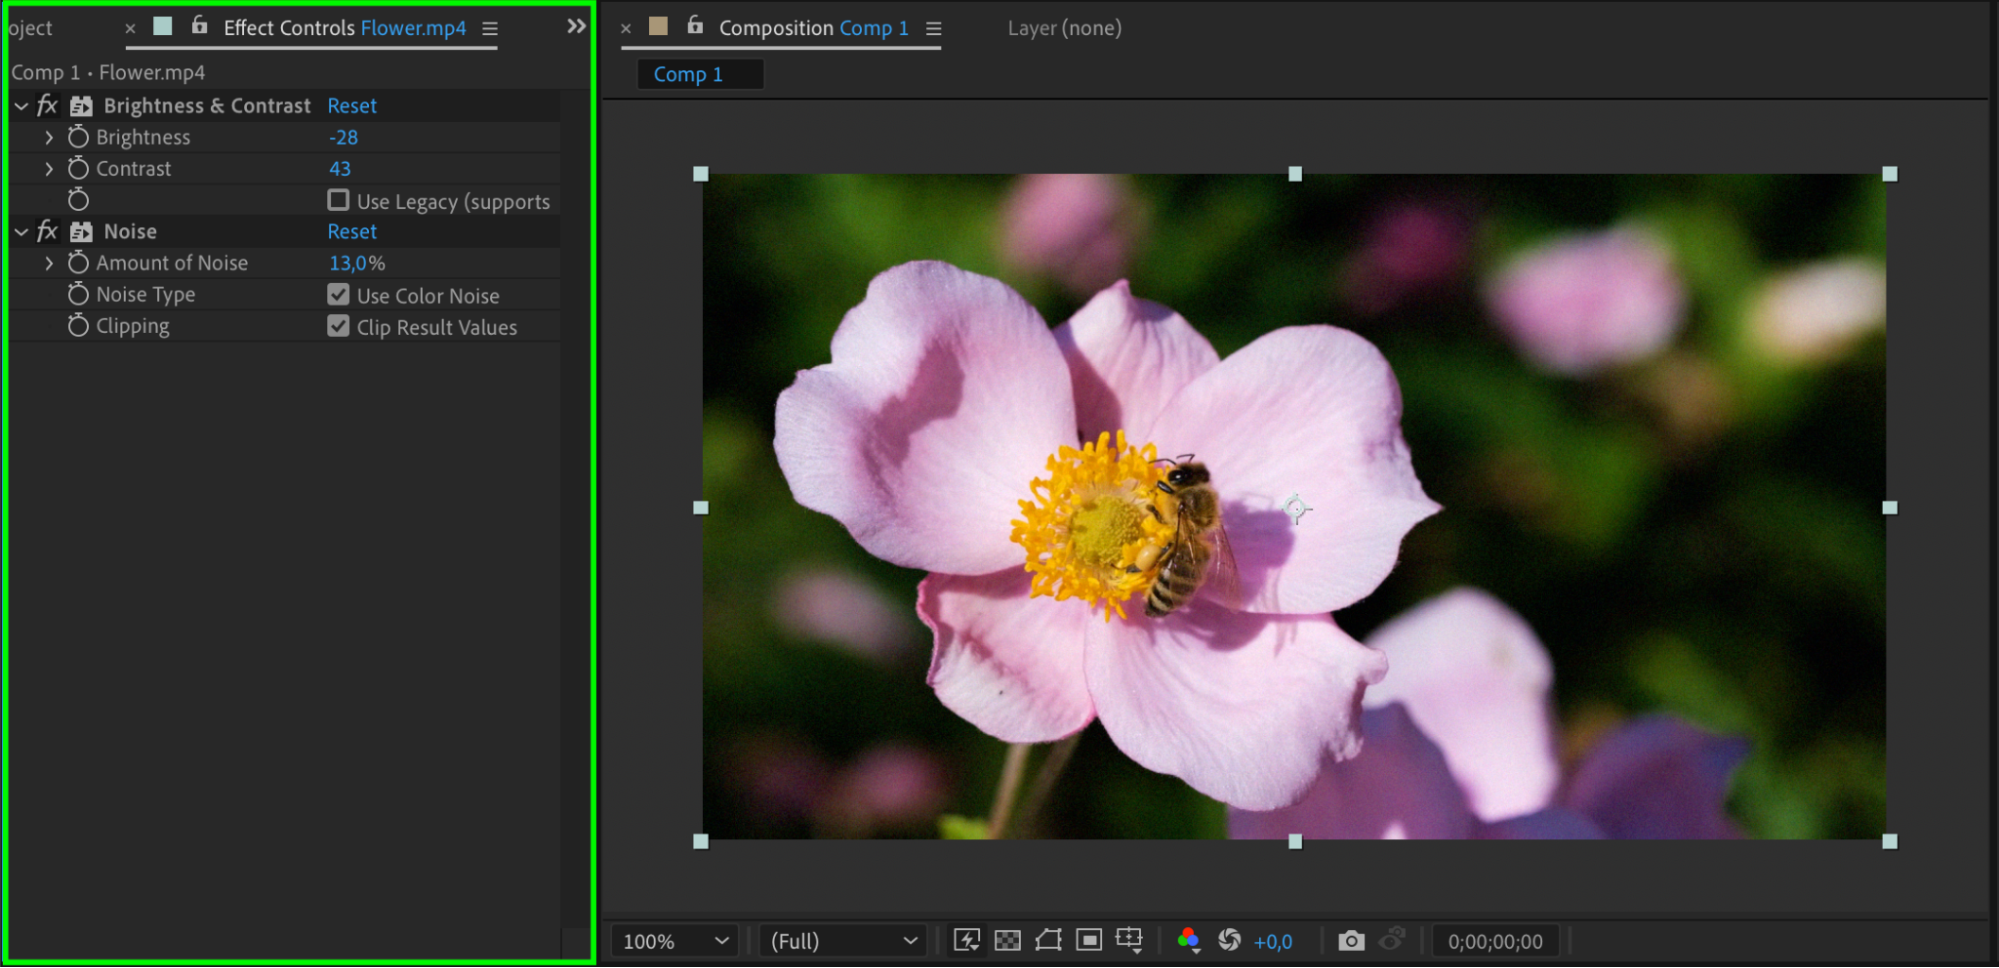
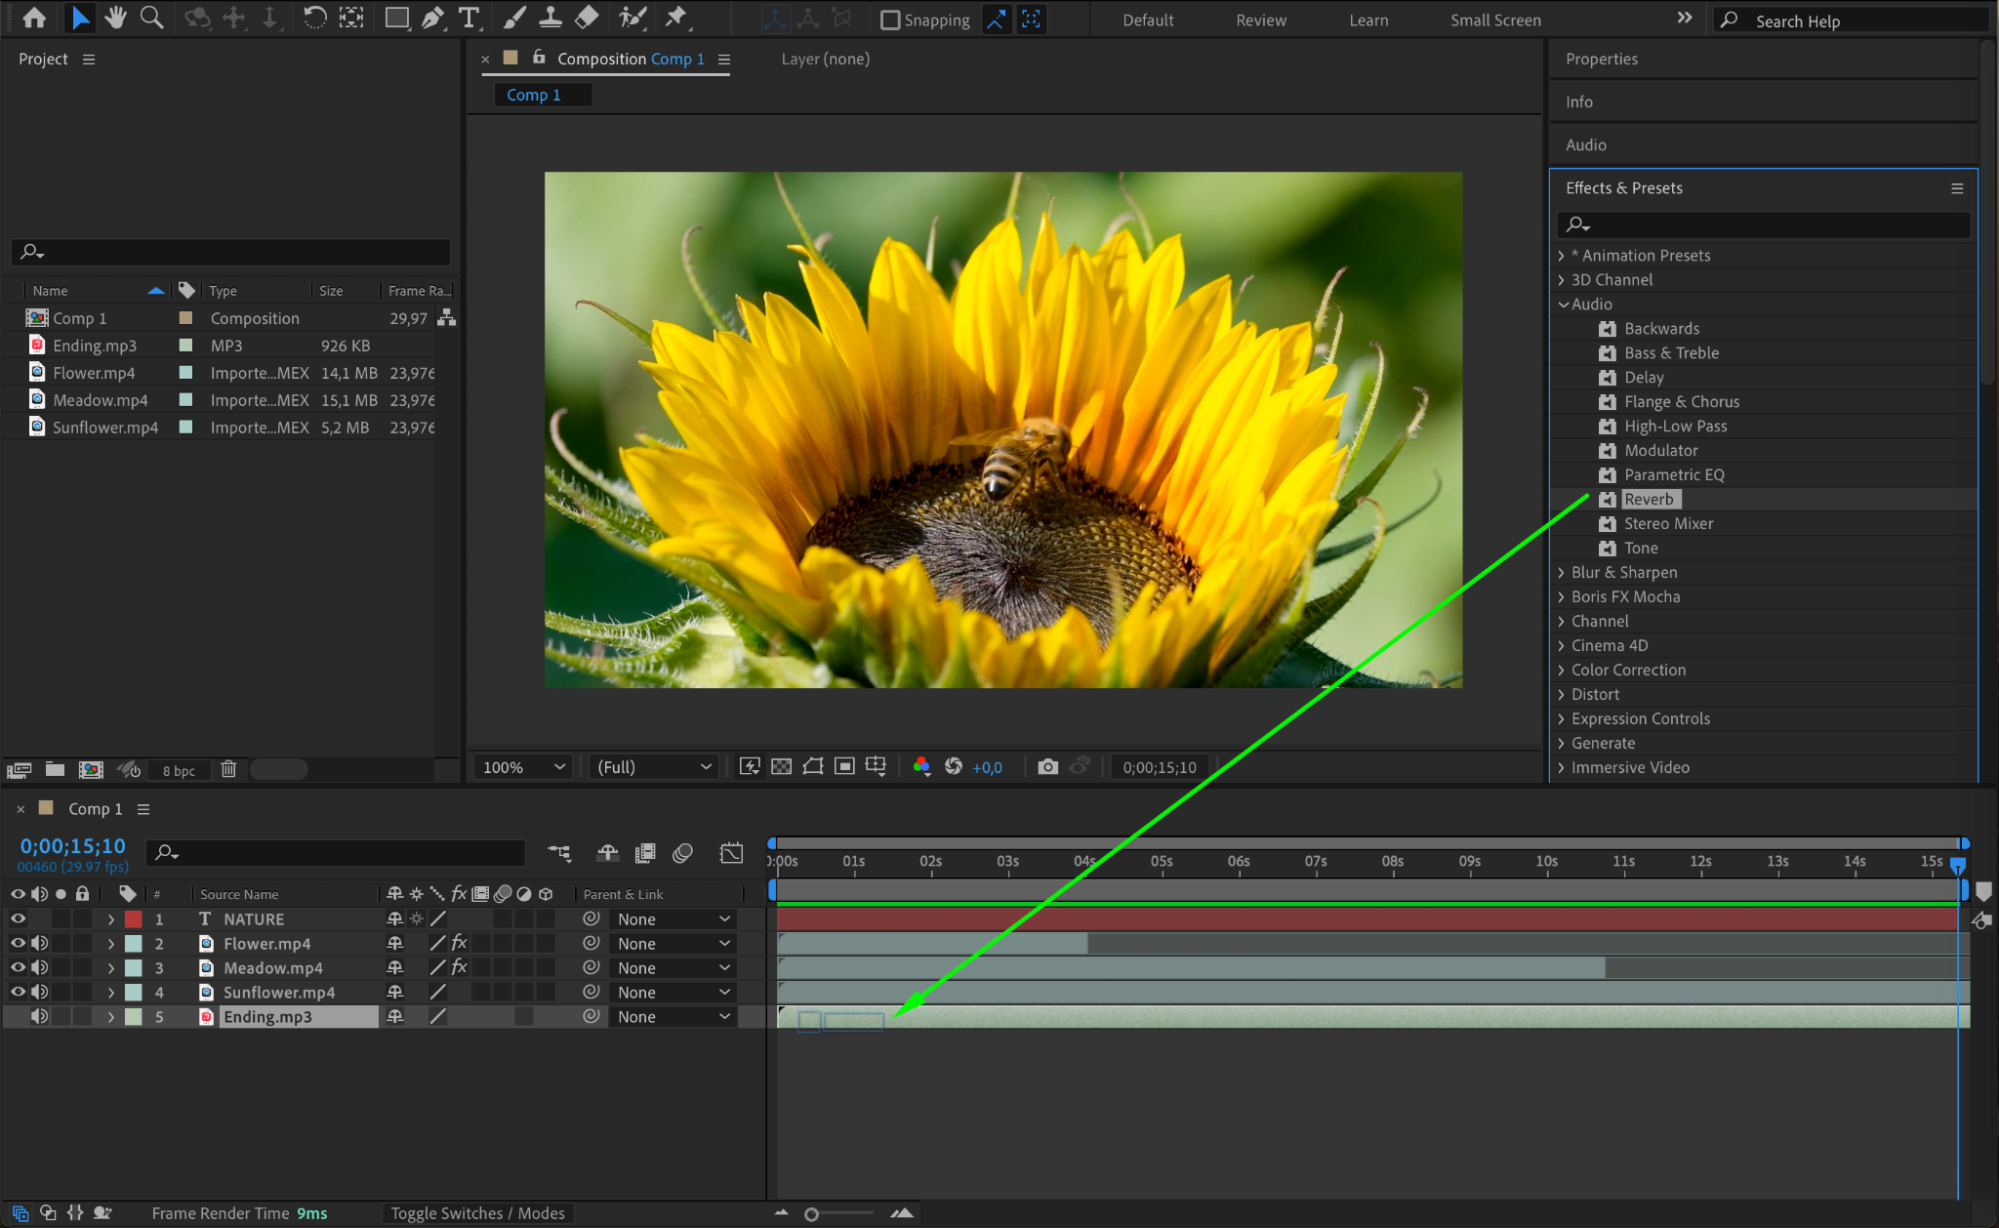
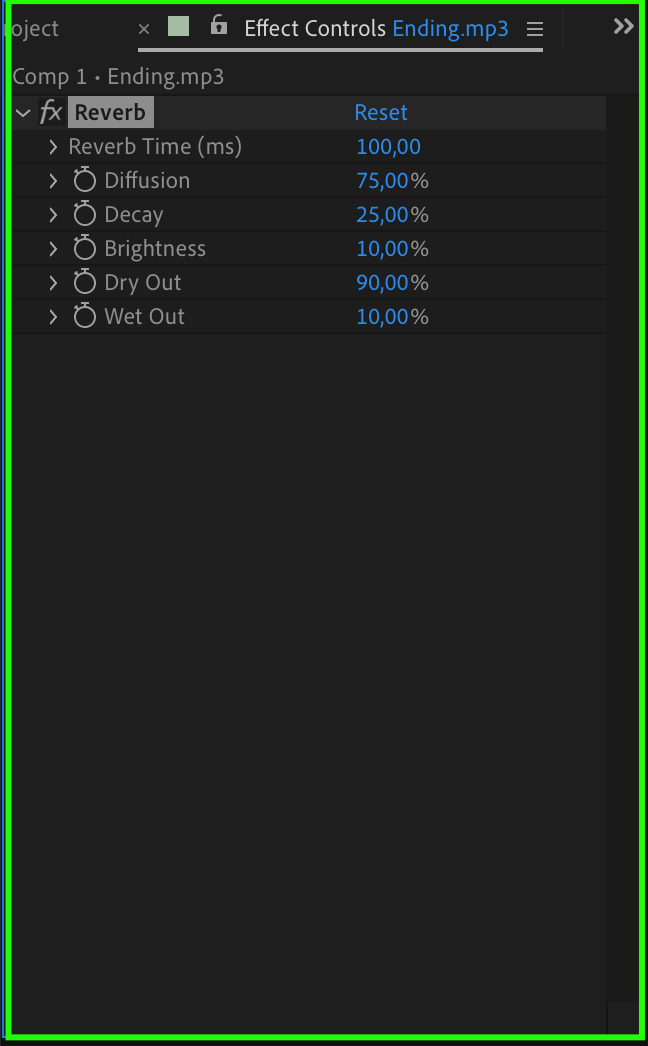
One of the strengths of After Effects is its extensive library of effects and presets. Whether you’re looking to color correct your footage, add visual effects, or create text animations, you can do it all in After Effects. To apply an effect, select the layer you want to modify, go to the “Effects & Presets” panel, and drag your chosen effect onto the layer. You can then fine-tune the effect settings in the “Effect Controls” panel to achieve the desired look.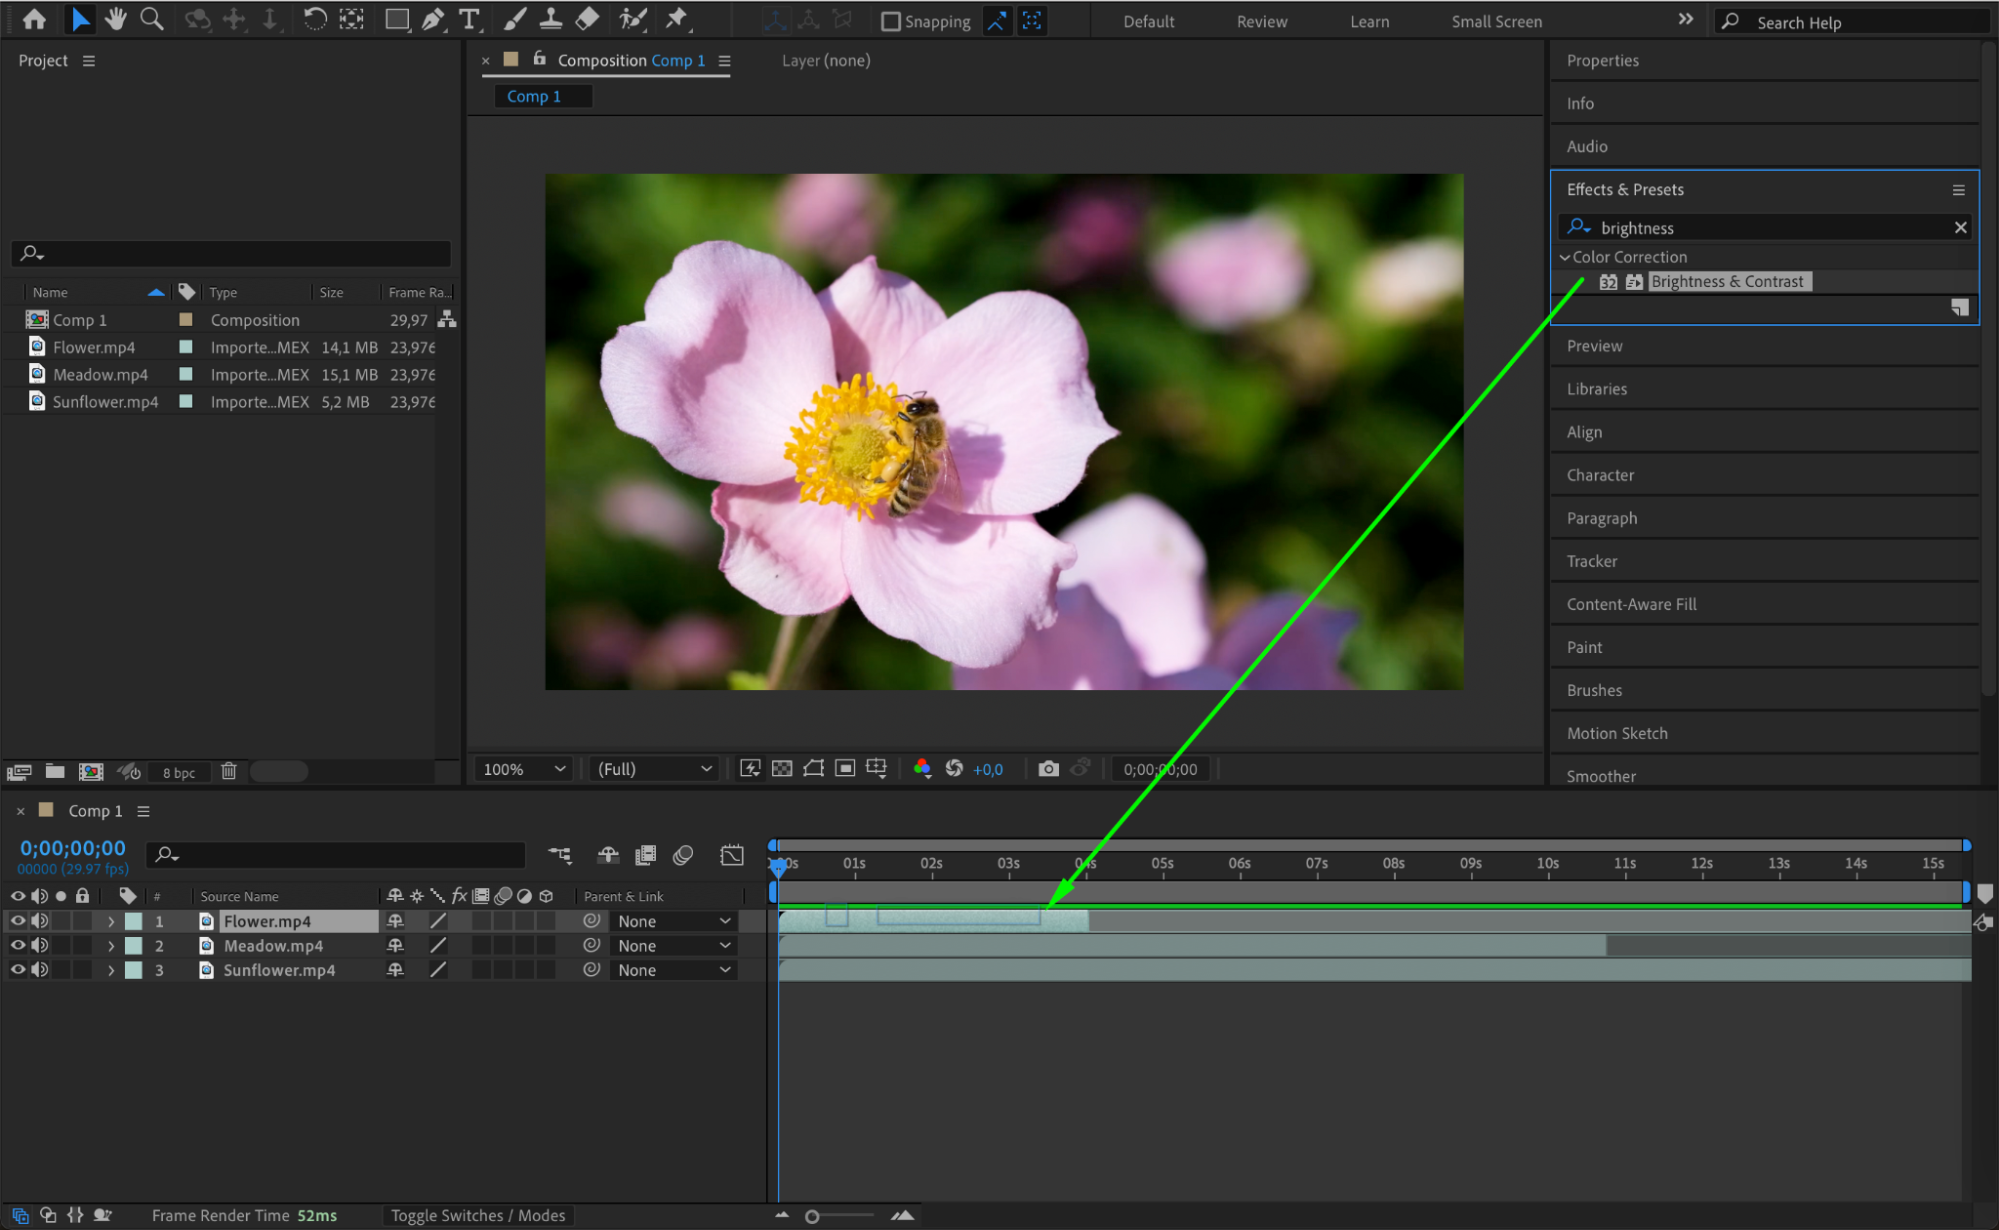
 Step 6: Working with Keyframes for Animation
Get 10% off when you subscribe to our newsletter

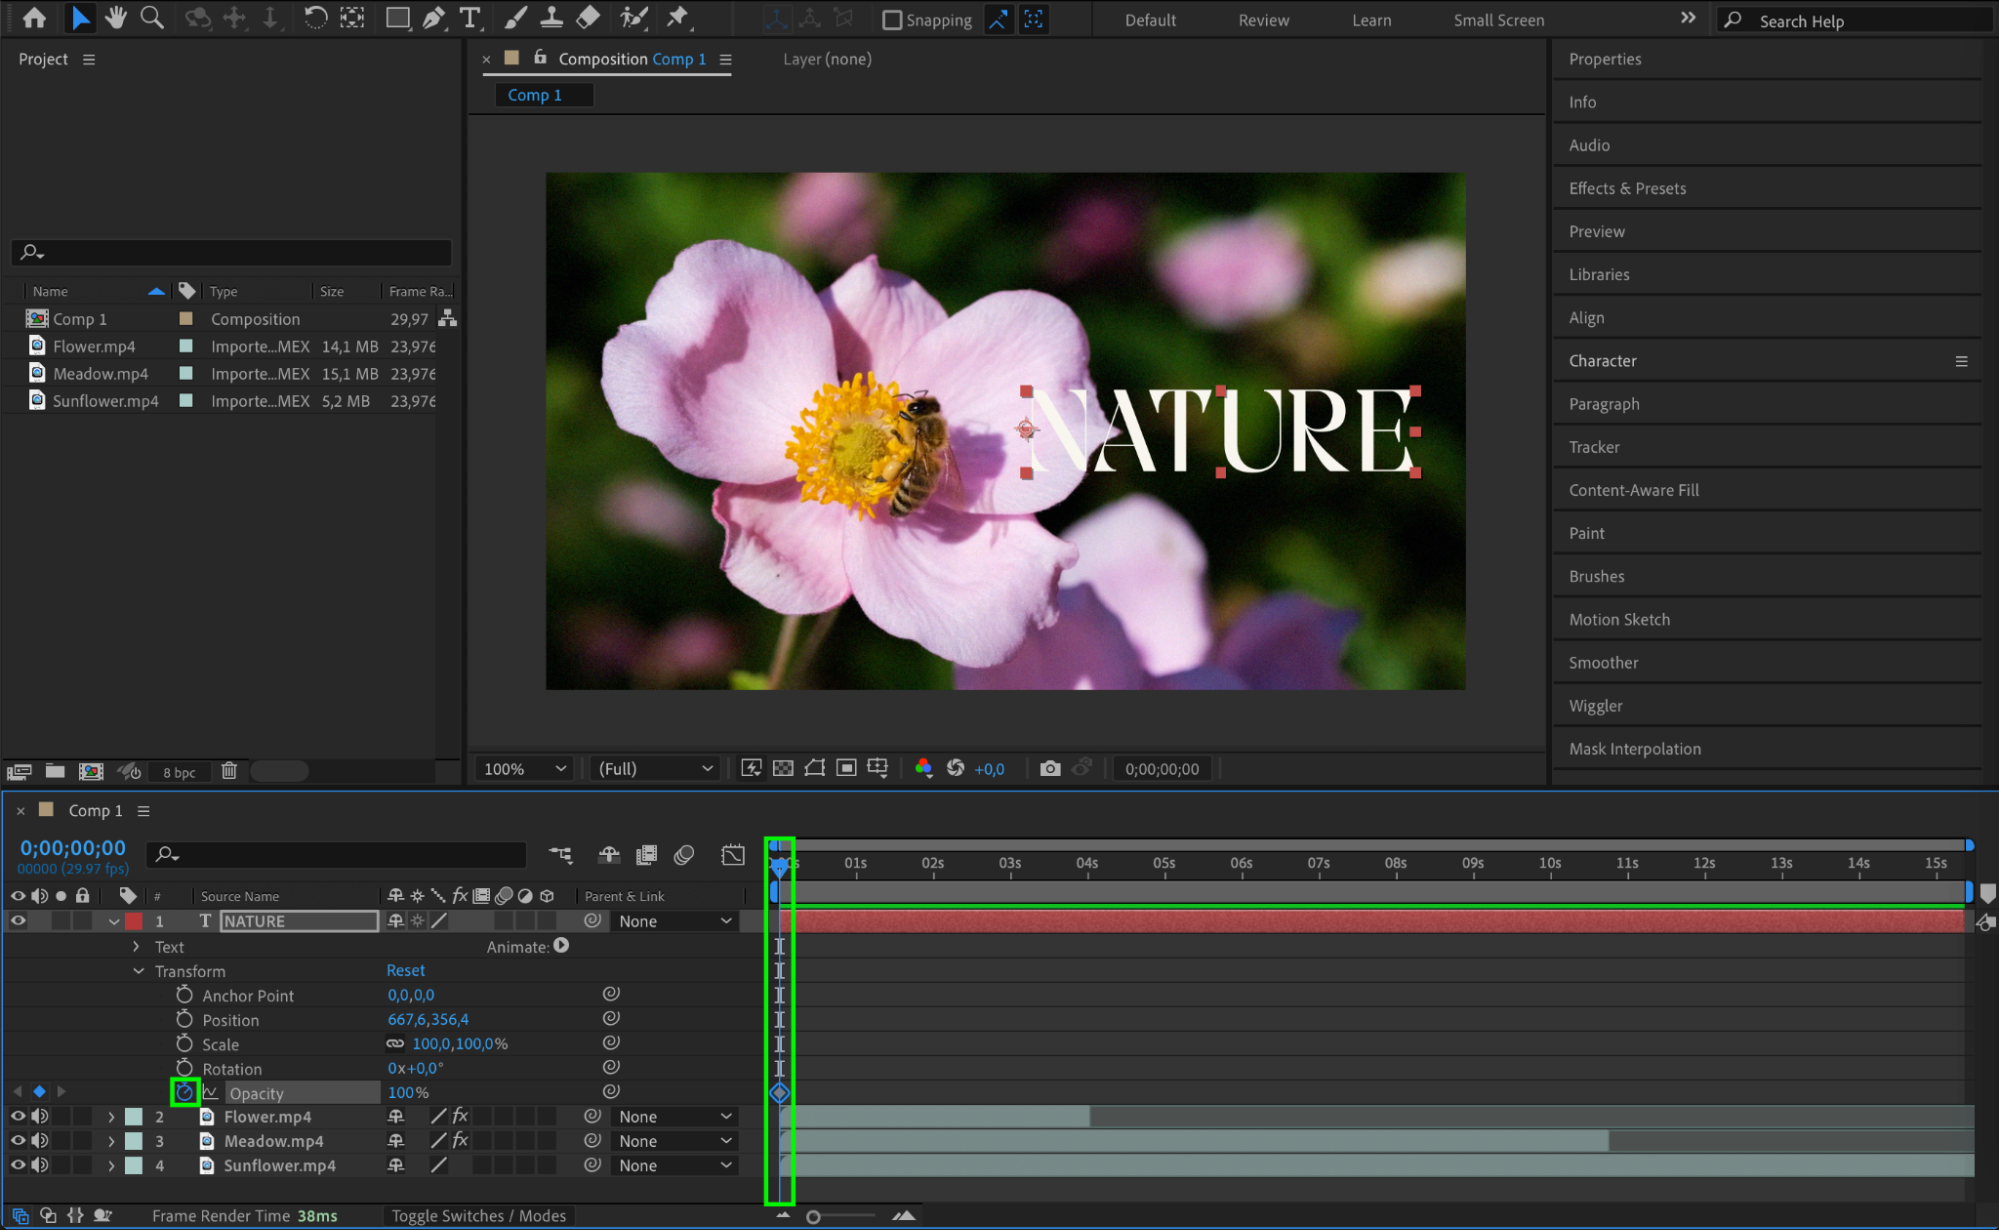
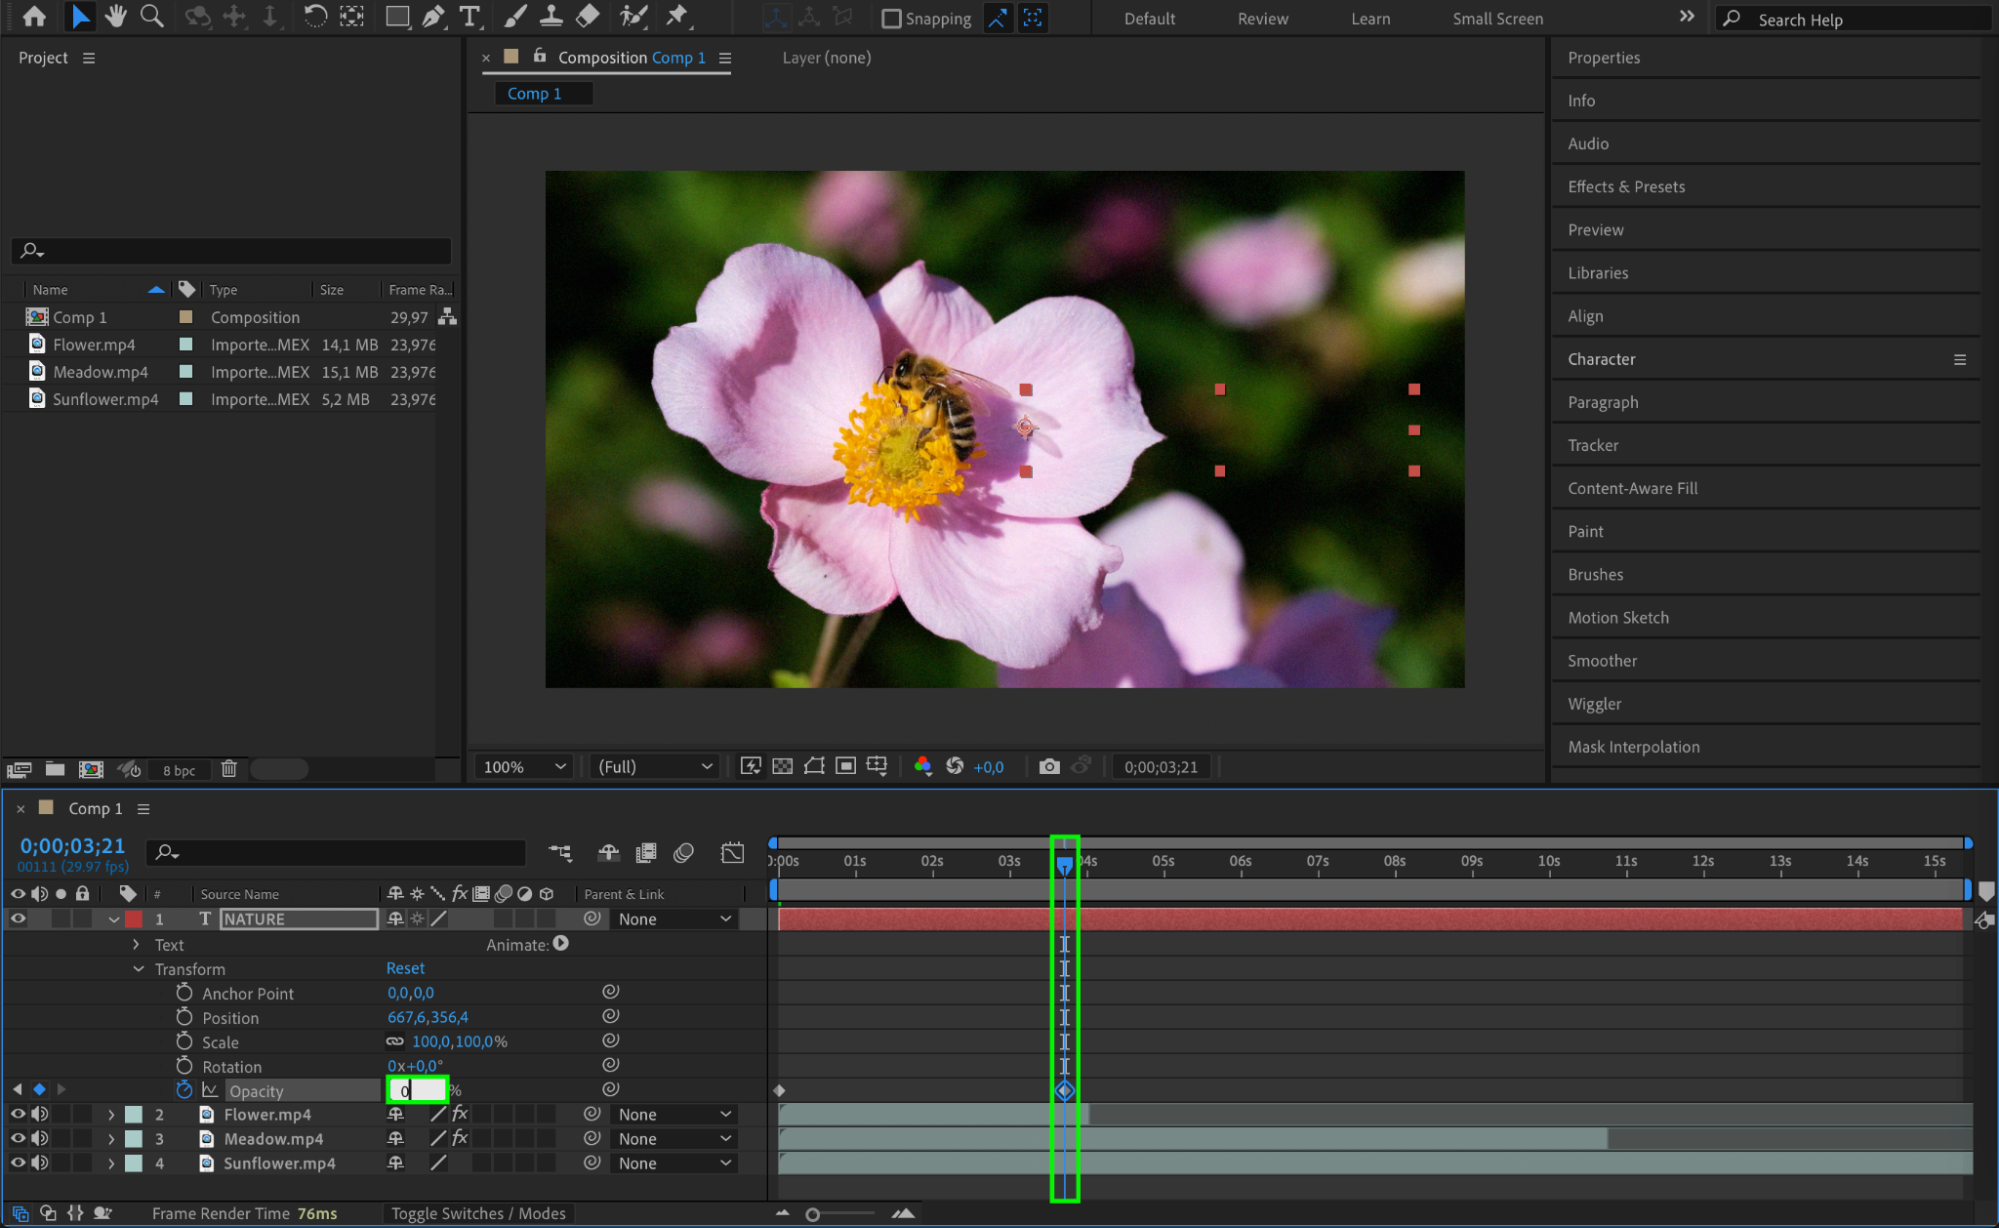
Keyframes are essential for creating animations and dynamic transitions in After Effects. By setting keyframes, you can define how an object’s properties change over time. To create a keyframe, click the stopwatch icon next to the parameter you want to animate, move the CTI to a new position, and adjust the parameter’s value. This will automatically generate a new keyframe. Experiment with keyframes to add motion and bring your visual elements to life.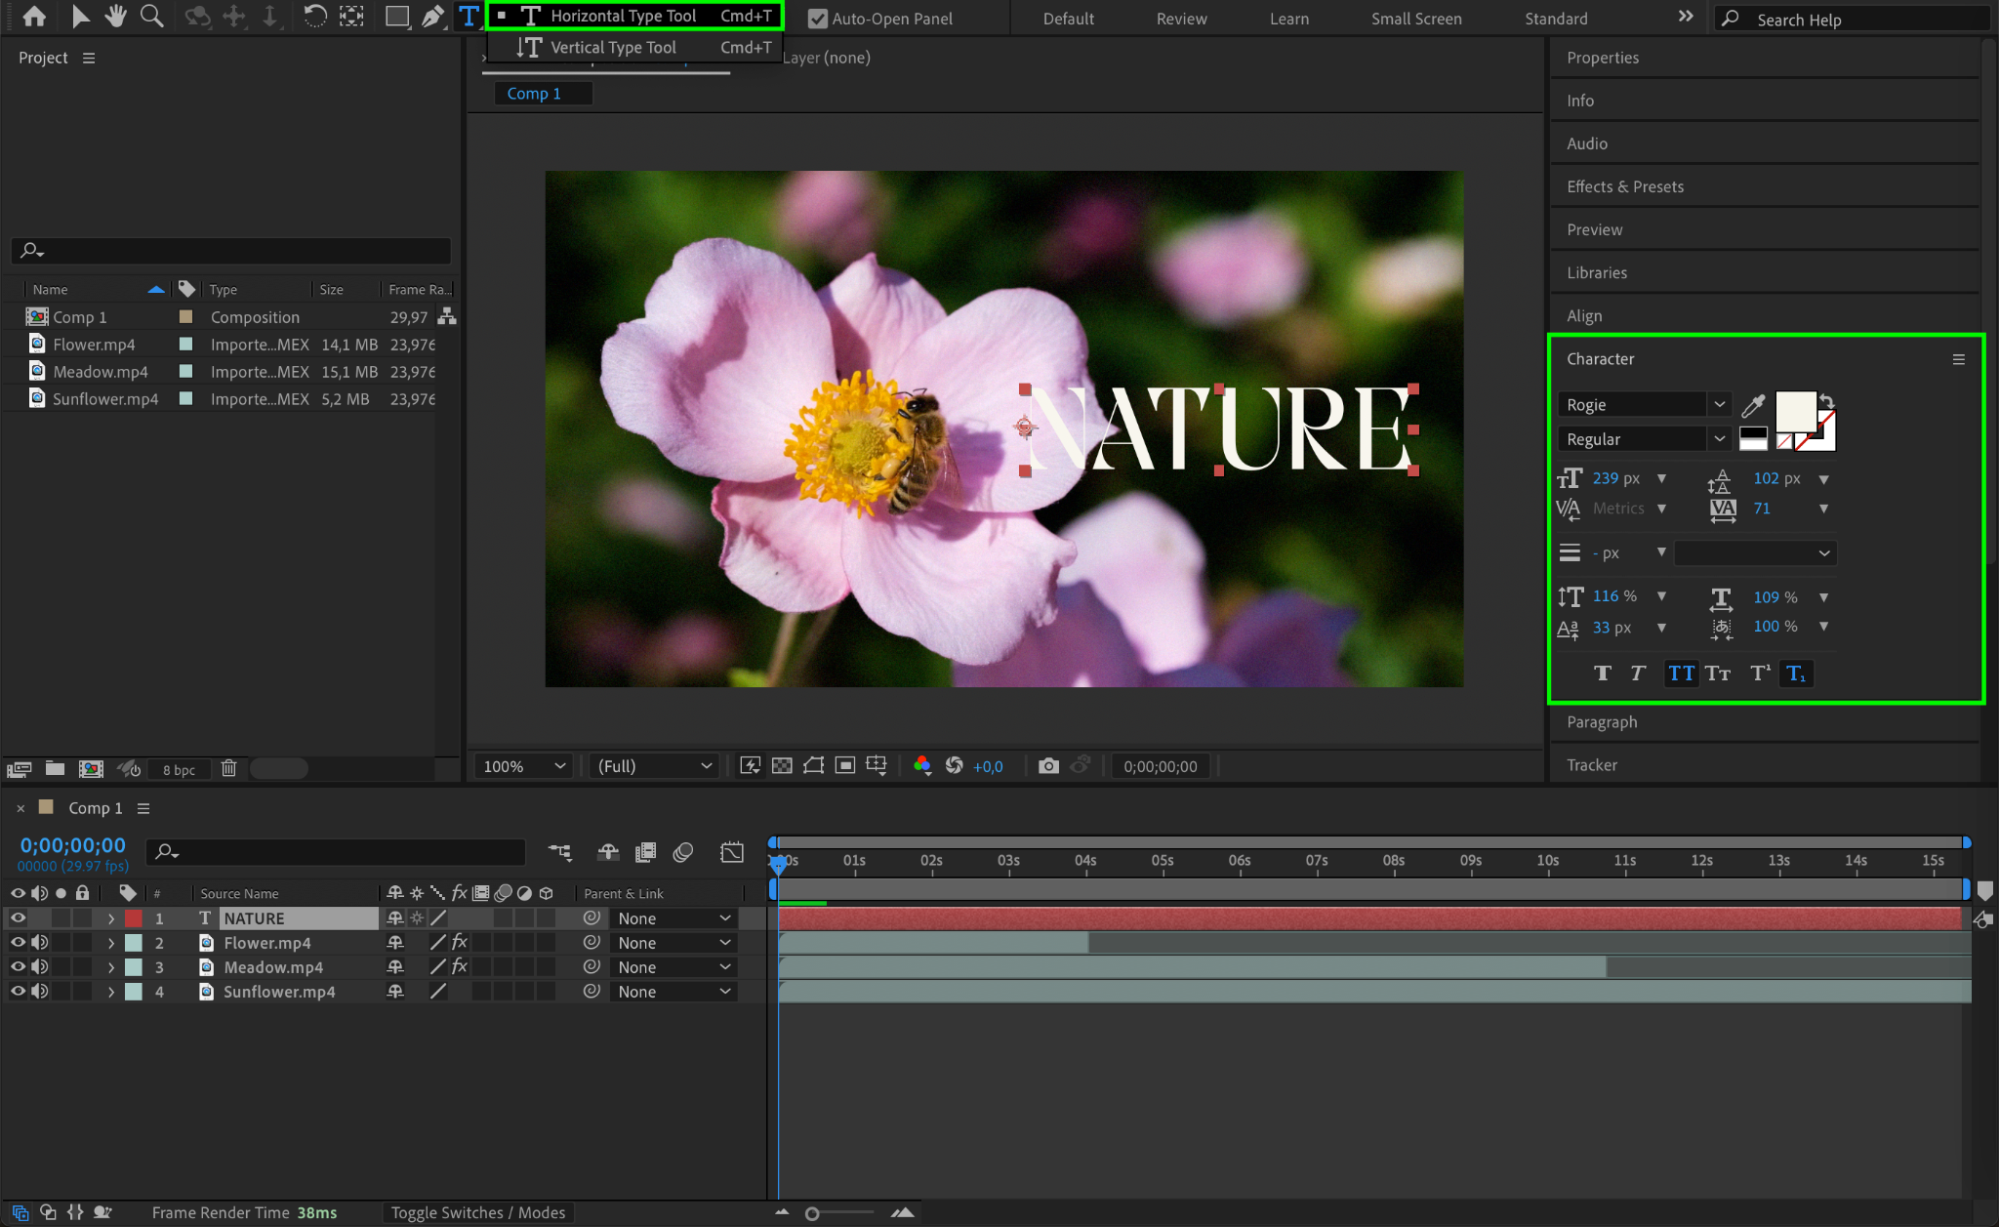
 Step 7: Audio Editing in After Effects
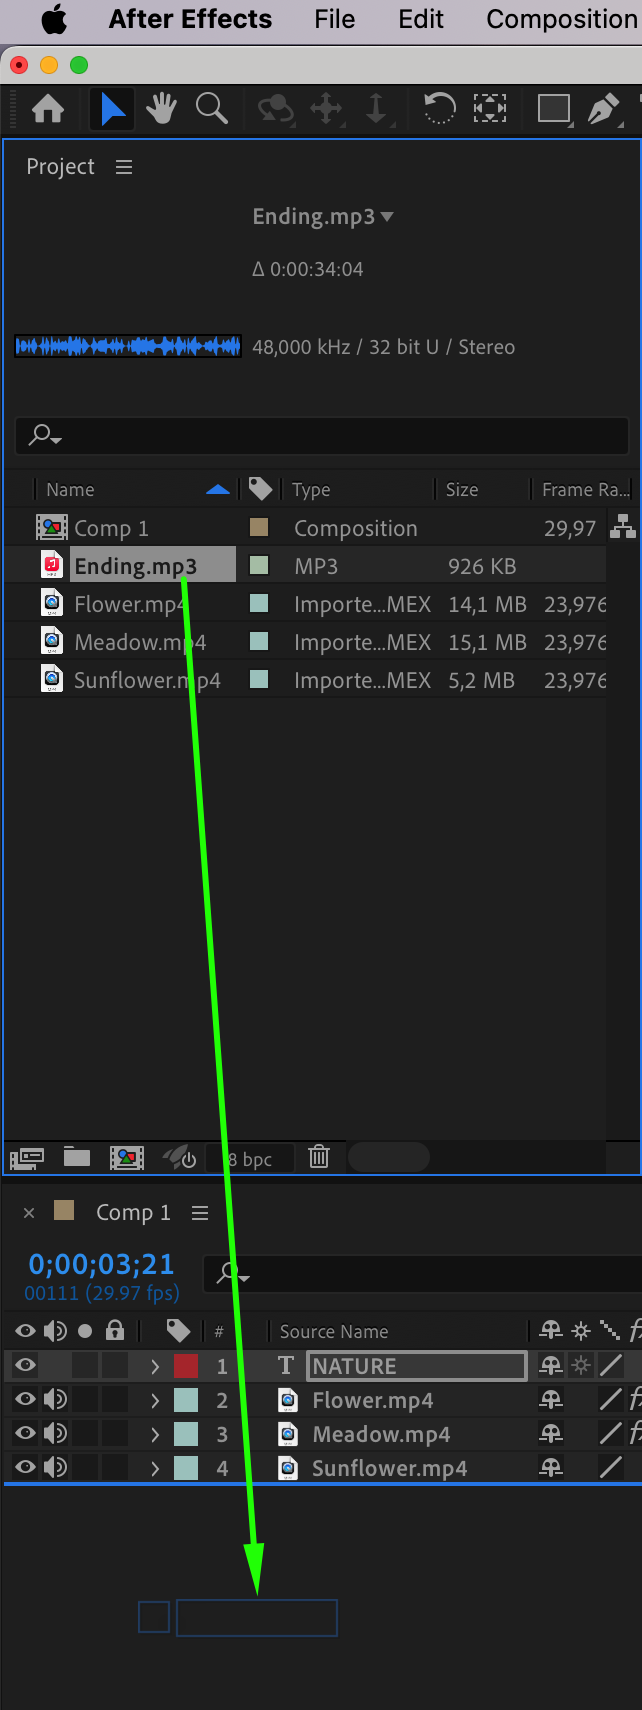
Audio is a crucial element in video editing, and After Effects provides tools to integrate and adjust audio tracks in your projects. To import audio, follow the same process as importing video files. Once imported, you can synchronize the audio with your video, adjust volume levels, and even add sound effects. Use the “LL” shortcut to display the audio waveform, making it easier to align sound with visual elements. You can also animate audio levels with keyframes to create dynamic audio effects.
Get 10% off when you subscribe to our newsletter



 Step 8: Exporting Your Final Video
Get 10% off when you subscribe to our newsletter

Once you’re satisfied with your edits, it’s time to export your video. After Effects offers several export options, allowing you to choose the best format and settings for your project. To export, go to “Composition” > “Add to Render Queue.” From there, you can select the output format, resolution, and other settings. Common export formats include MP4, MOV, and animated GIFs. After configuring your export settings, click “Render” to generate your final video.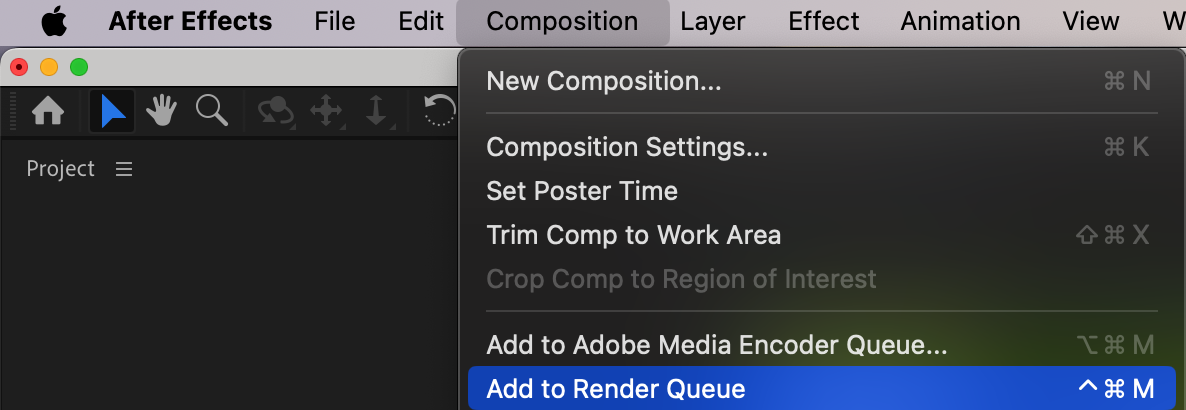
 Conclusion
Get 10% off when you subscribe to our newsletter

Editing videos in After Effects is a creative and rewarding process that allows you to bring your vision to life. With its powerful tools and features, you can transform your footage and create professional-looking videos that captivate your audience. Whether you’re editing a short film, a promotional video, or a social media clip, After Effects gives you the tools to make your videos stand out from the crowd.
In the following sections of this guide, we’ll provide detailed tutorials and tips on various aspects of editing videos in After Effects, including advanced effects, motion graphics, and audio editing. We’ll help you unlock the full potential of After Effects and elevate your video editing skills to new heights. So, let’s dive in and start creating amazing videos with After Effects!


