Mastering After Effects Video Export
Introduction – Crafting Polished Videos with After Effects Export
Discover how to export After Effects videos effectively with tailored steps for diverse purposes, ensuring high-quality results across platforms
Step 1: Understanding Export Basics
Understand the importance of exporting and its impact on your final video. For instance, exporting for YouTube requires optimizing settings for online streaming, while exporting for client presentations may prioritize high resolution and quality.
Get 10% off when you subscribe to our newsletter

Step 2: Choosing the Right Settings
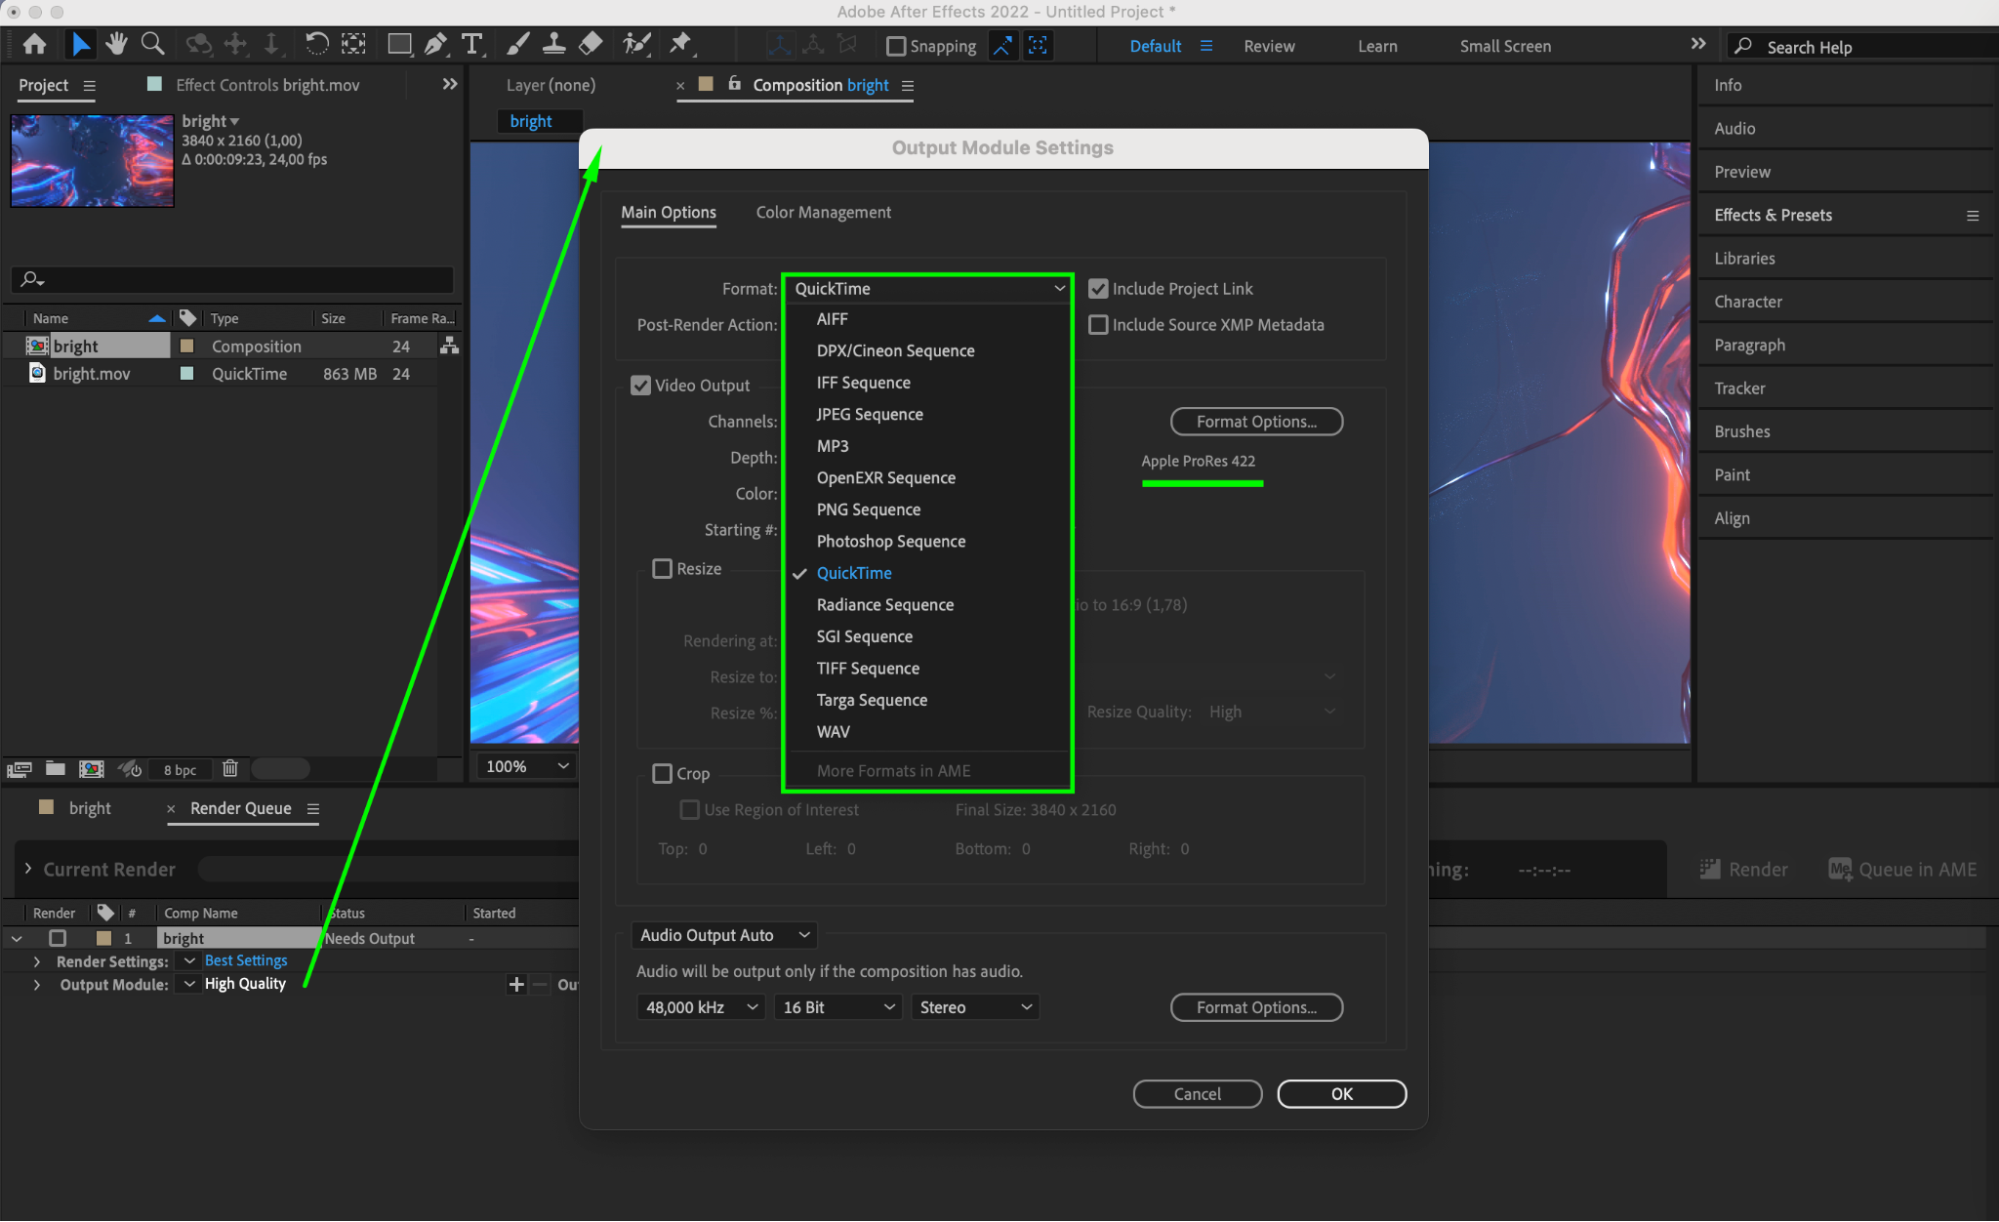
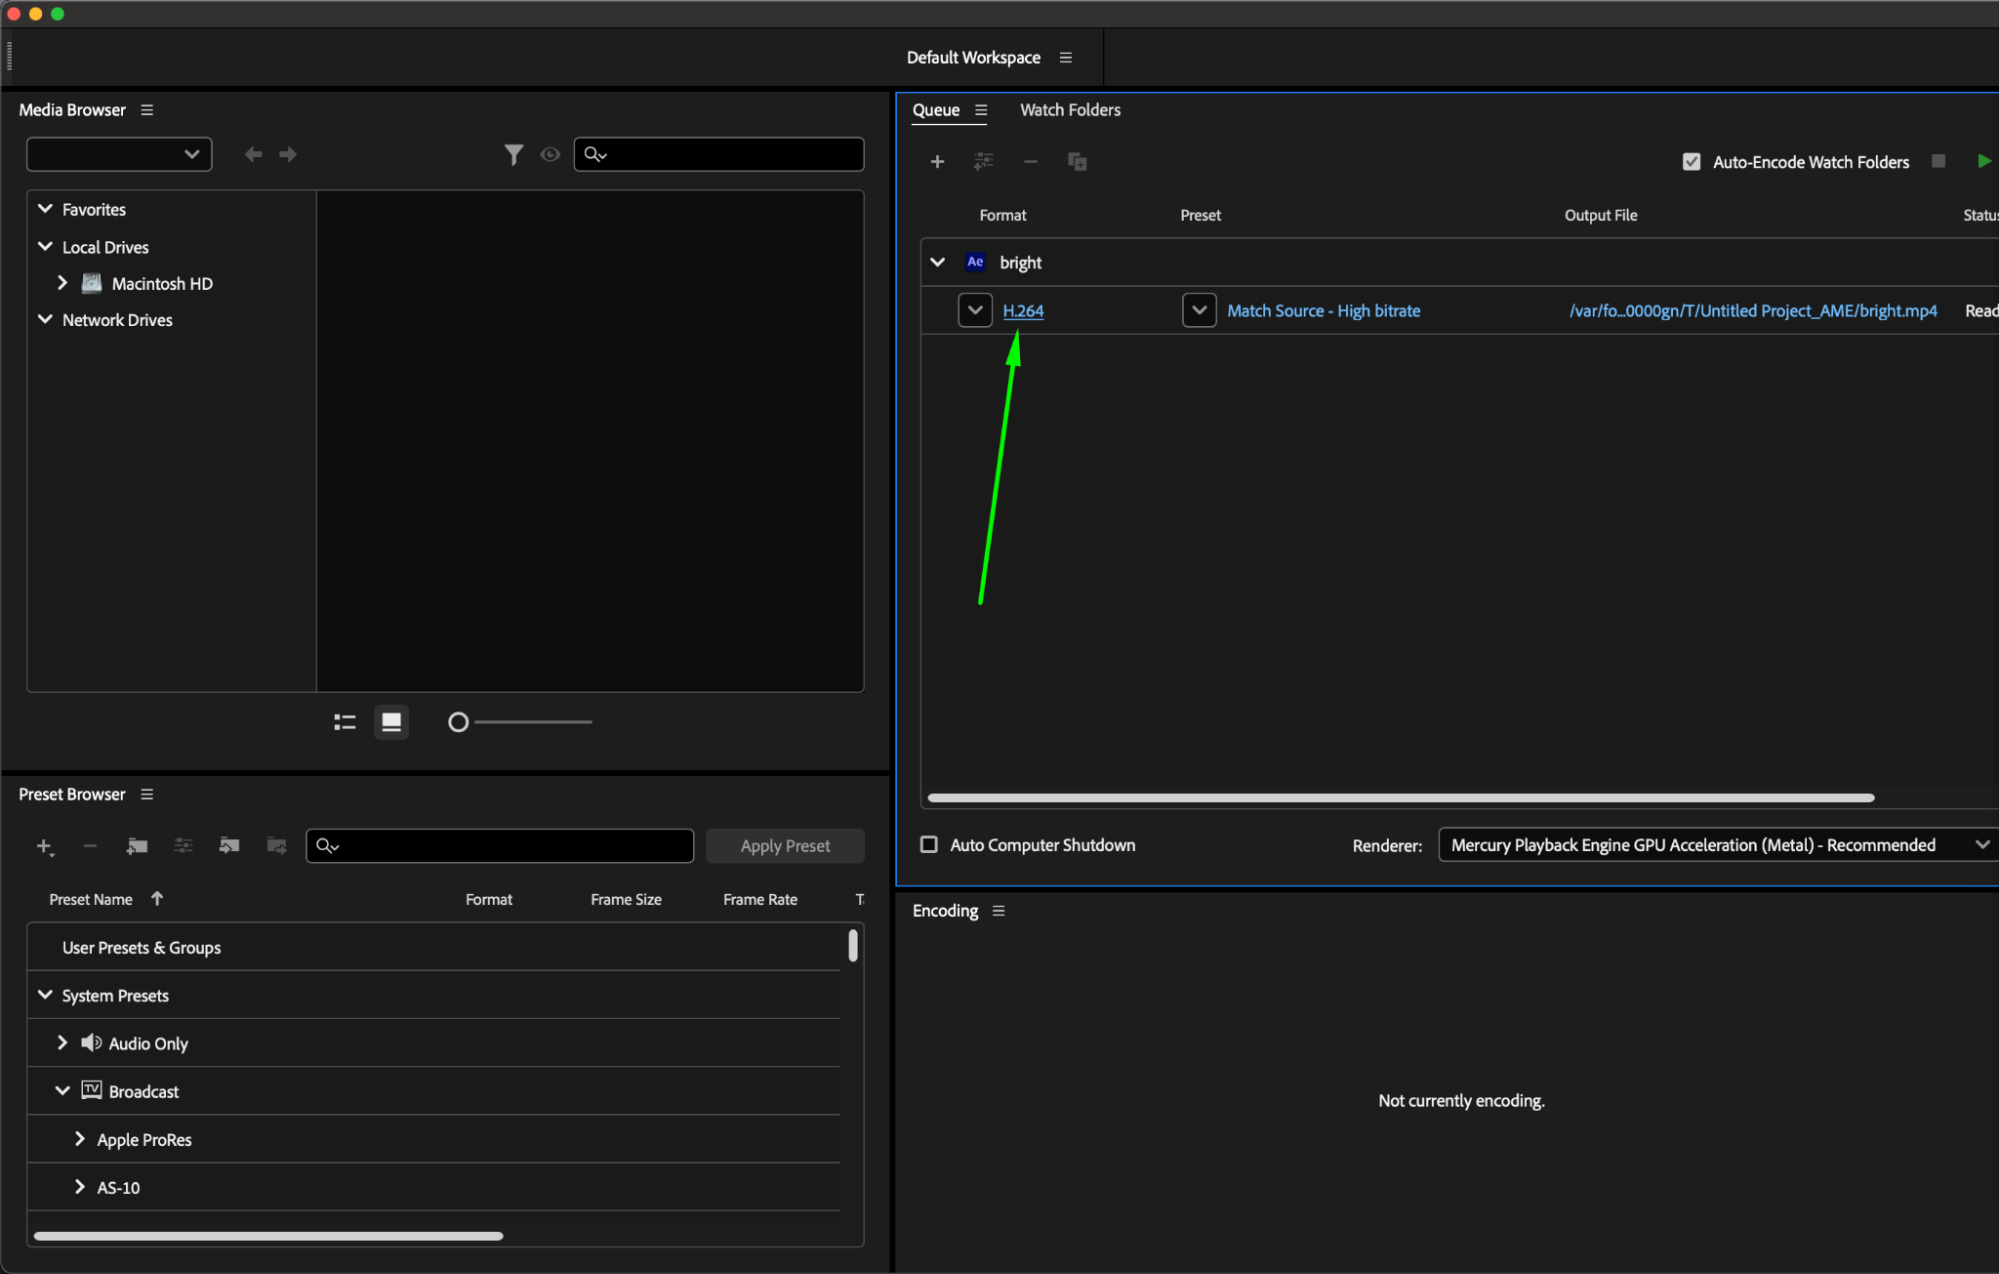
For YouTube, select the H.264 codec with preset settings for YouTube 1080p Full HD or 4K, depending on your project’s resolution, ensuring compatibility and efficient online streaming. For client presentations, consider using ProRes 422 or Animation codec for maximum quality and compatibility across different platforms. Additionally, QuickTime format can be utilized for exporting videos with alpha channels or for projects requiring a versatile format compatible with various editing software.

Step 3: Workflow Optimization
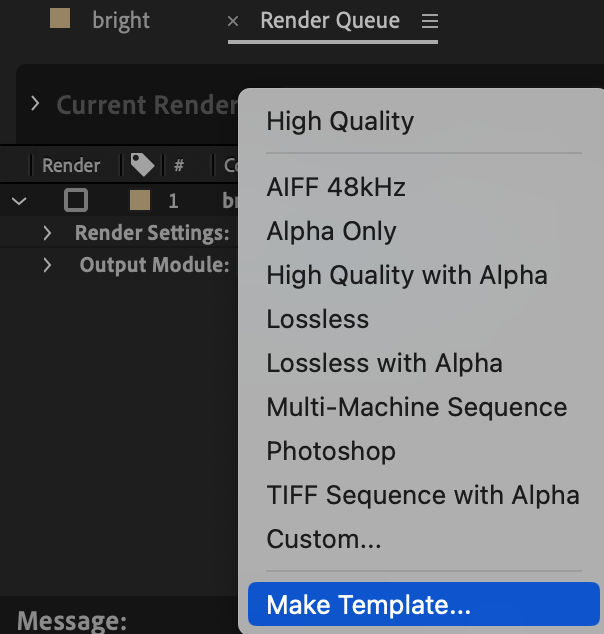
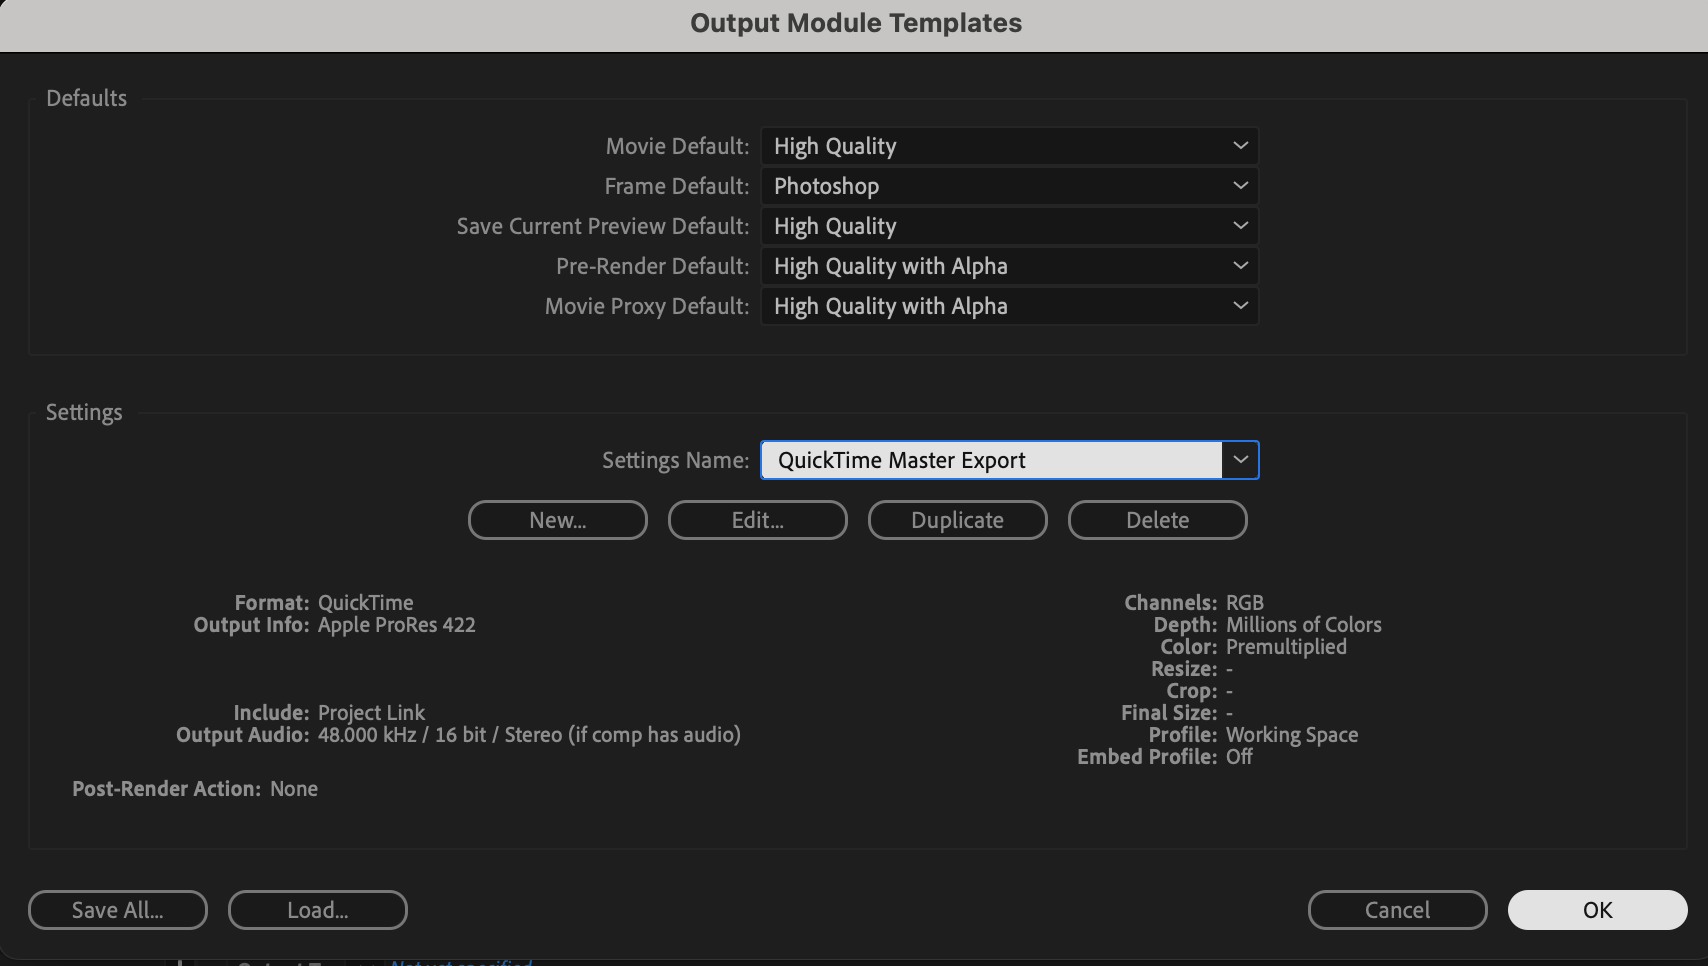
Create custom export presets for different purposes to streamline your workflow. For example, save presets for YouTube, Vimeo, and client presentations with predefined settings for quick access.
Get 10% off when you subscribe to our newsletter

Step 4: Balancing Speed and Quality
Utilize the Render Queue in After Effects to adjust render settings for optimal speed and quality. For fast exports, use QuickTime format with H.264 codec and lower quality settings. For high-quality exports, choose lossless codecs like ProRes 4444.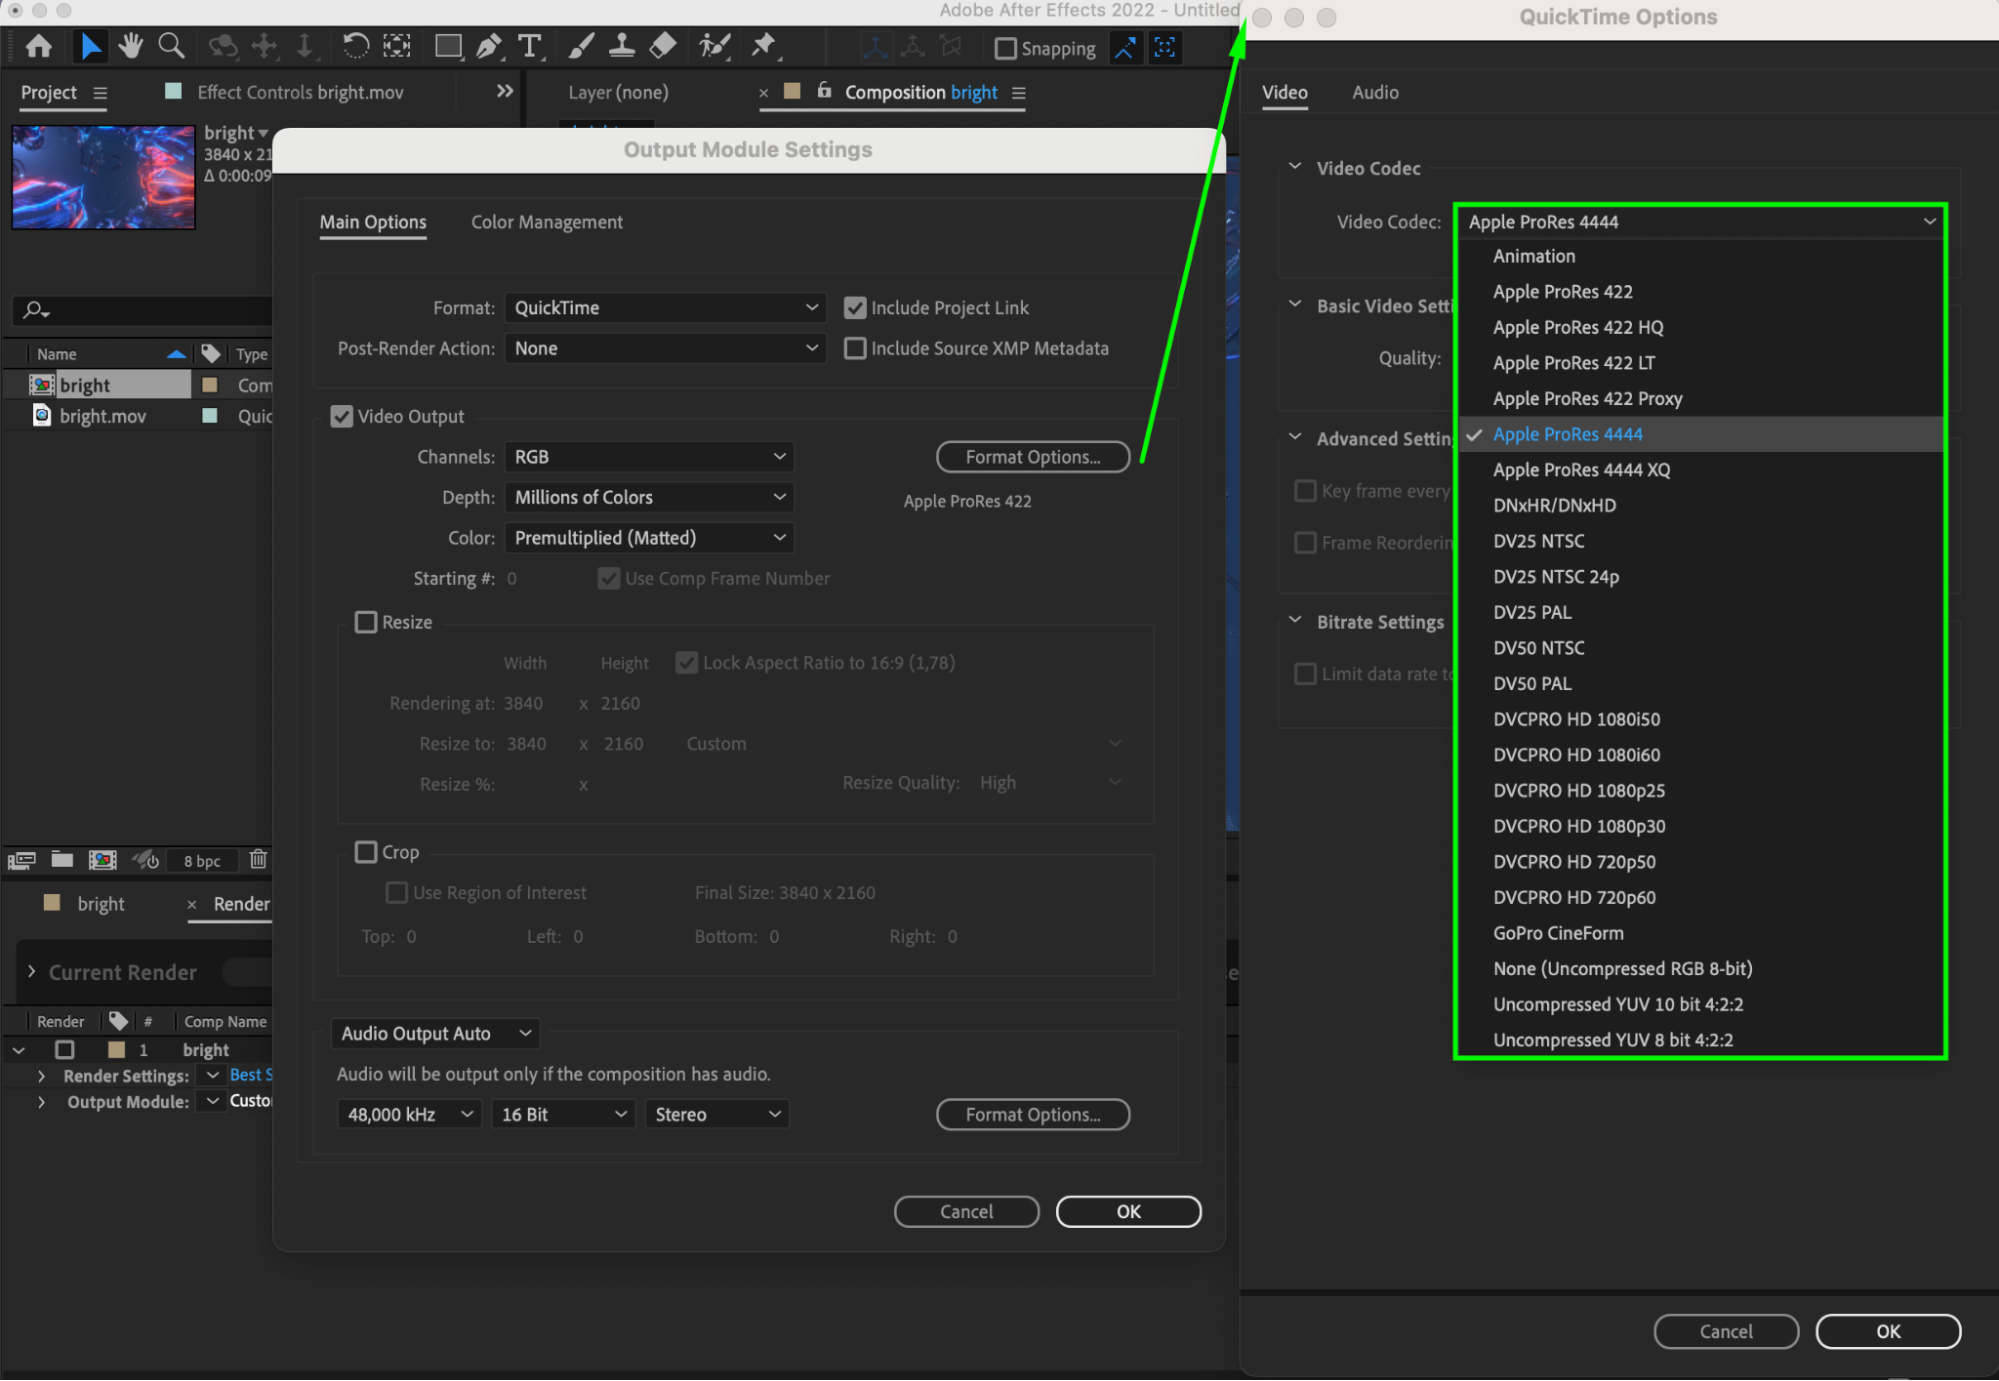
Get 10% off when you subscribe to our newsletter

Step 5: Troubleshooting Common Issues
Address common export problems by understanding their causes and solutions. For instance, if your exported video has playback issues on certain devices, try adjusting frame rate settings or using a different codec.
Step 6: Advanced Techniques
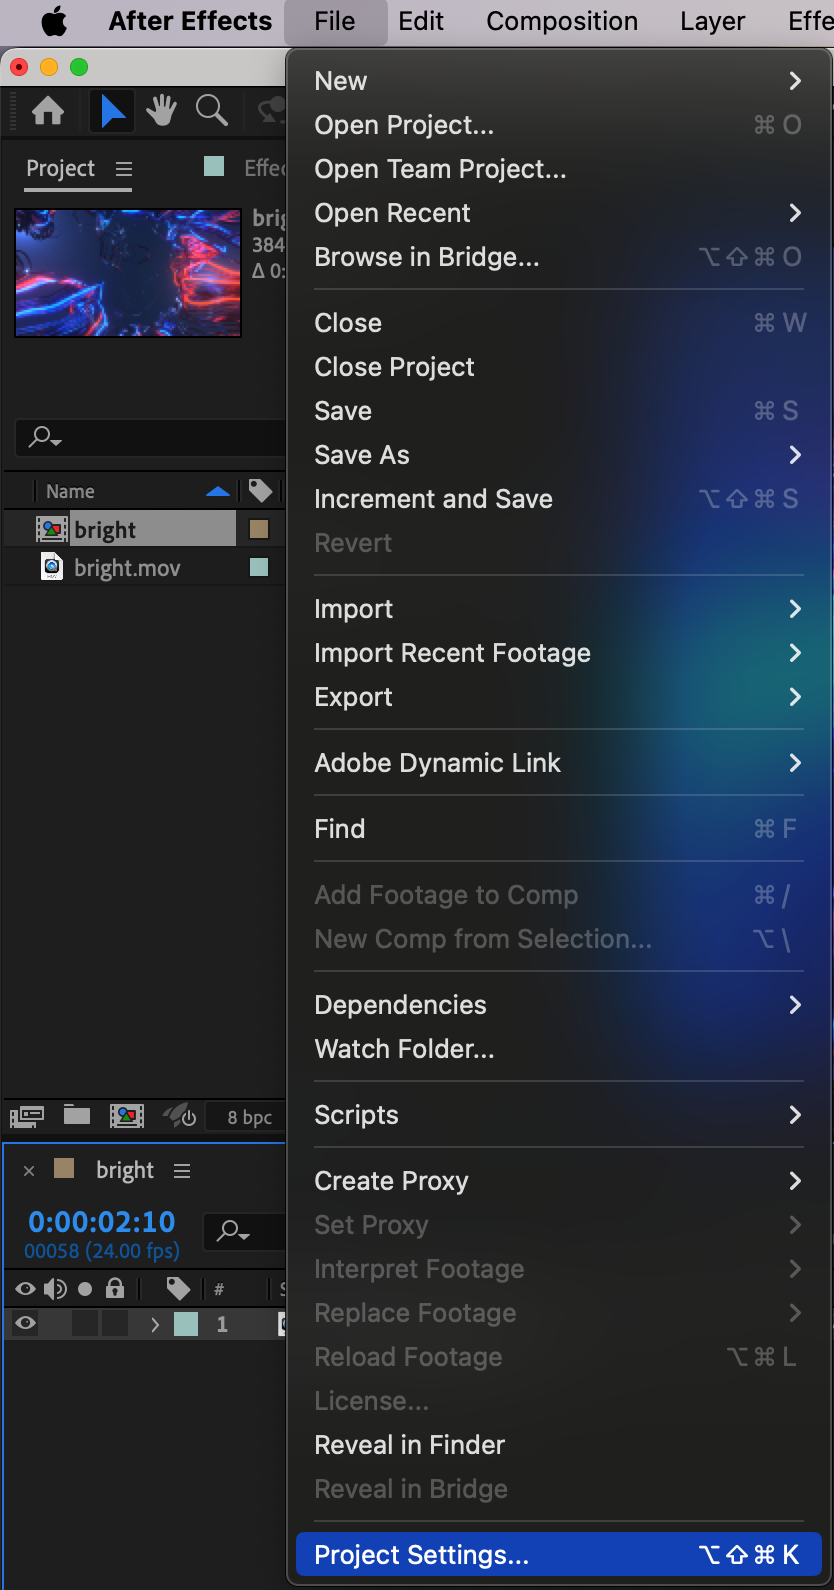
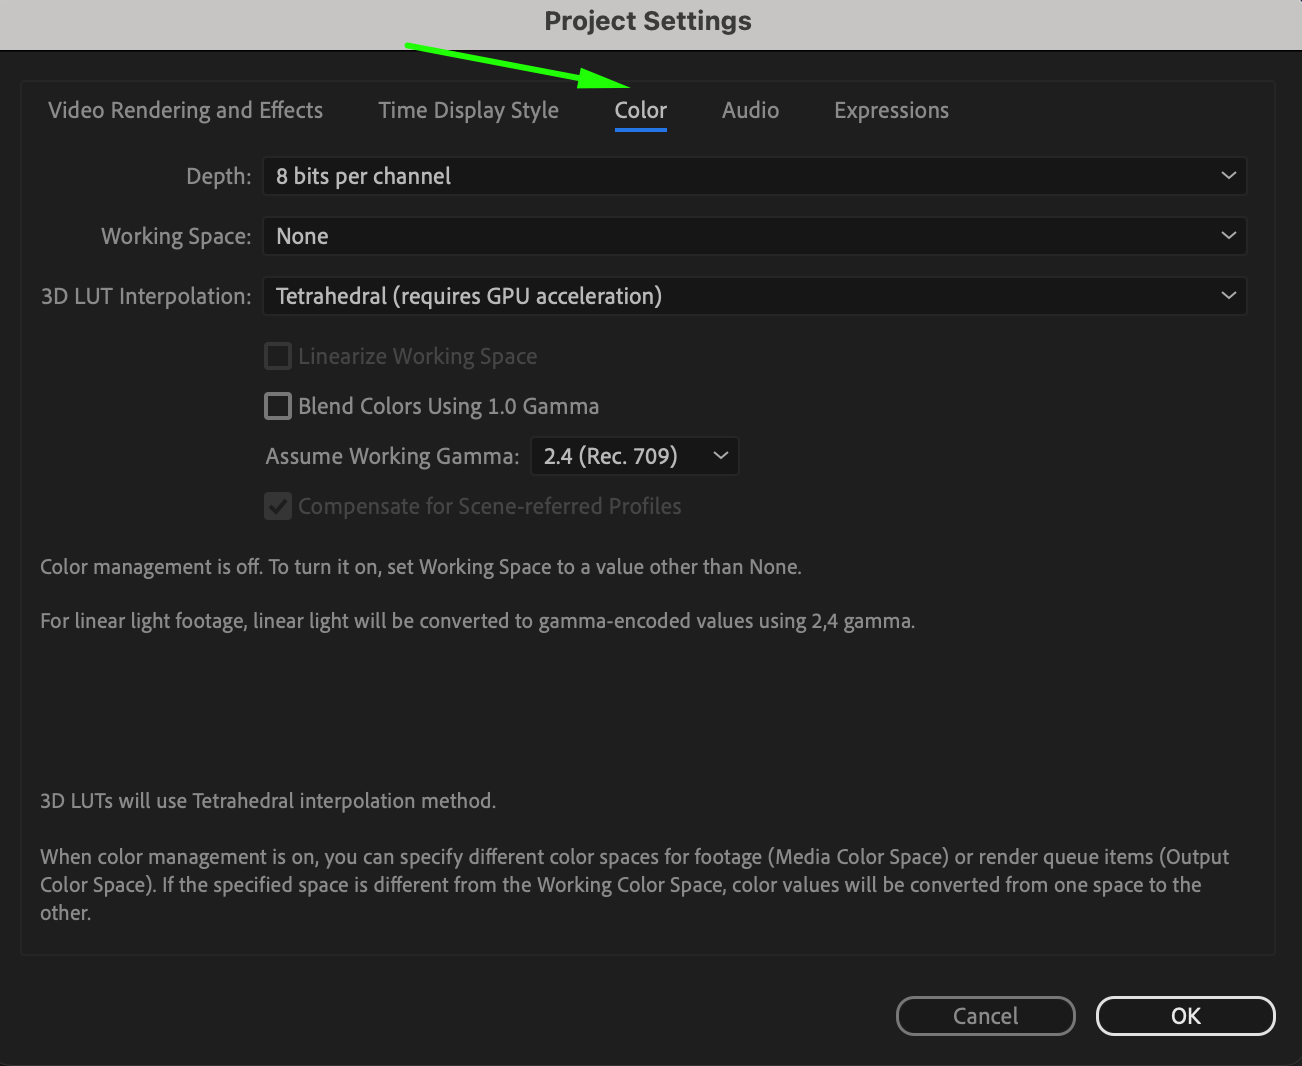
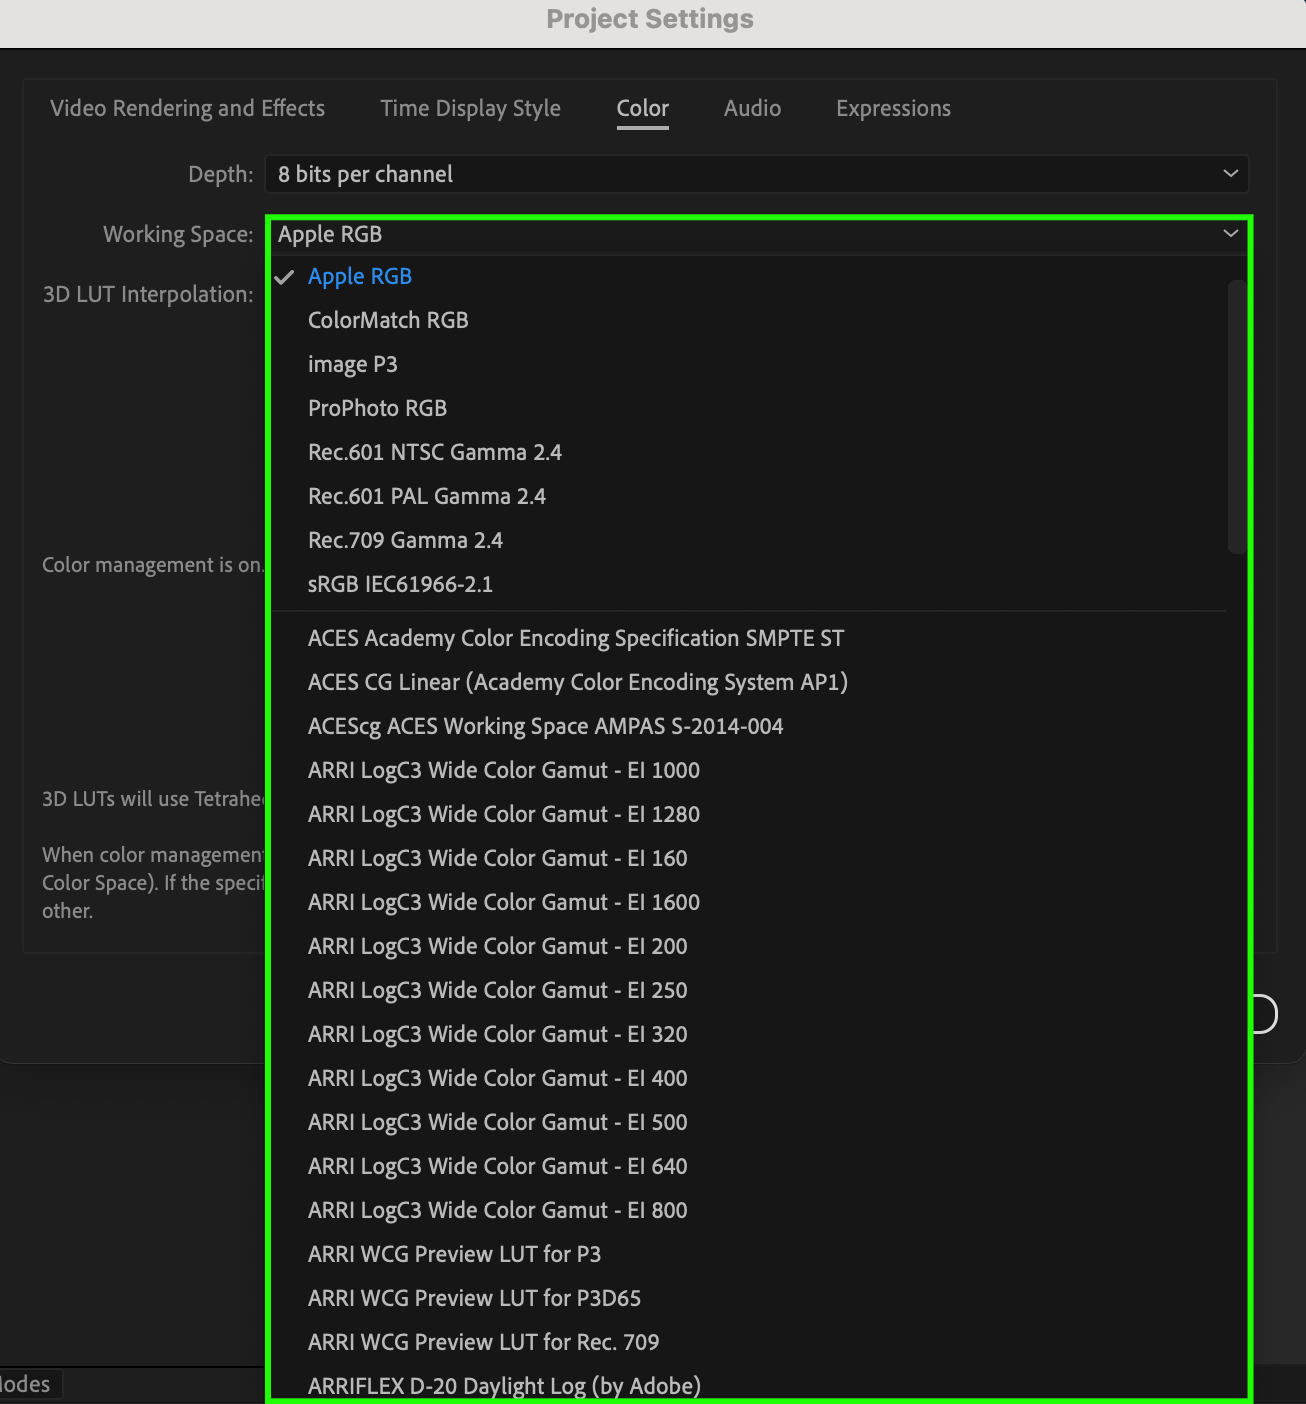
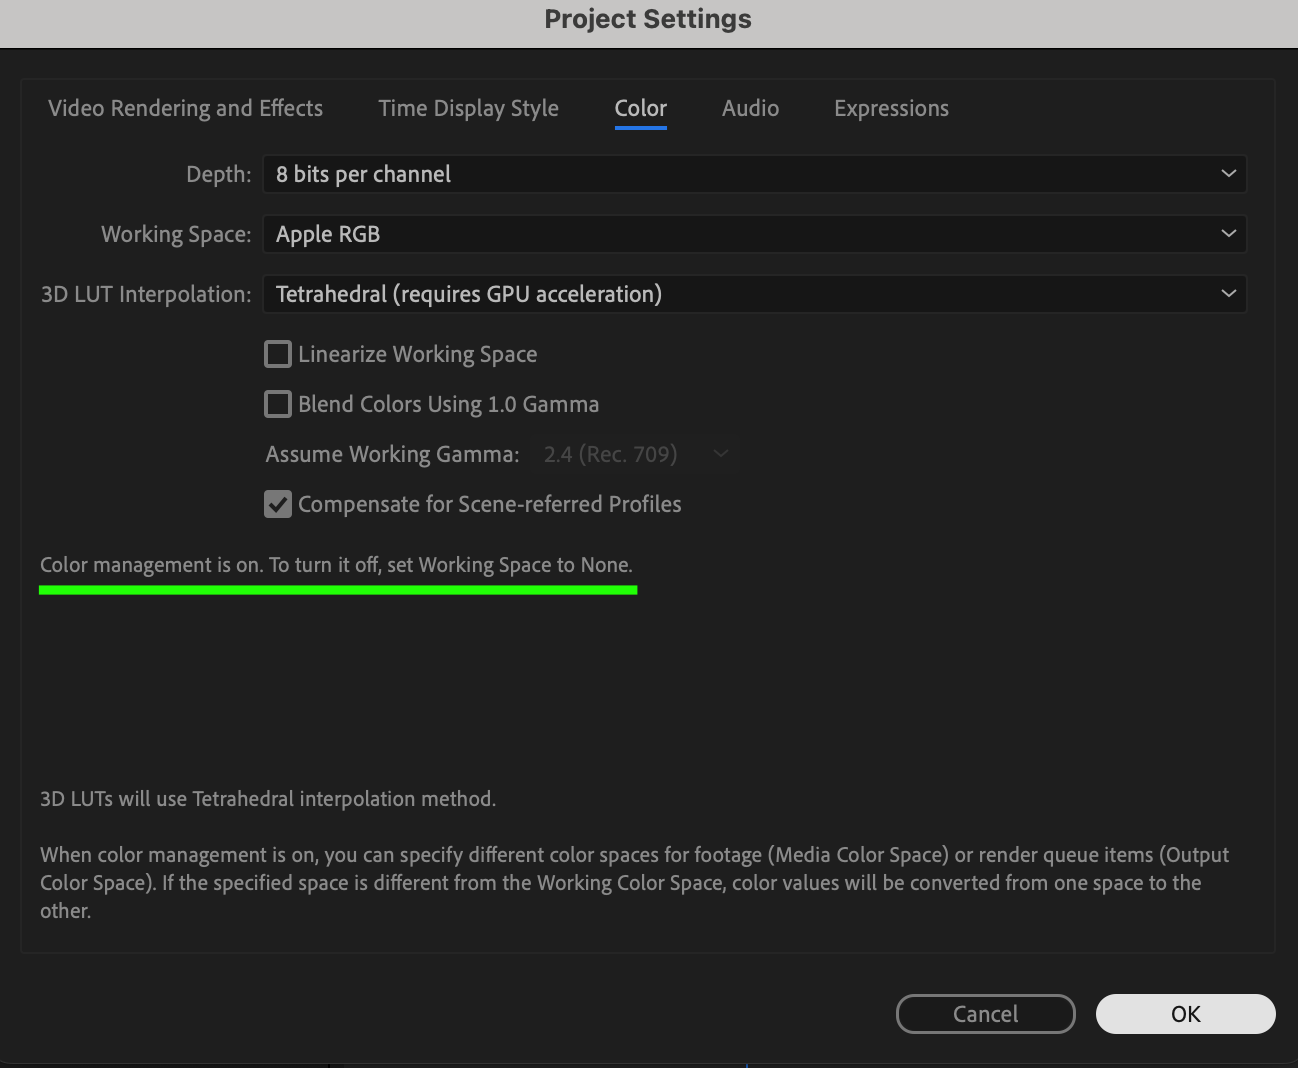
Explore advanced techniques such as color management and alpha channel handling for precise control over your export. For example, enable color management to ensure accurate color reproduction in your videos, especially for projects with specific color requirements.
Get 10% off when you subscribe to our newsletter

 Step 7: Metadata and Subtitles
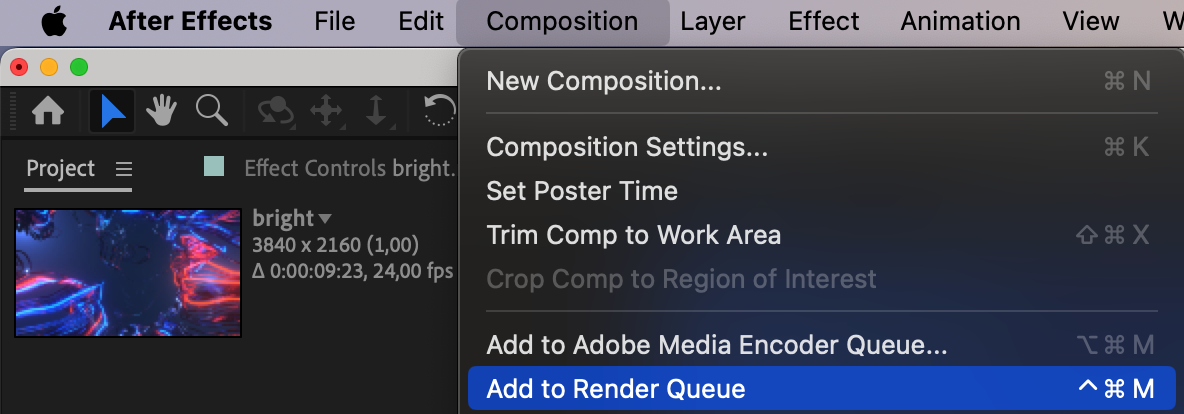
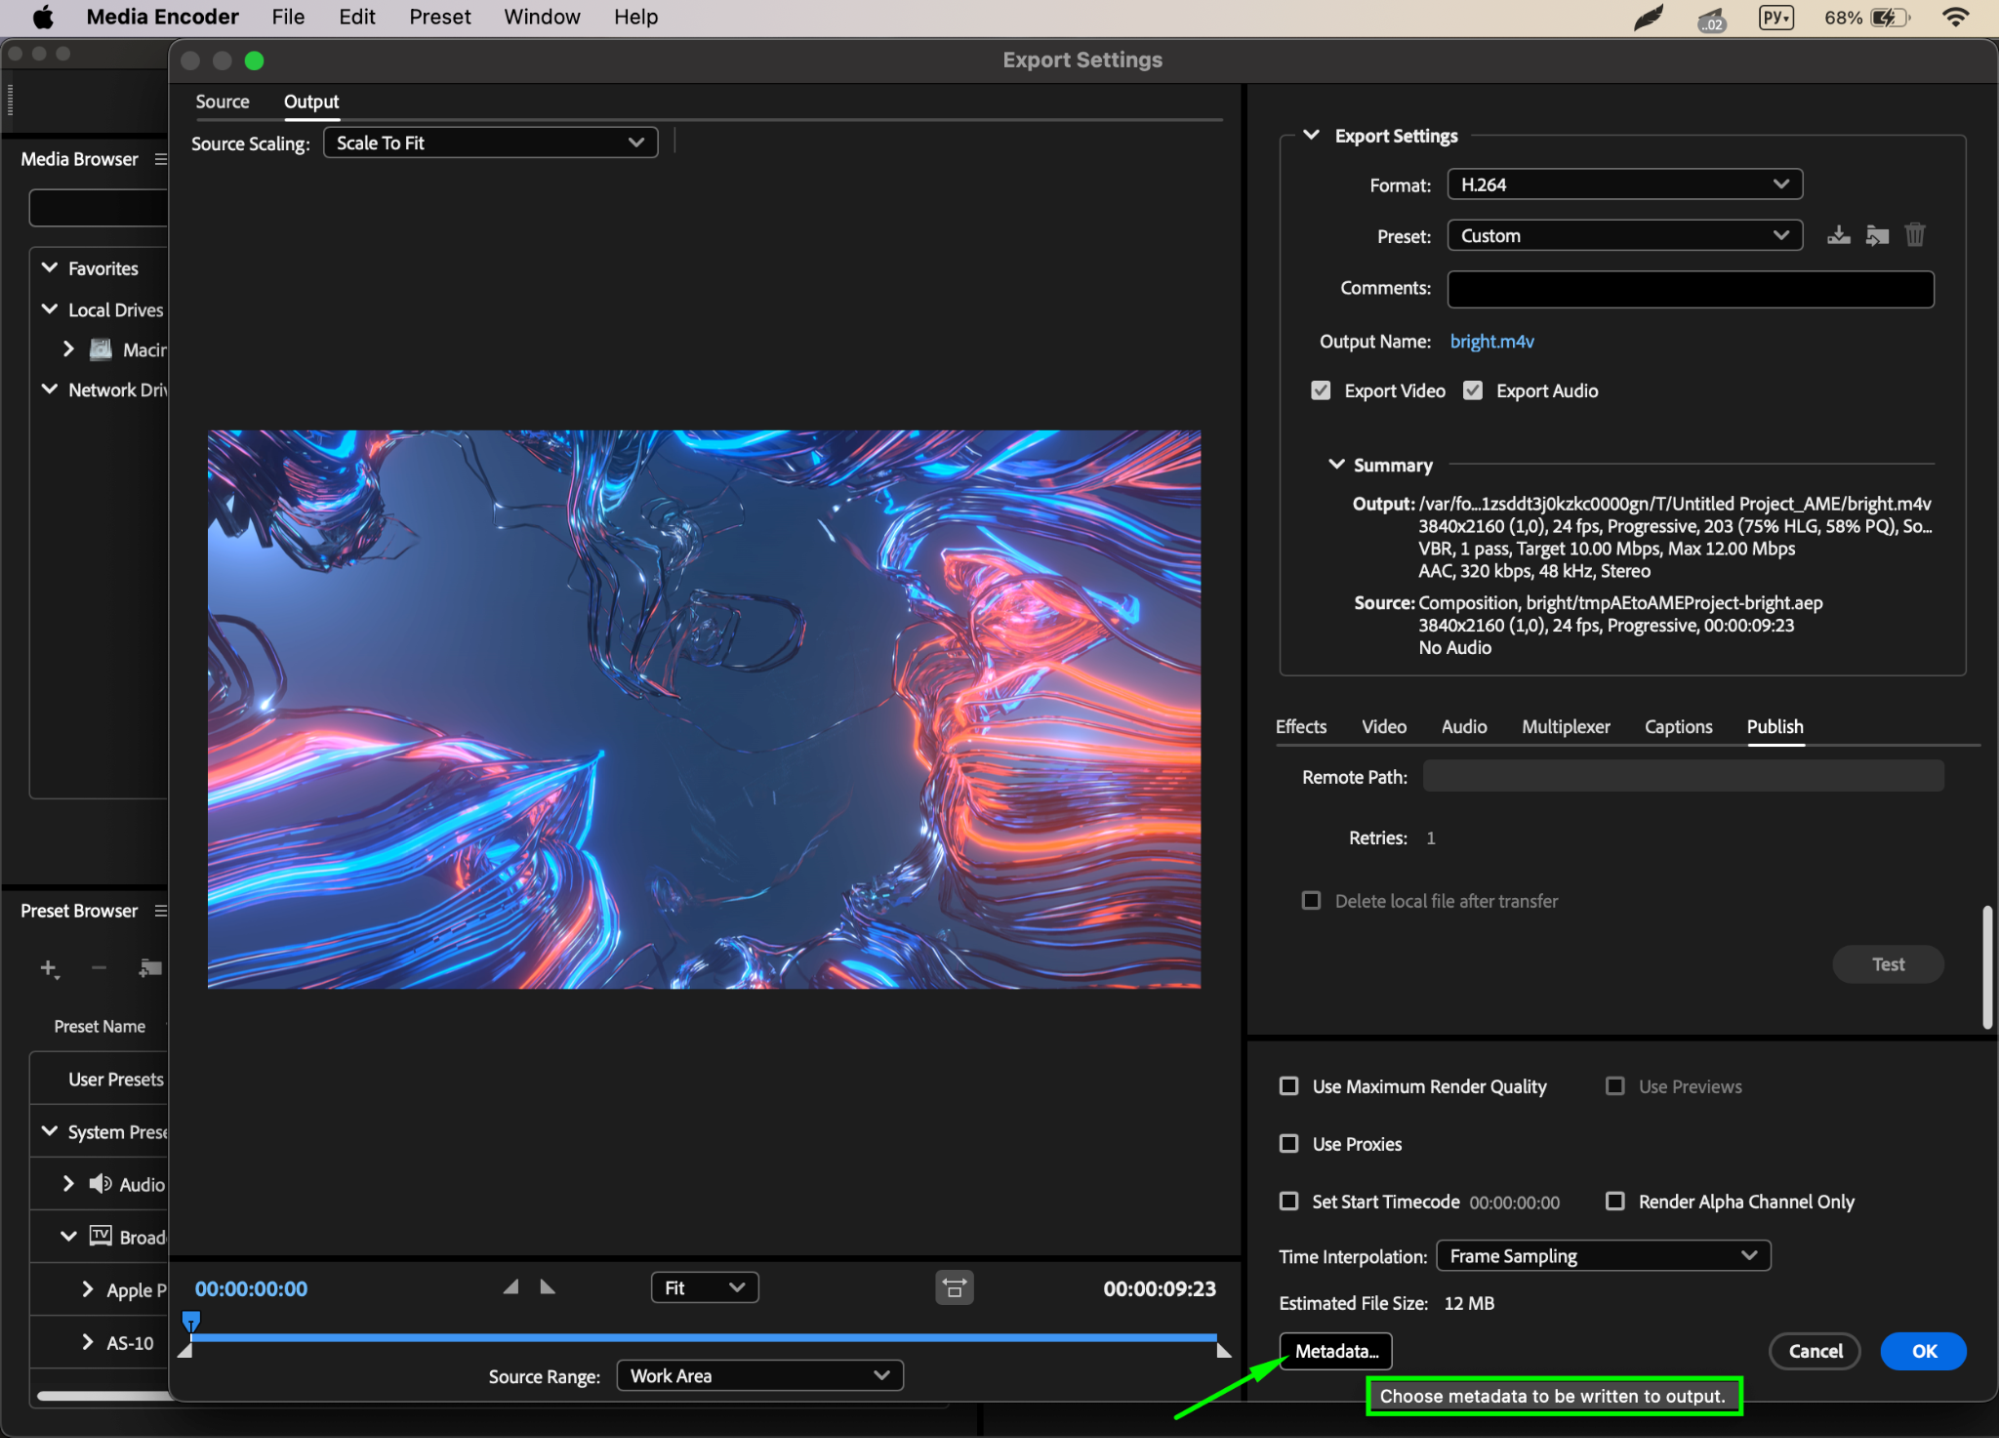
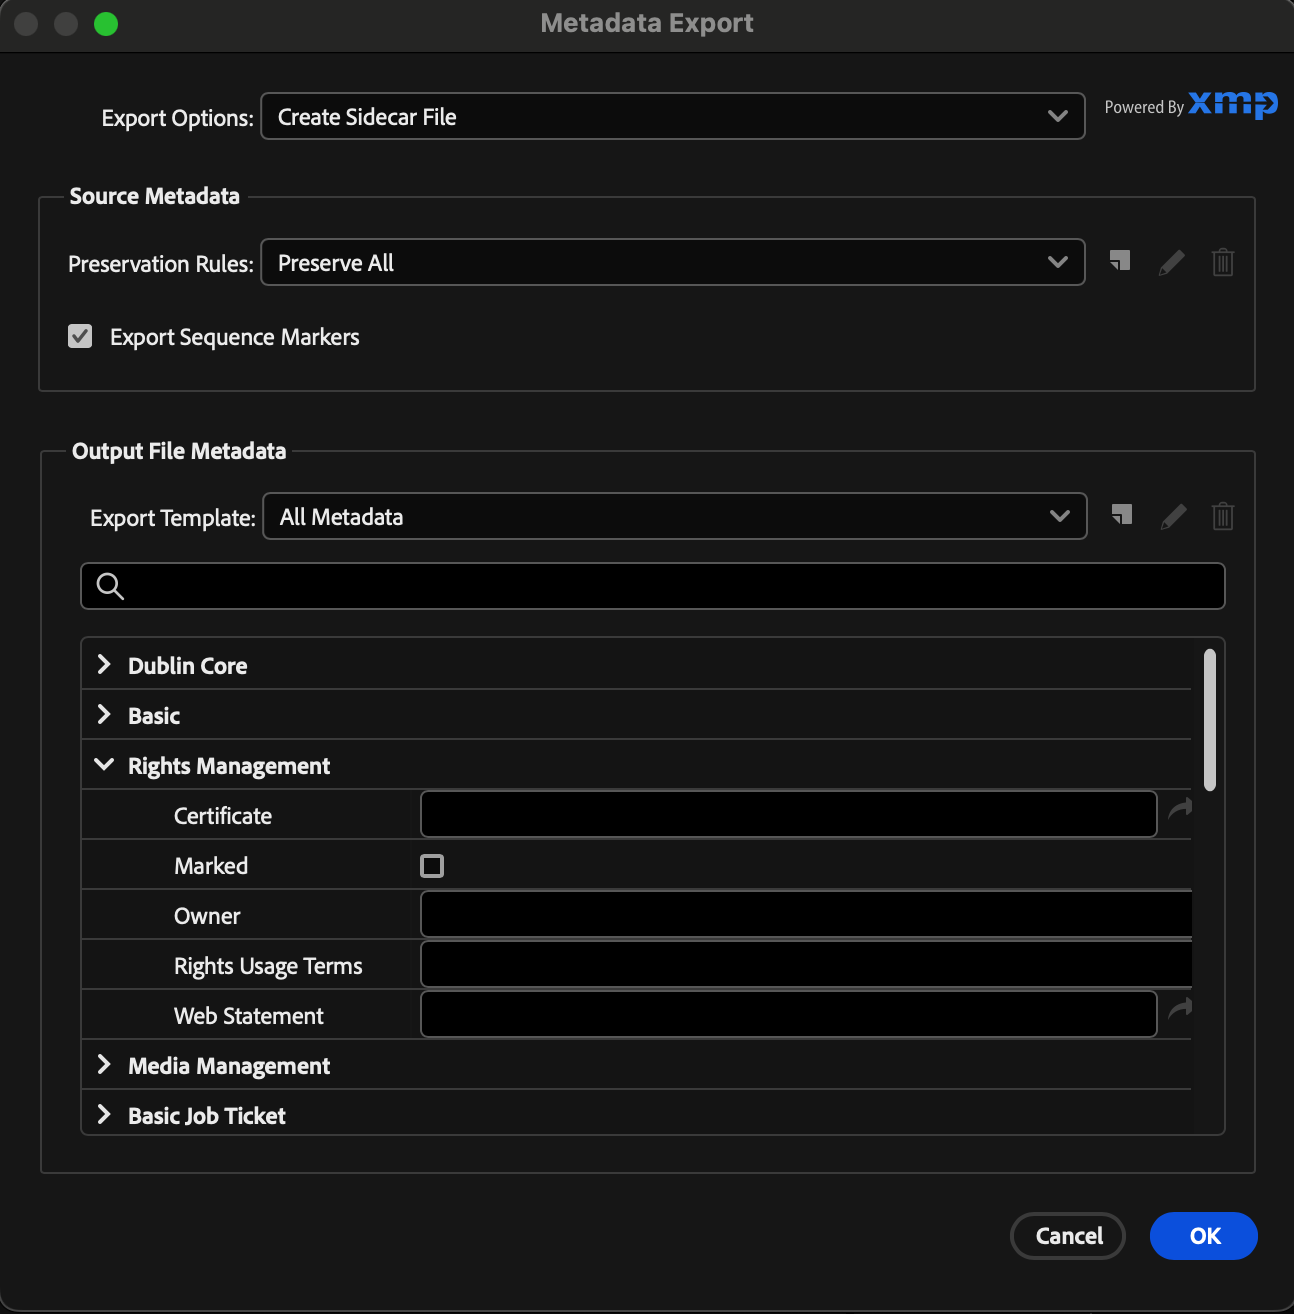
Embed metadata and subtitles to enhance the discoverability and accessibility of your videos. For YouTube, include relevant keywords and tags in the video description to improve search visibility. Use Adobe Media Encoder to input metadata. Once you’ve configured all export settings and entered metadata, click the “Start” button to initiate the export process.
Get 10% off when you subscribe to our newsletter

Get 10% off when you subscribe to our newsletter


Step 8: Compression and File Sizes
Optimize file sizes and compression settings to balance quality and delivery speed. For online platforms like Vimeo, aim for a balance between quality and file size to ensure smooth streaming without sacrificing visual integrity.
Step 9: Exporting Your Project
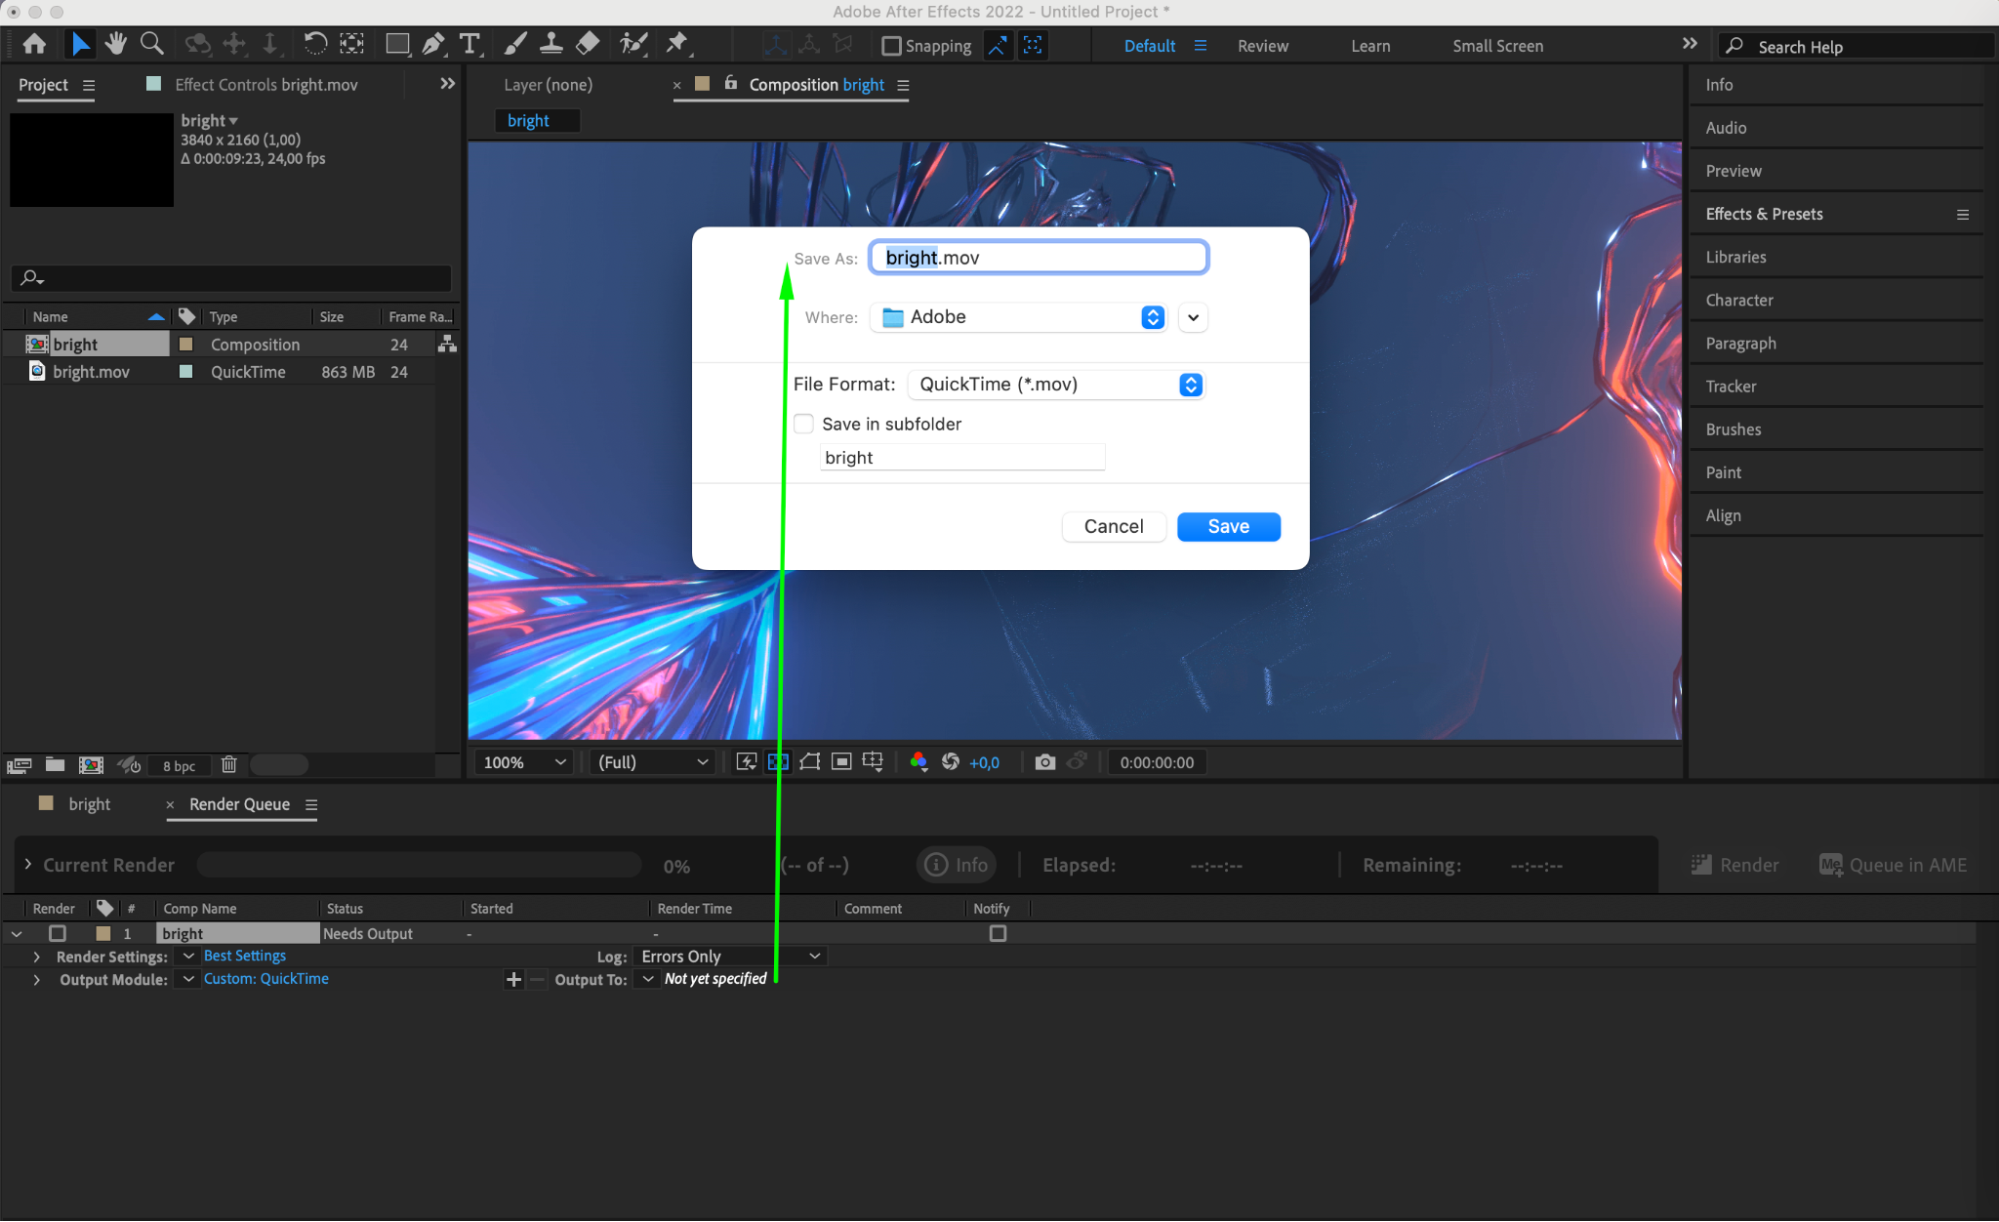
After you’ve finished configuring the export settings for your project, click on the “Output To” button and select the location for saving the file, as well as specify a name for the saved file. Then, click the “Render” button to initiate the export process for your project.

Step 10: Reviewing Your Video
After exporting, review your video to ensure it meets quality standards. Pay attention to visual clarity, audio quality, and any artifacts introduced during the export process. For example, check for color shifts or compression artifacts that may affect overall quality.
Get 10% off when you subscribe to our newsletter

Conclusion:
Mastering After Effects export requires a nuanced approach tailored to your specific needs and objectives. By following these concrete steps and examples, you’ll be equipped to export your videos effectively for various purposes, whether it’s for online sharing, client presentations, or personal projects. Elevate your work and make a lasting impression with polished and professional-looking videos exported from After Effects.


