Comprehensive Guide to Exporting a Movie from After Effects
Getting Started with Exporting Movies in After Effects
Exporting a movie in After Effects can seem like a daunting task, but fear not – we’ve got you covered! In this step-by-step guide, we’ll walk you through the process, ensuring that your exported movie is of the highest quality and compatible with various platforms.
Step 1: Set Up Your Composition
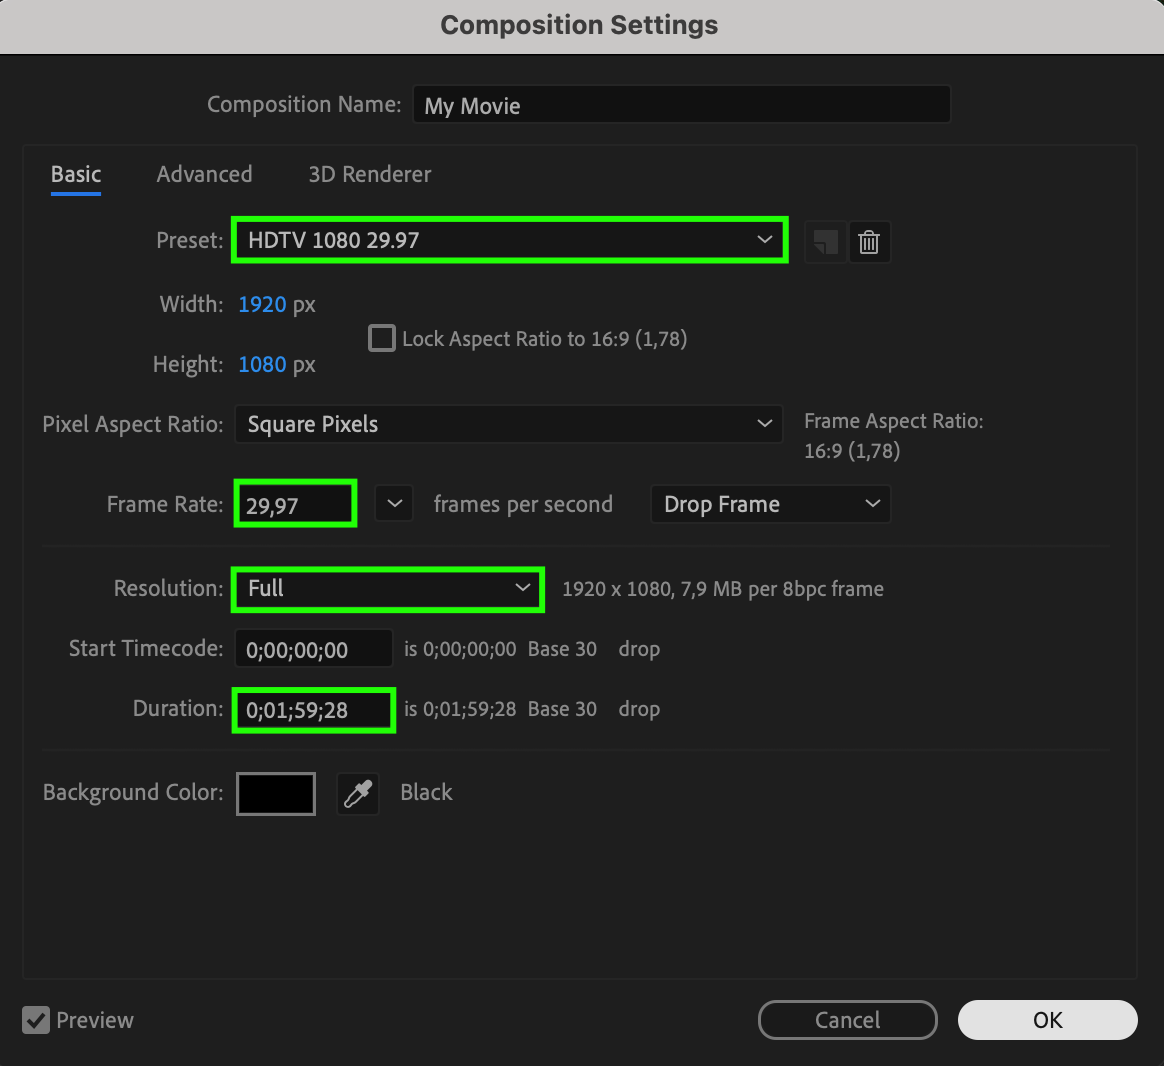
First, make sure your composition is set up correctly. Check the resolution, frame rate, and other project-specific settings to match your desired output format. This will help avoid any playback issues or quality loss. Additionally, ensure that you have the appropriate duration and that all layers fit within the timeline.
 Step 2: Prepare Your Timeline
Next, prepare your timeline by trimming unnecessary layers and adjusting the composition’s duration if needed. Removing unused layers can reduce the file size and streamline the export process. Use hotkeys “Alt/Option + [” and “Alt/Option + ]” to easily adjust the duration of layers.
 Step 3: Configure Output Module Settings
Get 10% off when you subscribe to our newsletter

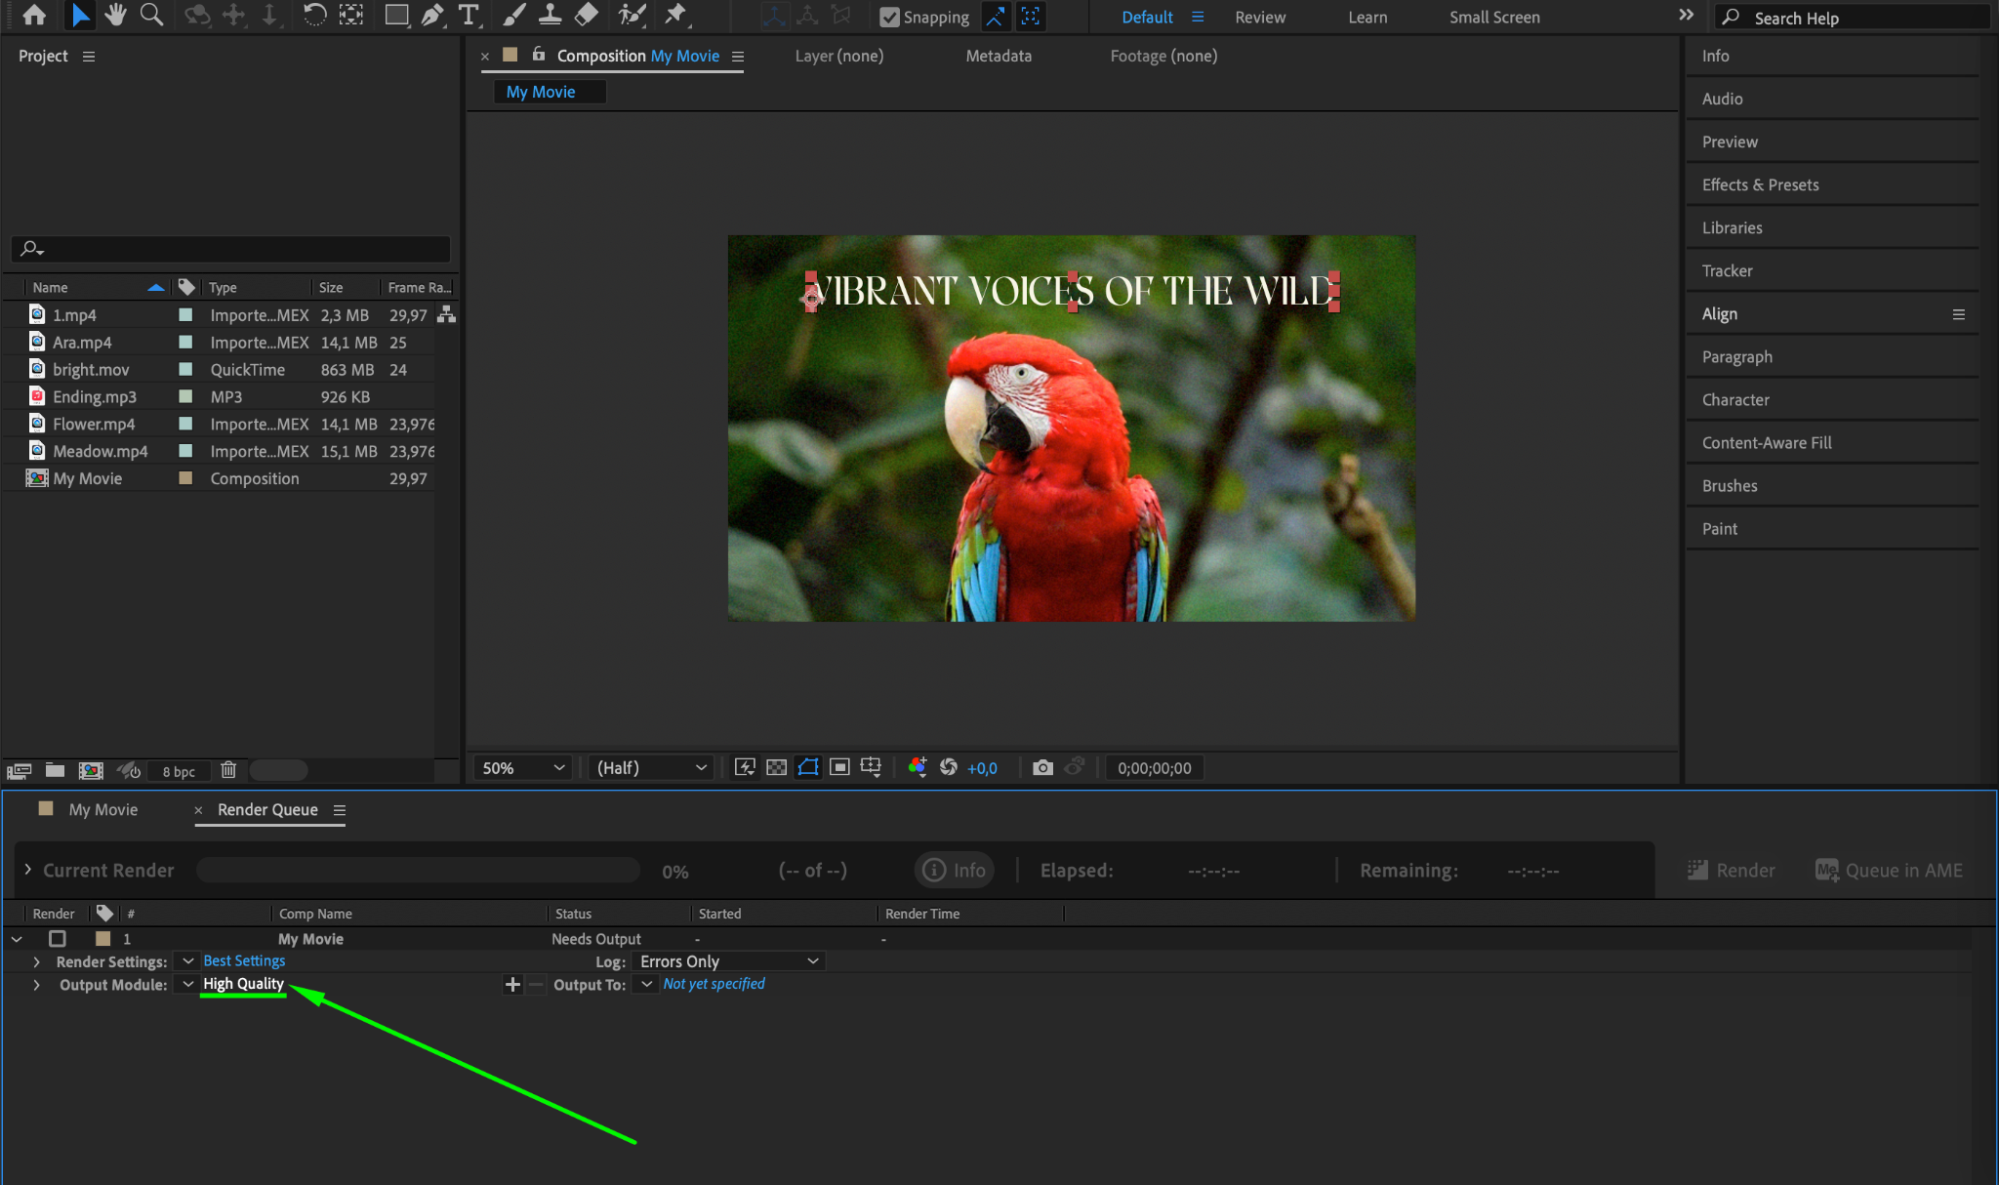
Now, let’s move on to the Output Module settings. Go to the “Composition” menu and select “Add to Render Queue”. In the Render Queue panel, click on “Output Module” to choose the desired format for your final exported movie.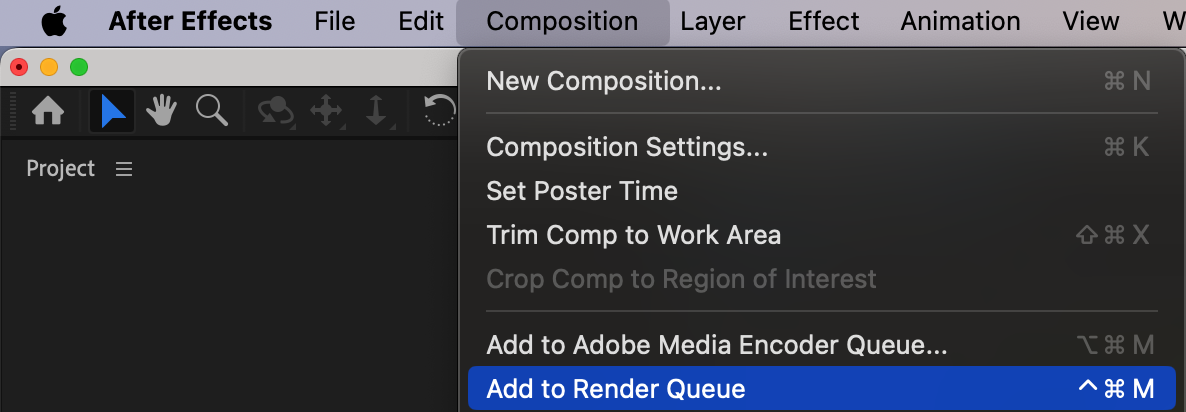
 Step 4: Select the Right File Format
Get 10% off when you subscribe to our newsletter

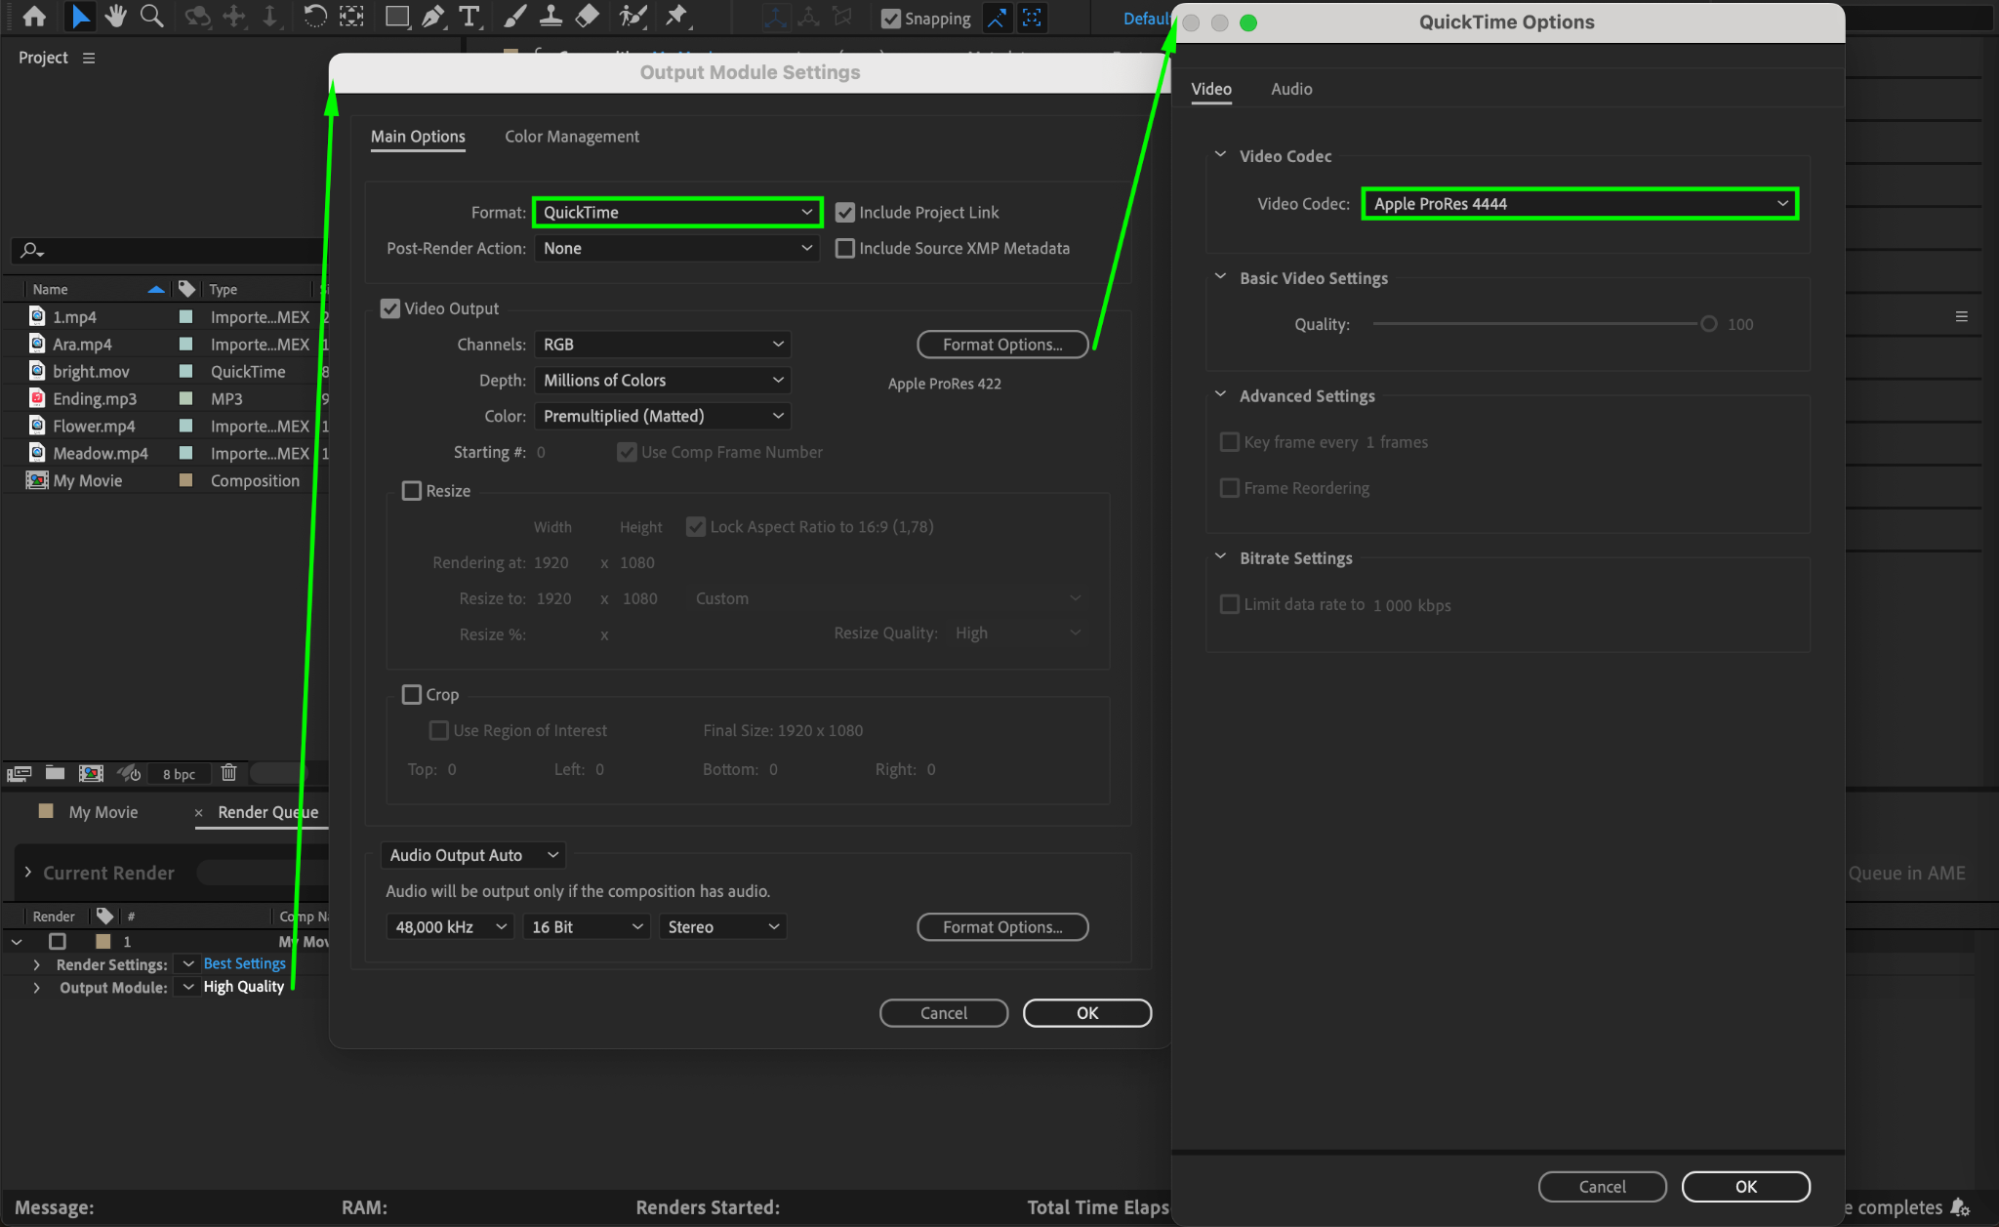
Consider the file format based on your project requirements. For high-quality videos with minimal compression, the QuickTime format with Apple ProRes or Animation codec is recommended. If compatibility is more important, use popular formats like MP4 or H.264.
 Step 5: Customize Audio Settings
Get 10% off when you subscribe to our newsletter

If your composition includes audio, customize the audio settings in the Output Module. Specify the audio codec, sample rate, and bit depth according to your project’s requirements.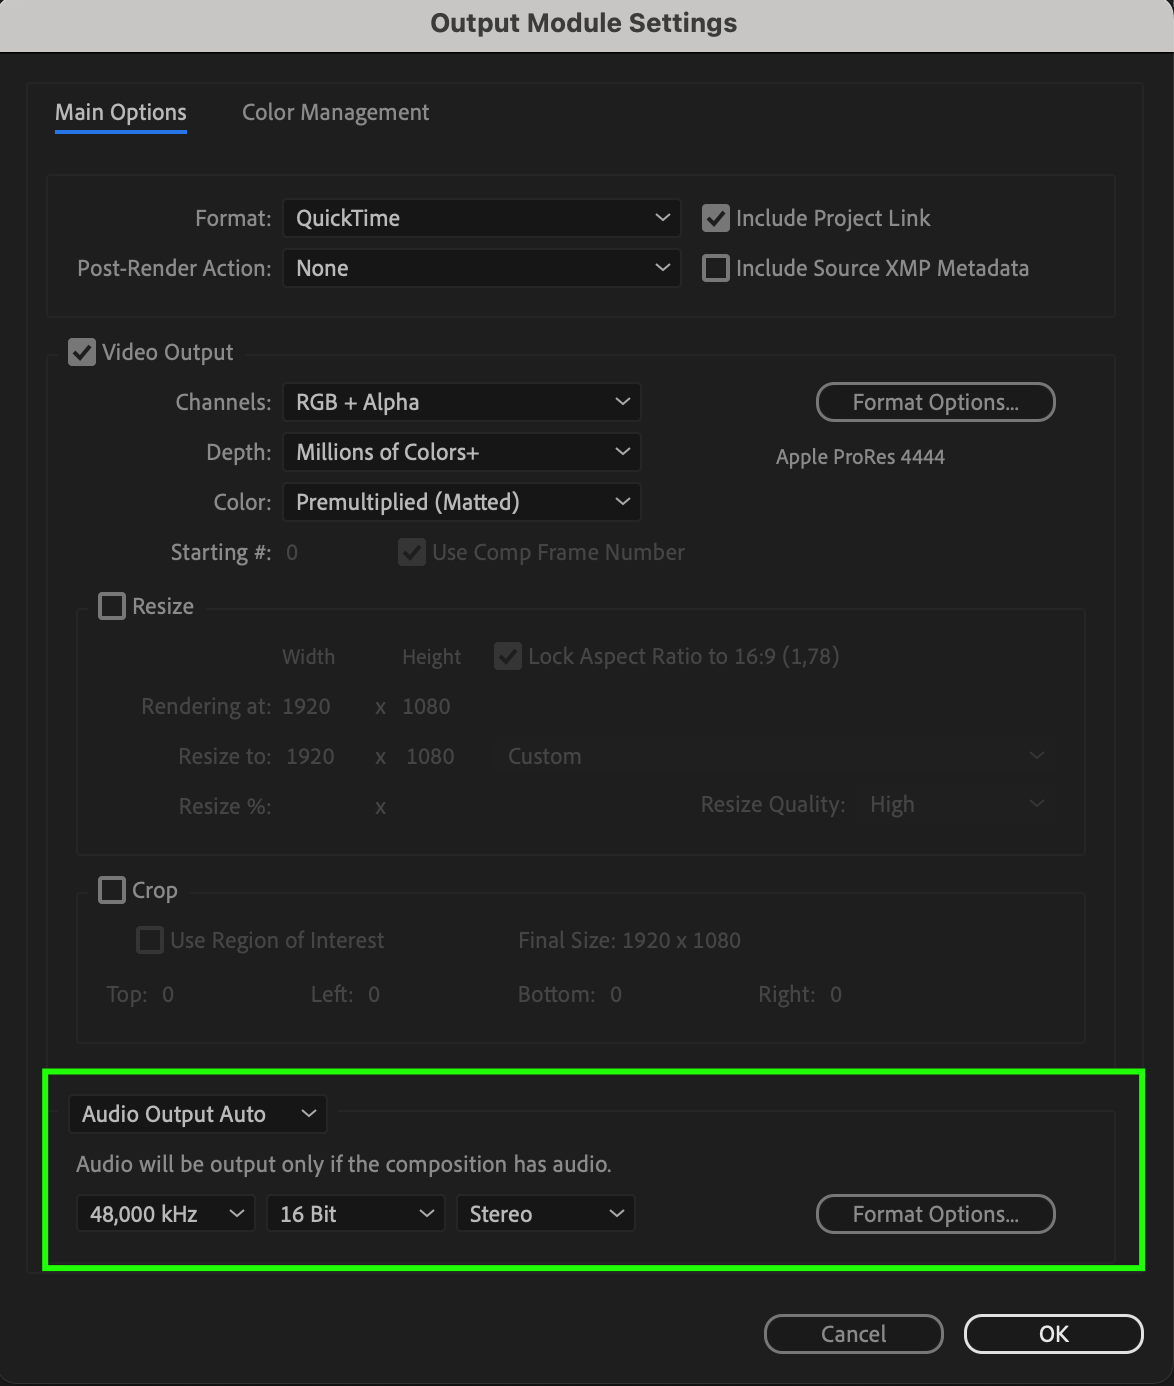 Step 6: Choose the Destination and File Name
Click on “Output To” in the Render Queue panel, then choose the file name and the destination folder where you want to save your exported movie. This helps keep your project files organized.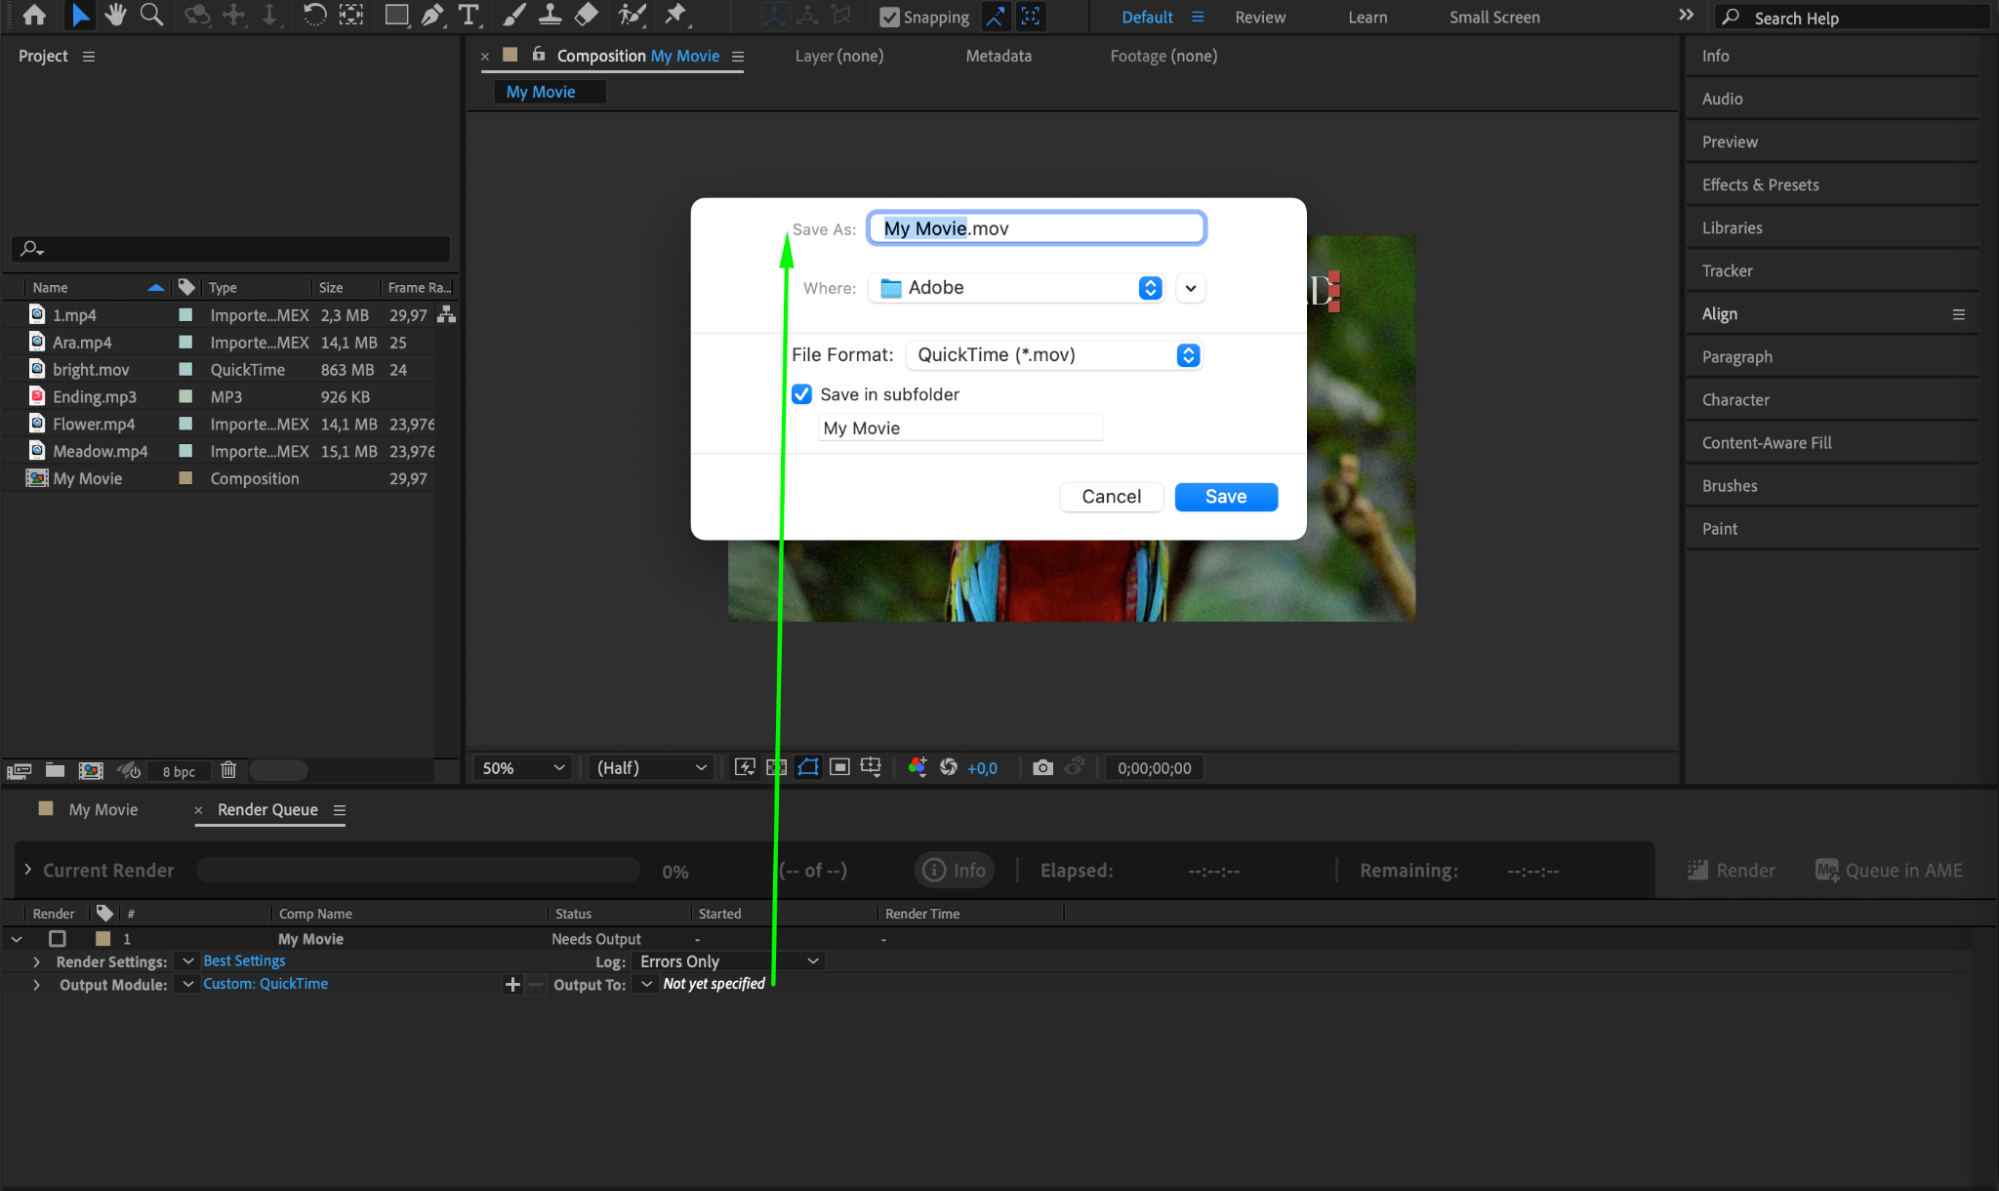 Step 7: Start the Rendering Process
Once all the settings are configured correctly, click on the “Render” button in the Render Queue panel. After Effects will start rendering your composition into the specified format and save it to the chosen output location. Depending on the complexity of your project, this may take some time. Step 8: Review the Exported Movie
After the rendering process is complete, carefully review the exported movie file. Play it to ensure that all the visual effects are intact, the audio is in sync, and there are no issues. If necessary, revisit the composition and re-export.
Conclusion
Voila! You’ve successfully exported your movie in After Effects. Now you can share it on different platforms, upload it to video sharing websites, and incorporate it into your other creative projects.
Get 10% off when you subscribe to our newsletter

Remember, exporting in After Effects requires attention to detail and understanding of the desired output. Don’t be afraid to experiment with different settings and formats to find the best balance of quality and compatibility for your specific needs. With practice, you’ll become proficient in exporting movies and showcase your creativity to the world. Happy exporting!


