How to Export Adobe After Effects Projects as MP4
Exporting Your After Effects Project as an MP4 File: A Step-by-Step Guide
Are you tired of struggling to export your Adobe After Effects projects as MP4 files? Don’t worry, we’re here to help! In this detailed guide, we will walk you through the entire process step-by-step, so you can easily share your stunning creations with the world.
A Comprehensive Guide to Exporting After Effects Projects as MP4
Exporting your Adobe After Effects projects as MP4 files is a straightforward process that ensures your videos are compatible with a wide range of platforms and devices. MP4 is a popular format due to its balance of quality and file size, making it ideal for sharing online or storing. Follow this comprehensive guide to ensure your export is done correctly and efficiently.
Get 10% off when you subscribe to our newsletter

Step 1: Add Composition to Render Queue
First, make sure you have selected the composition you want to export by clicking on it in the After Effects project panel. Once selected, navigate to the top menu and click on Composition. From the drop-down menu, select Add to Render Queue. This action will add your composition to the Render Queue panel, where you can adjust various export settings.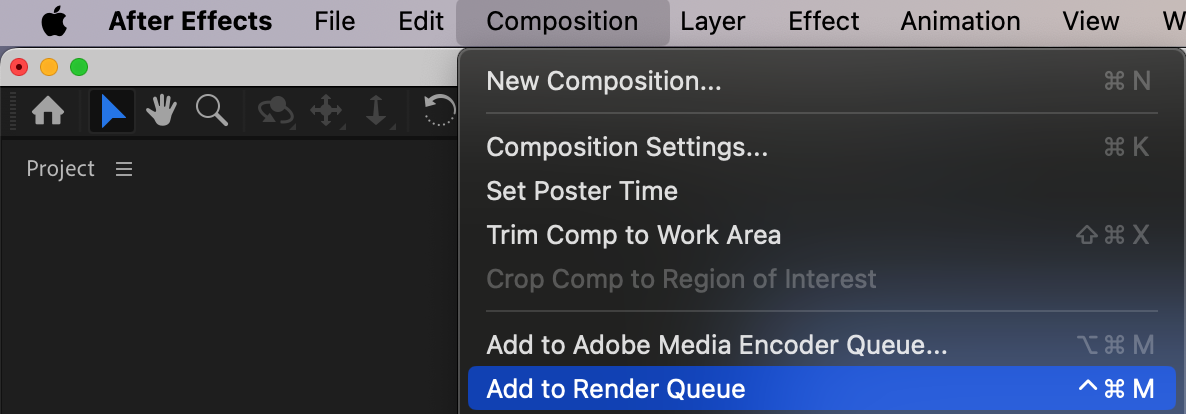 Step 2: Configure Output Settings
Next, configure the output settings by clicking on the text next to Output Module in the Render Queue panel. This will open the Output Module Settings window, where you can select the format and codec for your MP4 export. Ensure the format is set to H.264, which is the codec used for MP4 files. H.264 provides a good balance between video quality and file size, making it suitable for a variety of applications.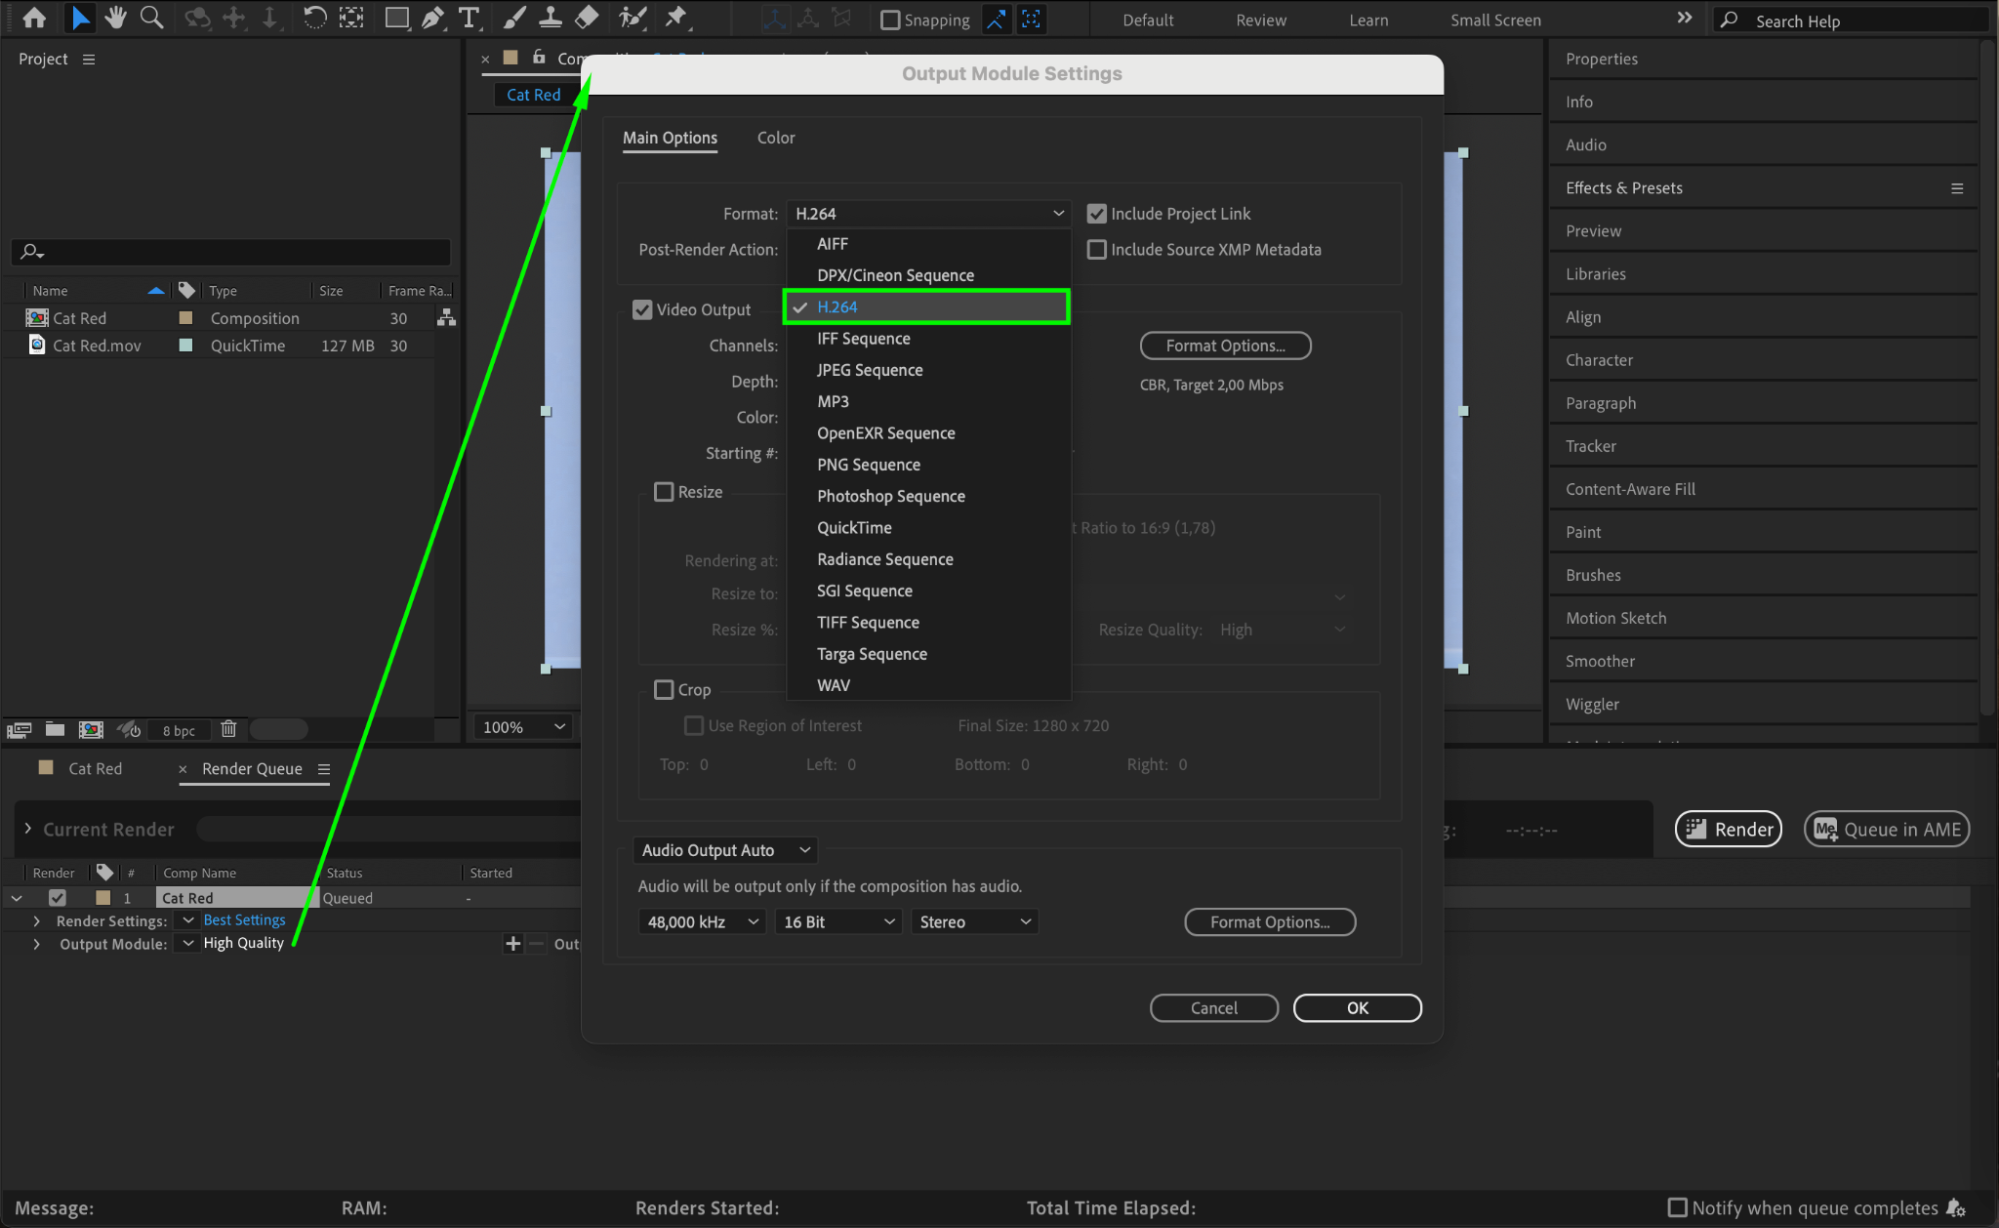 Step 3: Customize Export Settings
After setting the format, click on the Format Options button within the Output Module Settings window. This opens the Codec Settings dialog, where you can adjust parameters such as bitrate, frame rate, and resolution. The bitrate affects the quality and size of the file, so choose a bitrate that provides a good balance between quality and file size. Higher bitrates result in better quality but larger files, while lower bitrates reduce file size but may compromise quality.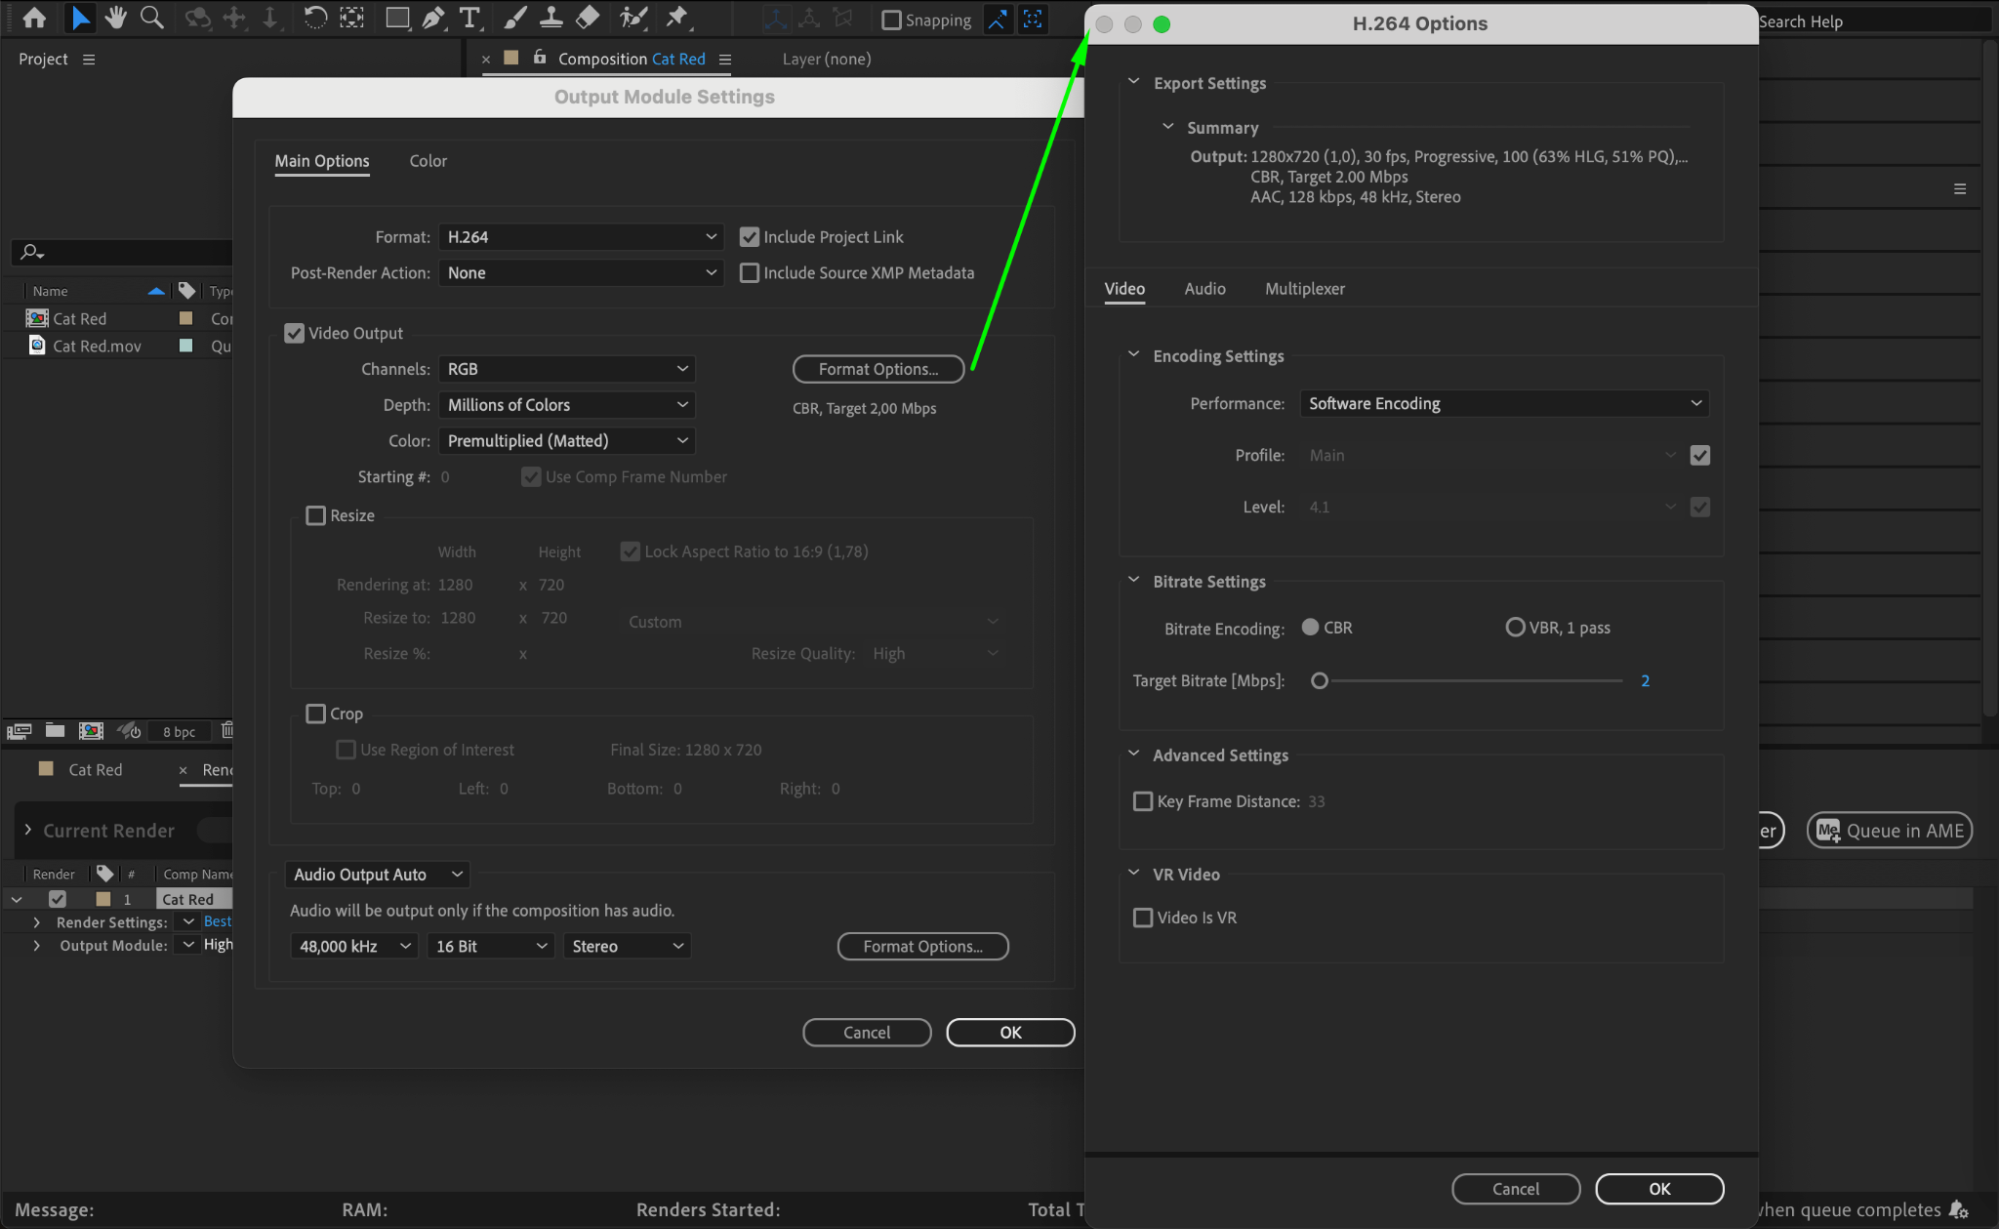 Step 4: Choose Output Destination
Now, choose the output destination for your MP4 file by clicking on the text next to Output To in the Render Queue panel. Select a location on your computer that is easily accessible and has enough storage space for your MP4 file. It’s helpful to choose a descriptive file name to make it easy to locate your exported video later.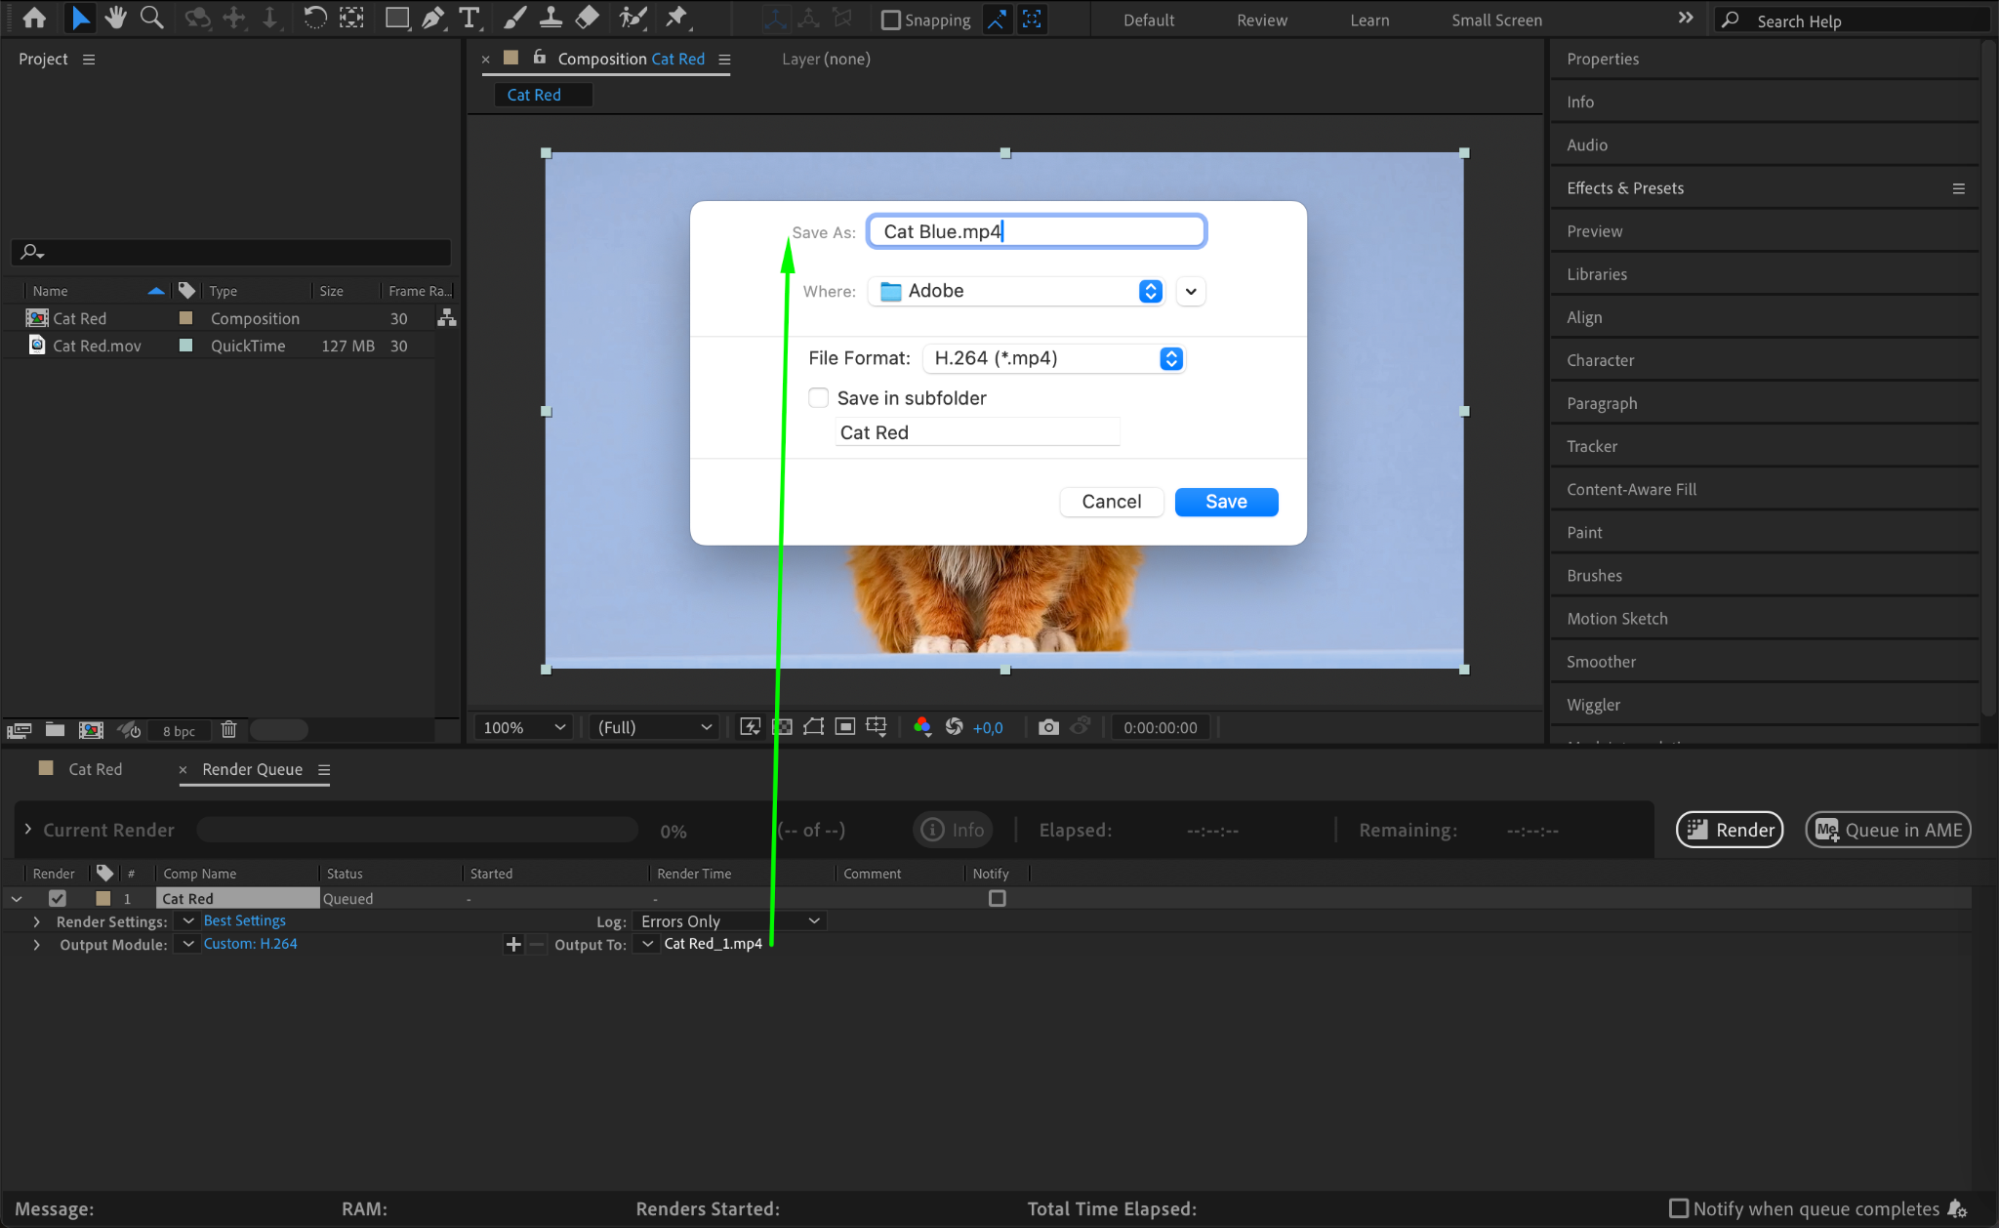 Step 5: Start the Export Process
Double-check your settings and make any necessary adjustments. Once you’re satisfied with the configuration, press the Render button in the Render Queue panel to start the export process. After Effects will begin rendering your composition and converting it into an MP4 file based on your specified settings. The duration of the rendering process will depend on the complexity of your project and the performance of your computer.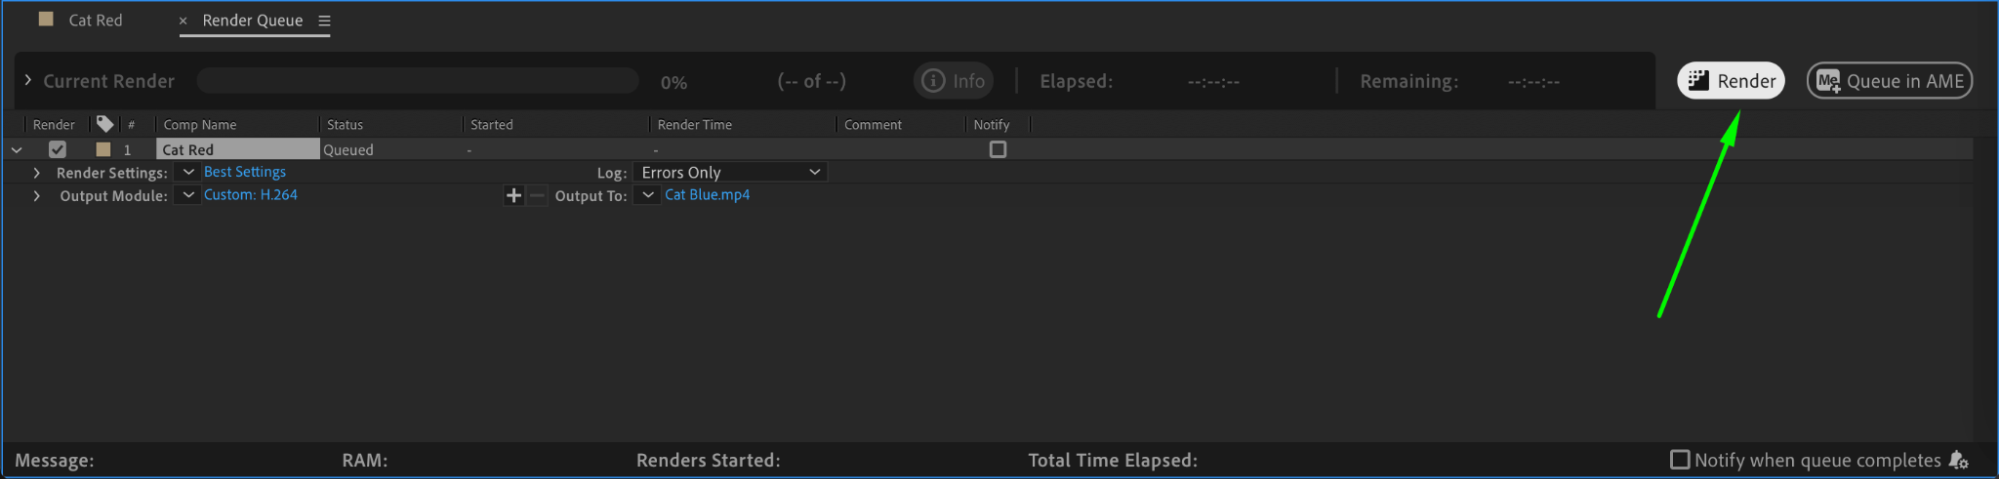 Step 6: Monitor Rendering Progress
Monitor the progress of the rendering process in the Render Queue panel. You will see details such as the estimated remaining time and the status of the render. Be patient during this process, as it can take some time depending on the size and complexity of your composition. If any errors or issues arise, After Effects will provide error messages to help you troubleshoot.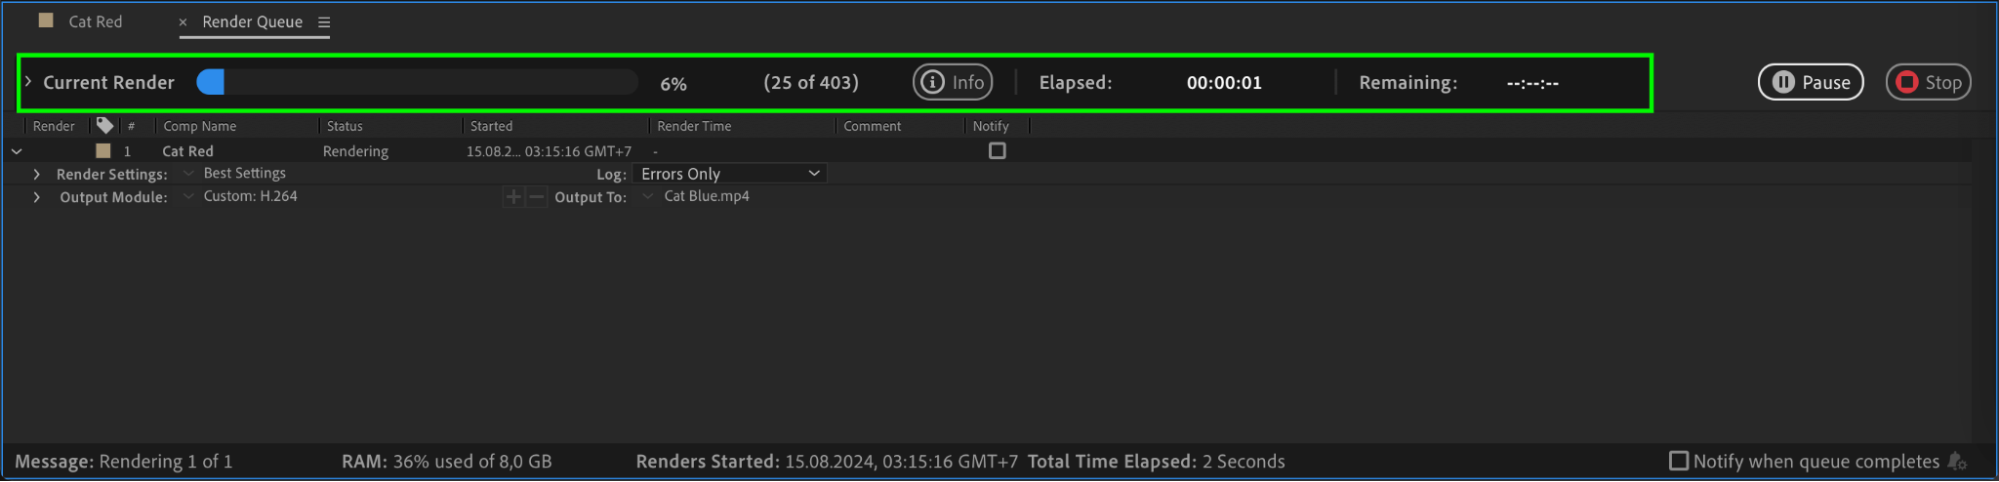 Conclusion
Congratulations! You have successfully exported your Adobe After Effects project as an MP4 file. Now you can share your stunning videos with the world and impress your audience on various platforms and devices.
In conclusion, exporting Adobe After Effects projects as MP4 is a straightforward process that requires attention to detail and a basic understanding of the settings. By following this step-by-step guide, you can ensure that your videos are exported with optimal quality, compatibility, and file size. So go ahead, experiment with different settings, and showcase your creativity to the world. Happy exporting!
Our Bestsellers


