A Comprehensive Guide to Exporting After Effects Compositions as GIFs
How to Create and Export Stunning GIFs from After Effects
Would you like to learn how to export your After Effects compositions as GIFs? With this comprehensive step-by-step guide, you’ll be creating stunning animated GIFs in no time, thanks to the AEJuice plugin. Whether you’re a professional video designer or a creative enthusiast, this tutorial will equip you with the knowledge and tools to captivate your audience with eye-catching animations.
Step 1: Install the AEJuice Plugin
Before you start exporting, you need to install the AEJuice plugin. Visit the AEJuice website and download the version compatible with your After Effects setup. Follow the installation instructions provided to integrate the plugin into After Effects seamlessly. The AEJuice plugin simplifies the process of exporting GIFs, offering various customization options for your animations.
Step 2: Select Your Composition
Get 10% off when you subscribe to our newsletter

Open your After Effects project and navigate to the composition panel. Choose the composition you want to export as a GIF. Ensure all the elements, layers, and effects you want to include are properly organized and positioned within the composition. This step is crucial as it determines what content will be featured in your final GIF.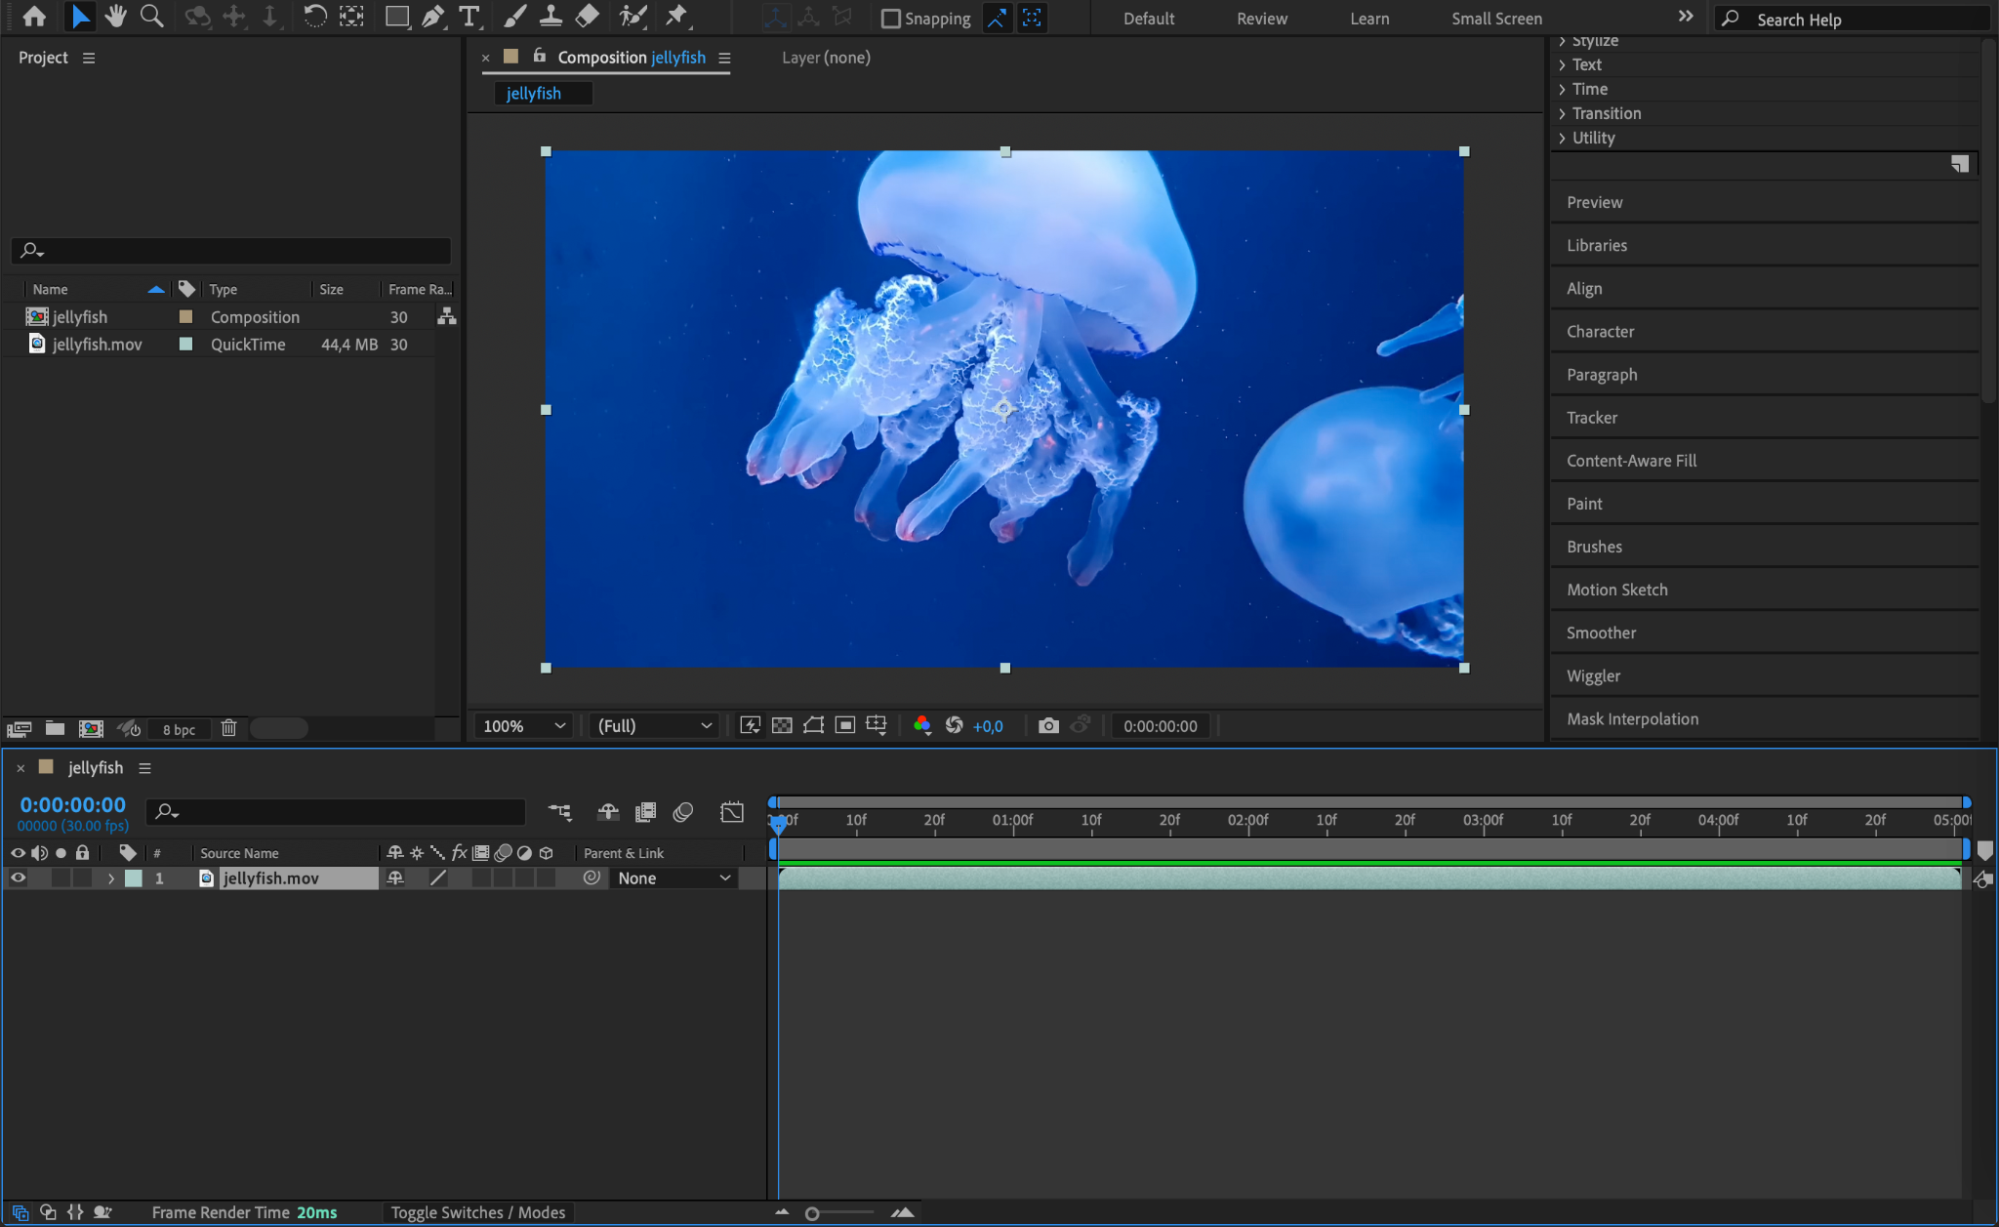
Step 3: Access the AEJuice Export GIF Panel
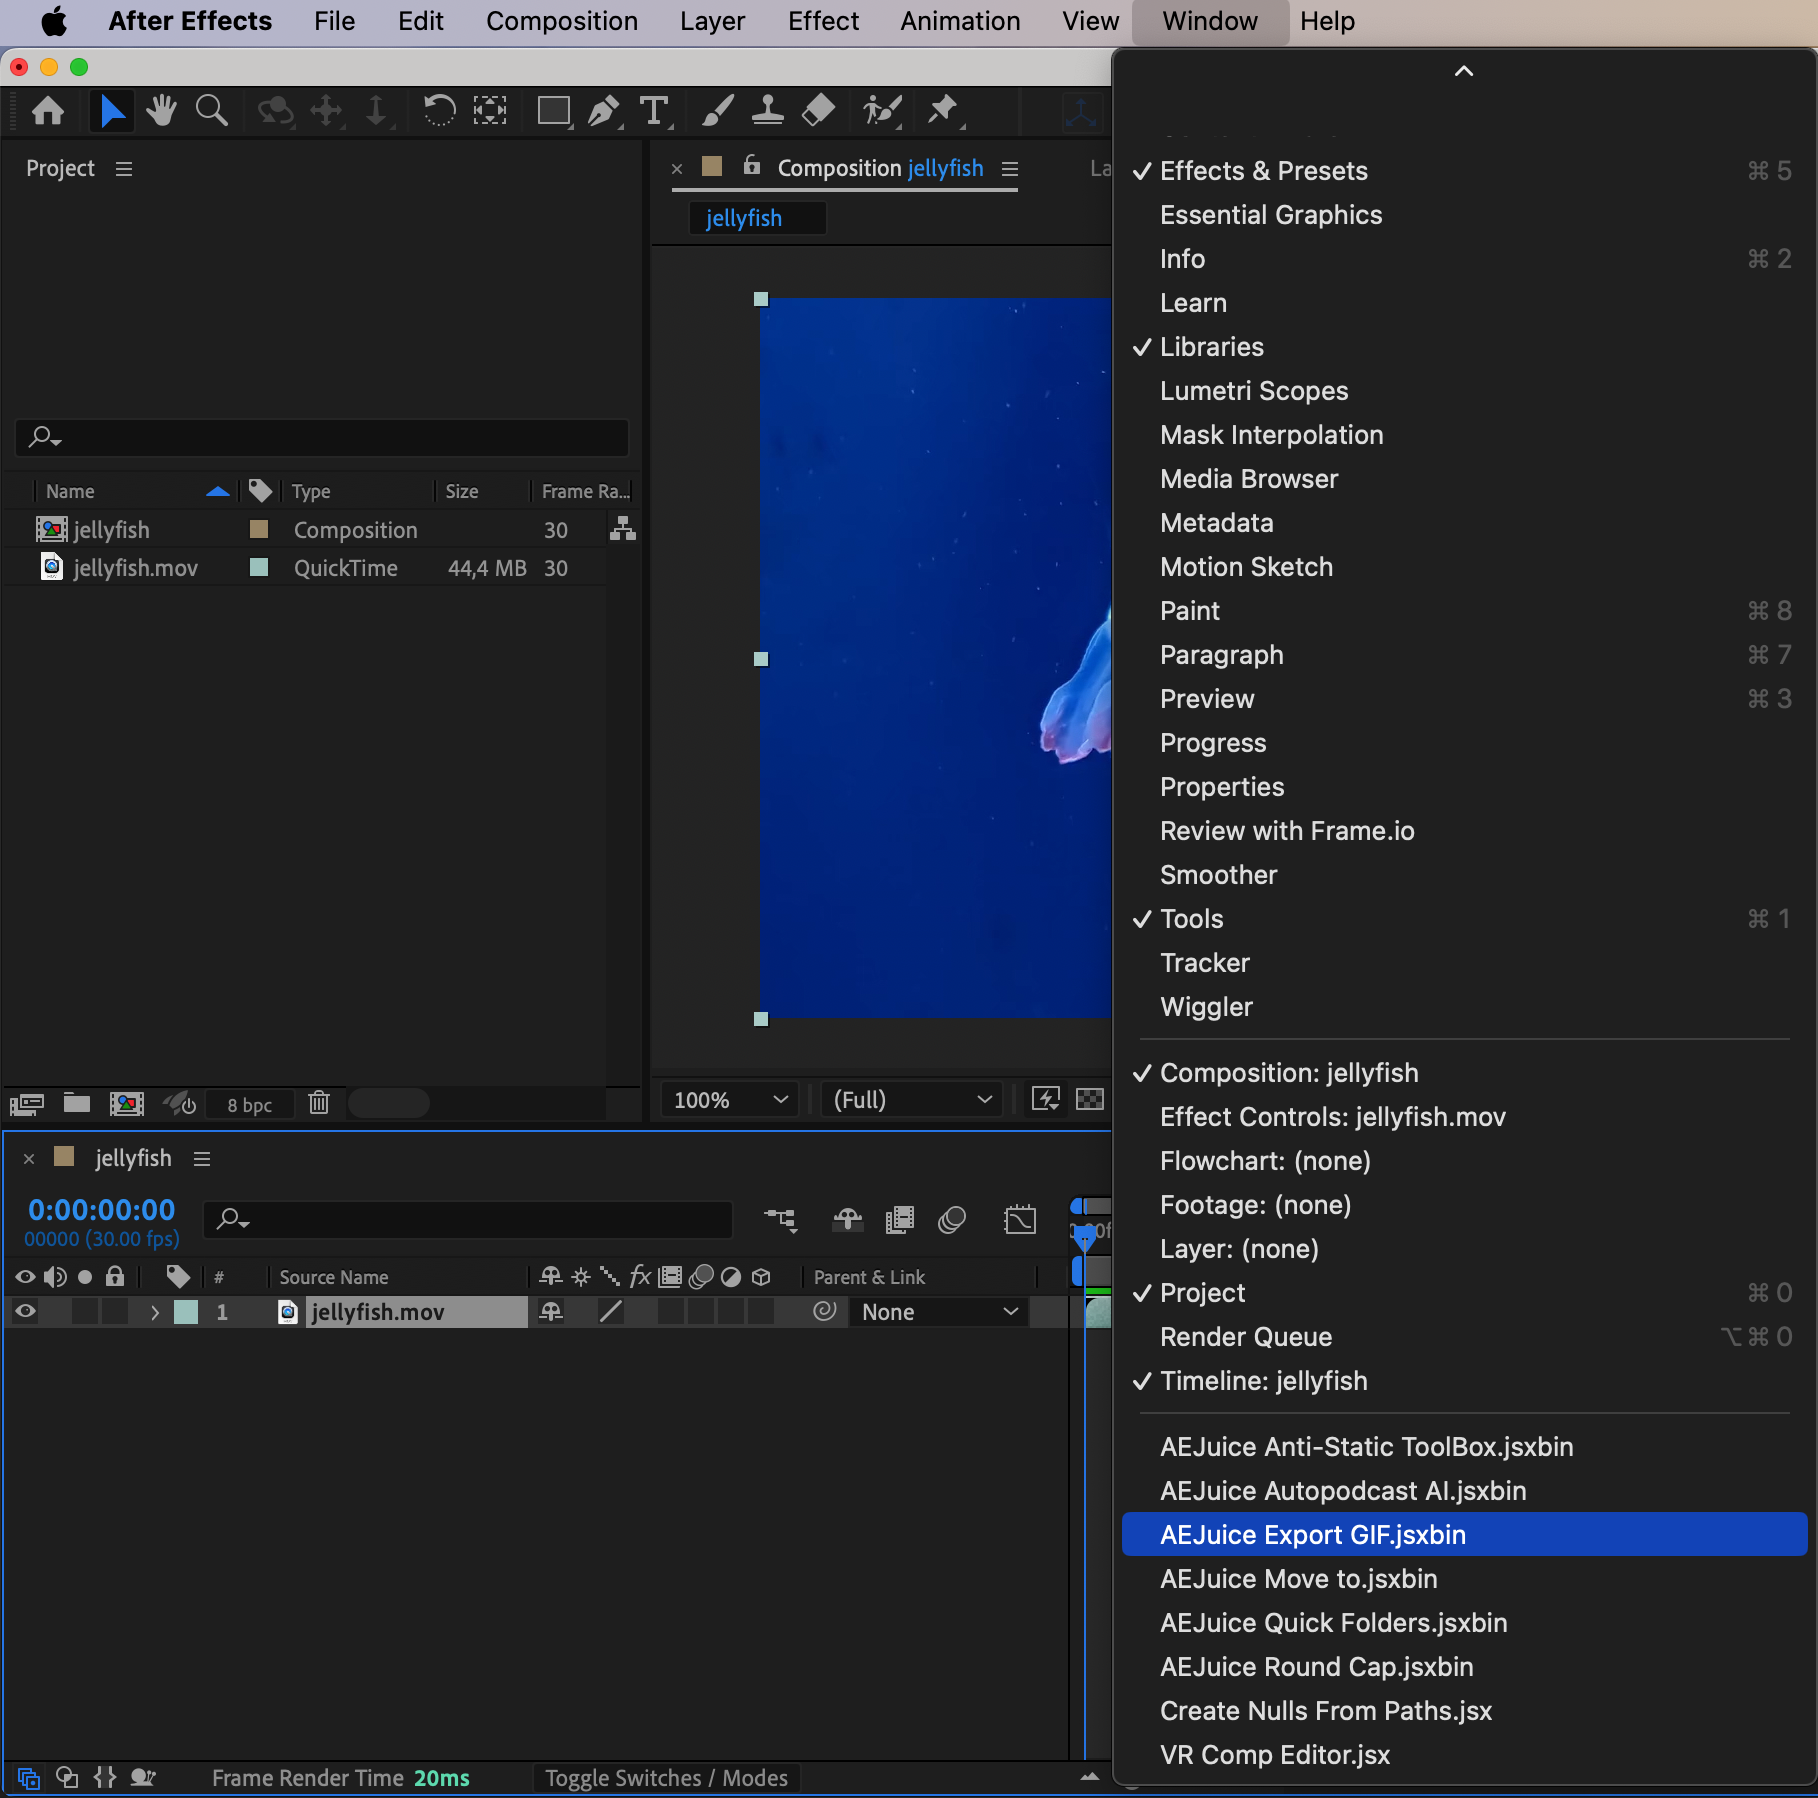
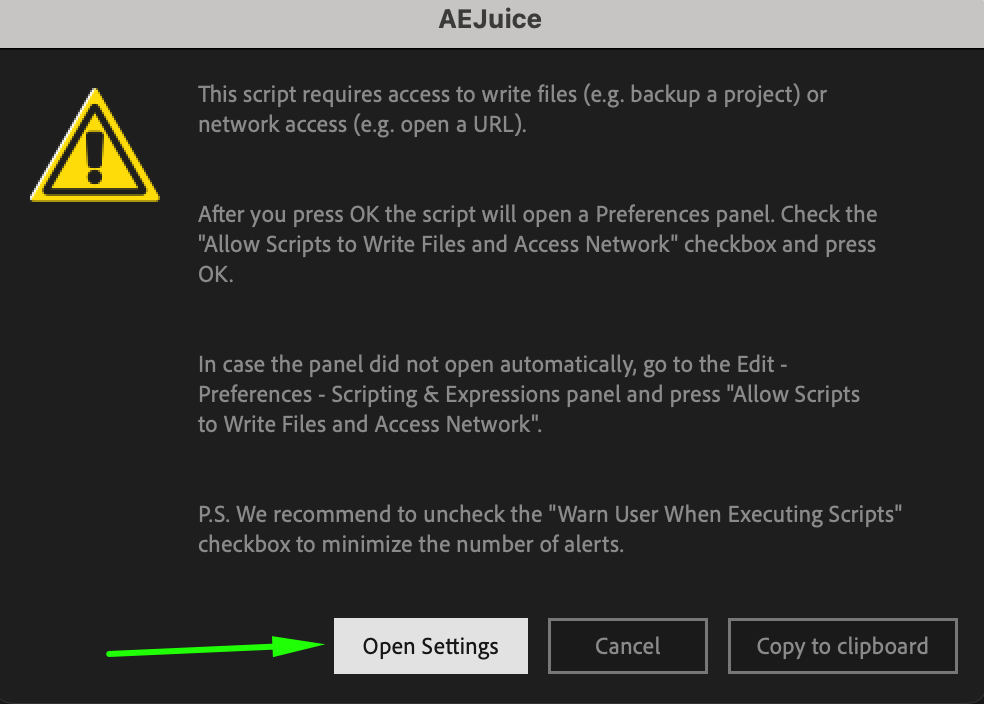
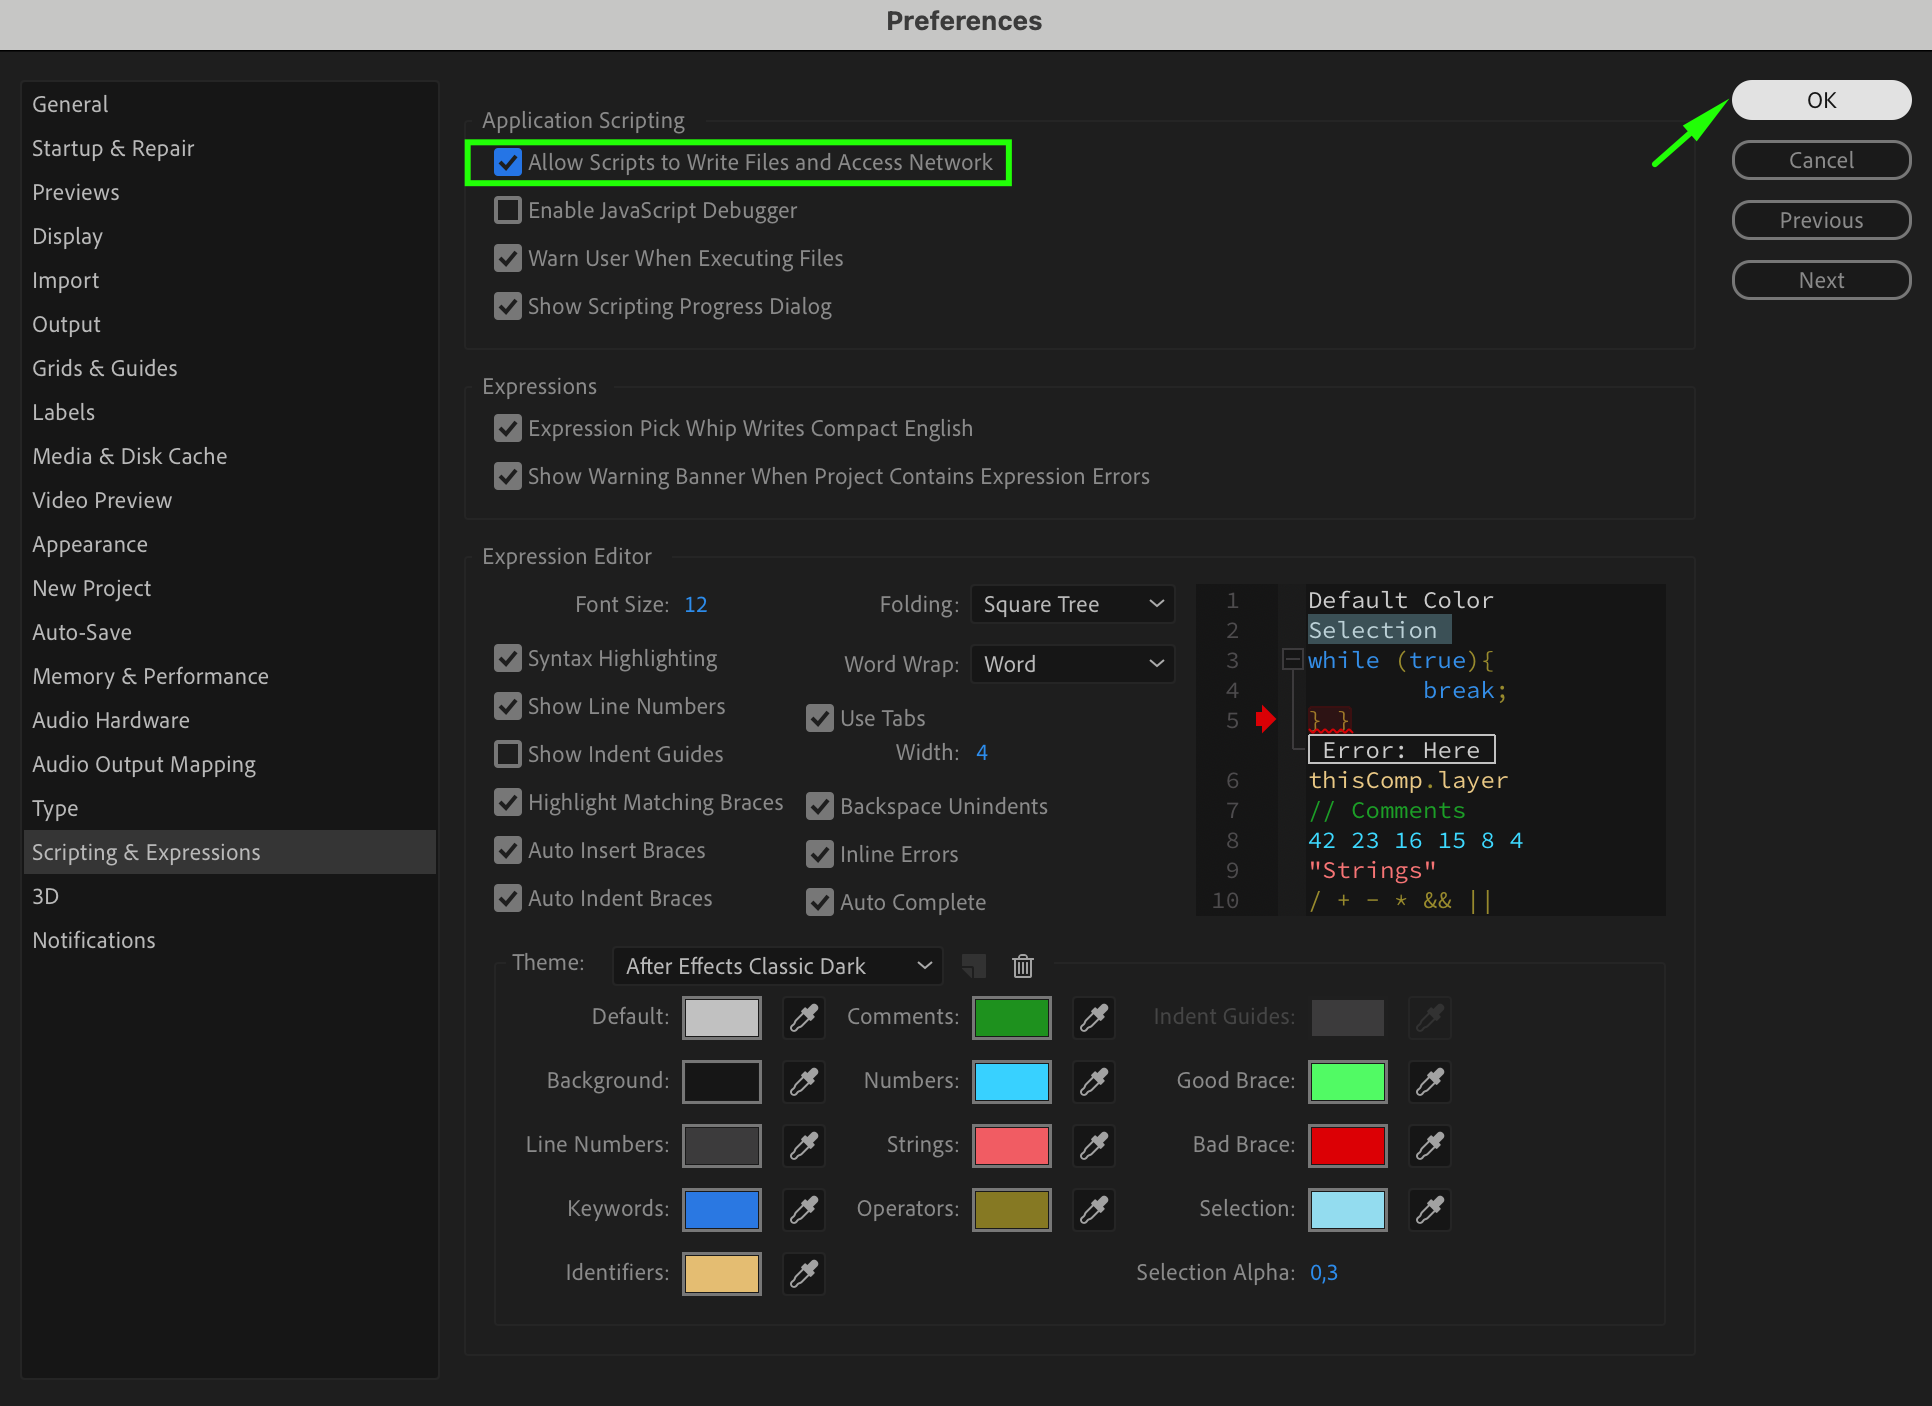
With your composition selected, go to Window > AEJuice Export GIF.jsxbin. This action will open the AEJuice Export GIF panel, where you can adjust various export settings. If you encounter any issues with script permissions, you may need to enable the option to allow scripts to write files and access the network by going to After Effects Preferences > Scripting & Expressions.
 Step 4: Configure Export Settings
In the AEJuice Export GIF panel, you’ll see options to edit export settings, such as looping animation and quality adjustments. Customize these settings according to your preferences. Once you’re satisfied with the configuration, click the GIF button to initiate the export process. Choose a destination folder on your computer to save the GIF file.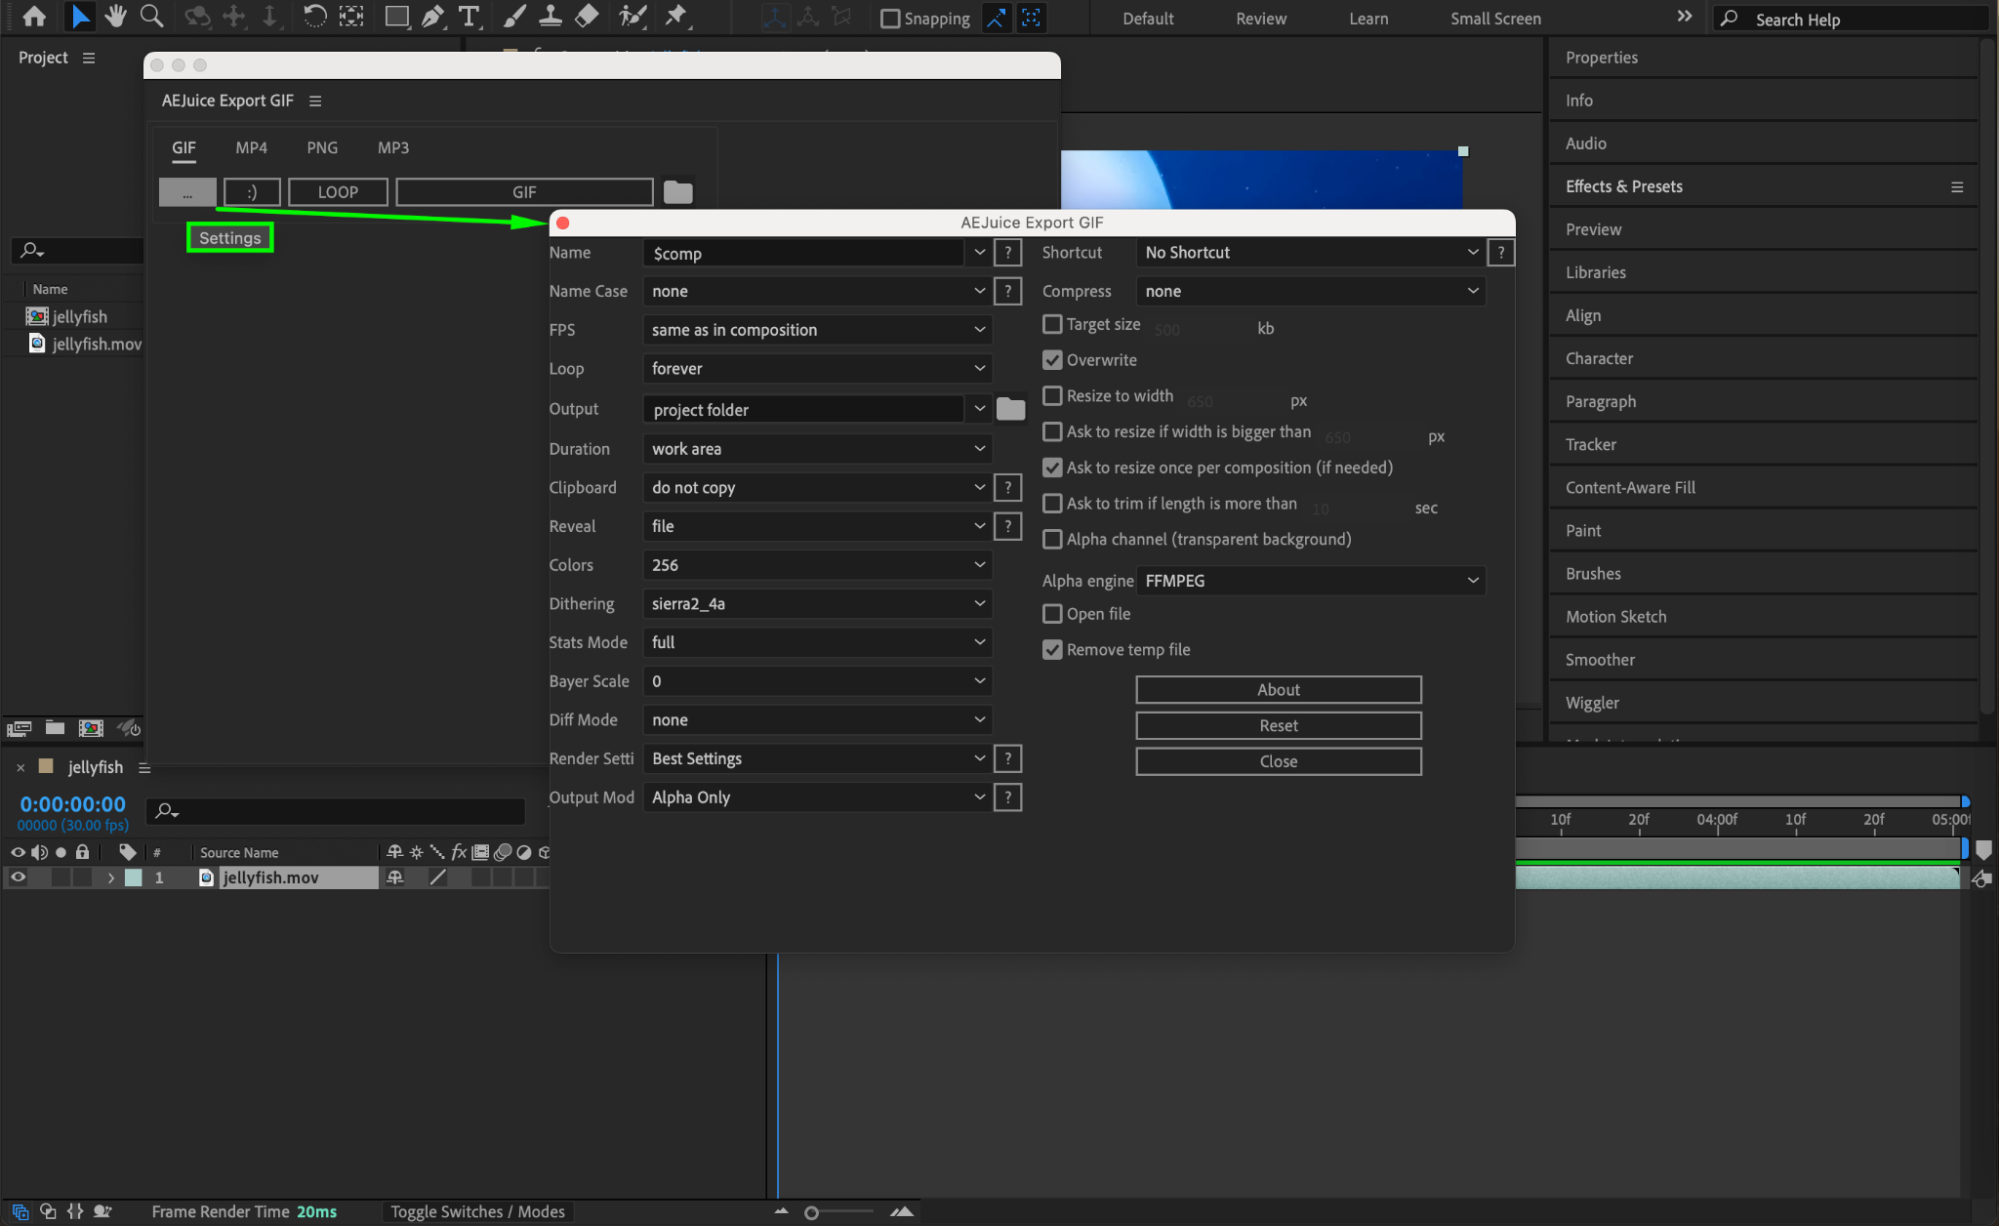
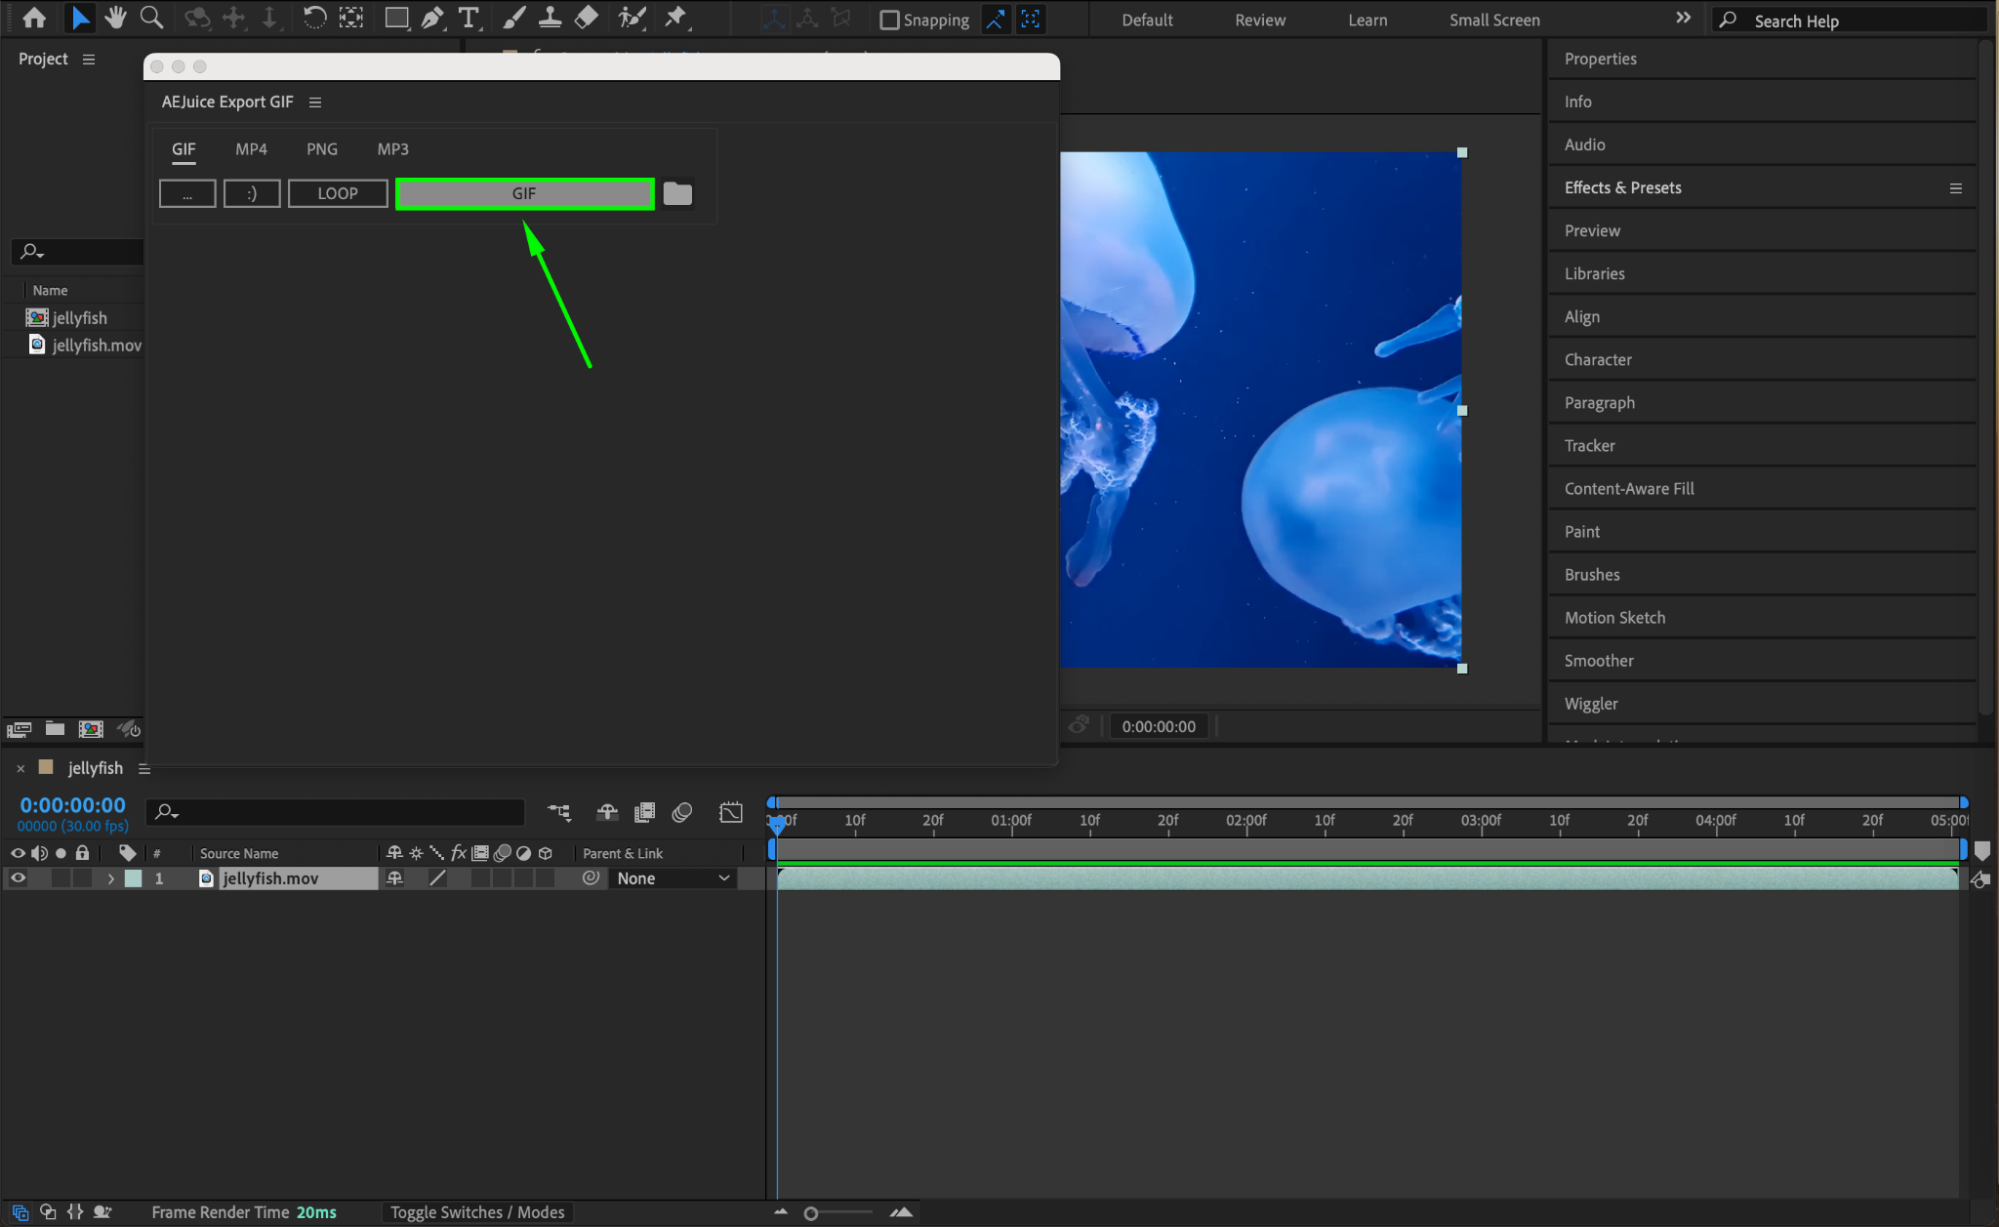 Step 5: Monitor the Rendering Process
After starting the export, the rendering panel will automatically open, showing the progress of your GIF creation. This panel provides updates on the export process and estimated time remaining. Keep an eye on this panel to ensure that the export completes successfully without errors.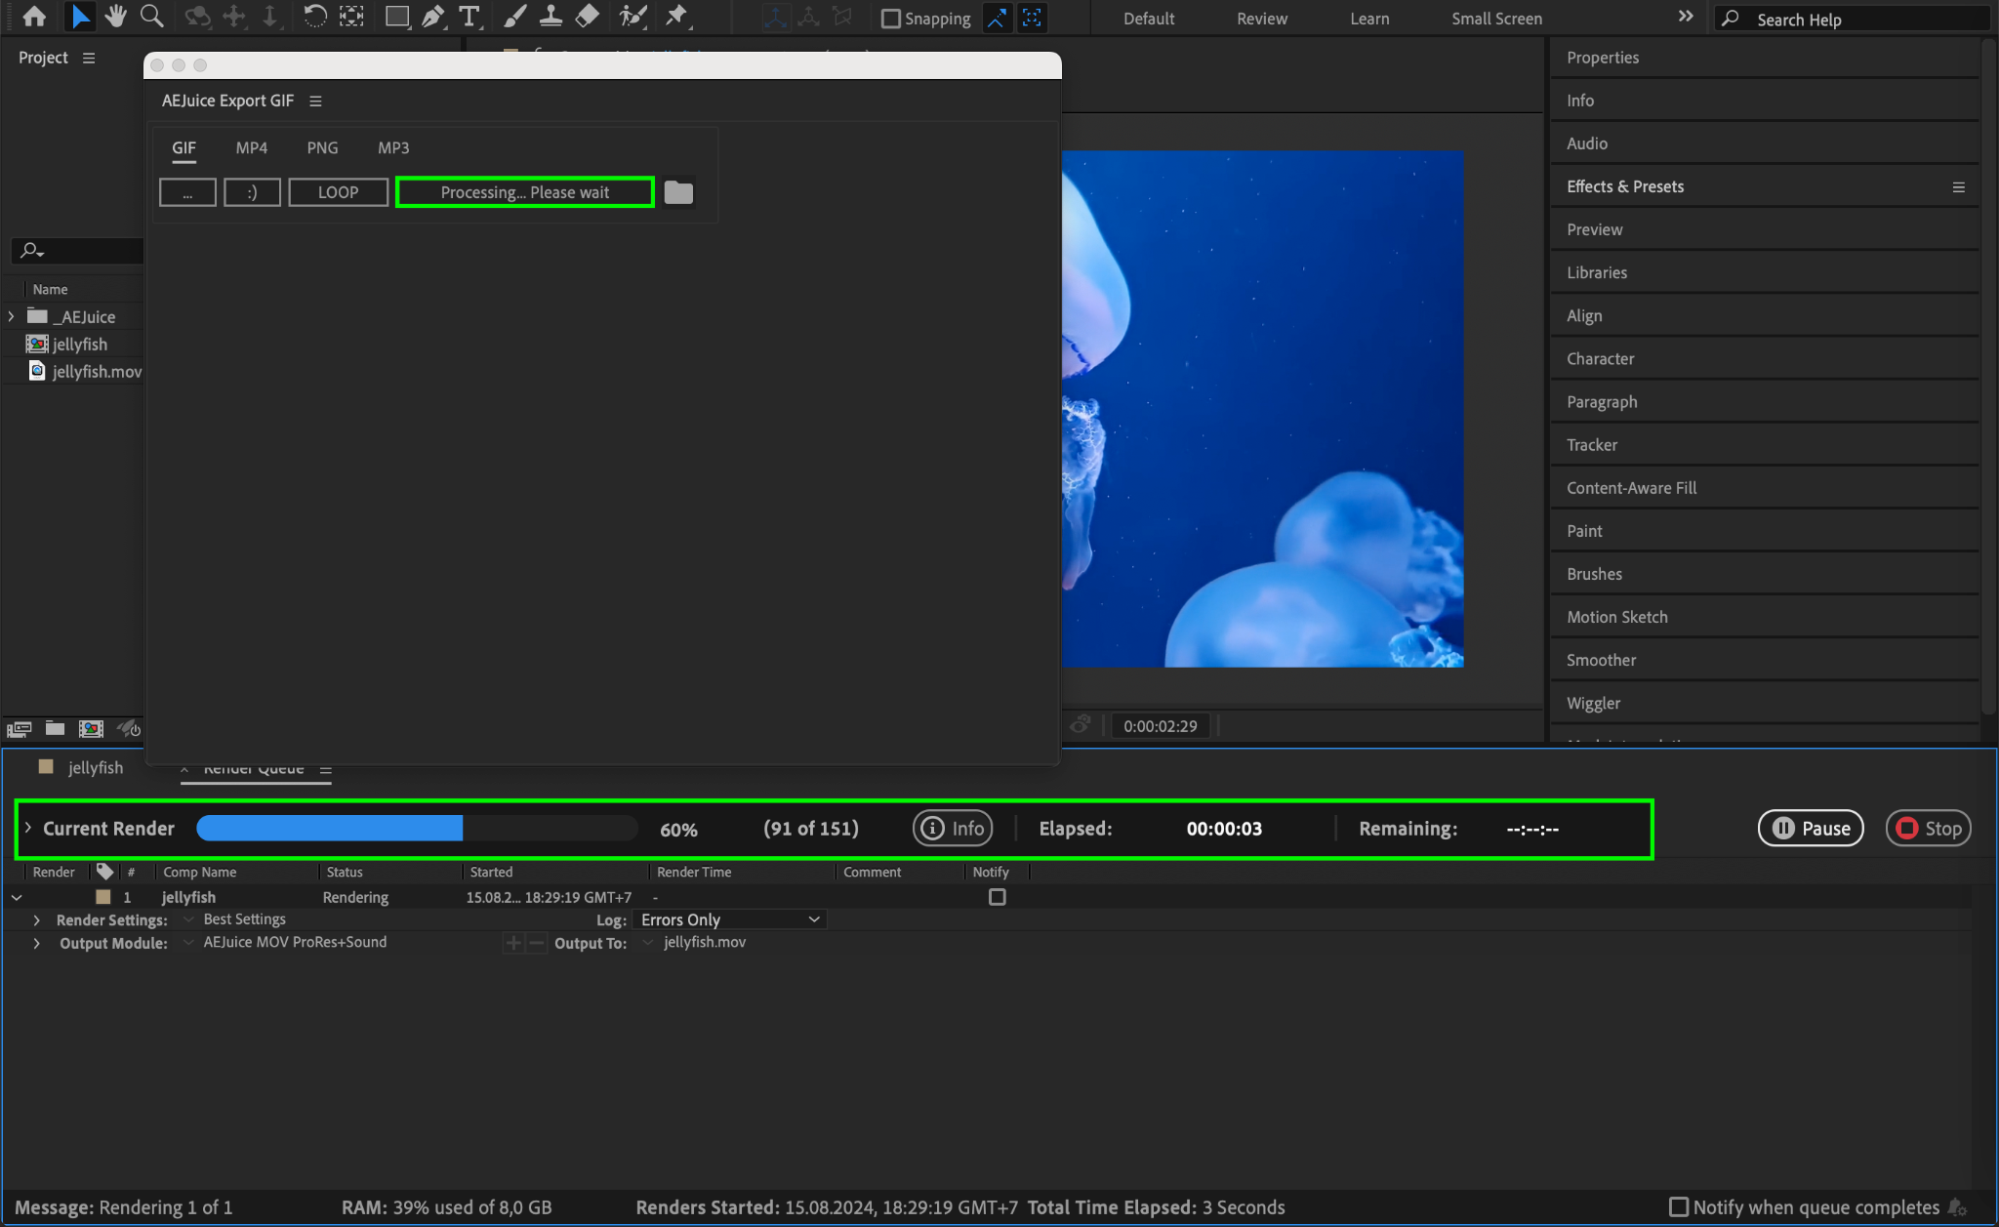
Step 6: Verify Your Exported GIF
Once the export is finished, locate the GIF file in the destination folder you selected earlier. Open the file to check its quality and ensure that all elements are correctly rendered. Verify that the GIF meets your expectations in terms of animation and visual appearance.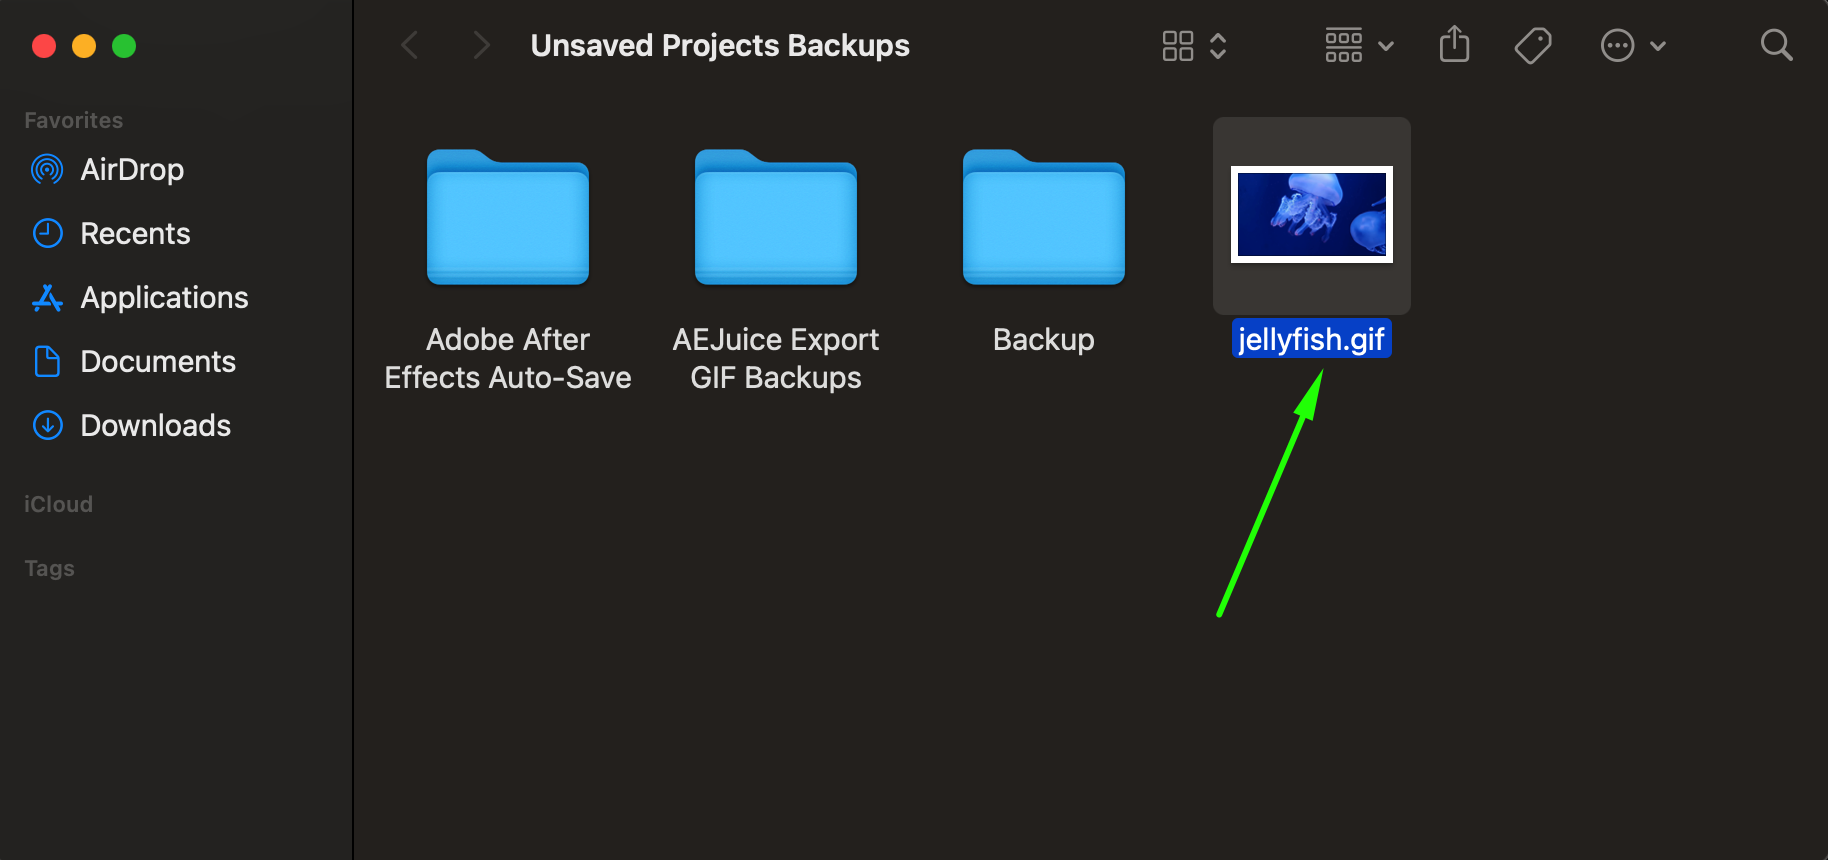 Conclusion
Exporting After Effects compositions as GIFs is a breeze with the AEJuice plugin. The plugin’s user-friendly interface and versatile customization options give you full control over your GIF animations. With these steps, you can easily create and export GIFs that enhance your creative projects and engage your audience. Start exploring the creative possibilities with AEJuice and let your animations shine!
Feel free to tweak the steps and settings according to your project’s specific needs. Happy animating!


