How to Export a File from After Effects
Exporting Files from After Effects: A Beginner’s Guide
Have you just finished creating an amazing video project in After Effects? Are you wondering how to share it with the world? Exporting your files correctly from After Effects ensures the best quality and compatibility across different platforms and devices.
In this beginner’s guide, we will show you step-by-step how to export files from After Effects. Whether you are new to the software or have some experience, this guide will help you understand different file formats, settings, and options available to you.
Following these instructions will ensure that your final product looks as stunning as it did in After Effects. So, let’s dive in and learn how to export your After Effects files like a pro.
A Comprehensive Guide to Exporting Files from After Effects
Exporting files from After Effects is an important step in the video production process. It allows you to share your creations with others and ensures they can be viewed on different platforms and devices. However, with so many file formats and export settings to choose from, it can feel overwhelming for beginners.
Get 10% off when you subscribe to our newsletter

In this comprehensive guide, we will walk you through the step-by-step process of exporting files from After Effects. We will cover everything from selecting the right file format to adjusting export settings and preserving the highest quality for your projects. So, let’s get started and learn how to export your After Effects files like a pro!
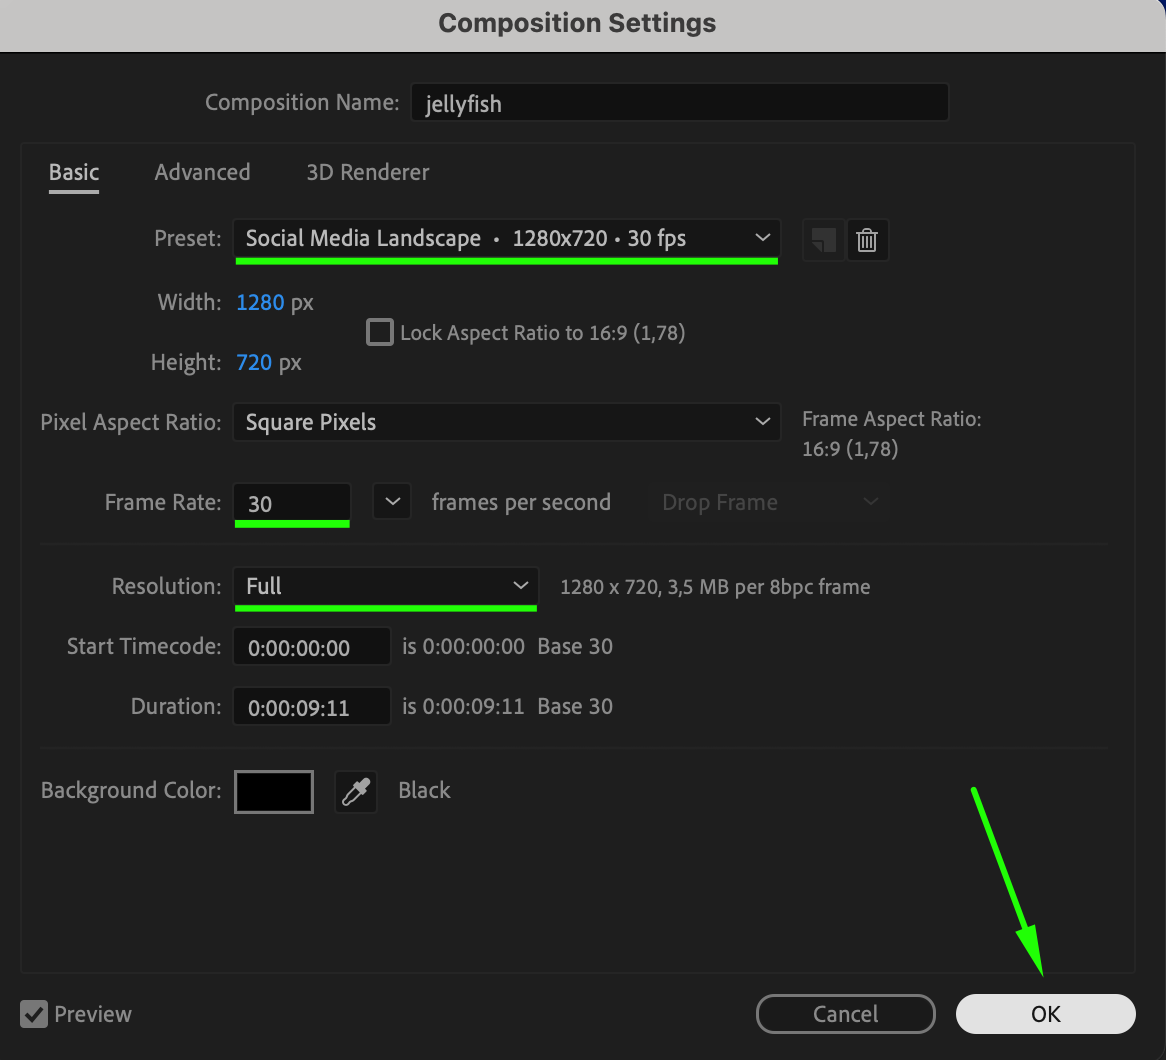
Step 1: Verify Project Settings
Before exporting, it’s essential to check and confirm your composition settings. Go to Composition > Composition Settings and review key parameters such as preset, frame rate, and resolution. Ensuring these settings are correct will affect the quality and compatibility of your exported file. Adjust them as needed to match your desired output specifications.

 Step 2: Add to Render Queue
Once your composition is ready, navigate to Composition > Add to Render Queue. This action opens the Render Queue panel, where you can configure export settings. The Render Queue panel allows you to manage your export job, specifying how you want After Effects to process and output your video. Step 3: Choose the Right File Format
In the Render Queue panel, click on the text next to Output Module to access the Output Module Settings window. Selecting the right file format is crucial for ensuring your video meets the required quality and compatibility. After Effects offers several formats:
QuickTime: Ideal for high-quality output and compatibility with various editing software. Great for sharing online or further editing.
H.264: Provides a balance between quality and file size. Highly compatible and suitable for playback on most devices.
Animated GIF: Best for creating looping animations or sharing short snippets of your project. Useful for social media or web use.
Choose the format that best suits your needs and adjust additional settings as necessary.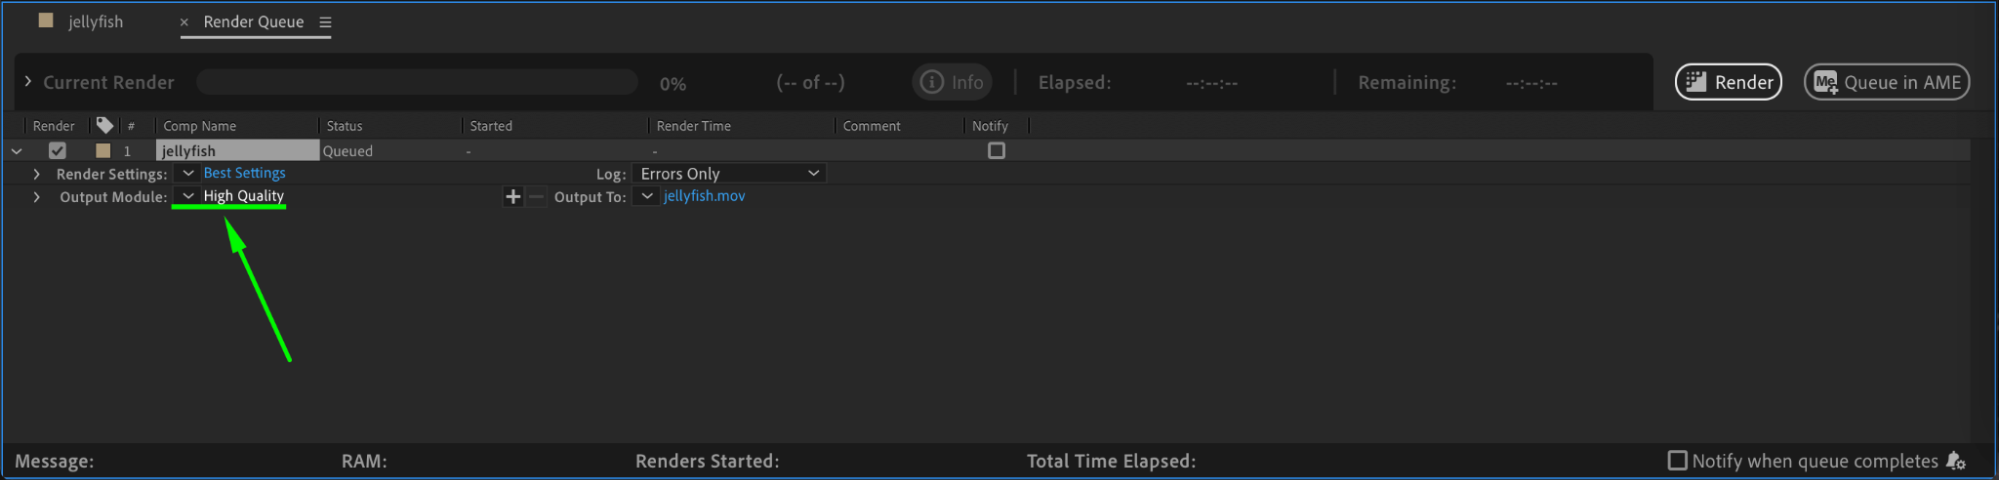
 Step 4: Select Destination and File Name
Click on the text next to Output To in the Render Queue panel to choose the destination folder and file name for your exported video. This step ensures you know where your file will be saved and helps you keep your projects organized. Select a clear and descriptive name to make locating the file easier.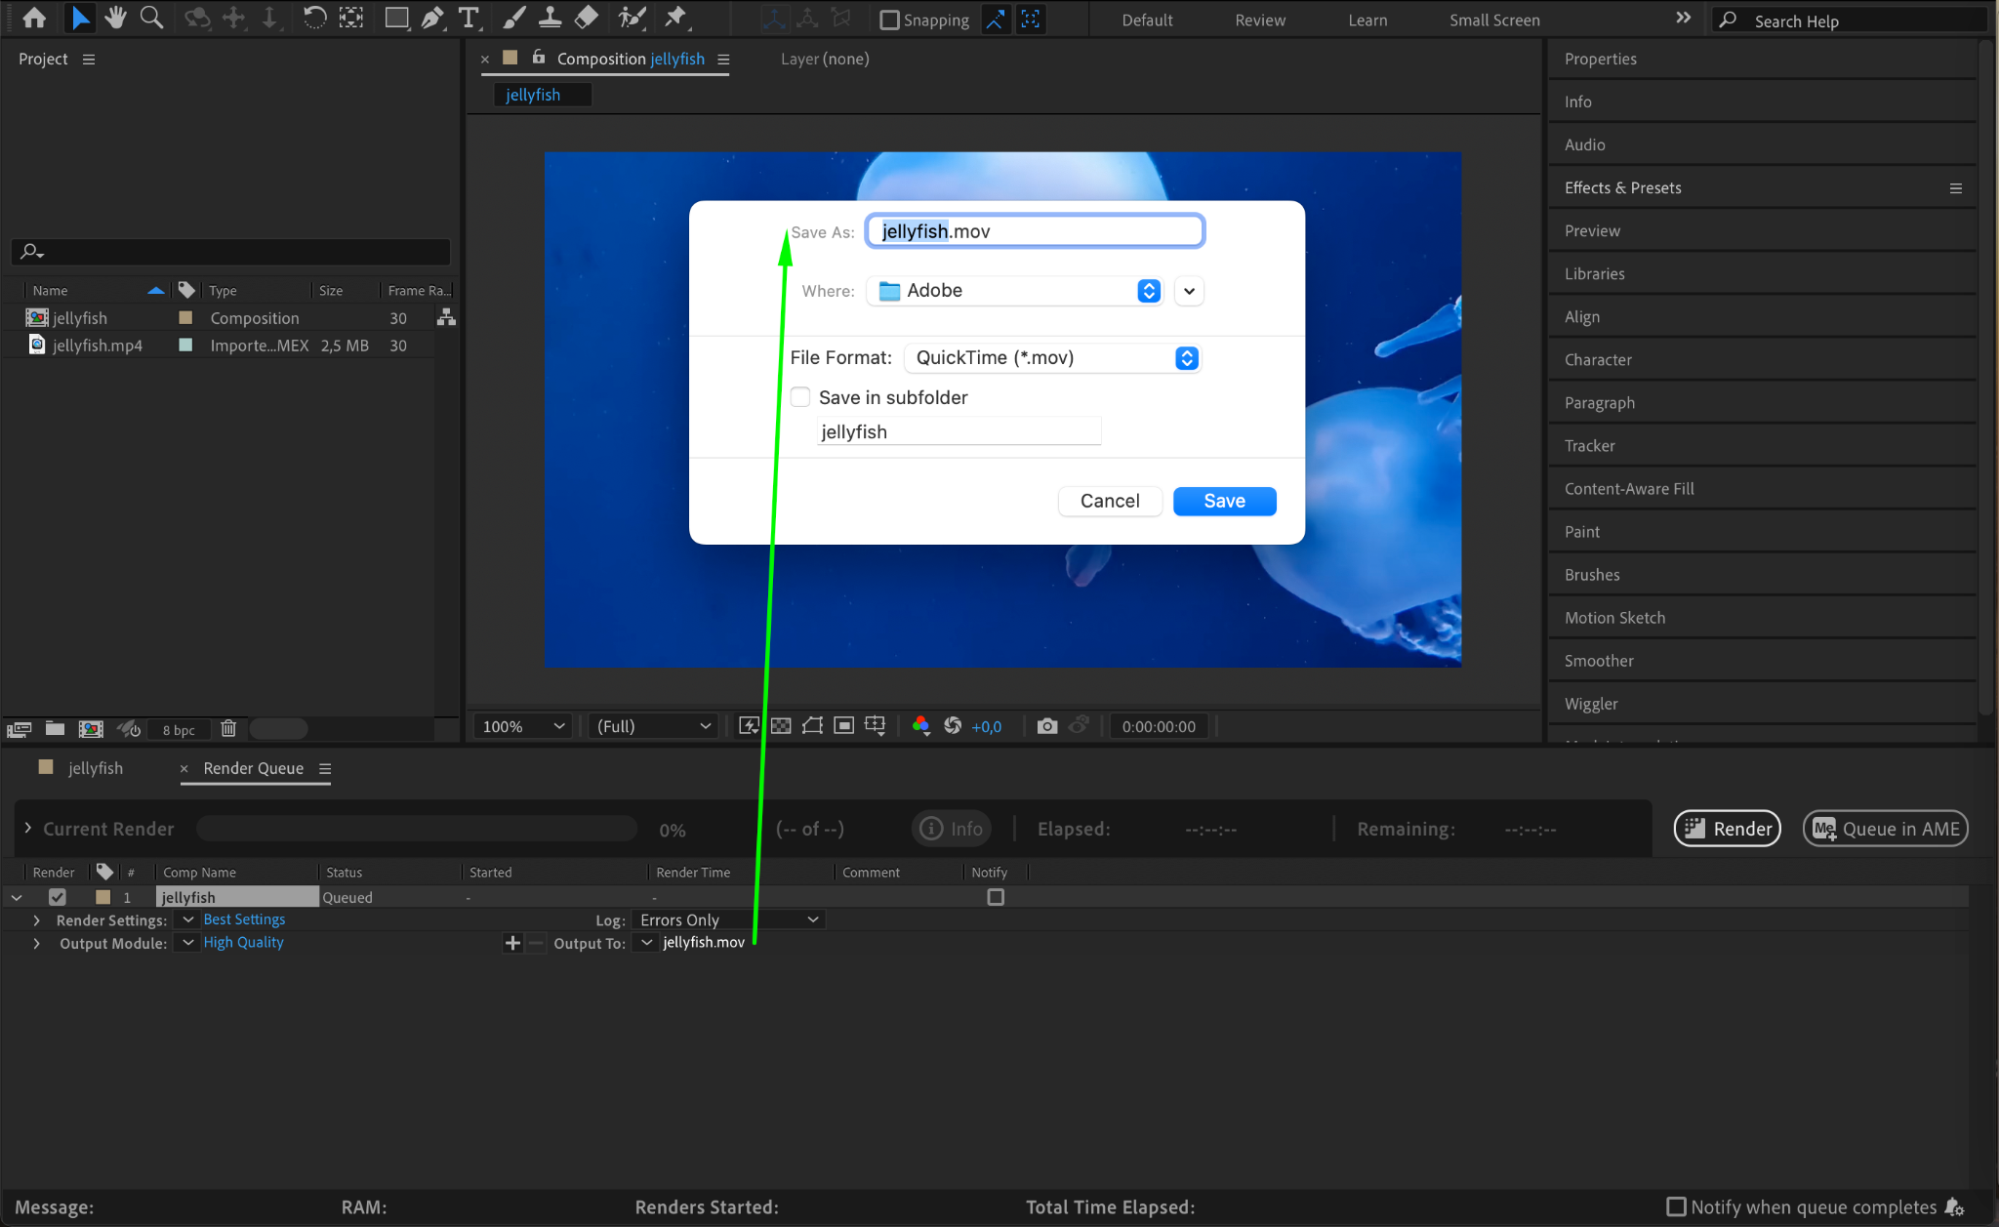 Step 5: Start the Rendering Process
With all settings configured, click the Render button in the Render Queue panel to start exporting your file. After Effects will process your composition based on the selected settings and format. Depending on the complexity and length of your project, rendering may take some time, so be patient and monitor the progress.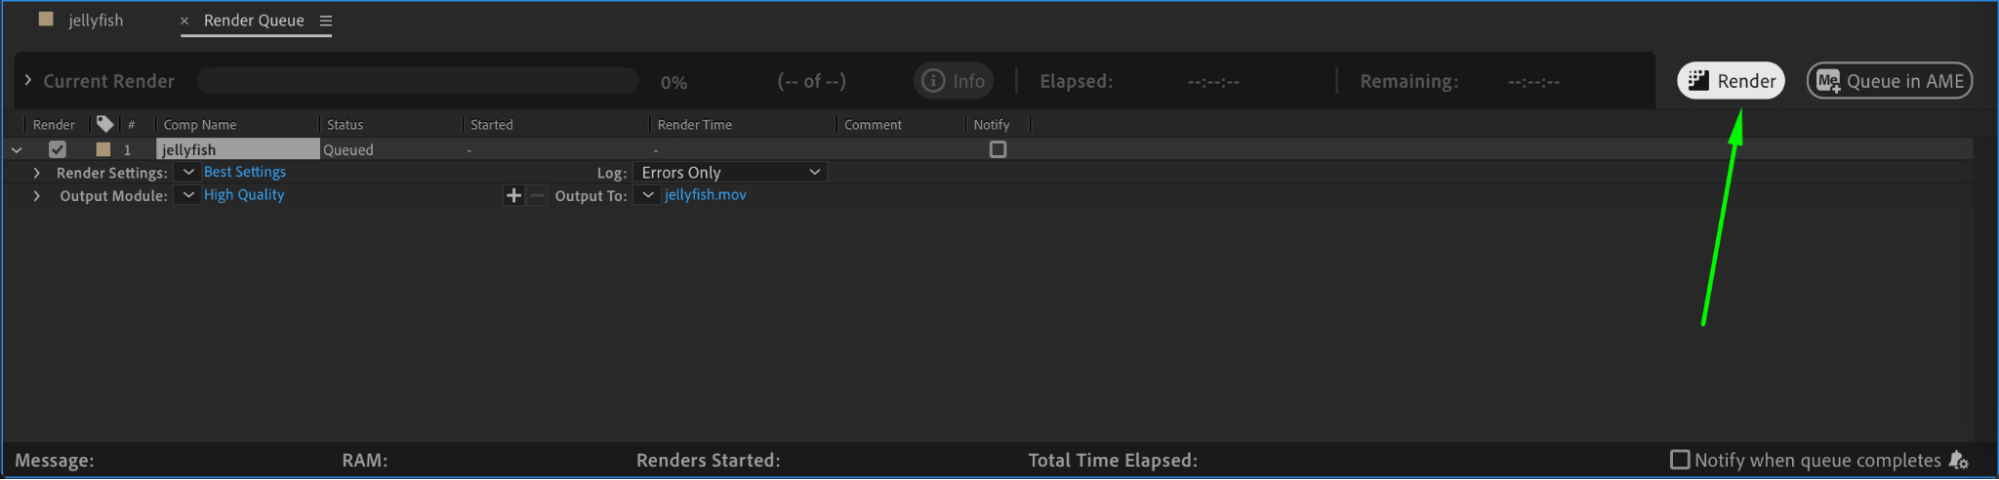 Conclusion
Exporting files from After Effects doesn’t have to be complicated. By following these steps and adjusting the necessary settings, you can ensure that your final video maintains the highest quality and compatibility. Don’t be afraid to experiment with different formats and settings to find the optimal balance between file size and quality for your specific needs. Happy exporting!
Feel free to tweak these steps based on your project’s requirements and explore additional settings and formats available in After Effects.
Our Bestsellers


