Mastering H264 Export in After Effects: A Comprehensive Guide
Introduction: Unveiling the Secrets of H264 Export
In the realm of video production, mastering the art of exporting in H264 format is paramount for delivering high-quality content. This comprehensive guide is your roadmap to navigating the intricate process within Adobe After Effects. From setting up your composition to fine-tuning export settings and troubleshooting common issues, each step is meticulously crafted to empower you with the knowledge and skills needed to optimize your workflow and achieve stellar results. Let’s embark on this journey together and unlock the full potential of H264 exports in After Effects.
Step 1: Setting Up Your Composition
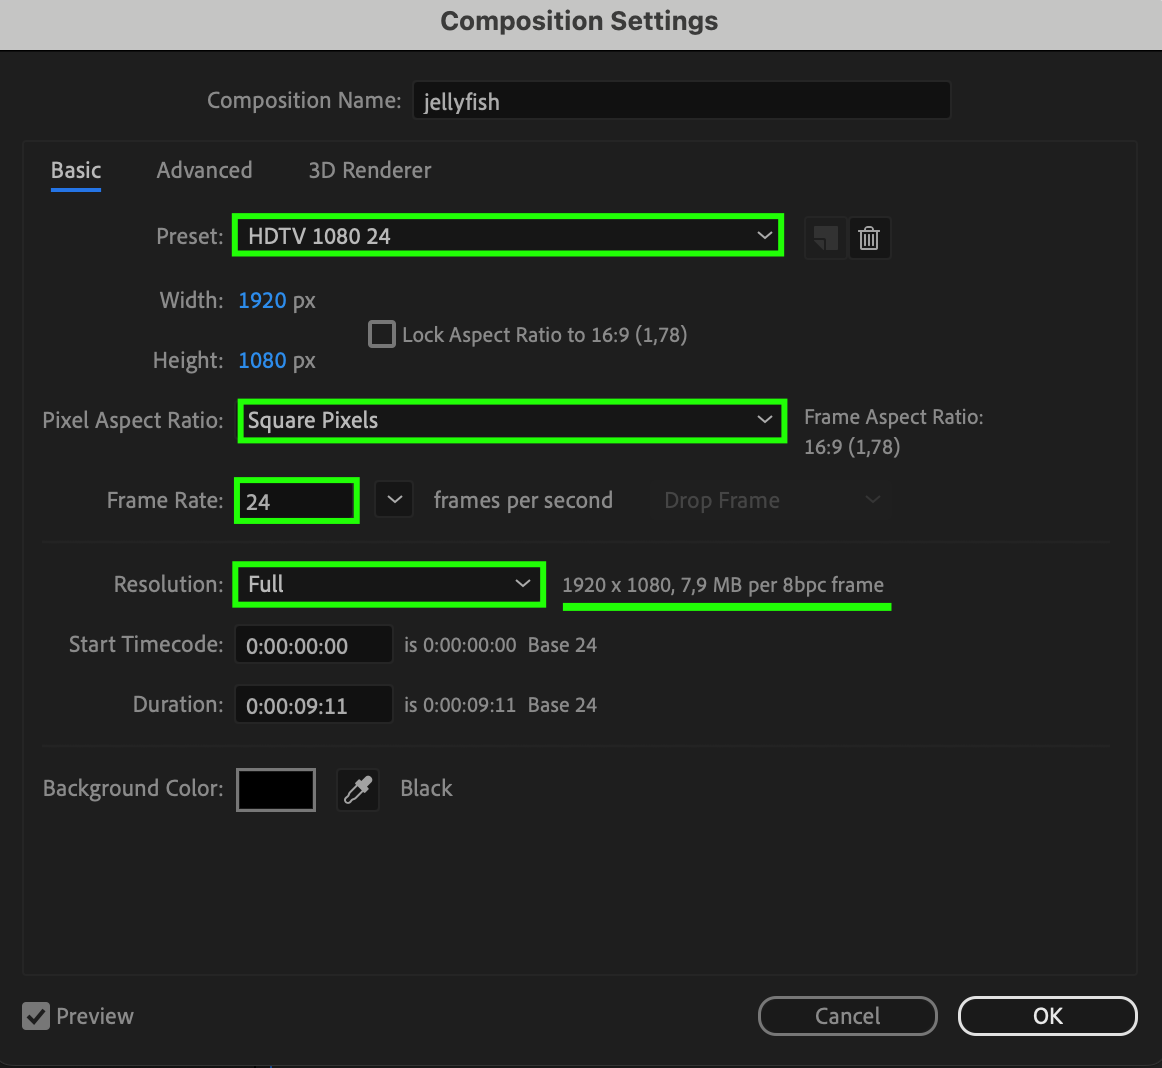
Before diving into the export process, ensure your composition settings are optimized for H264 output. This involves matching resolution and frame rate to your desired output and considering factors like pixel aspect ratios for optimal visual quality. Here are several key settings to consider:
1. Resolution: Ensure that your composition’s resolution matches the required resolution for your project. For example, if you’re planning to export video for web publication, standard resolutions might be 1920×1080 (Full HD) or 1280×720 (HD).
2. Frame Rate: Set the frame rate (FPS) to match the required rate for your project. For instance, standard values could be 24, 30, or 60 frames per second, depending on your needs.
3. Pixel Aspect Ratio: If necessary, consider the pixel aspect ratio. In most cases, it should be set to square pixels (1.0), but in some situations, a different aspect ratio might be required.
4. Color Depth: Ensure that the color depth of your composition matches the requirements of your project. Typically, this could be 8 bits per color channel (24 bits per pixel) or 16 bits per color channel (48 bits per pixel) for higher quality.
These are the fundamental settings to consider when optimizing your composition for export in the H.264 format. It’s also important to remember that specific settings may vary depending on your project’s requirements and the platform on which the video will be played.

Get 10% off when you subscribe to our newsletter

Step 2: Configuring Color Management in Project Settings
In After Effects, navigate to the Project Settings to configure color management for your project. Here, you can specify the working space and depth settings, ensuring accurate color representation throughout your workflow.
1. Working Space: Choose a working color space that best suits your project requirements. Options include sRGB, Adobe RGB, or ProPhoto RGB. Selecting the appropriate working space ensures consistent color interpretation across different devices and platforms.
2. Depth: Determine the color depth for your project, typically either 8 bits per channel (24 bits per pixel) or 16 bits per channel (48 bits per pixel). Higher color depth allows for more precise color representation and smoother gradients, particularly in projects requiring extensive color grading or visual effects work.
3. 3D LUT Interpolation: Select the interpolation method for 3D Look-Up Tables (LUTs) applied to your project. Options include trilinear and tetrahedral. This choice affects the accuracy and smoothness of color transformations when applying LUTs to your footage.
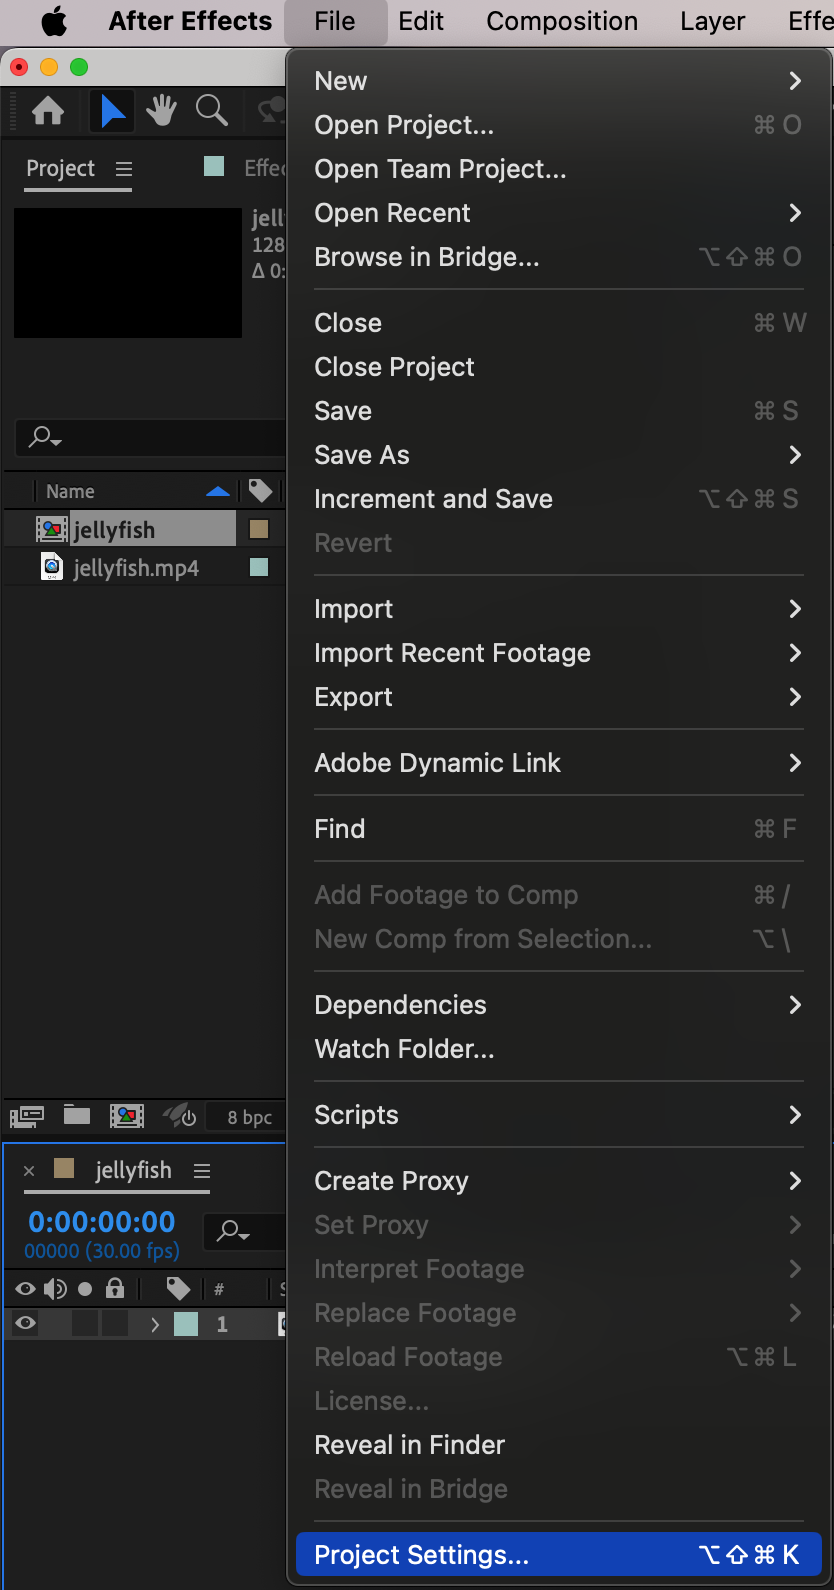
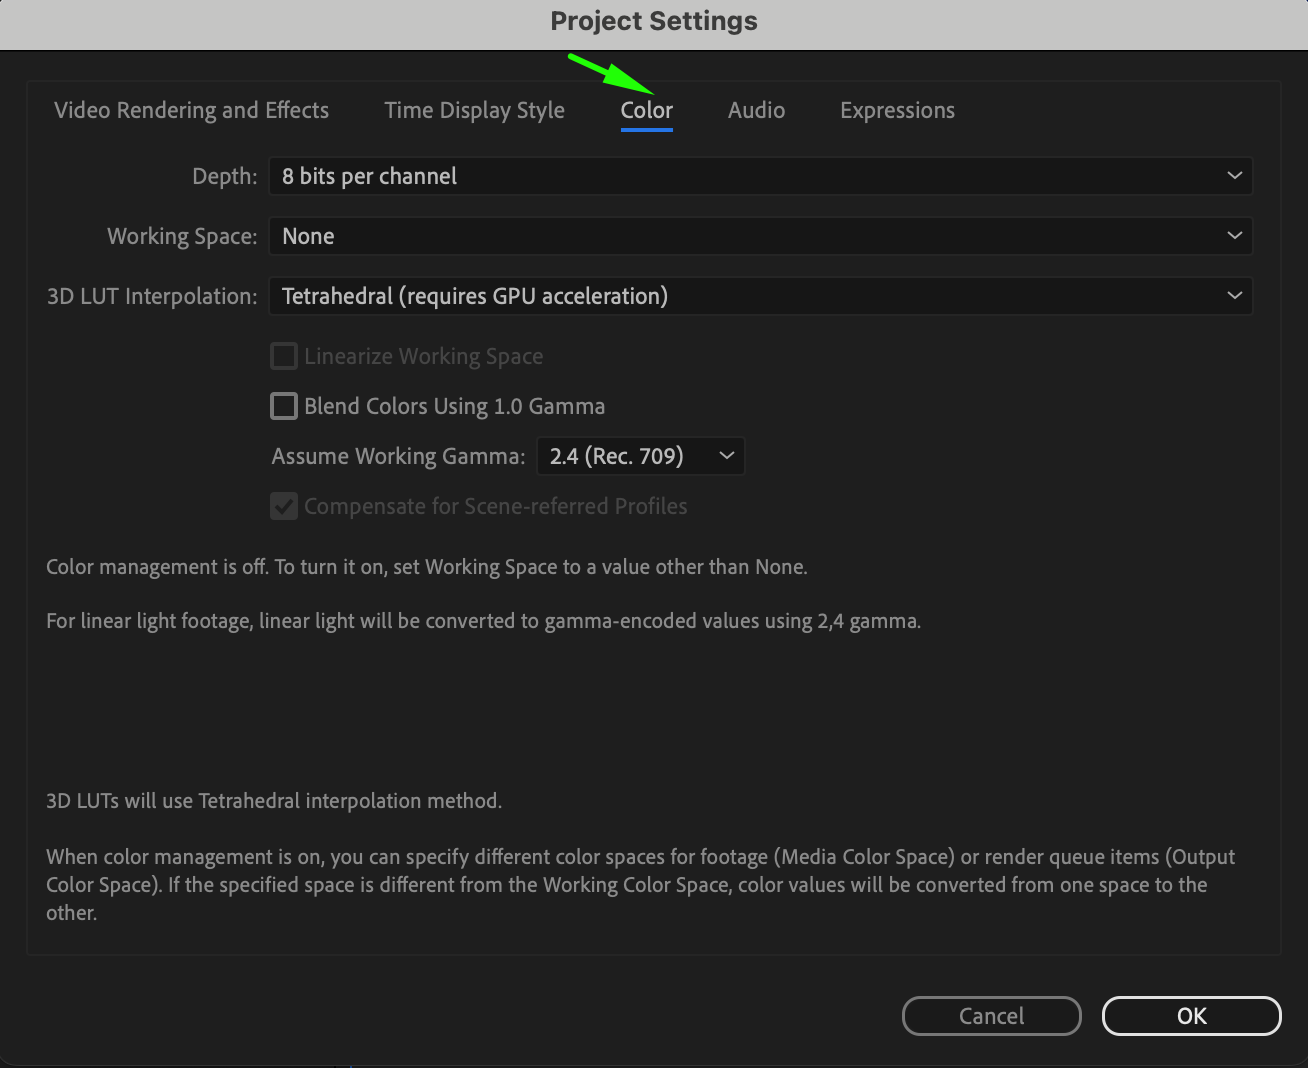
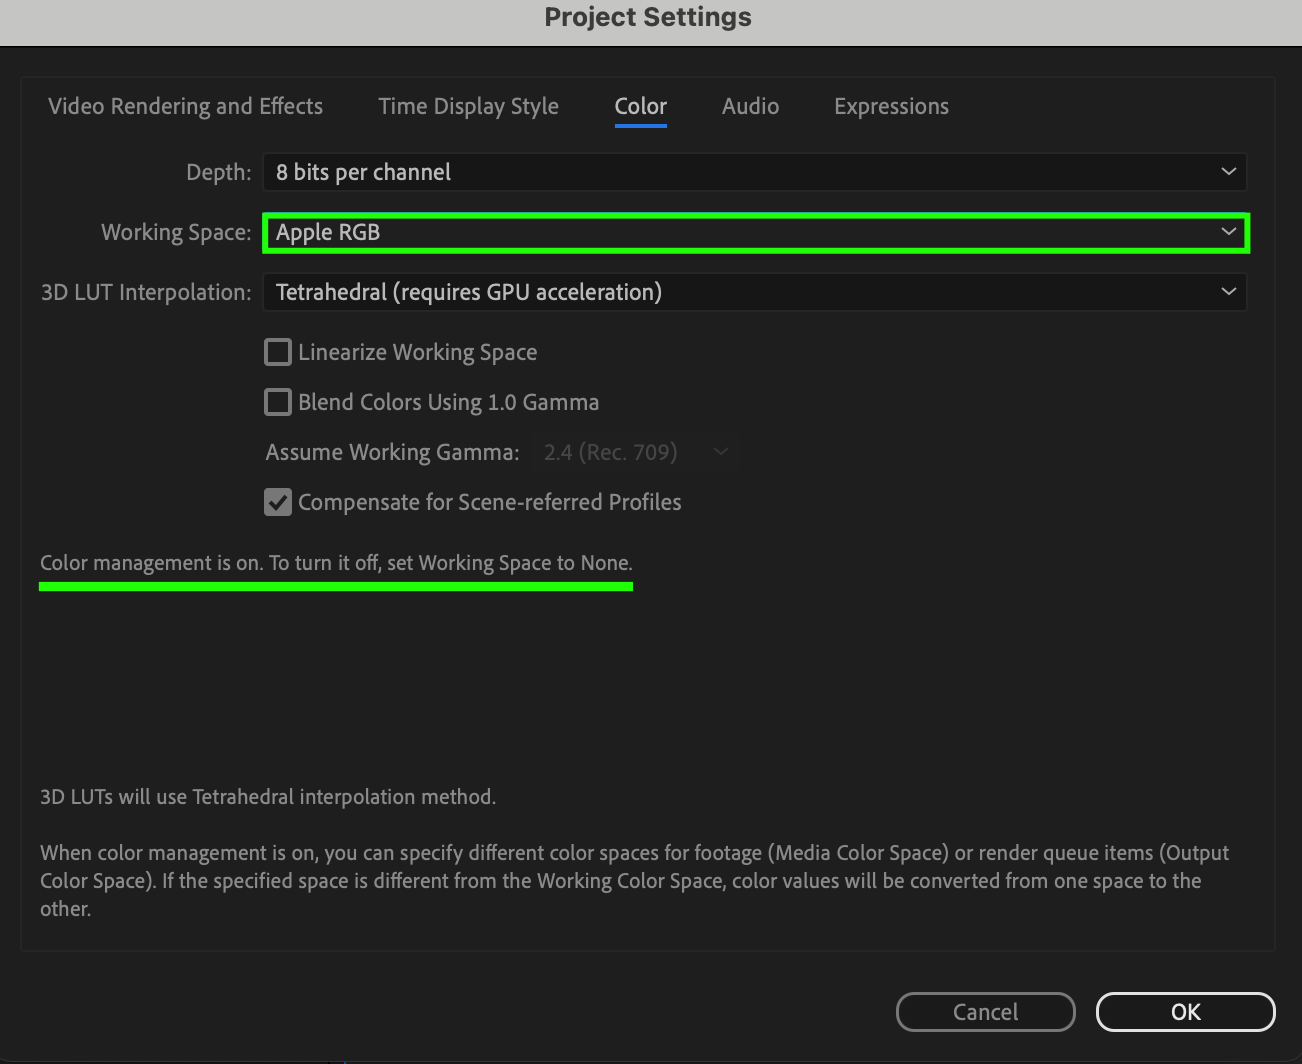
By configuring color management settings in the Project Settings, including the 3D LUT interpolation method, you establish a foundation for accurate color reproduction and consistency throughout your After Effects project, ultimately enhancing the quality of your H264 exports.
Step 3: Organizing Your Composition
Organize your composition effectively, ensuring all elements are arranged logically. Pre-render complex sequences if necessary to streamline the export process and reduce strain on your system during rendering.
Step 4: Selecting Export Settings
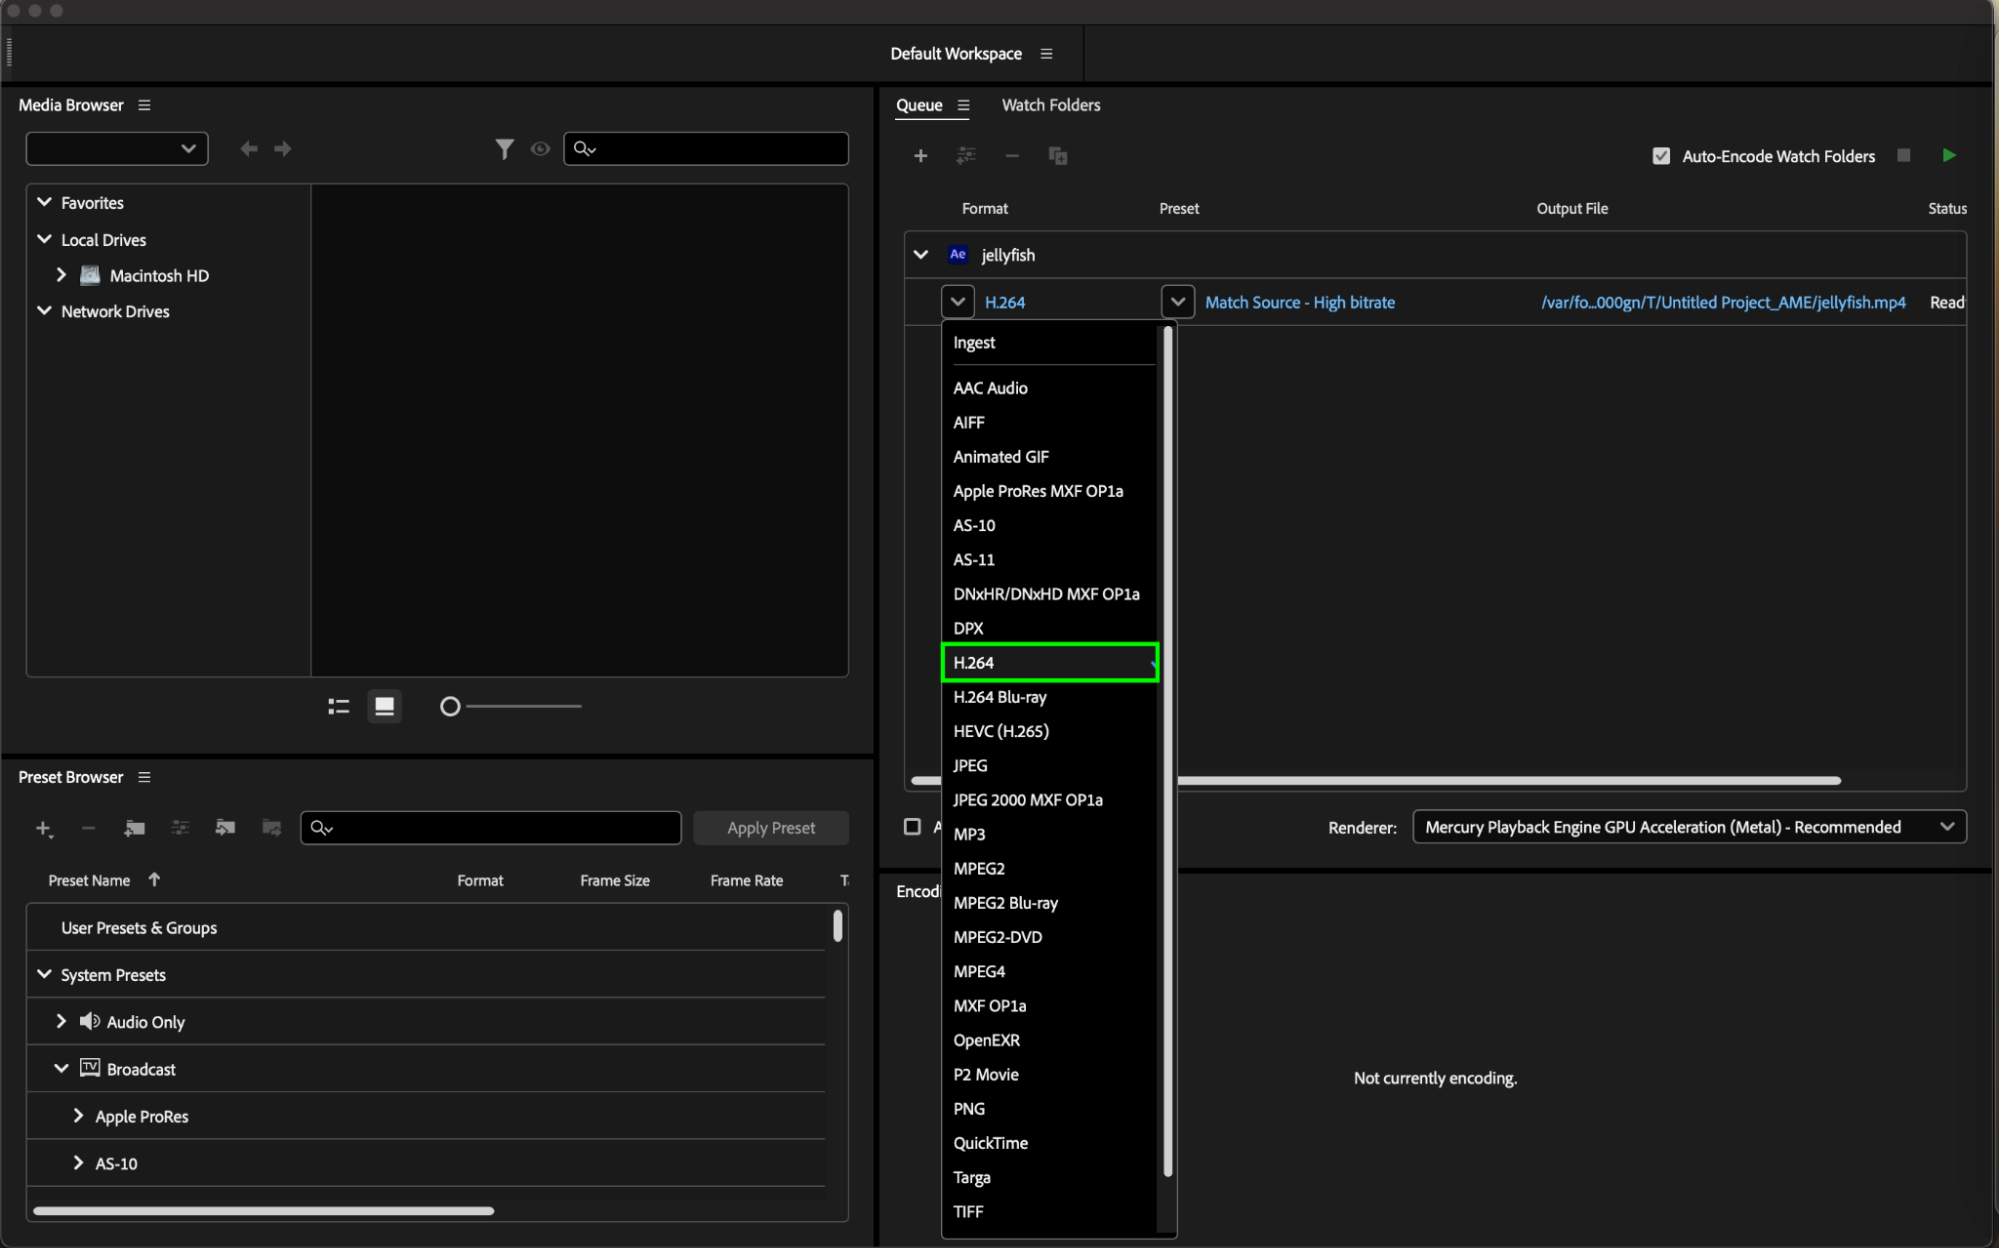
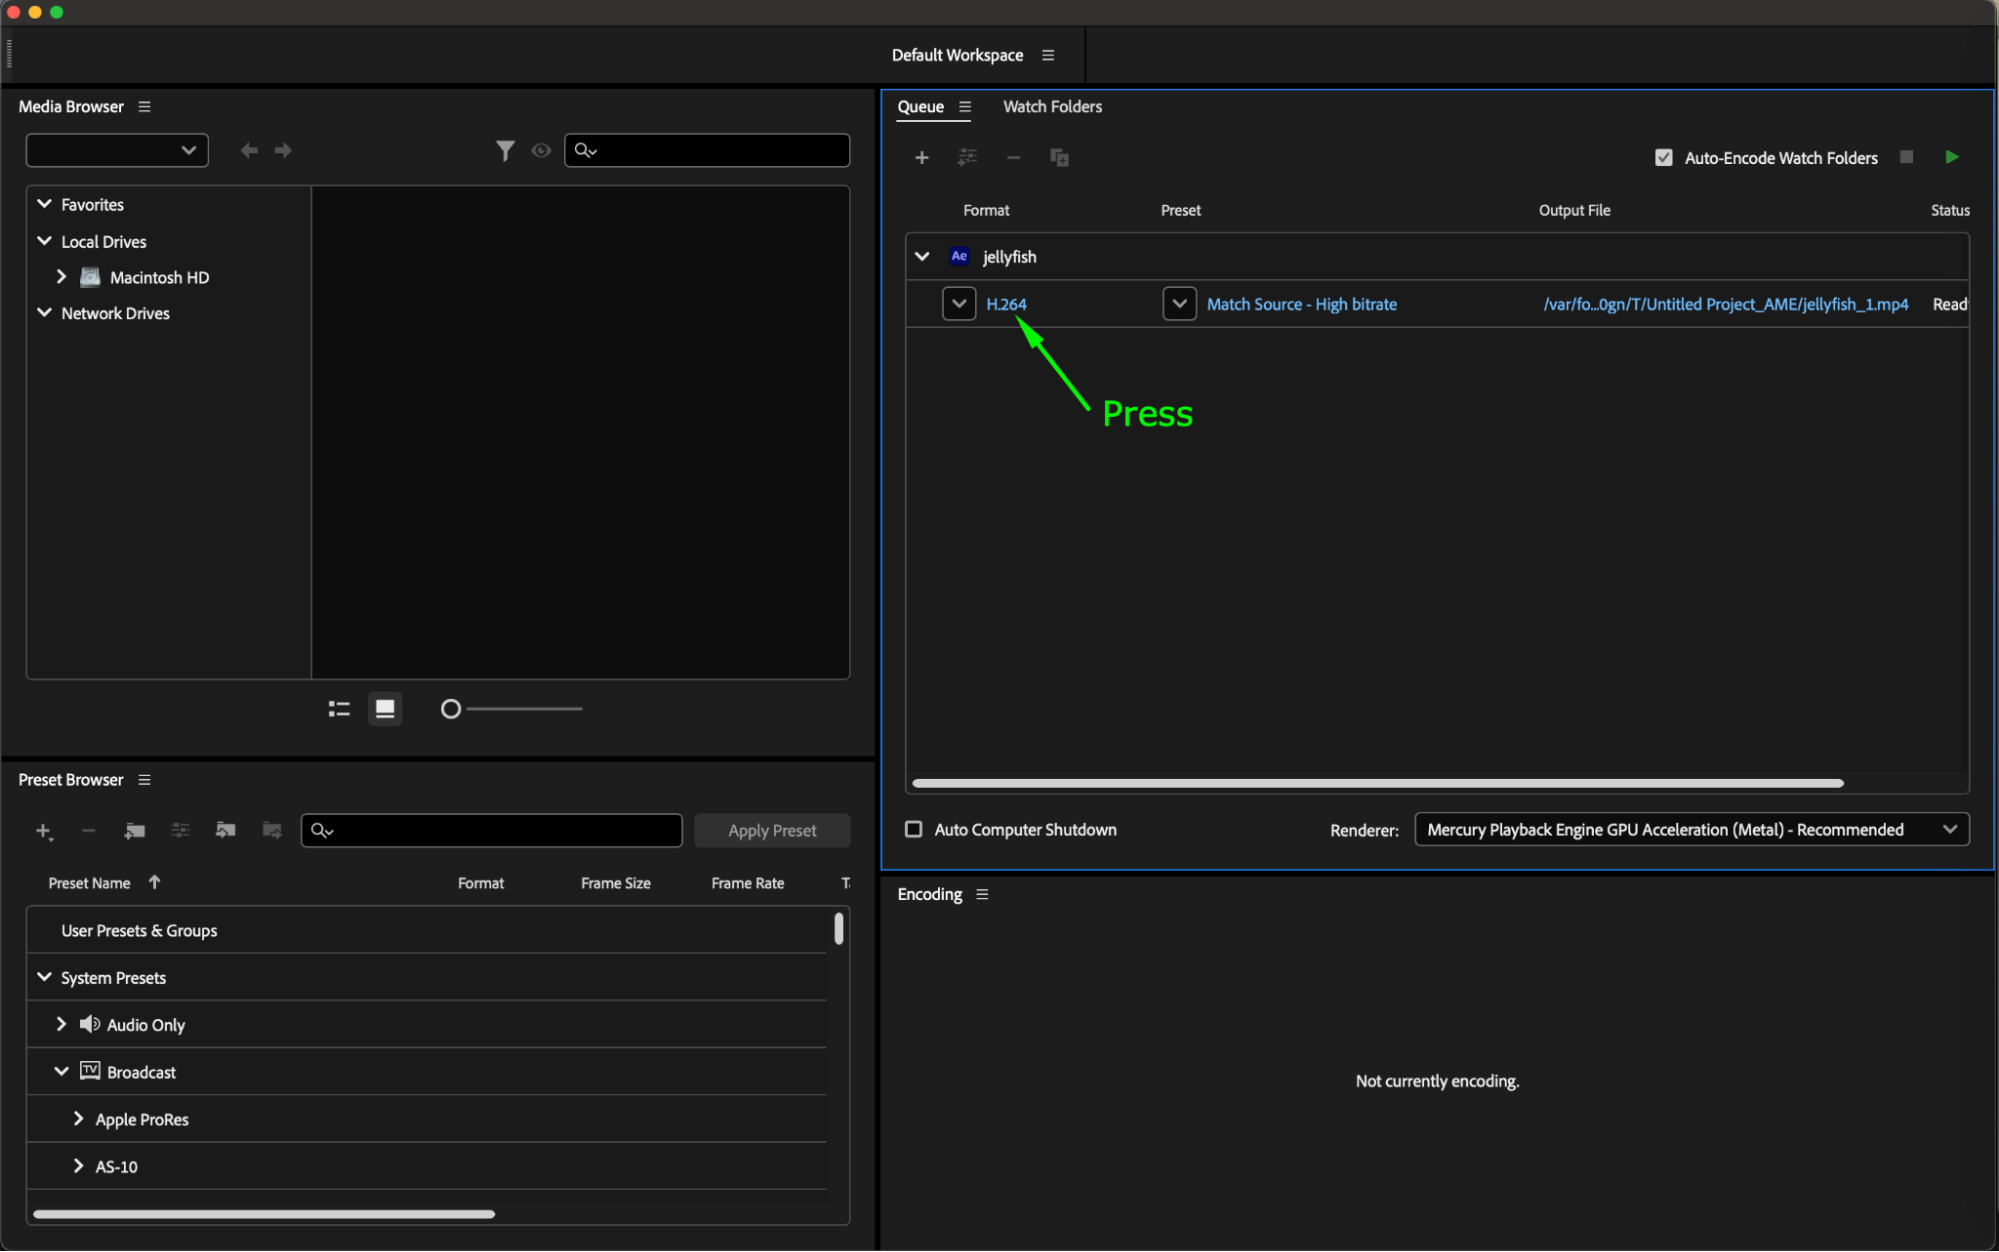
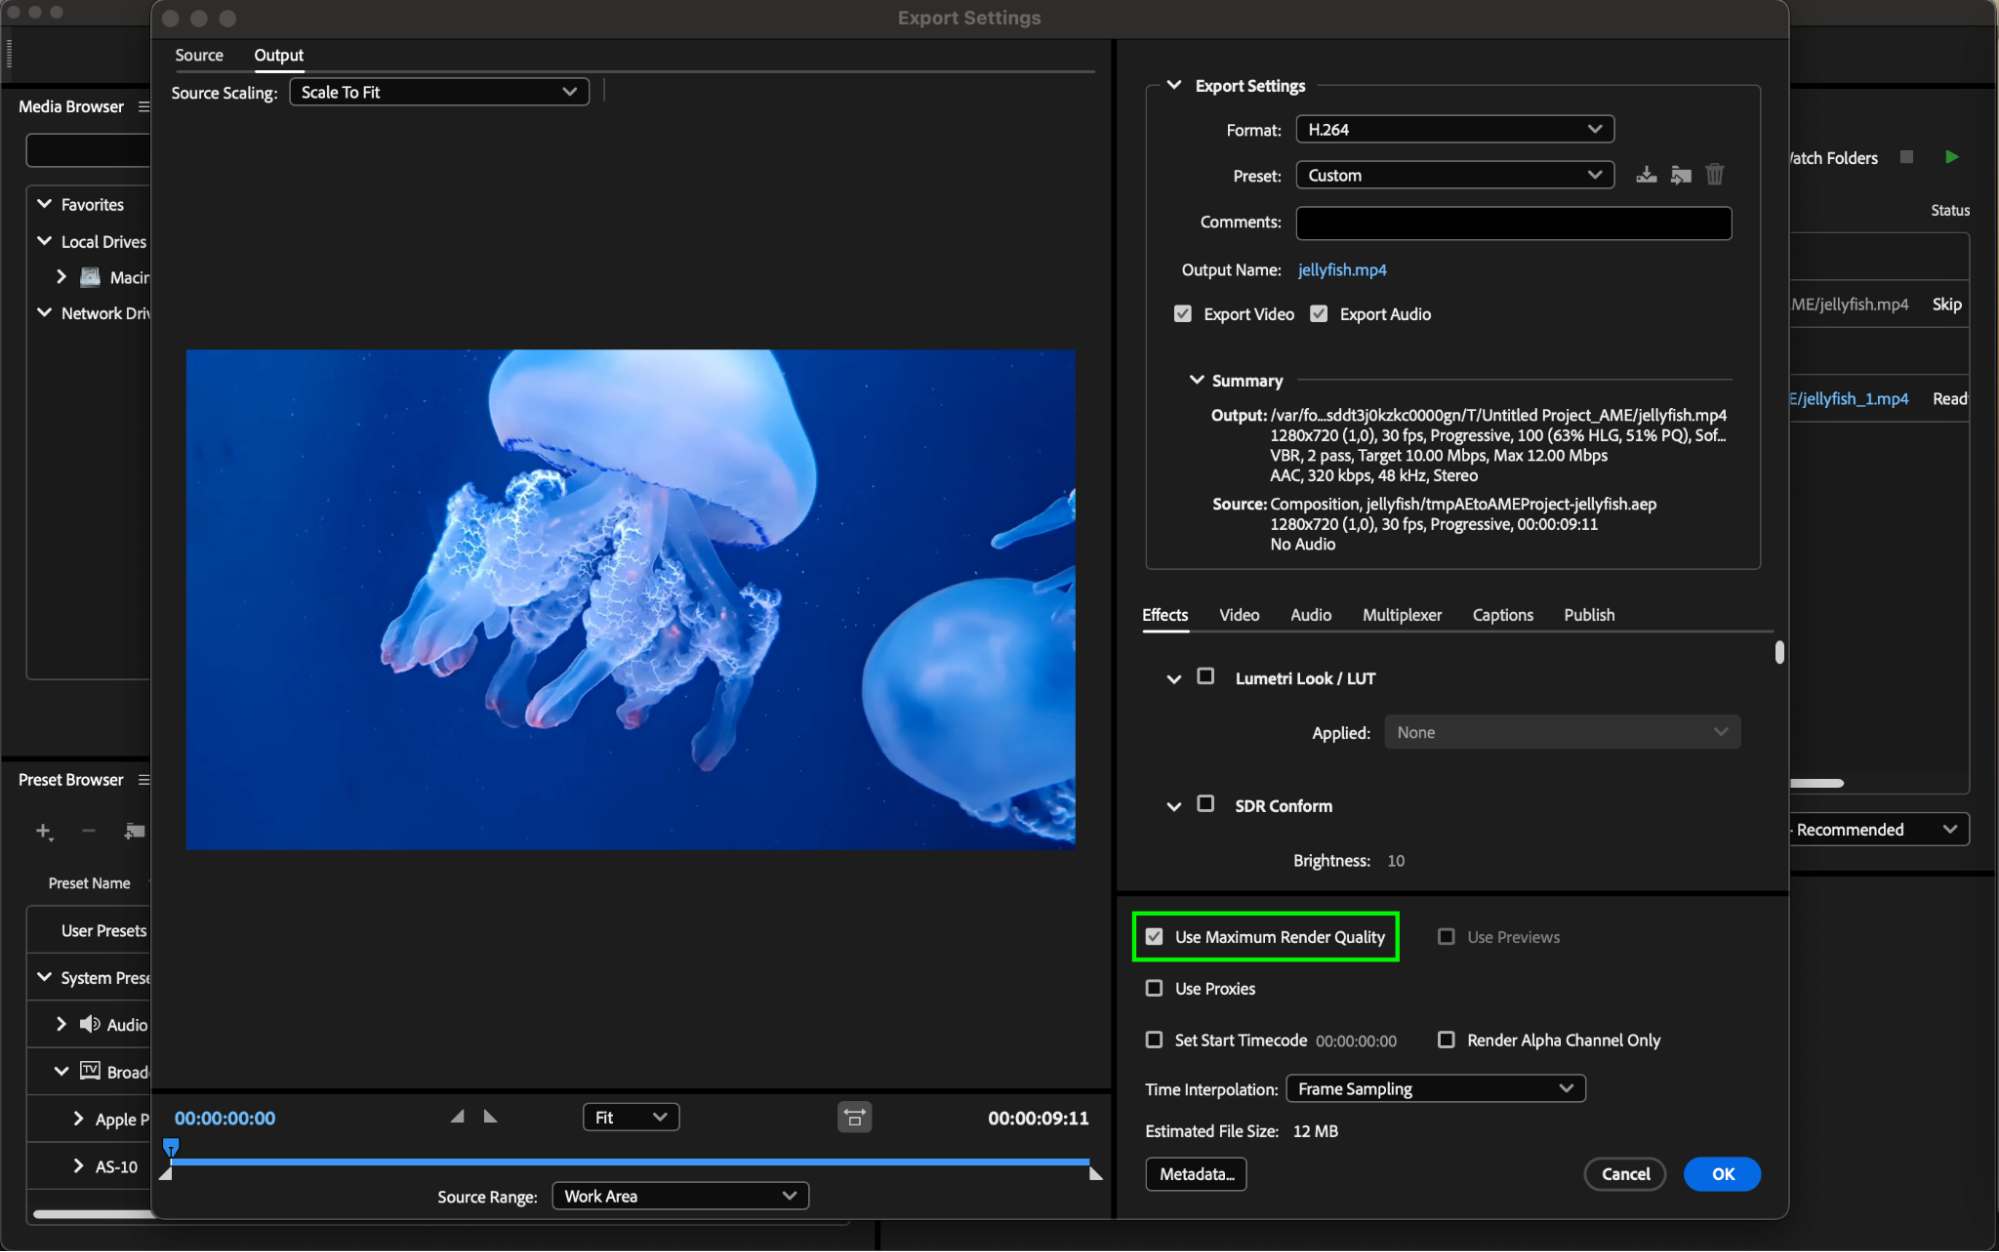
To access export settings in After Effects, navigate to the “Composition” menu and choose “Add to Adobe Media Encoder Queue.” This action opens Adobe Media Encoder, where you can fine-tune your export settings for optimal results. Select H264 as the format for your video output.
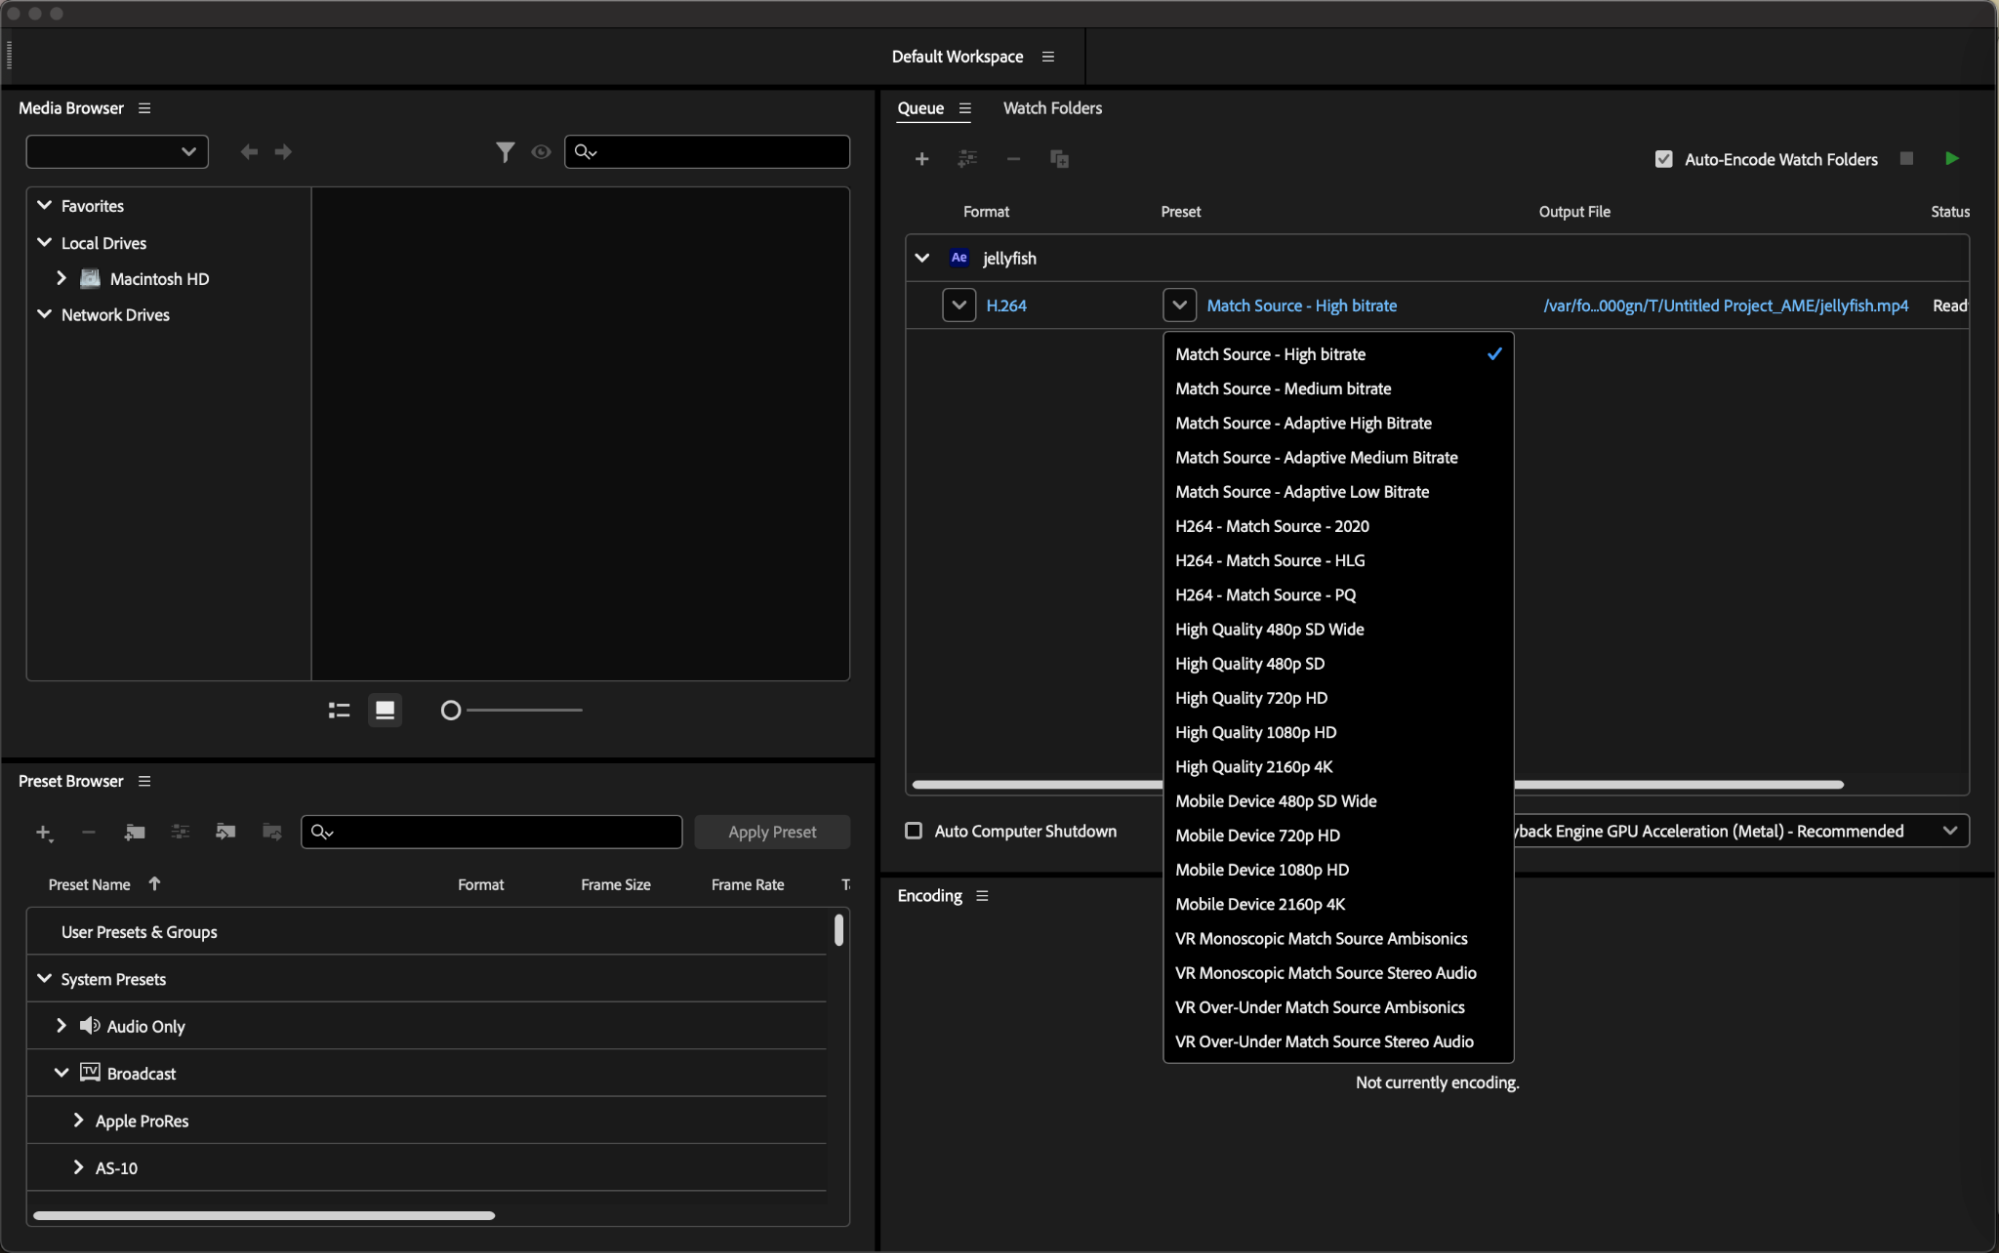
When selecting H264 as the format, you can further refine your settings by choosing a preset. Presets are pre-configured settings designed to optimize video output for specific purposes, such as web publishing, broadcasting, or high-quality playback. Common presets include “YouTube 1080p HD,” “Match Source – High Bitrate,” and “Custom.”
By selecting the right preset, you can streamline the export process and achieve optimal balance between file size and video quality, ensuring your H264 exports meet your project’s needs with efficiency and precision.

Step 5: Troubleshooting and Quality Checks
Conduct thorough quality checks to identify and address any issues before exporting. Troubleshoot common problems like playback glitches or quality degradation by adjusting bitrate settings, verifying audio compatibility, and ensuring correct composition configurations.
Step 6: Enabling Two-Pass Encoding
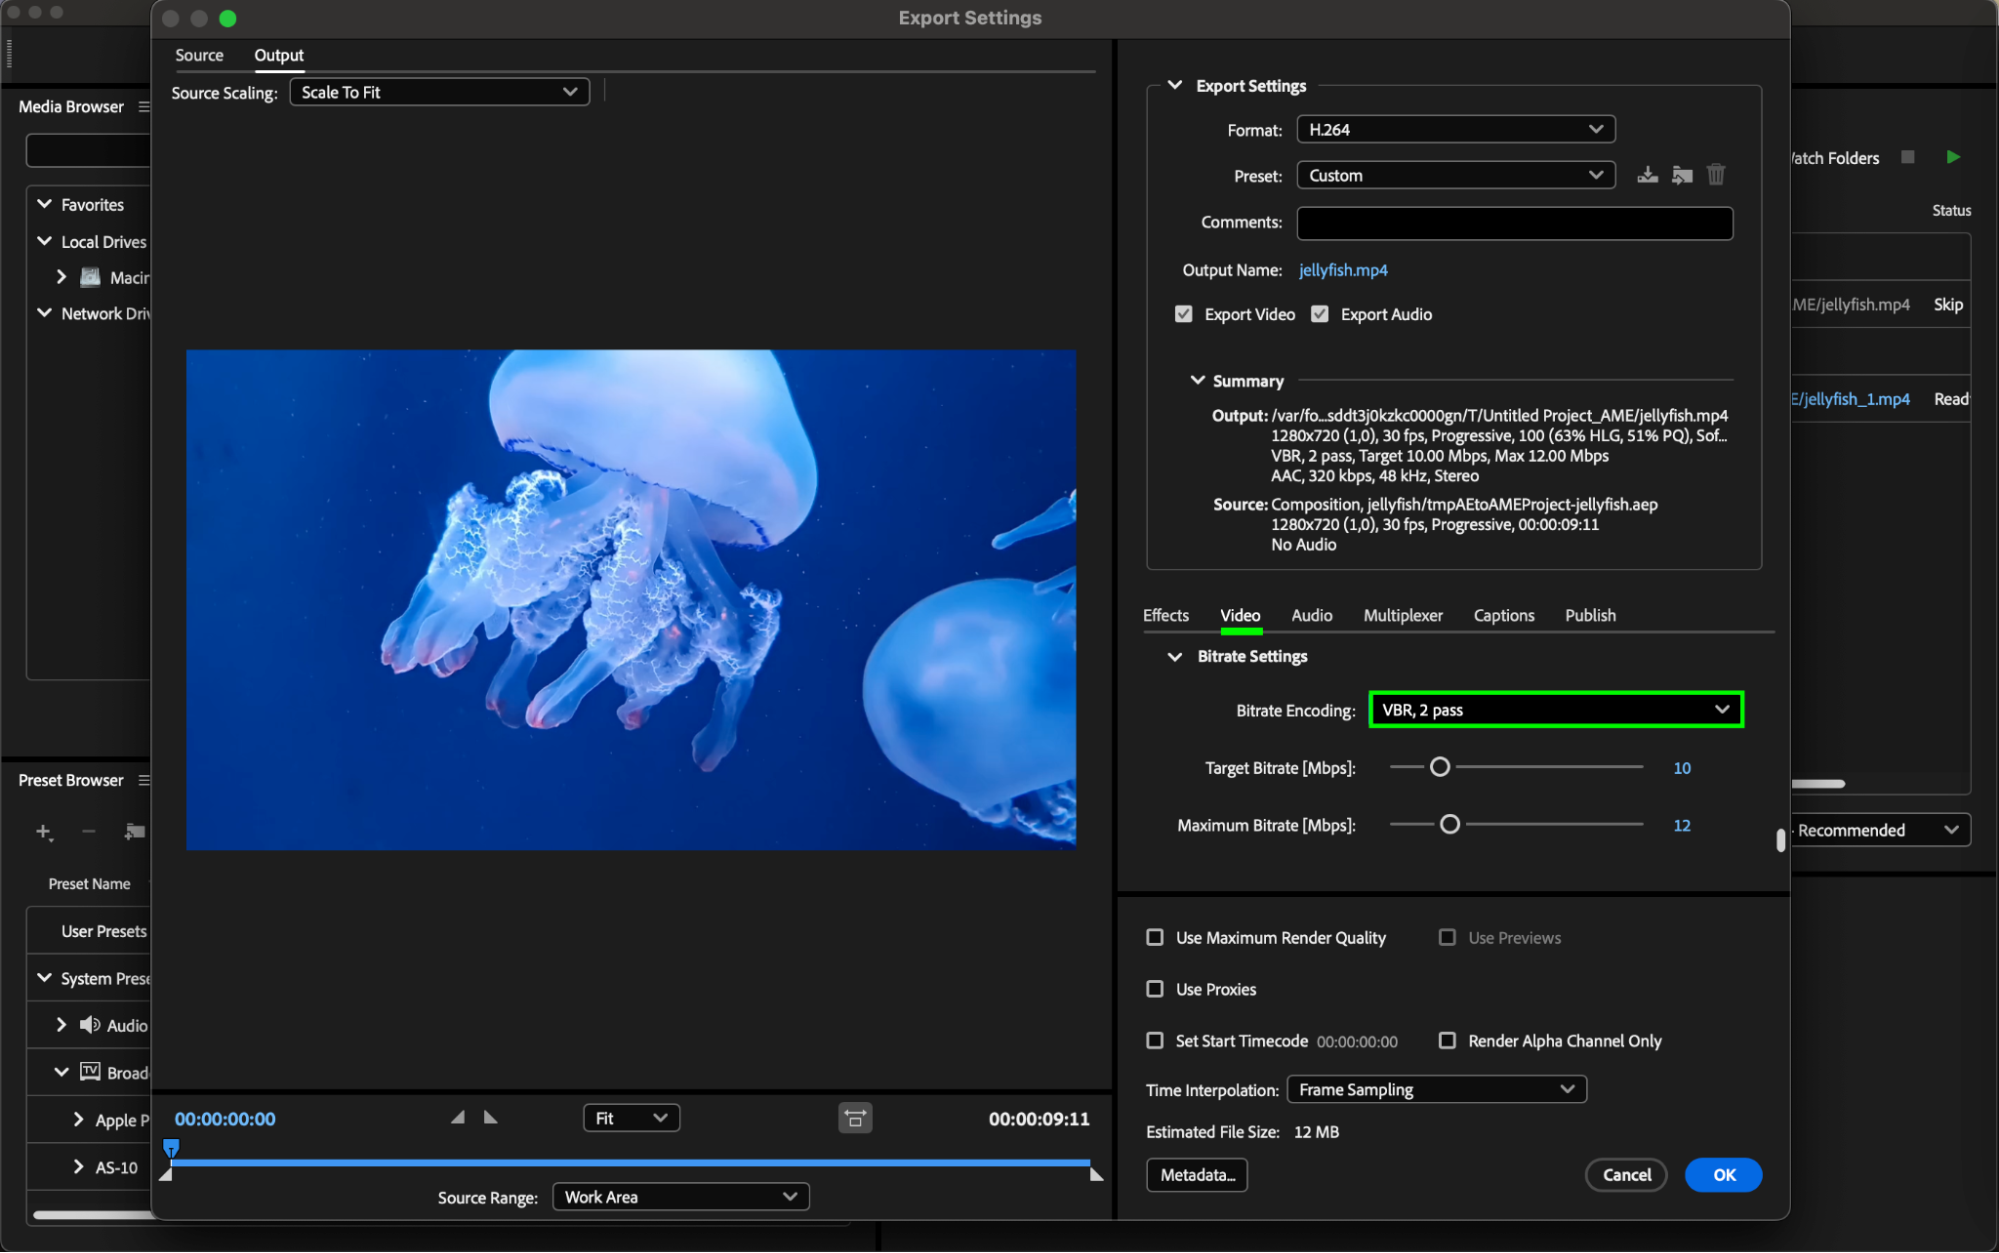
In Adobe Media Encoder, under the “Output” tab, navigate to “Video” and then “Bitrate Encoding.” Within the format settings, choose the option for “Two-Pass Encoding.” This allows the codec to analyze your video during the first pass and optimize the bitrate for the second pass, typically resulting in better quality at a given file size.
Enabling two-pass encoding is beneficial for H.264 exports as it enhances the codec’s efficiency in allocating bits across the video, ultimately leading to improved visual quality while maintaining desired file size constraints.
Step 7: Utilizing Maximum Render Quality
Enabling the “Use Maximum Render Quality” option in Adobe Media Encoder’s video settings is essential for H.264 exports as it enhances the quality of scaled or resized video, particularly beneficial when dealing with high-resolution footage or resizing for different display resolutions.
Step 8: Initiating Export
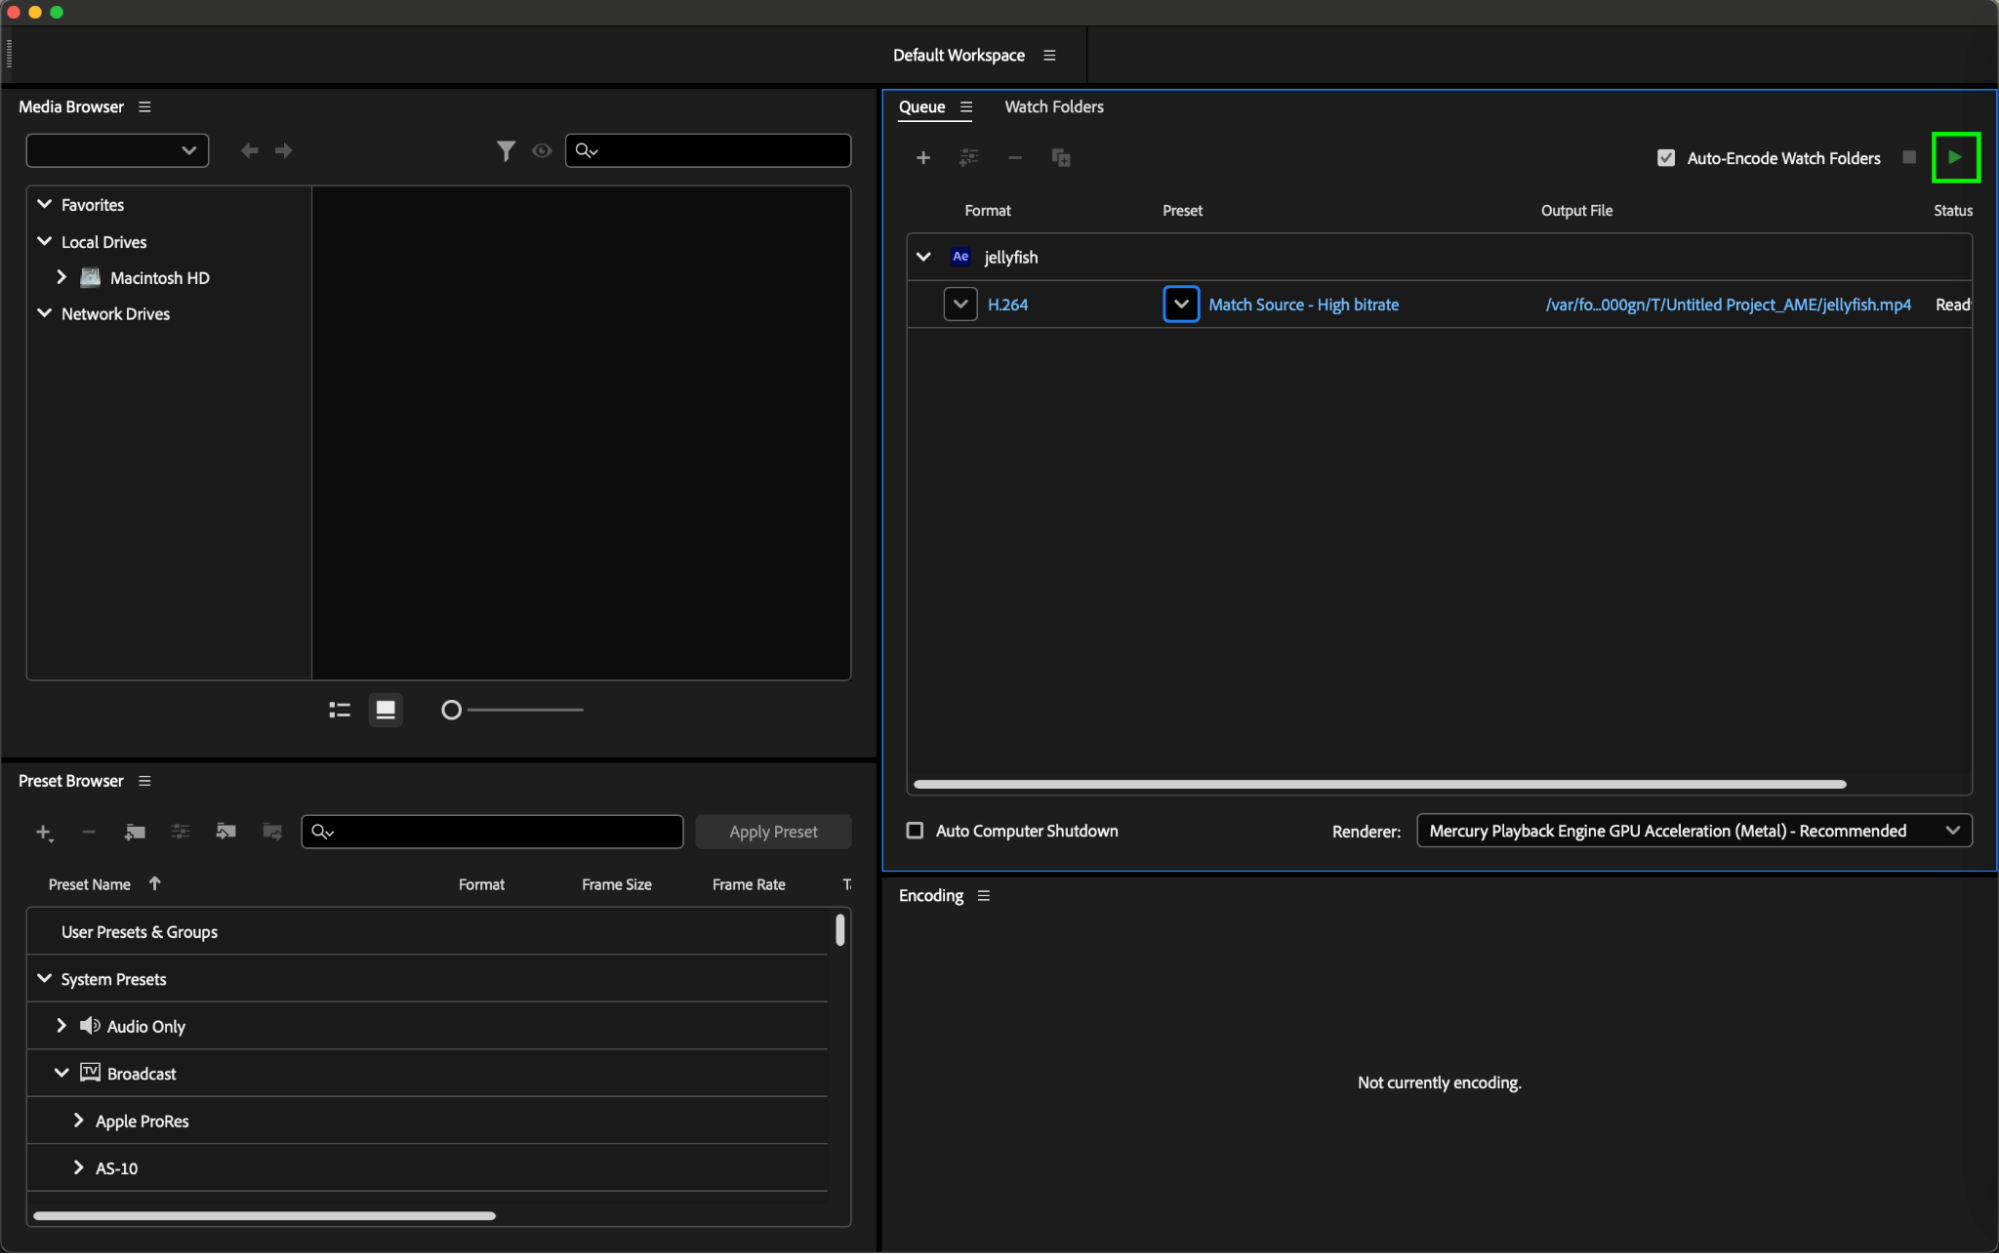
Once all settings are configured to your satisfaction, simply click on the “Start Queue” button (or press Return) in Adobe Media Encoder to commence the export process. This action initiates the rendering of your After Effects composition into the H.264 format according to the specified parameters, allowing you to generate the final video file ready for distribution or further post-production tasks.
Step 9: Error Prevention and Resolution
Prevent common export errors by ensuring codec compatibility, maintaining sufficient disk space, and double-checking render queue settings. Address any errors promptly post-export by updating software and codecs regularly.
By following these comprehensive steps, you can master the H264 export process in After Effects, ensuring high-quality video content while streamlining workflow efficiency.
Conclusion: Elevating Your Video Production with H264 Export Mastery
In the dynamic landscape of video production, proficiency in H264 export is non-negotiable. Armed with the insights gleaned from this comprehensive guide, you’re equipped to elevate your projects to new heights of quality and efficiency. By mastering the intricacies of composition setup, export settings customization, and error prevention strategies, you’re poised to deliver flawless H264 exports that captivate audiences and meet the demands of today’s digital platforms. Embrace the knowledge gained here, and let your creativity soar as you navigate the ever-evolving landscape of video production with confidence and precision.


