Exporting your animations from Adobe After Effects can be a challenging process, especially if you are new to the software. To ensure a smooth and successful export, it is essential to familiarize yourself with the different options available for saving your work.
A step-by-step guide to exporting in after effects
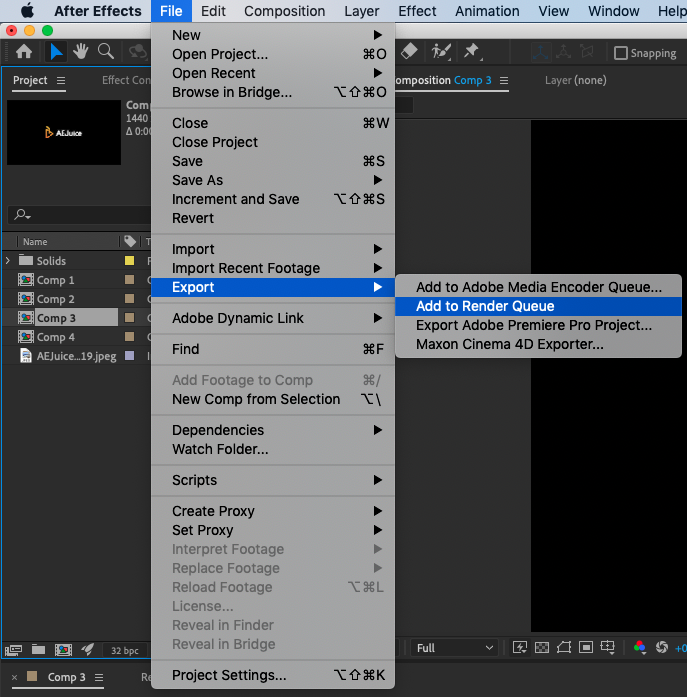
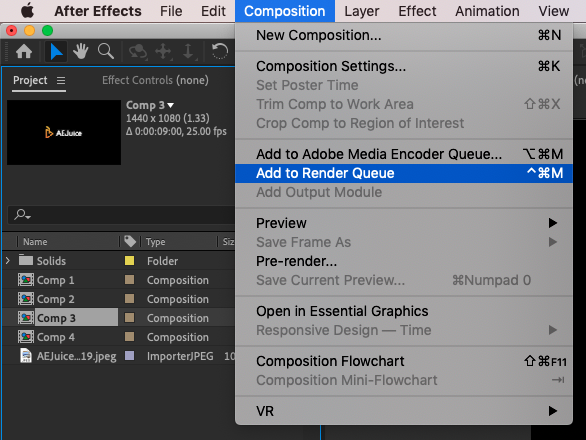
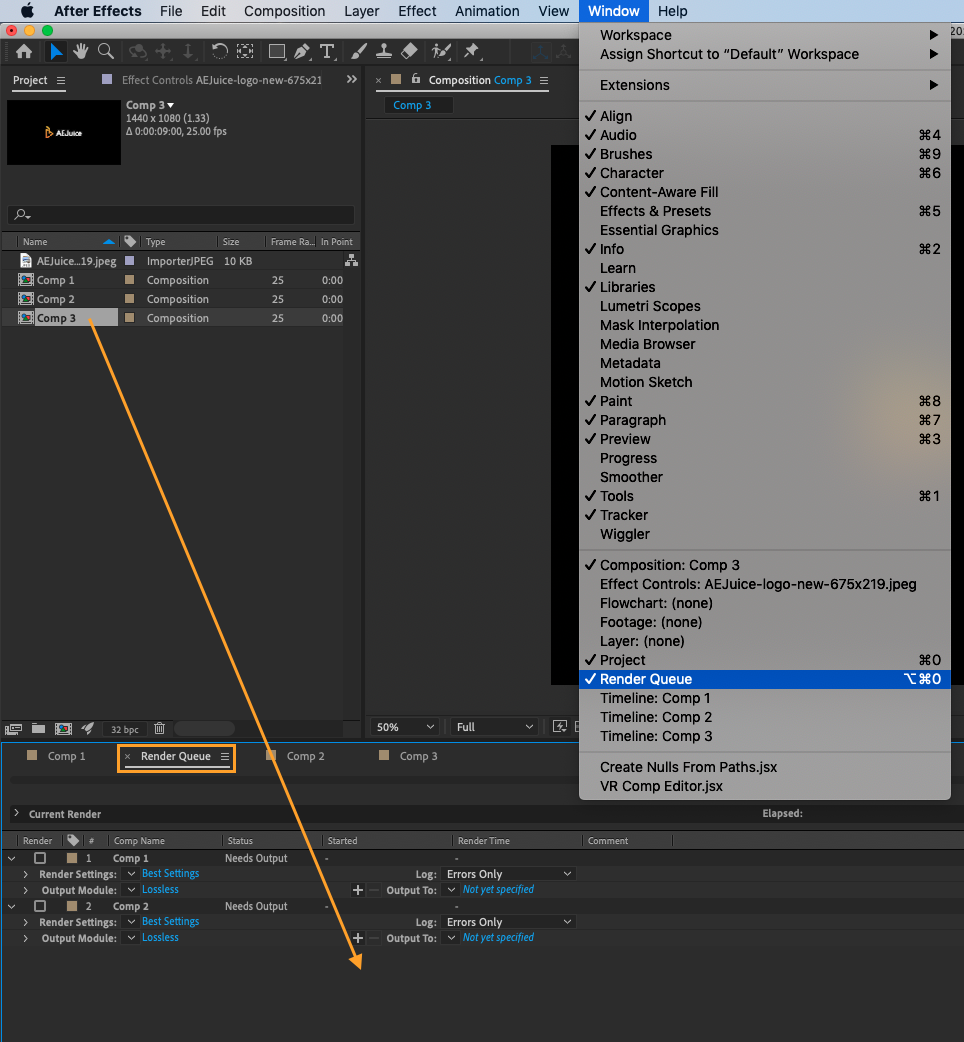
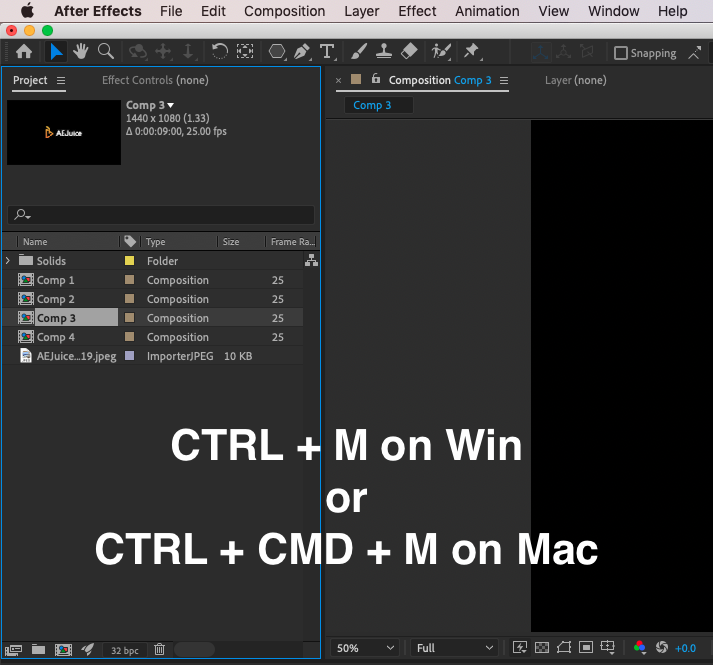
1. The first step in exporting your animations is to add your composition to the render queue. You can do this in several ways:
Get 10% off when you subscribe to our newsletter

- Go to File > Export > Add to Render Queue
- Go to Composition > Add to Render Queue
Get 10% off when you subscribe to our newsletter
- by dragging and dropping the composition from the Project panel directly into the Render Queue. Make sure to open the Render Queue window before using this method (go to Window > Render Queue).
- using the keyboard shortcut CTRL + M on Win or CTRL + CMD + M on Mac
Get 10% off when you subscribe to our newsletter
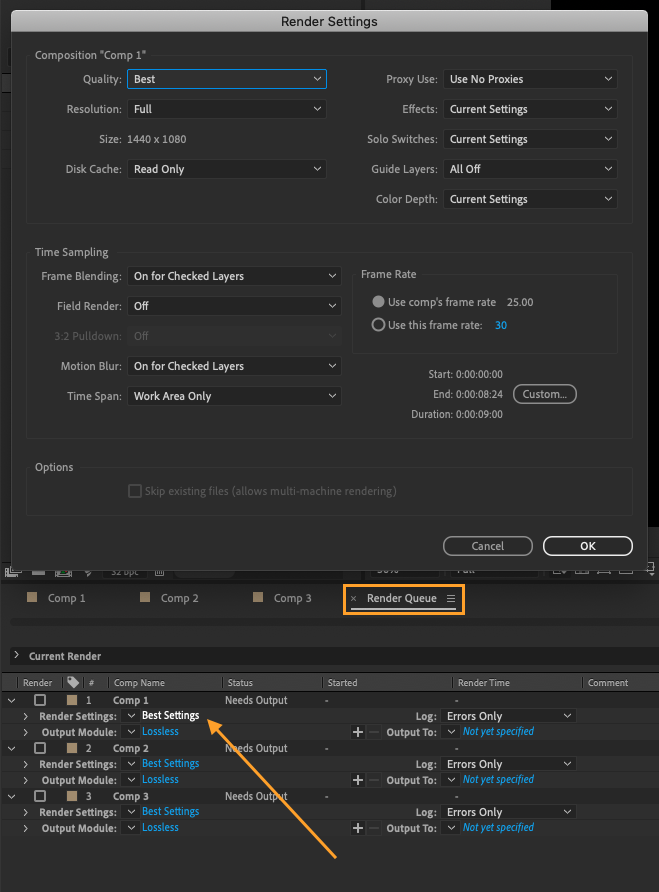
2. Once you have added your composition to the render queue, you can customize the render settings by clicking on the Render Settings option below your composition. From here, you can adjust the quality, resolution, and other settings for your exported file.
Get 10% off when you subscribe to our newsletter
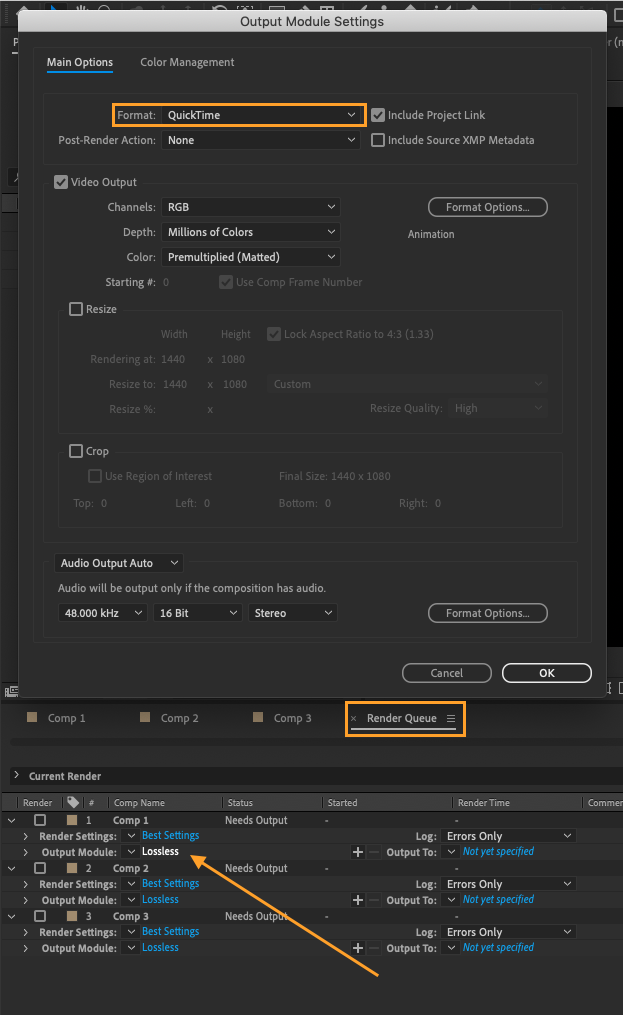
3. In addition to the render settings, you will also need to select the codec for your file. Under the Output Module option, you can choose the format you want to use (e.g., Quicktime, AIFF, etc.).
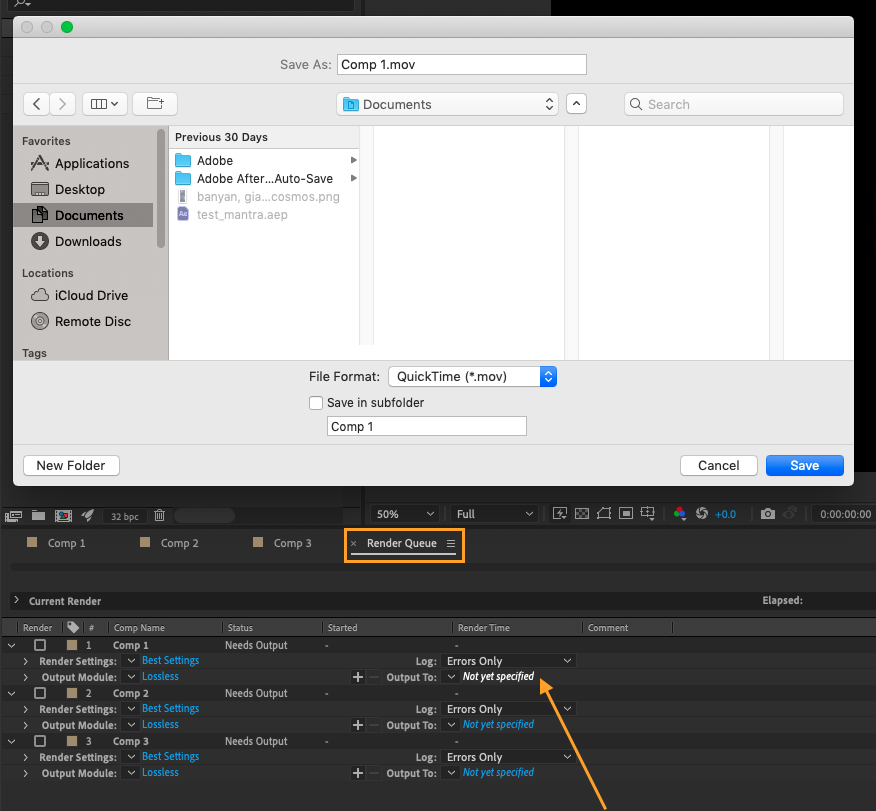
4. Finally, use the Output To option to specify the location where you want to save your file.
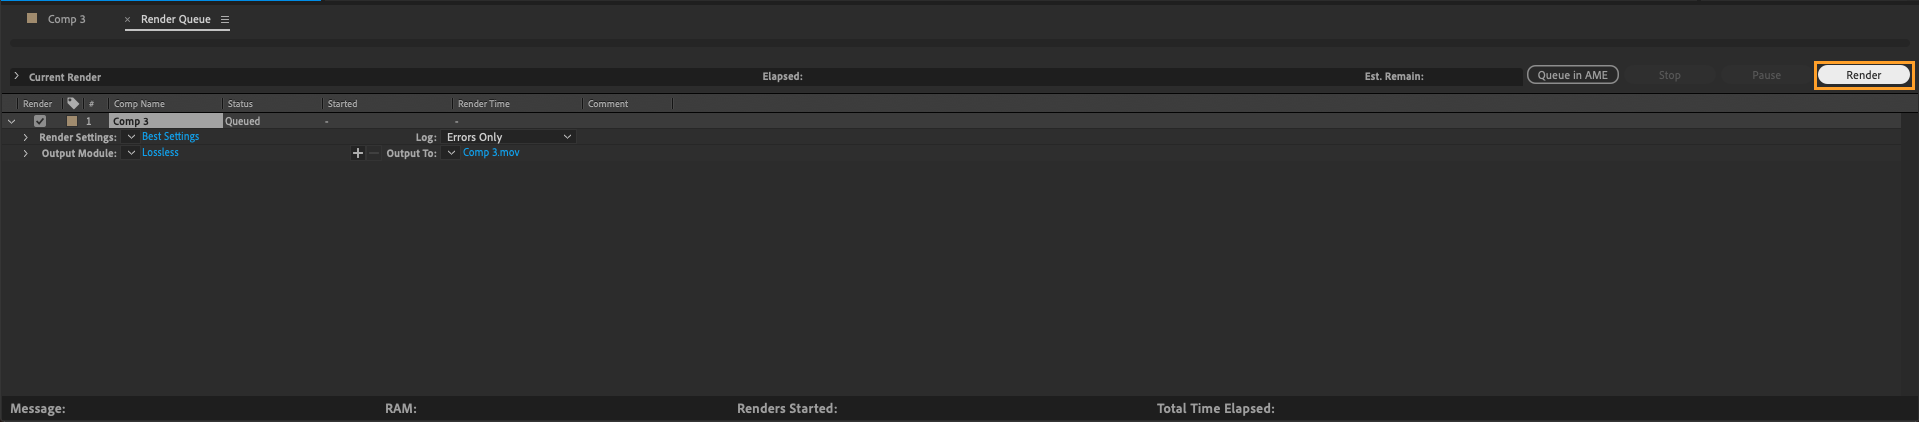
5. When everything is set, hit the render button on the right
Conclusion
If you want to learn more about After Effects, visit us at https://aejuice.com/products/courses.
Get 10% off when you subscribe to our newsletter
Our course covers everything you need to know about the software, including basic principles and real-world projects, with feedback from experienced staff and access to a community of other students and alumni. Whether you are a beginner or an experienced motion creator.
Our Bestsellers


