Mastering Movie Export in After Effects: A Step-by-Step Guide
Introduction: Navigating the Export Process in After Effects
Adobe After Effects stands as a powerful tool in the realm of video editing and motion graphics, offering the capability to craft visual effects, animations, and cinematic masterpieces. However, the culmination of your creative process in After Effects often involves the need to export your work, allowing you to share your creations with audiences worldwide. While exporting a movie from After Effects may seem daunting, especially for beginners, fear not – this comprehensive guide is here to walk you through the process step by step.
Get 10% off when you subscribe to our newsletter

Step 1: Composition Setup
The foundation of your project lies in the composition setup. Ensuring the correct resolution, frame rate, and duration via the Composition > Composition Settings menu is crucial. This step guarantees optimal image clarity and smooth animation playback, setting the stage for a polished final product.

Get 10% off when you subscribe to our newsletter

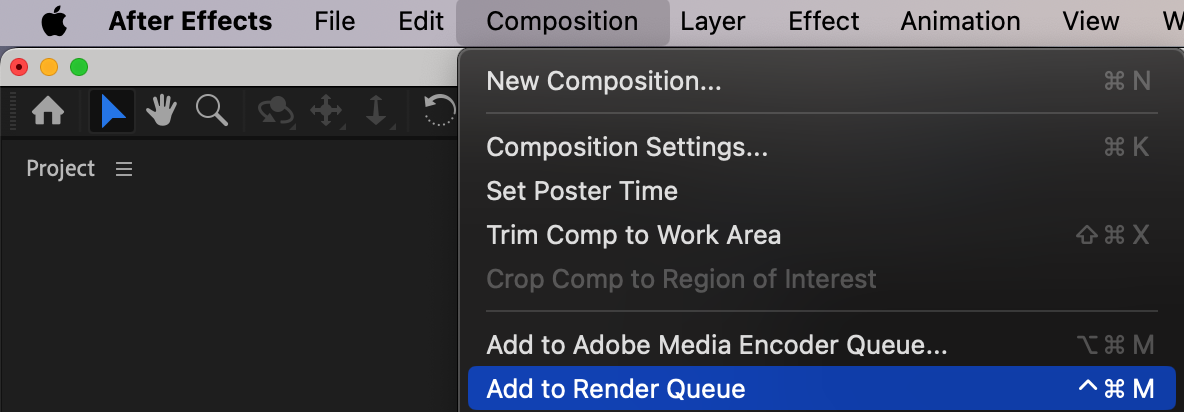
Step 2: Opening the Rendering Panel
Navigate to Composition > Add to Render Queue to open the rendering panel. This action sets the stage for defining export parameters and initiating the rendering process.
Get 10% off when you subscribe to our newsletter
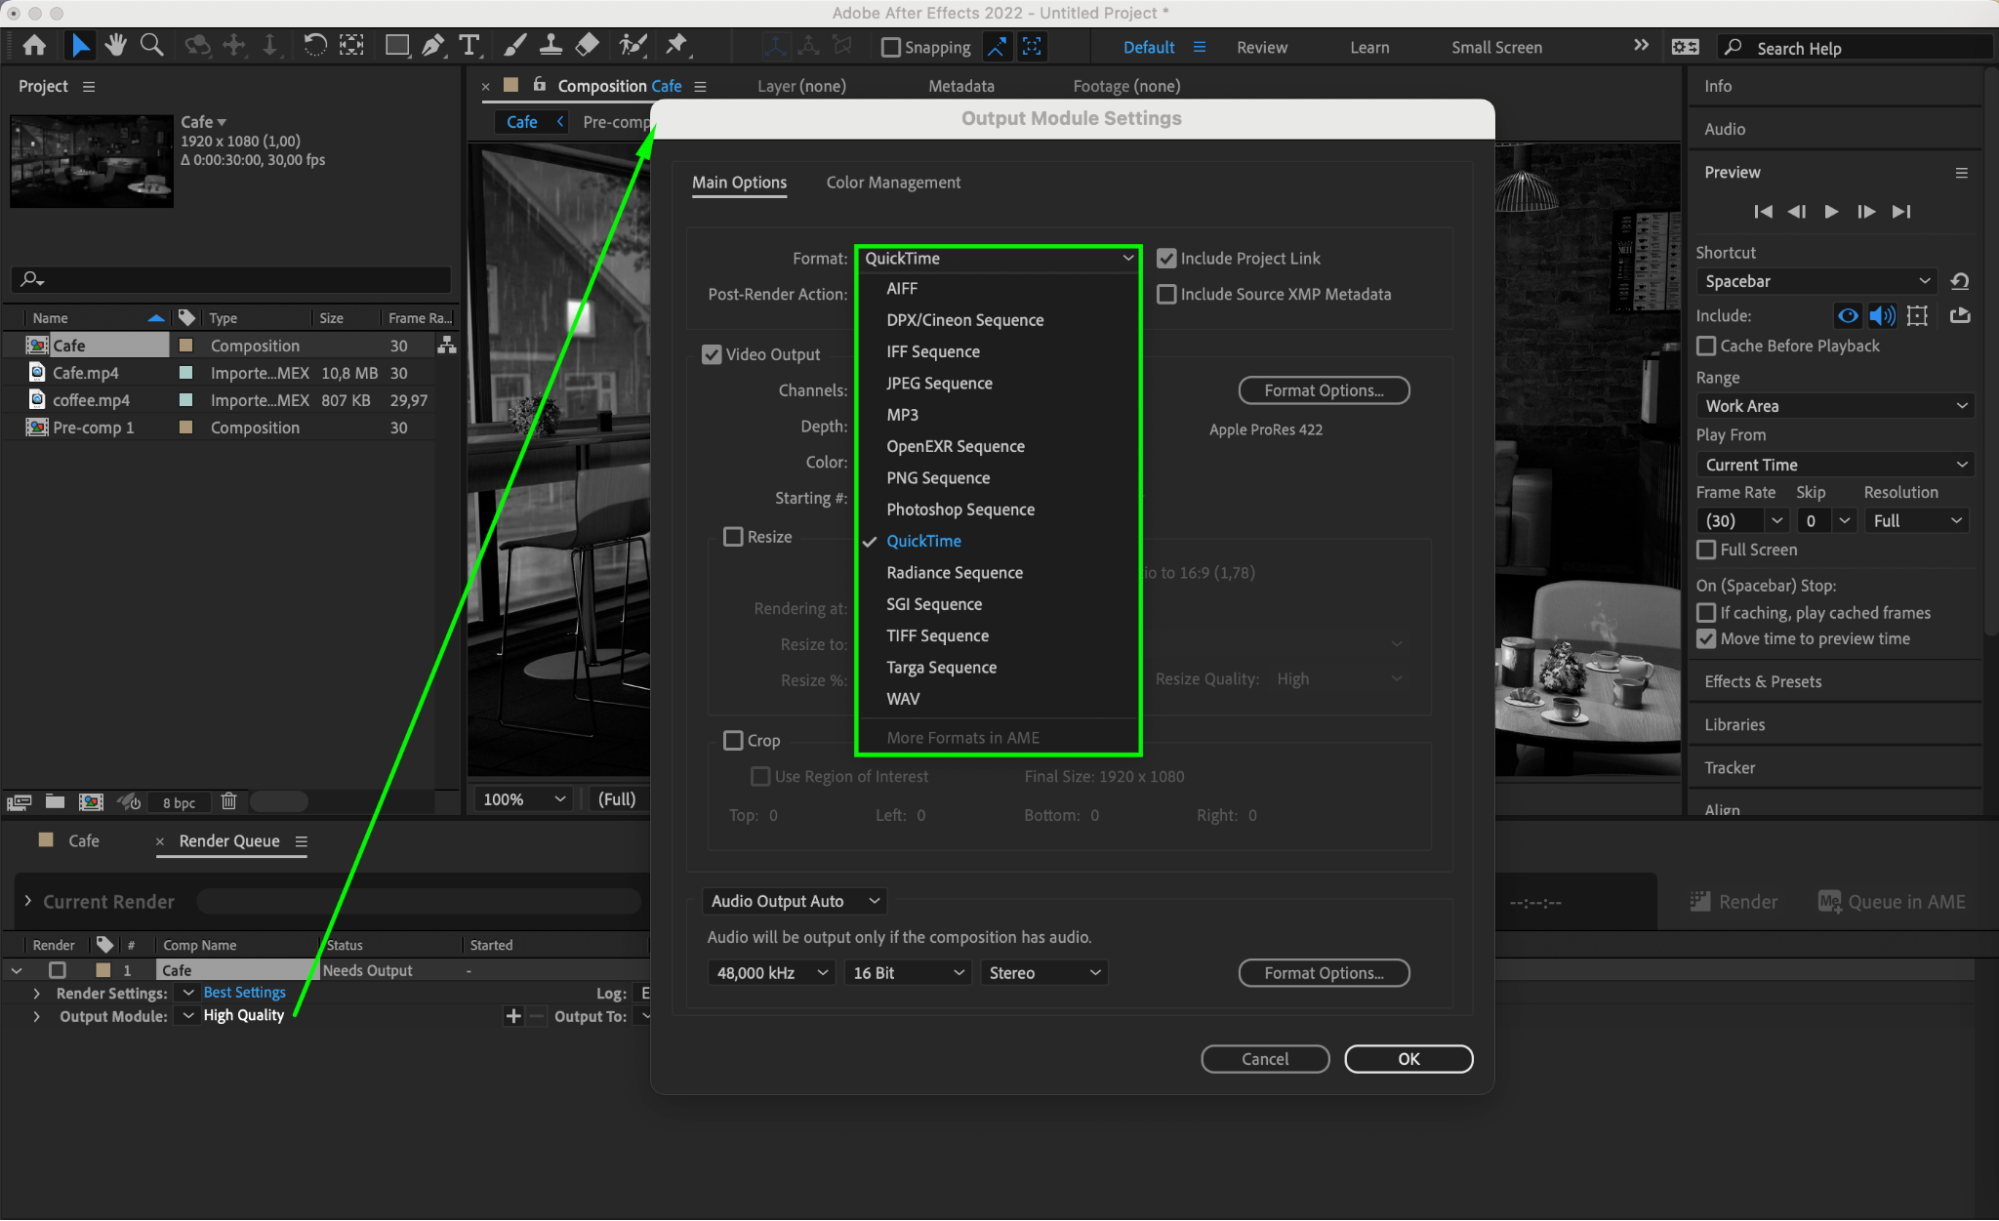
Step 3: Choosing the File Format
Selecting the appropriate file format is paramount for ensuring compatibility across various platforms and devices. After Effects offers an array of export formats, ranging from widely-used options like MP4 and MOV to specialized formats such as ProRes and AVI. Understanding the unique features of each format will aid in making an informed decision within the Output Module Settings.
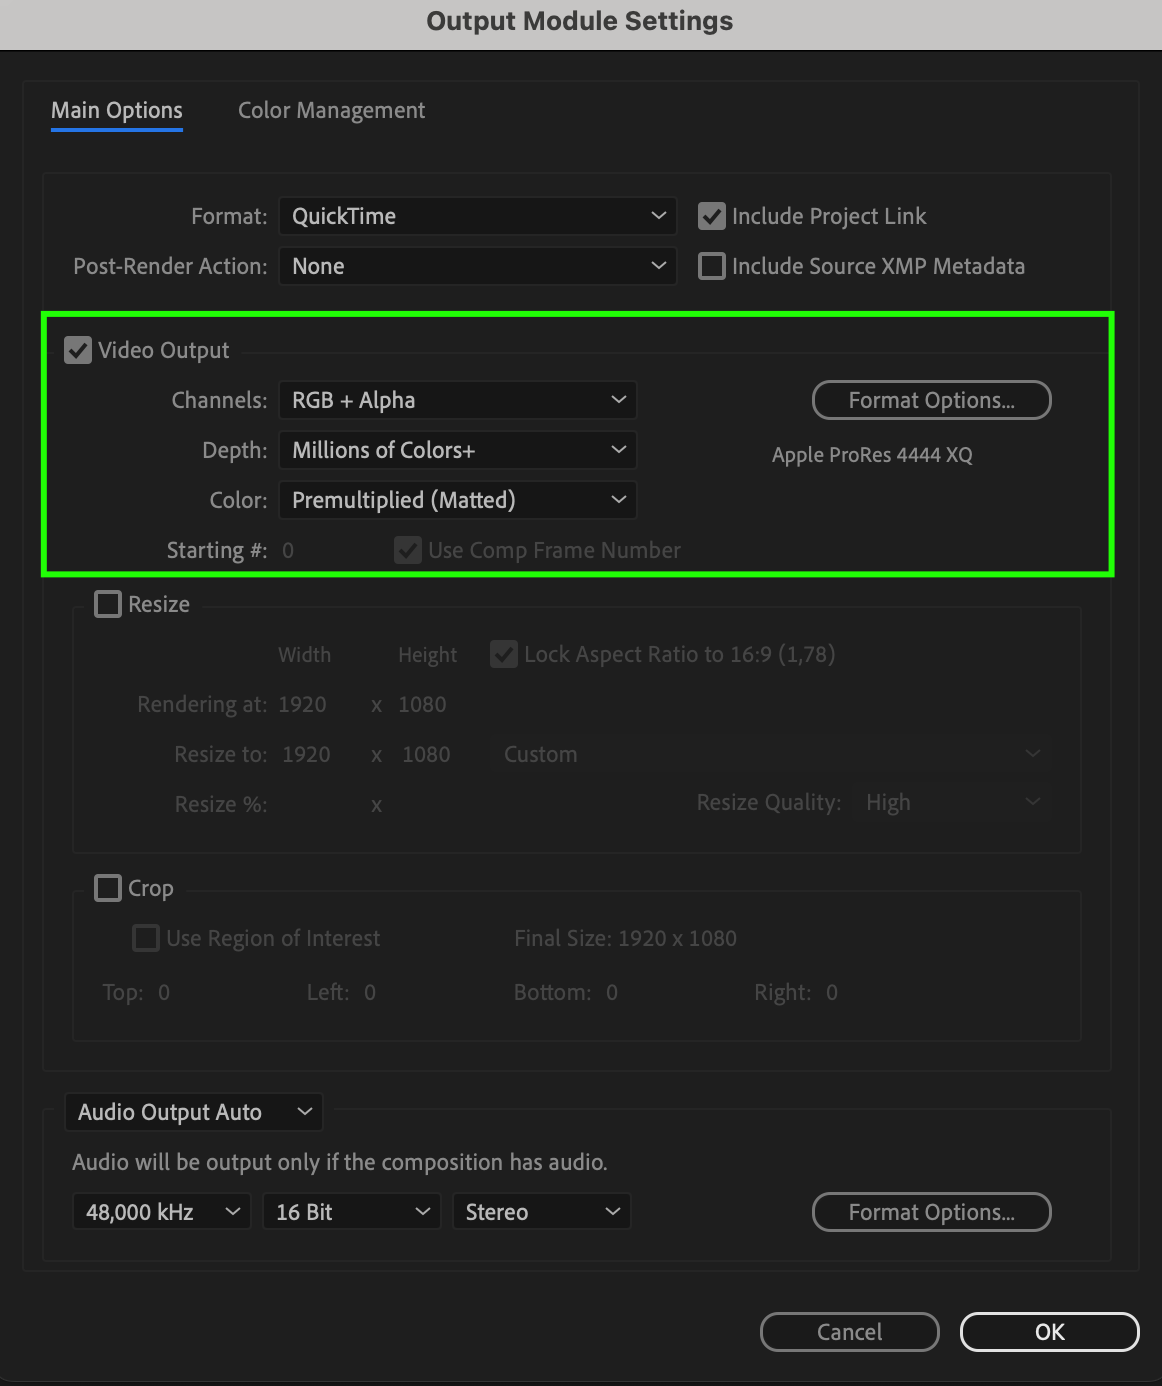
Step 4: Checking Color Requirements
Prior to export, meticulously reviewing color settings is imperative to maintain the accuracy and vibrancy of your project’s colors. This attention to detail ensures your video appears as intended across different viewing platforms, minimizing the risk of color distortion.
Get 10% off when you subscribe to our newsletter
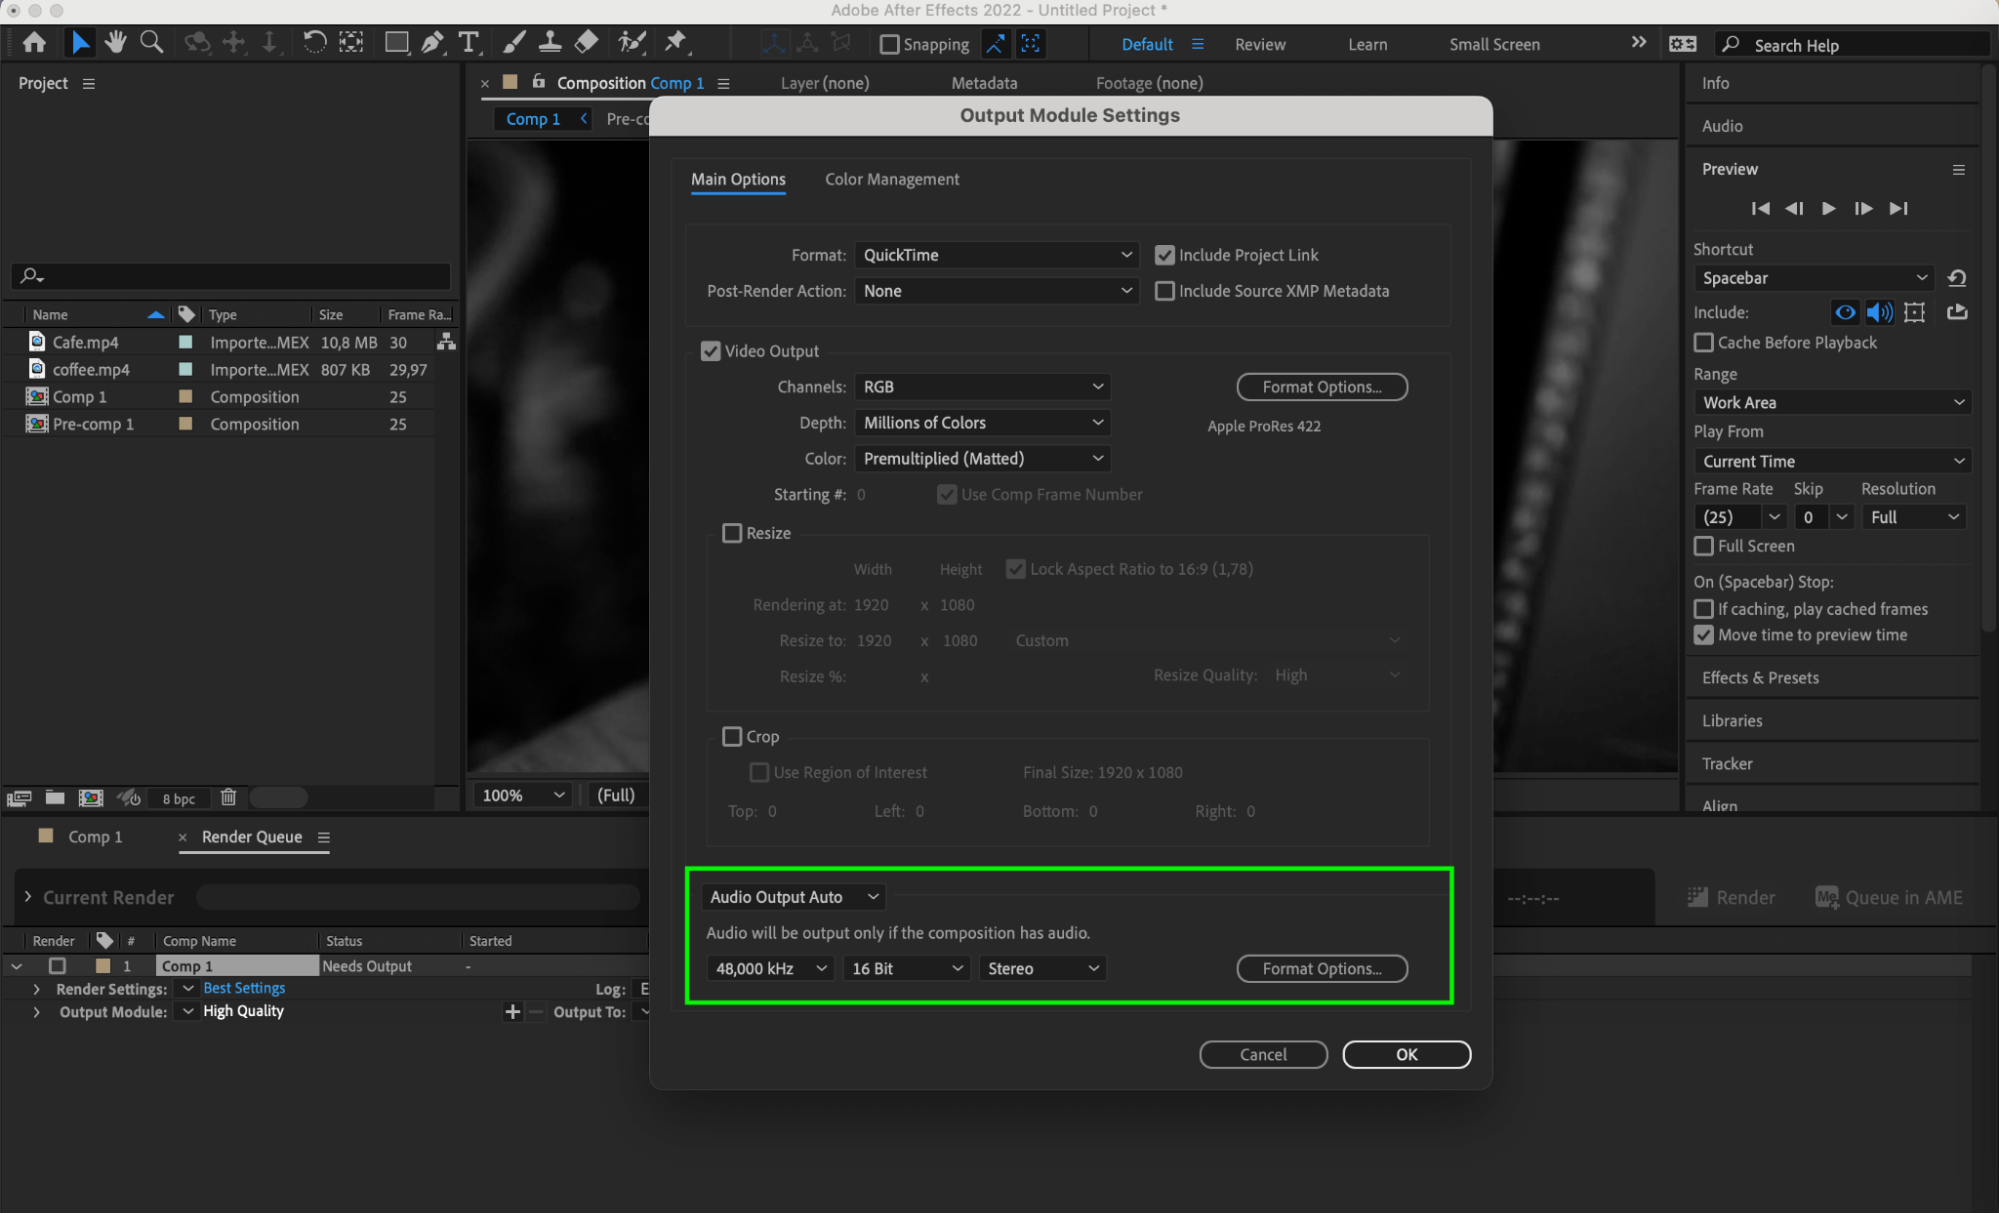
Step 5: Fine-Tuning Audio
Sound quality plays a pivotal role in the overall viewing experience. Proper adjustment of audio parameters in After Effects enhances the auditory aspect of your video, contributing to a cohesive and immersive final product.
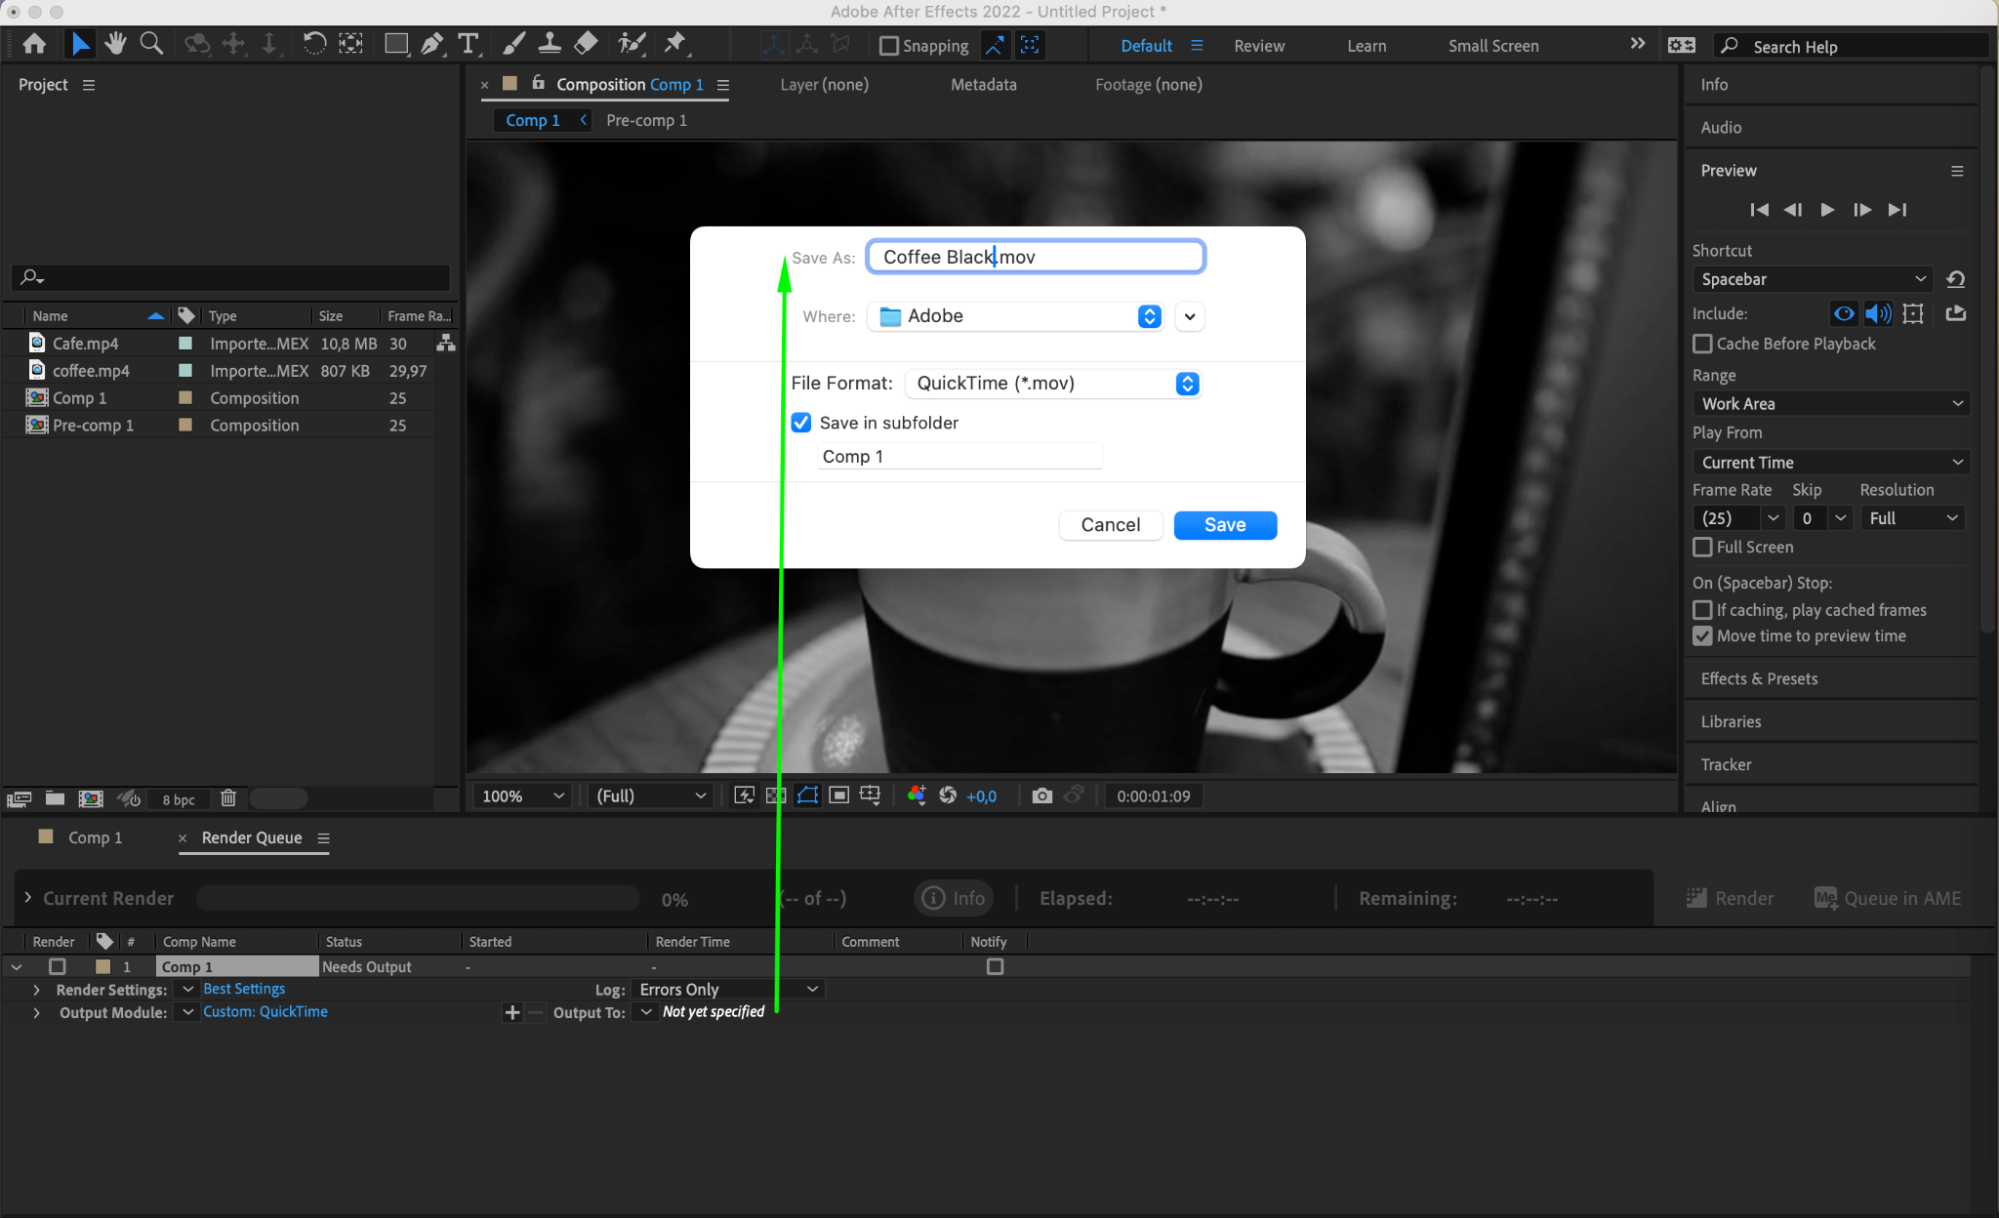
Step 6: Output and File Naming
Within the rendering panel, navigate to the output settings where you can specify the filename and destination for your exported file. Ensure that you select the desired file format once more to reaffirm compatibility and quality standards.
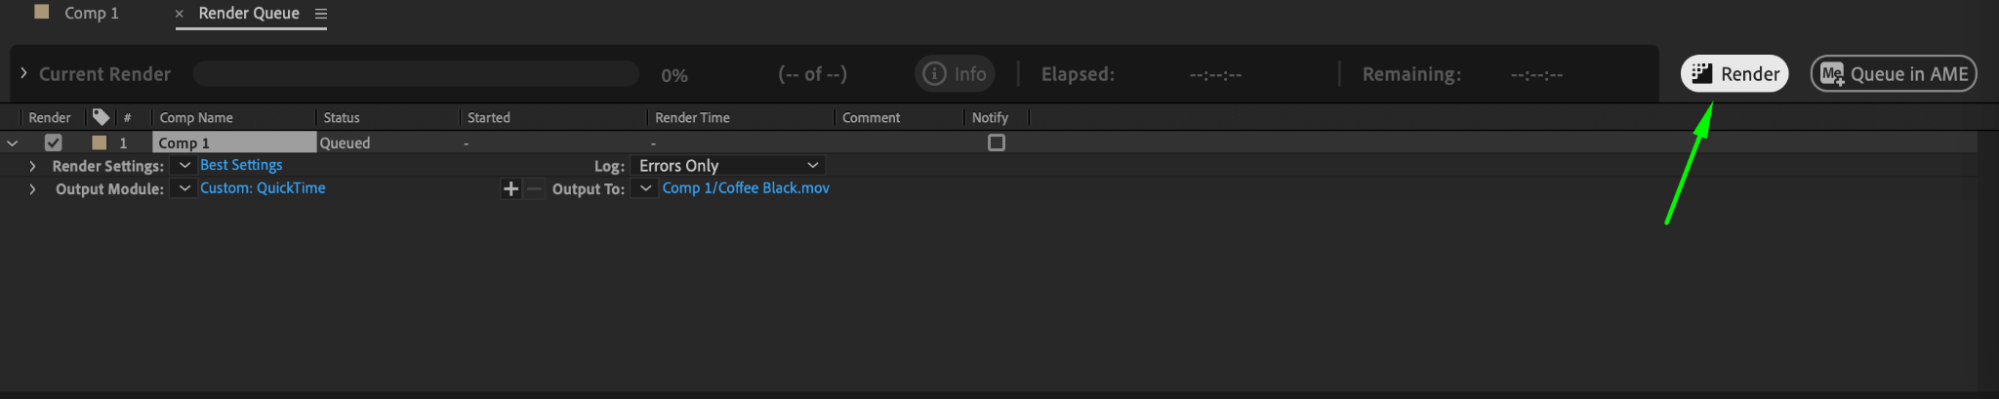
Step 7: Initiating Rendering
Get 10% off when you subscribe to our newsletter
With all settings configured to your satisfaction, it’s time to initiate the rendering process. Simply click on the rendering button within the rendering panel to commence exporting your movie from After Effects. Sit back, relax, and watch as your creation comes to life in its final form.
Conclusion
Get 10% off when you subscribe to our newsletter
Mastering the art of exporting movies from Adobe After Effects is not just about transferring your creations from the digital canvas to the world; it’s about ensuring that your vision is translated with precision and excellence. As we conclude this comprehensive guide, remember that each step—from composition setup to audio fine-tuning—is integral to delivering a polished and captivating final product.
By following these step-by-step instructions, you have equipped yourself with the knowledge and skills to confidently navigate the export process in After Effects. Whether you’re a seasoned professional or a novice exploring the world of motion graphics, this guide empowers you to share your creative endeavors with audiences worldwide.
Our Bestsellers


