Efficiently Exporting Video from After Effects with Adobe Media Encoder
Getting Started with Exporting from After Effects
Exporting videos from After Effects is an essential step in the video production process. After completing your project in After Effects, you’ll want to export it as a final video file. While After Effects does have a built-in rendering feature, using Adobe Media Encoder can provide a more efficient and flexible solution for exporting your projects.
Get 10% off when you subscribe to our newsletter

Step-by-Step Guide to Exporting Video from After Effects Using Adobe Media Encoder
Step 1: Set up your Composition
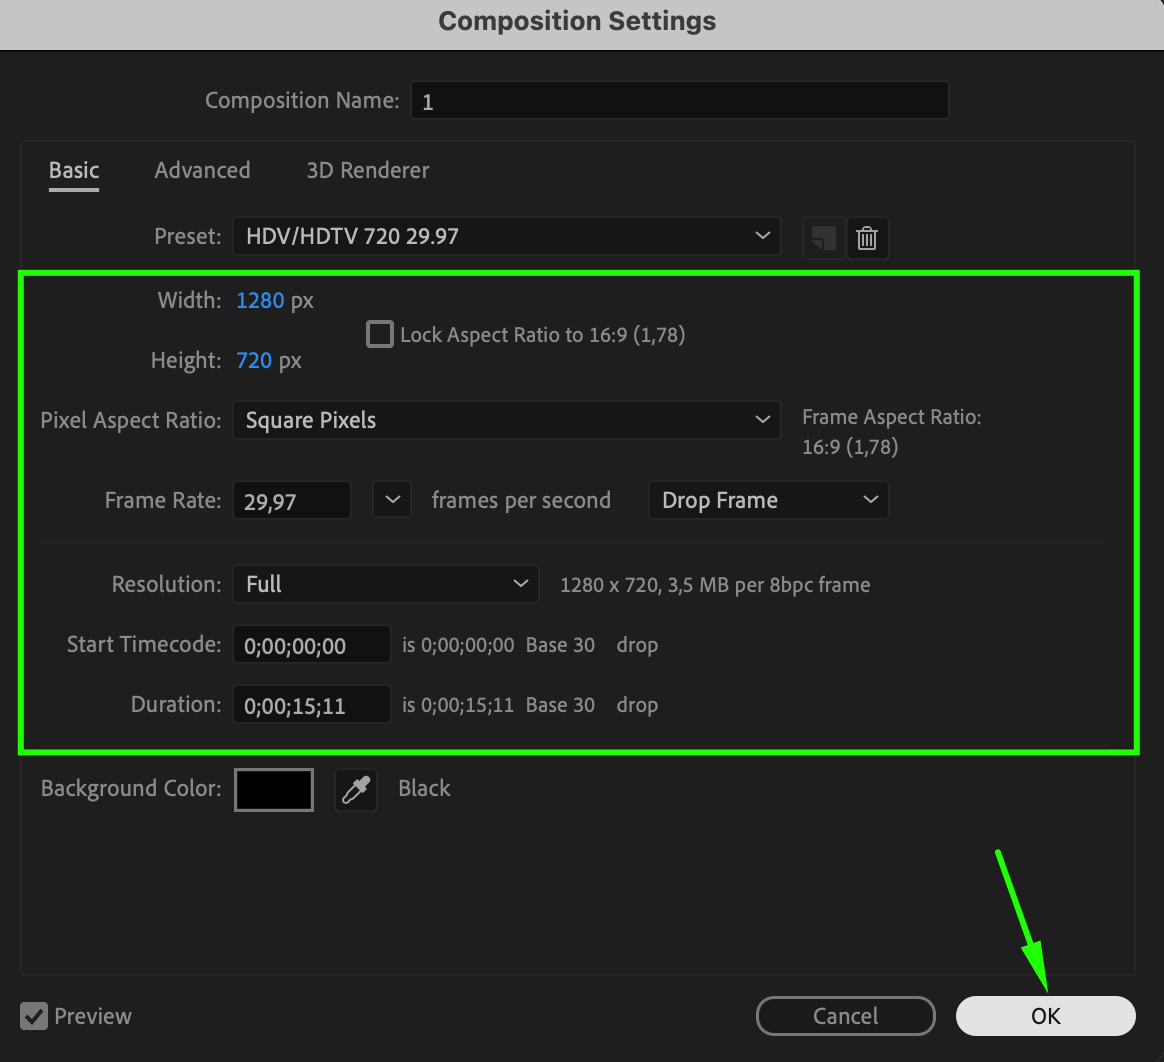
Before exporting, make sure your composition is set up correctly in After Effects. Adjust the composition settings, such as resolution, frame rate, and duration, to match your project requirements.

Step 2: Add Your Composition to Adobe Media Encoder
Go to the “Composition” menu and choose “Add to Adobe Media Encoder Queue.” Your composition will automatically appear in Adobe Media Encoder.

Step 3: Choose Output Format and Preset
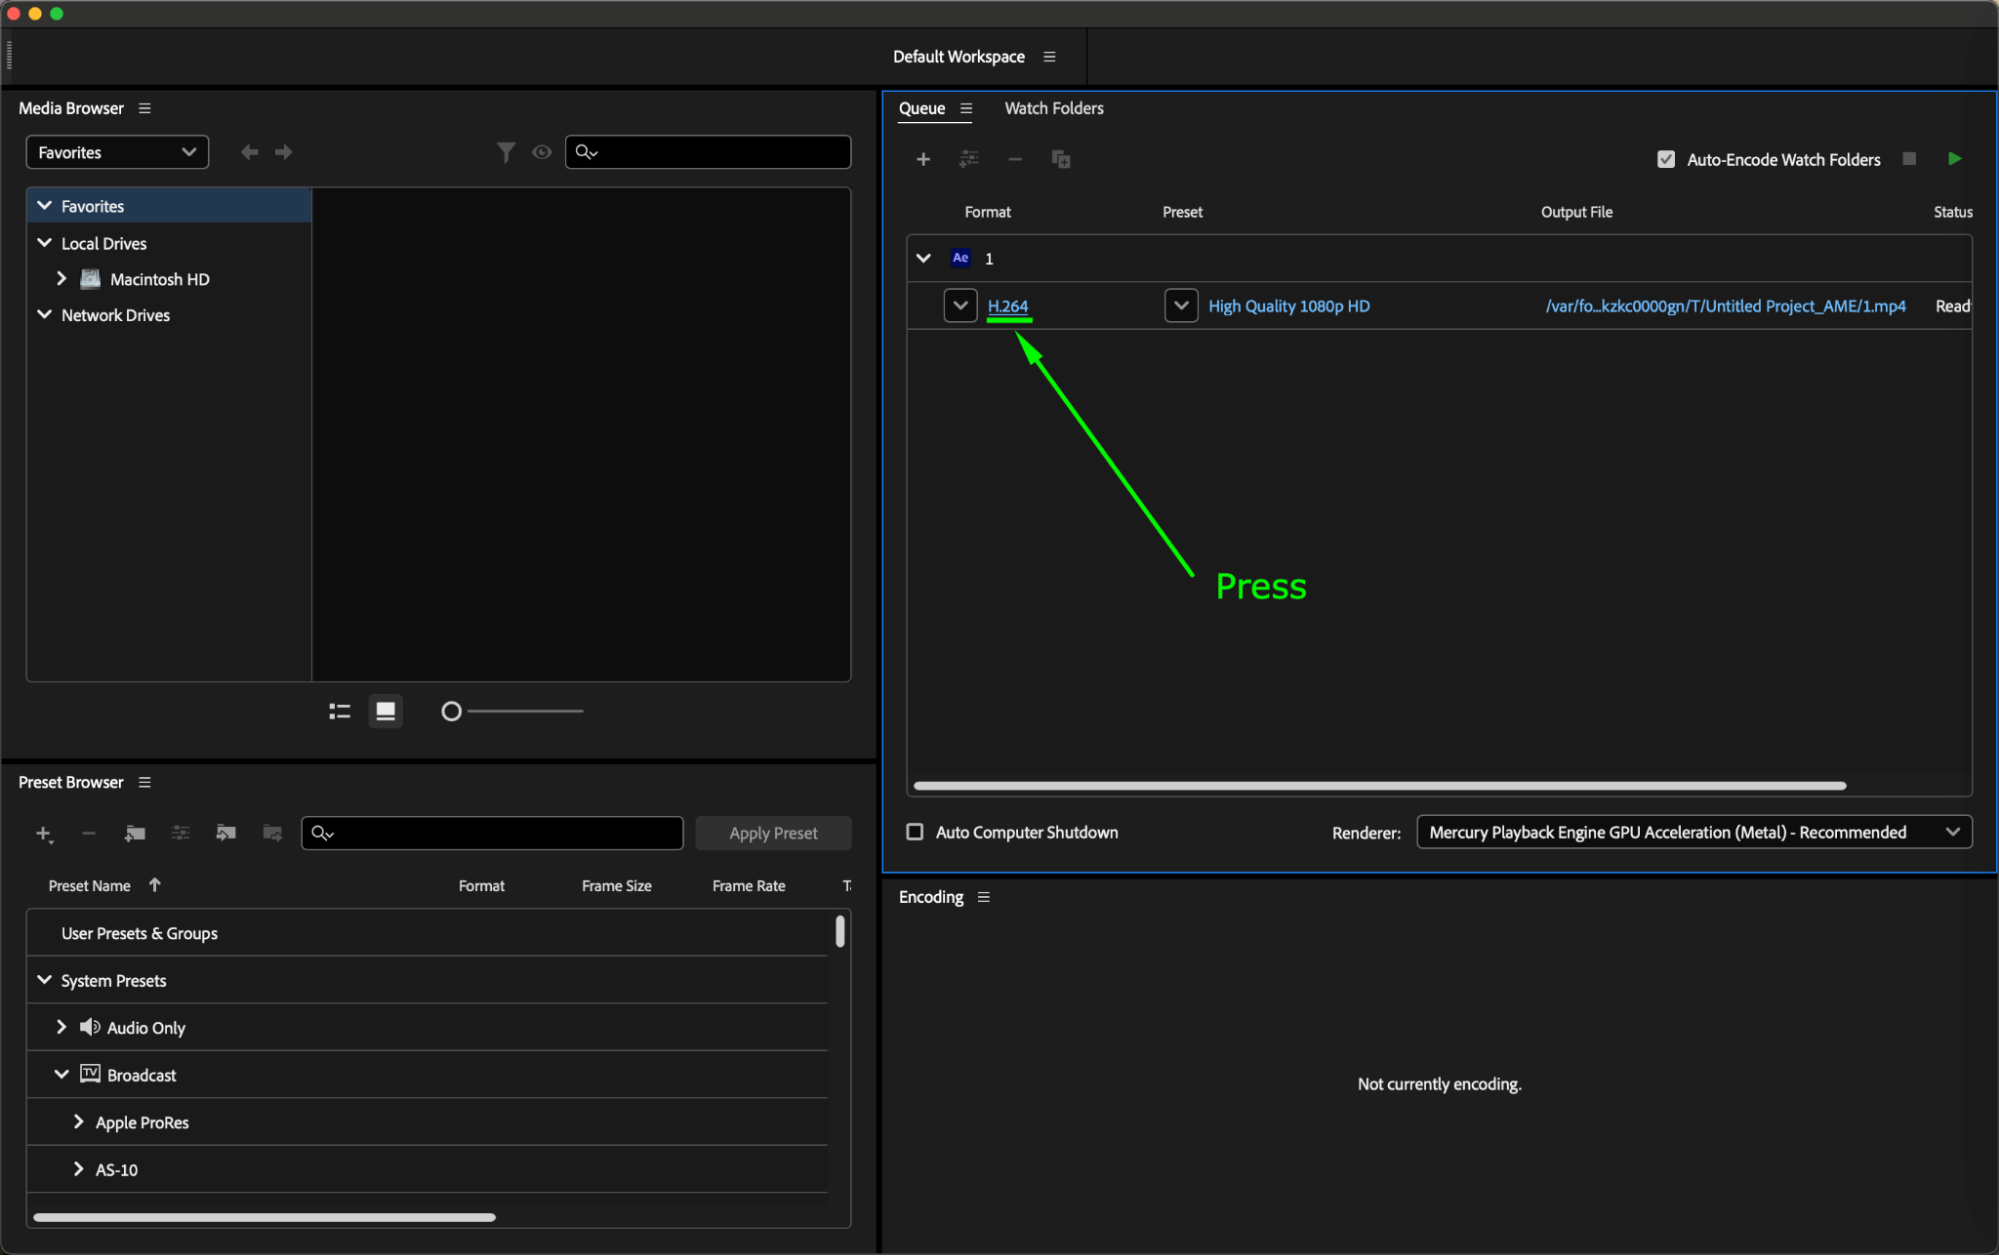
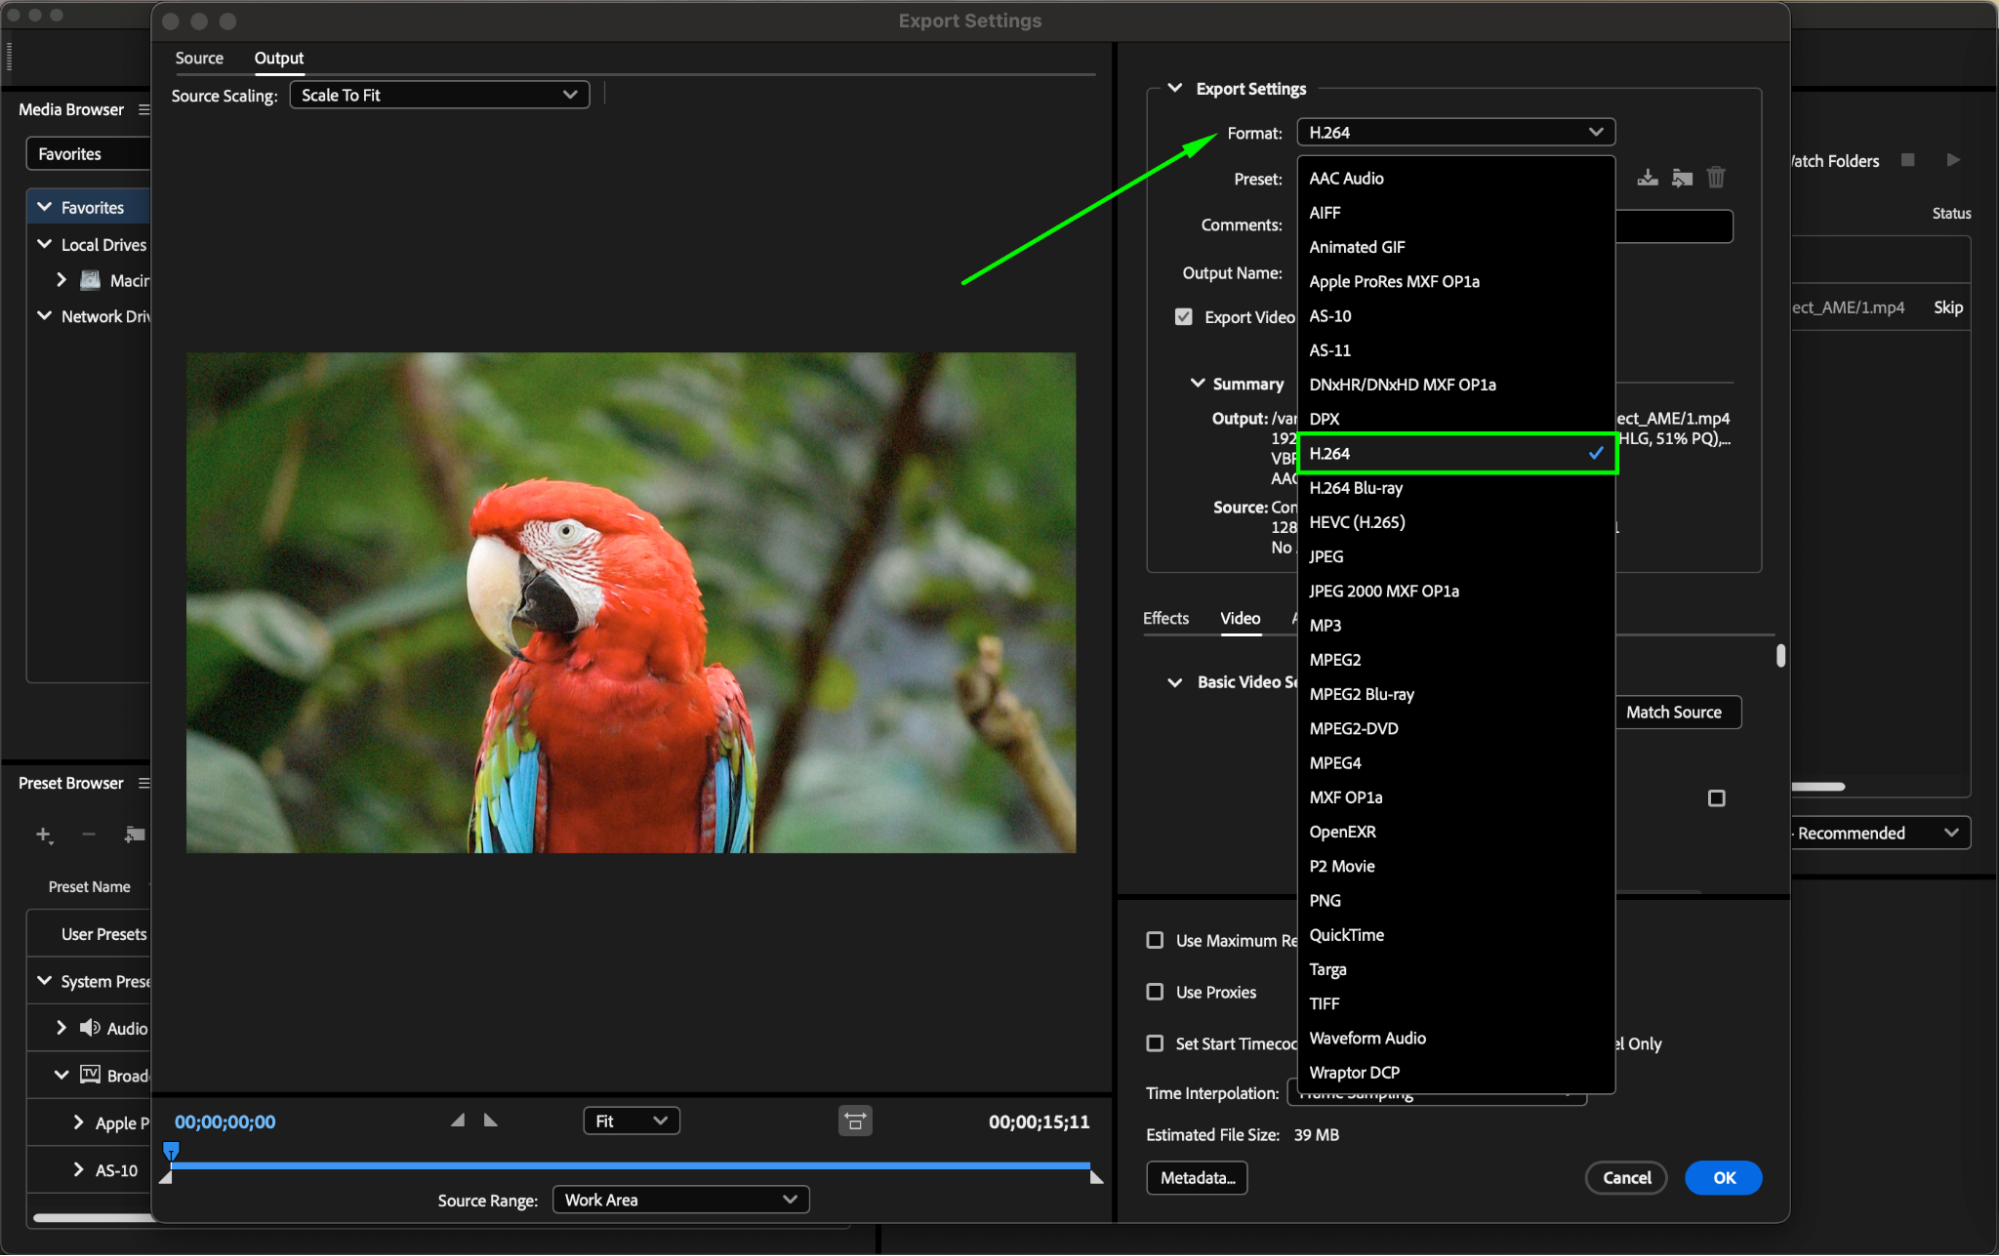
In the Media Encoder queue, select your composition and go to the “Format” column where the current format is listed. Click on the format to open the Export Settings window. Choose a format that suits your needs. Adobe Media Encoder supports a variety of formats, such as MP4, AVI, MOV, and more.
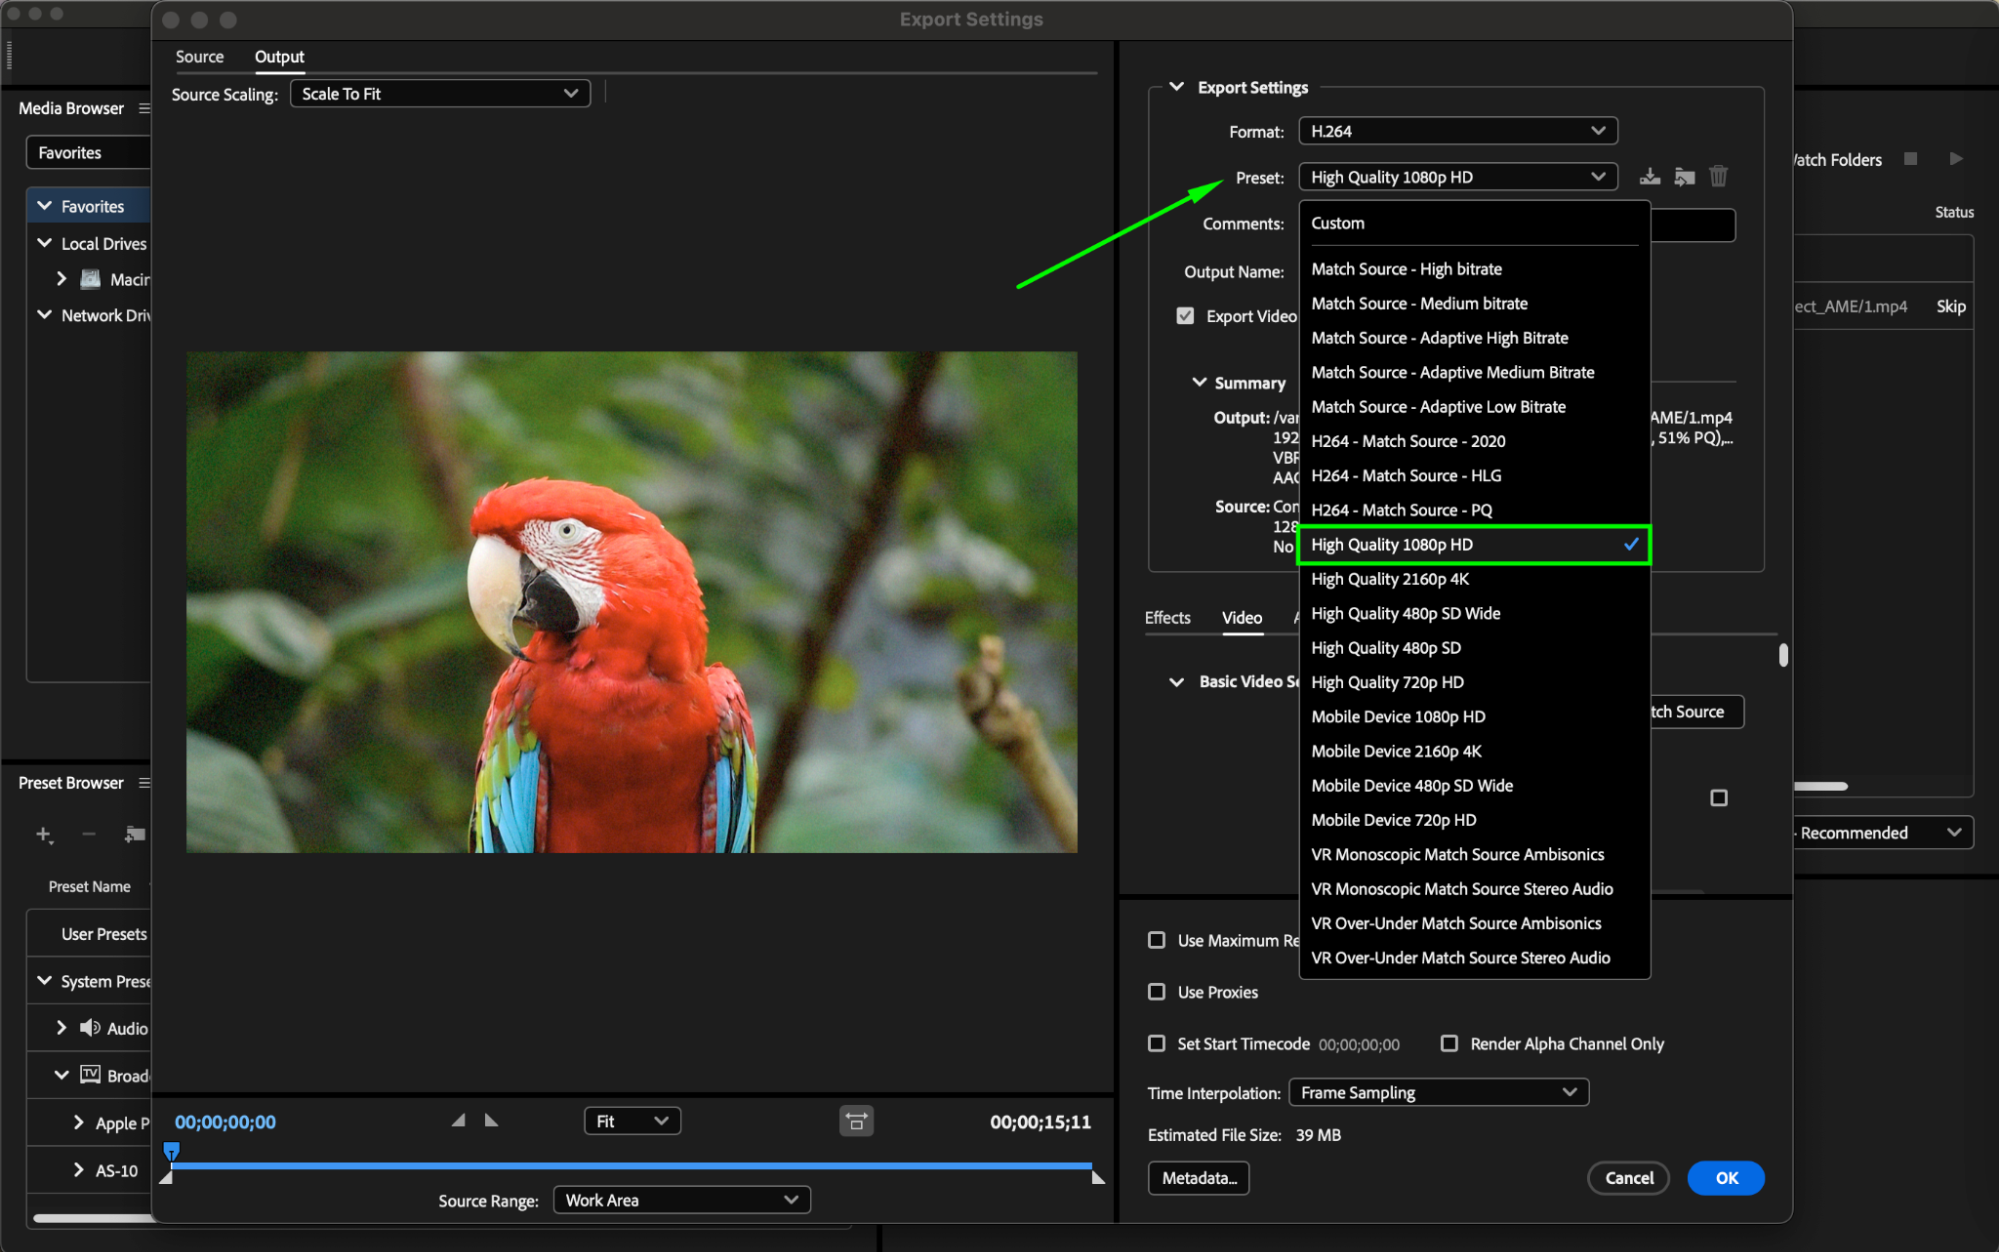
Under the format selection, you’ll find presets categorized by resolution and quality. Select a preset that matches or exceeds your composition settings for optimal results. You can also create custom presets by adjusting the settings in the “Video” and “Audio” tabs. Use options like “Render at Maximum Depth” and “Use Maximum Render Quality” for higher quality exports.
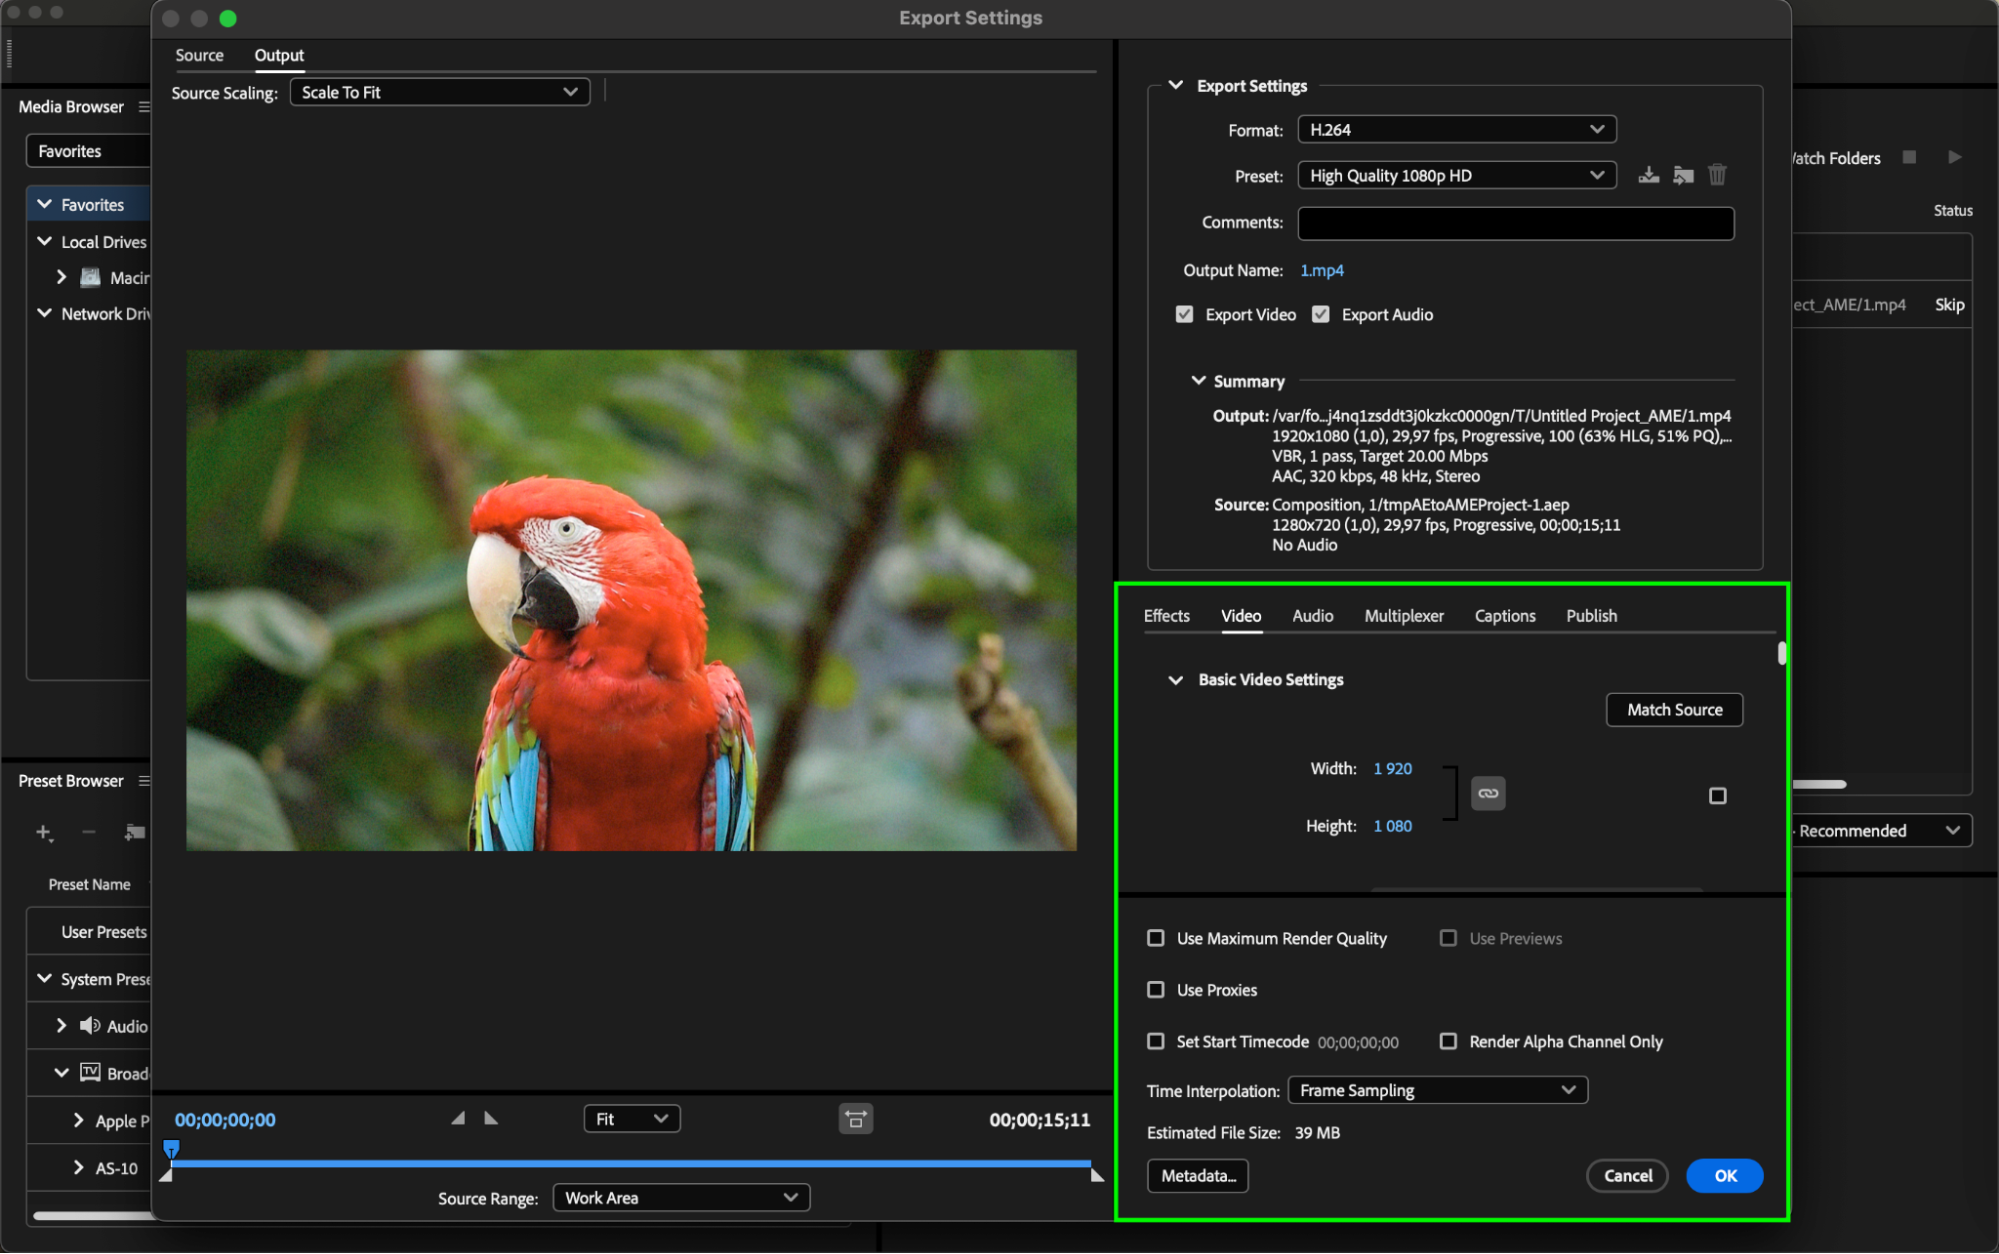
Step 4: Adjust Export Settings
Click on the output name link in the “Output Name” column. This will open a dialog box where you can specify the output destination and file name. Choose a location to save the exported video and give it a suitable file name.

Step 5: Export Your Video
ce you’ve finalized the export settings, click “OK” to close the window. Go to the top right of the Media Encoder queue panel and click the “Start Queue” button to begin the export process. Adobe Media Encoder will encode your After Effects composition based on the selected format and preset. You can monitor the progress in the Media Encoder queue window.

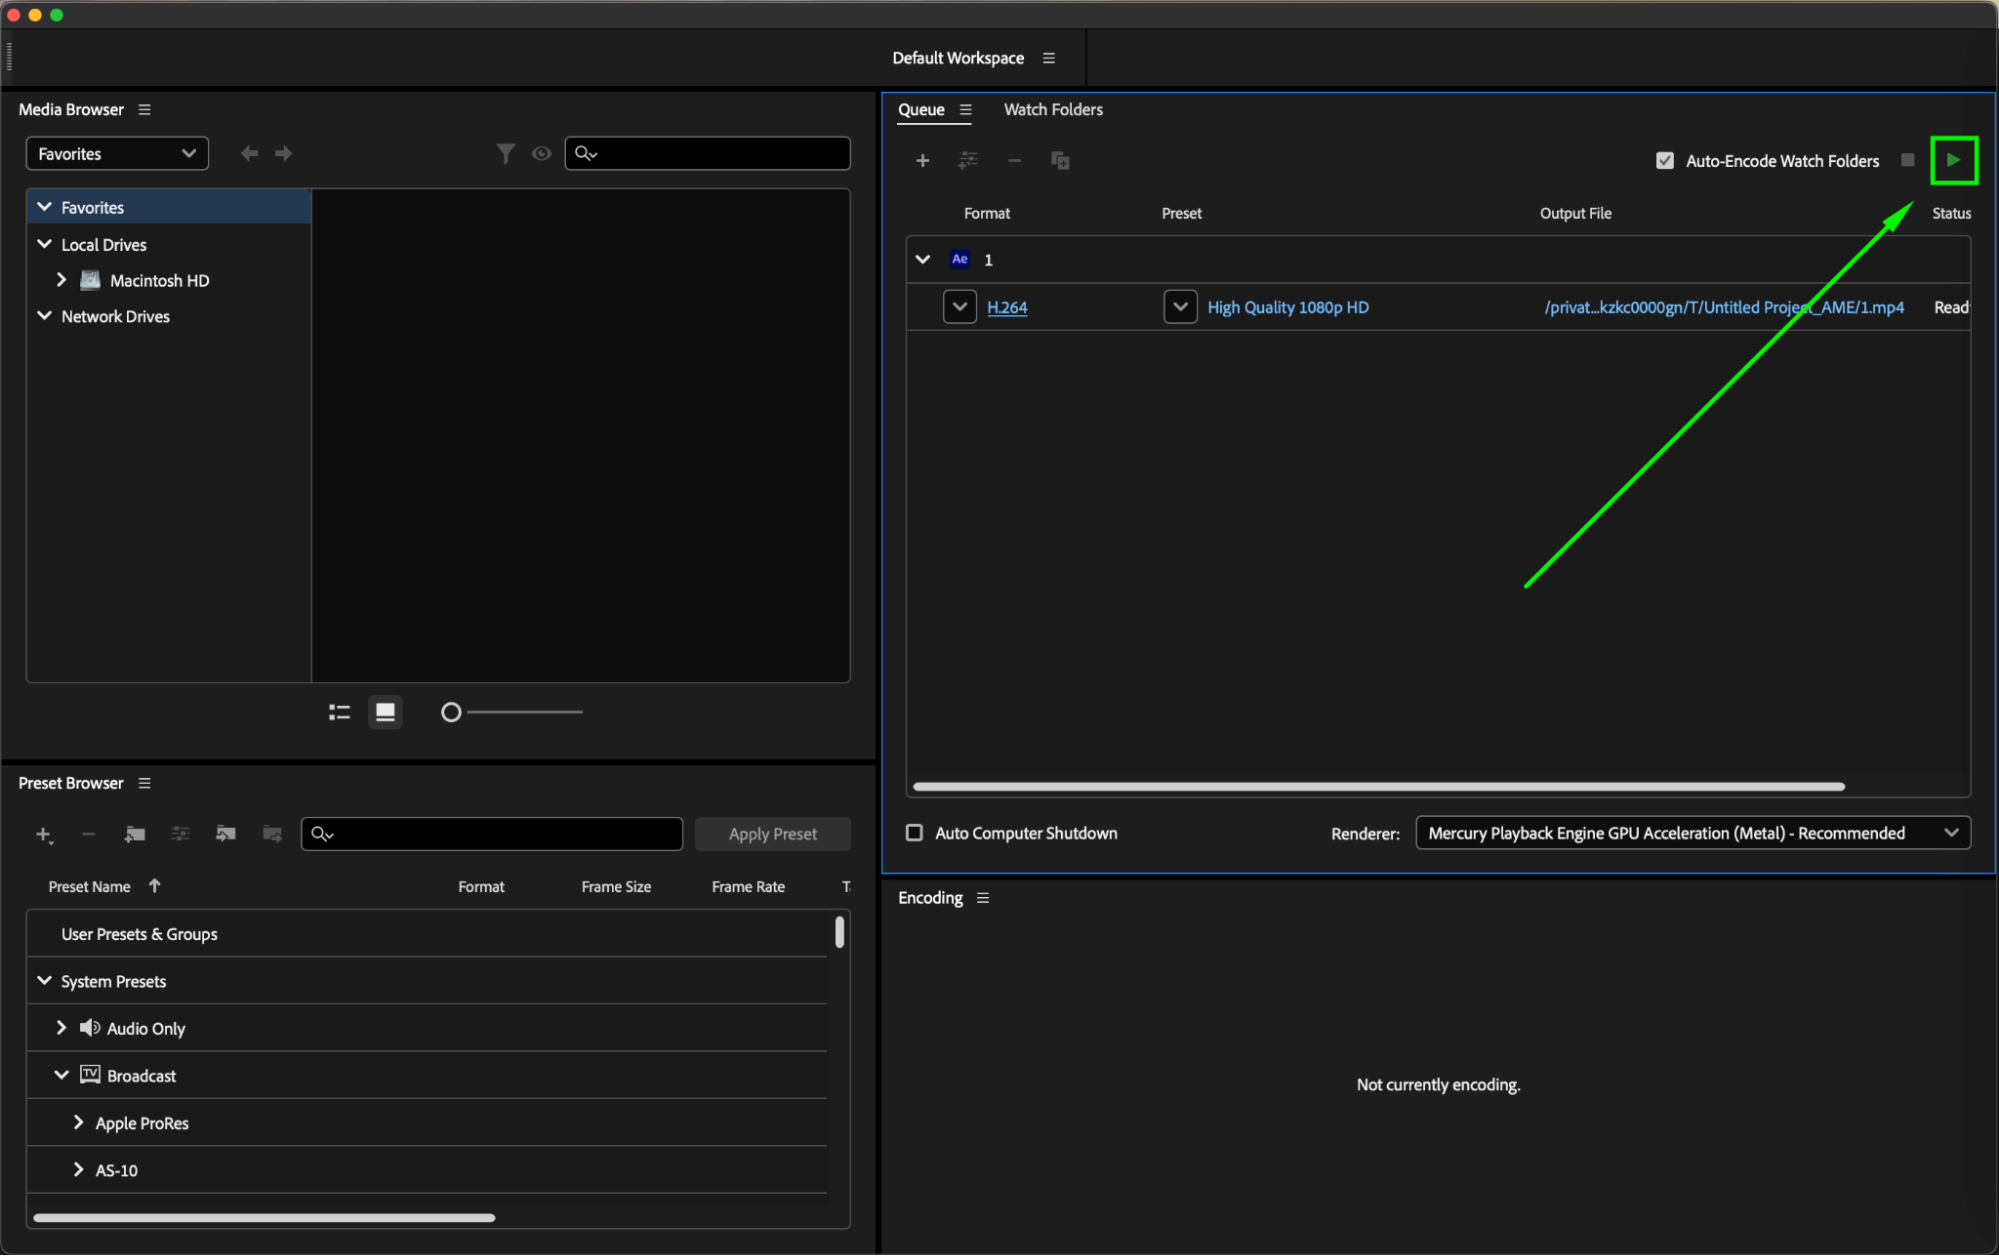
After the export is complete, navigate to the specified destination folder to find your exported video. The status of your file in Media Encoder will change to “Done.” Double-check the video to ensure it meets your expectations in terms of quality and compatibility.
Conclusion
Using Adobe Media Encoder to export your videos from After Effects provides a streamlined and flexible workflow. With the ability to choose from a variety of formats and presets, you can ensure that your final video meets the desired quality and specifications. Now that you know how to export your projects efficiently, you can focus on creating professional and polished videos. Happy editing and exporting!


