Extending Composition Duration in After Effects
Introduction
Are you working on a project in Adobe After Effects and finding yourself running out of time to complete it? Don’t worry! I’m here to help you extend the composition time in After Effects so you can have more room to work and create engaging visual content.
In this article, we will explore different techniques and tips to extend the composition time in After Effects. By increasing the duration of your projects, you can add more creative elements, make smoother transitions, and bring your vision to life.
Step 1: Adjust Composition Settings
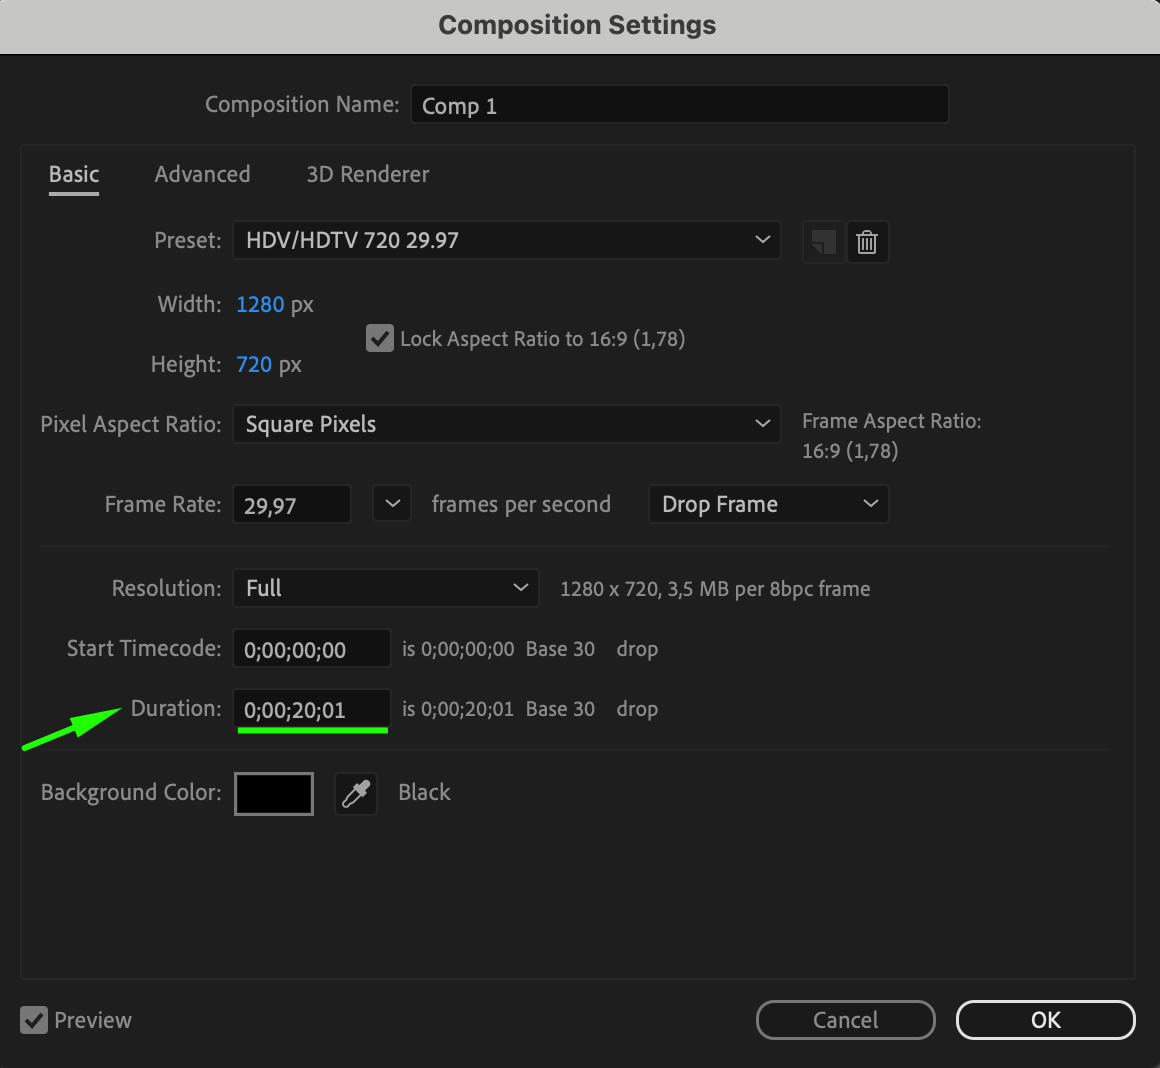
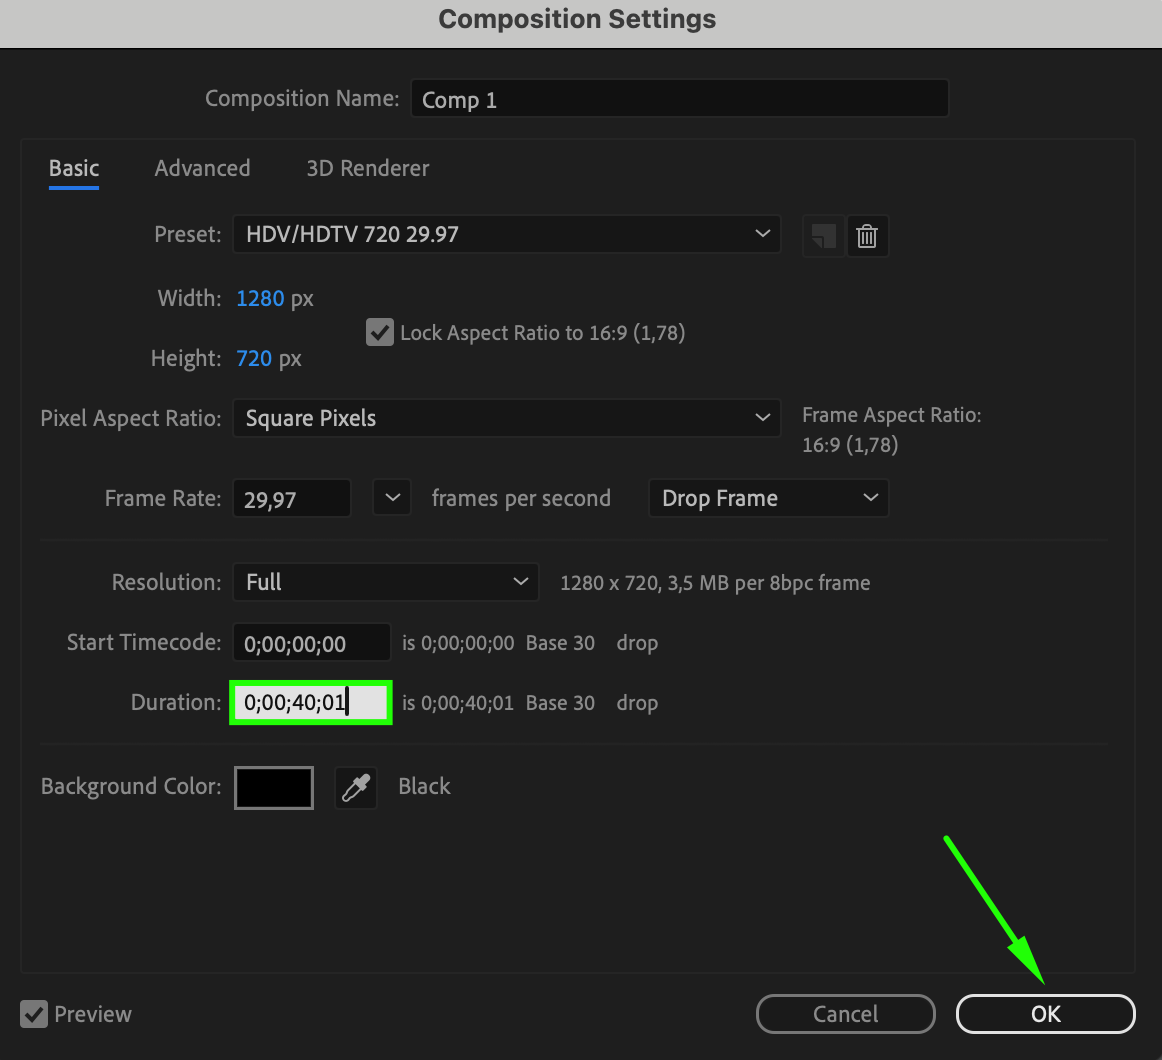
To begin, let’s adjust the composition settings. Go to the “Composition” menu, select “Composition Settings,” and modify the duration to your desired length. This simple adjustment allows you to add more layers, effects, and animations without feeling constricted by time limits. With an extended composition duration, you have the flexibility to experiment with different techniques and increase the length of your layers.
 Step 2: Pre-Compose Layers
Get 10% off when you subscribe to our newsletter

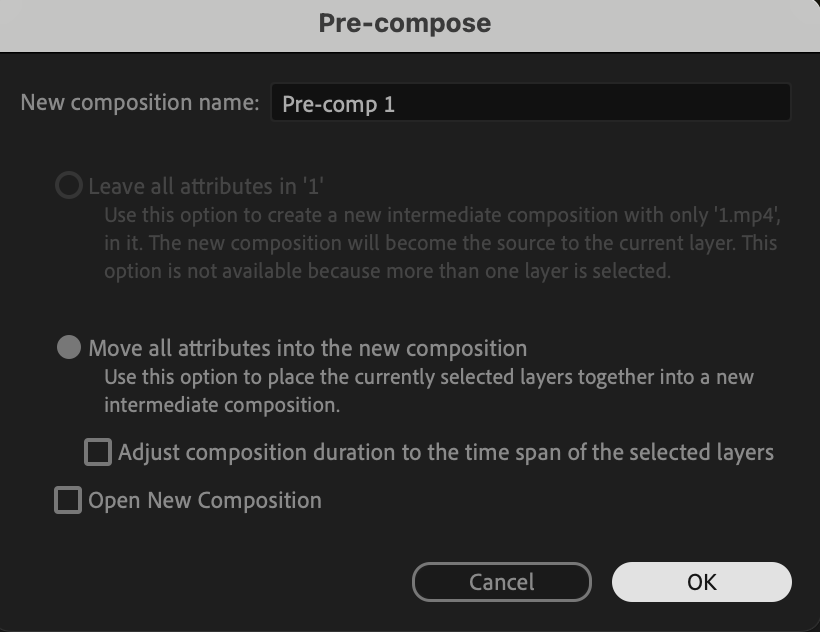
Before changing the duration of individual layers, combine them using pre-compose. Pre-composing is a powerful technique that involves combining multiple layers into a single composition. By pre-composing layers that make up a specific section of your project, you can treat them as a single entity. This makes it easier to manage and extend their duration.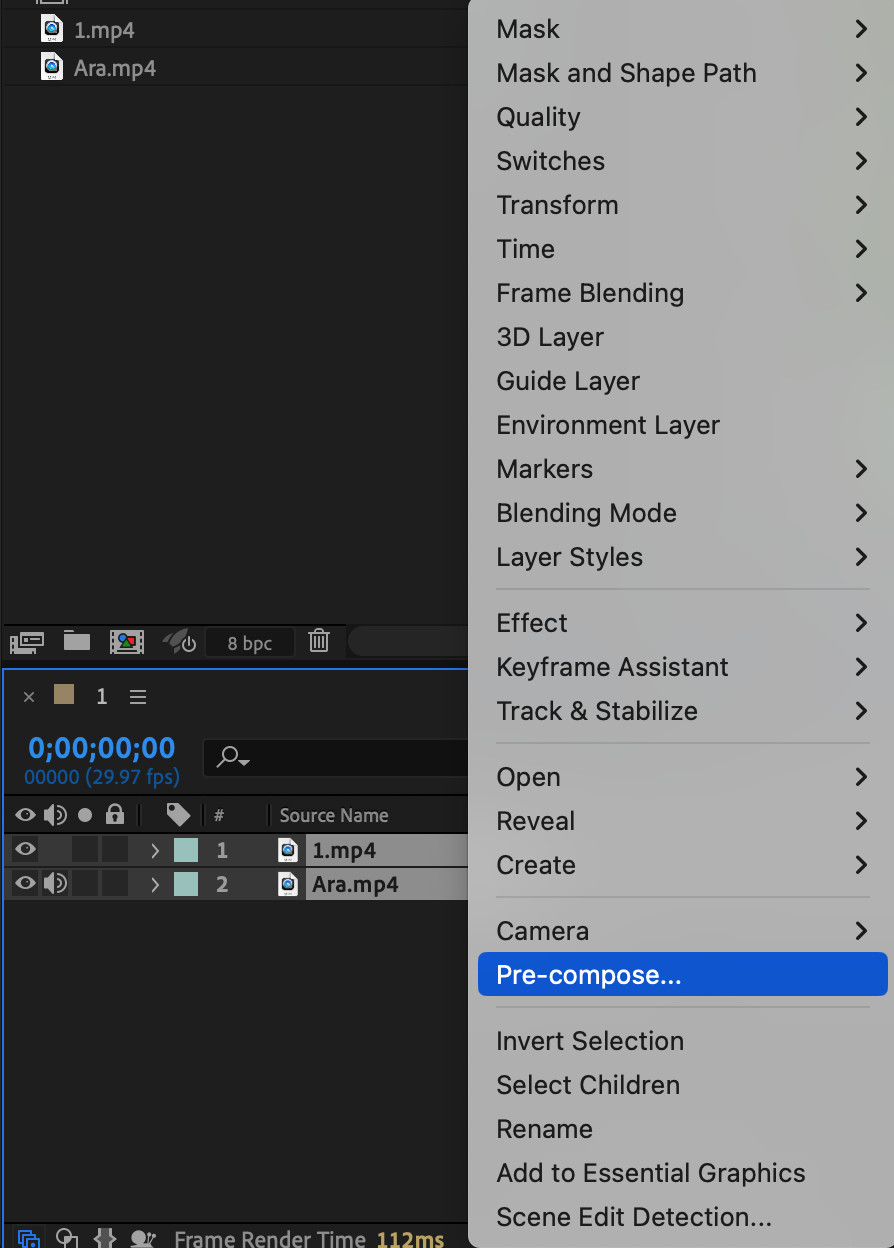
 Step 3: Use Time Stretching
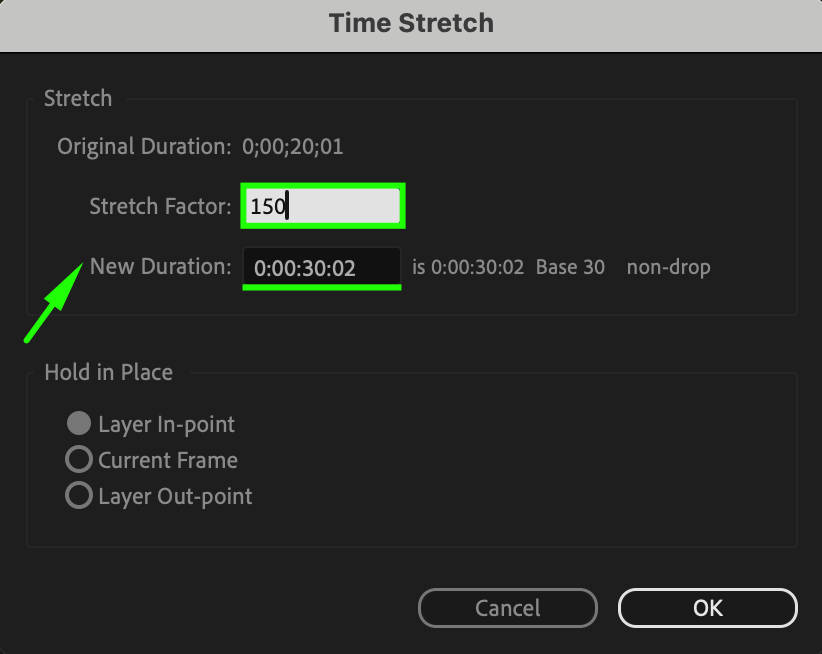
Now that you can easily manage all your layers, use the time stretching technique. Select the layer you want to extend, right-click, and navigate to “Time” > “Time Stretch.” Here, you can adjust the percentage to lengthen or shorten the duration, or enter a specific value in the “Stretch Factor” box. Play around with different values to achieve the desired result.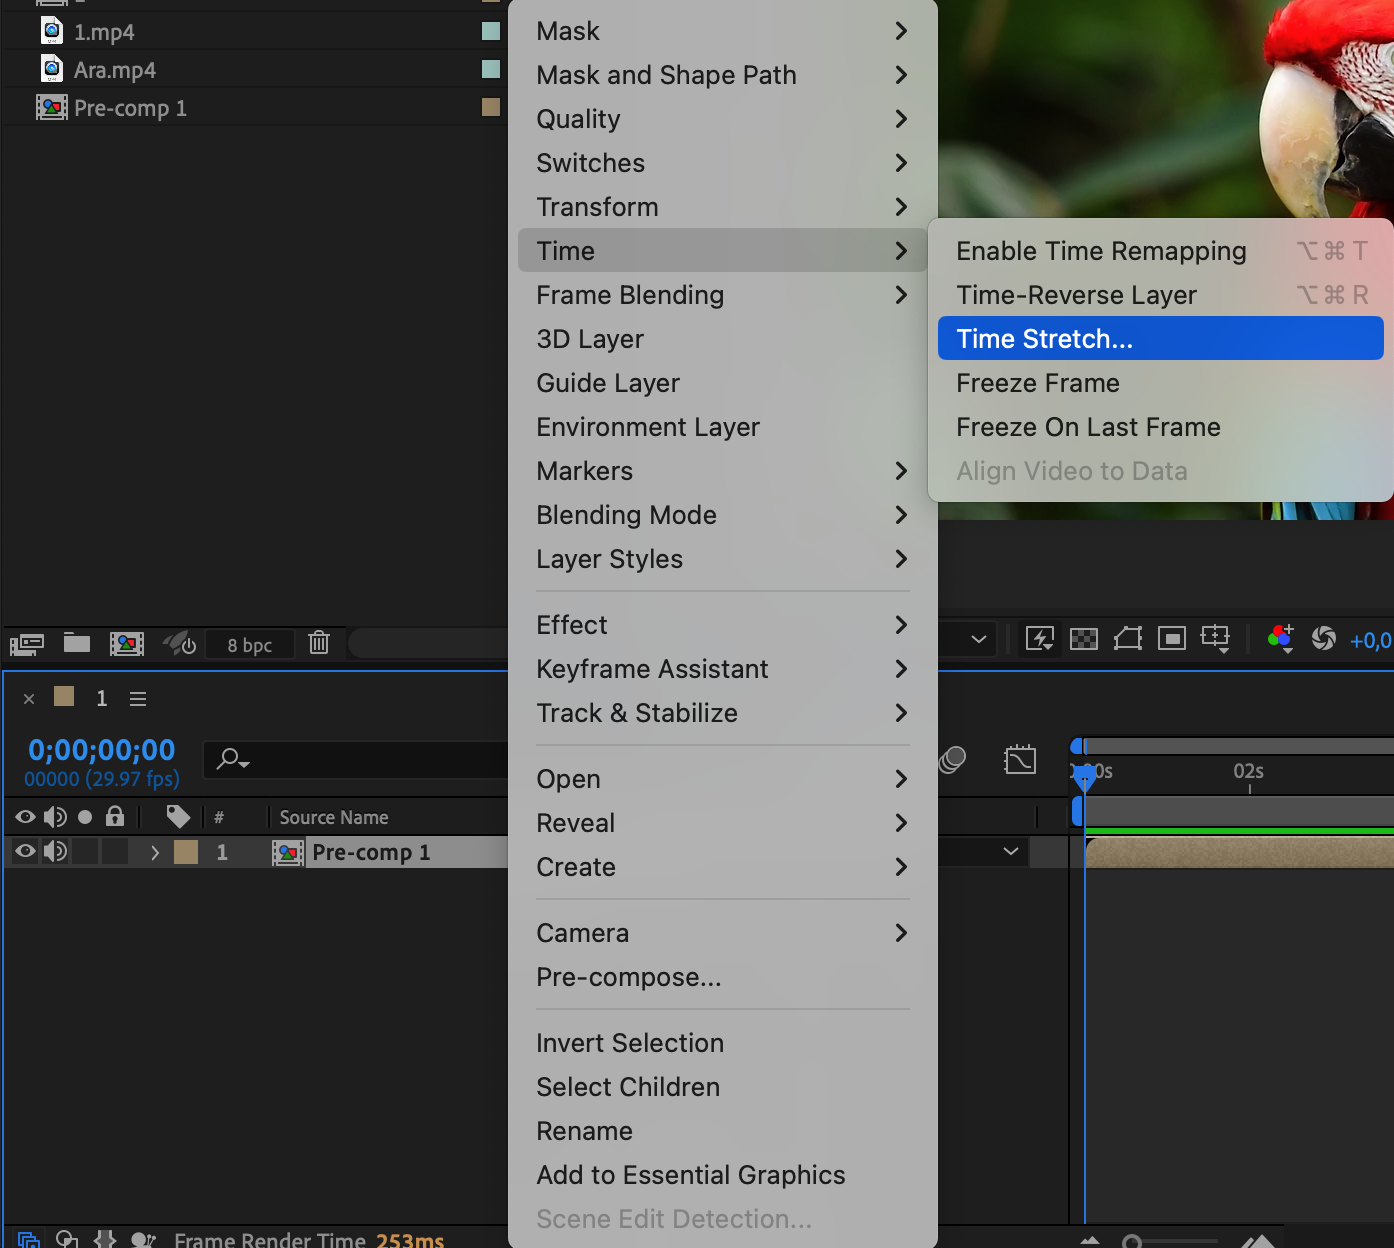
 Step 4: Apply Looping Techniques
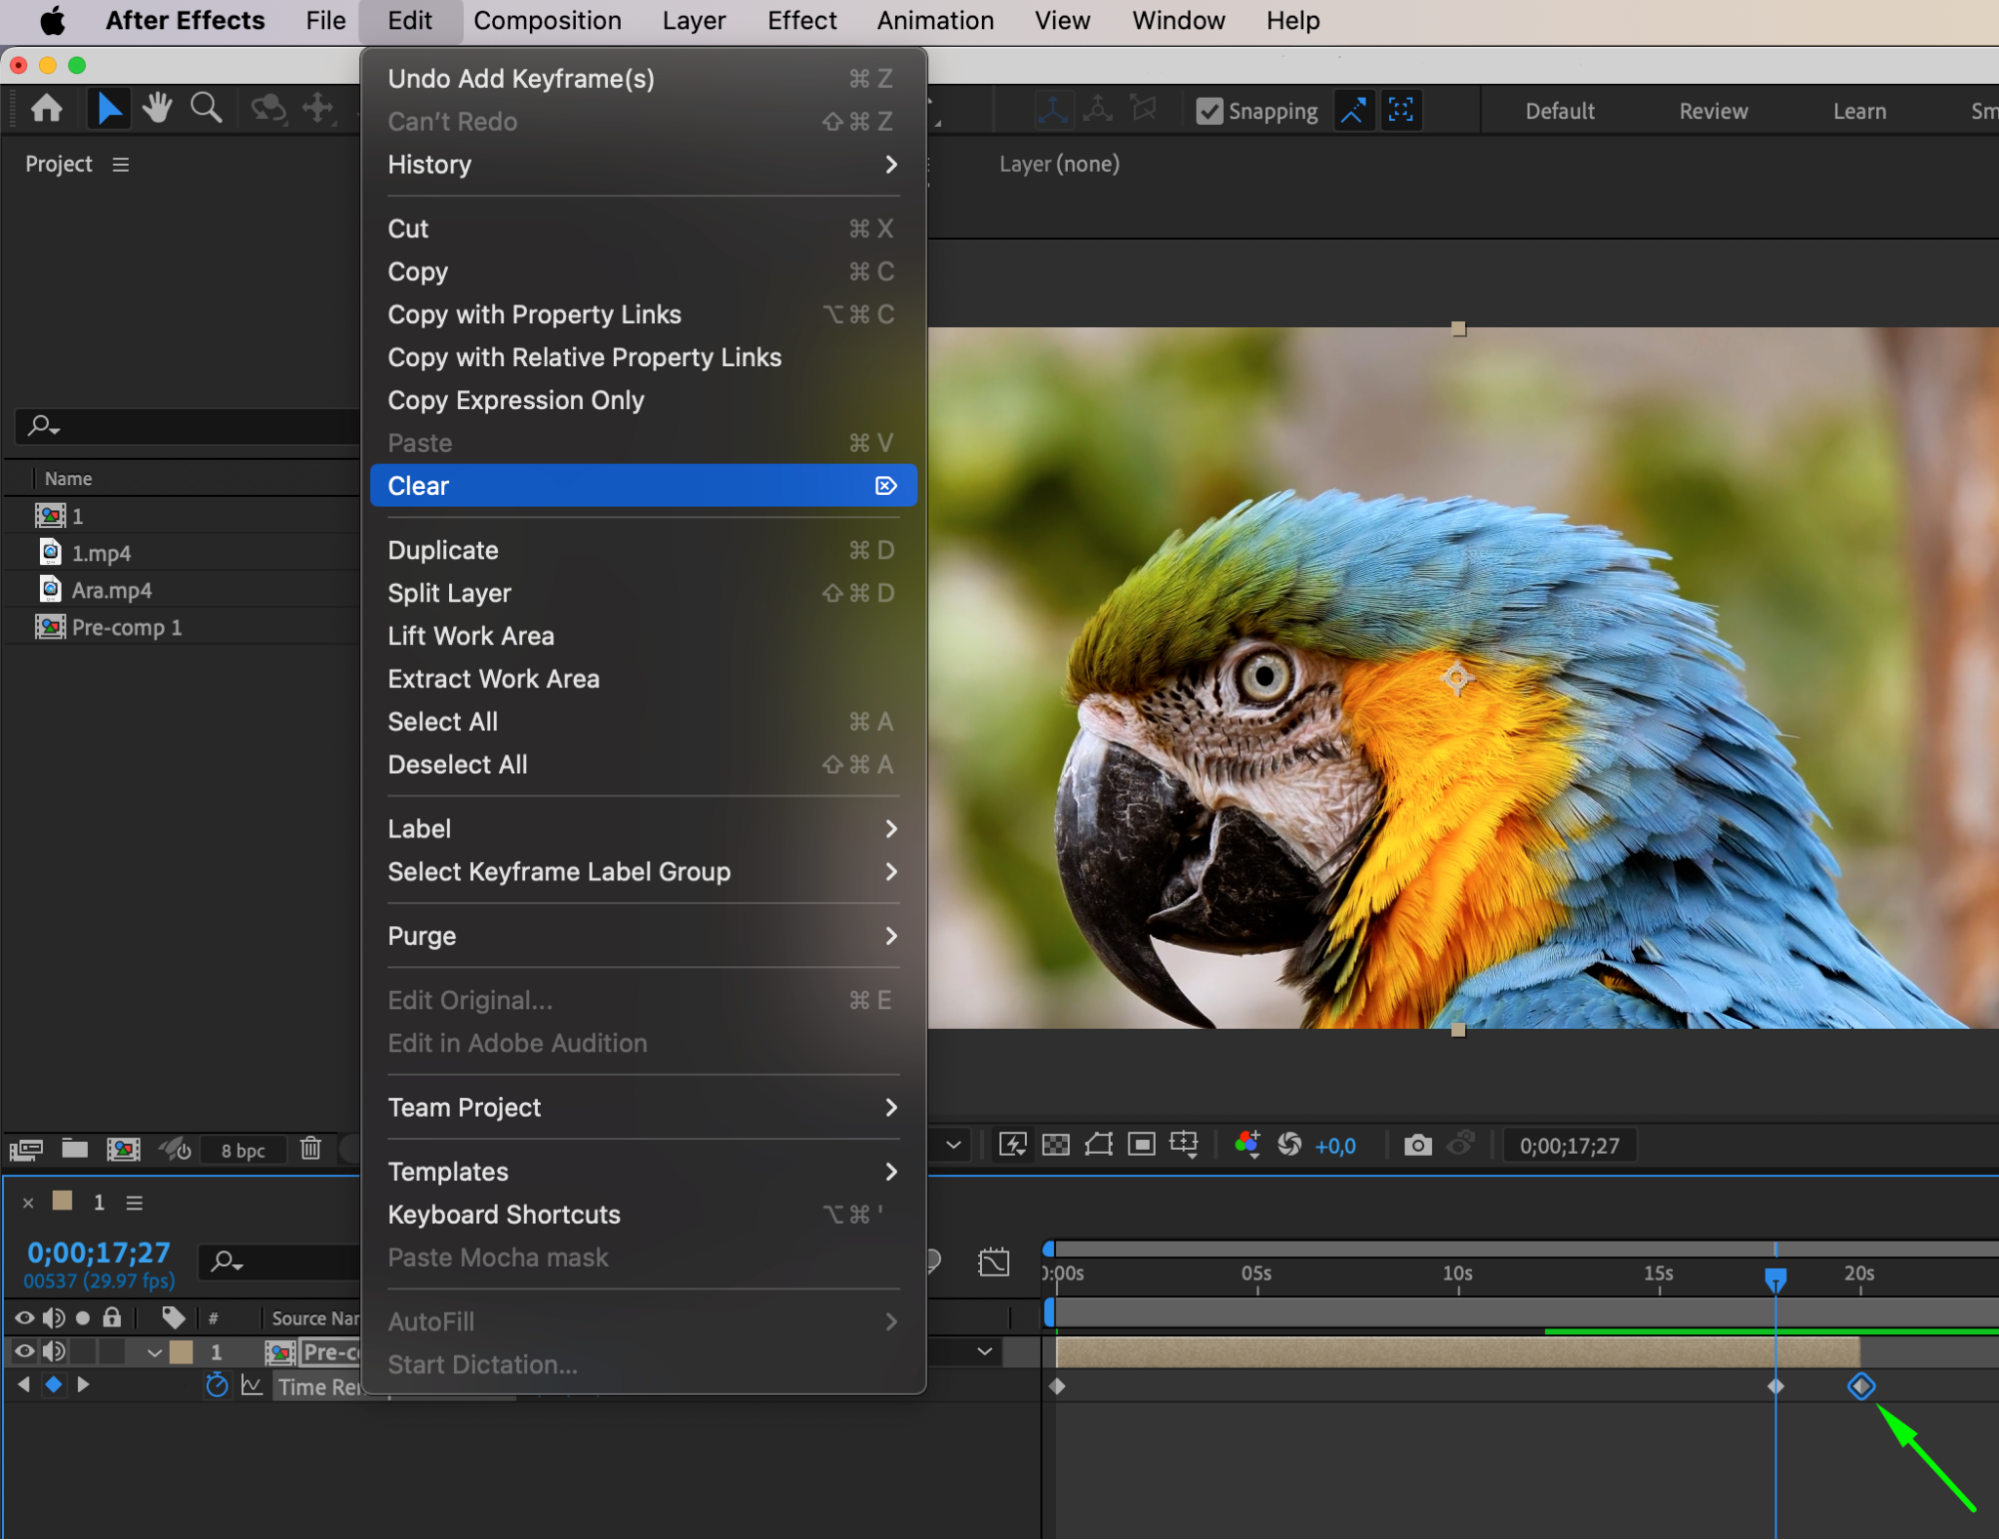
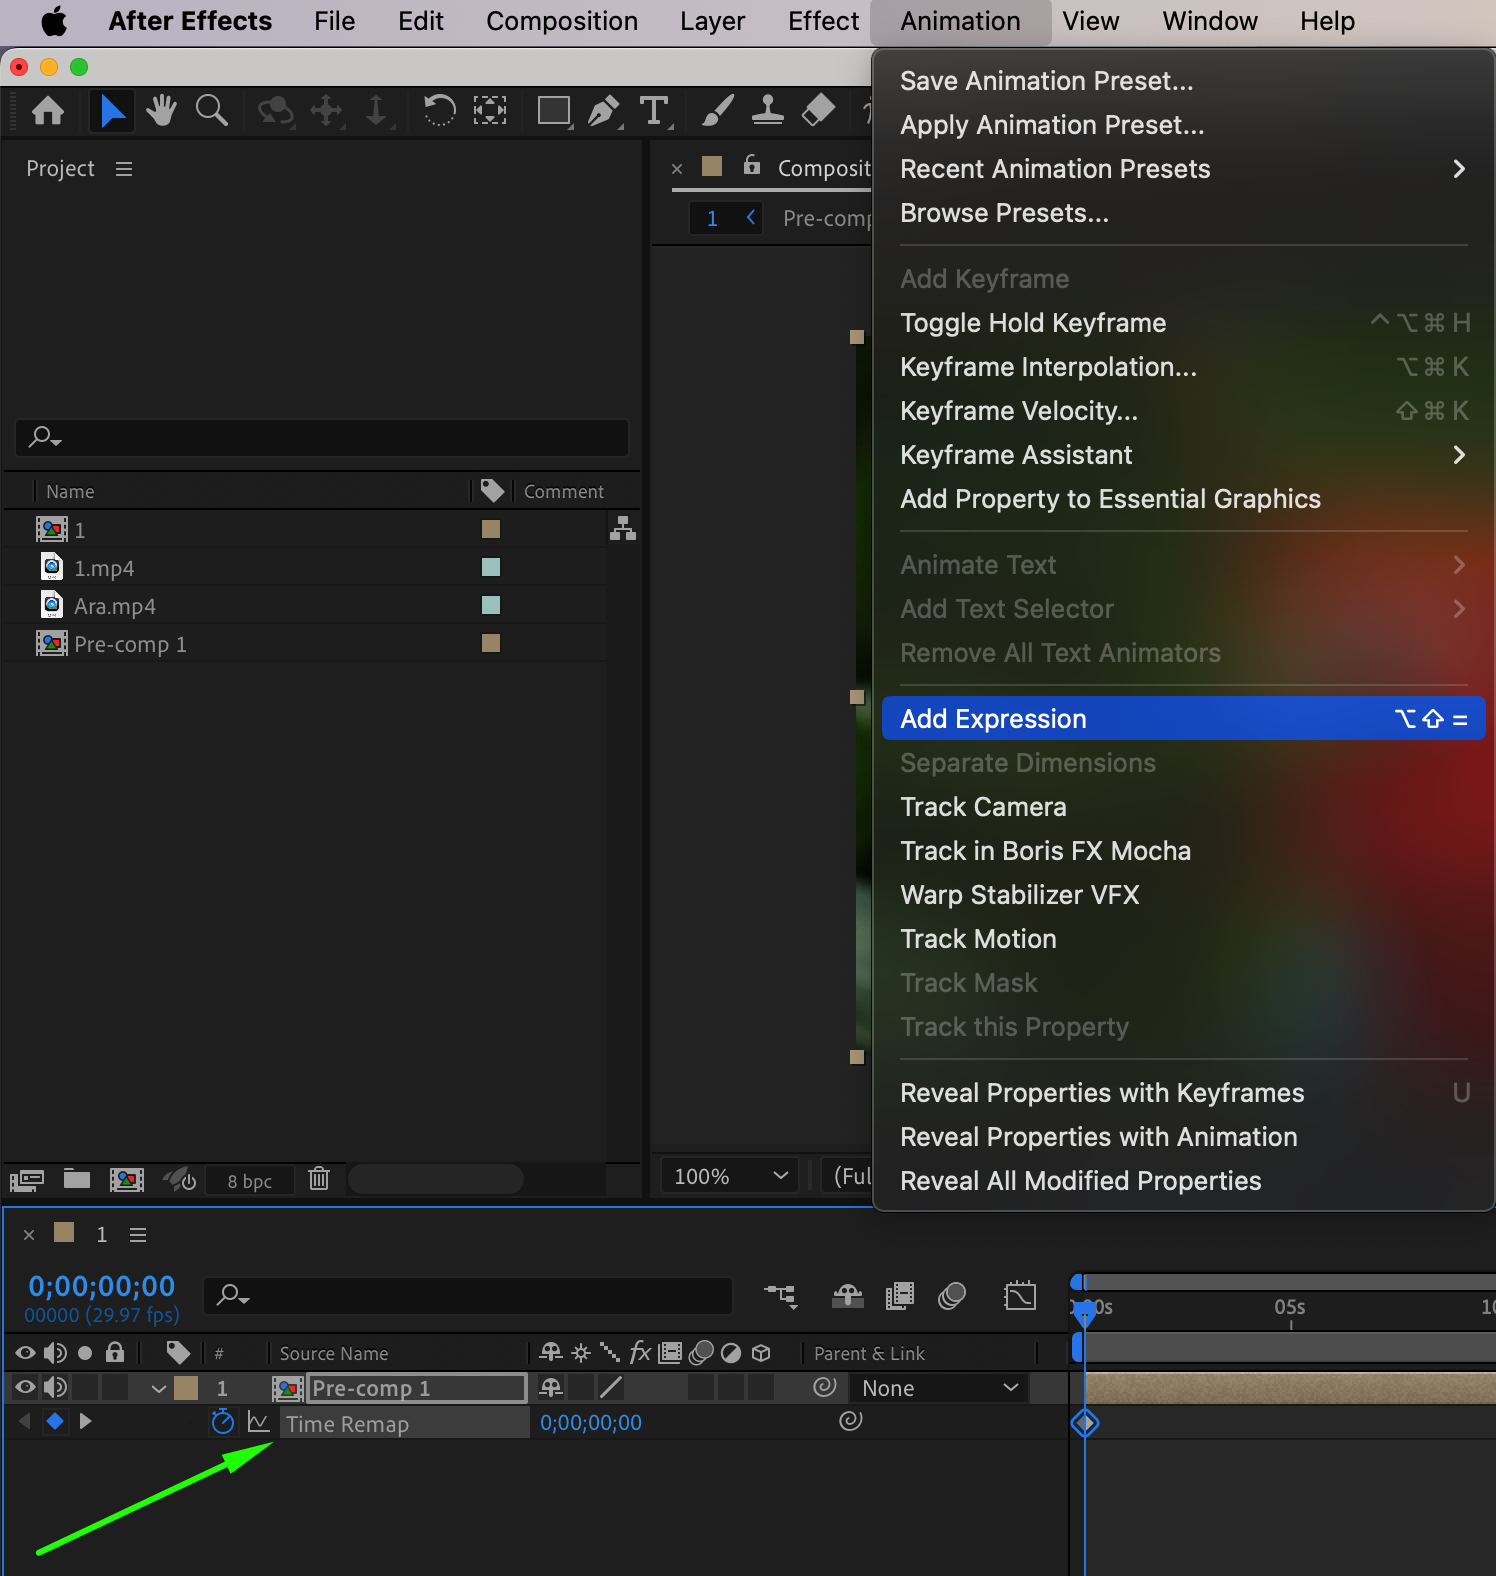
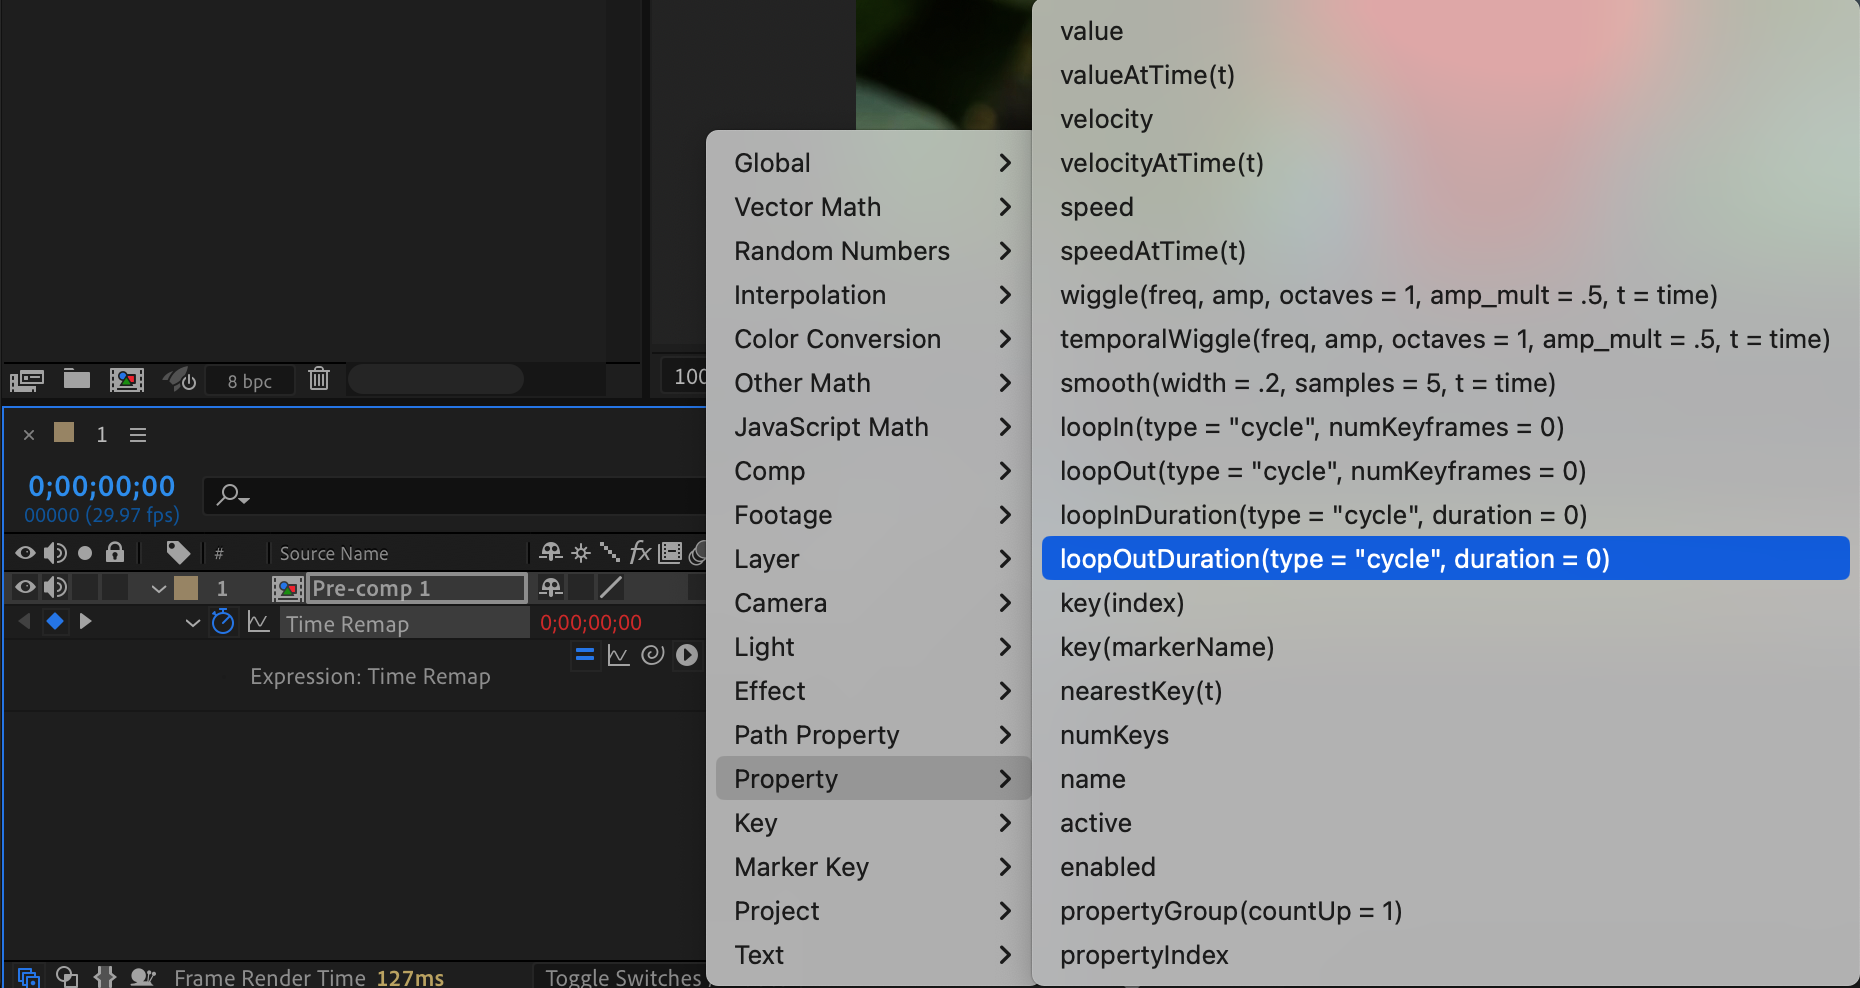
Another method to extend shorter clips is looping techniques. Right-click on your layer in the timeline panel and select “Time” > “Enable Time Remapping.” This creates keyframes at the beginning and end of the footage. Create a keyframe where you want the layer to end and delete the second keyframe at the end of the layer that was created automatically. This ensures a seamless loop. Then, click on the time remap parameter and go to Animation > Add Expression. Select the inverted triangle (expression language menu) and choose Property > loopOutDuration. Now, extend the layer in the timeline panel to the desired length.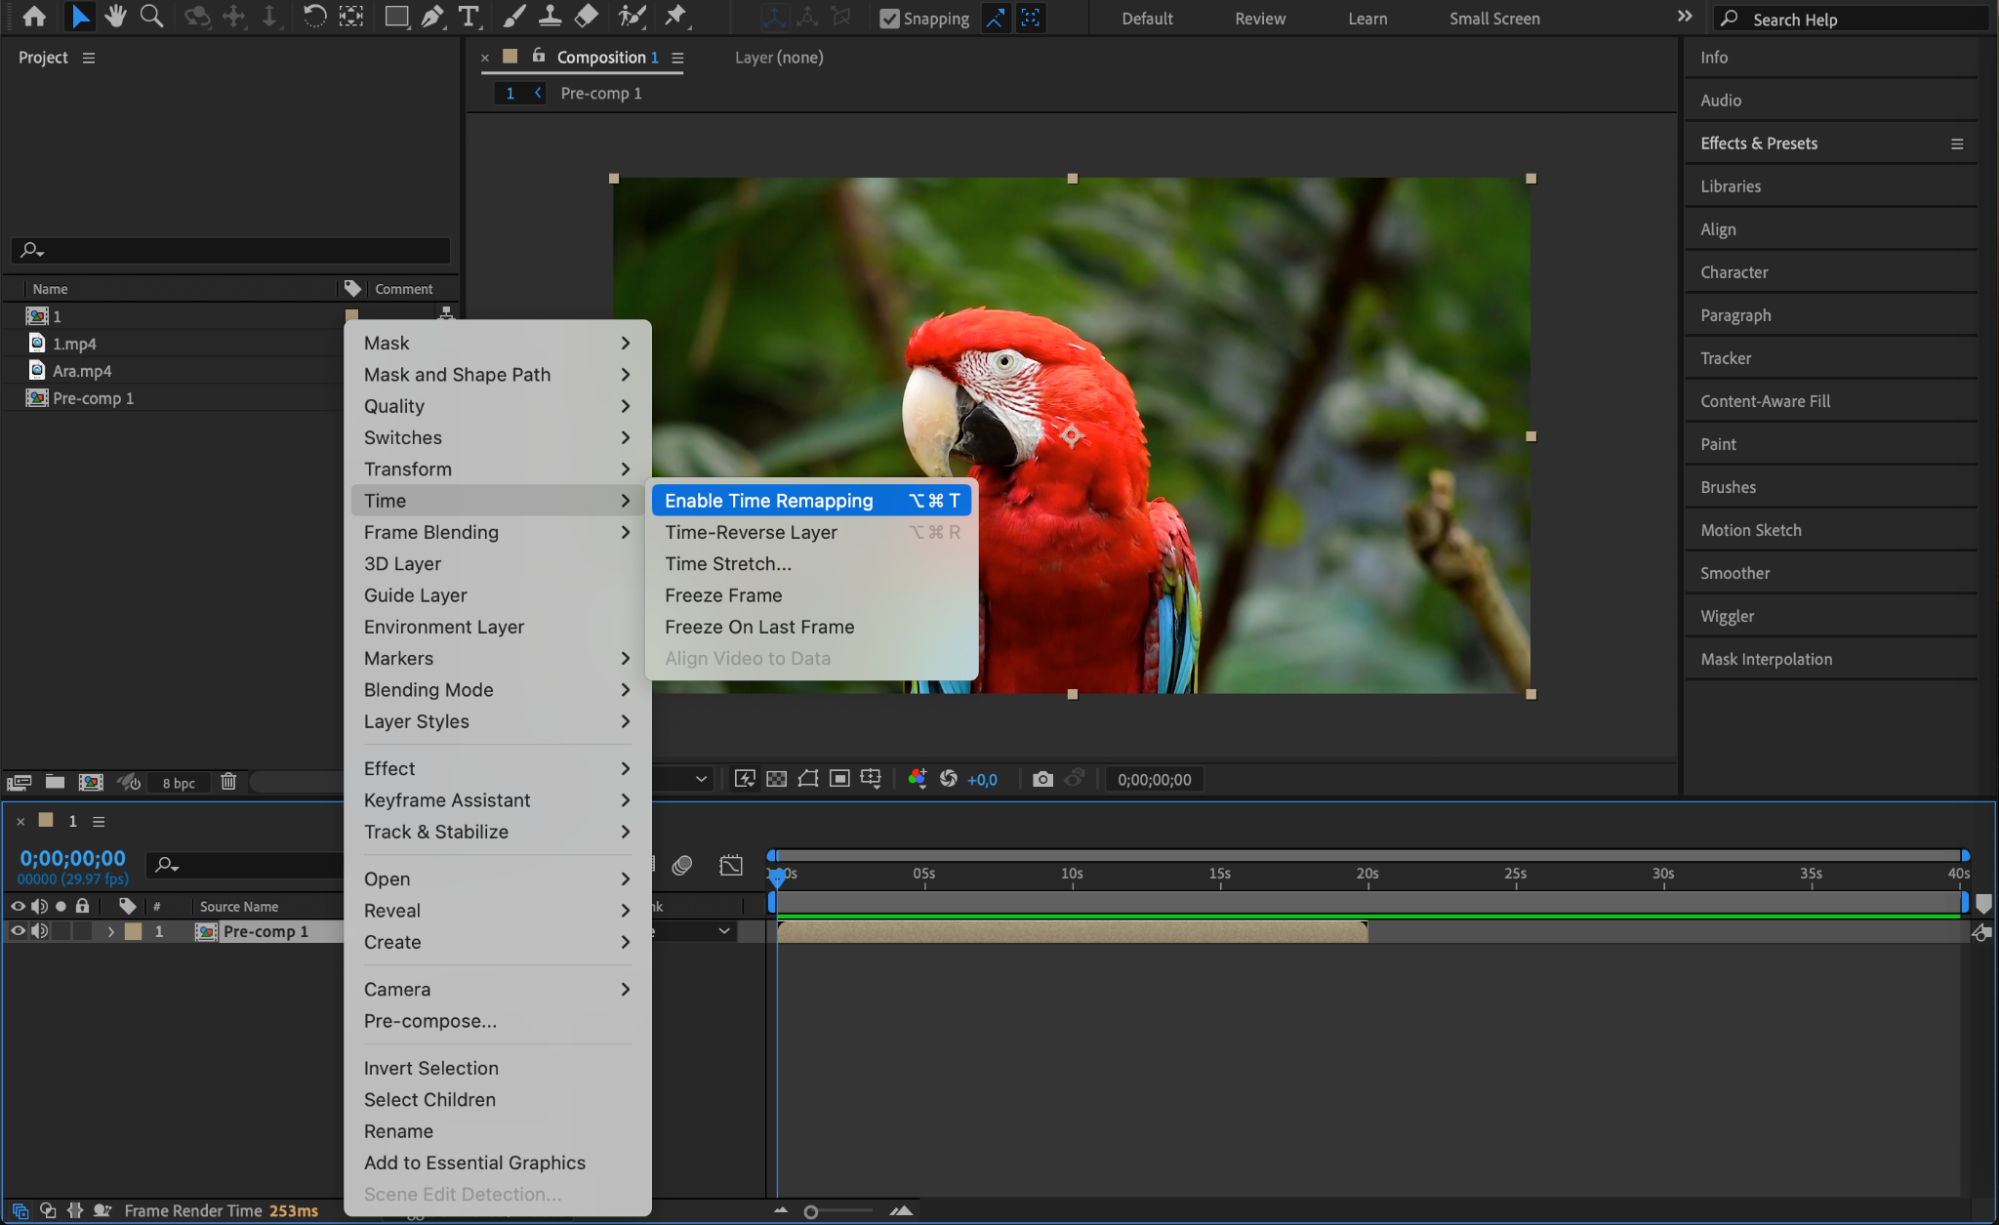


 Step 5: Utilize Easy Ease for Smooth Transitions
For dynamic transitions, use time-remapping with easy ease techniques. By adding keyframes to the time-remapping property of a layer, you can control its speed and create gradual changes. Applying easy ease to these keyframes will give your animations a more organic look. Experiment with different timings and easing options for the desired visual effect. Use the graph editor and curves to fine-tune the easing.


 Step 6: Implement Time-Reverse Layer
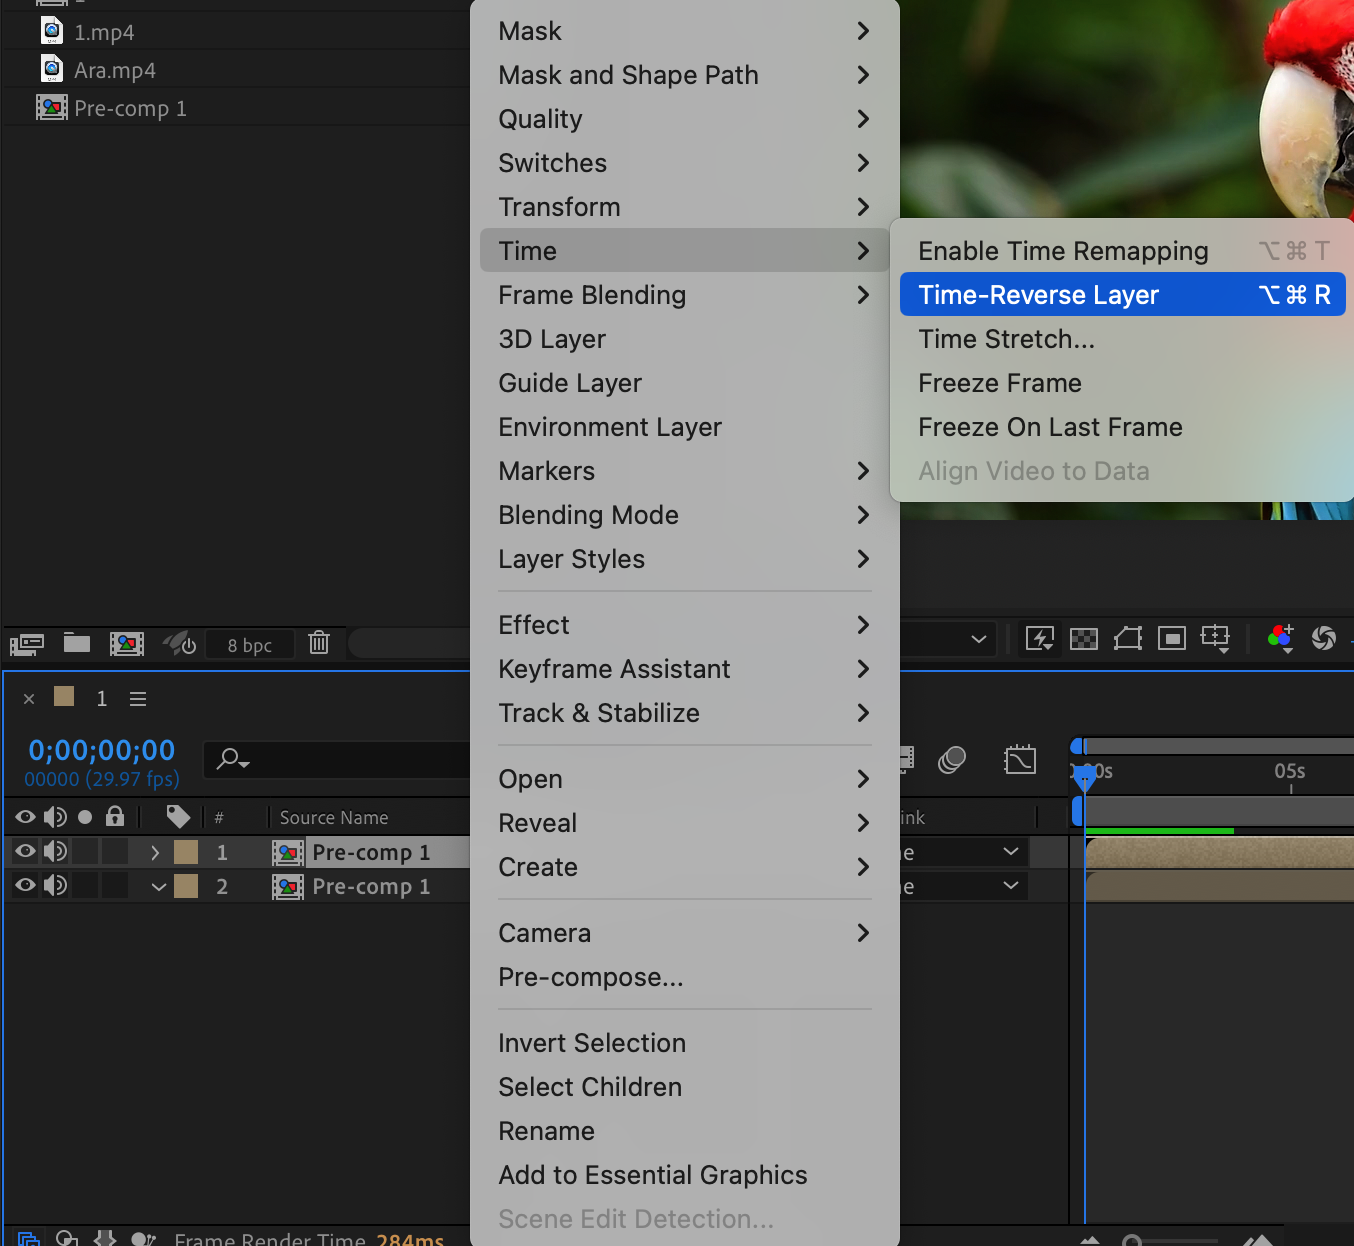
The final method is to consider using the time-reverse layer option if you have a short animation that you want to extend. This feature allows you to seamlessly loop a layer by reversing its playback direction. To enable this, duplicate your layer and right-click on the layer, choose “Time” > “Time-Reverse Layer,” and place the reversed layer immediately after the original in the timeline panel. This creates a loop that plays indefinitely without any visible seams.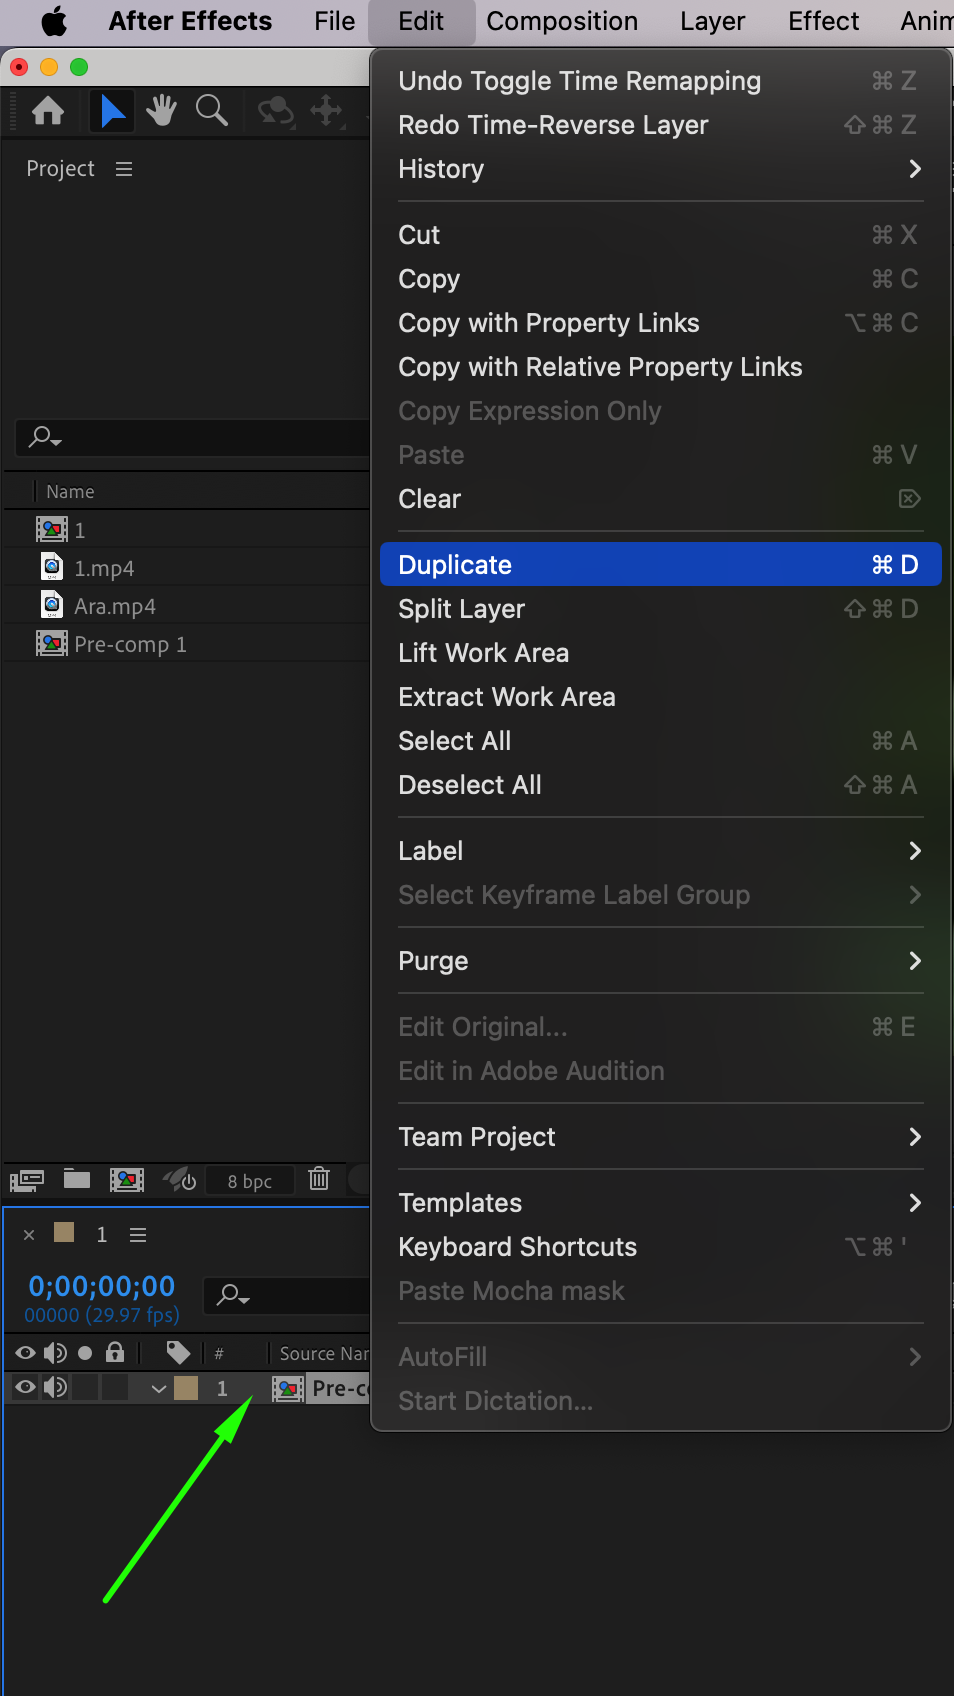


Conclusion
In conclusion, extending composition time in After Effects is crucial for creating engaging projects. Remember to experiment with different methods and techniques to find the best approach for your specific project. Happy composing!


