Freeze-Frame in After Effects: A Step-by-Step Guide
The freeze-frame effect in After Effects allows you to pause a specific frame in your video clip while you continue to edit the rest of the footage. This can be useful for creating dramatic transitions, highlighting a particular object or detail, or adding a touch of cinematic flair to your projects.
In this tutorial, we will go through the process of using the freeze-frame effect in After Effects, as well as answer some frequently asked questions about this feature.
Get 10% off when you subscribe to our newsletter

Step 1: Adding the Video Clip to After Effects
To get started, open your After Effects composition and import the video clip that you want to edit.
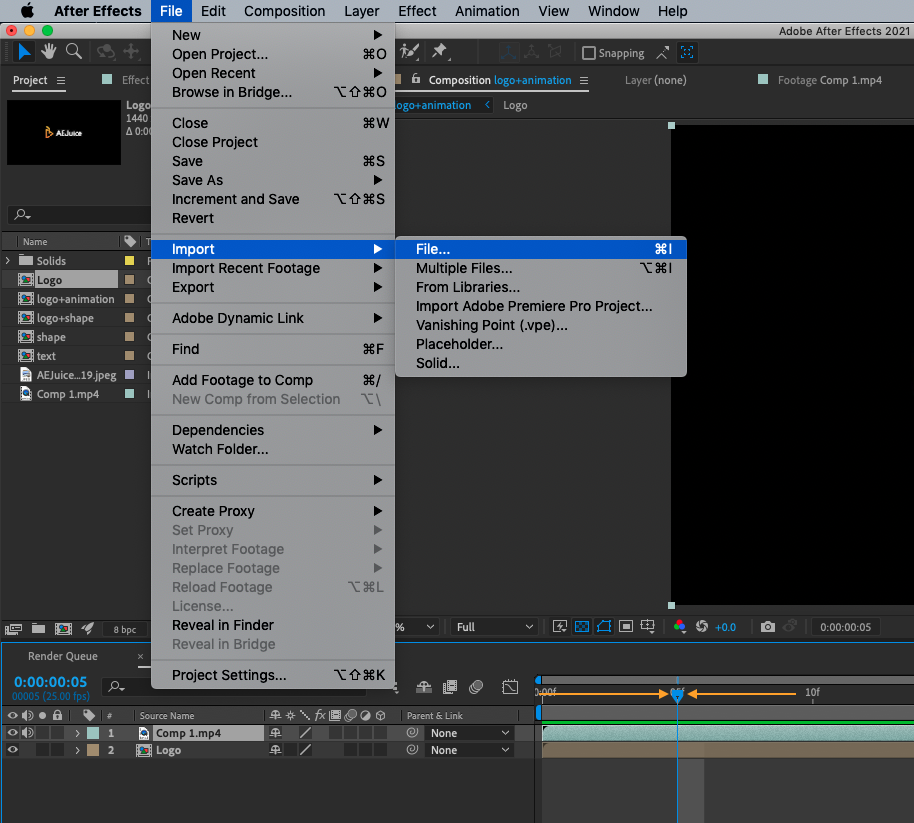
You can do this by going to File > Import > File, or by dragging the video file from your computer into the project panel in After Effects.
Once the clip is added to the project, use the time position indicator on the timeline to navigate to the point where you want to freeze the frame. This can be done by clicking and dragging the indicator to the desired location, or by using the keyboard shortcuts Command + Right Arrow (Left) on Mac or Ctrl + Right Arrow (Left) on Windows to move the indicator back and forth.
Step 2: Selecting the Layer for the Freeze-Frame Effect
Next, select the layer that you want to freeze, and right-click on it to access the Time menu. From the Time menu, click on Freeze-frame to hold the entire layer on the current frame. You can press the freeze-frame button again to remove the effect.
Step 3: Adding Multiple Layers for Additional Effects
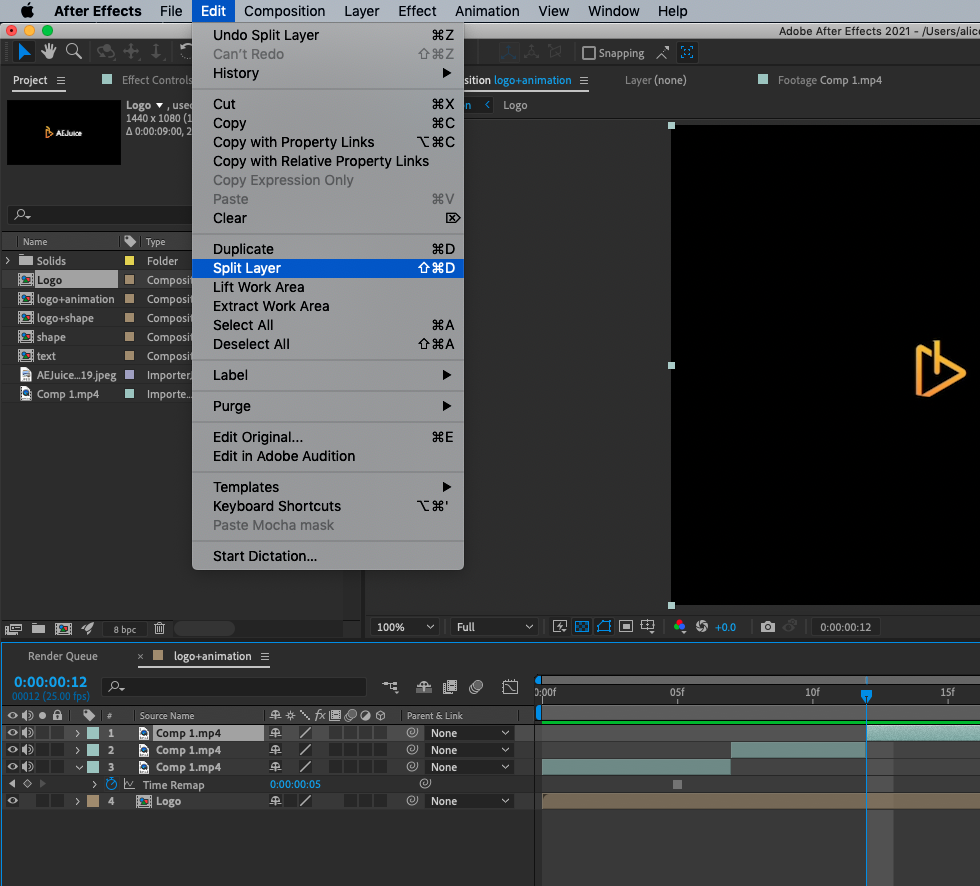
To add multiple layers for additional effects, you can hit Split Layer from the Edit menu or use the keyboard shortcut Command + Shift + D on a Mac or Ctrl + Shift + D on Windows. This will create two layers, with the top layer starting at the current time position indicator.
Repeat this process several times to create additional layers. This is useful if you want to apply different effects to different parts of the freeze-frame, or if you want to fade in or out of the freeze-frame using a crossfade transition.
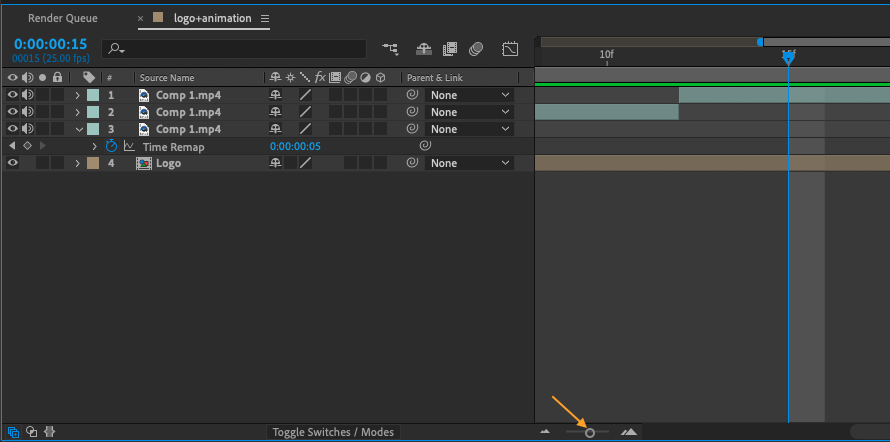
To get a closer look at the timeline and make precise edits, you can use the zoom function at the bottom of the Timeline window or by hitting the plus sign (+).
Step 4: Finally, when you are satisfied with the result, save the project and export the video to your device.
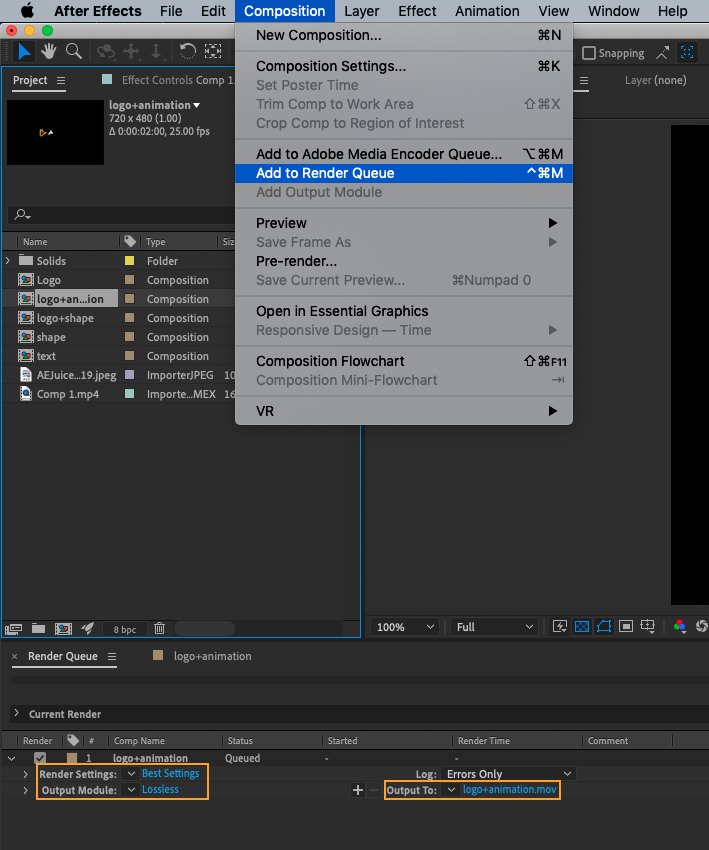
You can use the keyboard shortcut Ctrl + M on Windows or Command + M on a Mac to bring up the Render Queue panel, where you can choose the output format and settings for the video. Hit Render when everything is set.


