How to Freeze a Frame in After Effects: Step-by-Step Guide
Introduction to Freezing Frames in After Effects
Welcome to AEJuice.com! Today, we’ll show you how to freeze a frame in Adobe After Effects. Whether you’re looking to emphasize a key moment, create a dramatic pause, or extend a frame for longer, freezing a frame can be an impactful editing technique. After Effects makes it simple and efficient to freeze frames, allowing you to enhance your video editing with just a few steps.
Though this guide applies to the latest version of After Effects, the process is similar across many versions, including After Effects CS6.
Step-by-Step Guide to Freezing a Frame in After Effects
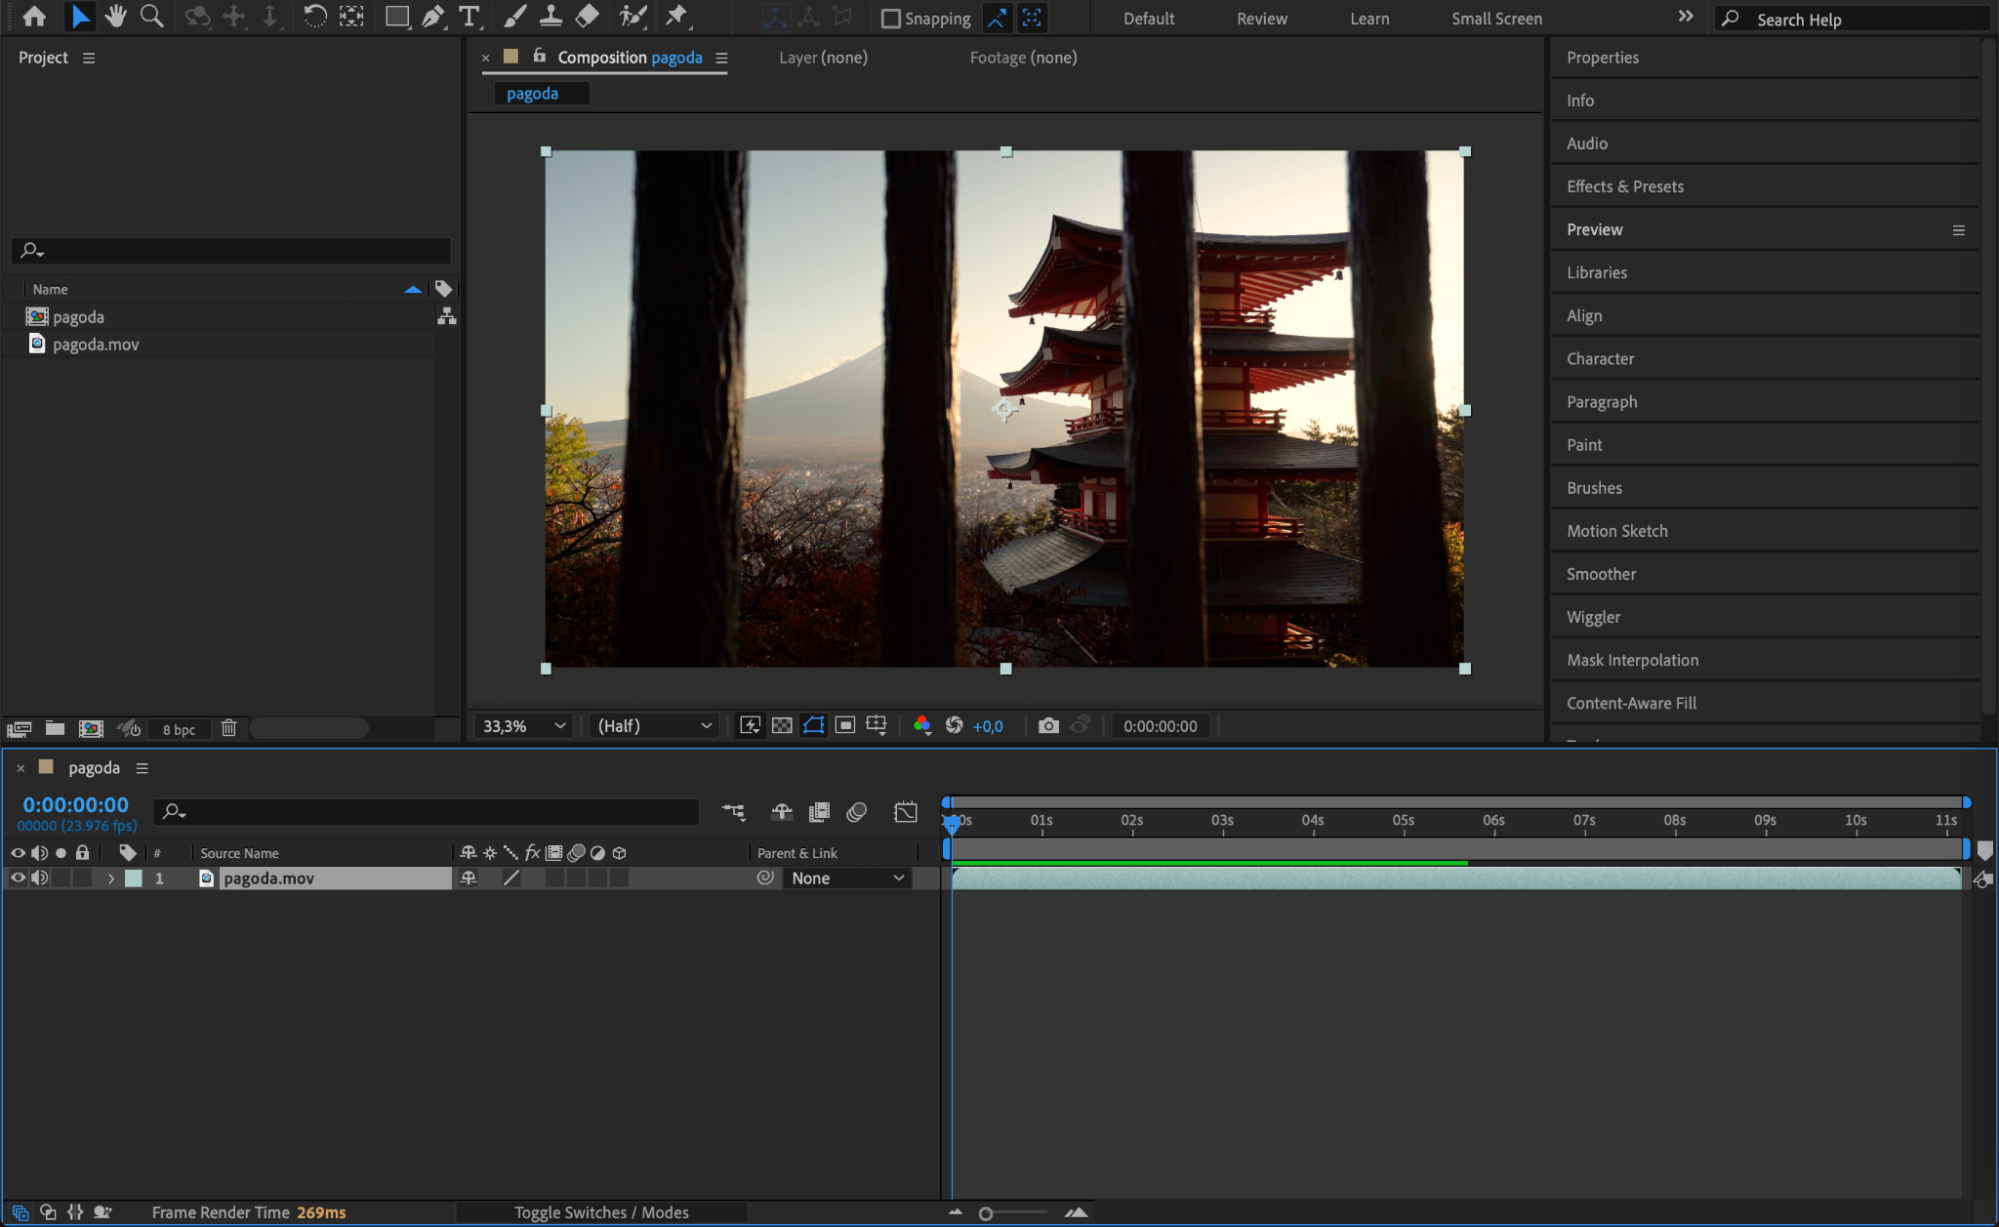
Step 1: Open Your Project in After Effects
Begin by opening the project in After Effects where you want to freeze a frame. If you haven’t already imported your footage, go to File > Import > File to bring in your video. Ensure your footage is placed on the Timeline for editing.
Get 10% off when you subscribe to our newsletter

 Step 2: Locate the Frame to Freeze
Next, move the Current Time Indicator (CTI) to the frame you want to freeze. You can do this by dragging the playhead along the Timeline. Make sure the playhead is positioned on the precise frame where you want the freeze effect to begin.
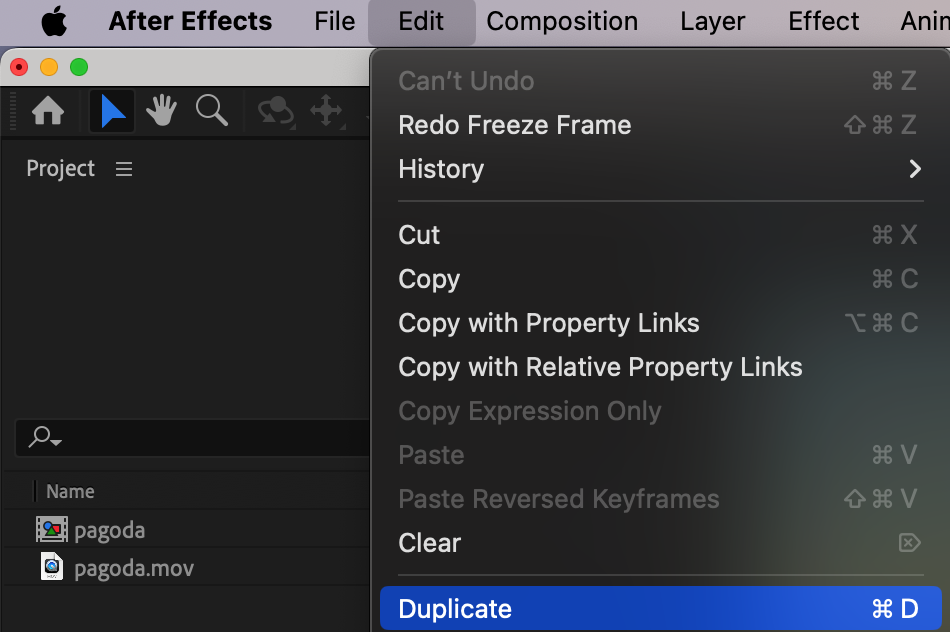
 Step 3: Duplicate the Layer
To avoid affecting the entire footage, it’s important to duplicate the layer where you want to apply the freeze effect. Go to Edit > Duplicate or use the keyboard shortcut “Ctr/Cmdl + D” to create a copy of the video layer. You will now have two identical layers stacked on top of each other in the timeline.
 Step 4: Apply the Freeze Frame Effect
Now, with the duplicated layer selected, go to Layer > Time > Freeze Frame. This will freeze the frame where your CTI is positioned, creating a still image that remains fixed in time. By freezing the frame, you effectively stop any motion at that particular point in the video, creating a static moment that can be stretched or timed as needed.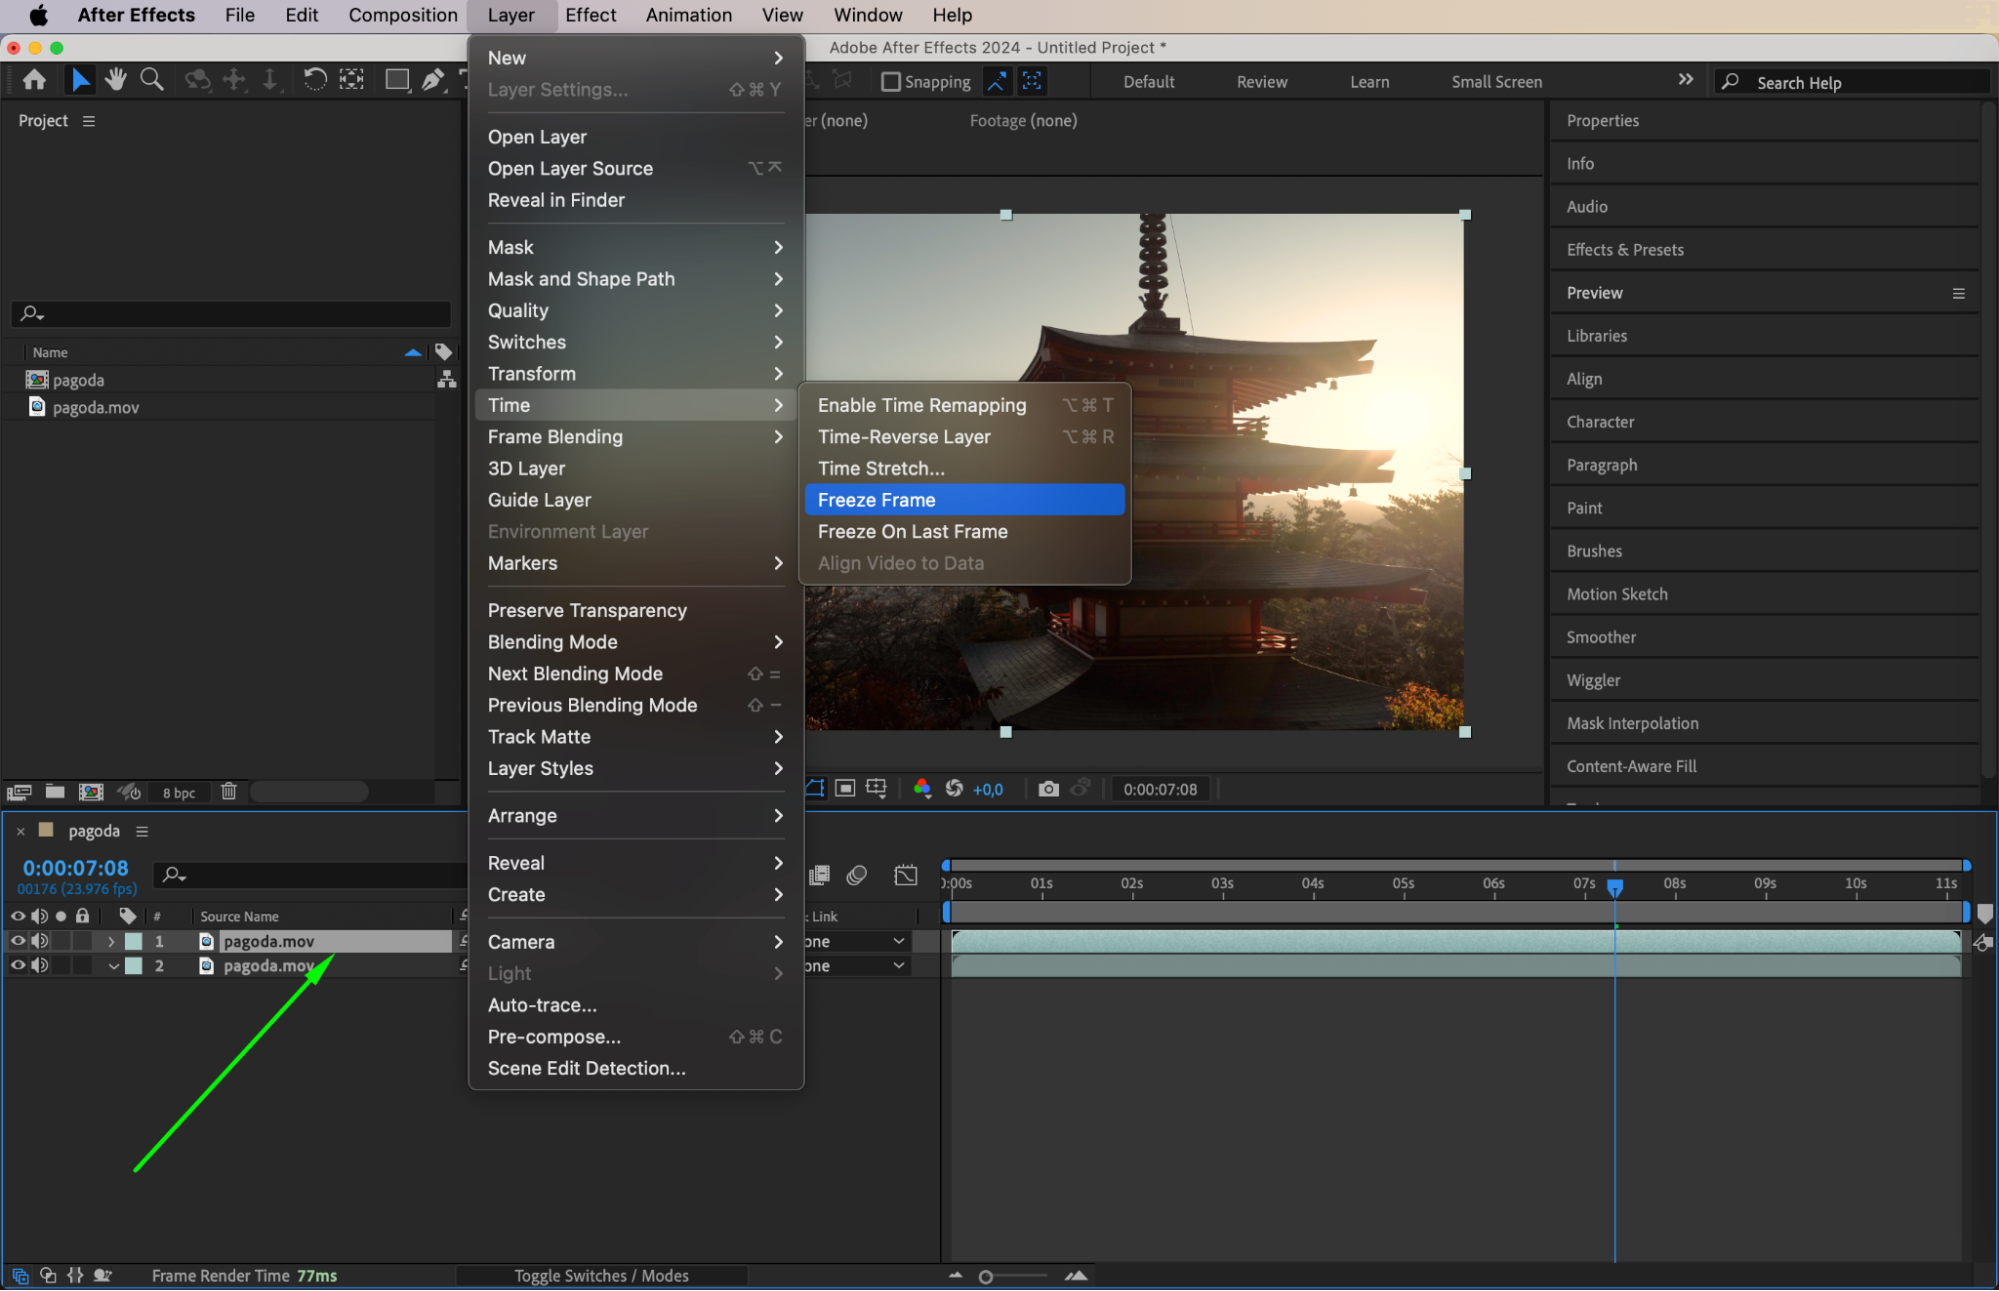 Step 5: Trim the Layer to Start at the Frozen Frame
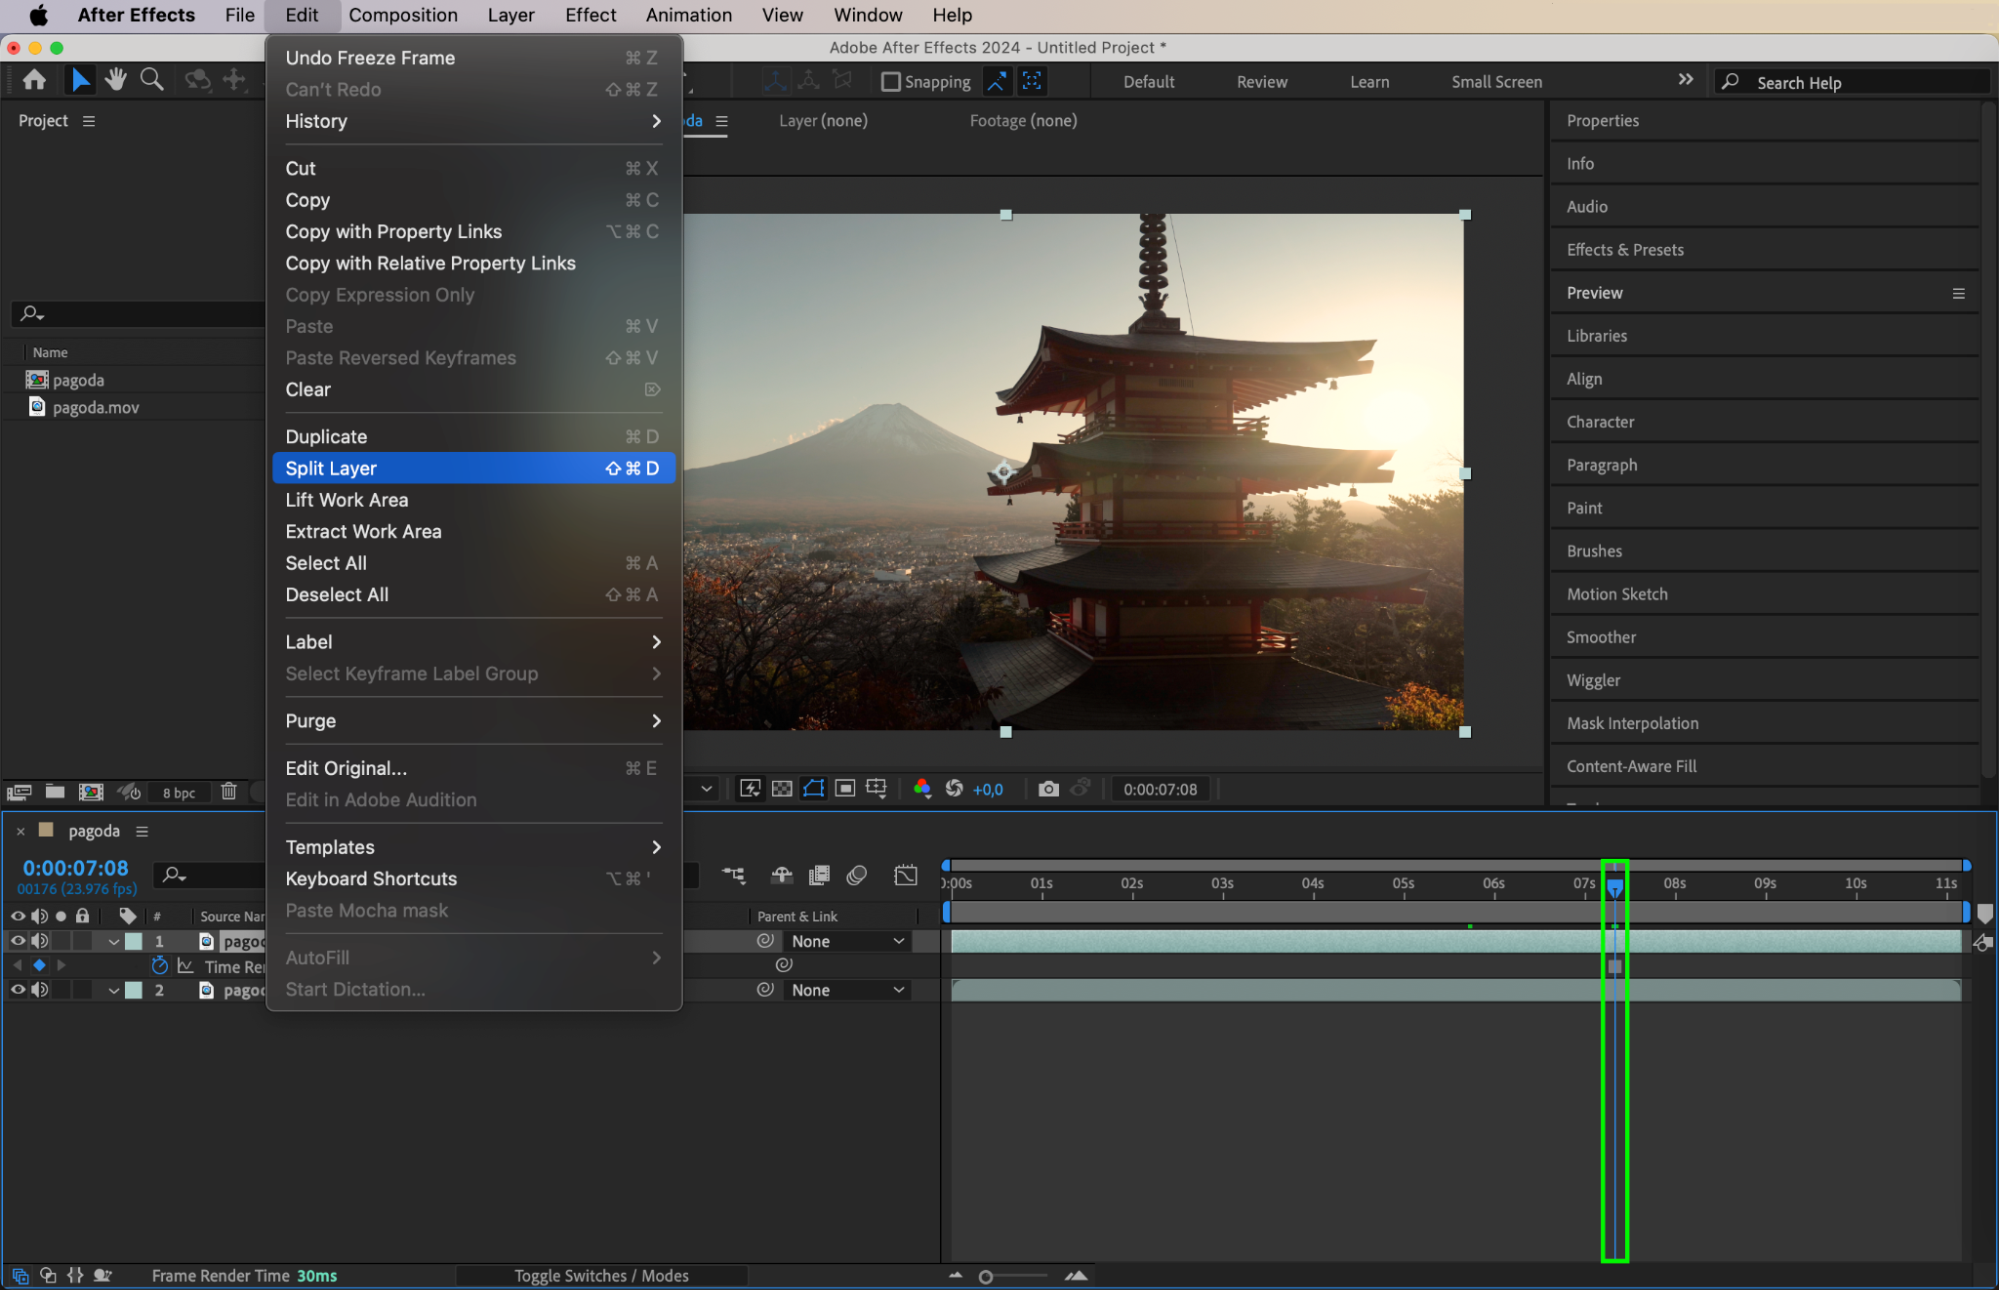
To ensure that the freeze effect only starts at the desired moment, trim the duplicated layer.
Go to Edit > Split Layer (shortcut: “Ctrl/Cmd + Shift + D”) while keeping the CTI at the same frame. This splits the layer at the playhead’s position.
Now, delete the unwanted part of the duplicated layer by selecting it and pressing Delete. This ensures that only the section with the frozen frame remains in place.

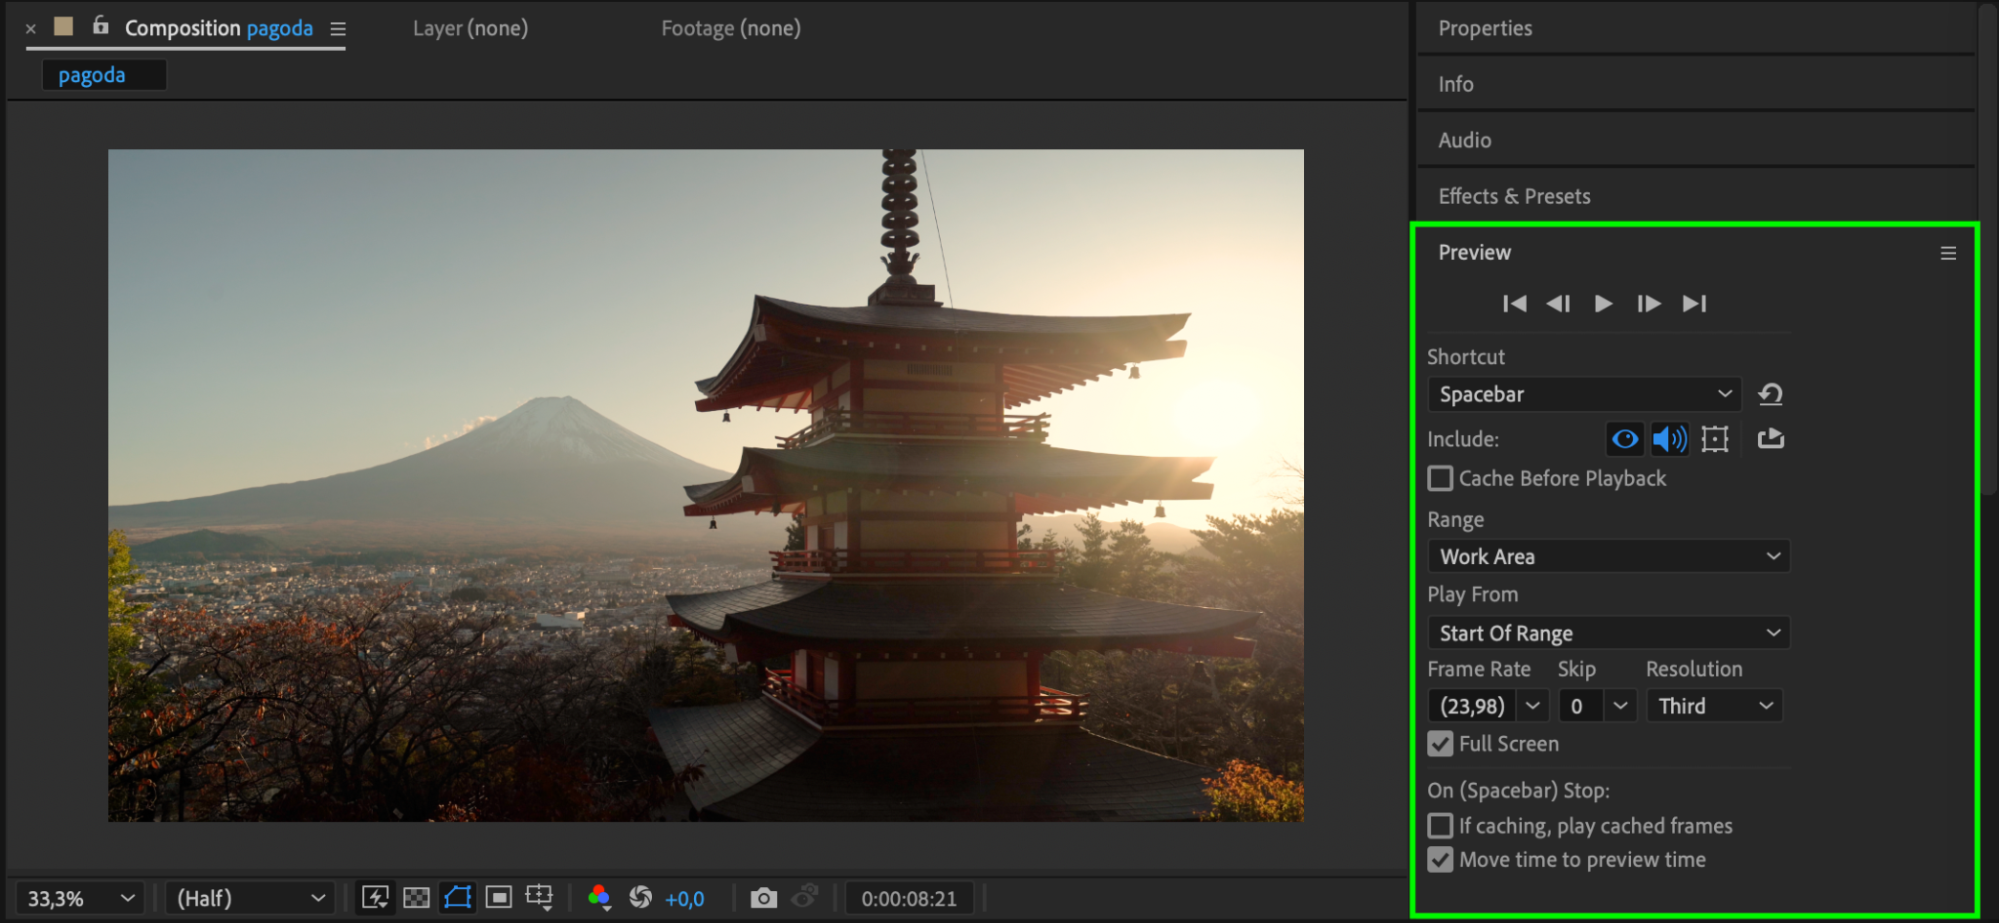
Step 6: Preview Your Edit
Once you’ve applied the freeze frame effect and trimmed the layers, preview the result. Press Spacebar to play your video and check the freeze effect. Ensure that it starts exactly where you want, and that the transition to the frozen frame is smooth.
Conclusion
By following these steps, you can easily freeze a frame in After Effects, adding a powerful visual element to your videos. Whether you’re using this technique for dramatic pauses or to emphasize key moments, the freeze frame effect is a versatile tool in your editing arsenal. Experiment with different timings and transitions to create professional-level edits. Happy editing!
Our Bestsellers


